Mev exocet build
Discussion


Right time to start a build thread as i will be picking my kit up on friday after putting a deposit down at stoneleigh.
Couple of pics the car before being stripped down it's a 1993 eunos roadster 1.8 for 400quid


Couple of pics of the strip down


Didn't take any pcis of the big step of removing the body but the ppf frame is back in my garage
 .
.
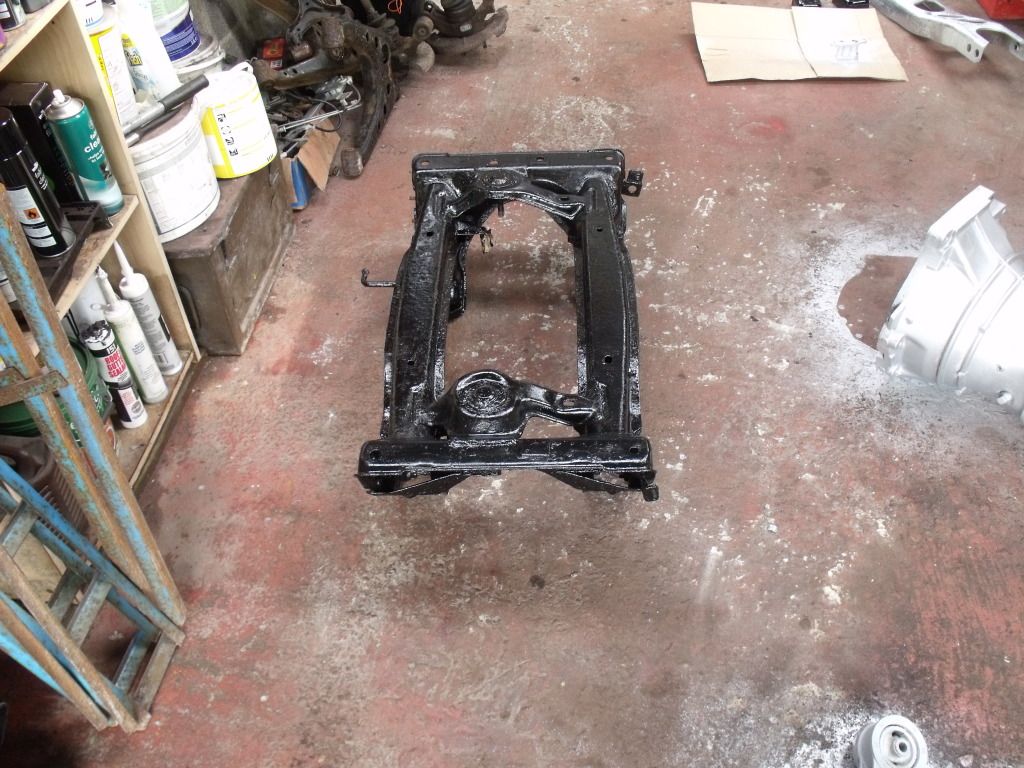
ppf frame has ben completly stripped cleaned and painted
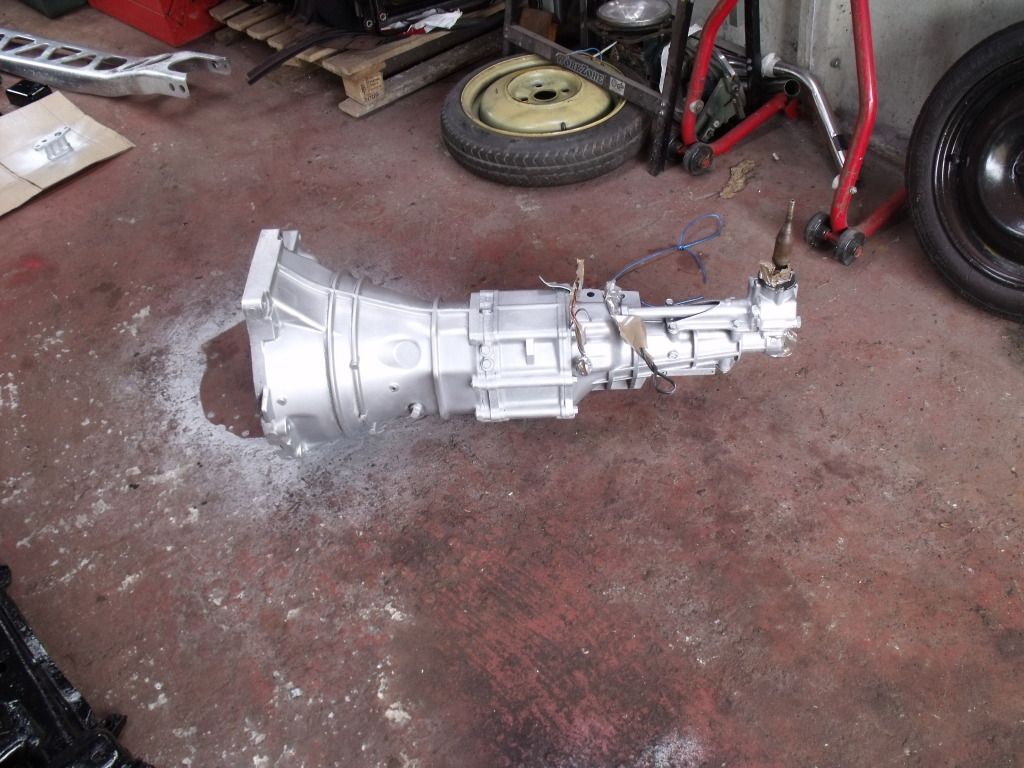
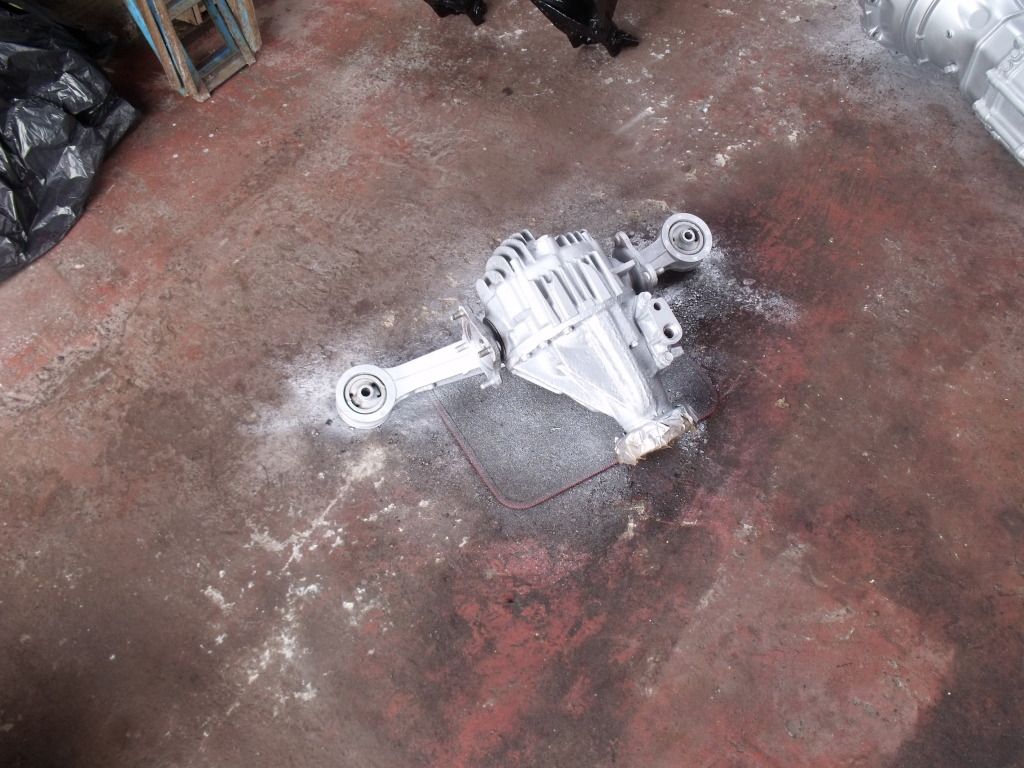
Diff and gearbox cleaned and painted
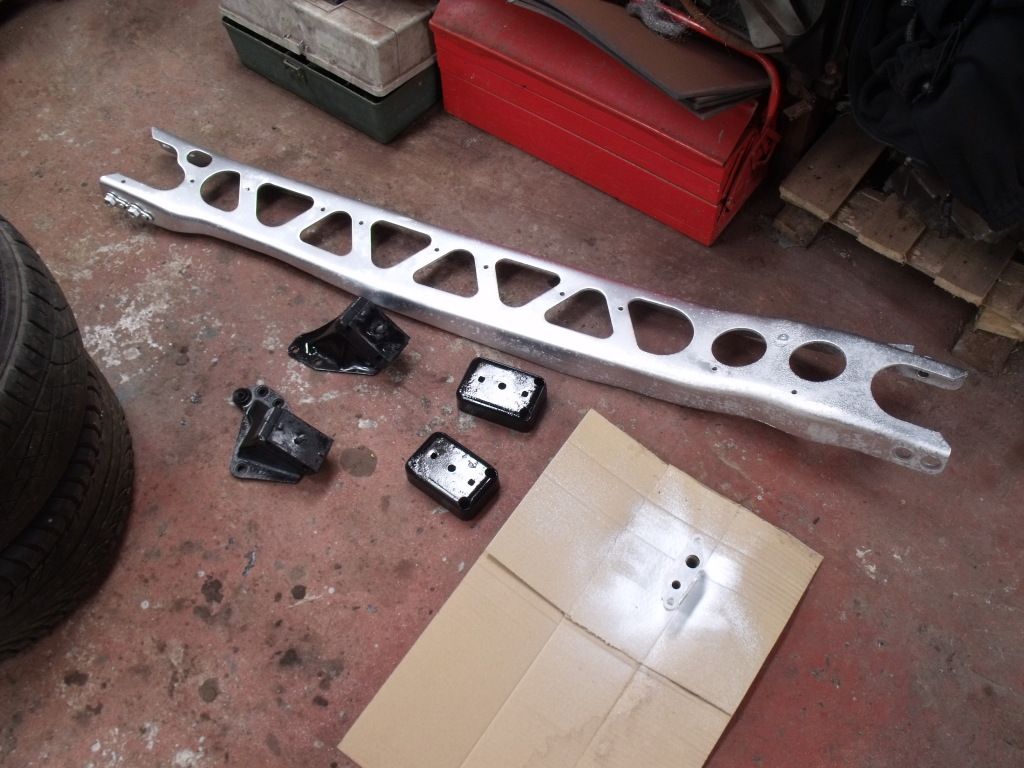
Engine mounts and ppf bar that conects the gearbox and diff together
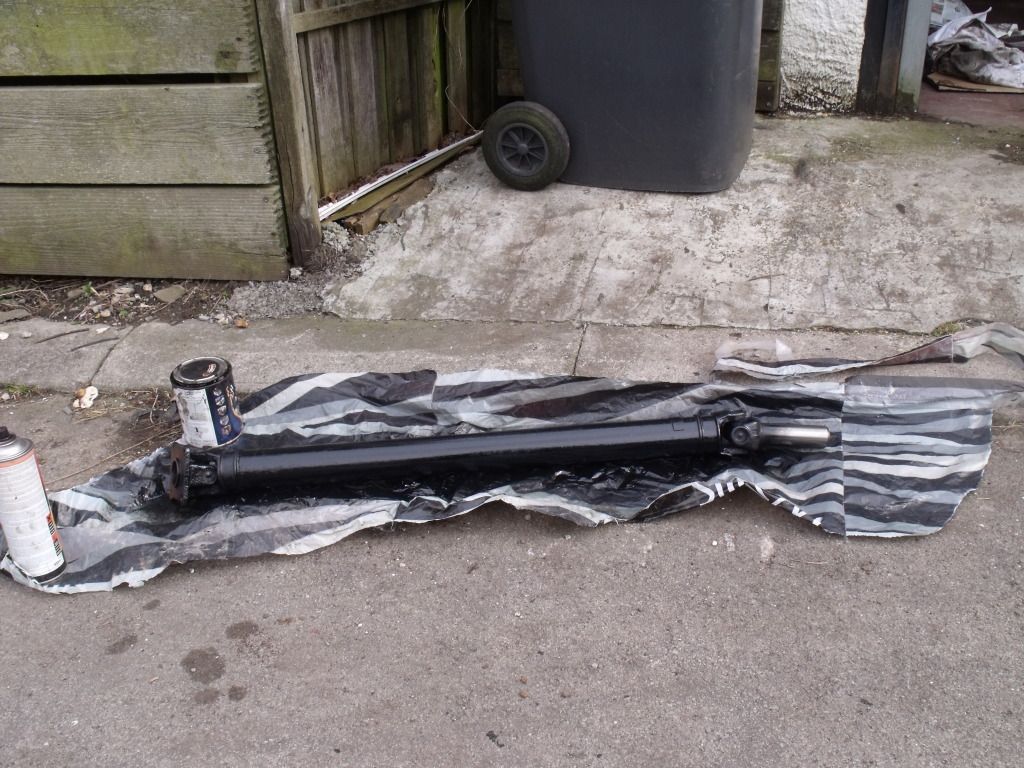
Propshaft painted
Shock and spring repainted
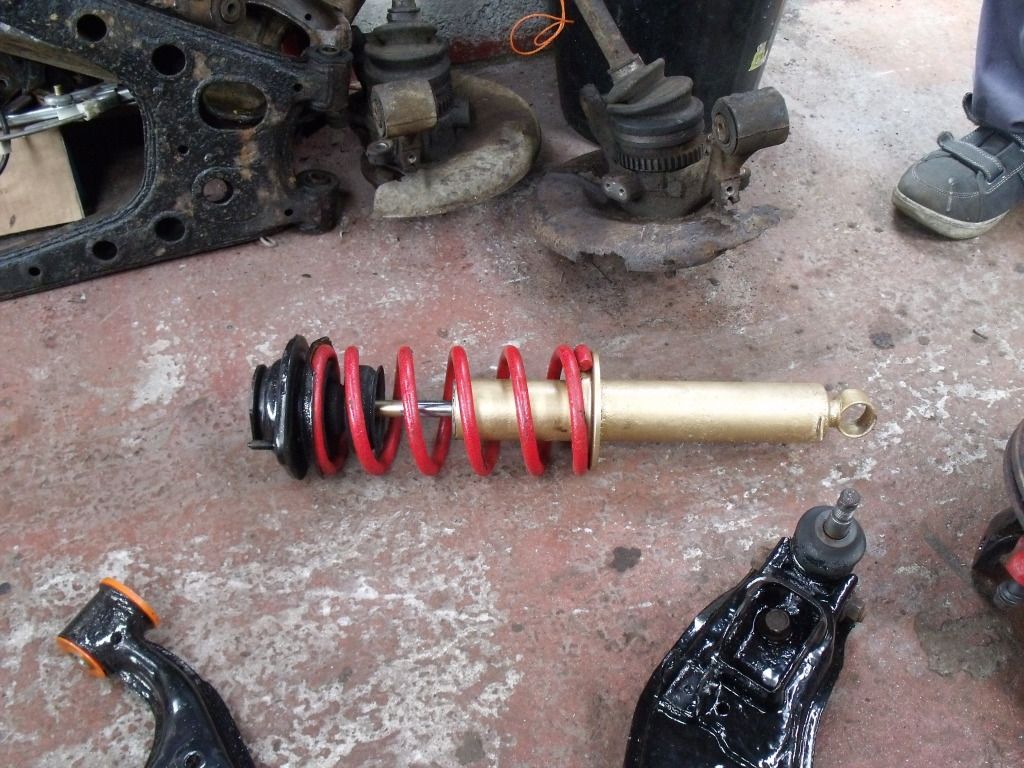
This is what i was going to do for all 4 shocks but have decided to get some gaz coilovers for it with adjustable damping and spring
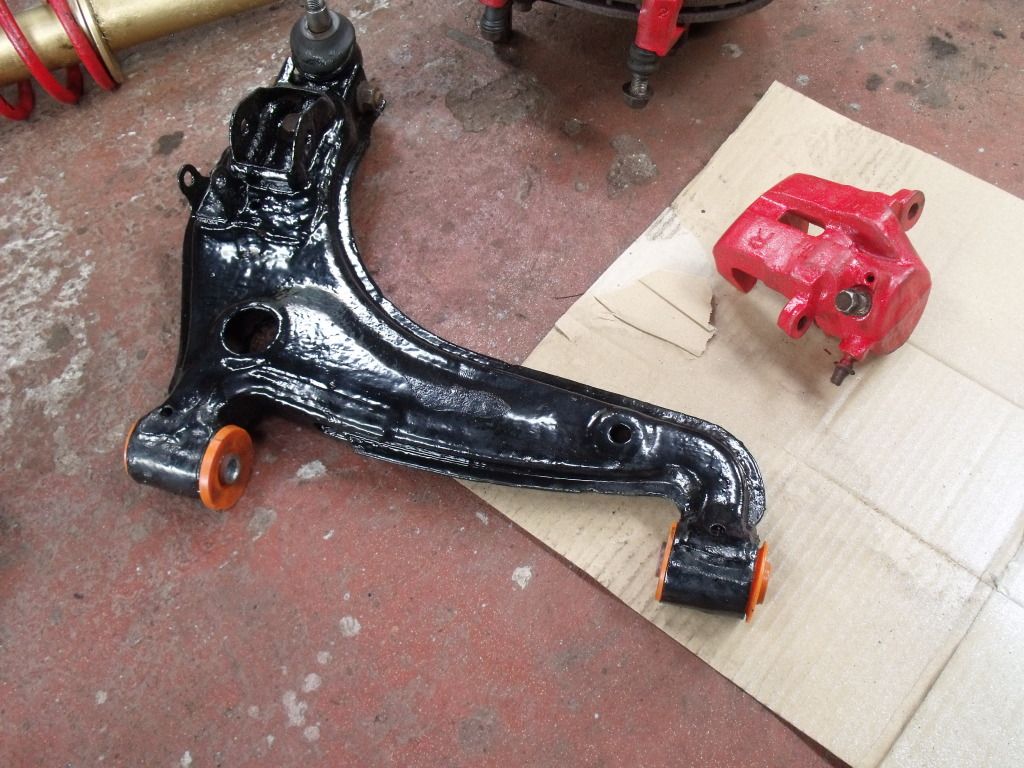
Bottom wishbone stripped, painted and polybushed
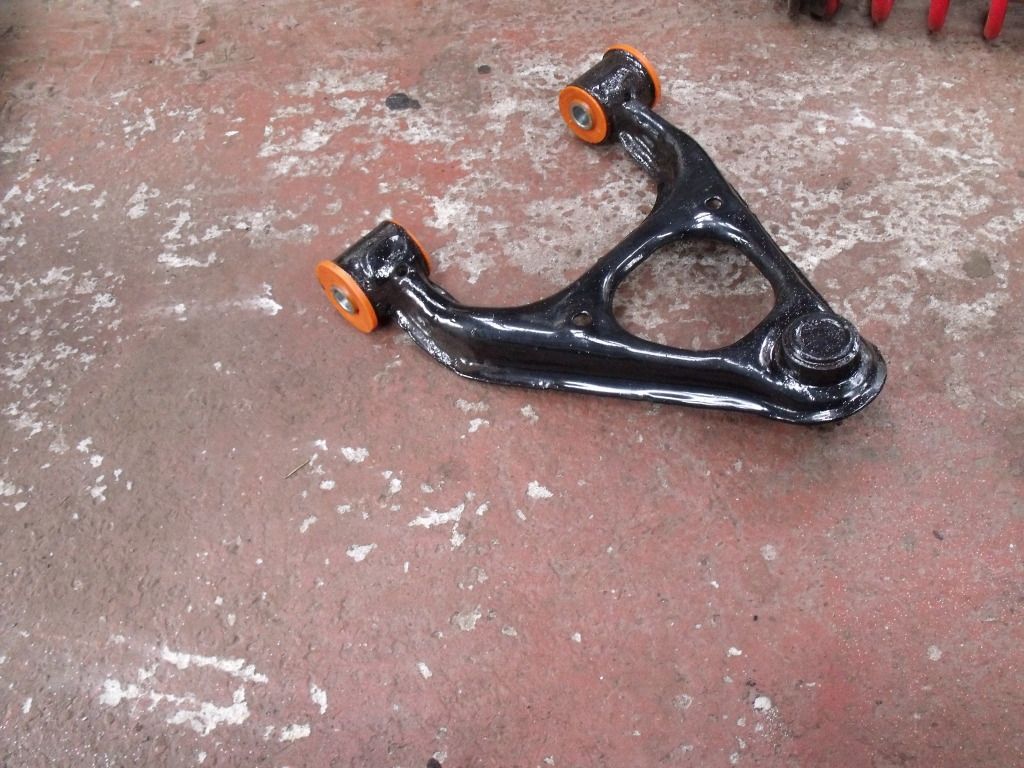
Upper wishbone stripped, painted and polybushed
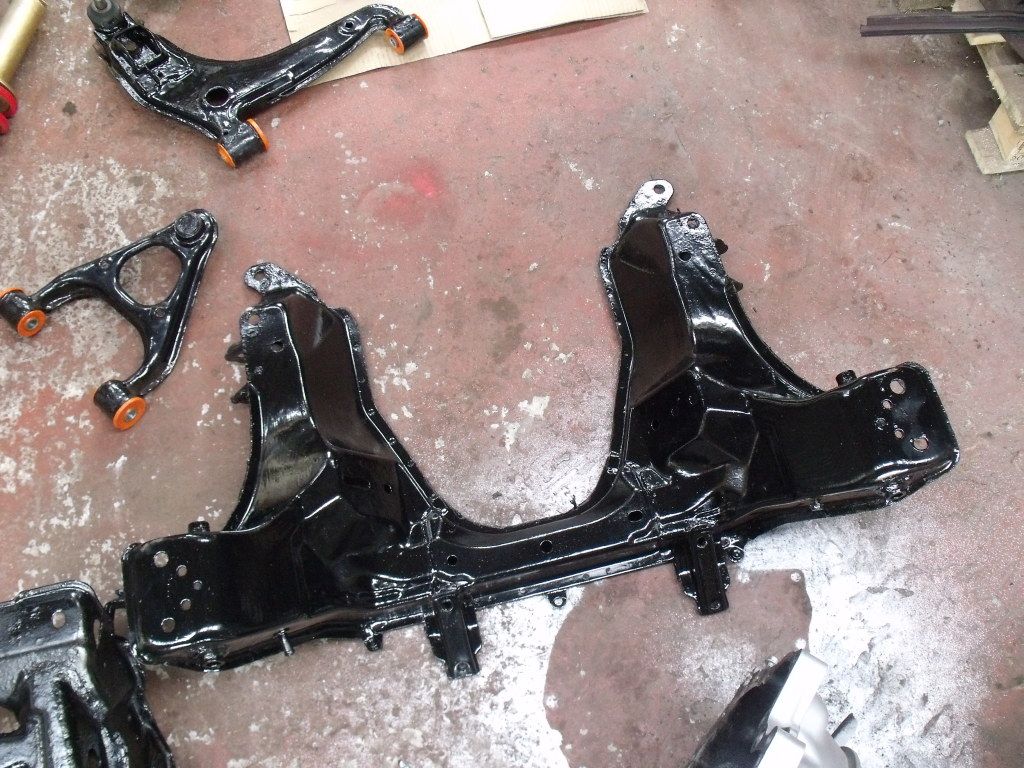
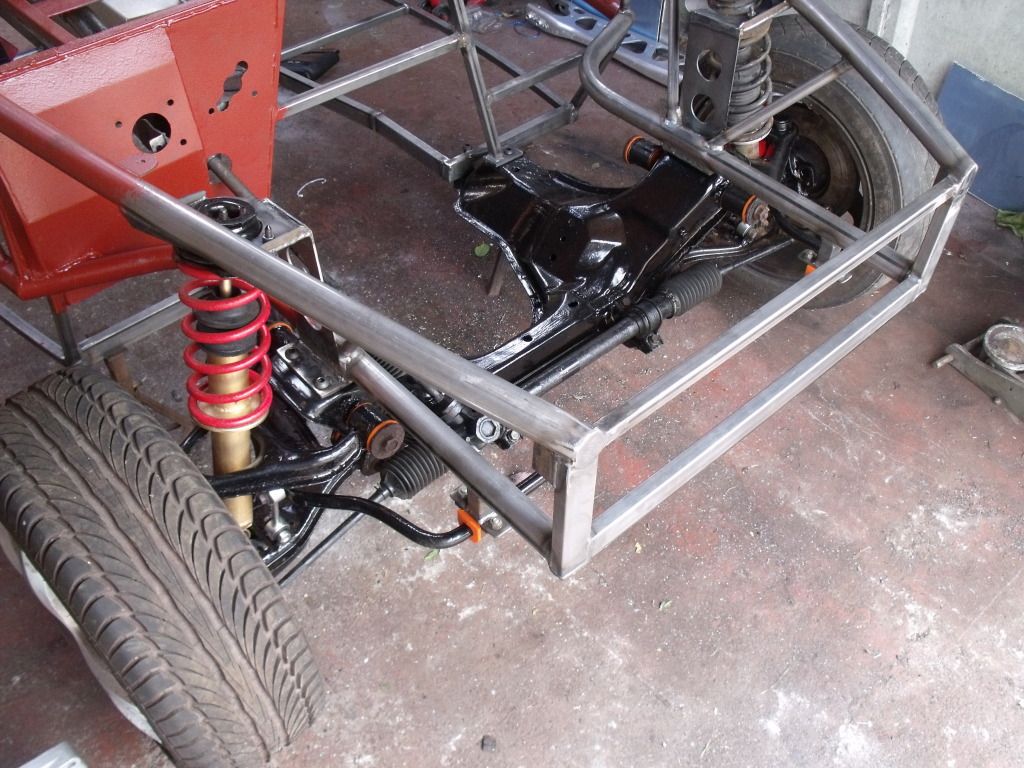
And front and rear subframes stripped and painted
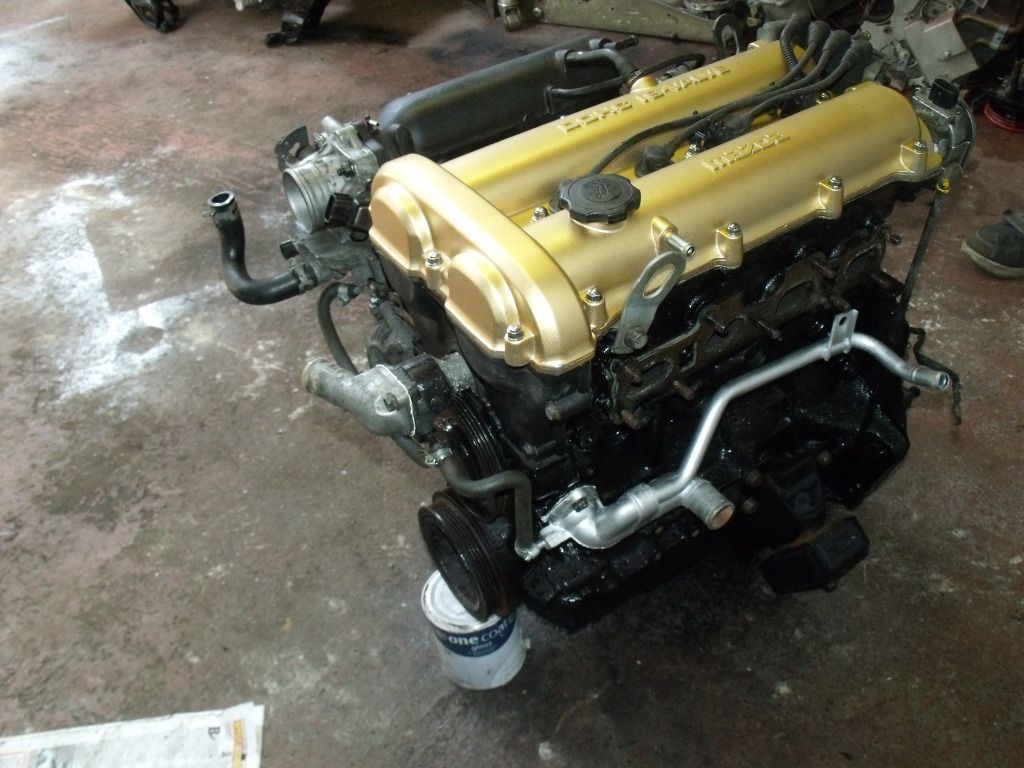
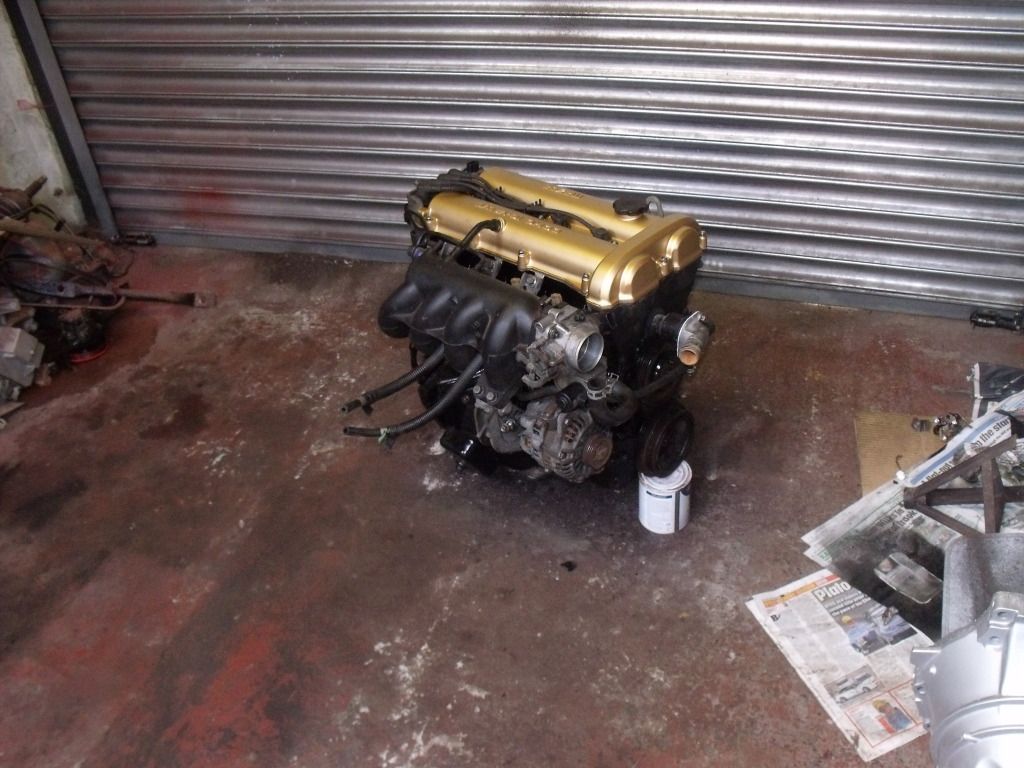
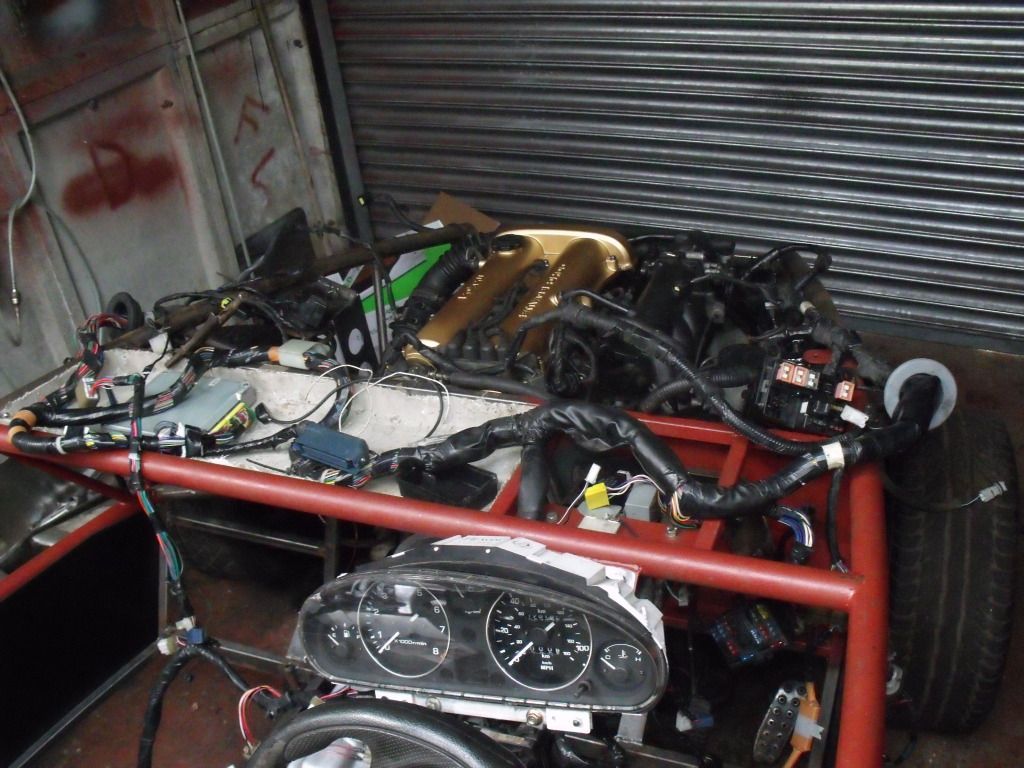
Engine rebuilt and cleaned a tip for anybody take plenty of pics of the stripping down because they may come in handy when you come to rebuild it
more pics
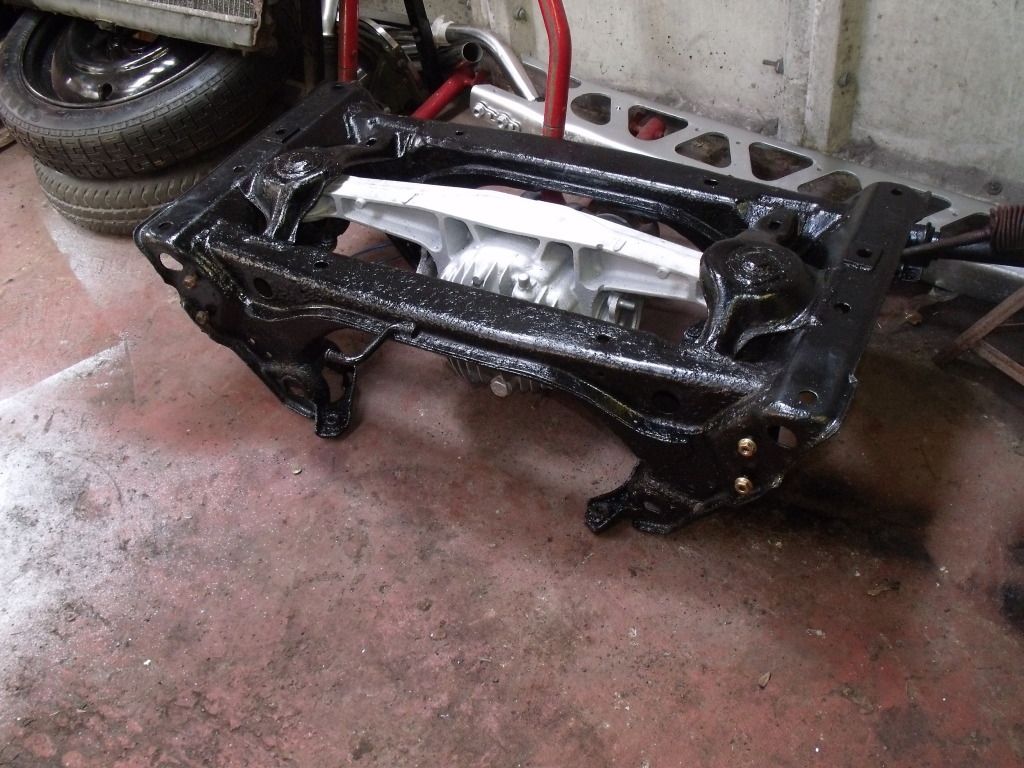
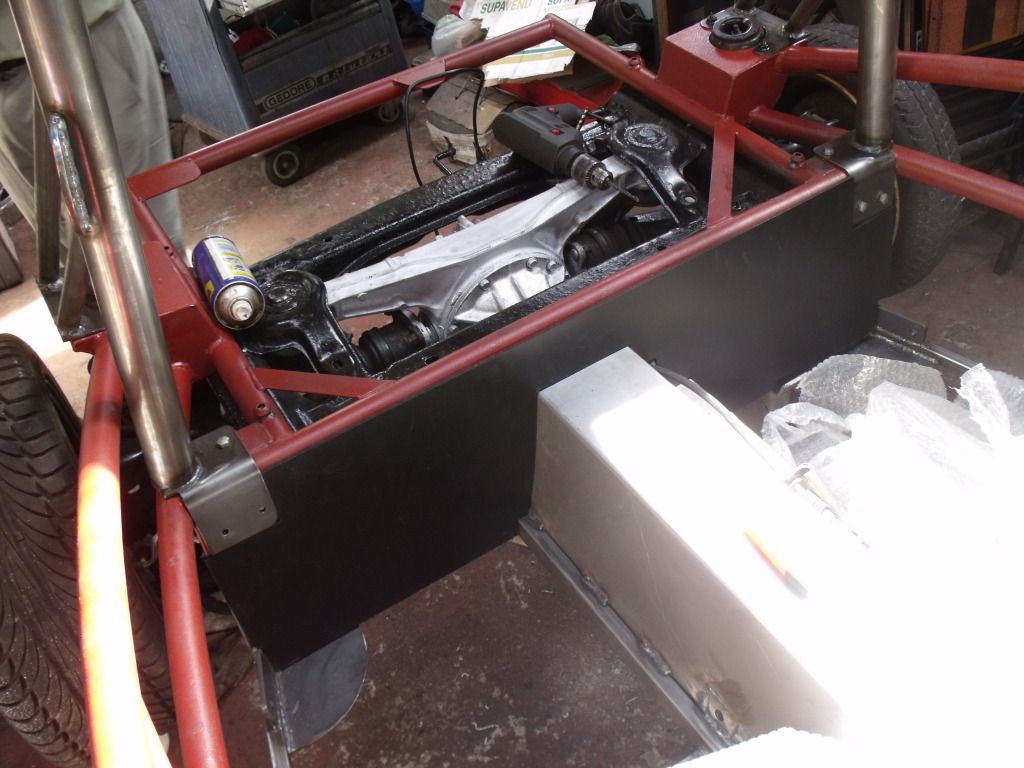
Also managed to refit the diff into the rear subframe
 .
.
This is pretty much where i am with it waiting for my clutch to arrive so i can rebolt my gearbox back on to my engine. Removed the bushes out of the upper rear wishbones and painted them will fit the plybushes tomorrow also got to remove the bushes out of the lower arms which are proving to be tricky might have to burn them out.
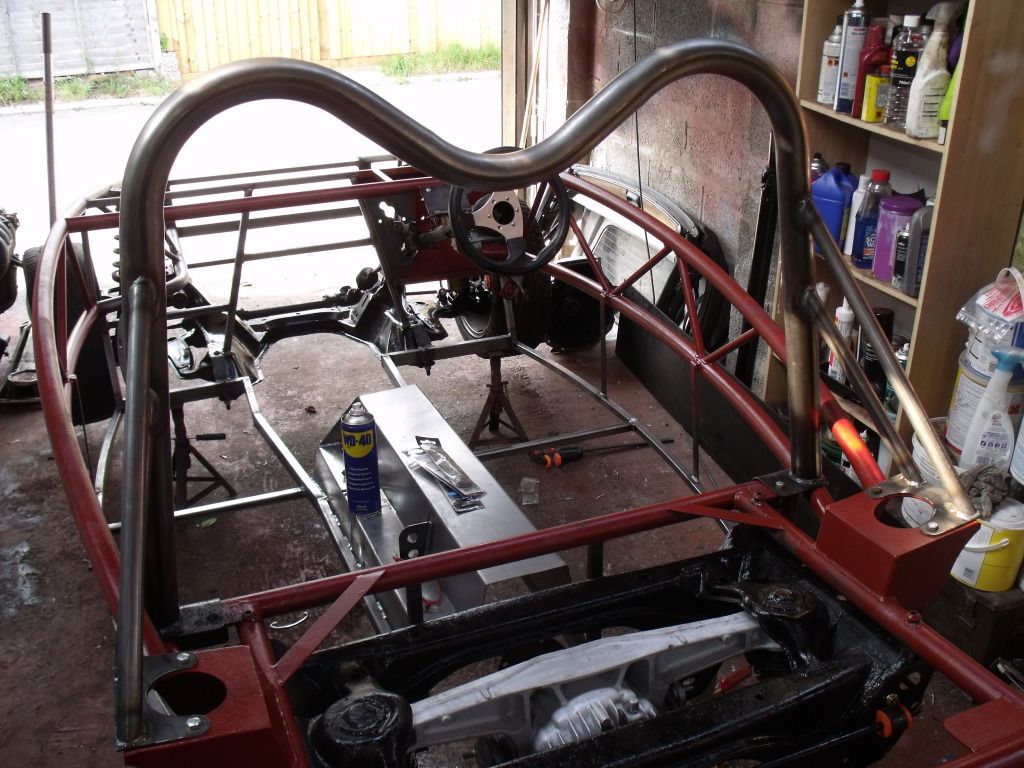
Will be picking the kit up on friday have opted for a bolt in roll bar so i can upgrade to a msa roll bar in the future, dash pods, fly screen and alloy fuel tank will source the seats and lights myself and going for some mods will be getting a set of gaz adjustable dampers and spring plans for either the omex ecu and throttle body kit which is an option with the kit or a mini supercharger conversion kit.
Will be going for a gold frame and black body work will spray the frame myself this haven't been done before on a exocet but has been done on a rocket and it did look good.
My next update will be involving picking up the kit.
Couple of pics the car before being stripped down it's a 1993 eunos roadster 1.8 for 400quid
Couple of pics of the strip down
Didn't take any pcis of the big step of removing the body but the ppf frame is back in my garage
.ppf frame has ben completly stripped cleaned and painted
Diff and gearbox cleaned and painted
Engine mounts and ppf bar that conects the gearbox and diff together
Propshaft painted
Shock and spring repainted
This is what i was going to do for all 4 shocks but have decided to get some gaz coilovers for it with adjustable damping and spring
Bottom wishbone stripped, painted and polybushed
Upper wishbone stripped, painted and polybushed
And front and rear subframes stripped and painted
Engine rebuilt and cleaned a tip for anybody take plenty of pics of the stripping down because they may come in handy when you come to rebuild it
more pics
Also managed to refit the diff into the rear subframe
.This is pretty much where i am with it waiting for my clutch to arrive so i can rebolt my gearbox back on to my engine. Removed the bushes out of the upper rear wishbones and painted them will fit the plybushes tomorrow also got to remove the bushes out of the lower arms which are proving to be tricky might have to burn them out.
Will be picking the kit up on friday have opted for a bolt in roll bar so i can upgrade to a msa roll bar in the future, dash pods, fly screen and alloy fuel tank will source the seats and lights myself and going for some mods will be getting a set of gaz adjustable dampers and spring plans for either the omex ecu and throttle body kit which is an option with the kit or a mini supercharger conversion kit.
Will be going for a gold frame and black body work will spray the frame myself this haven't been done before on a exocet but has been done on a rocket and it did look good.
My next update will be involving picking up the kit.
randlemarcus said:
Bookmarked, and following with interest, as am quite interested in doing one of these, perhaps running the donor over the summer.
Is a 1.8 that much better than a 1.6?
Depends what model really the early mk1 mx5 the 1.6 were 116bhp and the 1.8 was 133bhp the latter mk1 the 1.6 were 105bhp or similar. From people who run them every day there is not a great deal of difference between them only when you get to the high end of the rev range you would notice a difference.Is a 1.8 that much better than a 1.6?
The 1.6 are more plentyful in numbers and are cheaper but personal i would go with the 1.8 just that bit more power. My donor had no tax and no mot hence the cheap price of 400quid but ive had to replace the bushes polybush set front and back, disc & pads on back, pads front, clutch and a few other bits.
The best advice is to get the best car you can get and run it for a few months to sort any problems out but i didn't do that due to insurance purposes as im 19.
Did get the chance to drive it on an industrial site and it went well but the clutch was slipping so that is being replaced. It had no mot or tax so haven't driven it on the road.
Regarding the condition the rear arches were starting to rust and the o/s wing was corroded aswel apart from that i could of been put back on the road without to much problems.
Regarding the condition the rear arches were starting to rust and the o/s wing was corroded aswel apart from that i could of been put back on the road without to much problems.
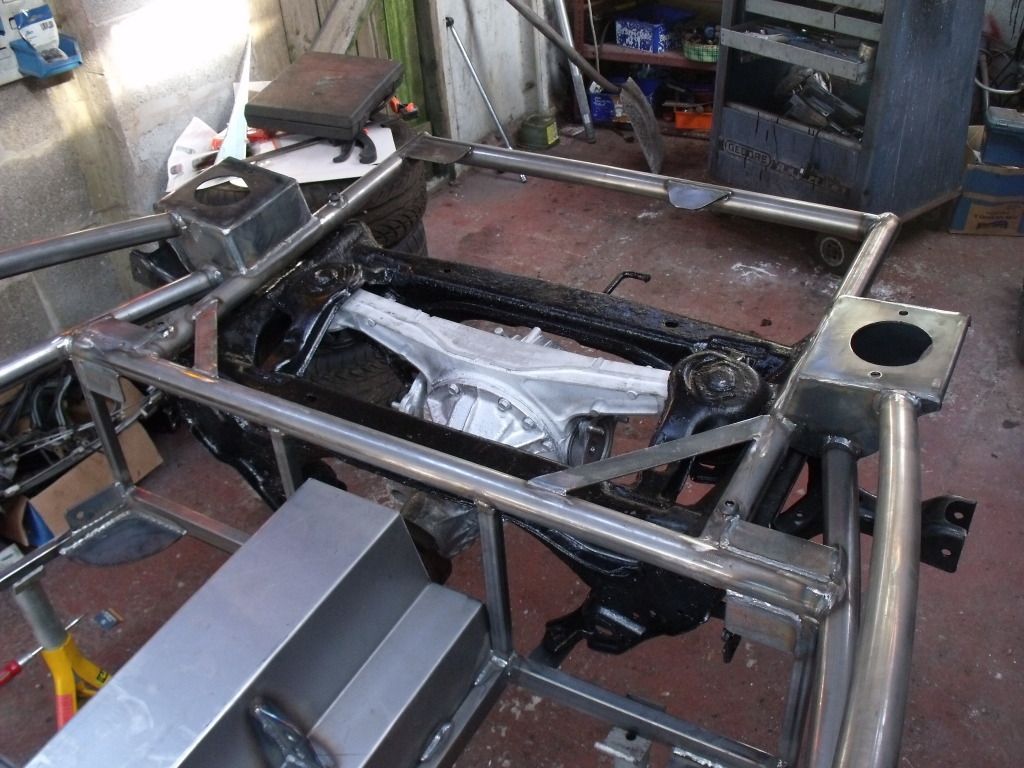
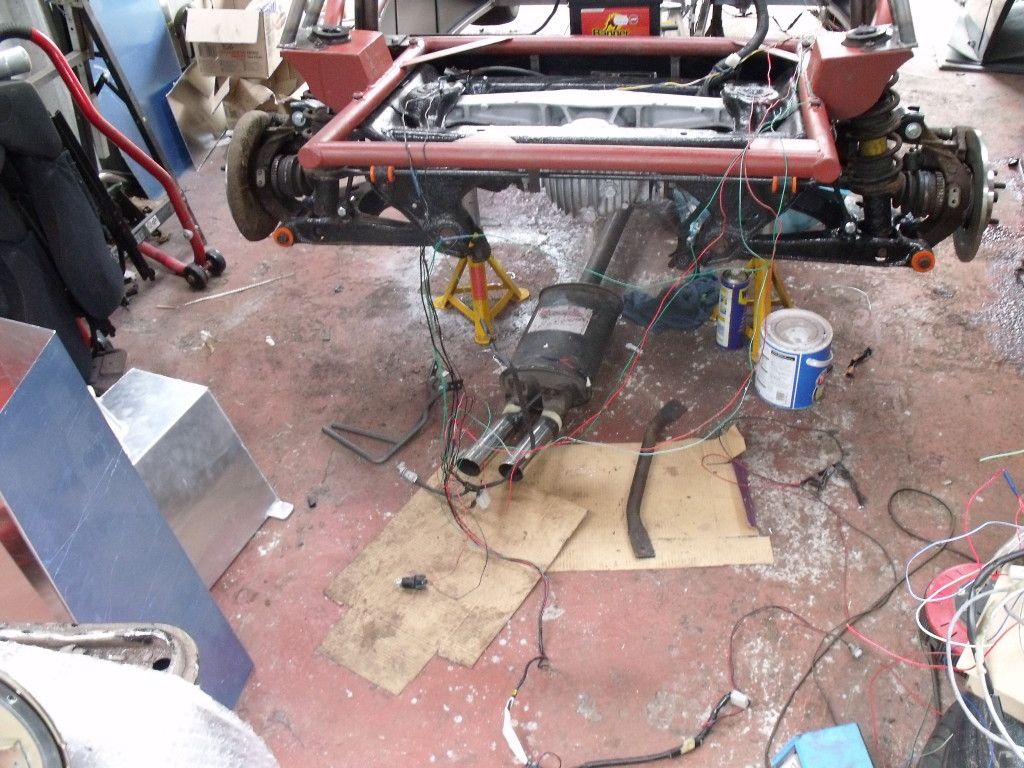
So after a 7 hour round trip thanks in no certain terms as the olympic torch relay coming through south east wales closing several roads the bridge works on the M50, knob head lorry drivers who spend 3 miles overtaking each other and some of the worst driving ive seen for a long time but that is for another day ive got the kit back to my garage.
Meet stuart and julie and had a look around at the mev facilites abd the X5 superlight which might become our 2nd kit after this one.
So a couple of pics of it back in my garage
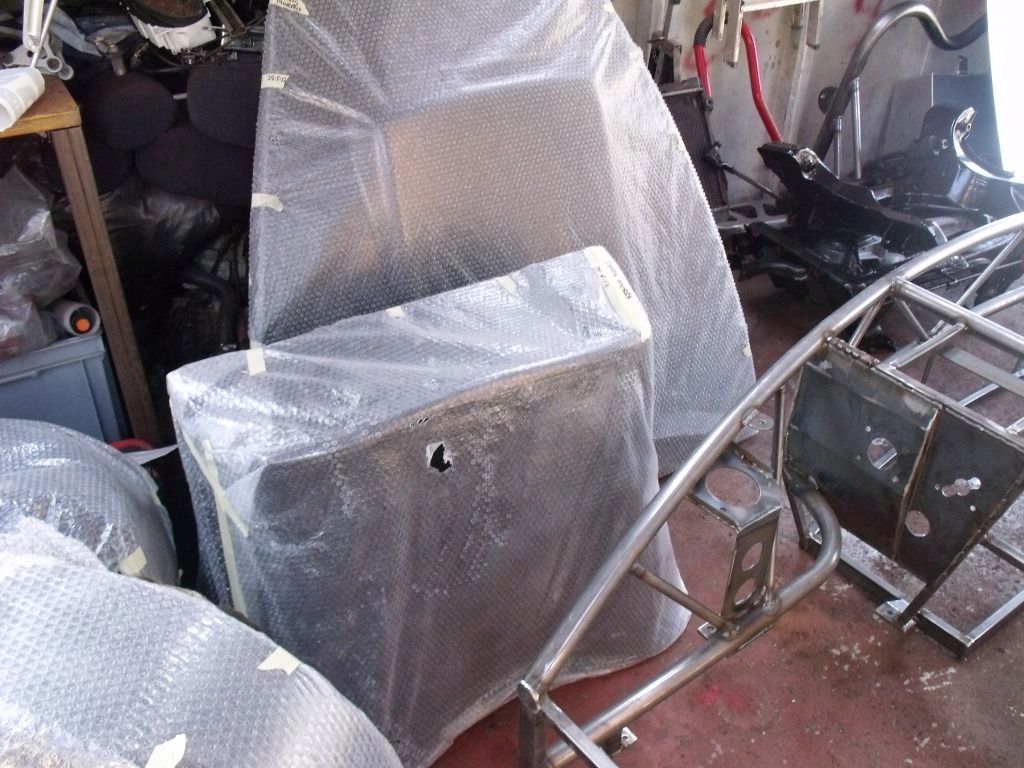
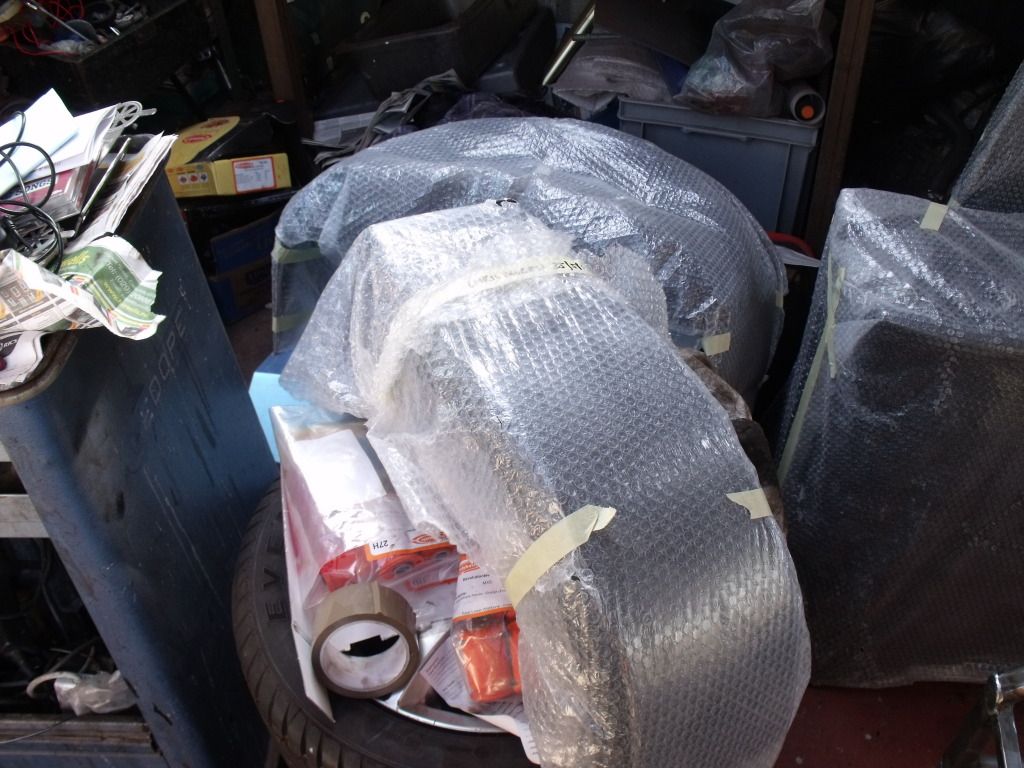
Ive moved all the body panels and panels down into the conservatory my mother is not best pleased mind you.
Got the alluminium fuel tank, bolt in roll cage which makes it easier to fit the floor and a mod i would recomend, aero screen and the dash pod.
I will prime the frame then build the kit so it's running and everything is in place strip it apart and spray it in gold to try and eliminate scratching the frame to much.
Couple of problems though this week the clutch that i ordered was to small the bushes out of the lower rear wishbone are not coming out so will have to burn them out but apart from that i should this weekend be able to spray the frame in primer, cut the floor out and secure it using a couple of self tapping screws it will be riveted on after i sprayed the frame in gold. Fit the front and rear subframe reaseambly the front suspension and a couple of other bits aswel.
Keep you updated
Meet stuart and julie and had a look around at the mev facilites abd the X5 superlight which might become our 2nd kit after this one.
So a couple of pics of it back in my garage
Ive moved all the body panels and panels down into the conservatory my mother is not best pleased mind you.
Got the alluminium fuel tank, bolt in roll cage which makes it easier to fit the floor and a mod i would recomend, aero screen and the dash pod.
I will prime the frame then build the kit so it's running and everything is in place strip it apart and spray it in gold to try and eliminate scratching the frame to much.
Couple of problems though this week the clutch that i ordered was to small the bushes out of the lower rear wishbone are not coming out so will have to burn them out but apart from that i should this weekend be able to spray the frame in primer, cut the floor out and secure it using a couple of self tapping screws it will be riveted on after i sprayed the frame in gold. Fit the front and rear subframe reaseambly the front suspension and a couple of other bits aswel.
Keep you updated
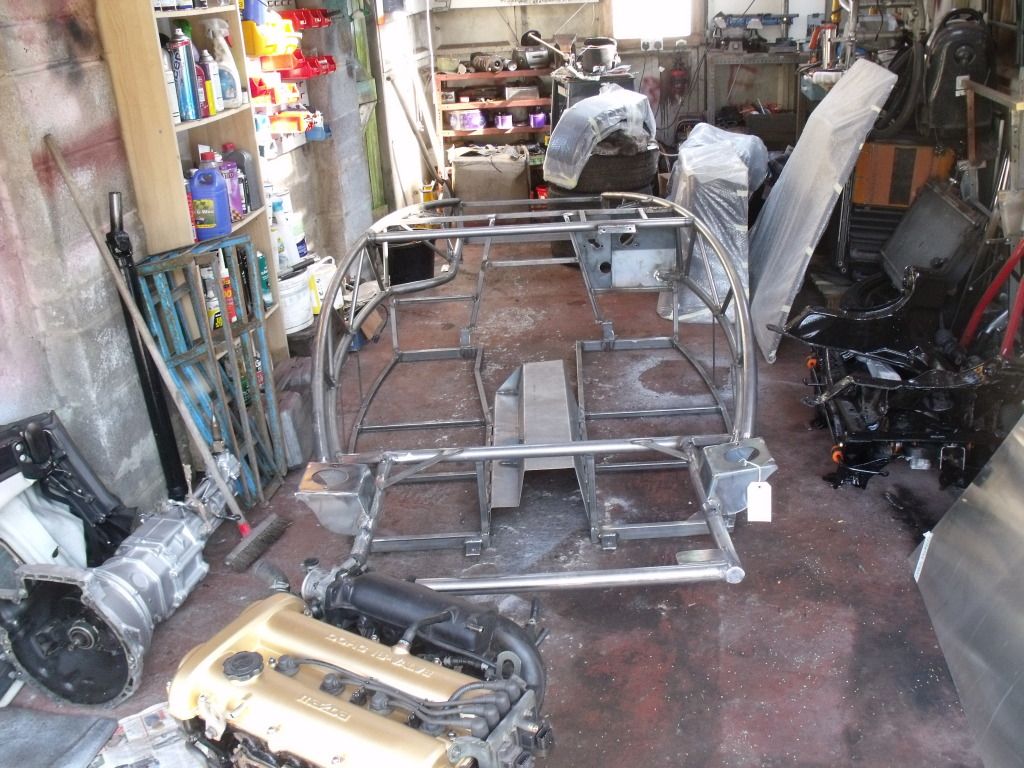
Right after poping down to llandow to have a look at the kits cars down there mainly the racing exocet managed to start on the build so
Day1
First thing to do was mark out the floor and cut to shape
Did start to drill the holes for the rivets after managing to drill 12 holes the drill went on the fritz and died so have to do the rest again.
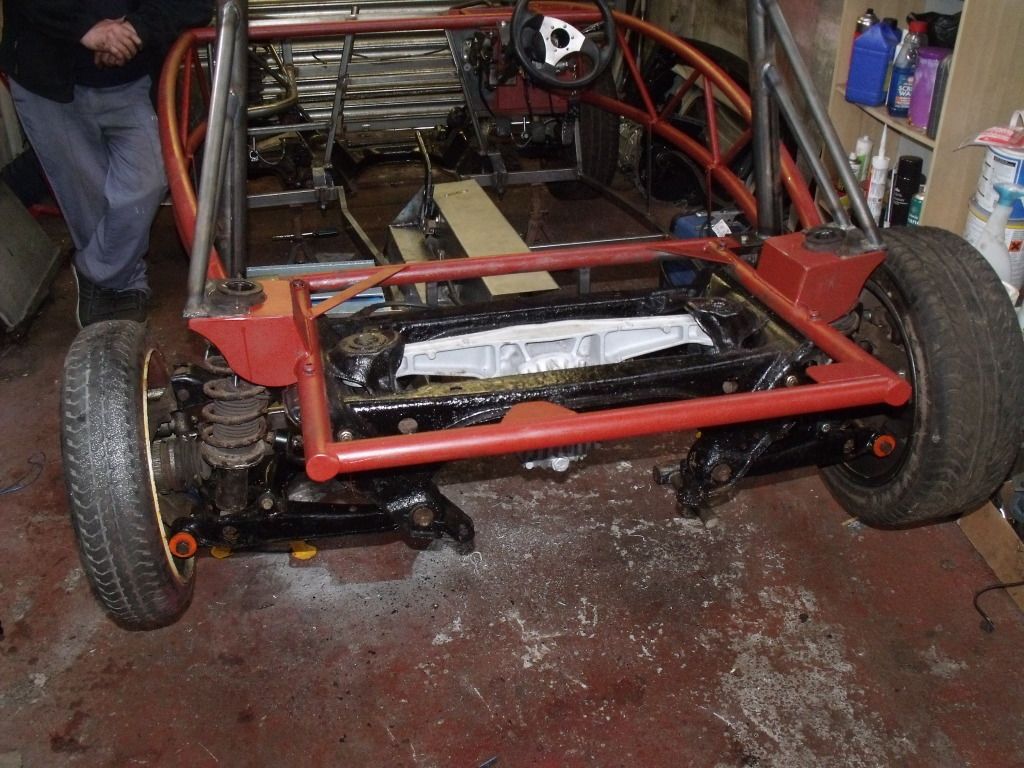
So as it was upside down decided to bolt on the front and rear subframes this was a mission in it's self but after mayby half hour or so managed to fit the front and rear subframes.
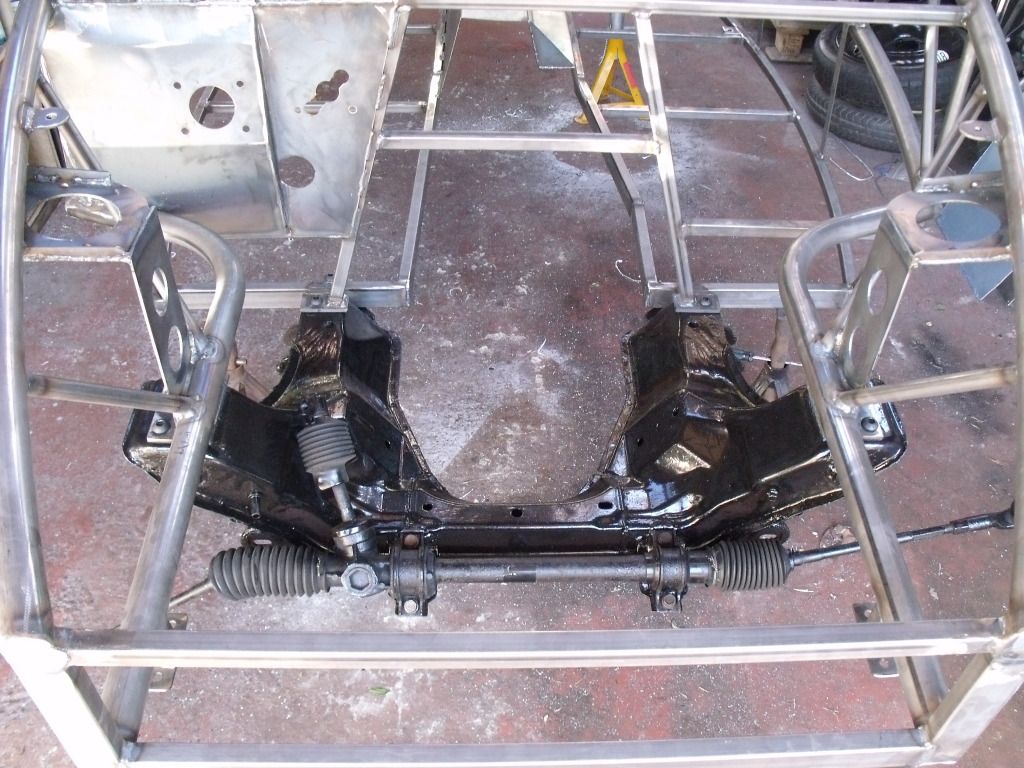
Finished for the day and going to be having a bbq one thing i rather be building a kit during the spring /summer months than winter.
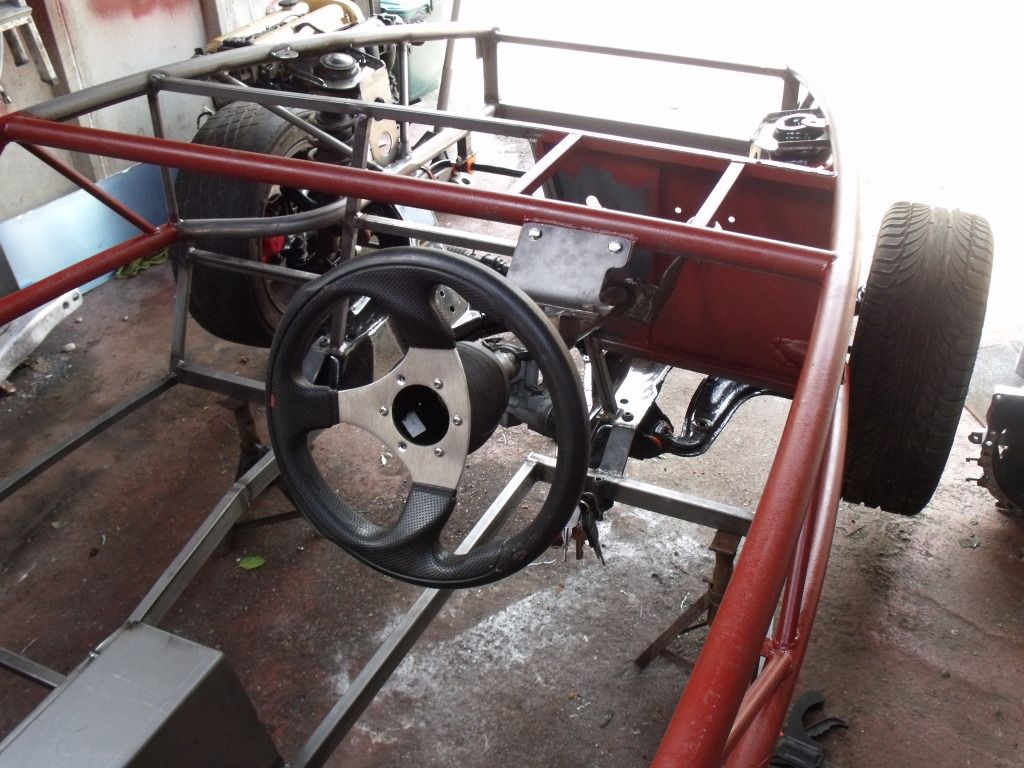
Tomorrow will reassamble the front suspension fit the roll bar and fit the steering collum
Day1
First thing to do was mark out the floor and cut to shape
Did start to drill the holes for the rivets after managing to drill 12 holes the drill went on the fritz and died so have to do the rest again.
So as it was upside down decided to bolt on the front and rear subframes this was a mission in it's self but after mayby half hour or so managed to fit the front and rear subframes.
Finished for the day and going to be having a bbq one thing i rather be building a kit during the spring /summer months than winter.
Tomorrow will reassamble the front suspension fit the roll bar and fit the steering collum
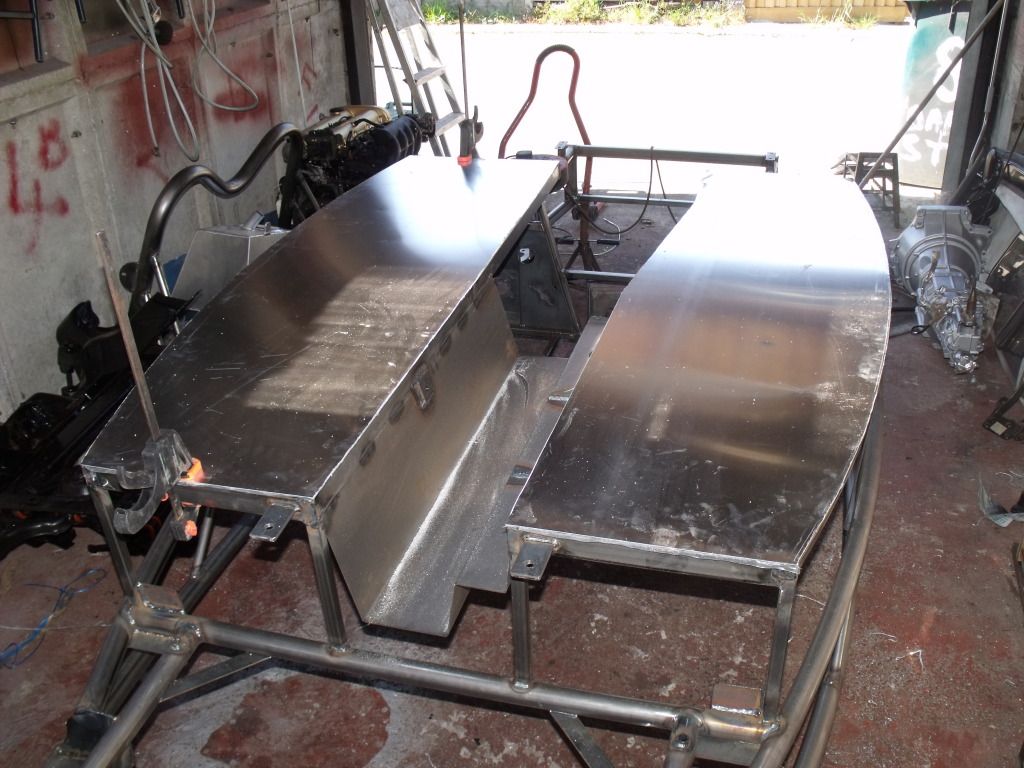
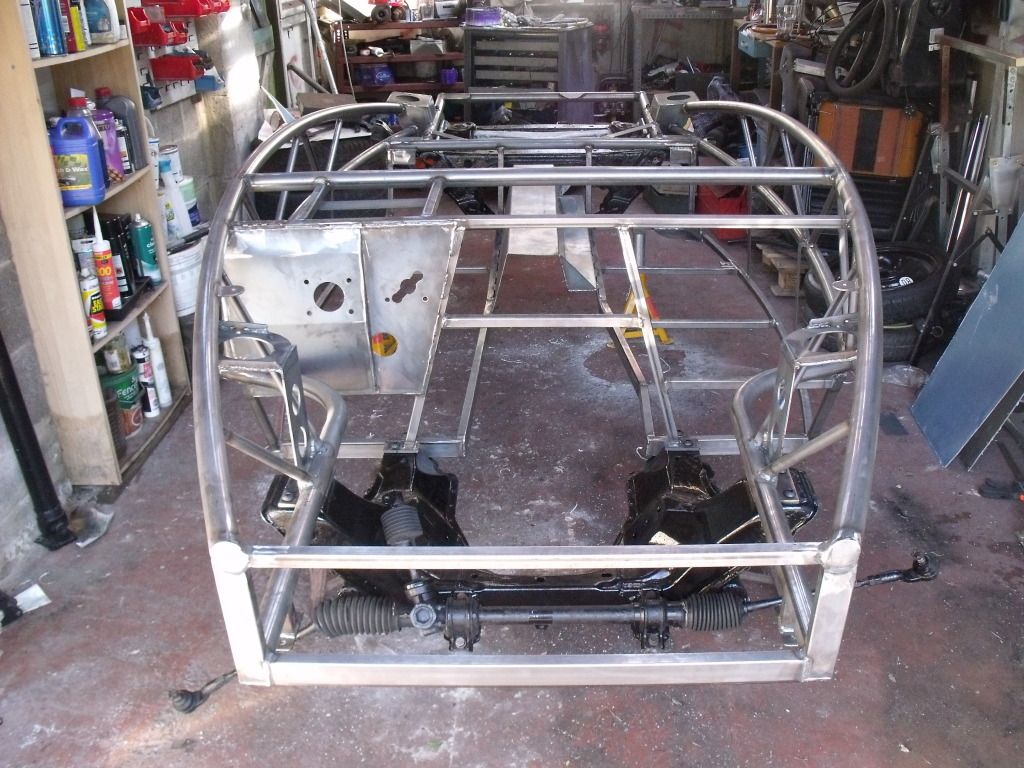
Day 2 rebuilt the front suspension mounted the roll bar and steering collum did start on trimming the side panels but had to stop to help a mate out so pictures of todays work
Layed a coat of red oxide primer in the places where im likely to touch so eliminating any rust from foarming.
Hopefully next week i should be able to burn the rear bushes out paint the arms and fit the new polybushes, my clutch should turn up and i got to get a servo, master cylinder and porportion valve of a non abs mx5 to convert mine to non abs.
So should be able to get an update during the week if i get time to work on it.
Day 3 on the build.
Cut and trimed the side panels to shape got to get some screws to fit them
Fitted the pedal assembley, brake servo, master cylinder and clutch master cylinder pics
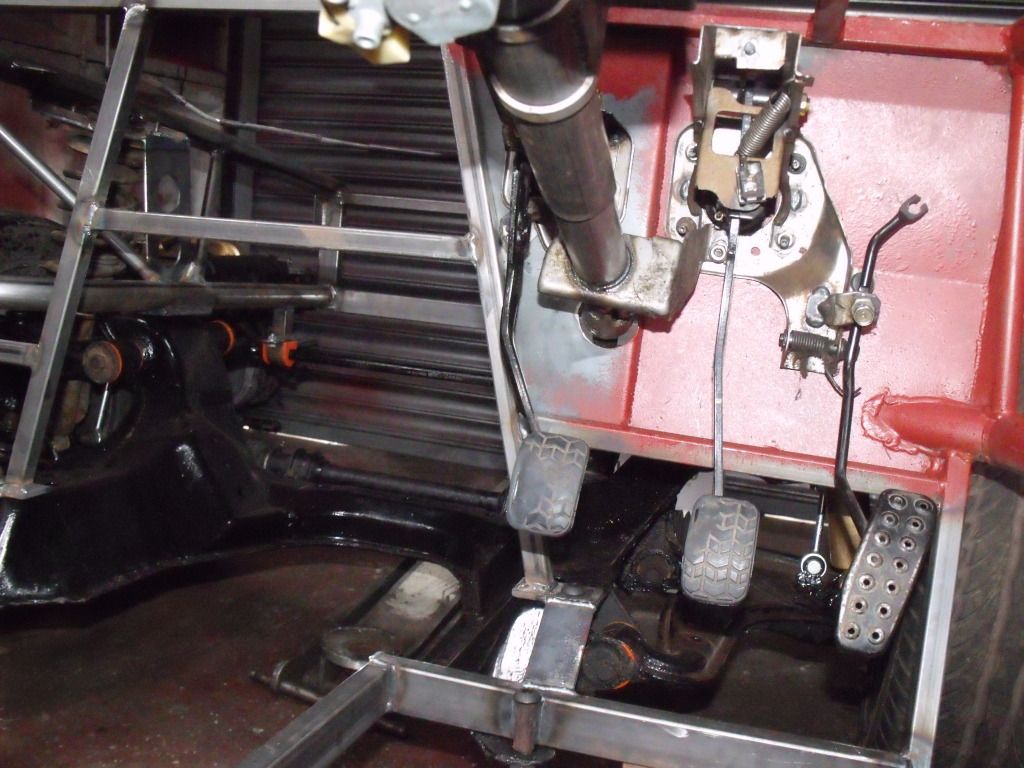
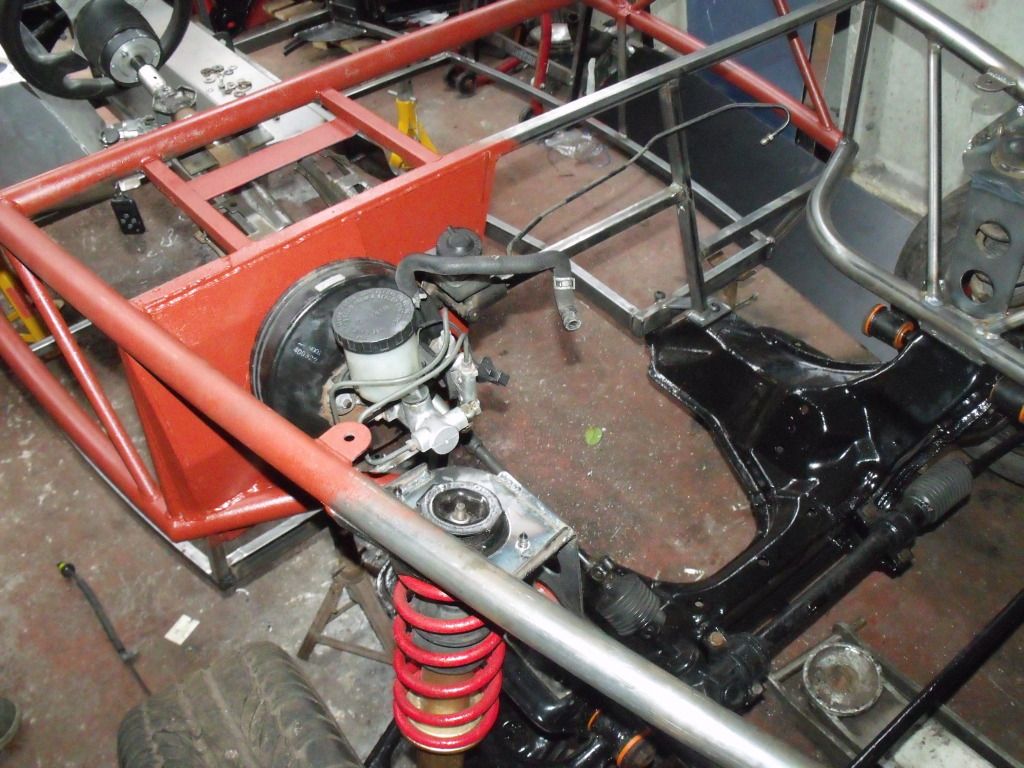
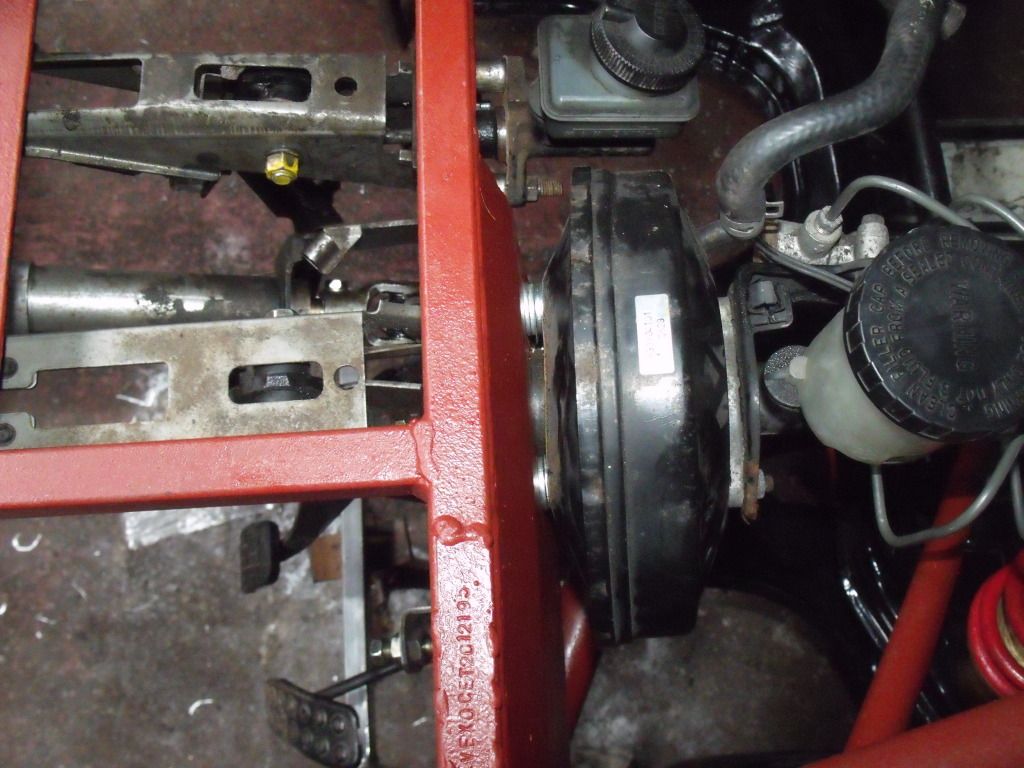
Might have to take a washer out of the left side of the servo to make it square with the pedal.
This was done mostly by my father as i was in colege.
Ordered a set of stainless brake hose arrived today so should have the side panels mounted, rear suspension fitted, brake lines fitted, wing stayes and wings mounted on the weekend.
Then next week start on getting the engine in and start on the wiring loom ??
Cut and trimed the side panels to shape got to get some screws to fit them
Fitted the pedal assembley, brake servo, master cylinder and clutch master cylinder pics
Might have to take a washer out of the left side of the servo to make it square with the pedal.
This was done mostly by my father as i was in colege.
Ordered a set of stainless brake hose arrived today so should have the side panels mounted, rear suspension fitted, brake lines fitted, wing stayes and wings mounted on the weekend.
Then next week start on getting the engine in and start on the wiring loom ??
JamesHayward said:
Hi Chris,
Was it you that came over and said hello at Llandow on Saturday? If so, was good to meet you and best of luck with your build.
James
Yes it was me good to meet you aswel and got some tips from the exocet you were using as a guide to building mine.Was it you that came over and said hello at Llandow on Saturday? If so, was good to meet you and best of luck with your build.
James
What tracks are you visiting this year for racing wouldn't mind coming down to one if it's localish.
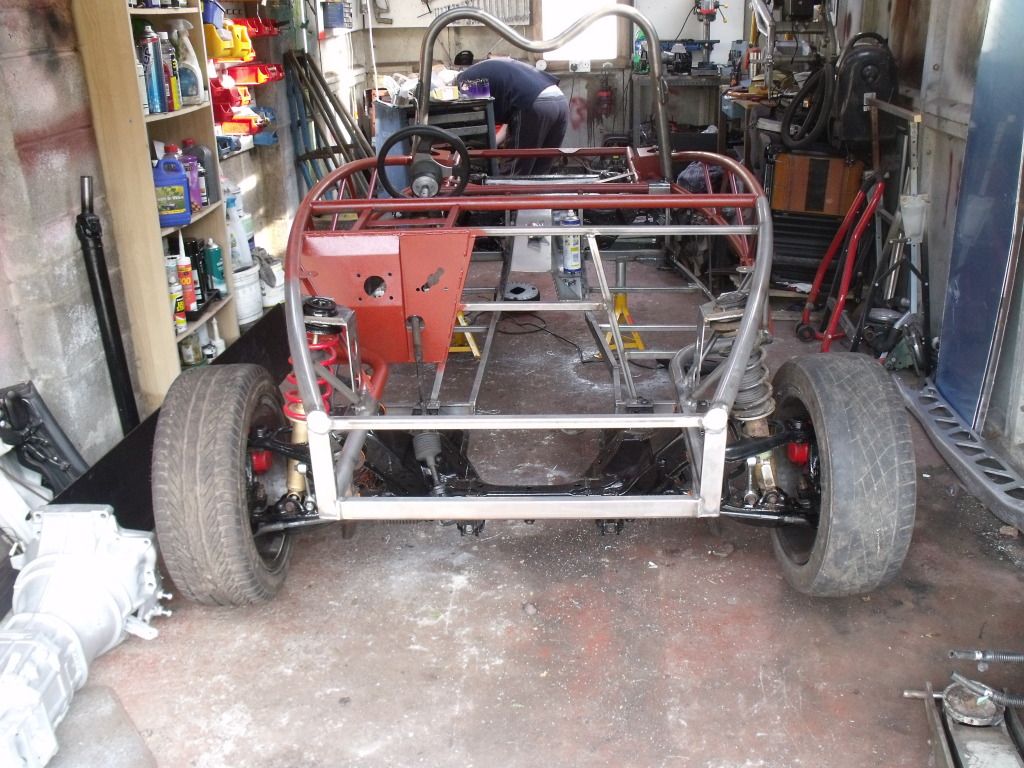
Day 4 on the build.
Refit rear suspension as i finally managed to burn the bushes out of the rear suspension
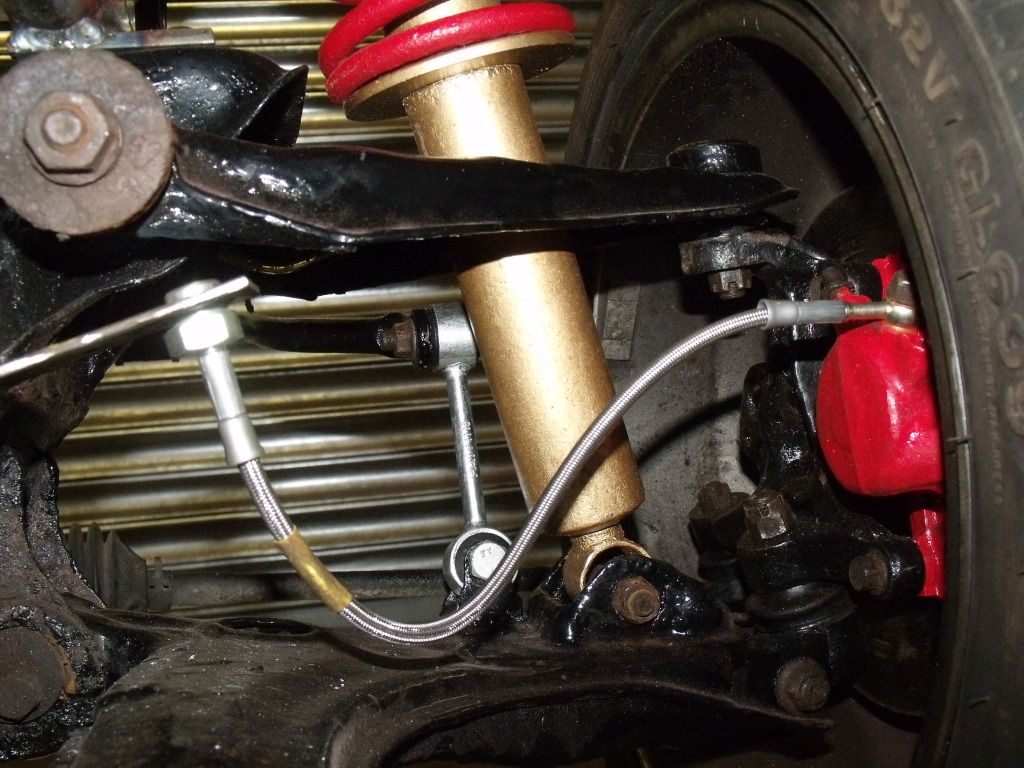
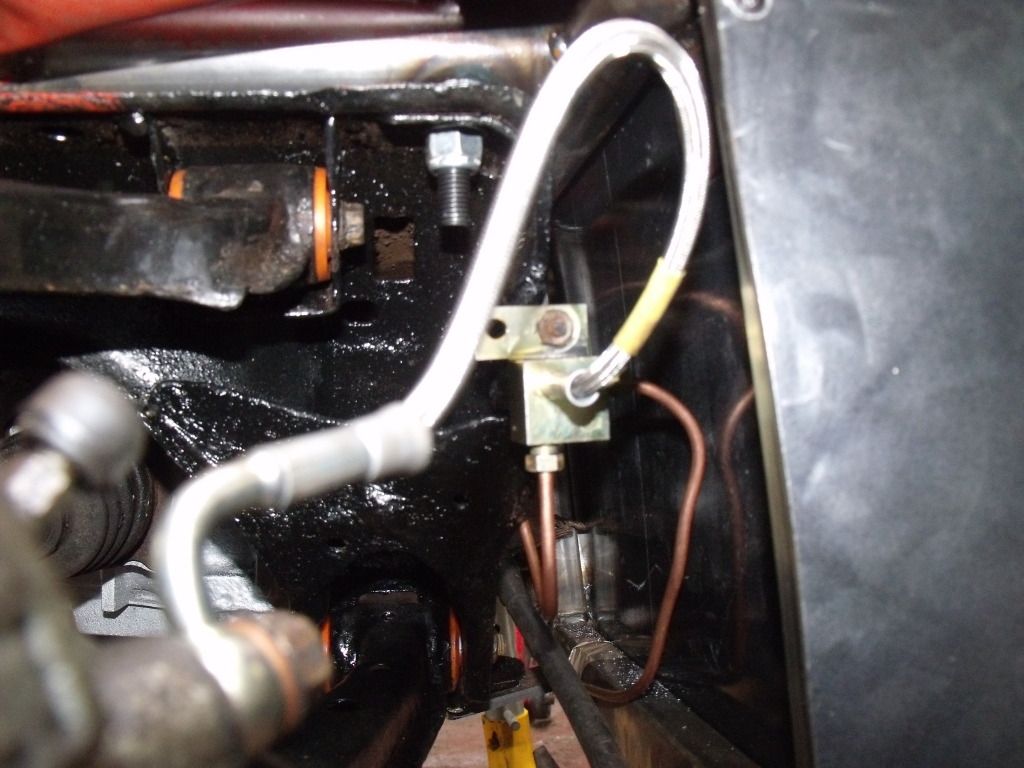
Fitted brake flexi after they arrived on friday. Rear ones simply to fit just reuses the original mounting points on the rear subframe
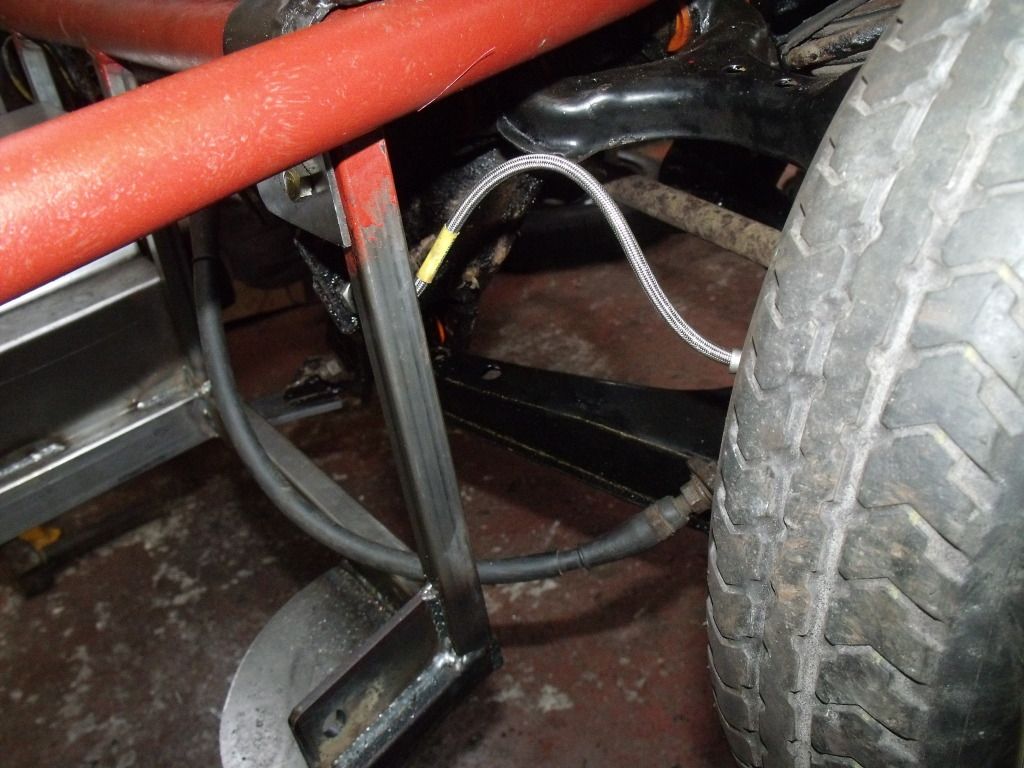
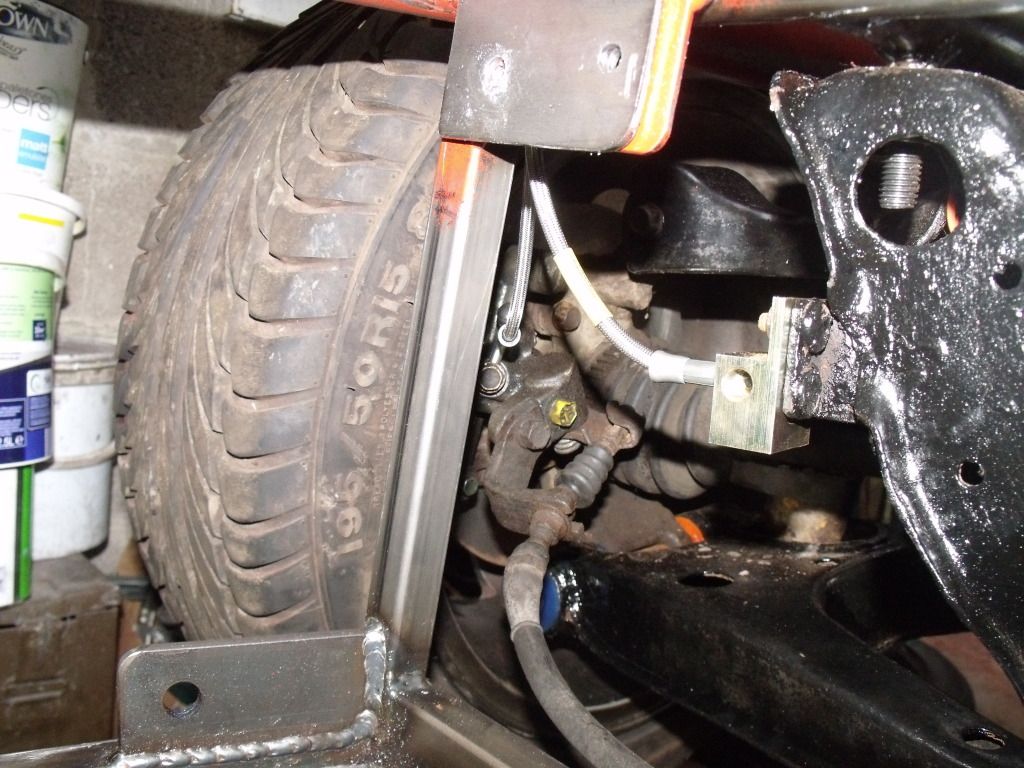
The front is more difficult as the mounting points on the mx5 are on the body and since the body is not being reused bracket need to be made, they have to be poistioned so they don't strech when on full lock or touch the suspension with the steering the other way

was going to route the brake pipes bought brake ends and roll of brake pipe but someone forgot to take the brake flaring tool from work on friday and now not open till wednesday : so that will have to be done again
Next job was to fit the handbrake cable and fit the handbrake lever, to do this you need to set the cable to the least tension possible mark out the holes for the lever and drill 3 holes
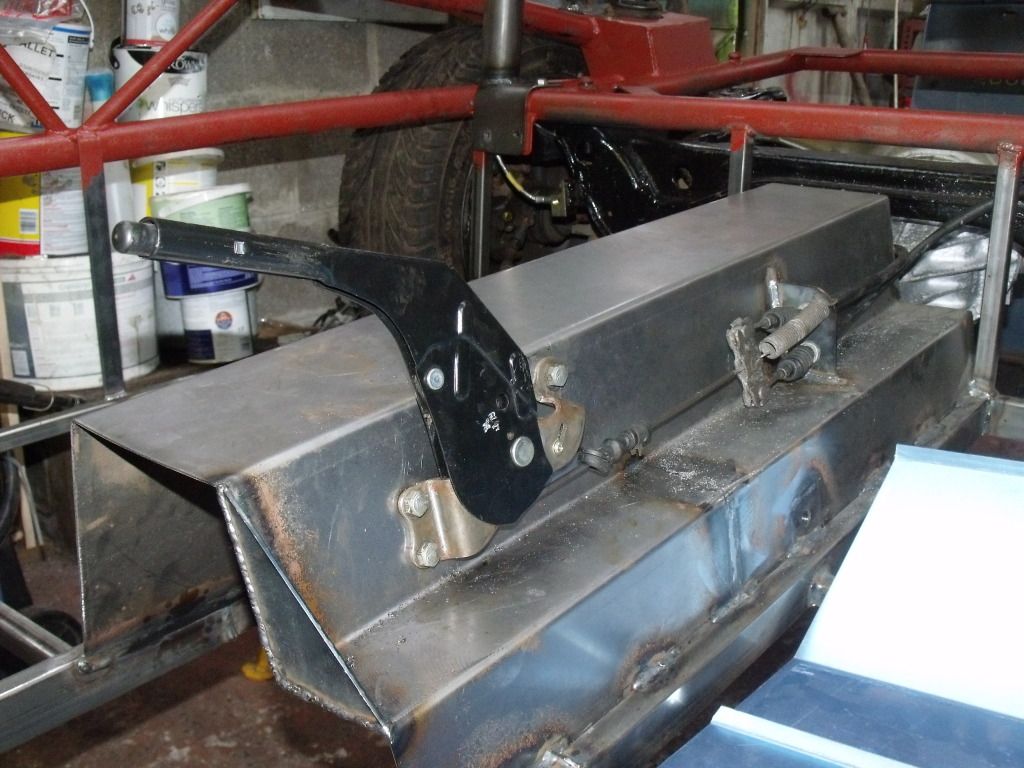
Also drilled the hole for the accelerater cable

Refit rear suspension as i finally managed to burn the bushes out of the rear suspension
Fitted brake flexi after they arrived on friday. Rear ones simply to fit just reuses the original mounting points on the rear subframe
The front is more difficult as the mounting points on the mx5 are on the body and since the body is not being reused bracket need to be made, they have to be poistioned so they don't strech when on full lock or touch the suspension with the steering the other way
was going to route the brake pipes bought brake ends and roll of brake pipe but someone forgot to take the brake flaring tool from work on friday and now not open till wednesday :
so that will have to be done againNext job was to fit the handbrake cable and fit the handbrake lever, to do this you need to set the cable to the least tension possible mark out the holes for the lever and drill 3 holes
Also drilled the hole for the accelerater cable
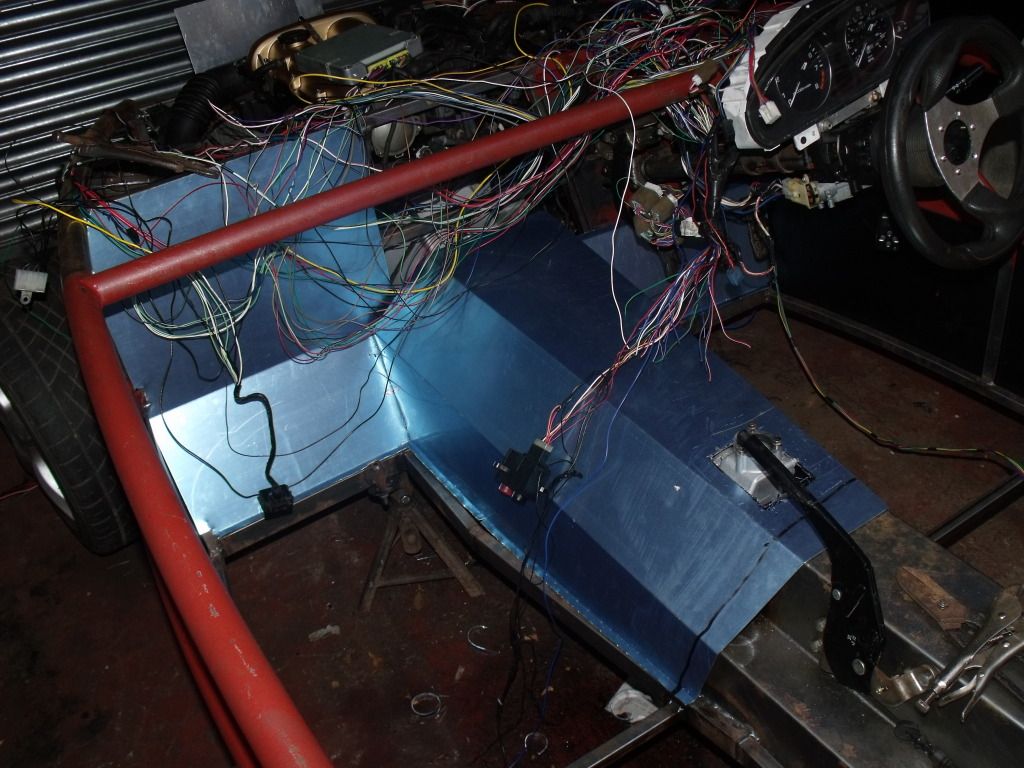
Day 5 on the build.
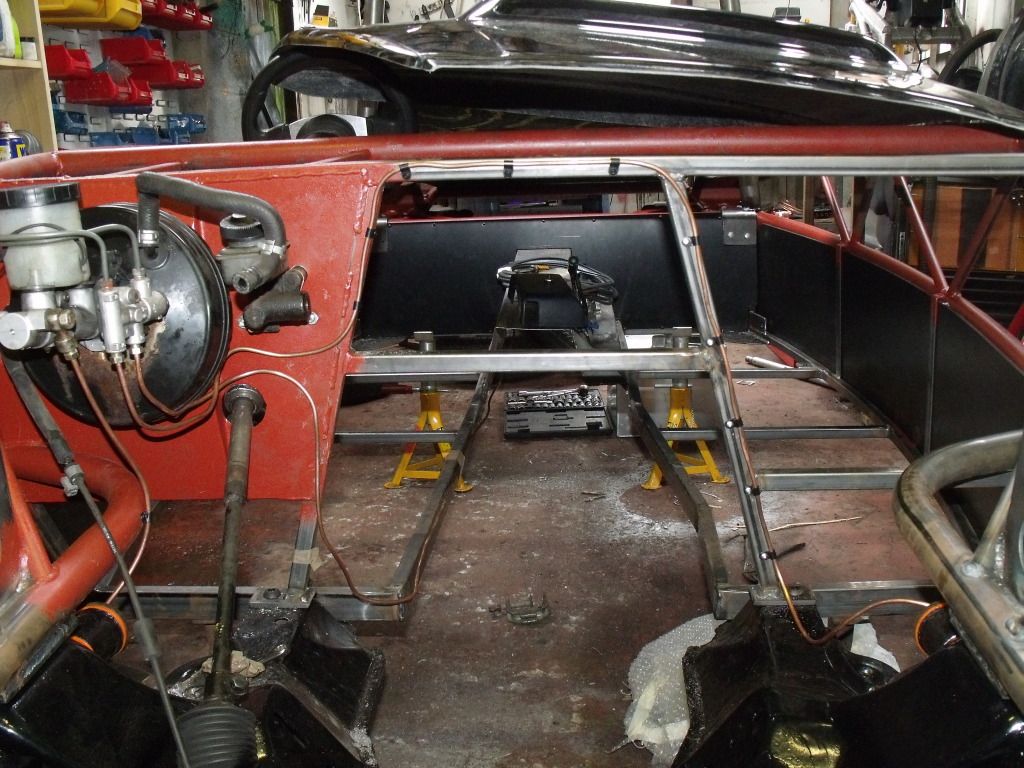
Made a template for the rear bulkhead and marked out on to the plastic sheeting had to make a couple of cuts to get it to line up but managed to get it in
Also started to mock up the brake pipes using fencing wire to get the correct shape and length will have to transfer them to copper during the week and get them mounted.
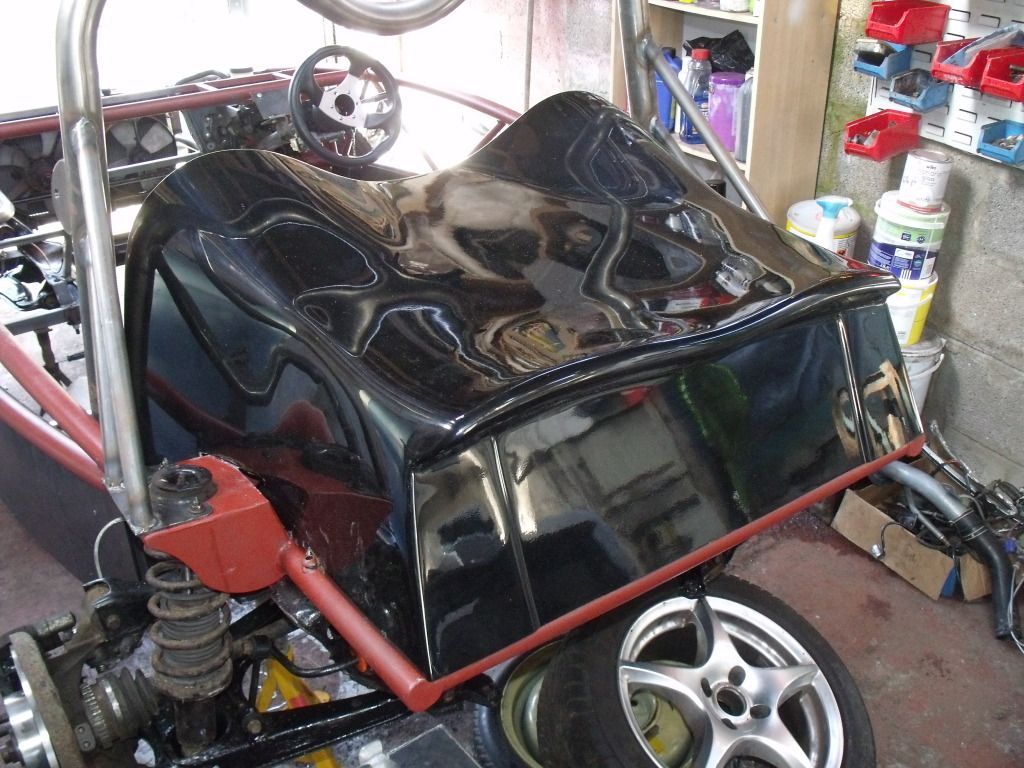
Got bored with doing the mechanical side of it so thought i see what the front end will look like this. So decided to paint the mesh grill gold trimmed to size and fitted to front nose. Mounted it to the front and also put the bonnent on to see the results
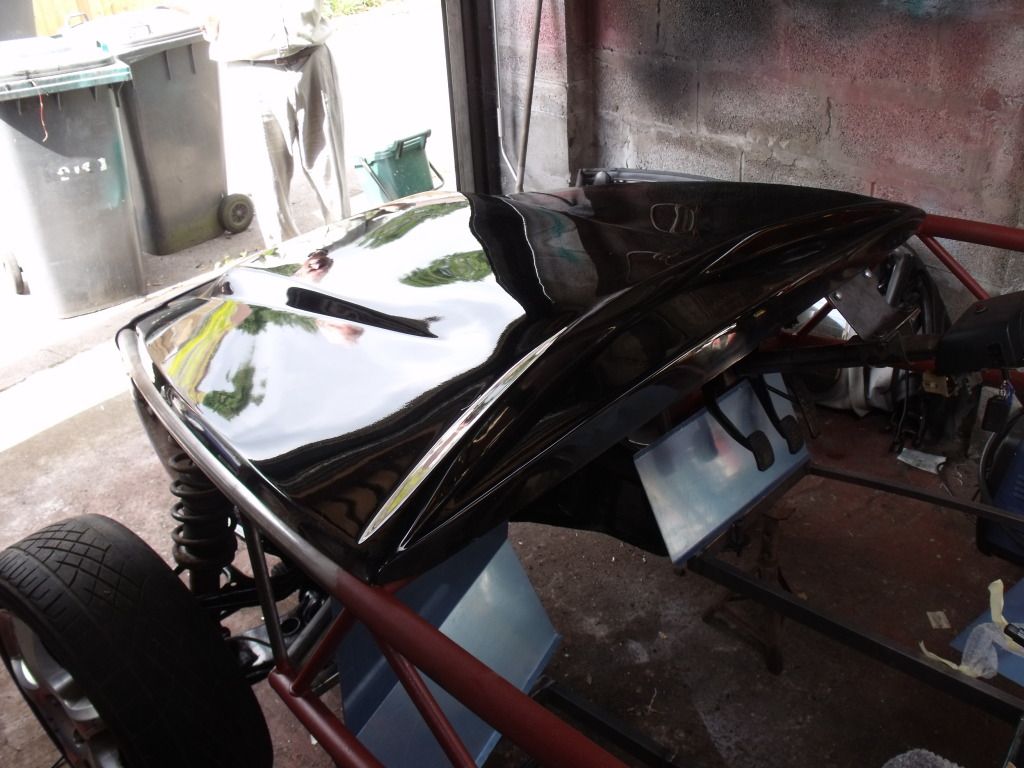
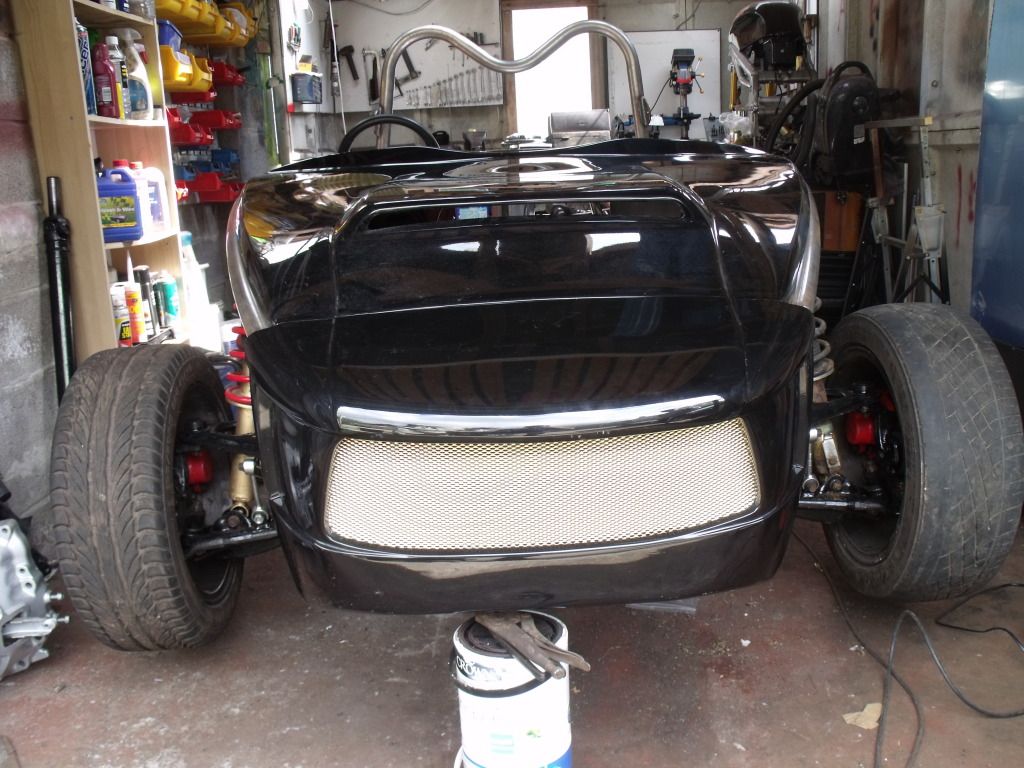
Im glad i went with the black and gold theme.
This weeks plan is to fit brake pipes. Fit new clutch when it arrives and refit gearbox then fit back into the frame. Then can start on making brackets for all the engine parts, header tank etc and start with the wiring loom.
Made a template for the rear bulkhead and marked out on to the plastic sheeting had to make a couple of cuts to get it to line up but managed to get it in
Also started to mock up the brake pipes using fencing wire to get the correct shape and length will have to transfer them to copper during the week and get them mounted.
Got bored with doing the mechanical side of it so thought i see what the front end will look like this. So decided to paint the mesh grill gold trimmed to size and fitted to front nose. Mounted it to the front and also put the bonnent on to see the results
Im glad i went with the black and gold theme.
This weeks plan is to fit brake pipes. Fit new clutch when it arrives and refit gearbox then fit back into the frame. Then can start on making brackets for all the engine parts, header tank etc and start with the wiring loom.
Mr2Mike said:
How are you going to protect the chassis from rust in all the areas that are now inaccessible due to subframes being bolted on etc?
It may sound a lot of work but due to my choice of colour for the frame gold i was adviced to build it first drilling out the holes in the frame etc then strip apart then paint it to prevent scratching to the frame.Mev only does black powder coating so any scracthes in the frame that occurs when building it can be touched in and wouldn't notice it after with gold it's harder to match the colour if you need to touch it up if it gets scratched when drilling holes etc.
Day 6 on the build.
After mocking out the route for the brake pipes borrowed the flaring tool for work and fitted the 4 brake pipes needed.
Still got to secure the front to rear brake pipes once i get more clips.
Fitted the rear bulkhead panel and both side panels that i cut to shape last week
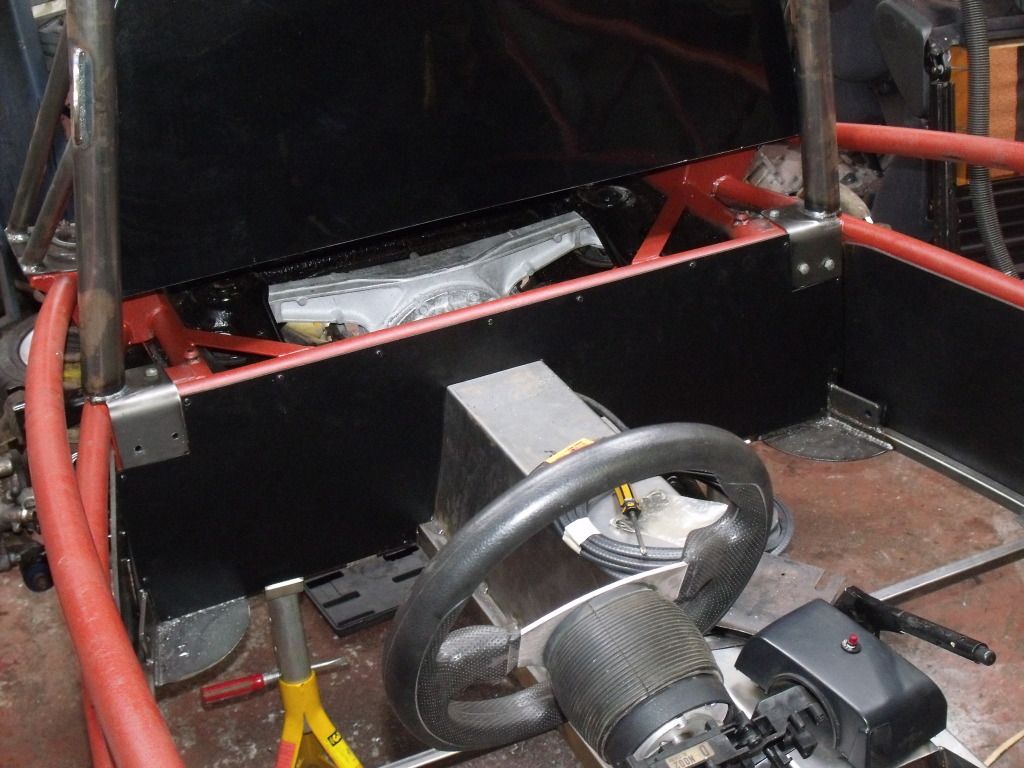
Also mounted the instrument cluster into the mev supplied housing
 .
.
Should get the engine in this weekend and start on the wiring loom.
After mocking out the route for the brake pipes borrowed the flaring tool for work and fitted the 4 brake pipes needed.
Still got to secure the front to rear brake pipes once i get more clips.
Fitted the rear bulkhead panel and both side panels that i cut to shape last week
Also mounted the instrument cluster into the mev supplied housing
.Should get the engine in this weekend and start on the wiring loom.
robcollingridge said:
MG CHRIS said:
It may sound a lot of work but due to my choice of colour for the frame gold i was adviced to build it first drilling out the holes in the frame etc then strip apart then paint it to prevent scratching to the frame.
Mev only does black powder coating so any scracthes in the frame that occurs when building it can be touched in and wouldn't notice it after with gold it's harder to match the colour if you need to touch it up if it gets scratched when drilling holes etc.
How are you going to remove things that are rivetted to the chassis such as panels and brake pipes?Mev only does black powder coating so any scracthes in the frame that occurs when building it can be touched in and wouldn't notice it after with gold it's harder to match the colour if you need to touch it up if it gets scratched when drilling holes etc.
Rob
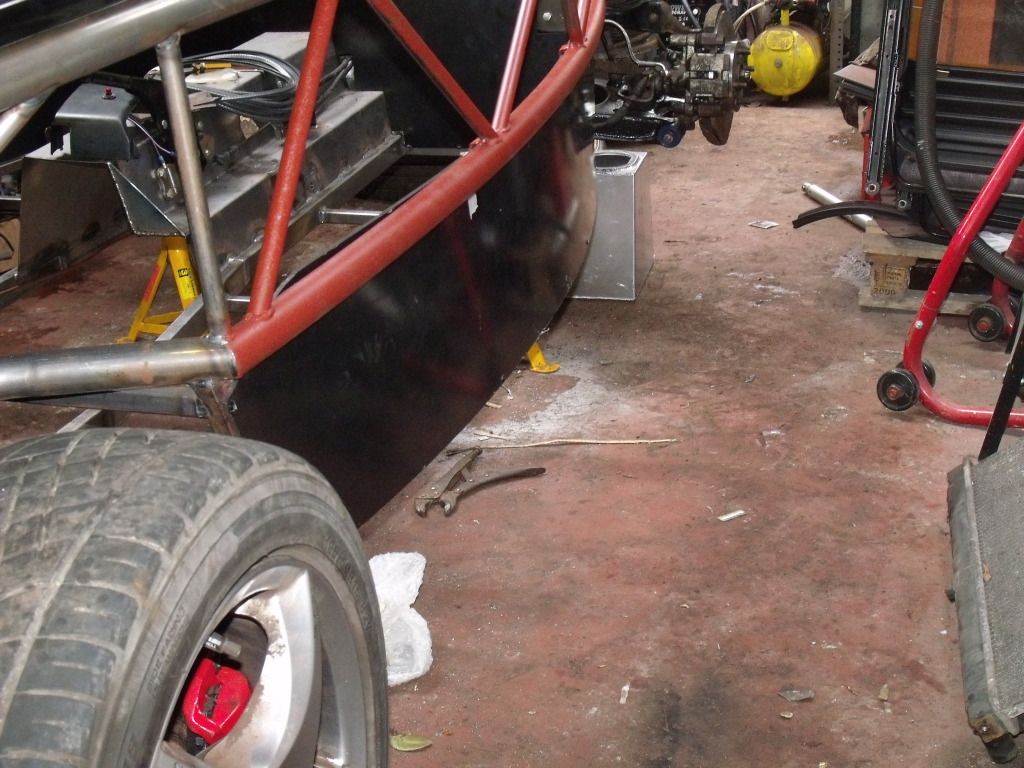
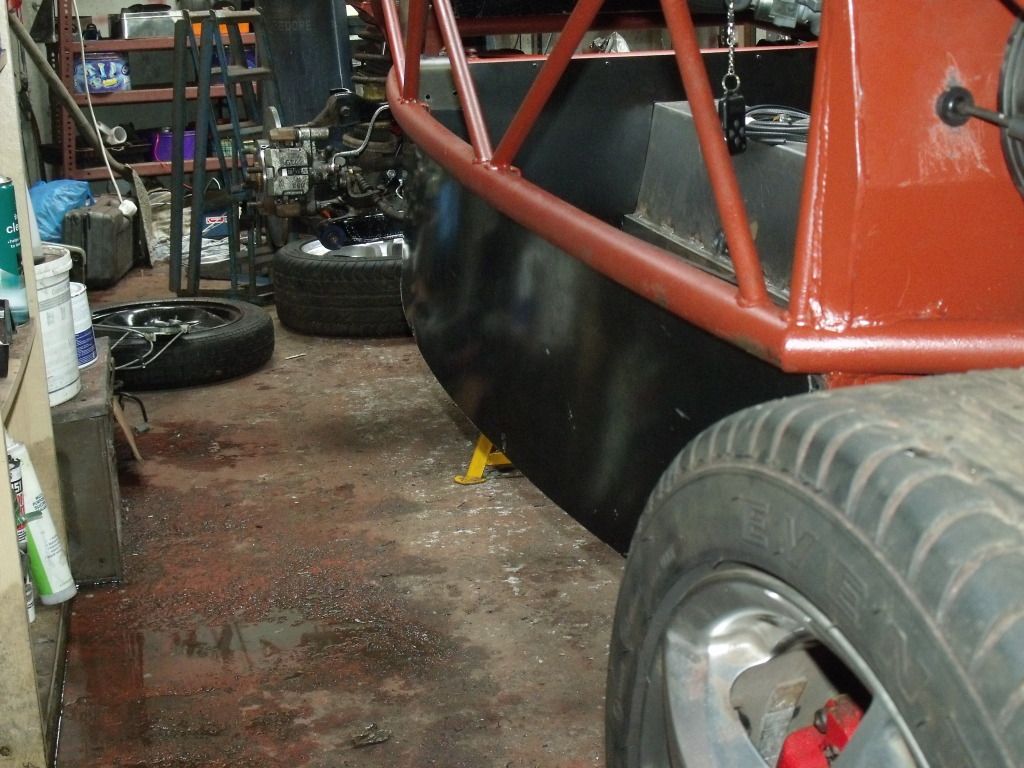
Day 7
Was going to put the engine in but my mate who was going to bring a engine hoist down couldn't come over to play :'( so decided to fit the radiator.
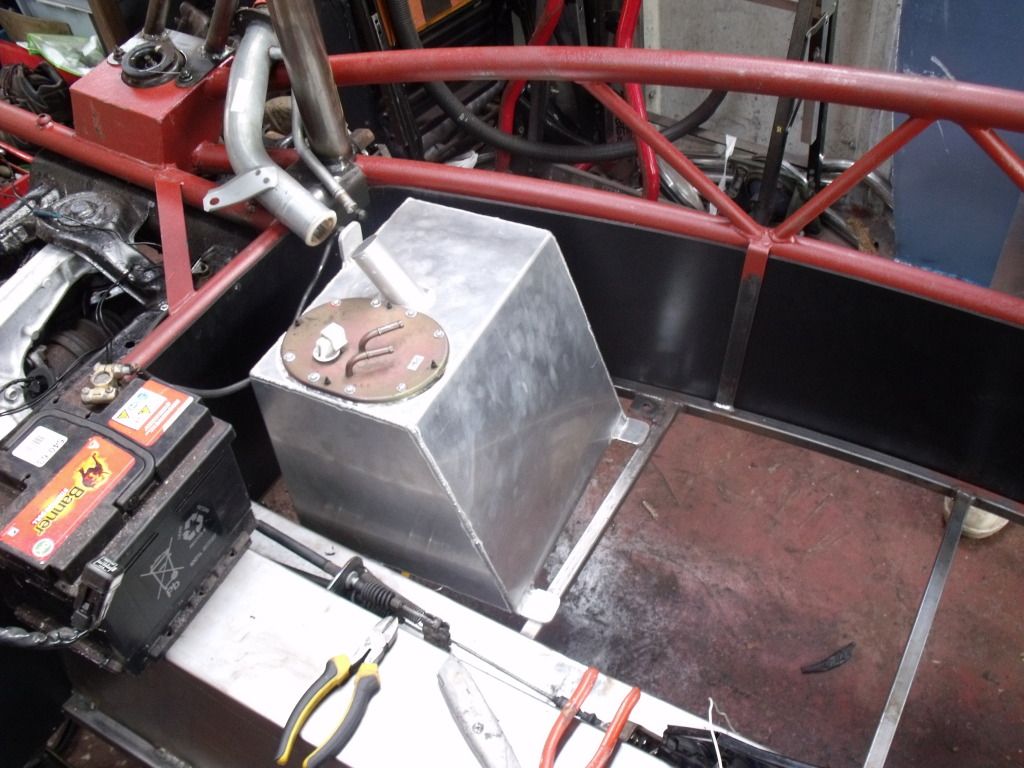
Trim the rear fuel tank cover allthough mine doesn't have a fuel tank under it will be making a boot and putting the ally fuel tank behind the passenger seat and started on making brackets for the instrument cluster.
Fuel tank cover trimmed will be getting some quick release bonnet catches to use to make getting under it easier
Rad mounted
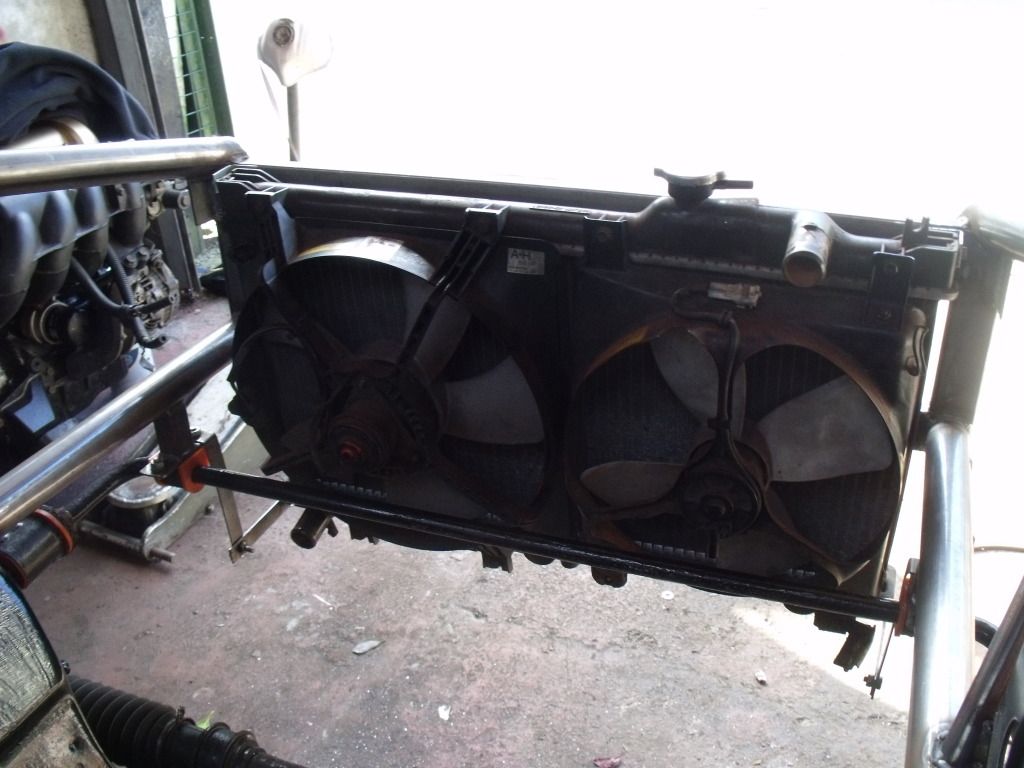
Rad brackets bottom
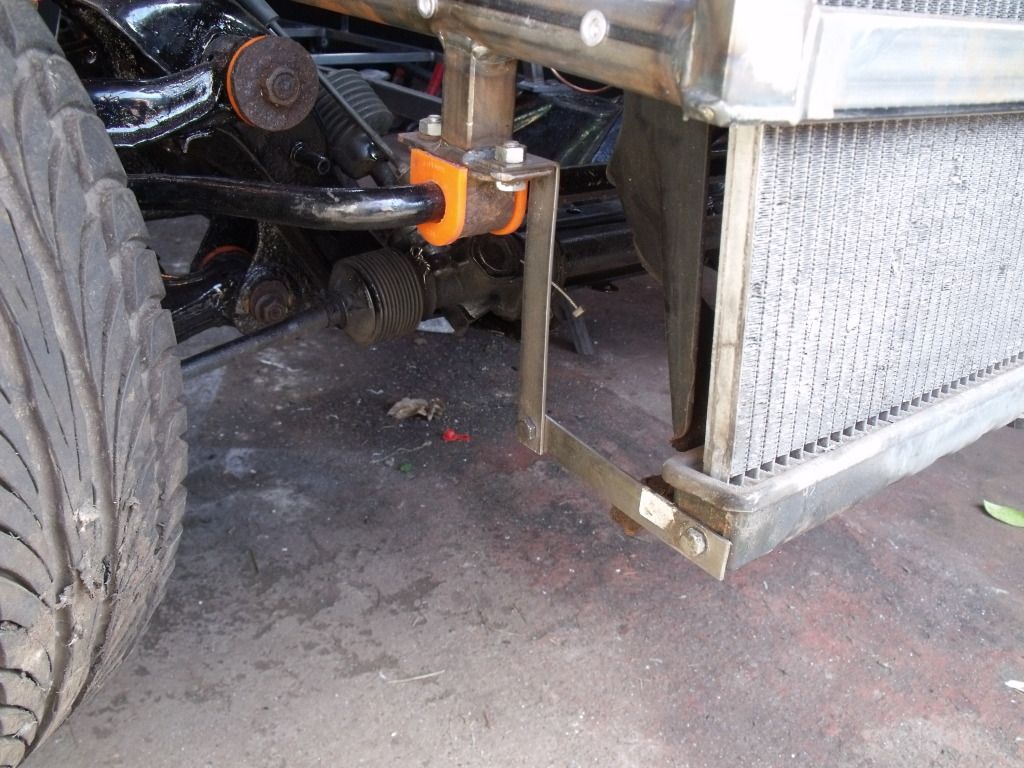
top bracket
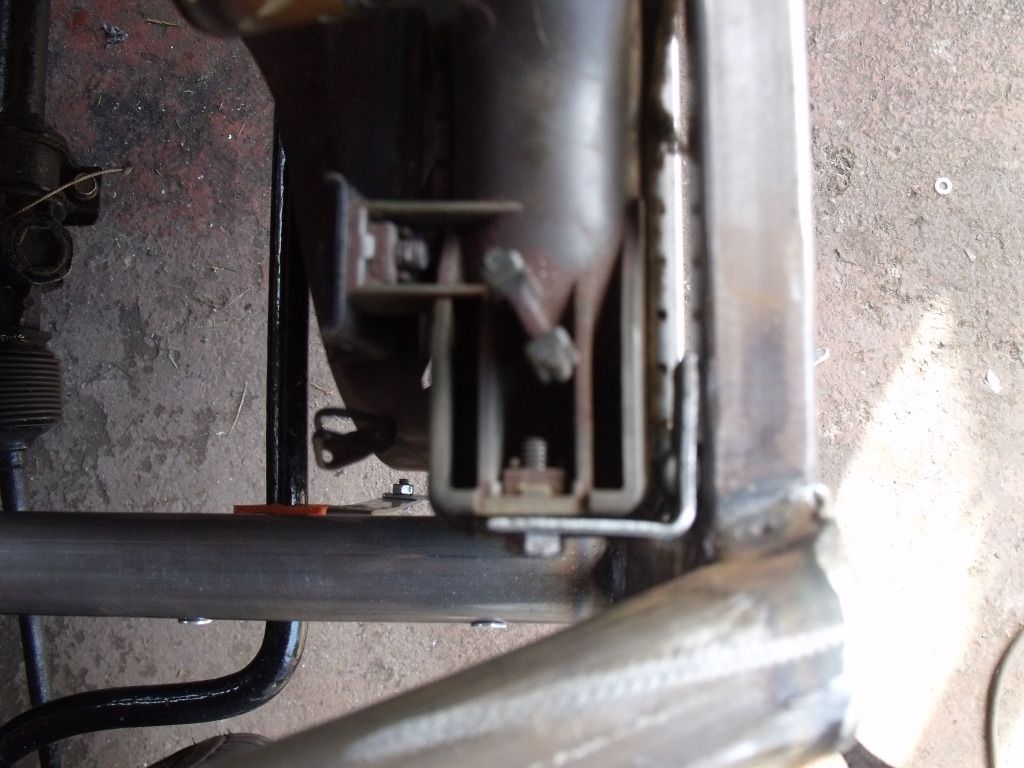
Also got to use my new rivnut tool i ordered on wednesday to attach the brackets did a great job to. Did mount the front nose cone but will have to modify it to fit past the bottom rad mount not to much needed though.
Edited by MG CHRIS on Saturday 9th June 19:53
Steve_D said:
MG CHRIS said:
......putting the ally fuel tank behind the passenger seat
If you do that don't forget the filler has to be outside the passenger compartment and you will have to build a separate, sealed, compartment around the tank. IVA rules I'm afraid.Steve
Thanks for the heads up anyway.
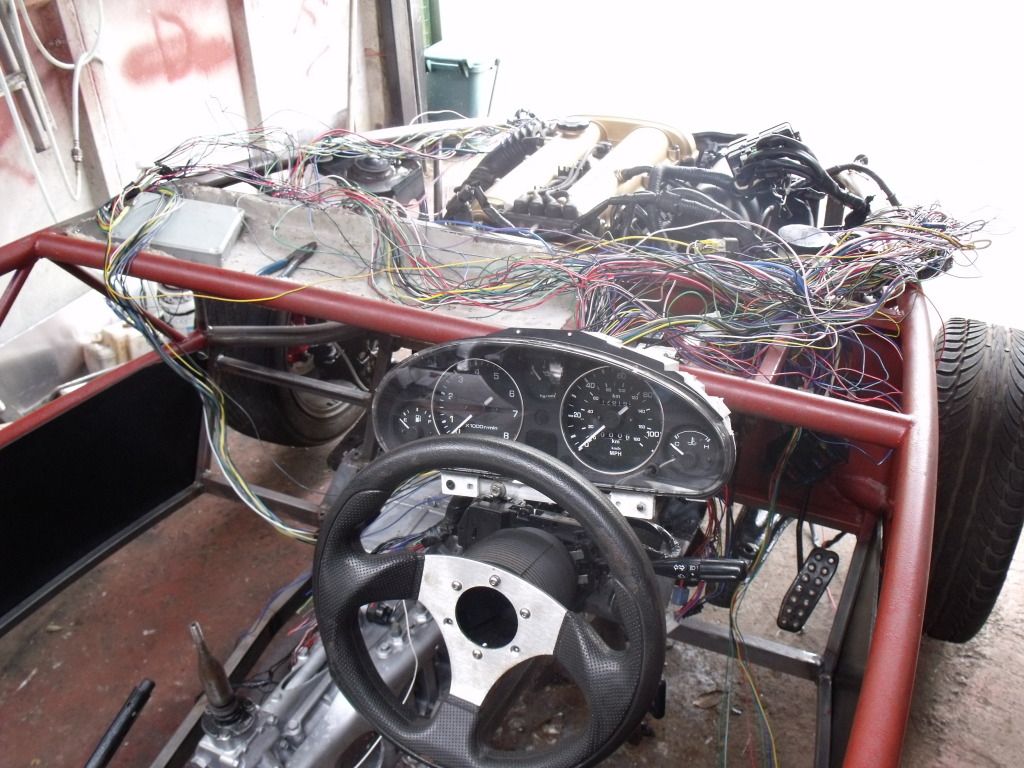
Day 8
Managed to borrow the engine hoist from work to get the engine in so 2 of my mates help to get it in after a early finish from colege.
Also mounted the dash pod not ideal but will modify it when i get the correct steering wheel on etc
Pics
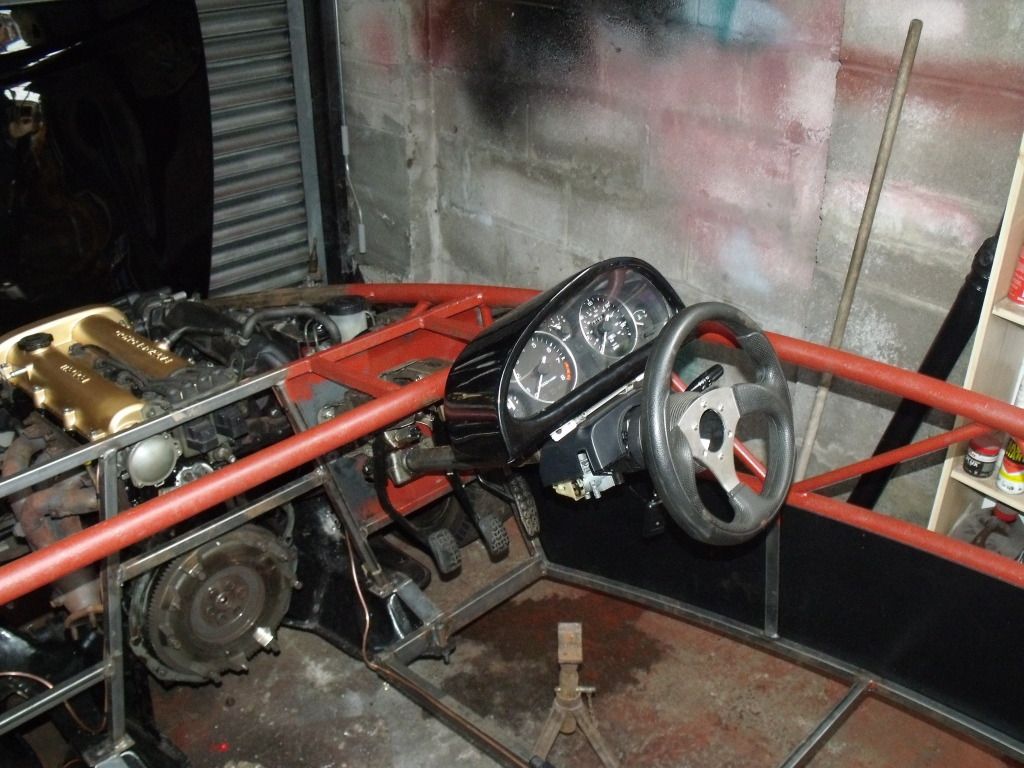
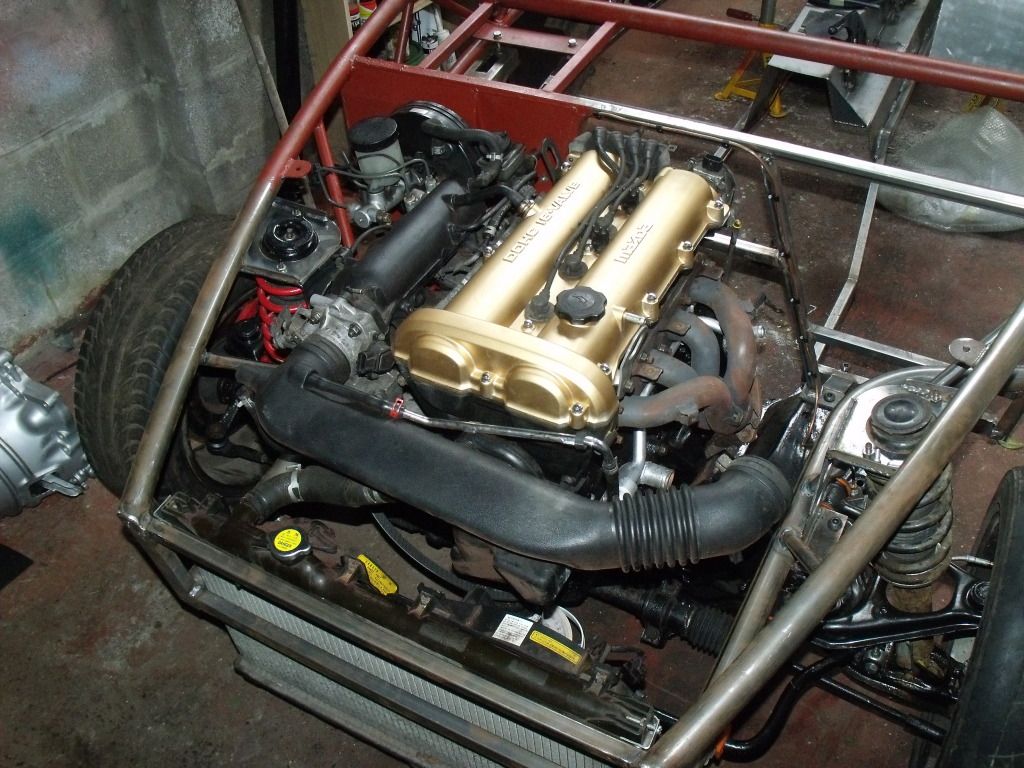
Still waiting for the clutch as the one sent was to small, note to anyone with an import mx5 the clutch is 225mm the normal mx5s are 220mm.
So will put the gearbox in without the clutch so i can start on running the wiring loom and getting it in place. Not a job im perticaly looking forward too but my 2 mates who helped strip it down will be giving me a hand too.
Managed to borrow the engine hoist from work to get the engine in so 2 of my mates help to get it in after a early finish from colege.
Also mounted the dash pod not ideal but will modify it when i get the correct steering wheel on etc
Pics
Still waiting for the clutch as the one sent was to small, note to anyone with an import mx5 the clutch is 225mm the normal mx5s are 220mm.
So will put the gearbox in without the clutch so i can start on running the wiring loom and getting it in place. Not a job im perticaly looking forward too but my 2 mates who helped strip it down will be giving me a hand too.
Andy888 said:
I tried to mount the radiator exactly the same way as you, but it doesn't clear the bottom of the nose cone. You might like to check yours and see.
I noticed that to but have modified the nose cone slightly to allow it to fit.pidsy said:
OP - following this with huge interest. Would love to follow in your steps. Just got to fix my other cars first lol
Can i ask what you have budgeted for the project?
And - have you had any luck selling the parts you dont need on ebay?
No real budget i have set myself spent around 3.8k so far which includes the donor car not expecting to spend no more than 5k but still have to buy lights, paint the frame, mirrors, battery box, seats and harness, catches and planing on getting a set of GAS coilovers. On the selling front got back around 300 quid so far on only a few parts roof, roll bar, seats, window motors, electric arial, some of the lights and also the bonent so still have plenty left to sell only paid 400 for the car.Can i ask what you have budgeted for the project?
And - have you had any luck selling the parts you dont need on ebay?
Edited by MG CHRIS on Thursday 28th June 20:33
Edited by MG CHRIS on Thursday 28th June 21:41
Update days 9 and 10 on the build.
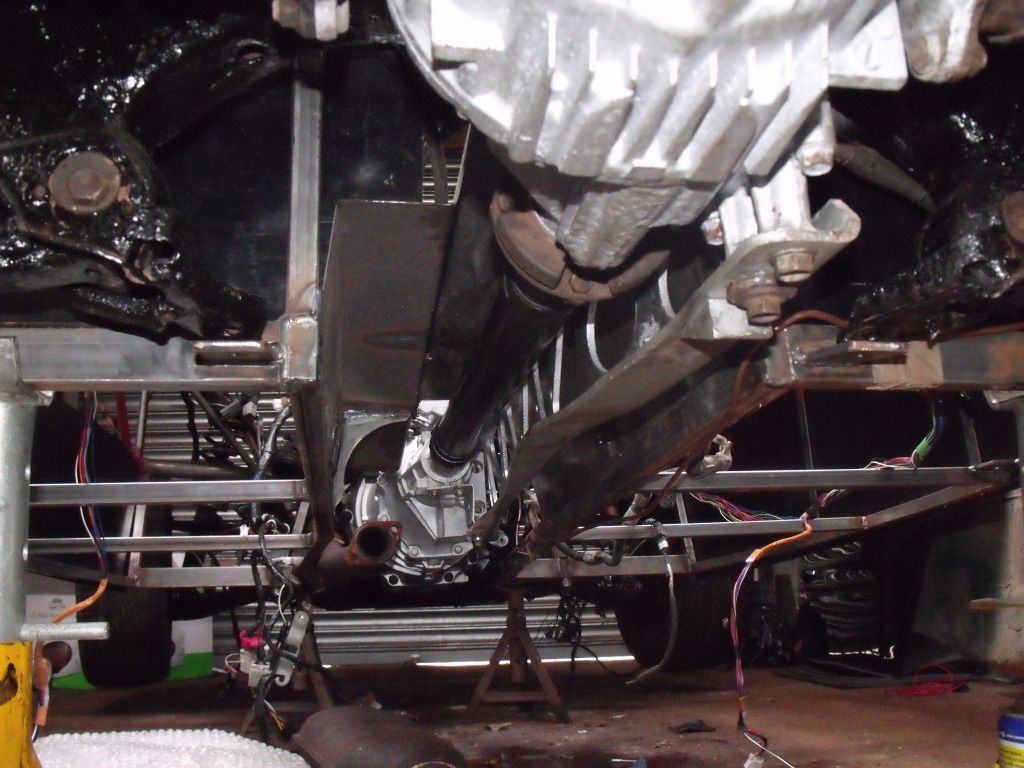
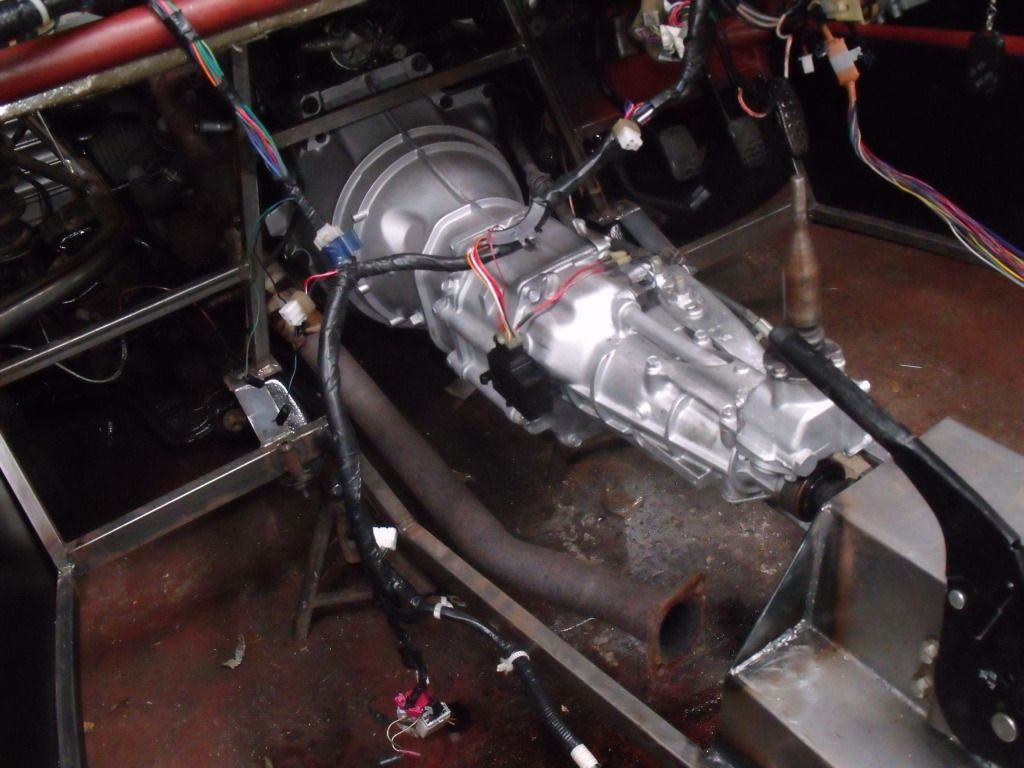
Day 9 after an age of waiting for my clutch it finaly arrived so got it fitted and after my 2 mates came over to lend a hand fitted the gearbox, prop, torque tube, starter motor and slave cylinder for the clutch.
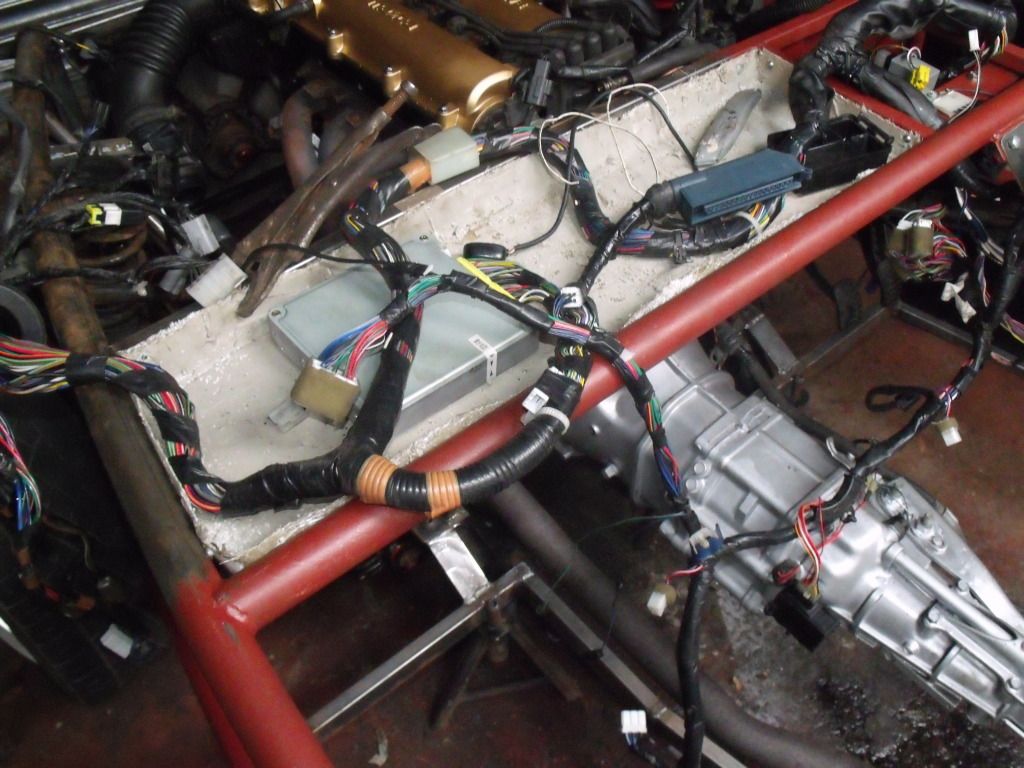
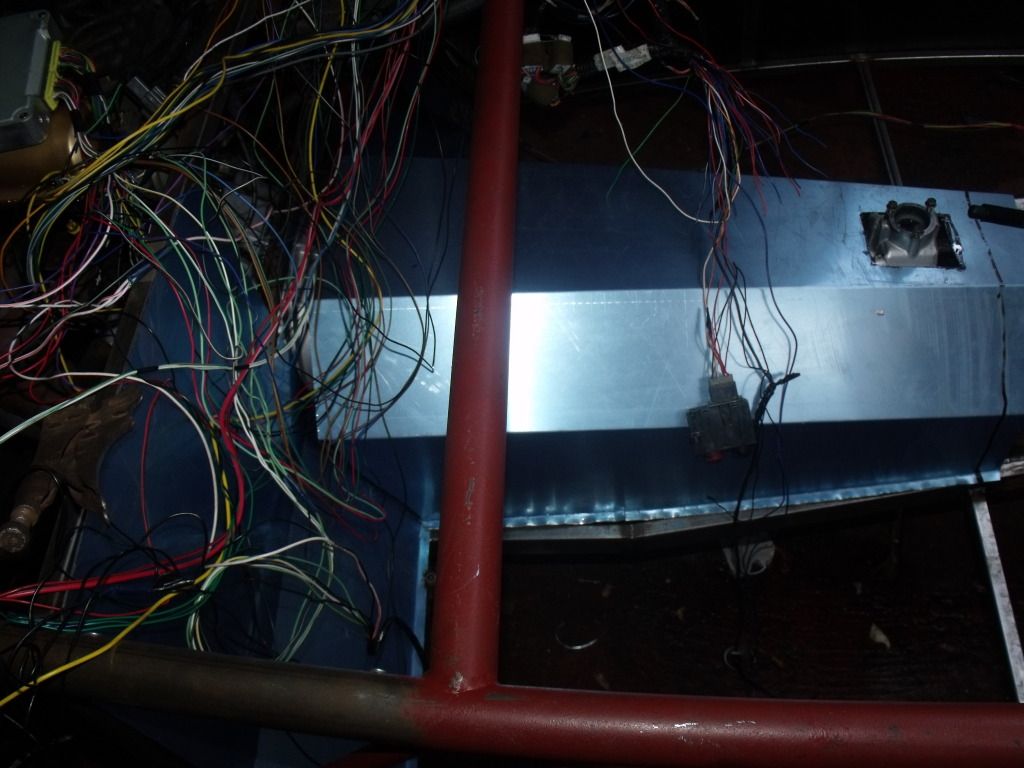
I also made up a template out of 2 serial boxes to hold the ecu and wiring loom. After it was cut to shape layed it with fiberglass and left it to harden. Give it a layer of filler will smooth it up nice later and fixed it to the frame using 4 5mm rivnuts.
pics
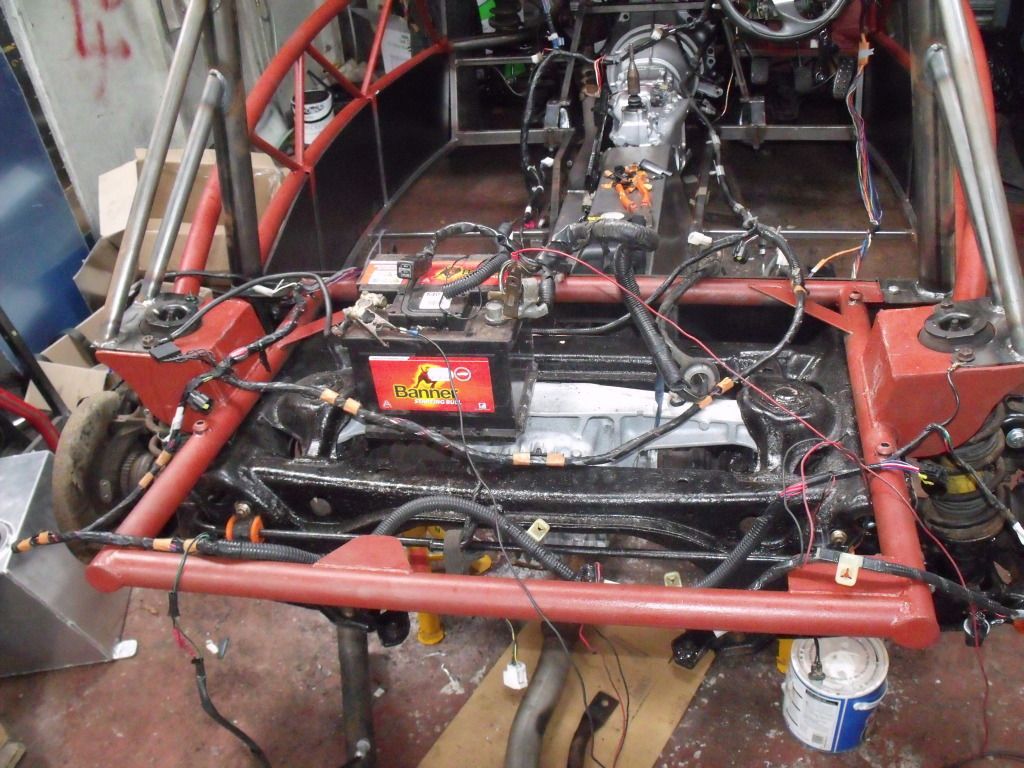
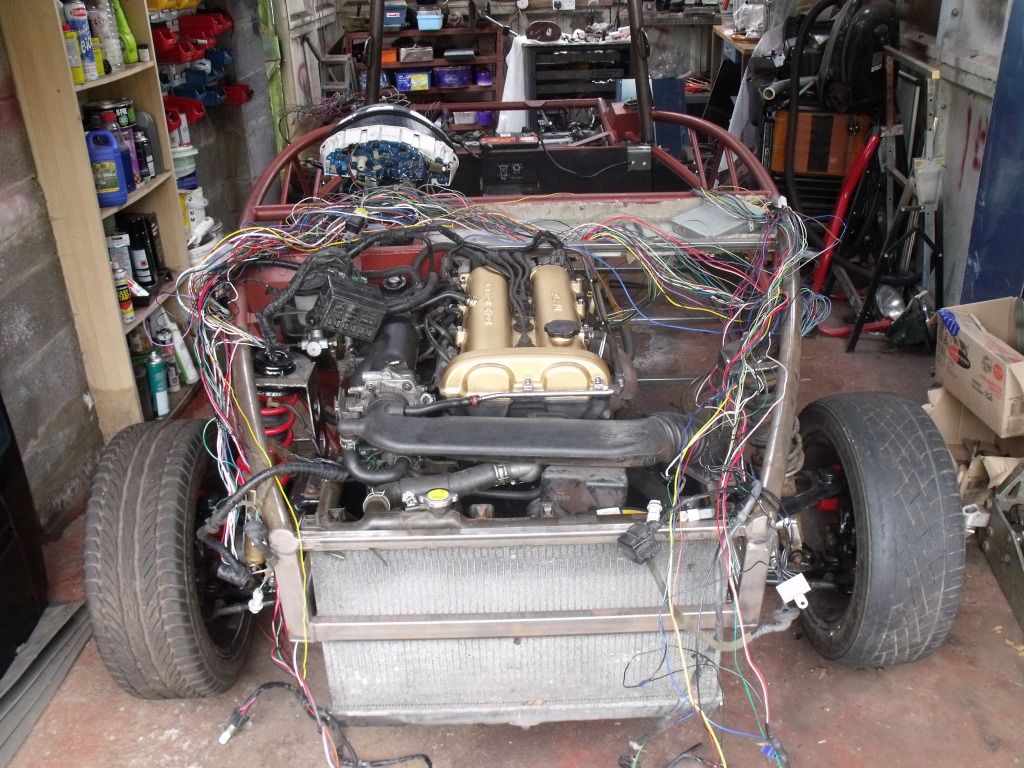
Day 10 was spent getting the wiring loom in place reconecting the main fues box back to the main part of the wiring loom, connecting all the plugs back onto the various engine components and working out wher everything plugs back into.
After a couple of hours (more like a day) i have dash lights, side headlights and main beam working and also the engine cranks aswel but as there is no fuel tank yet cant start it but am happy it cranks after ripping out the aftermarket alarm.
Pics of the mess of a modern day wiring harness

Next jobs are to order my lights get them mounted and working then start on stripping back any unecessery wiries that i don't need which will include the abs wiring , pop up headlights wiring, most of the interior wiring and any others i don't need oh the joys.
Day 9 after an age of waiting for my clutch it finaly arrived so got it fitted and after my 2 mates came over to lend a hand fitted the gearbox, prop, torque tube, starter motor and slave cylinder for the clutch.
I also made up a template out of 2 serial boxes to hold the ecu and wiring loom. After it was cut to shape layed it with fiberglass and left it to harden. Give it a layer of filler will smooth it up nice later and fixed it to the frame using 4 5mm rivnuts.
pics
Day 10 was spent getting the wiring loom in place reconecting the main fues box back to the main part of the wiring loom, connecting all the plugs back onto the various engine components and working out wher everything plugs back into.
After a couple of hours (more like a day) i have dash lights, side headlights and main beam working and also the engine cranks aswel
but as there is no fuel tank yet cant start it but am happy it cranks after ripping out the aftermarket alarm.Pics of the mess of a modern day wiring harness
Next jobs are to order my lights get them mounted and working then start on stripping back any unecessery wiries that i don't need which will include the abs wiring , pop up headlights wiring, most of the interior wiring and any others i don't need oh the joys.
So day 11-12-13
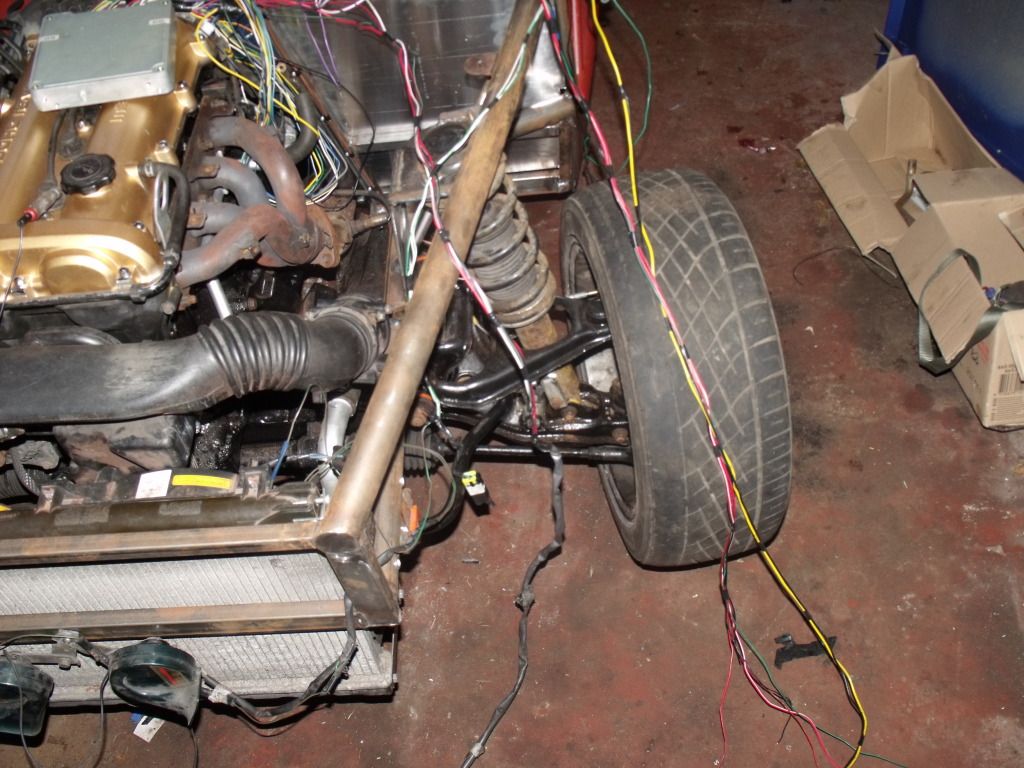
Was spent pretty much stripping back the insulation and removing any unwanted wires which in the end turned out to be a lot of wires. Also as im using the ally fuel tank fitted the fuel pump and sender into the tank
Pics
Had to cut a bit of the bottom of the metal bracket and cut the fuel pipe feed and refit the pump. Fitted back in the tank and used some fuel proff sealent and 8 self tapping screws to secure it to the tank
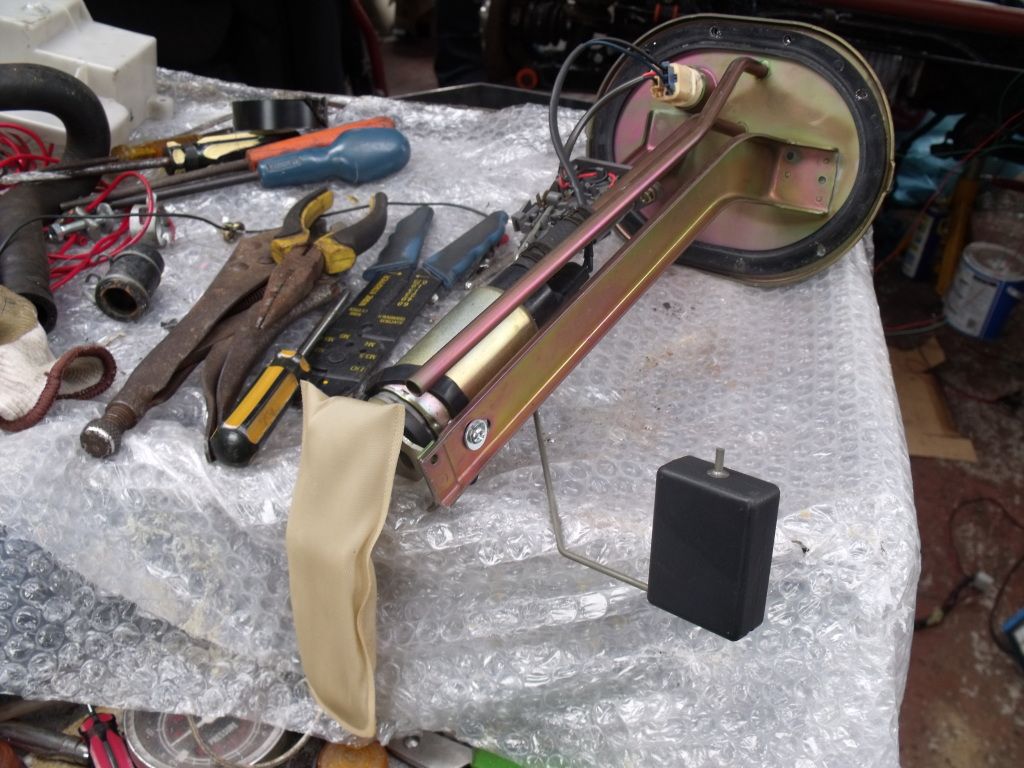
Would the fuel pipe position by there would be ok for iva as it is outside of the passenger compartment
On to the wiring stripped back the majority of the unwanted wiring loom and it has reduced a hell of a lot of wires and loom size and will sort the wires out shorten where i need to and buy some of the plastic spiral wire stuff to make it look neat and tidy
and after all that i still have working lights and still the engine cranks aswel so im doing something right.
So day 14
Got most of the ally panels trimmed to shape a little bit more fettling required to get it spot on though
Mounted the twin horns using a single m6 rivnut
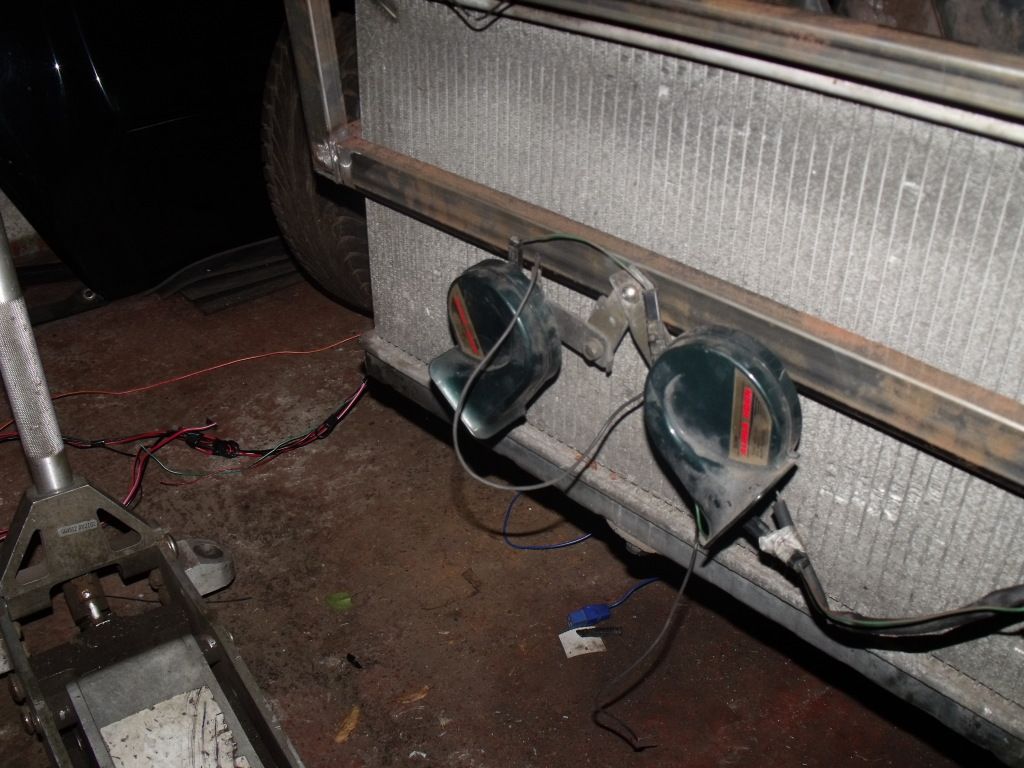
Sorted the n/s wiring for mass air flow, lights and horn
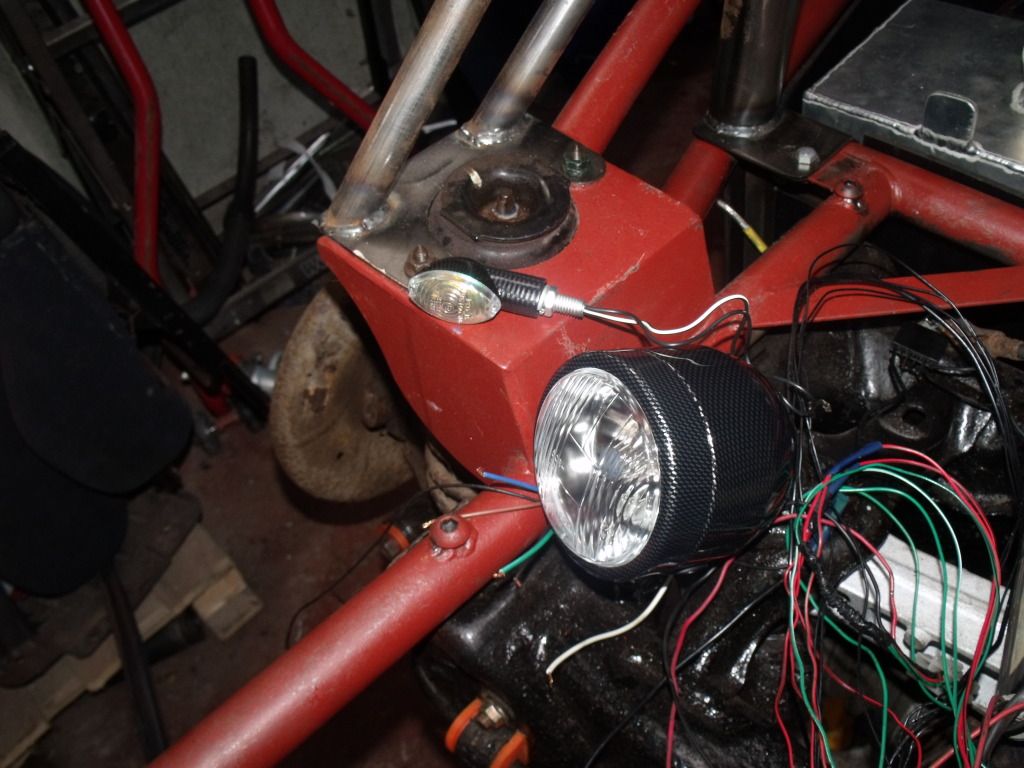
And yesterday my lights arrived and a few other bits and peices from car builders solutions looks very nice too
Headlights and indicator
Rear lights LED stop/tail and indicator in one, fog and reverse
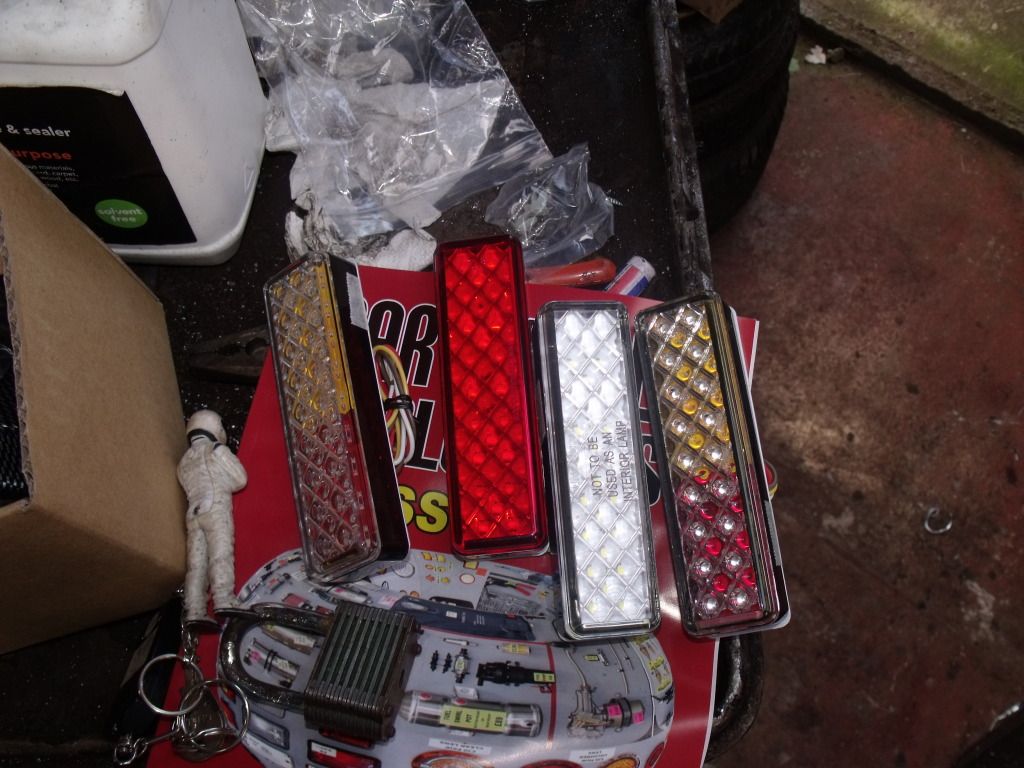
Next jobs are to finish the ally panels, mount the lights wire them up and rap the loom in plastic spiral stuff i ordered with the lights.
Got most of the ally panels trimmed to shape a little bit more fettling required to get it spot on though
Mounted the twin horns using a single m6 rivnut
Sorted the n/s wiring for mass air flow, lights and horn
And yesterday my lights arrived and a few other bits and peices from car builders solutions looks very nice too
Headlights and indicator
Rear lights LED stop/tail and indicator in one, fog and reverse
Next jobs are to finish the ally panels, mount the lights wire them up and rap the loom in plastic spiral stuff i ordered with the lights.
Gassing Station | Kit Cars | Top of Page | What's New | My Stuff