My Caterham race car
Discussion


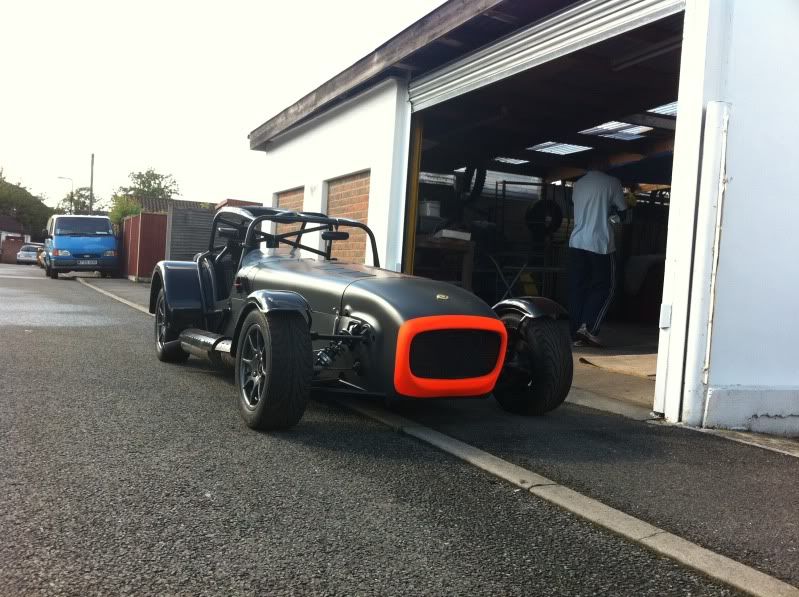
I thought it was about time I started my own thread and said hi. I've enjoyed reading James Russell's thread on his Caterham race car so here's my beast when I first got her:
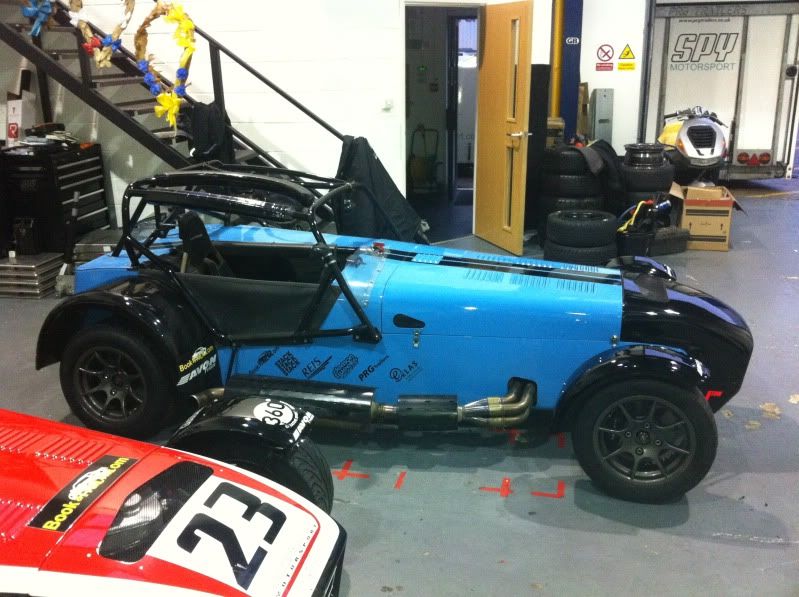
It's a 2009 Caterham Superlight R300 race car. Whilst it looks good in the photo, it was looking a bit tired close up so I decided to start doing this:
I'll keep this updated as I go, I have loads of pictures of the rebuild so if there's a bit of interest I'll turn it into more of a project thread
It's a 2009 Caterham Superlight R300 race car. Whilst it looks good in the photo, it was looking a bit tired close up so I decided to start doing this:
I'll keep this updated as I go, I have loads of pictures of the rebuild so if there's a bit of interest I'll turn it into more of a project thread
Hi soad,
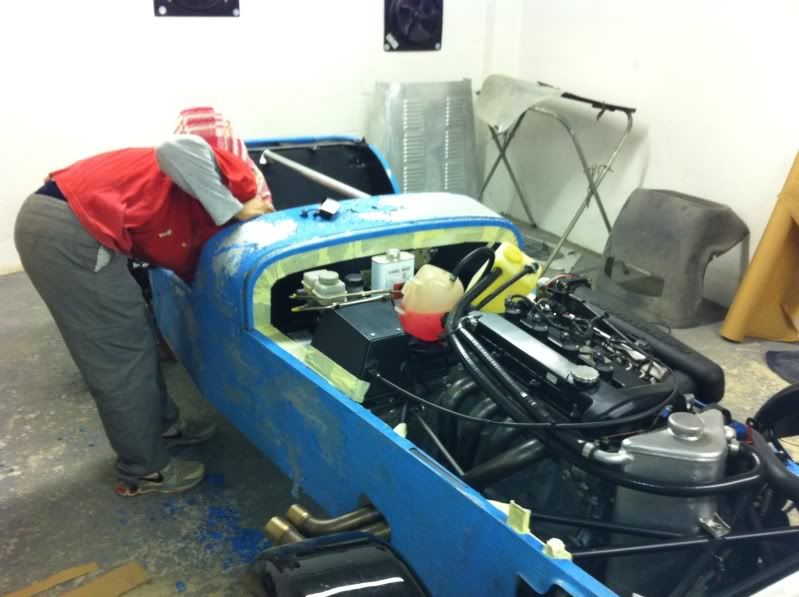
Yes, it's a 2 litre Ford Duratec engine. Pretty much standard bar a different map and a dry sump system. Figures from Caterham say 175bhp but most are more than that
Hi AF,
She's a race car and I am taking part in the R300 Superlight championship this year. I've been racing since 2009, always in Caterham's.
Here's my first car with a couple of friends who popped down to help
My second car was the same spec as the first (Roadsport A) but a bit newer:
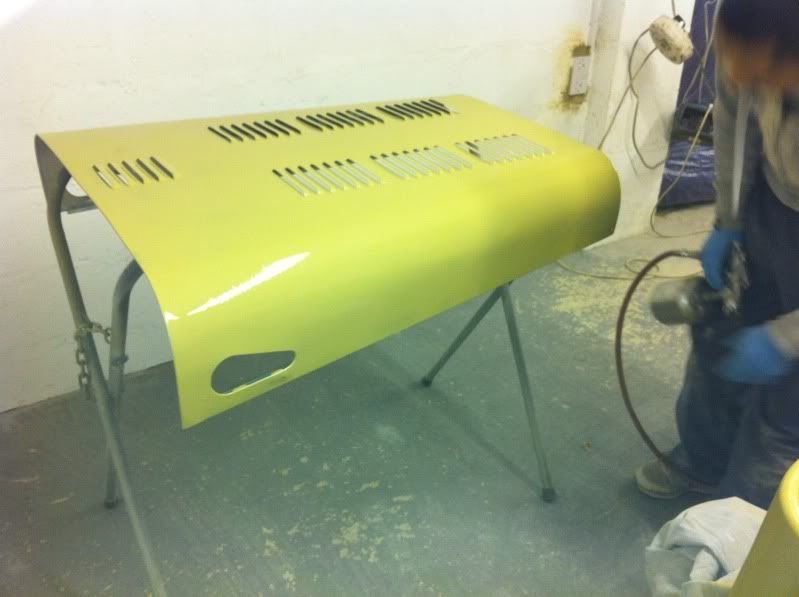
I only raced the black and white car once before Roadsport A was stopped. The sister series with an identical spec but Ford Sigma engine was the Supersport championship. This was my first step into stripping and painting my own car to save money. Here she is when she emerged from paint - yes, it is a matt colour
grenpayne - I will get some more photo's up of the stripdown etc a bit later
Yes, it's a 2 litre Ford Duratec engine. Pretty much standard bar a different map and a dry sump system. Figures from Caterham say 175bhp but most are more than that
Hi AF,
She's a race car and I am taking part in the R300 Superlight championship this year. I've been racing since 2009, always in Caterham's.
Here's my first car with a couple of friends who popped down to help
My second car was the same spec as the first (Roadsport A) but a bit newer:
I only raced the black and white car once before Roadsport A was stopped. The sister series with an identical spec but Ford Sigma engine was the Supersport championship. This was my first step into stripping and painting my own car to save money. Here she is when she emerged from paint - yes, it is a matt colour
grenpayne - I will get some more photo's up of the stripdown etc a bit later
The R300 is great fun, the first time I've had an LSD to play around with and a perfect balance of power and handling.
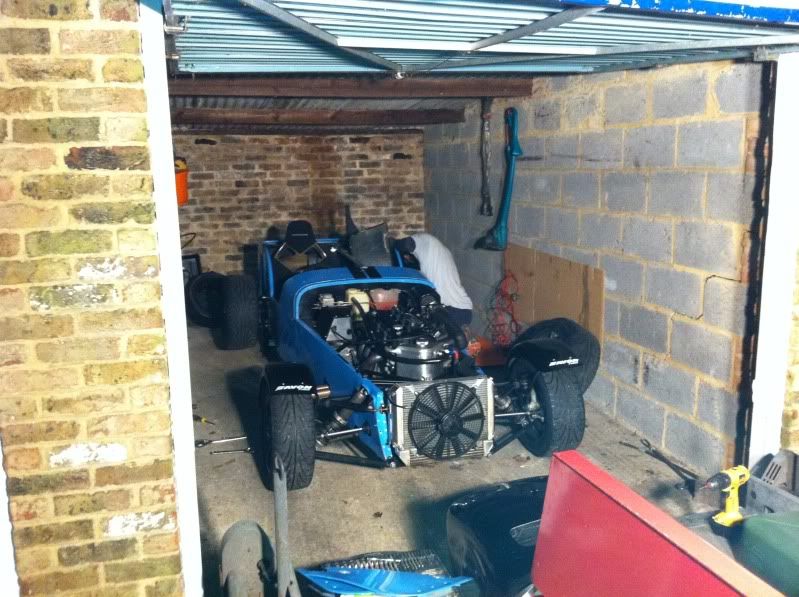
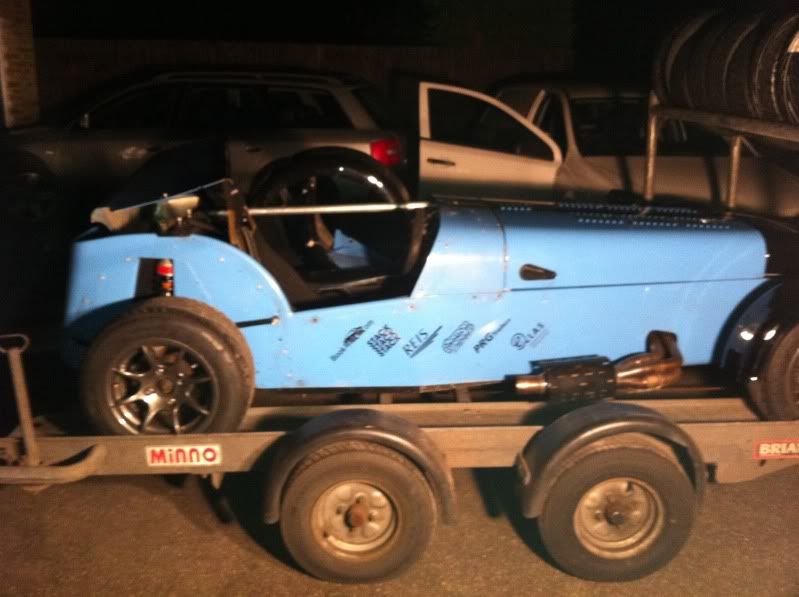
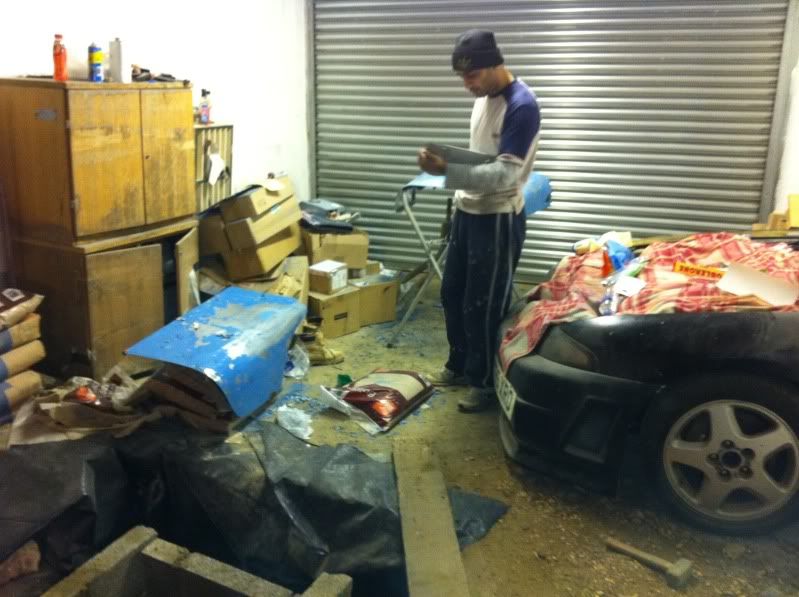
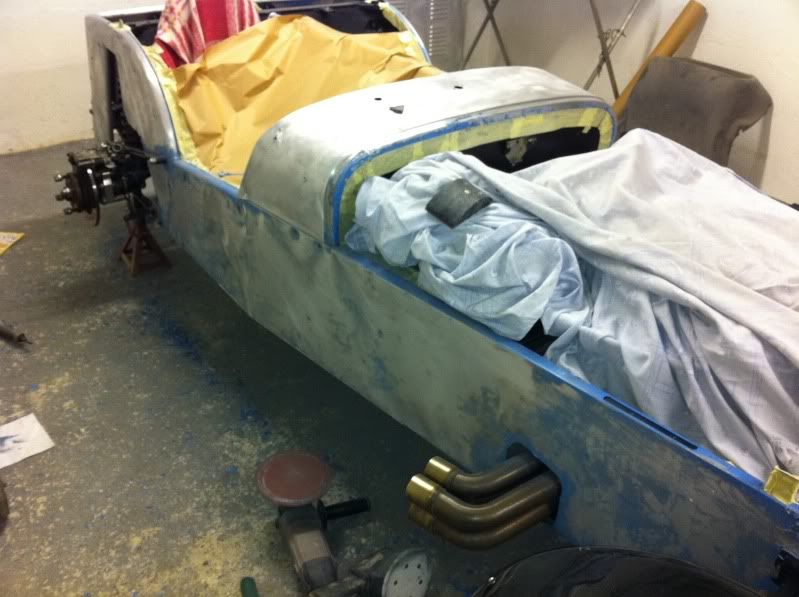
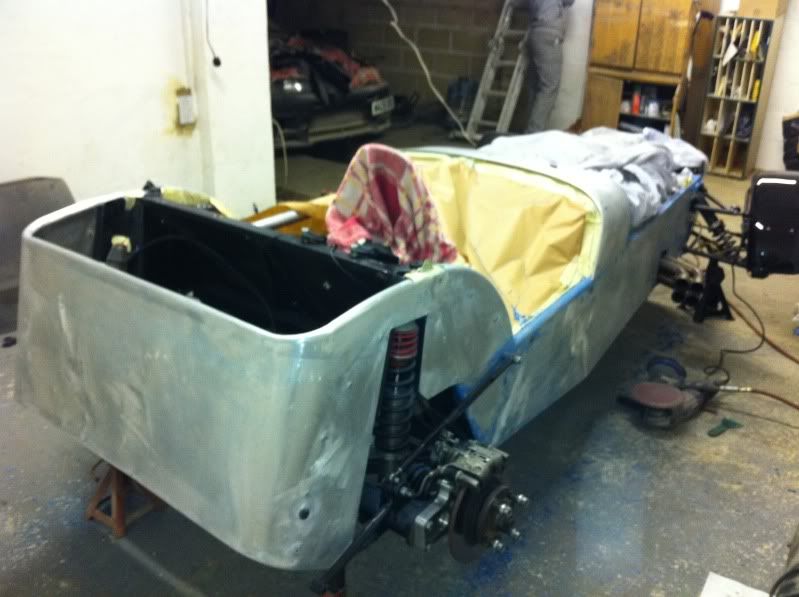
On with the stripdown - my mate Mickey popped round to give me a hand. To be honest, he's the skilled one having taught himself how to paint and do bodywork and I was just the apprentice.
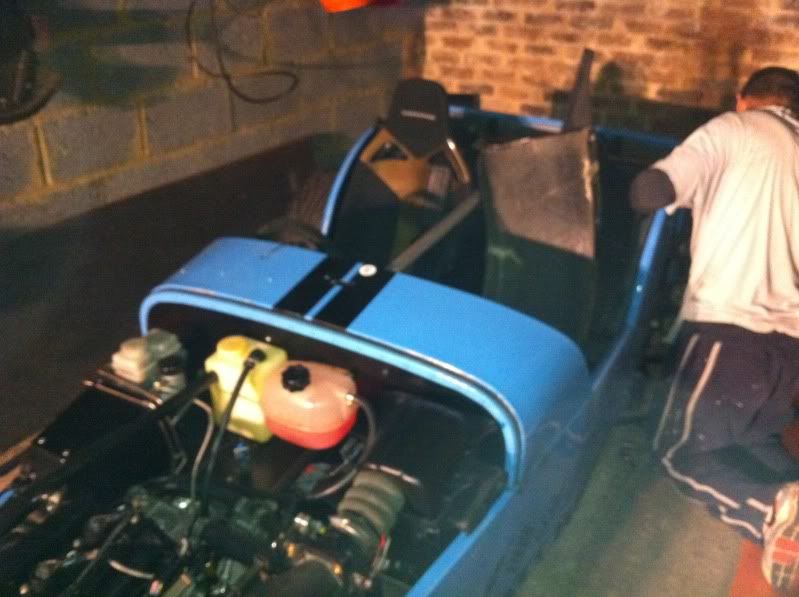
We removed the cage, rear wings, boot cover, exhaust, tonneau cover, nose cone and a load of parts in the engine bay to get better access for painting. Once that was done, it was on the trailer and off to Mickey's garage.
Here she is in the operating theatre. My mate asked why I had 3 old rads hanging on the wall
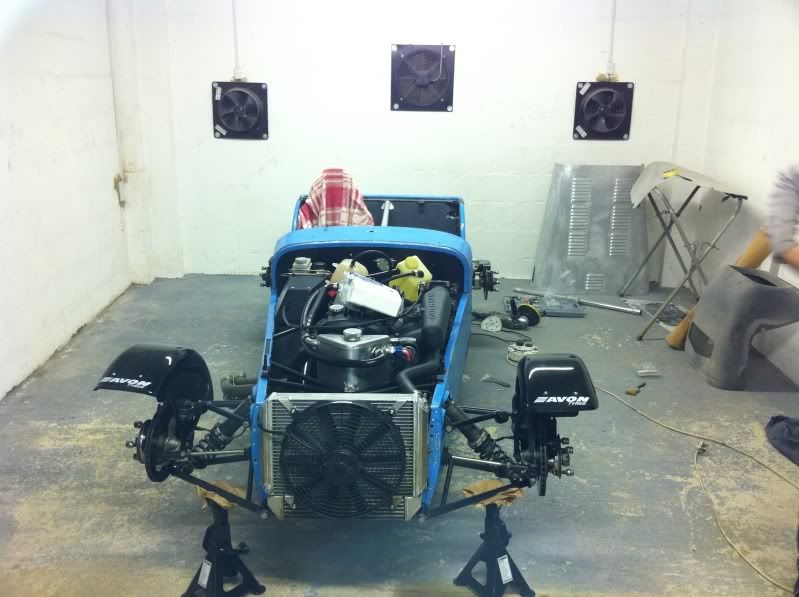
All of this happened around Xmas 2011. I had a few weeks off work but came down with tonsilitis which knocked me out for a week. The plan was to strip the car back to bare metal and start again.
I'm very lucky in that I have been sponsored this year by borro who are a personal asset lender (www.borro.com) so the car would be in their colours (red with a white cage and decals).
On with the stripdown - my mate Mickey popped round to give me a hand. To be honest, he's the skilled one having taught himself how to paint and do bodywork and I was just the apprentice.
We removed the cage, rear wings, boot cover, exhaust, tonneau cover, nose cone and a load of parts in the engine bay to get better access for painting. Once that was done, it was on the trailer and off to Mickey's garage.
Here she is in the operating theatre. My mate asked why I had 3 old rads hanging on the wall
All of this happened around Xmas 2011. I had a few weeks off work but came down with tonsilitis which knocked me out for a week. The plan was to strip the car back to bare metal and start again.
I'm very lucky in that I have been sponsored this year by borro who are a personal asset lender (www.borro.com) so the car would be in their colours (red with a white cage and decals).
So I now have an expensive toy sitting in my mates garage in hundreds of pieces. The task ahead slowly started to dawn on us so we needed a plan. Here's Mickey having a think
We moved the car to my dads garage a few doors down and started preparing all the removeable panels. Sandpaper and elbow grease wasn't touching the paint so we needed some extra help in the way of paint stripper. Nitromors nowadays is rubbish so Brown Brothers came up trumps with some industrial strength stripper.
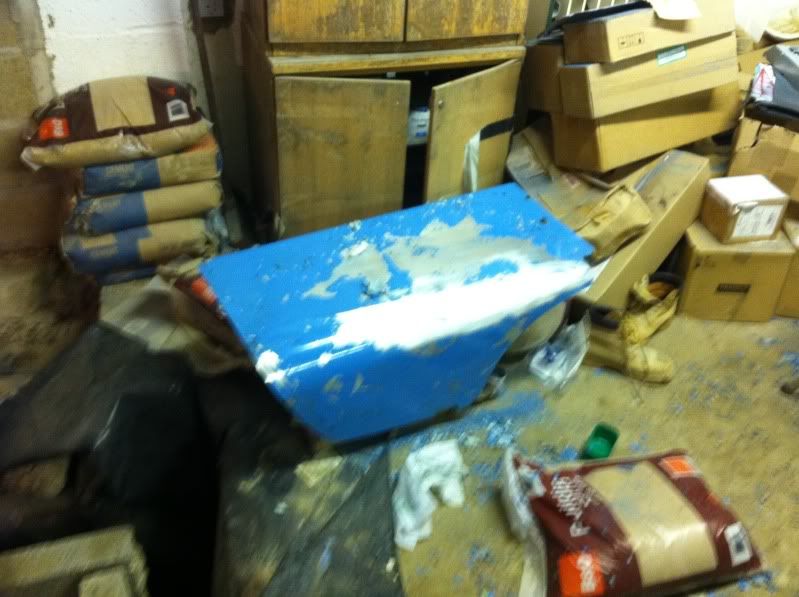
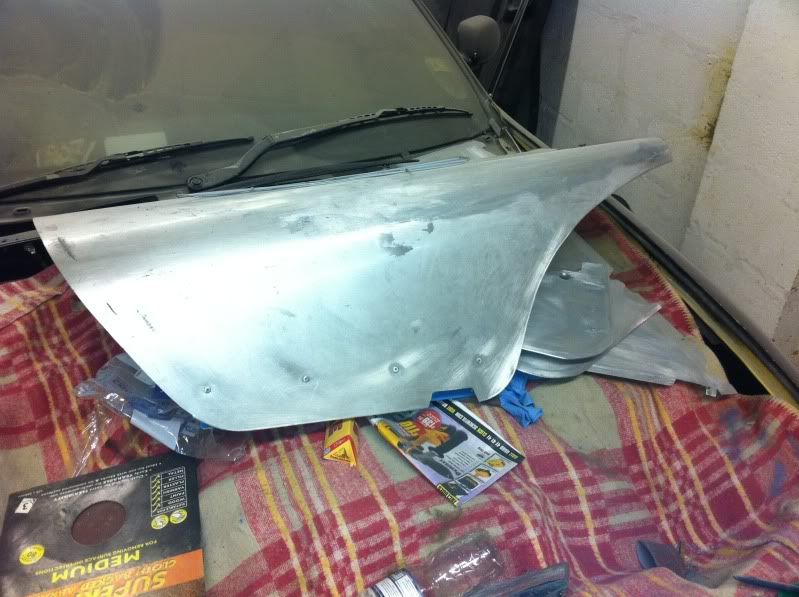
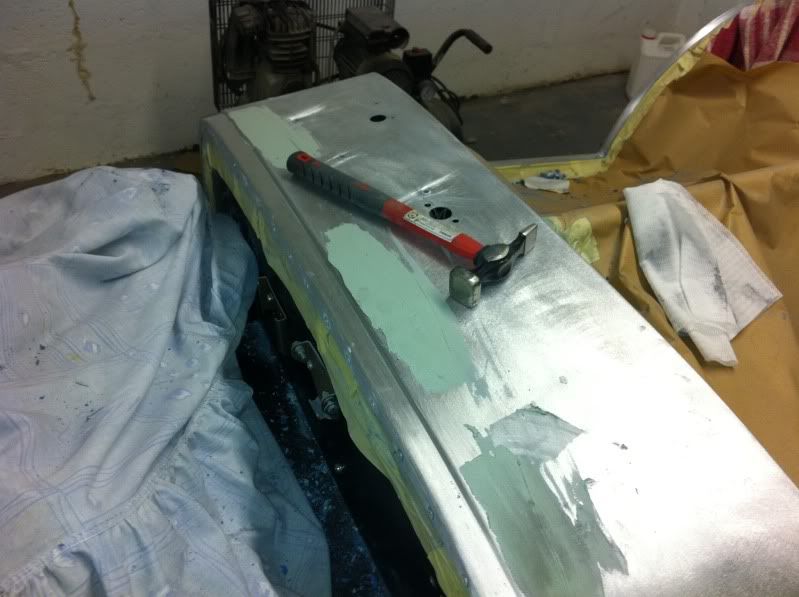
Nose cone ready for primer
This is Mickey's payment for helping me as he wouldn't take any money:
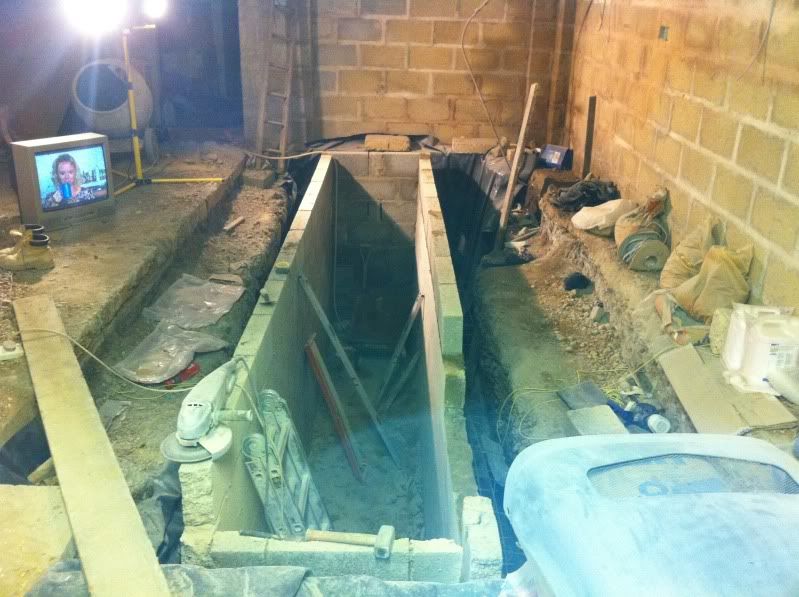
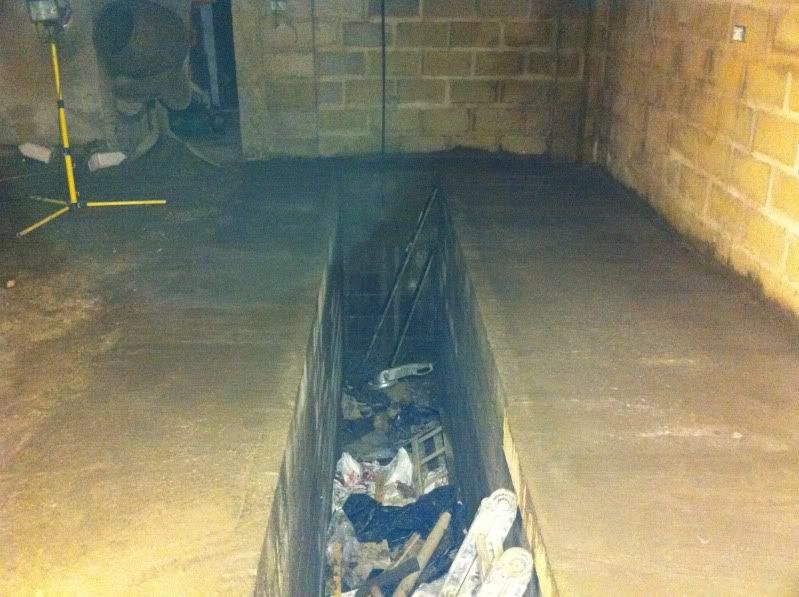
We hand dug a pit in his garage (yes you did ready that right, hand dug!!!!). That was just the start as the base, block work and concreting of the sides took weeks of lates nights and weekends. I didn't need the gym during those weeks
How it looked when finished
We moved the car to my dads garage a few doors down and started preparing all the removeable panels. Sandpaper and elbow grease wasn't touching the paint so we needed some extra help in the way of paint stripper. Nitromors nowadays is rubbish so Brown Brothers came up trumps with some industrial strength stripper.
Nose cone ready for primer
This is Mickey's payment for helping me as he wouldn't take any money:
We hand dug a pit in his garage (yes you did ready that right, hand dug!!!!). That was just the start as the base, block work and concreting of the sides took weeks of lates nights and weekends. I didn't need the gym during those weeks
How it looked when finished
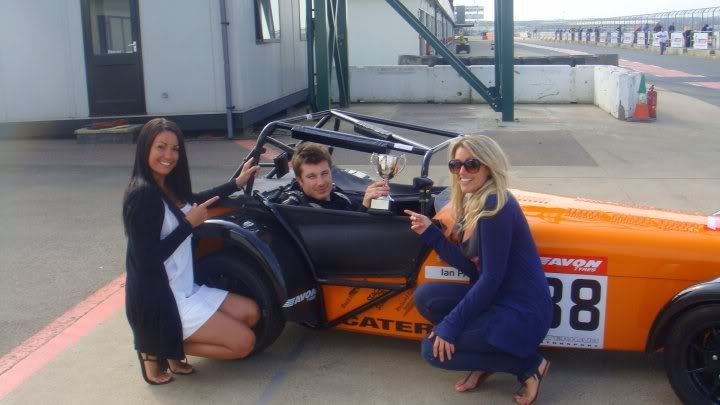
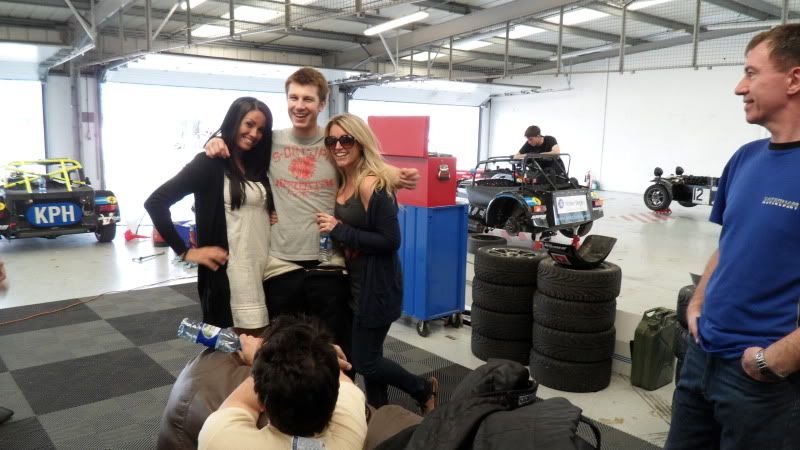
10 hours to ask for more pictures of the girls?! I thought you guys would be much quicker lol.
Feel free to keep posting/asking questions as it's good to know people are interested
Hi TX, the regs state that the car and driver must weigh 630kg's after the race. I have circa 30kg's of lead in my car and bring it up to weight on the fuel. As it's Caterham racing and can get quite close you have to allow for a loss of bodyparts (wings/nose cones etc).
Some more pics for you. This is the tonneau and boot cover parts fully stripped. Mickey's 600bhp Skyline doubling up as a bench!
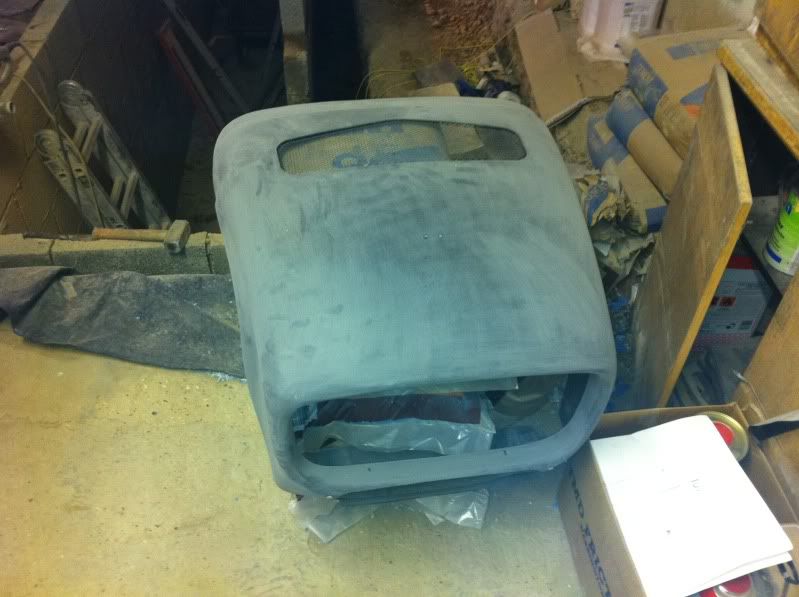
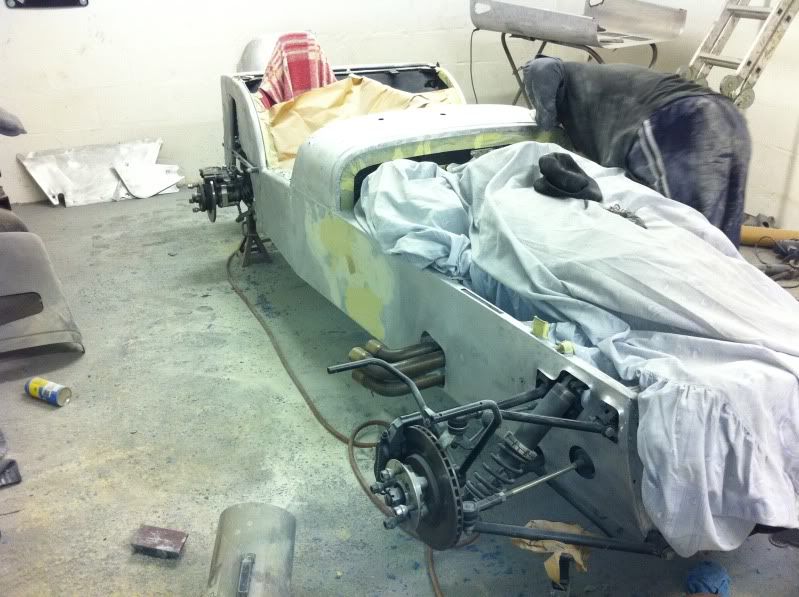
Once all the removeable body parts were stripped of paint we wheeled the car back in from my dads and started stripping the body.
The back panel during the paint stripping process. You can see the Skyline in the background which needed to go on to the pit before the Caterham could come back in.
Feel free to keep posting/asking questions as it's good to know people are interested
Hi TX, the regs state that the car and driver must weigh 630kg's after the race. I have circa 30kg's of lead in my car and bring it up to weight on the fuel. As it's Caterham racing and can get quite close you have to allow for a loss of bodyparts (wings/nose cones etc).
Some more pics for you. This is the tonneau and boot cover parts fully stripped. Mickey's 600bhp Skyline doubling up as a bench!
Once all the removeable body parts were stripped of paint we wheeled the car back in from my dads and started stripping the body.
The back panel during the paint stripping process. You can see the Skyline in the background which needed to go on to the pit before the Caterham could come back in.
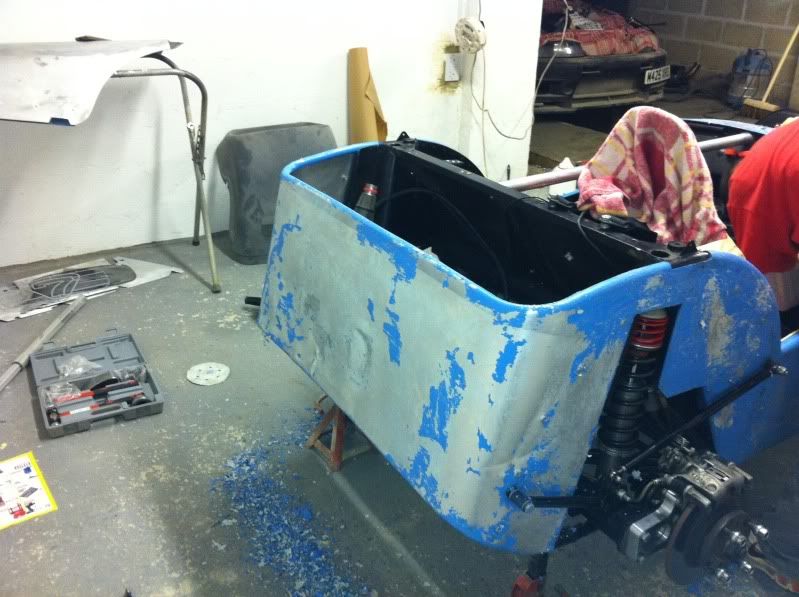
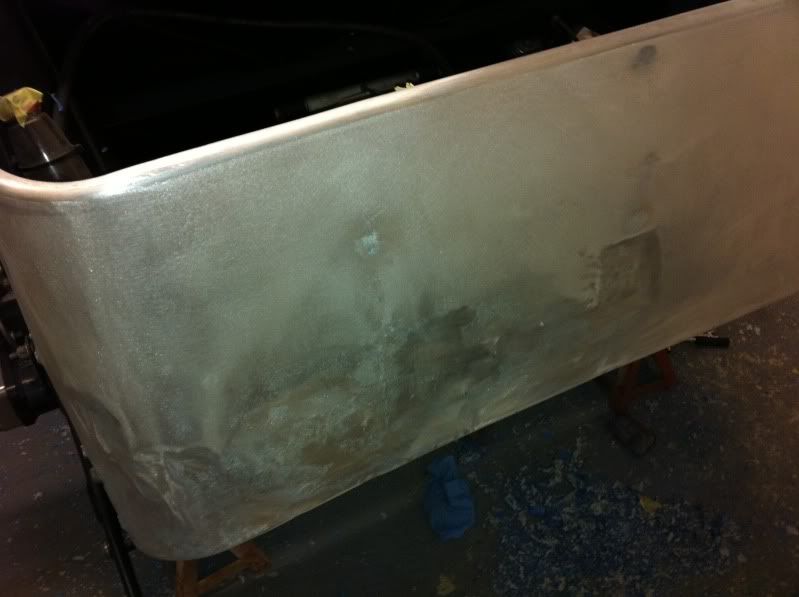
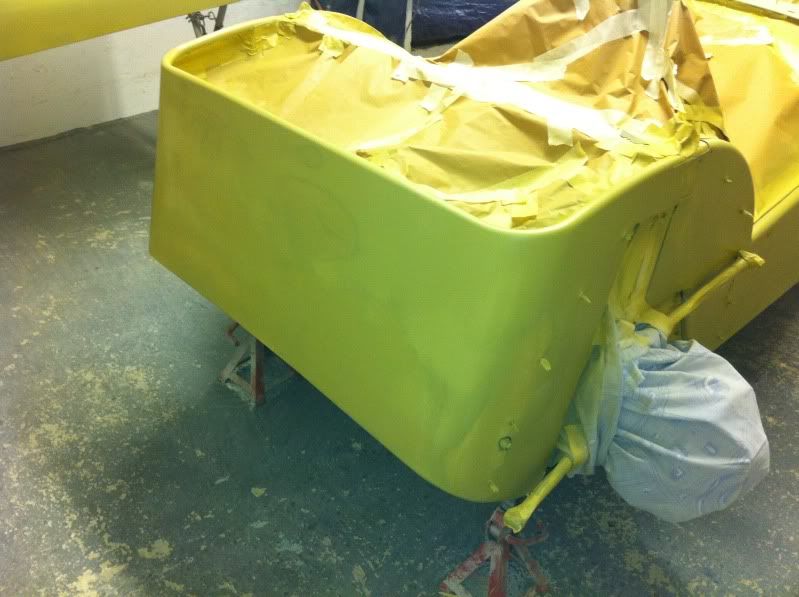
I'll see if I can find one more picture of the girls - in the meantime here she is missing most of her paint. It was quite difficult getting in and around the front suspension so we left this till last.
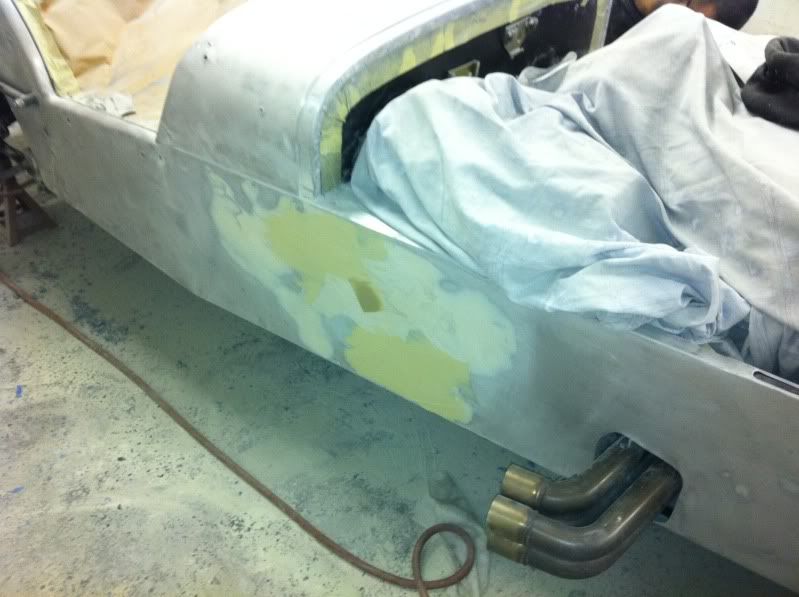
You can see the paint pickling in this picture. It was just a matter of scraping it off when it was still moist.
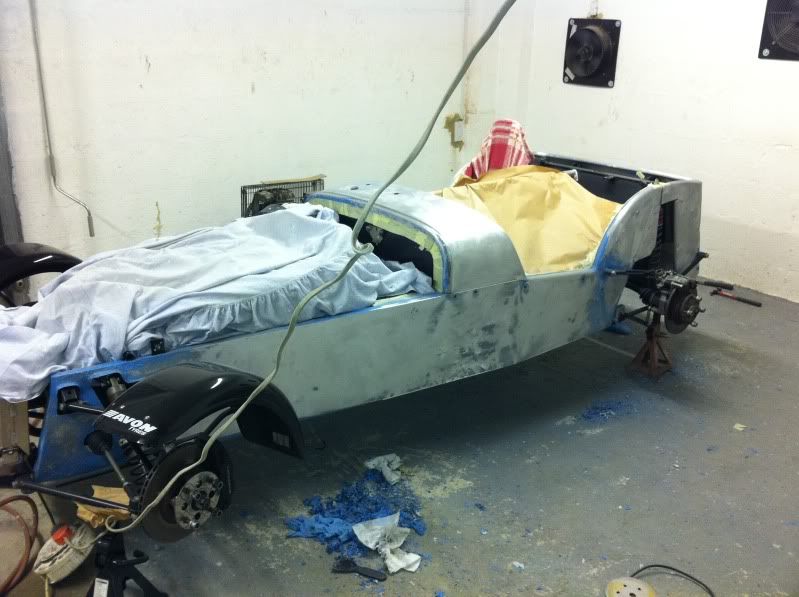
Getting there
You can see the paint pickling in this picture. It was just a matter of scraping it off when it was still moist.
Getting there
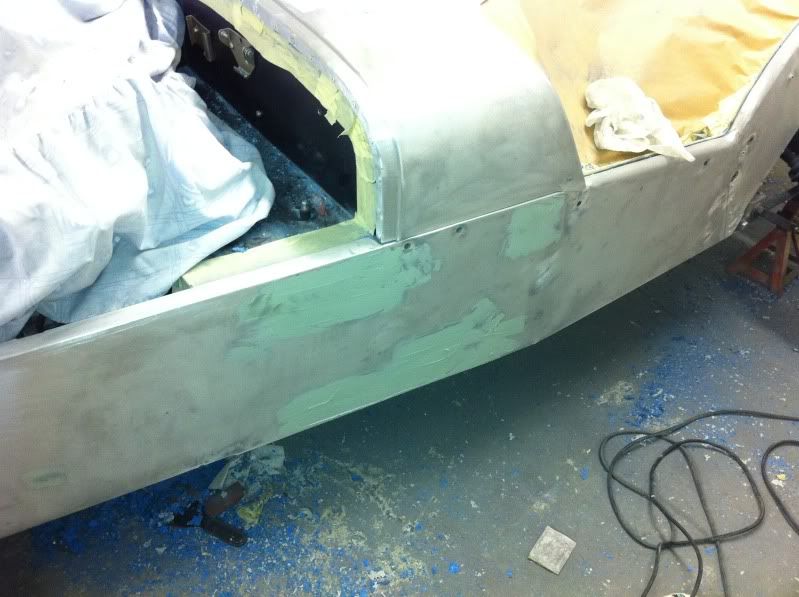
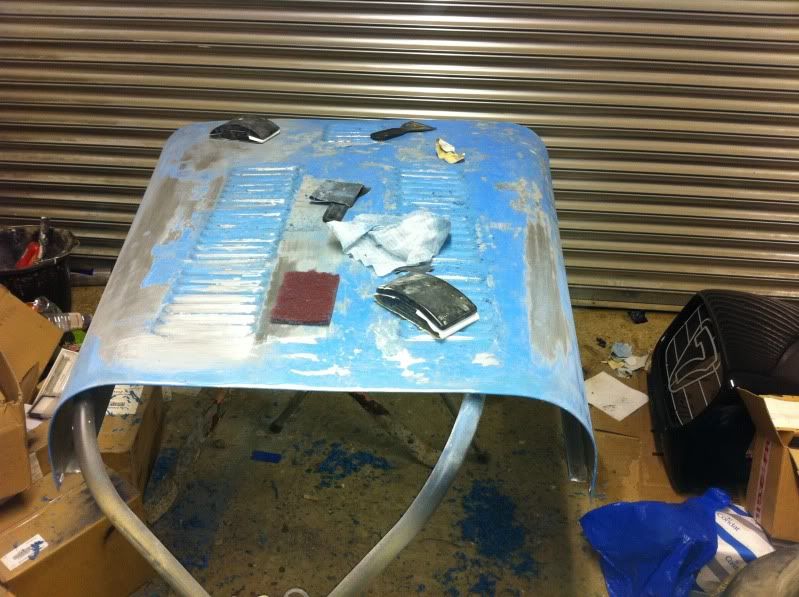
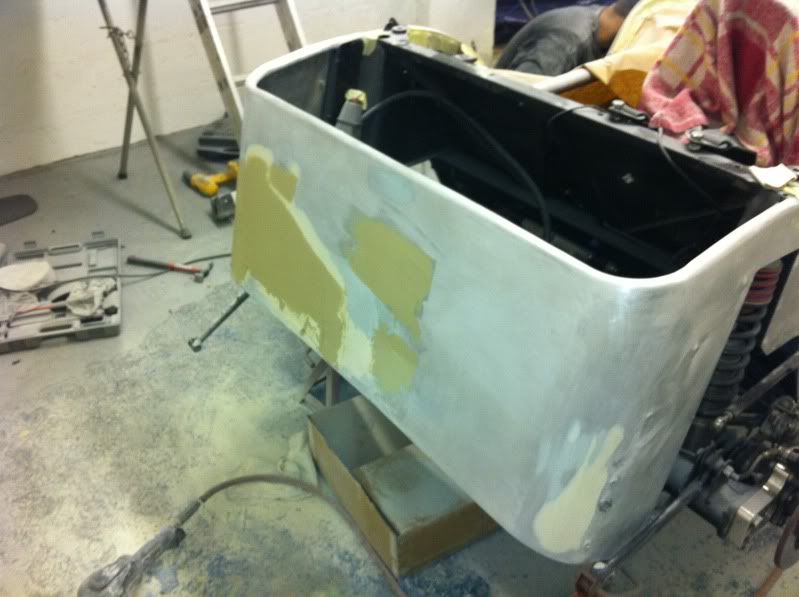
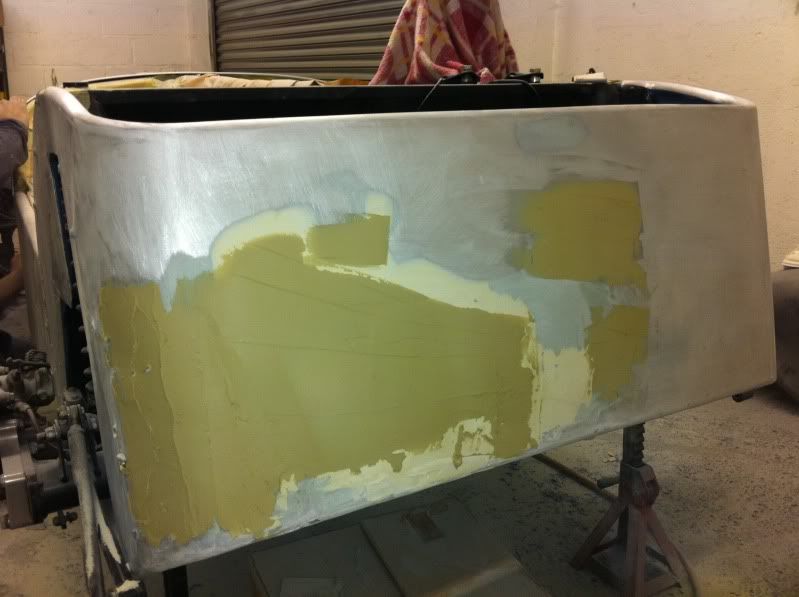
The back panel was the biggest mess having been hit up the backside in the very last race before I bought it. Mickey told me to drill a few holes where the dents were to help pull as much of the damage out as possible.
Mickey was being a perfectionist again and we skimmed the panel with filler 8 times before he was happy with the finish.
More to come
Mickey was being a perfectionist again and we skimmed the panel with filler 8 times before he was happy with the finish.
More to come
Edited by Ian P on Tuesday 3rd April 08:18

As promised
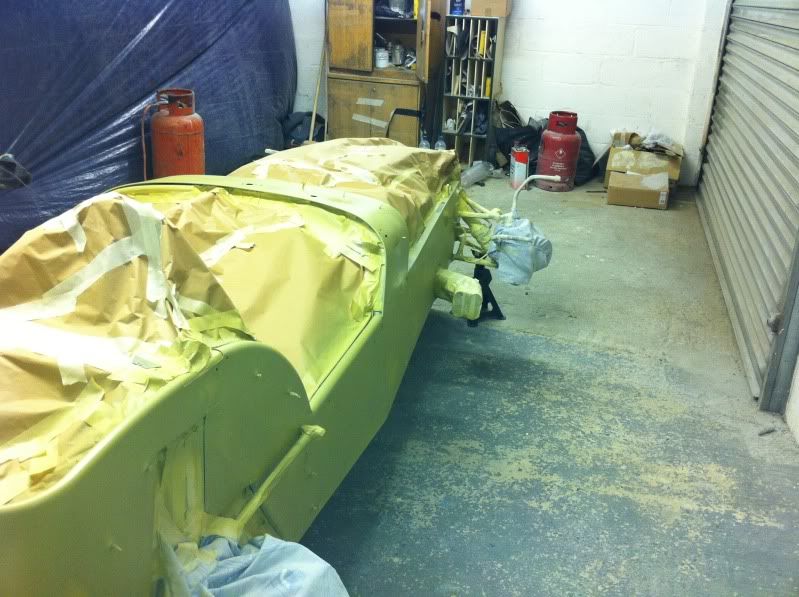
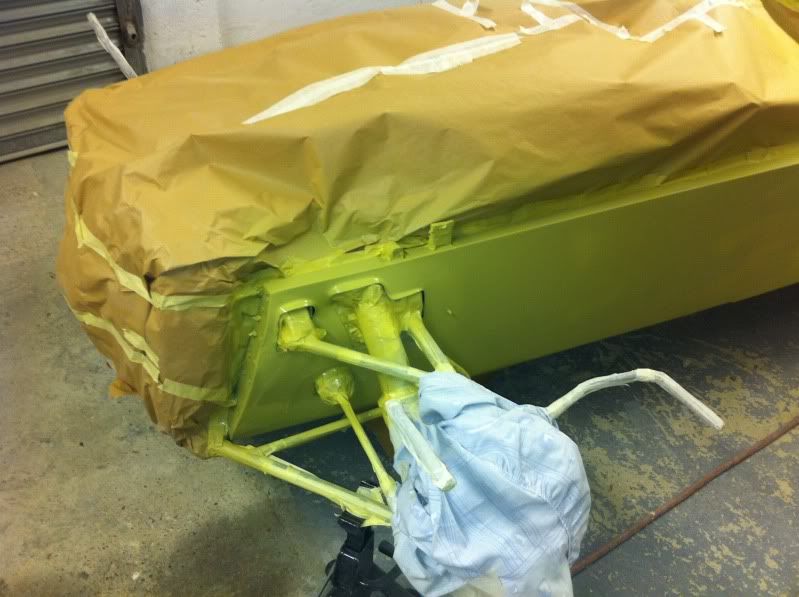
But to keep it on track here's the side panels taking shape. The car had been subject to a few accidents and had been to Arch Motors to be repaired - having 2 long fronts early in the season. If they don't replace the side panel they bend it out so they can weld in the new tubing section which leaves ripples in the panel under the scuttle area.
Once again Mickey wasn't happy with a gentle skim and these bits took an age to get right - fair play to him though as they looked great when finished:
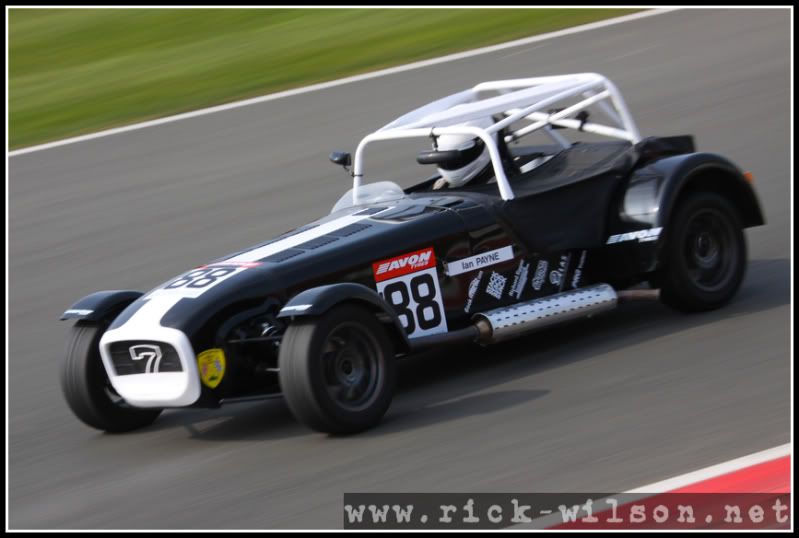
An action shot 
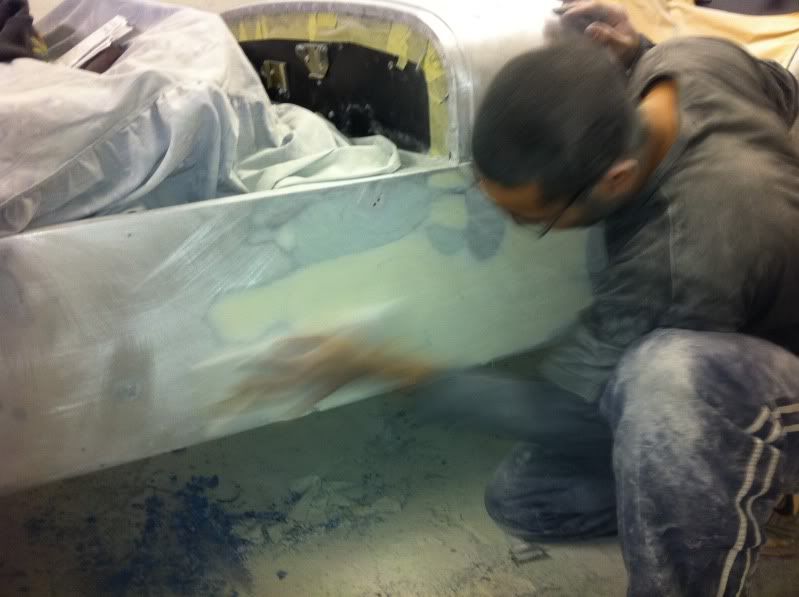
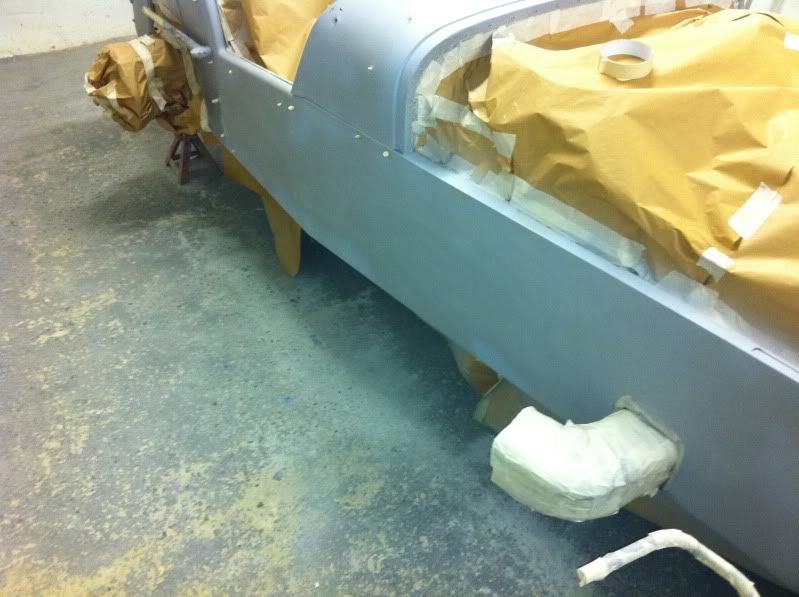
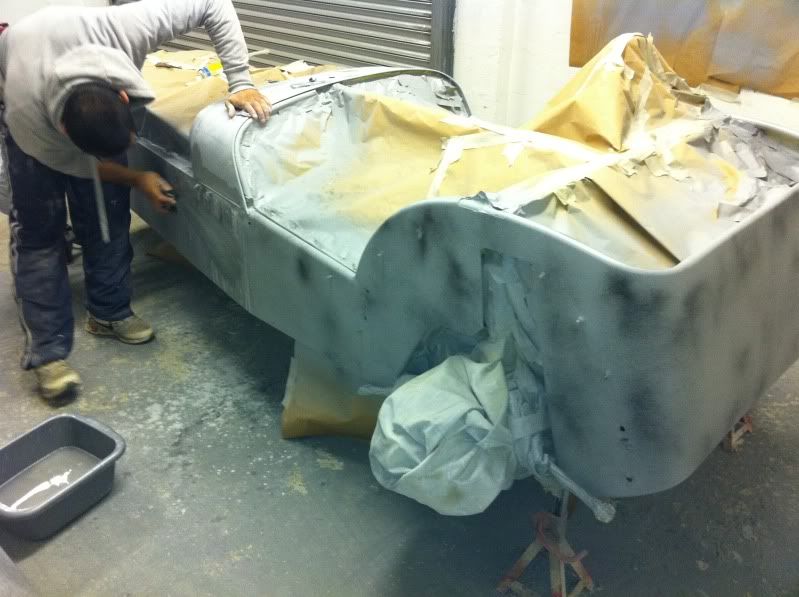
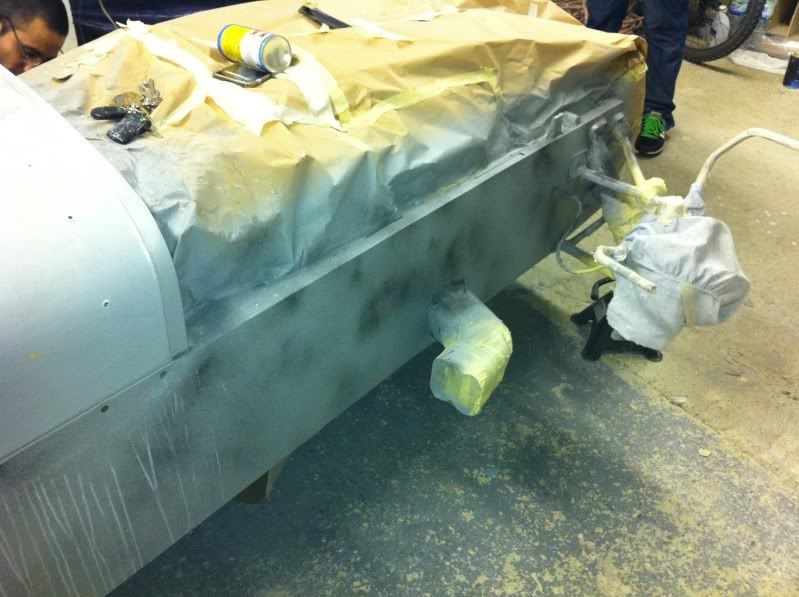
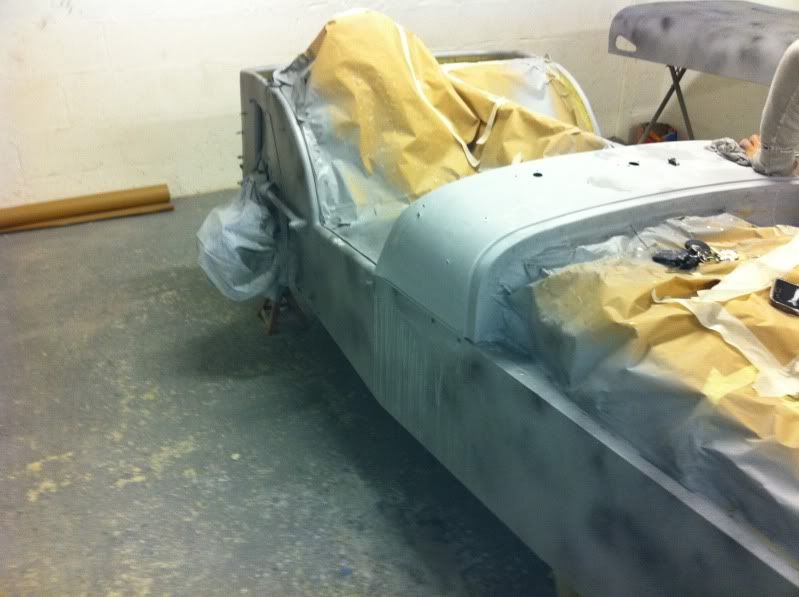
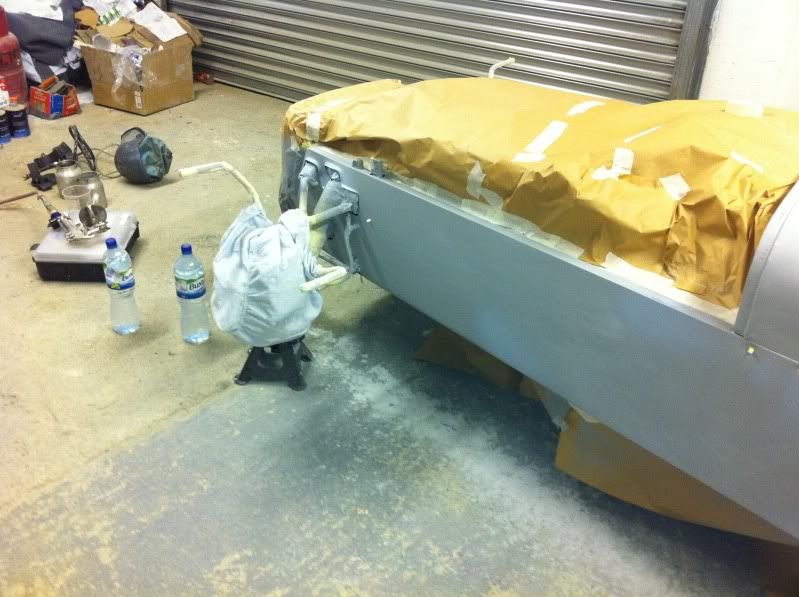
With most of the bodywork done it was time to panel wipe the car. We blew the majority of the dust off with the fans in the garage running. Mickey was fastidious about the panel wiping and said "anything that can go wrong, will go wrong when painting".
With the car clean and wiped down we watered the floor of the garage to keep dust particles to a minimum and cracked on. The first stage was masking; with all the front suspension, wishbones, radiator etc left in place this took two of us around 3 hours. I did think about taking everything off but Peter Young at Spy Motorsport had already set the car up for me so I didn't want to change any of the settings.
Once masked, we got on with the first spraying stage - etch primer. Etch primer eats into the metal bonding it to the car. This stage is very important as stickers and gaffer tape will be going on and off the car this season and I don't want the paint falling off
In this picture you can see little bits of tape rolled up in the thread holes to aid the refitting stage - my first good idea of the project
Here are a few more pictures of the etch stage
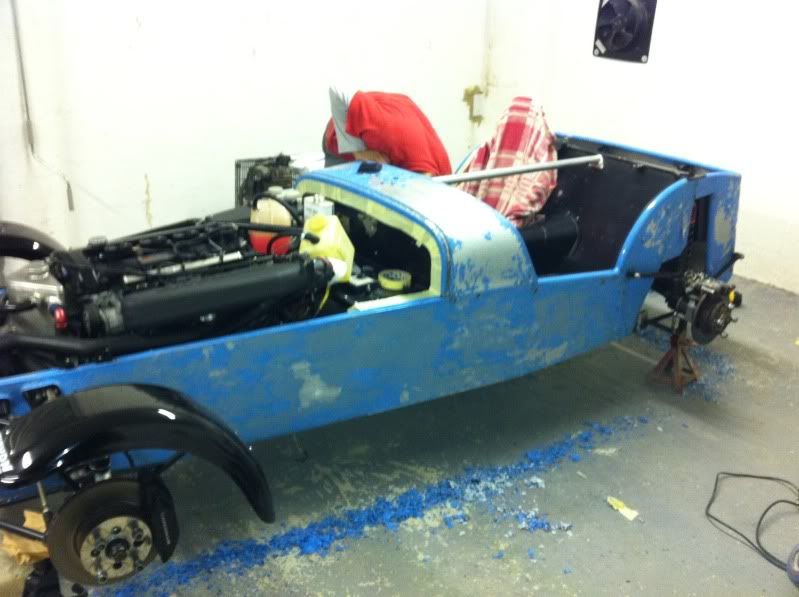
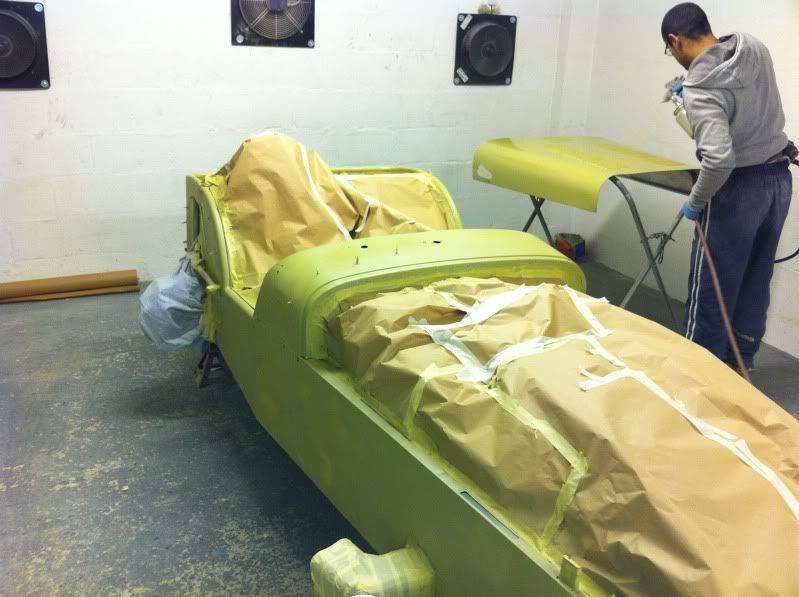
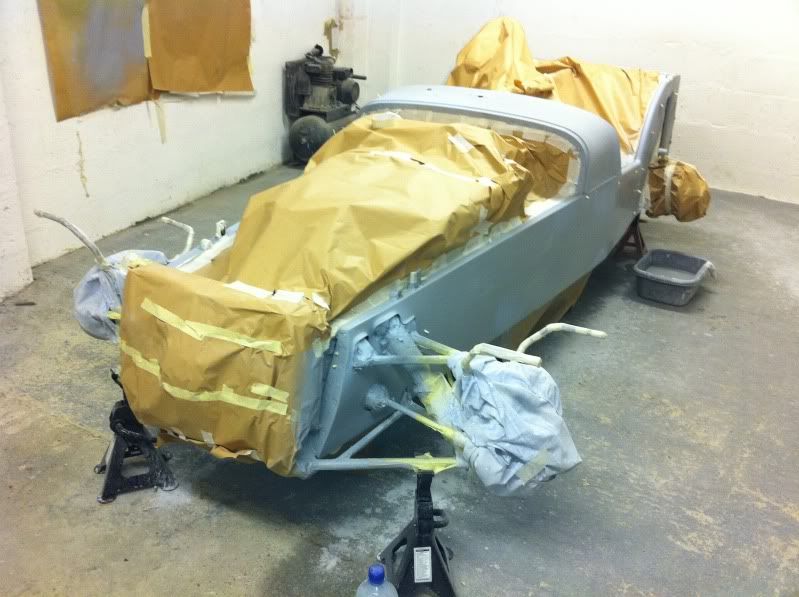
Now the etch primer was on the exciting bits started; primer and top coat. Being a bit of a novice I didn't realise we were still miles away from finishing it
It was now mid January and we had been working 3 evenings a week and every weekend to get ready. I wanted the car ready for it's first track day at the end of January but this was looking unlikely.
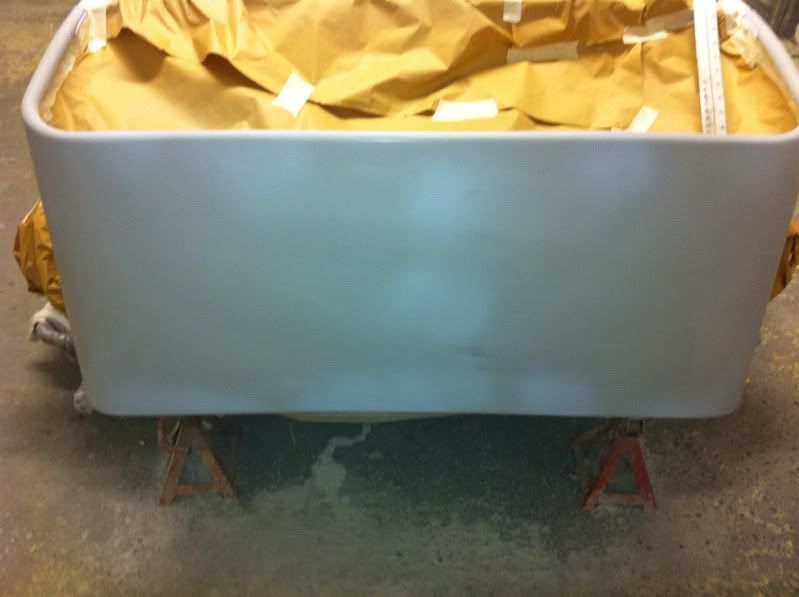
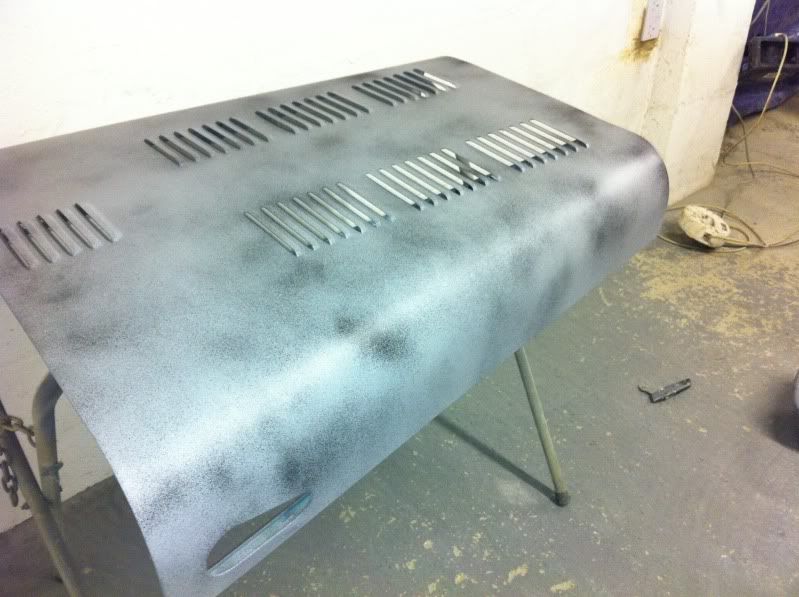
Once primered we smoothed the panels with 400 paper and it felt smooth as a baby's bum This is where the first WTF moment happened as Mickey took a spray can with black paint and started dusting the whole car in black  !!!!
!!!!
He thought it was hilarious as I was standing there seeing all our hard work smoothing going down the pan! Mickey then explained that the dusting of black is to find the high/low spots in the primer so the smoothing can go to the next level
Now the etch primer was on the exciting bits started; primer and top coat. Being a bit of a novice I didn't realise we were still miles away from finishing it
It was now mid January and we had been working 3 evenings a week and every weekend to get ready. I wanted the car ready for it's first track day at the end of January but this was looking unlikely.
Once primered we smoothed the panels with 400 paper and it felt smooth as a baby's bum
This is where the first WTF moment happened as Mickey took a spray can with black paint and started dusting the whole car in black !!!!He thought it was hilarious as I was standing there seeing all our hard work smoothing going down the pan! Mickey then explained that the dusting of black is to find the high/low spots in the primer so the smoothing can go to the next level
This was lingering on page 4 so I thought it was time for an update
After the dusting of black and more hours smoothing with soapy water the car looked like this.
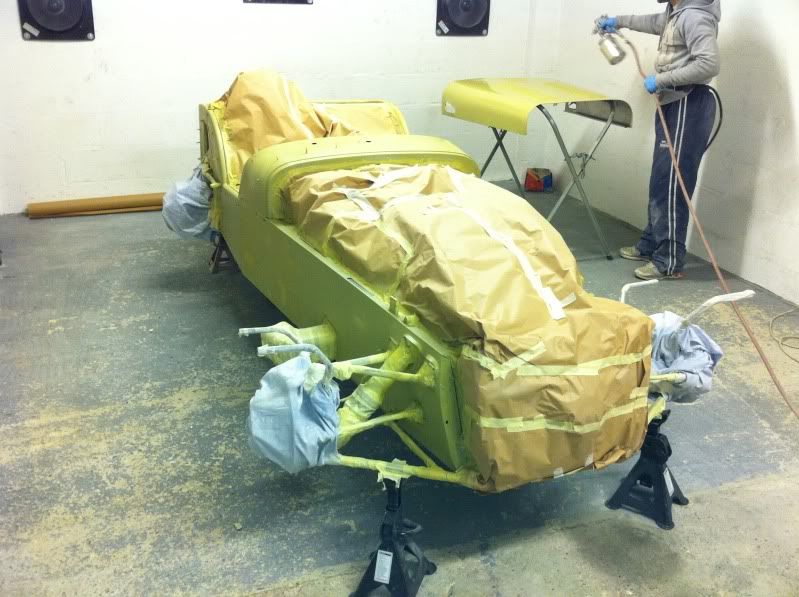
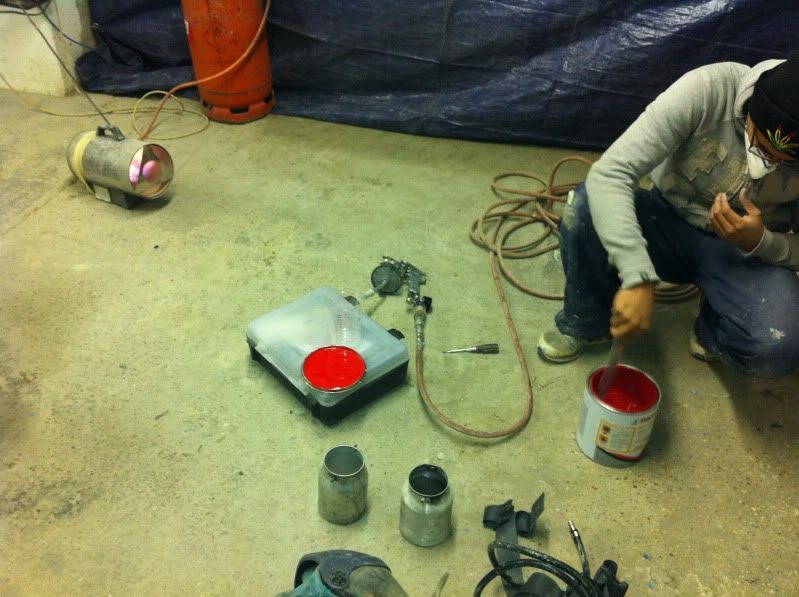
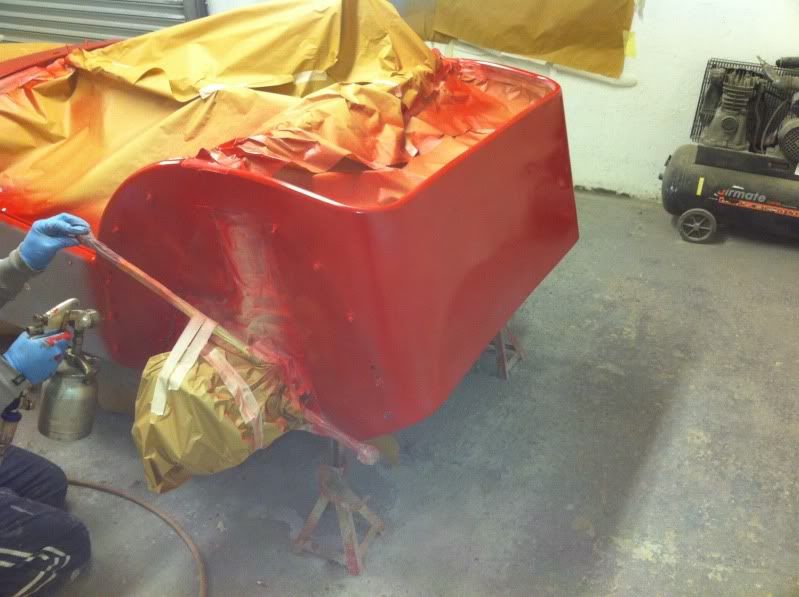
After another fastidious few hours spent panel wiping the car it was the moment we had both been waiting for - topcoat
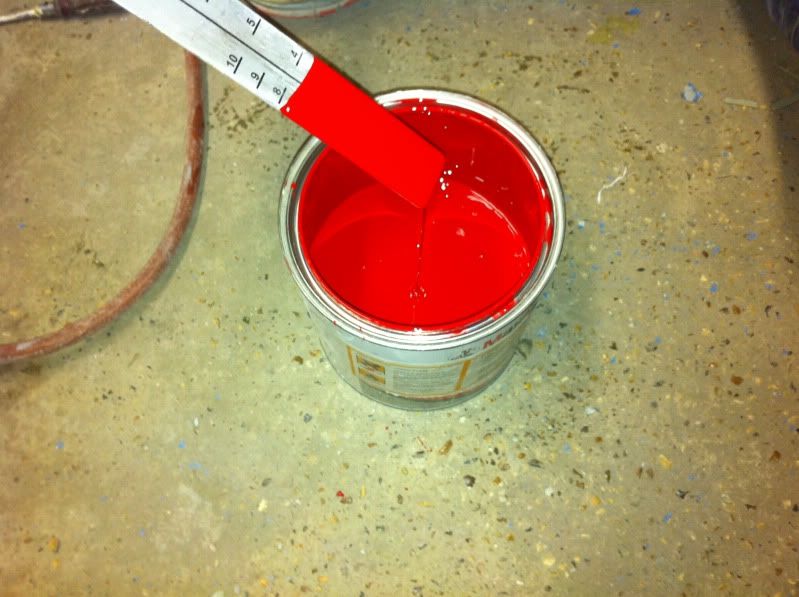
Here's Mickey mixing the paint. It was now towards the end of January and still rather cold - the only heat in the garage was the space heater you can see in this picture. Not ideal conditions for spraying but needs must.
After the dusting of black and more hours smoothing with soapy water the car looked like this.
After another fastidious few hours spent panel wiping the car it was the moment we had both been waiting for - topcoat
Here's Mickey mixing the paint. It was now towards the end of January and still rather cold - the only heat in the garage was the space heater you can see in this picture. Not ideal conditions for spraying but needs must.
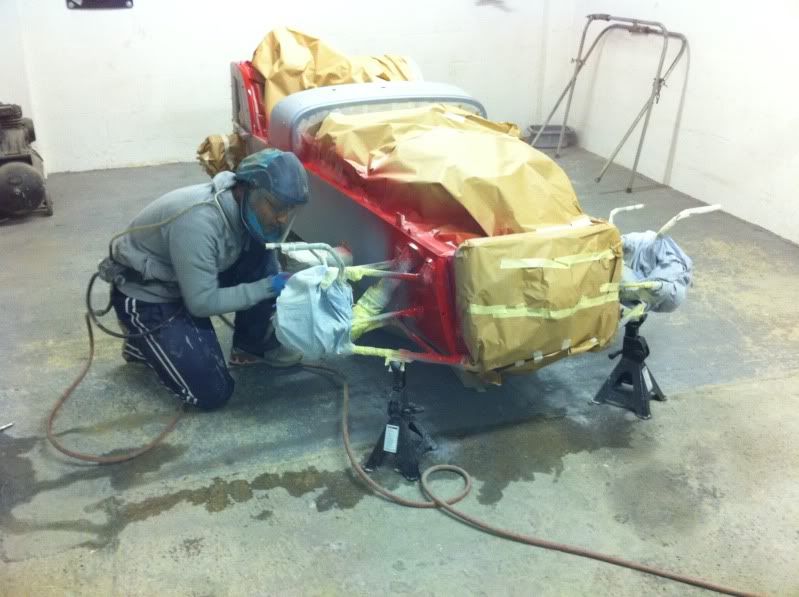
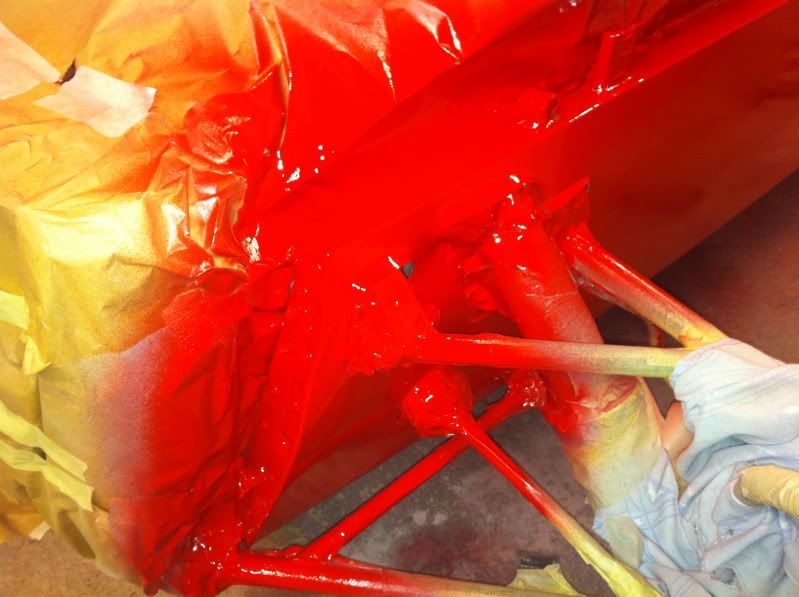
The garage had been swept and watered to rid it of dust particles in the air and then allowed to settle overnight. The following evening I left the office early as the car would be in red by the end of the night and we wanted to start before the temperature dropped below zero.
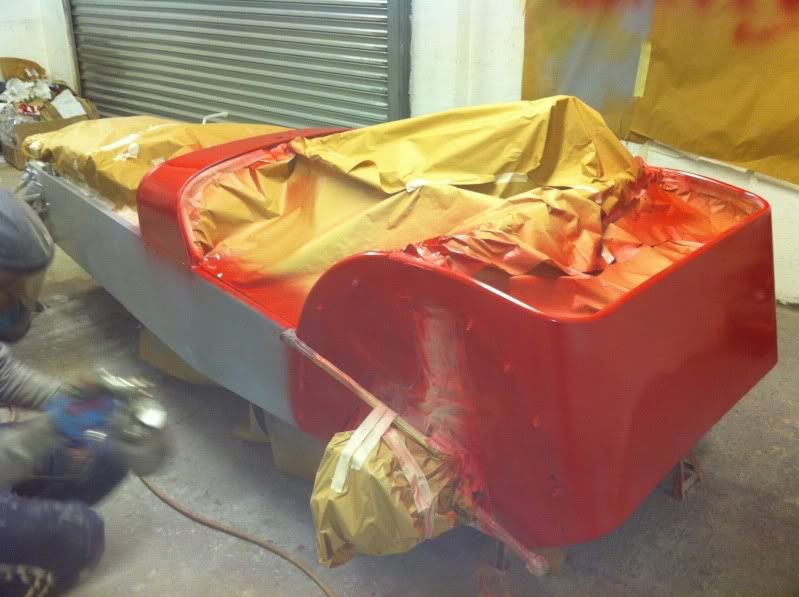
We watered the floor again and cracked on
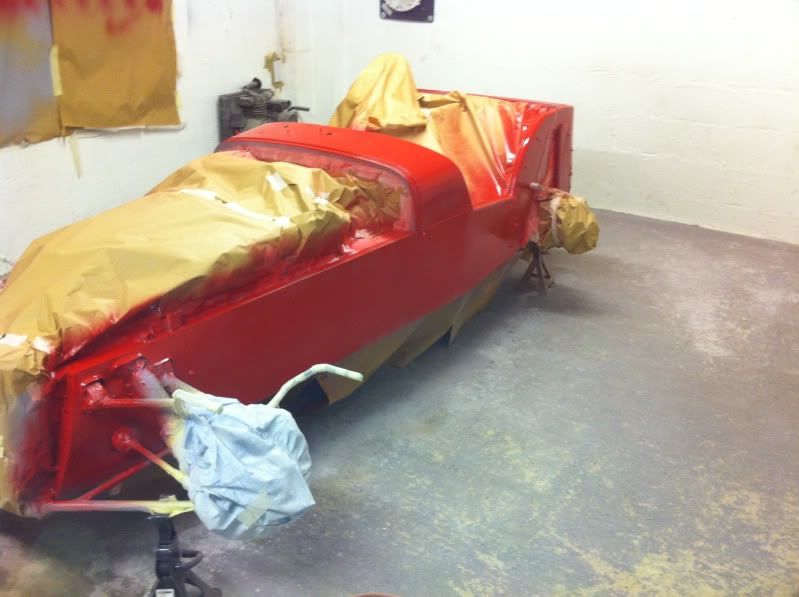
More to come later.
We watered the floor again and cracked on
More to come later.
Gassing Station | Readers' Cars | Top of Page | What's New | My Stuff