E36 Track Car - Replacement Engine Build(s)
Discussion
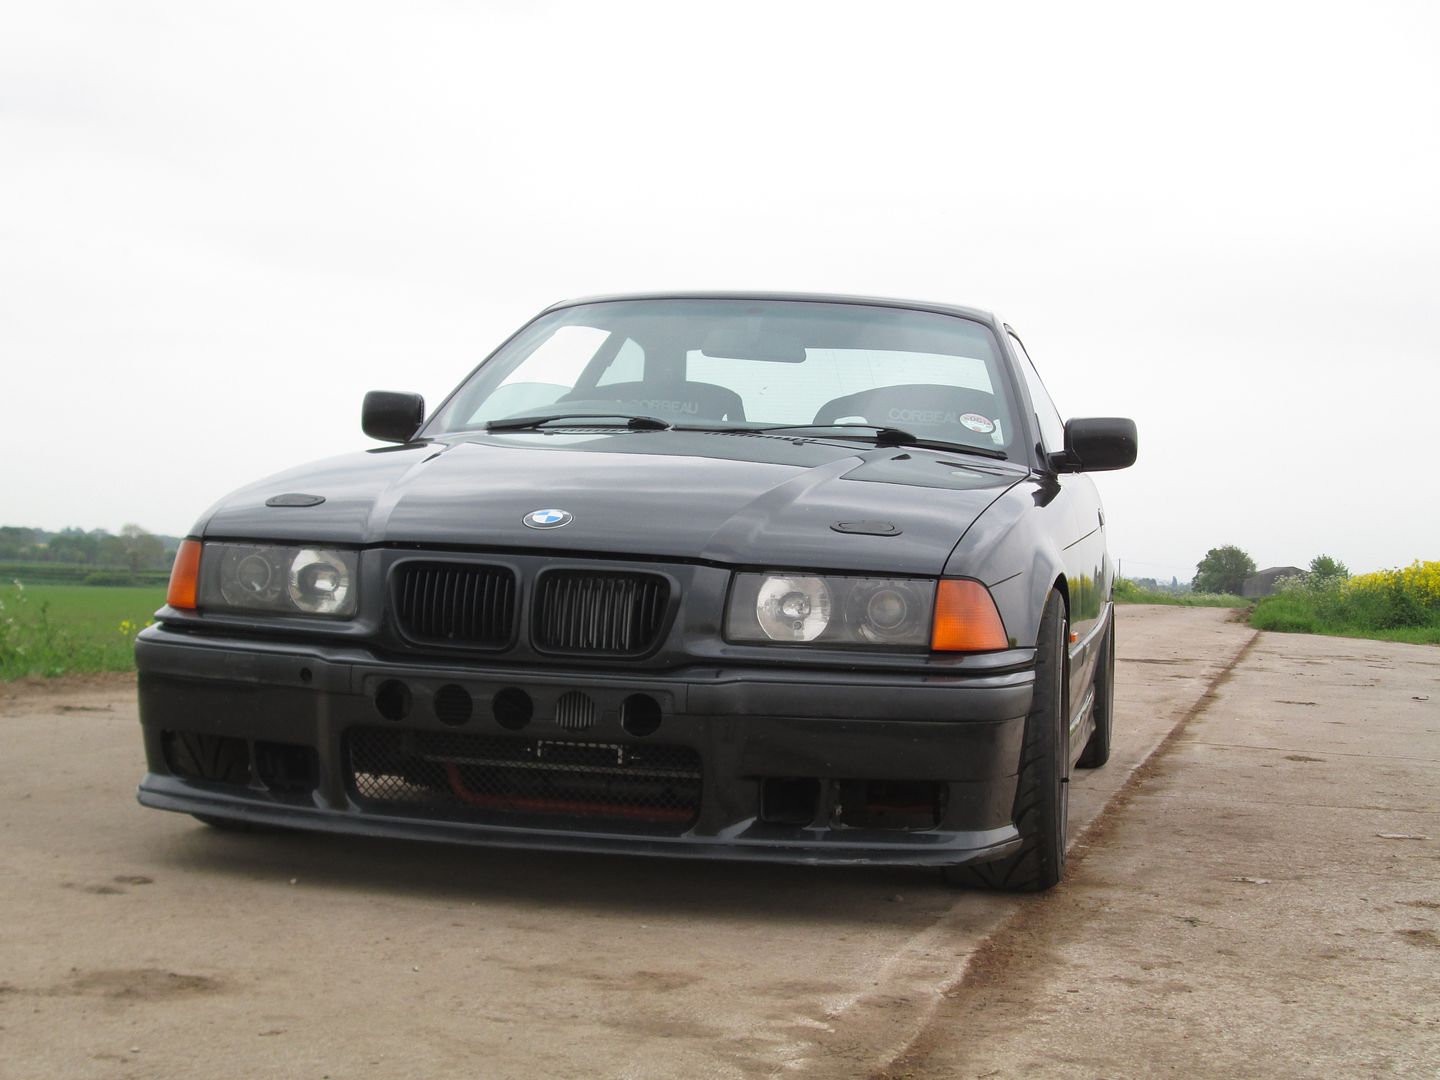
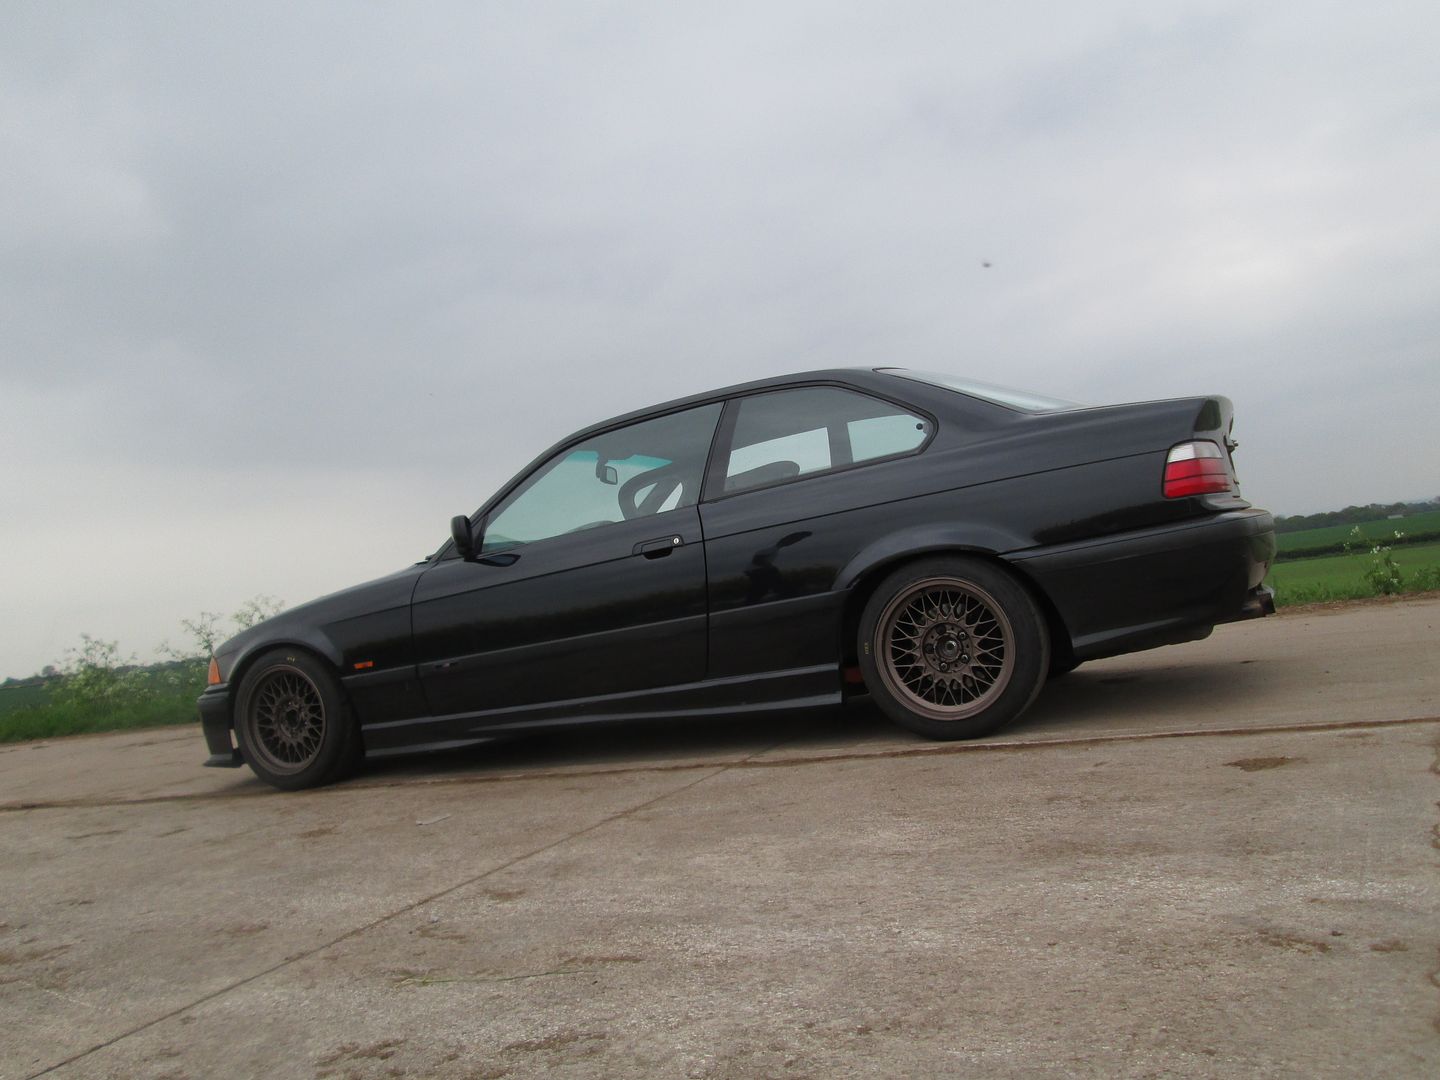
After having a number of BMWs, from E30s, E36s, and an E46 in the past, I wanted another E36 for track days, so picked a solid example up, '97 328i M Sport Coupe. From having the previous models I started by pulling everything off the chassis, and replacing/upgrading where bits had failed in the past. Although, I thought a more interesting start to the thread would be the history of an engine rebuild that took a number of turns before coming good, so I will come back to the chassis later.
As the chassis work had nearly all been completed, I wanted to turn my attention to the tired, original 200k+ M52 Nikasil engine which was blowing oil past the rings and burning it just as quick. Performance wise it was OK, with the M50 inlet and different flash on the ECU it made 216hp, 205lb/ft, although it just felt really flat to drive. Originally I decided to just rebuild a 328 motor, as all I wanted was reliability to go with now good chassis, which drove well.
I picked up an Alusil M52B28 on around 90k miles, and stripped everything down ready for the head and block to go to the machine shop.
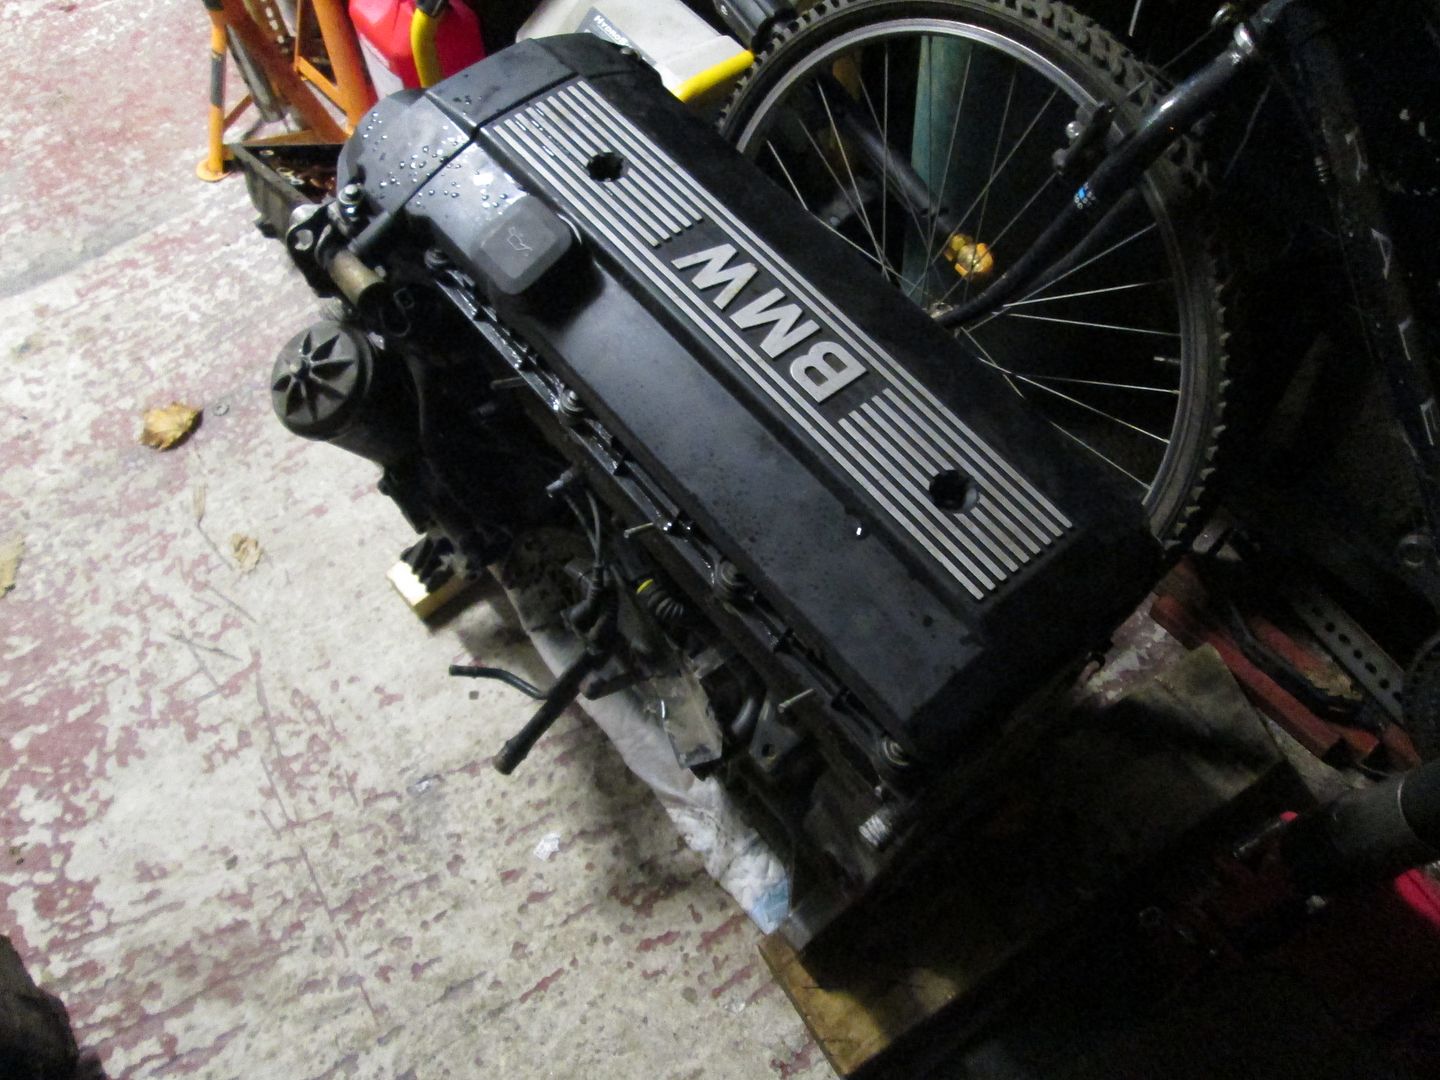
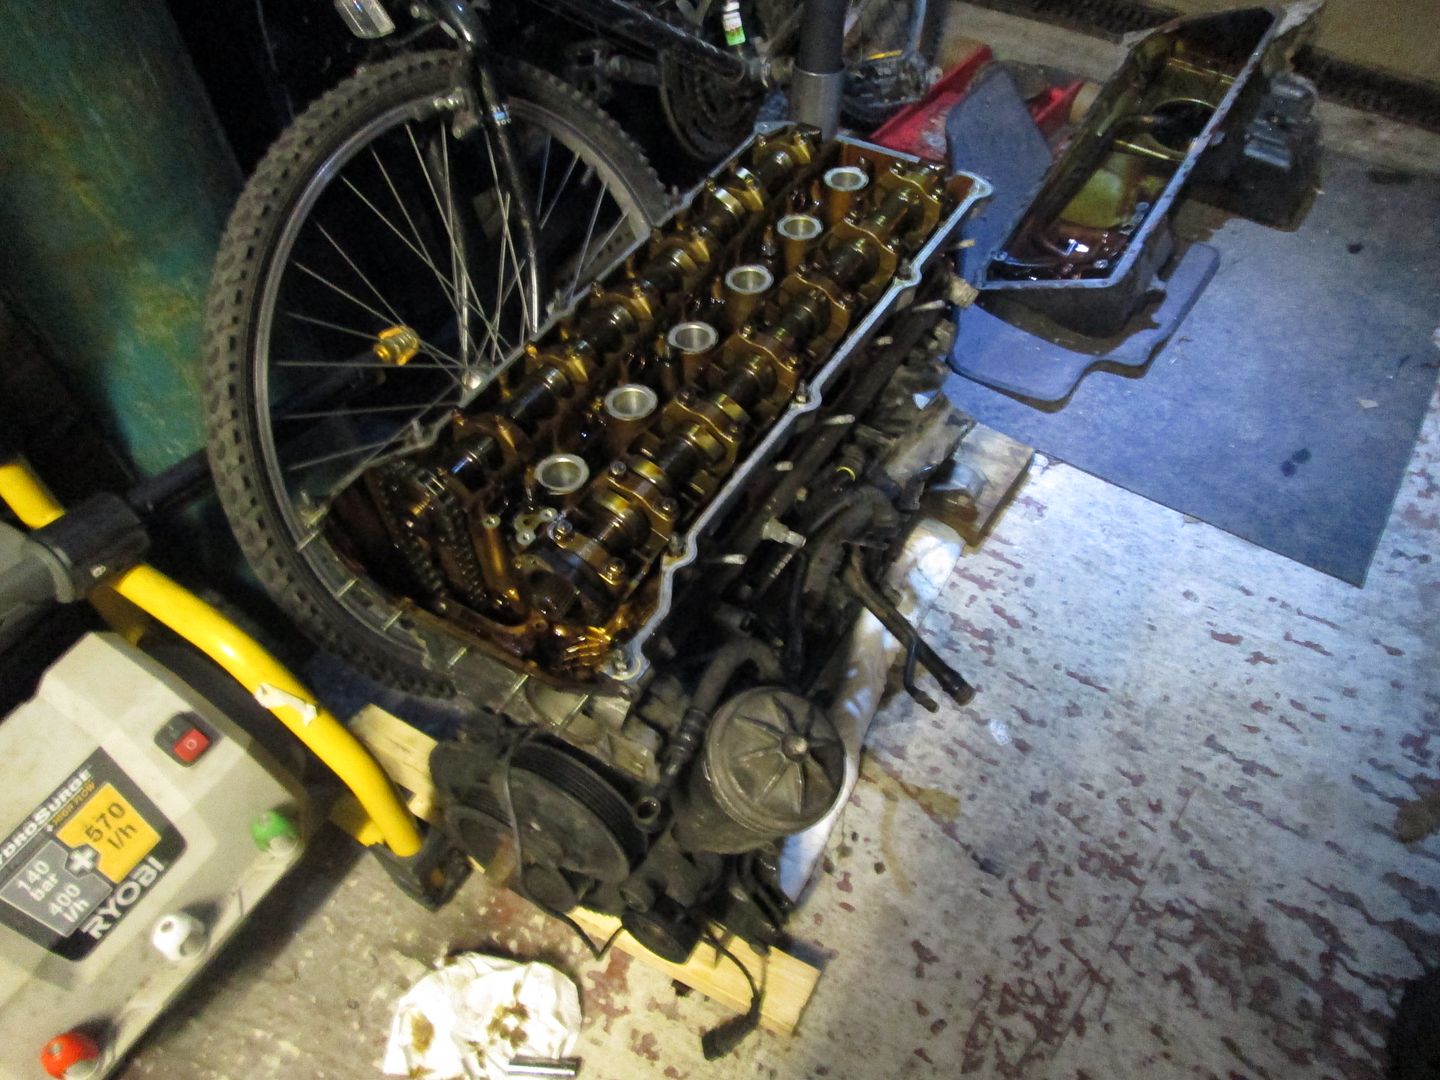
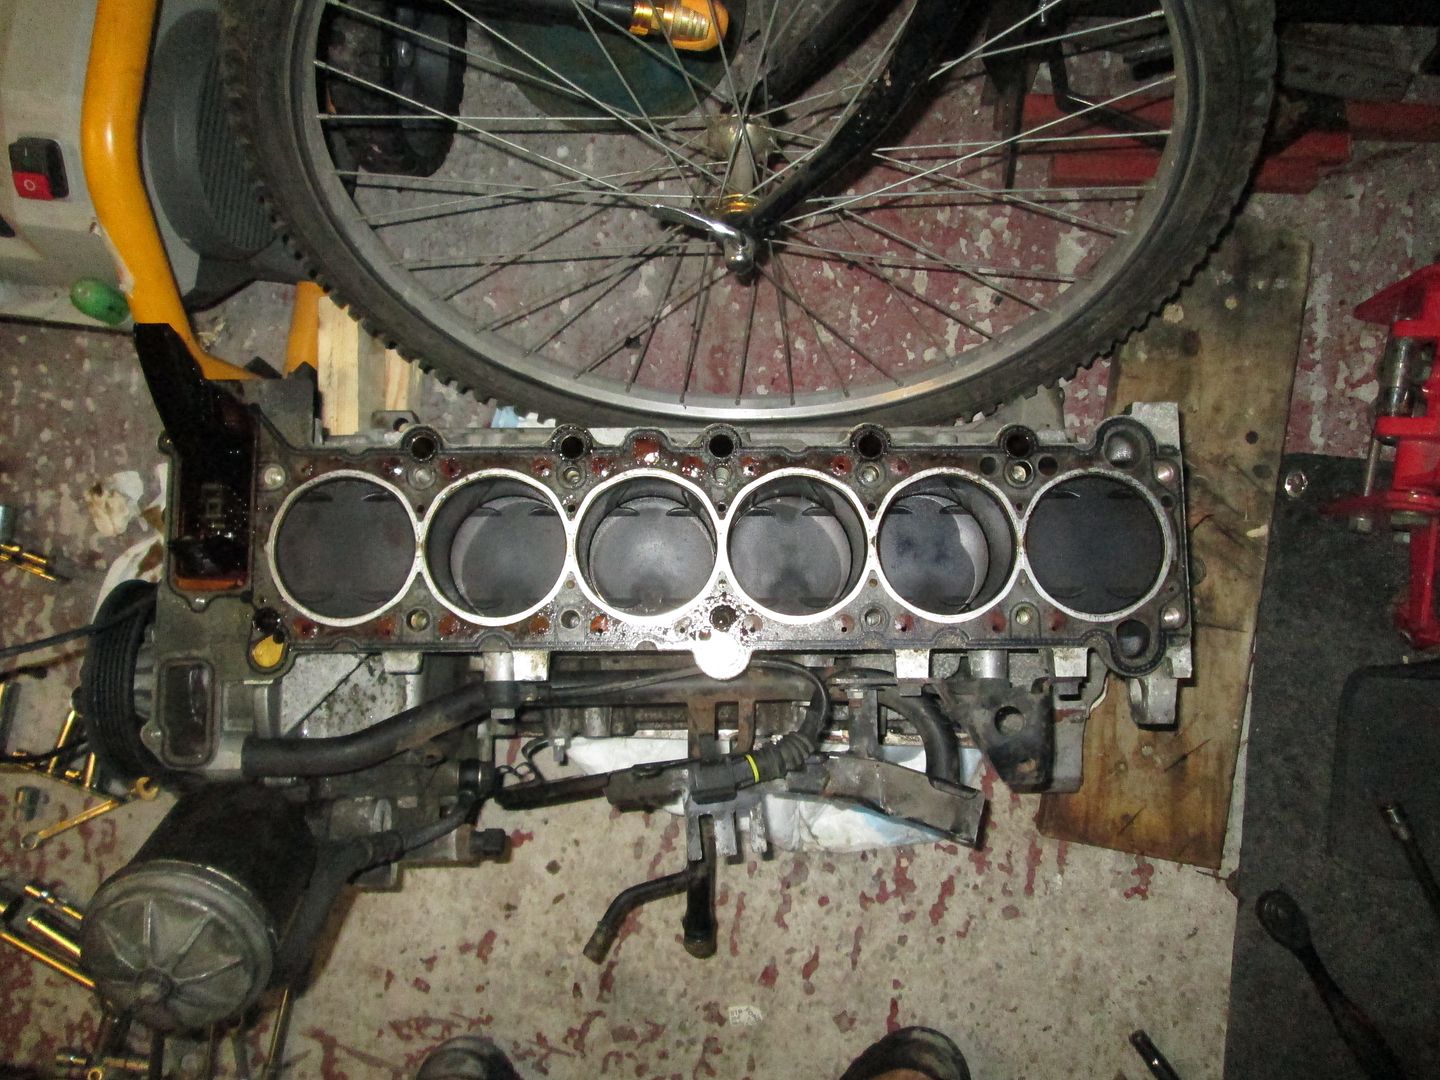
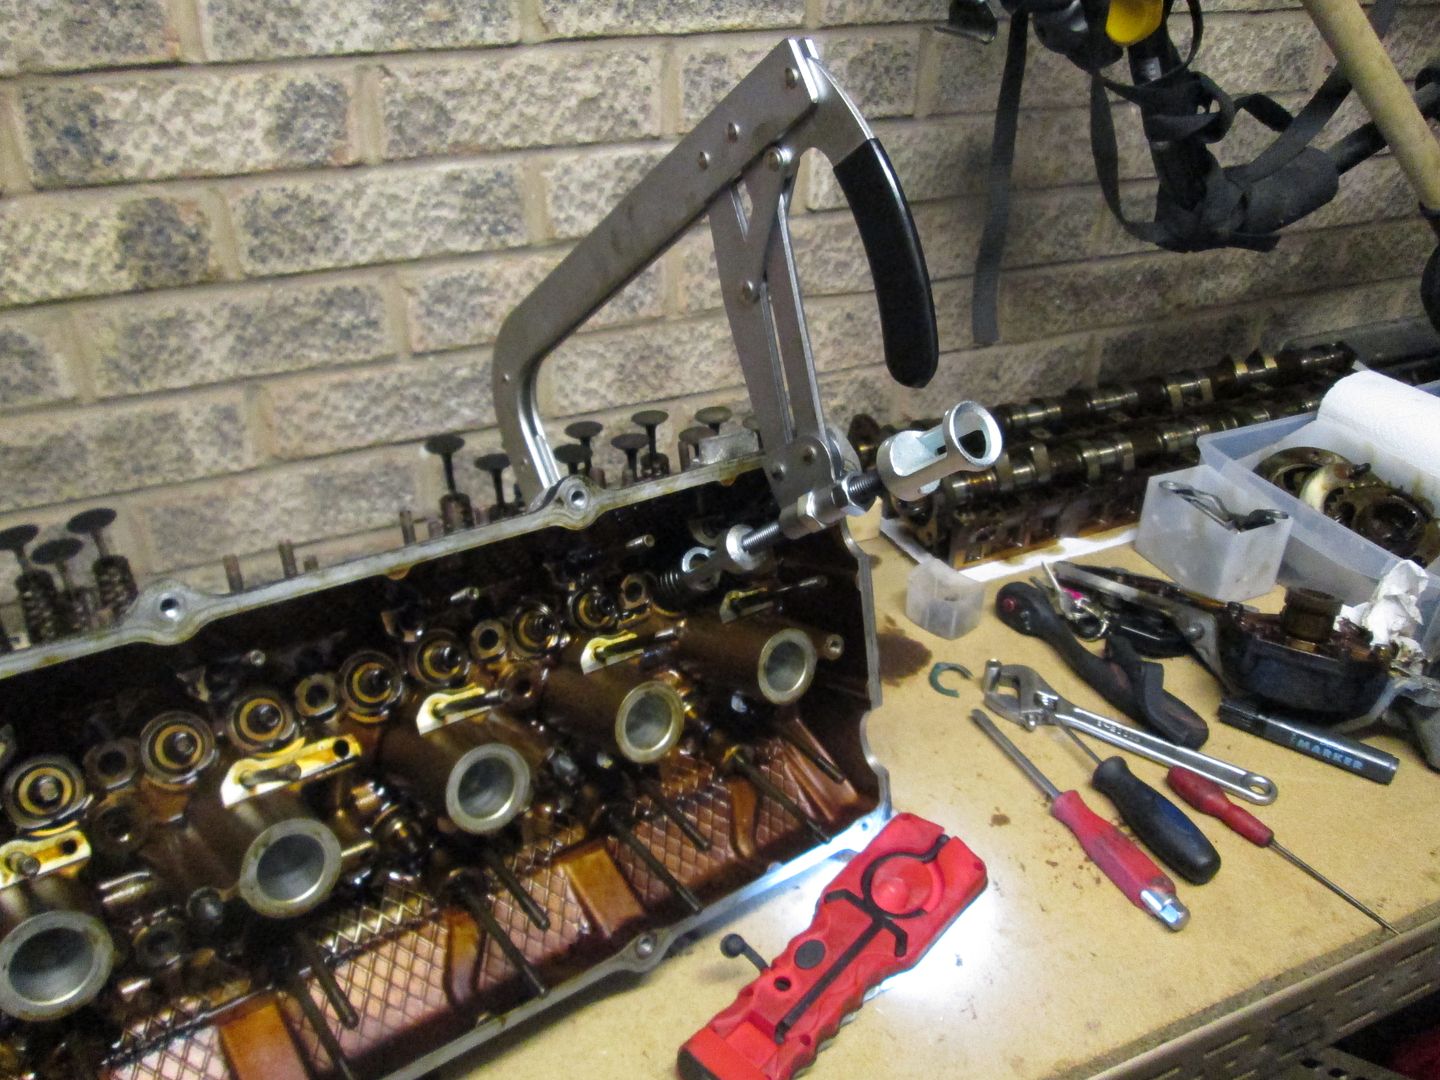
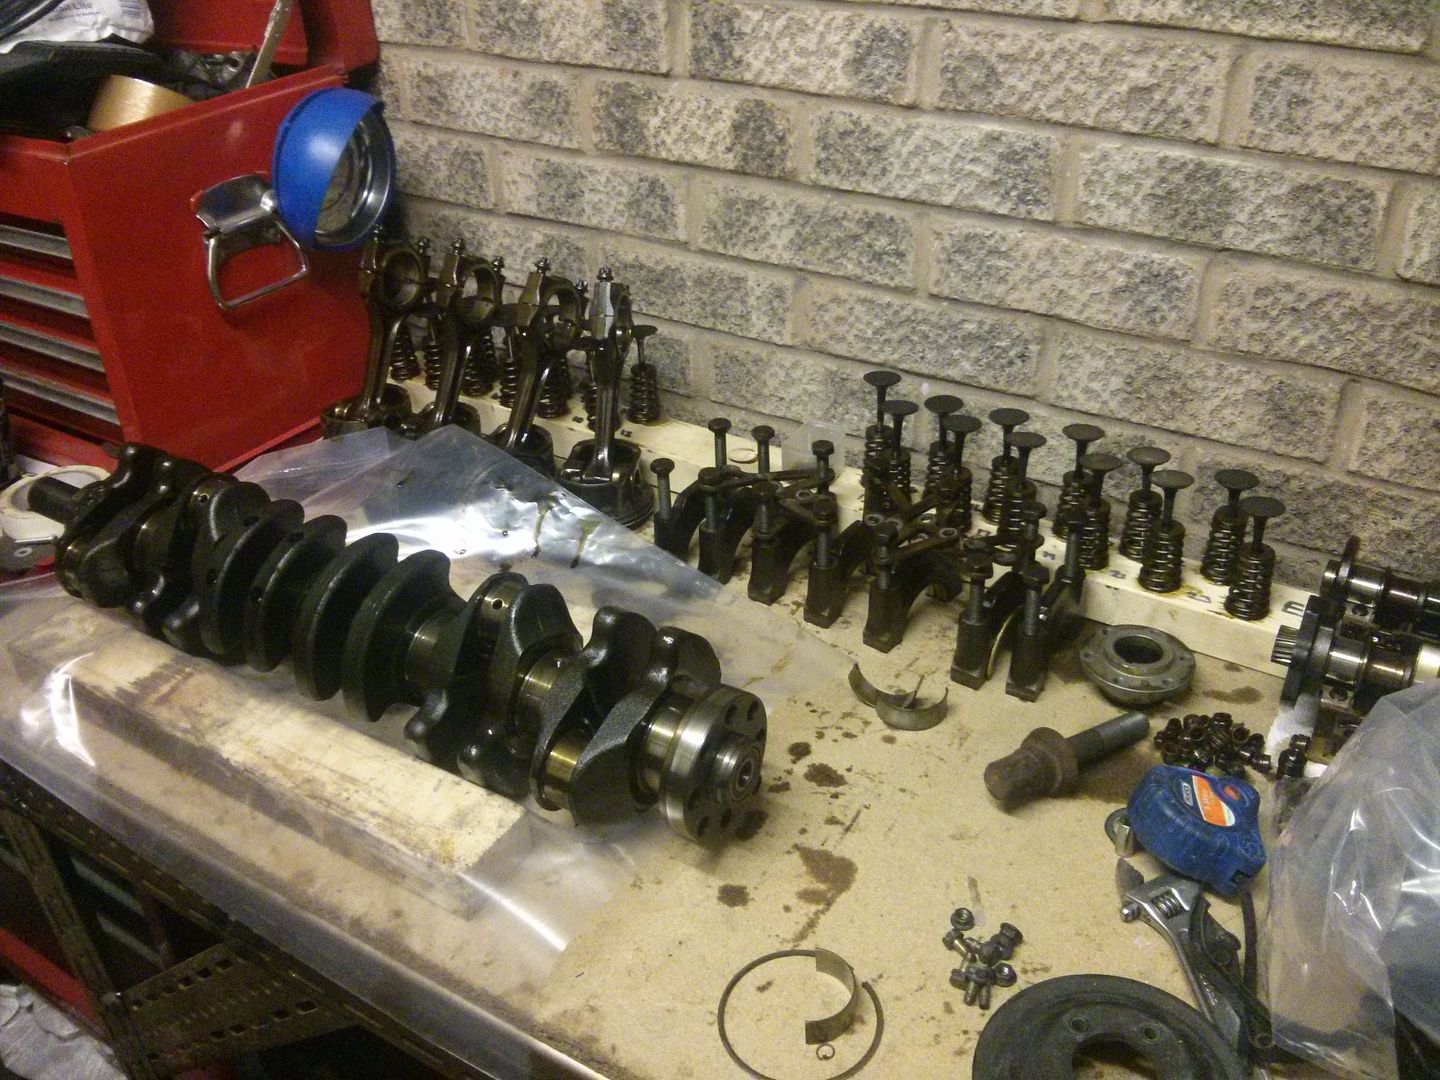
Around a week later I had the skimmed head back, along with the decked and honed block.
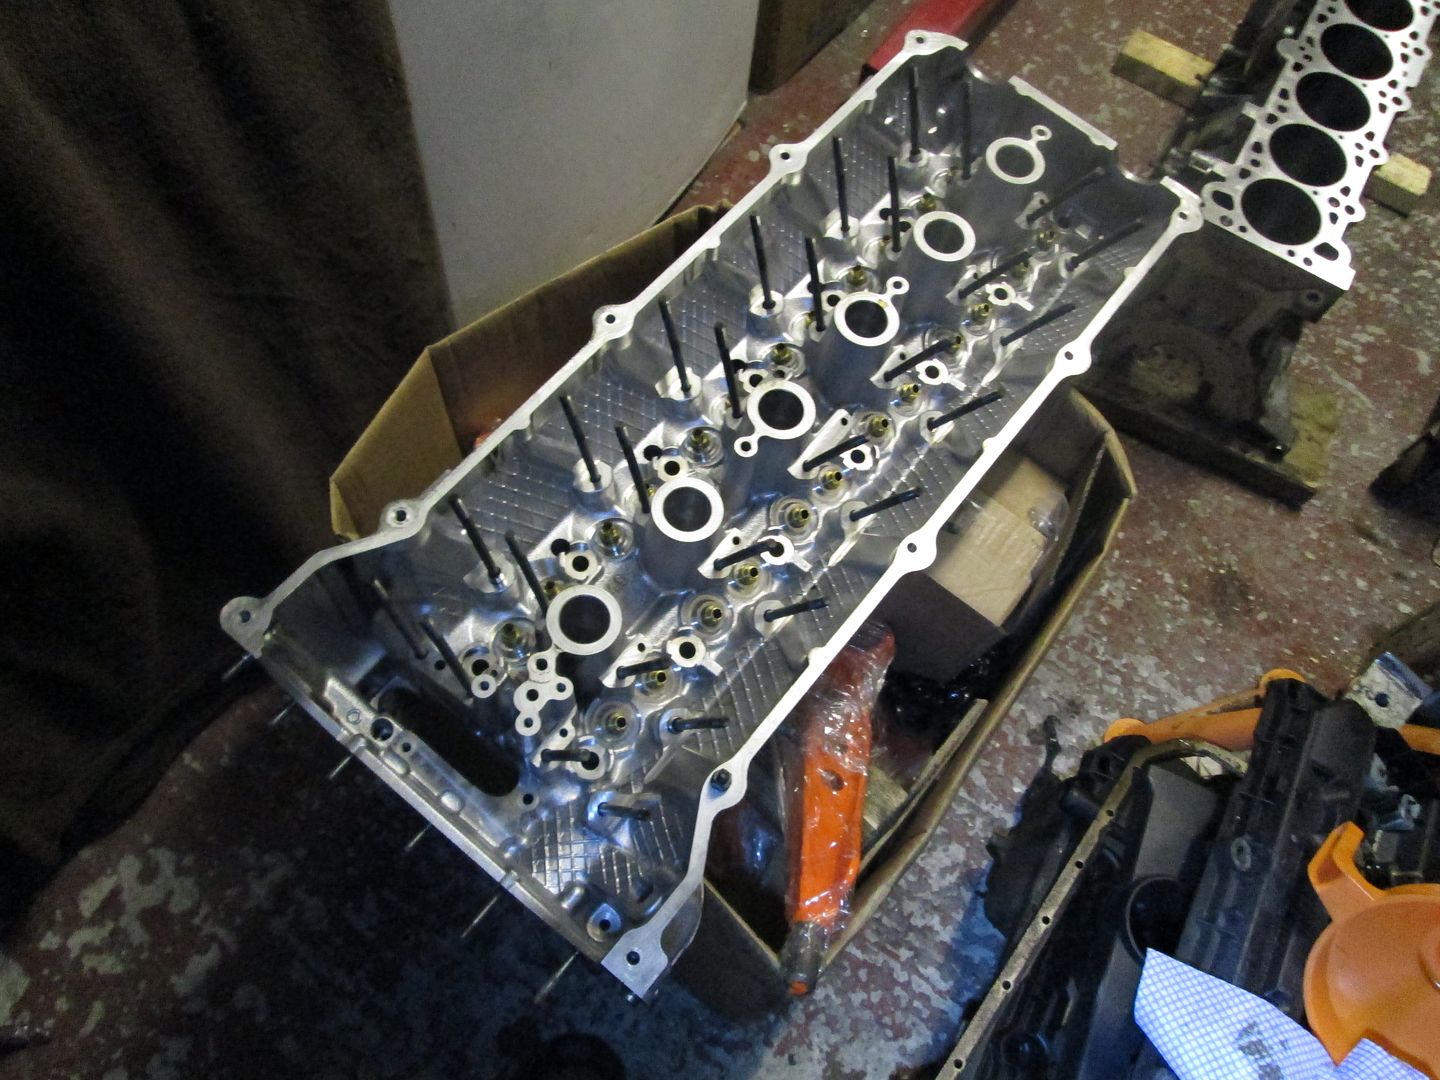
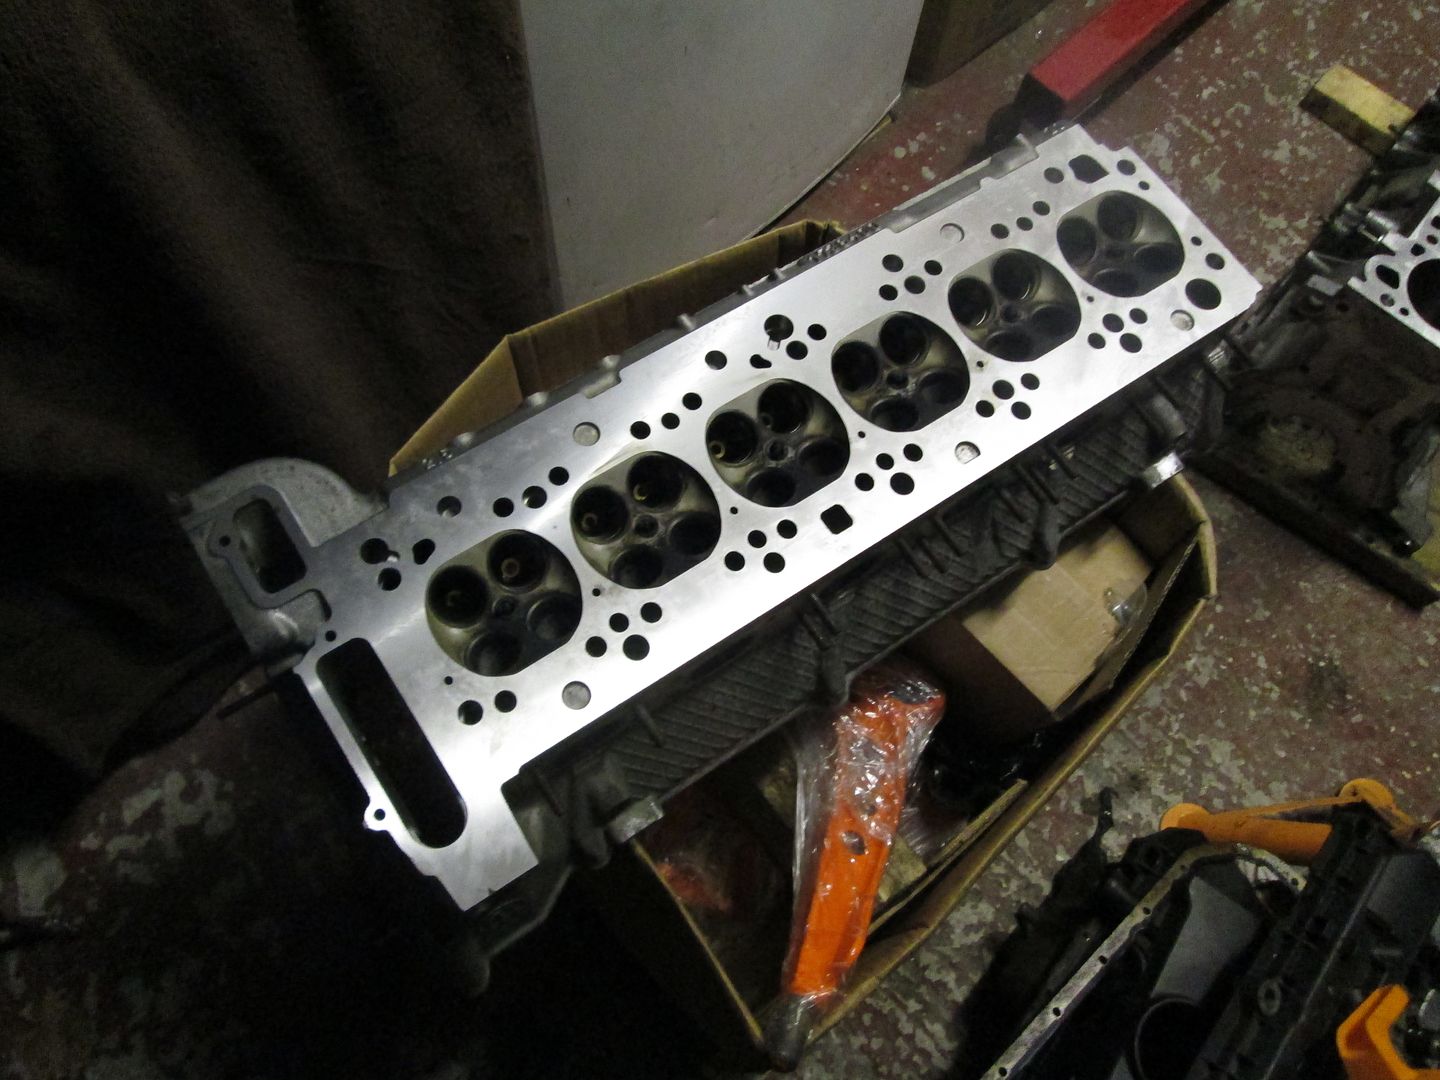
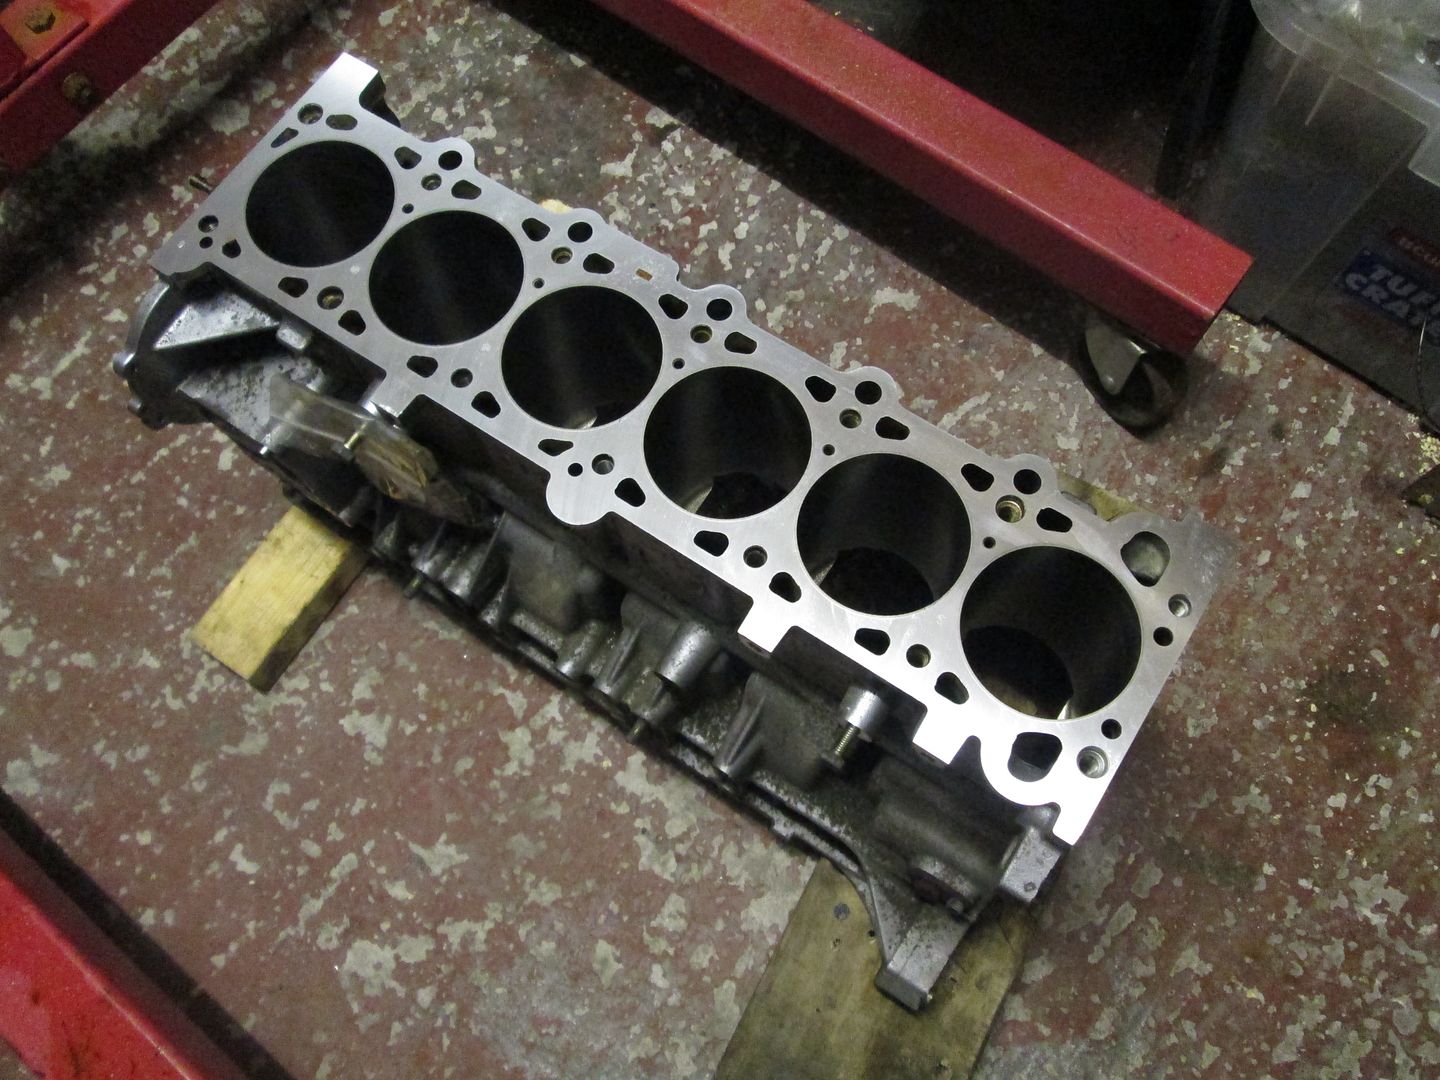
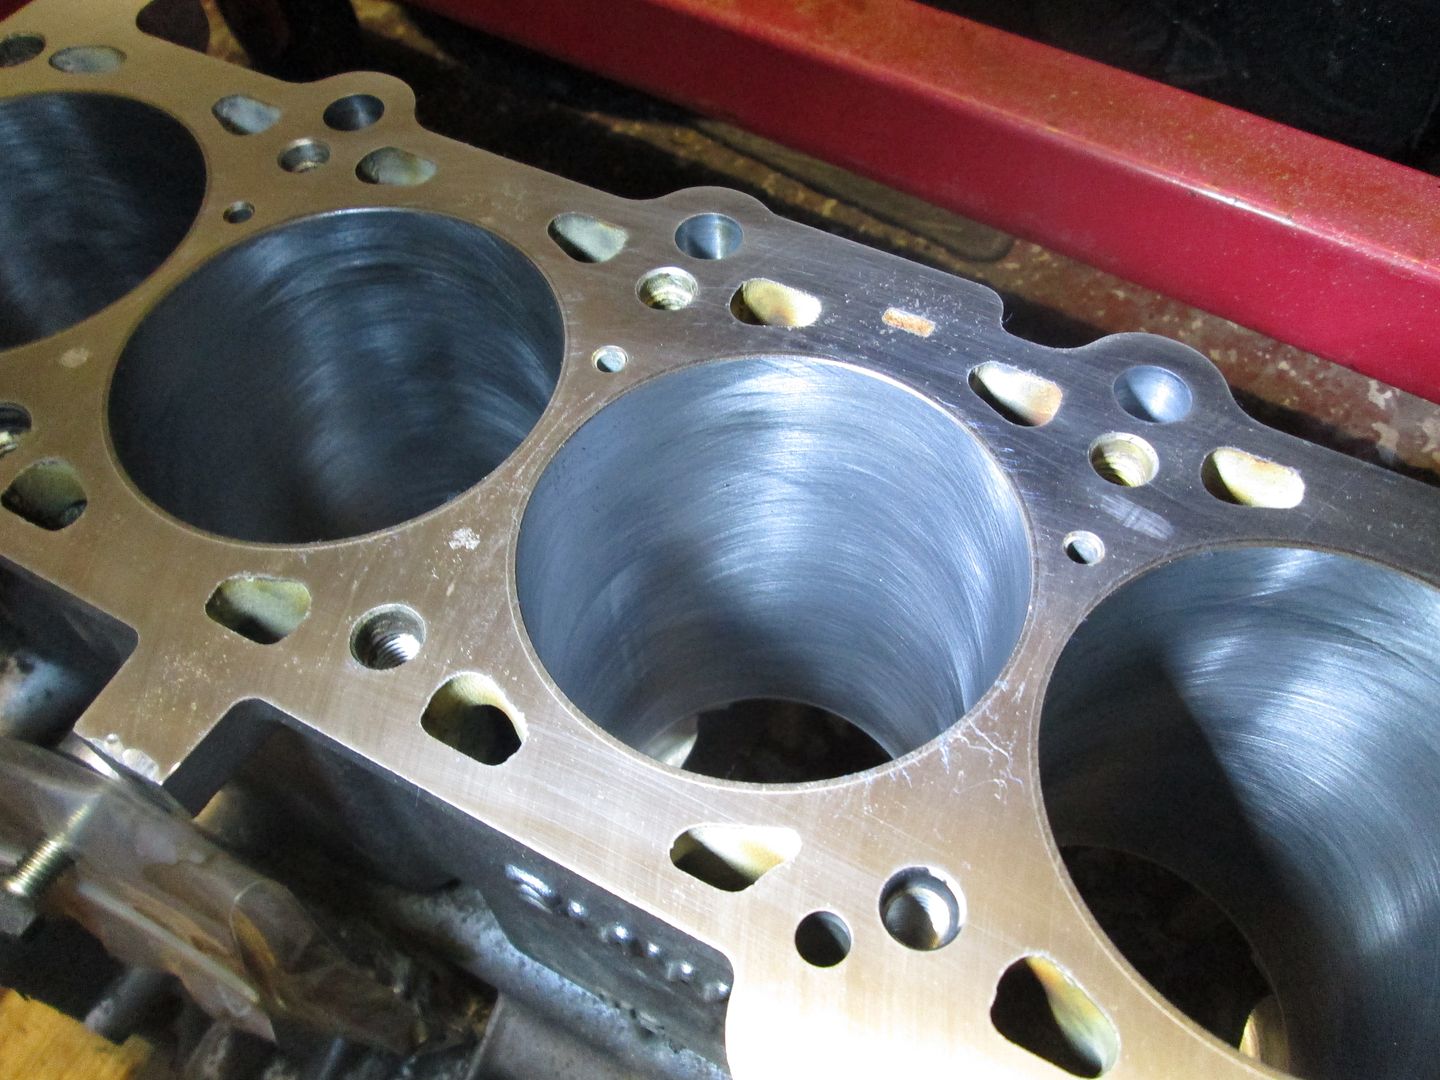
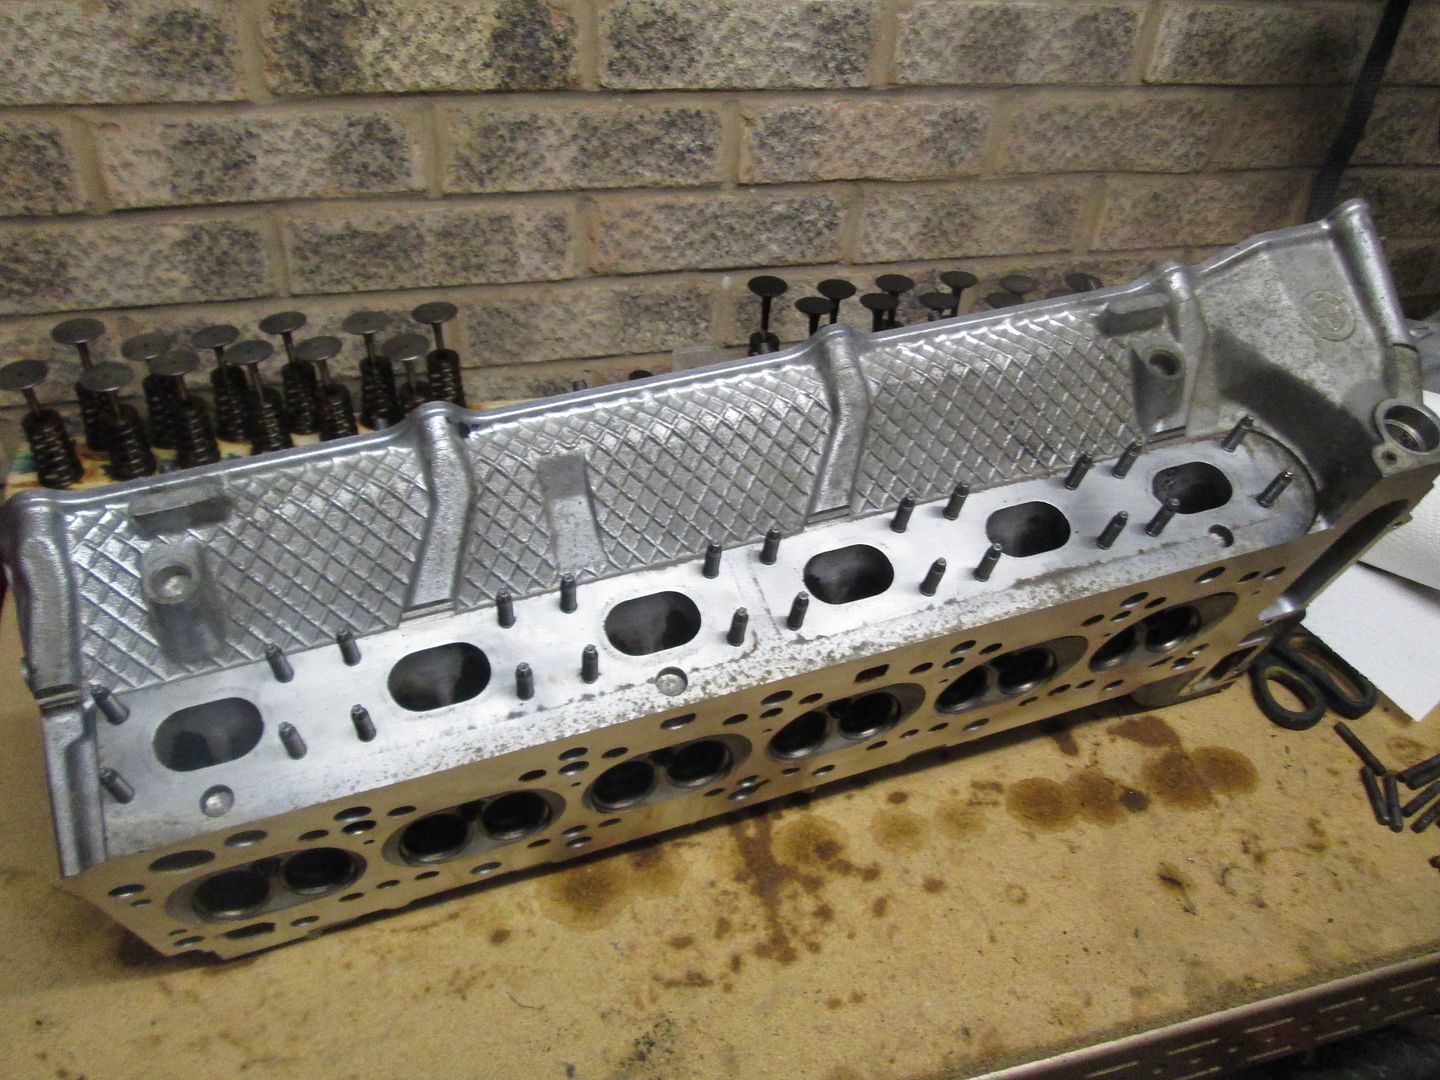
Built up the head with new stem seals, and 24 relapped valves..
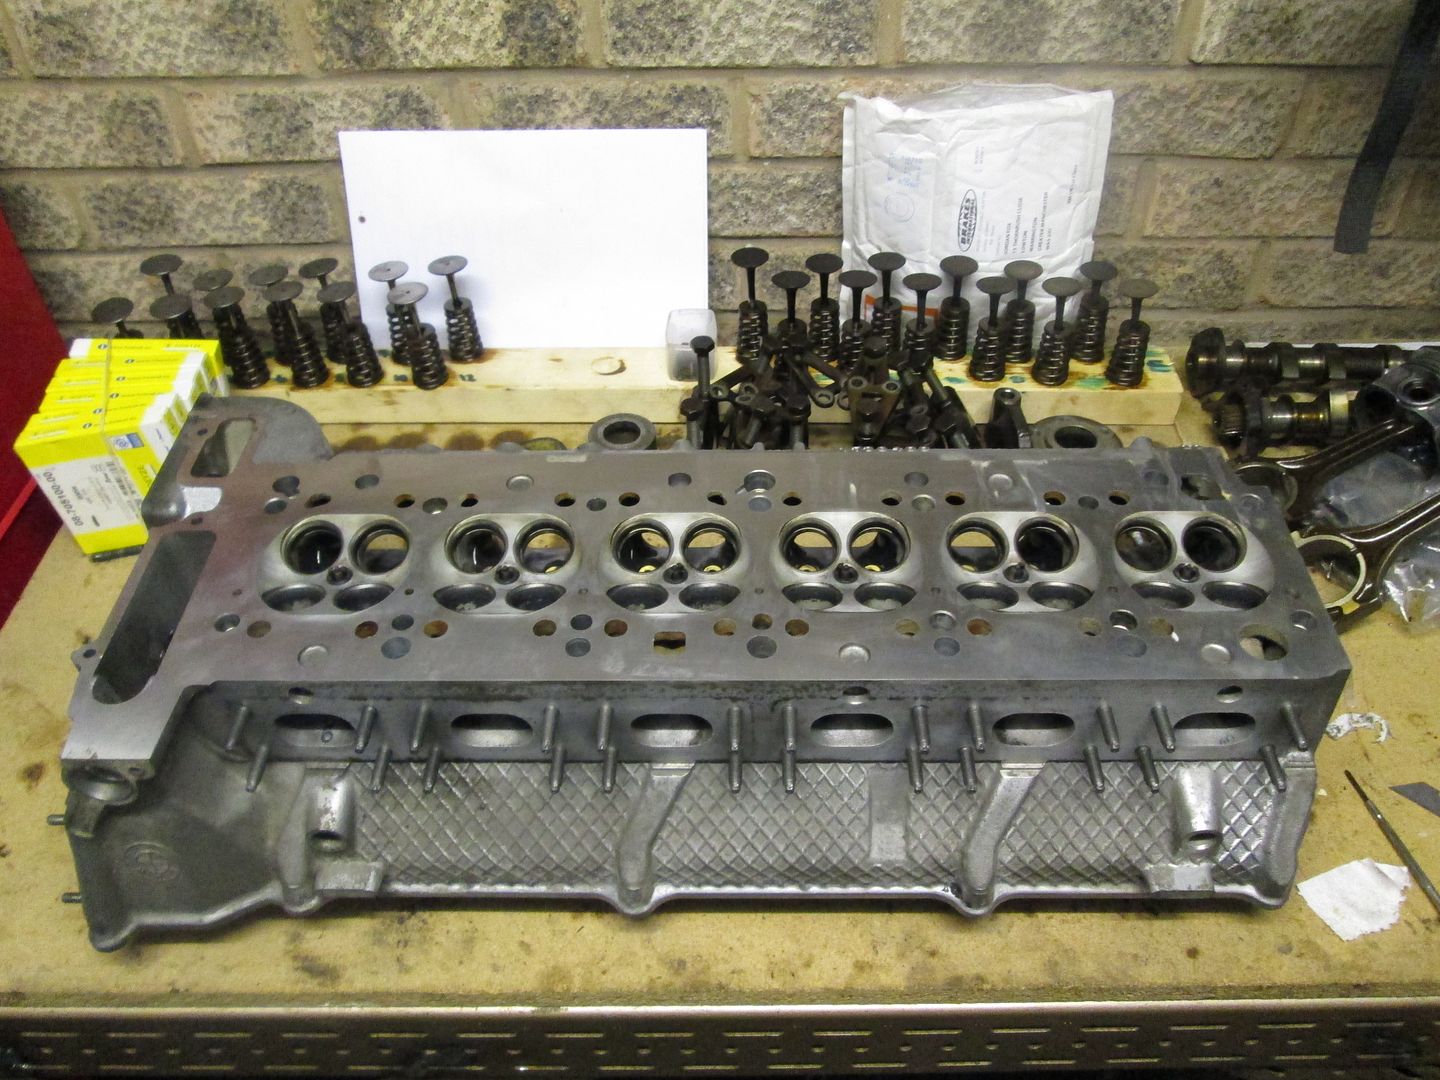
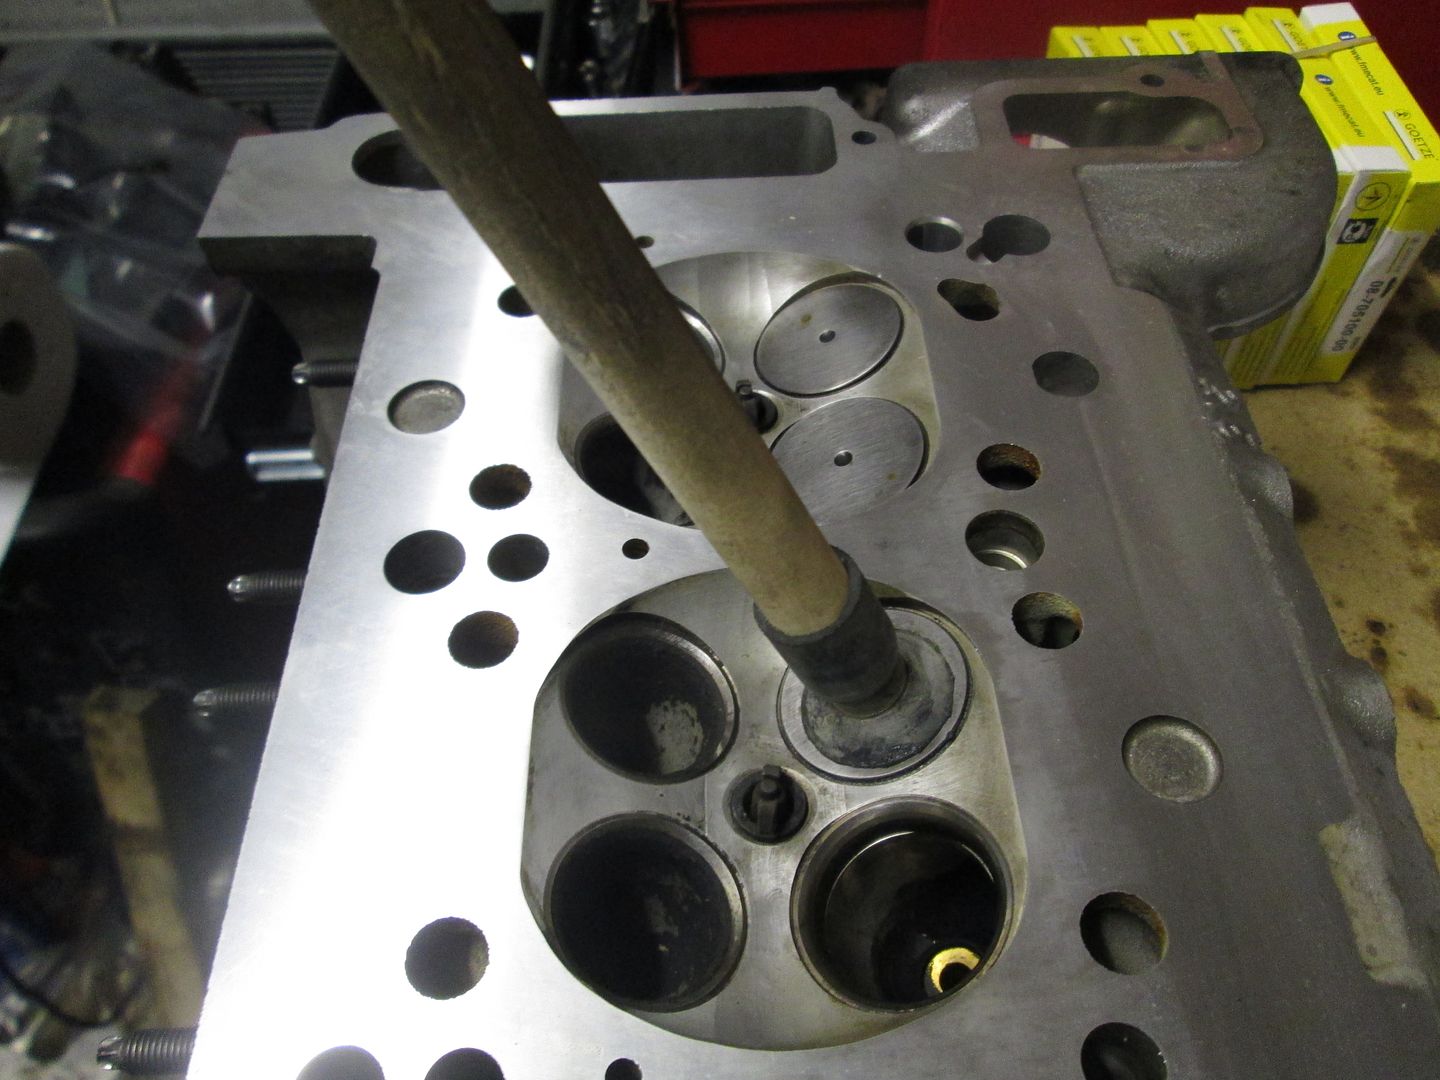
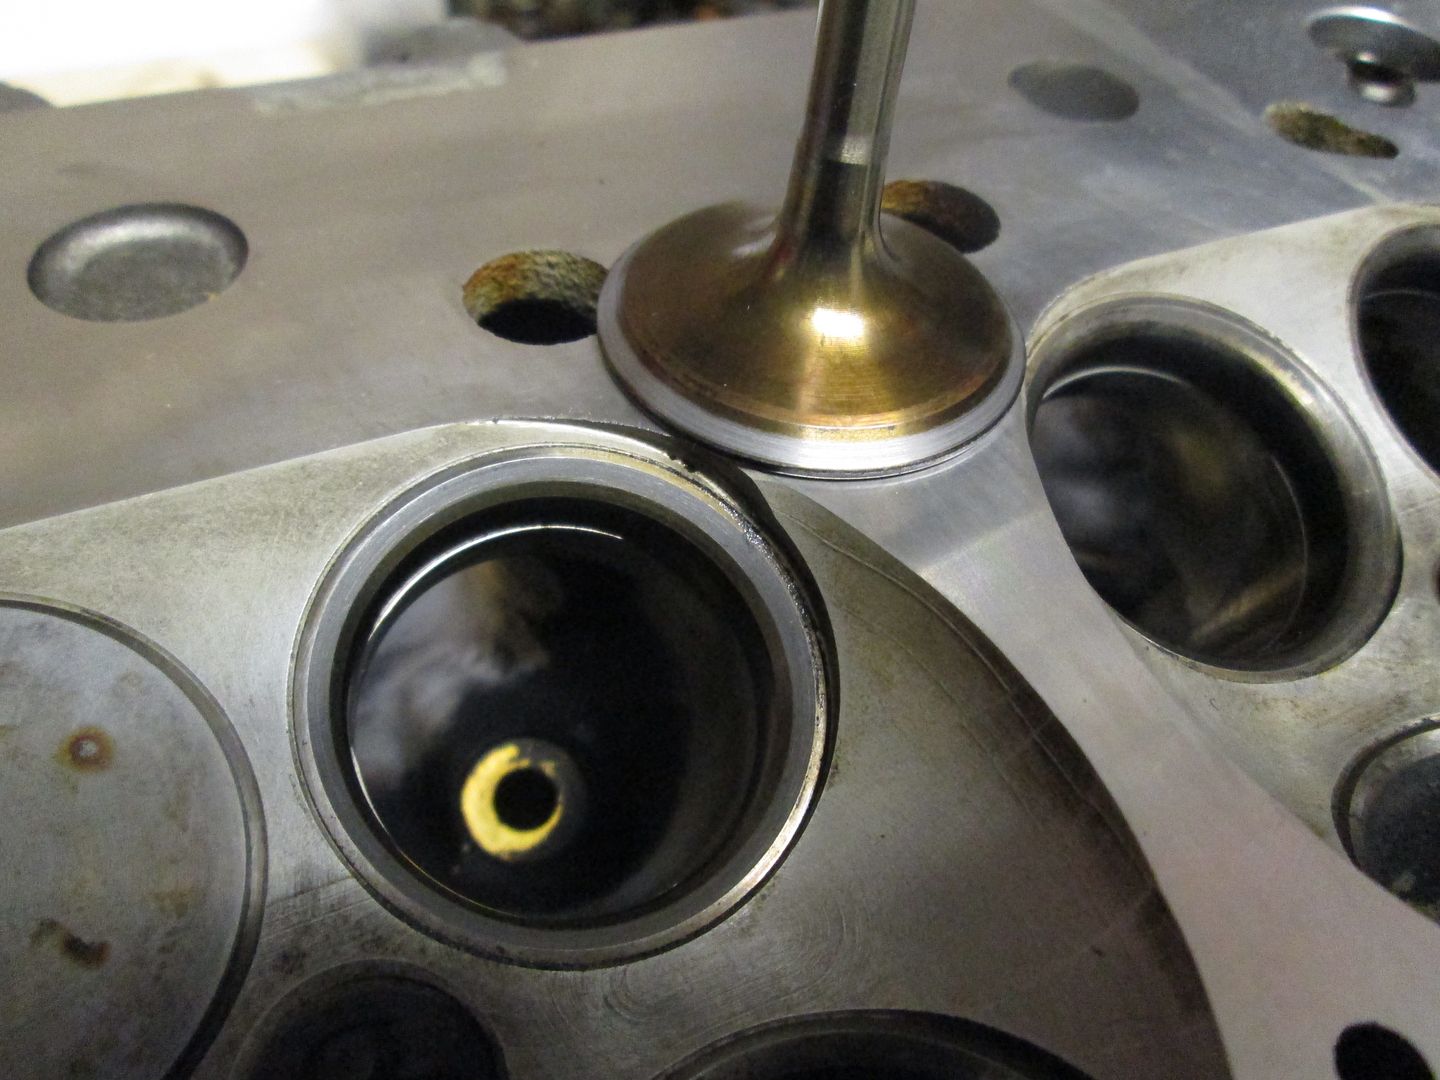
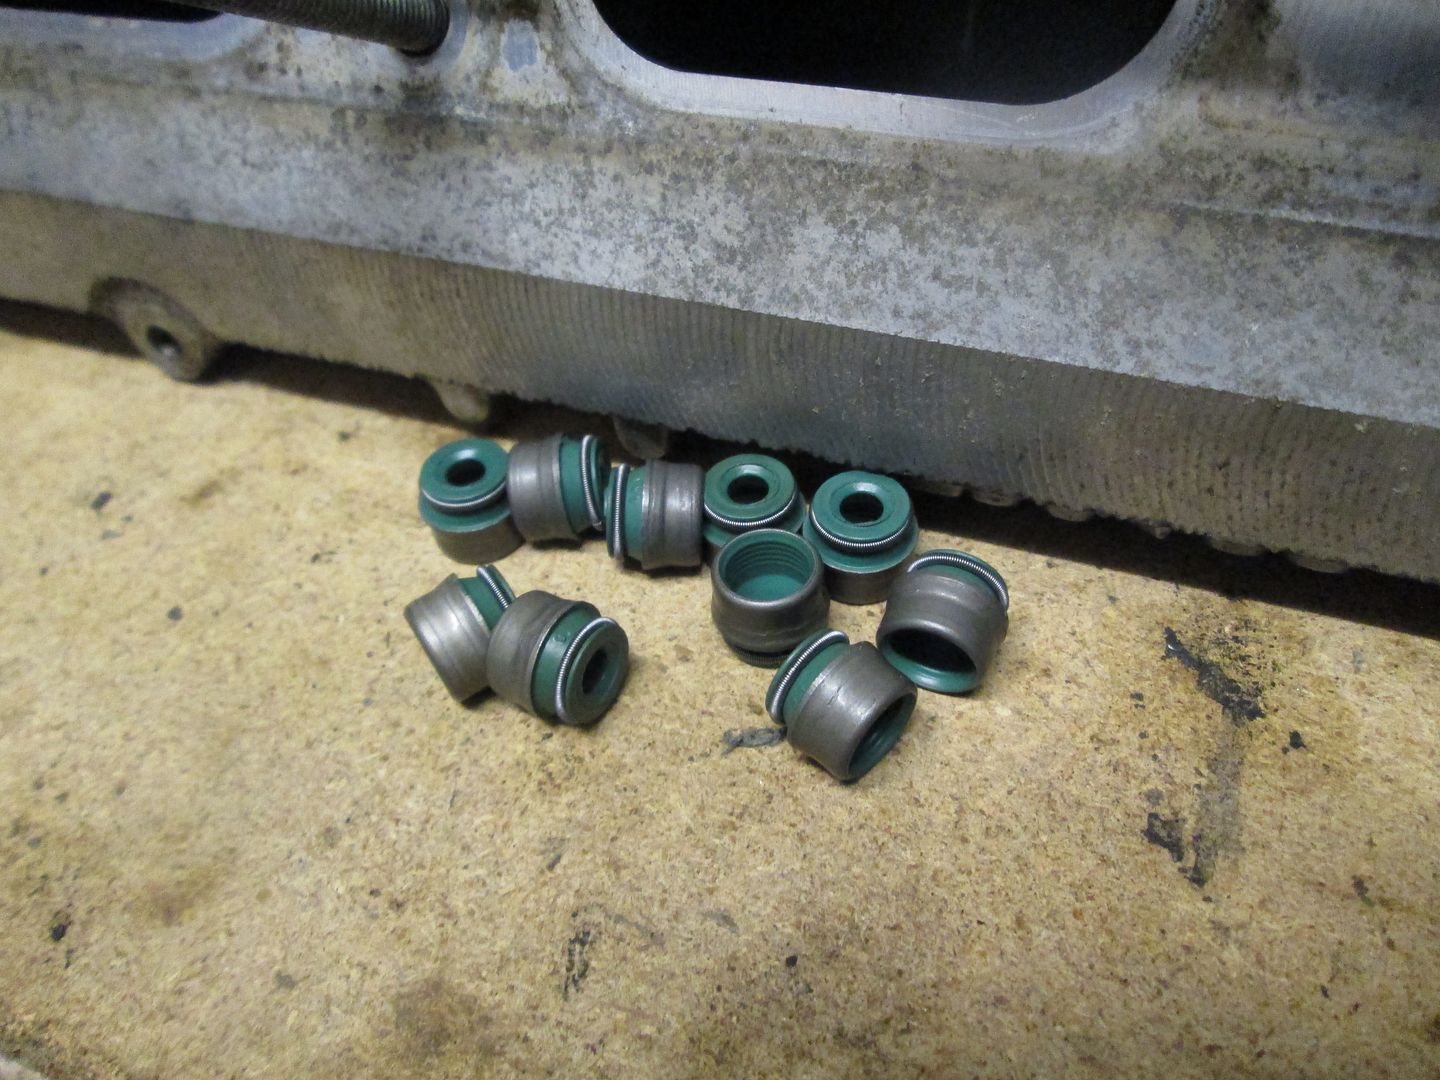
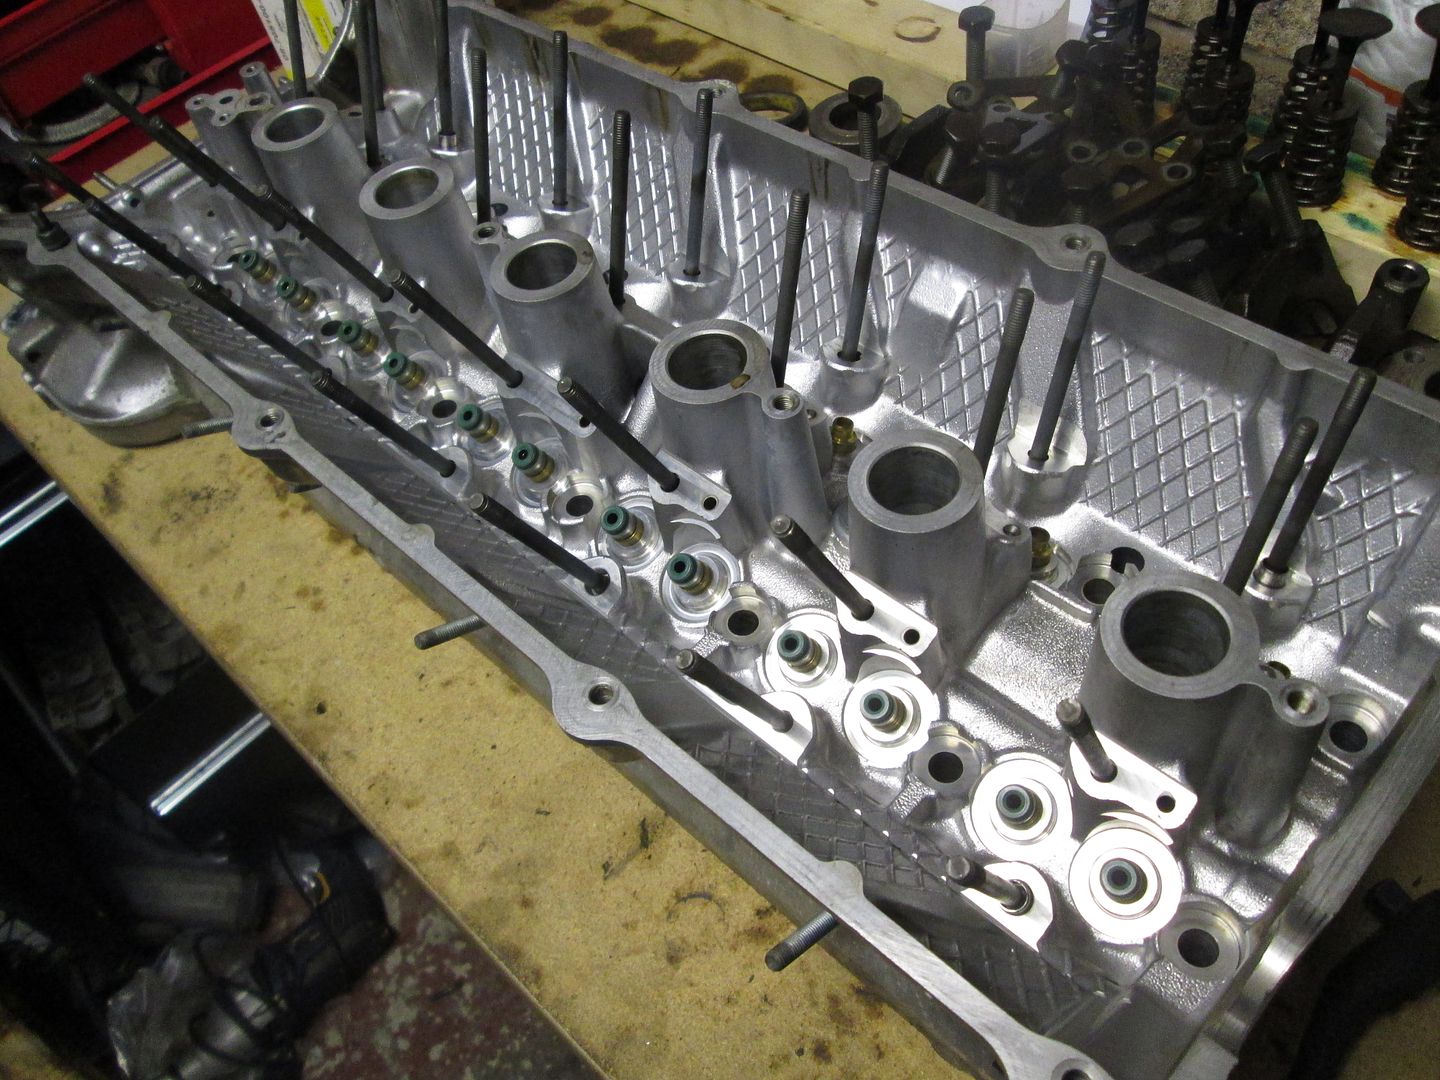
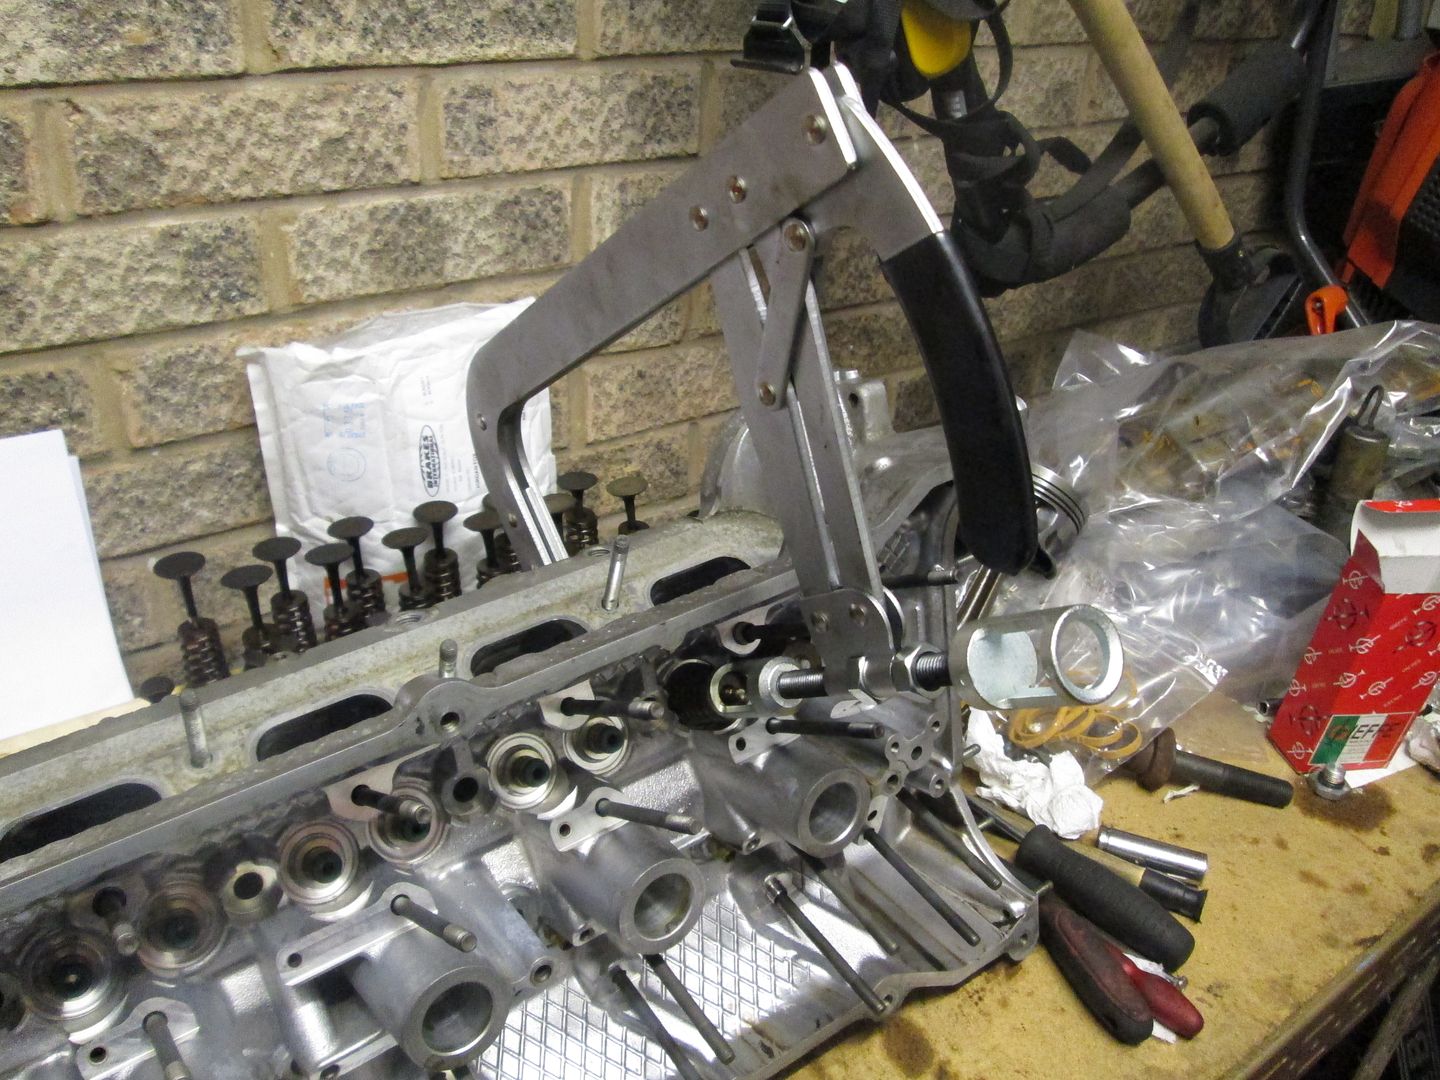
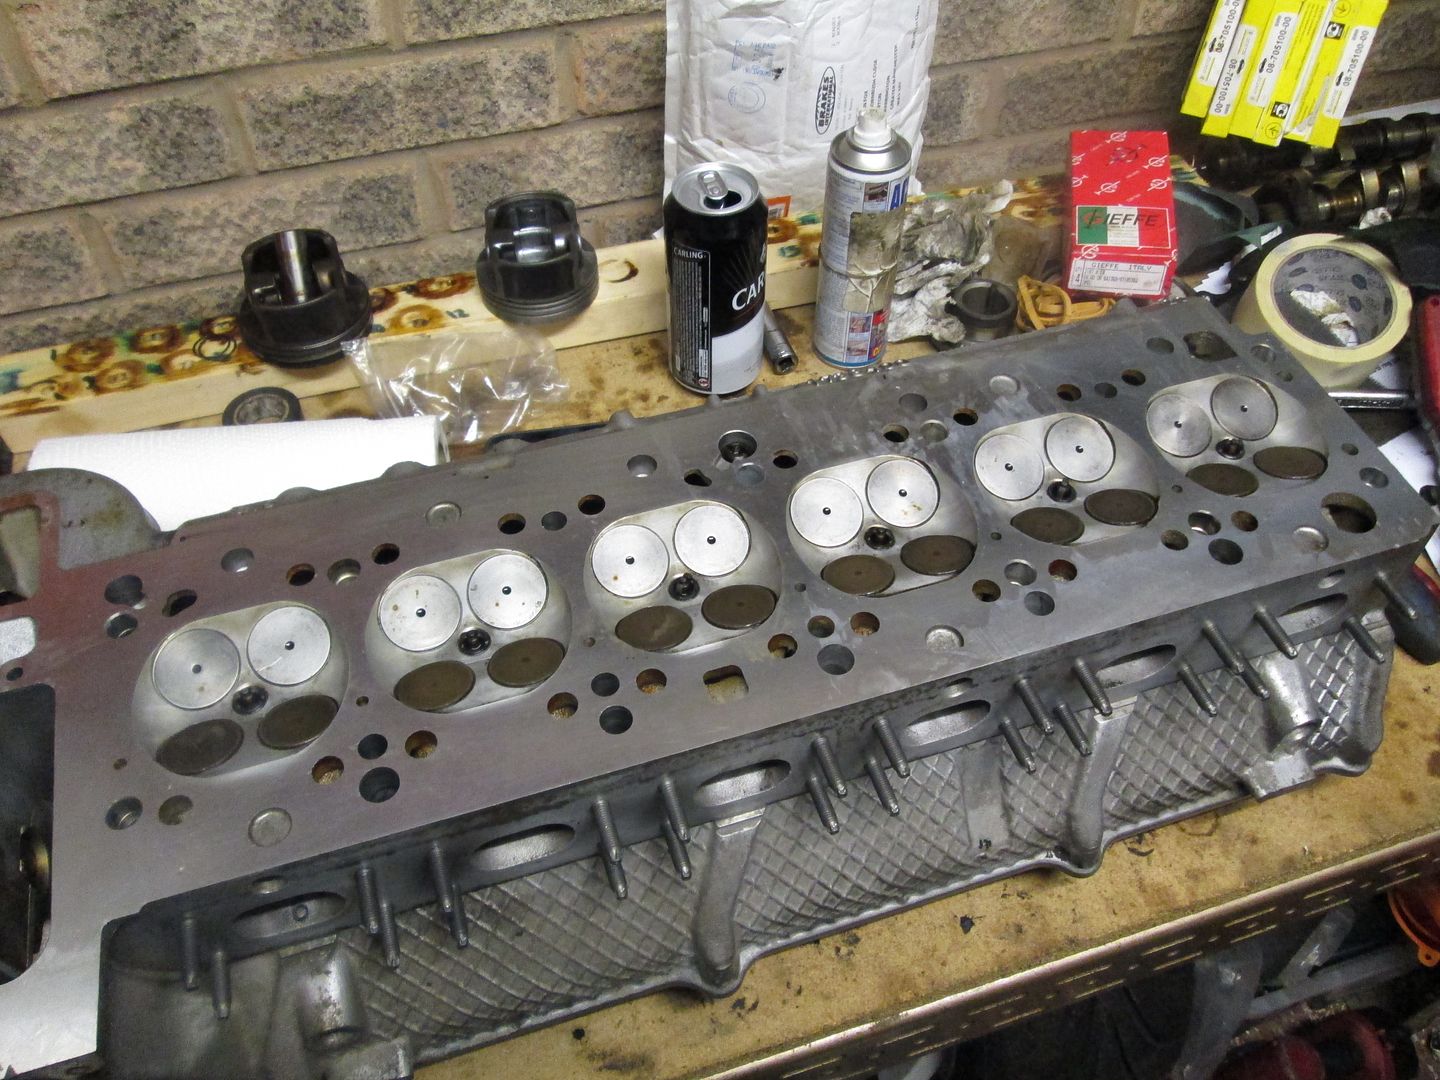
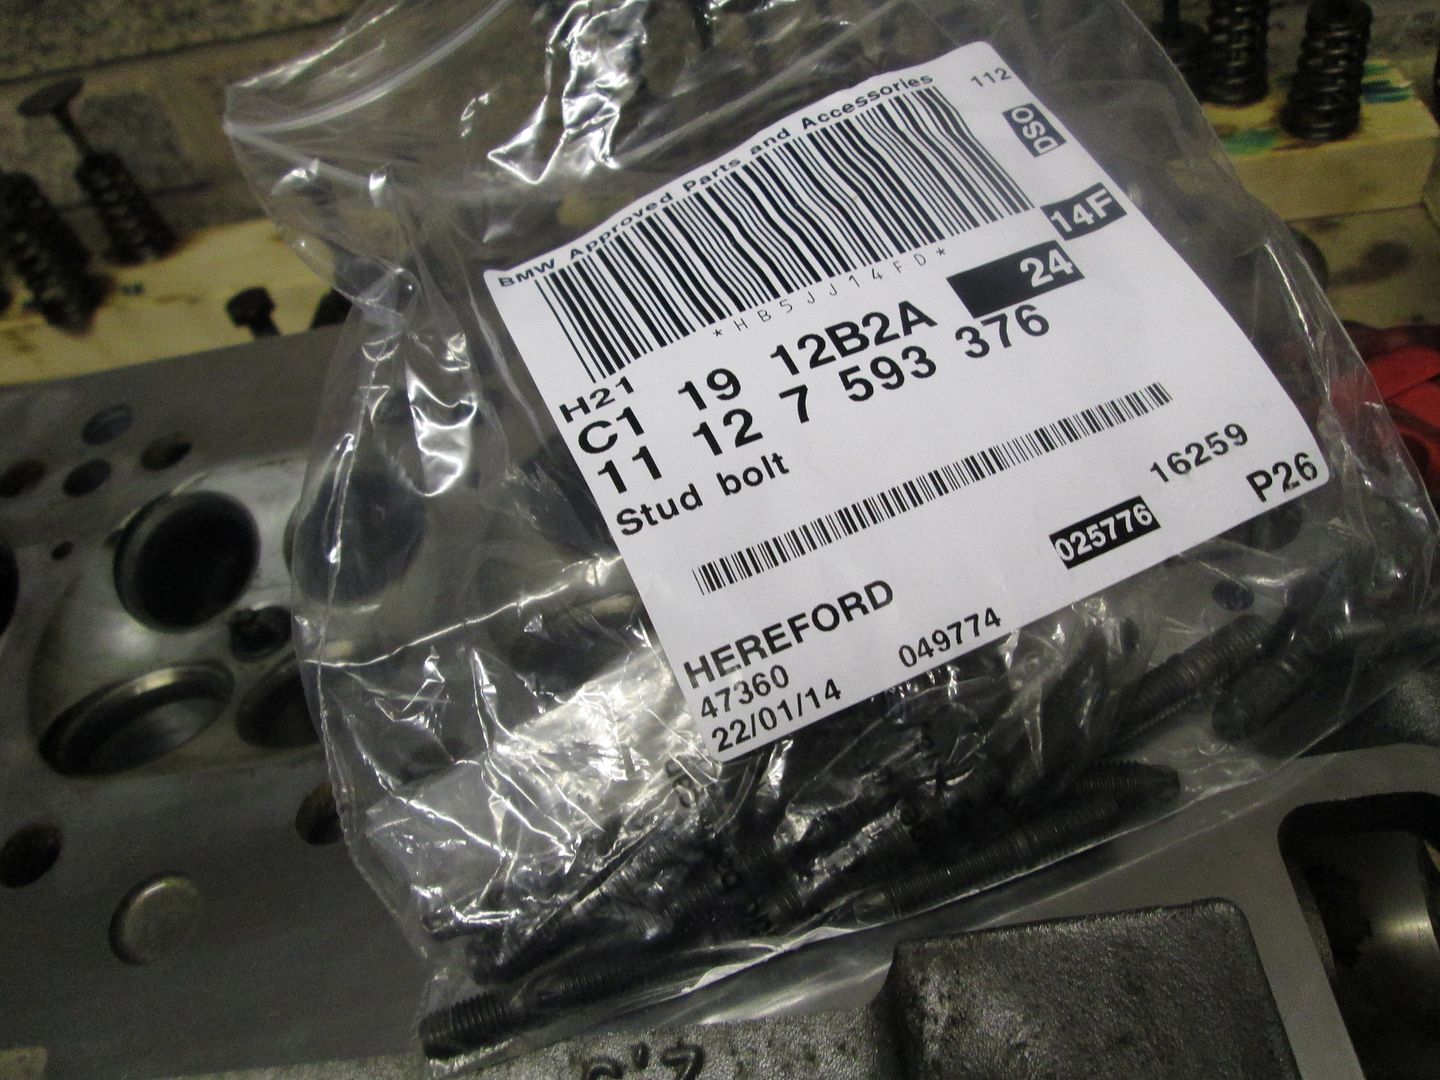
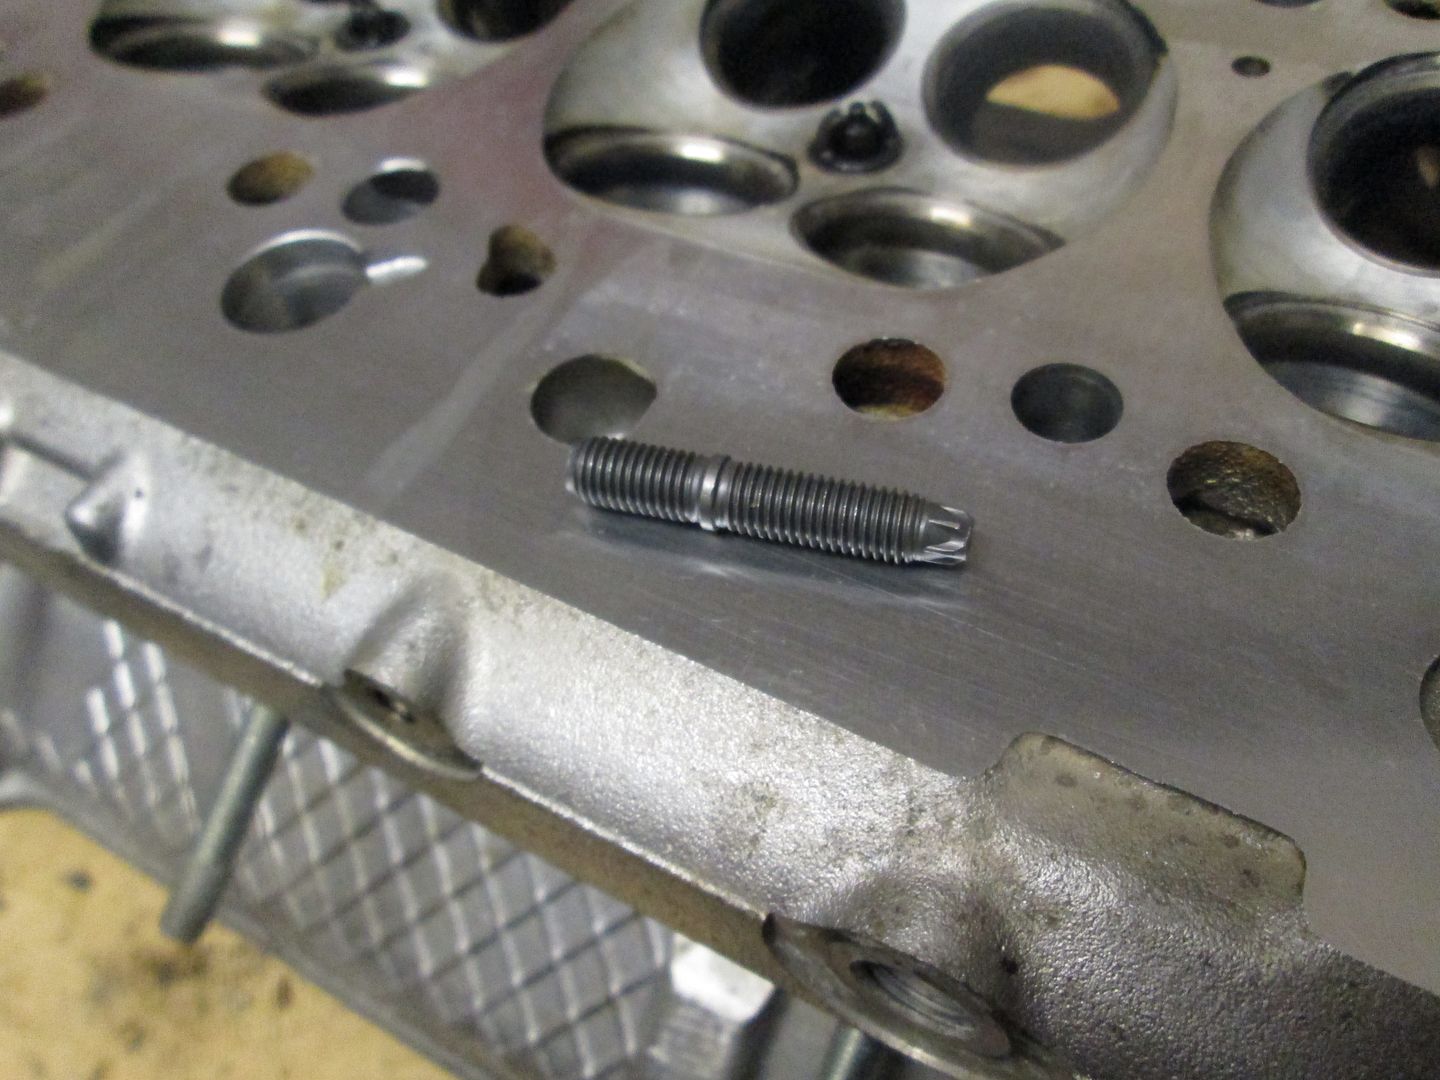
Quick leak down test and everything was OK. I wanted to replace the 24 exhaust studs at this stage, as some of the old ones were missing and others very rusty. The original M52 items (11121744057) were expensive at £1.91 each, whereas the E60 N52 items (11127593376) where much cheaper at £0.50 each. These also have an E-Torx on the end of the stud for ease of fitting.
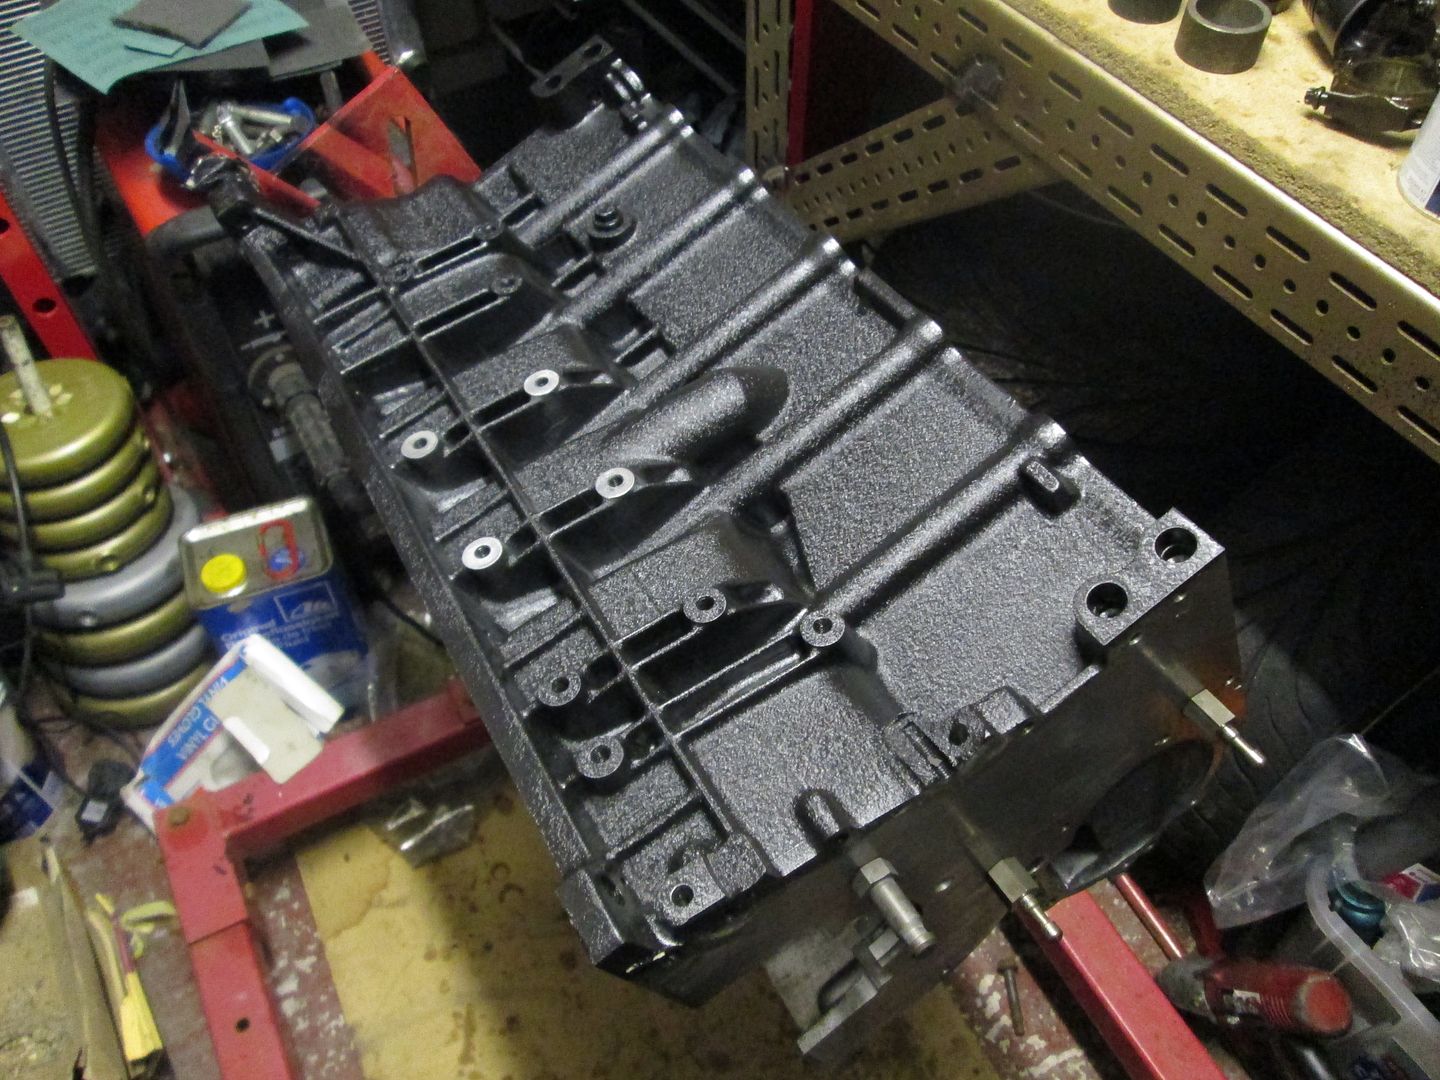
Next the block was put on the stand and given a quick coat of paint.
Oil jets refitted and torqued.
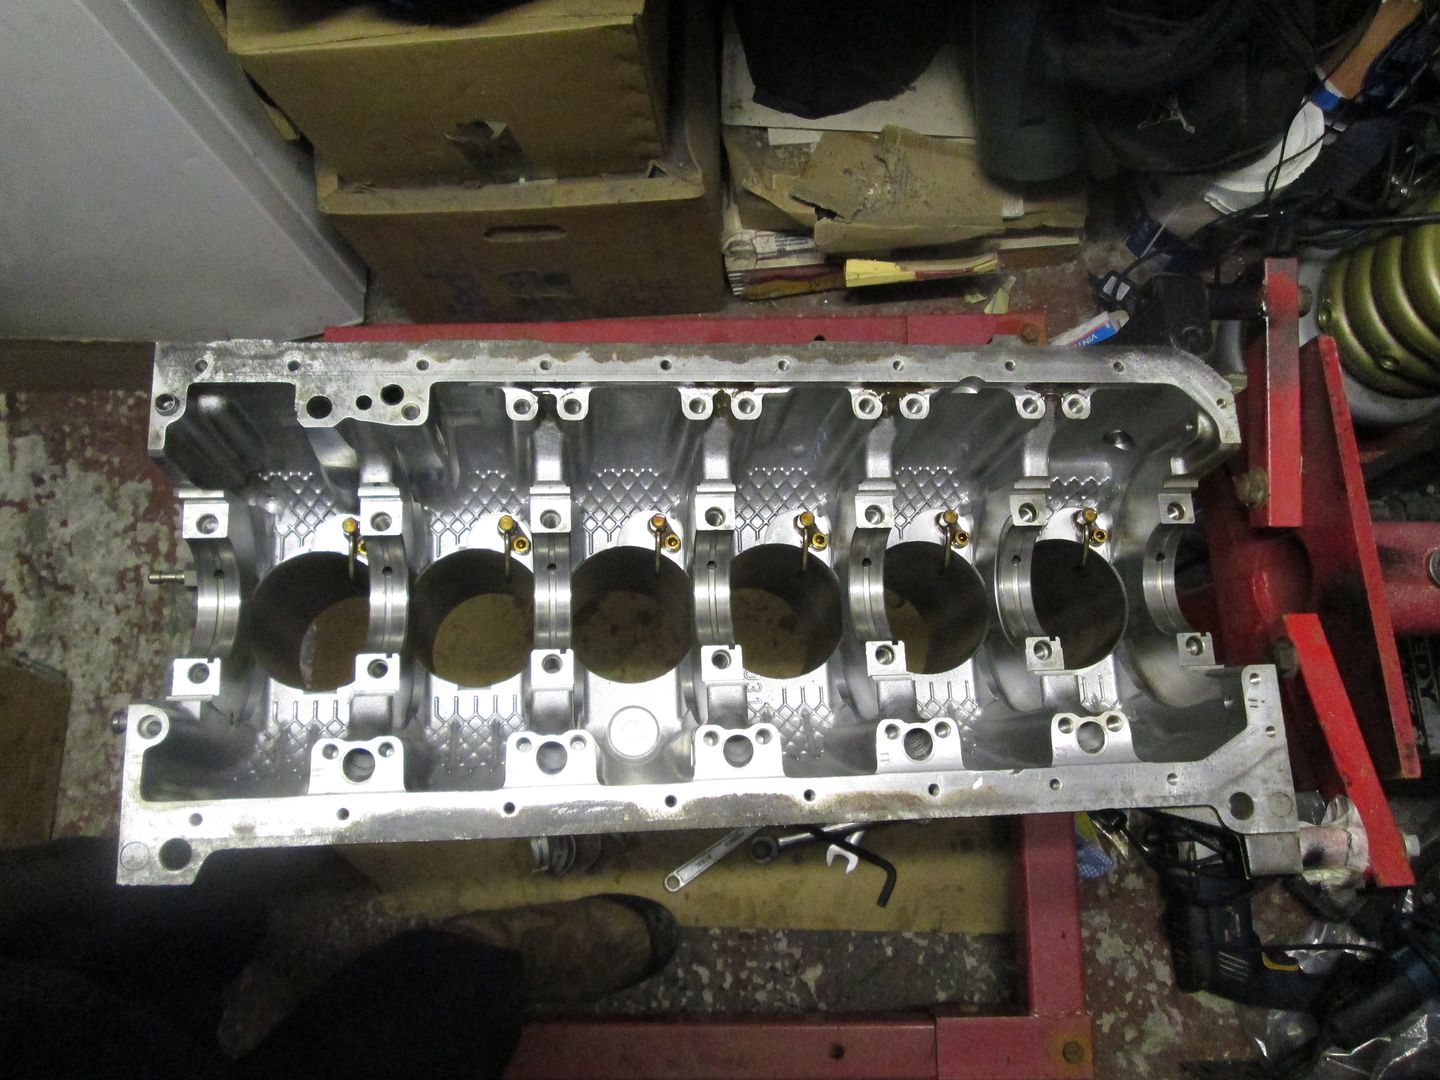
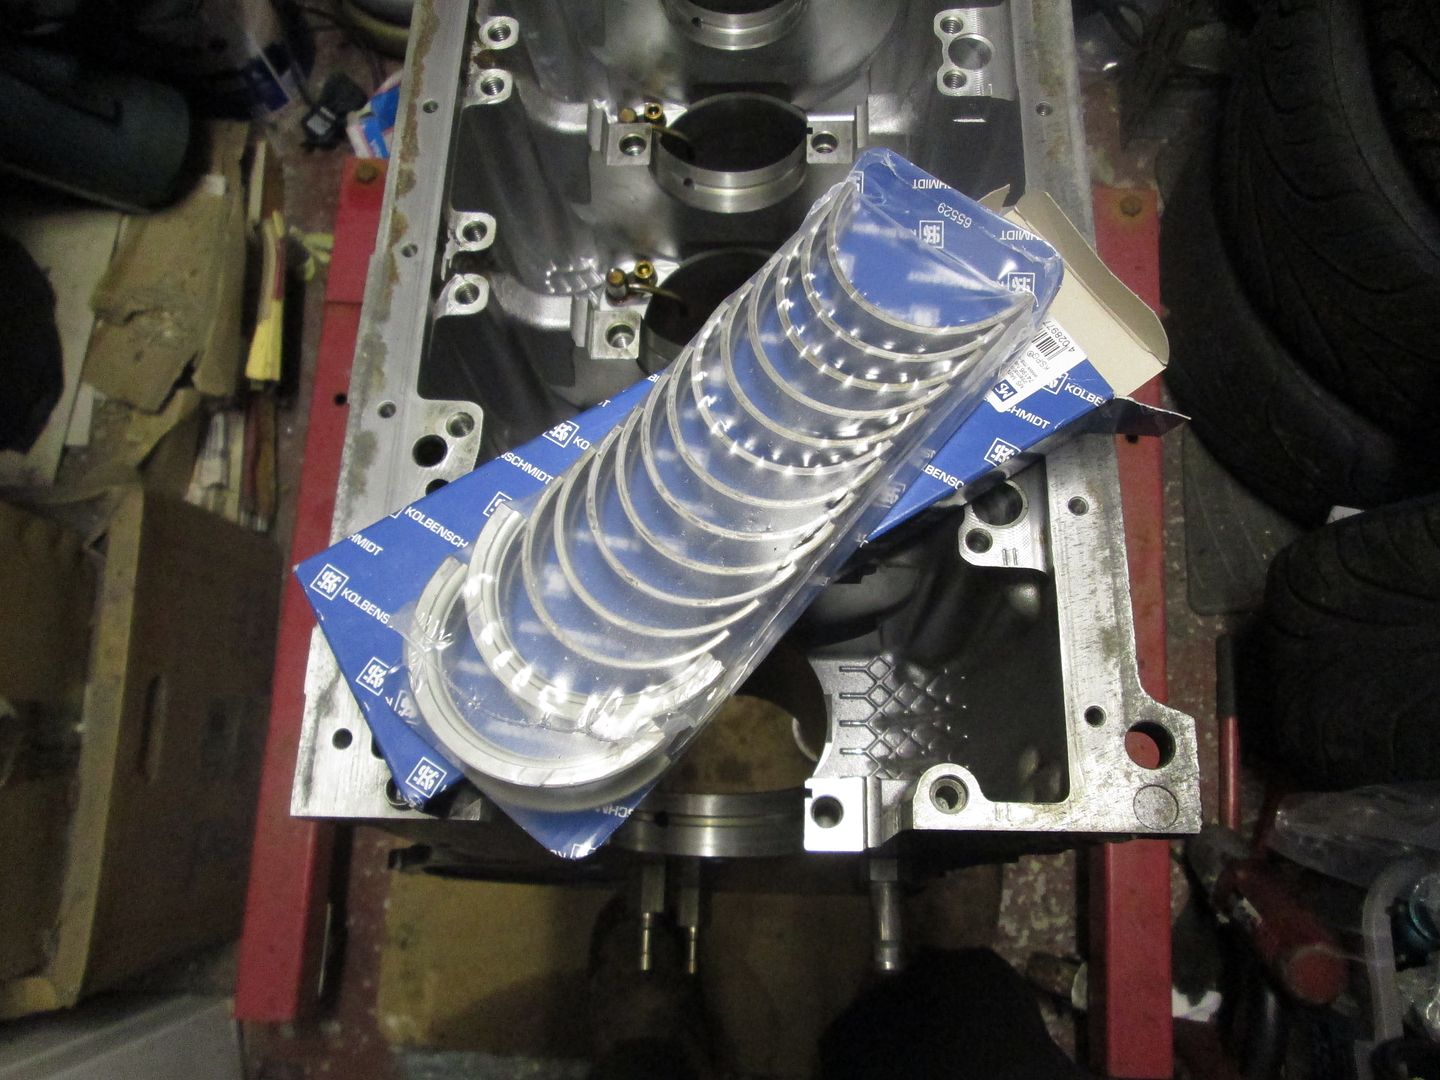
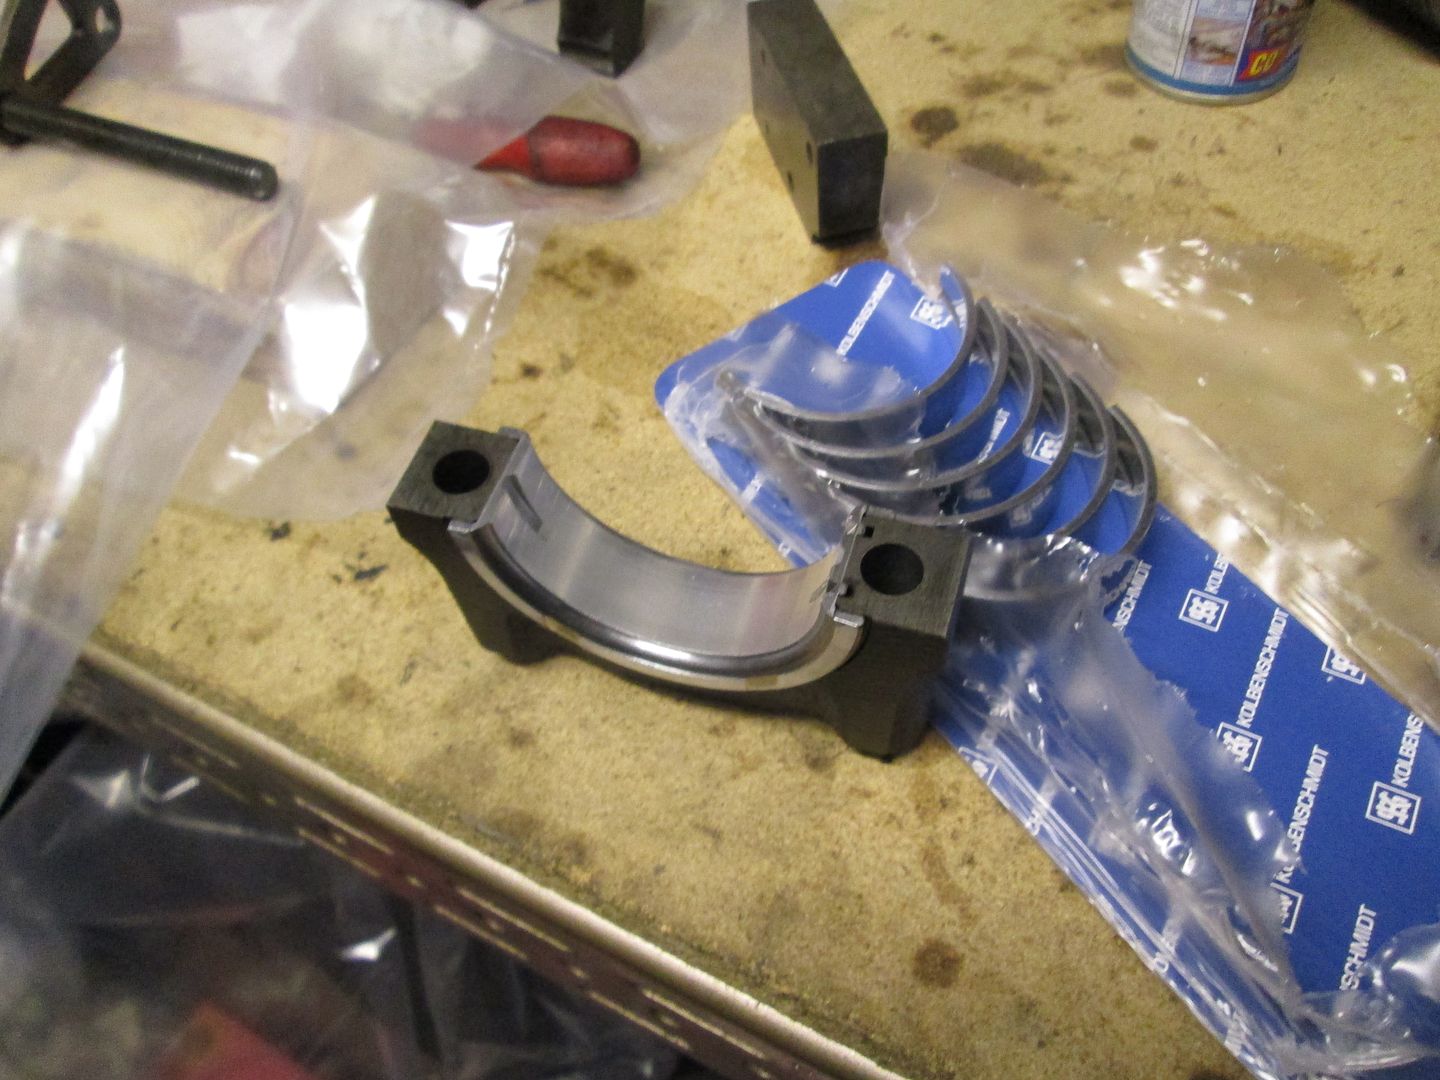
The bearing faces were then given a quick wipe down, and new bearings fitted to the block and caps.
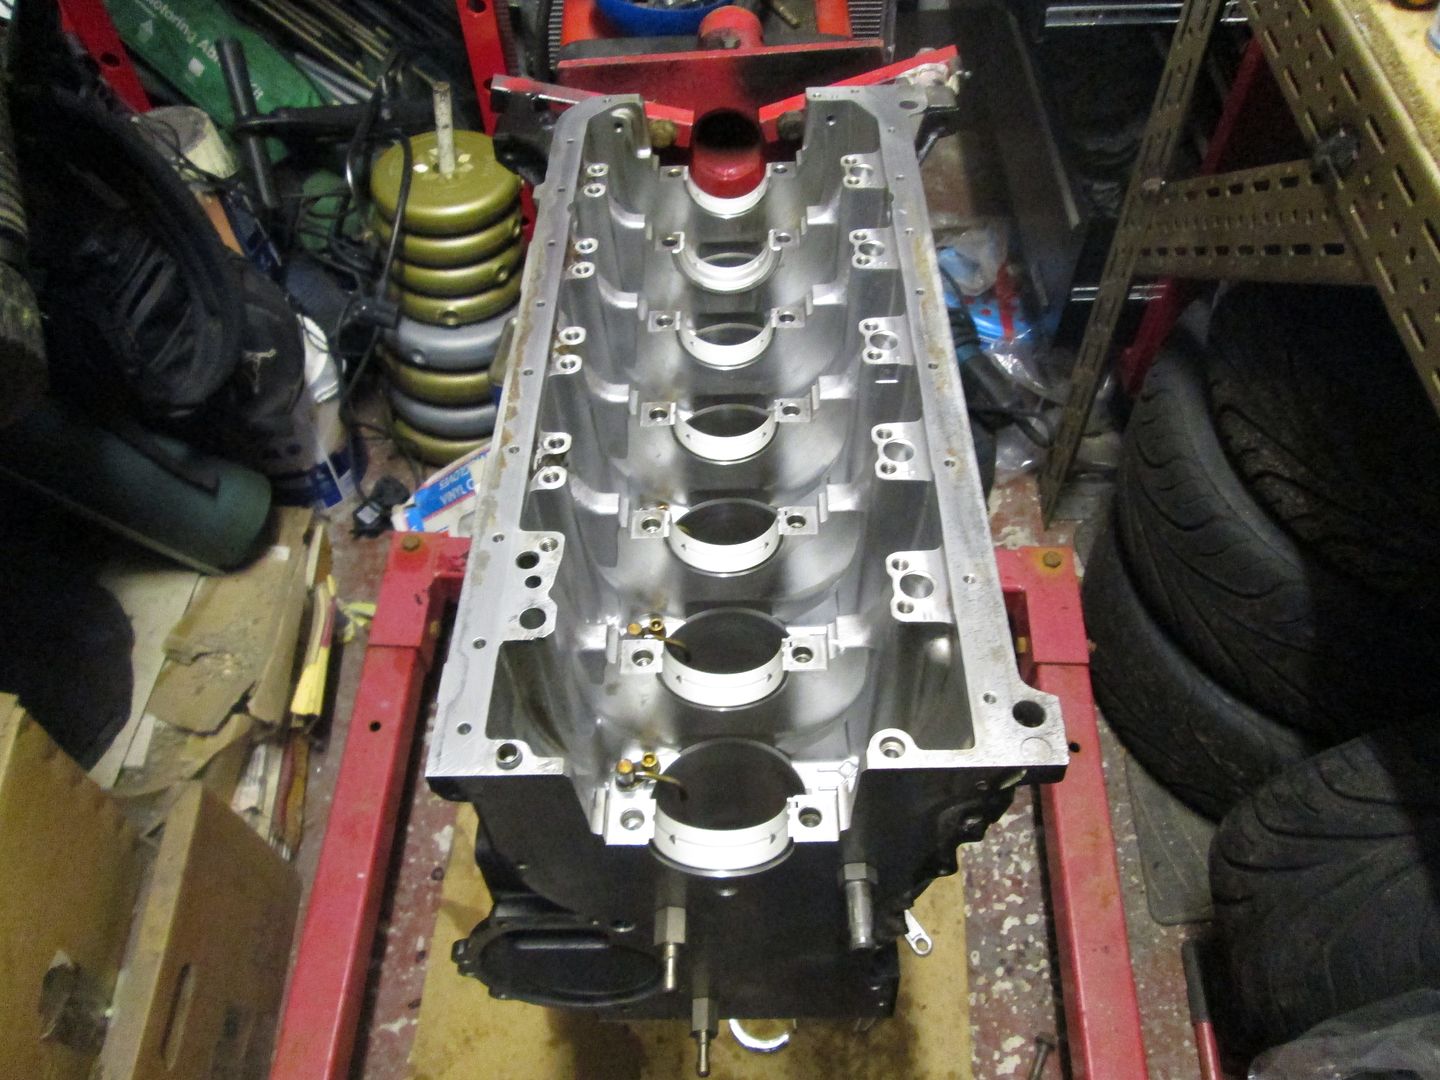
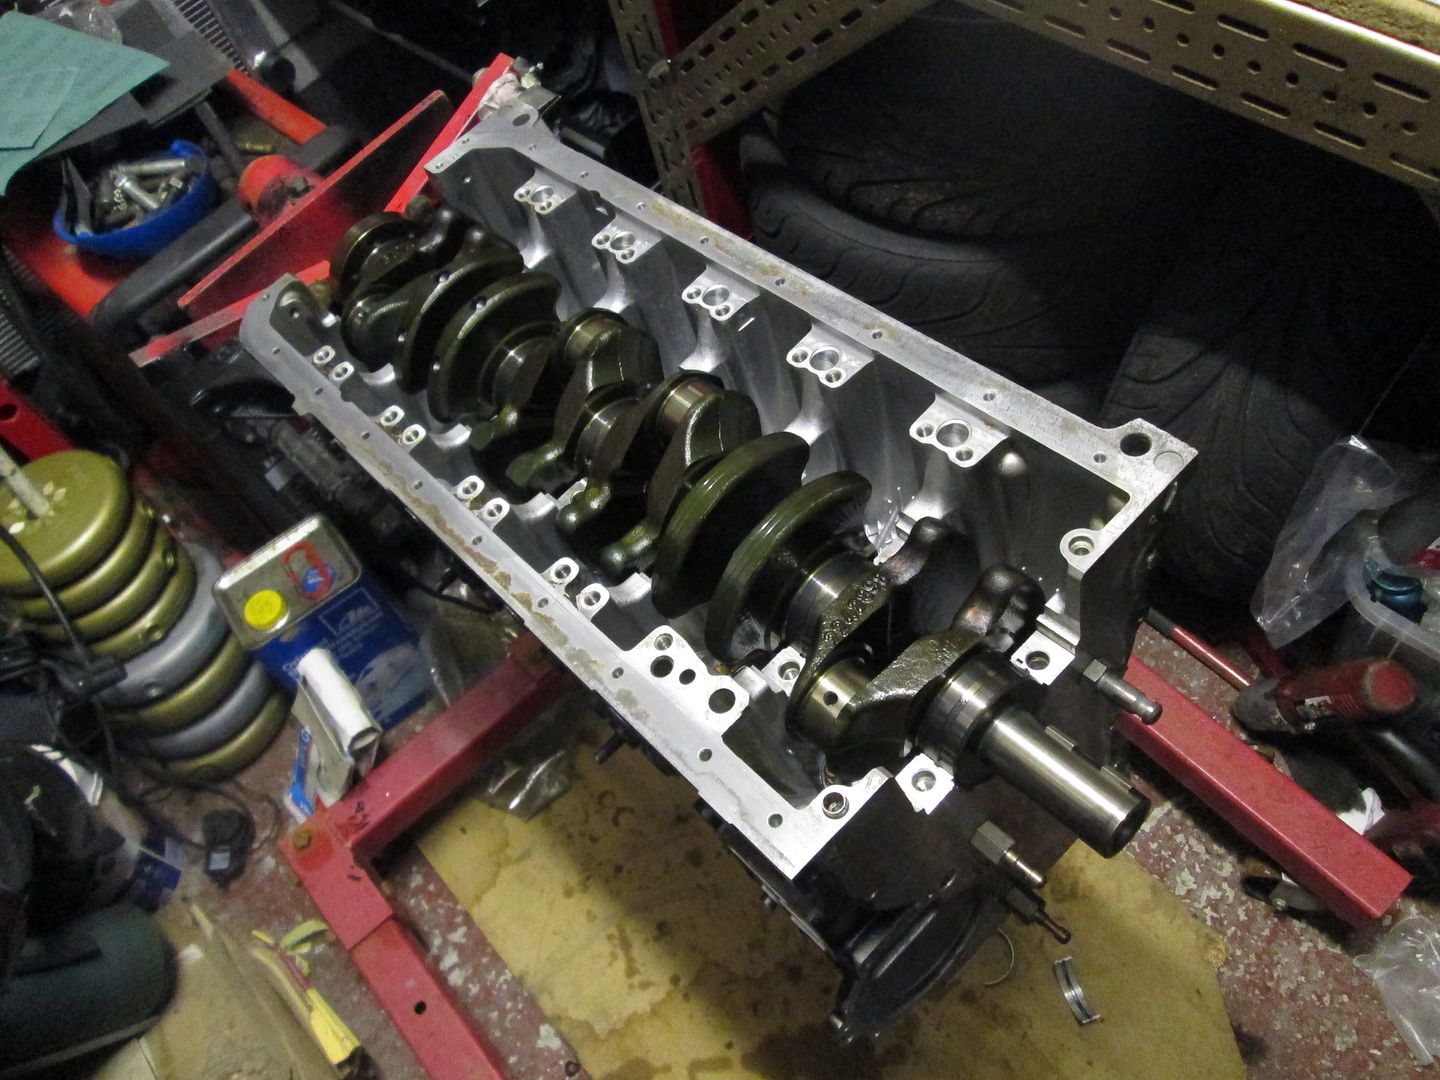
Dropped the crank in to place and torqued the caps down with some Plastigauge to check for stock clearances - which was all OK.
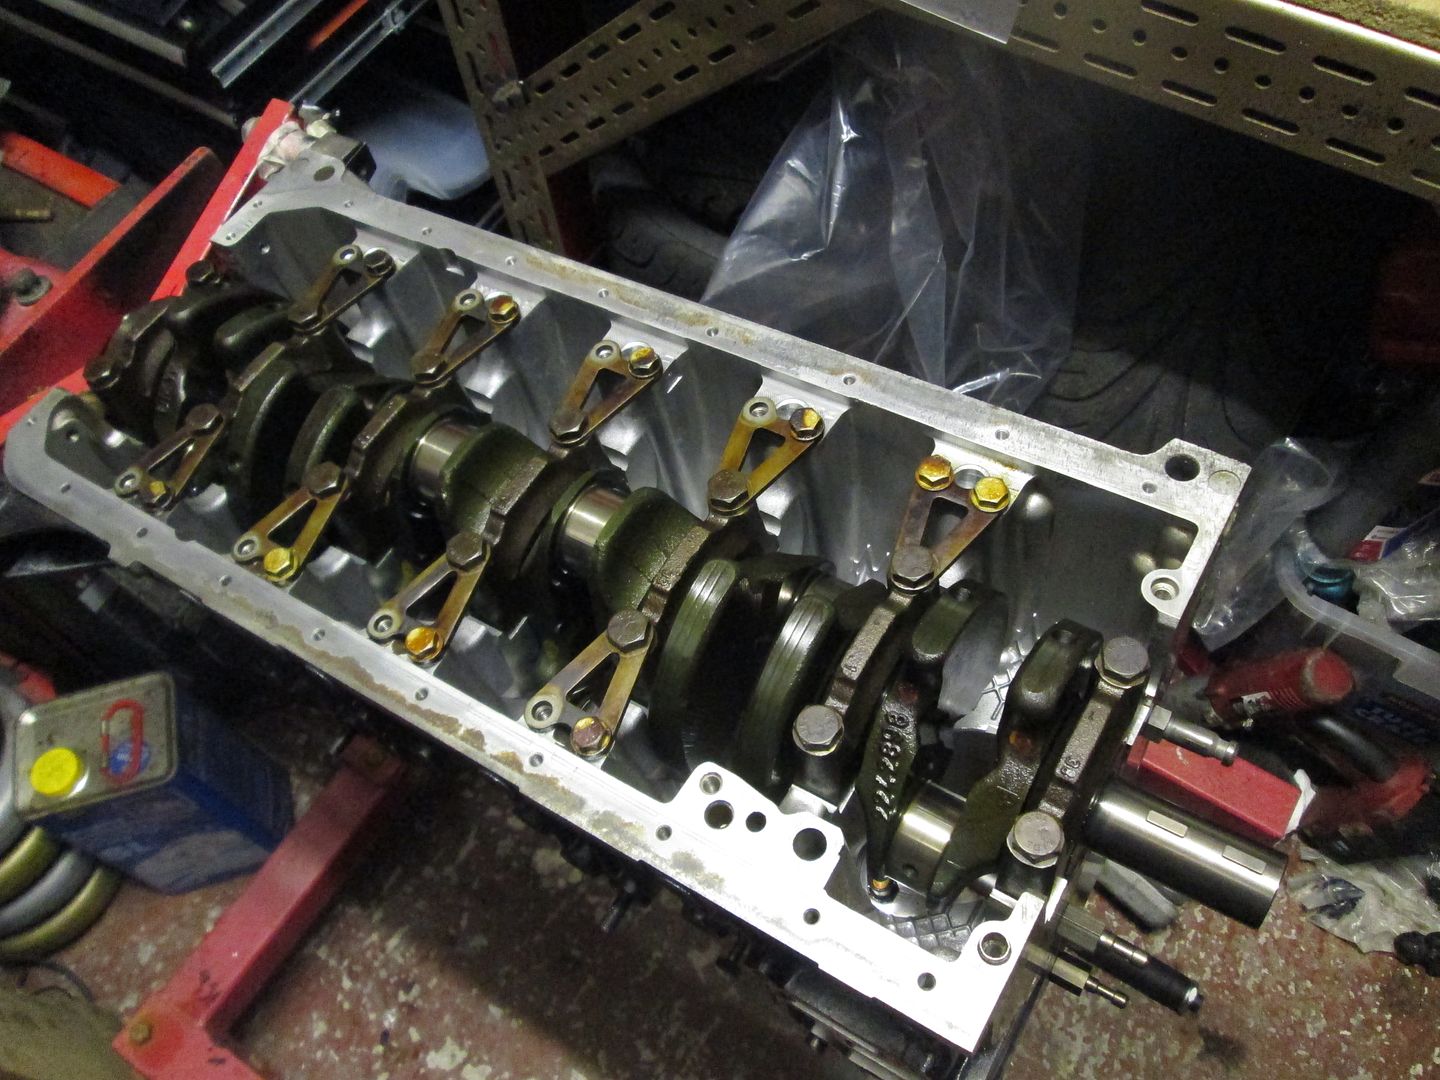
The crank removed again, and assembly grease added, then caps torqued down with new bolts.
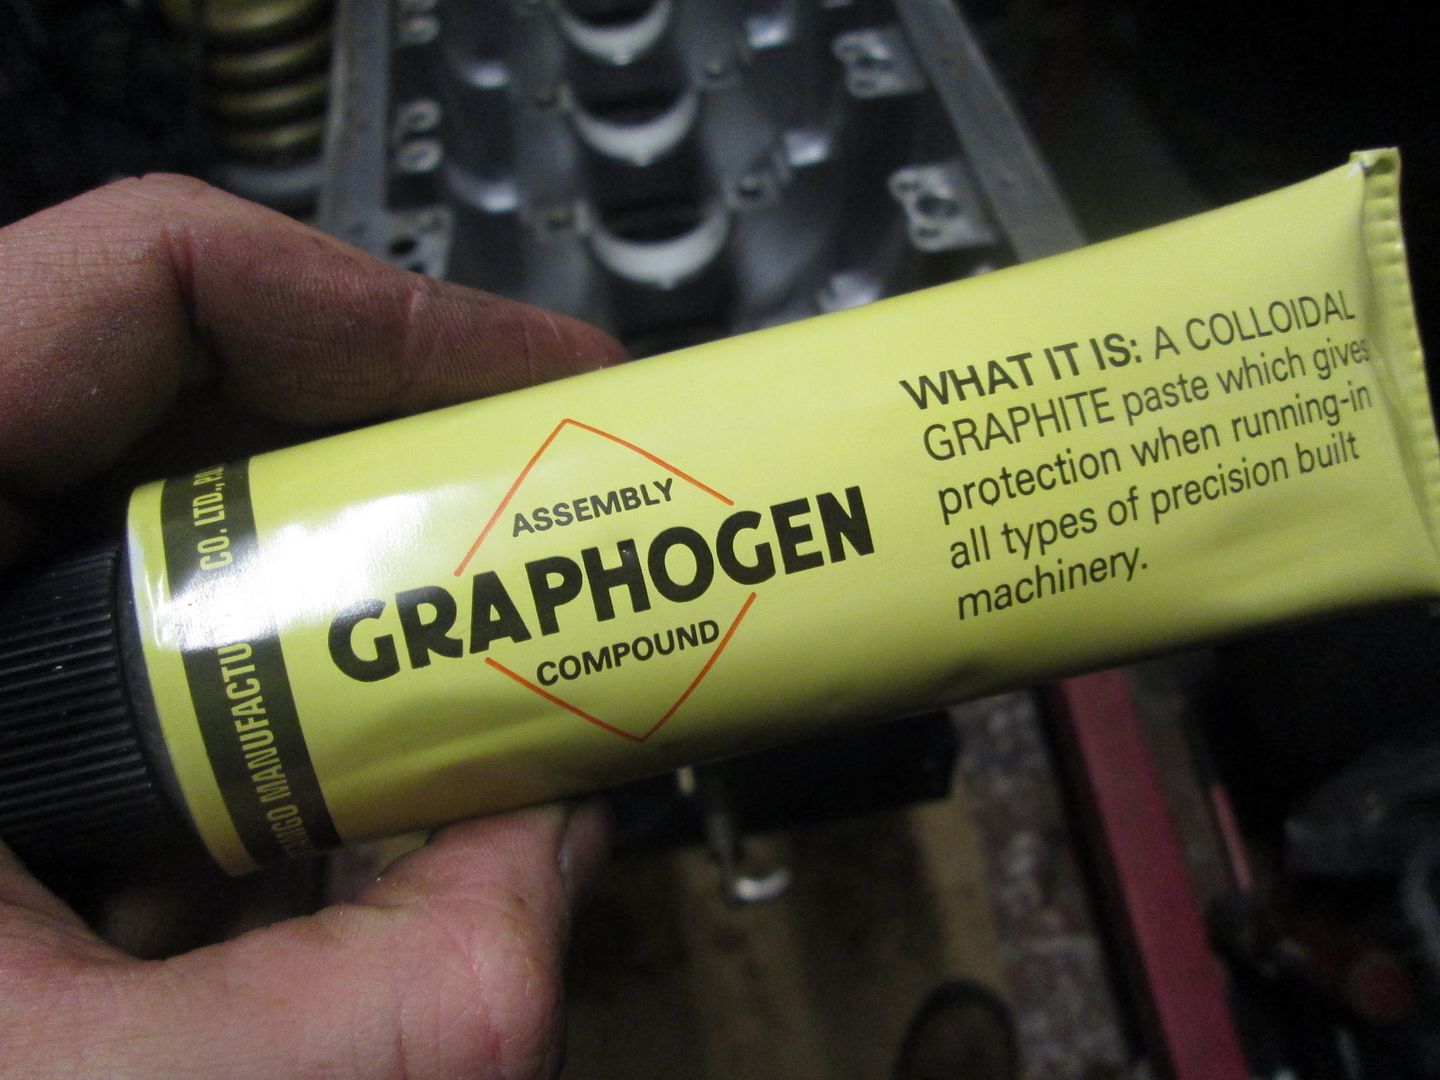
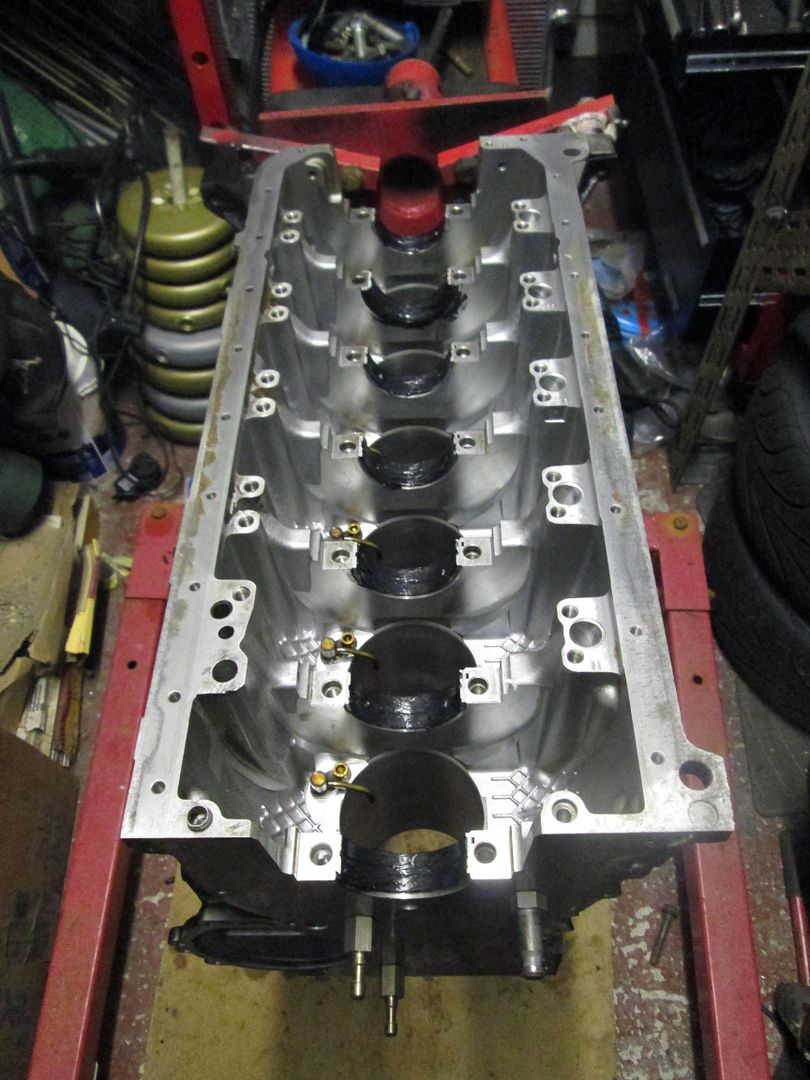
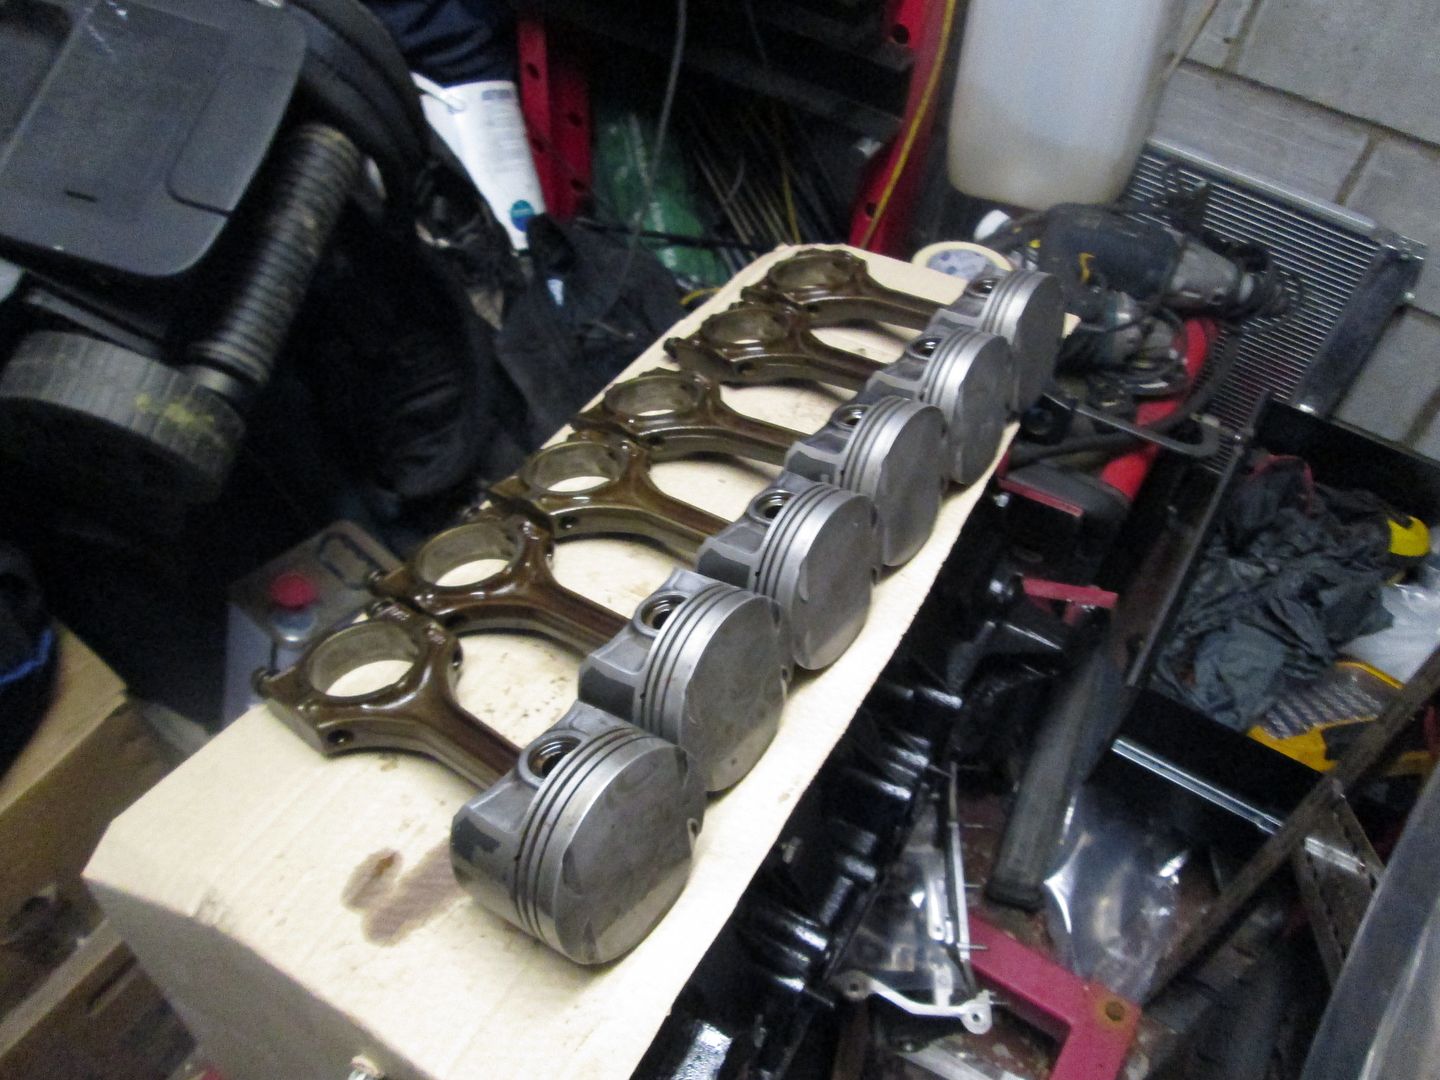
Pulled the pistons apart, which were checked and cleaned. Re-assembled and ready for new rings..
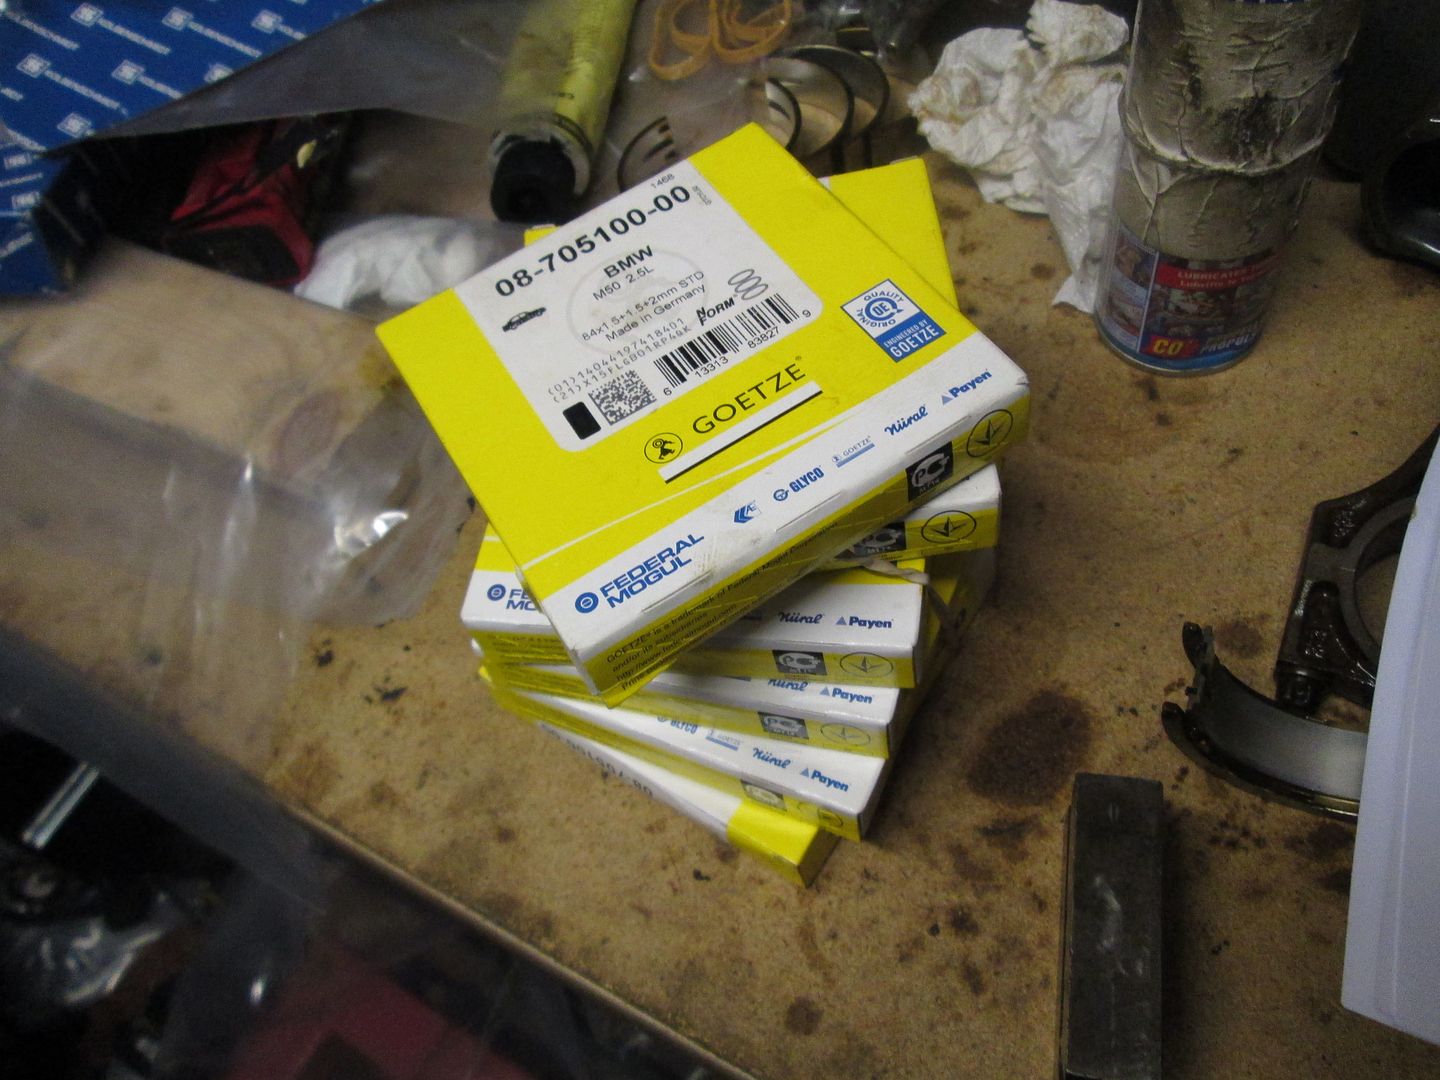
Some new piston rings..
Which were then gapped for each cylinder..
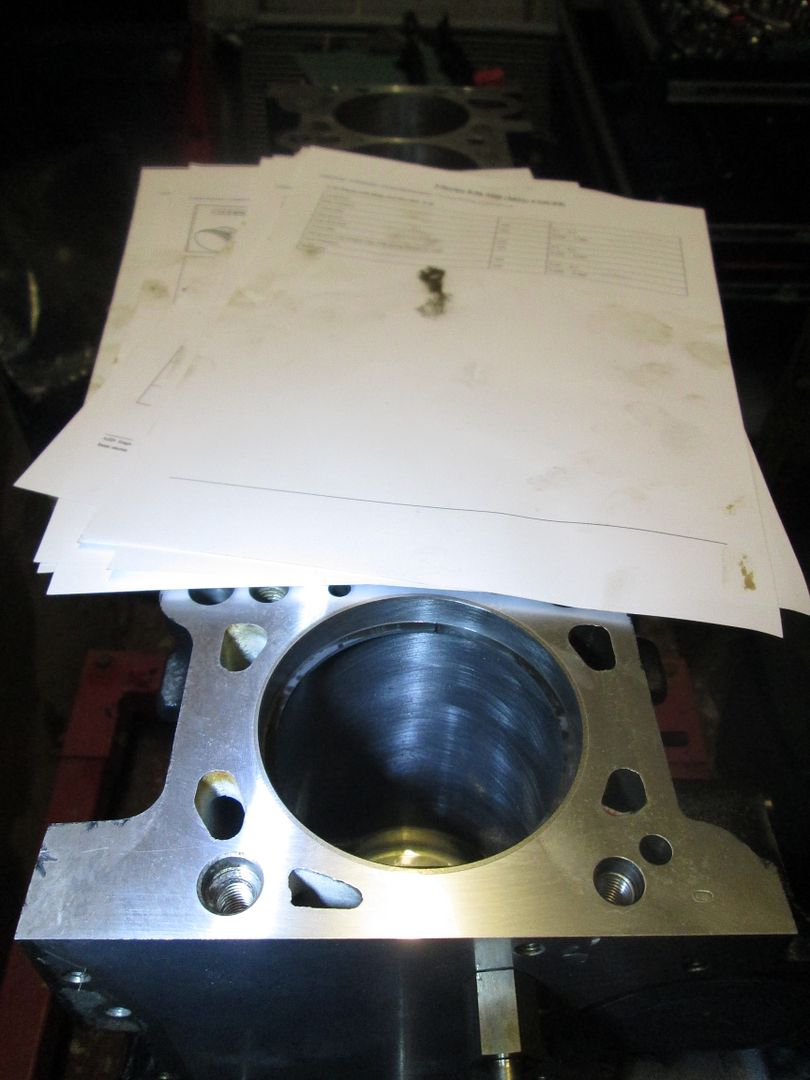
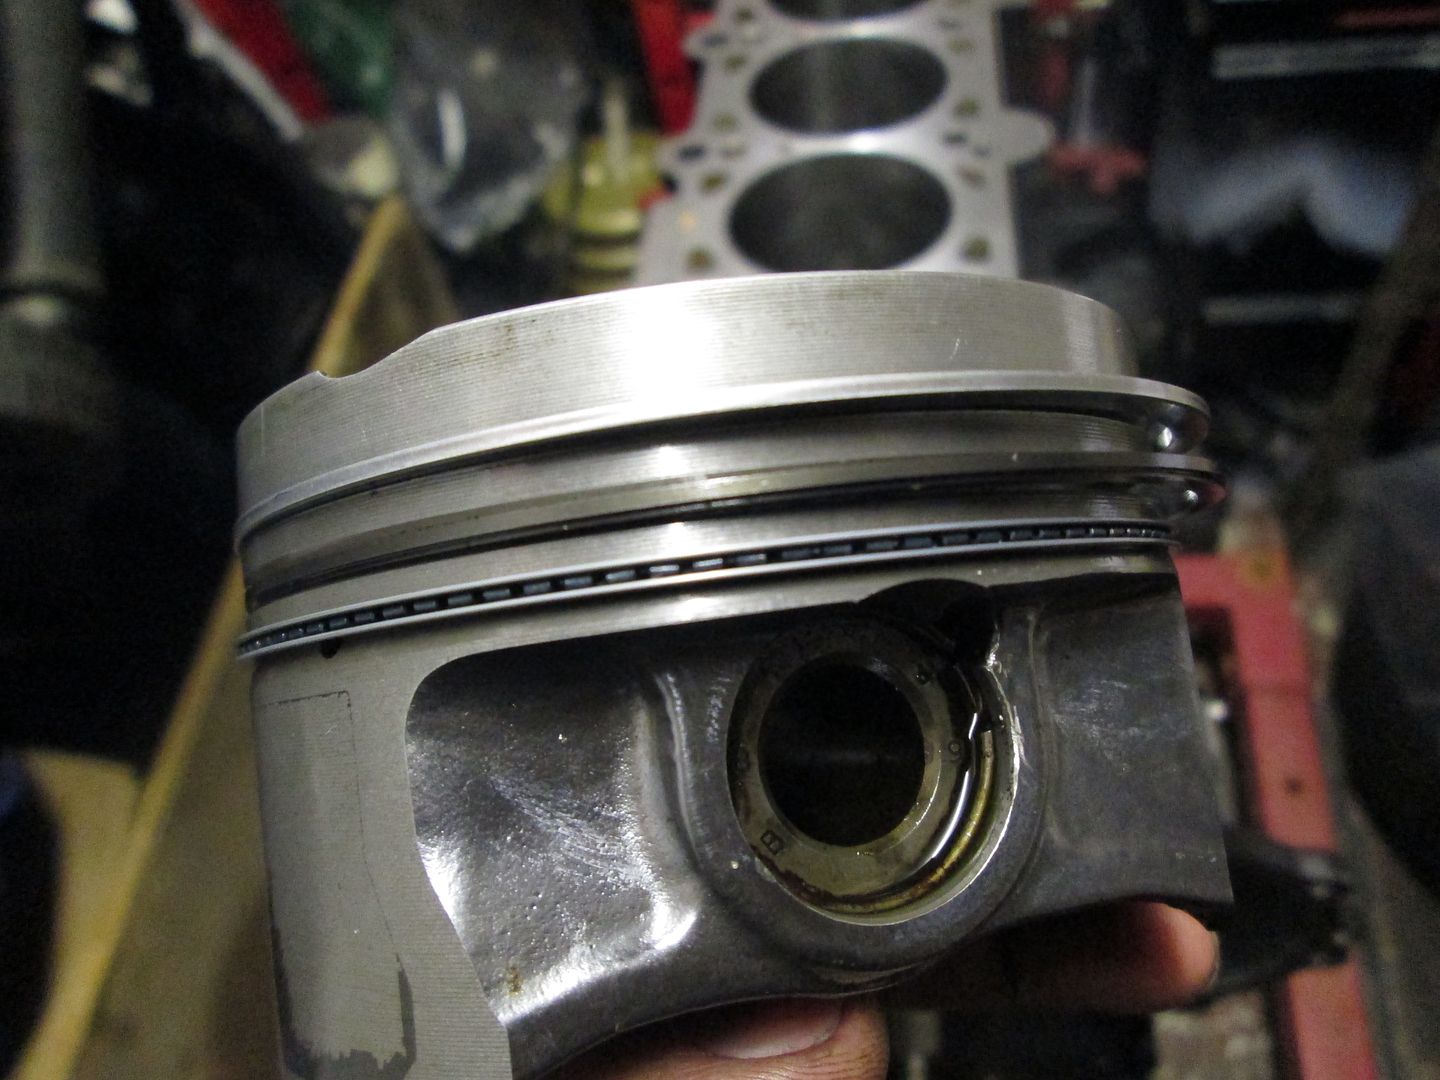
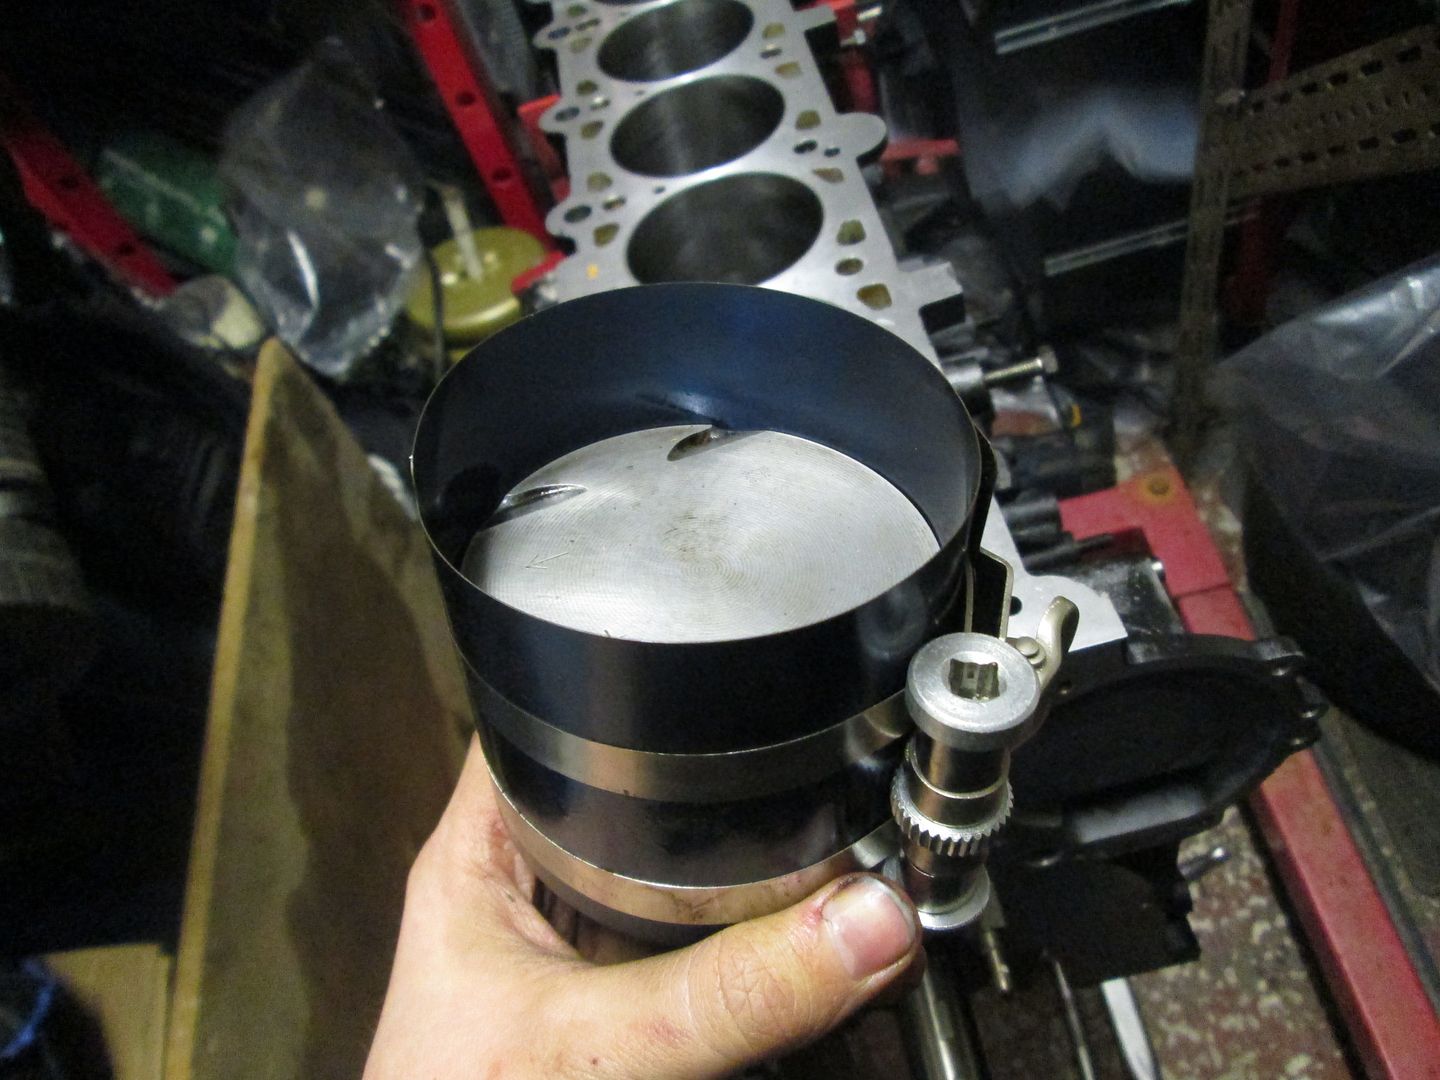
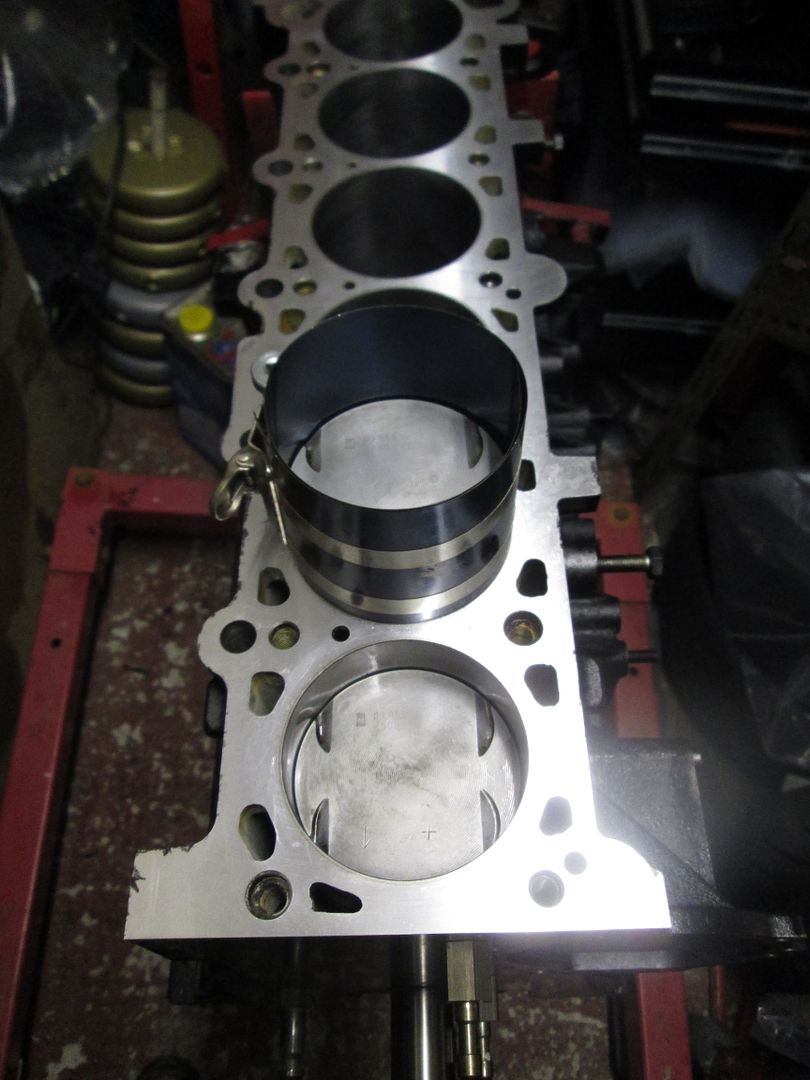
Then in turn fitted to the piston, and dropped into the block..
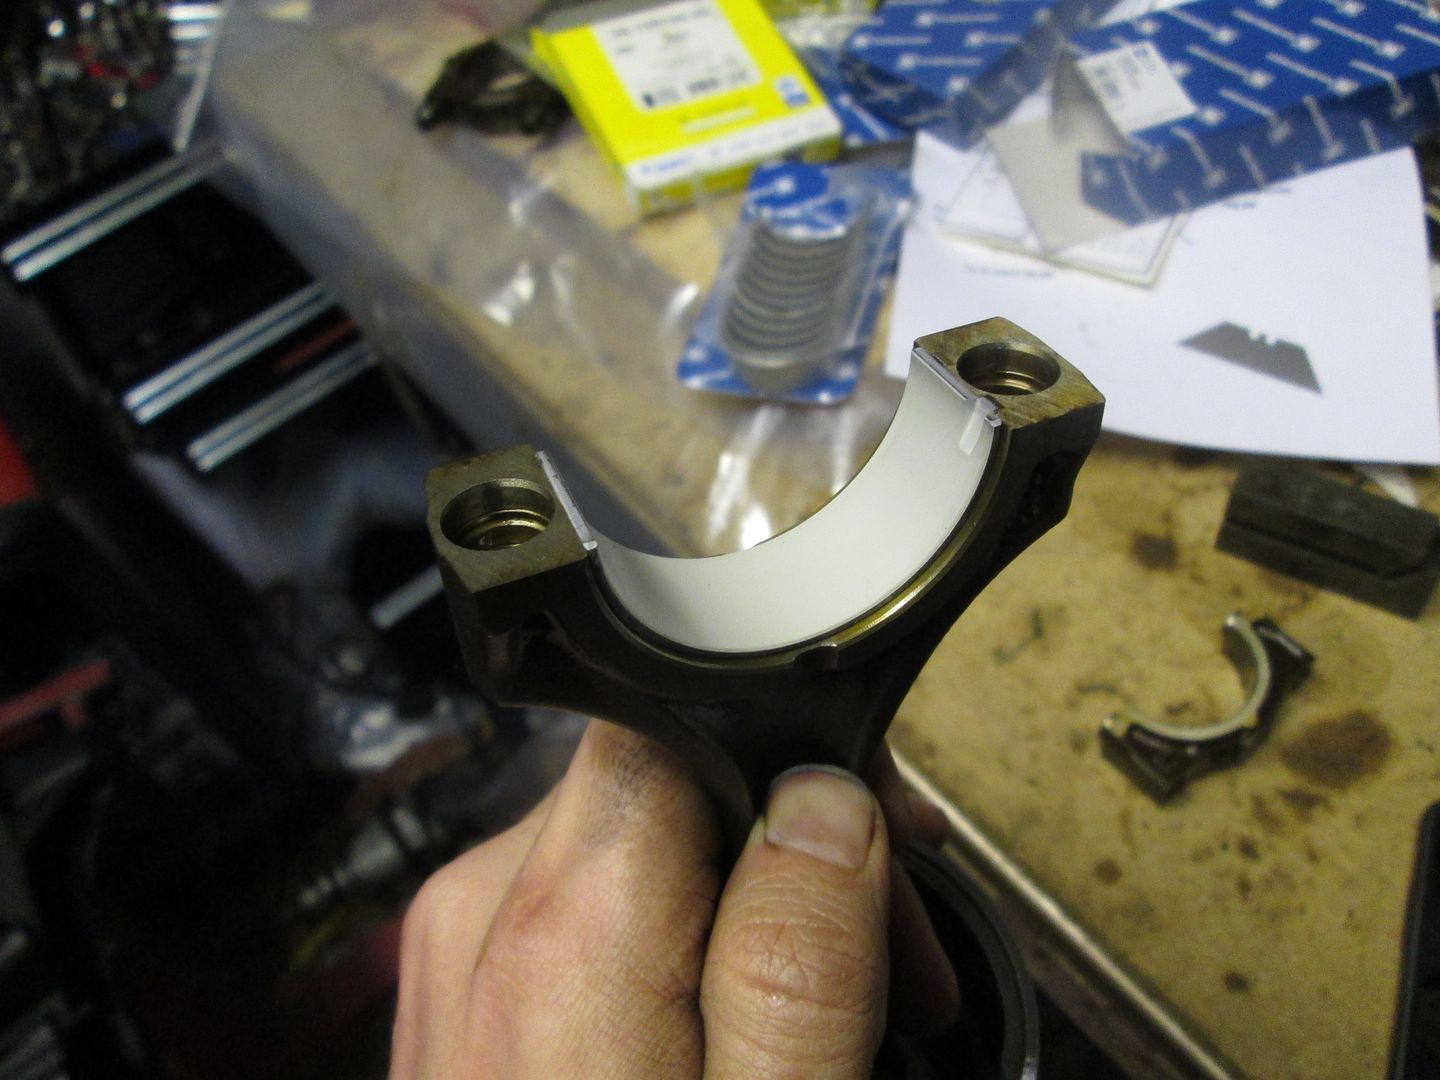
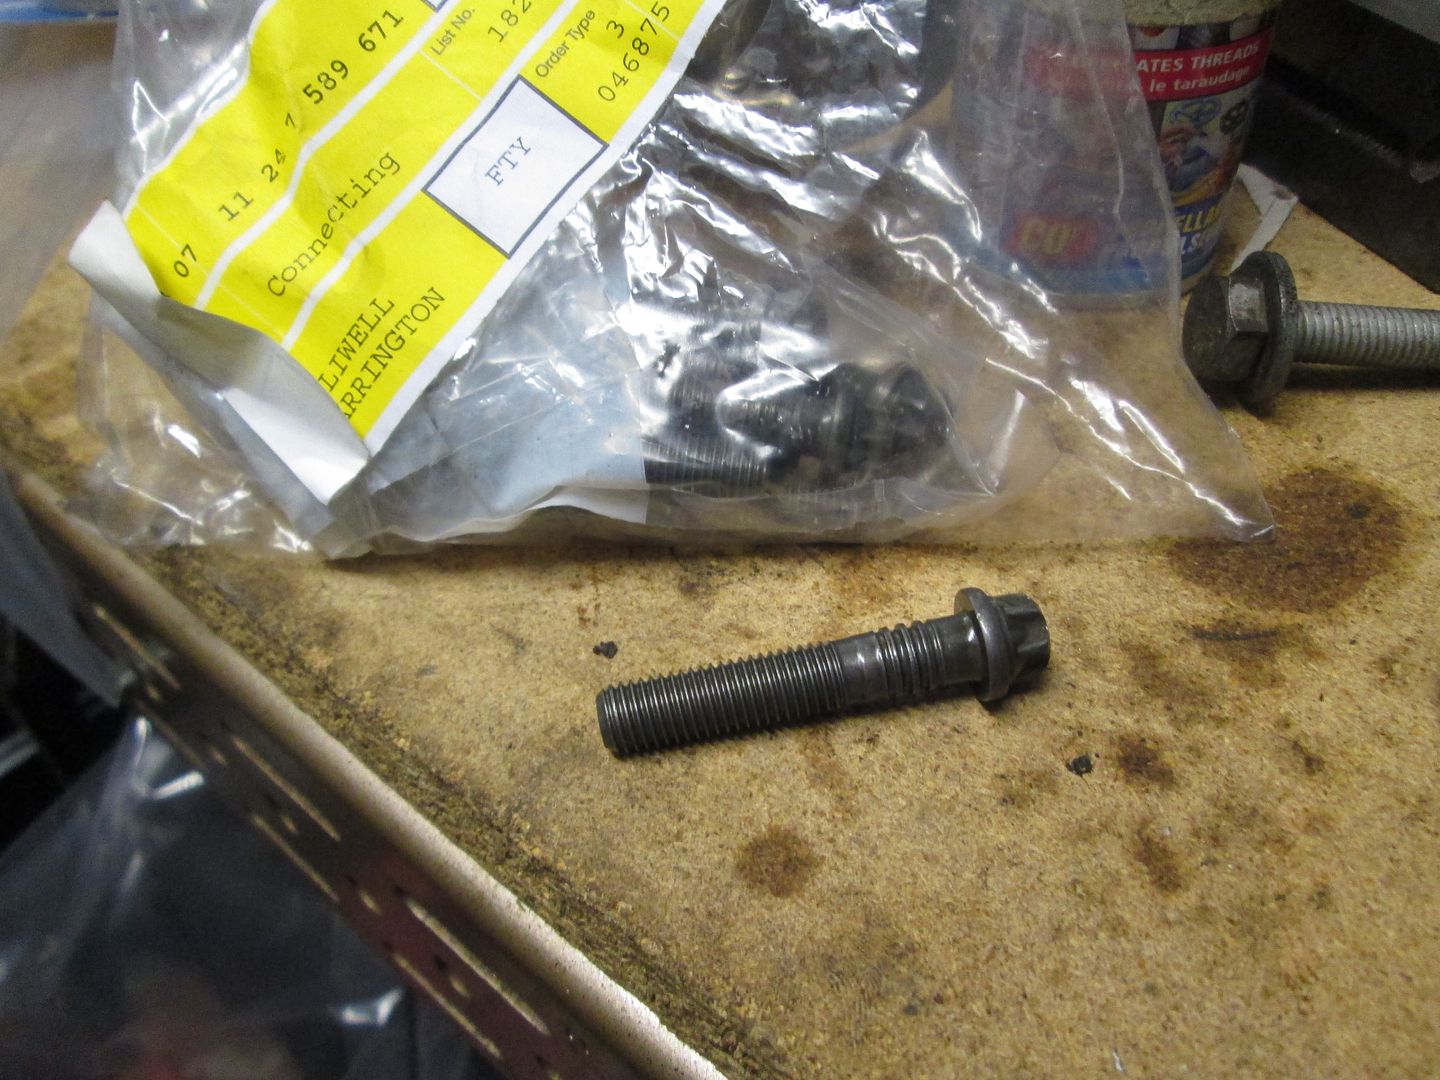
New big end bearings were fitted to each rod and cap, then torqued up to the crank with plenty of assembly grease and new connecting rod bolts..
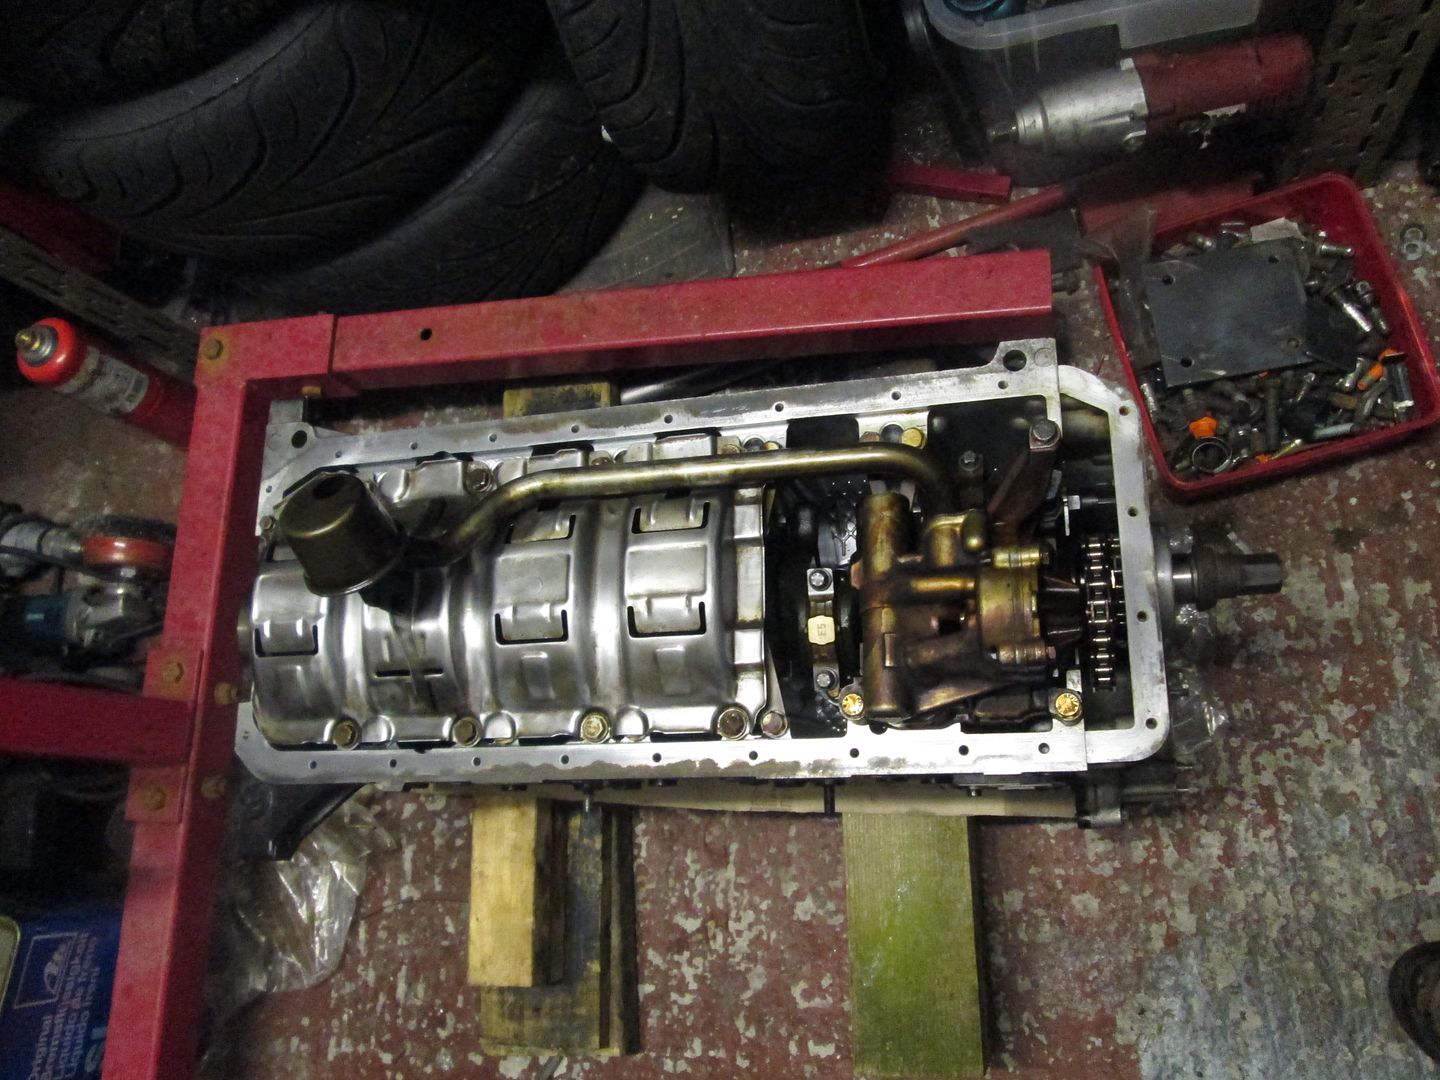
The windage/baffle plate and oil pump were then fitted, along with the sump and a new gasket..
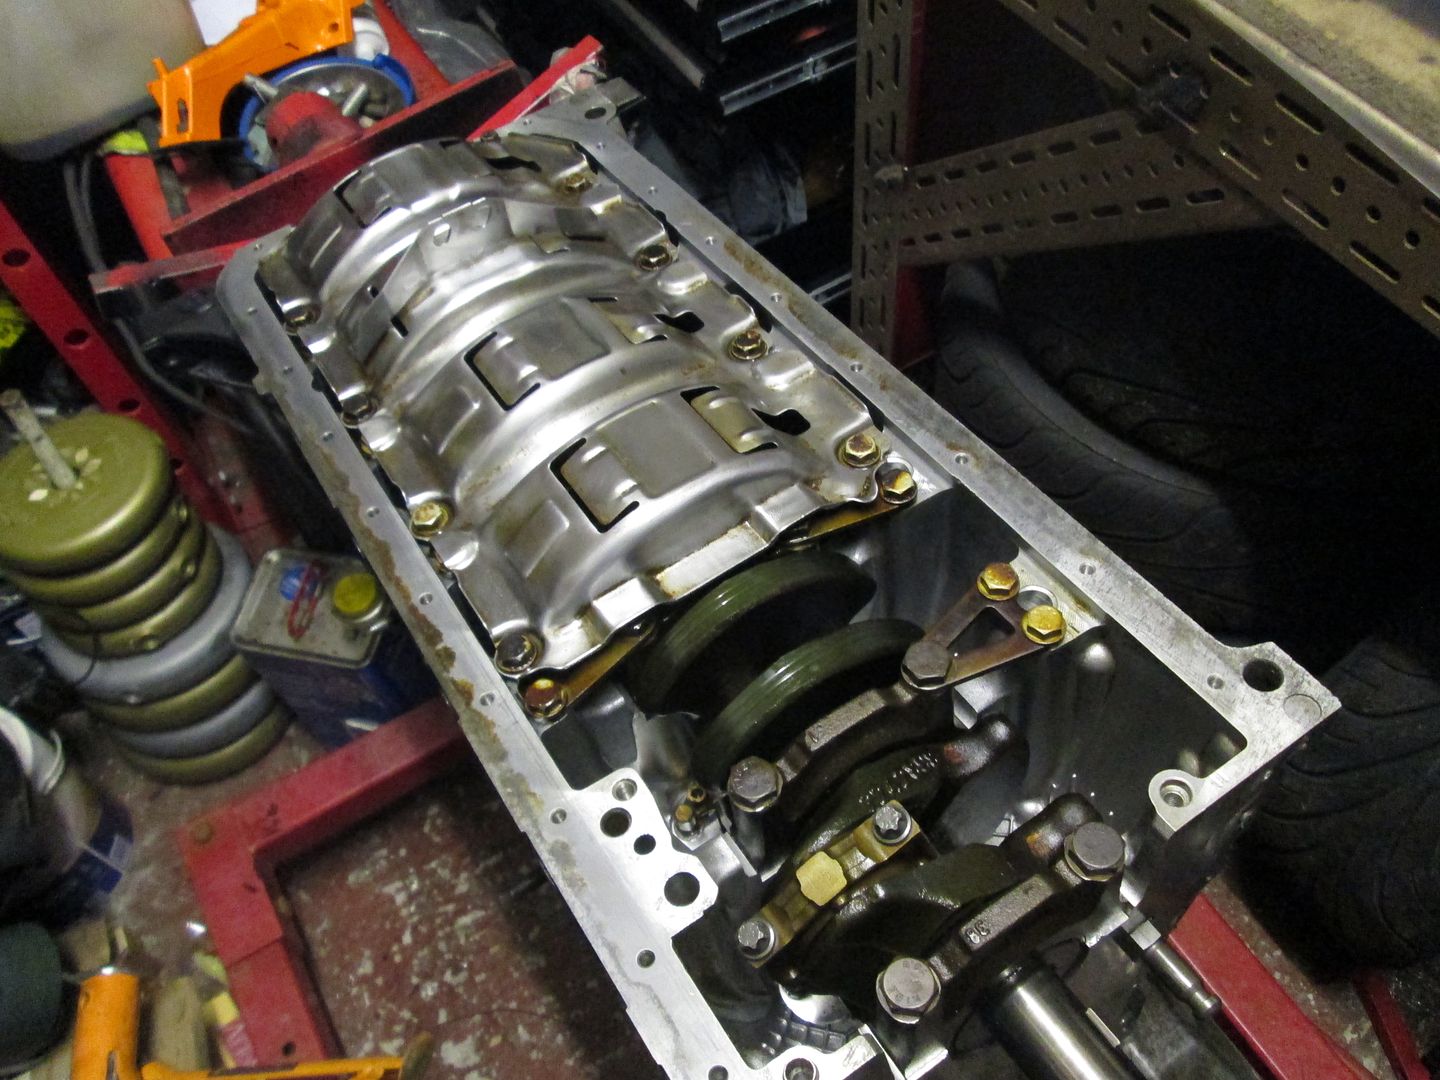
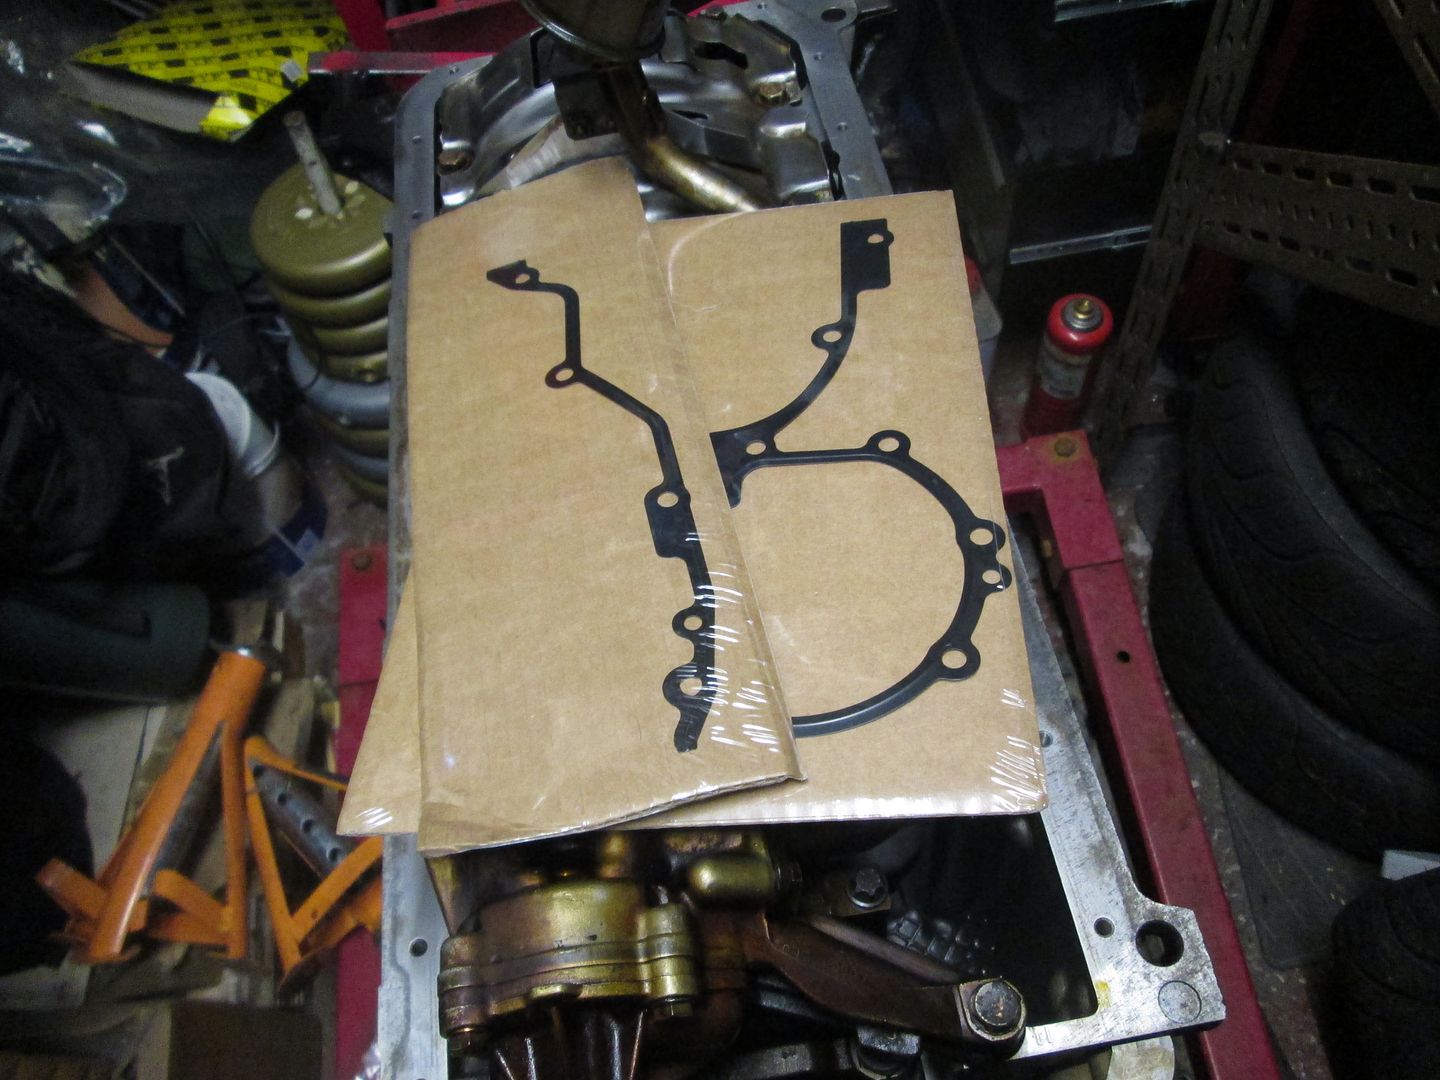
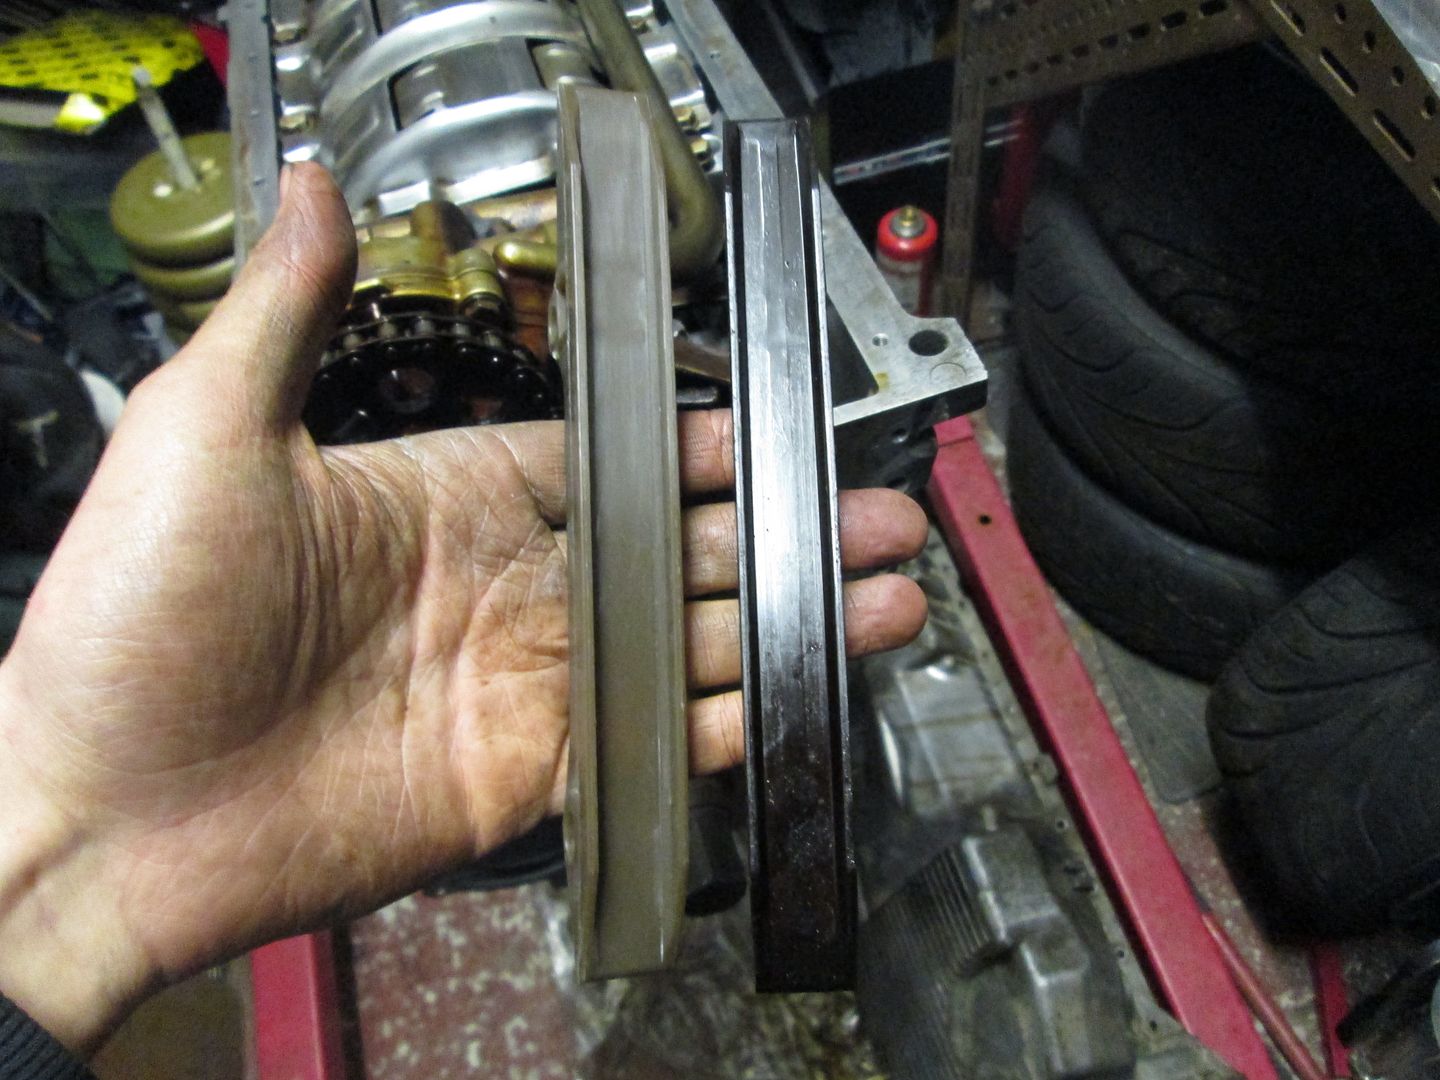
Other small jobs included fitting the chains, new chain guides, the timing case cover, and the flywheel end cap. All with new gaskets again.
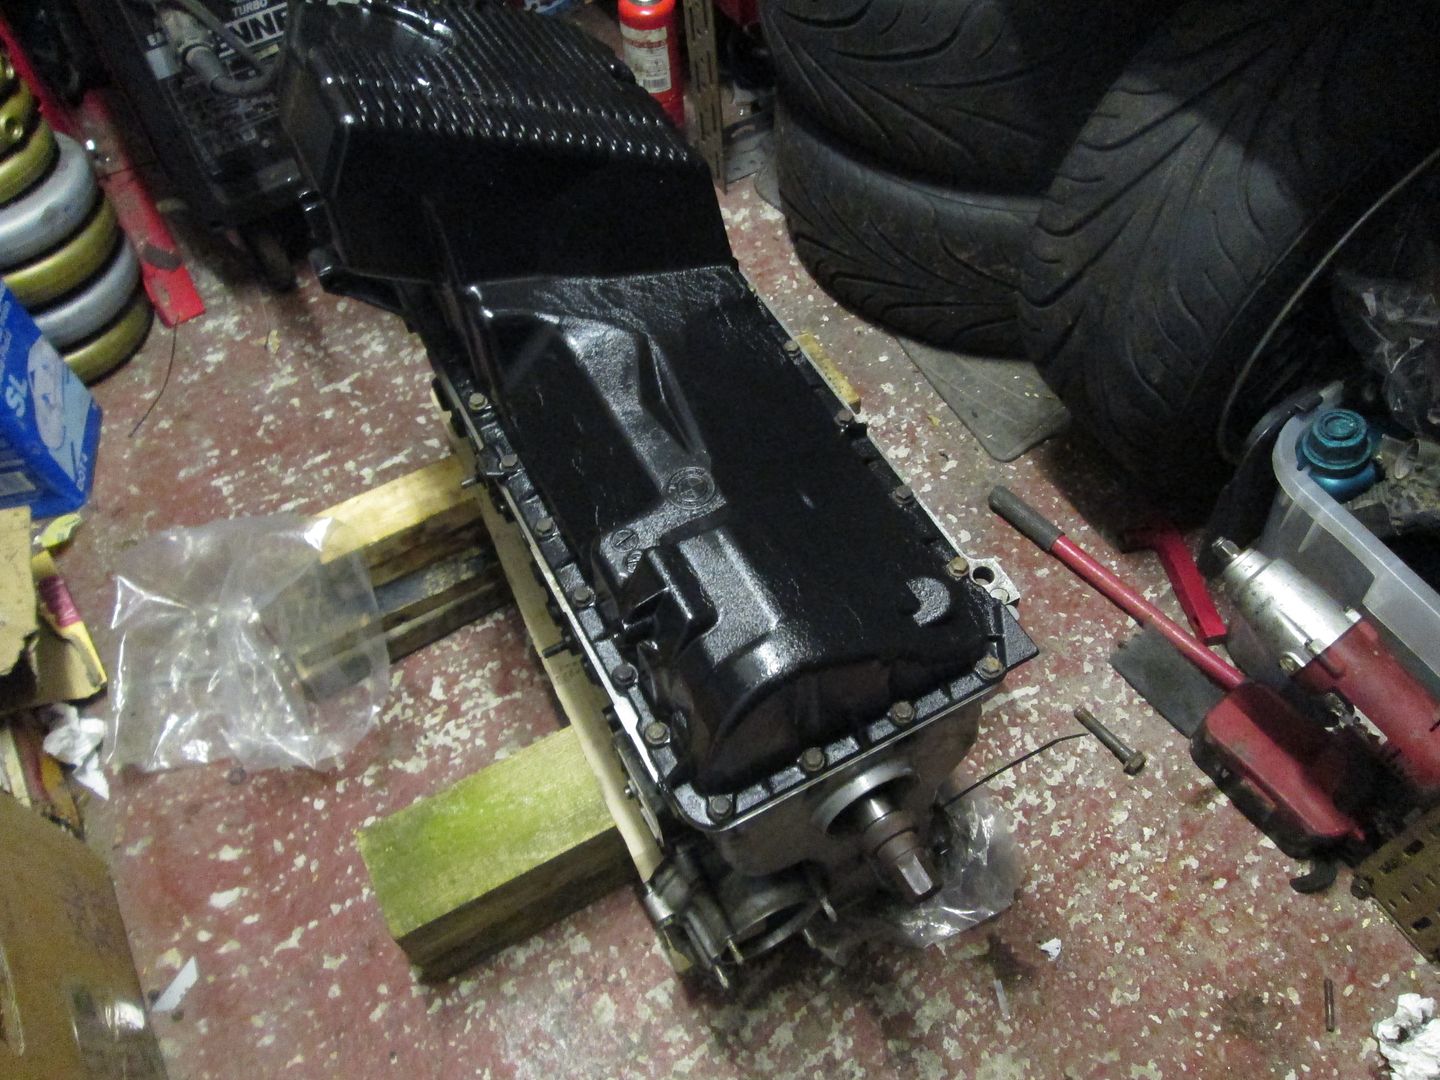
As some of you may know, the sump on these engines practically sits at a 45 degree angle, so to make things easier when building the rest of the engine I quickly knocked up a frame for it to sit on, along with some castors.
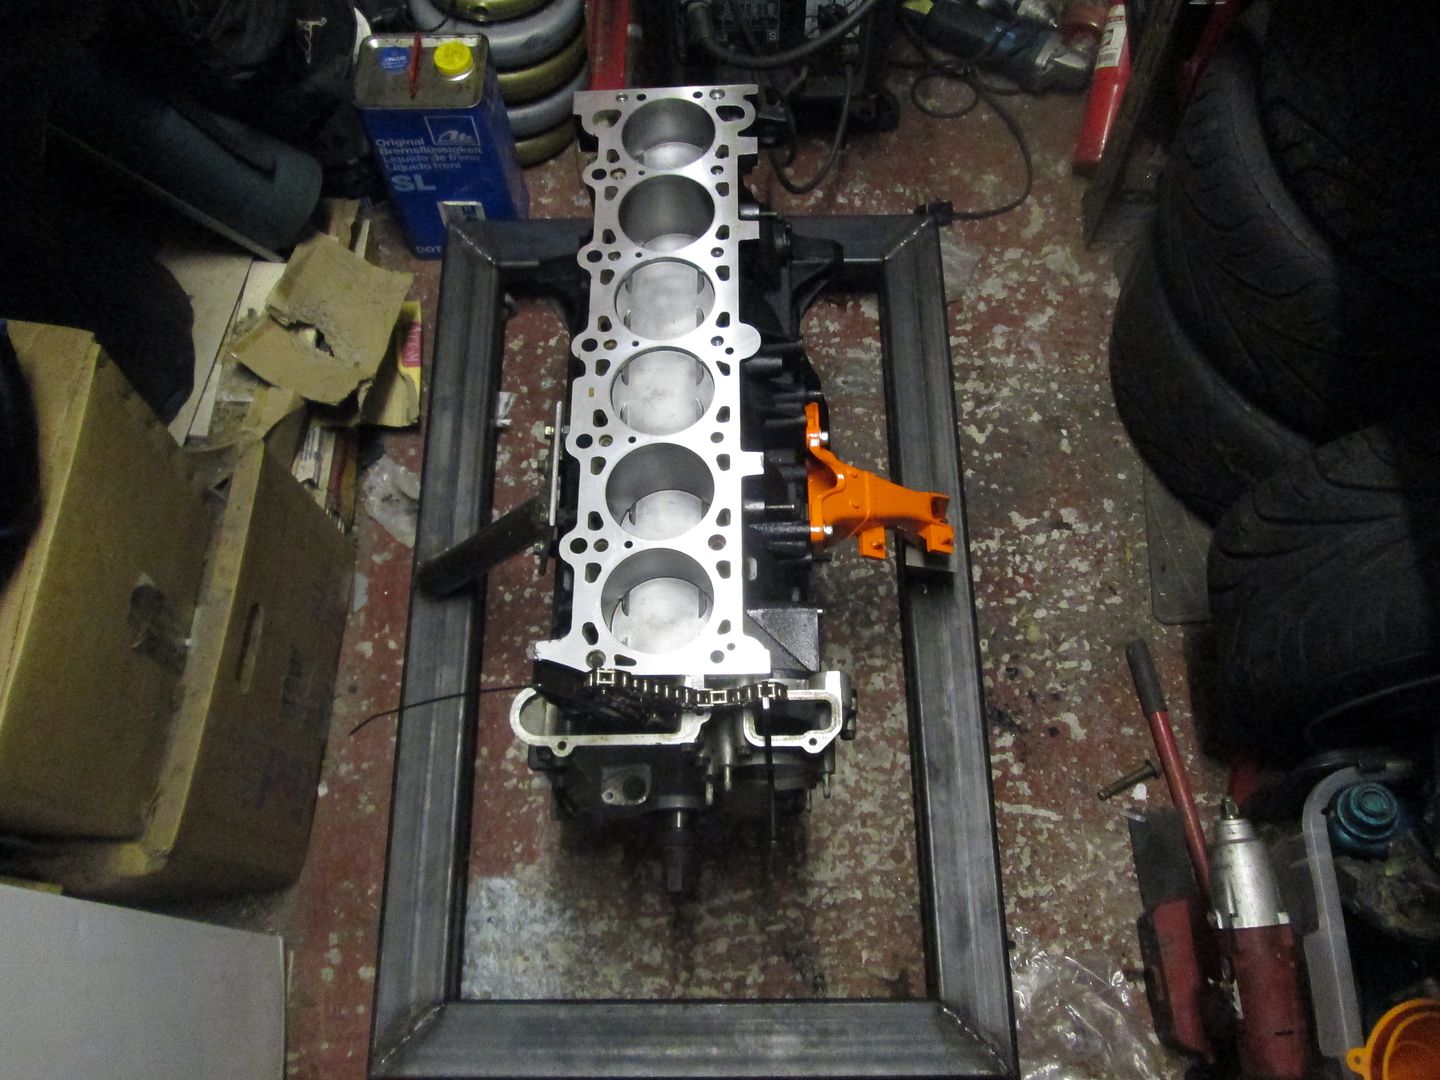
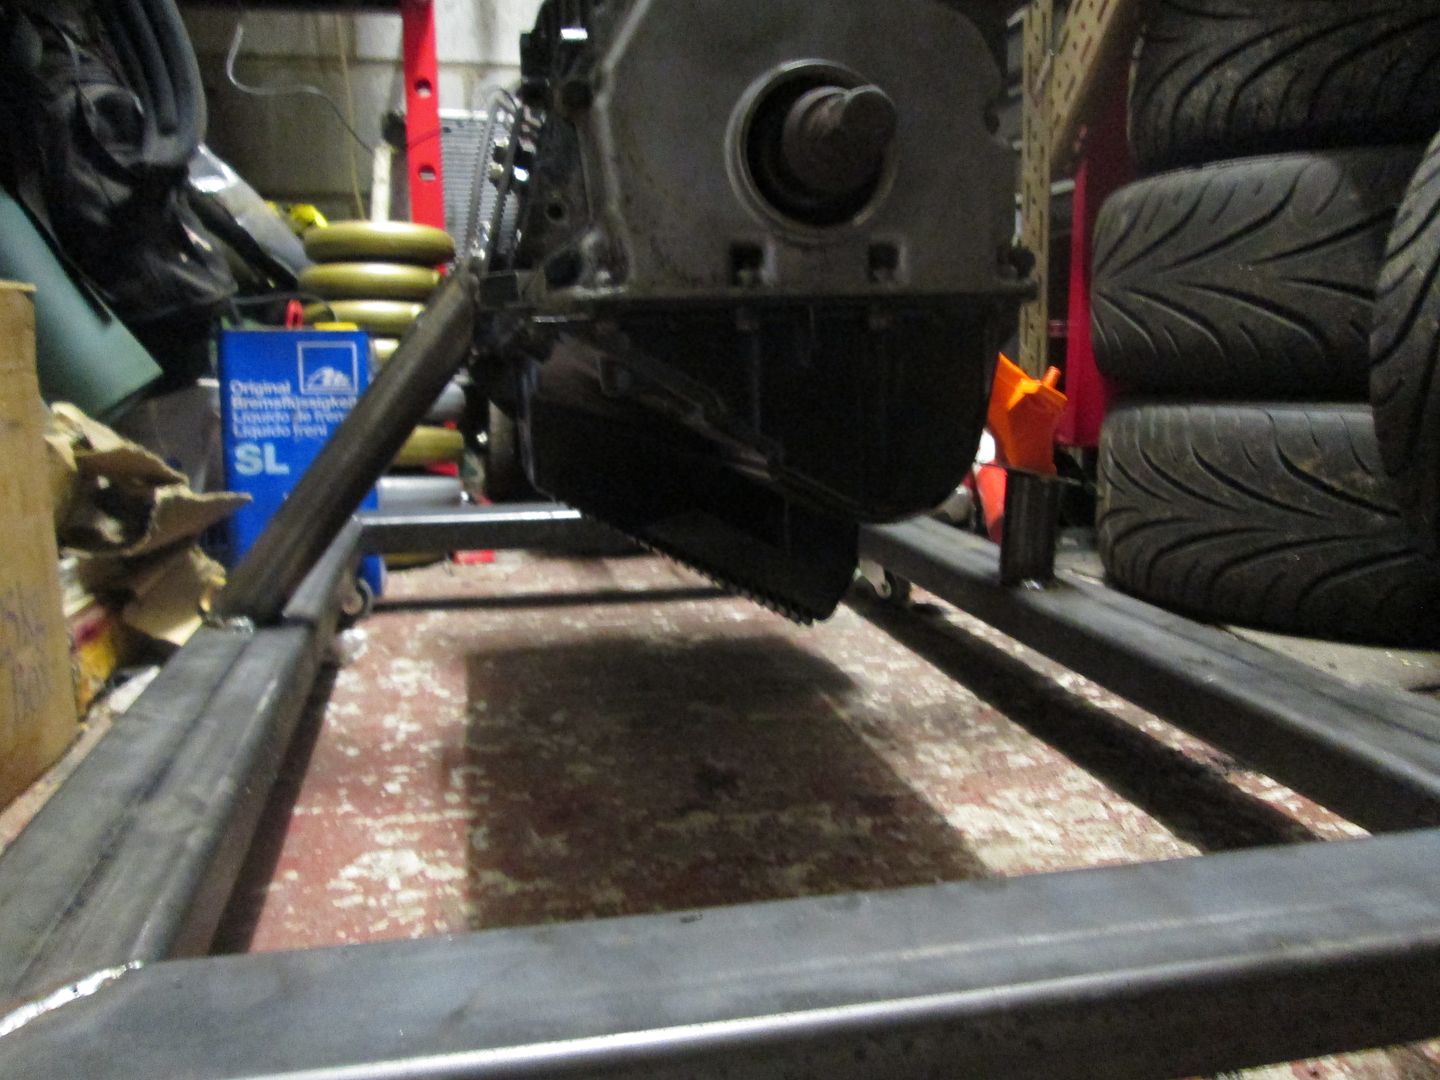
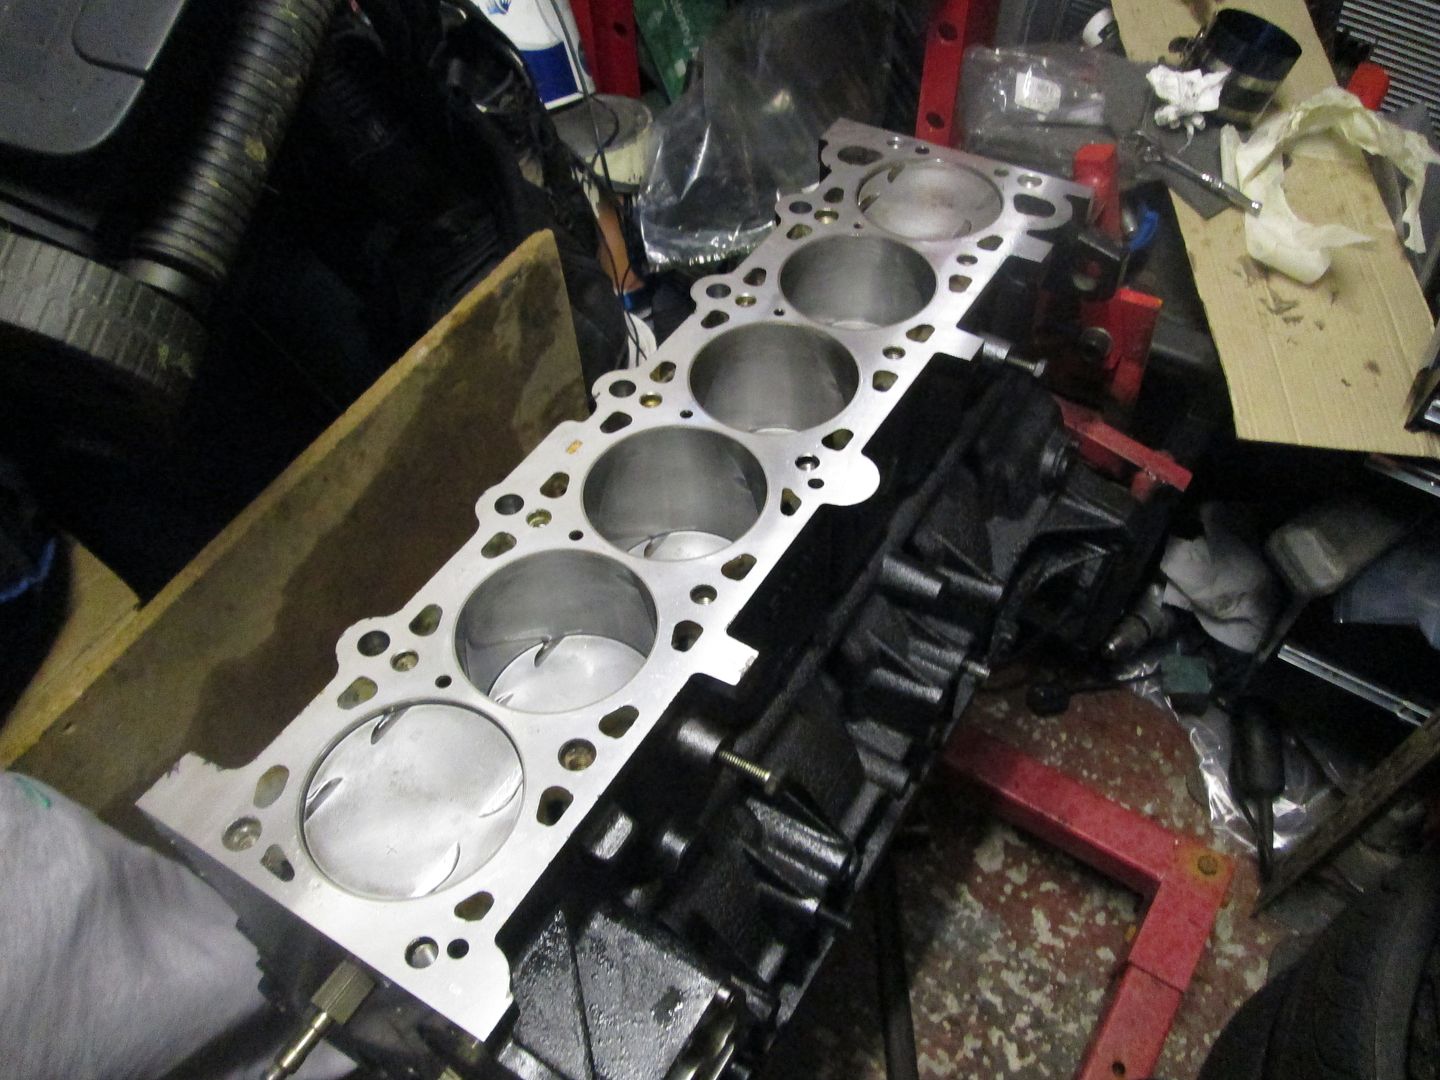
The obvious next step was to bolt the head onto the block. So a new headgasket went on, then the head on its dowels..
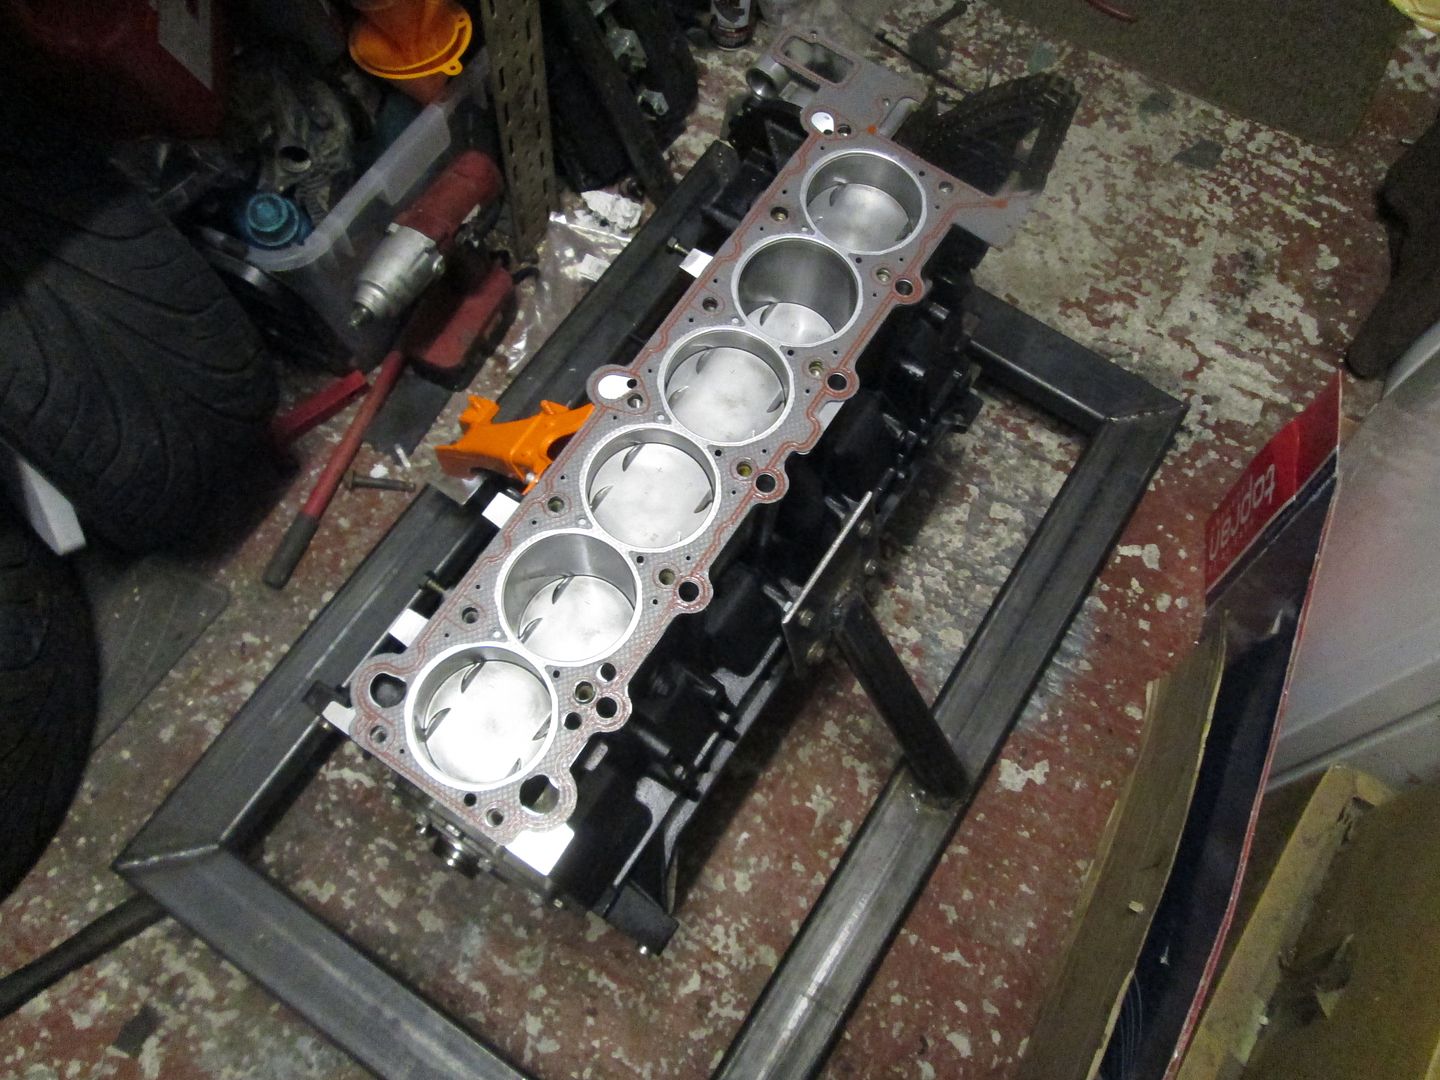
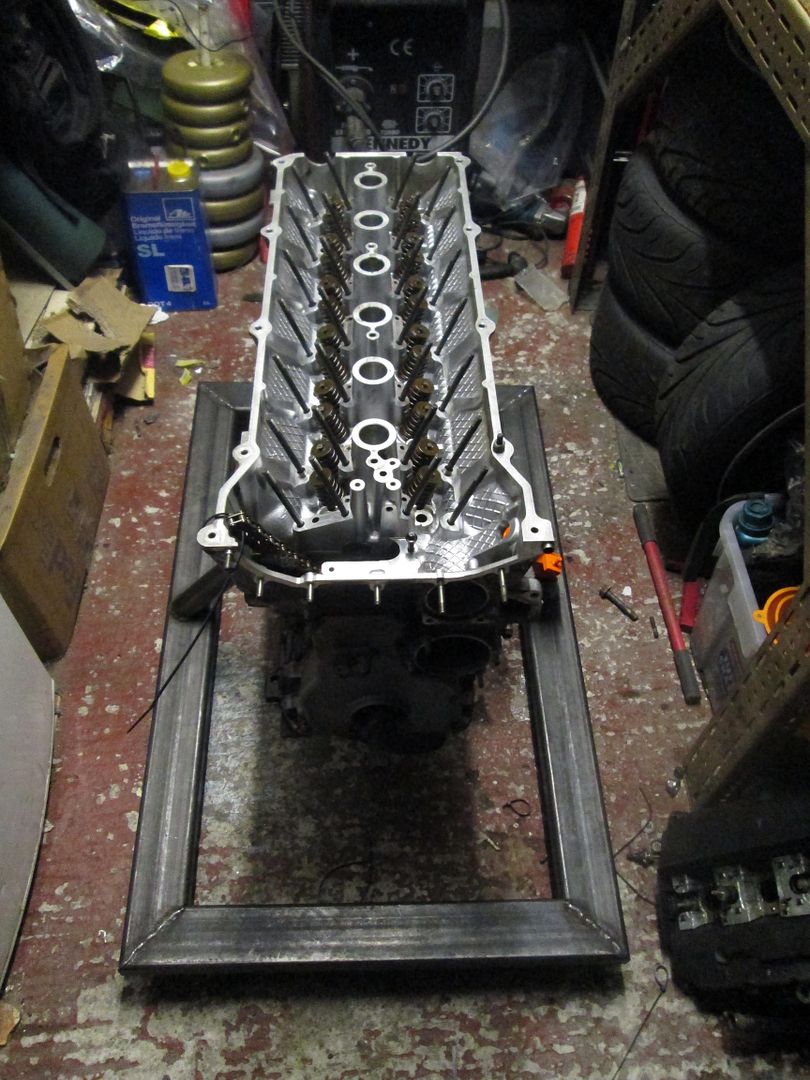
Lastly a set of new head bolts. The sequence for the engines with an Aluminium engine block is 40nm, then 90 degrees, then a further 90 degrees. All twelve bolts held 40nm in order - when moving back to bolt #1 to perform the first 90 degree application the threads pulled straight out of the block, lovely.
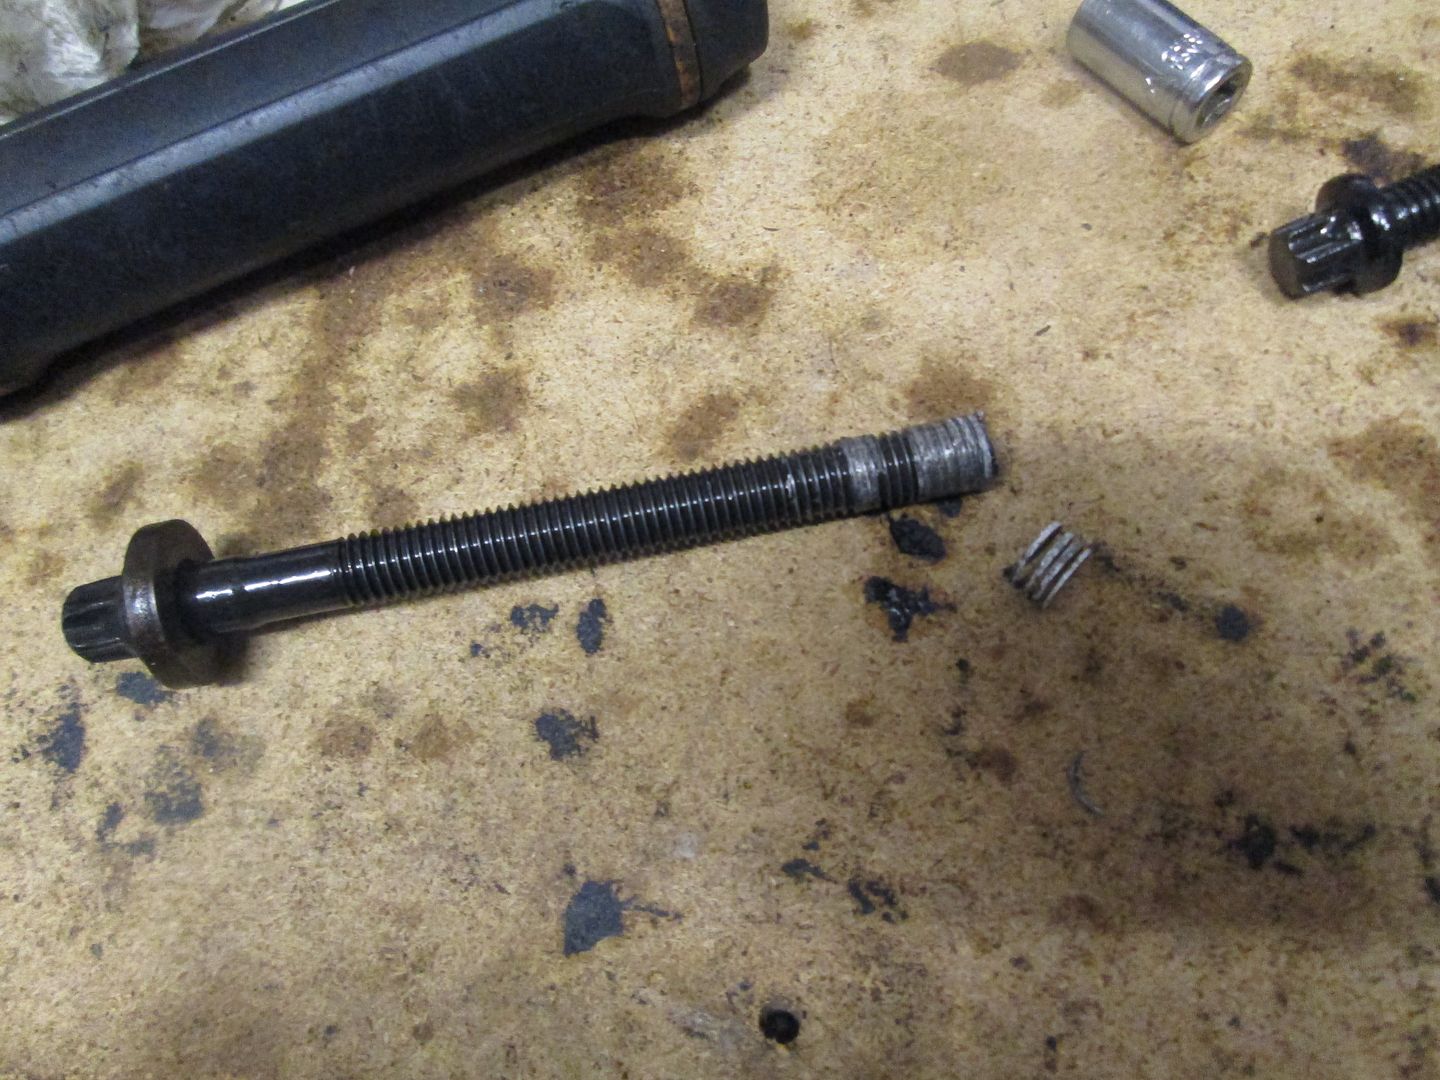
I had heard of this issue before, but more so on the newer M54s, and not the older M52s. After speaking to a number of people, specialists and reading the forums it was a 50/50 split between using some proper 'timeserts' to basically helicoil the block or start again with a cast iron block from the M50 series of engines. I had seen people have success with the thread repair, and others where it had lifted after 1000 miles or more - I suppose that is also down to quality of installation also. Considering this engine would live its life at fairly high RPMs on track, I did not want to risk the head lifting after X amount of miles, so set about sourcing a cast iron M50 engine block...
As the chassis work had nearly all been completed, I wanted to turn my attention to the tired, original 200k+ M52 Nikasil engine which was blowing oil past the rings and burning it just as quick. Performance wise it was OK, with the M50 inlet and different flash on the ECU it made 216hp, 205lb/ft, although it just felt really flat to drive. Originally I decided to just rebuild a 328 motor, as all I wanted was reliability to go with now good chassis, which drove well.
I picked up an Alusil M52B28 on around 90k miles, and stripped everything down ready for the head and block to go to the machine shop.


Around a week later I had the skimmed head back, along with the decked and honed block.


Built up the head with new stem seals, and 24 relapped valves..


Quick leak down test and everything was OK. I wanted to replace the 24 exhaust studs at this stage, as some of the old ones were missing and others very rusty. The original M52 items (11121744057) were expensive at £1.91 each, whereas the E60 N52 items (11127593376) where much cheaper at £0.50 each. These also have an E-Torx on the end of the stud for ease of fitting.


Next the block was put on the stand and given a quick coat of paint.

Oil jets refitted and torqued.

The bearing faces were then given a quick wipe down, and new bearings fitted to the block and caps.


Dropped the crank in to place and torqued the caps down with some Plastigauge to check for stock clearances - which was all OK.
The crank removed again, and assembly grease added, then caps torqued down with new bolts.


Pulled the pistons apart, which were checked and cleaned. Re-assembled and ready for new rings..

Some new piston rings..

Which were then gapped for each cylinder..

Then in turn fitted to the piston, and dropped into the block..


New big end bearings were fitted to each rod and cap, then torqued up to the crank with plenty of assembly grease and new connecting rod bolts..


The windage/baffle plate and oil pump were then fitted, along with the sump and a new gasket..


Other small jobs included fitting the chains, new chain guides, the timing case cover, and the flywheel end cap. All with new gaskets again.


As some of you may know, the sump on these engines practically sits at a 45 degree angle, so to make things easier when building the rest of the engine I quickly knocked up a frame for it to sit on, along with some castors.


The obvious next step was to bolt the head onto the block. So a new headgasket went on, then the head on its dowels..


Lastly a set of new head bolts. The sequence for the engines with an Aluminium engine block is 40nm, then 90 degrees, then a further 90 degrees. All twelve bolts held 40nm in order - when moving back to bolt #1 to perform the first 90 degree application the threads pulled straight out of the block, lovely.

I had heard of this issue before, but more so on the newer M54s, and not the older M52s. After speaking to a number of people, specialists and reading the forums it was a 50/50 split between using some proper 'timeserts' to basically helicoil the block or start again with a cast iron block from the M50 series of engines. I had seen people have success with the thread repair, and others where it had lifted after 1000 miles or more - I suppose that is also down to quality of installation also. Considering this engine would live its life at fairly high RPMs on track, I did not want to risk the head lifting after X amount of miles, so set about sourcing a cast iron M50 engine block...
Please enter your BBcode here.At the time M50 blocks were quite hard to come by, especially stripped bare. The priority was good clean bores, without any damage or marking. I purchased one from a 'trusted' seller, it was a complete bottom end, very cheap and he assured me the block was fine. Once stripped down, it went on the honing machine which revealed extensive bore wear..
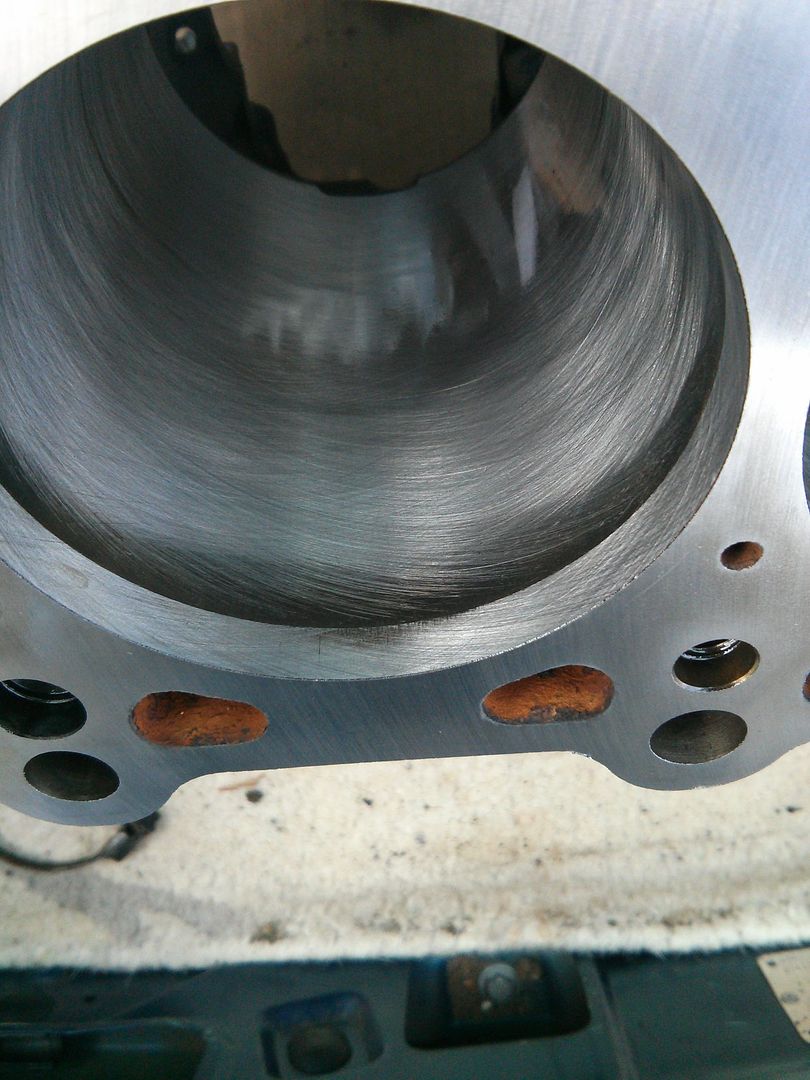
So in the end it was a good 50kg lump of scrap iron. Luckily I managed to recoup the loss of purchasing that by selling the rotating bottom end assembly. After a couple more weeks, I managed to source a pair of good condition M50 blocks, both already stripped down and very cheap.
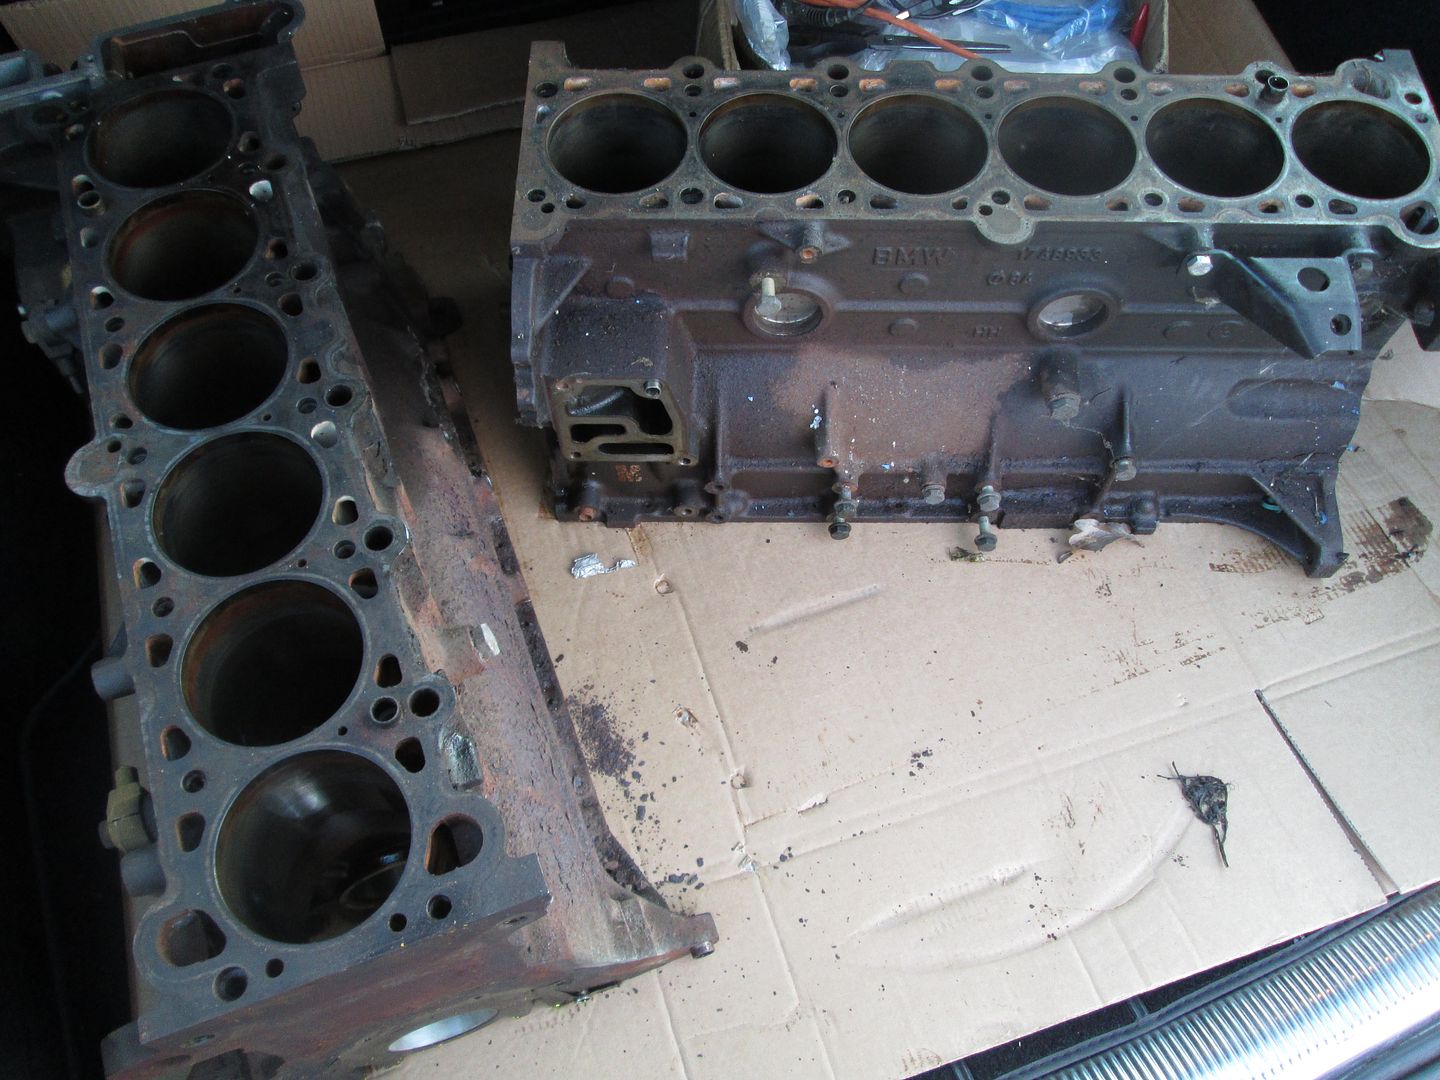
One was picked, which then went to be decked and honed again. The other was kept as a spare.
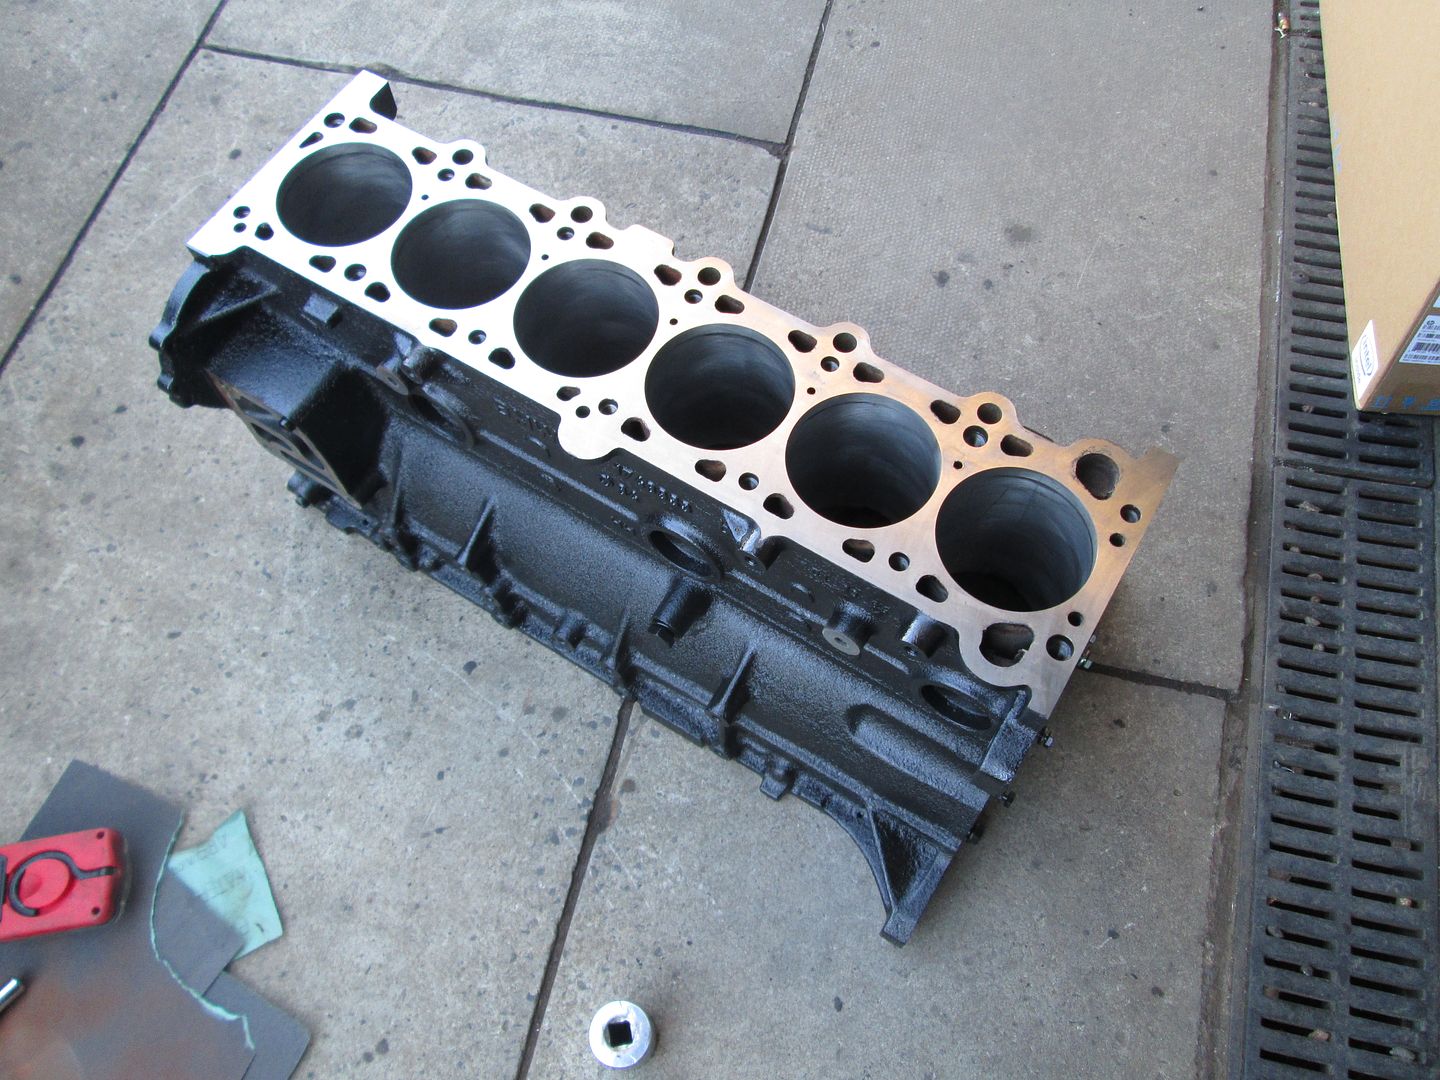
The M52 aluminium block was stripped of its parts, then the same process repeated for the M50 iron block. Surfaces cleaned, Plastigauged, then assembly grease..
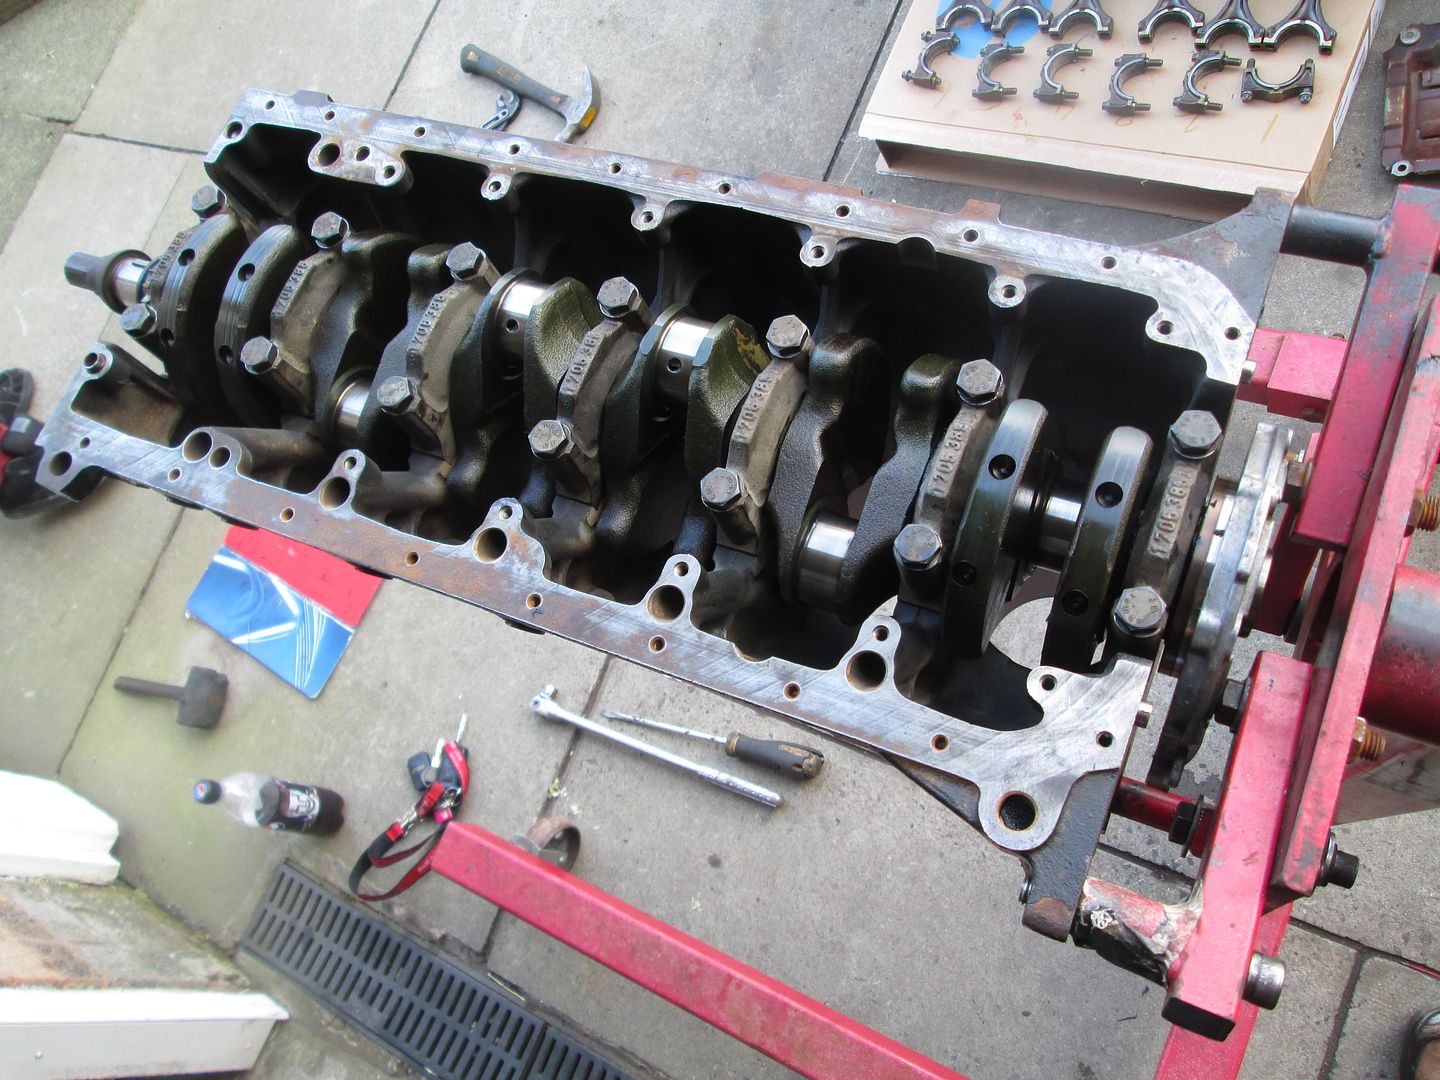
Ring gaps checked again, each one fitted and connected with another new set of rod bolts..
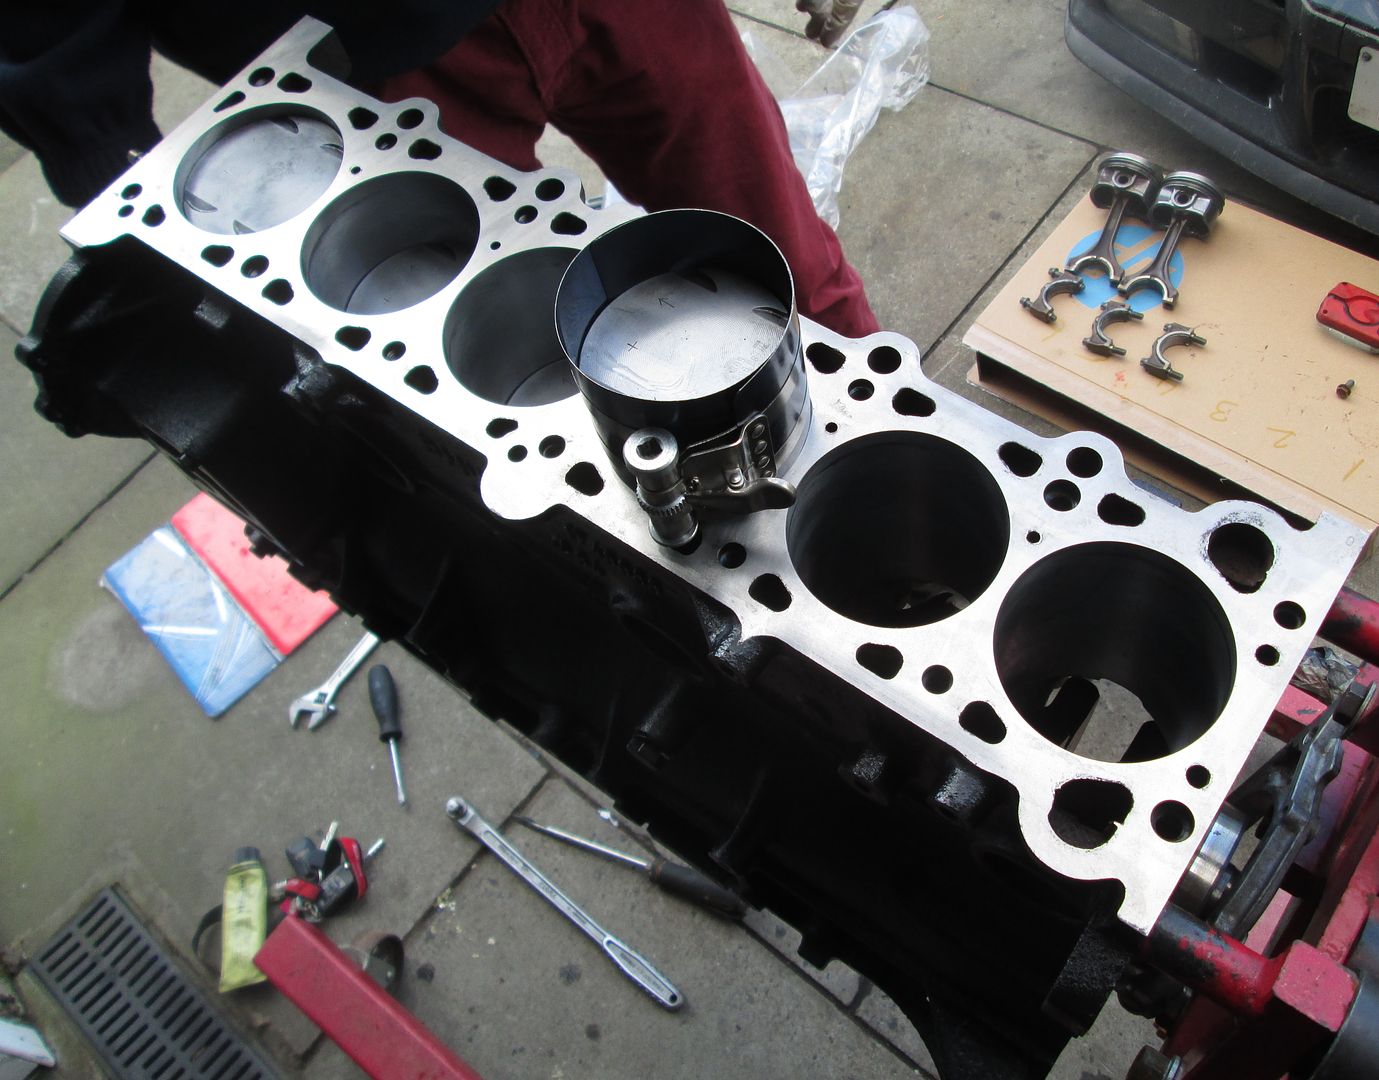
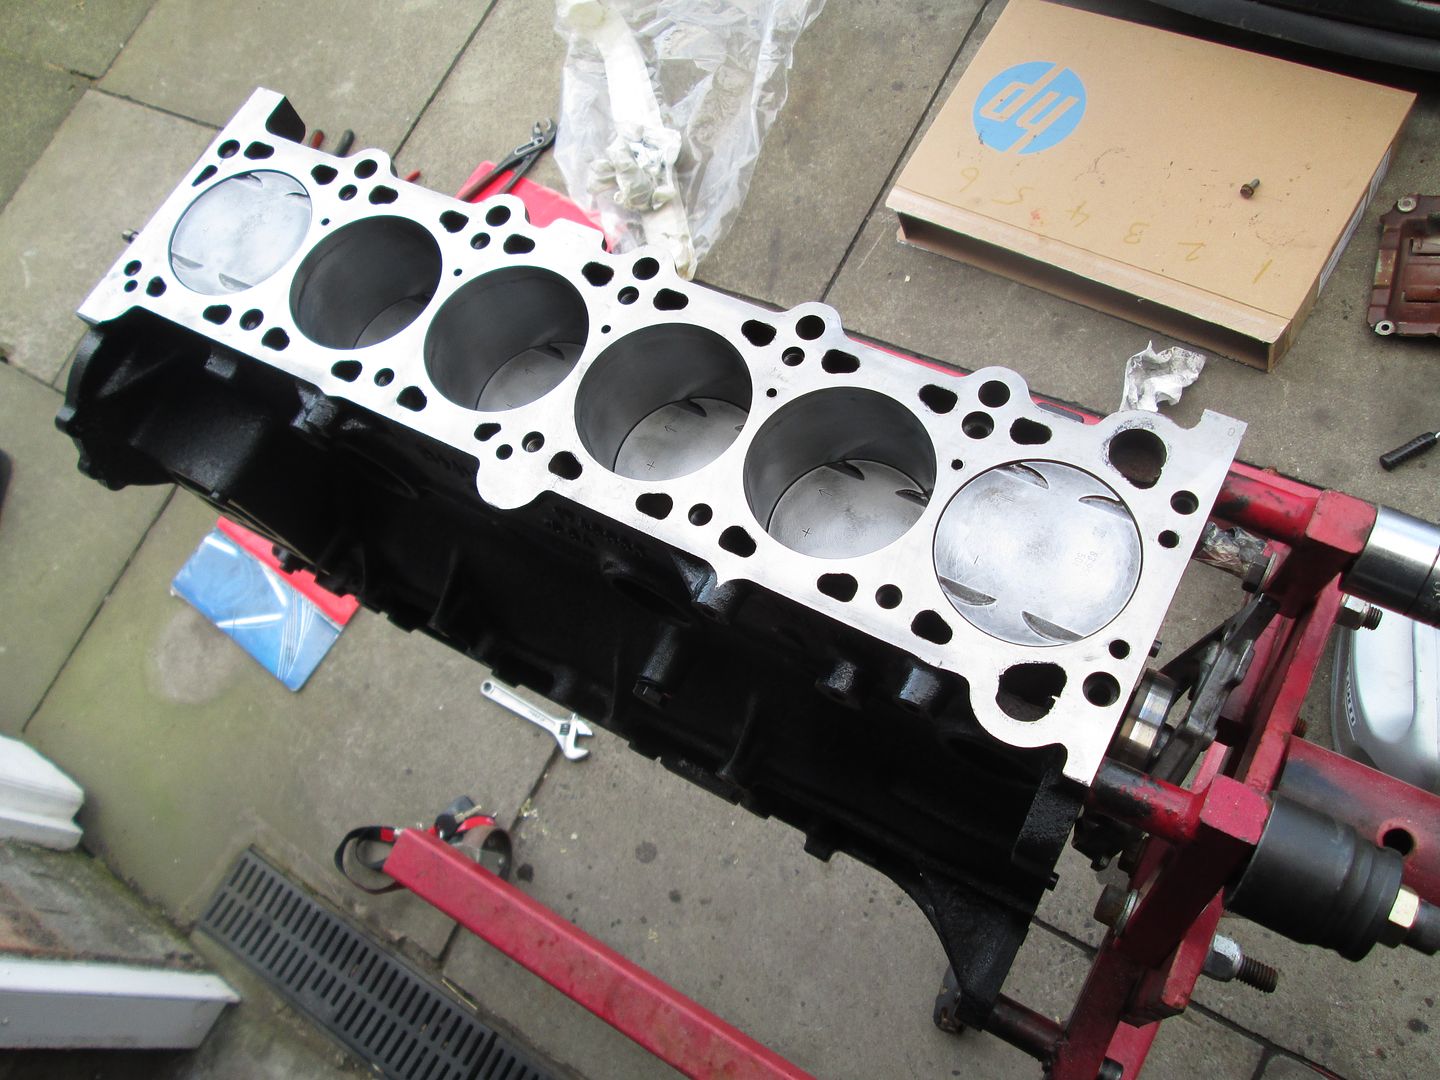
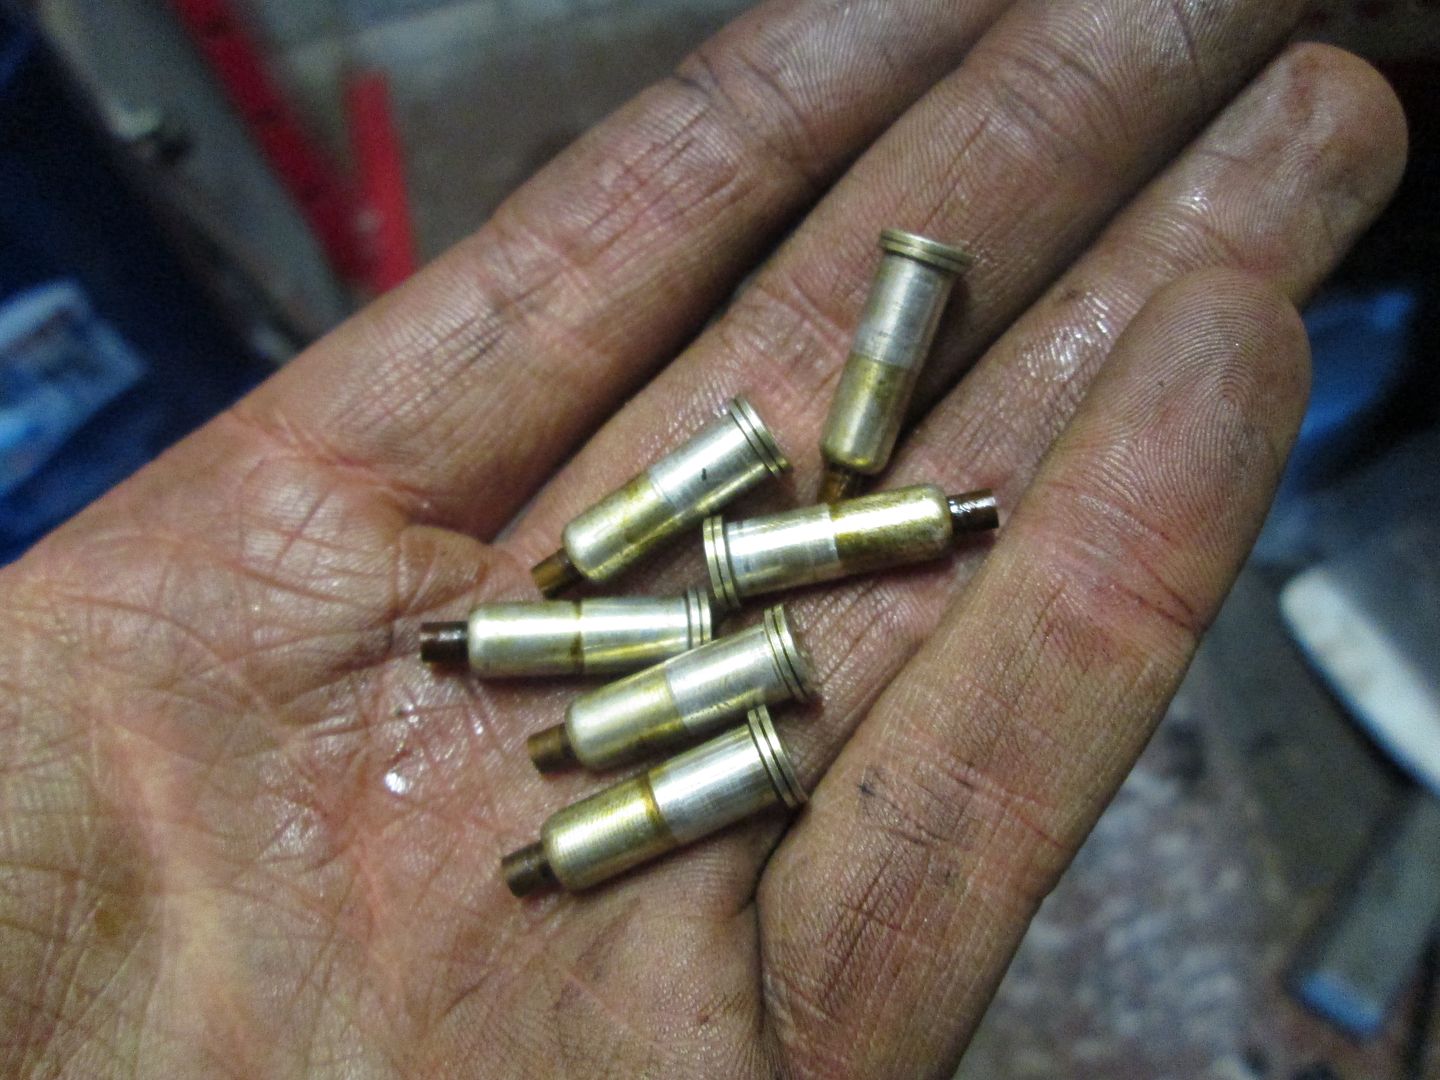
There are a few slight differences with the M50 iron block (aside from the weight increase). The piston oil jets are different, they sit under the bearing journal instead of being separate..
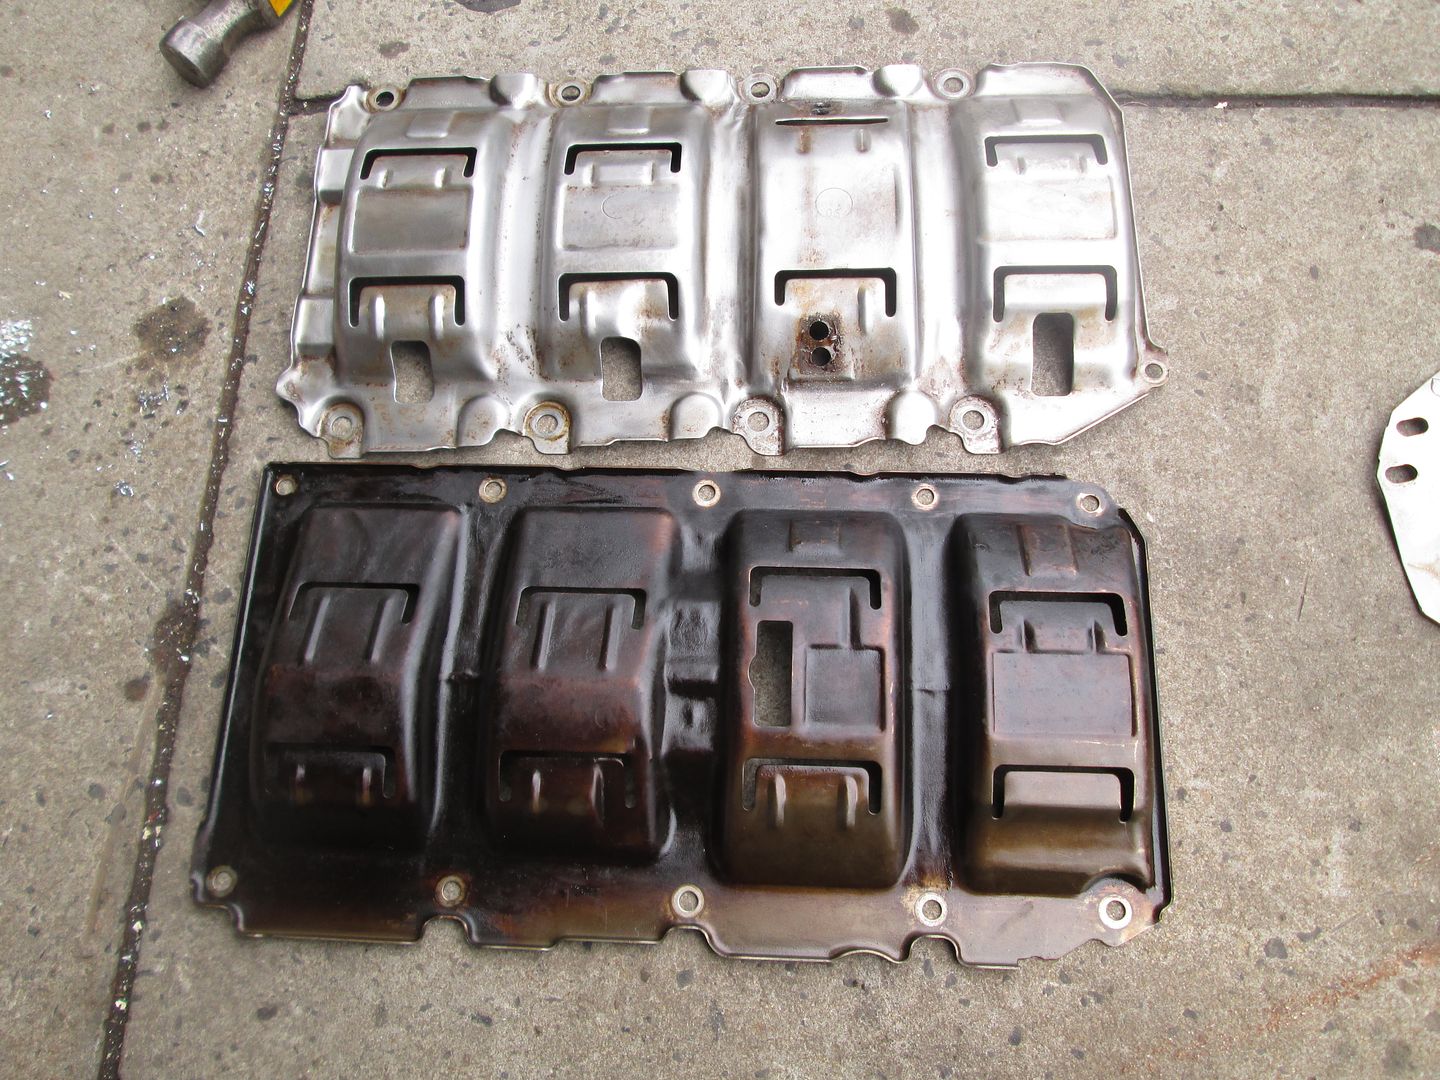
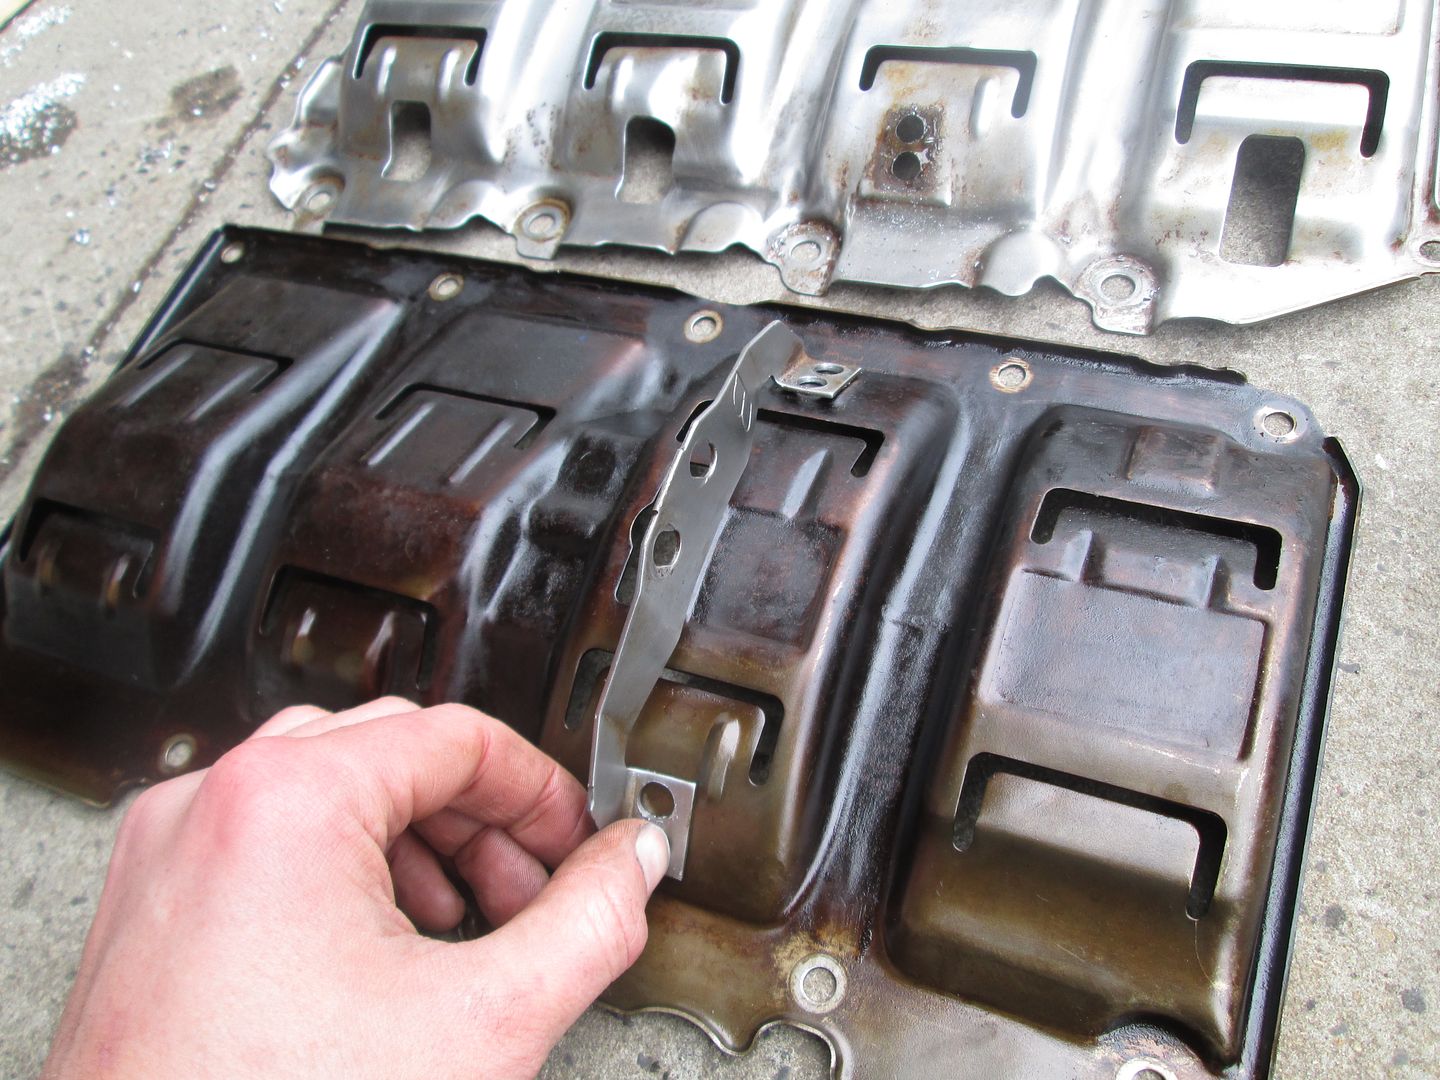
The windage/baffle plate is different, as the iron block does not have the support webbing that the aluminium one does. This means the oil pump pickup mounting is in a different place. A few spot welds drilled out on the M52 item and then welded onto the M50 item in the correct place wasn't too much work. You also have to knock a bit of shape into the far two channels of the plate, otherwise the rod caps will touch the plate. This is due to the M52 crank having a longer stroke than the M50. Easily done once assembled though.
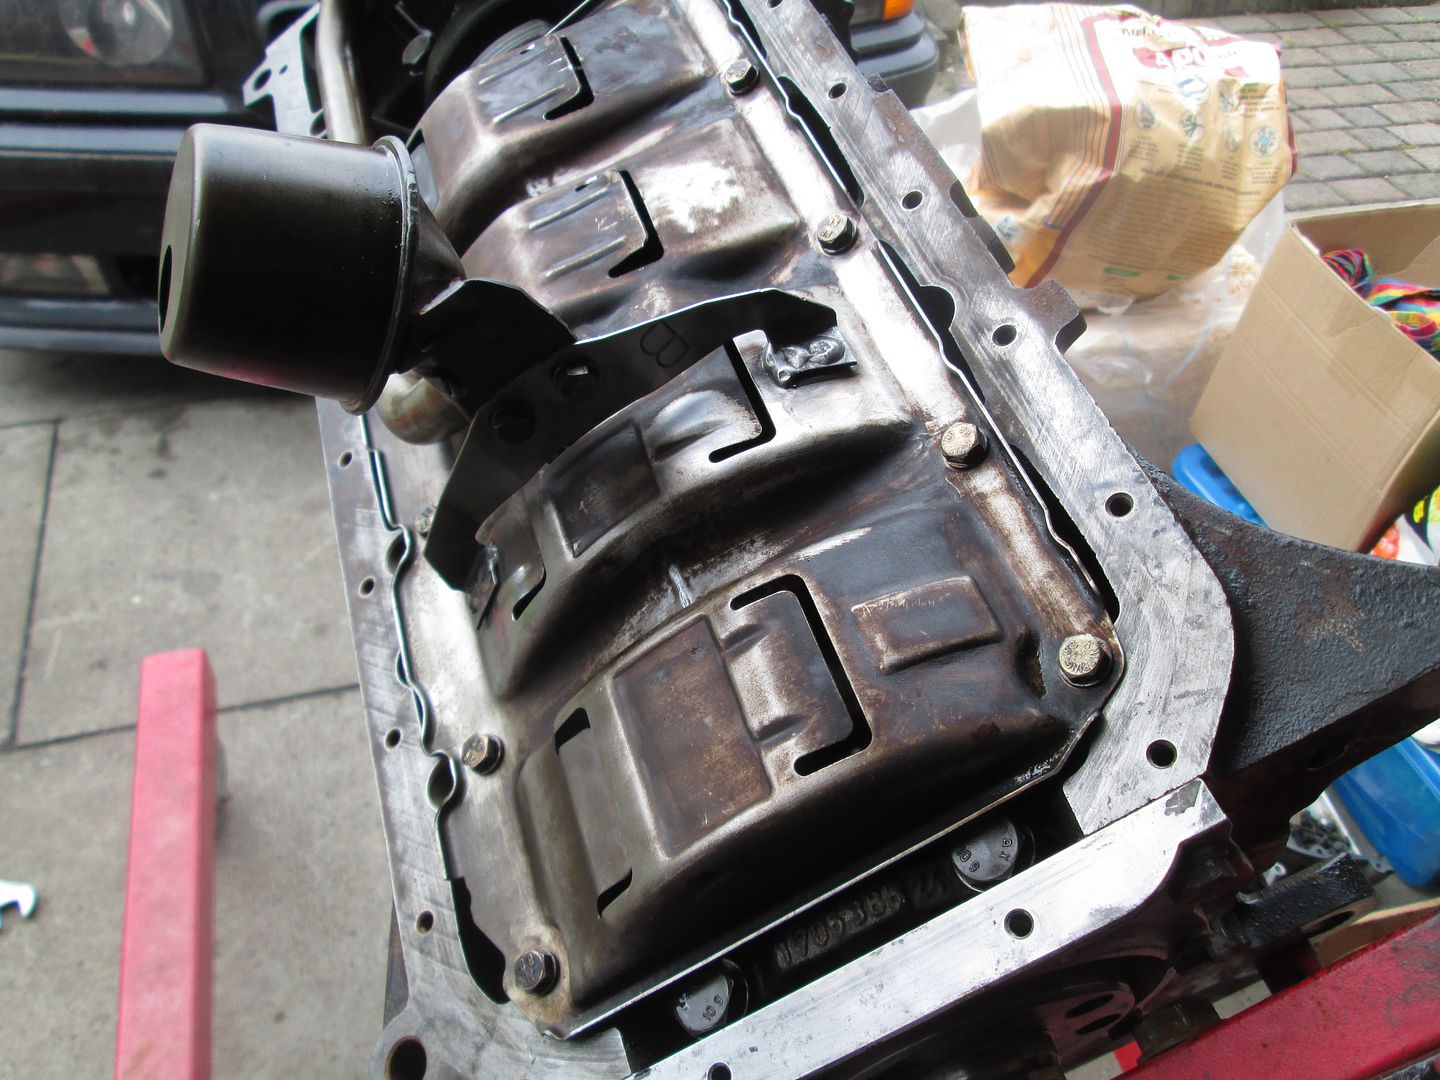
Lastly one of the oil pump bolts is in a slightly different location, by all of 1mm. This is sorted by opening the hole up on the oil pump, plenty of material available to do so. You could also use an M50 pump to get around the above two issues, but I didn't have one and I knew the M52 item had been cleaned/rebuilt. The sump, chain guides, chains and timing covers were then also fitted..
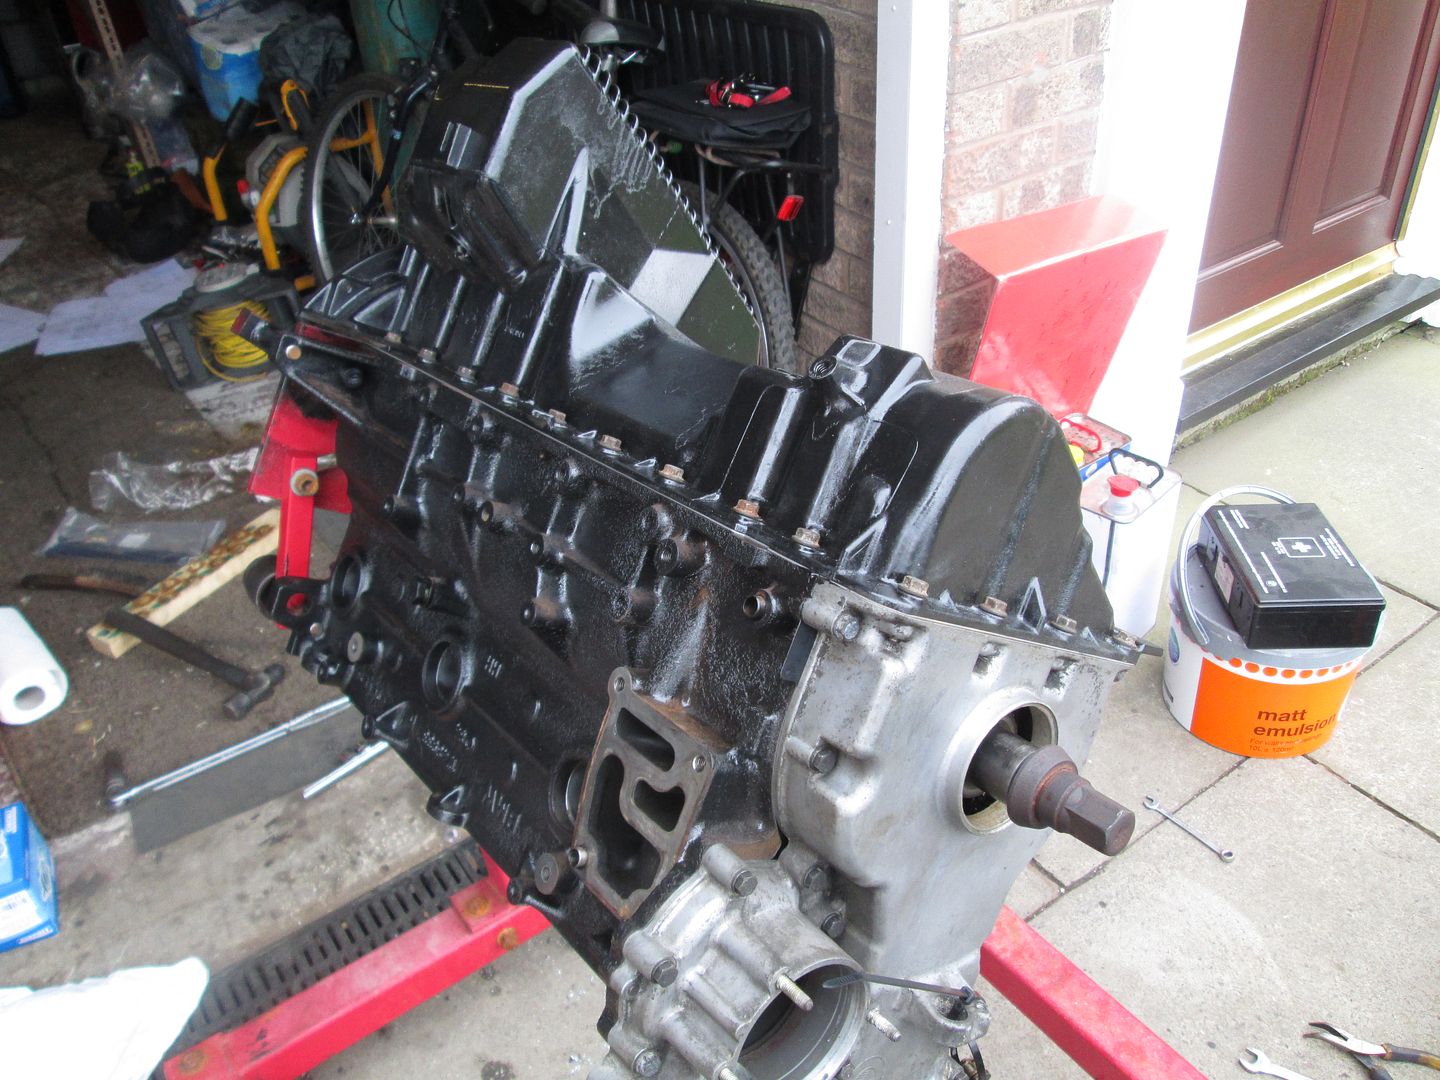
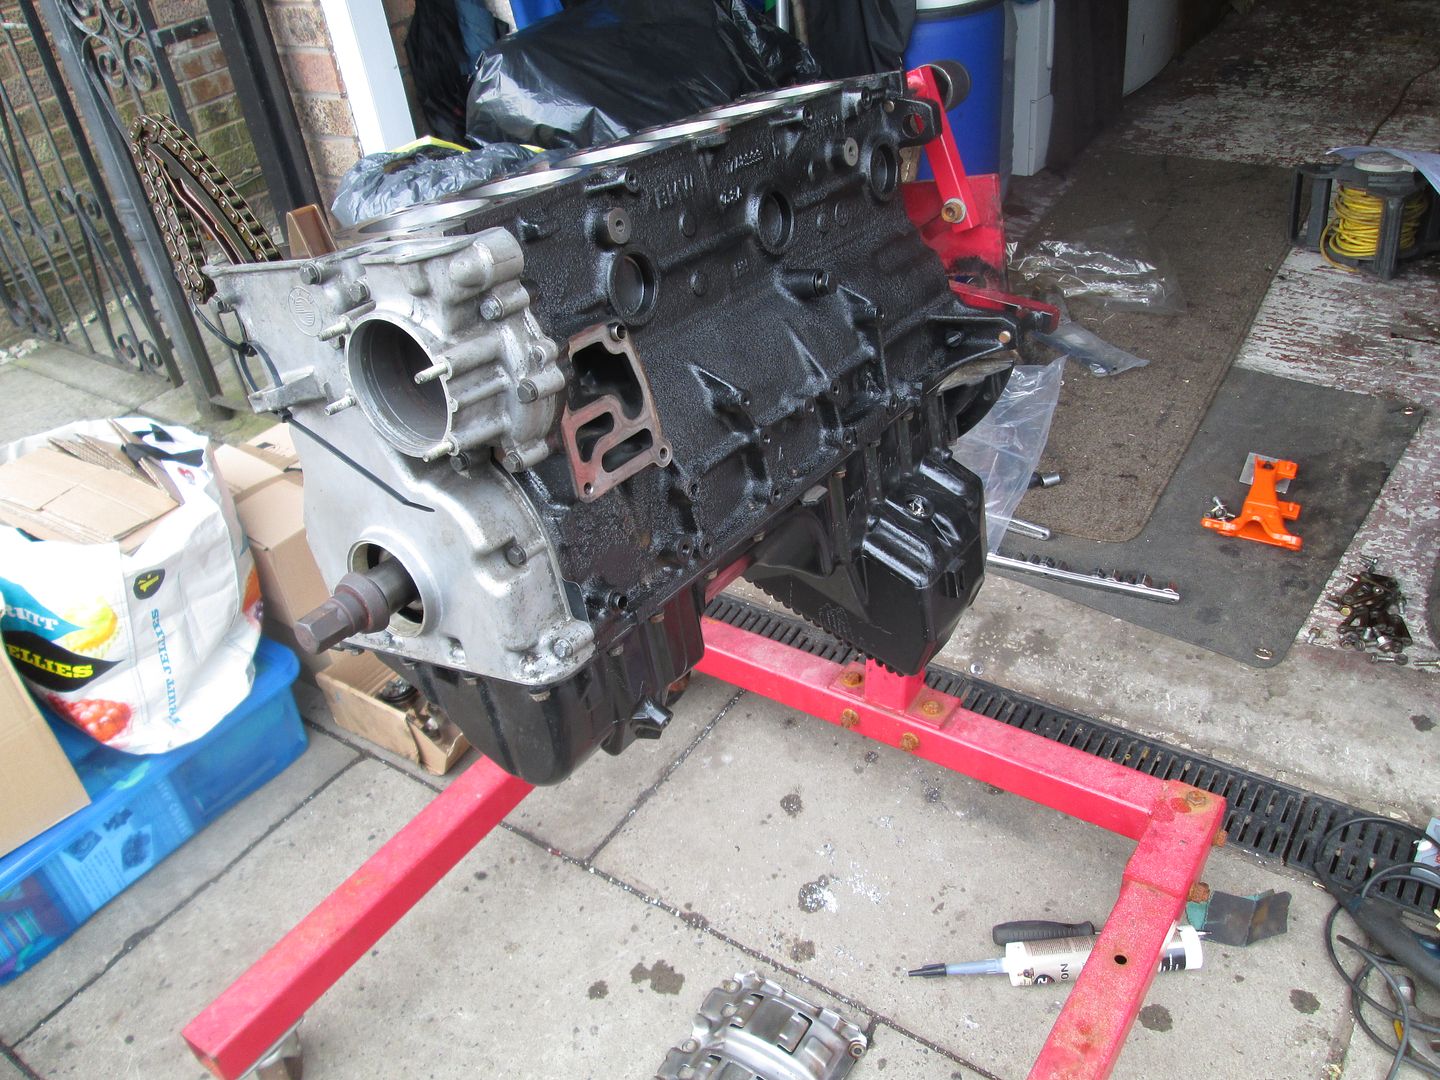
Back onto the lower stand, and another new headgasket. Head dropped on and torqued down to the M50 iron block specification, everything held well this time.
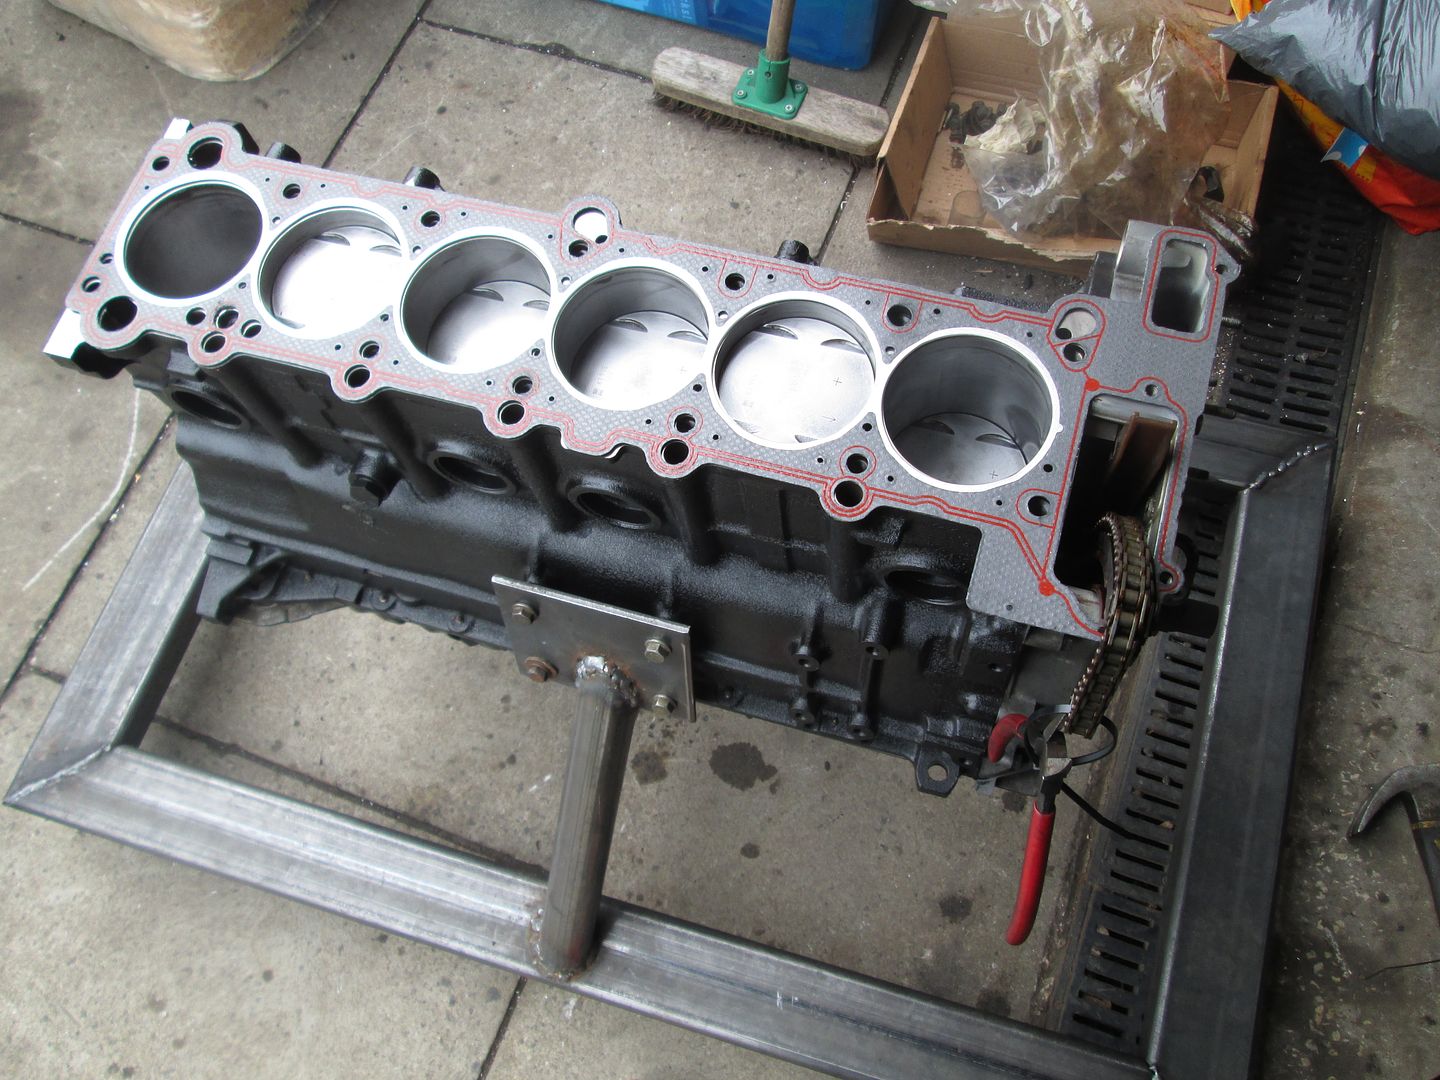
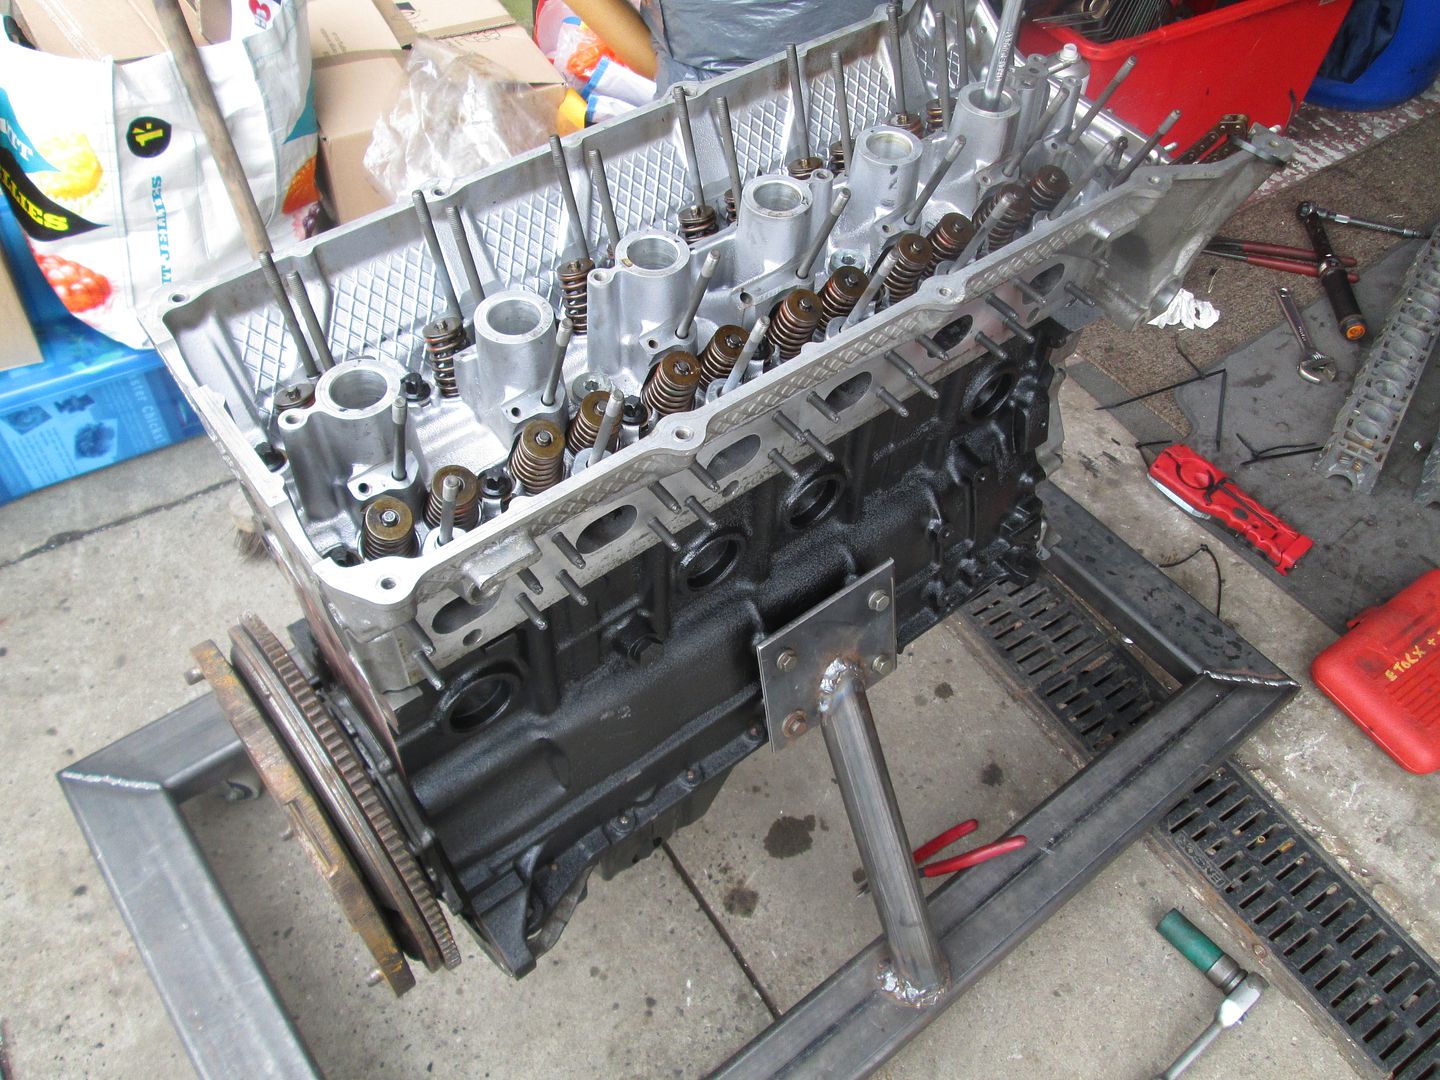
The hydraulic tappets were then fitted, along with the cam trays, cams and caps. All with plenty of assembly grease again.
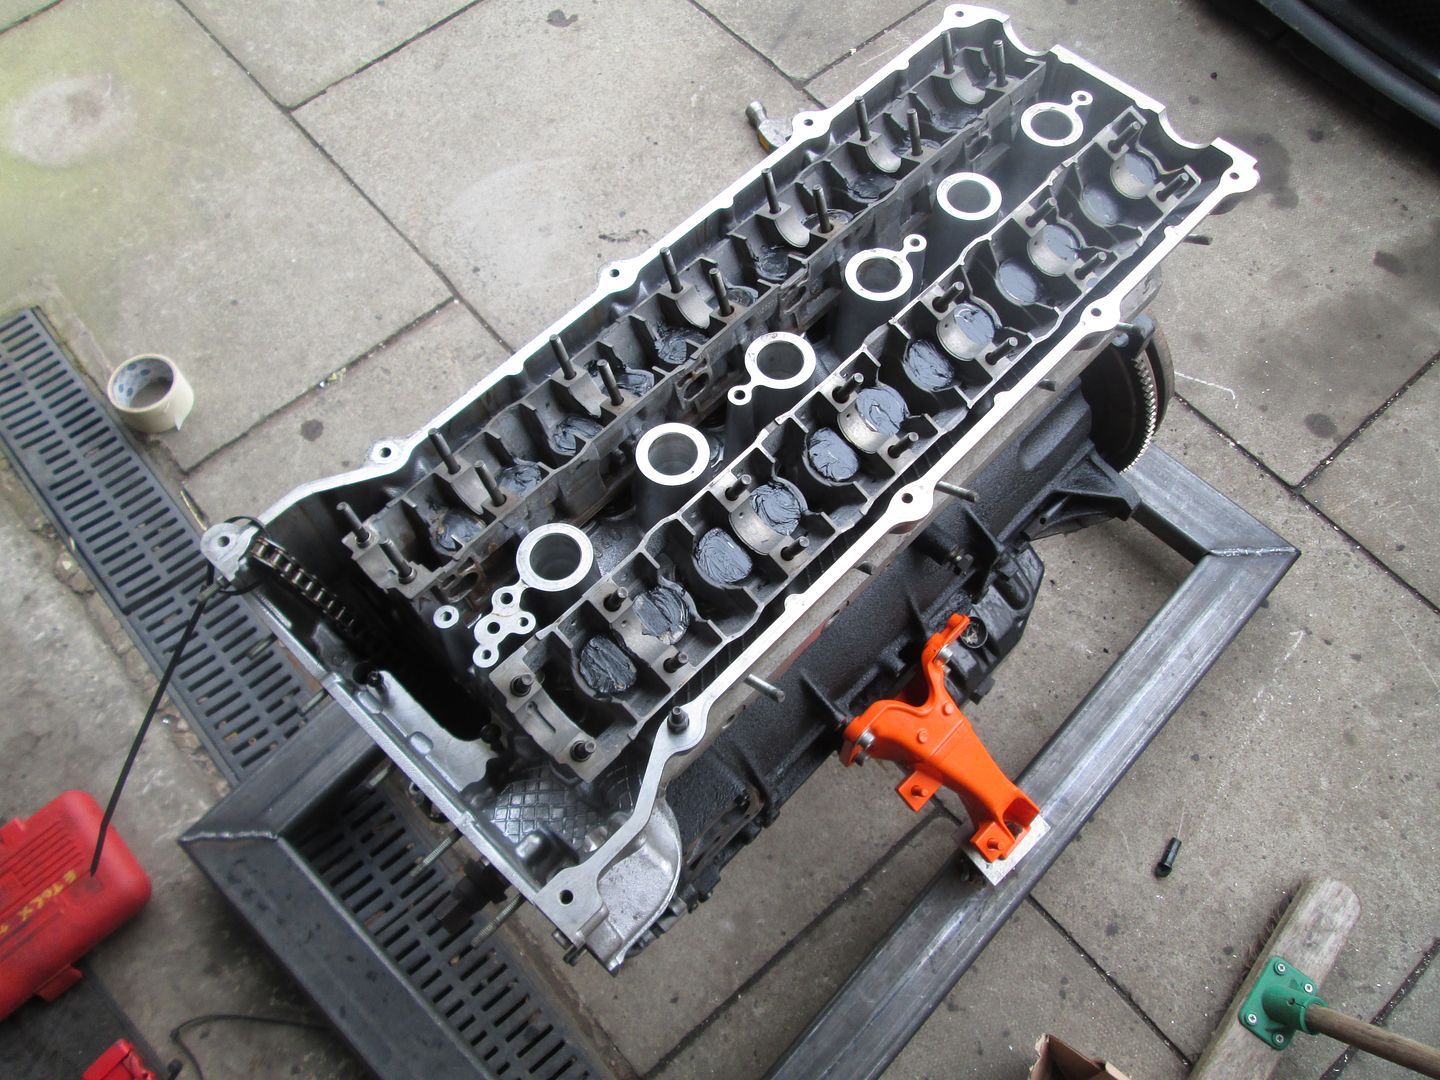
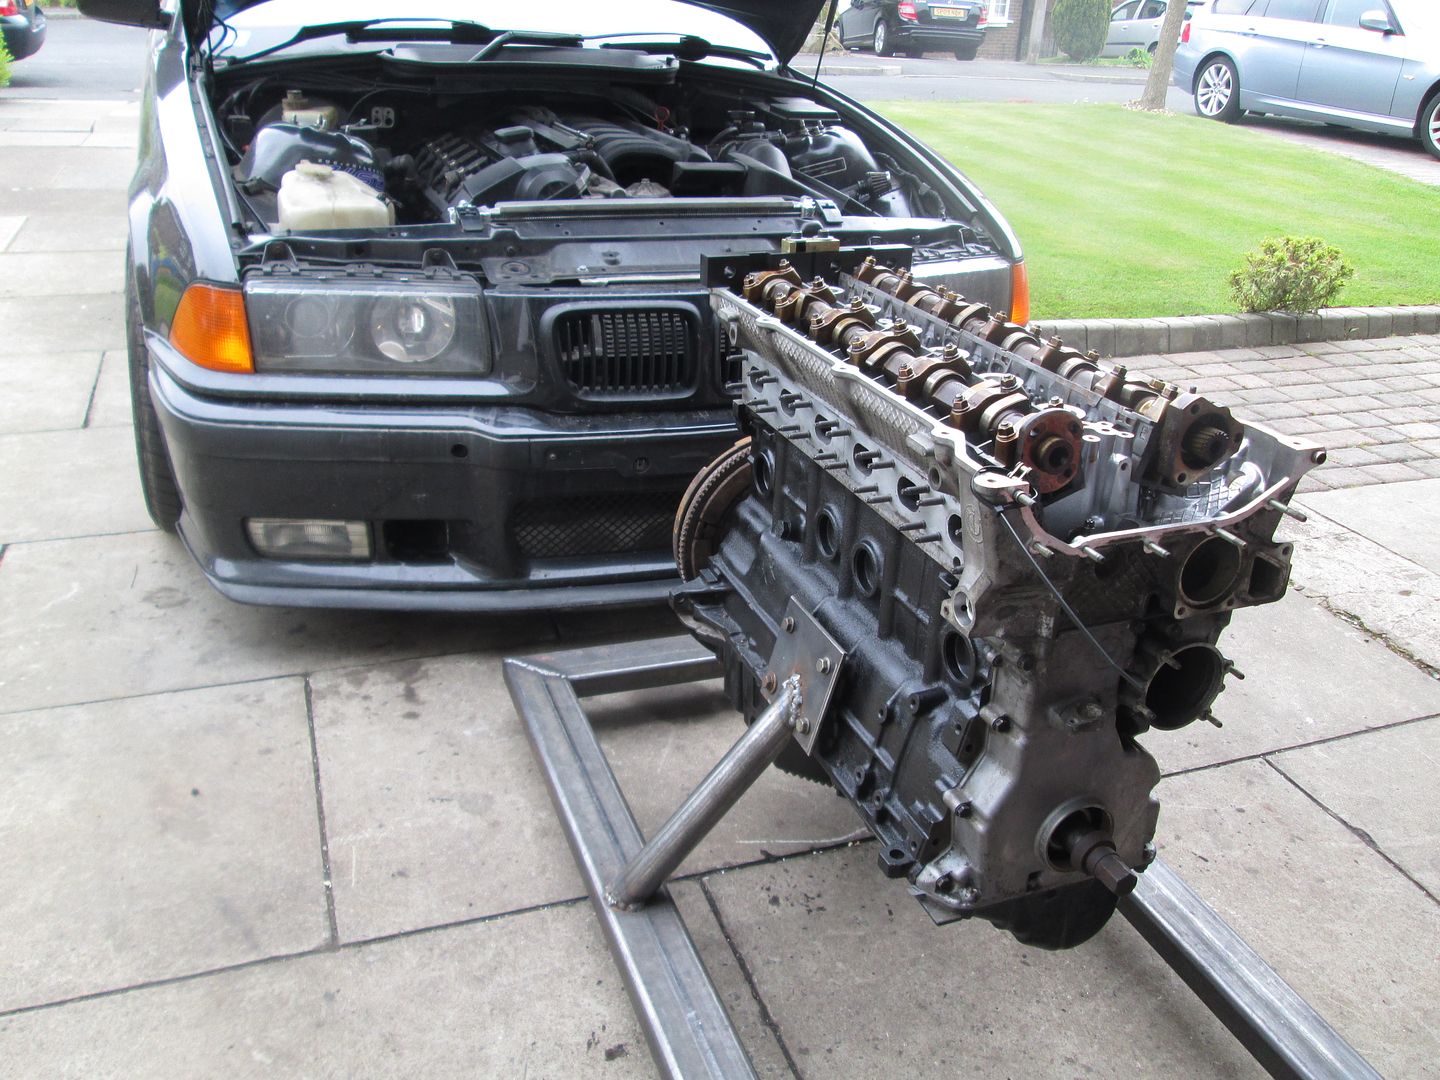
The engine was then timed up, along with new tensioner springs..
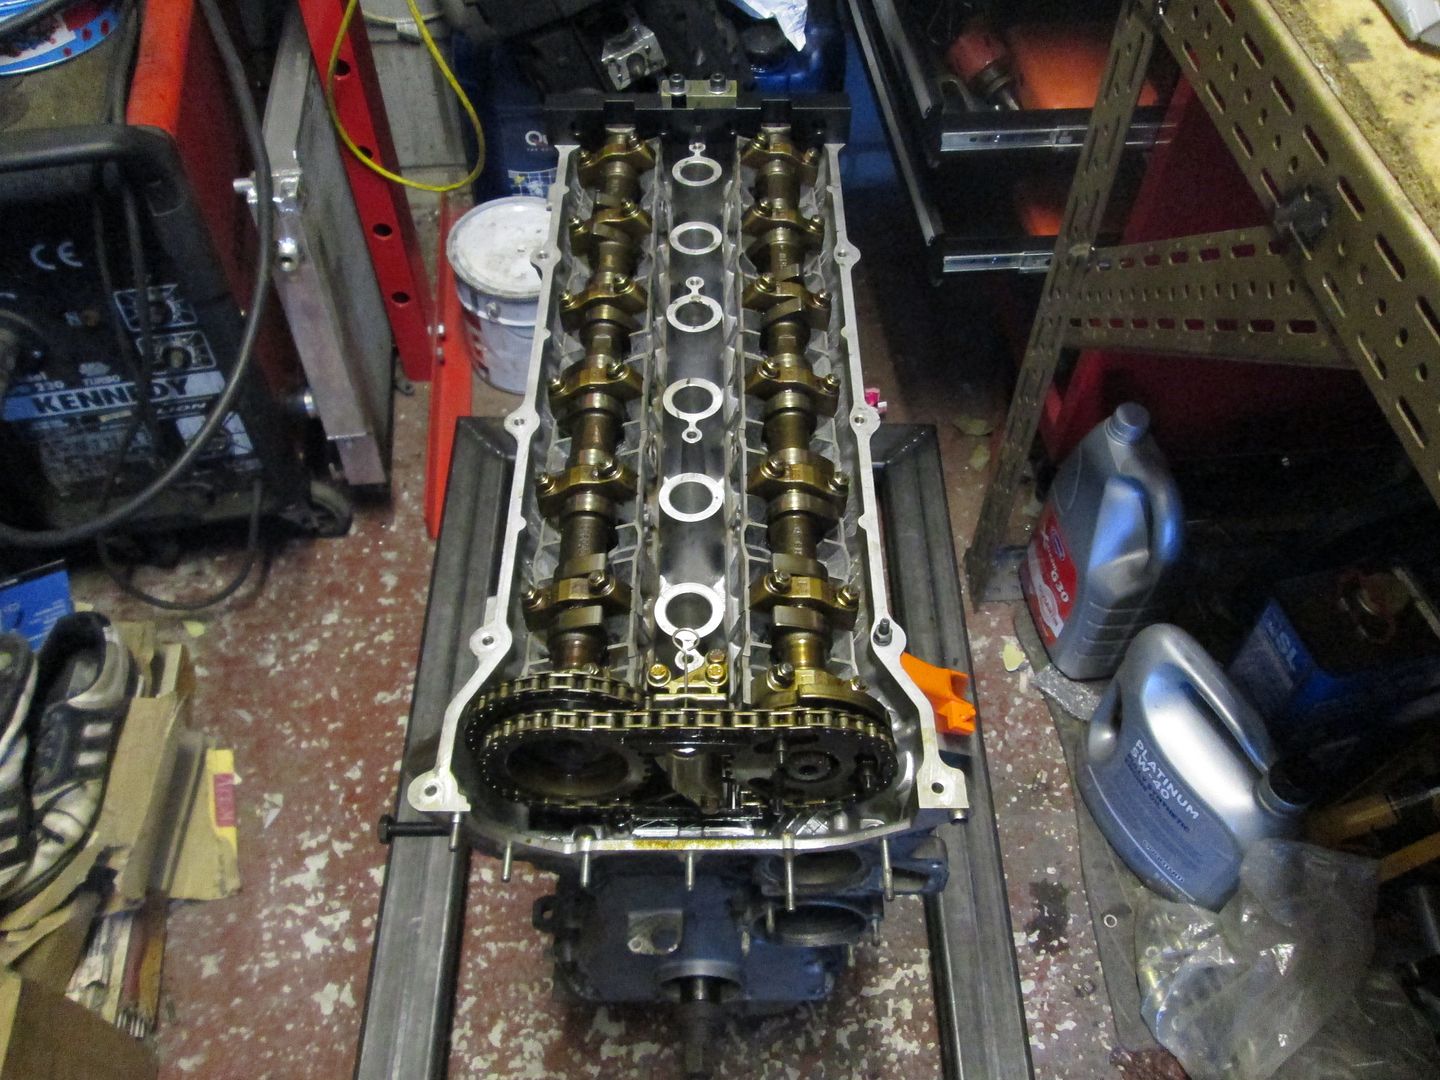
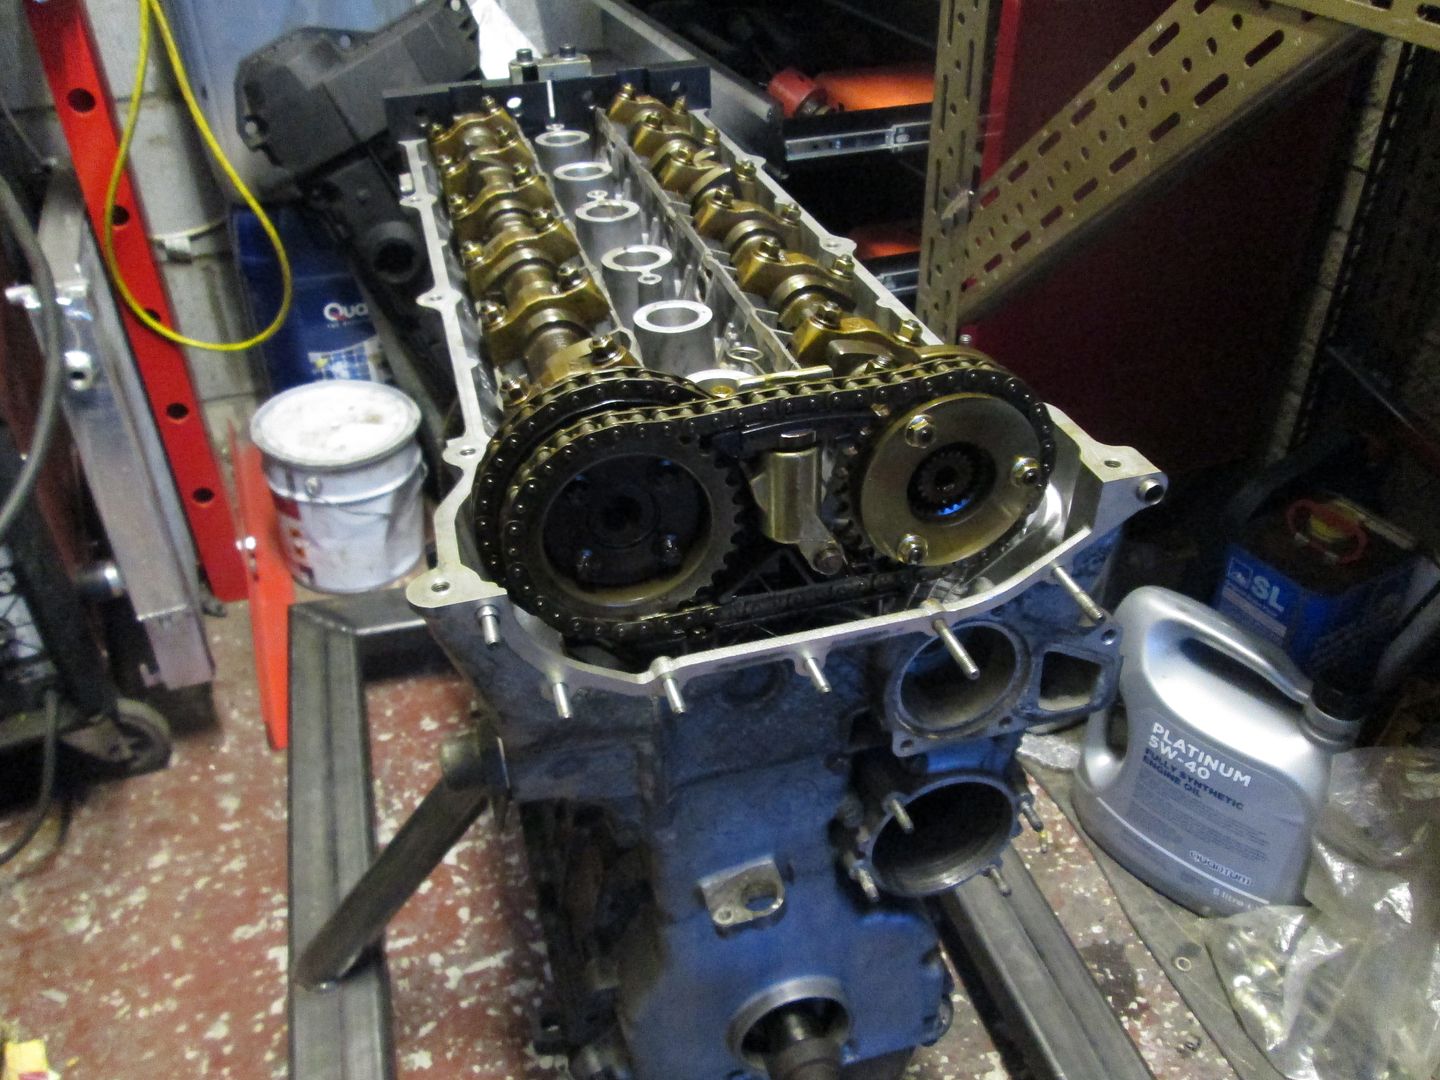
VANOS unit was pulled apart and seals replaced..
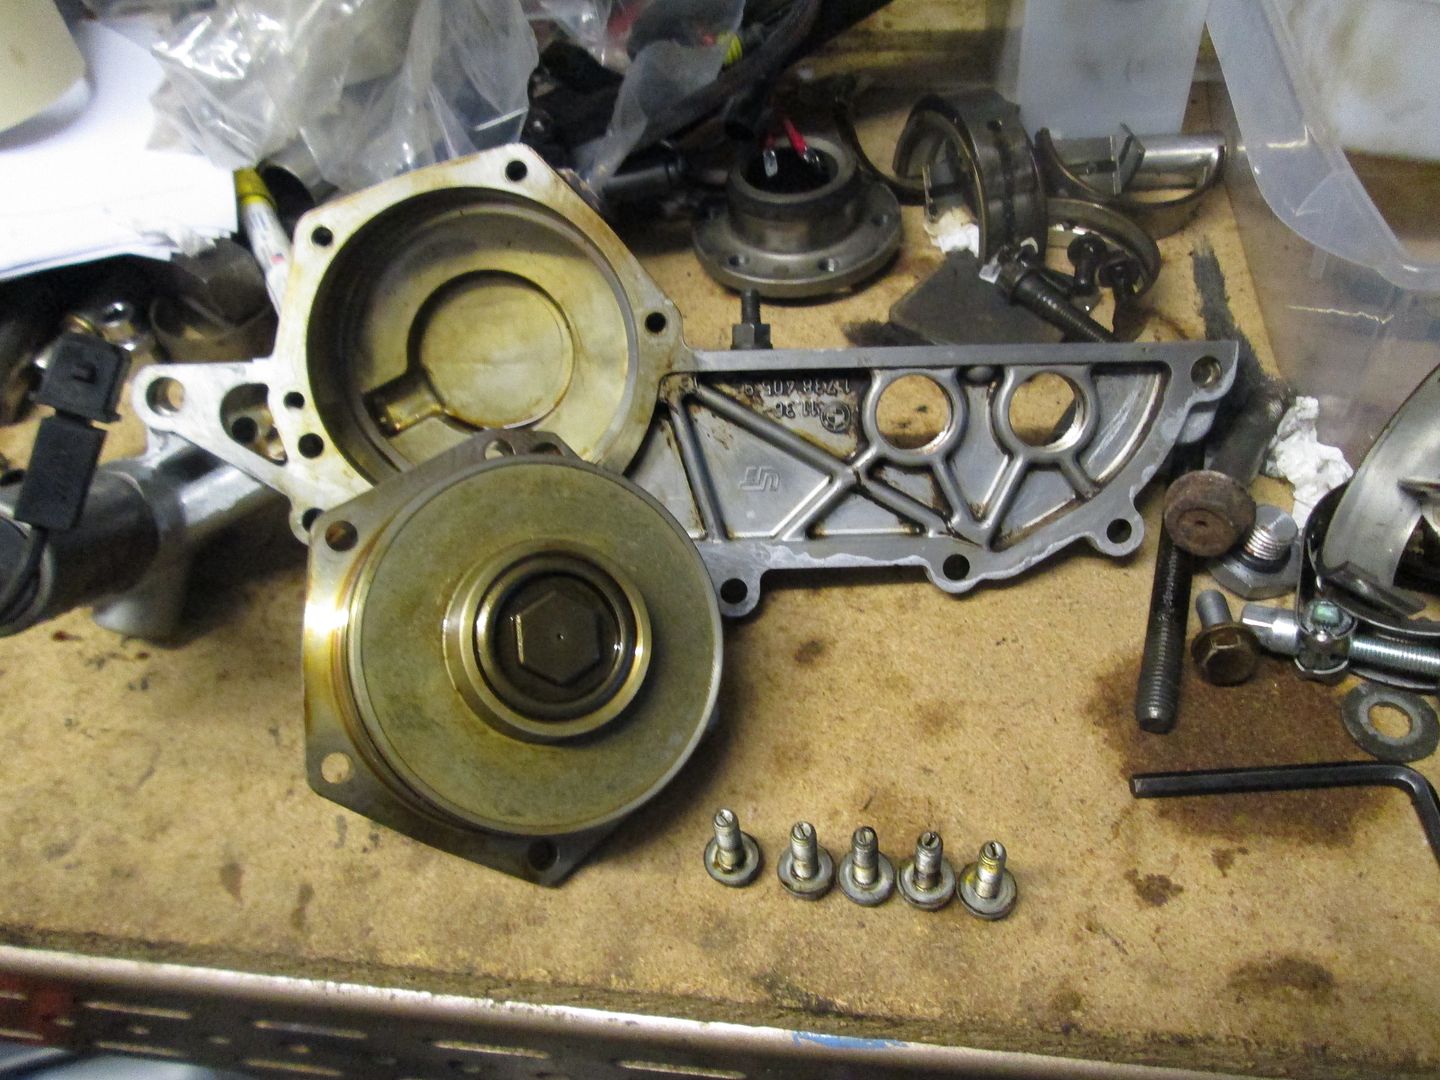
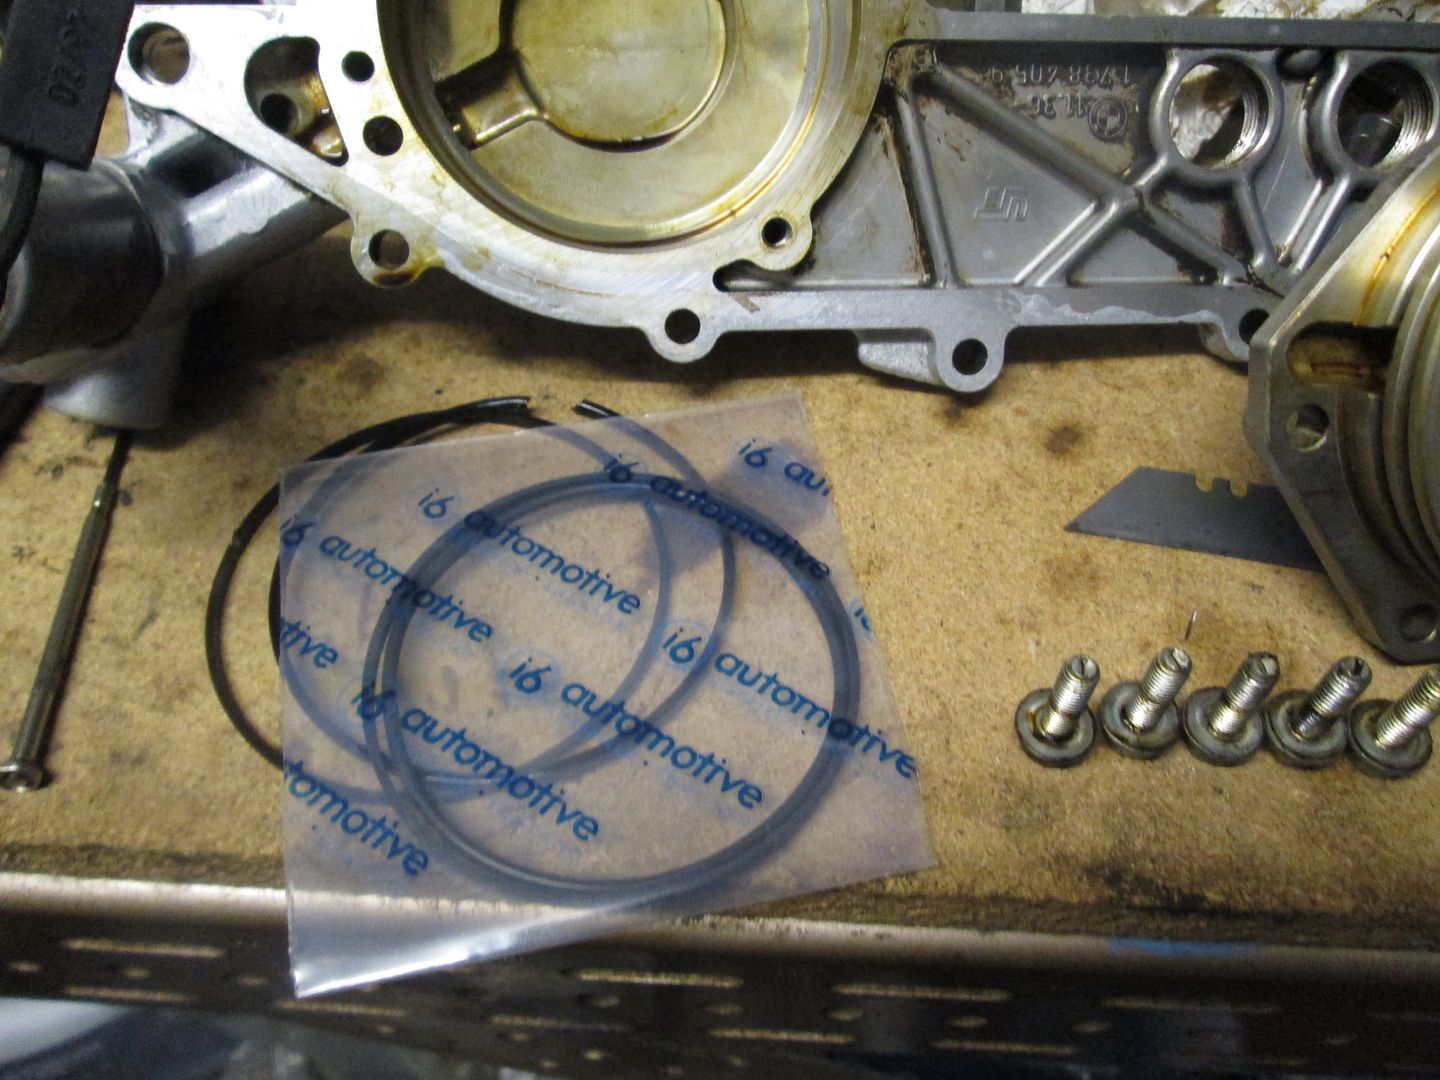
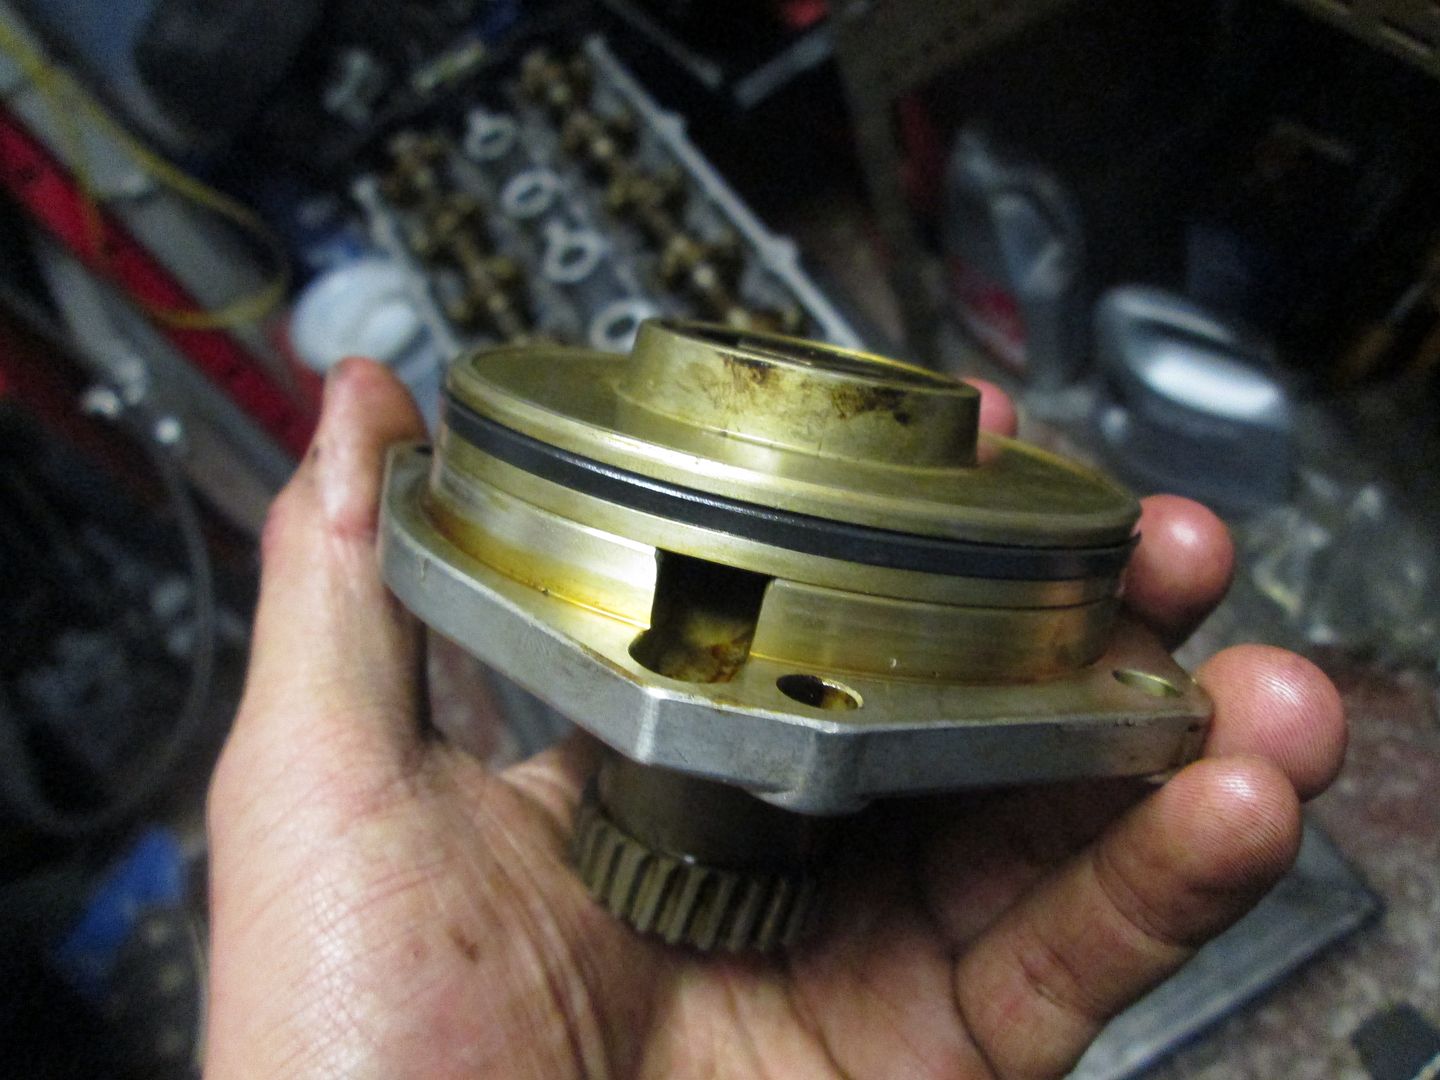
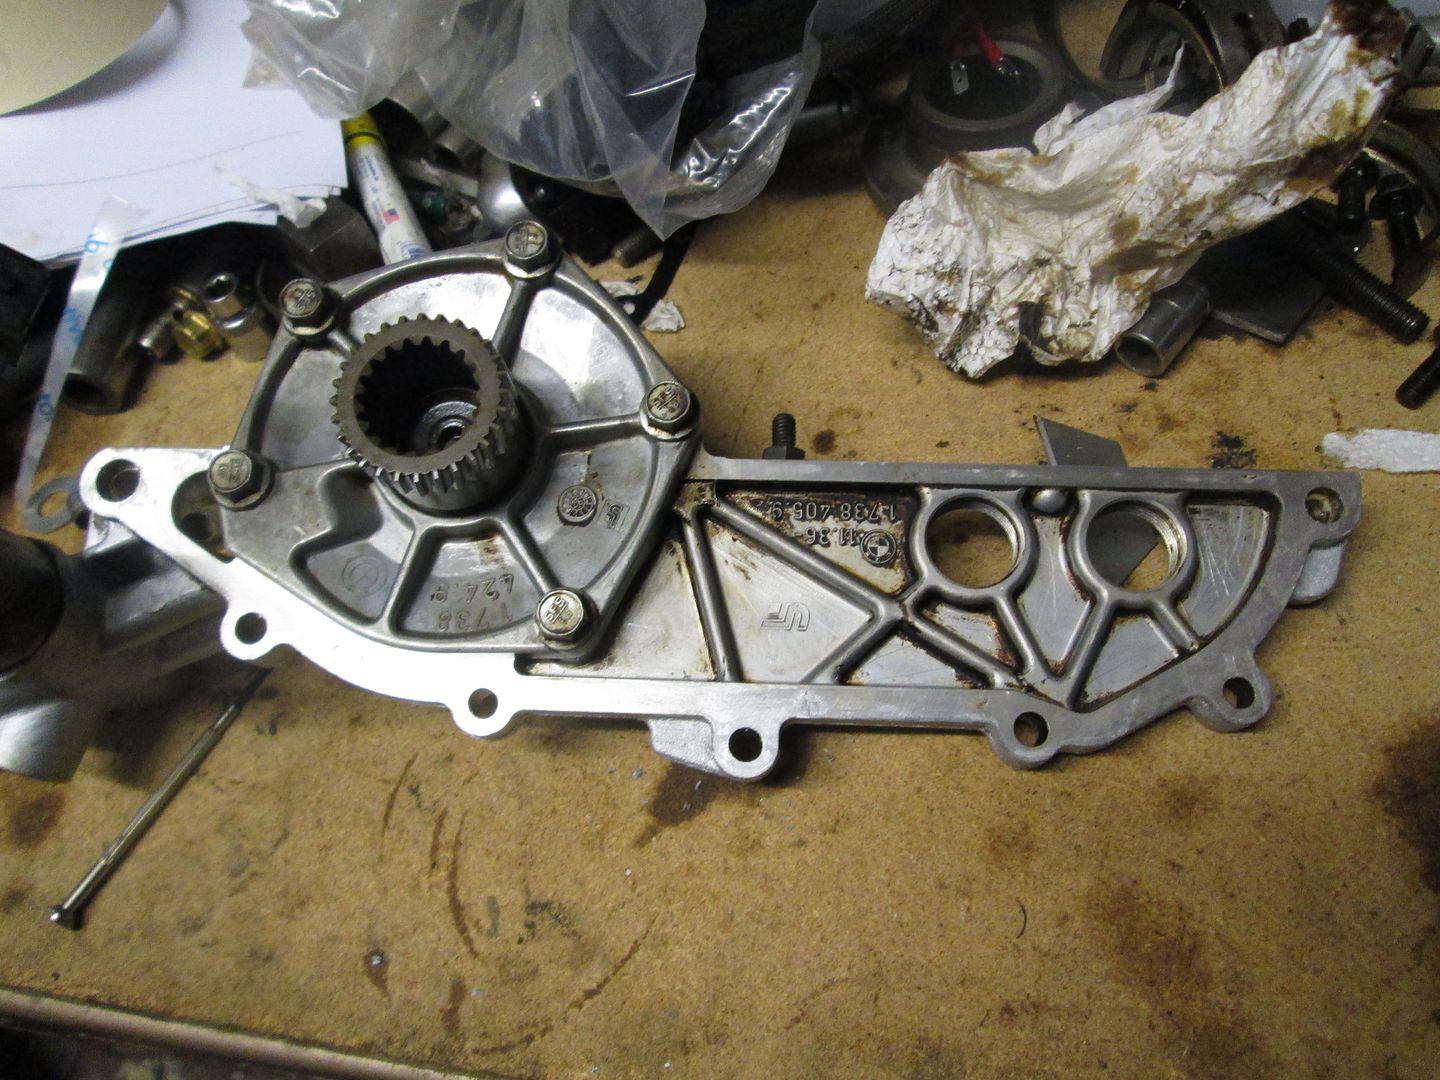
The VANOS unit was then installed onto the head, with a new gasket..
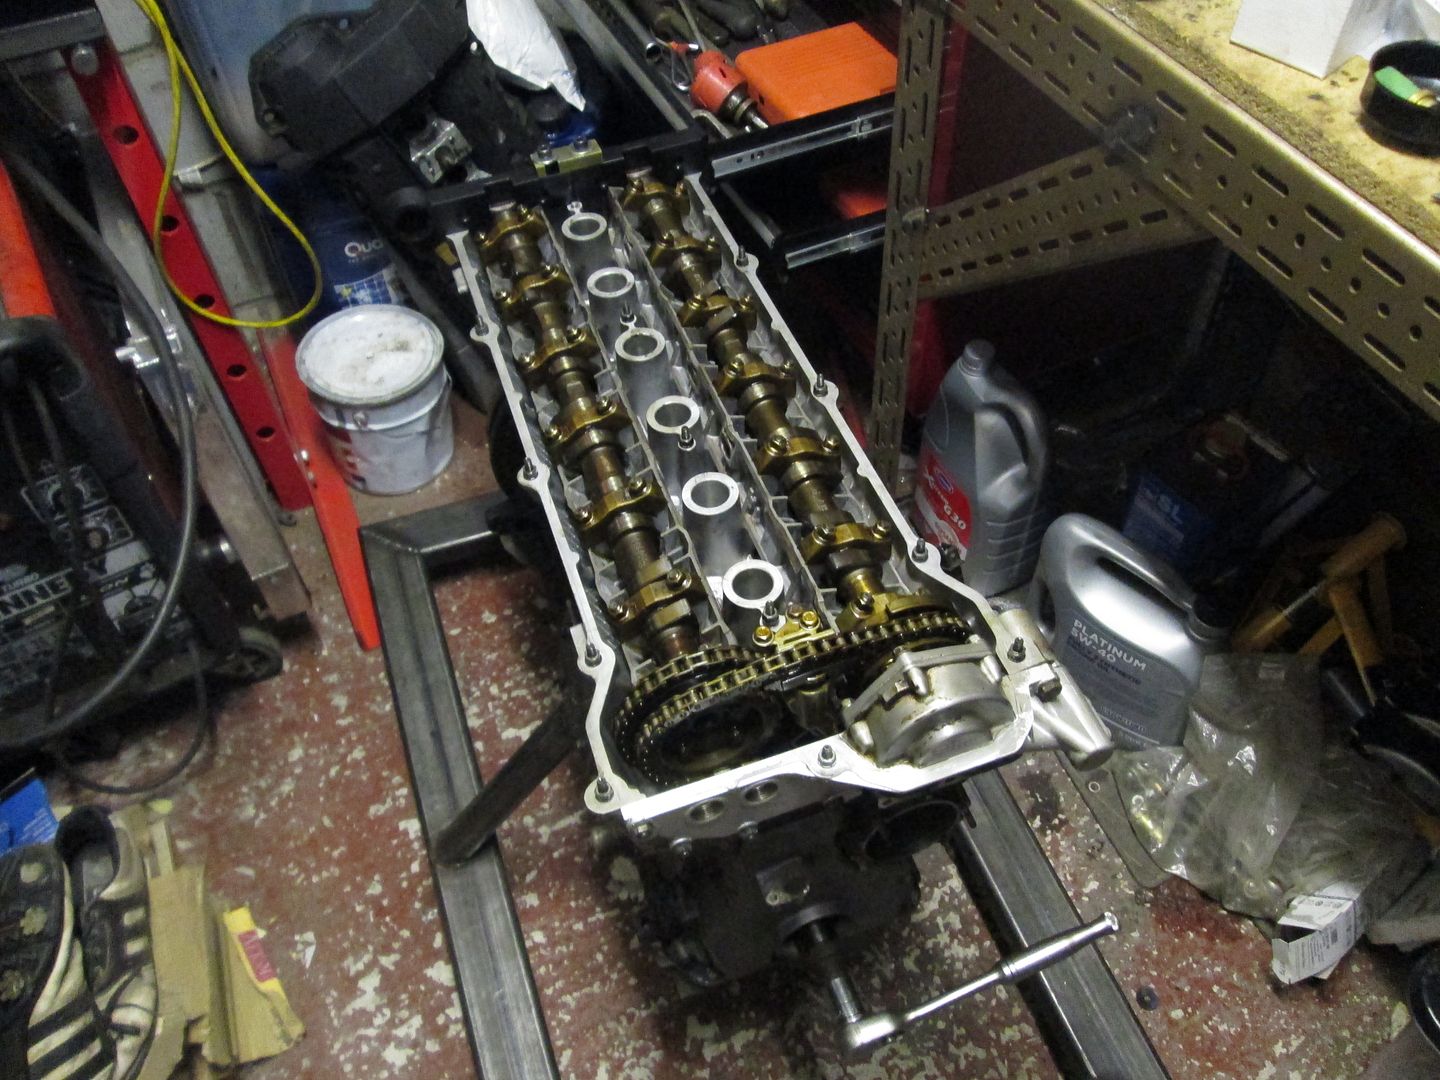
New crank seals at both ends, with a new crank bolt and torqued to spec..
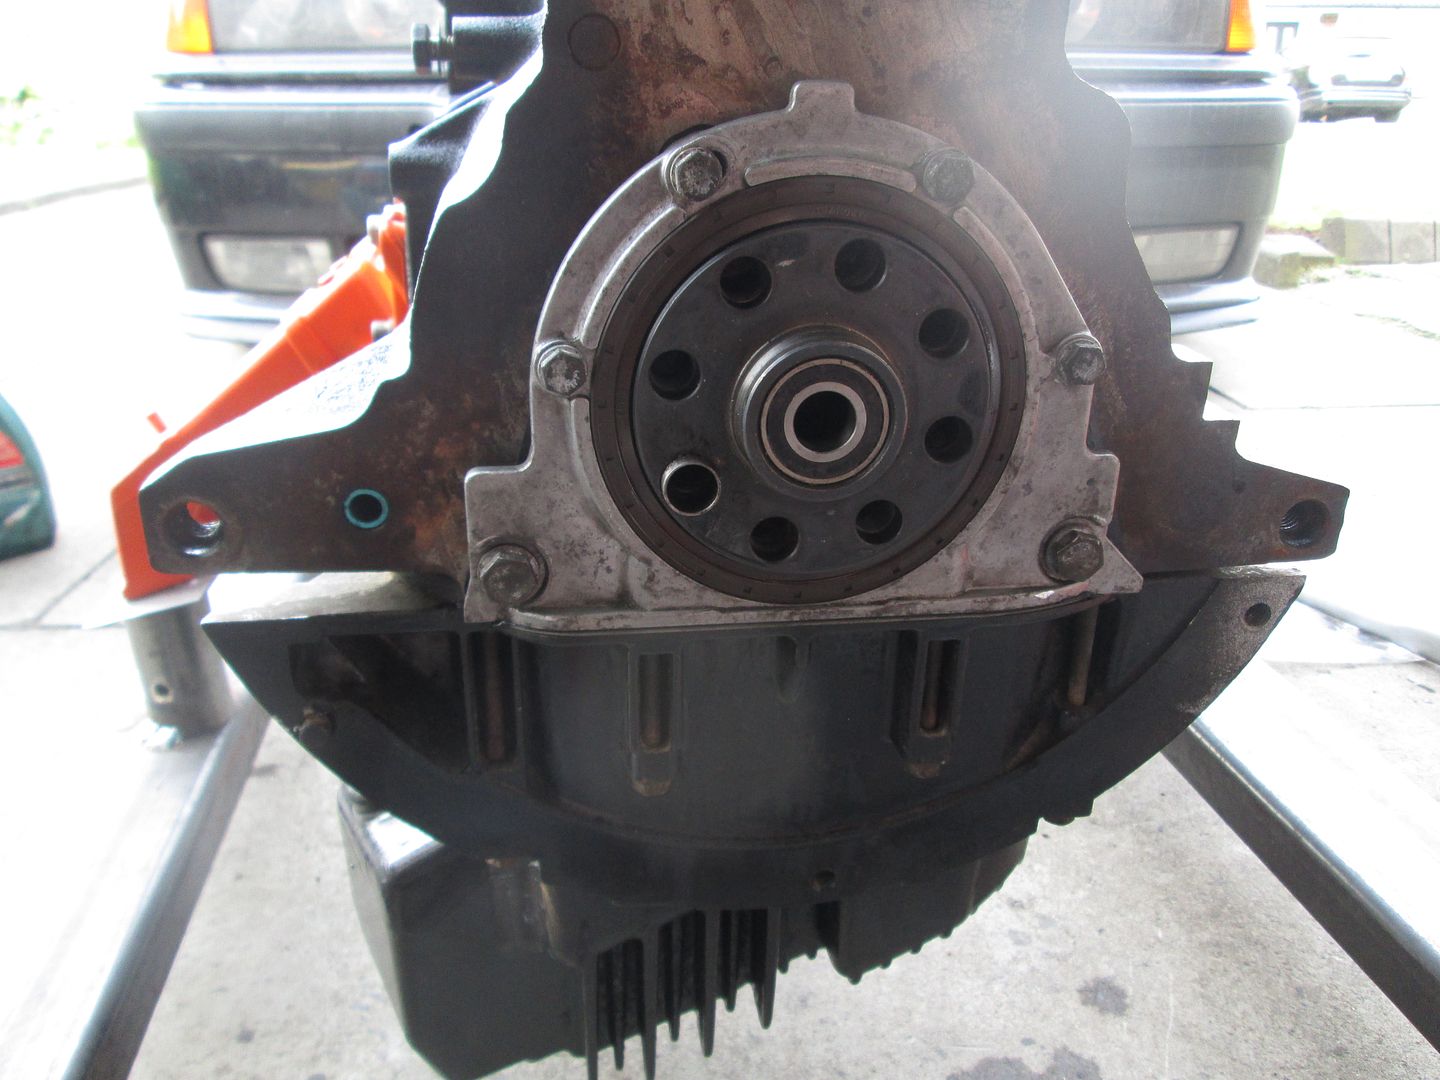
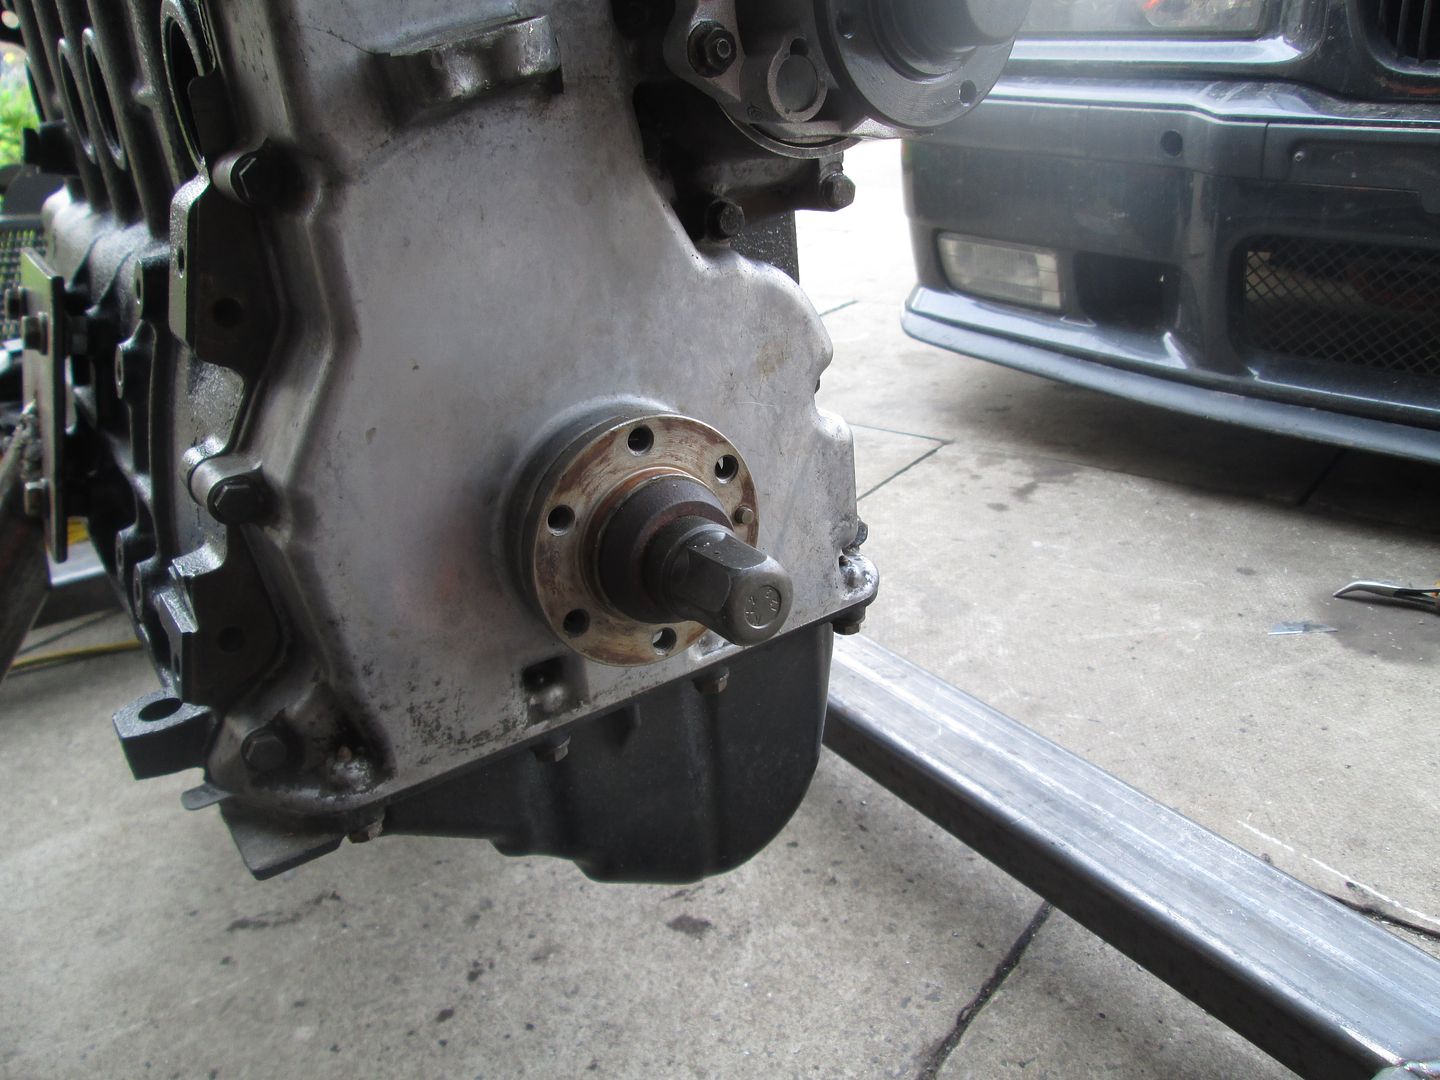
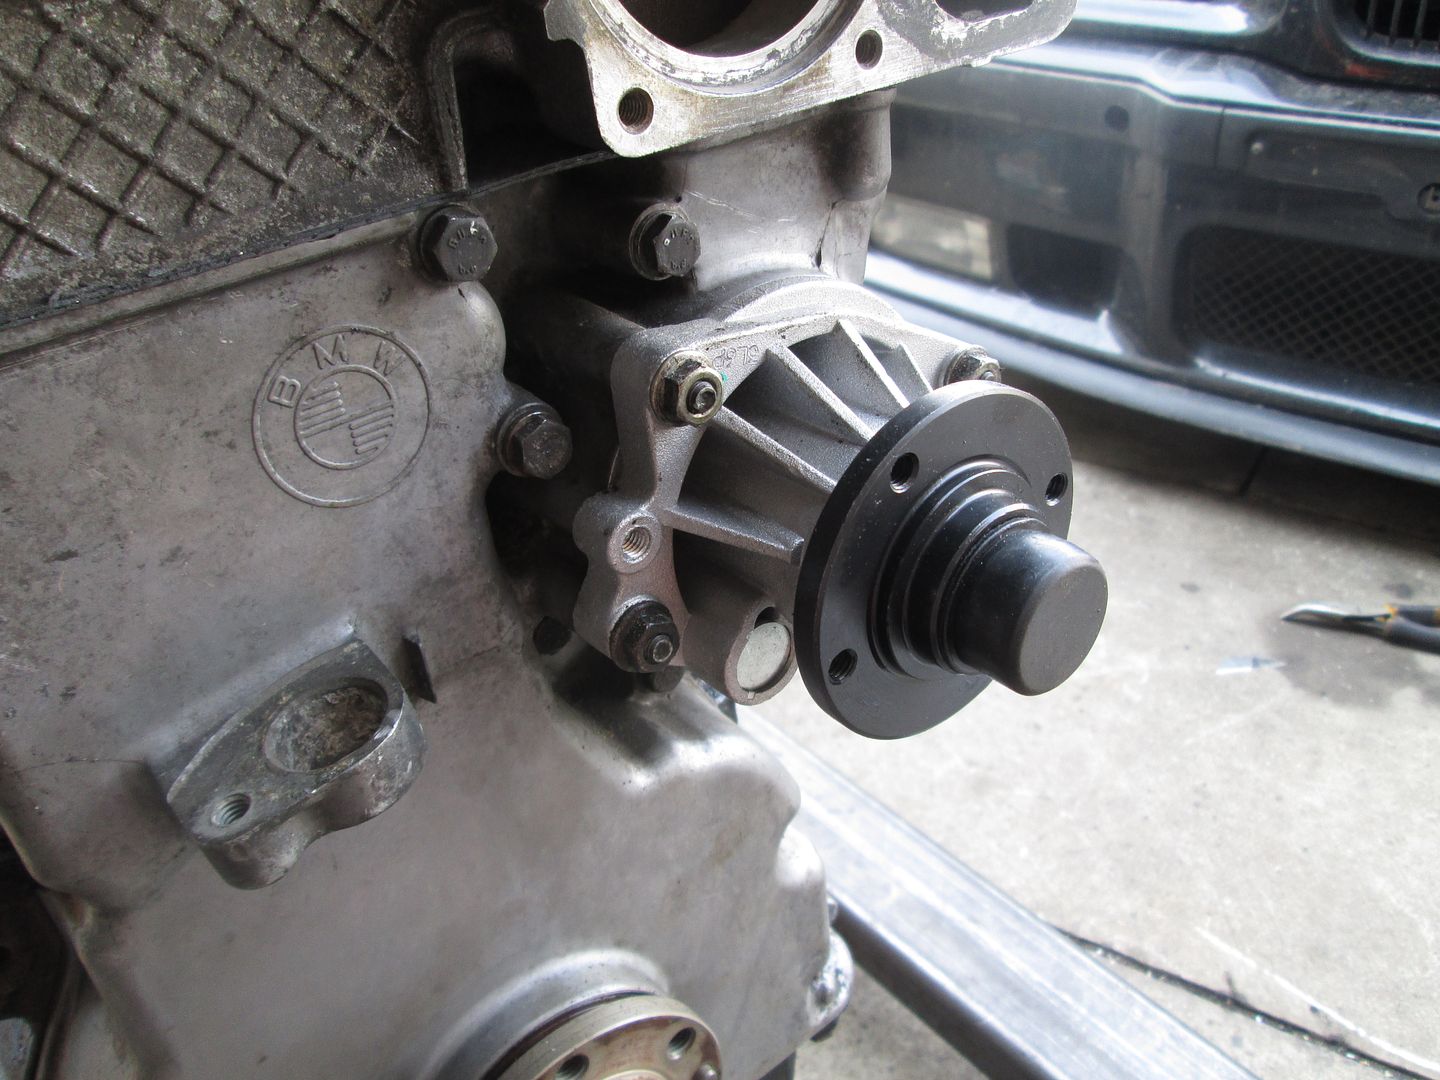
Metal impeller water pump, low temperature thermostat, new rocker cover gasket and the main timing pulley..
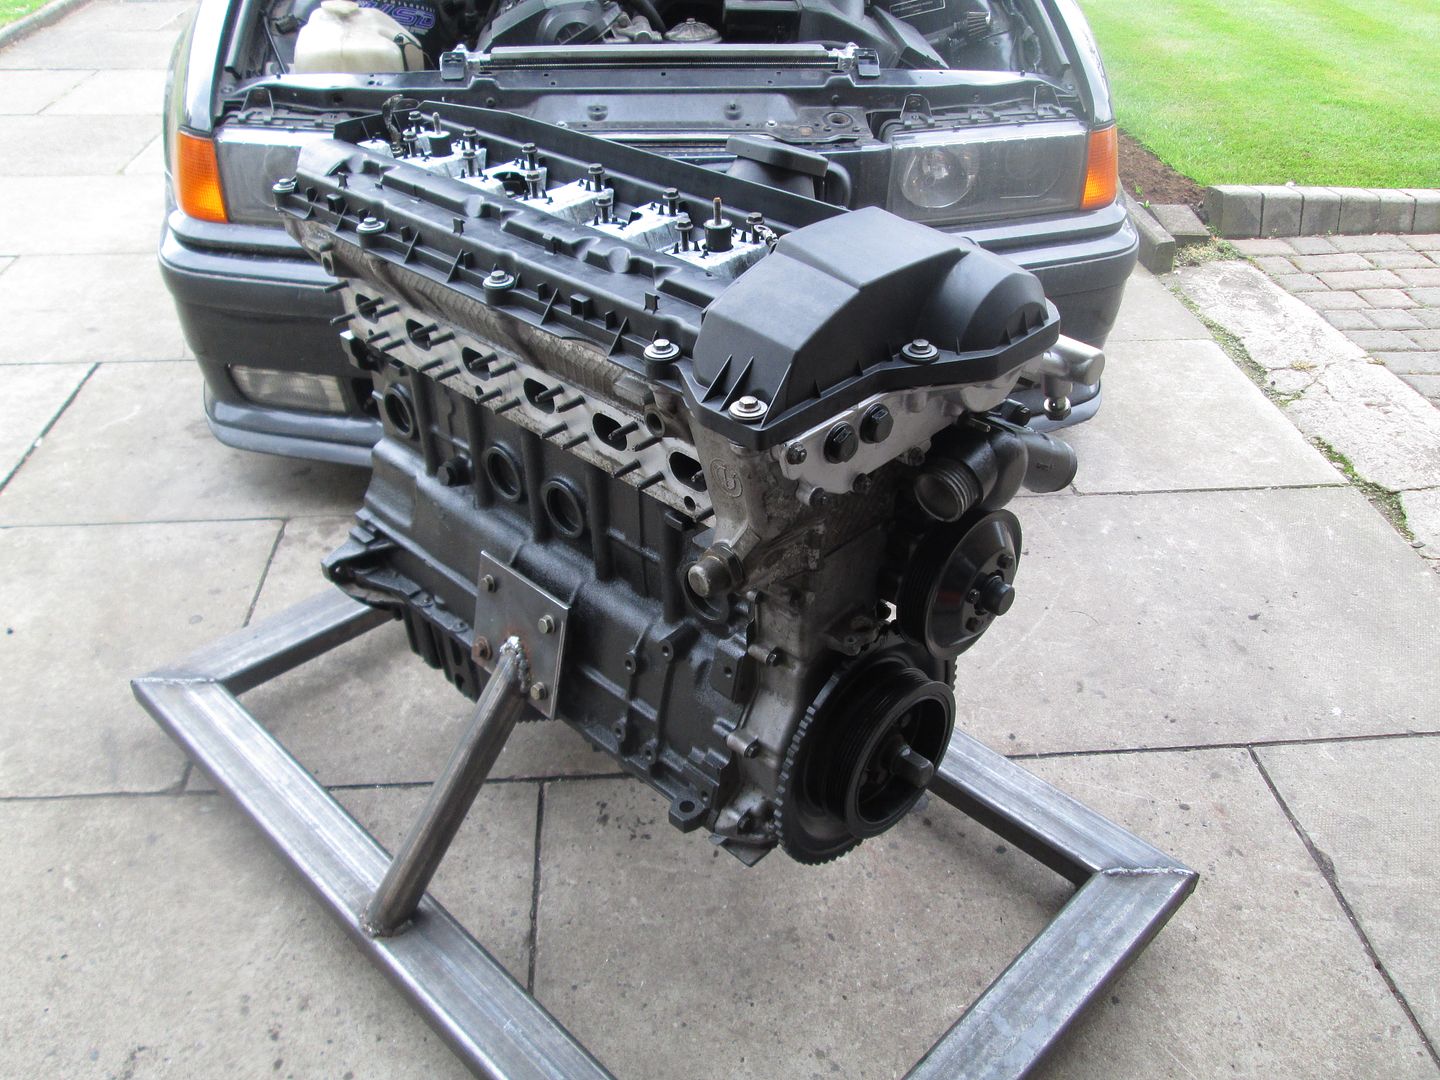
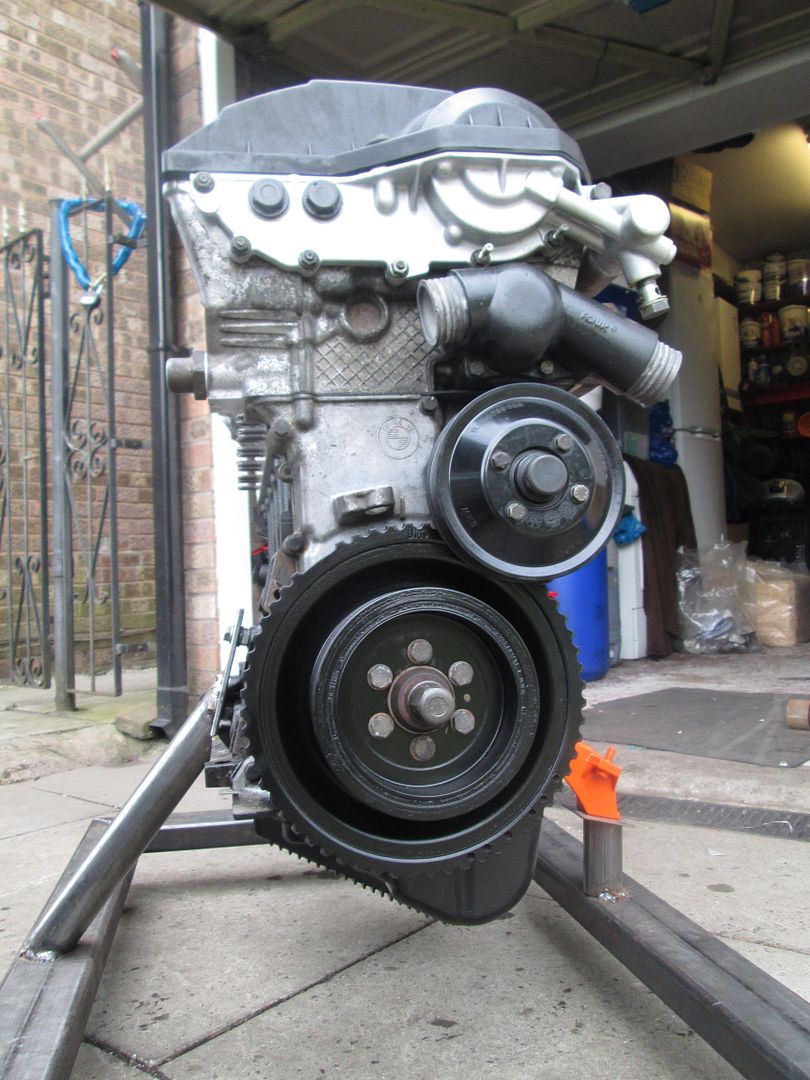
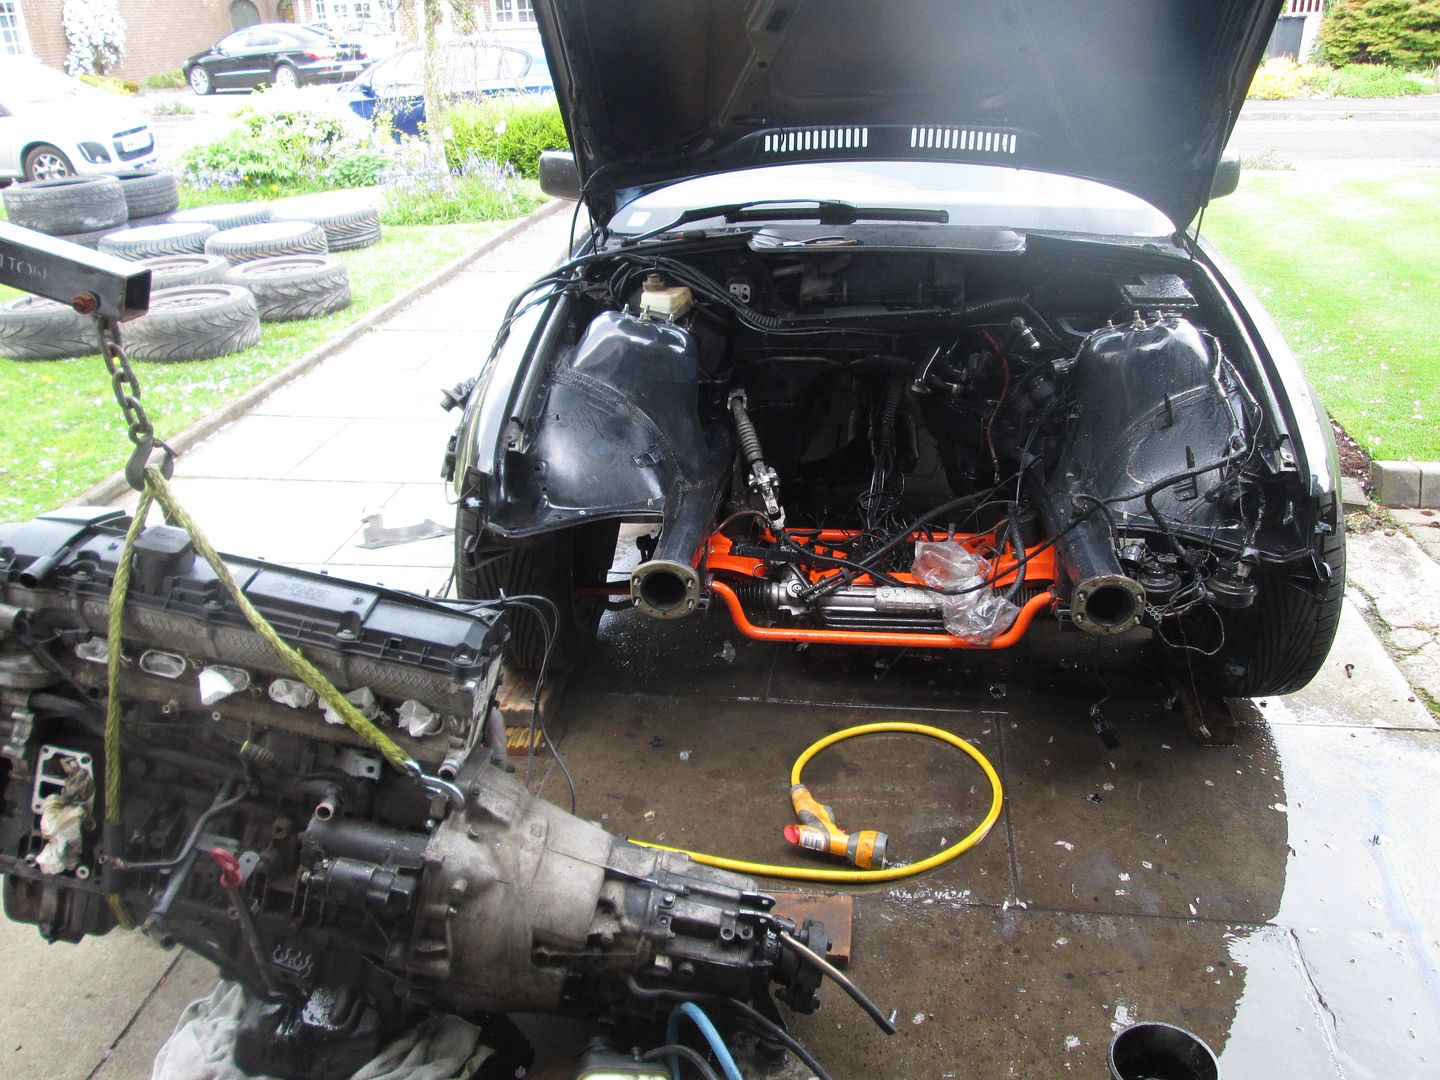
With the engine complete, all that was left to do is actually put it into the car. The old +200k motor was pulled out..
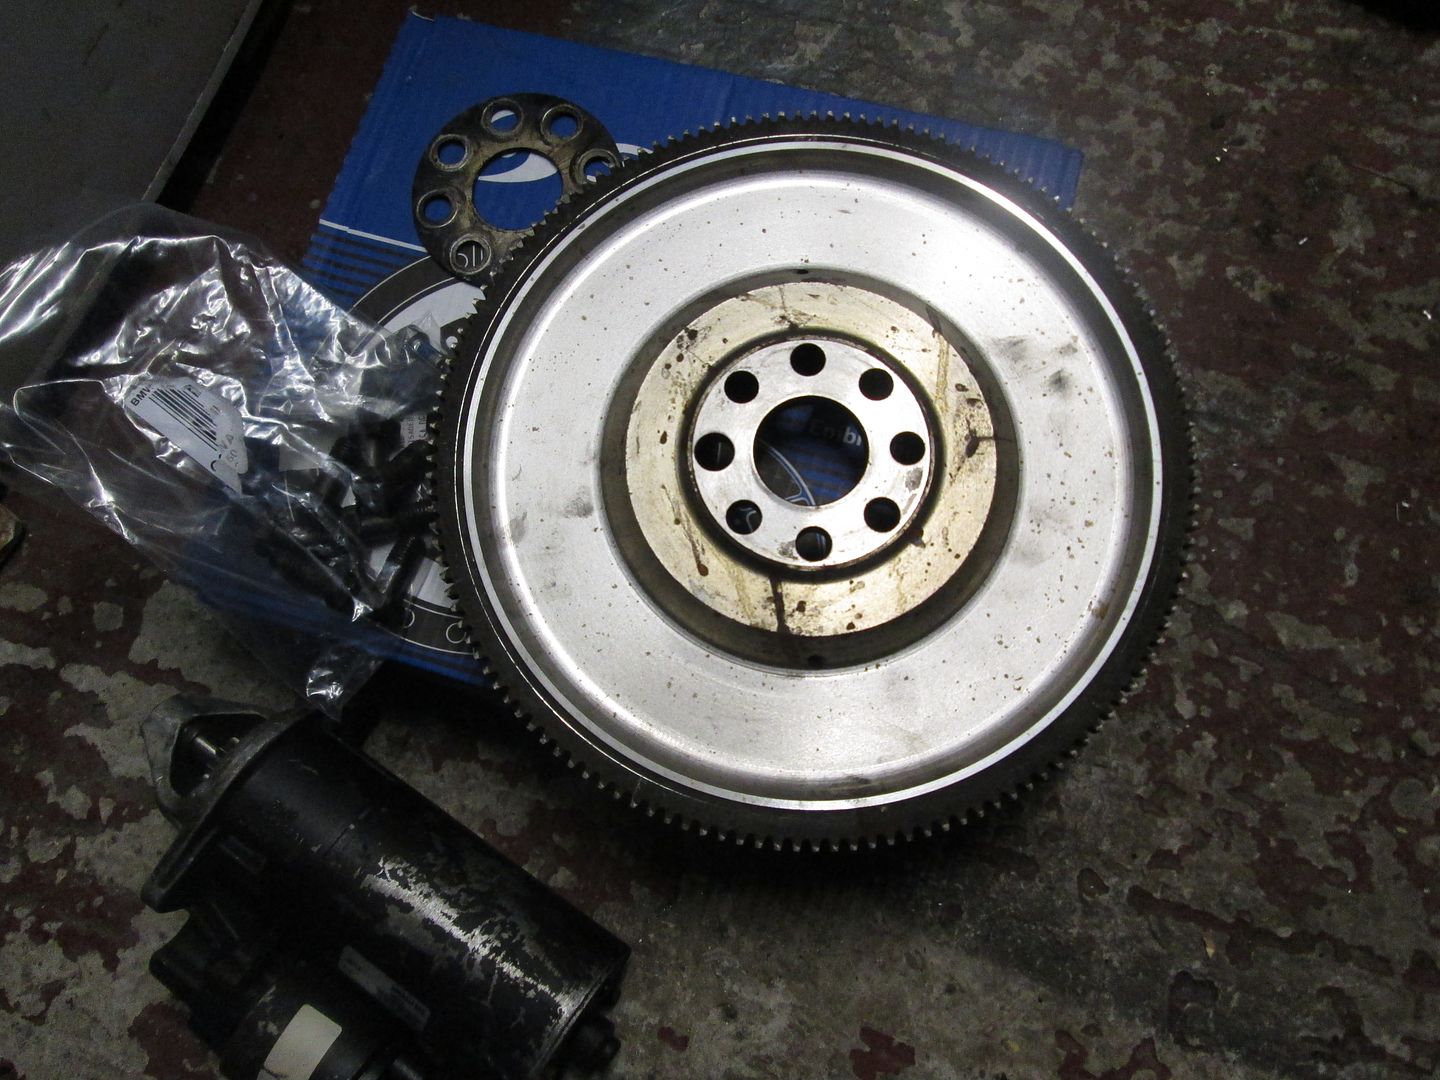
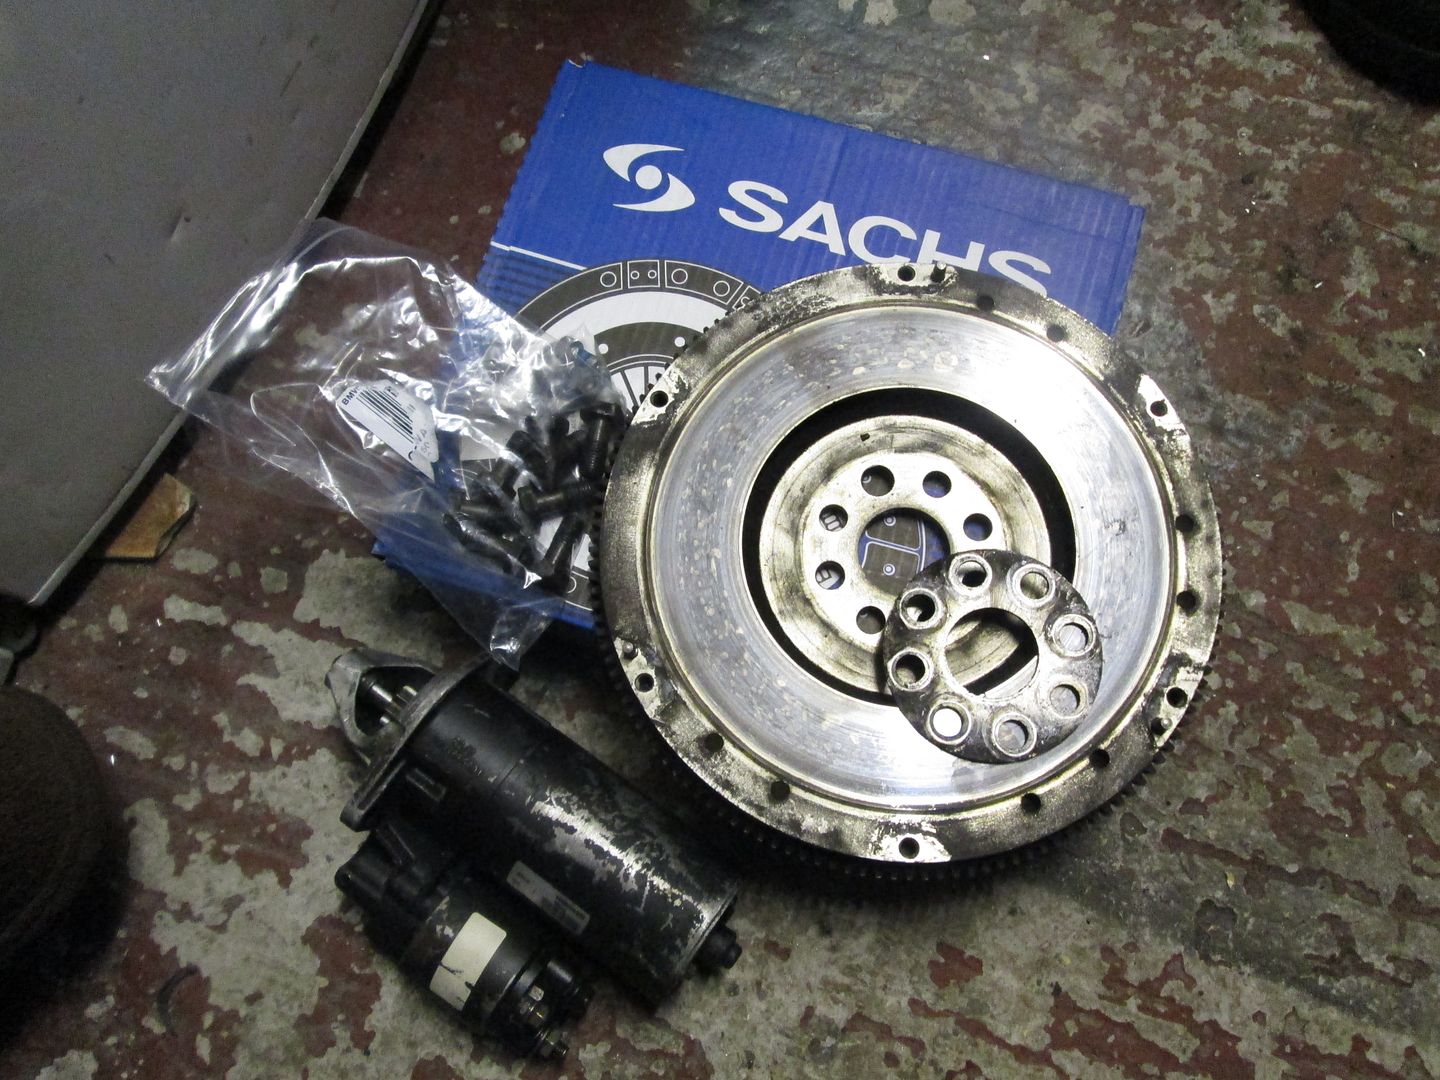
The flywheel and clutch set up were removed, and fitted to the new engine. This consists of an M20 325i flywheel, and a Sachs clutch. Contrary to popular belief, you do not need a taller release bearing to make this work if you are using the ZF (standard 328i and M3) transmission. It all works fine.
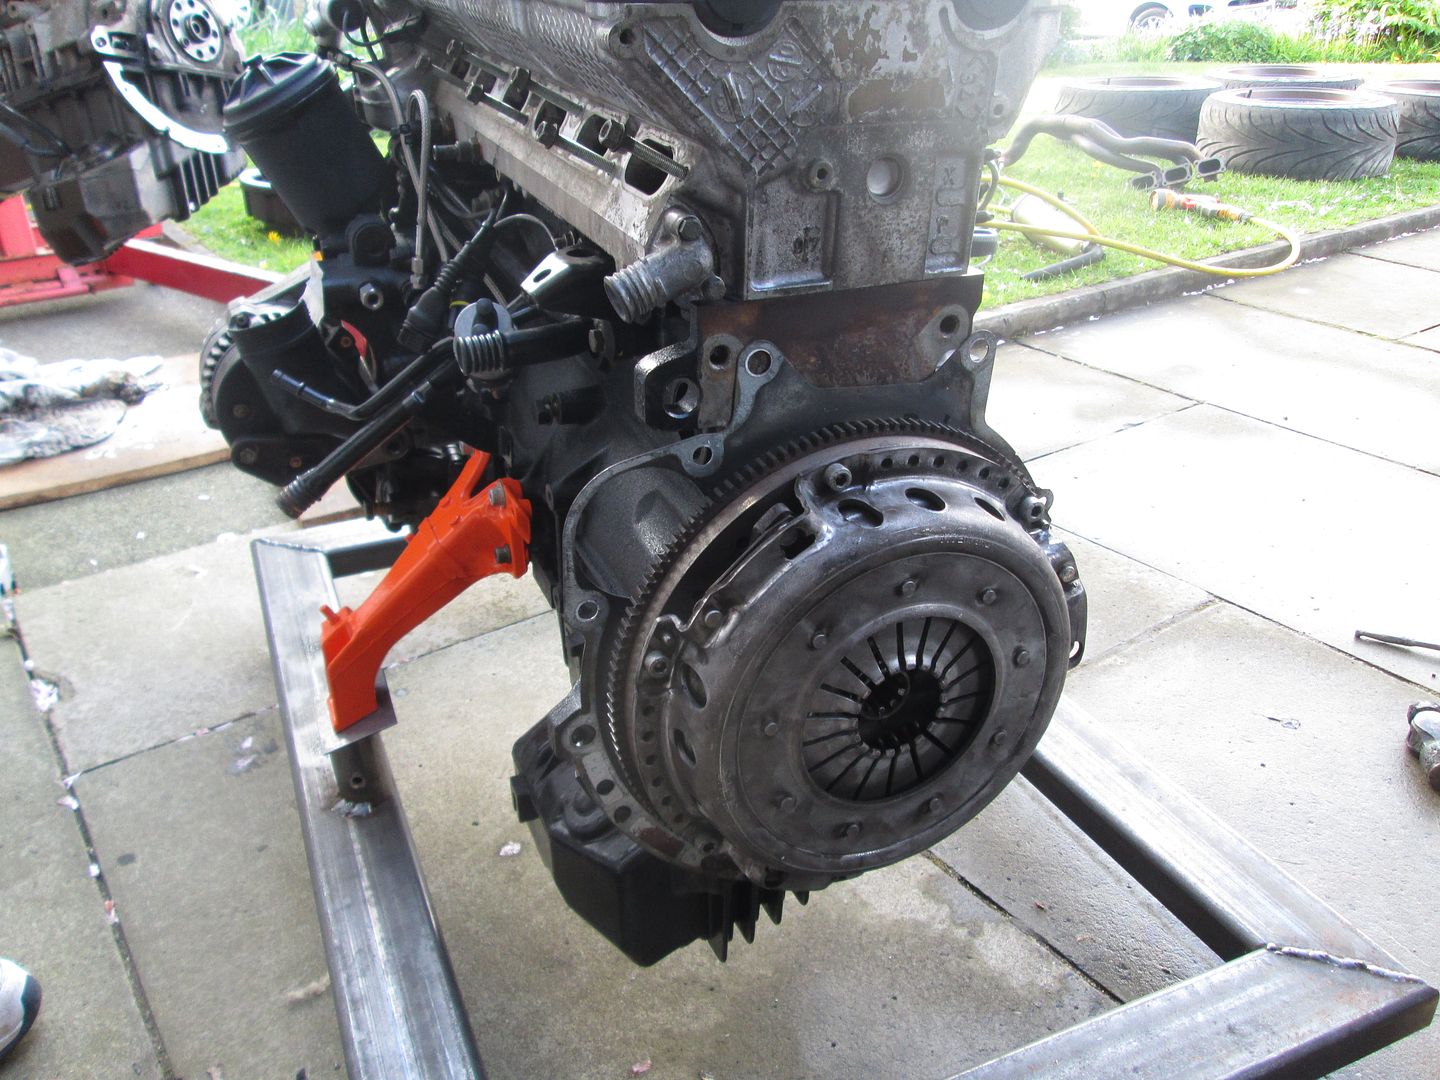
I also fitted the oil filter housing (with a new gasket) and various other bits before the engine went into the car. The oil filter housing had been previously changed to one from an M3, as I ran an oil cooler on the old engine, along with auxiliary oil pressure/temperature gauges. The 'new' VANOS oil feed line was also swapped, previously in use on the old engine also.
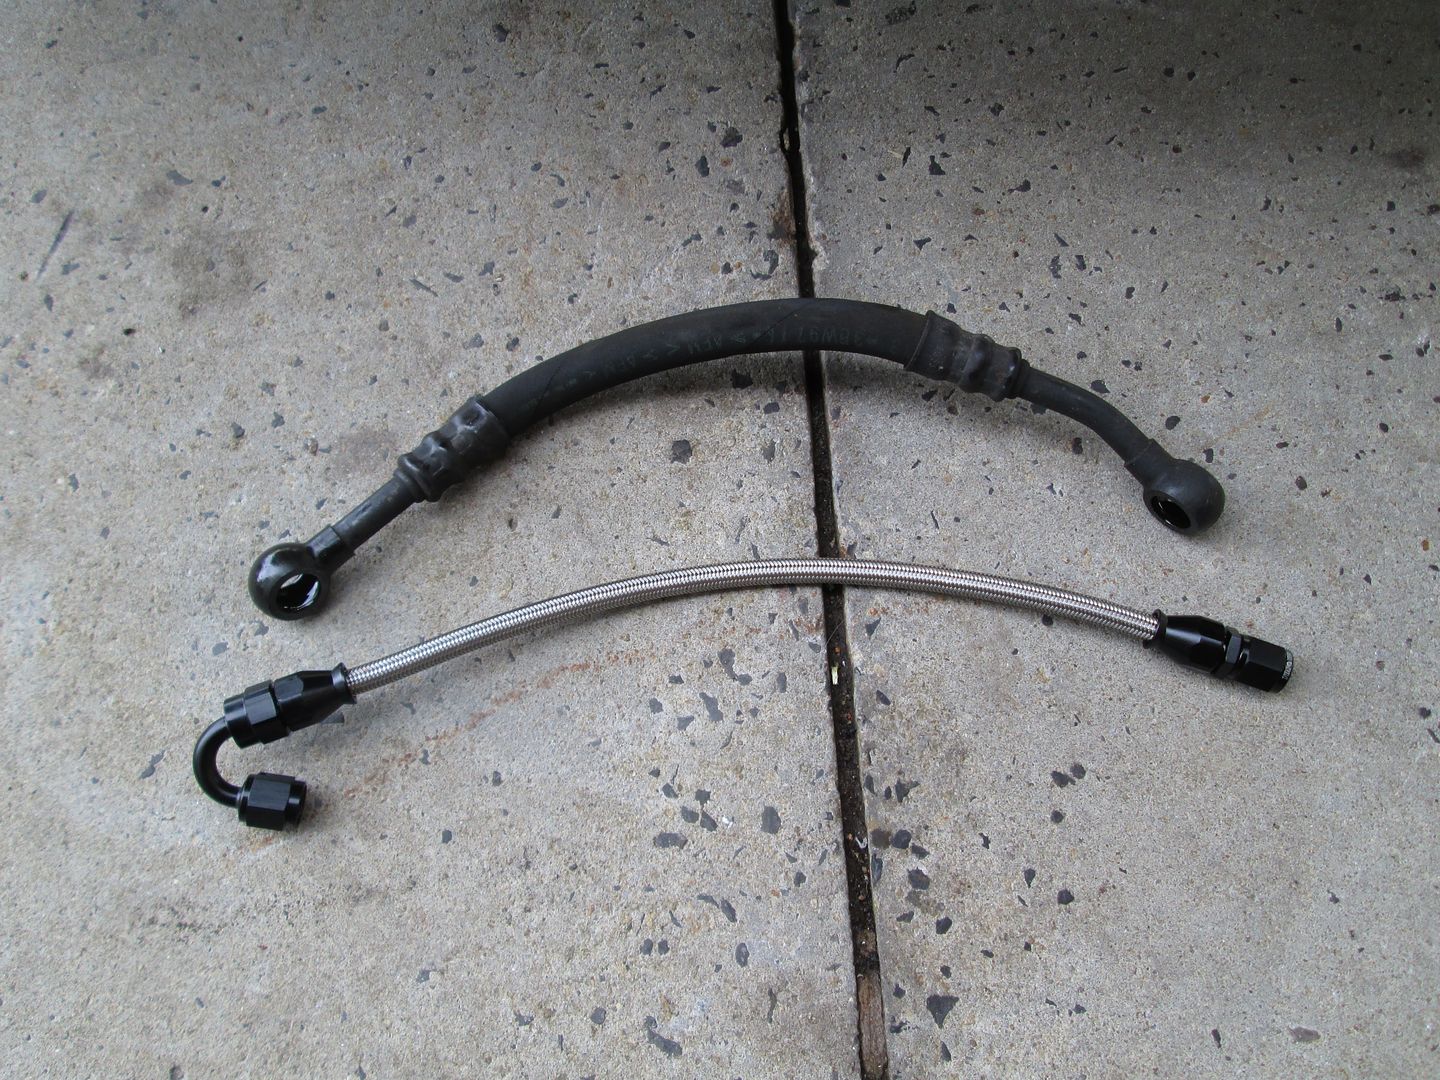
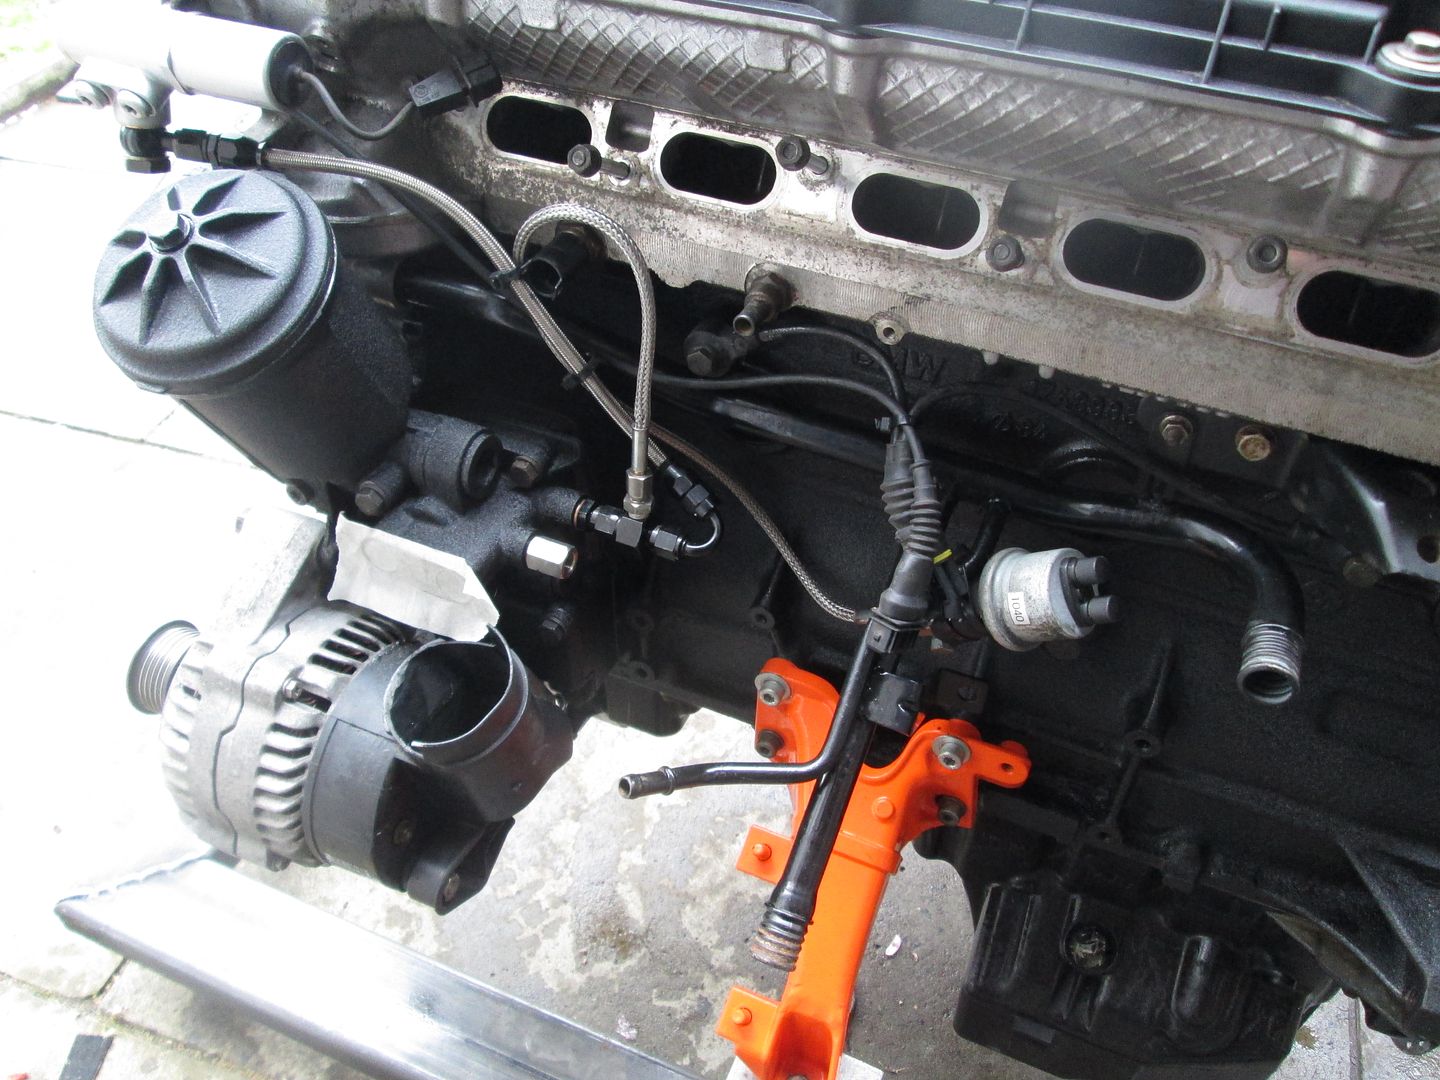
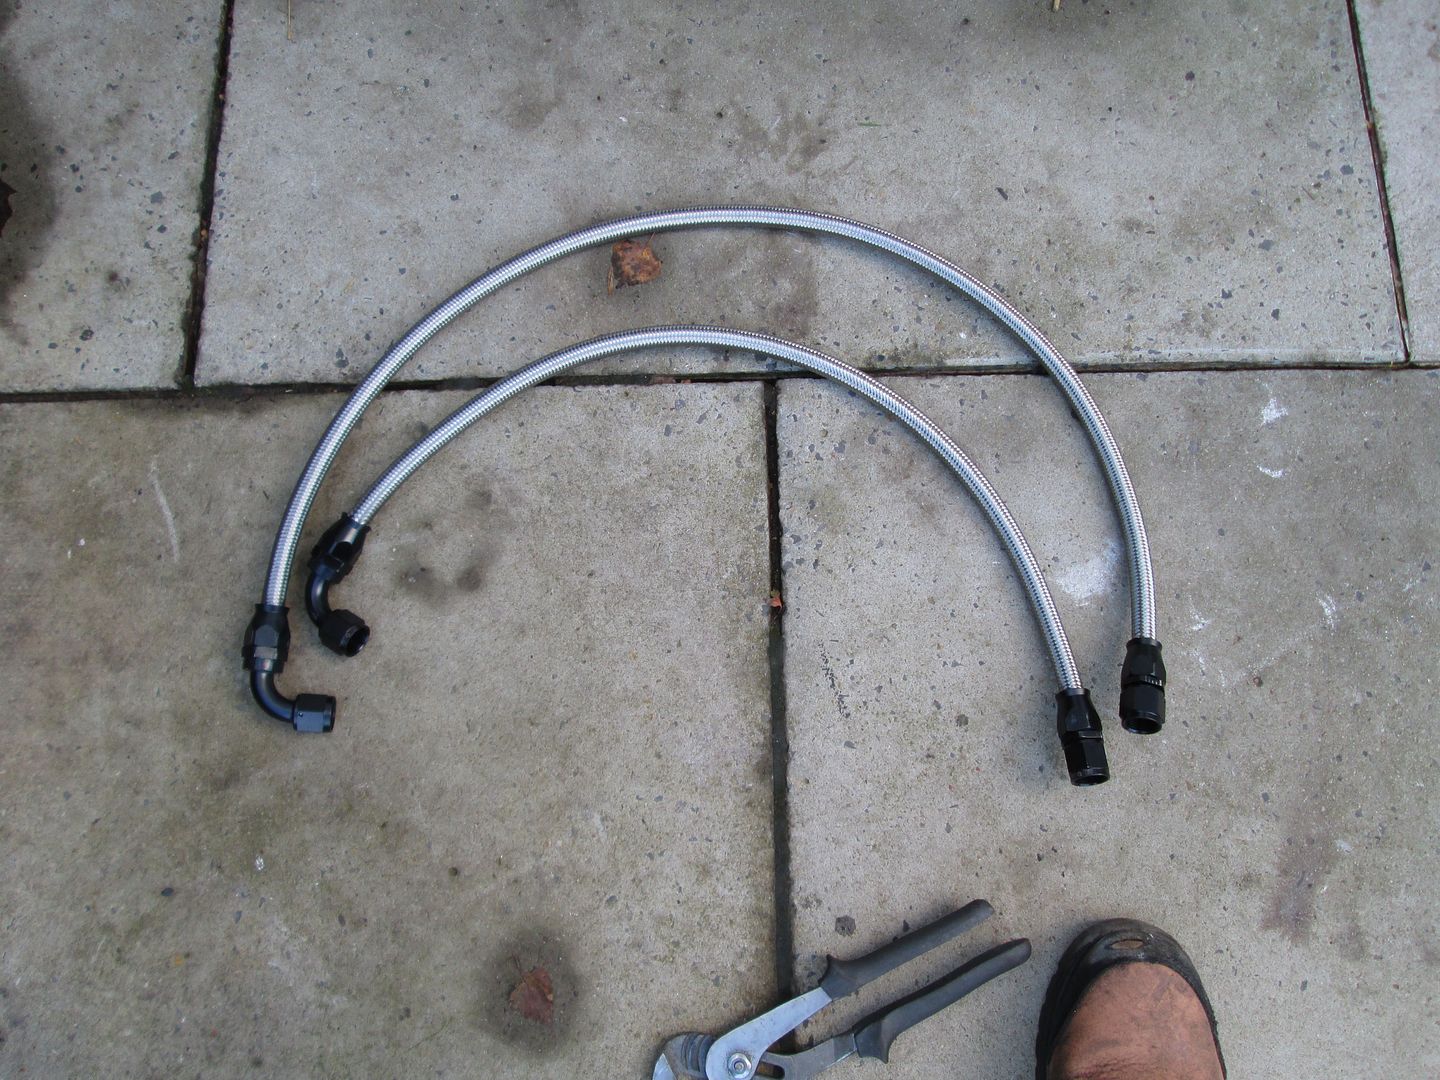
So from a while back, the M3 Oil Cooler fitting > -AN10 adaptor..
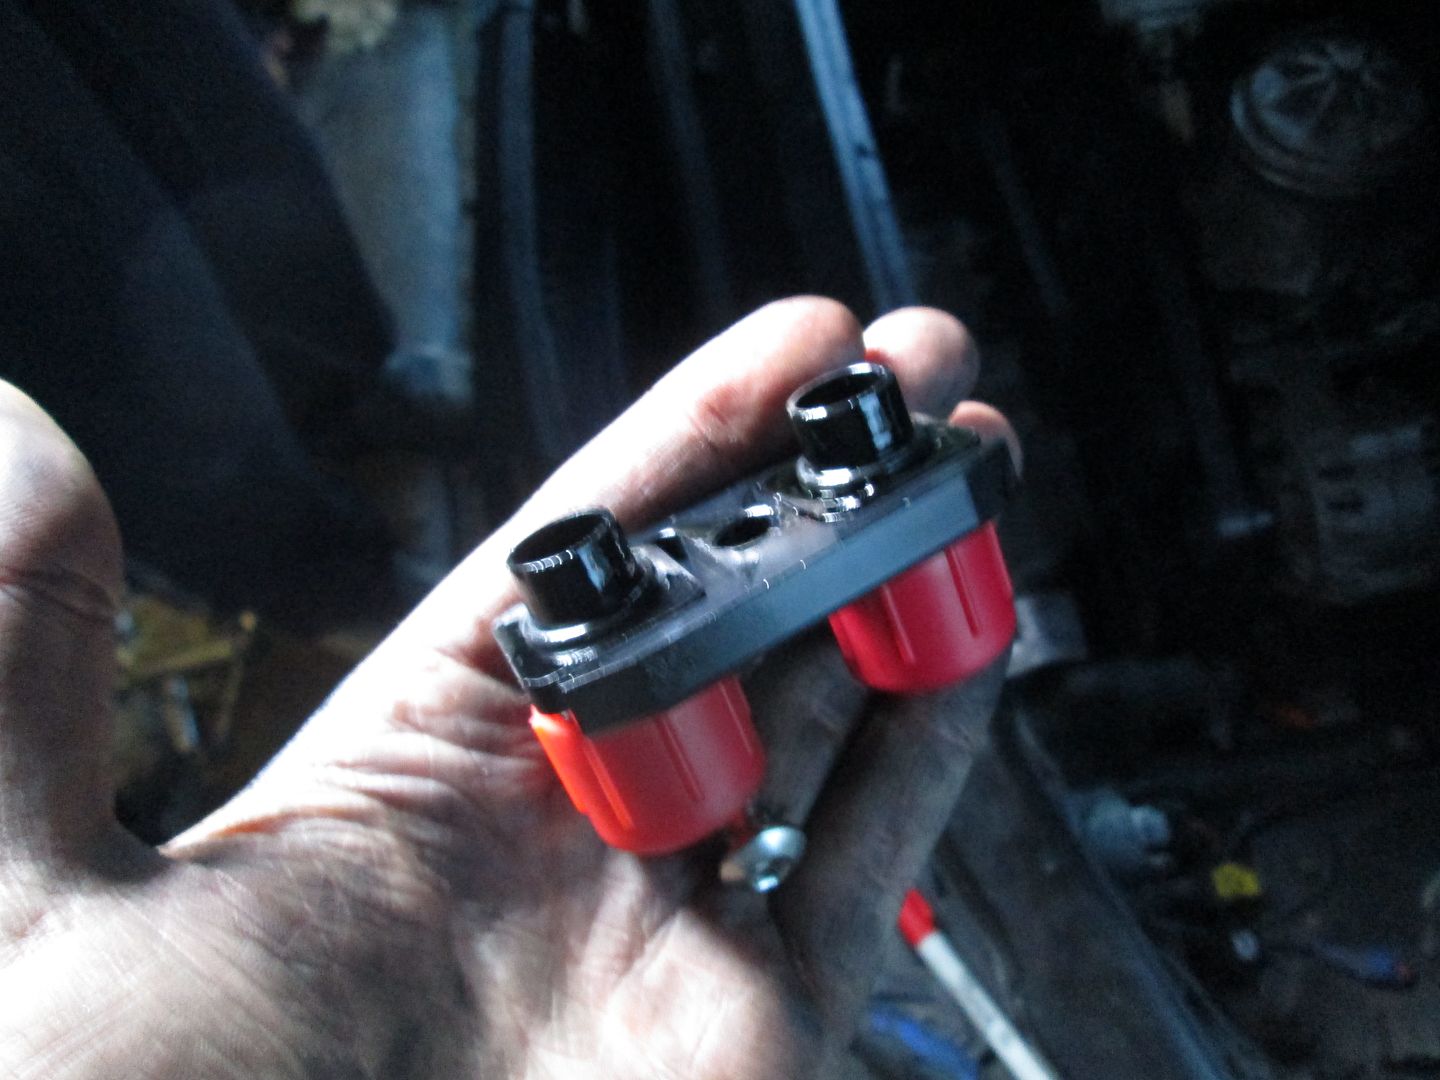
..and matching lines that were made up.
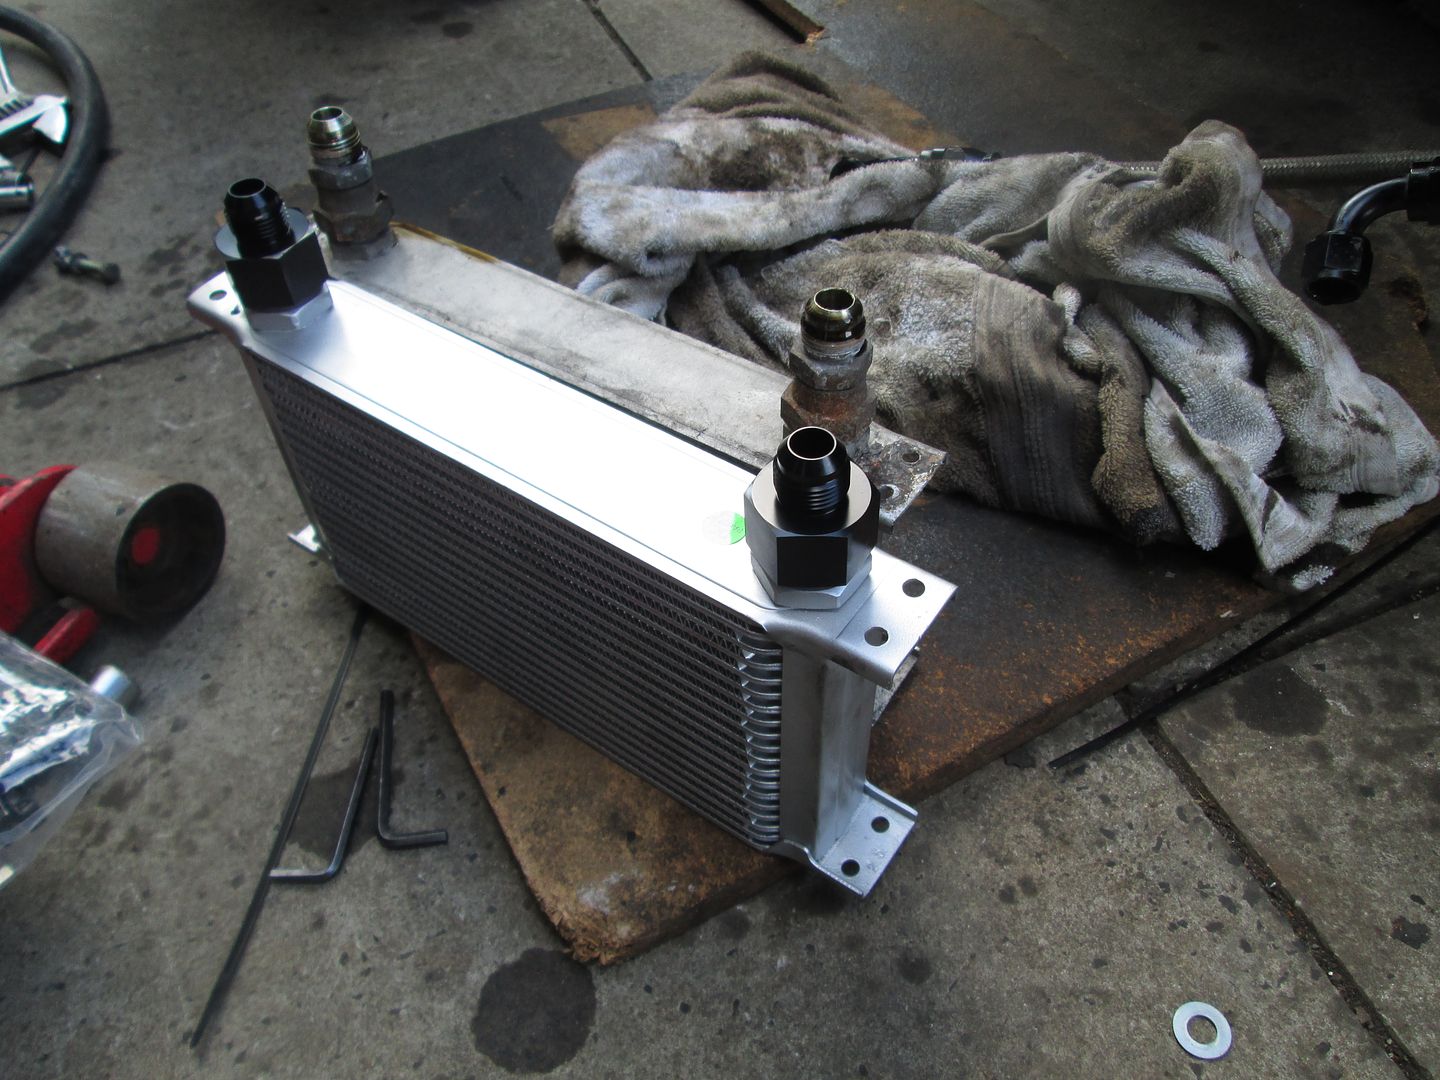
I previously ran a 13 row cooler, but with the new engine have gone to a new 19 row for the relative low cost..
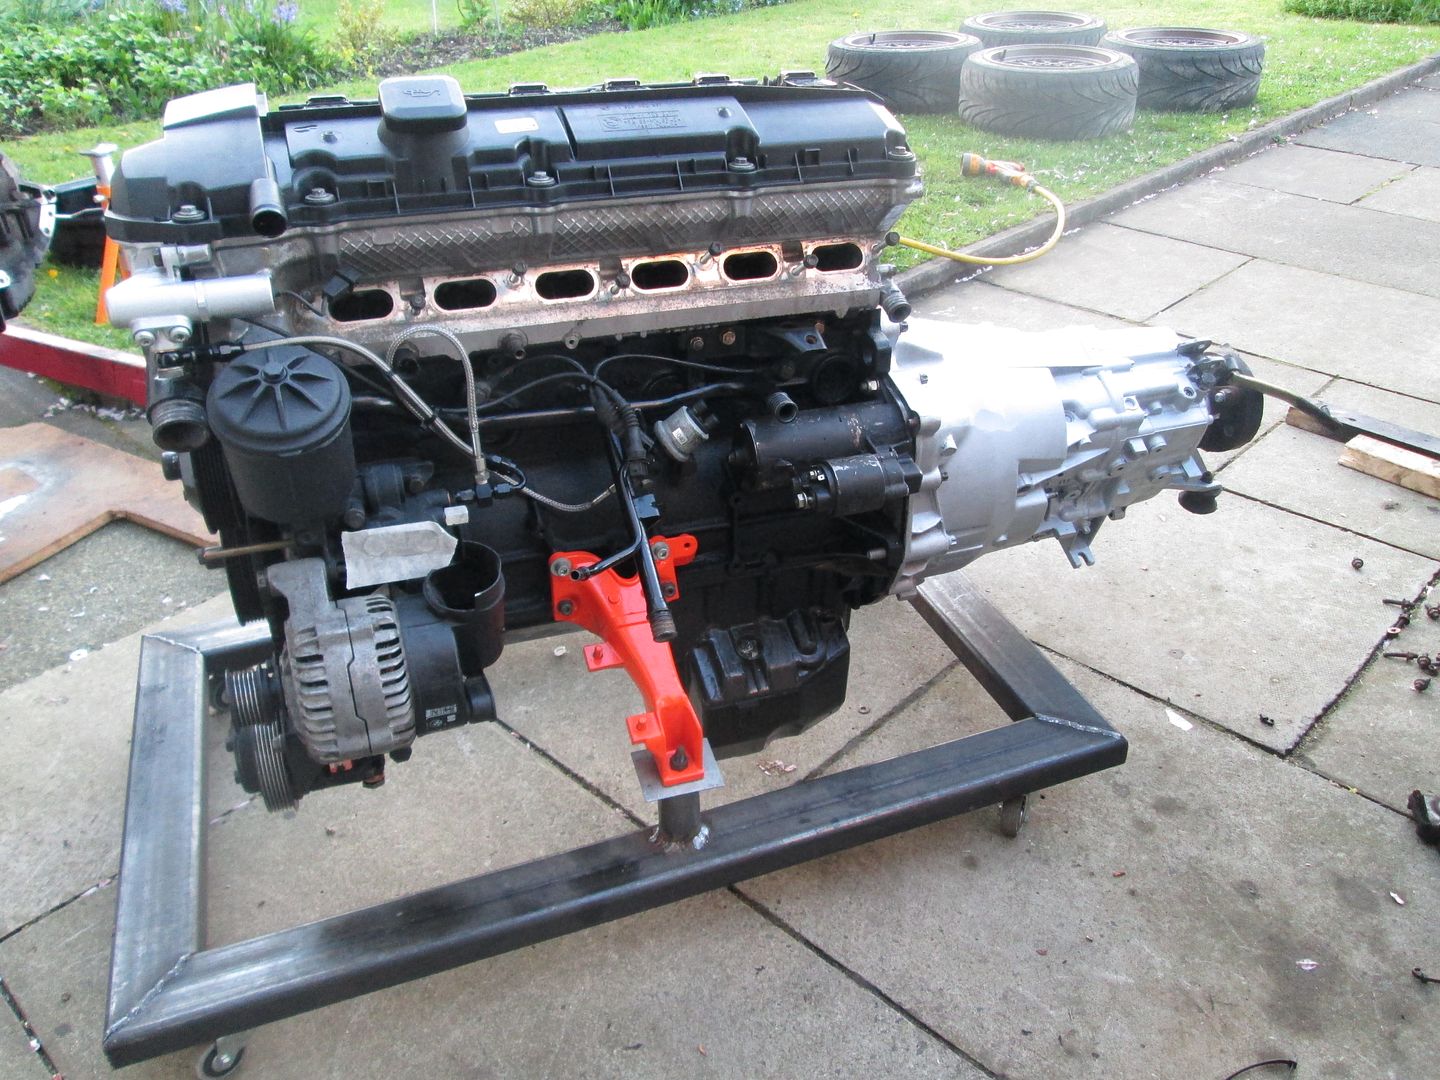
The gearbox was cleaned up, given a coat of paint and fitted to the engine along with a couple of new shifter bushes..
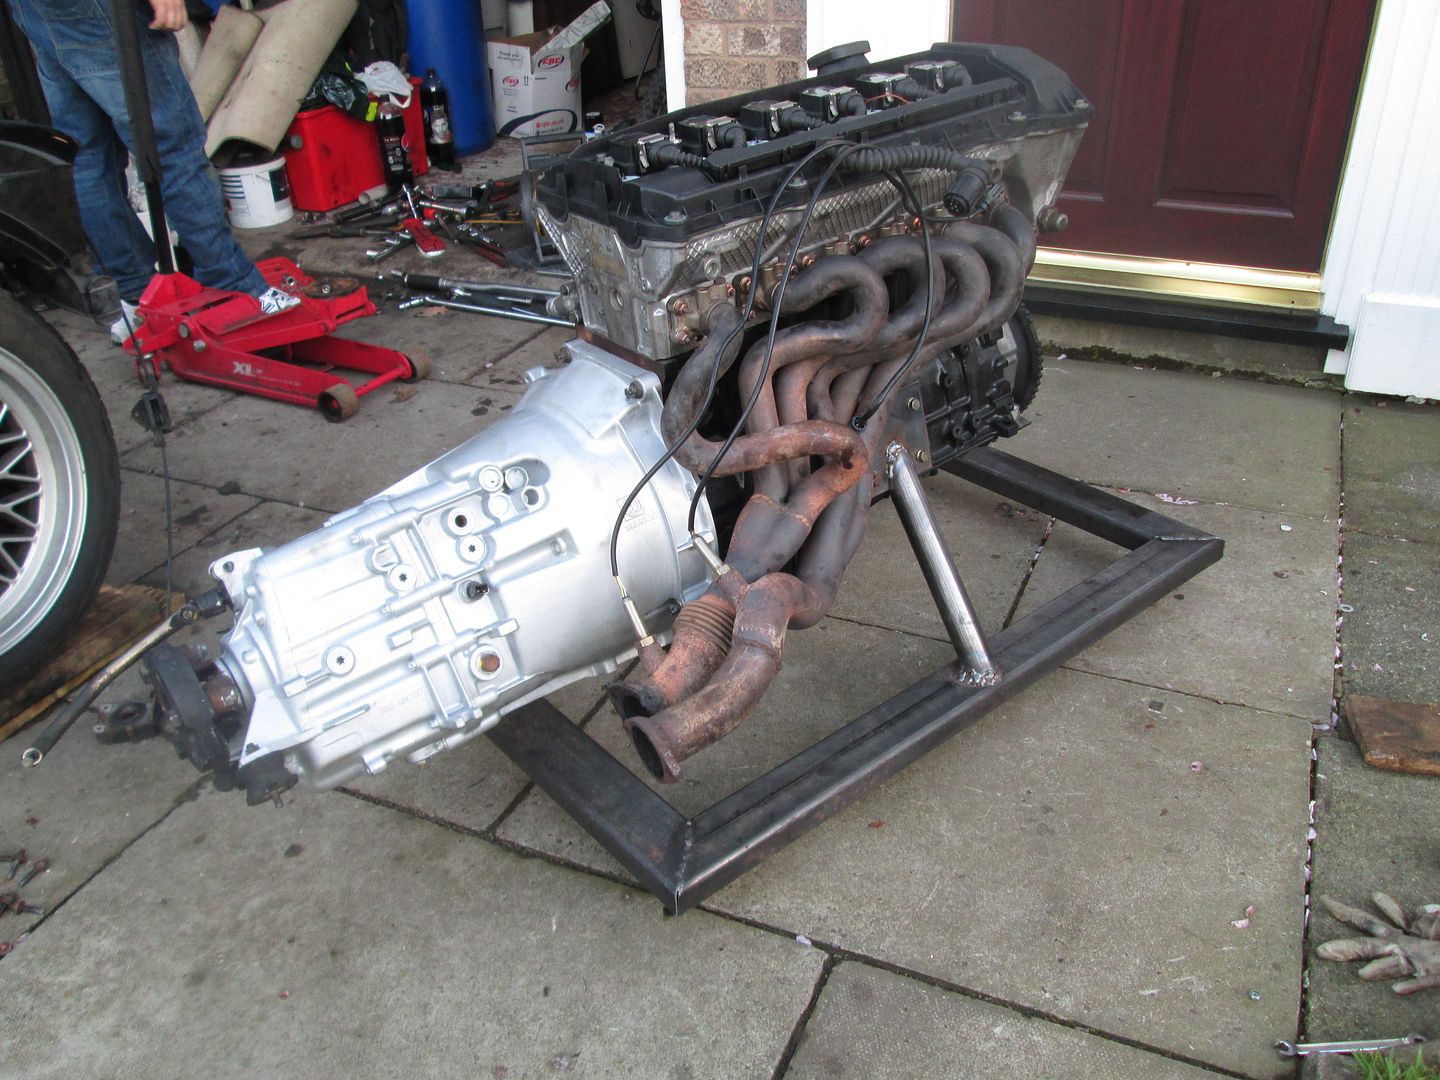
M3 3.2 exhaust manifolds also fitted while the engine was out for ease (modified to work with a standard 328i exhaust) with new nuts on the new studs..
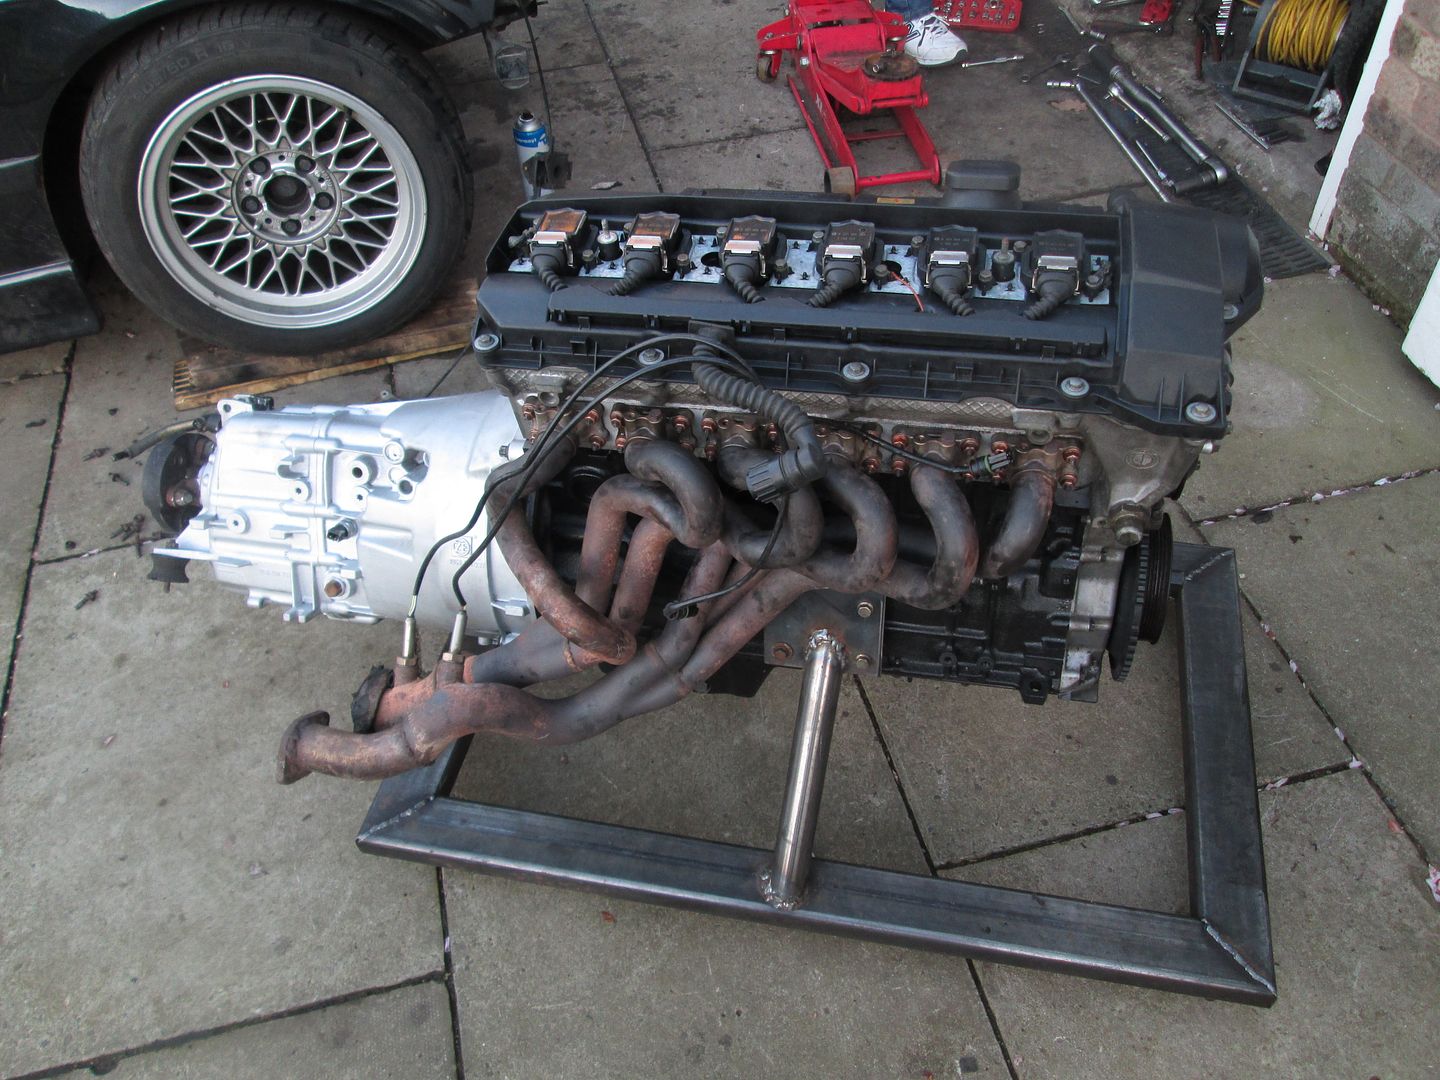
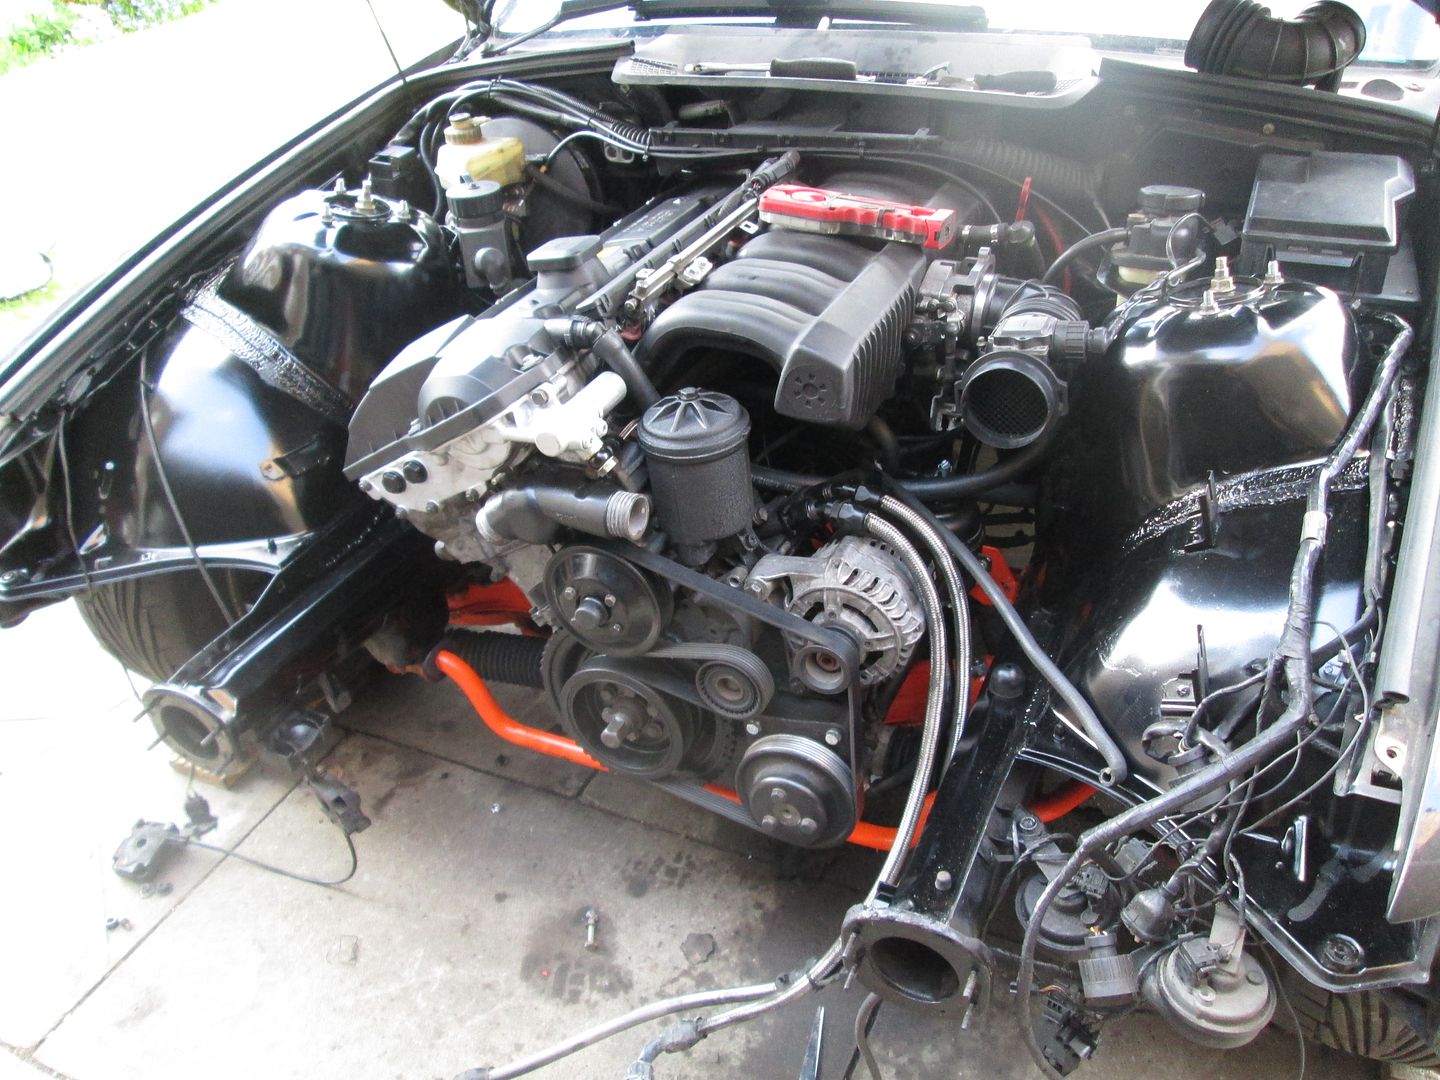
Finally it was lifted in to place and sat on the mounts. The rest of the ancillary setup was fitted, wiring connected, and the pipework under the inlet manifold for the idle control valve replaced. I don't run a PCV breather setup.
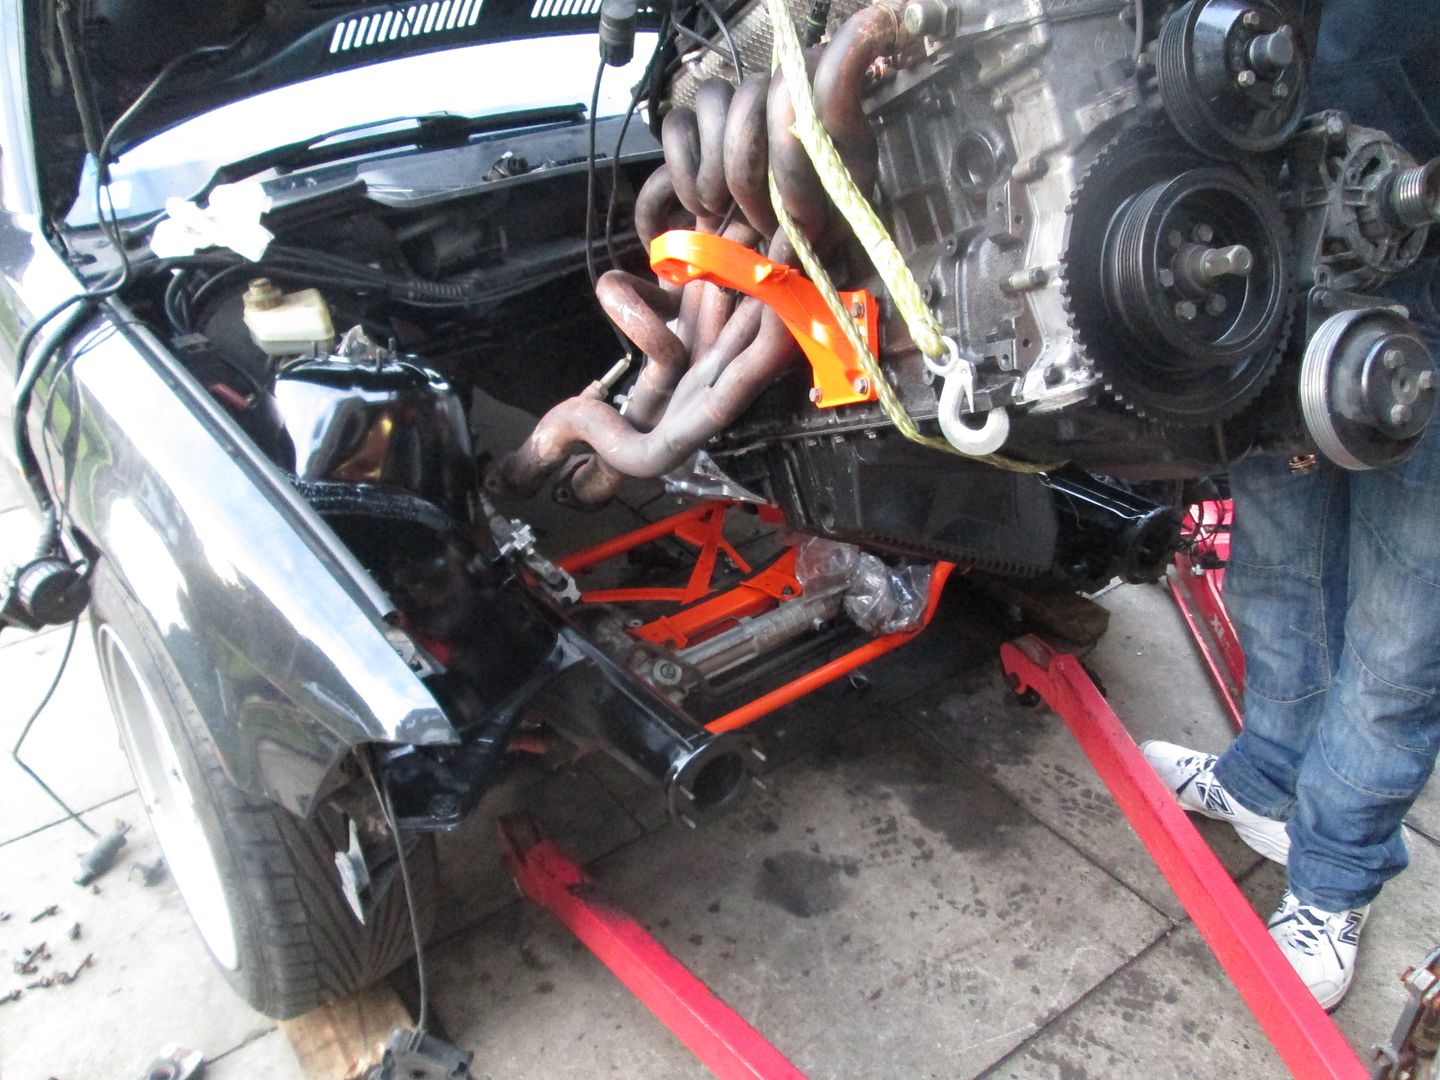
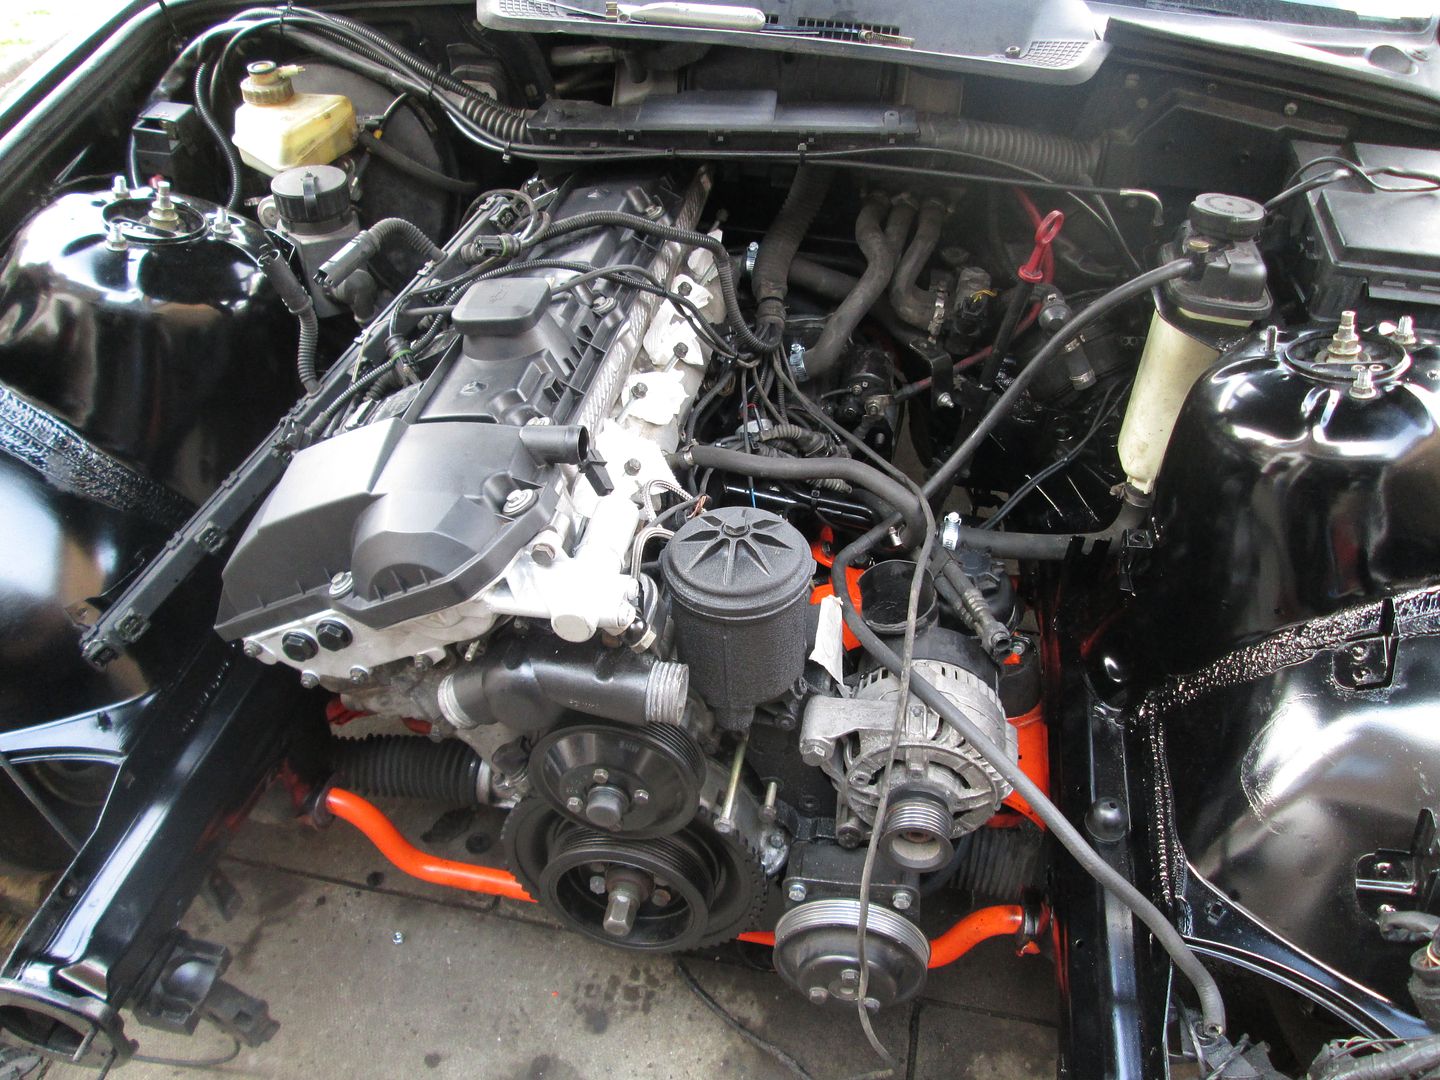
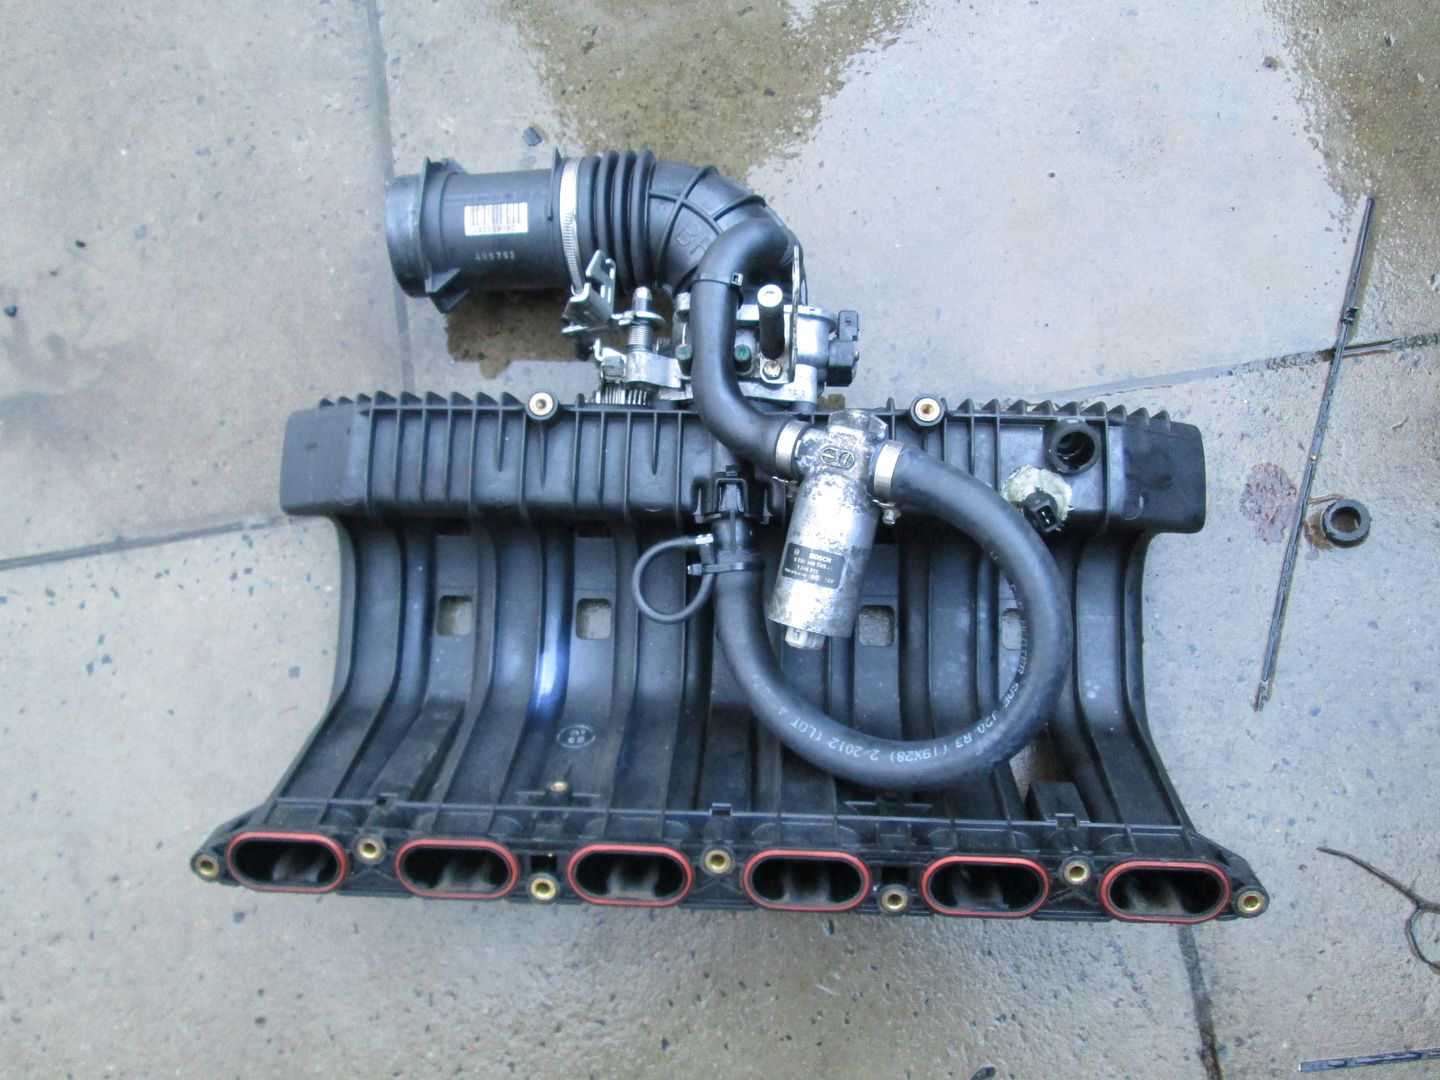
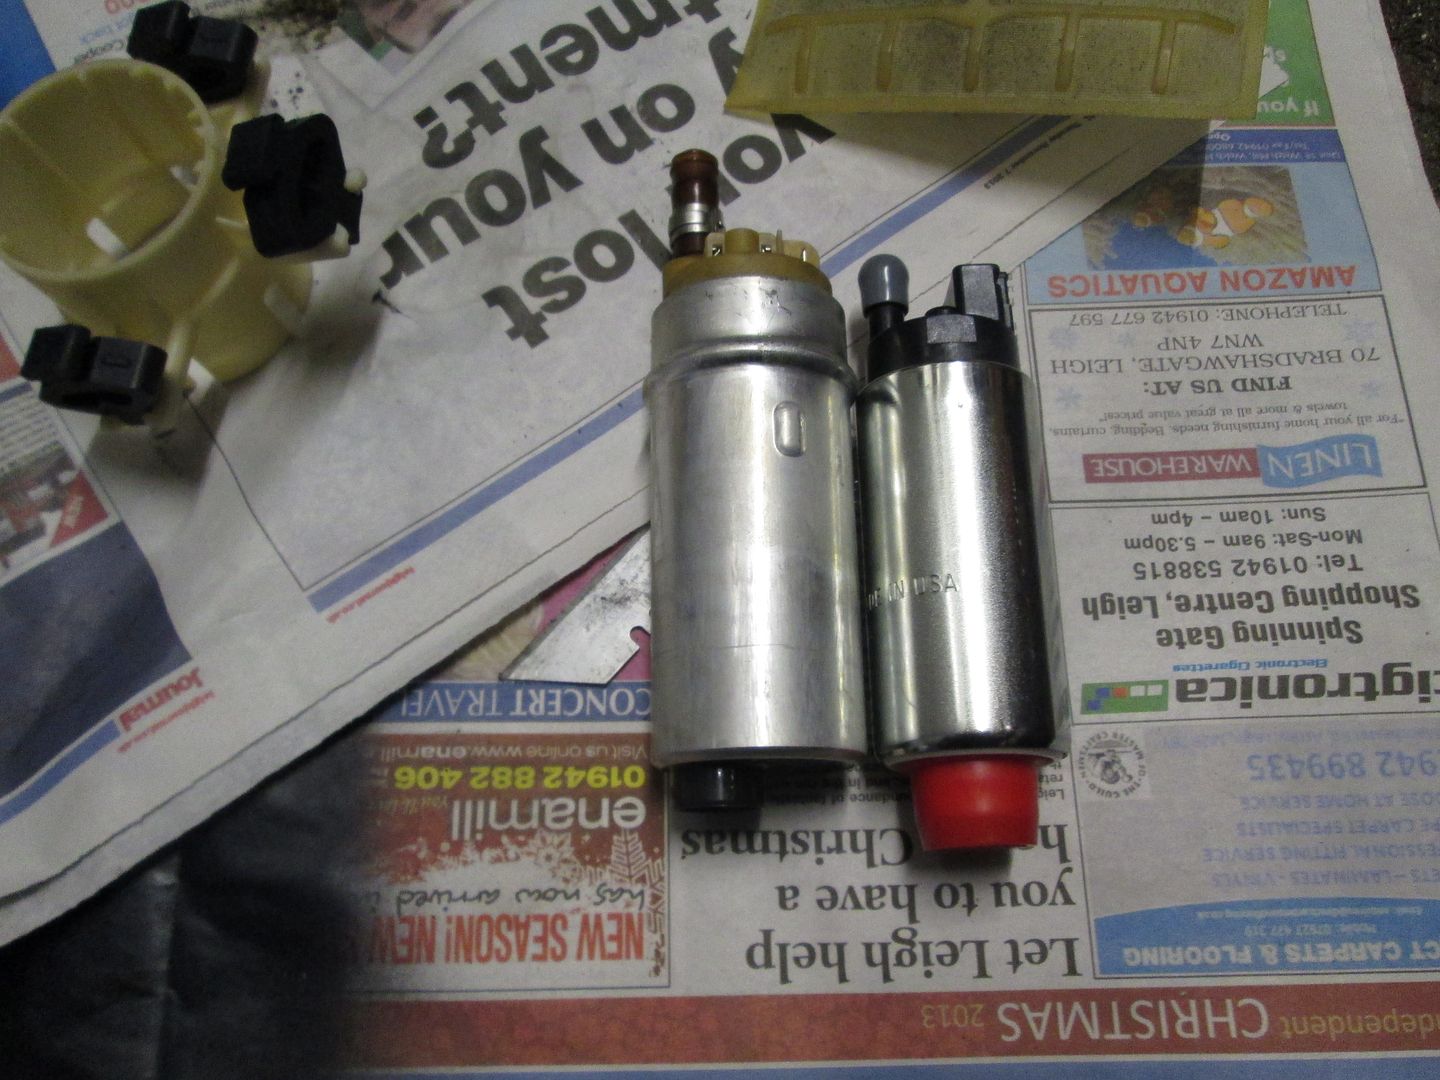
Fuel pump was replaced with a Walbro 255lph unit, considering the old one was original and way past the 200k marker.
As you may notice from the pictures, I don't run a standard radiator setup. Its actually an M3 radiator with a header tank from a different model, mounted at the back of the engine bay. The front end was left half assembled in case there were any issues..
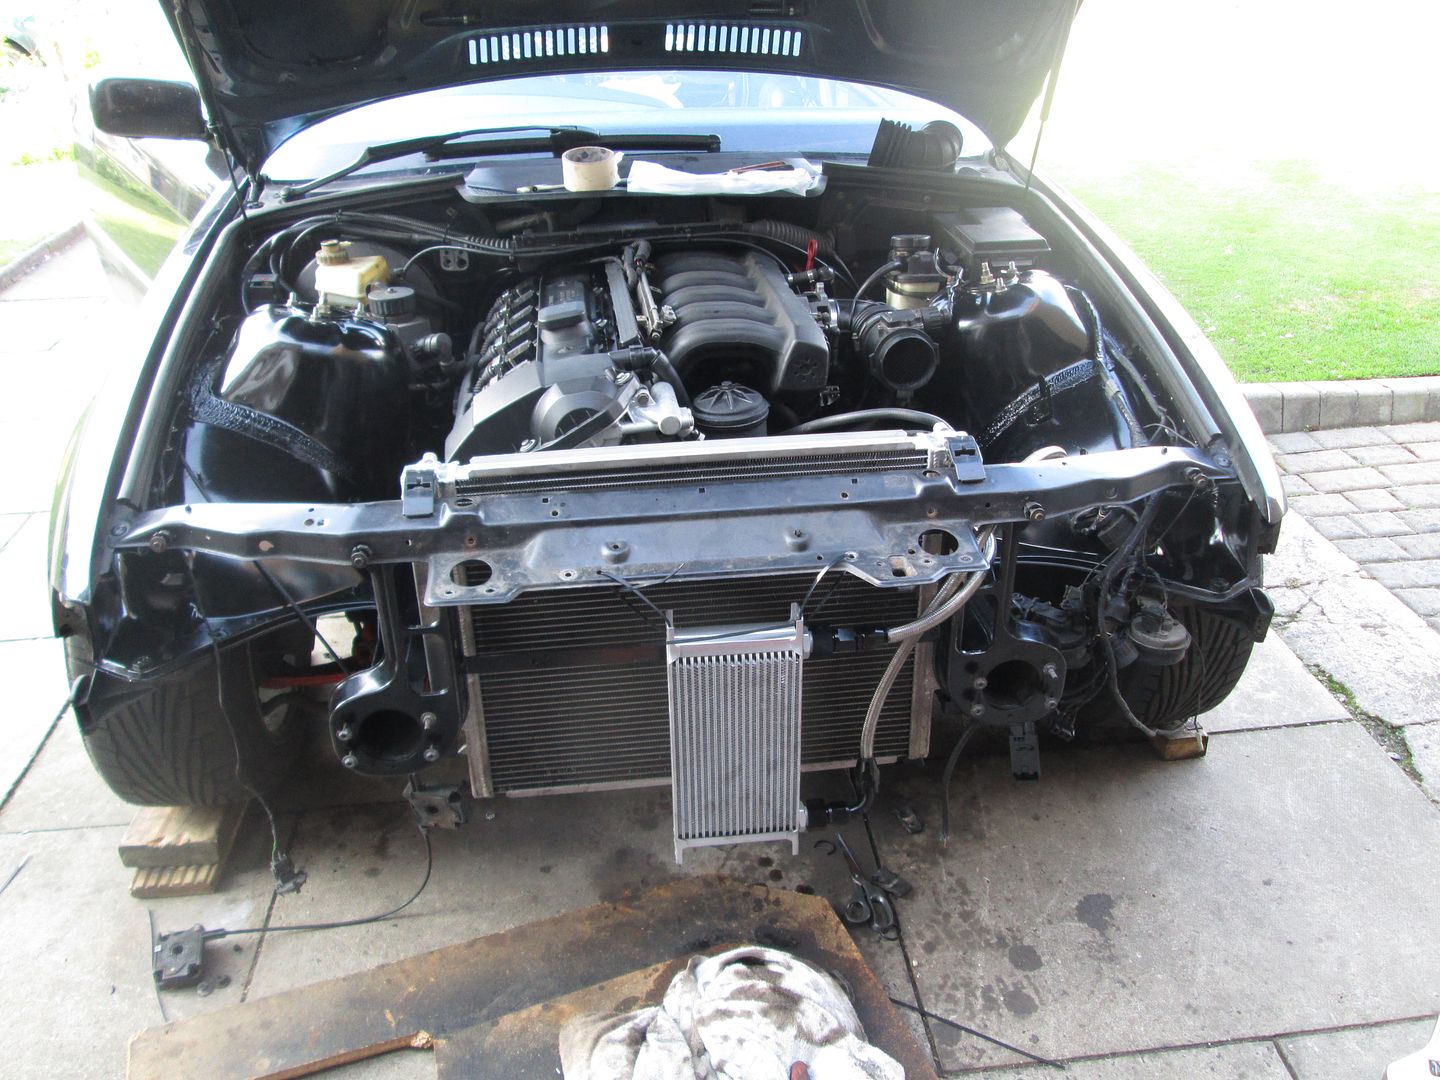
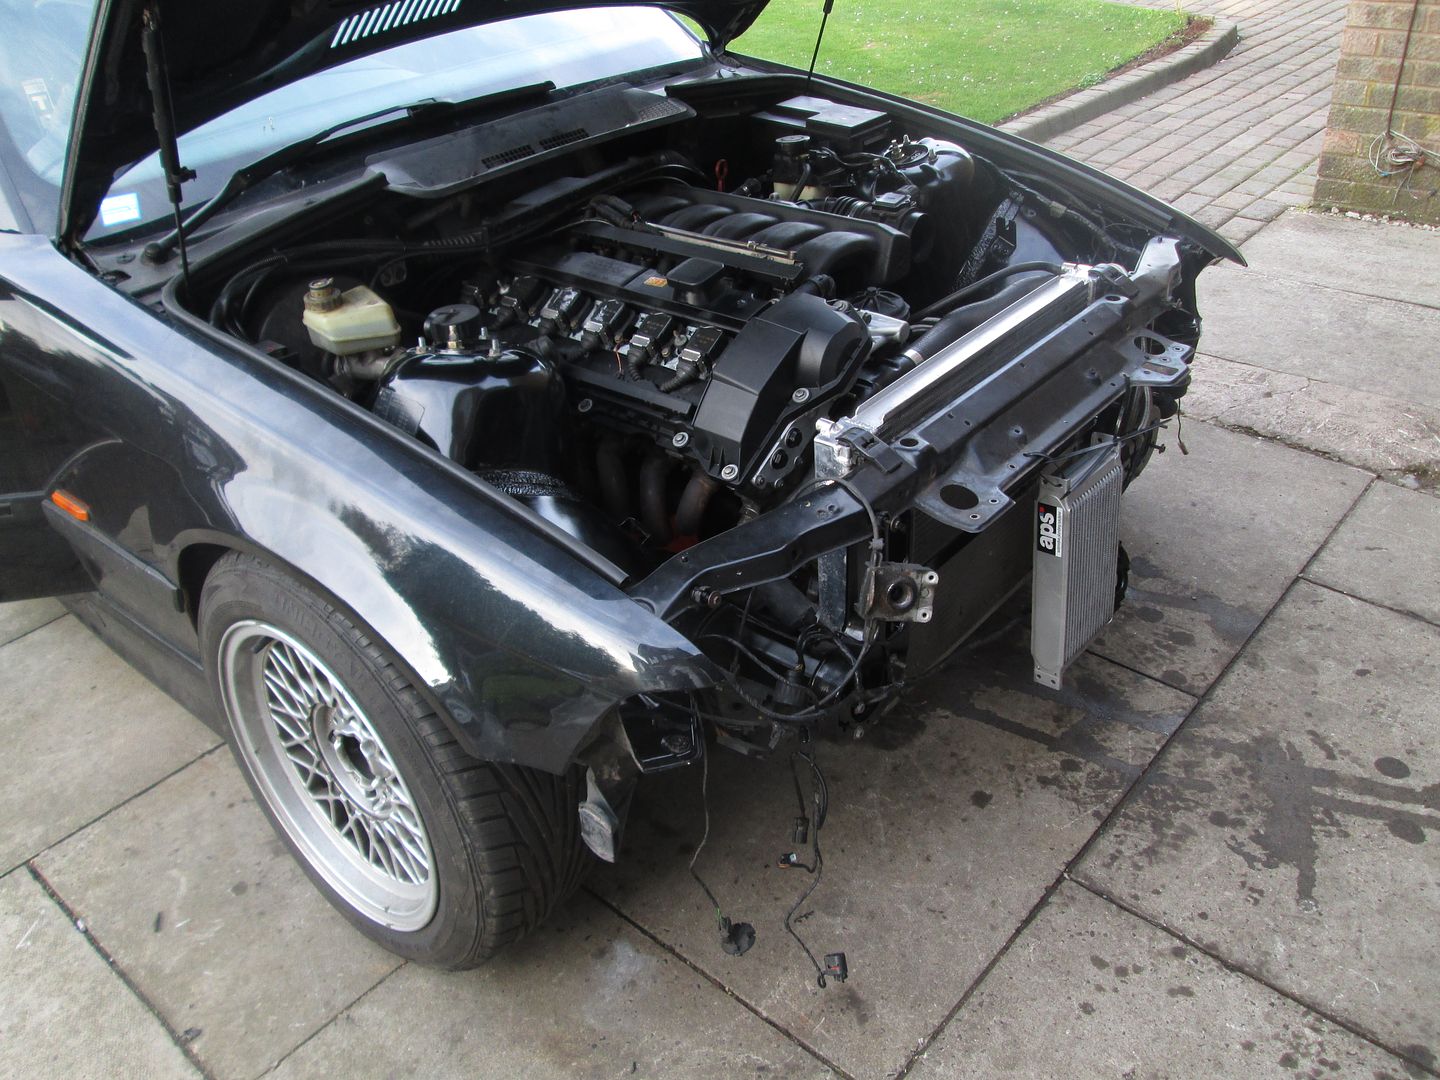
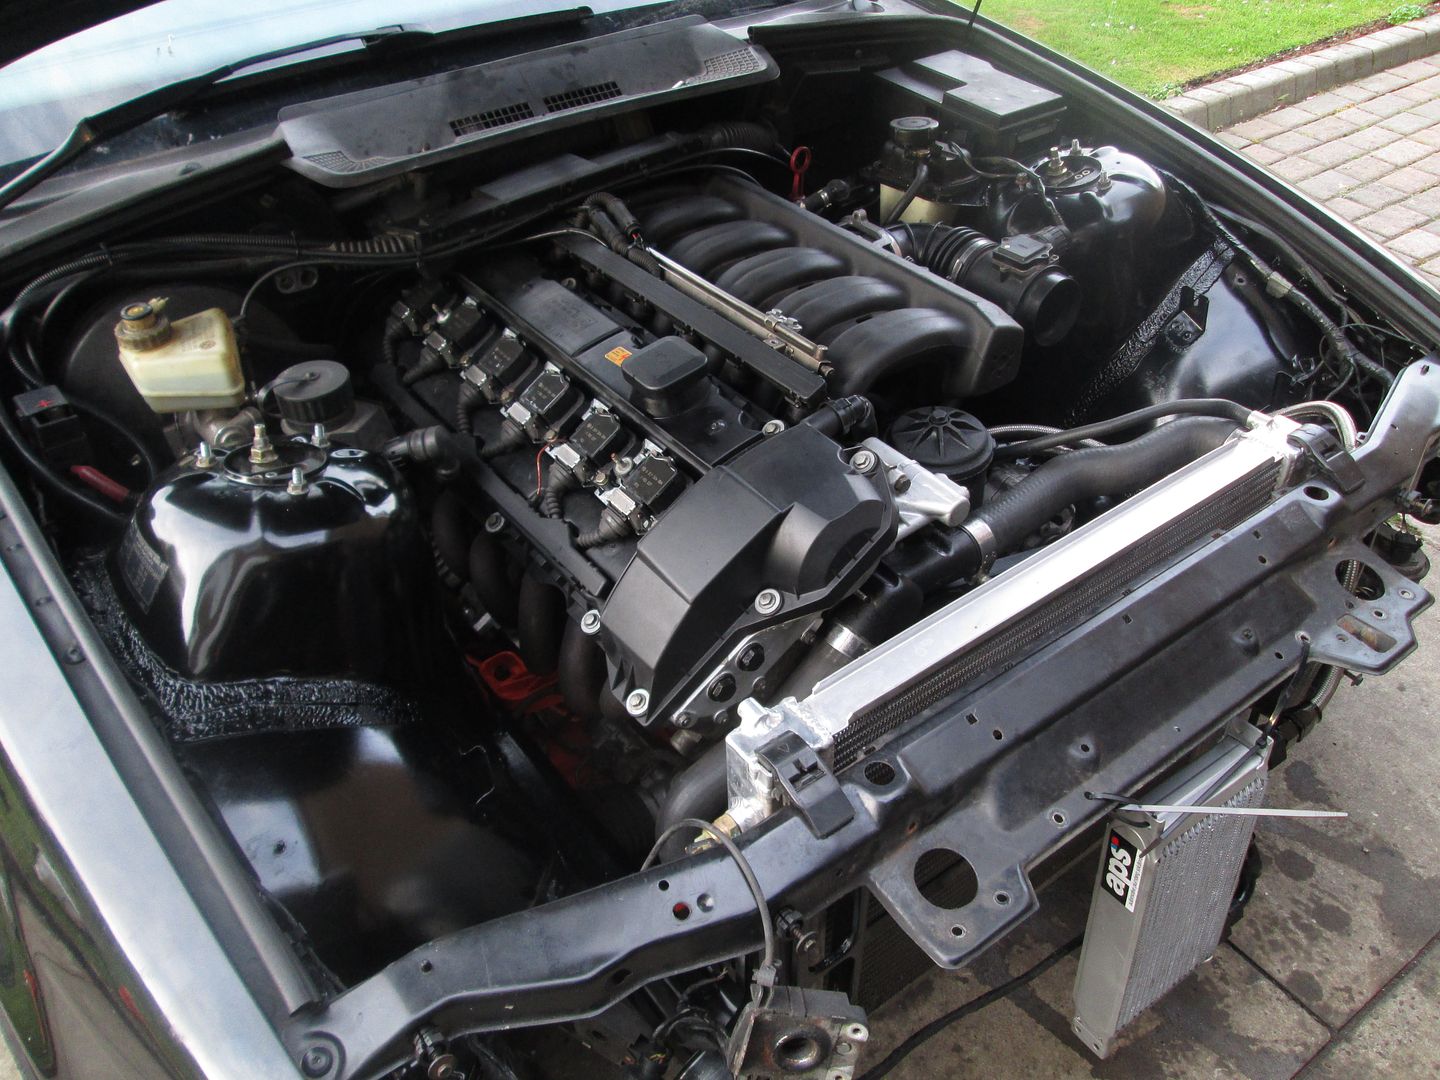
With everything connected, mineral oil in the engine and other fluids filled, it was ready to run. Cranked it over without the ECU to build some oil pressure, then..
https://www.youtube.com/watch?v=nn4wX-Pdm3o
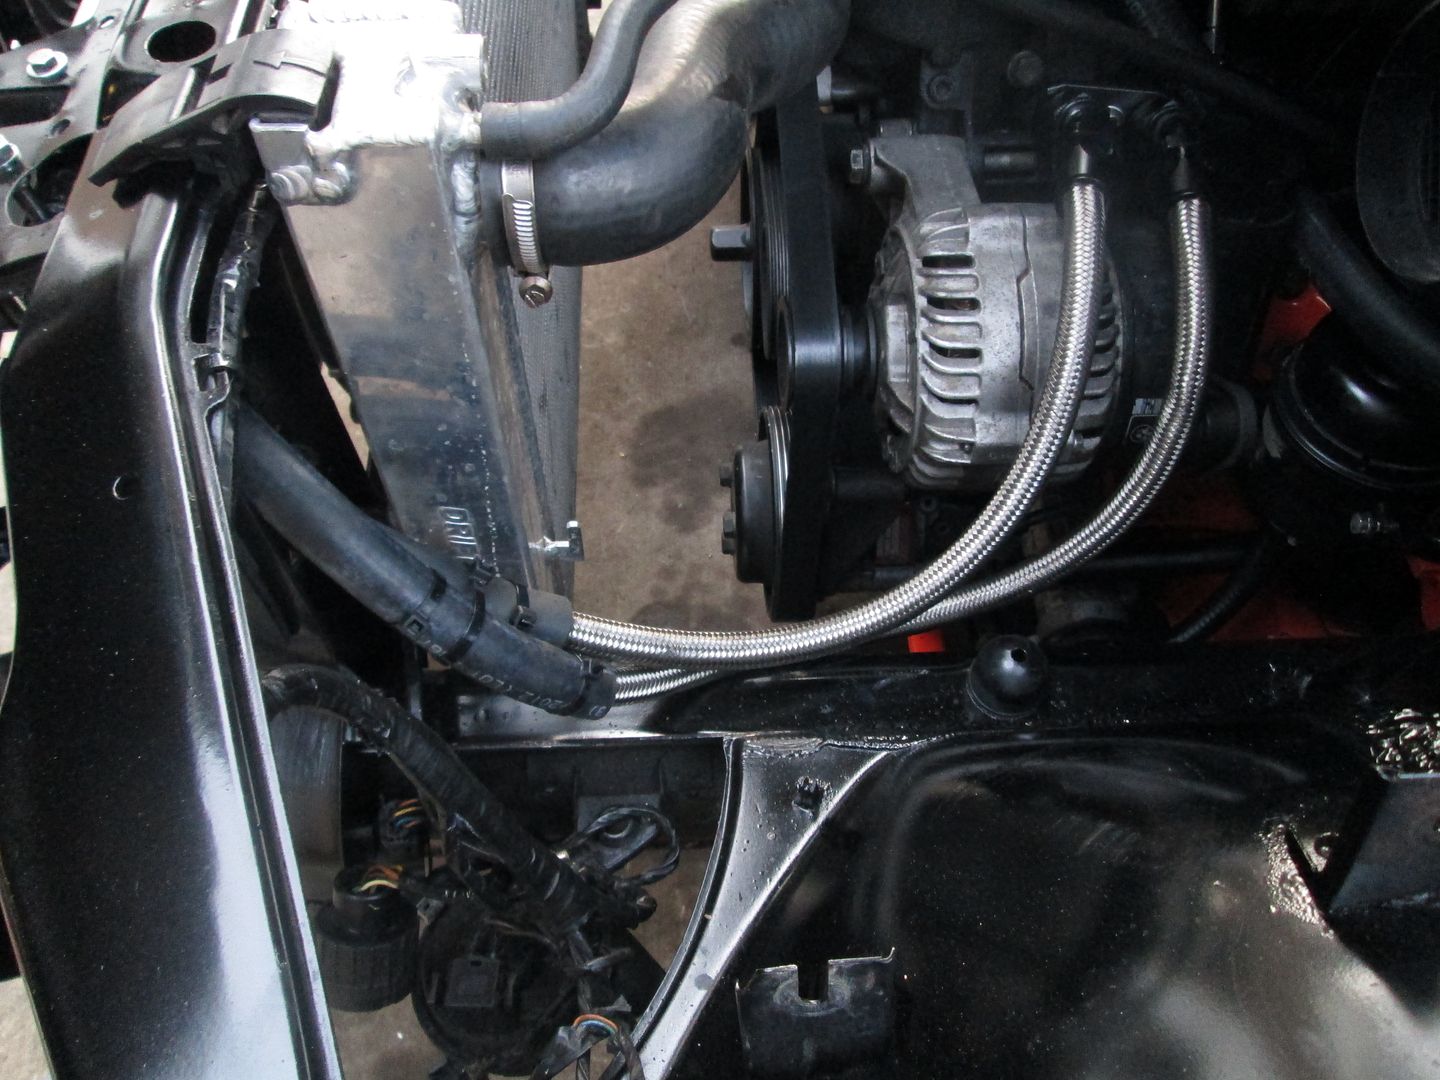
After running it for a short period of time to check for any leaks, all seemed OK, so the rest of the front end was assembled. The oil cooler was properly mounted from all four points, with some rubber bushes..
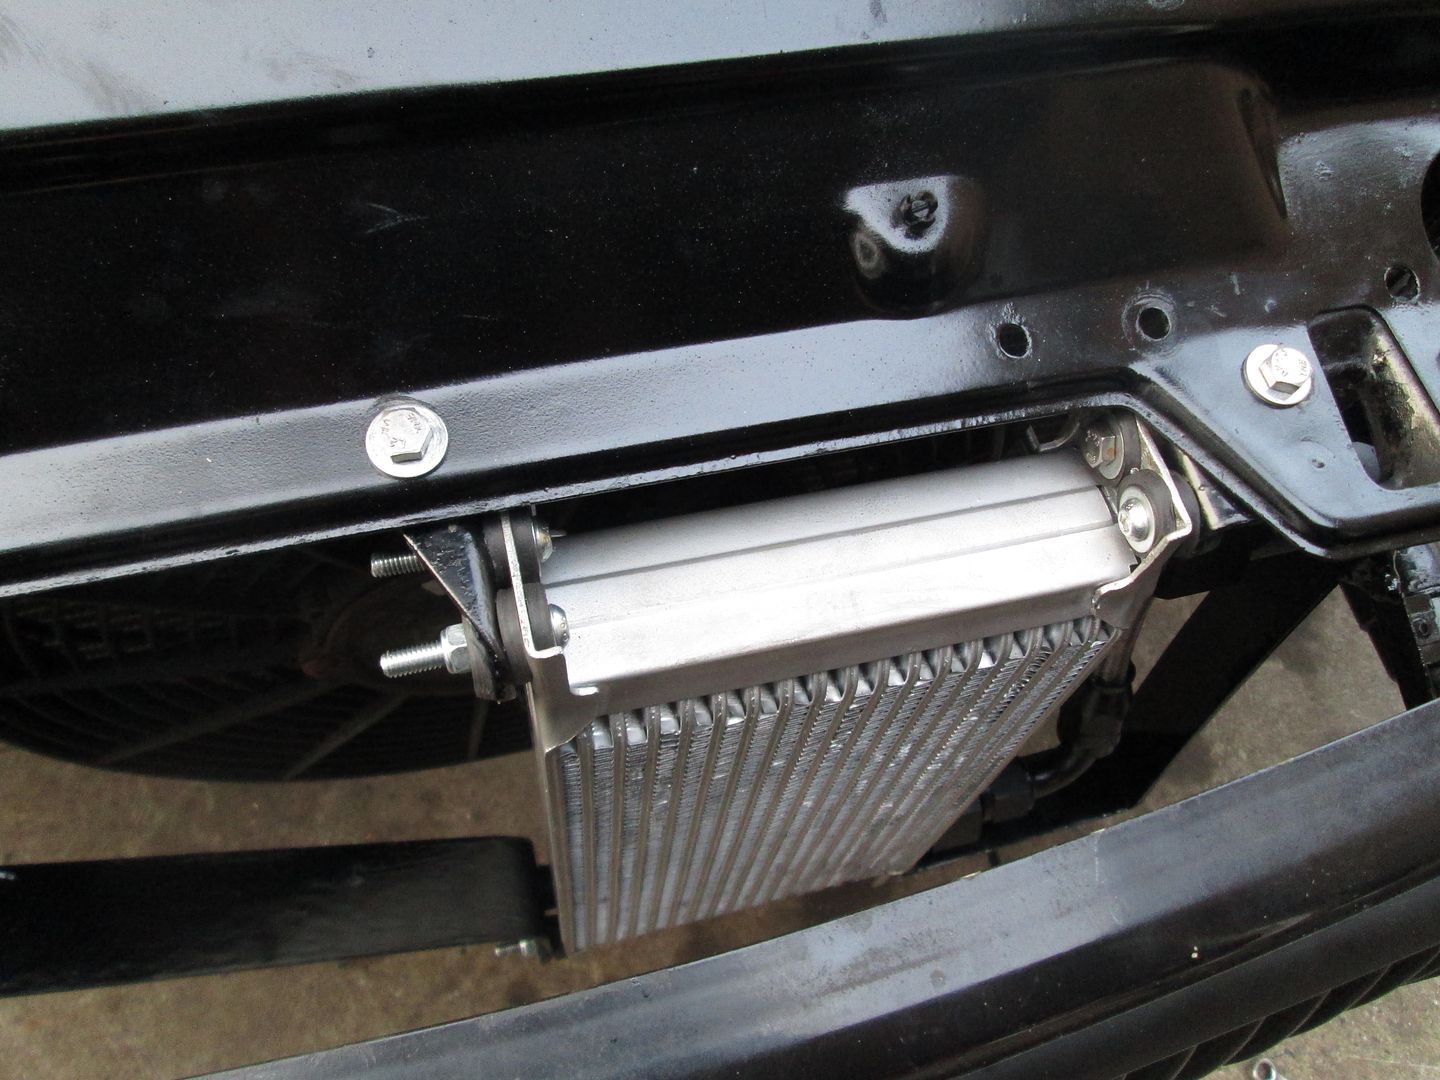
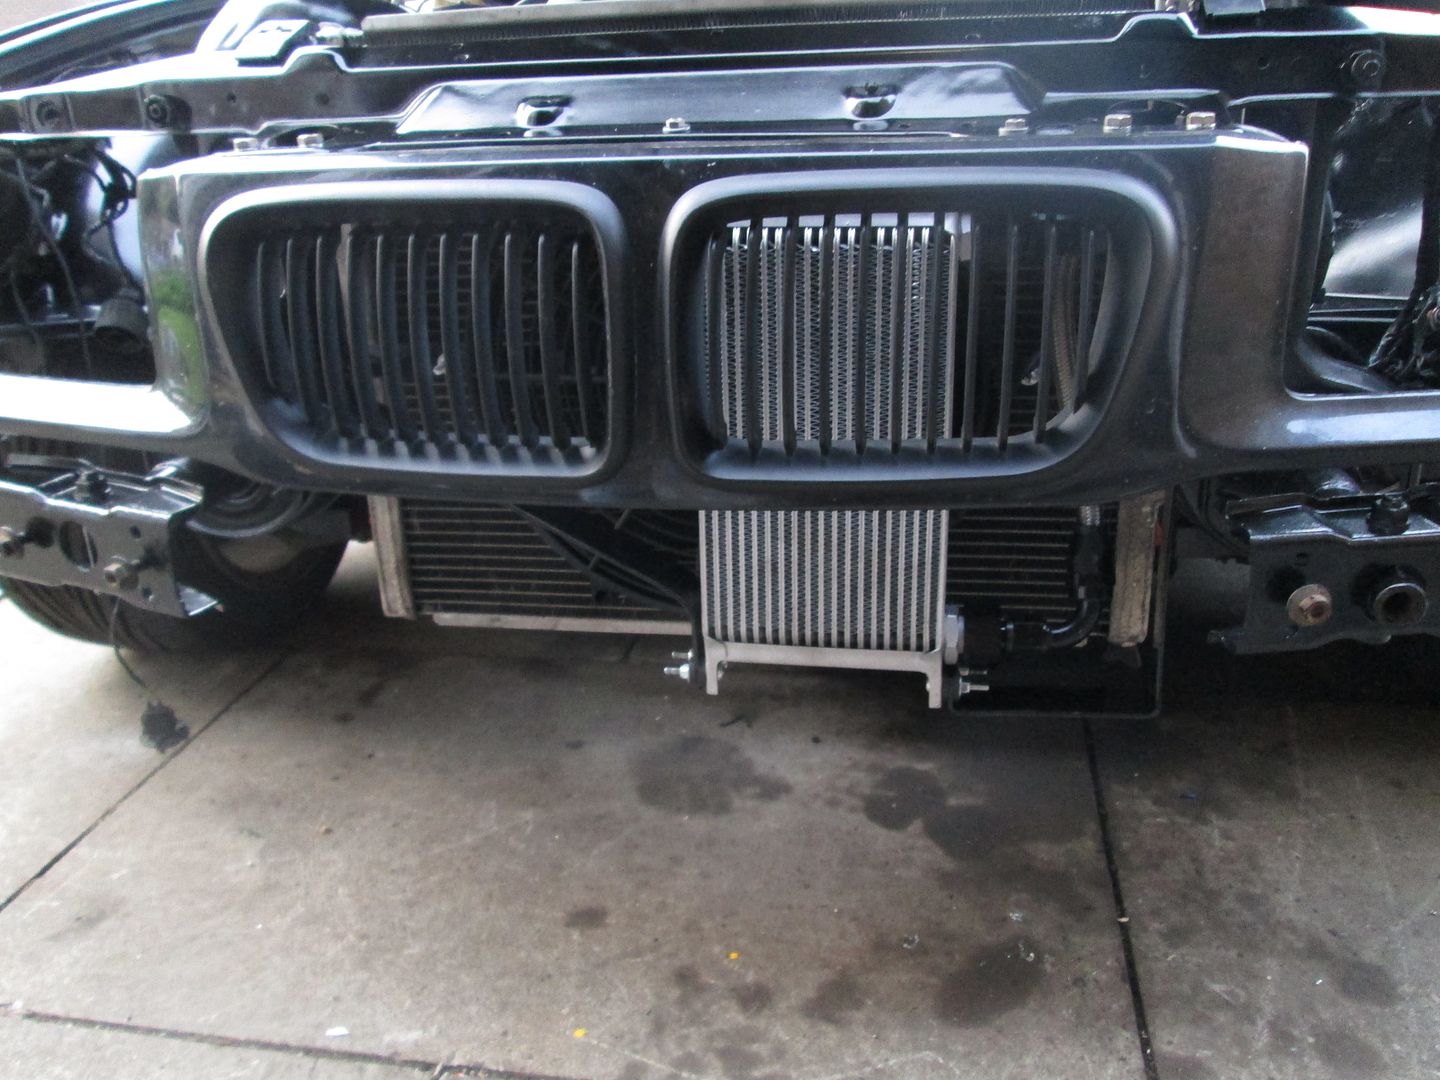
Oil lines routed and protected..
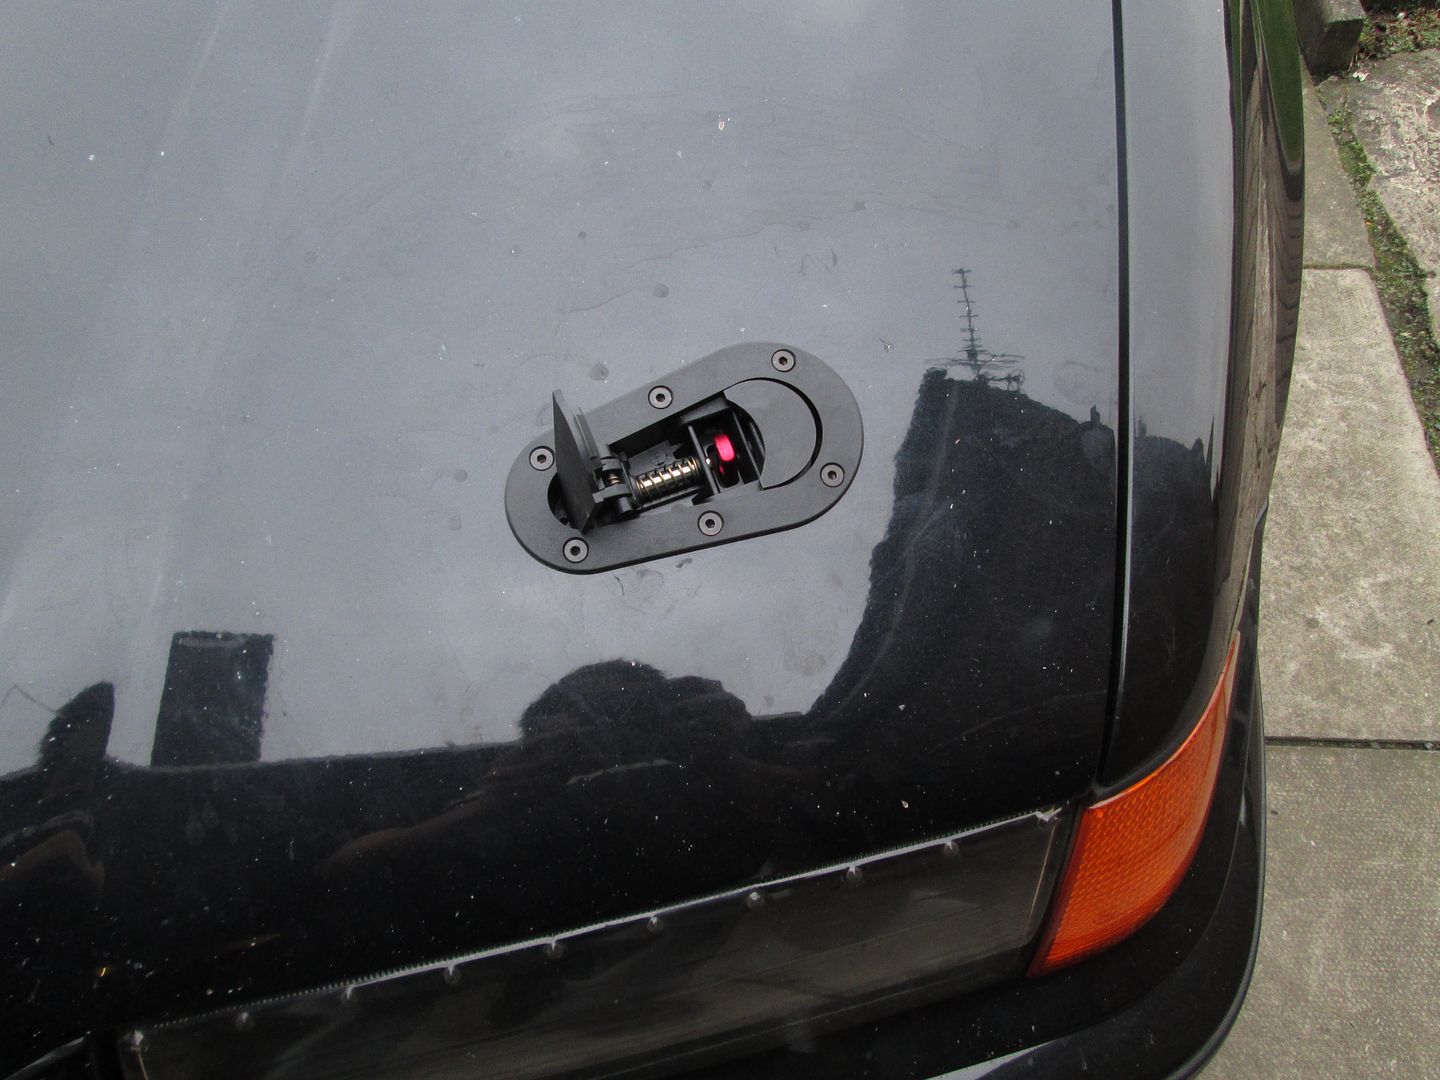
Due to the way the oil cooler was now fitted, and the position of the oil lines, the standard bonnet catches were a bit too close. Instead, I decided to fit some aerocatches I had from a previous car.
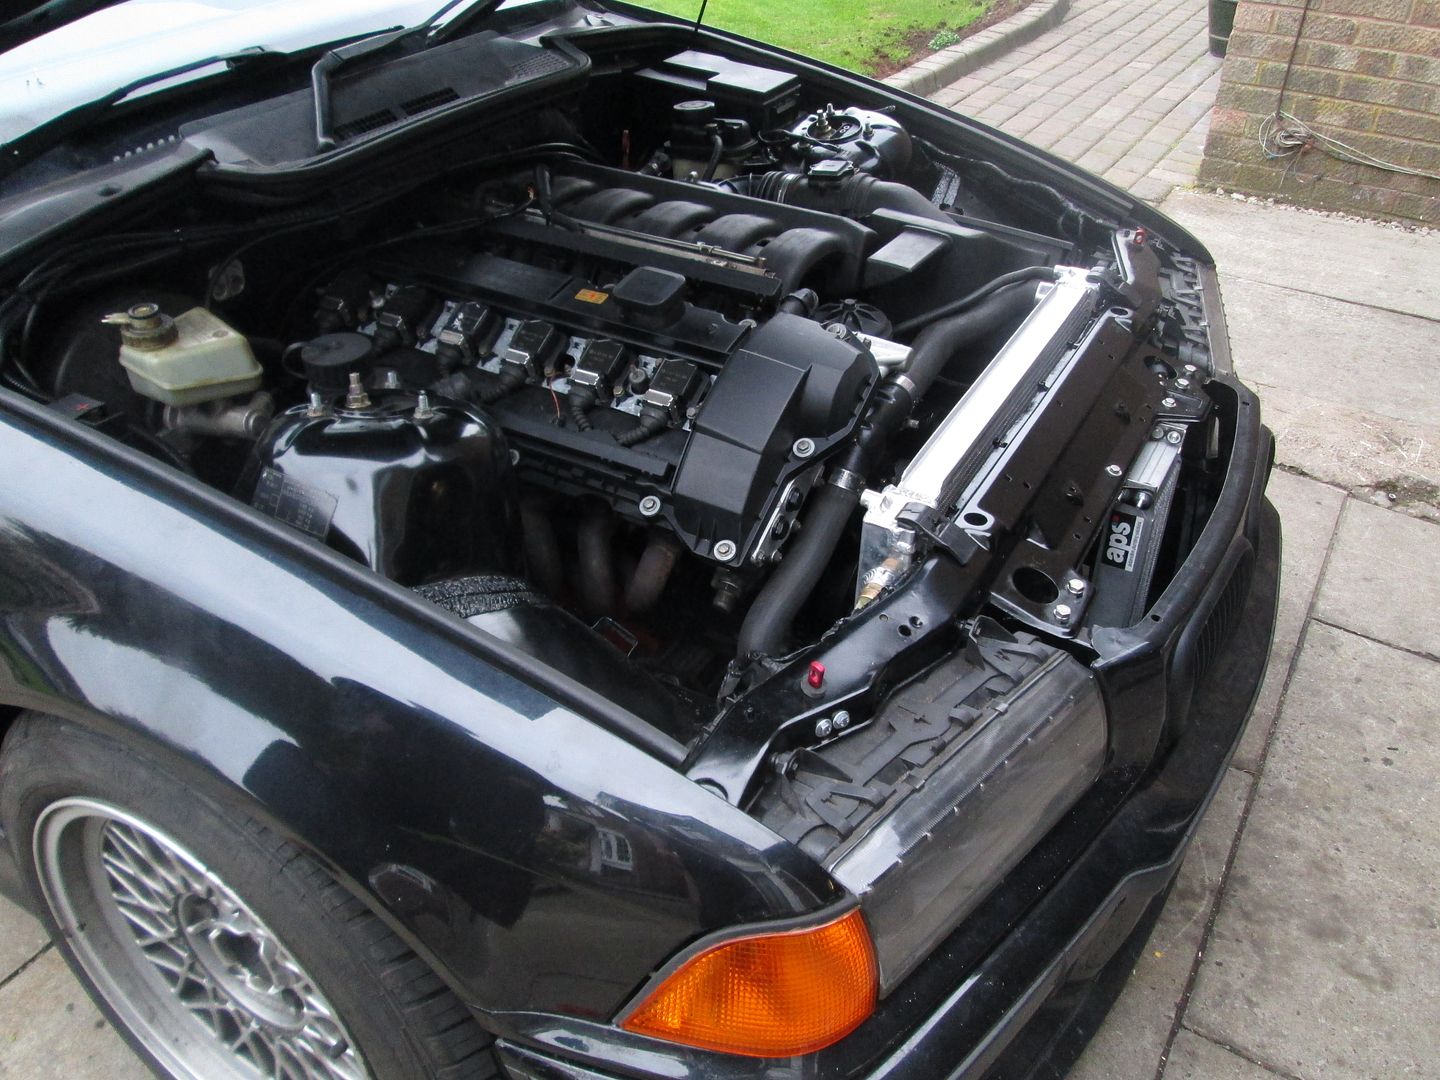
The standard airbox and front bumper were put back on..
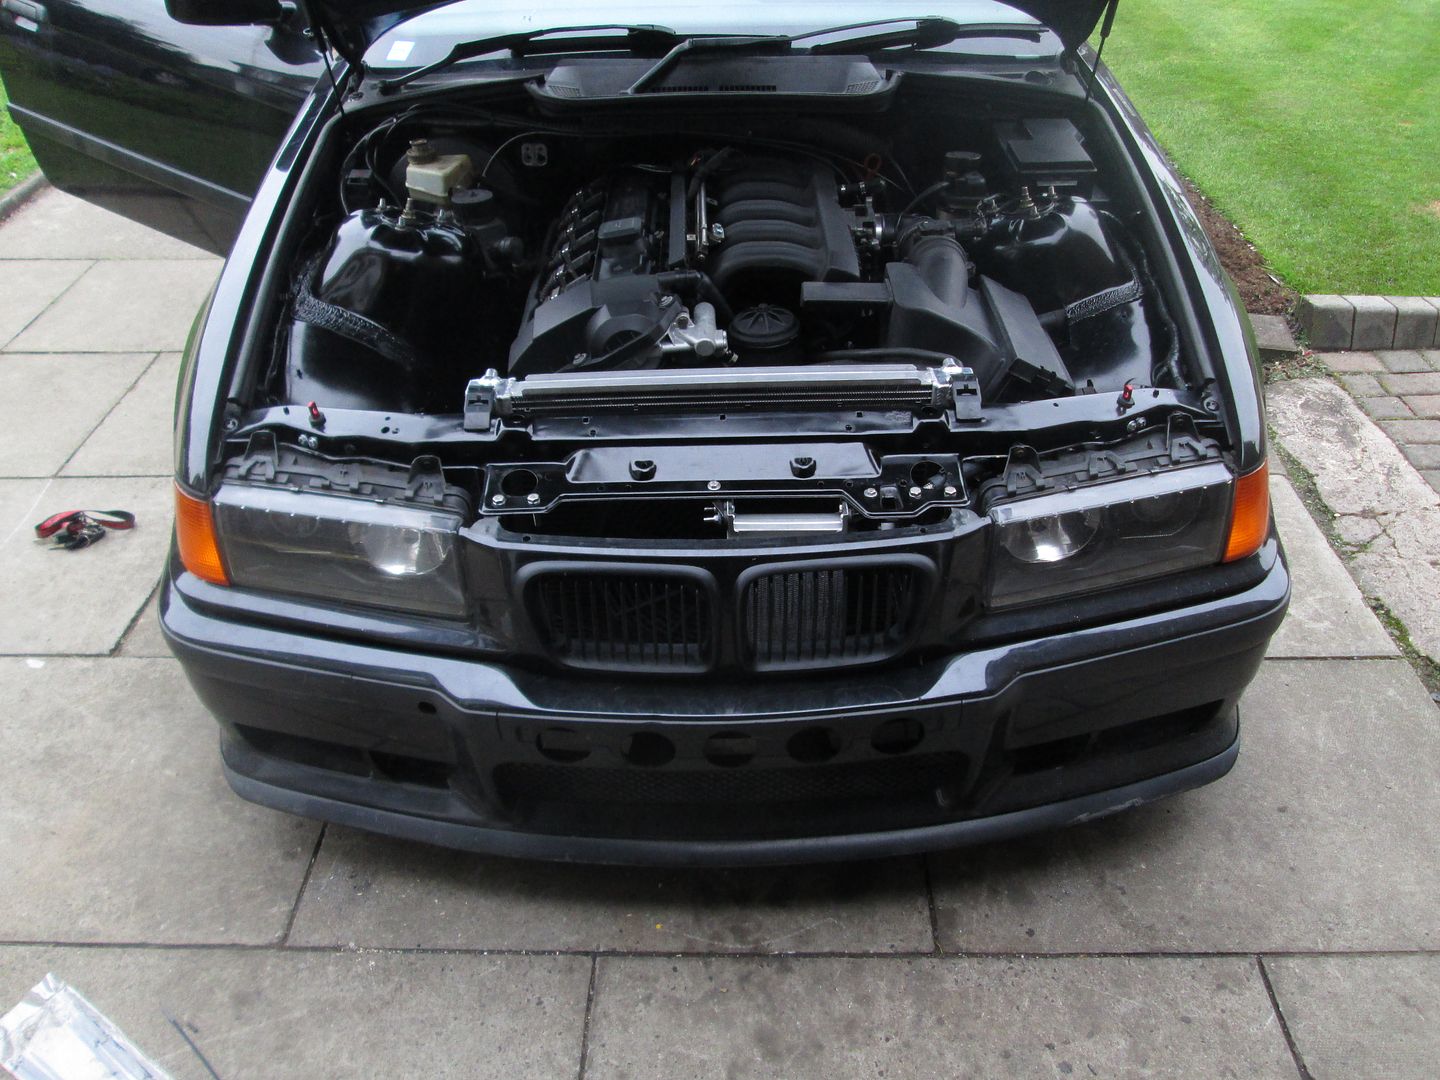
Then the engine just needed some running in miles to see how everything went...
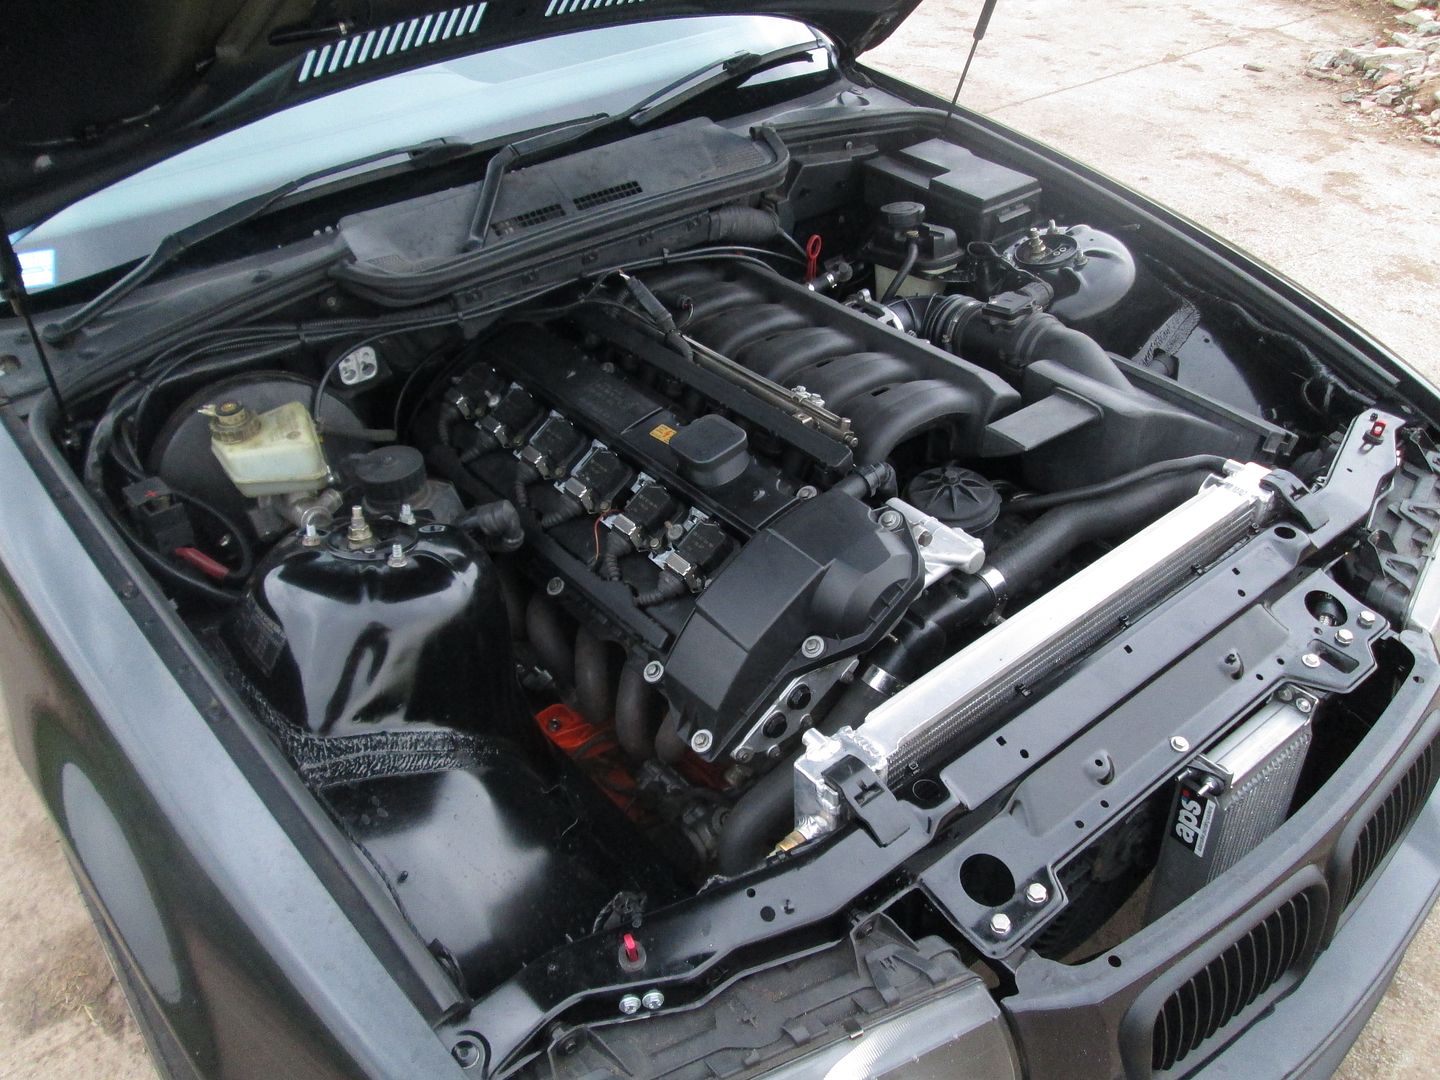
After approximately 750 miles of opening the engine up, the mineral oil was dropped and changed. Everything seemed well, engine was much stronger and no more oil blowby. Next job was to get it back out on track...

So in the end it was a good 50kg lump of scrap iron. Luckily I managed to recoup the loss of purchasing that by selling the rotating bottom end assembly. After a couple more weeks, I managed to source a pair of good condition M50 blocks, both already stripped down and very cheap.

One was picked, which then went to be decked and honed again. The other was kept as a spare.

The M52 aluminium block was stripped of its parts, then the same process repeated for the M50 iron block. Surfaces cleaned, Plastigauged, then assembly grease..

Ring gaps checked again, each one fitted and connected with another new set of rod bolts..


There are a few slight differences with the M50 iron block (aside from the weight increase). The piston oil jets are different, they sit under the bearing journal instead of being separate..

The windage/baffle plate is different, as the iron block does not have the support webbing that the aluminium one does. This means the oil pump pickup mounting is in a different place. A few spot welds drilled out on the M52 item and then welded onto the M50 item in the correct place wasn't too much work. You also have to knock a bit of shape into the far two channels of the plate, otherwise the rod caps will touch the plate. This is due to the M52 crank having a longer stroke than the M50. Easily done once assembled though.


Lastly one of the oil pump bolts is in a slightly different location, by all of 1mm. This is sorted by opening the hole up on the oil pump, plenty of material available to do so. You could also use an M50 pump to get around the above two issues, but I didn't have one and I knew the M52 item had been cleaned/rebuilt. The sump, chain guides, chains and timing covers were then also fitted..


Back onto the lower stand, and another new headgasket. Head dropped on and torqued down to the M50 iron block specification, everything held well this time.


The hydraulic tappets were then fitted, along with the cam trays, cams and caps. All with plenty of assembly grease again.


The engine was then timed up, along with new tensioner springs..


VANOS unit was pulled apart and seals replaced..


The VANOS unit was then installed onto the head, with a new gasket..

New crank seals at both ends, with a new crank bolt and torqued to spec..


Metal impeller water pump, low temperature thermostat, new rocker cover gasket and the main timing pulley..


With the engine complete, all that was left to do is actually put it into the car. The old +200k motor was pulled out..

The flywheel and clutch set up were removed, and fitted to the new engine. This consists of an M20 325i flywheel, and a Sachs clutch. Contrary to popular belief, you do not need a taller release bearing to make this work if you are using the ZF (standard 328i and M3) transmission. It all works fine.


I also fitted the oil filter housing (with a new gasket) and various other bits before the engine went into the car. The oil filter housing had been previously changed to one from an M3, as I ran an oil cooler on the old engine, along with auxiliary oil pressure/temperature gauges. The 'new' VANOS oil feed line was also swapped, previously in use on the old engine also.


So from a while back, the M3 Oil Cooler fitting > -AN10 adaptor..

..and matching lines that were made up.

I previously ran a 13 row cooler, but with the new engine have gone to a new 19 row for the relative low cost..

The gearbox was cleaned up, given a coat of paint and fitted to the engine along with a couple of new shifter bushes..

M3 3.2 exhaust manifolds also fitted while the engine was out for ease (modified to work with a standard 328i exhaust) with new nuts on the new studs..


Finally it was lifted in to place and sat on the mounts. The rest of the ancillary setup was fitted, wiring connected, and the pipework under the inlet manifold for the idle control valve replaced. I don't run a PCV breather setup.


Fuel pump was replaced with a Walbro 255lph unit, considering the old one was original and way past the 200k marker.

As you may notice from the pictures, I don't run a standard radiator setup. Its actually an M3 radiator with a header tank from a different model, mounted at the back of the engine bay. The front end was left half assembled in case there were any issues..


With everything connected, mineral oil in the engine and other fluids filled, it was ready to run. Cranked it over without the ECU to build some oil pressure, then..

https://www.youtube.com/watch?v=nn4wX-Pdm3o
After running it for a short period of time to check for any leaks, all seemed OK, so the rest of the front end was assembled. The oil cooler was properly mounted from all four points, with some rubber bushes..


Oil lines routed and protected..

Due to the way the oil cooler was now fitted, and the position of the oil lines, the standard bonnet catches were a bit too close. Instead, I decided to fit some aerocatches I had from a previous car.


The standard airbox and front bumper were put back on..

Then the engine just needed some running in miles to see how everything went...


After approximately 750 miles of opening the engine up, the mineral oil was dropped and changed. Everything seemed well, engine was much stronger and no more oil blowby. Next job was to get it back out on track...
Edited by f0xy on Saturday 3rd January 19:33
Main reason was I wanted a 'new' engine, at the time I wasn't chasing power and just wanted to learn about this particular series of engine. I've previously done a number of 4 cylinder rebuilds on other track day cars I've had, so this was a bit different. Also the relative cost of a rebuild (even with the issues) is much less than the price people are selling the S50's for..
Yeah, in hindsight it would have been much easier to start with an M3, well apart from the initial purchase price also considering this was circa £1k, but I wouldn't have learnt anything. The chassis/setup was done quite a way before all this engine stuff, so I already had a good base, just an old engine at the time 

So with the engine run in and a day at Oulton Park (my local circuit) booked, I had the alignment checked and headed over.

https://www.youtube.com/watch?v=R33OFQ0PnGk
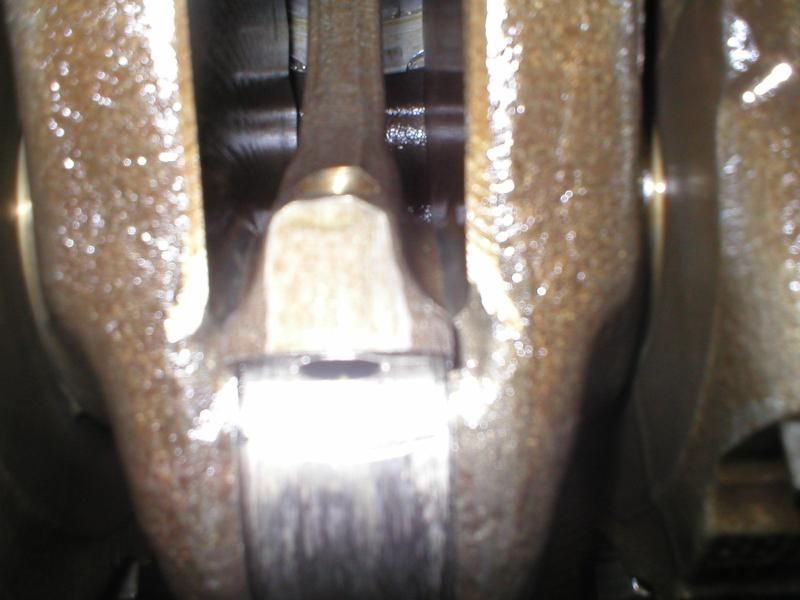
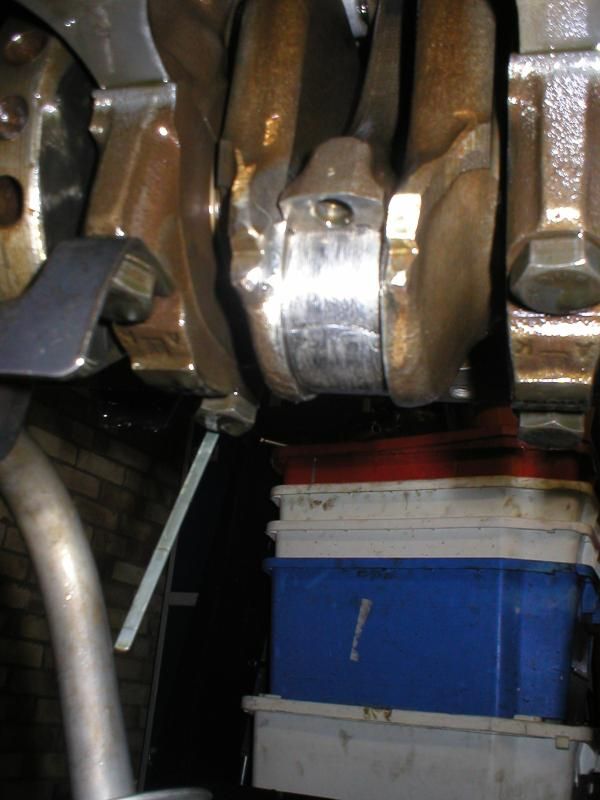
The engine seemed to go well, oil pressure good, water temperature good, but if anything oil temperature was a tad higher than with the old engine by a few degrees. Thought nothing of it, until the day was over and the engine developed a slight miss fire. Once I had the car home, I plugged the laptop in and there was a fault logged for missfire on cylinder 1. I checked the plug, coil pack and injector. Swapped out each in turn but the miss fire remained. A quick compression test revealed..

All other cylinders were bang on as expected. Obviously a problem internally with cylinder 1 somewhere. I pulled the engine back out..

To reveal some discolouration on cylinder 1, looking like its been lean. Head off..
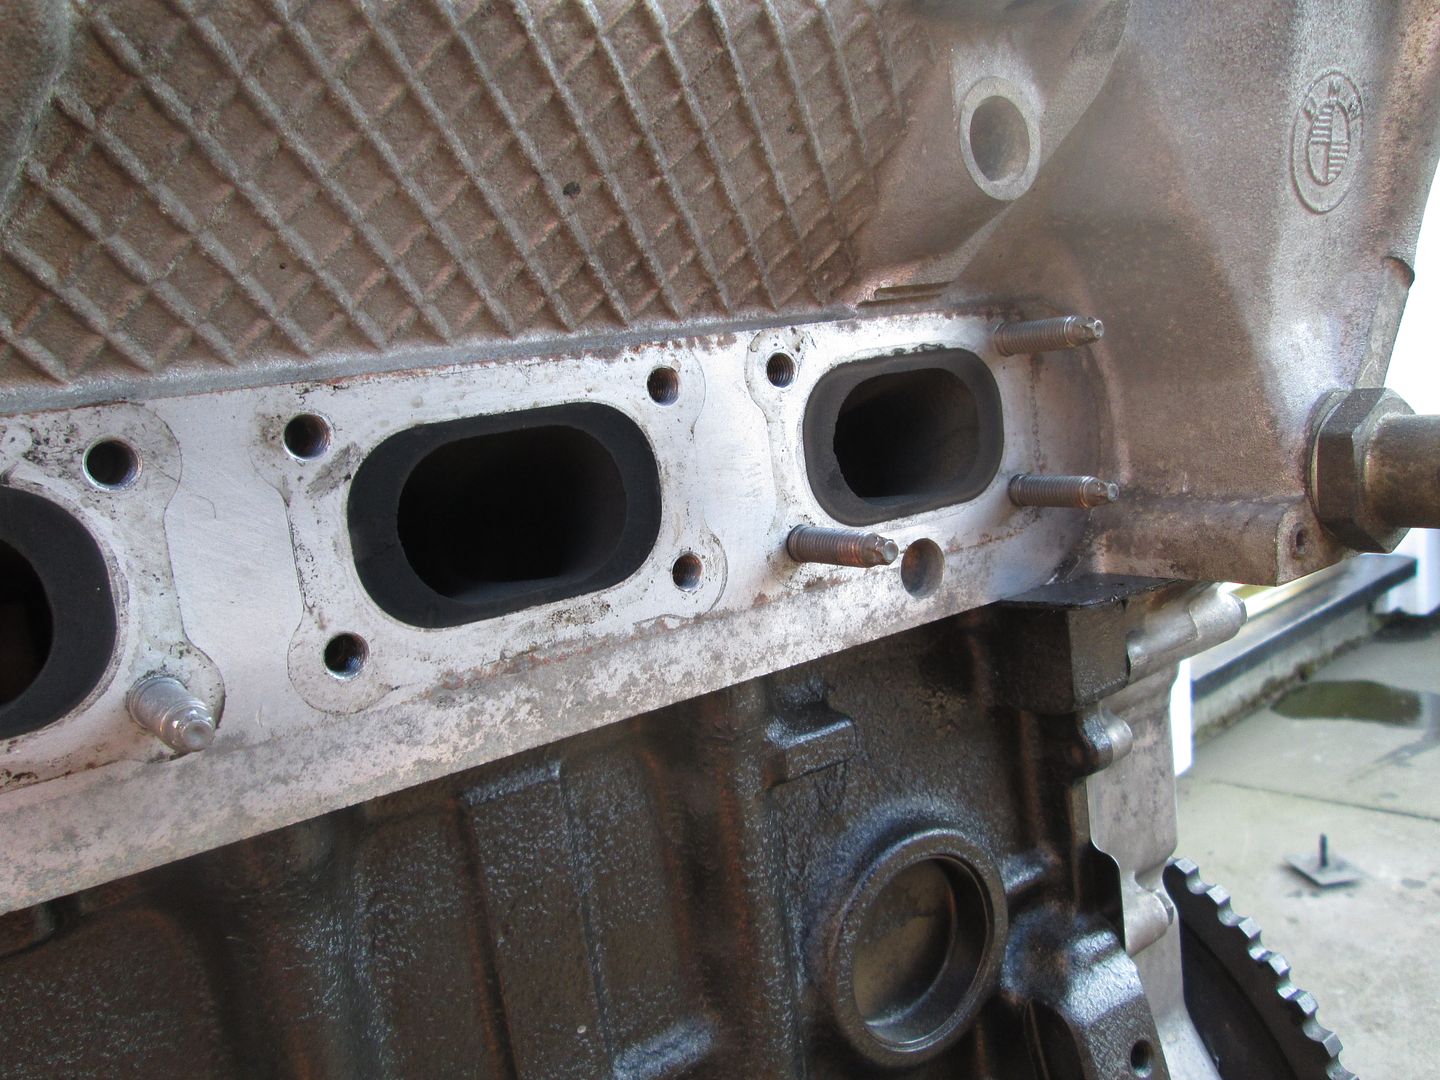
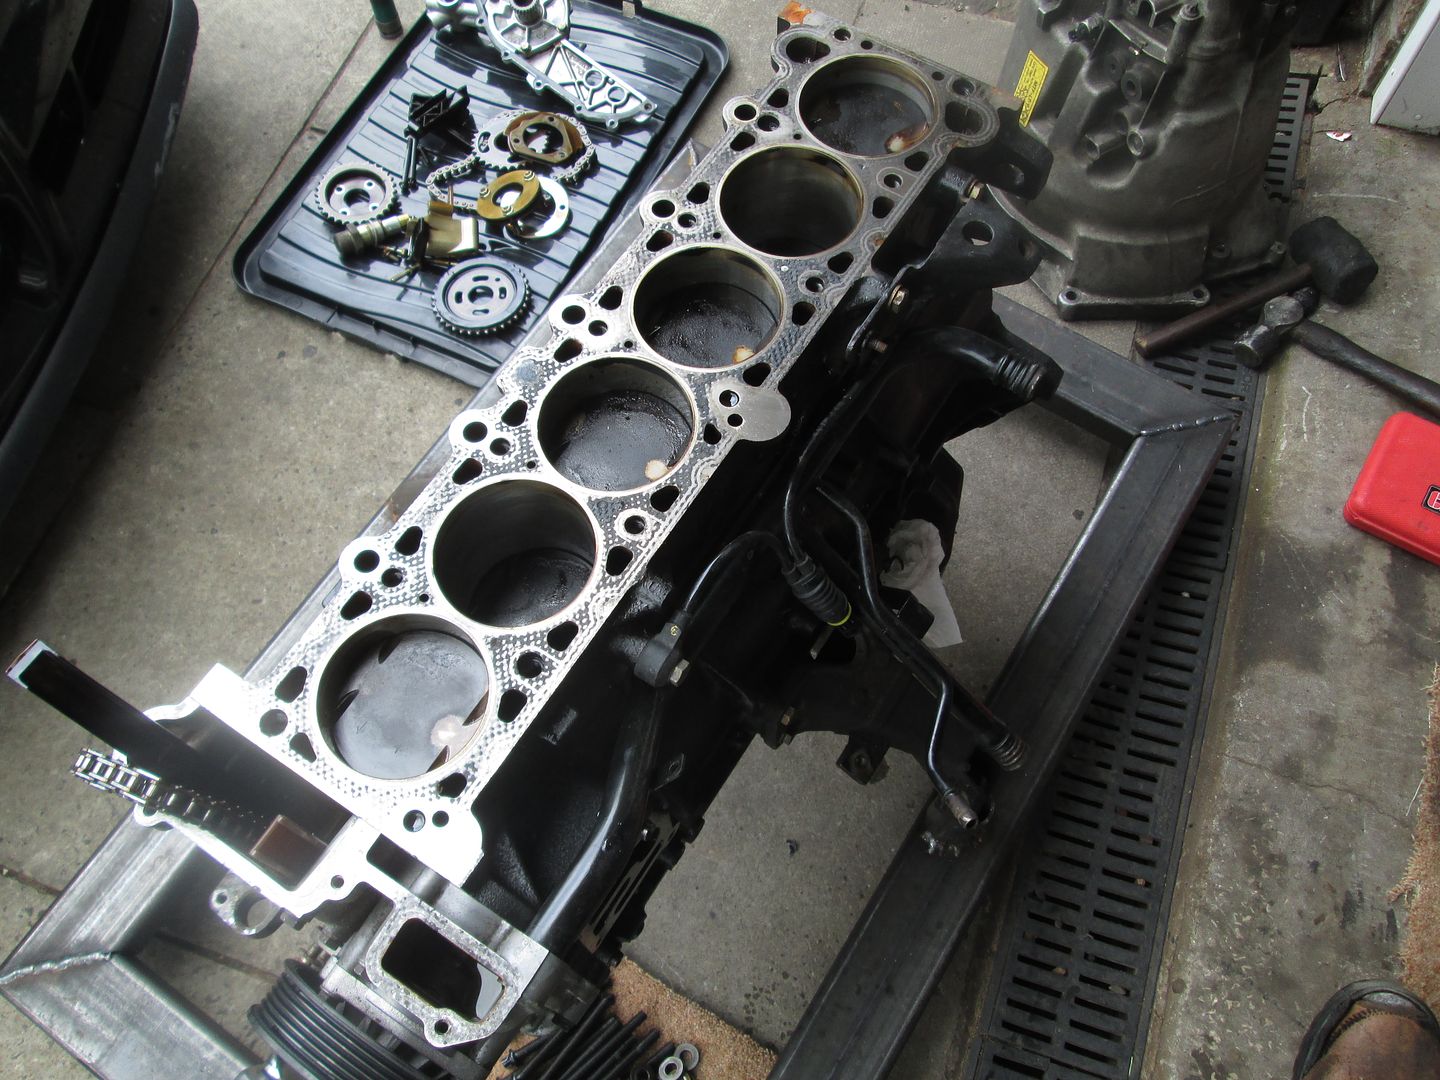
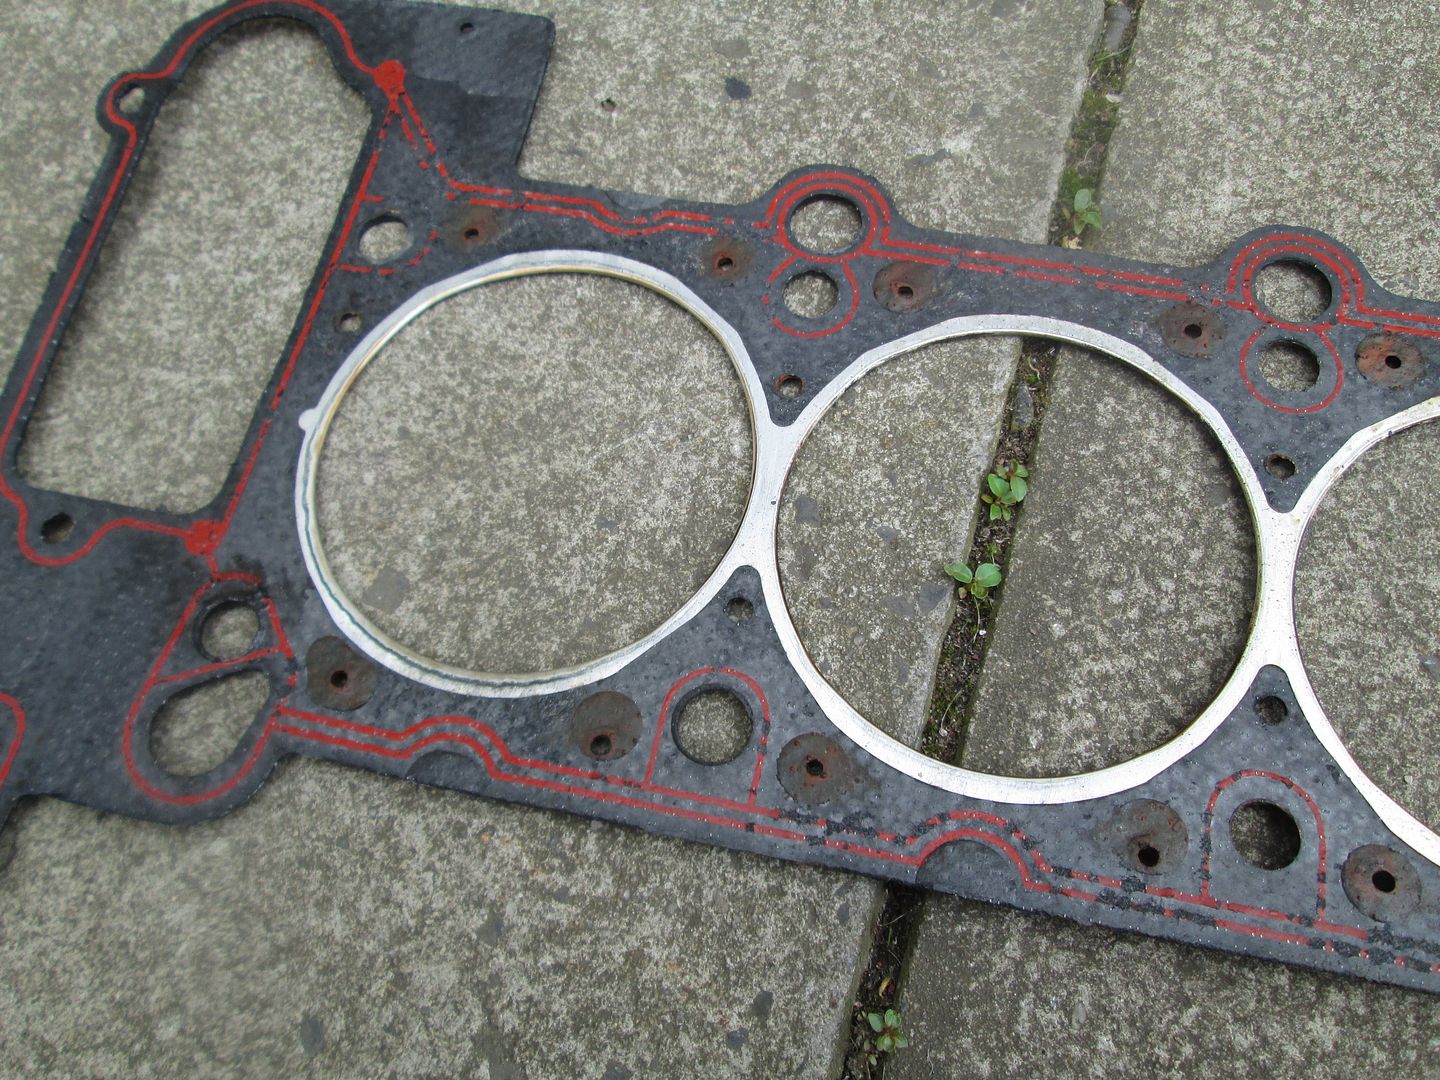
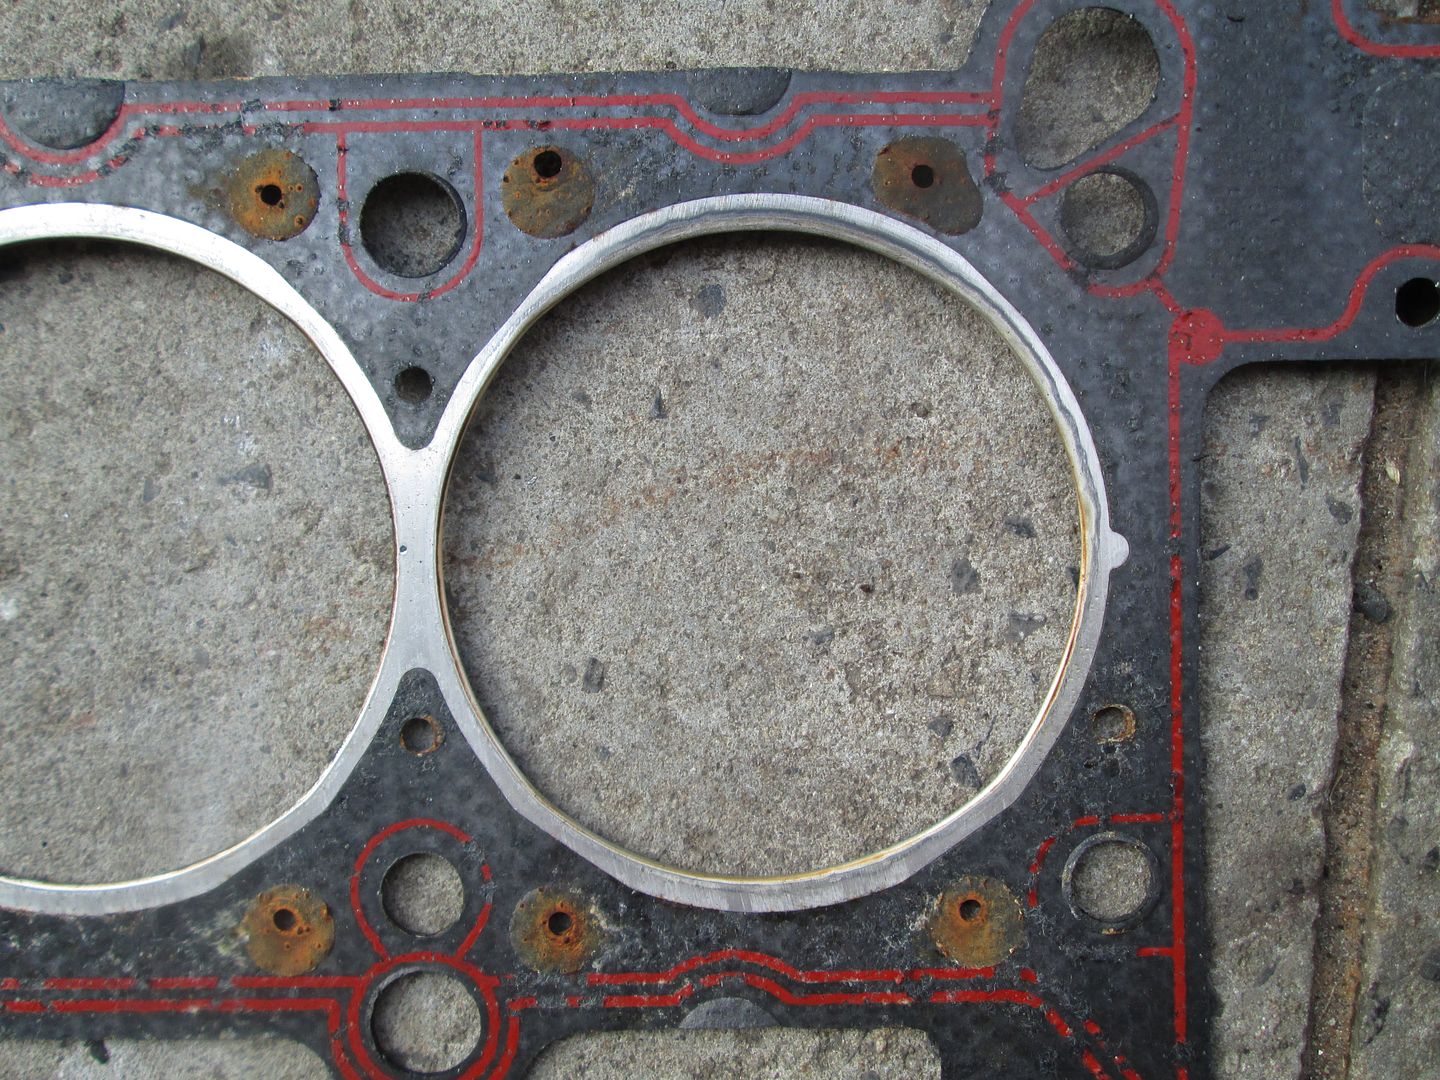
Pulled the pistons out of the block to reveal..
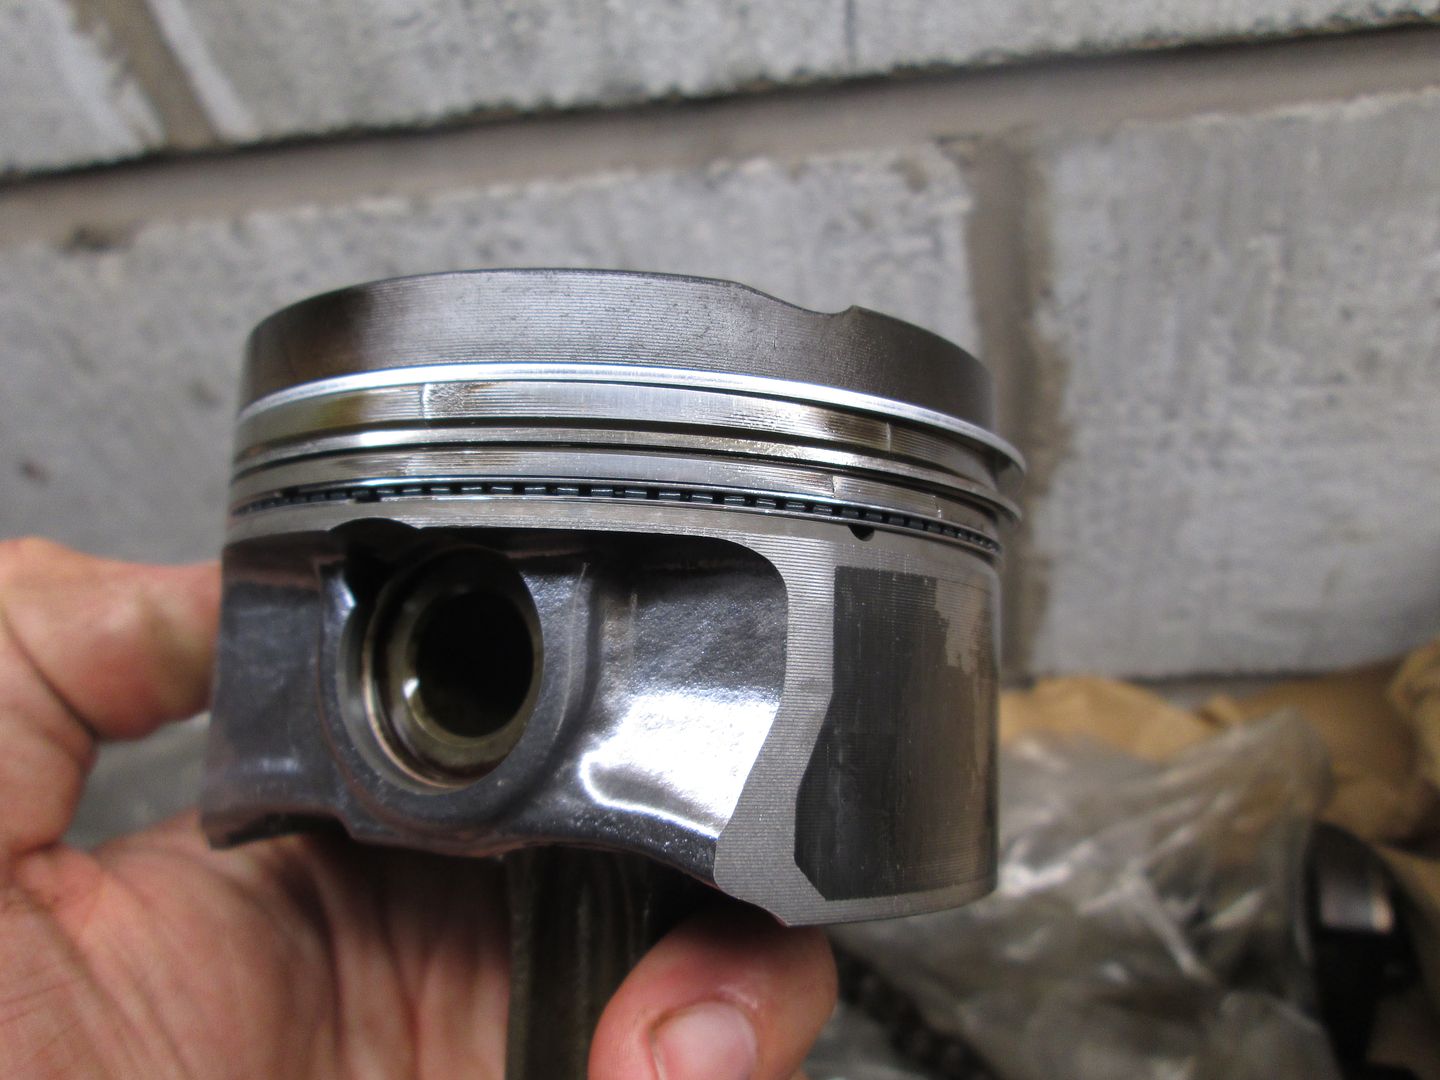
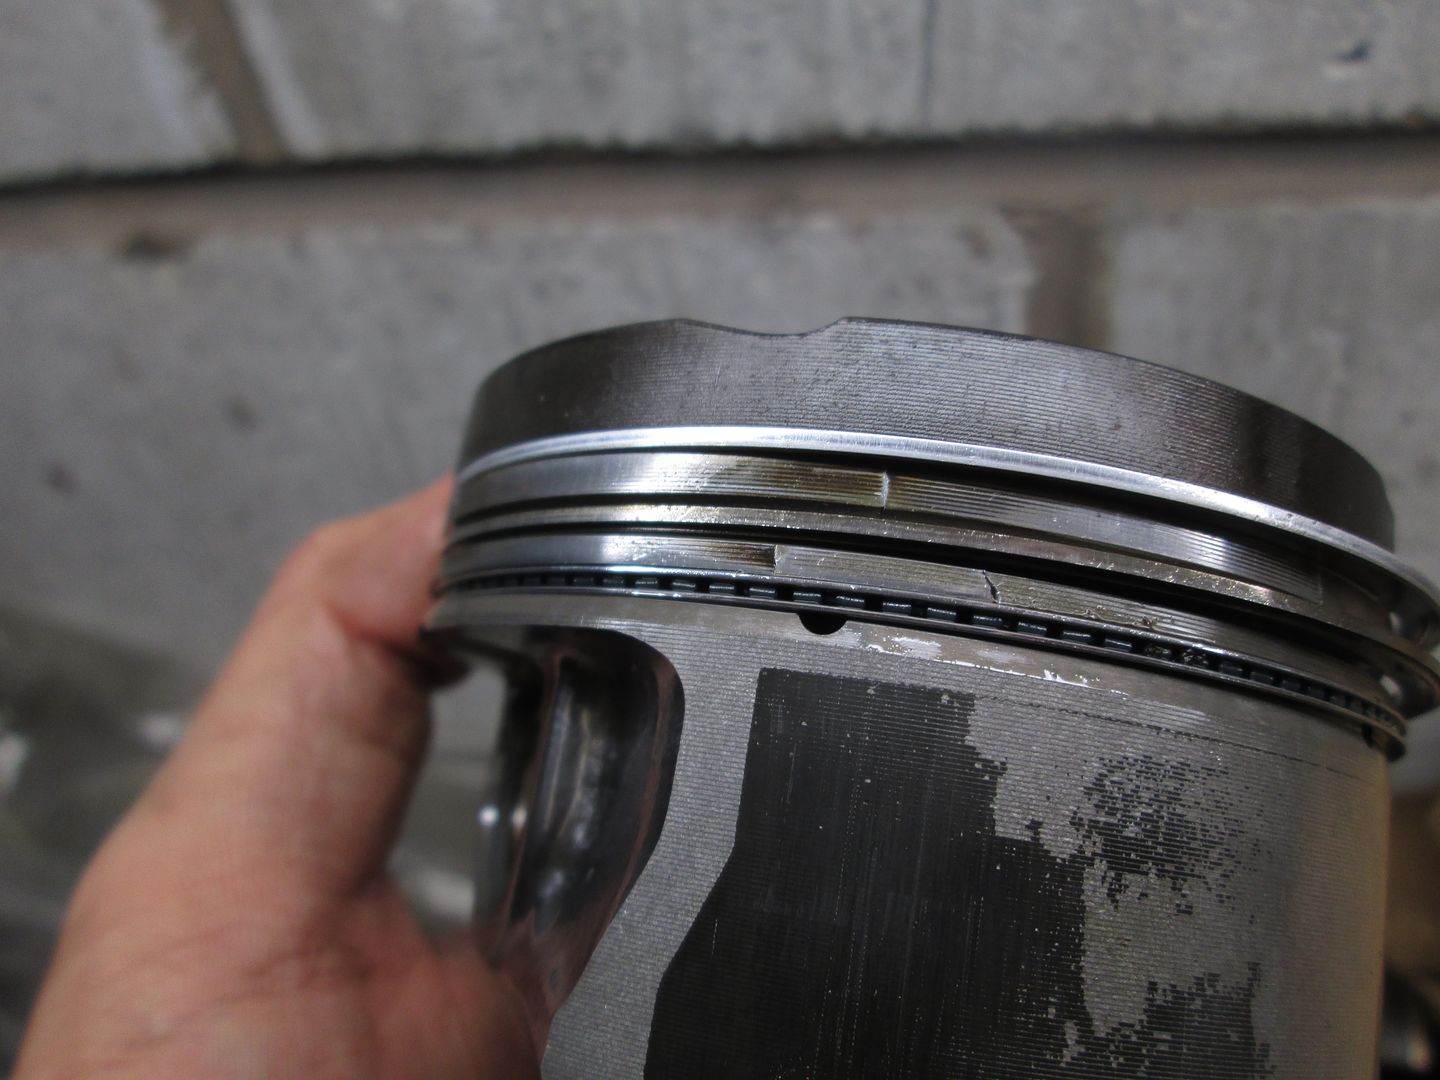
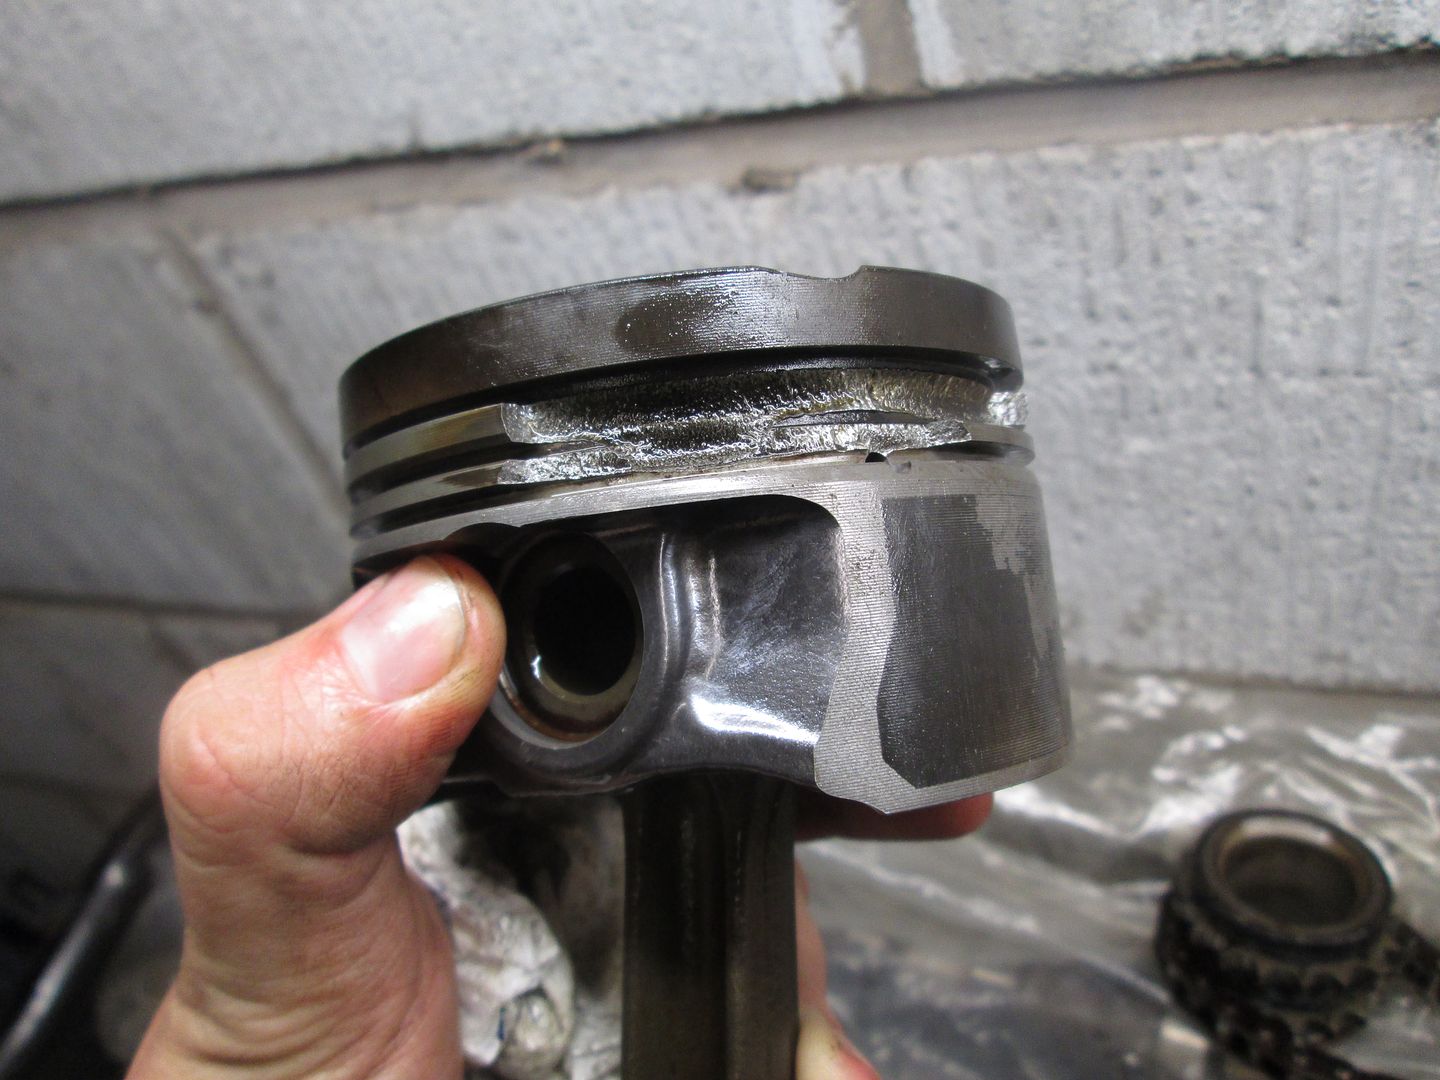
So its just been a bit lean then...... Whether there was an issue with the head, or gasket, or an injector had an issue, or the piston was damaged beforehand? Who knows. They were all checked again before installation and none looked to have an issue.
Ended up putting it down to bad luck... but at the time I didn't know whether to break the car for parts, or carry on and get another second hand engine, or do something a bit different...

https://www.youtube.com/watch?v=R33OFQ0PnGk
The engine seemed to go well, oil pressure good, water temperature good, but if anything oil temperature was a tad higher than with the old engine by a few degrees. Thought nothing of it, until the day was over and the engine developed a slight miss fire. Once I had the car home, I plugged the laptop in and there was a fault logged for missfire on cylinder 1. I checked the plug, coil pack and injector. Swapped out each in turn but the miss fire remained. A quick compression test revealed..

All other cylinders were bang on as expected. Obviously a problem internally with cylinder 1 somewhere. I pulled the engine back out..

To reveal some discolouration on cylinder 1, looking like its been lean. Head off..


Pulled the pistons out of the block to reveal..


So its just been a bit lean then...... Whether there was an issue with the head, or gasket, or an injector had an issue, or the piston was damaged beforehand? Who knows. They were all checked again before installation and none looked to have an issue.
Ended up putting it down to bad luck... but at the time I didn't know whether to break the car for parts, or carry on and get another second hand engine, or do something a bit different...
Edited by f0xy on Saturday 3rd January 20:37
Dr Imran T said:
Darn, did you only manage one track day on a rebuilt engine?
You're certainly committed. Seems like a lot of work. However, I've learnt from experience that if you can do a job, do it yourself.
I've not had a great experience recently with a bmw specialist.
Keep at it though, it's a learning curve for sure.
Yep, it literally started miss firing as I got home unfortunately, but learnt a huge amount again just due to the difference with this specific engine like you say.You're certainly committed. Seems like a lot of work. However, I've learnt from experience that if you can do a job, do it yourself.
I've not had a great experience recently with a bmw specialist.
Keep at it though, it's a learning curve for sure.
vx220 said:
Just out of interest, did you measure the weight difference between the aluminium and iron blocks?
Cheers
Yeah. The M52 Aluminium block is 22kg. The M50 cast iron block is 40kg. So 18kg difference - although the M20 flywheel is 5kg, and the original DMF is 13kg. So in the grand scheme of things the difference is only 10kg. Saved the weight elsewhere really, one of the posts to come shows how 30kg was saved on changing the stock exhaust!Cheers
Sf_Manta said:
I'd have the block honed assuming that the bores weren't badly damaged.
Good excuse to have low compression pistons in and go with a forced induction setup
The bore looked OK to be honest, I've still got it as a 'spare'. I built another engine after this, which I will post once wrote up Good excuse to have low compression pistons in and go with a forced induction setup


Sf_Manta said:
Alright, though if you're building an engine for track days, it's probably worth getting decent fixings from ARP for the rods, head and flywheel.
Even if you're not adding more power, it's peace of mind knowing that the weak links in the engine are eliminated for reliability.
Also, do you run a baffled sump? didn't see any mention of baffles, or a oil pressure sensor for a gauge to monitor pressure levels. maybe a thought to invest in.
Yep, I have used ARP fasteners in the bottom end now, as of the newest build (to come). Yeah, I have ran Oil Temp/Pressure gauge since the original engine, the pressure sender can be seen in the picture before the new engine was lifted in Even if you're not adding more power, it's peace of mind knowing that the weak links in the engine are eliminated for reliability.
Also, do you run a baffled sump? didn't see any mention of baffles, or a oil pressure sensor for a gauge to monitor pressure levels. maybe a thought to invest in.
 I also now run a wideband and datalogger, which will become clear with the next post. No aftermarket baffle setup no, just the standard lower baffle in the standard sump...
olly22n said:
Well get writing it then!
Anymore on the car development before the engine?
Very soon.. its running a 3.15 LSD, along with every part underneath having been replaced.Anymore on the car development before the engine?
Edited by f0xy on Saturday 3rd January 21:52
Dr Imran T said:
So chaps, is it not better to put some decent mileage on an engine before pounding it round a track?
That would generally be my route. I've done a fair few track days and it really is tough on the engine.
Op - I would be reluctant on buying a used engine unless you can verify that it is in good health.
Yeah, well had around 1200 miles on it before taking it to Oulton, but with it only being a track day car, its not used all that often. Luckily its the only real failure I've had in 7-8 years of track days, even with engines in the past that have only been run in on a dyno. I guess its just the luck of the draw to some extent also.That would generally be my route. I've done a fair few track days and it really is tough on the engine.
Op - I would be reluctant on buying a used engine unless you can verify that it is in good health.
Yeah, I would much rather build one, which I've just posted below. You generally can't trust anything anyone says, unless you were there when it was built...
After some thought, and the realisation people were really asking ridiculous money for M3 engines, even on 70k miles, it just wasn't an option.
From browsing the US forums a handful of people had done the 'cheap' 3.0L engine, using the rotating assembly from an M54B30, i.e. E46 330i, etc. I couldn't really find much information about it in the UK, just a few vague threads on various forums with no real definitive information. These engines were for sale ranging from £200-300, nearly a 10th of the price people had M3 engines listed for. After a bit of waiting, one came up local on the cheap end of that scale and I went to collect it..

Considering I only really wanted the crank, pistons and rods from this, I found out the rest of it (inc. ancillaries) were selling well on eBay, after some patience and once everything had gone, essentially the internals ended up costing nothing.
To eliminate a problem with the M50 block used in the previous build, I had the machine work done to my good spare..
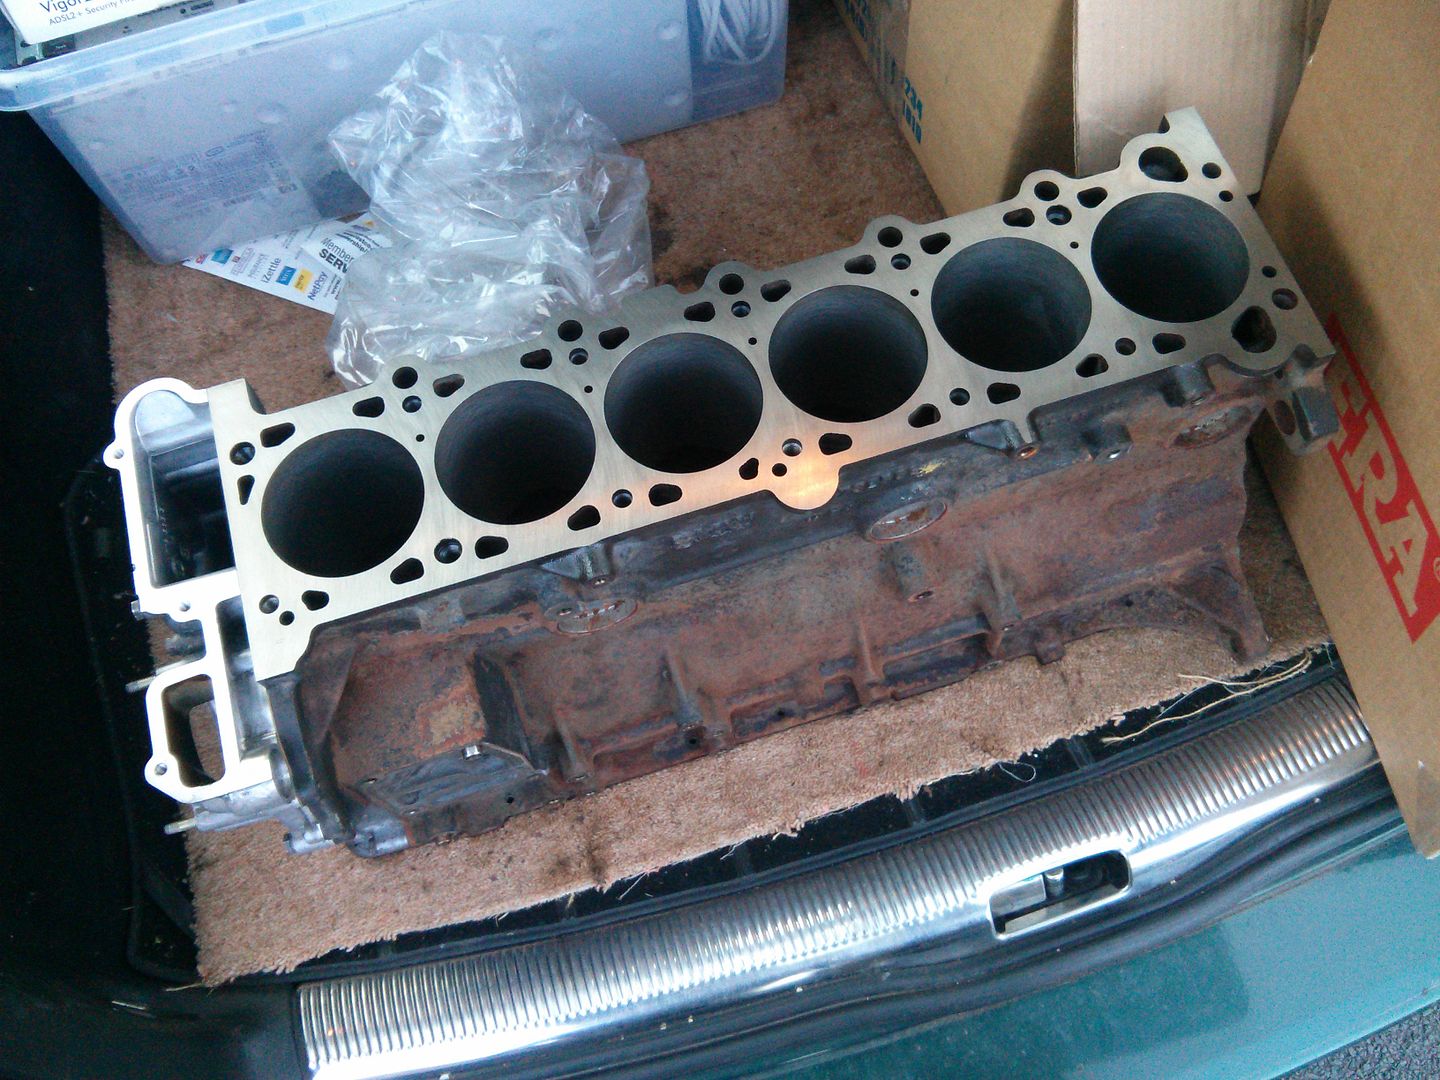
The bores were also double checked for roundness to be 110% sure, and all came out great.
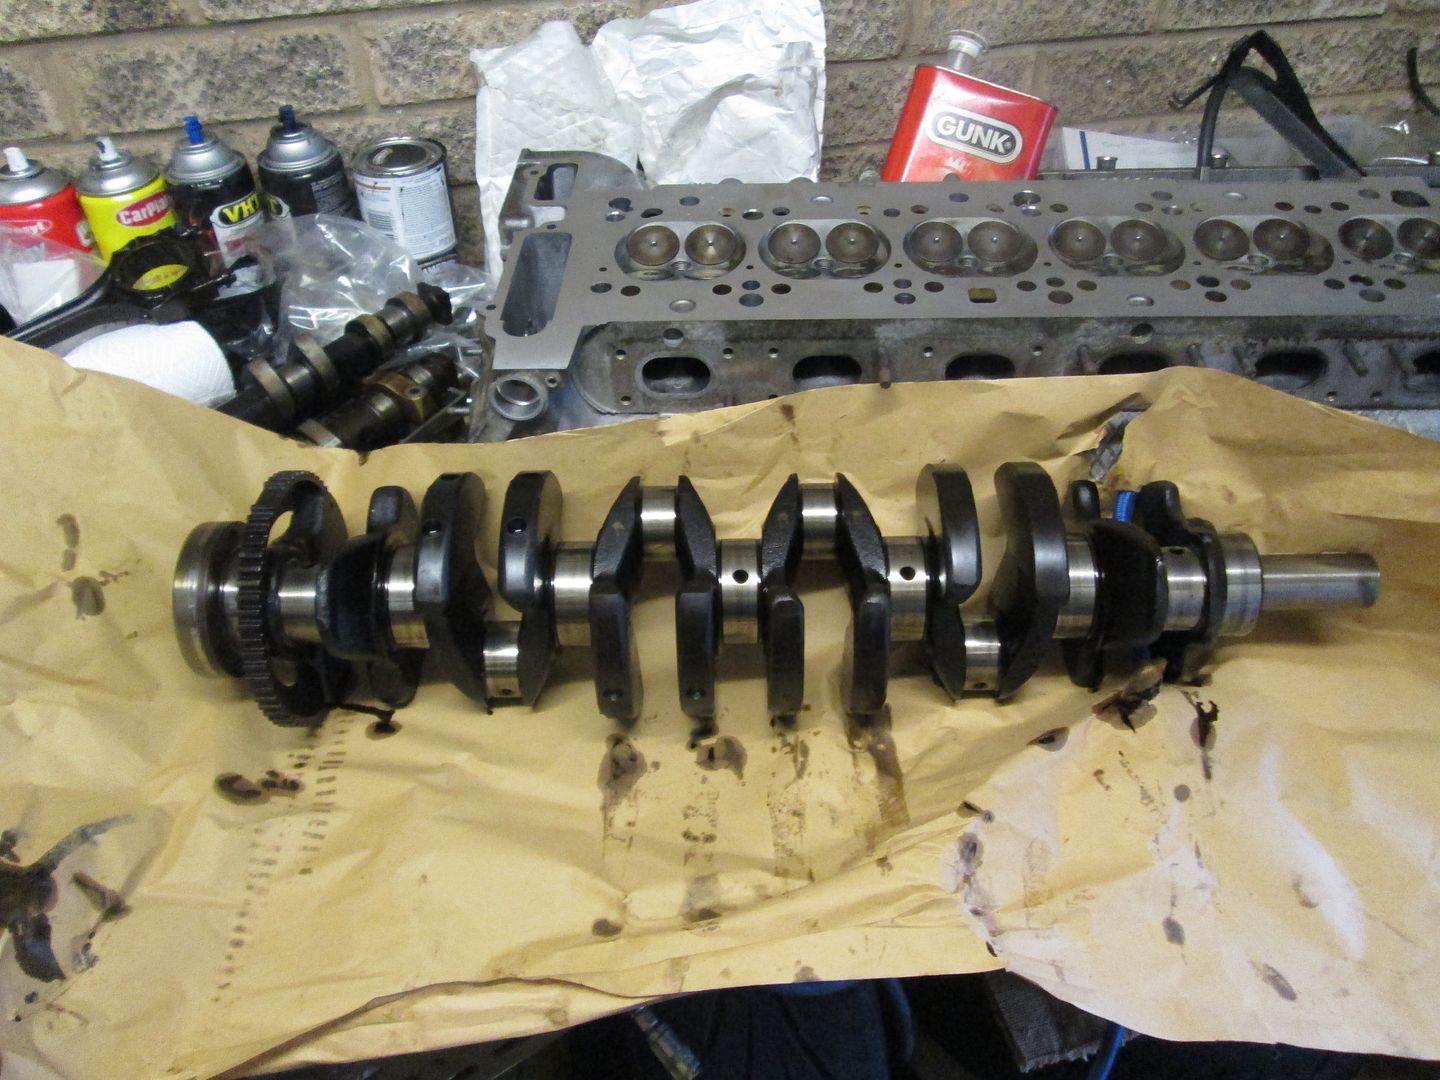
The M50, M52 and M54 engines are very similar internally, the M54 having different coolant/oil pathways, dual VANOS and various other things. They share the same 84mm bore, and the extra capacity is gained by an 89mm stroke on the crank in the M54, over the 84mm stroke on a 2.8L.
M54B30 Crank..
M54B30 Piston vs M52B28 Piston..
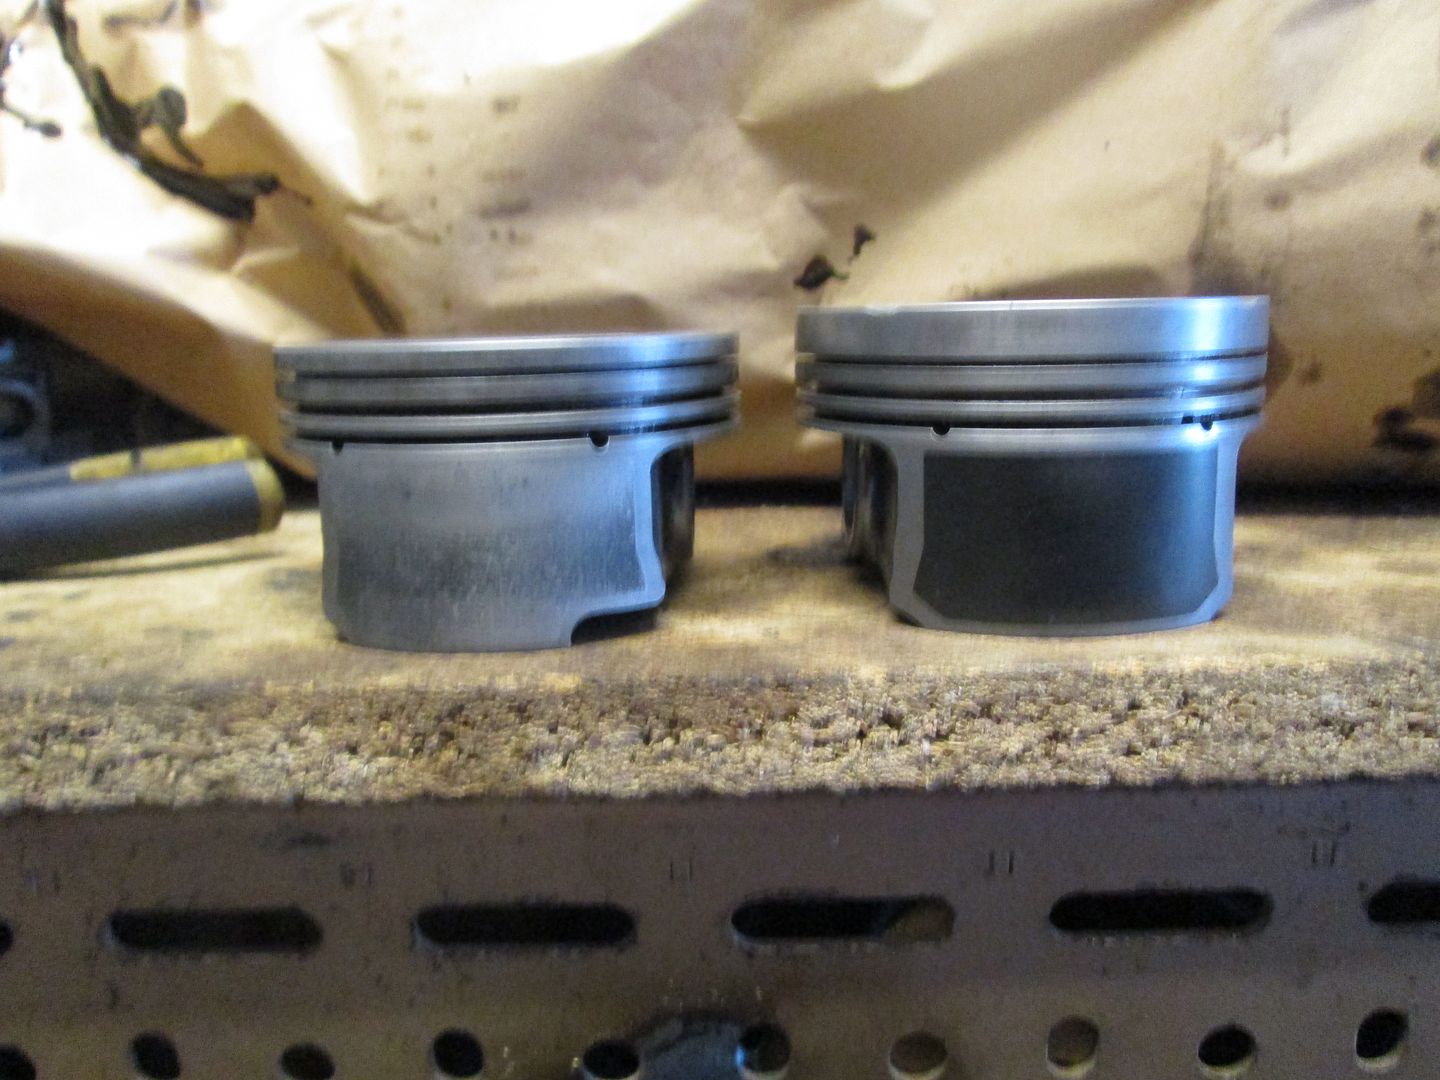
The M54B30 and M52B28 rods are the same, so you could use either. I kept the pistons with their rods either way. In summary:
M50B25 (2.5L Petrol, 1990-1996, E36 325i and E34 525i) - Steel/Iron Block, 84mm Bore, 75mm Stroke - 189hp, 181lbft.
M52B28 (2.8L Petrol, 1992-2001, E36 328i, E39 528i, E38 728i, Z3 2.8) - Aluminium Block, 84mm Bore, 84mm Stroke - 190hp, 210lbft.
M54B30 (3.0L Petrol, 2000-2006, E46 330i, E39 530i, E60 530i, X3/5 3.0, Z4 3.0) - Aluminium Block, 84mm Bore, 89.6mm Stroke - 230hp, 220lbft.
Again, did not know whether to trust the head that was used previously, so I had my spare head cleaned, skimmed, new stem seals again and then finally pressure tested to be 110% sure. All came back OK.
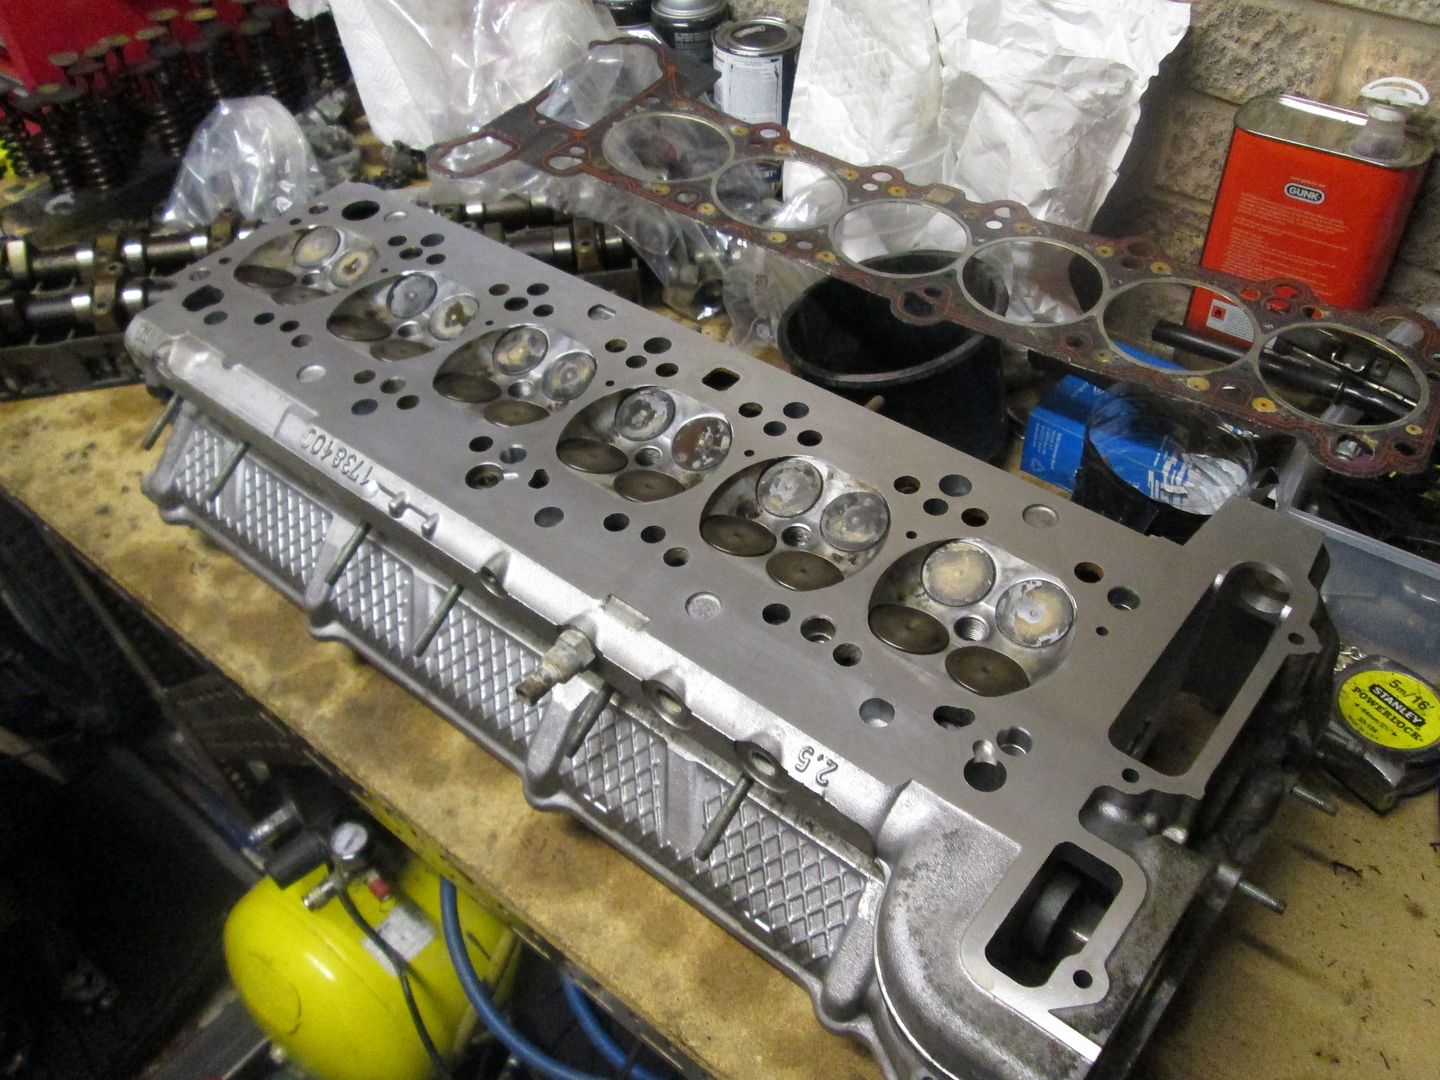
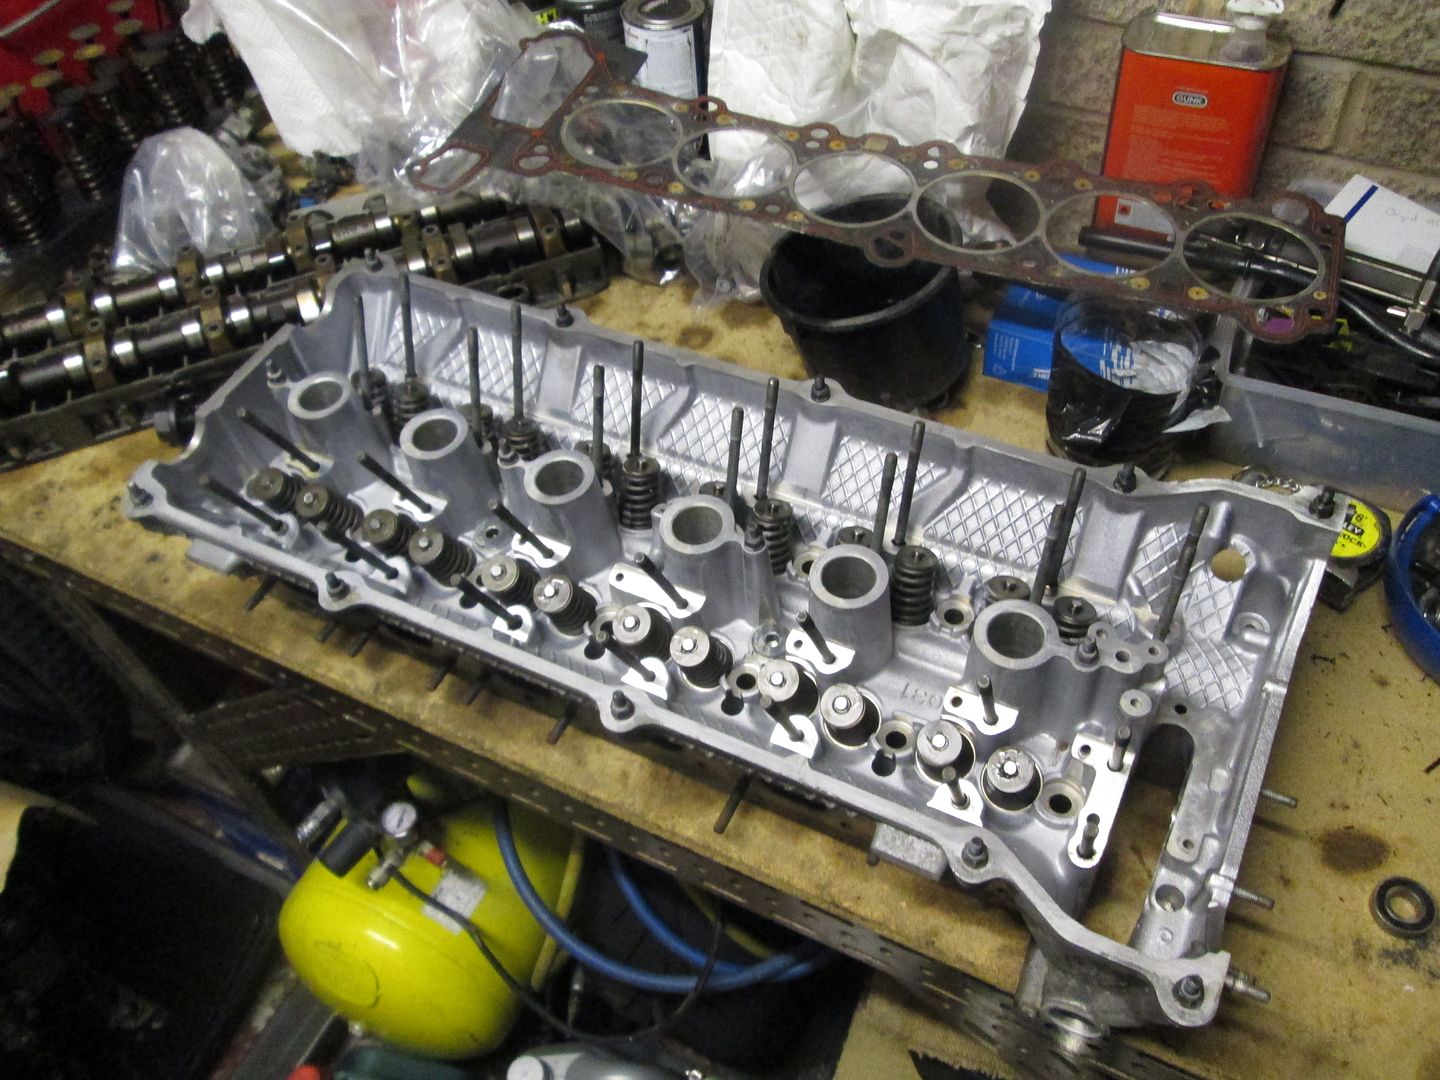
The pistons, rods and other bits were properly cleaned at the same time..
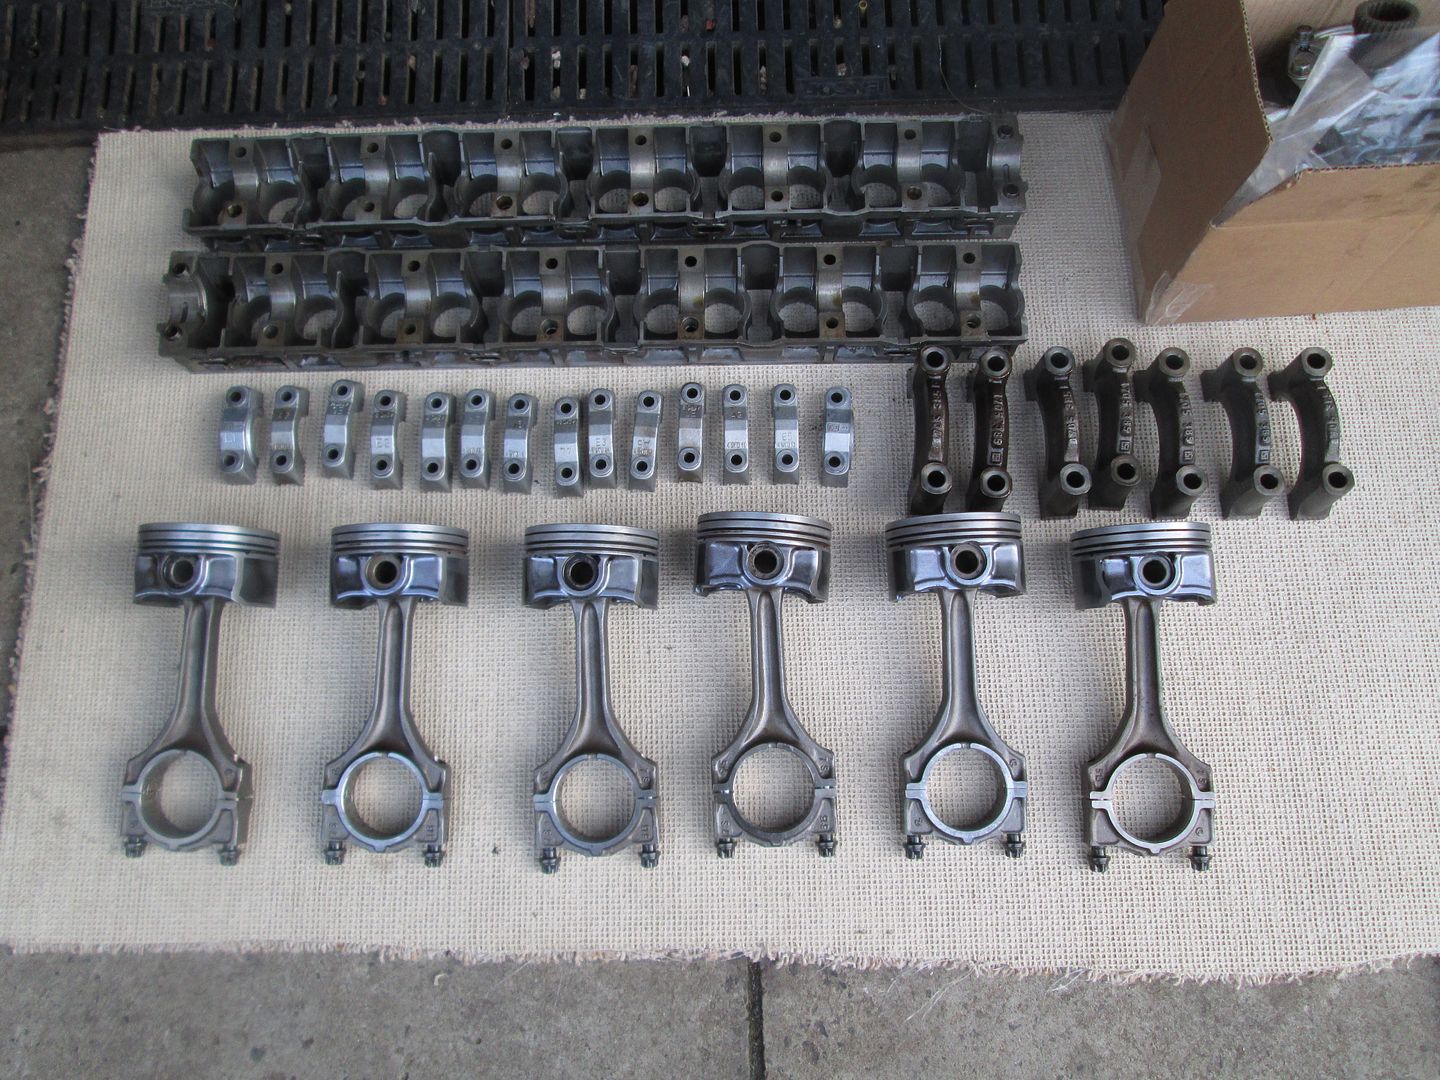
So the block was given a quick coat of paint, then the oil jets put in place, and some bearings fitted..
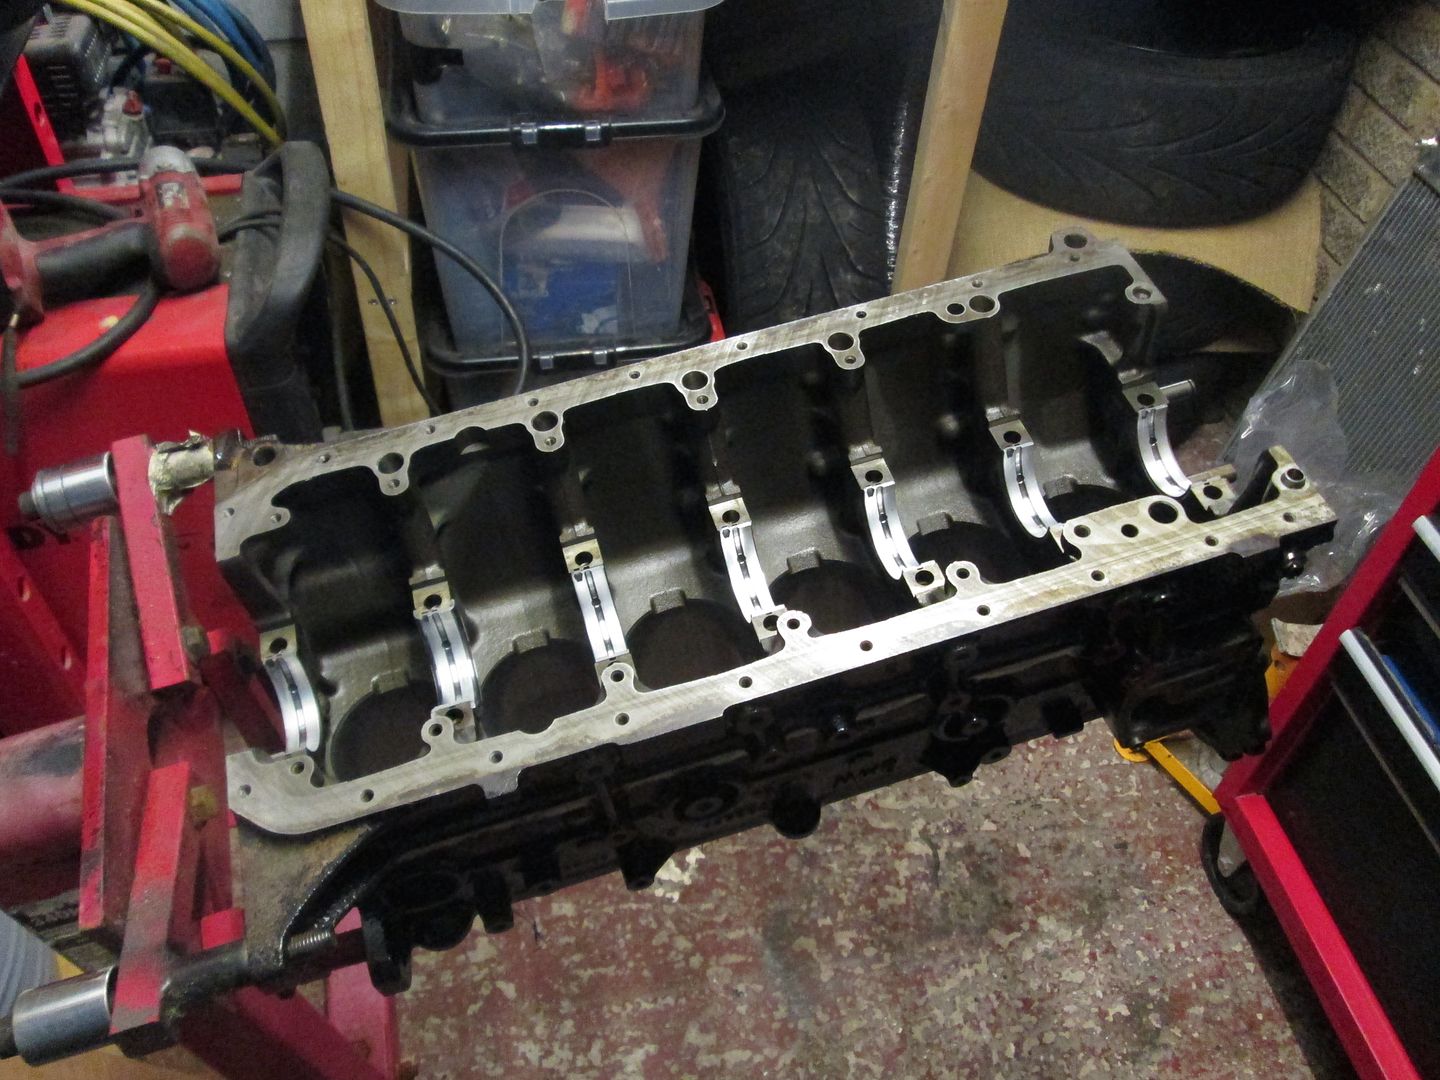
There had been a ridiculous increase in the price of mains bolts at BMW since I last had them, and it was actually cheaper to purchase ARP hardware..
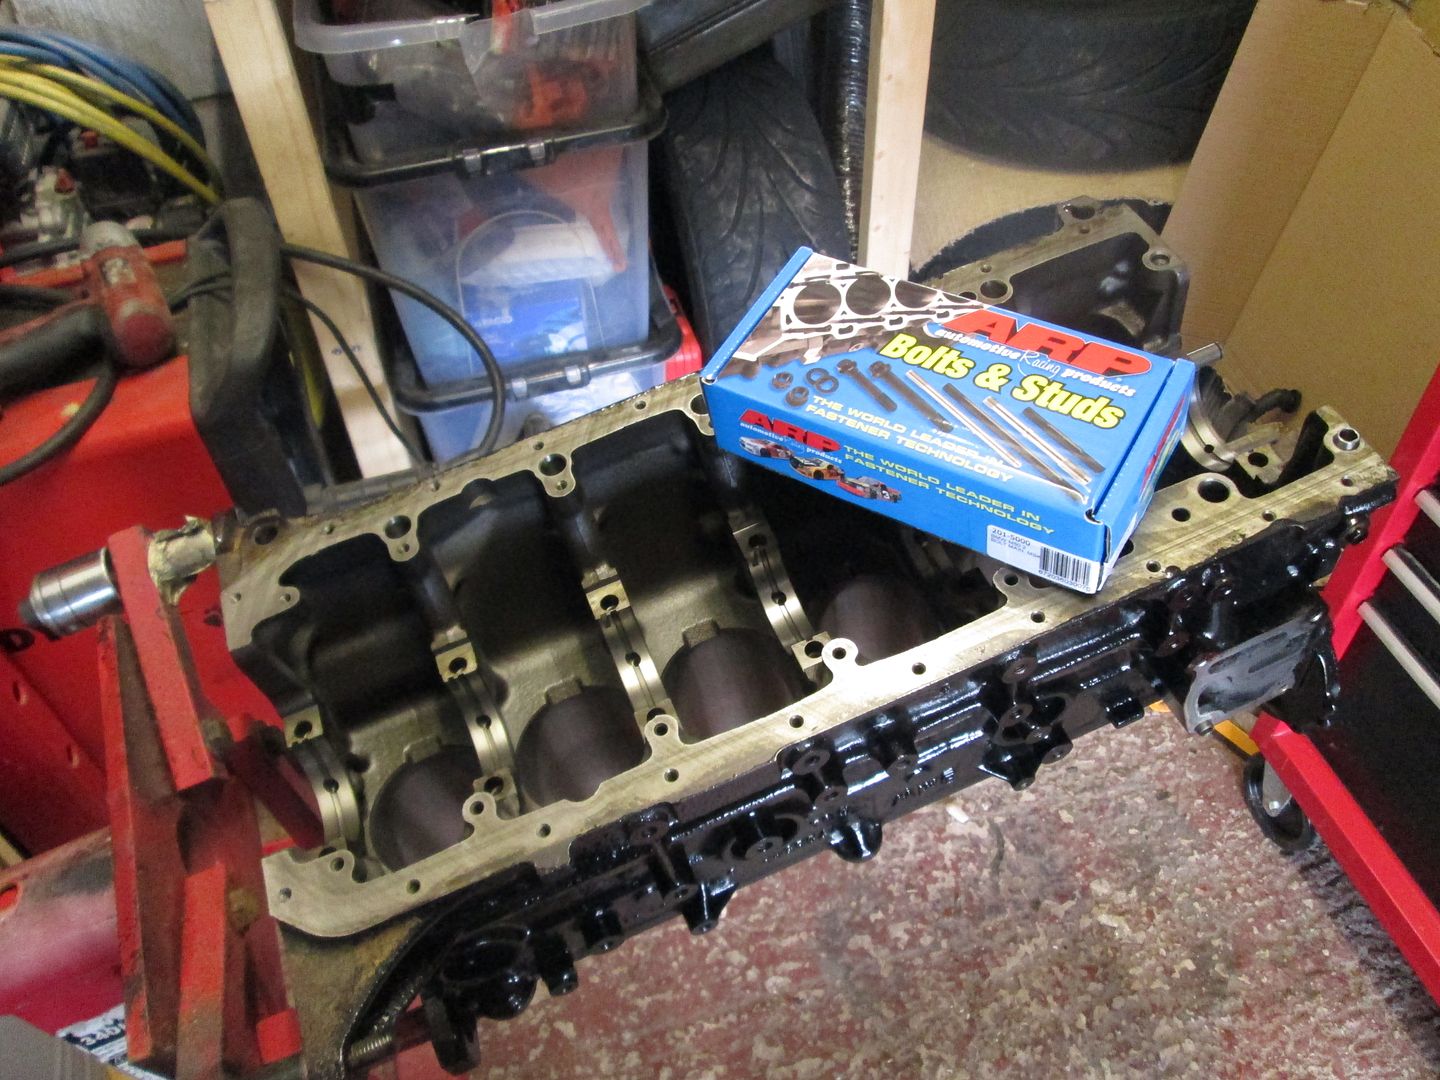
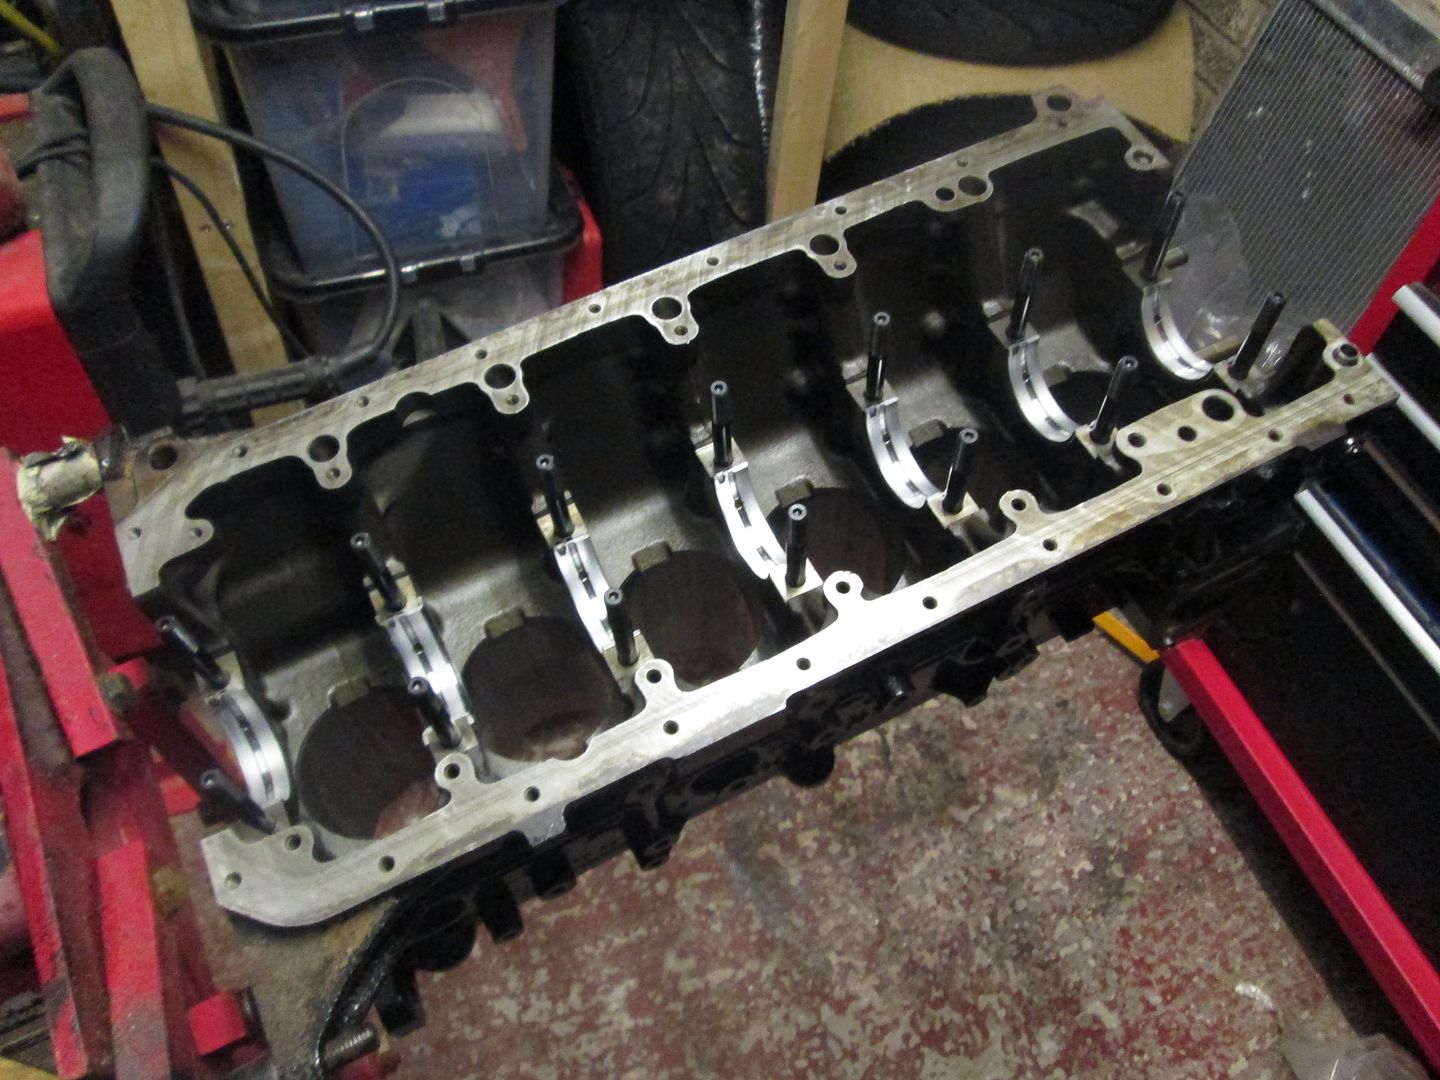
Degreased and checked the crank over, then dropped it into the block and checked the clearances..
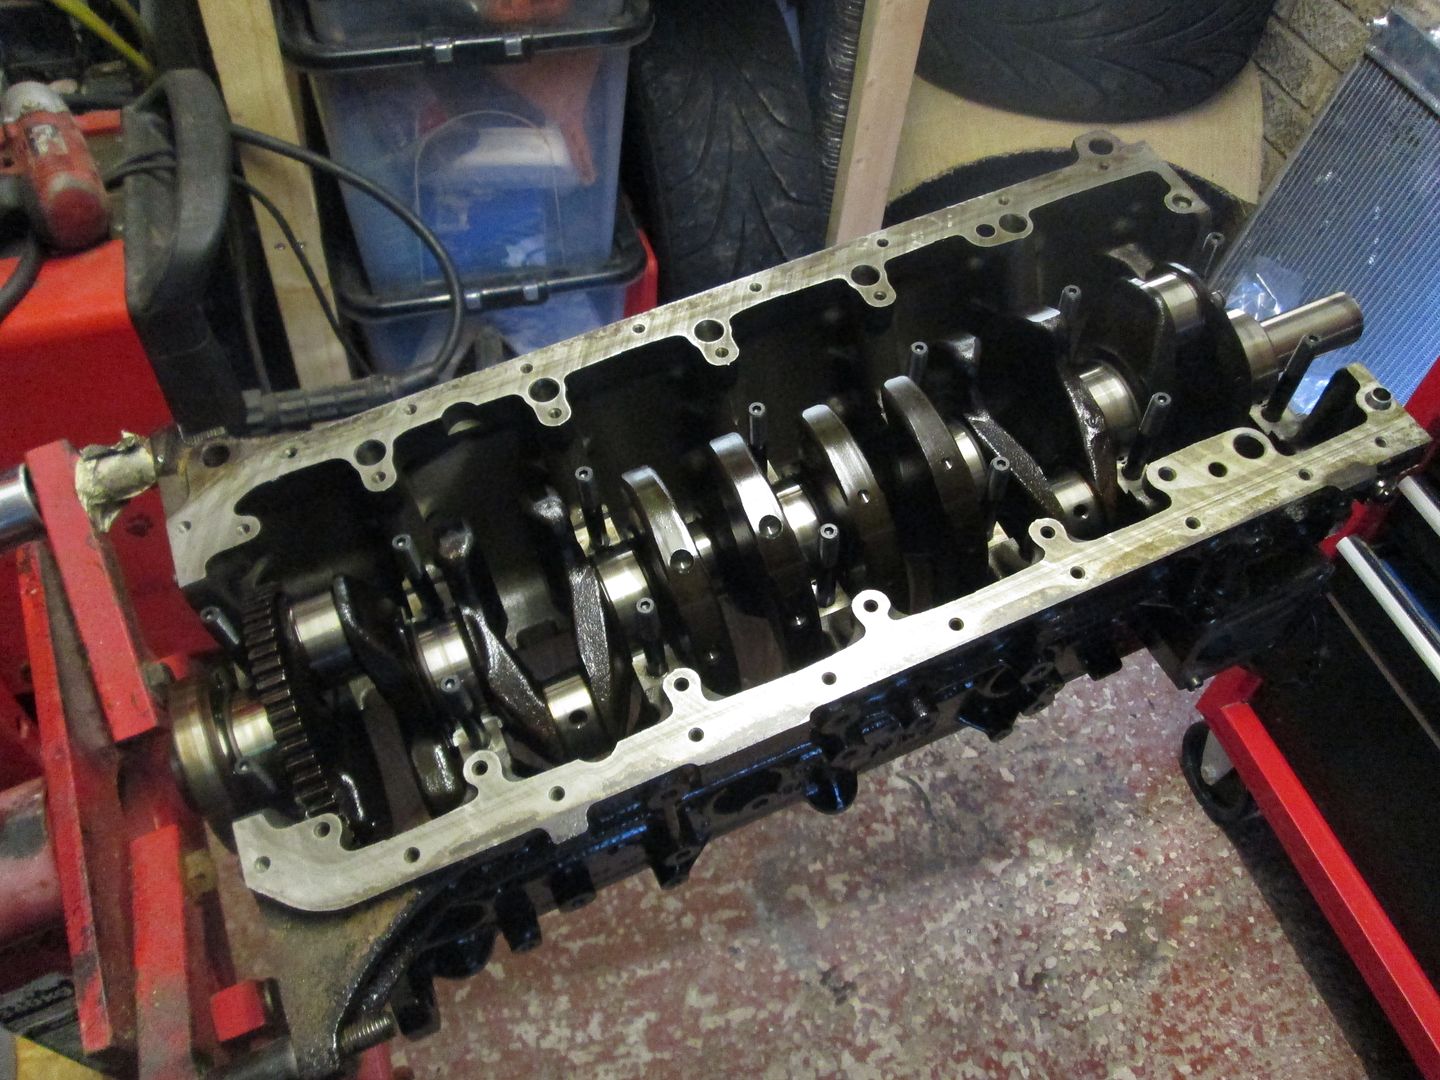
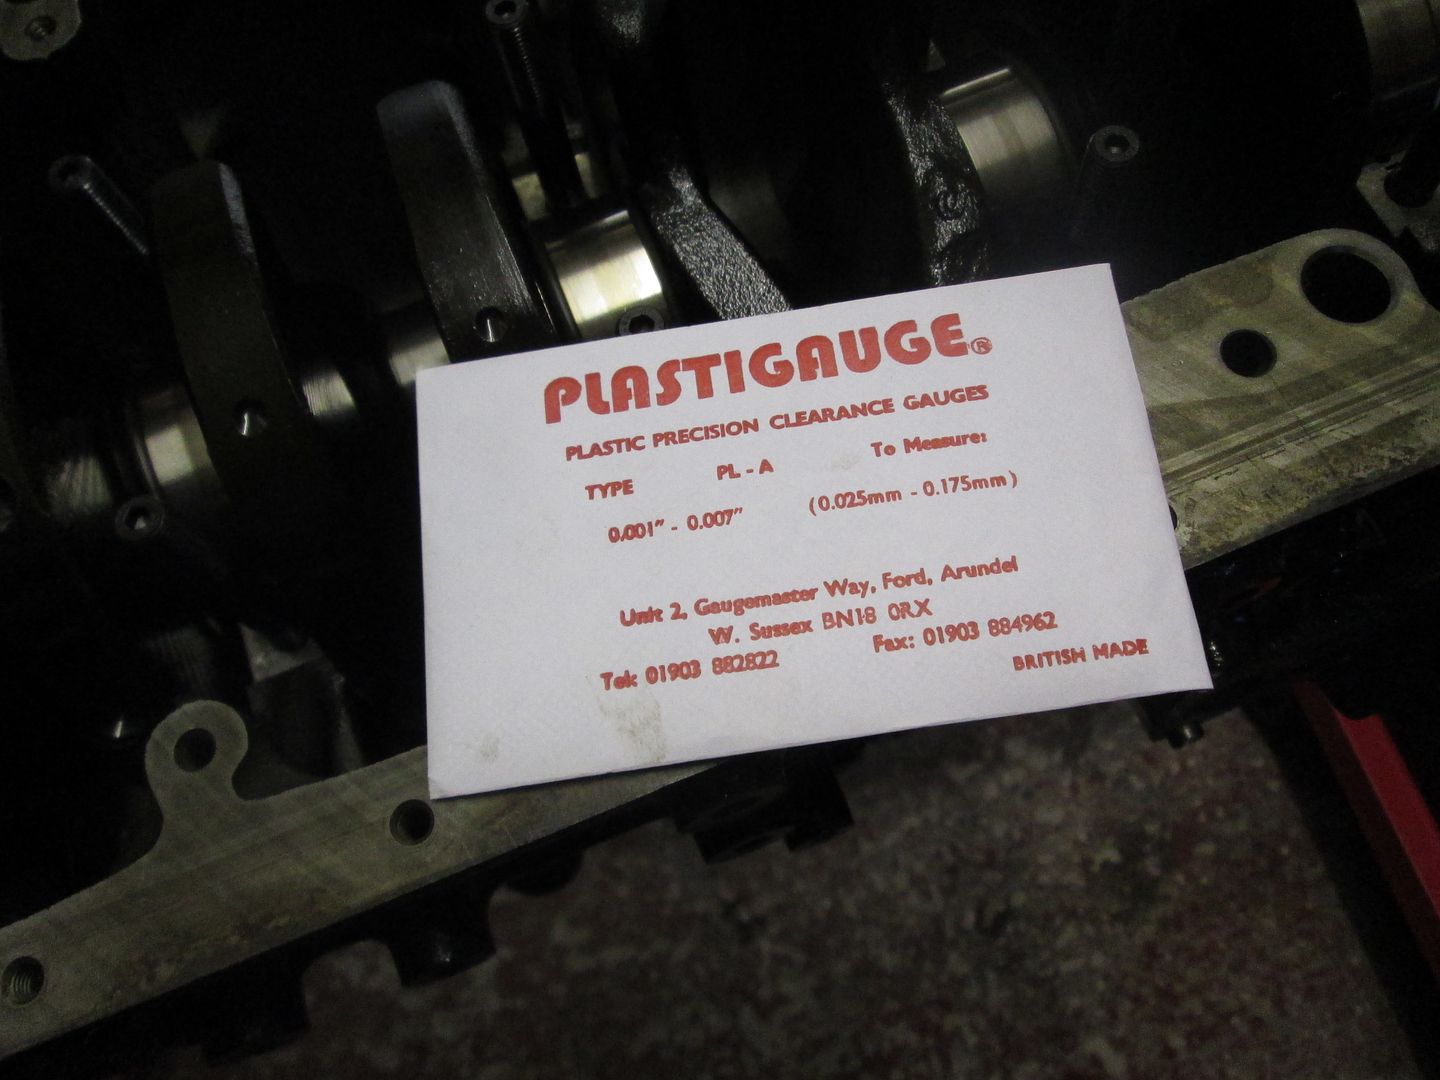
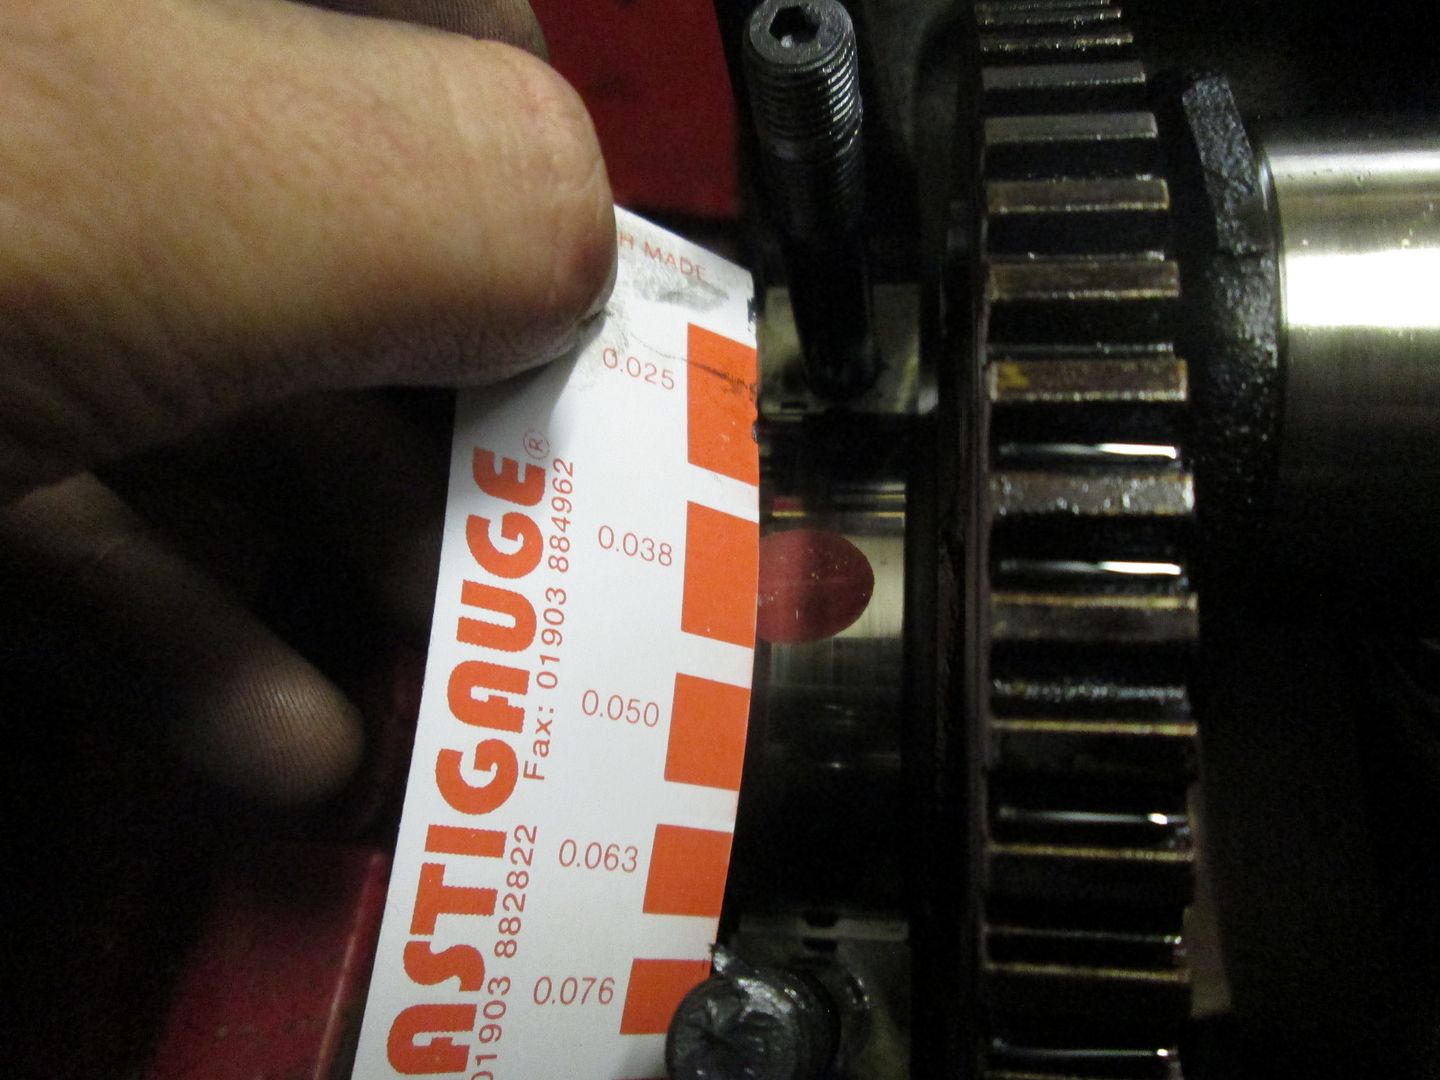
Factory clearance is 0.020mm <> 0.058mm, all were identical at circa 0.038mm.
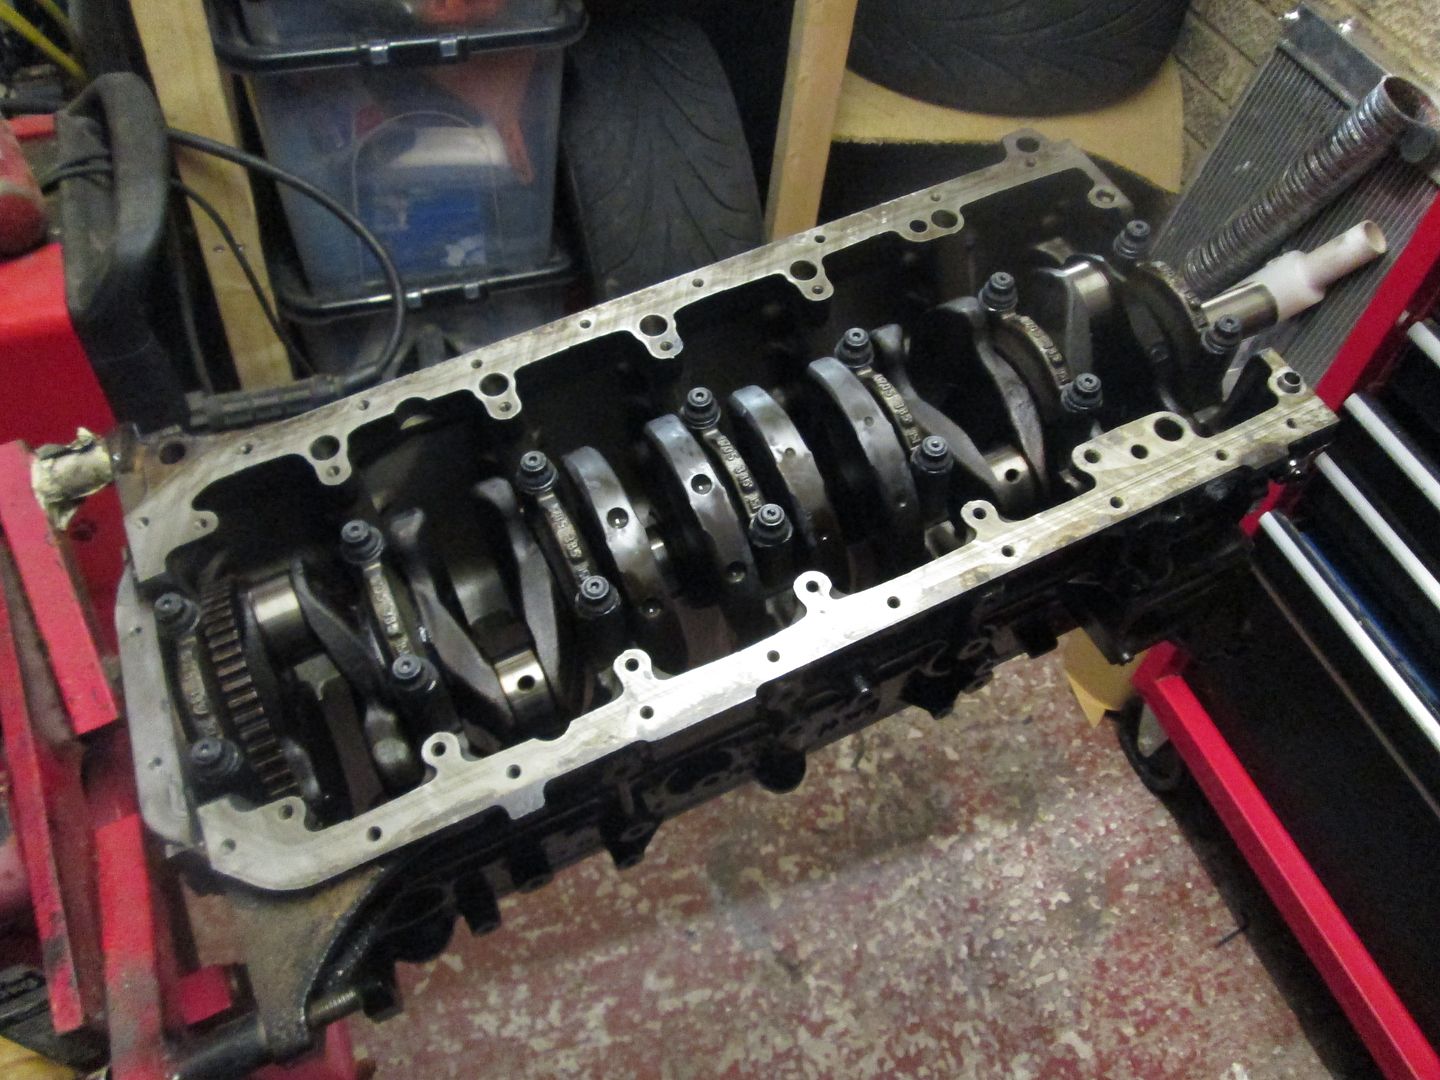
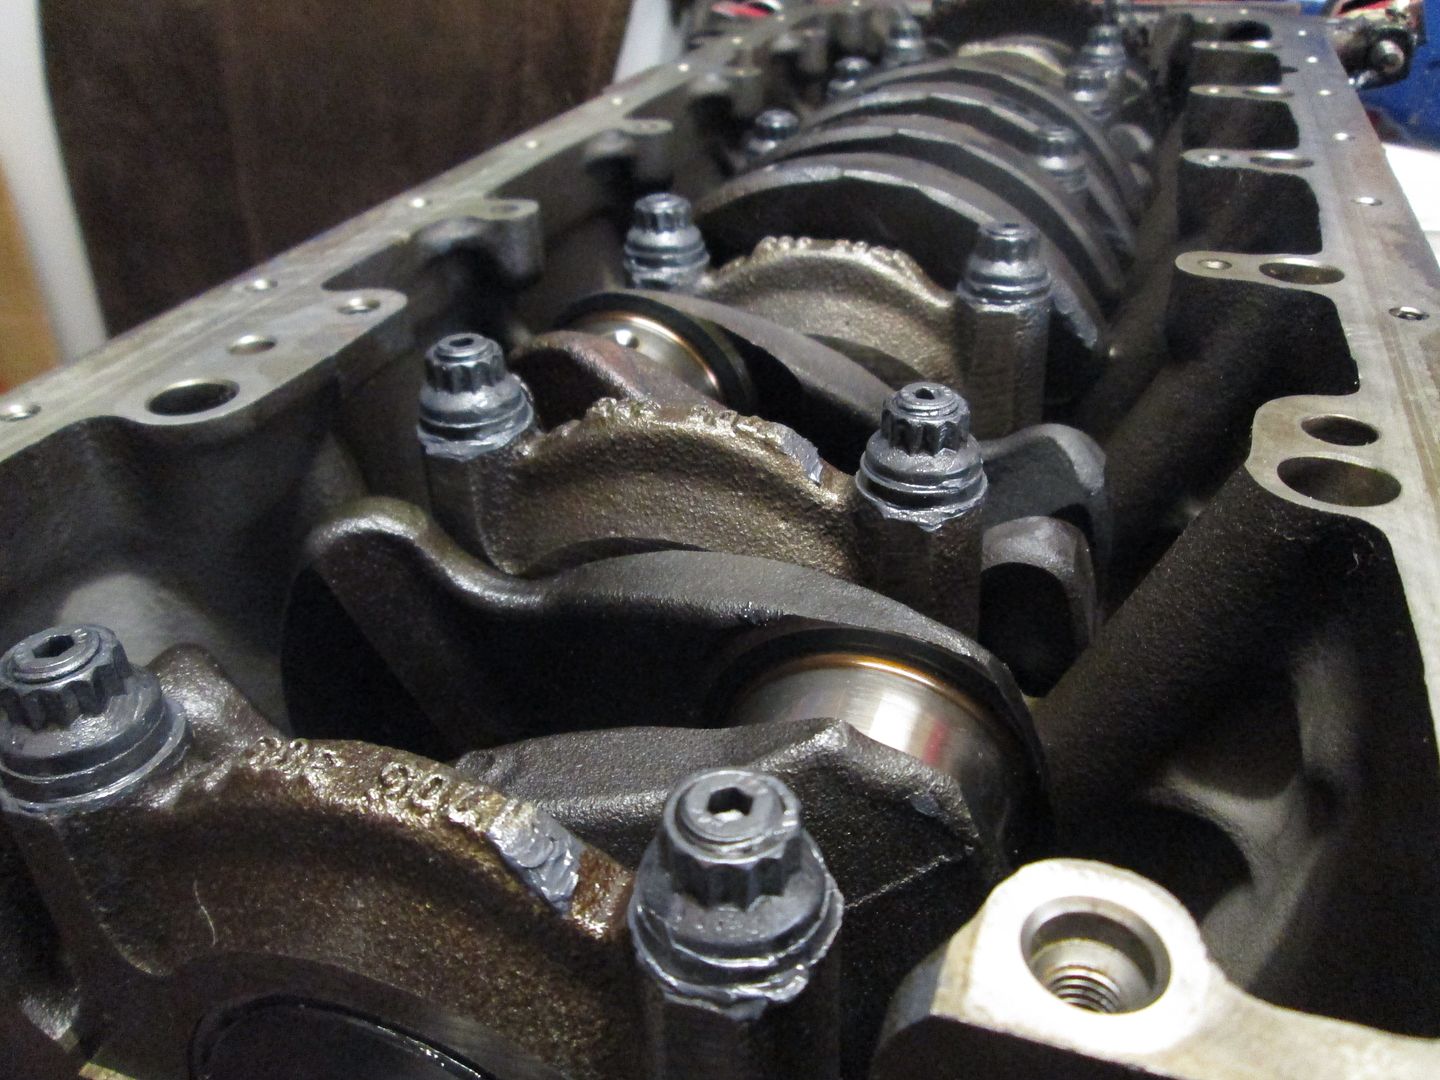
Removed the caps, cleaned, and added assembly grease again. Then torqued the caps down with the ARP ultra torque grease as per the spec..
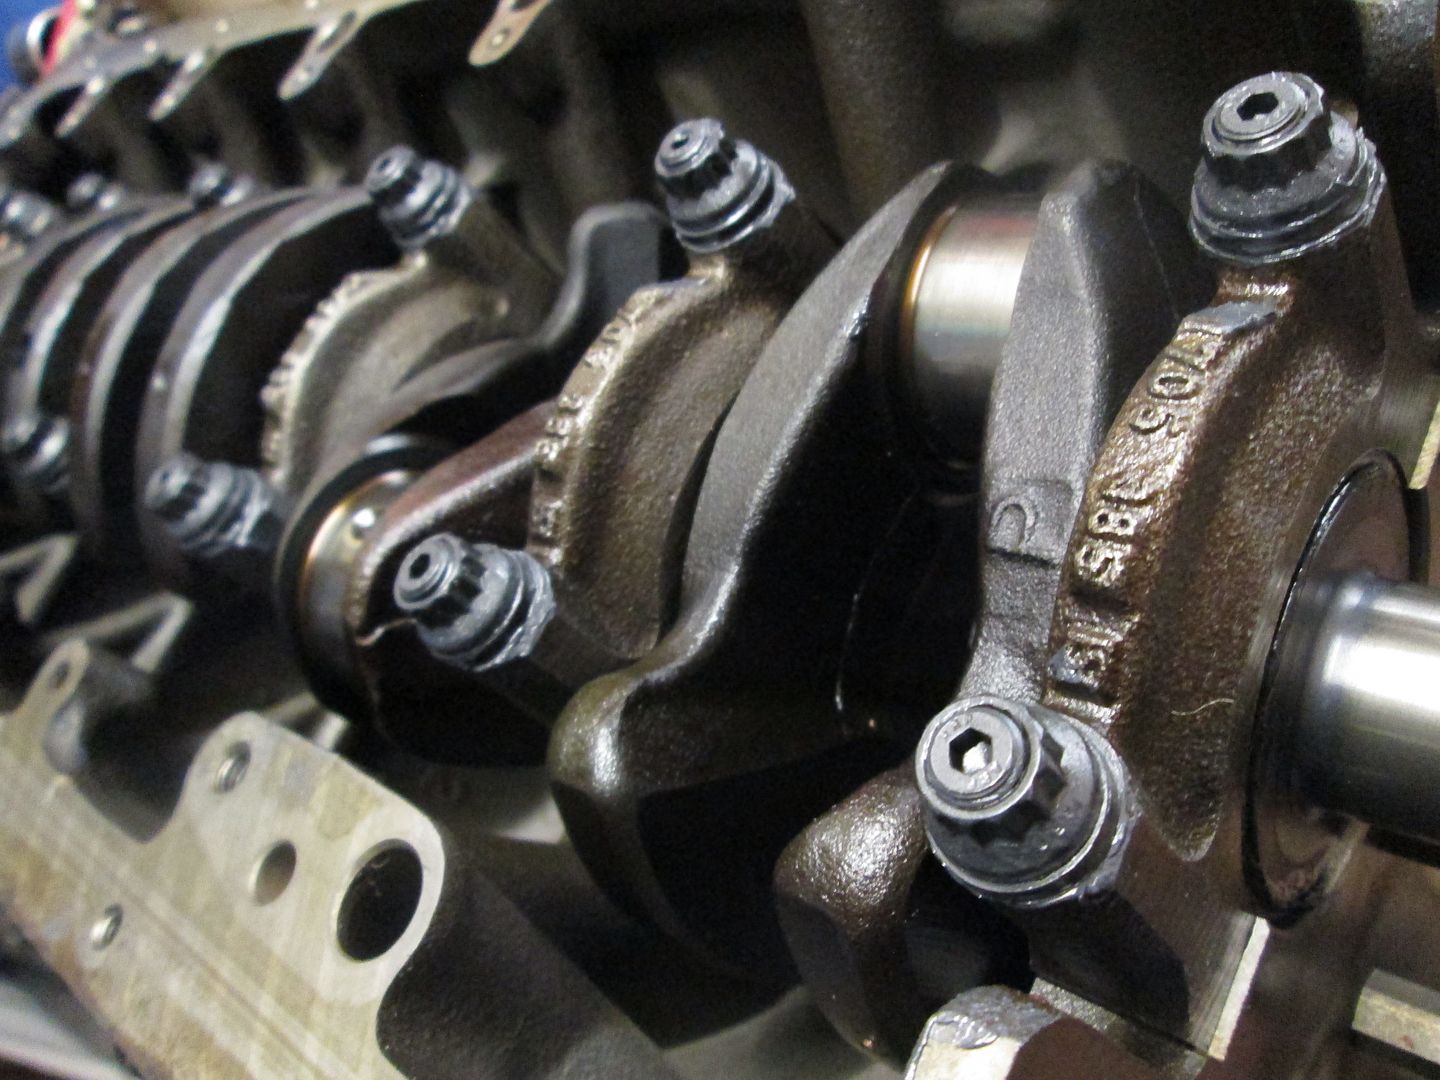
New piston rings for the M54B30 pistons, as they are completely different and should be replaced anyway..
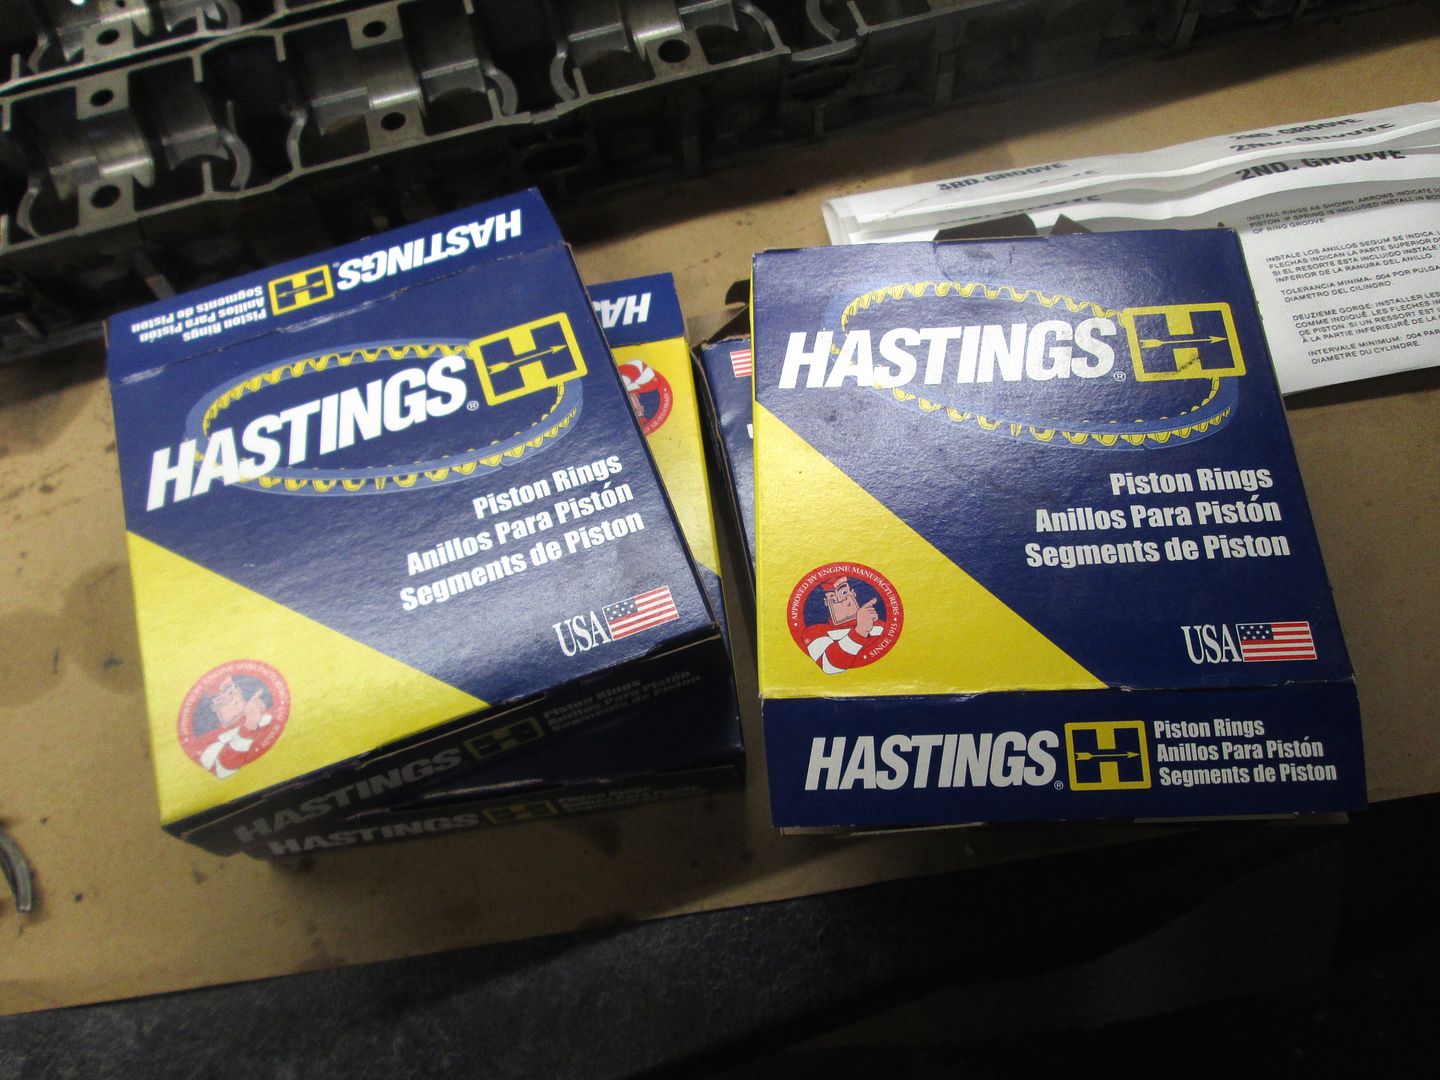
Gapped, fitted to the piston and then dropped into the block..
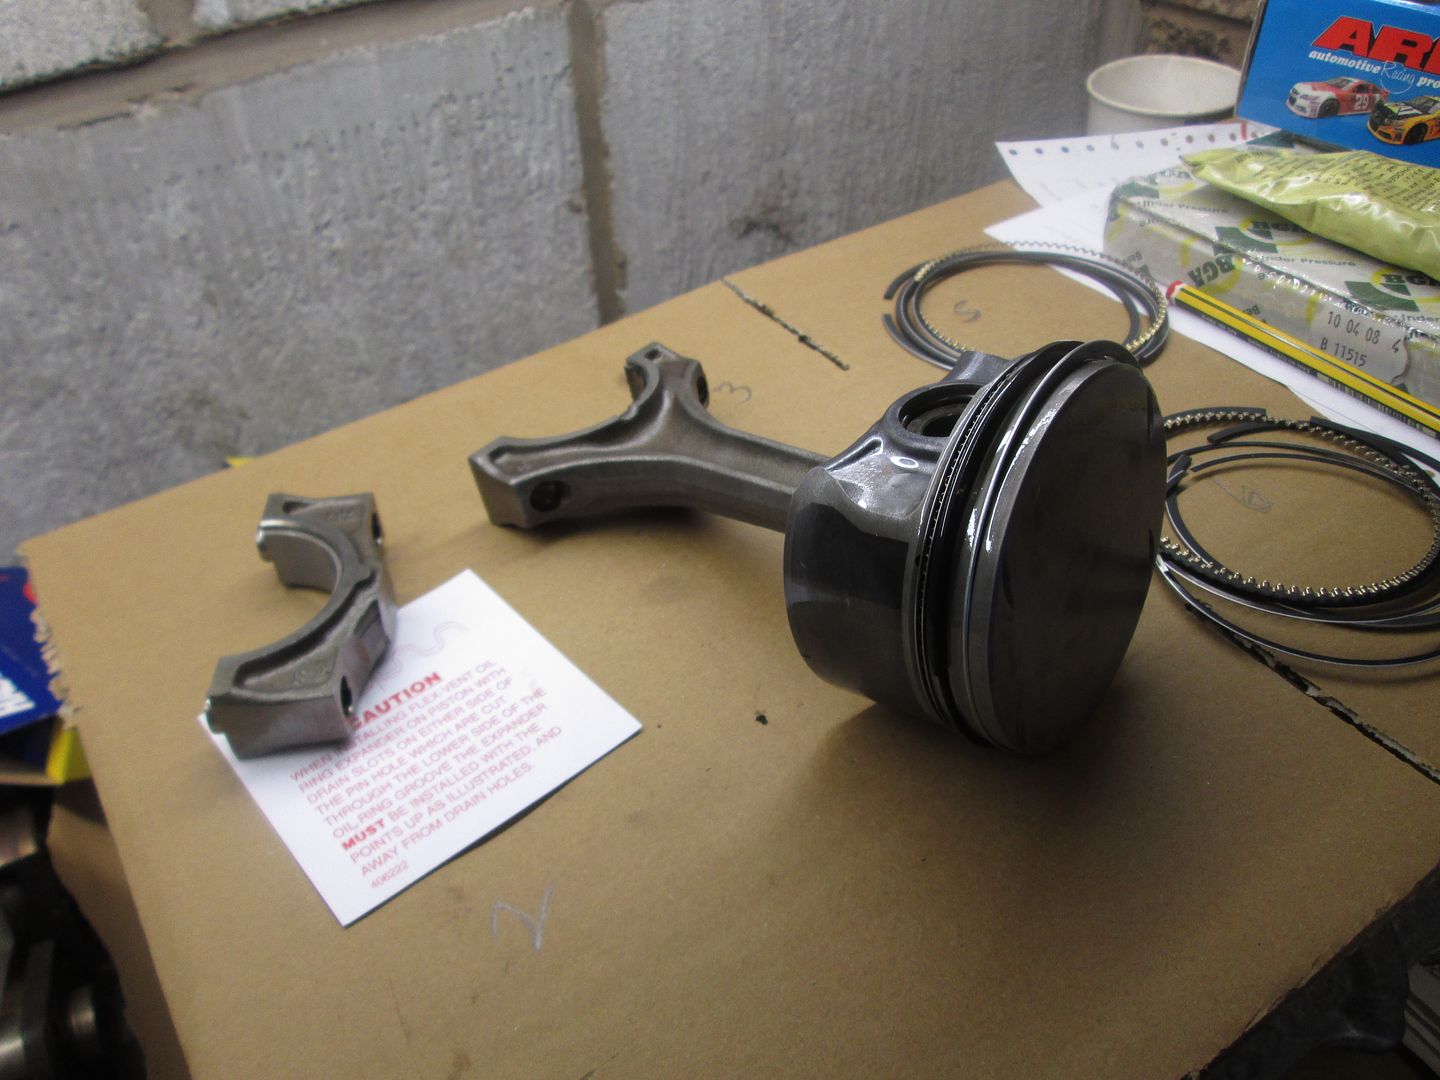
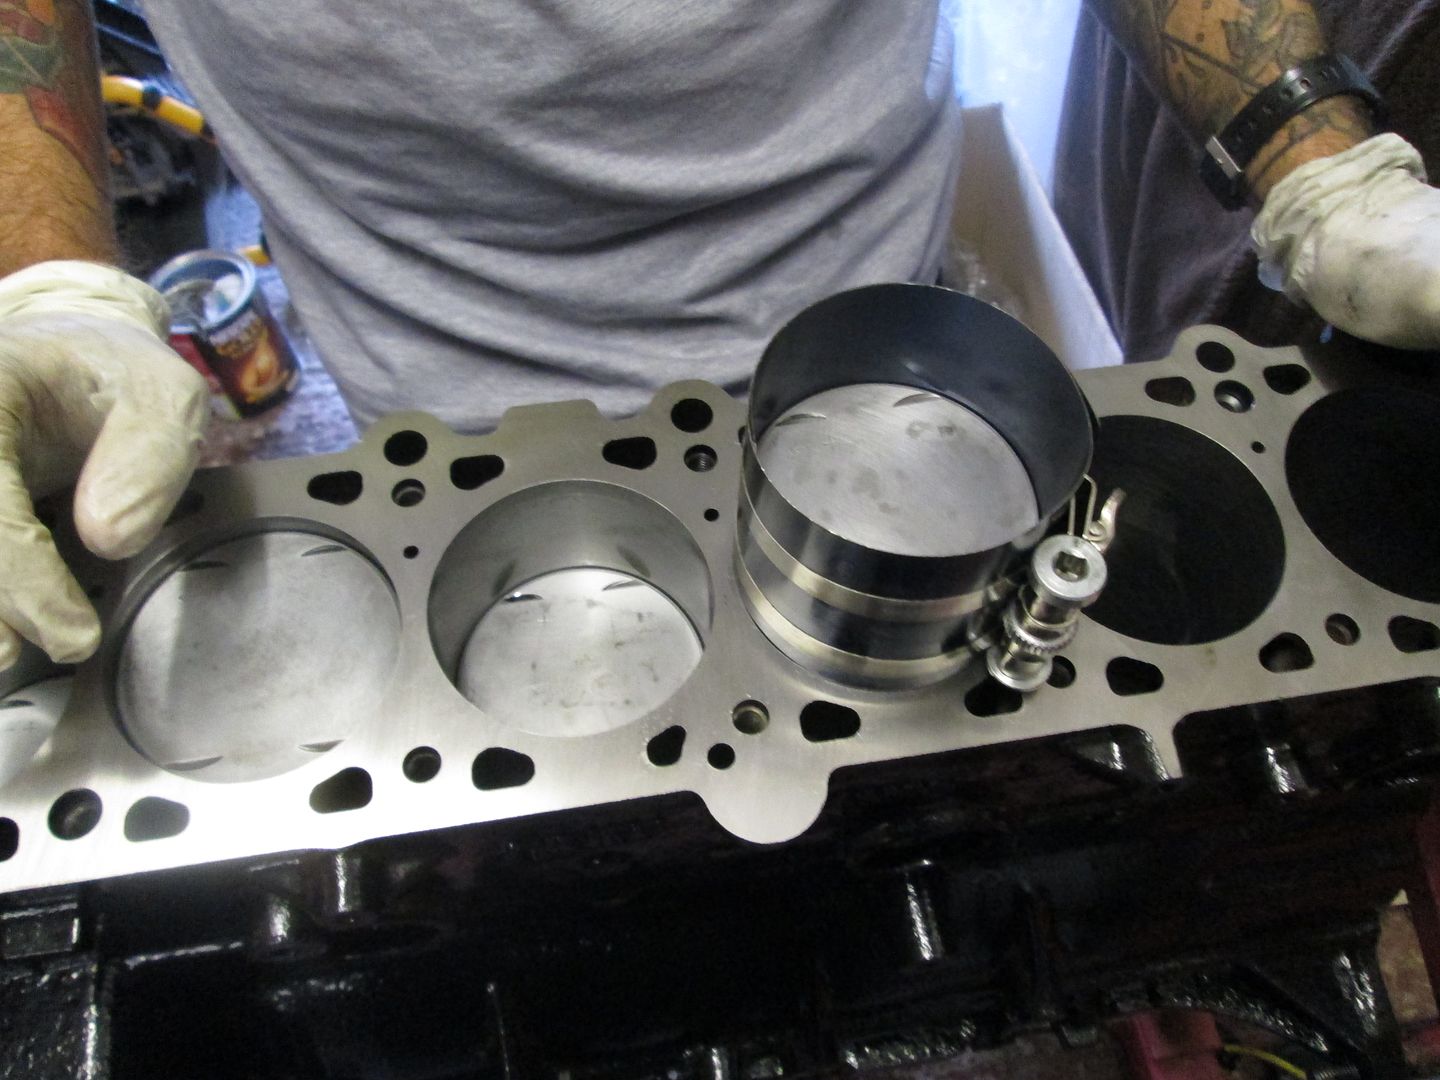
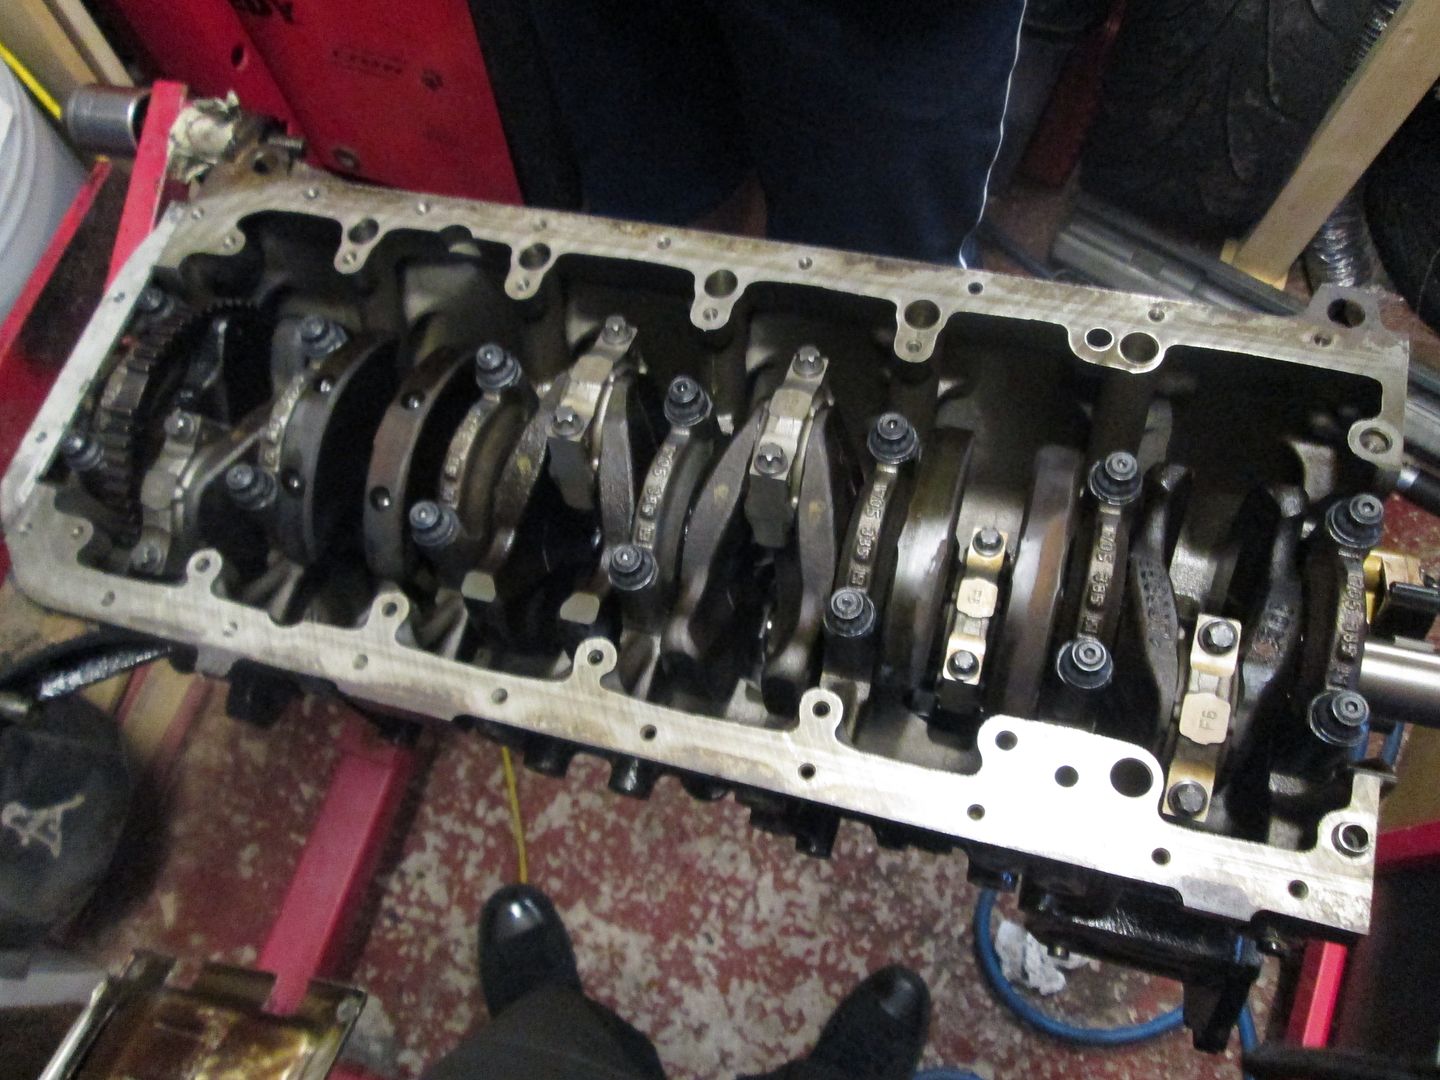
The windage/baffle plate needed more modification to clear the ARP studs, and longer stroke of the M54 crank, but its all easy stuff.
Timing gear, covers, oil pump, sump back on with a new gasket..
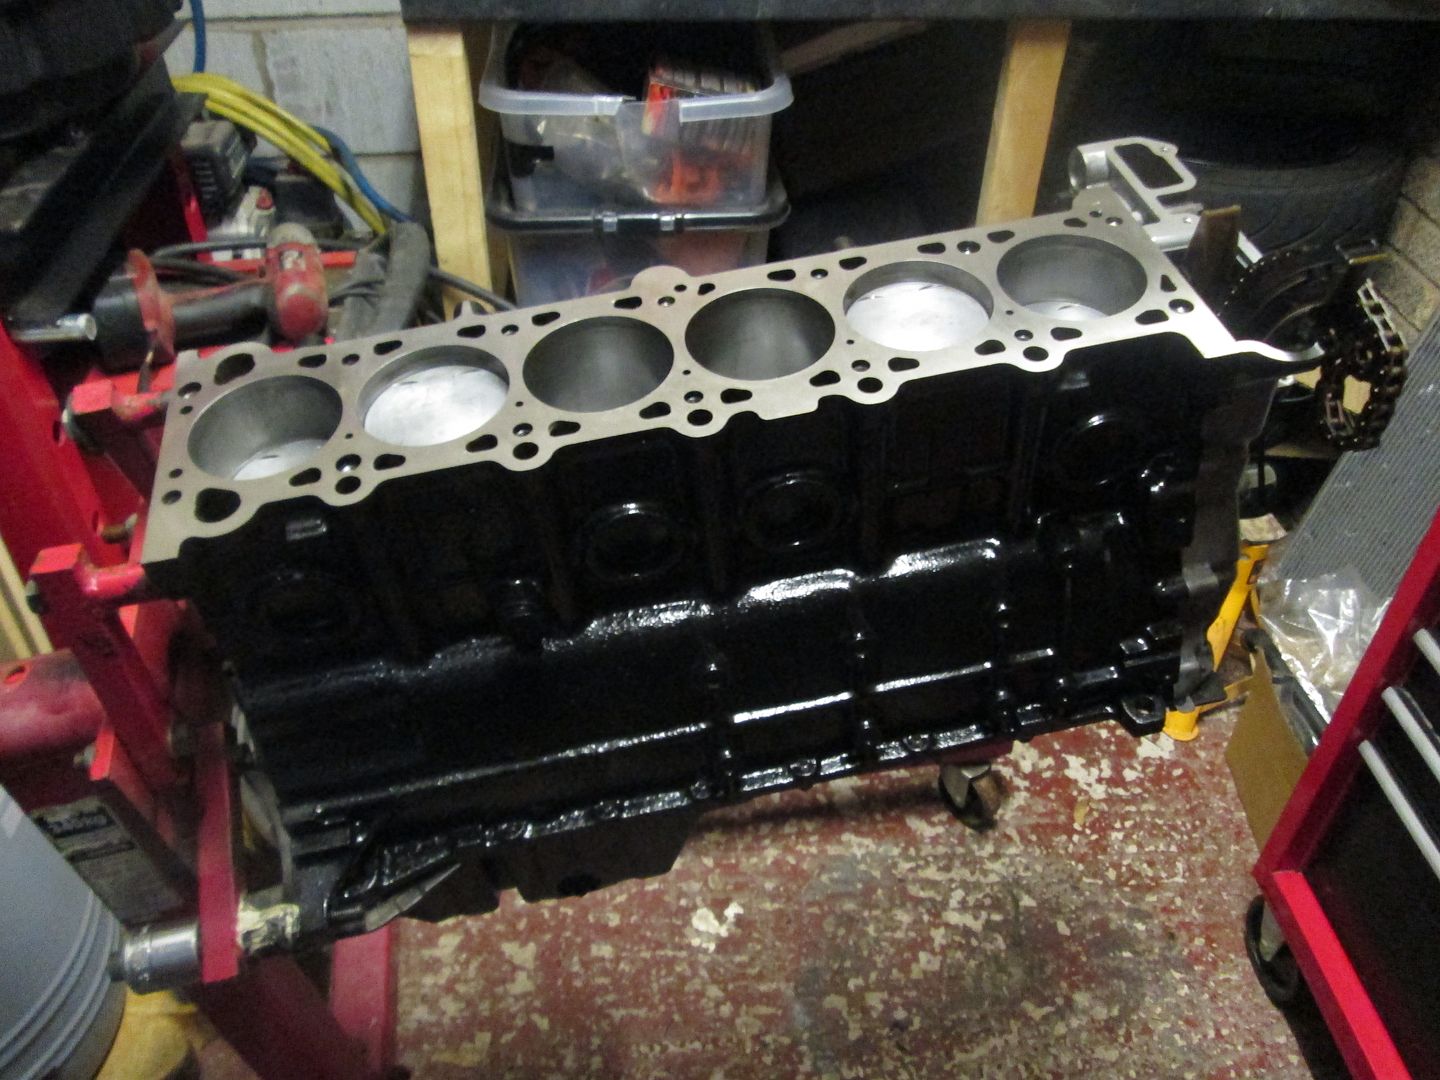
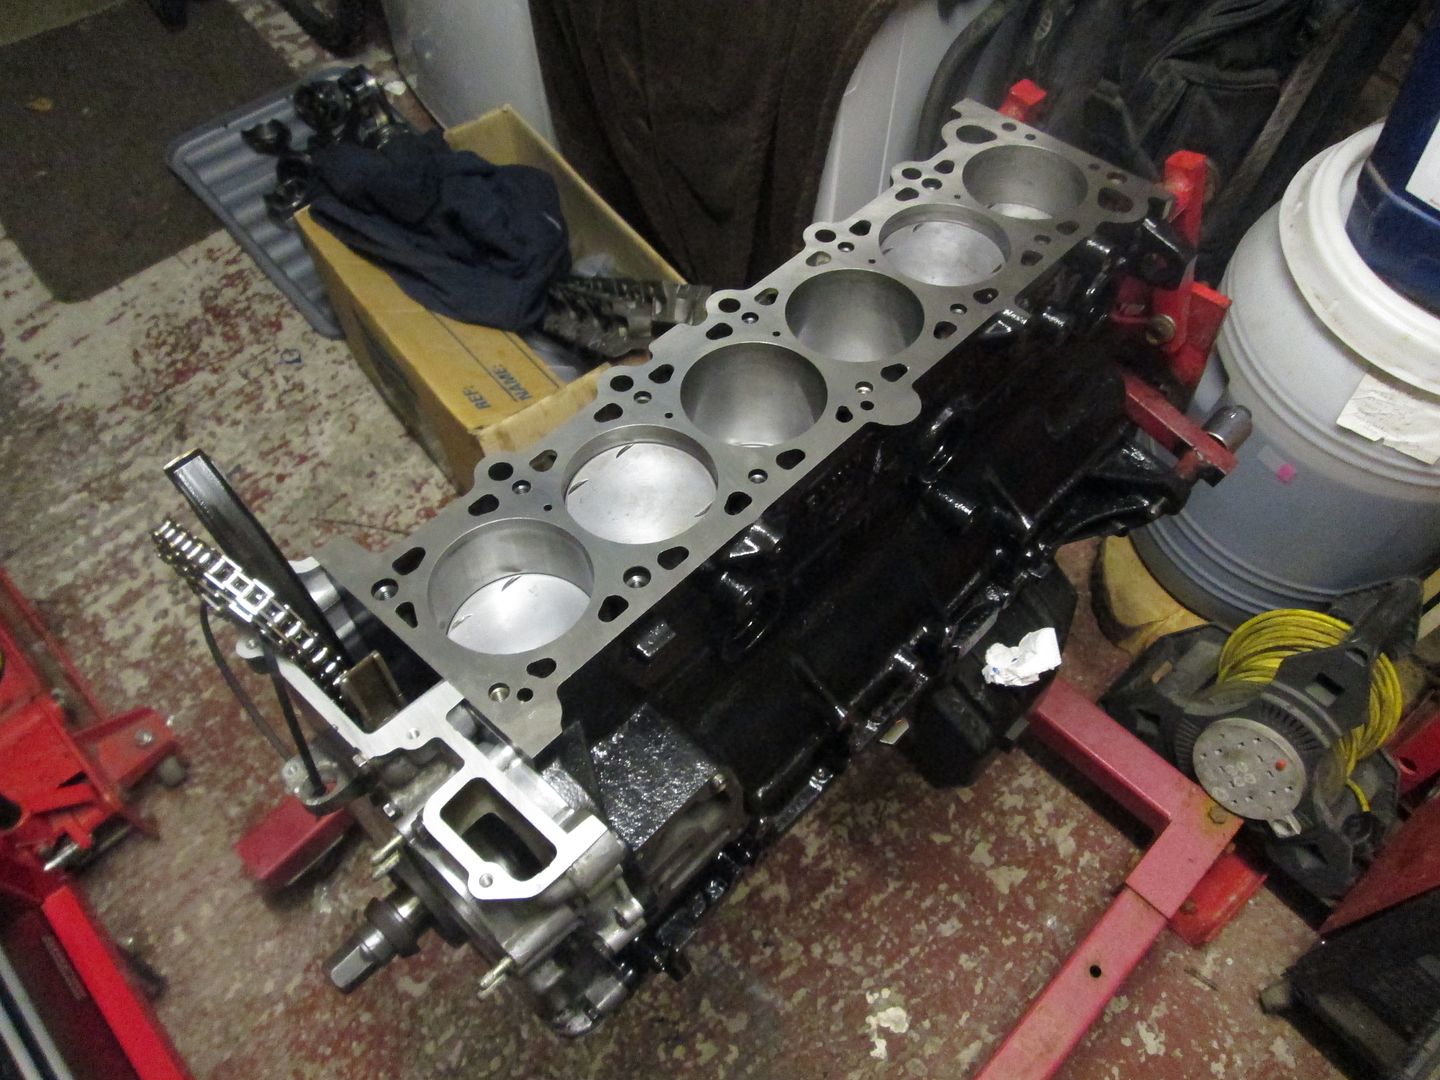
You can see here how the M54 assembly sits a few mm below the deck when used in an M50 block, as expected..
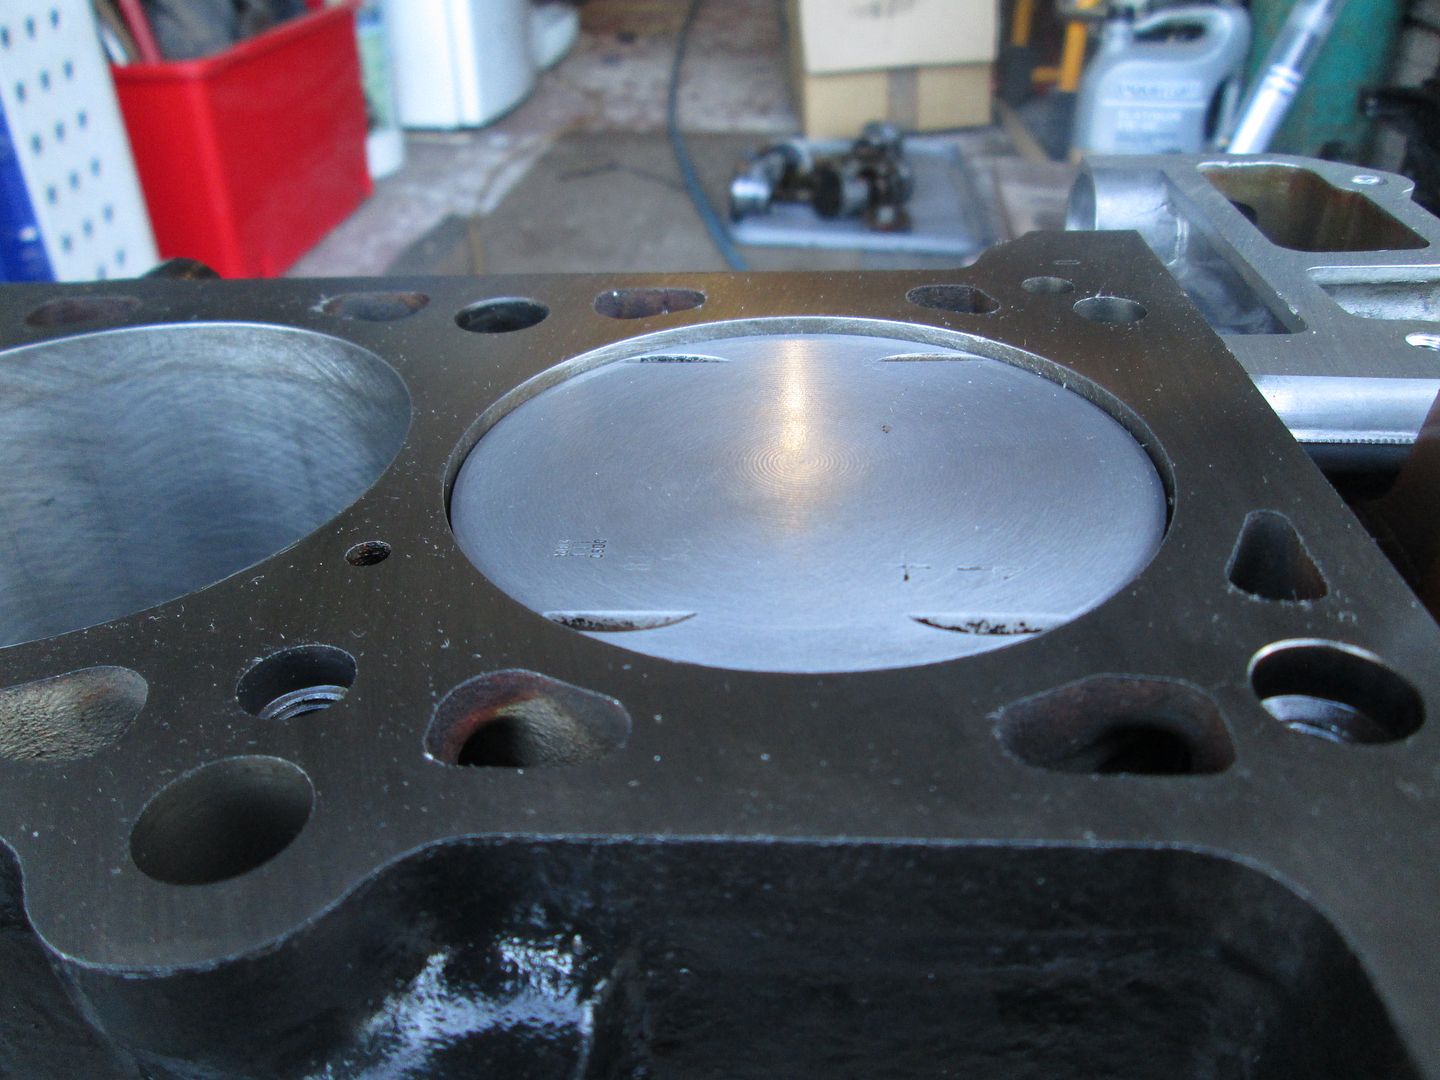
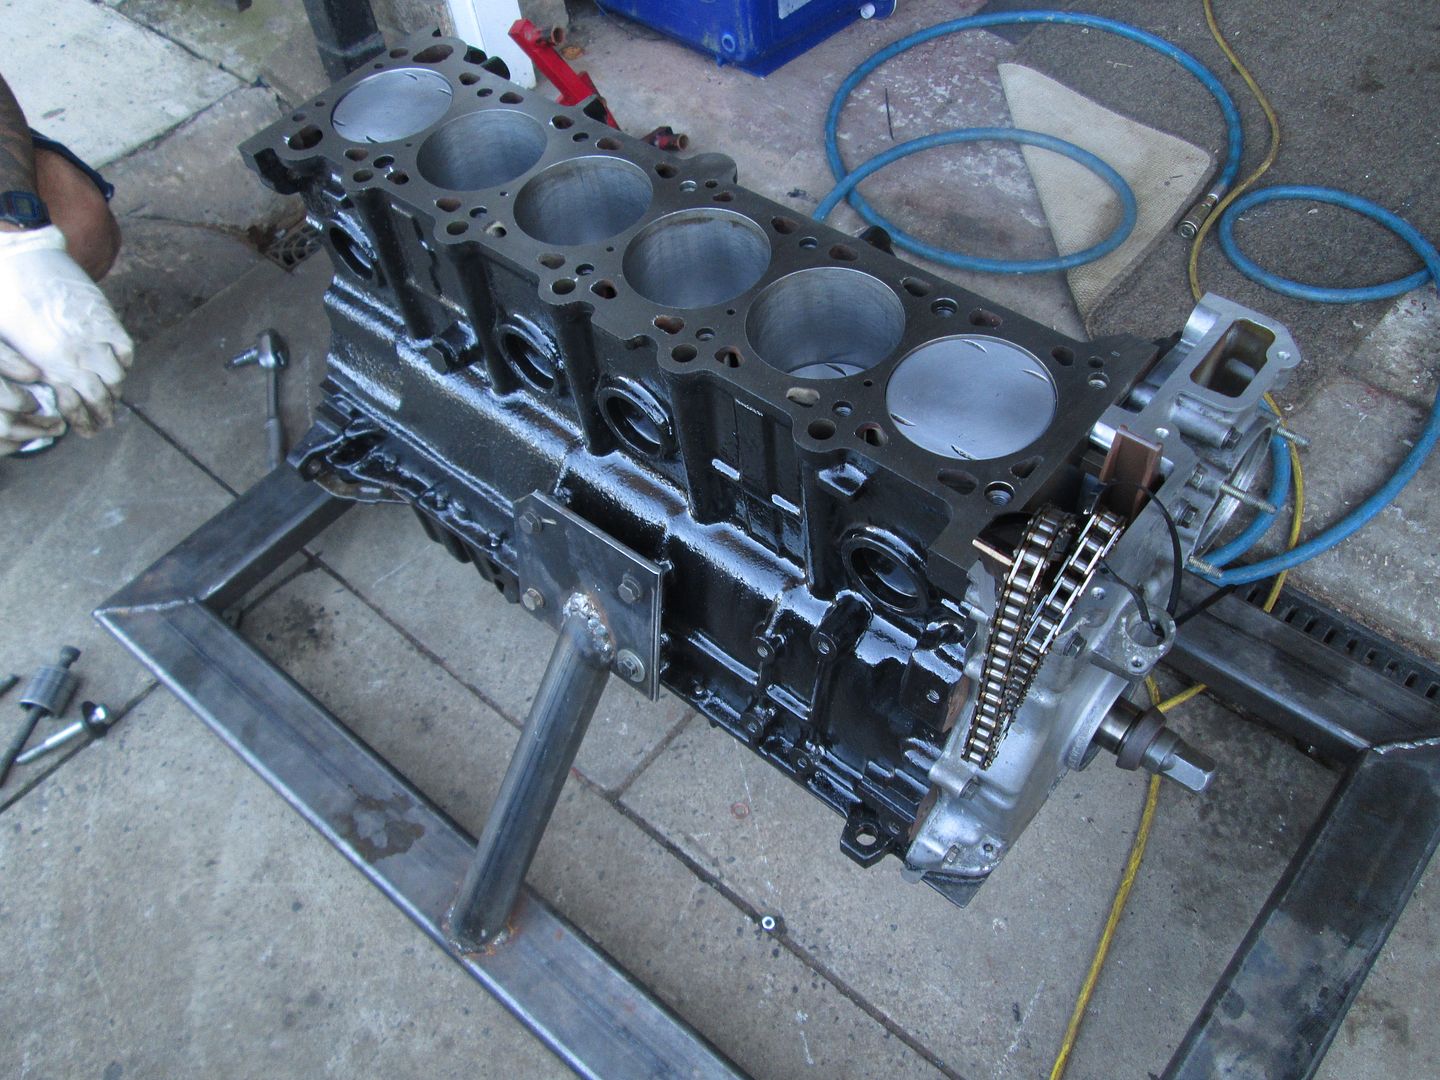
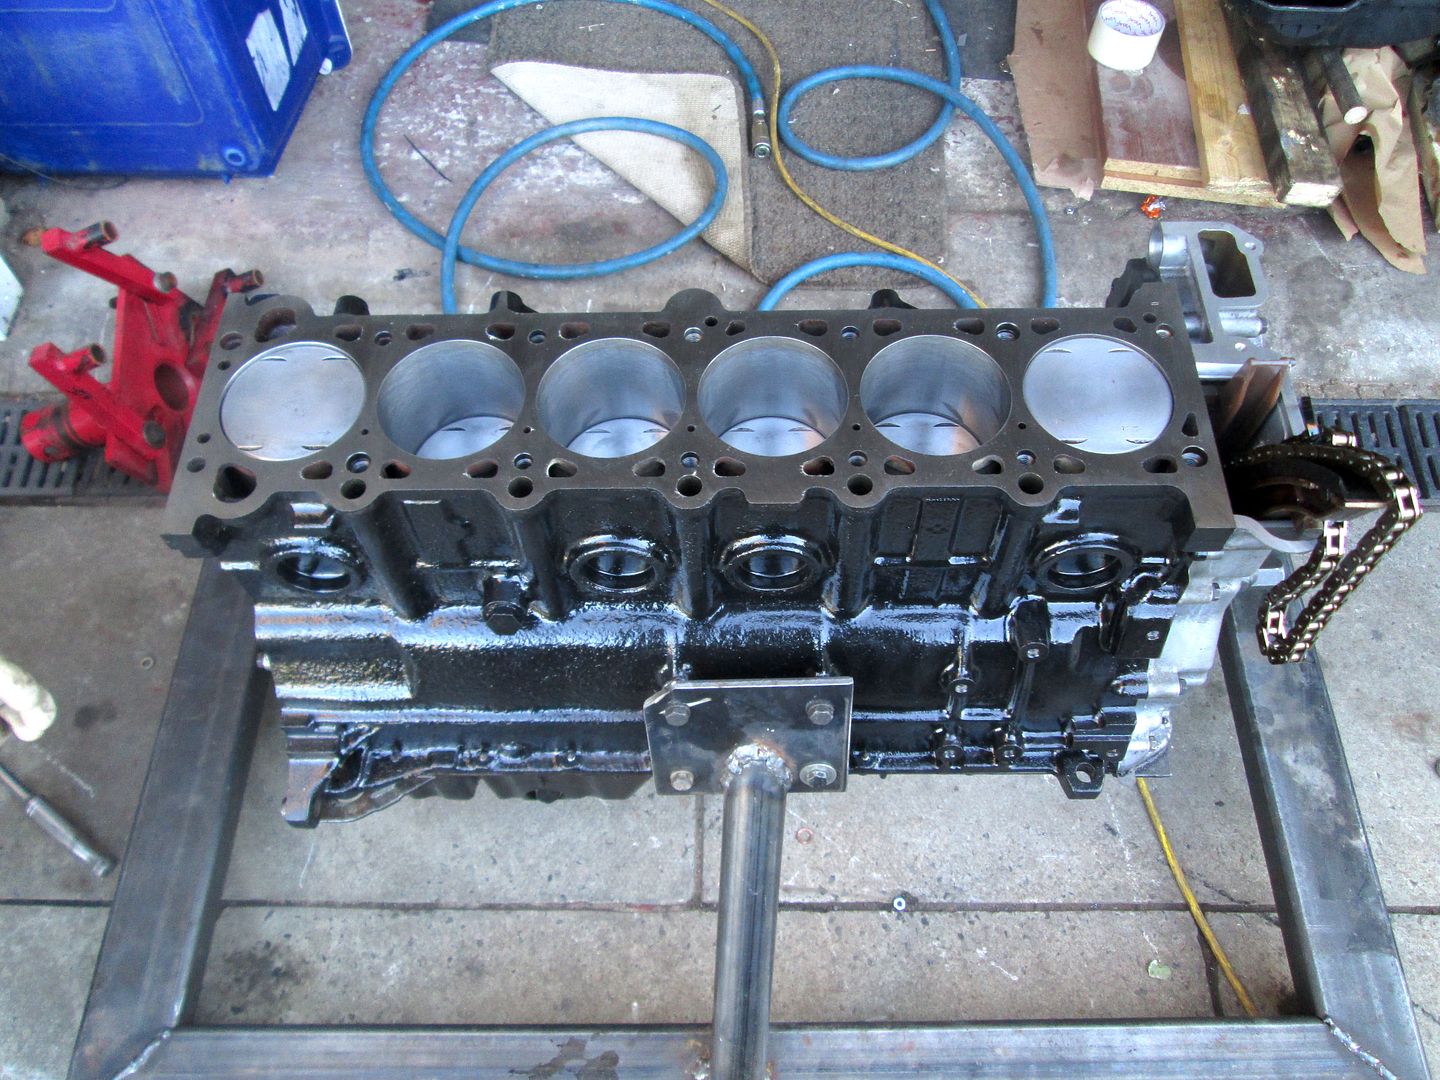
Cleaned the block face one last time, then fitted two new dowels and a new headgasket..
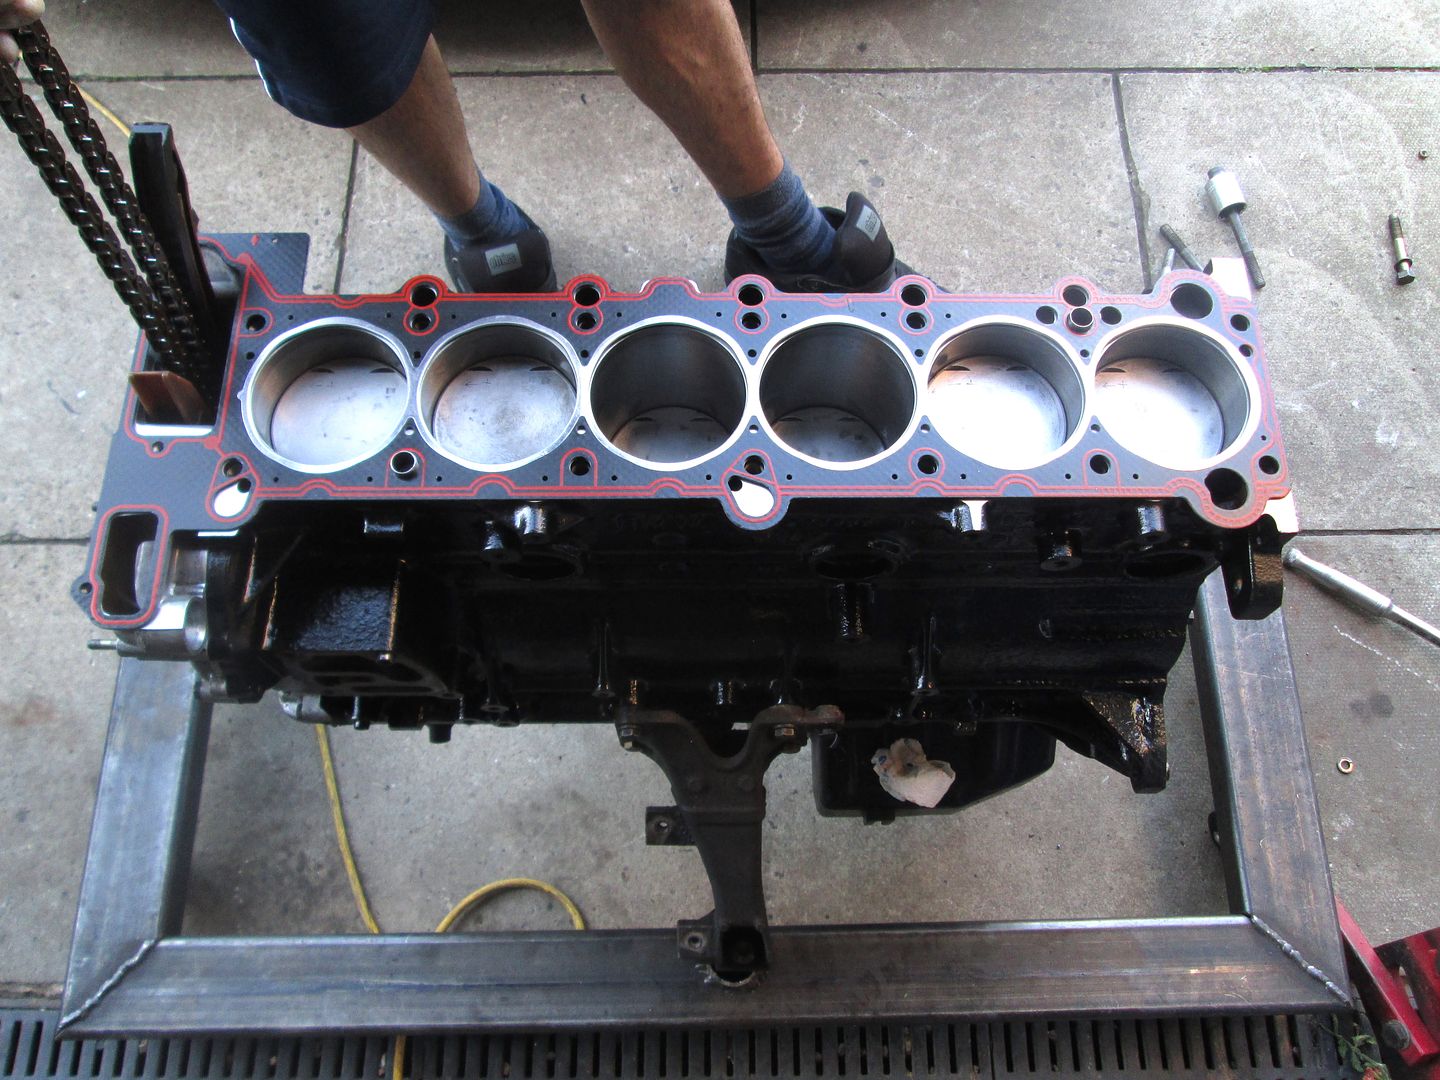
Dropped the head on, new head bolts again. All held full torque correctly..
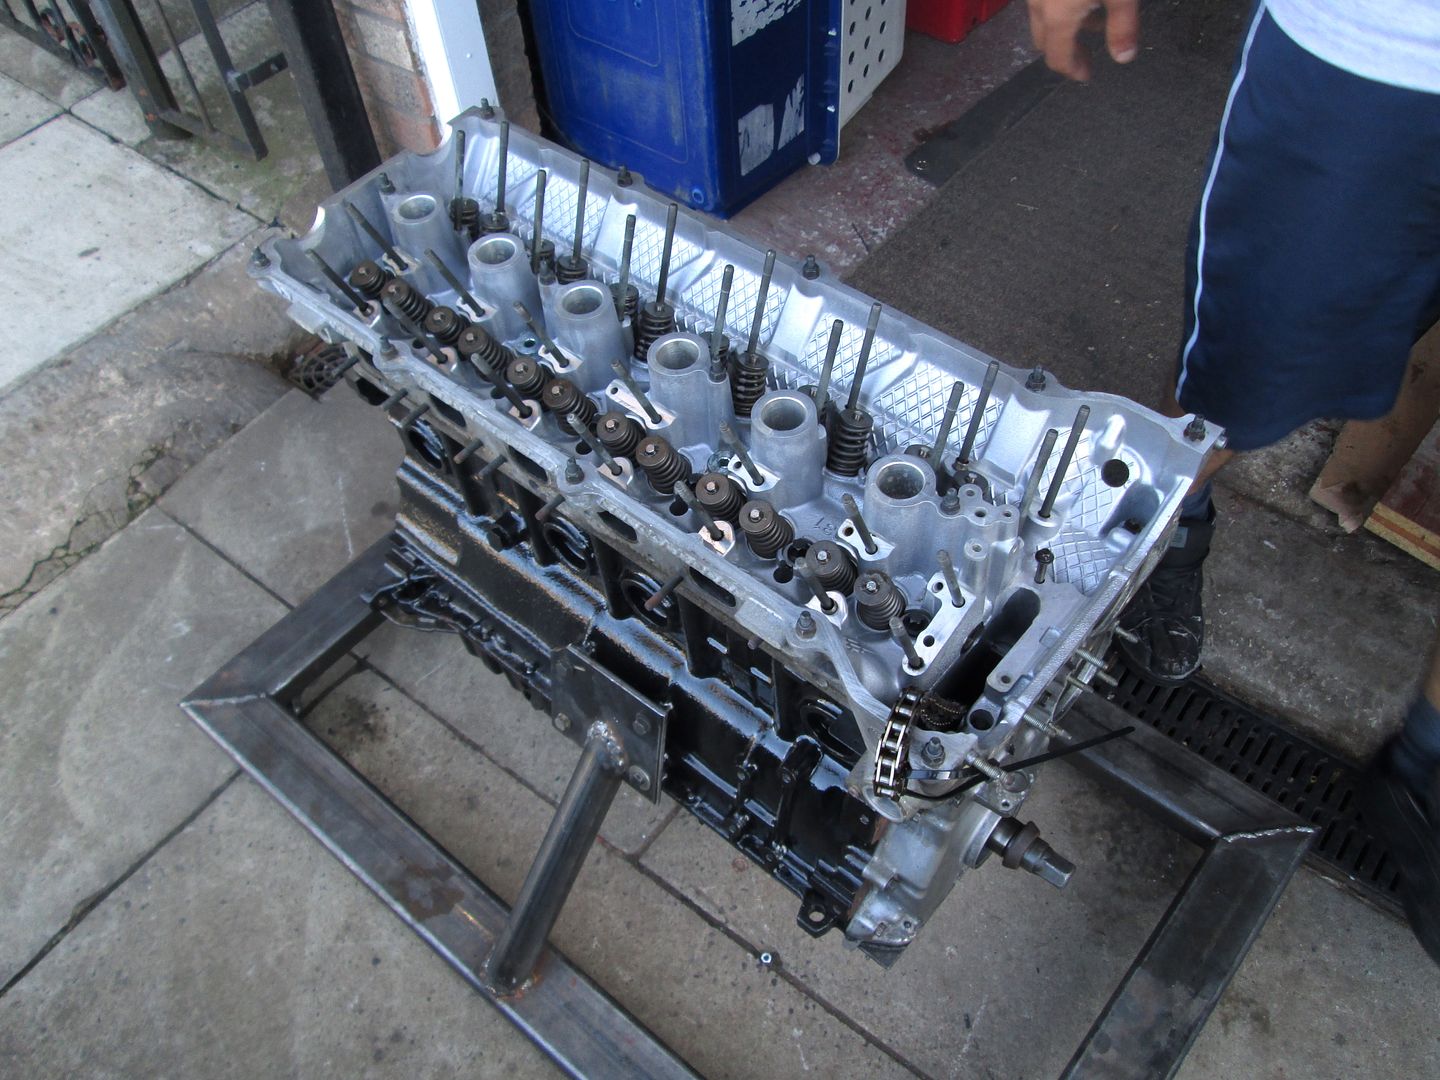
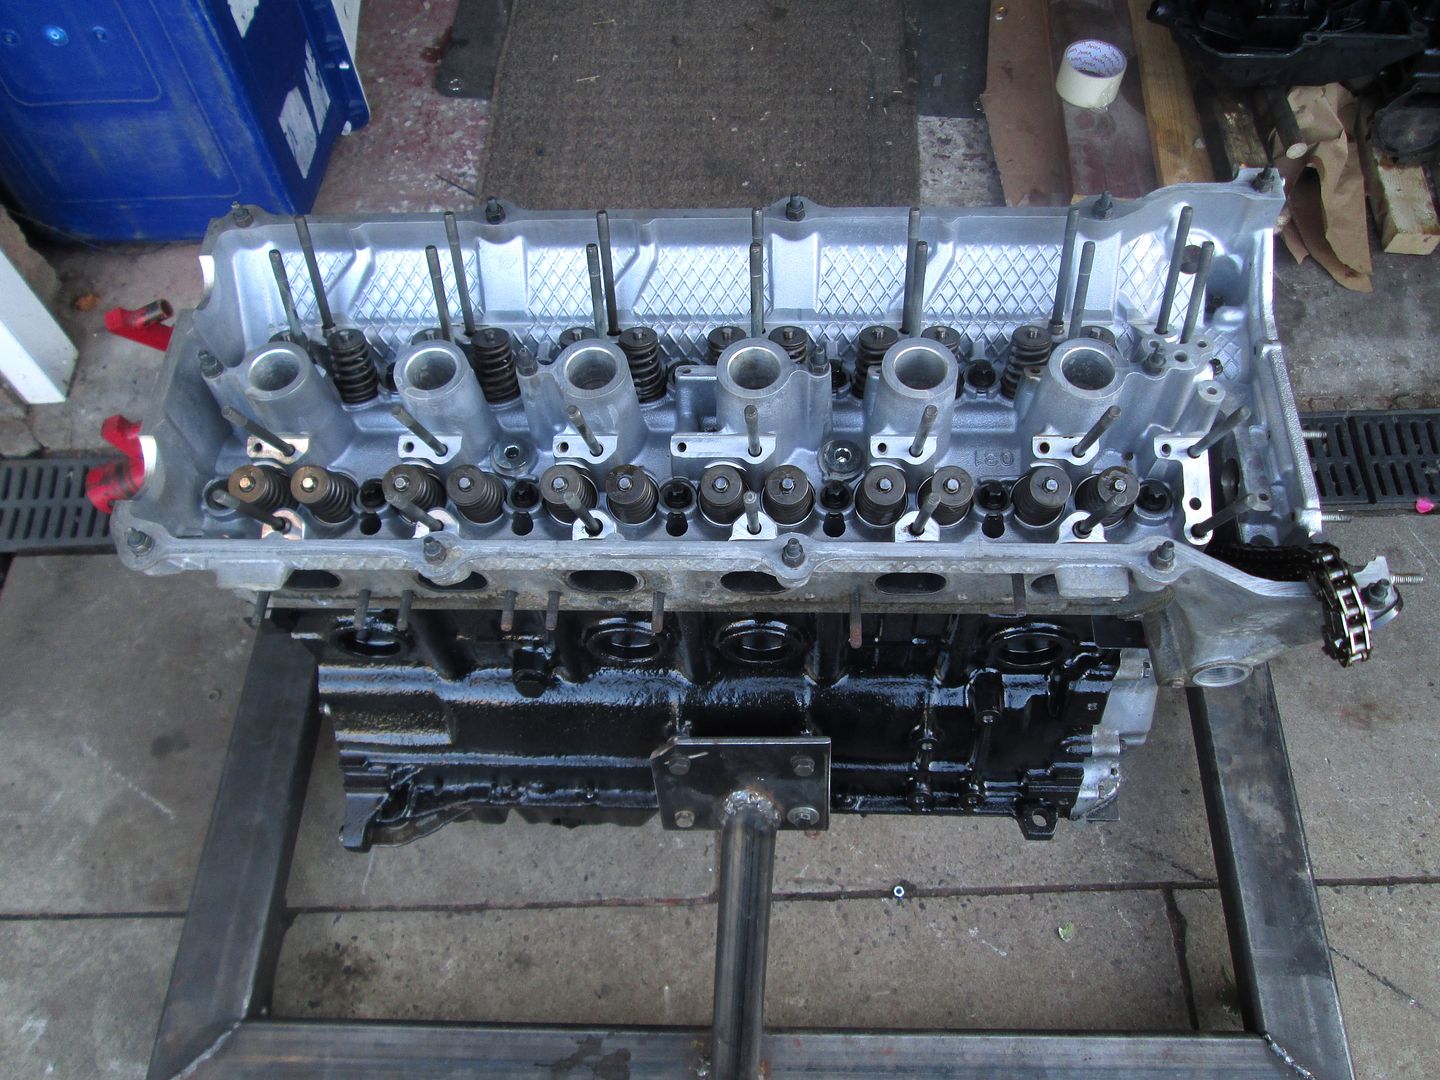
Before assembling the rest of the head, I wanted to strip all 24 hydraulic tappets apart and clean them, to check all were operating at full travel..
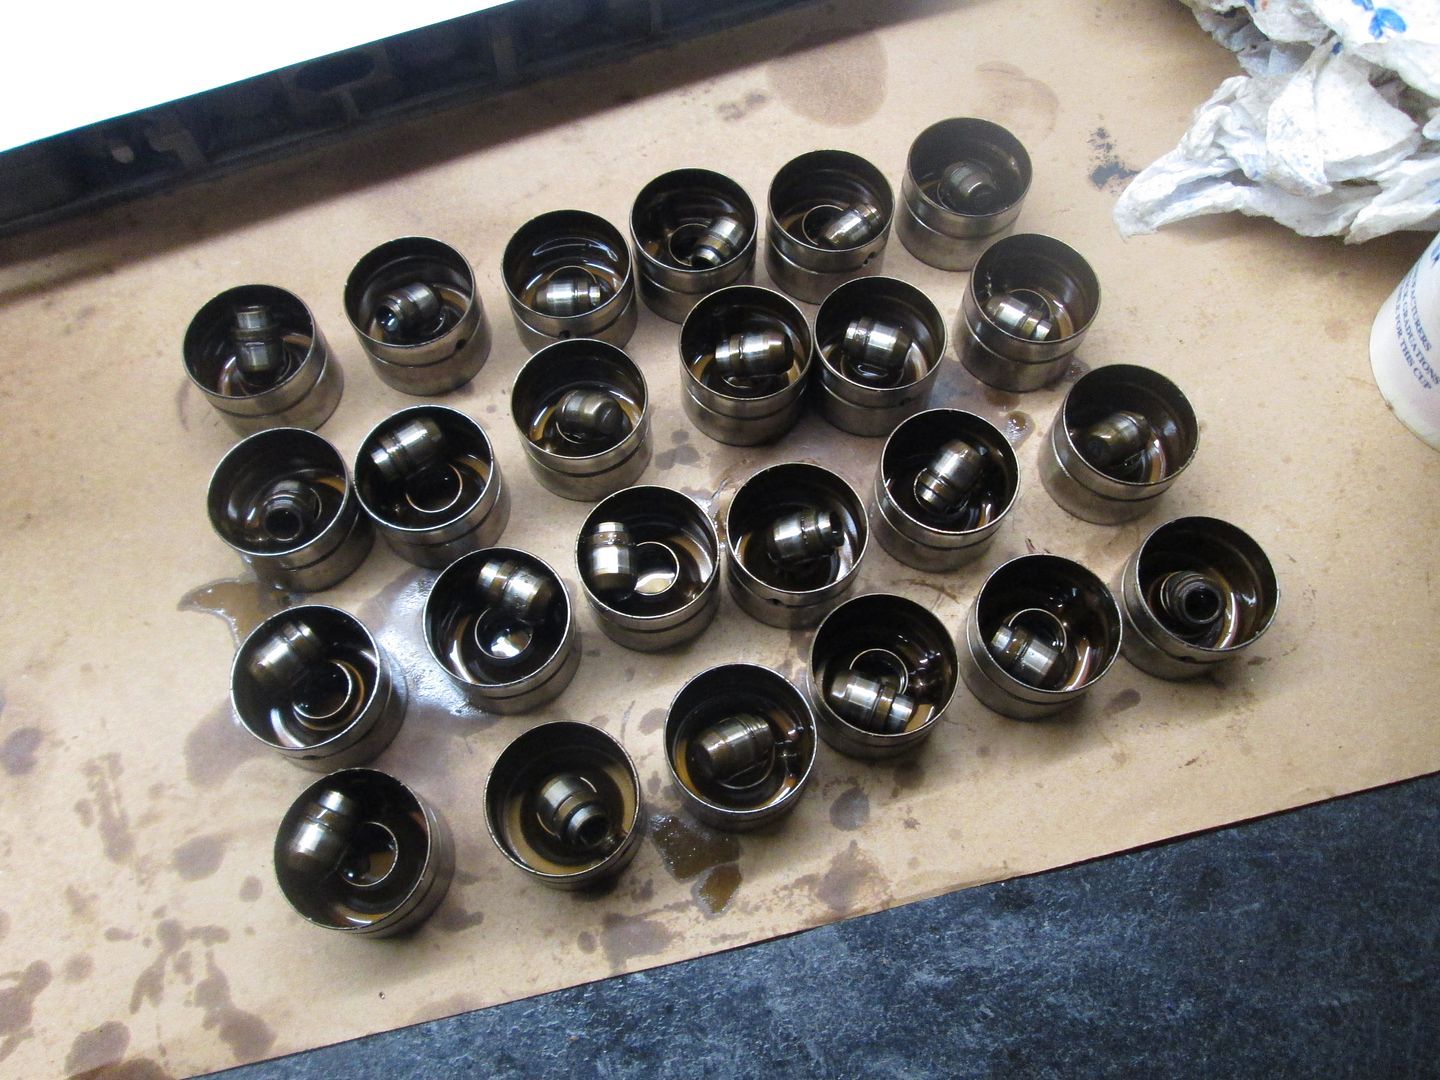
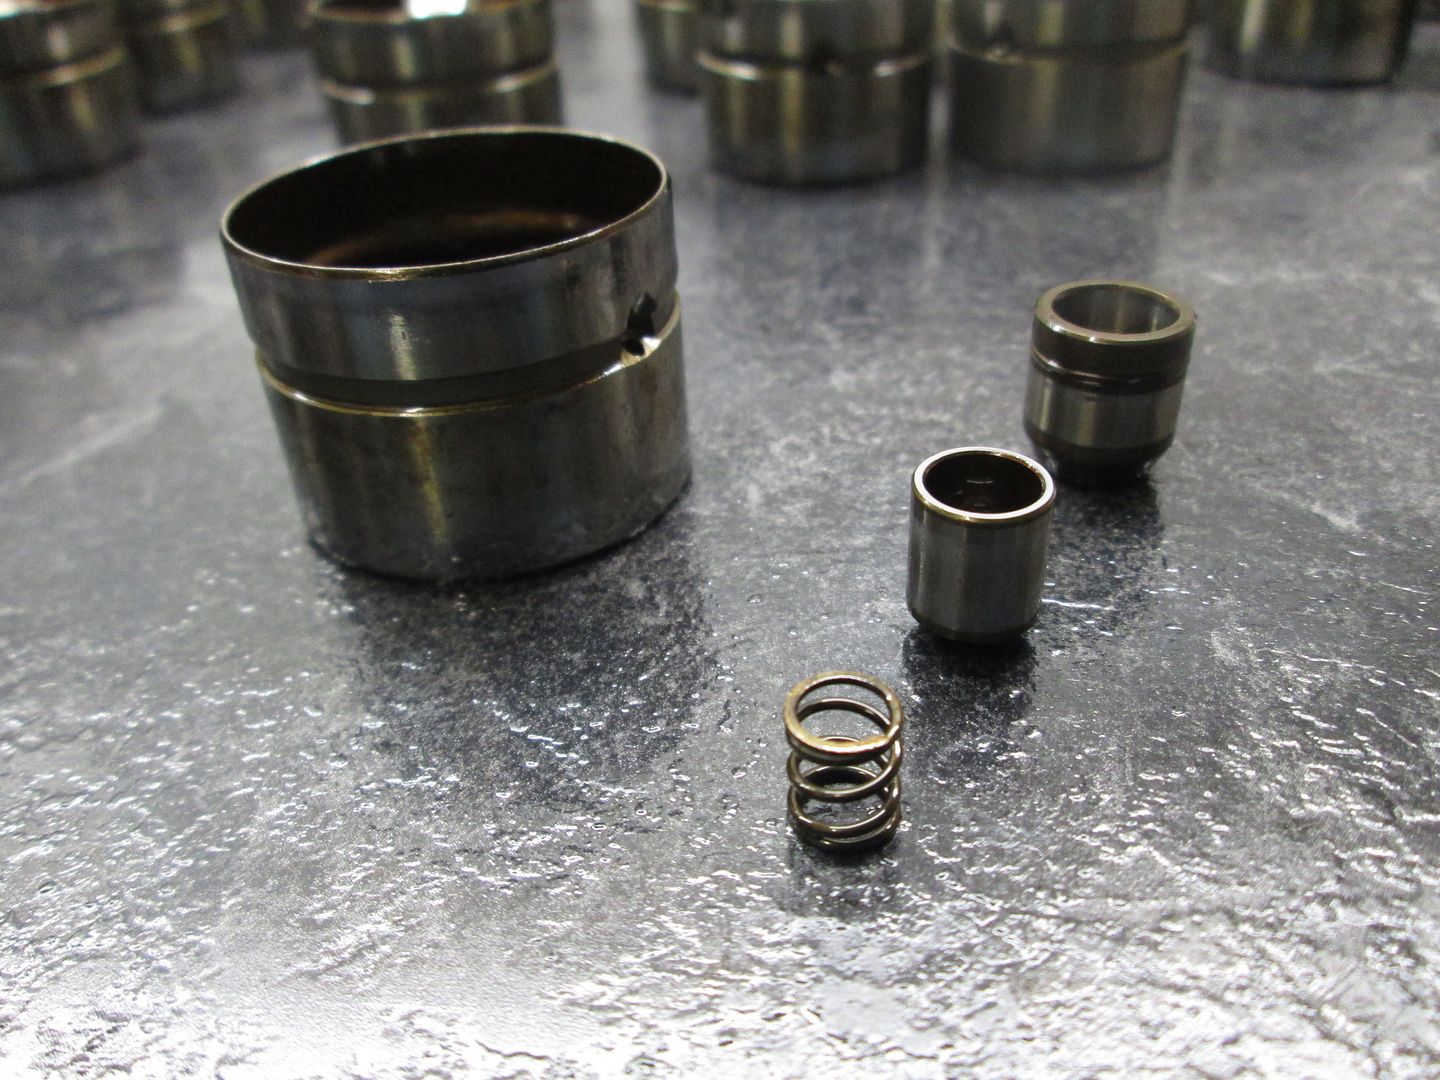
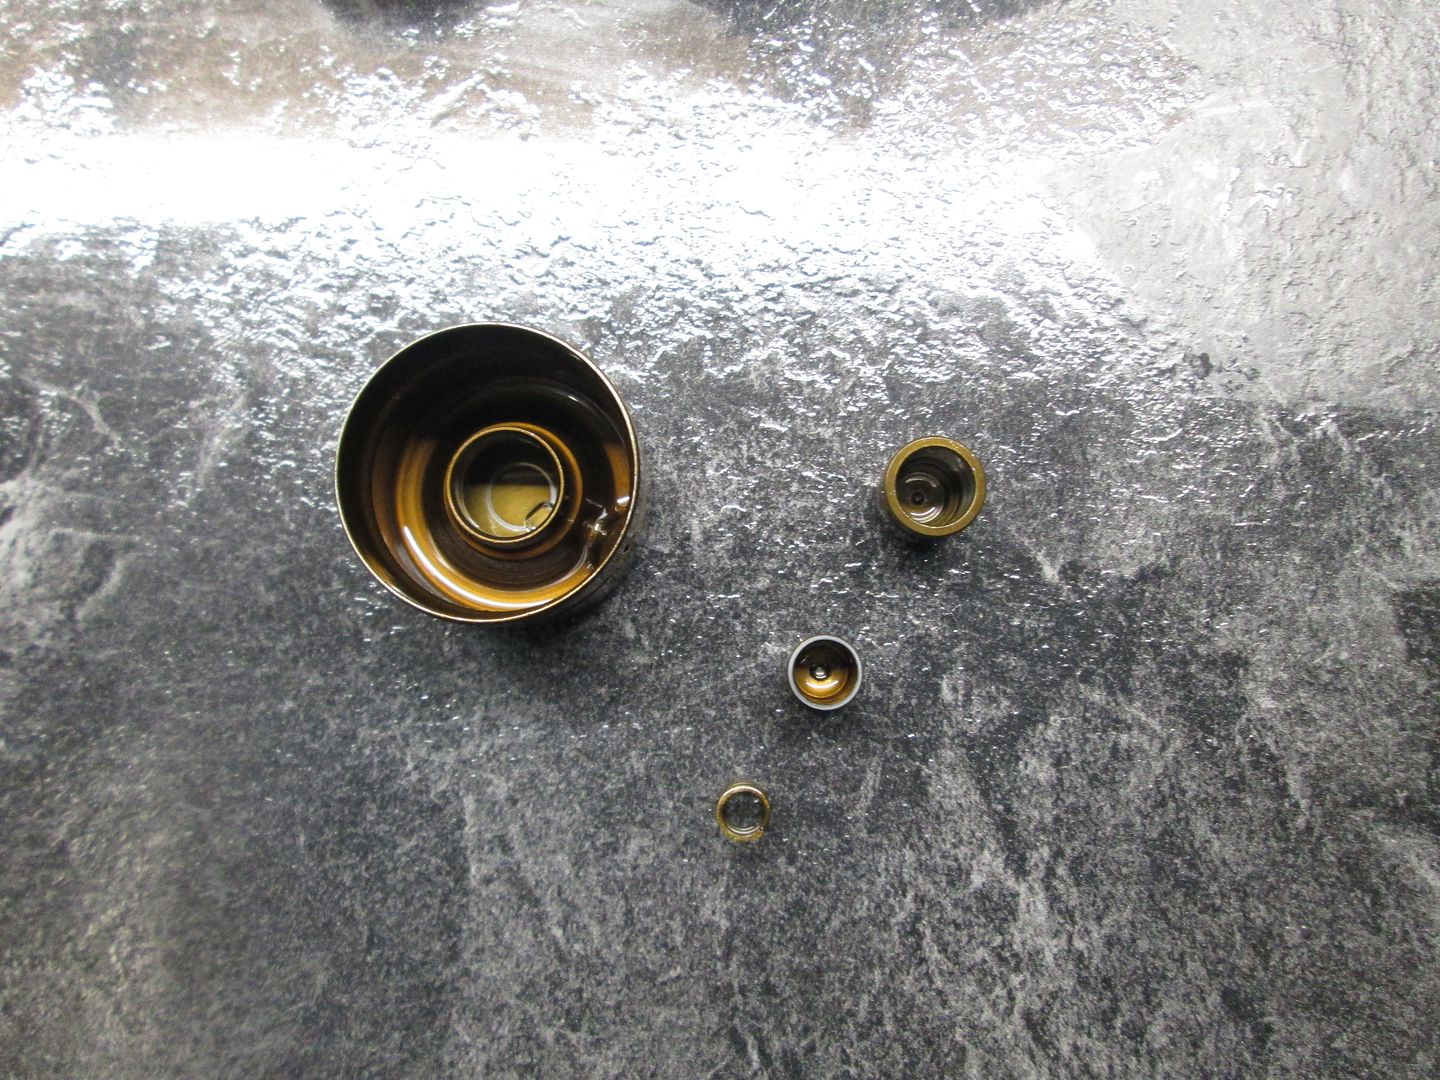
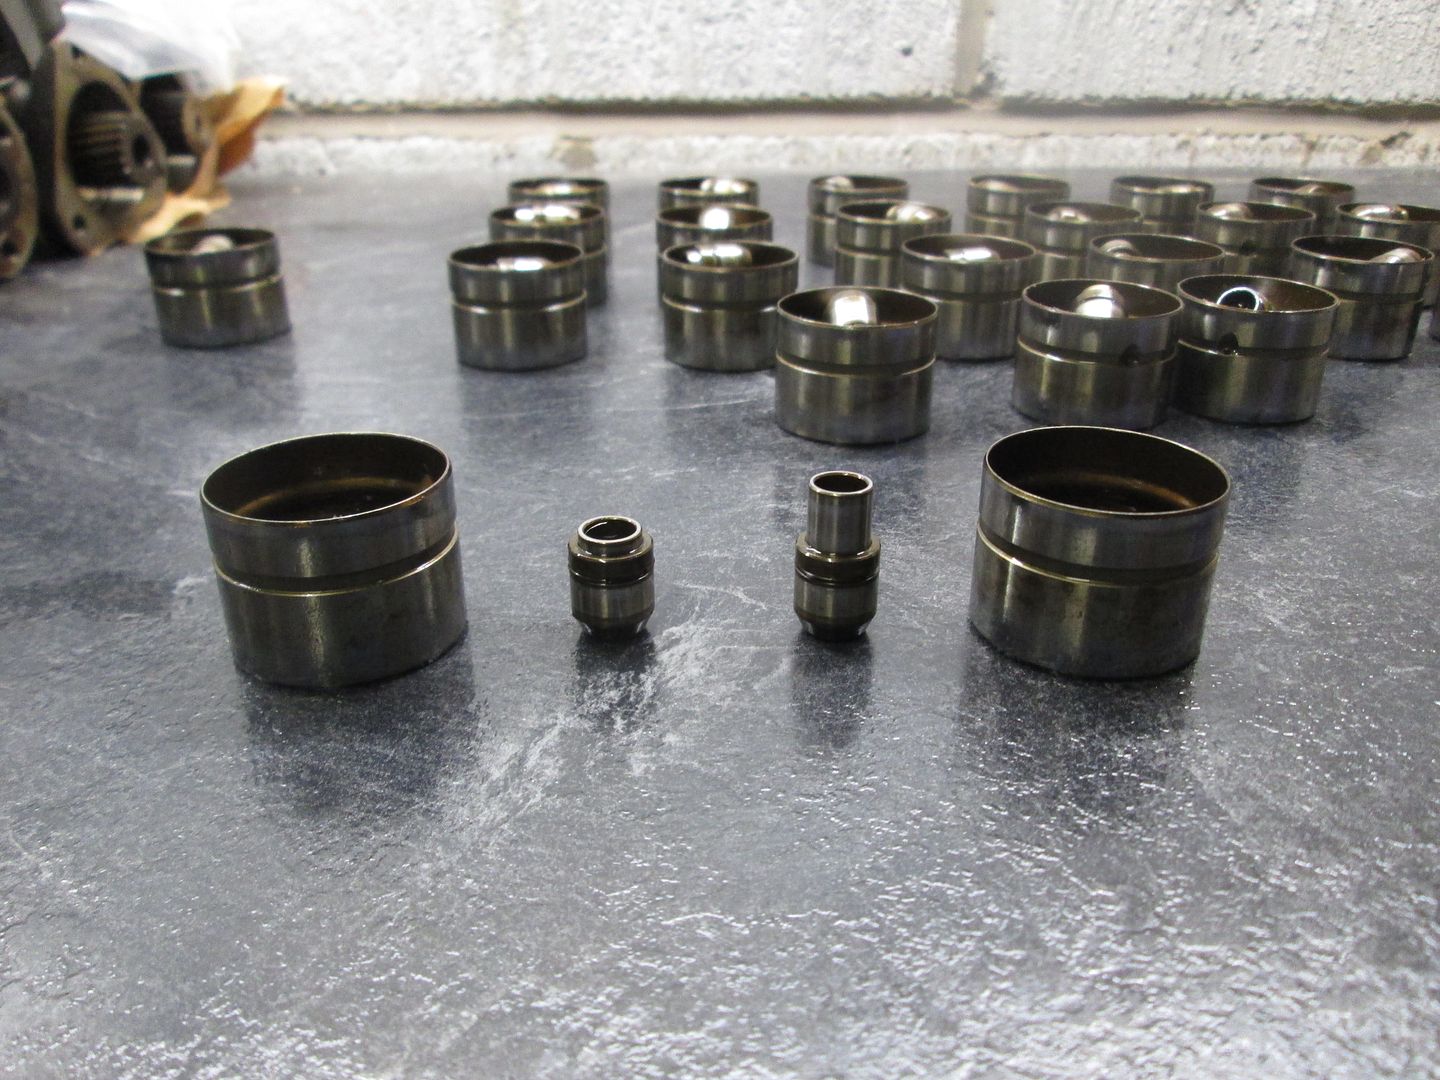
Every component cleaned in degreaser, then every piston cleaned fully before re-assembly with fresh oil. There was a lot of old oil build up inside every component. Every single piston had brown burnt on (15 years worth) oil deposits round the bottom, and none of them would freely move in and out of the housing. I would say approximately 20 out of the 24 were all stuck in one position. To show the difference, the freshly cleaned/assembled one is on the right, old on the left. You can see how the piston is stuck in..
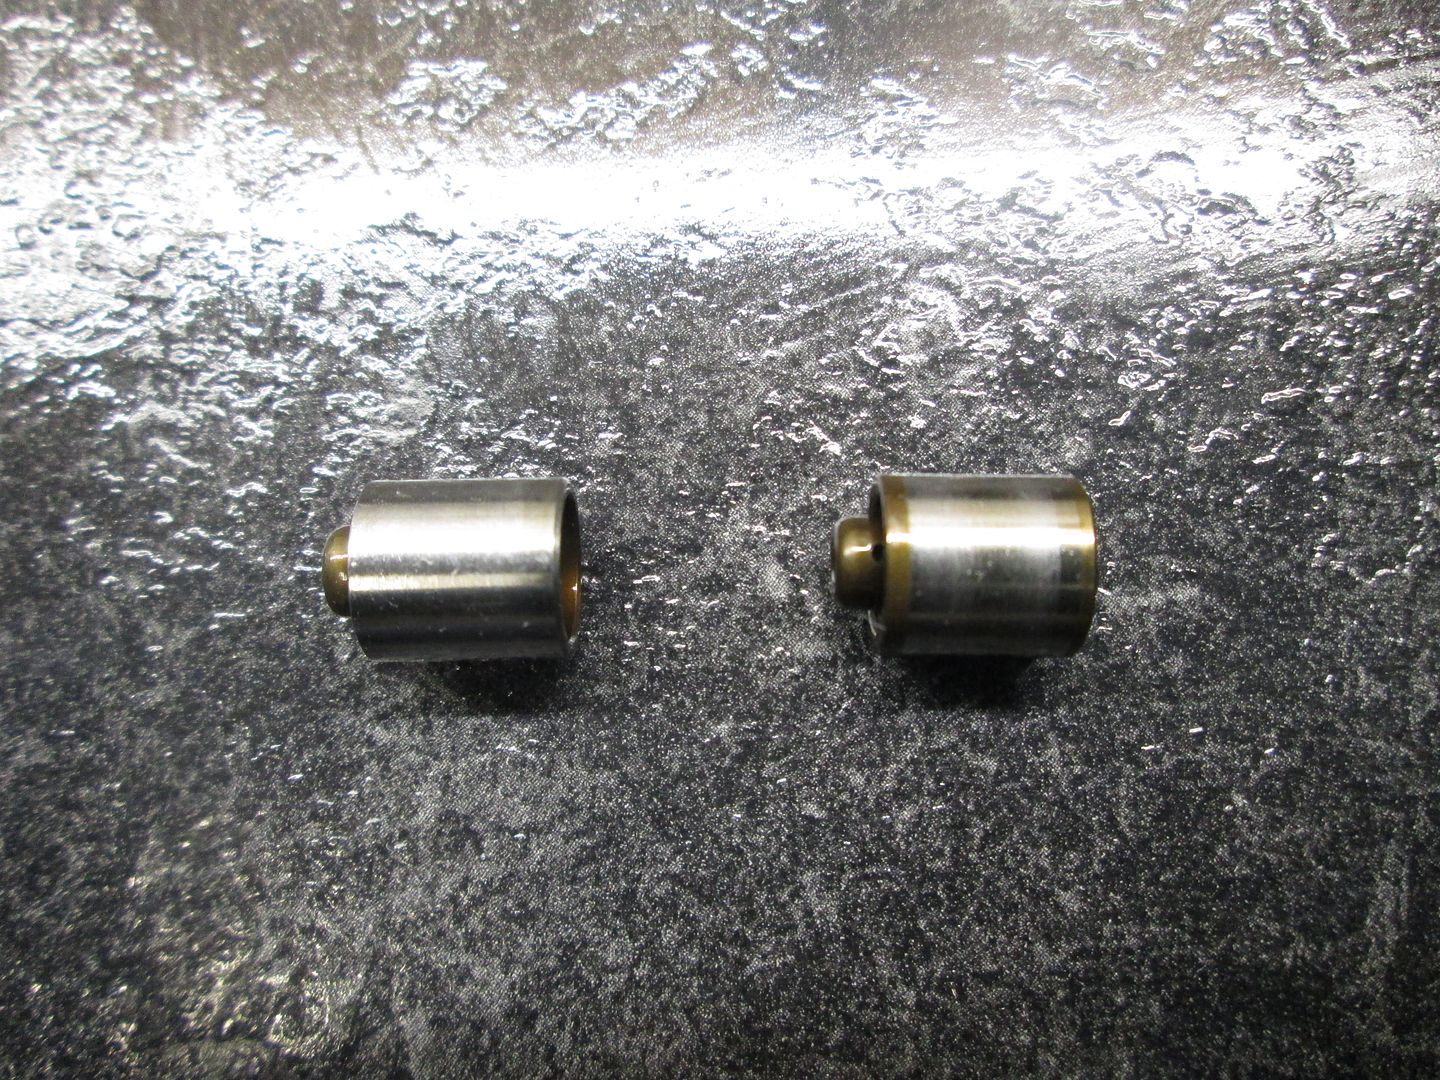
As you can see here, the internal part of the tappet has a build up of old oil on both ends, which causes the moving part to stick in as above. The one on the left has been cleaned.
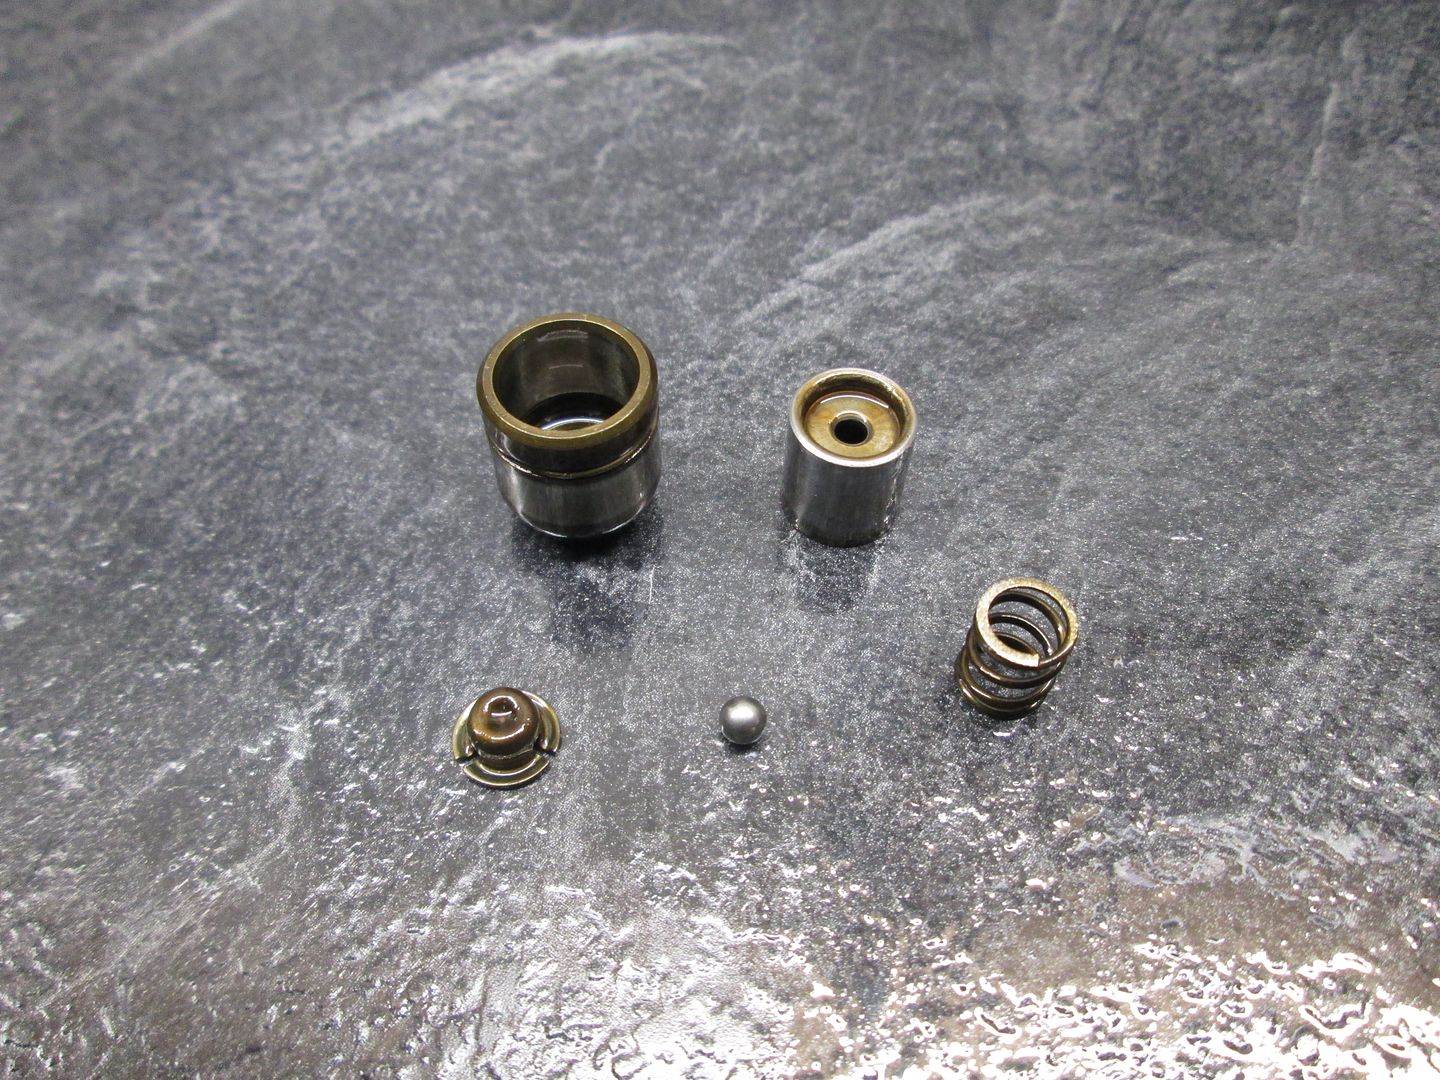
Further disassembly reveals all the components - the actual internal parts are very small..
With everything clean and smooth, all 24 were reassembled. Before vs after..
https://www.youtube.com/watch?v=C0Fr12S_86U
With them all operating correctly, they were dropped into the head with assembly grease on the cam carriers..
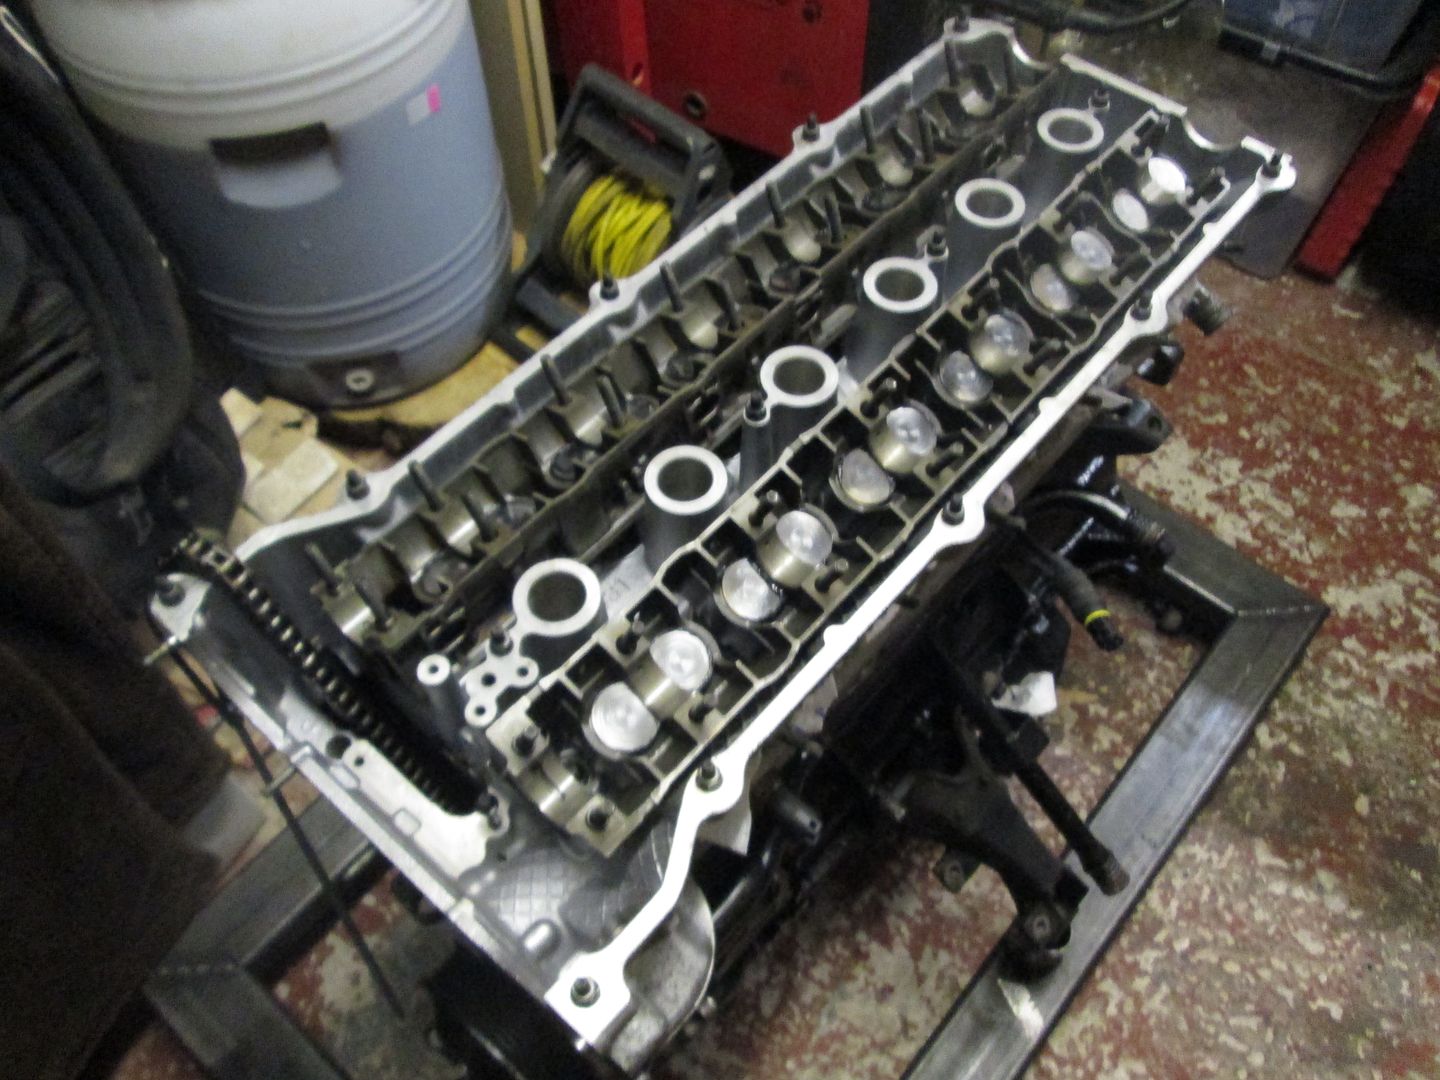
As mentioned above, the M54B30 uses dual VANOS, where the M50B25 and M52B28 use single. The hardware/gears on the inlet camshaft is the same between all three, just the M54 has an additional VANOS unit on the exhaust cam. The M54B30 inlet camshaft has a slightly more aggressive profile than the other two, being 240deg duration and 9.7mm lift, whereas the others are 228deg duration and 9.0mm lift. As you can see, they are very similar:
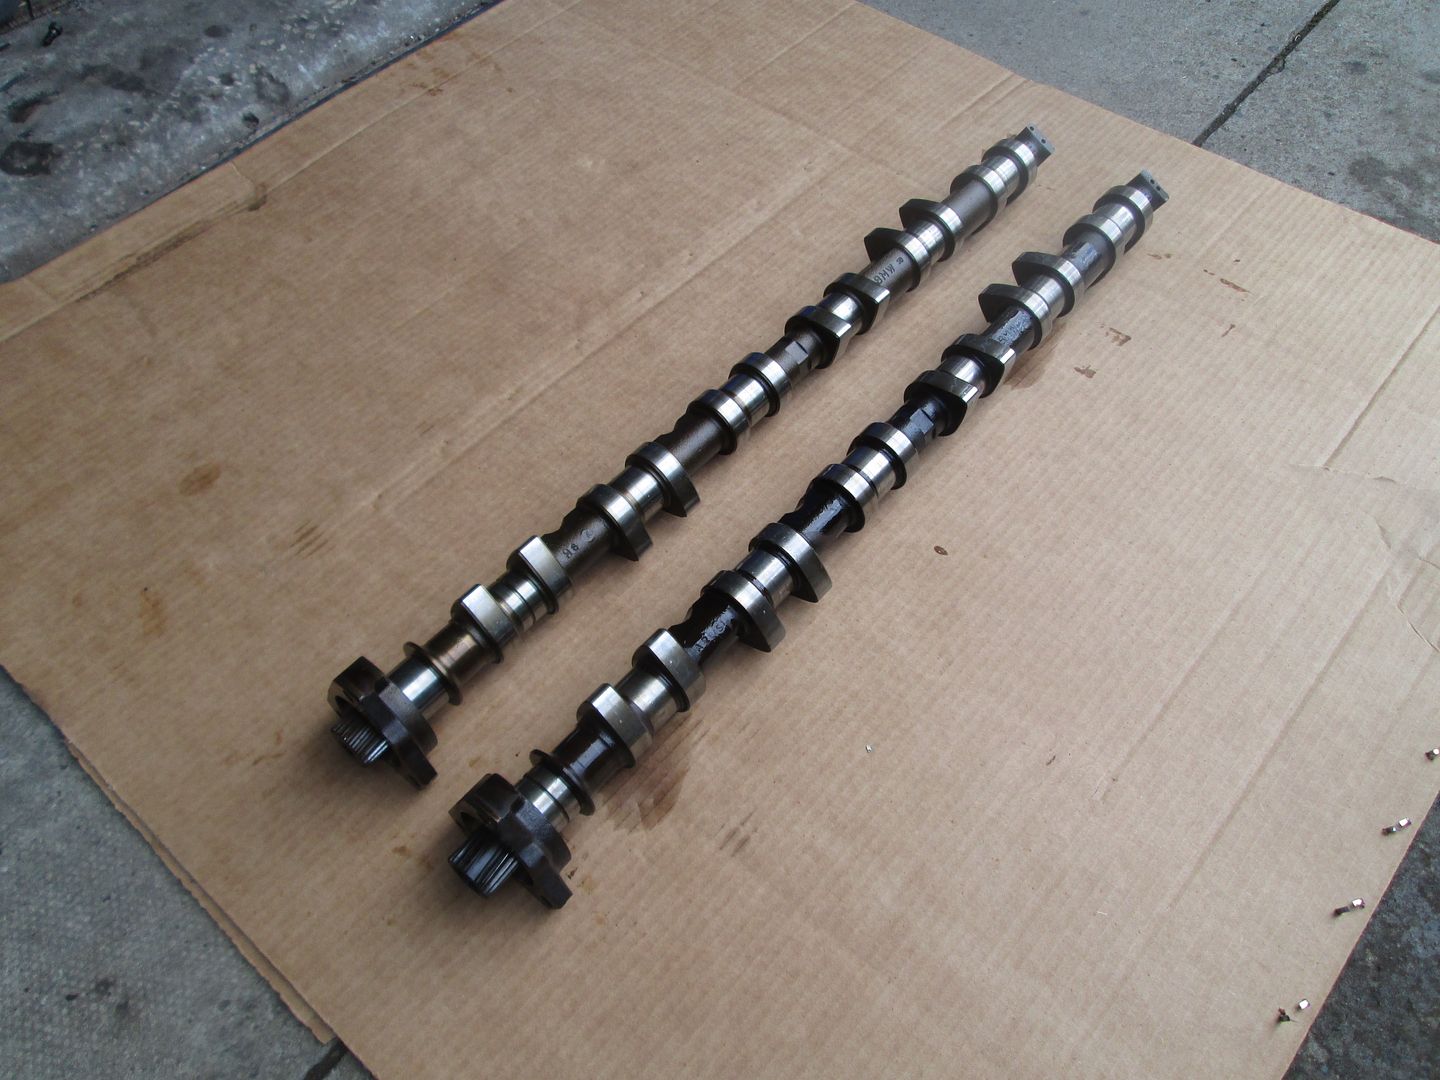
It will time up with the standard timing tools, which lock onto the blocks at the end of the camshafts. It will also drop straight into the M52B28 camshaft trays without issue. Even though the VANOS hardware is the same, the M54 uses a slightly longer engagement spline, so to allow use on an M52 unit it has to be machined by 5mm. M52 on the left, M54 on the right:
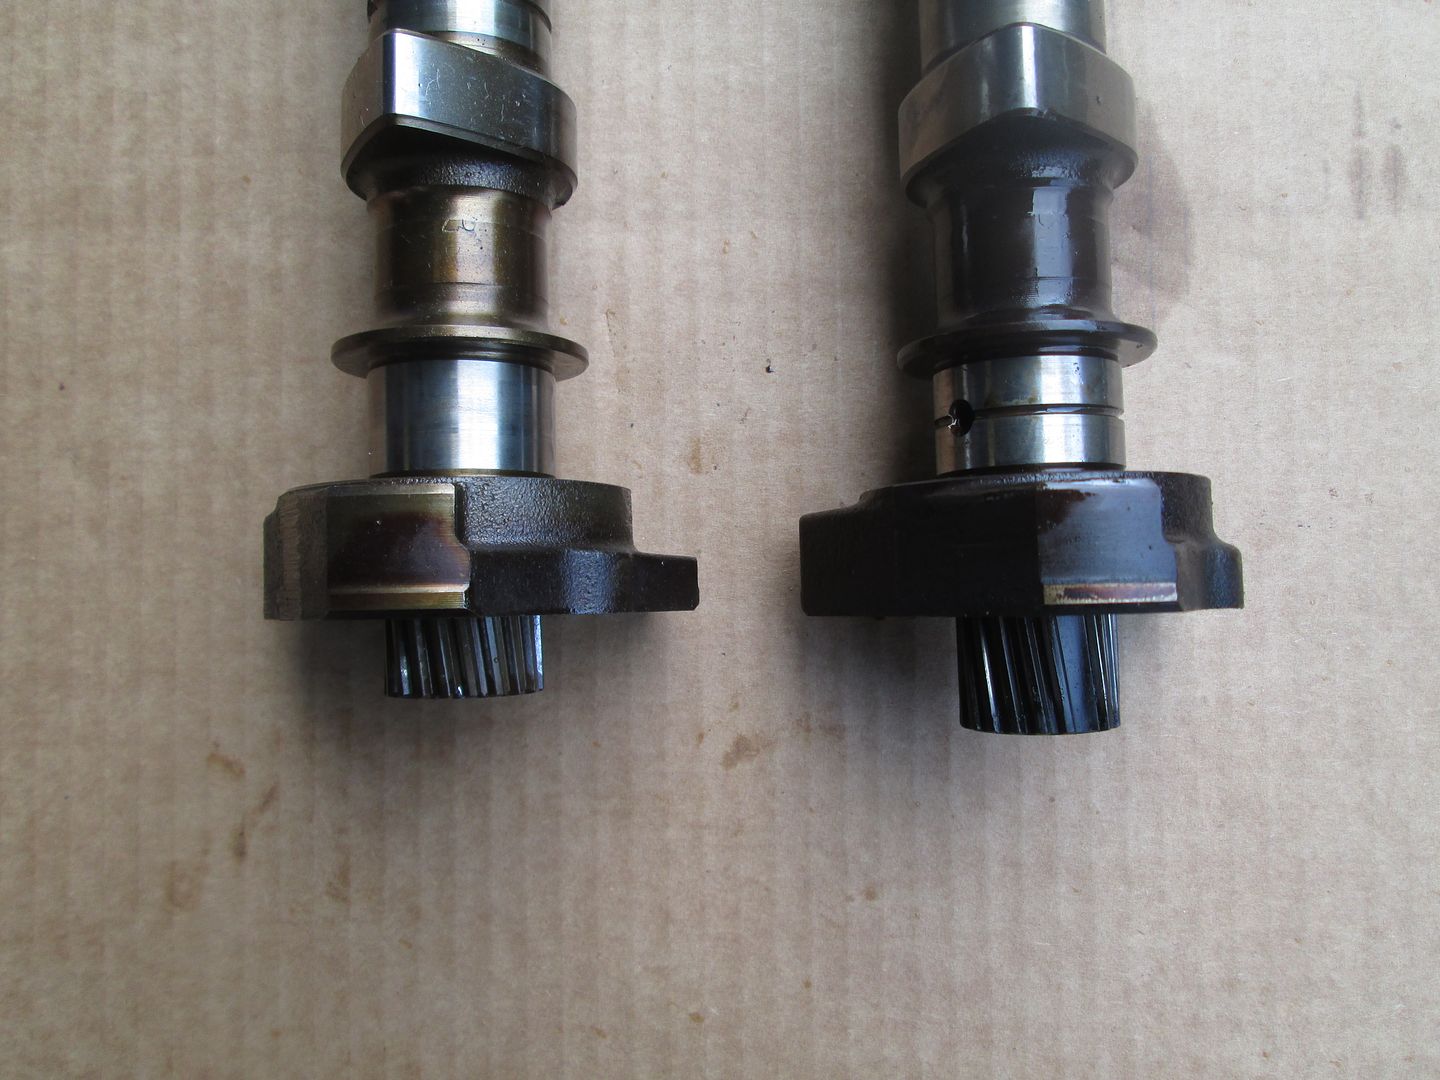
So the camshaft went onto a lathe..
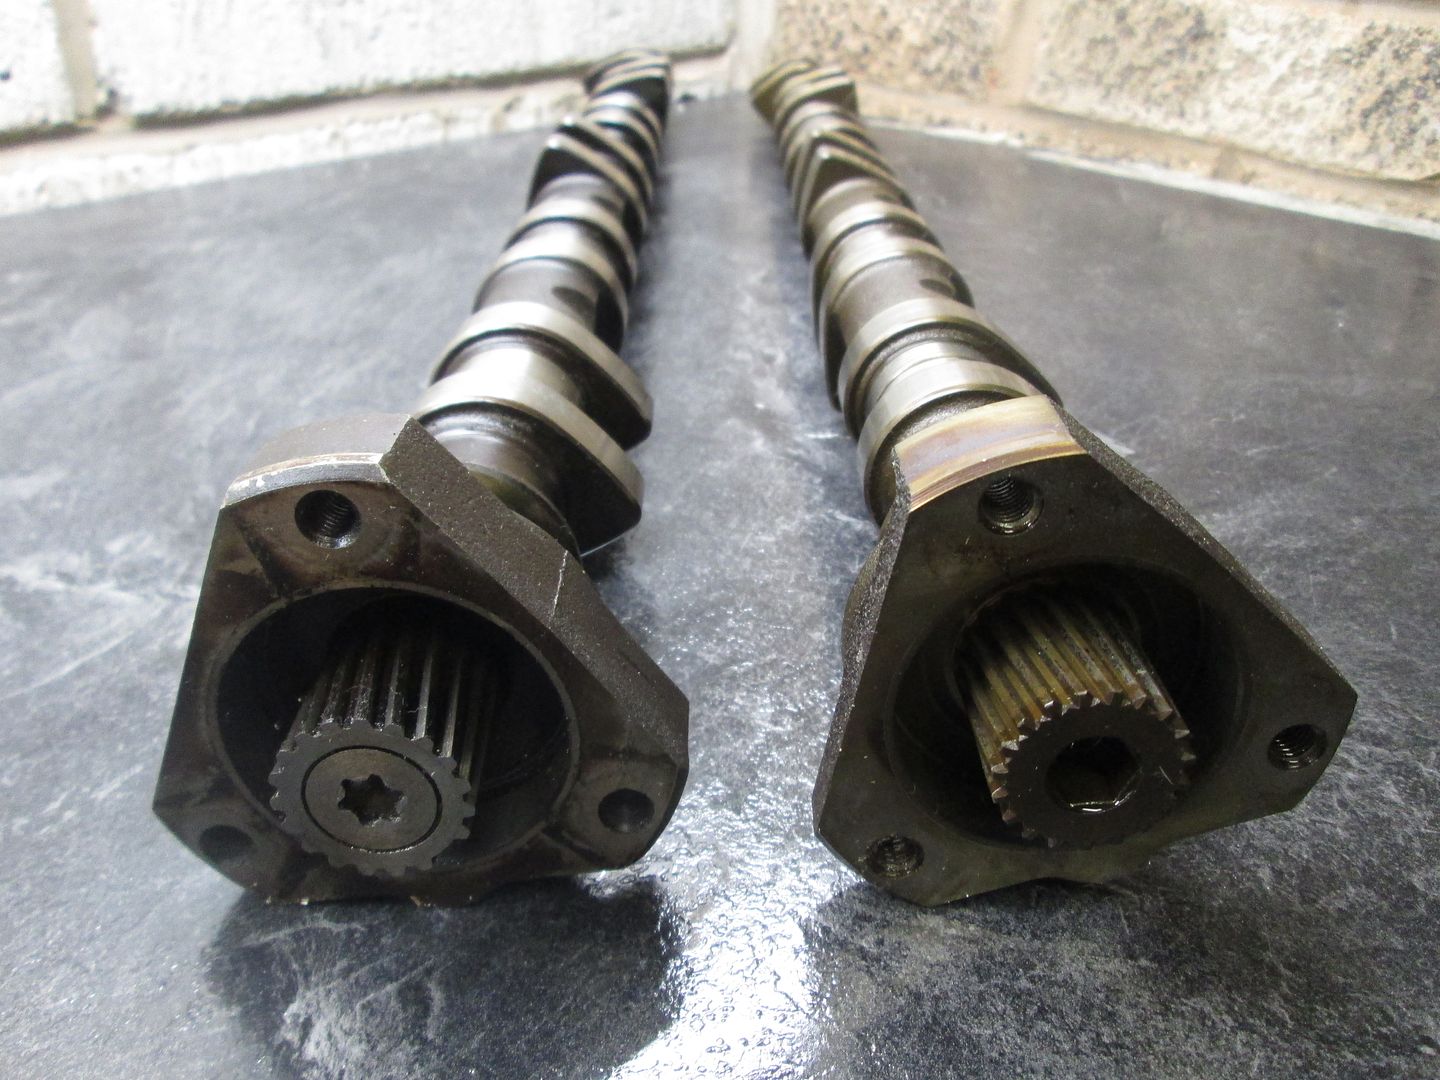
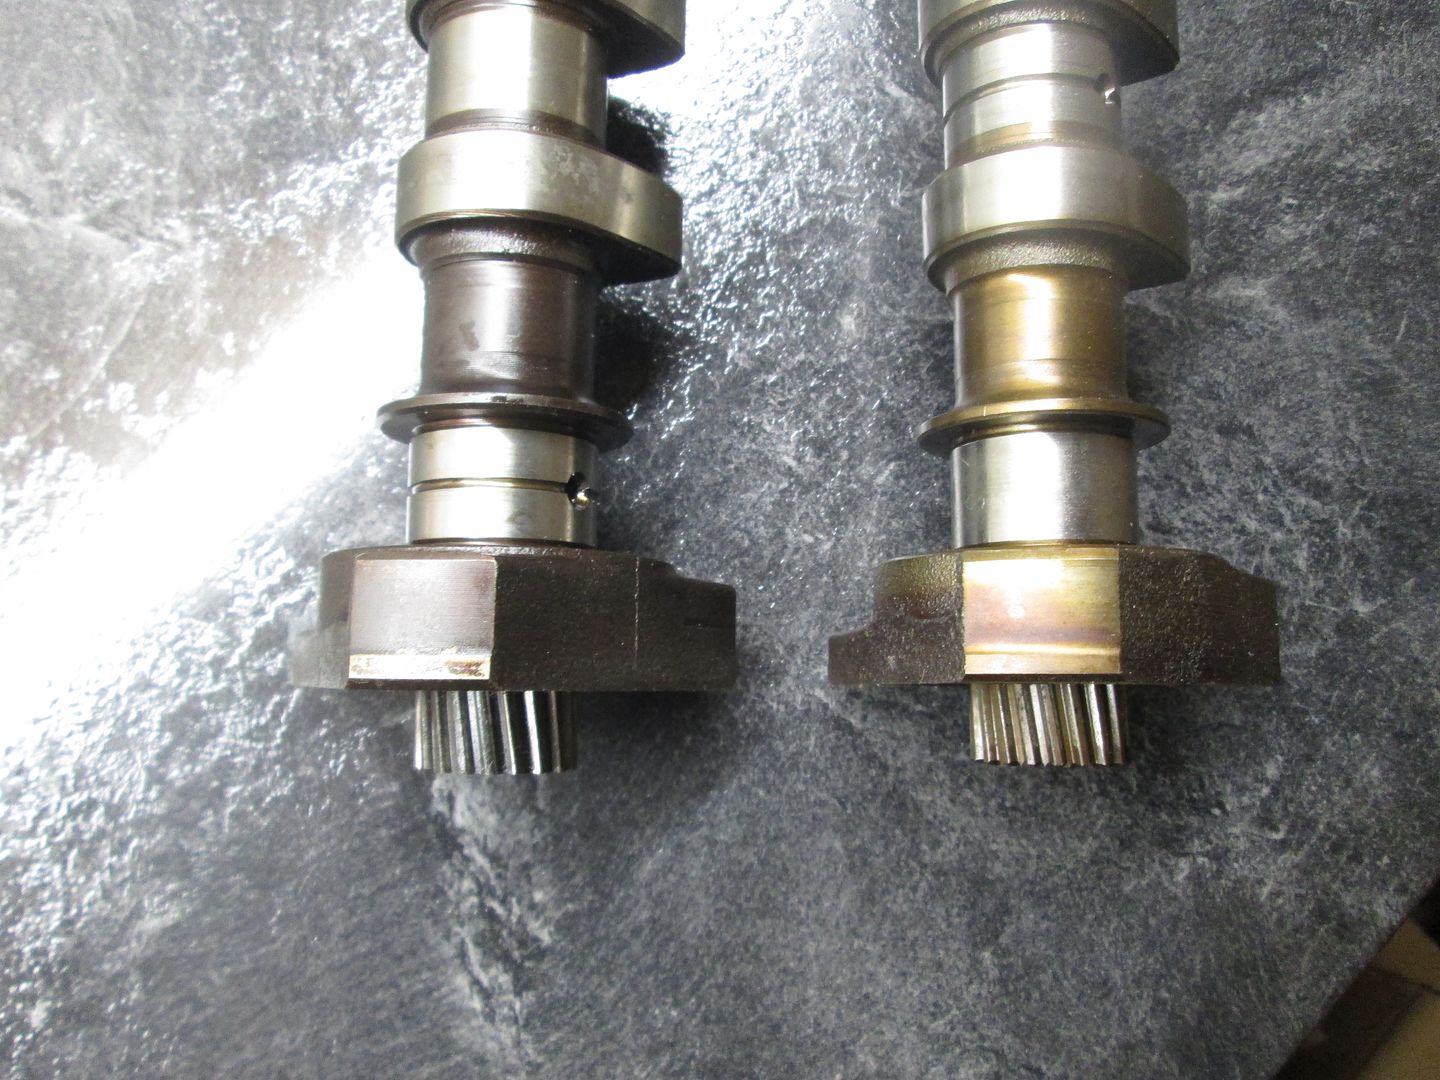
..and the result is an M54B30 inlet camshaft that will fit into the M52 head, with a bit more lift and duration. This was then fitted, along with the M52B28 exhaust camshaft, and locked at TDC..
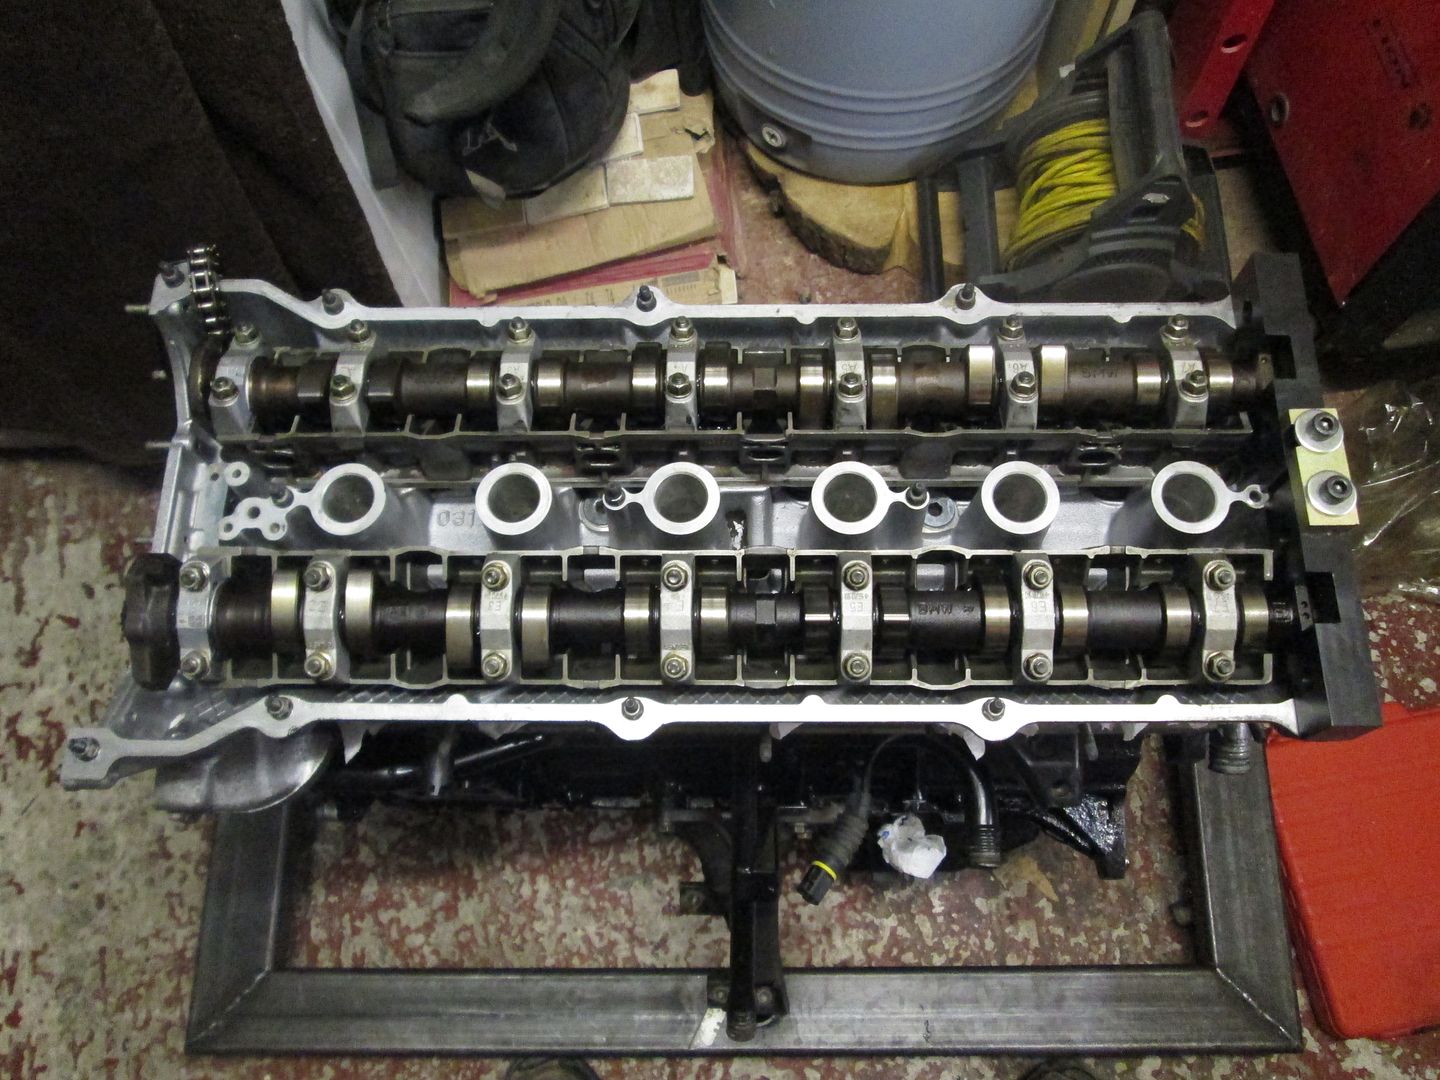
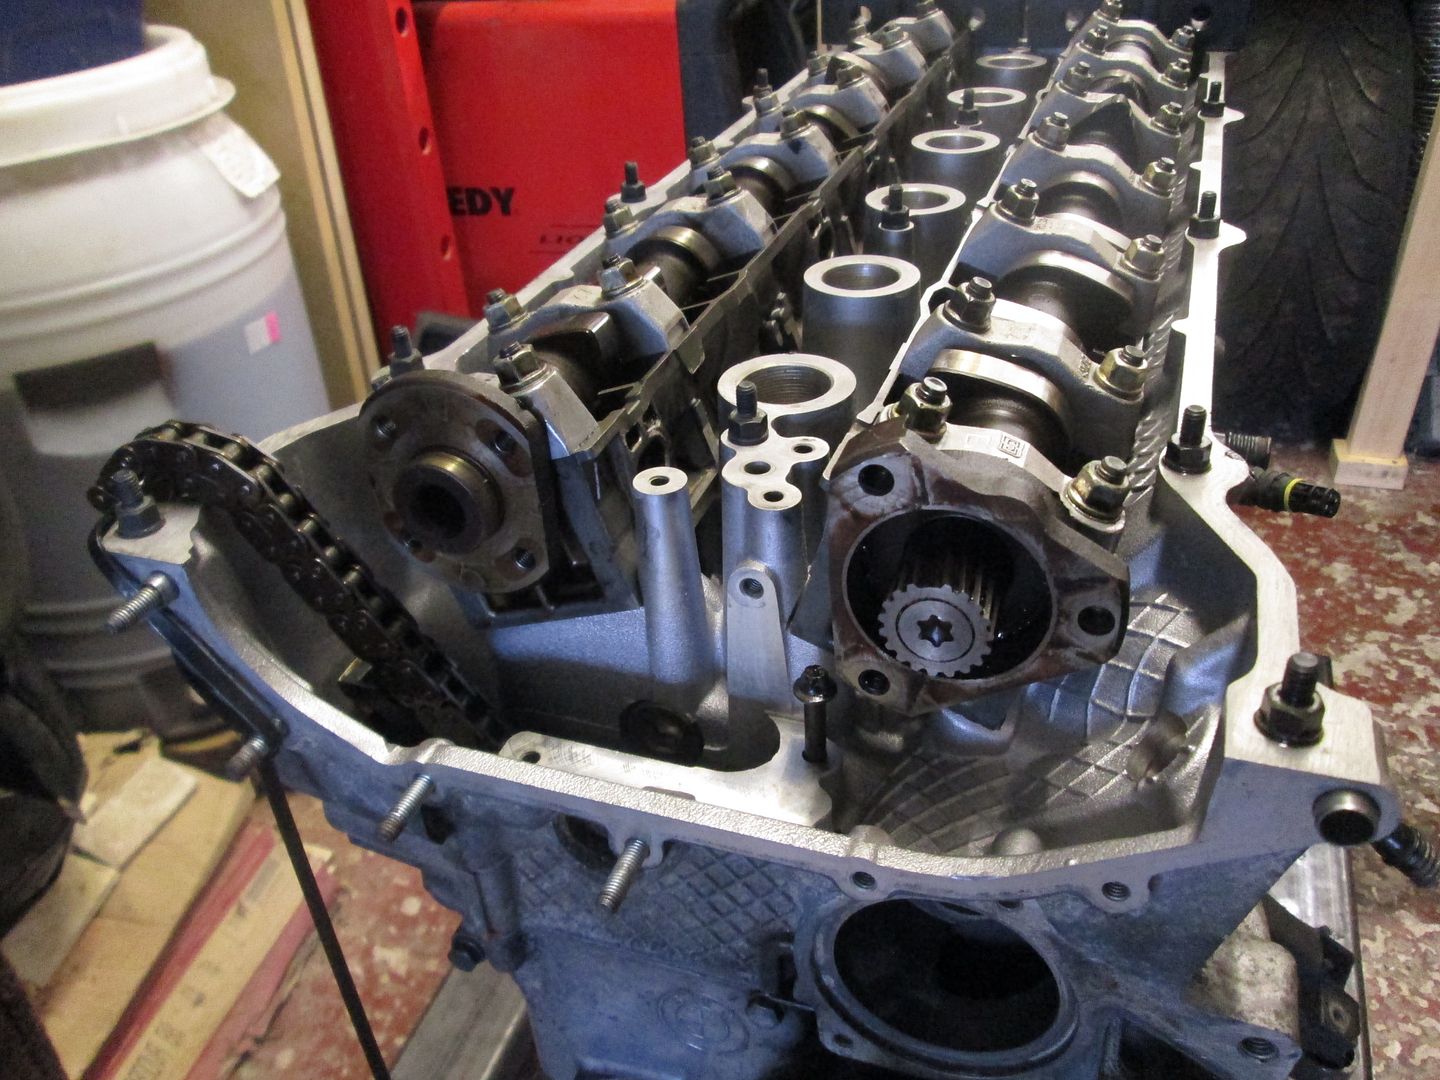
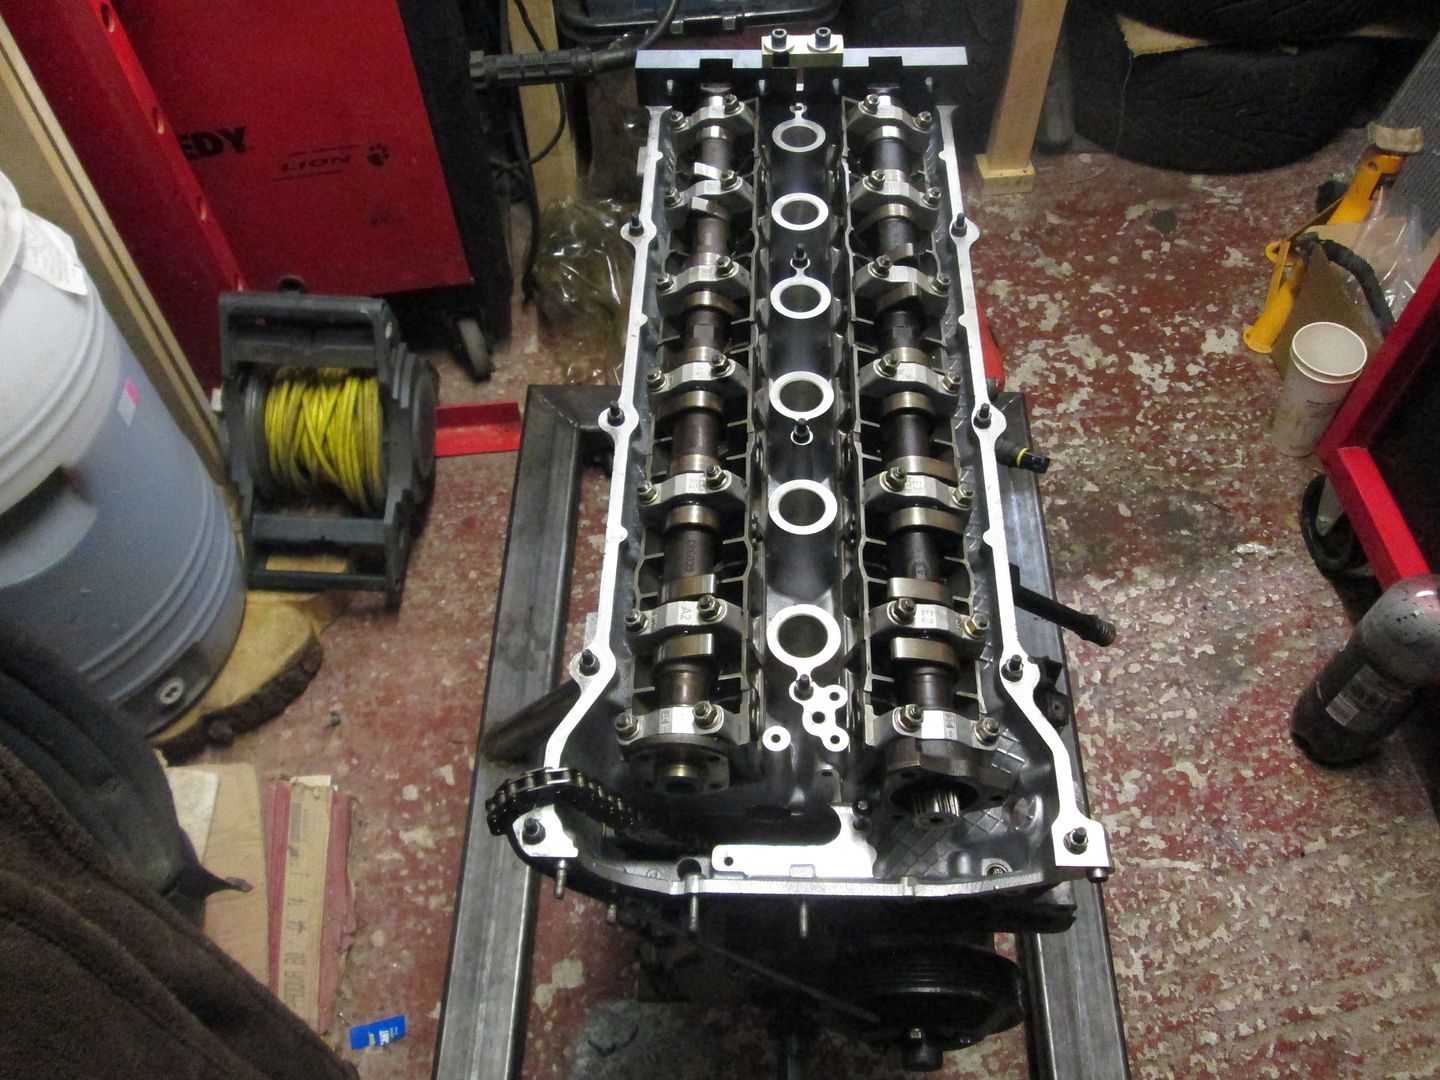
The camshaft gears were fitted along with upper chain and tensioners, timed up then VANOS unit bolted into place. Span the engine over a few times to check the timing and the tools dropped right in. Fitted the thermostat housing with new seals, then a new front crank seal. The front pulley then went on, with a new crank bolt again and torqued to spec. Cleaned up the rocker cover mating face and fitted that, finishing with some new spark plugs and the M54/E46 coil packs.
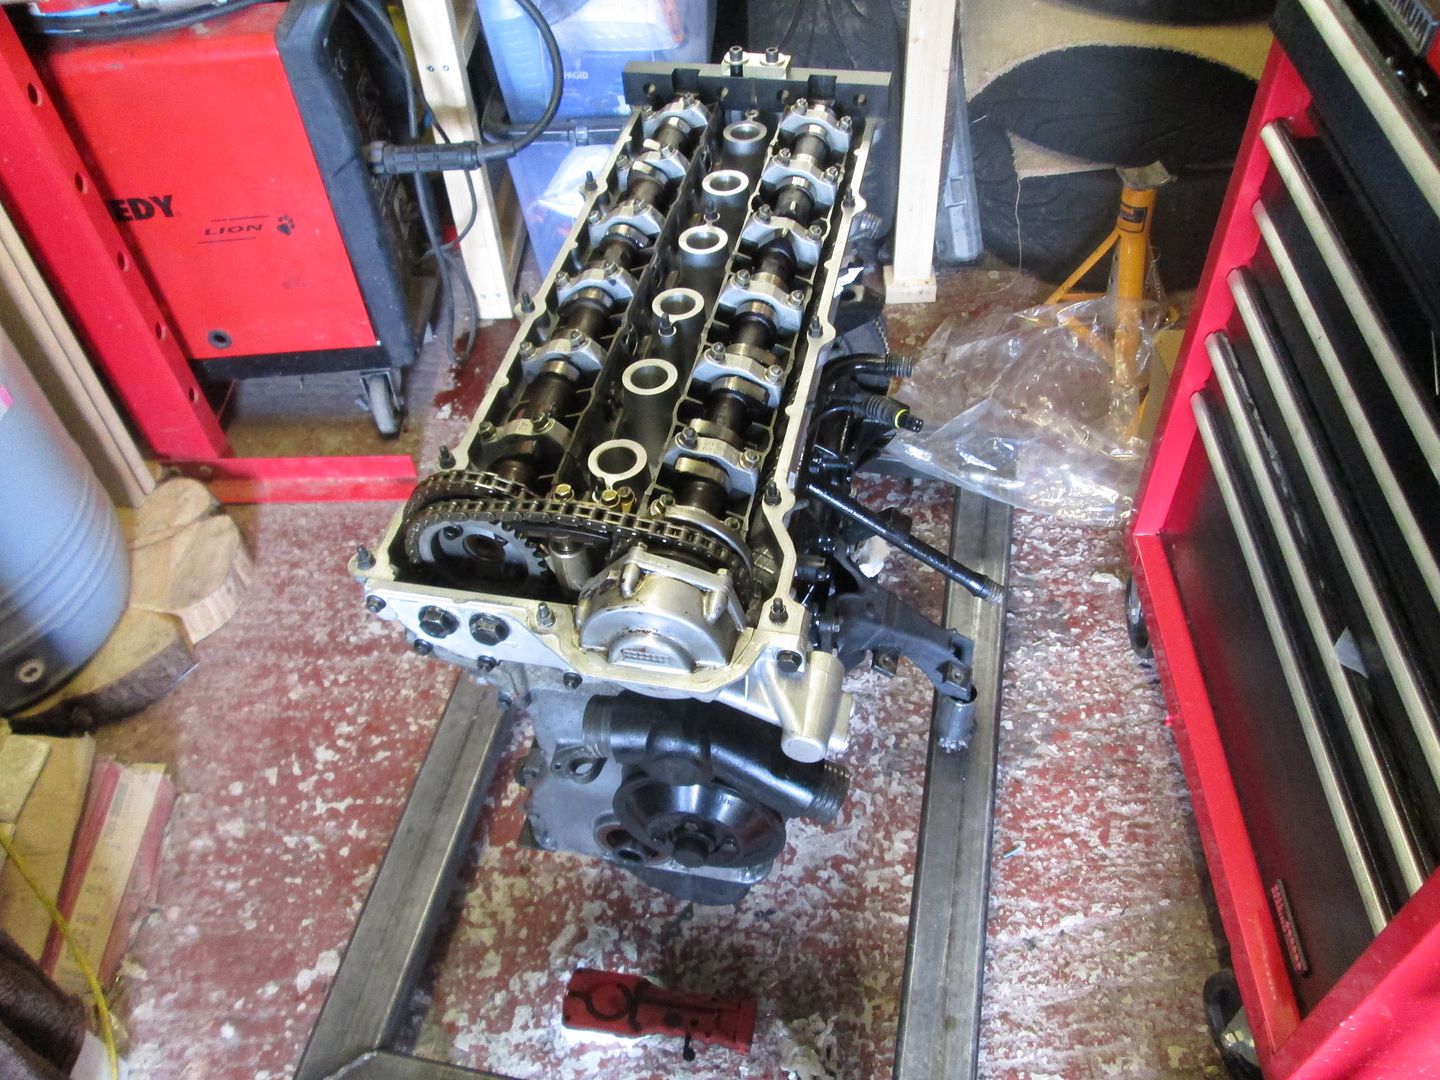
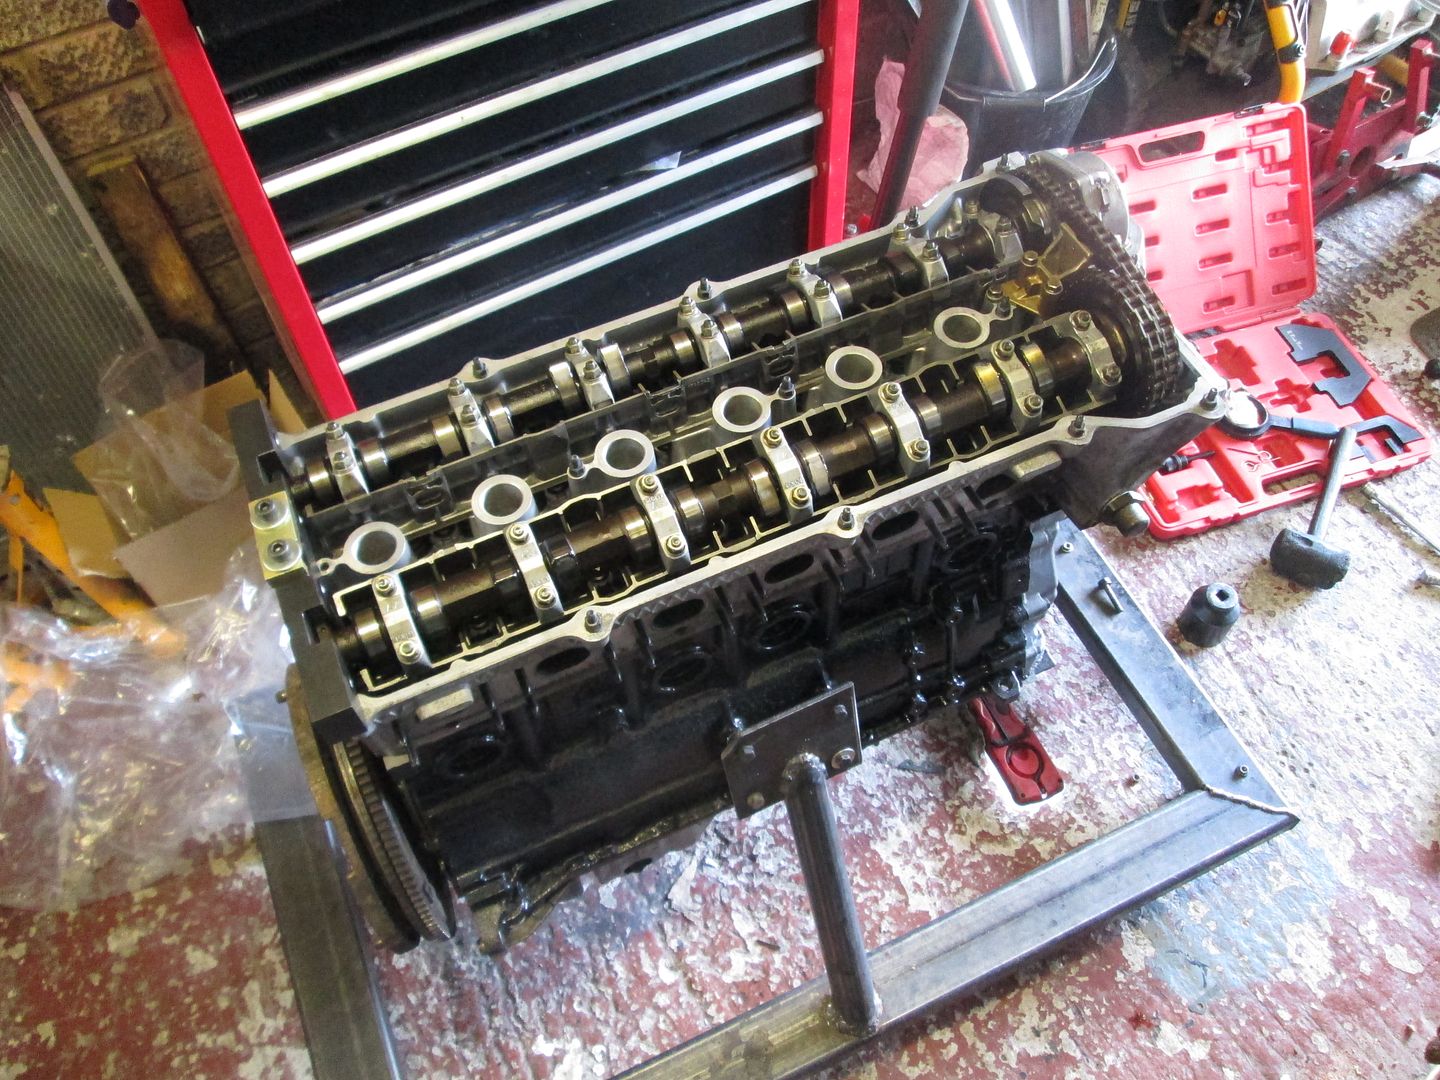
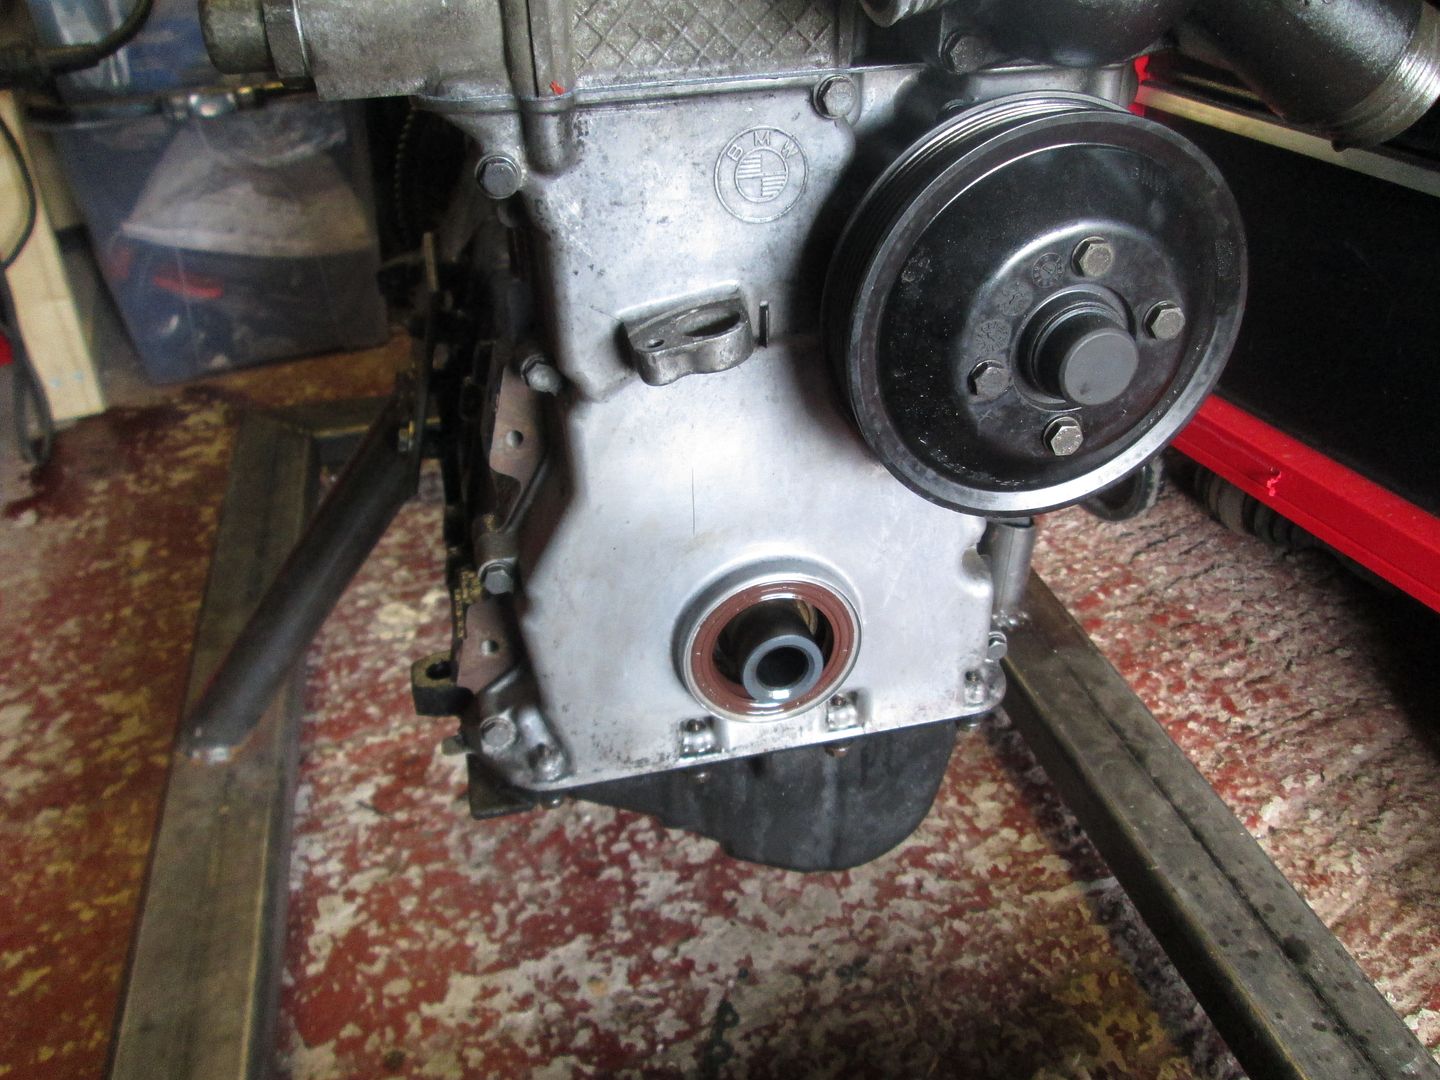
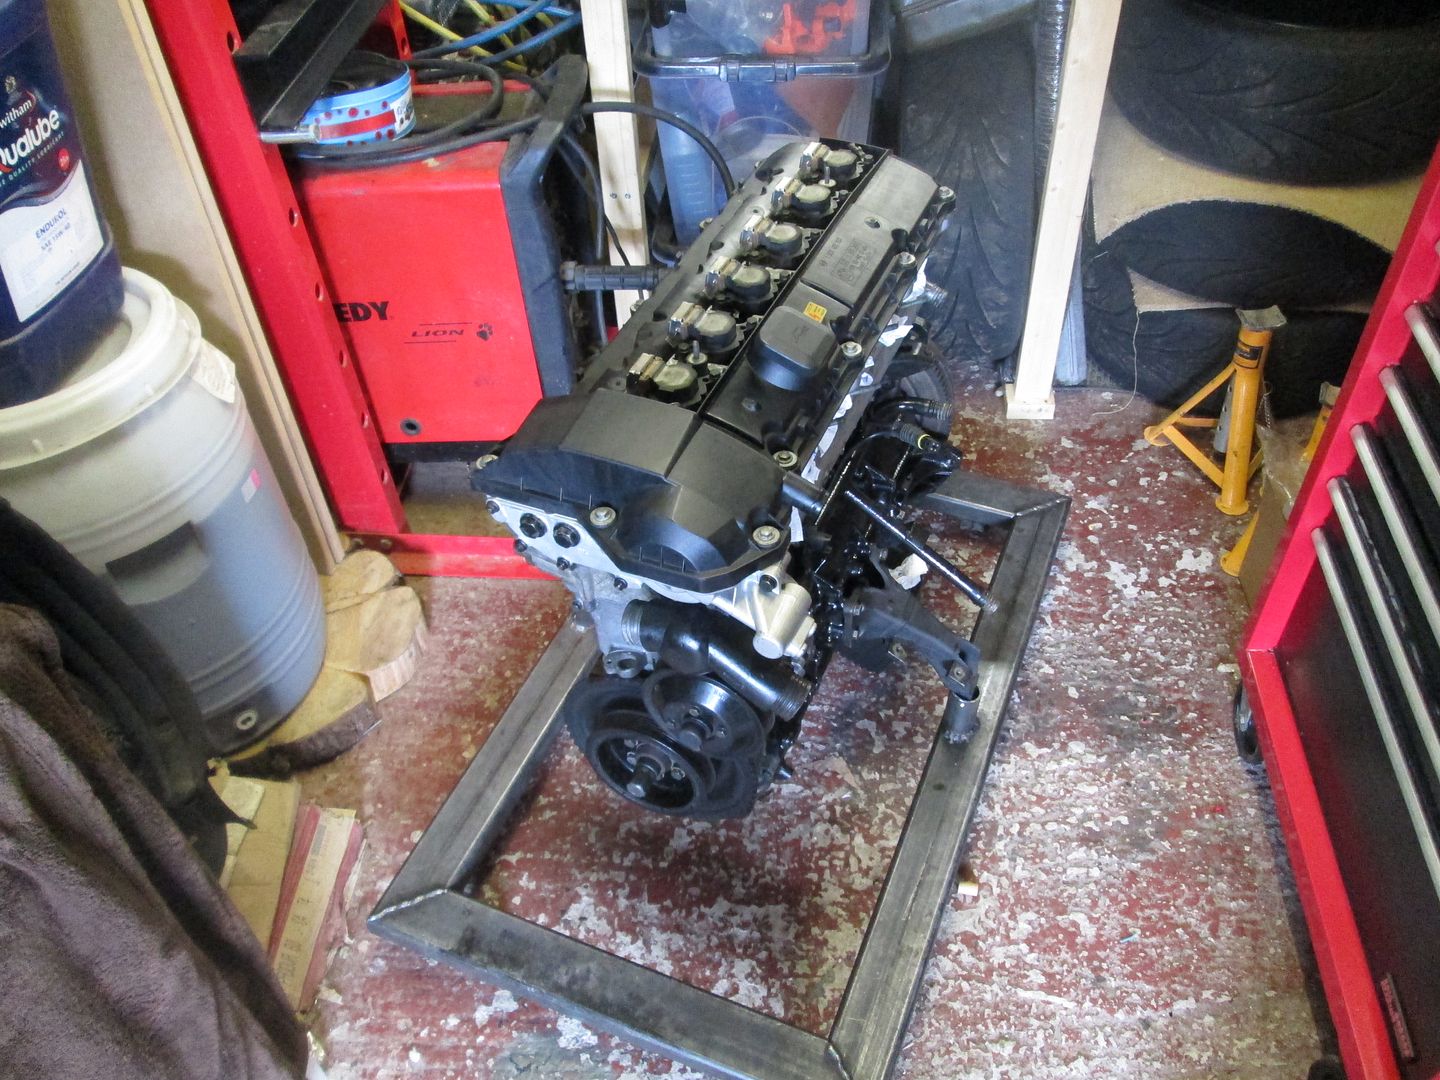
Before fitting this to the car, I wanted to make a few other changes...
From browsing the US forums a handful of people had done the 'cheap' 3.0L engine, using the rotating assembly from an M54B30, i.e. E46 330i, etc. I couldn't really find much information about it in the UK, just a few vague threads on various forums with no real definitive information. These engines were for sale ranging from £200-300, nearly a 10th of the price people had M3 engines listed for. After a bit of waiting, one came up local on the cheap end of that scale and I went to collect it..

Considering I only really wanted the crank, pistons and rods from this, I found out the rest of it (inc. ancillaries) were selling well on eBay, after some patience and once everything had gone, essentially the internals ended up costing nothing.
To eliminate a problem with the M50 block used in the previous build, I had the machine work done to my good spare..

The bores were also double checked for roundness to be 110% sure, and all came out great.
The M50, M52 and M54 engines are very similar internally, the M54 having different coolant/oil pathways, dual VANOS and various other things. They share the same 84mm bore, and the extra capacity is gained by an 89mm stroke on the crank in the M54, over the 84mm stroke on a 2.8L.
M54B30 Crank..

M54B30 Piston vs M52B28 Piston..

The M54B30 and M52B28 rods are the same, so you could use either. I kept the pistons with their rods either way. In summary:
M50B25 (2.5L Petrol, 1990-1996, E36 325i and E34 525i) - Steel/Iron Block, 84mm Bore, 75mm Stroke - 189hp, 181lbft.
M52B28 (2.8L Petrol, 1992-2001, E36 328i, E39 528i, E38 728i, Z3 2.8) - Aluminium Block, 84mm Bore, 84mm Stroke - 190hp, 210lbft.
M54B30 (3.0L Petrol, 2000-2006, E46 330i, E39 530i, E60 530i, X3/5 3.0, Z4 3.0) - Aluminium Block, 84mm Bore, 89.6mm Stroke - 230hp, 220lbft.
Again, did not know whether to trust the head that was used previously, so I had my spare head cleaned, skimmed, new stem seals again and then finally pressure tested to be 110% sure. All came back OK.


The pistons, rods and other bits were properly cleaned at the same time..

So the block was given a quick coat of paint, then the oil jets put in place, and some bearings fitted..

There had been a ridiculous increase in the price of mains bolts at BMW since I last had them, and it was actually cheaper to purchase ARP hardware..


Degreased and checked the crank over, then dropped it into the block and checked the clearances..


Factory clearance is 0.020mm <> 0.058mm, all were identical at circa 0.038mm.
Removed the caps, cleaned, and added assembly grease again. Then torqued the caps down with the ARP ultra torque grease as per the spec..


New piston rings for the M54B30 pistons, as they are completely different and should be replaced anyway..

Gapped, fitted to the piston and then dropped into the block..


The windage/baffle plate needed more modification to clear the ARP studs, and longer stroke of the M54 crank, but its all easy stuff.
Timing gear, covers, oil pump, sump back on with a new gasket..


You can see here how the M54 assembly sits a few mm below the deck when used in an M50 block, as expected..


Cleaned the block face one last time, then fitted two new dowels and a new headgasket..

Dropped the head on, new head bolts again. All held full torque correctly..


Before assembling the rest of the head, I wanted to strip all 24 hydraulic tappets apart and clean them, to check all were operating at full travel..


Every component cleaned in degreaser, then every piston cleaned fully before re-assembly with fresh oil. There was a lot of old oil build up inside every component. Every single piston had brown burnt on (15 years worth) oil deposits round the bottom, and none of them would freely move in and out of the housing. I would say approximately 20 out of the 24 were all stuck in one position. To show the difference, the freshly cleaned/assembled one is on the right, old on the left. You can see how the piston is stuck in..

As you can see here, the internal part of the tappet has a build up of old oil on both ends, which causes the moving part to stick in as above. The one on the left has been cleaned.

Further disassembly reveals all the components - the actual internal parts are very small..

With everything clean and smooth, all 24 were reassembled. Before vs after..

https://www.youtube.com/watch?v=C0Fr12S_86U
With them all operating correctly, they were dropped into the head with assembly grease on the cam carriers..

As mentioned above, the M54B30 uses dual VANOS, where the M50B25 and M52B28 use single. The hardware/gears on the inlet camshaft is the same between all three, just the M54 has an additional VANOS unit on the exhaust cam. The M54B30 inlet camshaft has a slightly more aggressive profile than the other two, being 240deg duration and 9.7mm lift, whereas the others are 228deg duration and 9.0mm lift. As you can see, they are very similar:

It will time up with the standard timing tools, which lock onto the blocks at the end of the camshafts. It will also drop straight into the M52B28 camshaft trays without issue. Even though the VANOS hardware is the same, the M54 uses a slightly longer engagement spline, so to allow use on an M52 unit it has to be machined by 5mm. M52 on the left, M54 on the right:

So the camshaft went onto a lathe..


..and the result is an M54B30 inlet camshaft that will fit into the M52 head, with a bit more lift and duration. This was then fitted, along with the M52B28 exhaust camshaft, and locked at TDC..


The camshaft gears were fitted along with upper chain and tensioners, timed up then VANOS unit bolted into place. Span the engine over a few times to check the timing and the tools dropped right in. Fitted the thermostat housing with new seals, then a new front crank seal. The front pulley then went on, with a new crank bolt again and torqued to spec. Cleaned up the rocker cover mating face and fitted that, finishing with some new spark plugs and the M54/E46 coil packs.


Before fitting this to the car, I wanted to make a few other changes...
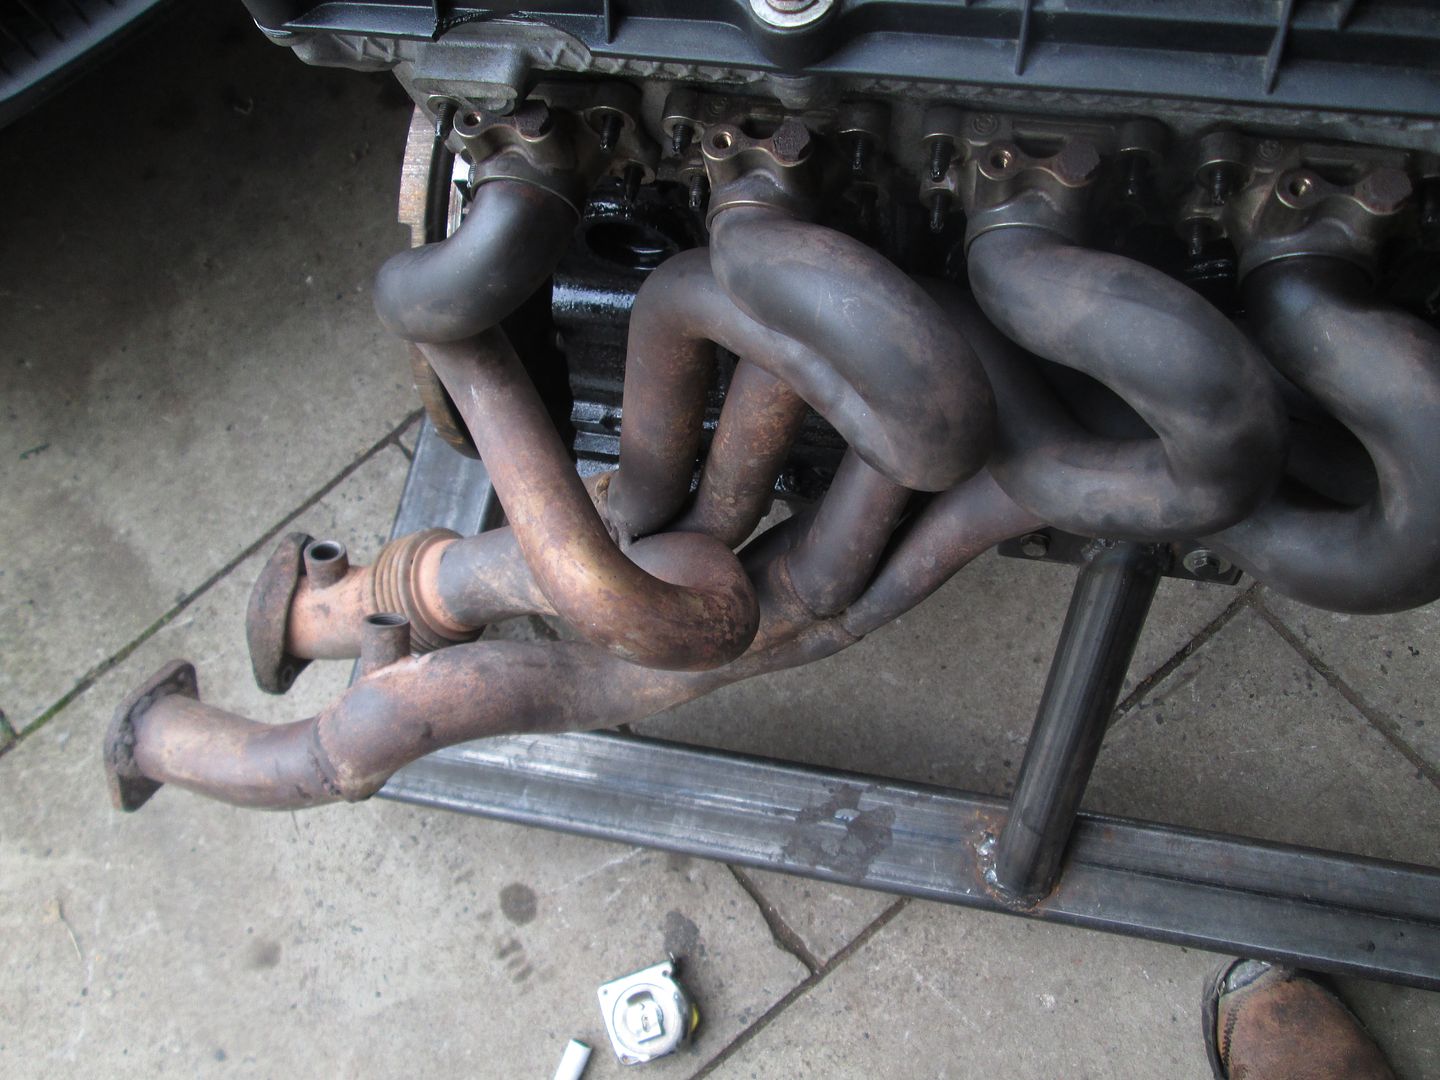
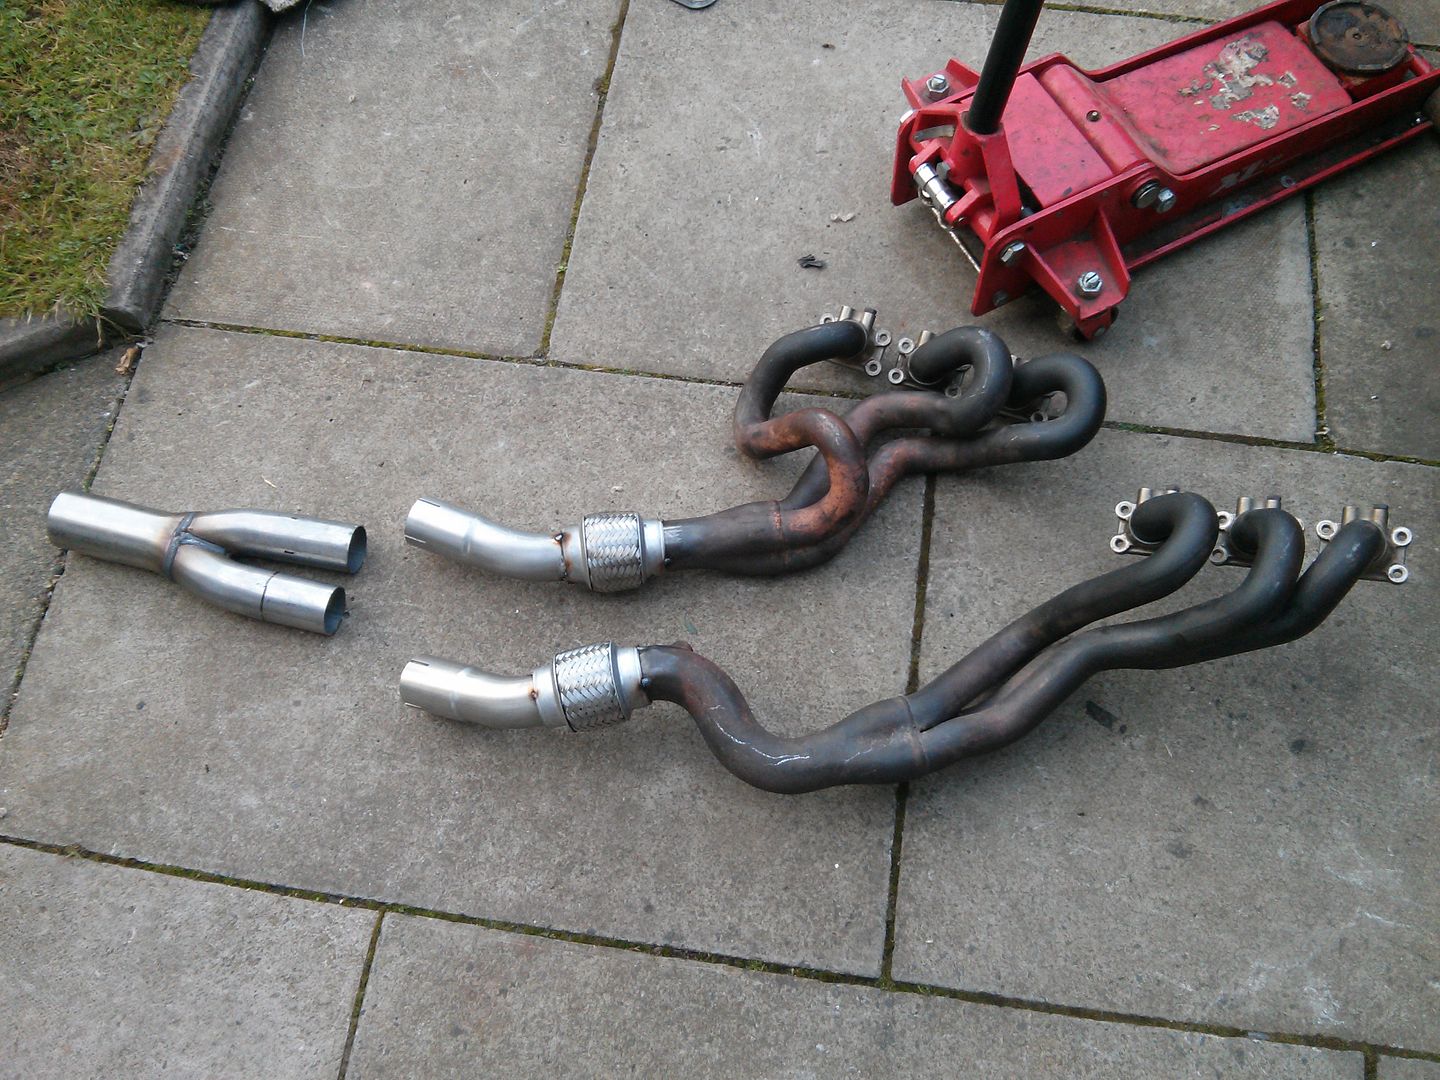
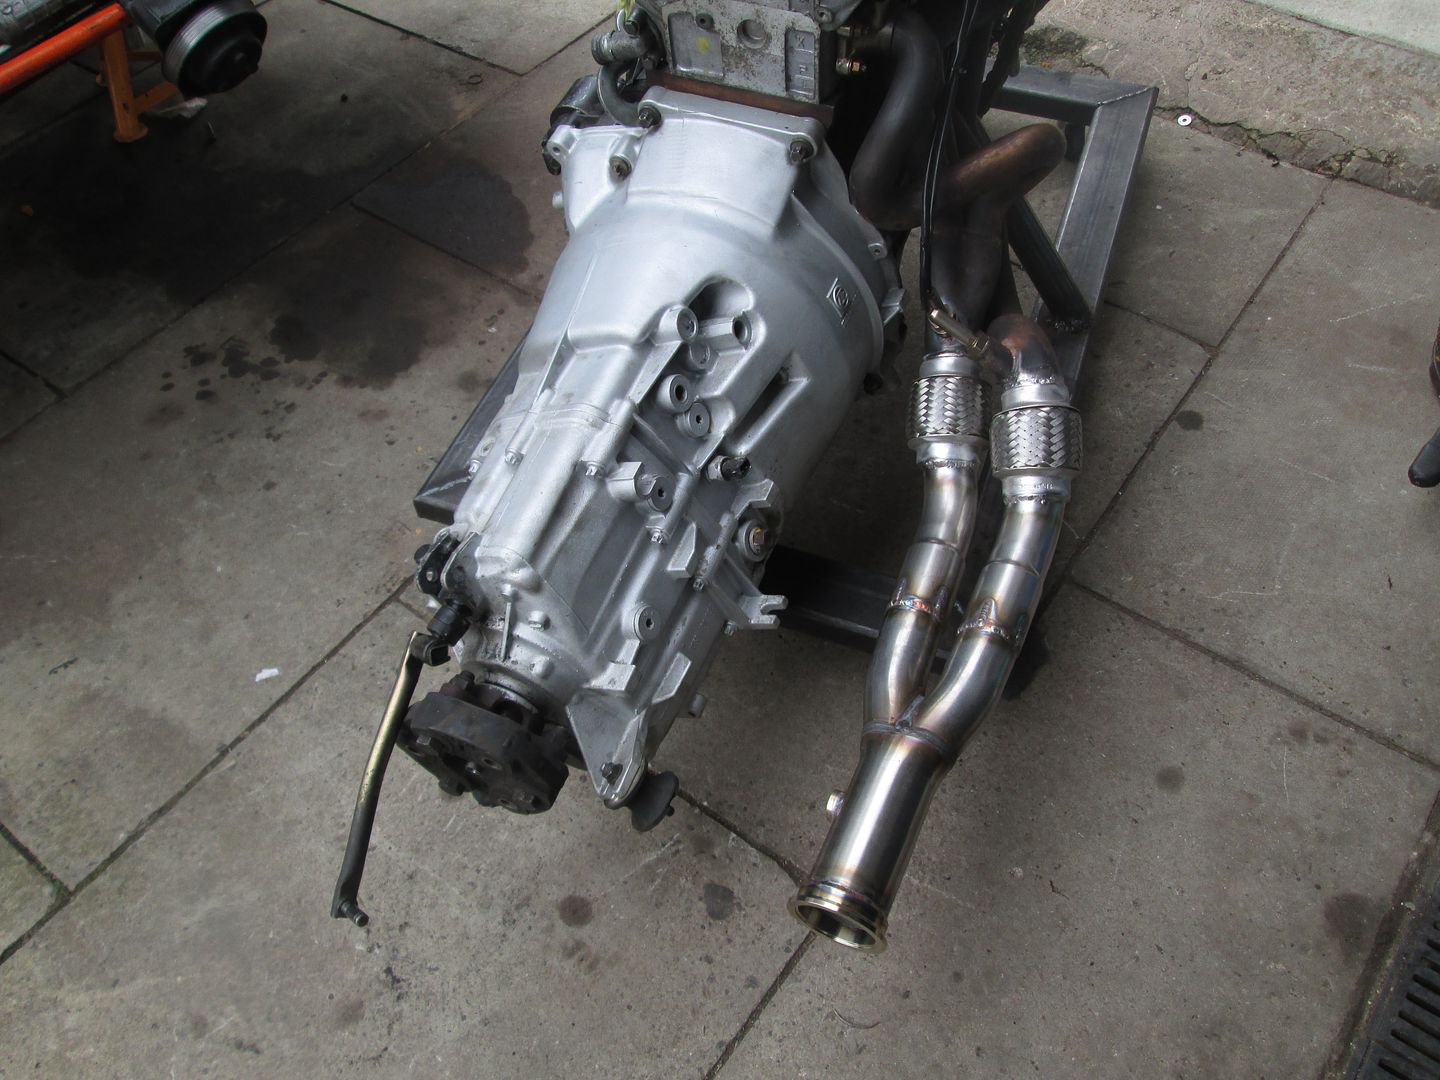
I wanted to sort the M3 exhaust manifolds out properly... as #1, I hate having old flanges that never join properly, #2, the weight of the standard exhaust system (albeit modified) is just a joke, and #3, the standard flexi was damaged and needed replacing. So the standard manifolds in standard form (M3 3.2 Evo, as they have the Lambda holes. The 3.0 does not)..
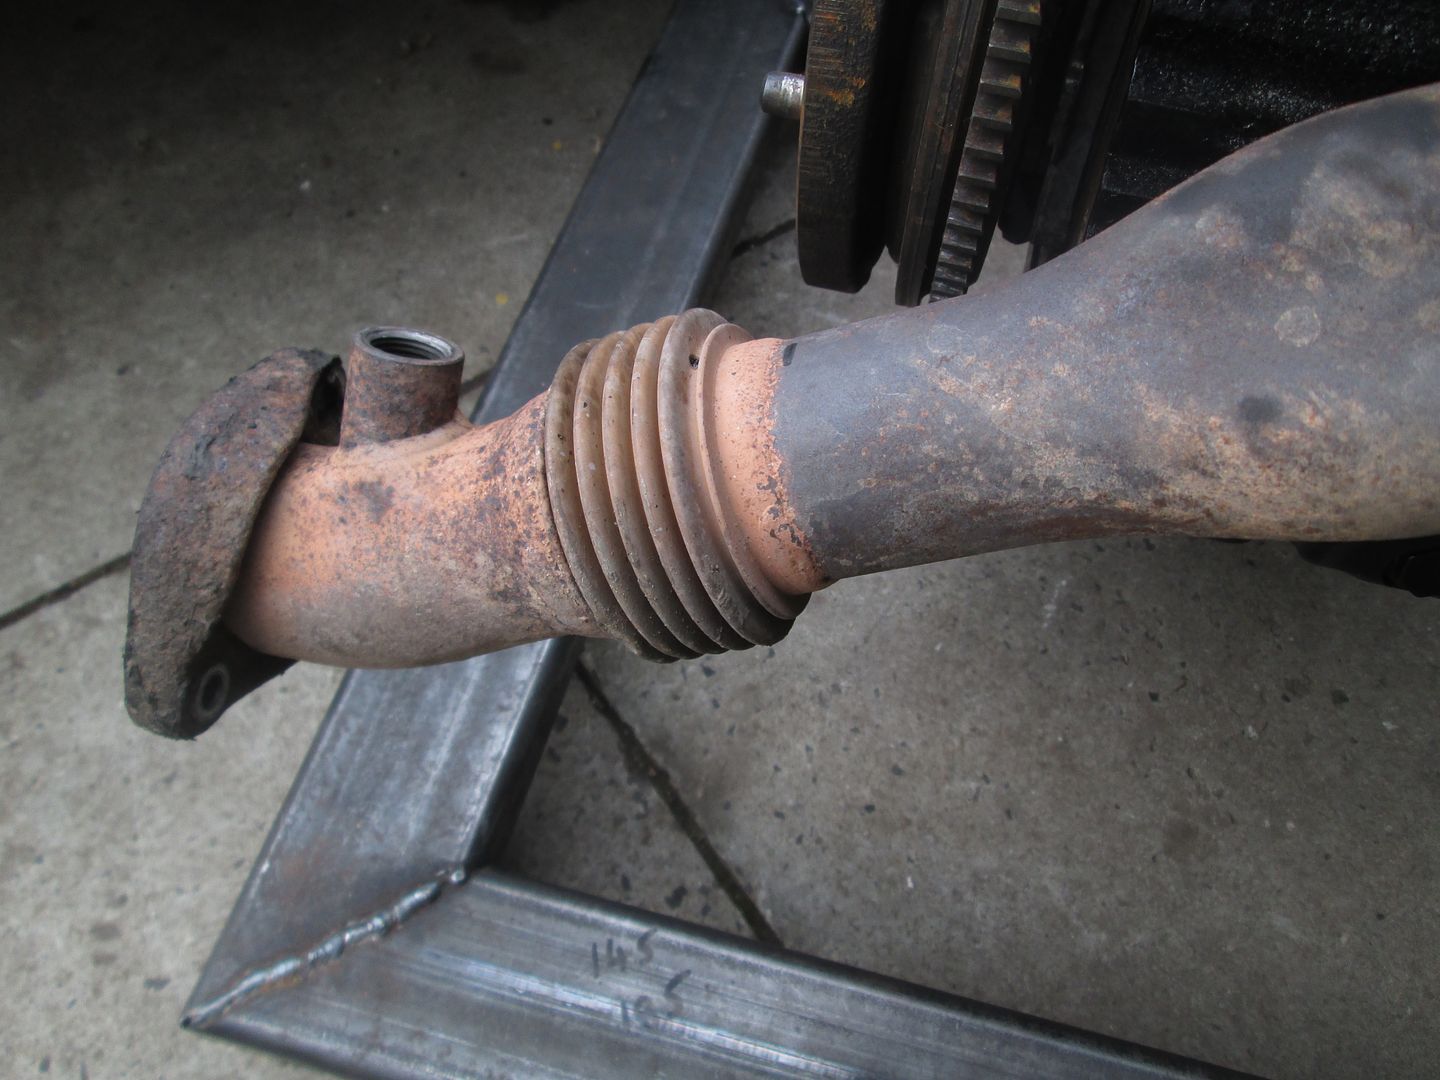
I wanted to have a flexi on each manifold instead, then bring the two pipes into one for simplicity and weight. Quite a common change in the US.
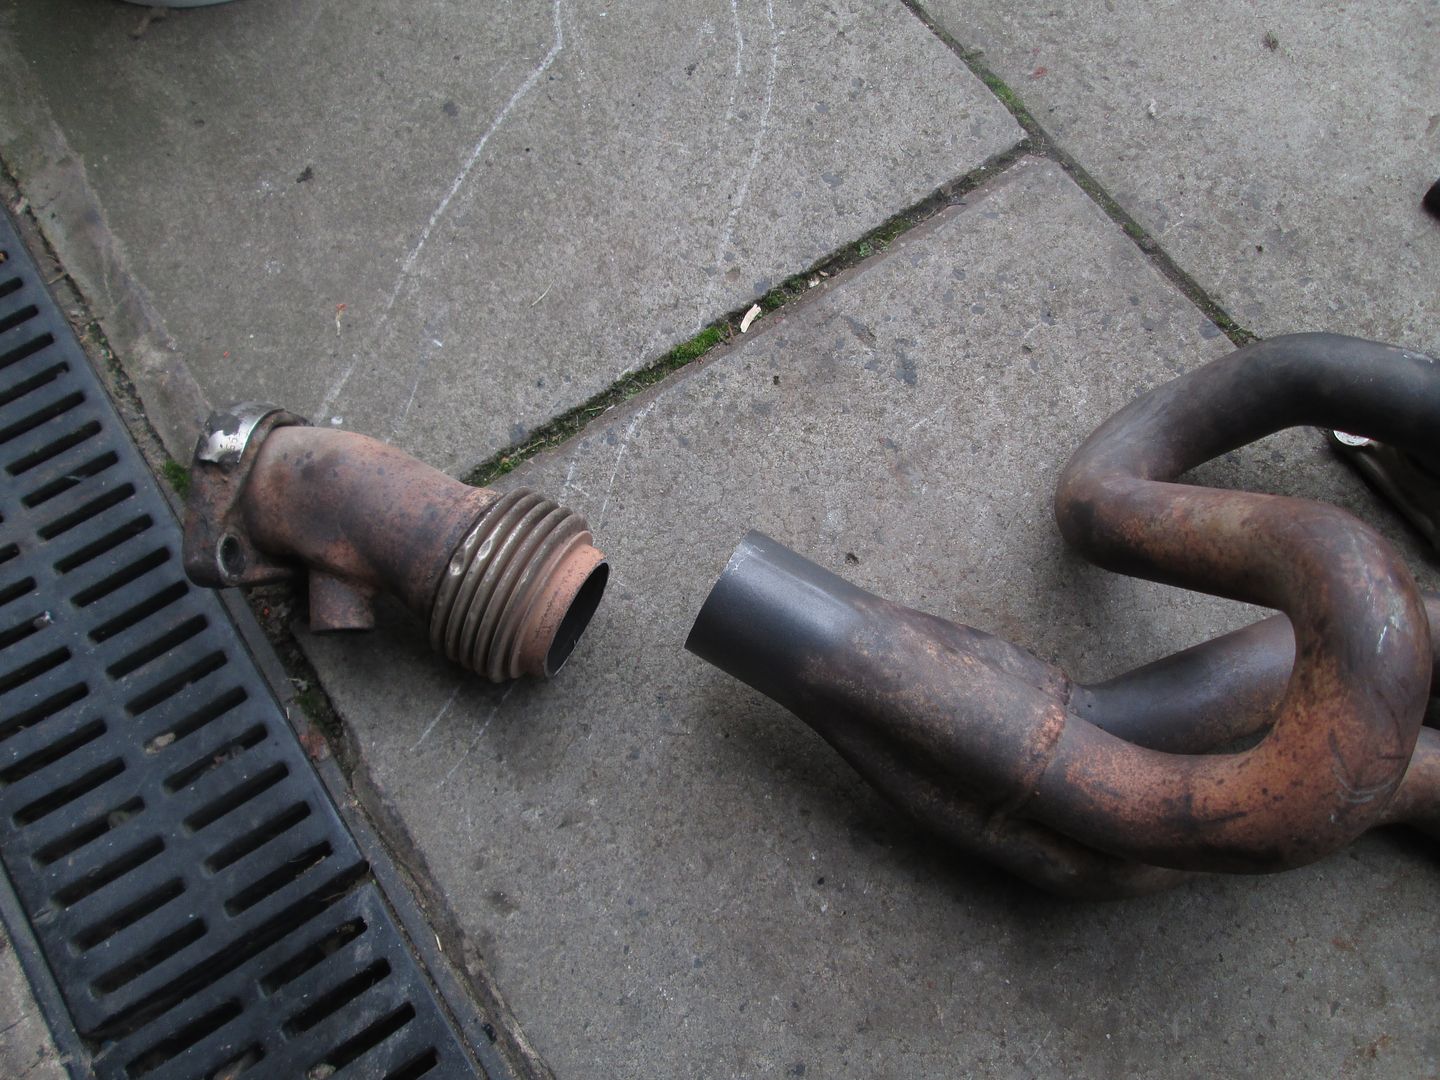
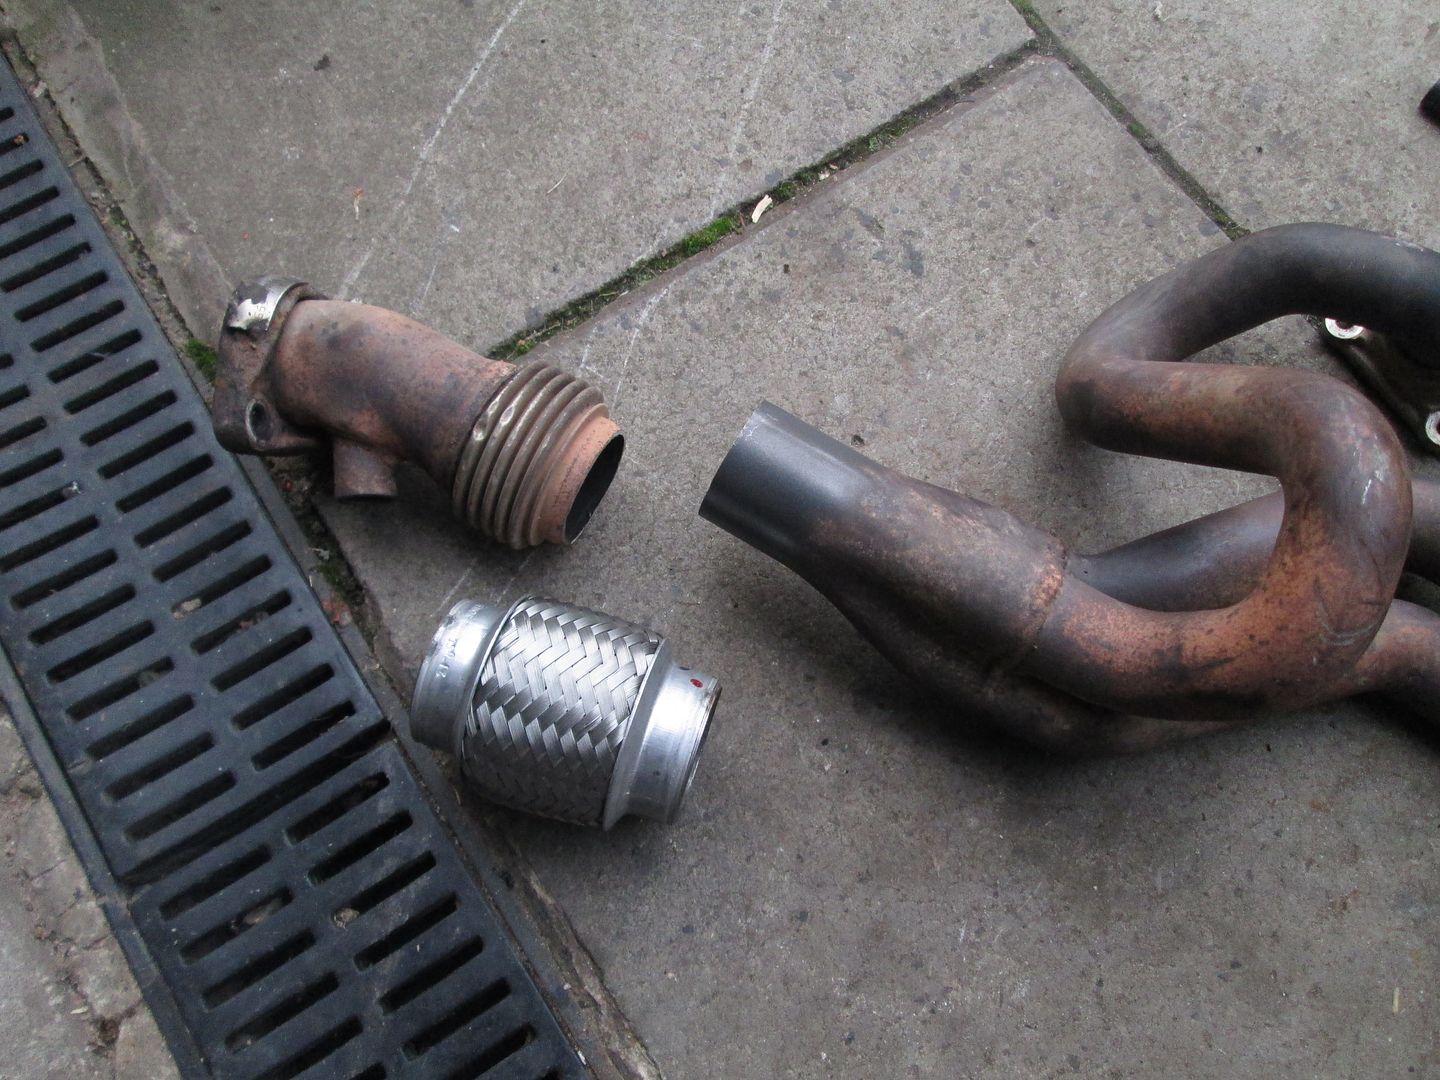
To get the fitment and clearance spot on, I mounted a scrap block/head in the car along with my spare gearbox, so I could easily move things about..
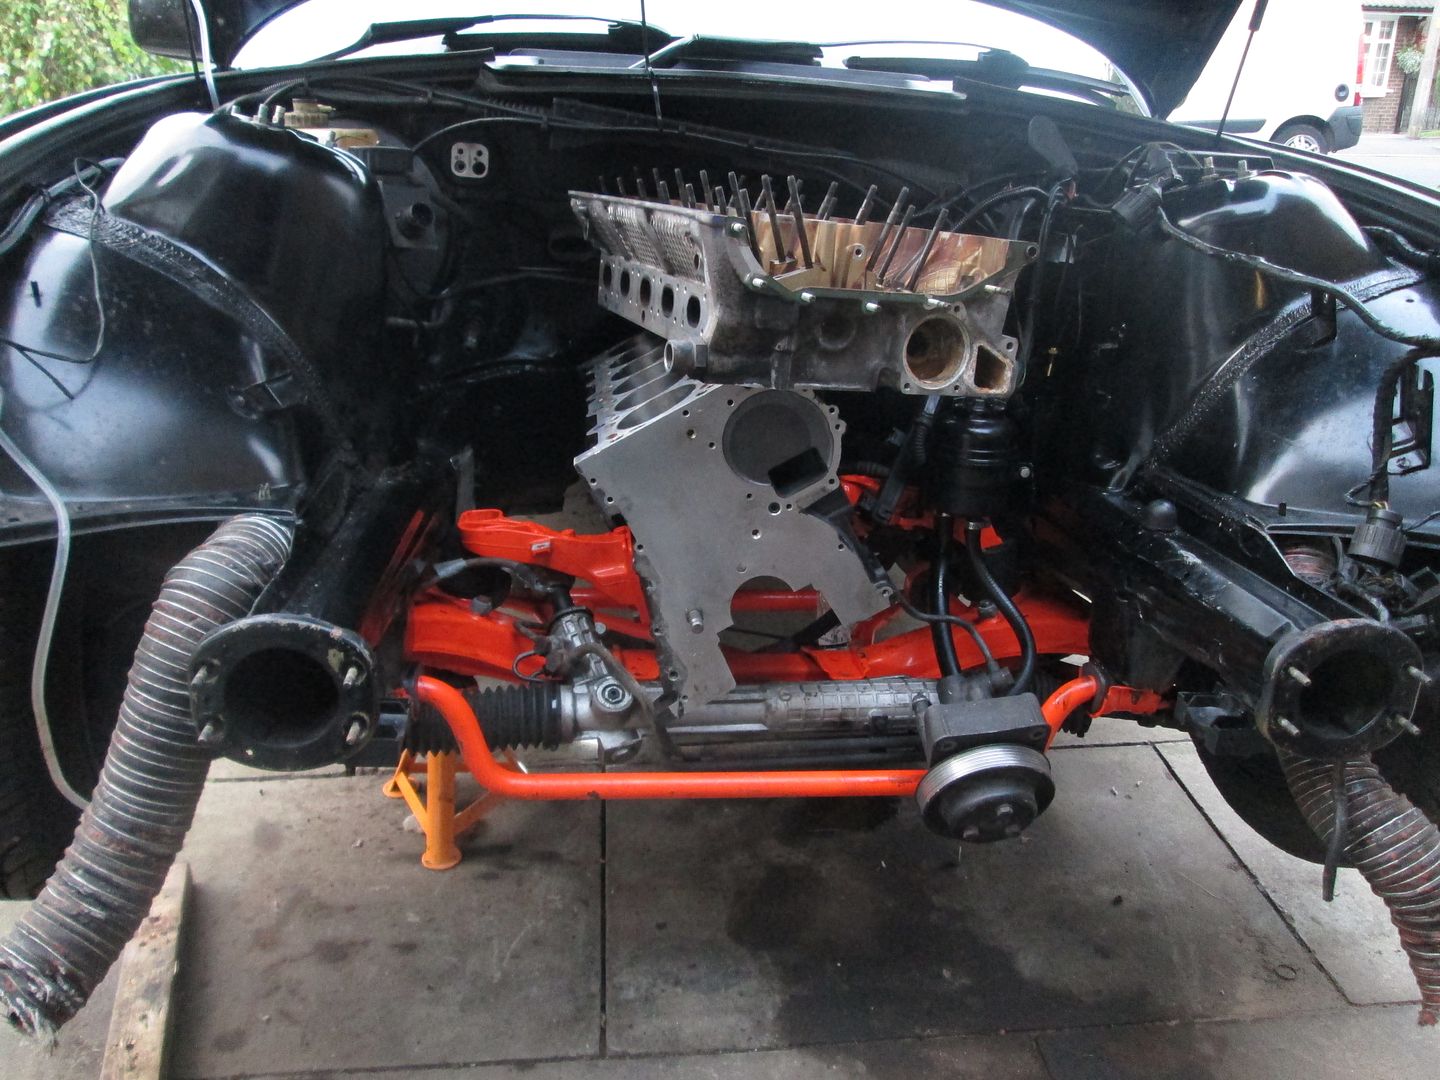
After bolting things to the mockup engine a few times, and some cutting/positioning, I had the flexis and bends in place. Using stainless only here..
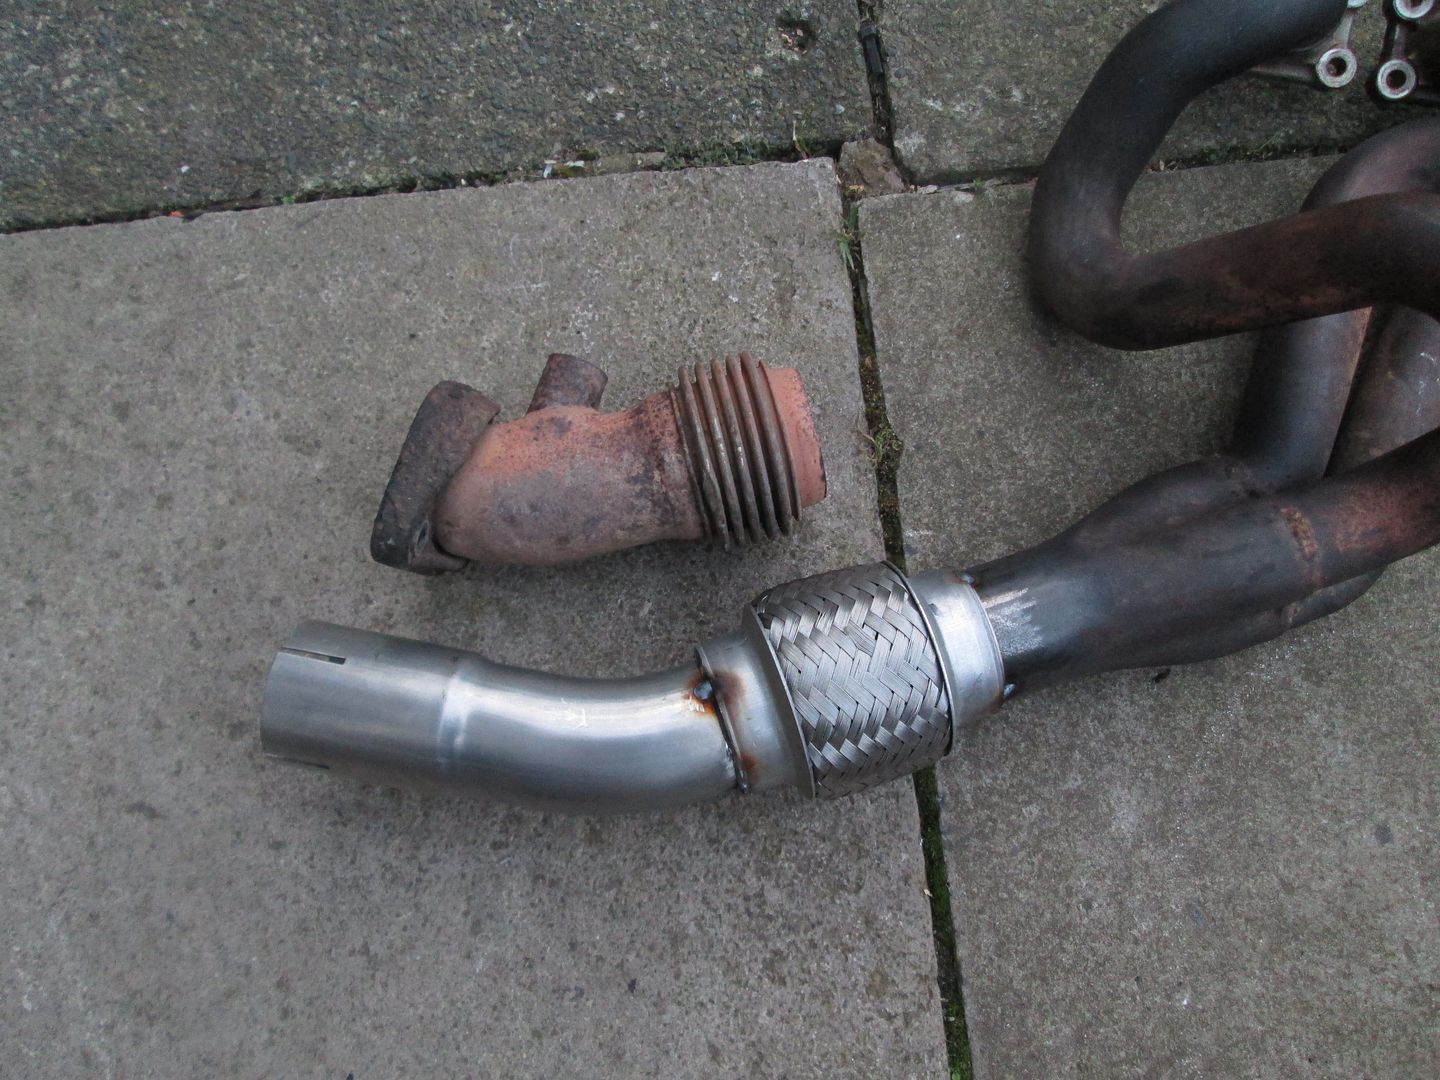
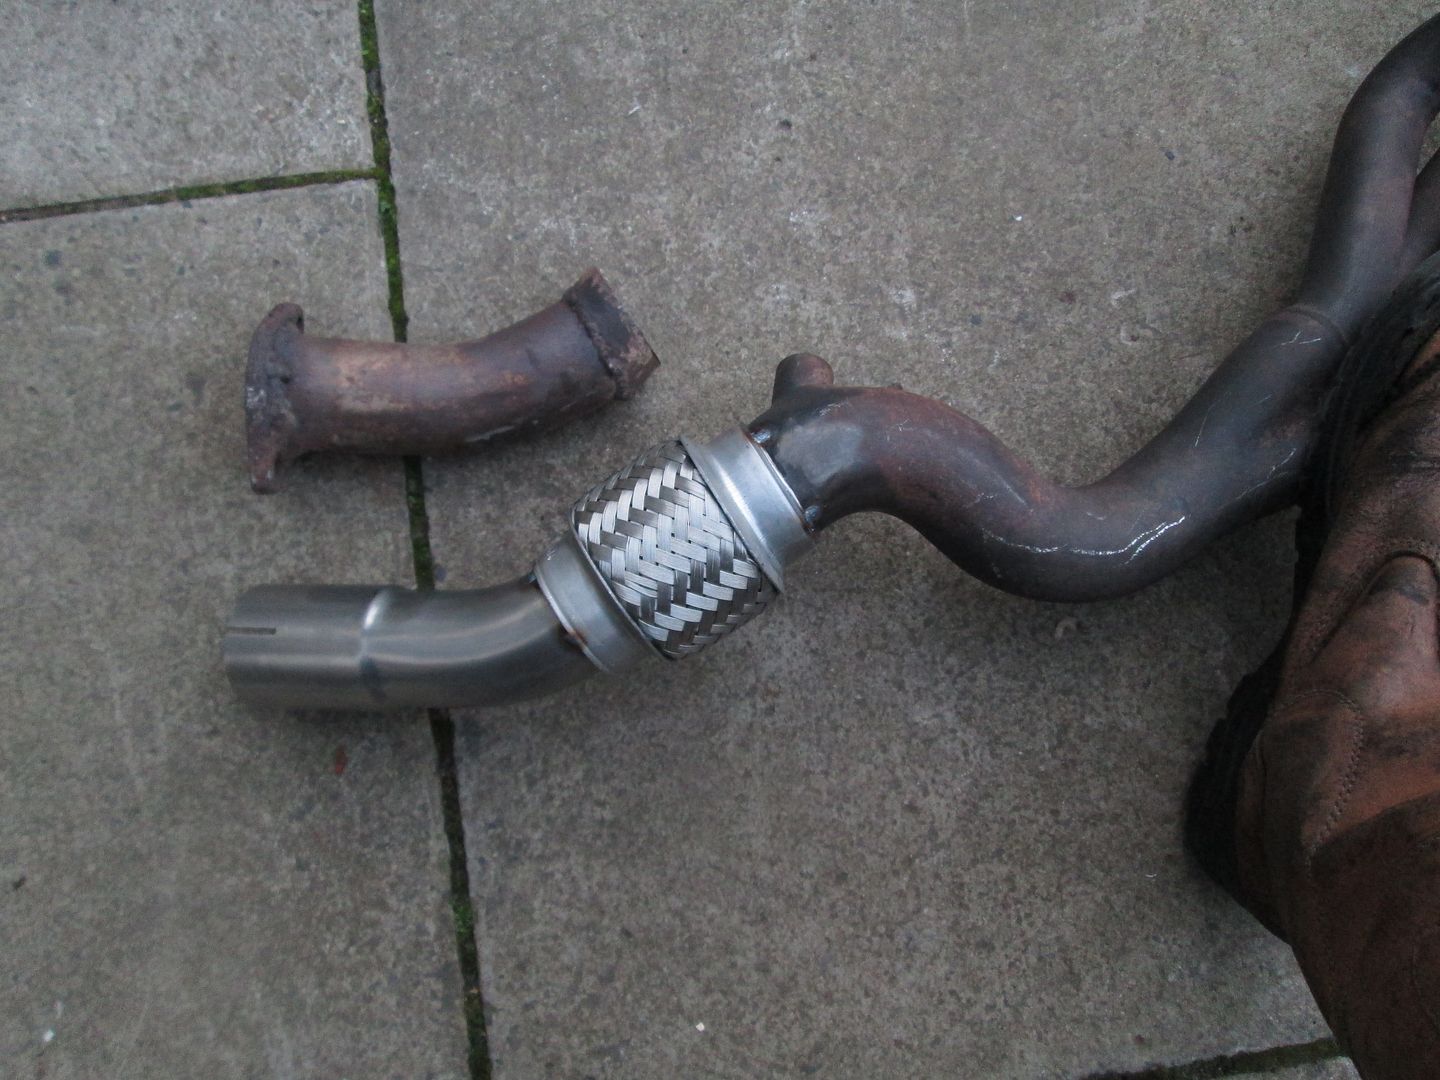
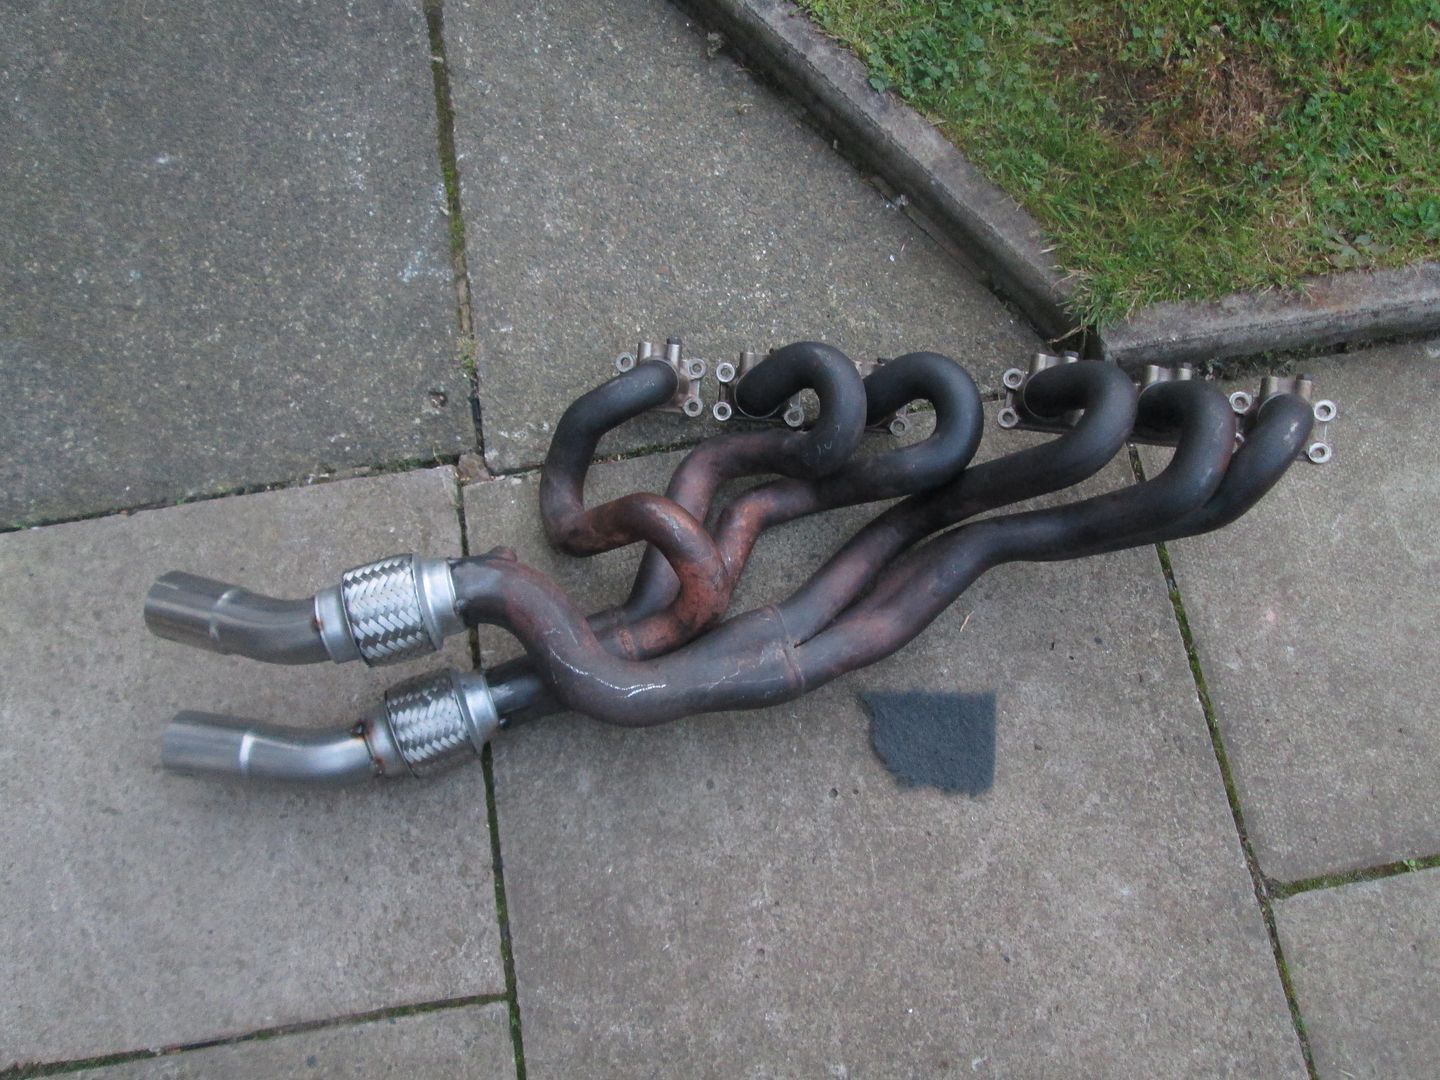
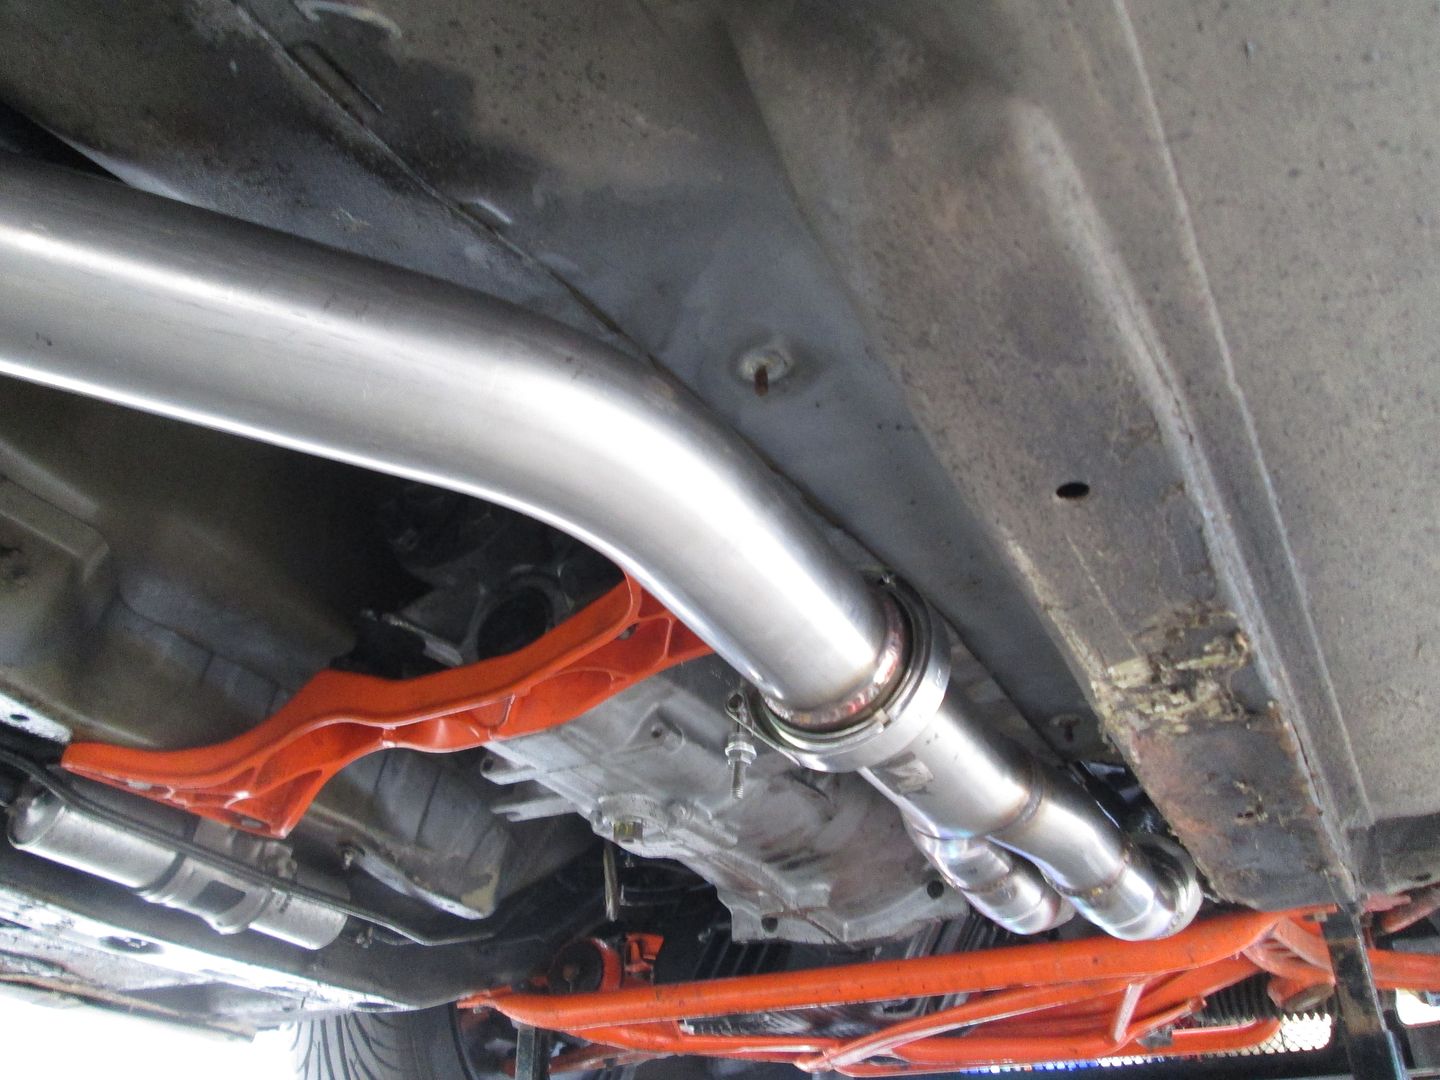
The final piece which brings the two manifolds into one pipe was then checked and marked up. V-band is going on the end to join the exhaust system rather than a normal flange.
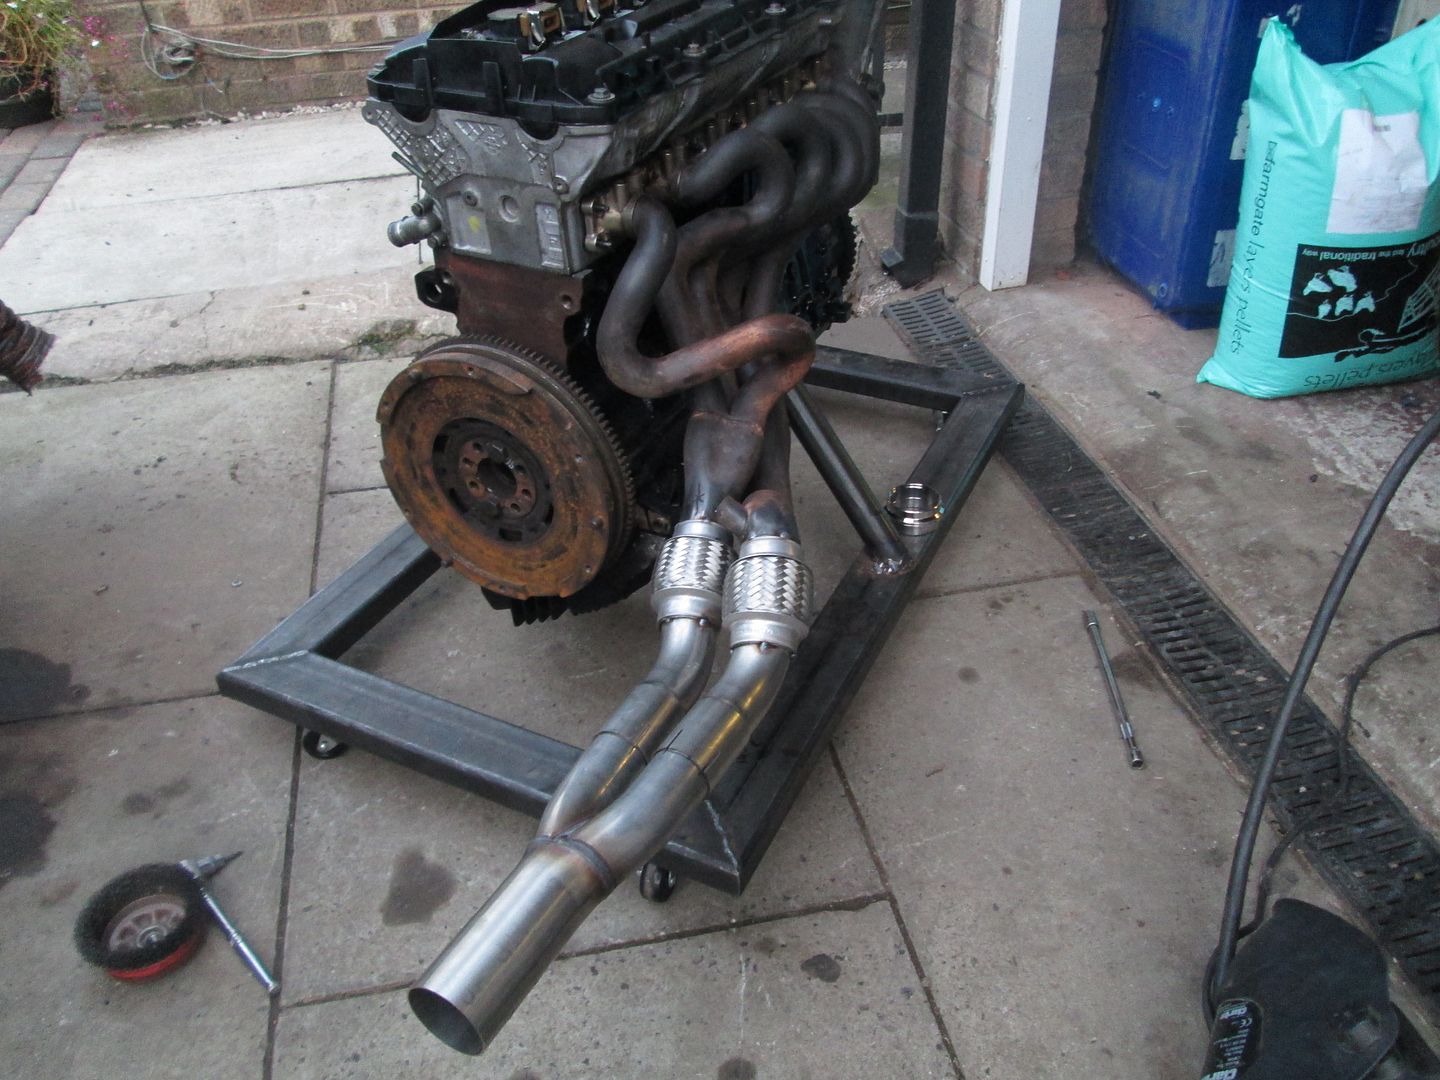
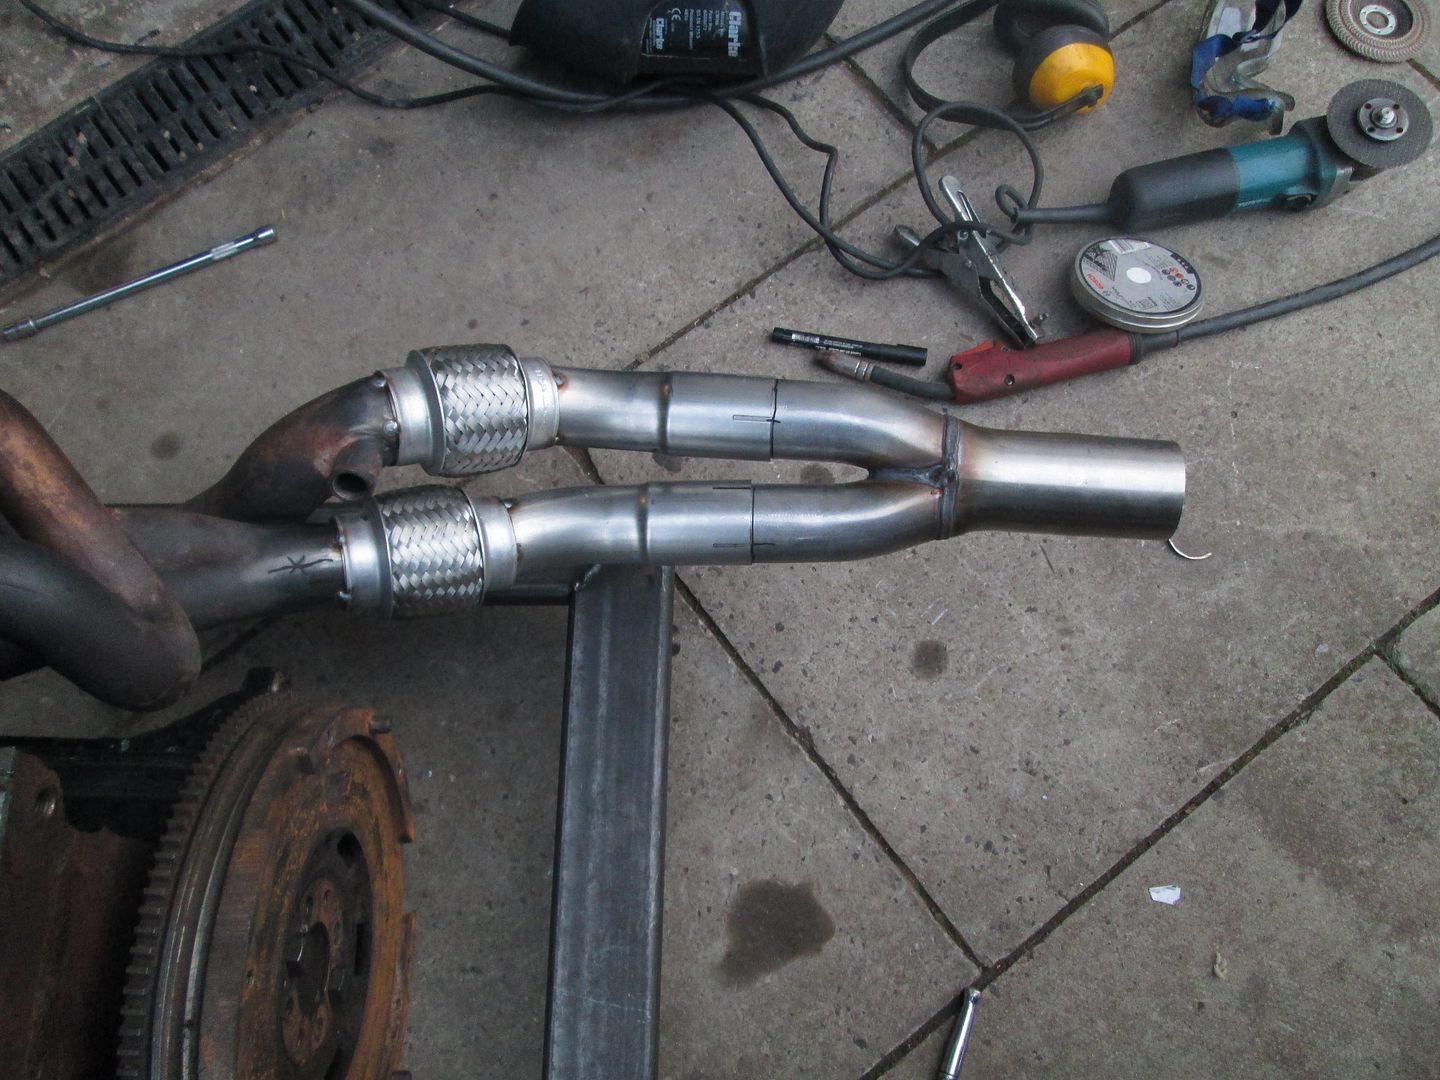
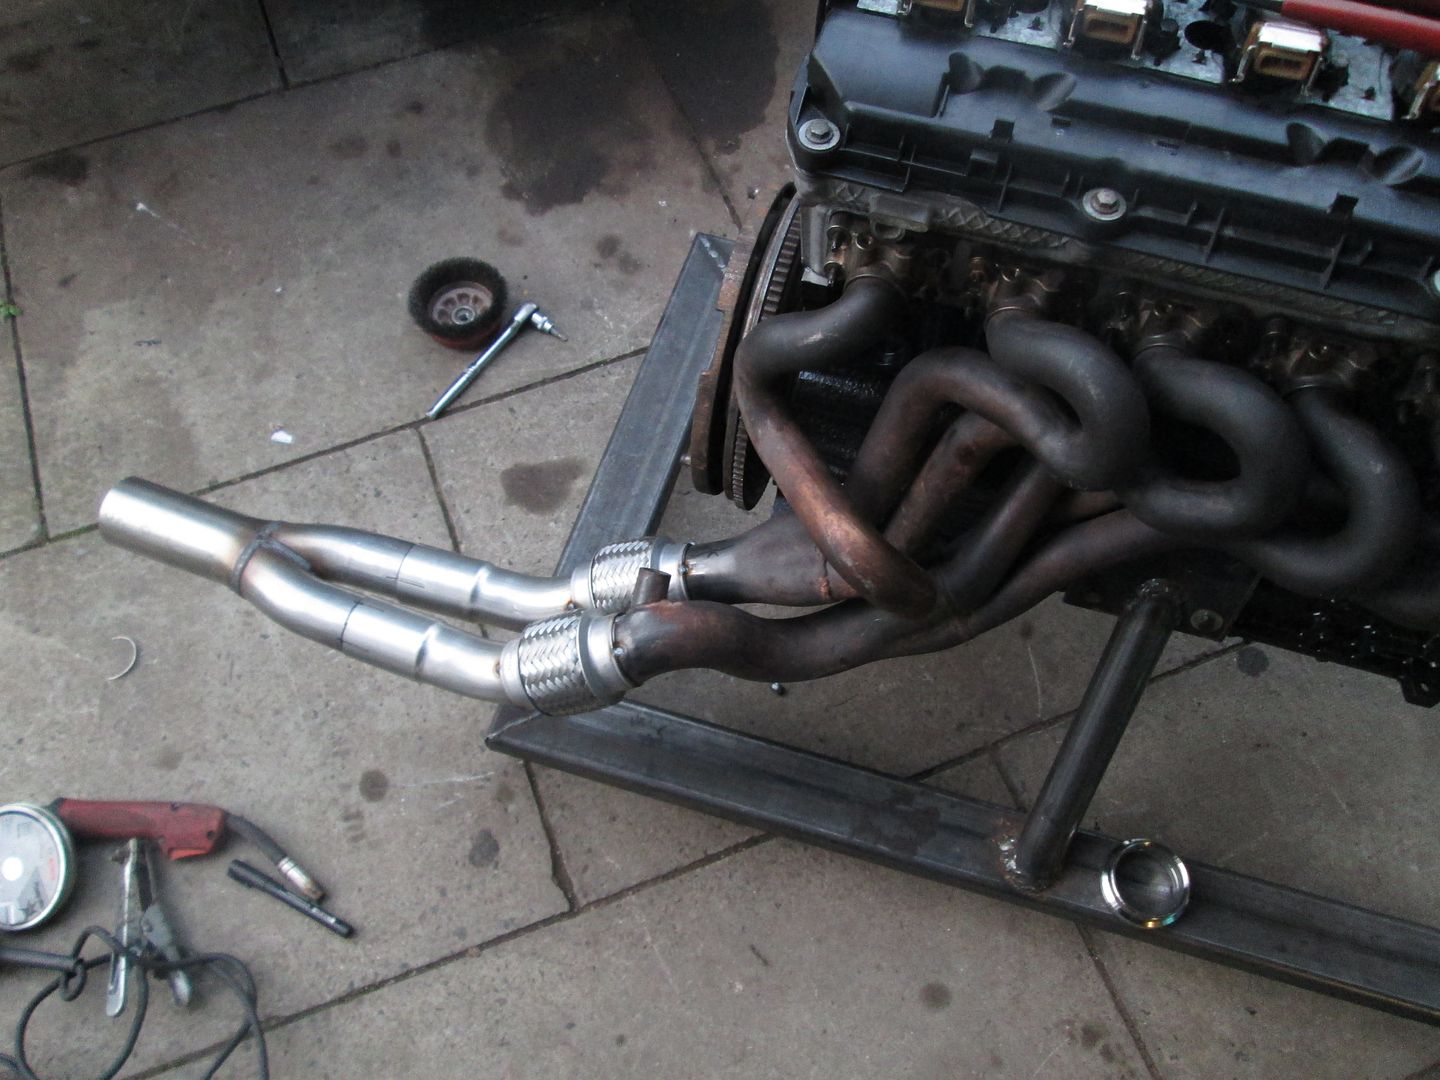
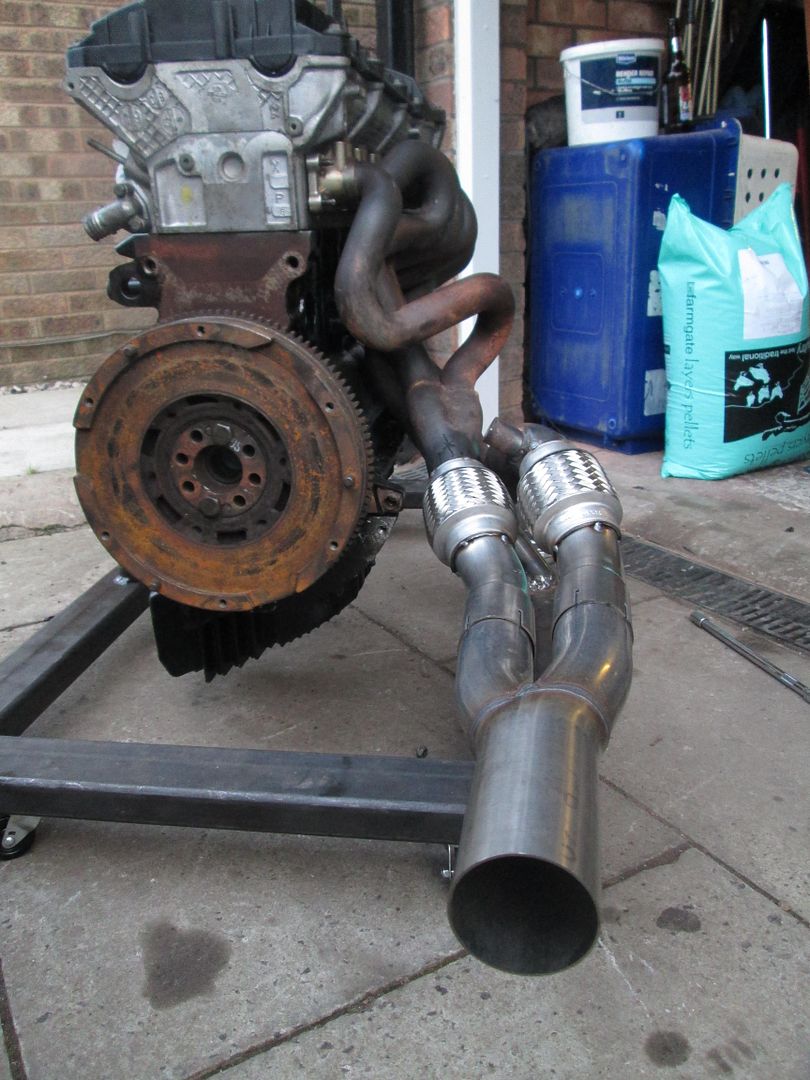
(Ignore the old flywheel, its simply used for timing the engine up)
Once I was happy with the fitment after a few more tests, I took the lot to be TIG'd by a friend. We also added the missing lambda boss back in, along with an additional one downstream for a wideband sensor.
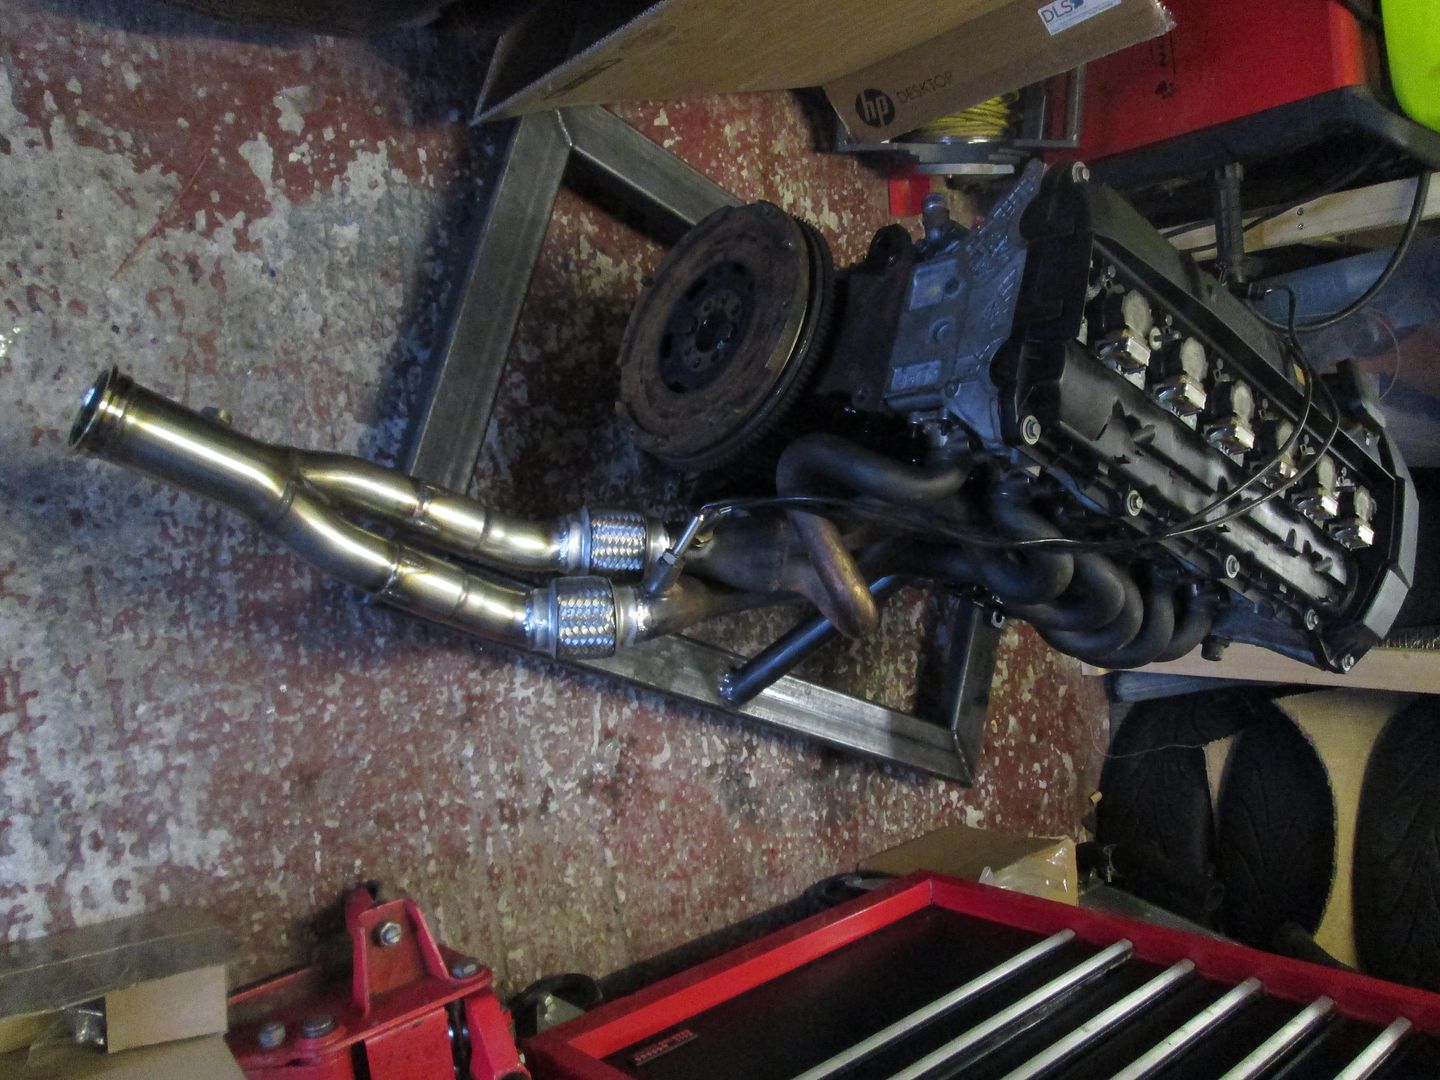
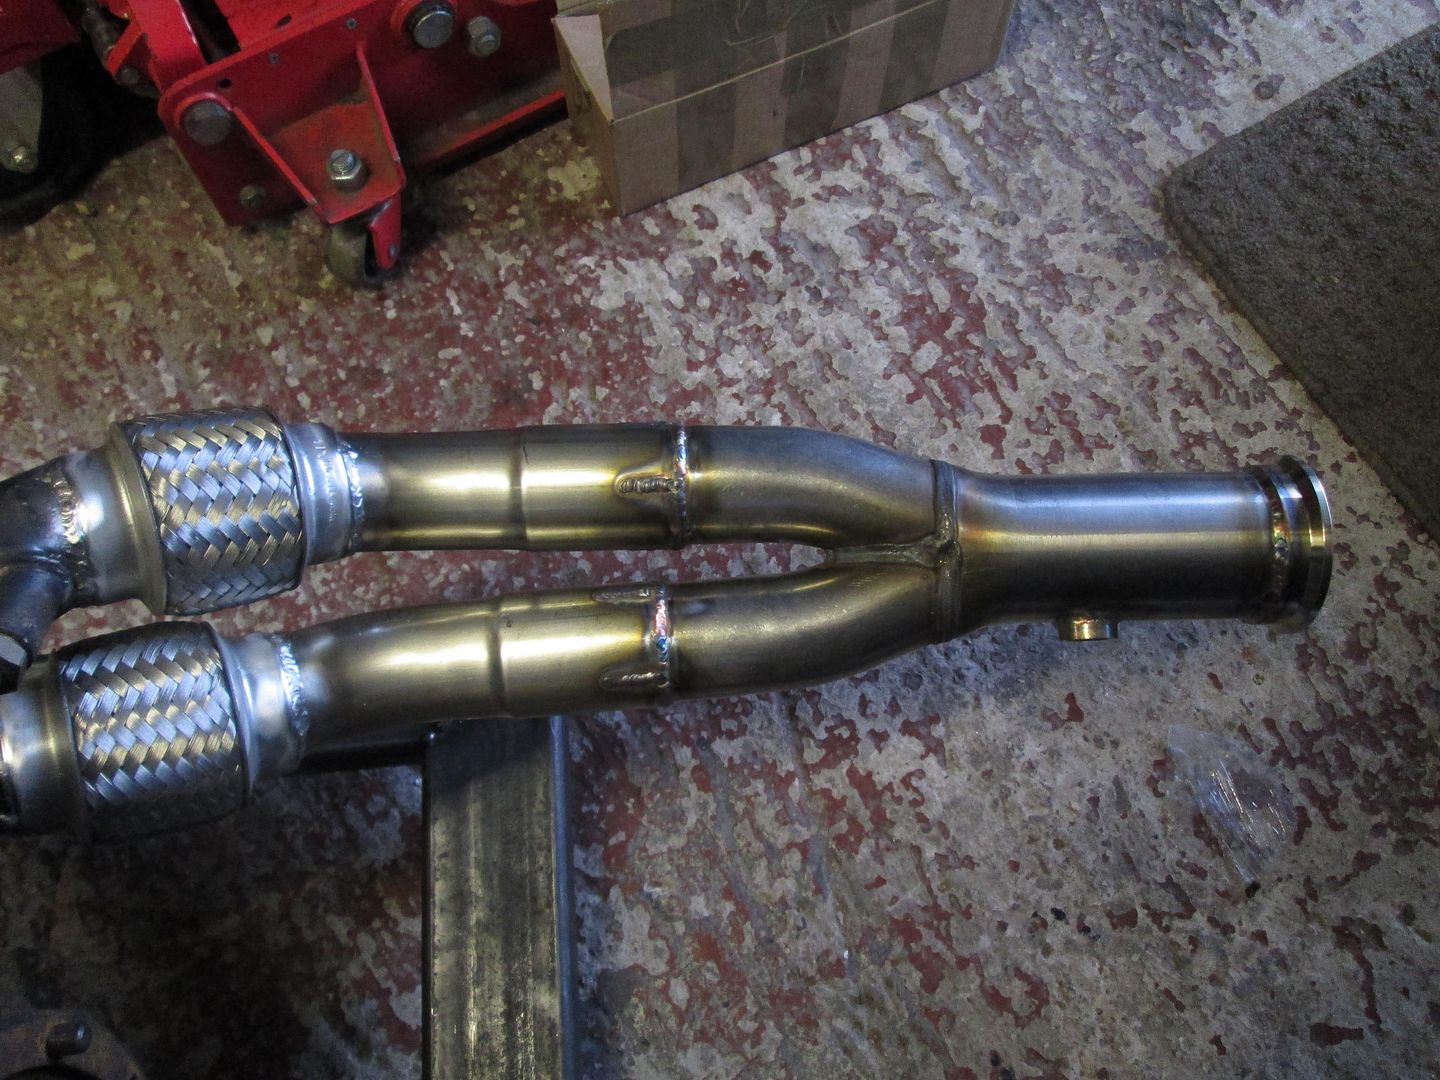
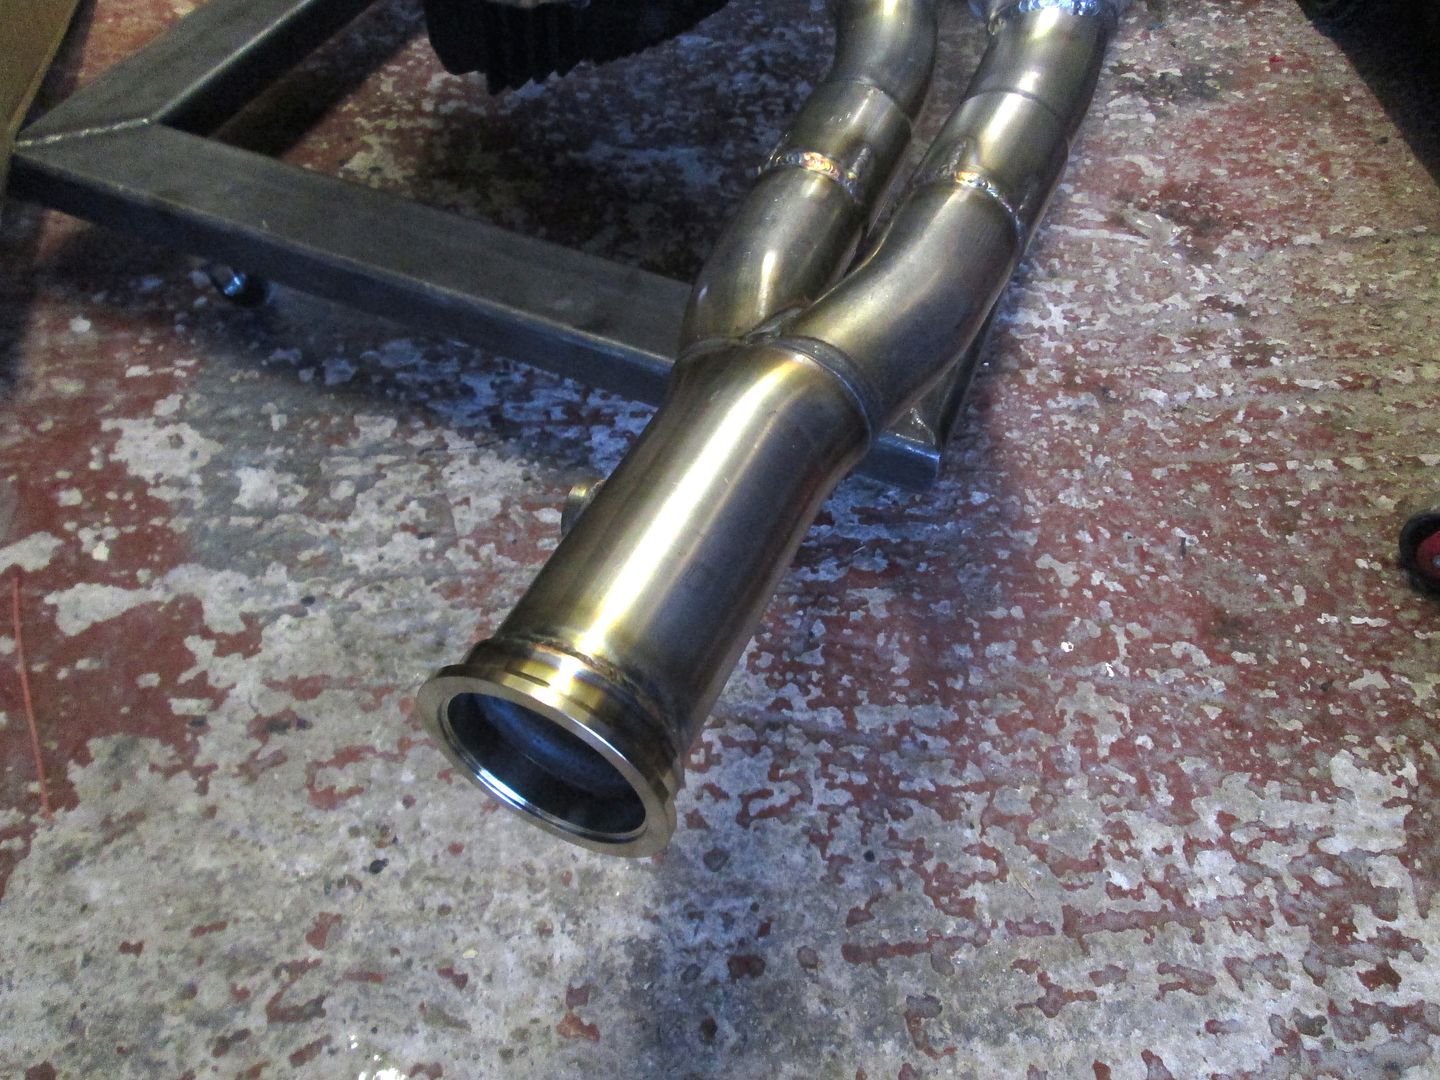
The M20 flywheel and clutch setup were then re-fitted, and the gearbox put onto the new 3.0L. I also cut a small section out of the gearbox bell housing to aid clearance on the rear manifold - in the past this has just sat up against the gearbox, but didn't want to risk putting too much stress on it and having issues with cracks in the future. Im assuming this is because they are 3.2 manifolds which use the 6 speed box and probably are cast to miss this.
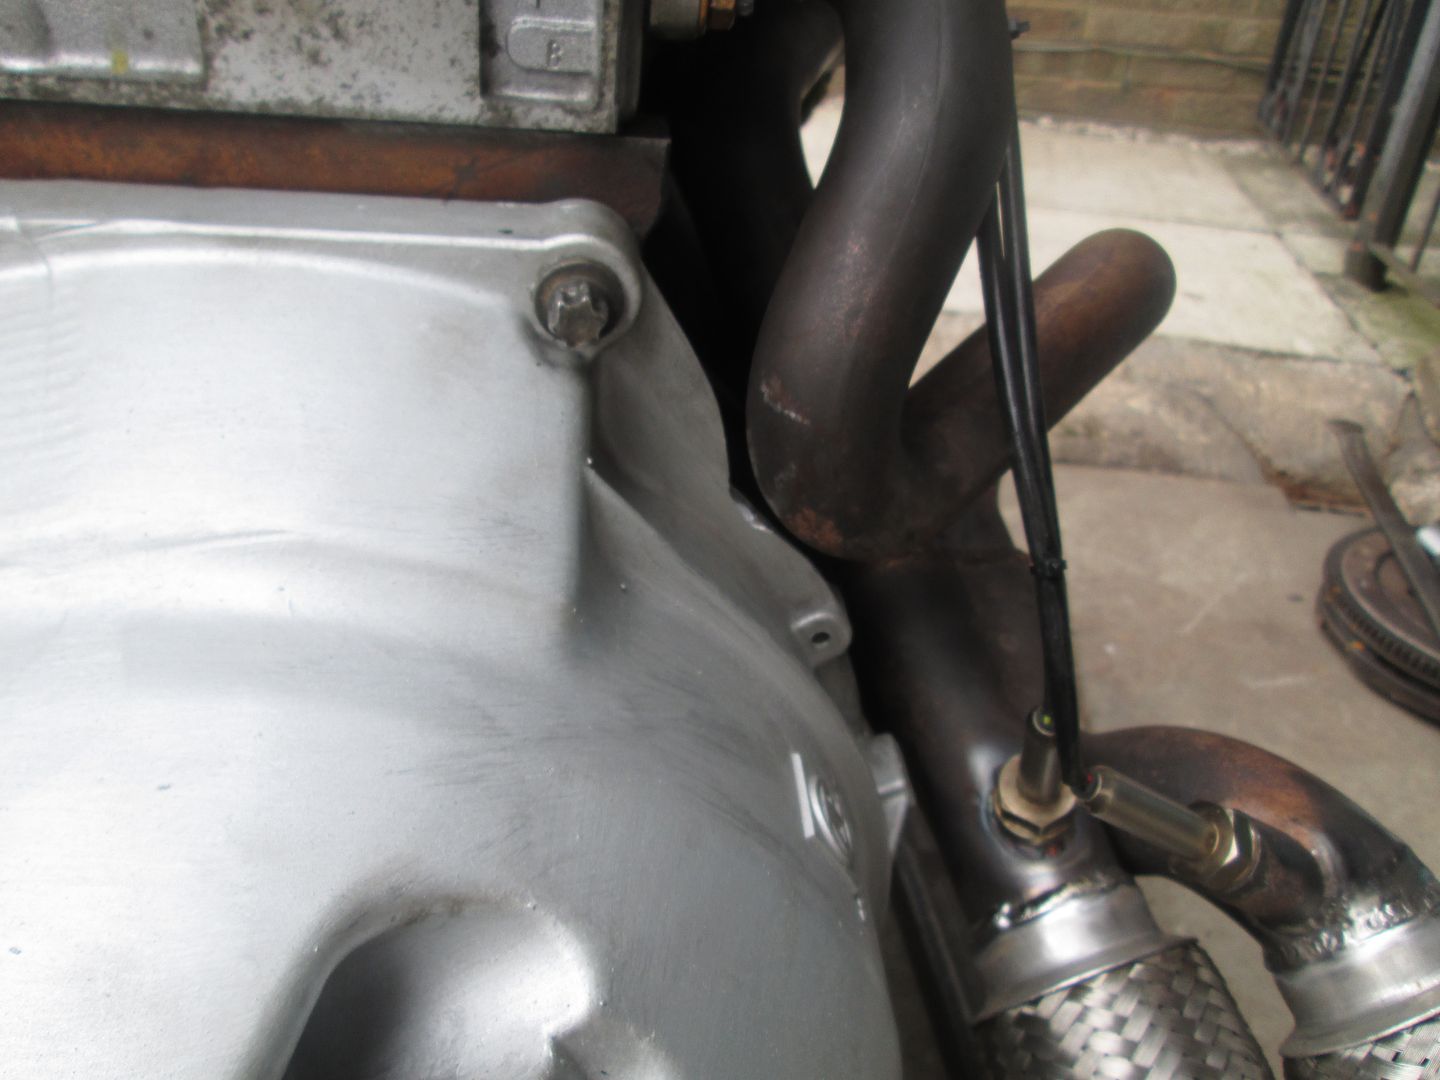
Fitted the mounts and dropped it in. Very tight going in now with the manifold/collector being longer than it was, but going slow enough it did go in fine..
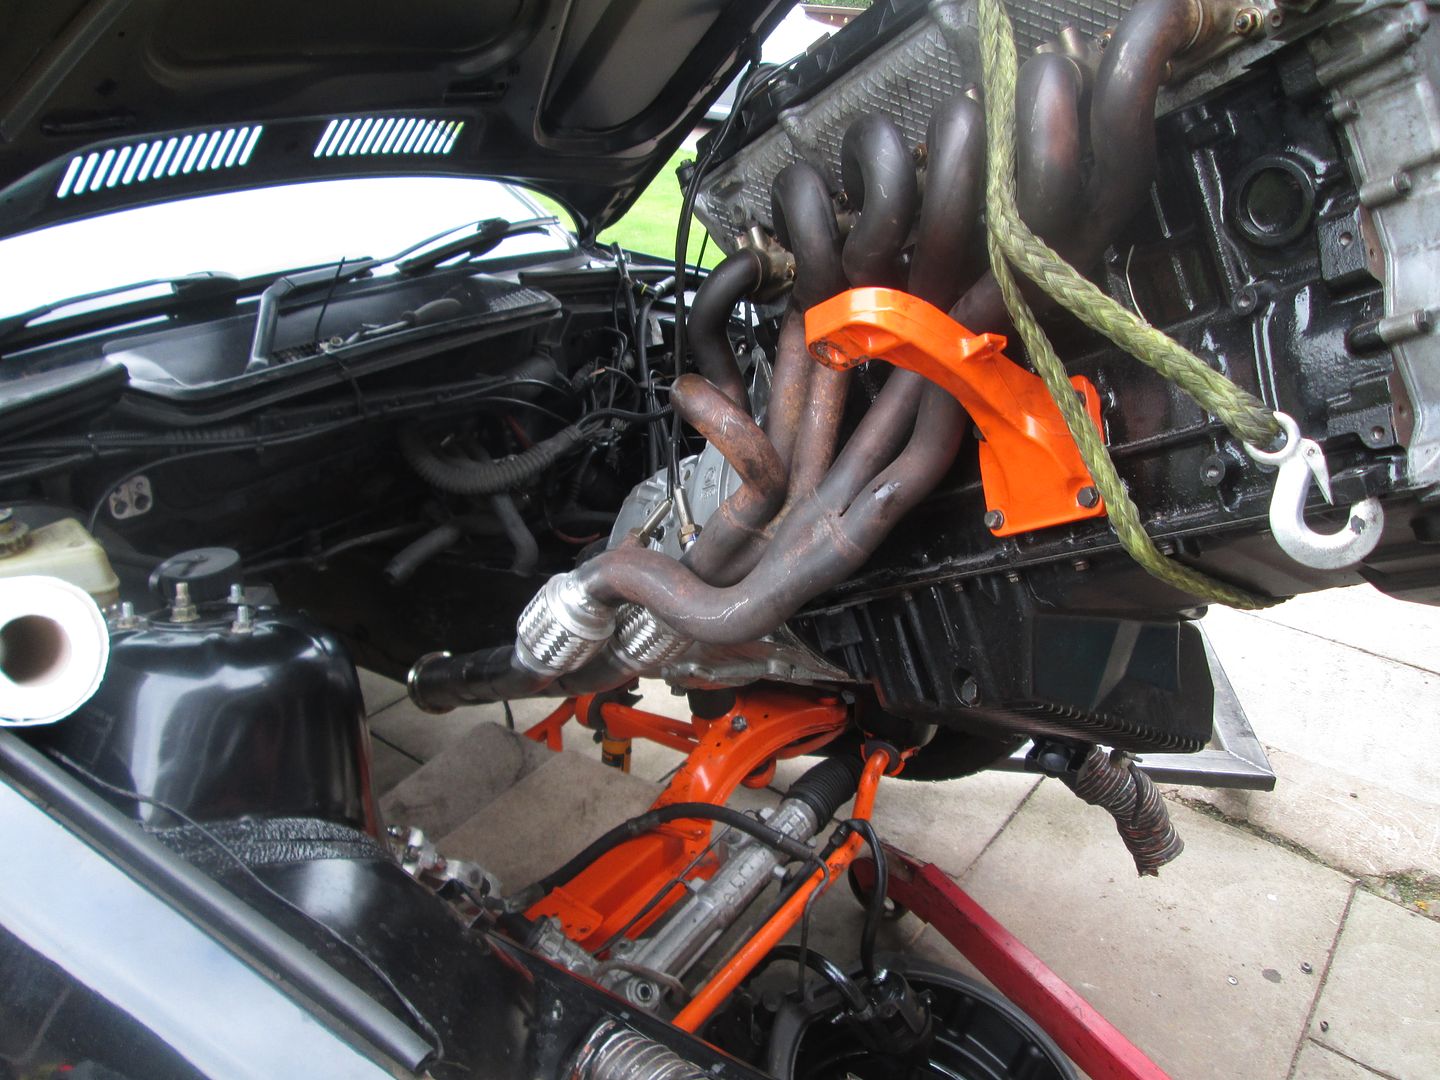
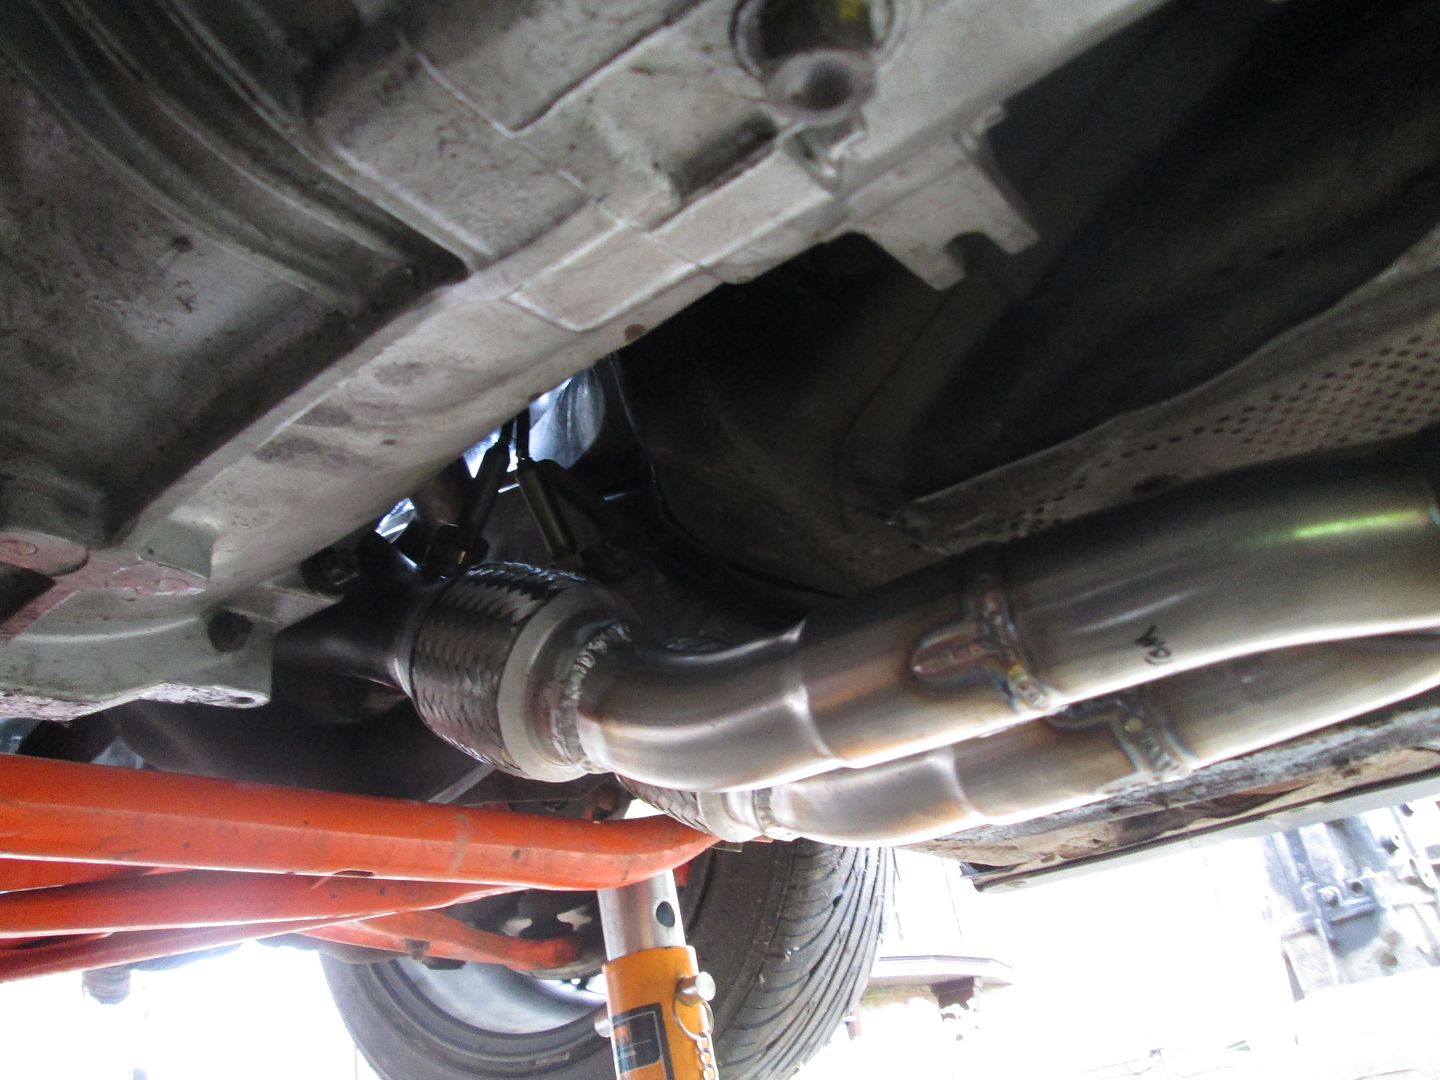
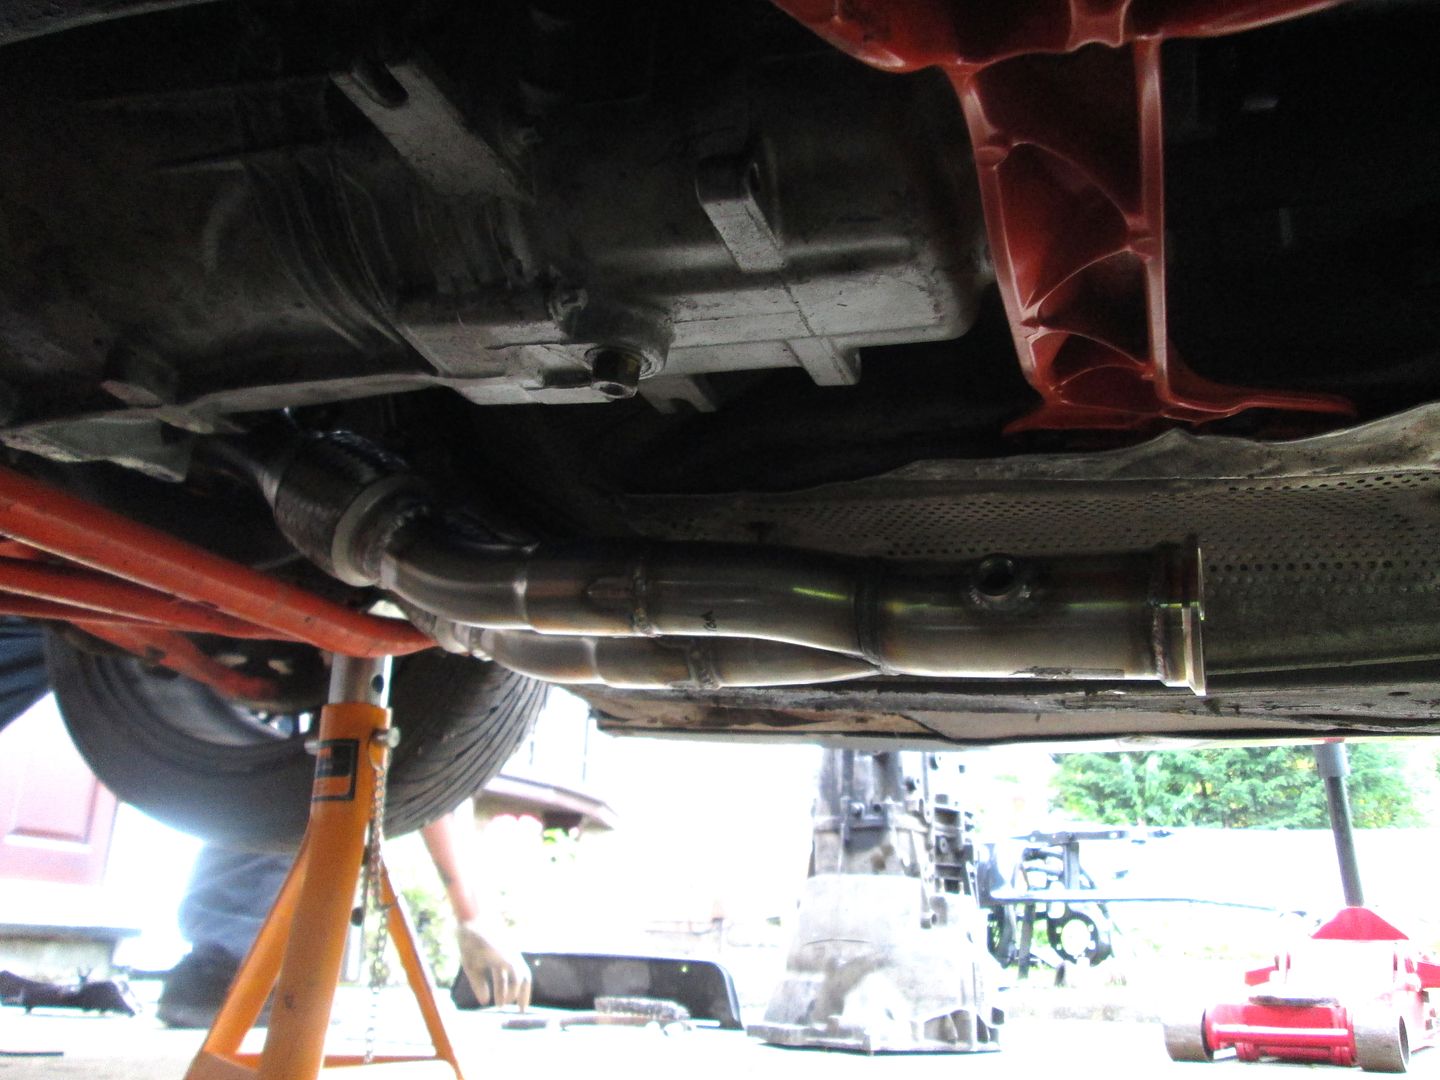
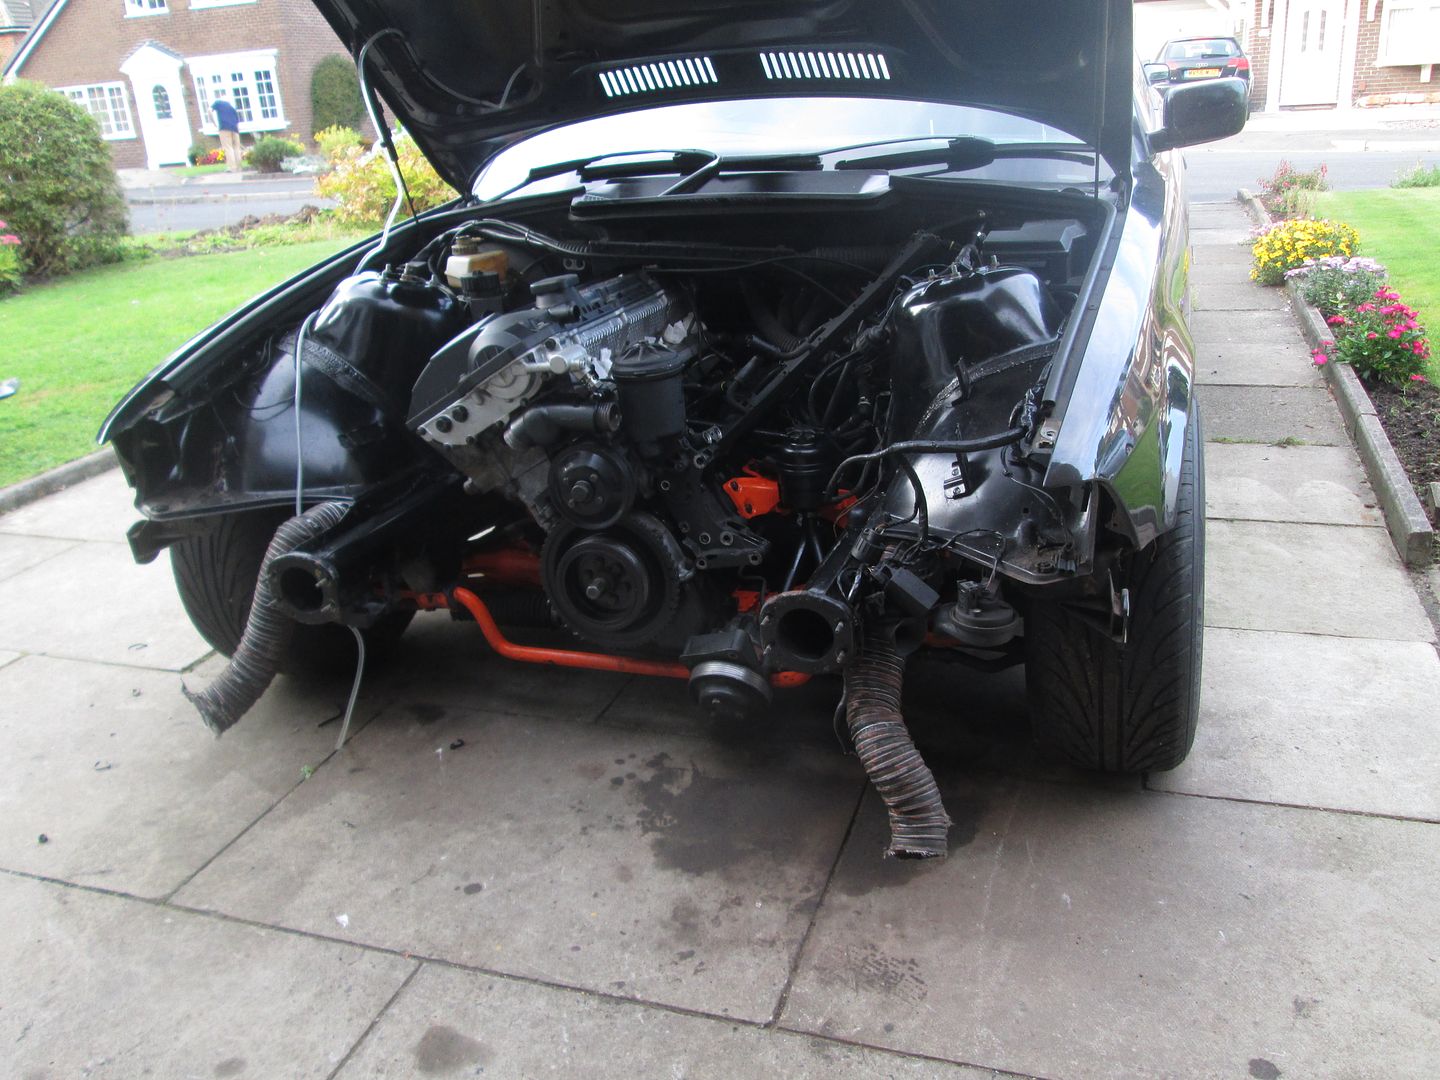
Originally I was going to take it somewhere to have an exhaust made, then decided I could probably do it myself with better quality components for half the cost. I had a few recommendations on local places, but either they were too busy or far too expensive in the end.
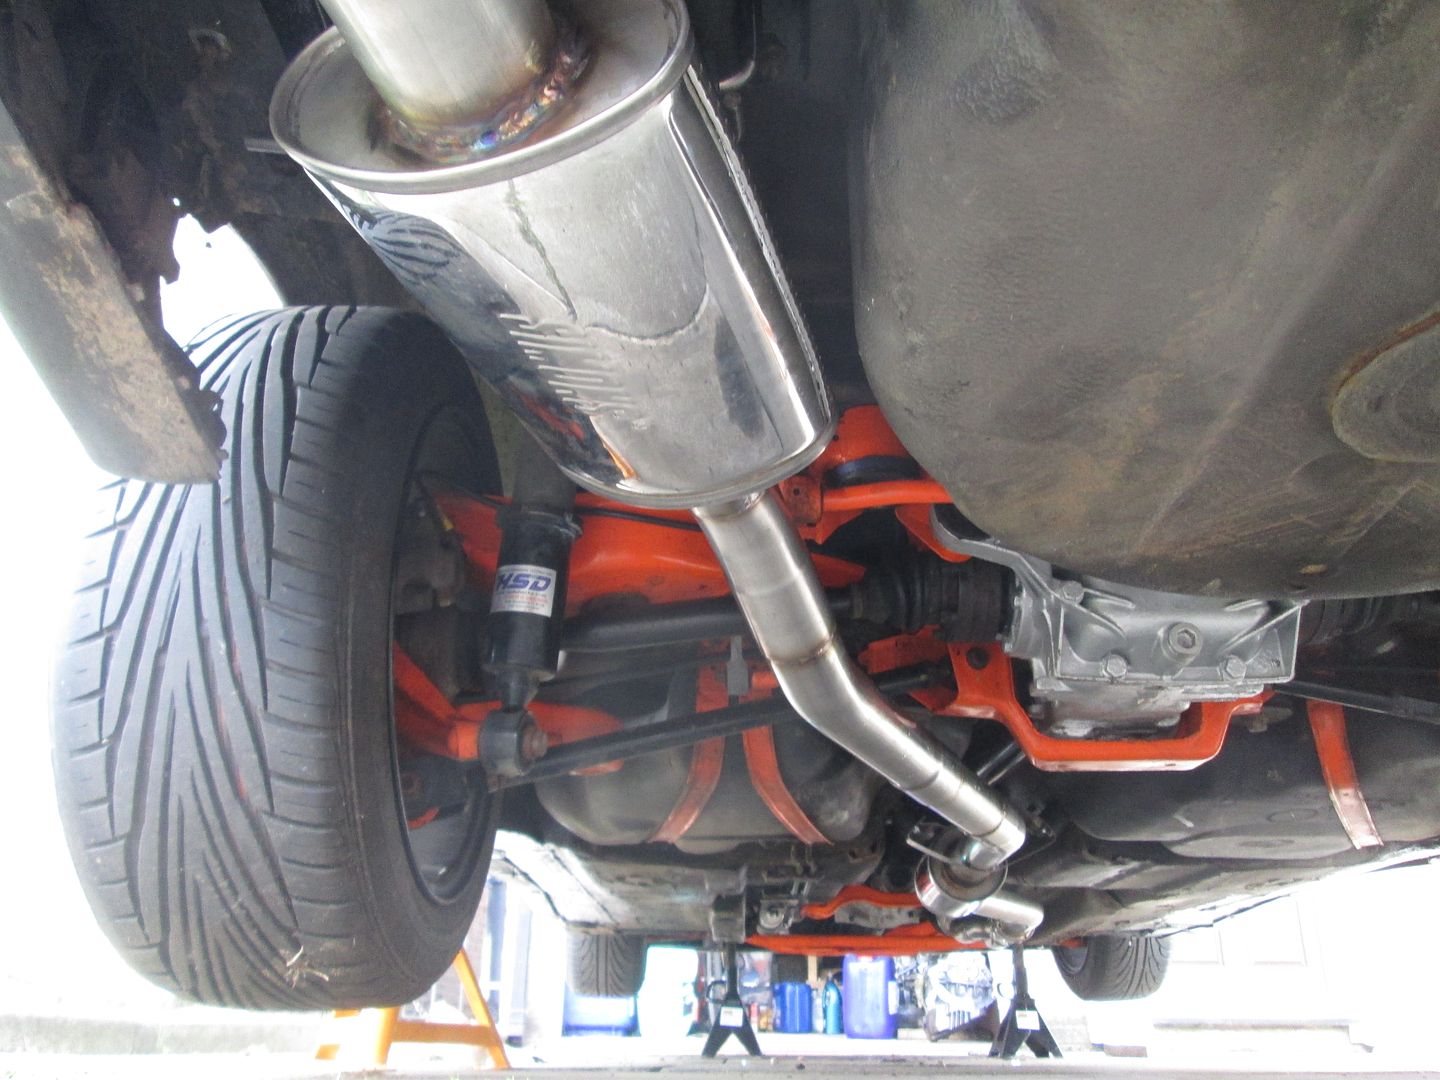
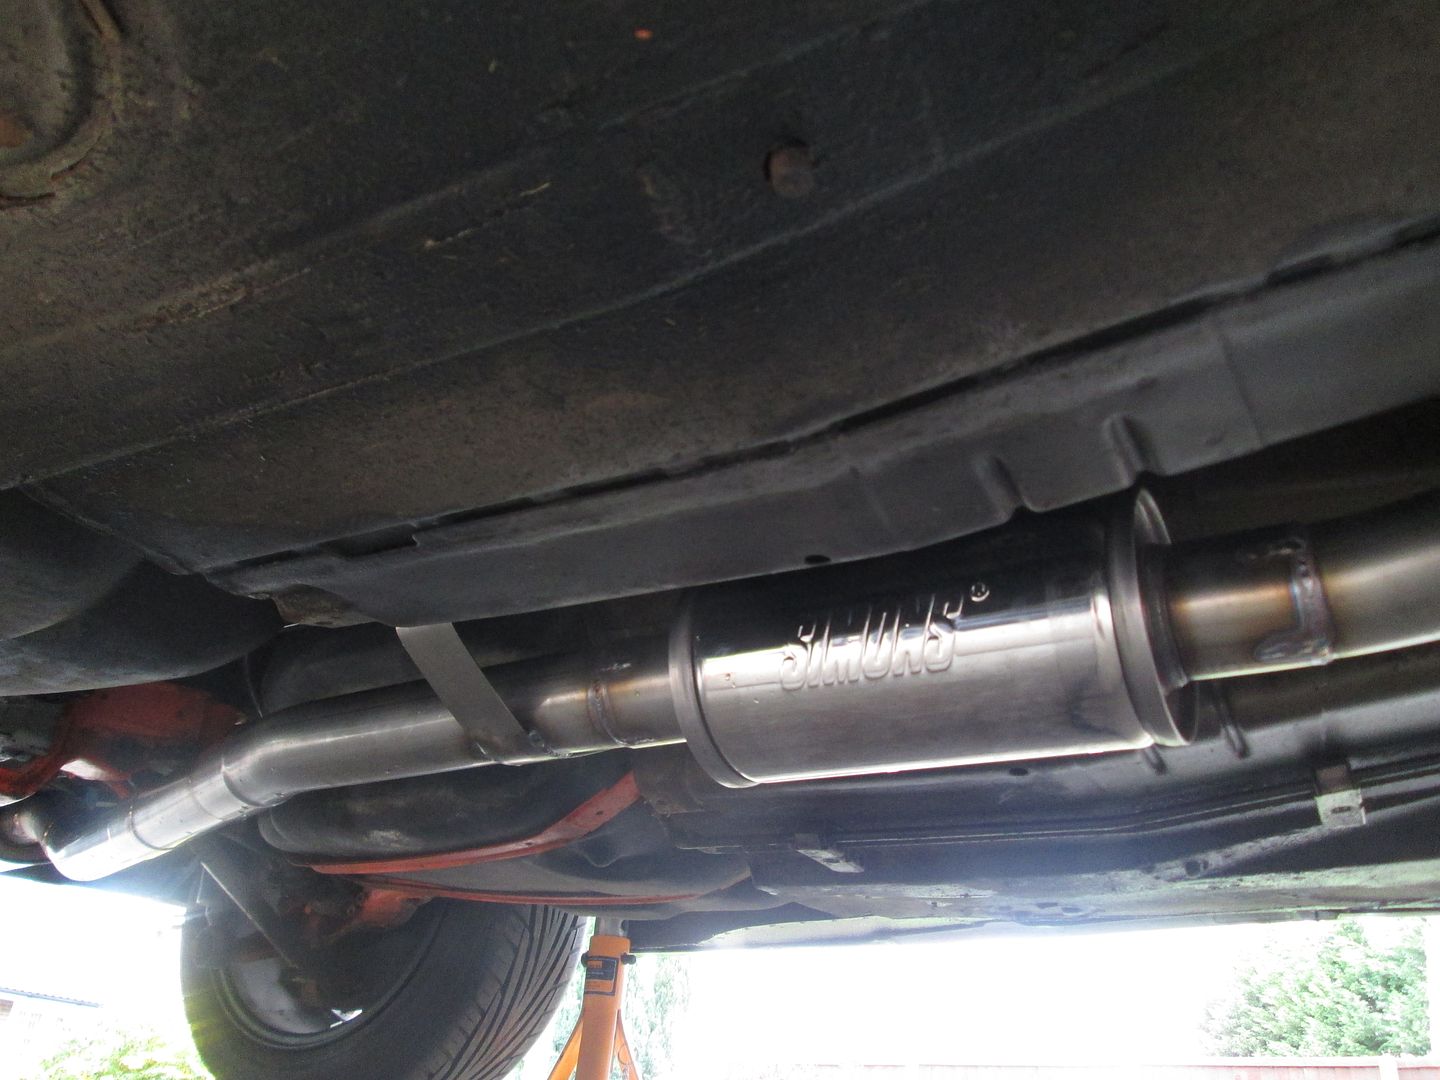
I used five mandrel bends (3 x 20degree, 2 x 40degree), a small straight section and a pipe former. Decided to go with two good quality 'Simons' silencers. Everything is 304 stainless, including brackets and silencers. Every joint has been sleeved by 40mm to ensure strength.
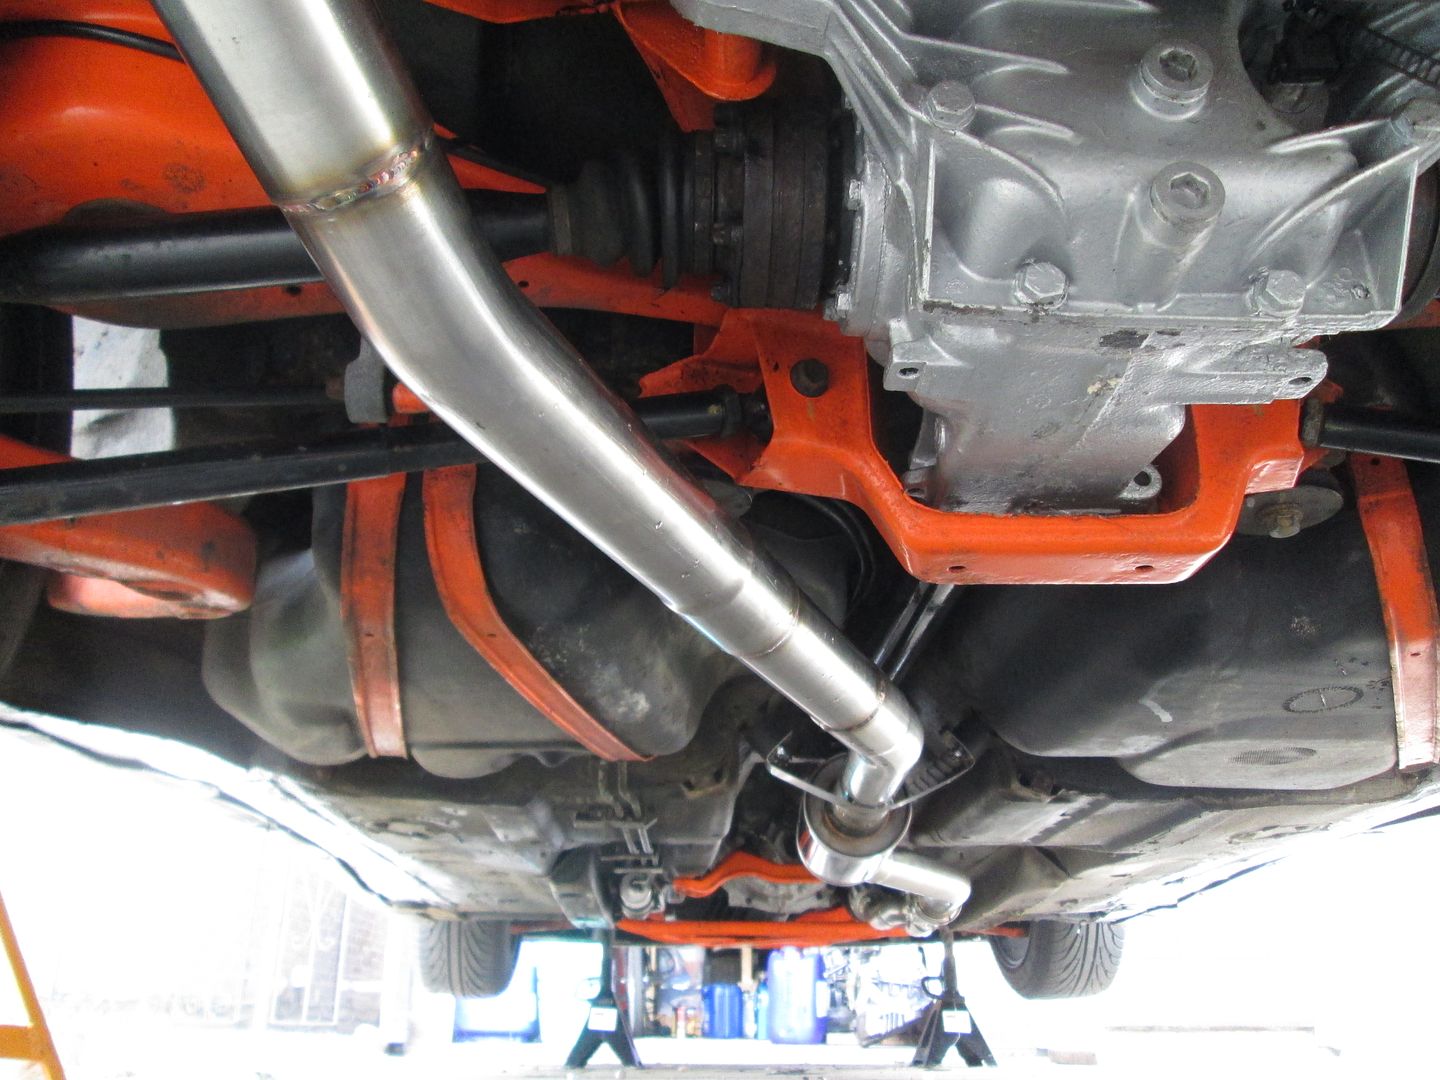
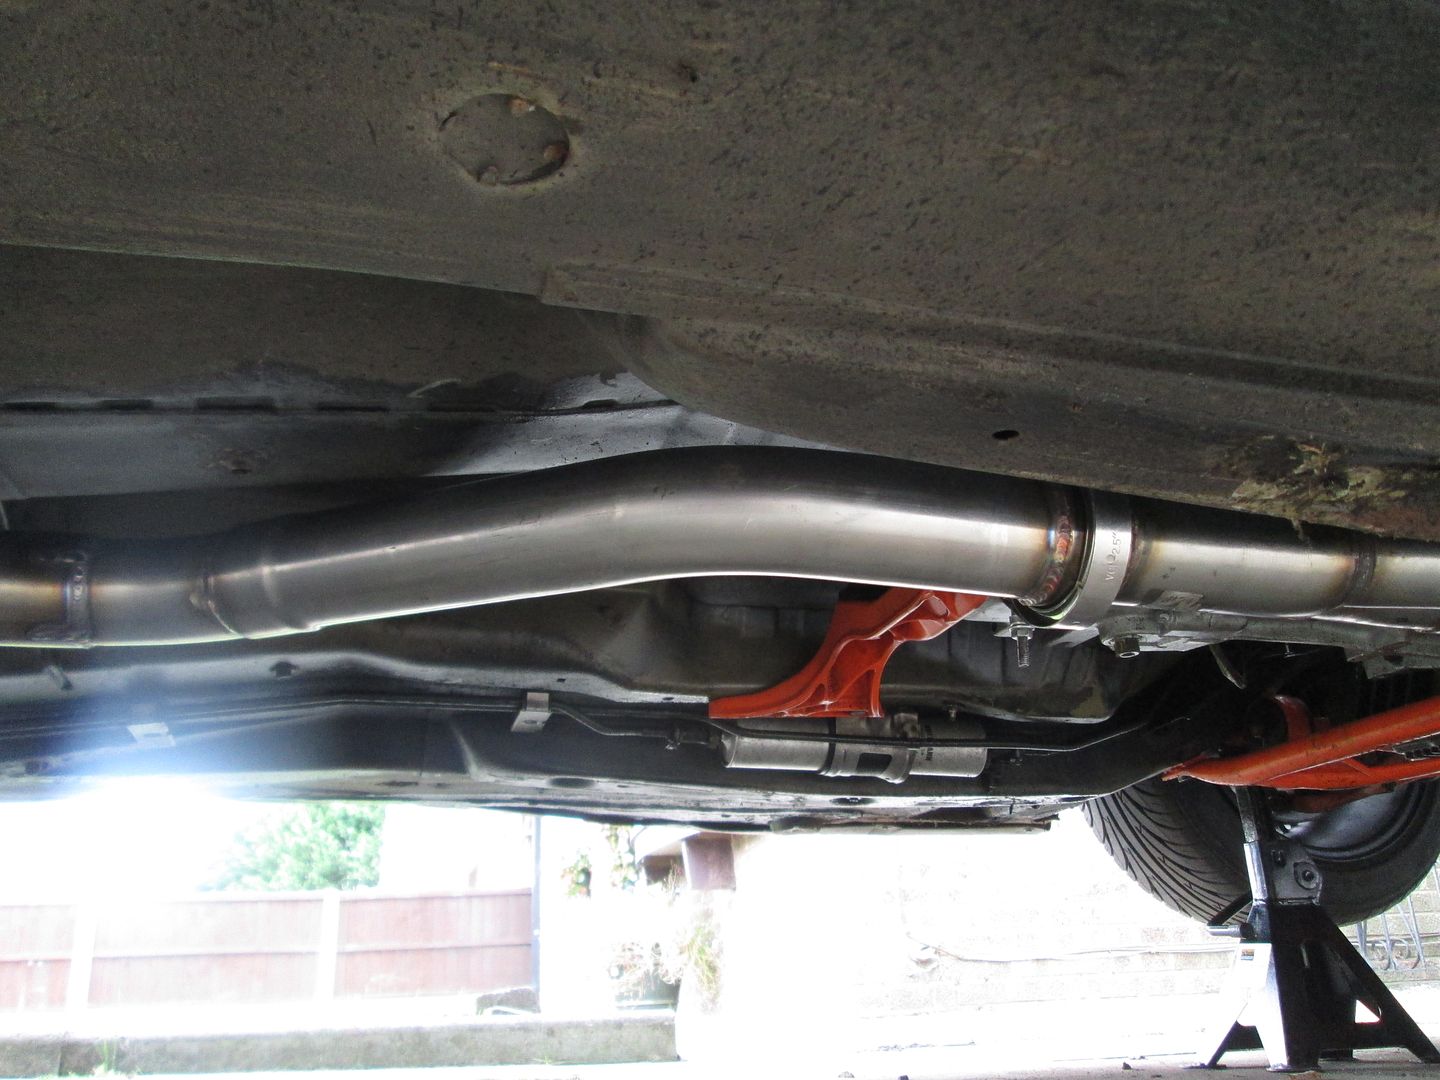
With a bit of patience, measuring everything twice and quite a bit of test fitting, everything went together fine. The v-band makes fitting/removal a breeze. The system now sits closer to the chassis and all mounts have been made from scratch, nothing OEM on there anymore. I tacked everything together..
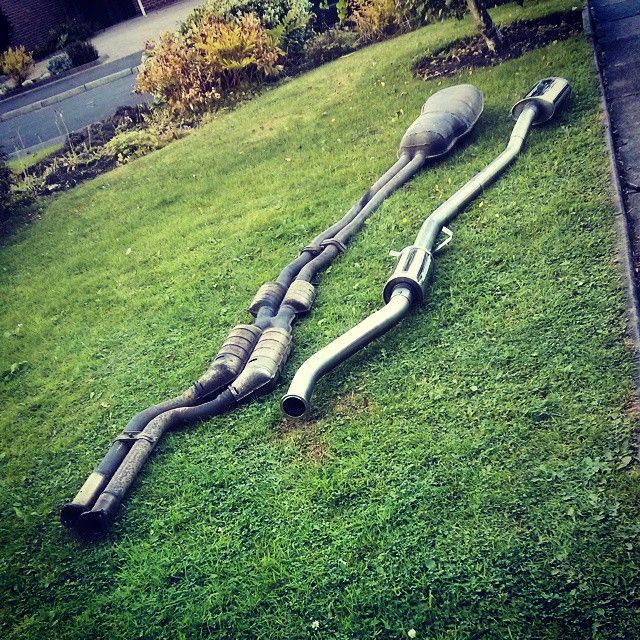
The standard exhaust, in original form (without being modified to match the M3 manifolds) weighed a whopping 36kg. The new system, just under 7kg. Quite some saving in the exhaust alone! I took the new exhaust to be TIG'd..
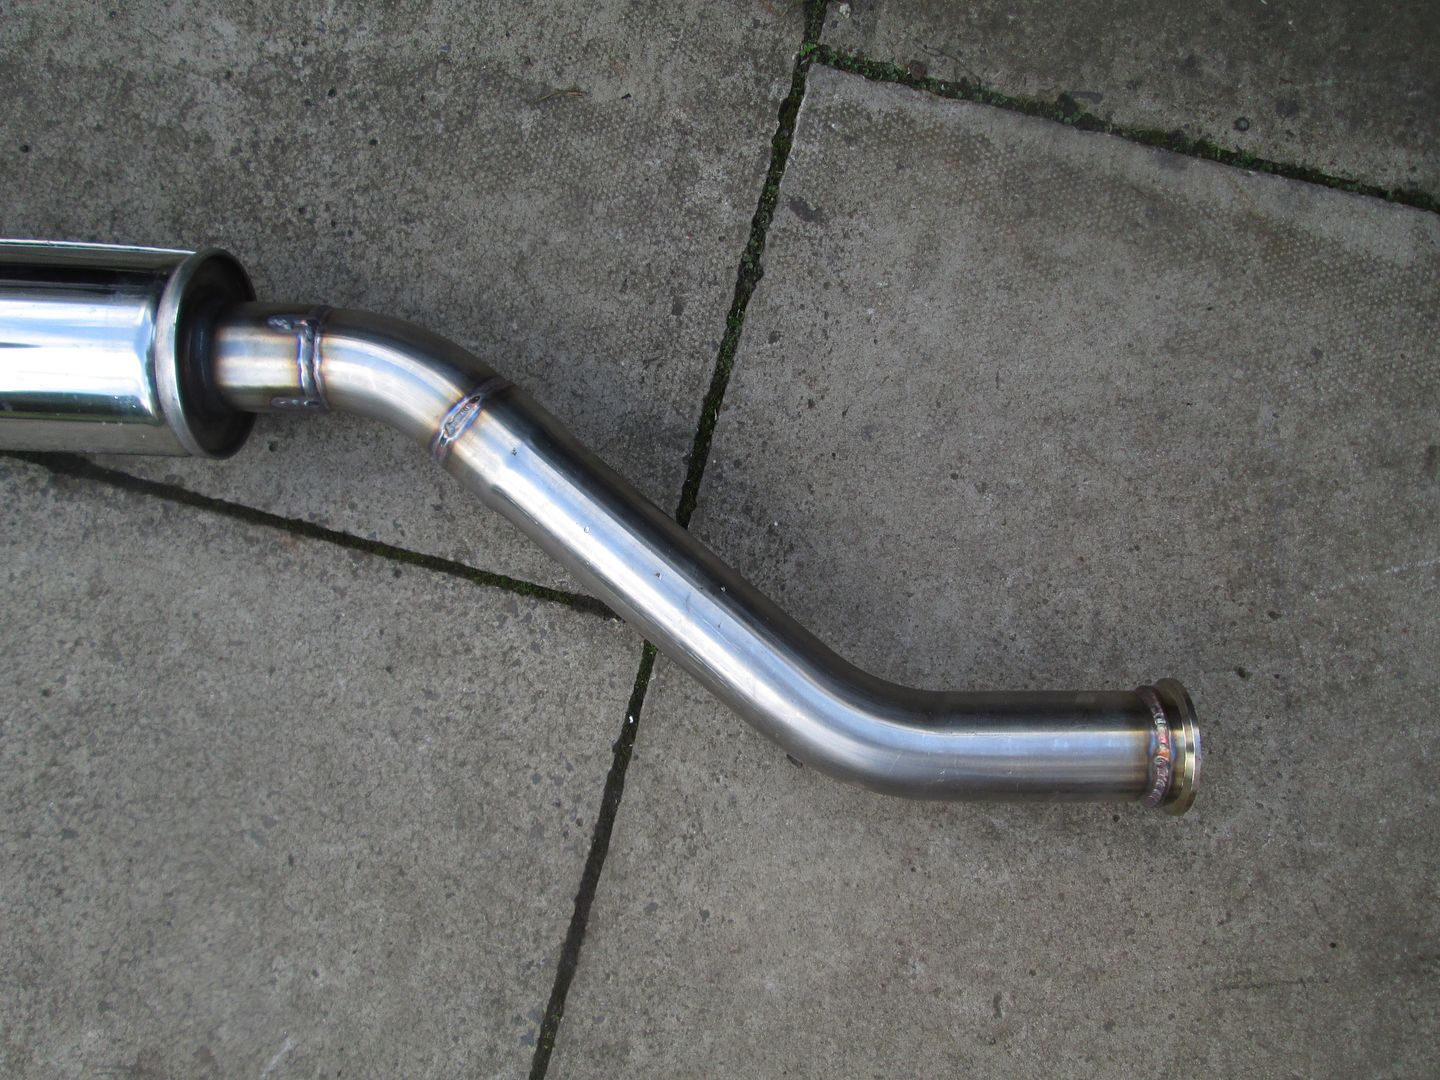
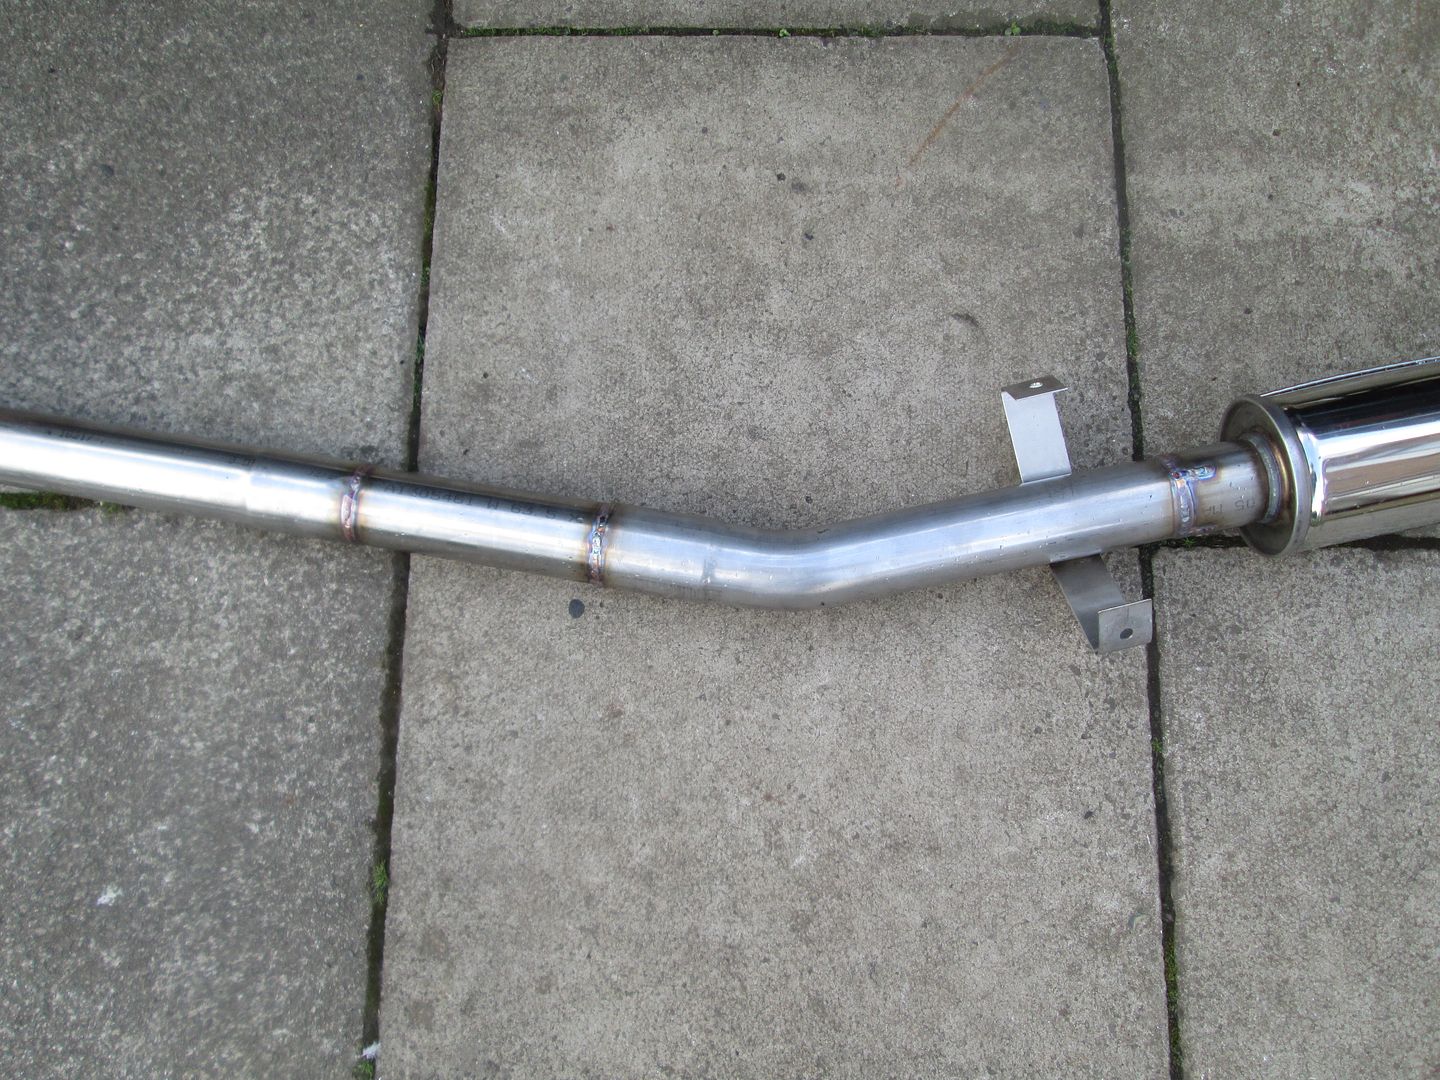
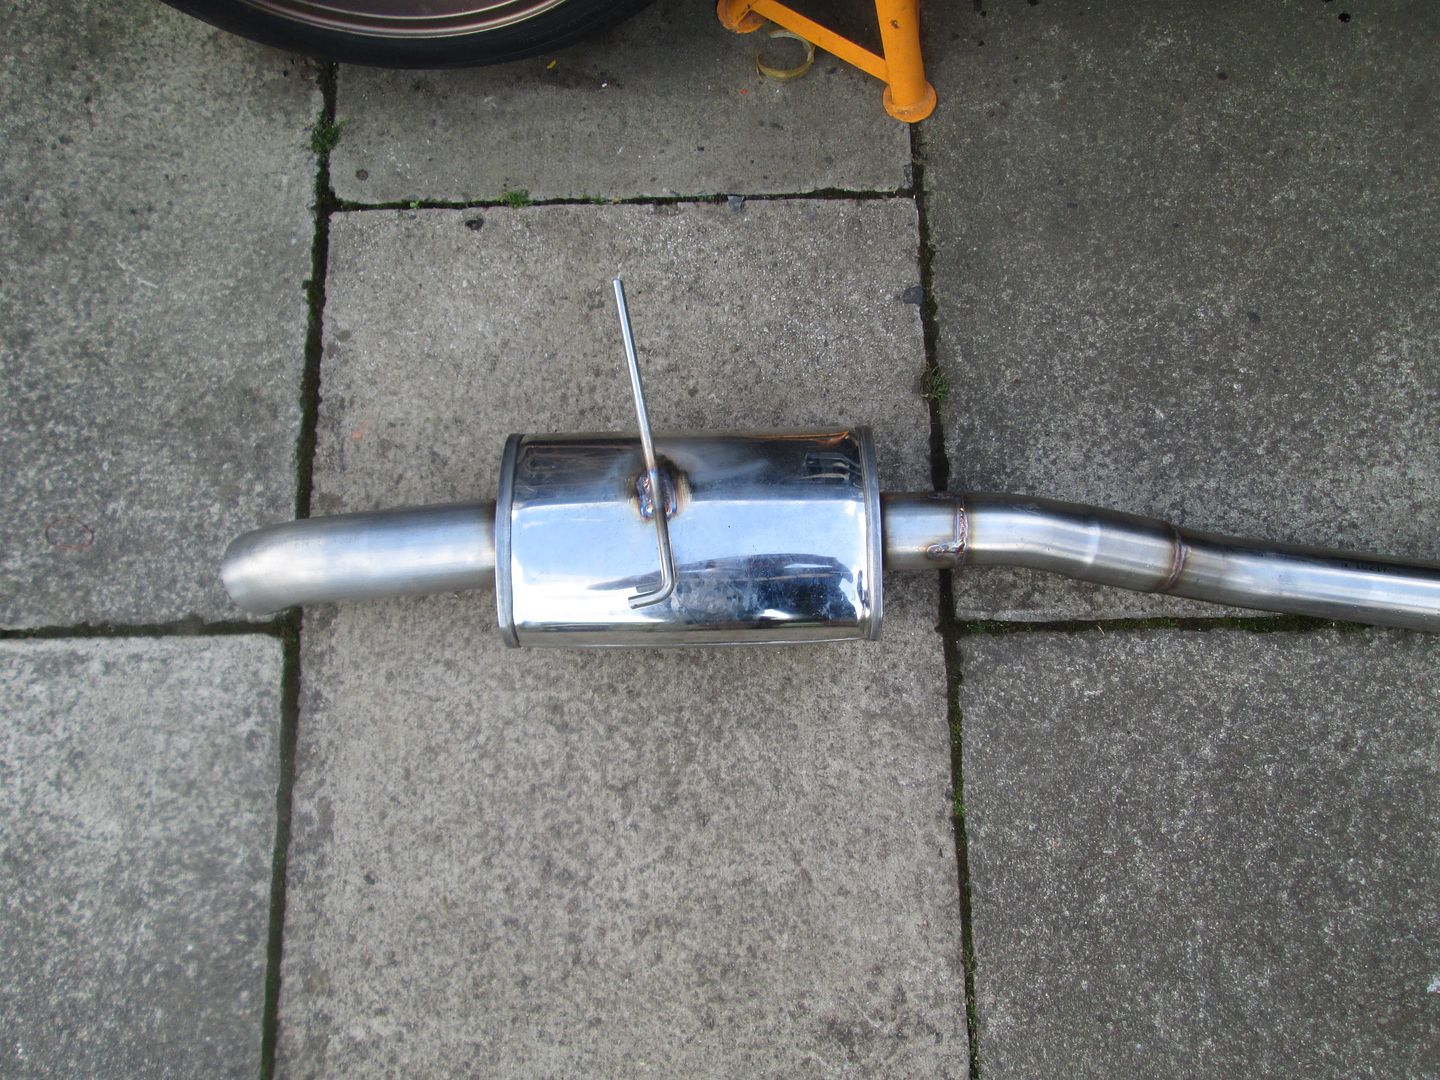
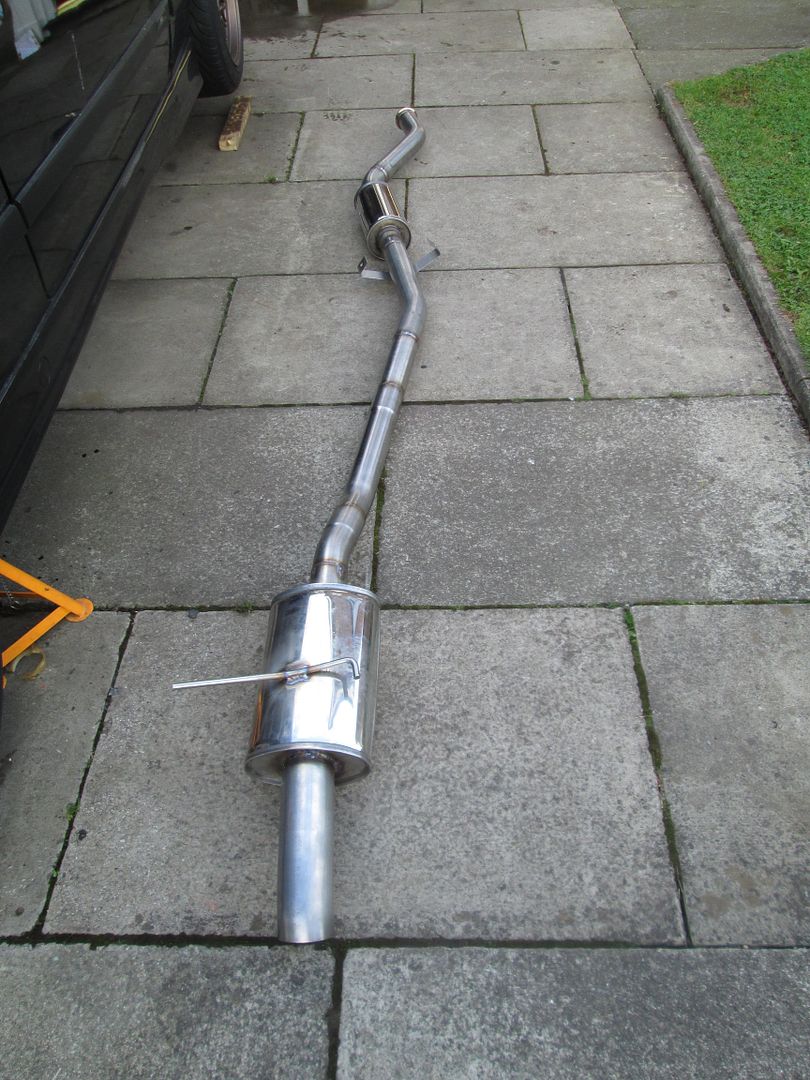
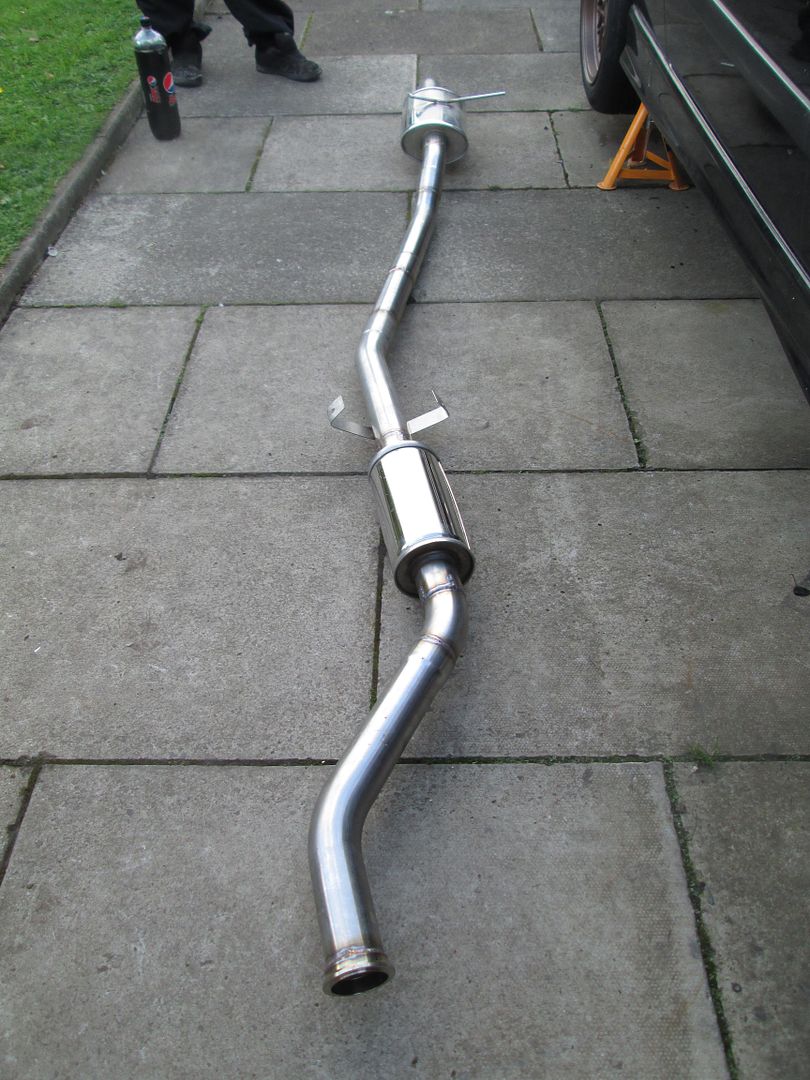
Then fitted it to the car..
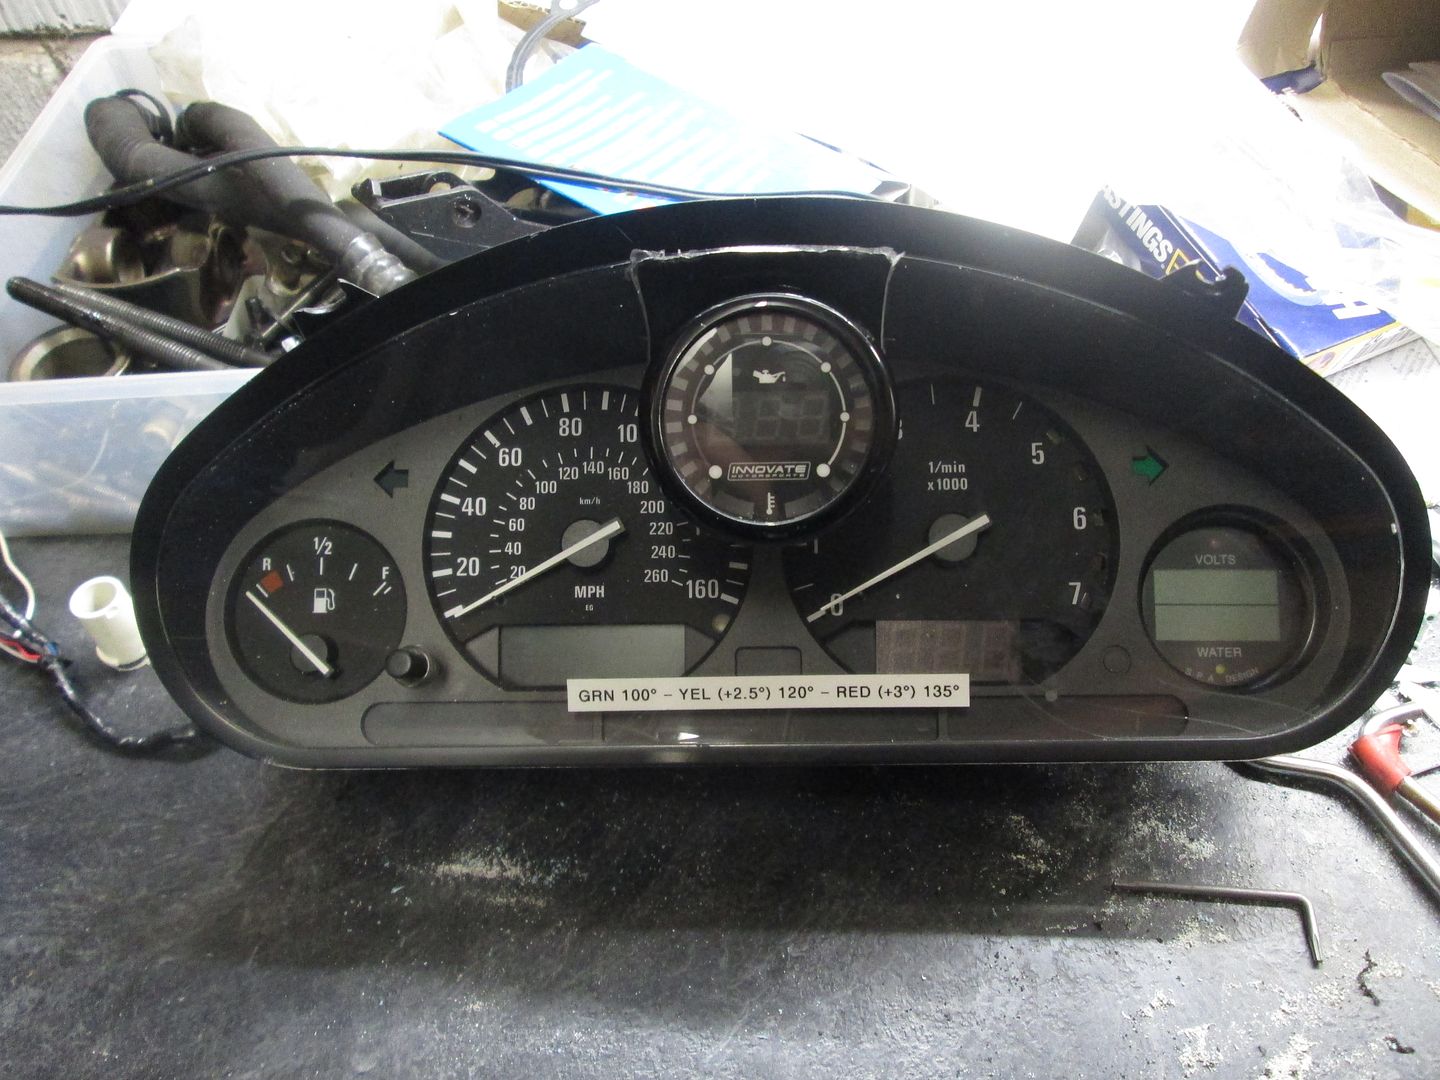
As someone previously mentioned, gauges.. I run an Innovate Oil Pressure/Temperature gauge, and an SPA Water Temperature Gauge. These have additional senders - water is in a spare outlet on the head next to the OEM sensor, and oil pressure/temperature come from the oil filter housing..
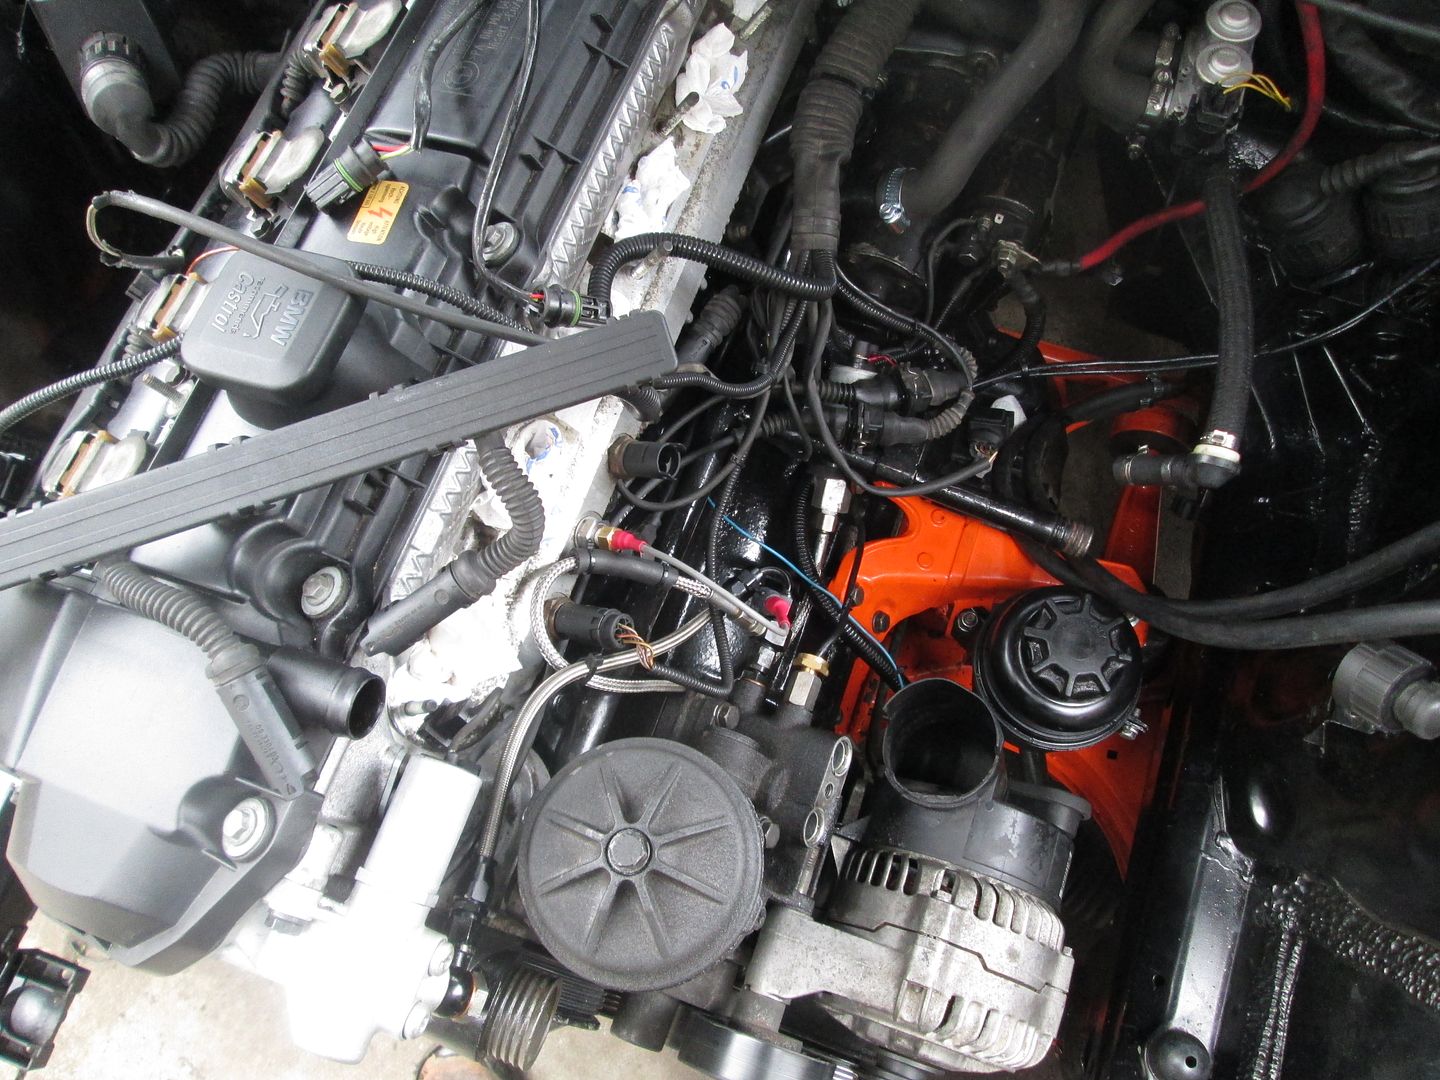
With the new engine now having an exhaust, everything else just needed building back up and fluids adding..
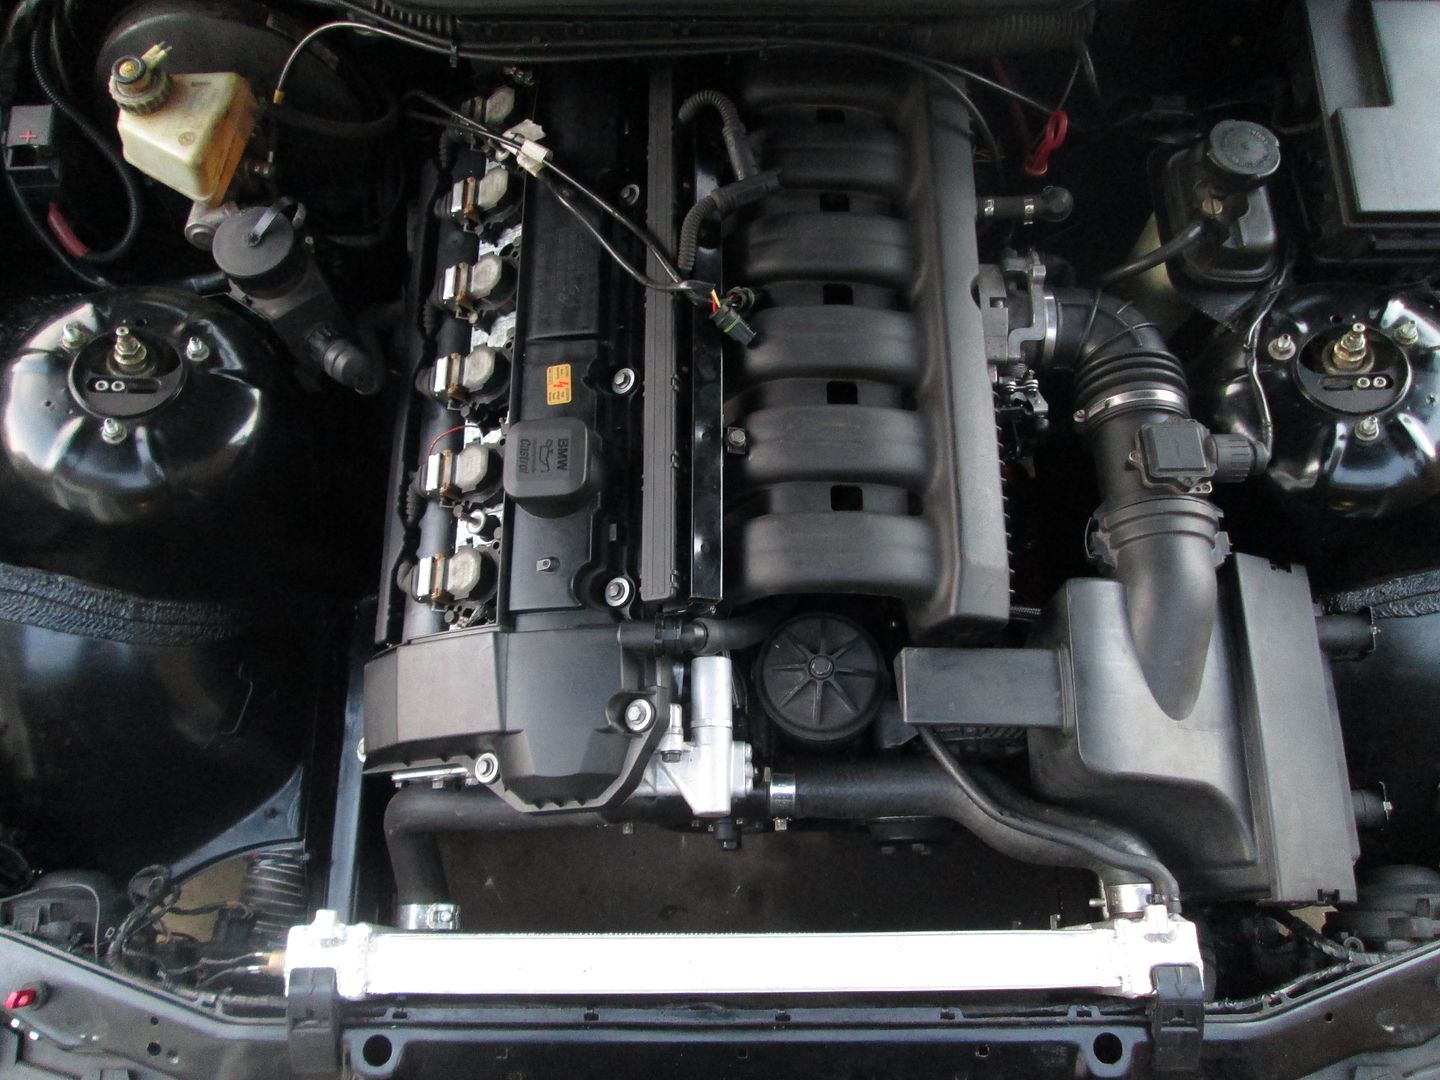
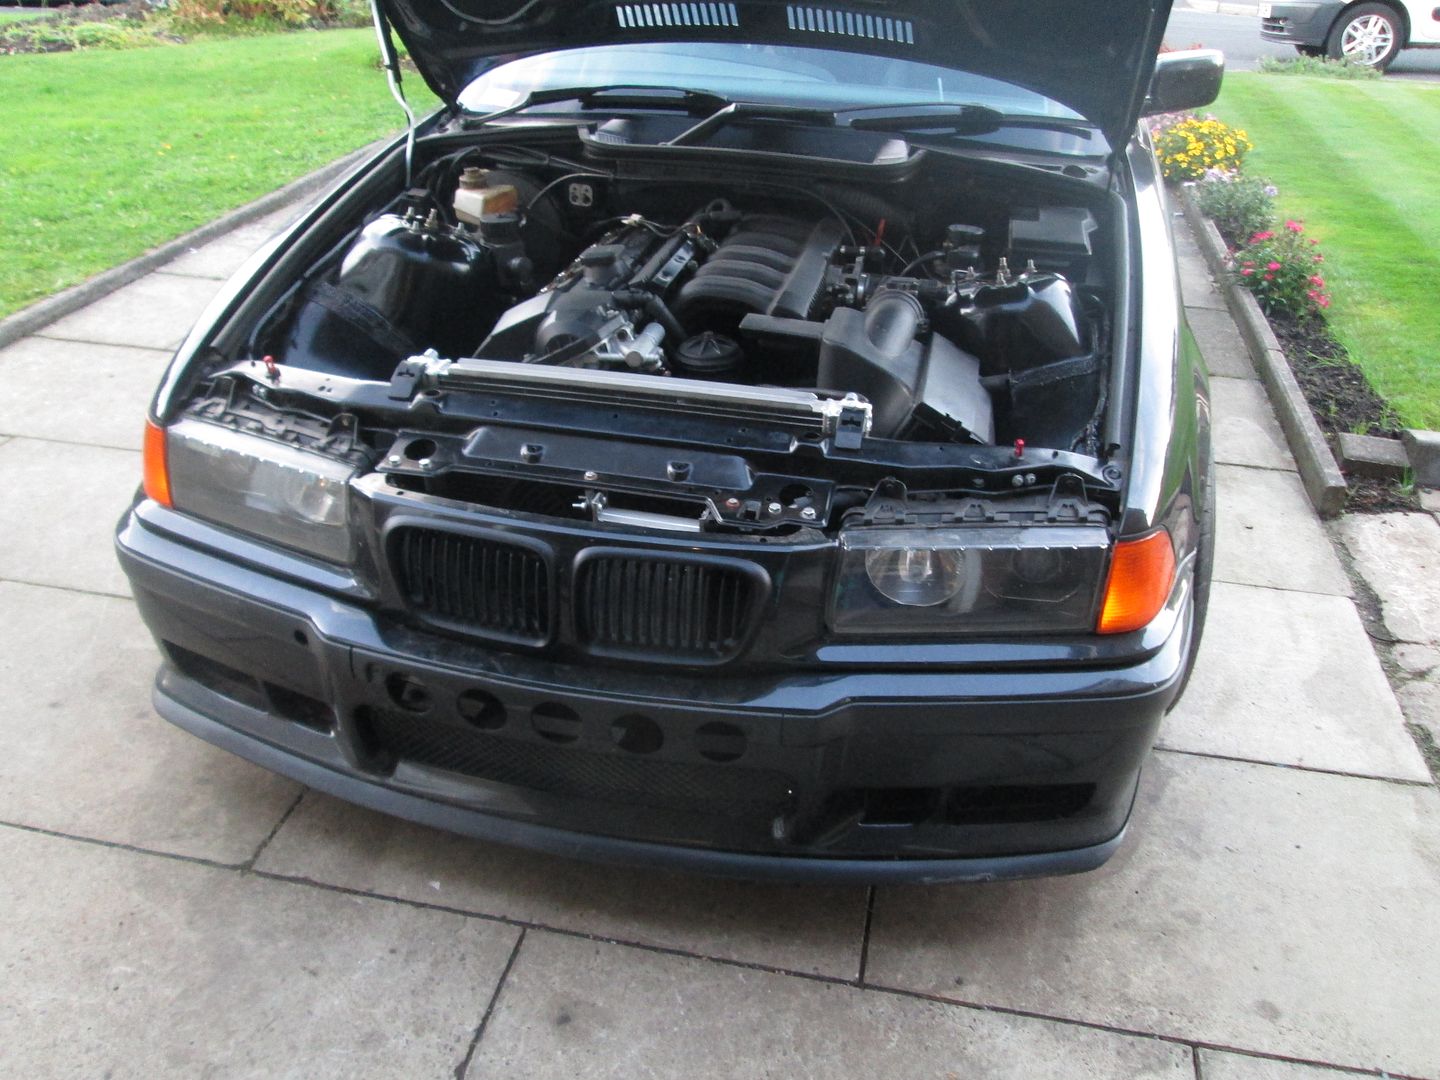
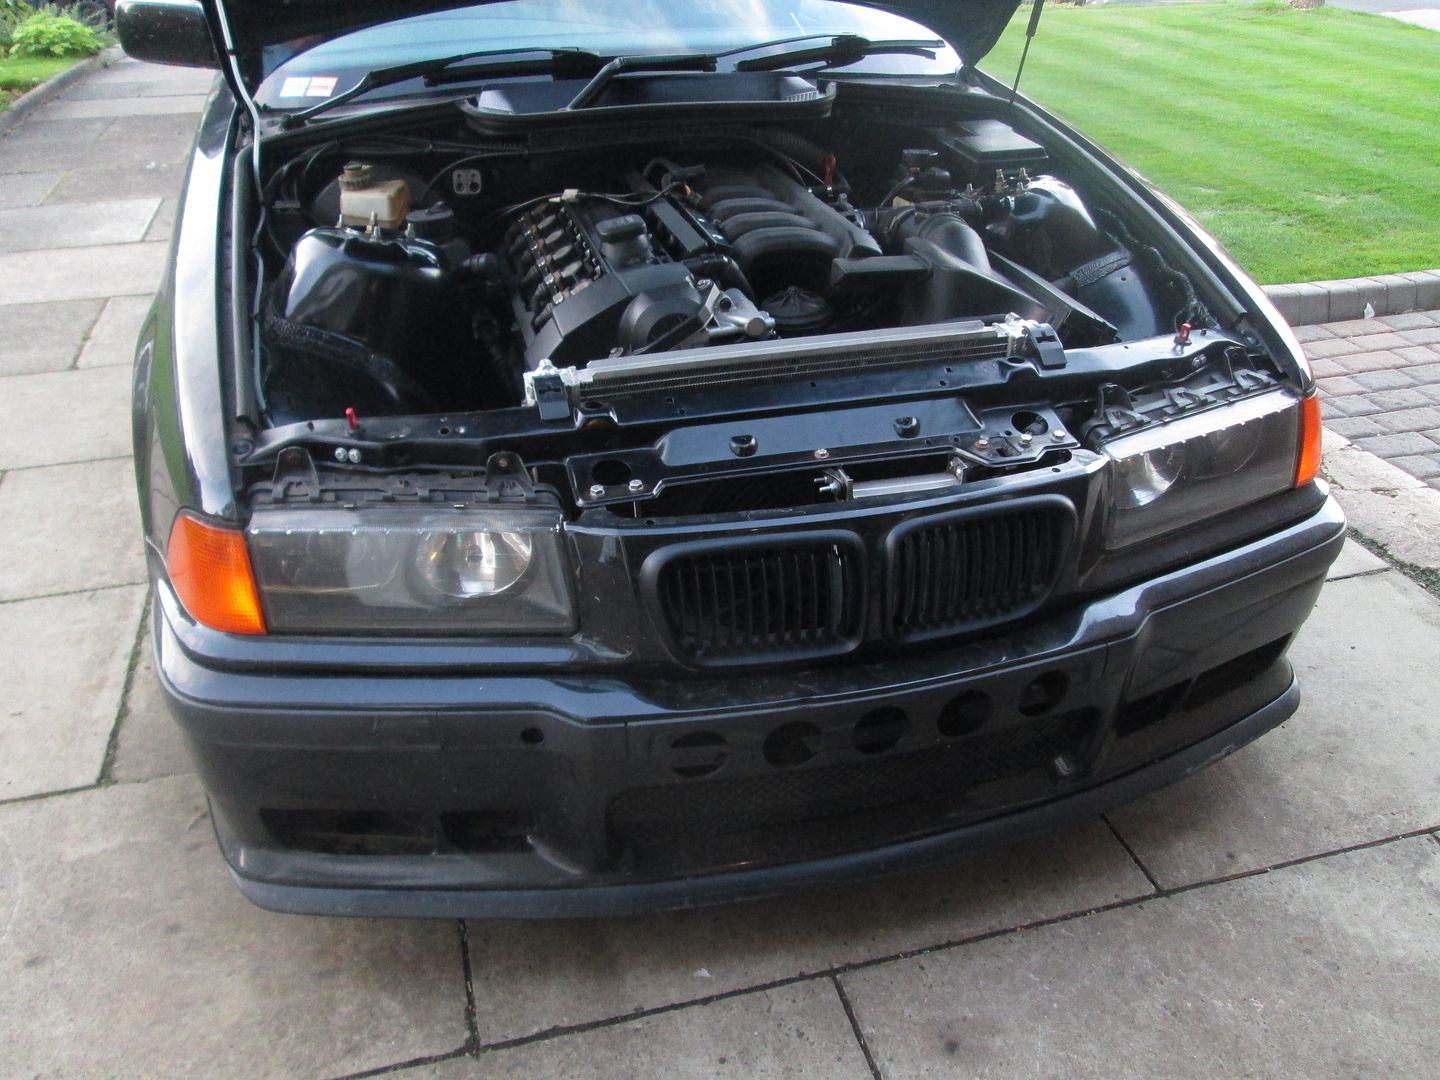
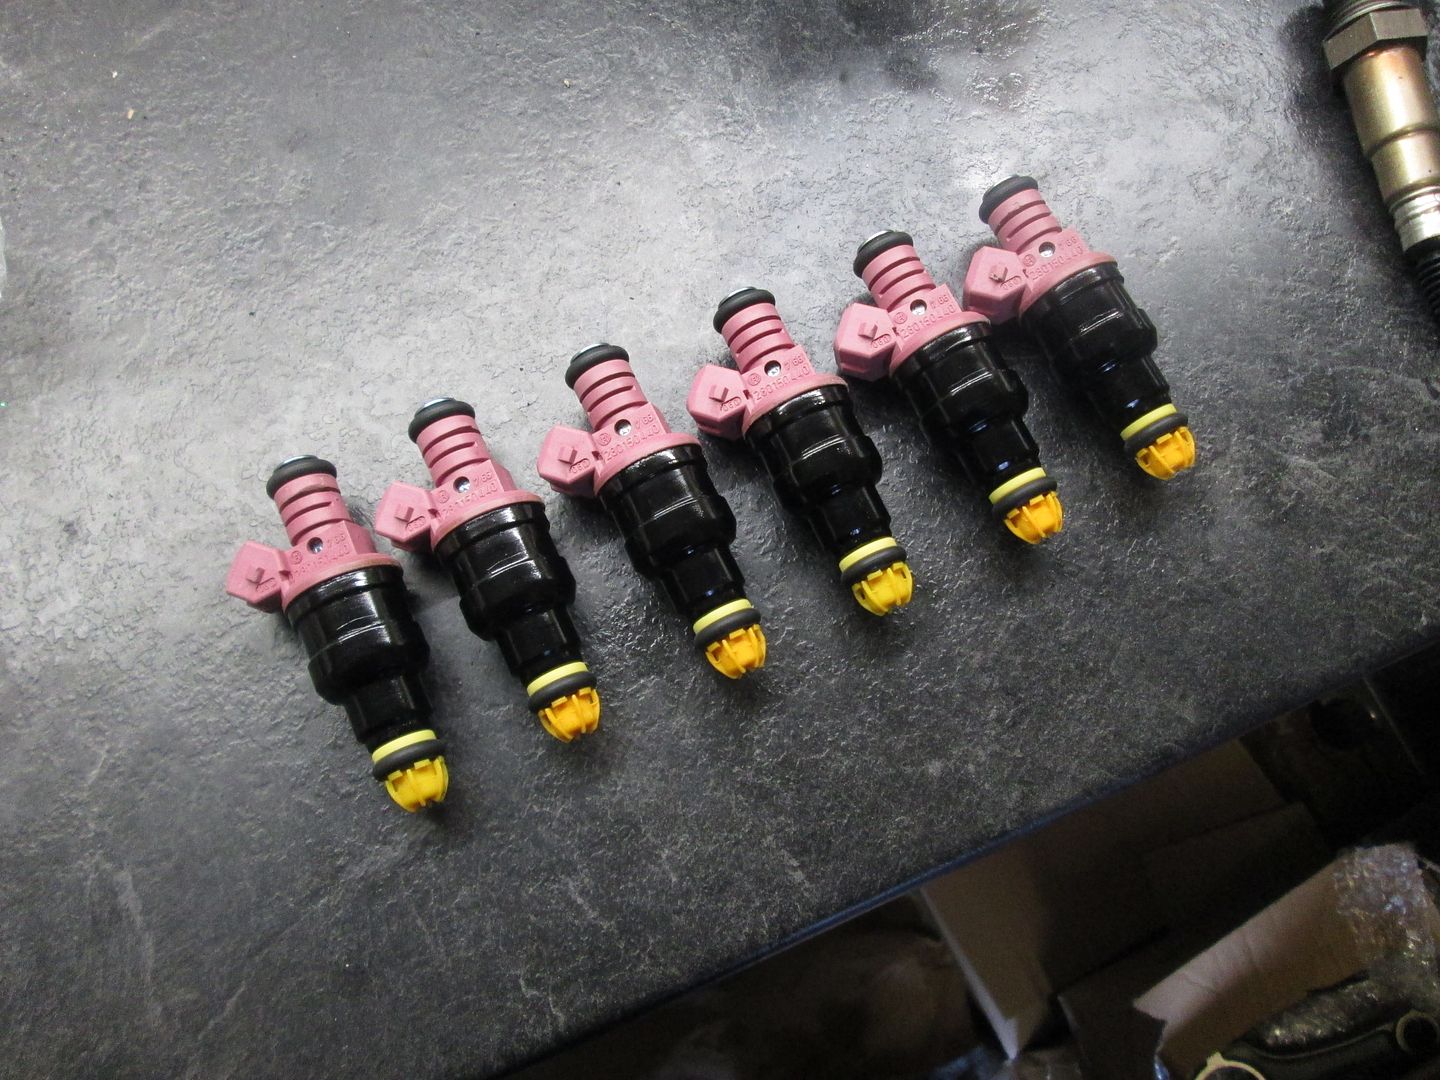
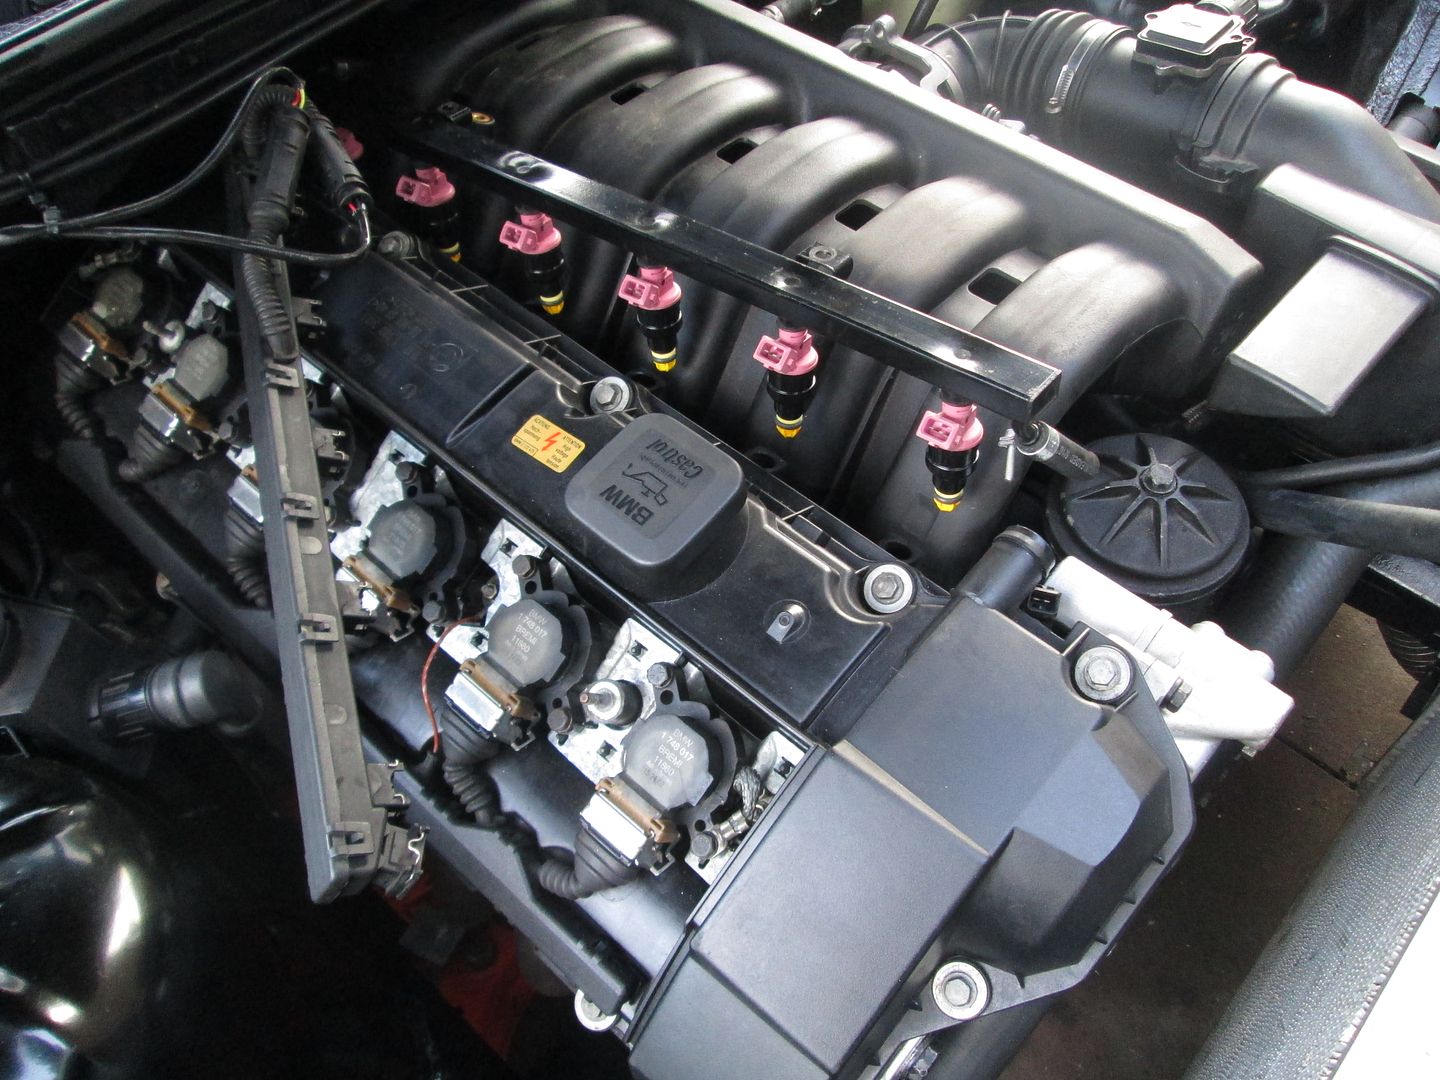
I also had a spare set of injectors reconditioned, to ensure they were all balanced and none of them had an issue. I run an M50 fuel rail if anyone wonders why it looks different.
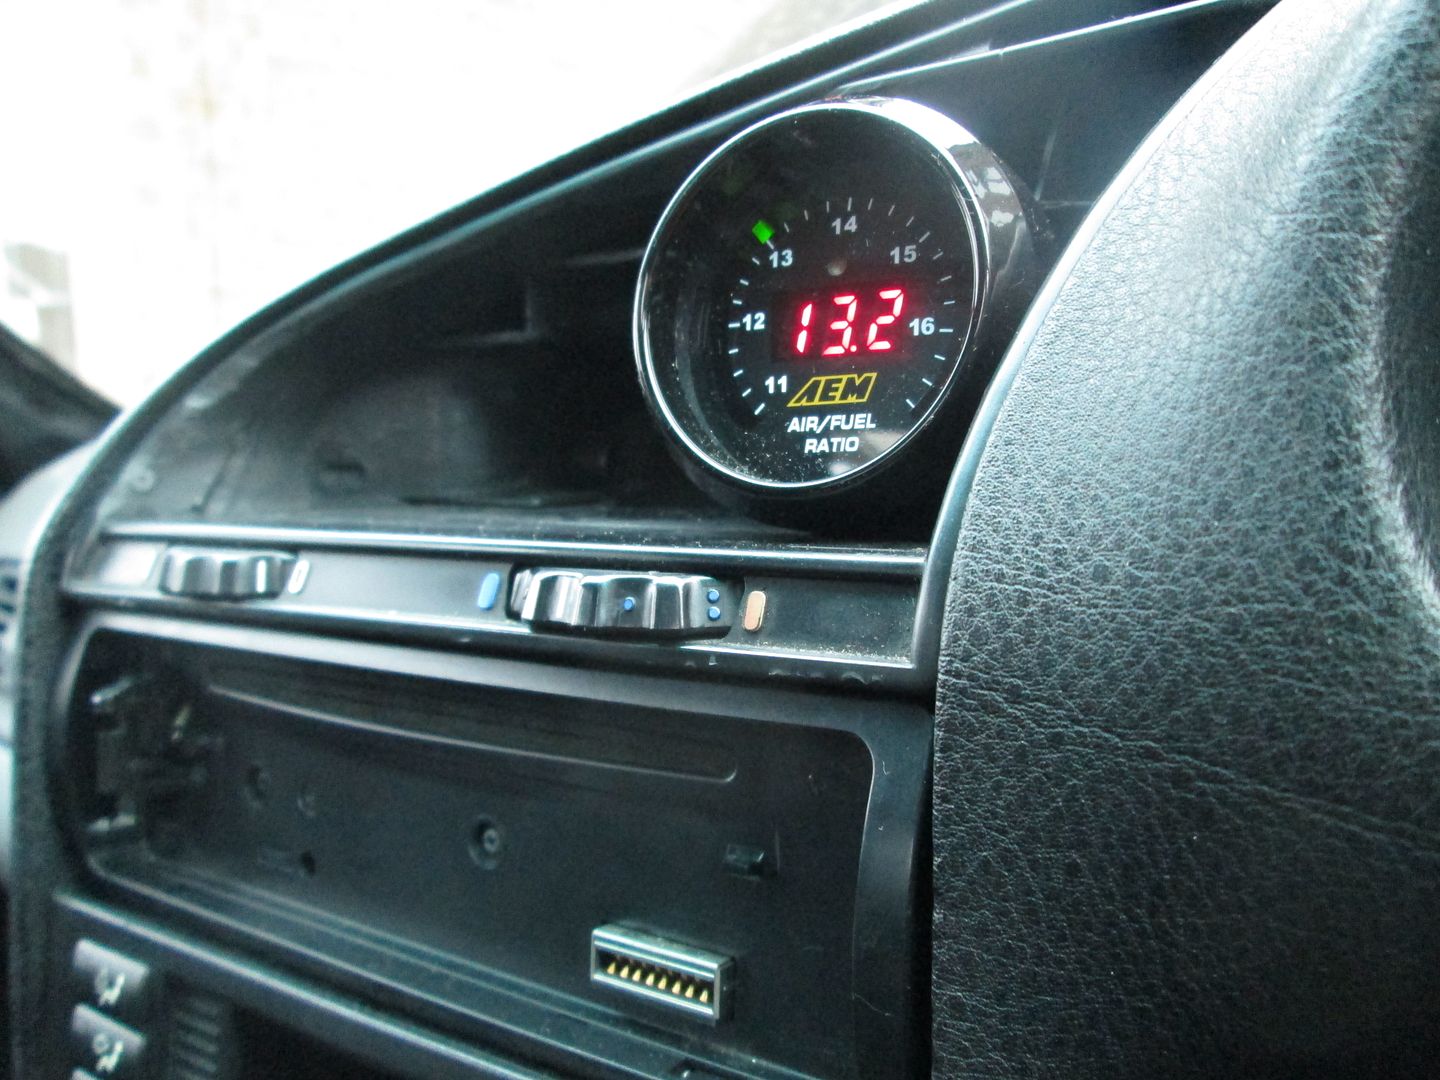
Fitted my AEM wideband into the additional lambda boss now on the exhaust, and mounted the gauge inside. The engine will remain on the M52 management, and calibration adjusted as we go along.
Filled the engine with mineral oil, coolant and then cranked over to build some oil pressure. Plugged the ECU back in and fired it up..
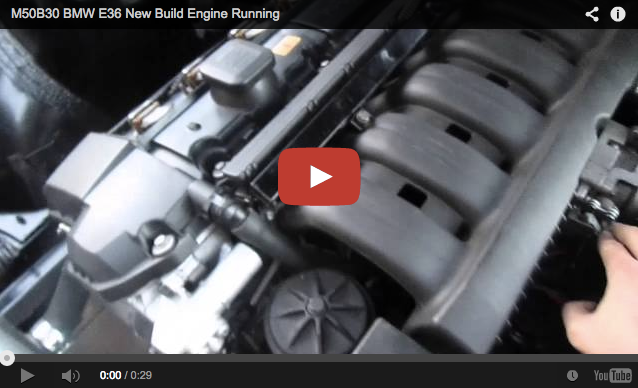
https://www.youtube.com/watch?v=3hacr1F4Ags
Happy that there were no leaks, the last job was to get a method of logging data before running the 3.0L in..


I wanted to have a flexi on each manifold instead, then bring the two pipes into one for simplicity and weight. Quite a common change in the US.


To get the fitment and clearance spot on, I mounted a scrap block/head in the car along with my spare gearbox, so I could easily move things about..

After bolting things to the mockup engine a few times, and some cutting/positioning, I had the flexis and bends in place. Using stainless only here..


The final piece which brings the two manifolds into one pipe was then checked and marked up. V-band is going on the end to join the exhaust system rather than a normal flange.


(Ignore the old flywheel, its simply used for timing the engine up)
Once I was happy with the fitment after a few more tests, I took the lot to be TIG'd by a friend. We also added the missing lambda boss back in, along with an additional one downstream for a wideband sensor.


The M20 flywheel and clutch setup were then re-fitted, and the gearbox put onto the new 3.0L. I also cut a small section out of the gearbox bell housing to aid clearance on the rear manifold - in the past this has just sat up against the gearbox, but didn't want to risk putting too much stress on it and having issues with cracks in the future. Im assuming this is because they are 3.2 manifolds which use the 6 speed box and probably are cast to miss this.


Fitted the mounts and dropped it in. Very tight going in now with the manifold/collector being longer than it was, but going slow enough it did go in fine..


Originally I was going to take it somewhere to have an exhaust made, then decided I could probably do it myself with better quality components for half the cost. I had a few recommendations on local places, but either they were too busy or far too expensive in the end.
I used five mandrel bends (3 x 20degree, 2 x 40degree), a small straight section and a pipe former. Decided to go with two good quality 'Simons' silencers. Everything is 304 stainless, including brackets and silencers. Every joint has been sleeved by 40mm to ensure strength.
With a bit of patience, measuring everything twice and quite a bit of test fitting, everything went together fine. The v-band makes fitting/removal a breeze. The system now sits closer to the chassis and all mounts have been made from scratch, nothing OEM on there anymore. I tacked everything together..

The standard exhaust, in original form (without being modified to match the M3 manifolds) weighed a whopping 36kg. The new system, just under 7kg. Quite some saving in the exhaust alone! I took the new exhaust to be TIG'd..


Then fitted it to the car..


As someone previously mentioned, gauges.. I run an Innovate Oil Pressure/Temperature gauge, and an SPA Water Temperature Gauge. These have additional senders - water is in a spare outlet on the head next to the OEM sensor, and oil pressure/temperature come from the oil filter housing..


With the new engine now having an exhaust, everything else just needed building back up and fluids adding..


I also had a spare set of injectors reconditioned, to ensure they were all balanced and none of them had an issue. I run an M50 fuel rail if anyone wonders why it looks different.


Fitted my AEM wideband into the additional lambda boss now on the exhaust, and mounted the gauge inside. The engine will remain on the M52 management, and calibration adjusted as we go along.

Filled the engine with mineral oil, coolant and then cranked over to build some oil pressure. Plugged the ECU back in and fired it up..

https://www.youtube.com/watch?v=3hacr1F4Ags
Happy that there were no leaks, the last job was to get a method of logging data before running the 3.0L in..
B'stard Child said:
I love that you thought about the exhaust routing - I mean I built an exhaust for my Monza and then had to redo it when I realised that the whole system needed removal to remove the box every time I needed to change the clutch - so I had to do it again
I recognise the car in your profile picture - long shot but were you at an RAF Marham day in 2009 by any chance?Another Fluffer said:
Hands down, one of the best threads I've read on here. Amazing attention to detail, I was unaware that the M50/52/54 were quite that interchangeable!
So the Engine is currently running the M50 block with M54 crank/rods/pistons with the M52B28 head? and just to top it off the M20 solid mass flywheel/clutch upgrade, astonishing.
If you don't mind me asking, how much did the machining cost for the head/block etc?
The exhaust looks like a quality bit of engineering, is there a noticeable difference between the standard and custom one in terms of noise? I find that the standard exhaust with a lightweight aftermarket backbox drones terribly and would like to rectify it. A friend of mine has turbocharged his E36 323 and had a custom exhaust made for it 3" straight-through with only a small backbox and claims that it does not drone at all.
Anyway fantastic work and I look forward to more updates!
Yeah thats correct. Well, its actually an M50B25 head, which is the same anyway. This was used as it has an additional coolant sensor location on the head (as per the post above), because the M50's used two separate sensors for the ECU/Dash, whereas the M52's used a single sensor. So the Engine is currently running the M50 block with M54 crank/rods/pistons with the M52B28 head? and just to top it off the M20 solid mass flywheel/clutch upgrade, astonishing.
If you don't mind me asking, how much did the machining cost for the head/block etc?
The exhaust looks like a quality bit of engineering, is there a noticeable difference between the standard and custom one in terms of noise? I find that the standard exhaust with a lightweight aftermarket backbox drones terribly and would like to rectify it. A friend of mine has turbocharged his E36 323 and had a custom exhaust made for it 3" straight-through with only a small backbox and claims that it does not drone at all.
Anyway fantastic work and I look forward to more updates!
I have a local place for machining who I've used for years, so pay different prices to the norm. Generally you're probably looking at £25-30 for a skim and a bit more for honing. Varies quite a bit but its worth going somewhere thats recommended over the cheapest price.
The standard exhaust was very quiet originally, so a long while ago the back box was cut open and the baffles changed, which did increase noise a bit, but it was still under 90db. The new exhaust was 98db @ 4500rpm when at Oulton around a month ago. It does not really drone, its just noisy anyway as there is nothing inside the car..
Sf_Manta said:
I was the one mentioning about gauges.
Thoroughly impressed with the build, would be good to see numbers once you've got it mapped fully.
Ironically I've just got myself a 3.0, be it in a E46 touring.
It has been tweaked and dyno'd already, numbers to come soon Thoroughly impressed with the build, would be good to see numbers once you've got it mapped fully.
Ironically I've just got myself a 3.0, be it in a E46 touring.
 The thread is a couple of months behind at the moment.
Thanks for the comments everyone.
Lancia888 said:
Epic! I'm in awe at you mechanical skills. And you must have s t loads of money or no girlfriend/wife or a well paying job!! I should have tried harder at skool!!
I've only learnt what I know as I go along, I actually work in IT.. Anyone can do it with enough time and patience (and money!).. t loads of money or no girlfriend/wife or a well paying job!! I should have tried harder at skool!!
 BritishRacinGrin said:
This is interesting. My car has an M50B25TU 
The original M50B25 was just a straight 6 non-VANOS engine (which is preferred by people who Turbo these cars), then the TU had VANOS. All my reference to the M50 in this thread is actually for the TU. The M50 block is the same, just the valve train differentiating between the two.
BritishRacinGrin said:
I looked into this a bit myself, I was worried about deck height on the M50 block with 89mm stroke but yours are clearly safe. I was also a little apprehensive about how well a 75mm bore would get on with an 89mm stroke... Did you bore the block out to 84mm? I guess you must've since you're running M54 Pistons (duh!)
M50B25, M52B28 and M54B30 share the same 84mm bore, with the S50B3x using ~86mm. I think the 2.0L 6 cylinders were 80mm bore, which is a slightly different block.. Not sure what models use a smaller size though!So I needed a way of logging data using what I already have - no aftermarket ECUs, no production data loggers or additional sensors etc. I wanted it to work with what was already on the car, and the stock ECU. The main reason for wanting to log data was so I could review RPM vs AFR, and other things such as Throttle Position etc, once I was back on a computer, as its neigh on impossible to watch everything all the time when driving. A quick glance at WOT is fine, but apart from that you've got no chance without a dyno.
These days many people know about the BMW INPA software, which is used for fault code reading/sensor value reading on the older BMW models. You can use this on a Windows laptop with a VAGCOM KKL cable and a BMW 20pin (diagnostic) adaptor, which works fine. Inside INPA, you can view live sensor data and do various sensor/actuator tests, which is handy. The problem is, the refresh rate on this data is terribly slow, 1 update per second, if that. The E36 is not technically OBD, it will report simple fault codes in generic OBD language to off the shelf code readers, but if you want to read sensor data BMW use a different type, being the DS2 protocol.
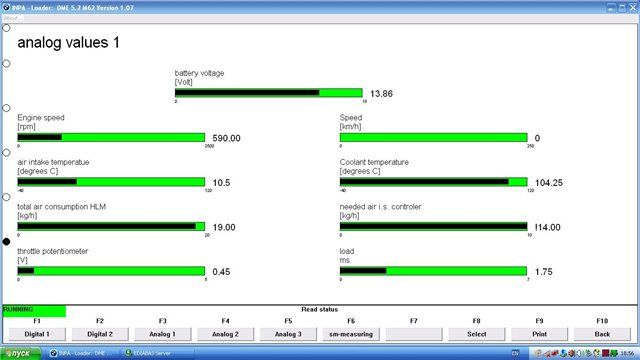
Essentially when you are using a VAGCOM cable, the driver on your computer installs it as a COM port. With this in mind, the INPA data goes backwards and forwards over this COM port. Next step was to use a COM port monitor to view the raw binary data going over this port, and it may give a clue to how the software is talking to the ECU. I started INPA and got the Analog Sensor Values screen up, which shows information for most of the sensors you would want to see, then started monitoring.
The same request was being sent by the software to the ECU, and a long reply coming back every time, containing sensor data. Although, we're still in binary here, so the values actually mean nothing.

I won't go into too much detail on the actual language, if you are interested how the data is constructed let me know - as I really struggled to find any information out there about the DS2 format, especially for a BMW. I ended up spending weeks working everything out manually, as every byte represents a different sensor, and each has a multiplication factor, sometimes even two.
Before I looked into working out which byte was which sensor, I wanted to try and manually talk to the ECU using a COM port terminal, to see if I got a response without any other software running. I used a virtual machine (running Linux), connected using the same cable, at 9600baud, and sent the same command as above. I then read the contents of the serial buffer to find the ECU responded with the full string of data. This essentially meant I could communicate with the ECU directly over the COM port, without the need for any of the INPA software. Because you are missing out the software layer that INPA uses with the above, you can send this command to the ECU over the COM port and read the responses much quicker. I quickly wrote a small script and managed to get the request sent/data string back from the ECU 6-7 times per second (6-7 times quicker than INPA can) before I getting 'ECU Busy' responses. Not a bad rate of data at all.
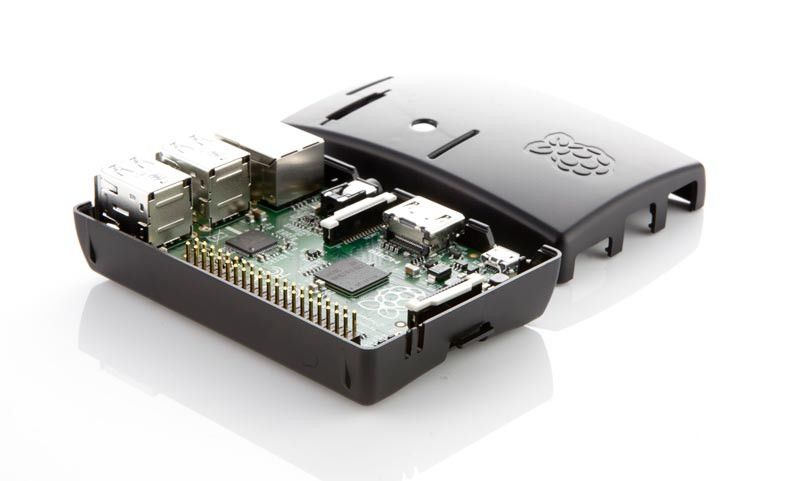
With that in mind, next was to decide what hardware and software to use for building something. It had to be small form factor, quick, efficient and accept different types of inputs, especially USB for the VAGCOM cable. I ended up going with a RaspberryPi, as they offer good performance, decent RAM and very small form factor.
I only had two things in mind for the software to begin with - logging the data as quickly as possible and writing it to a CSV file for use in data log explorer/viewers. Databases are not really quick enough on a rPi to be writing data 5+ times a second without filling up a buffer and using more CPU time, so I stuck with flat files. Luckily there are plenty of libraries in Python for doing these sort of things.
Luckily the AEM Wideband outputs a serial stream of data also, which could also be fed into the RaspberryPi, and logged at the same time as all the other sensor data. After a short while and finding some of the multiplication factors for some of the sensor values, I had a starting point..
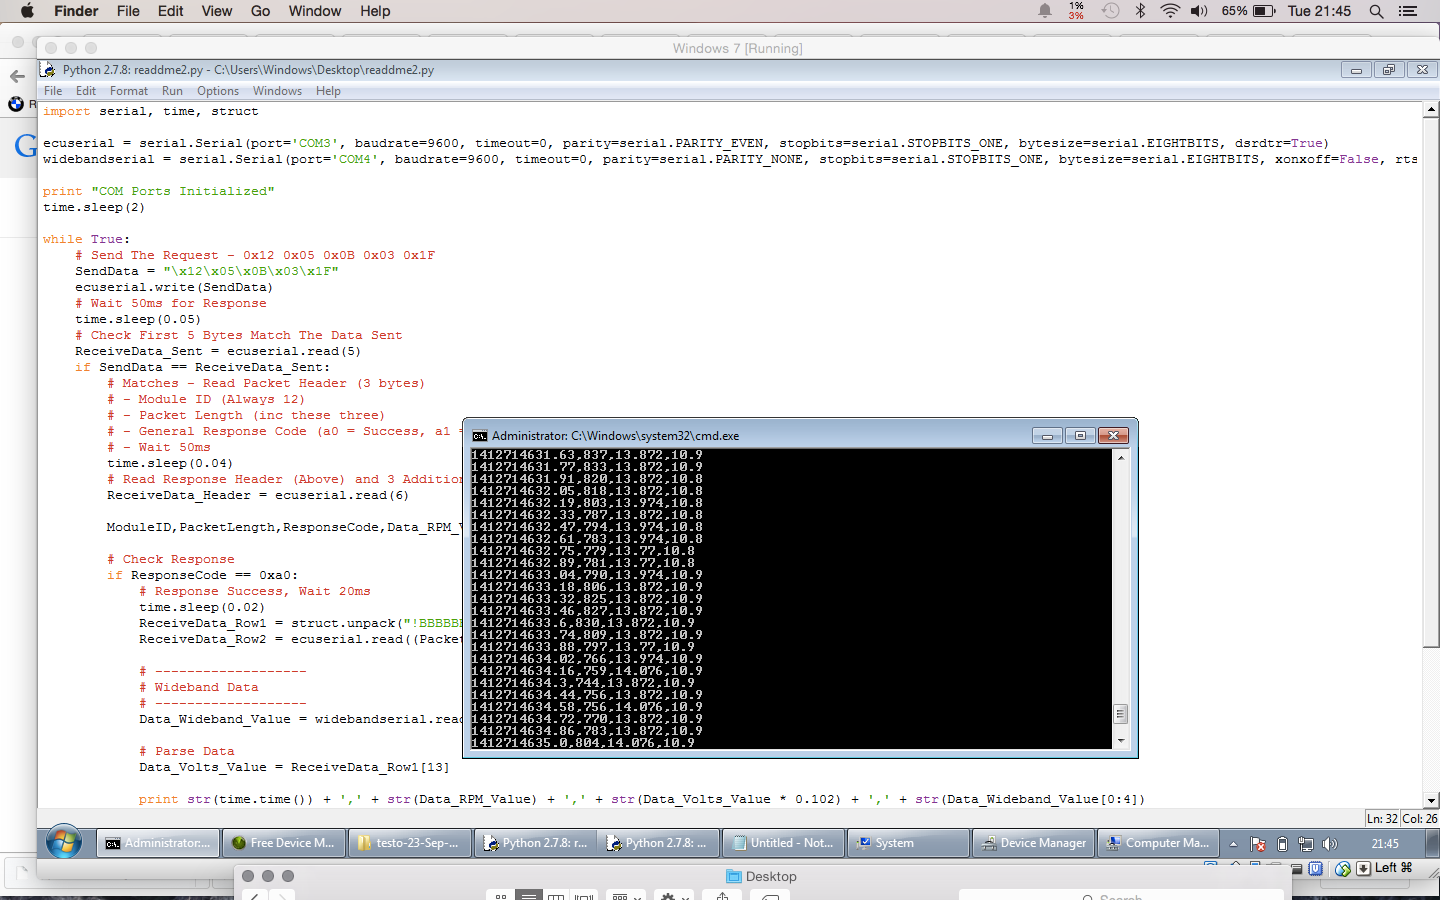
(Time, RPM, Wideband, Volts)
After a couple of weeks, I had worked out/found all the factors for each value, and which byte represented which sensor. The easily accessible ones (at any sort of speed) are:
After a bit more time on the application and a few tweeks, I had it running on the RaspberryPi, which was powered from a 12v > 5v converter. The resulting log file appeared to show everything was working well:
Now it was running on the Raspberry Pi, I needed some way of starting/stopping the logging, and knowing what its current status is. Originally I planned on just having a switch and a single LED, as the rPi has input/output pins available for use, which is ideal for things like that. I then decided make use of the 18 button OBC already in the car, and have those buttons control the logging. My OBC did not work properly anyway, so I pulled it apart and started tracing the circuit board inside.
I hacked up a bit of the OBC, and added a rocker switch to the far left, which controls the power going to the rPi. I then set up Temp, Speed and Dist as the control buttons for the application. Temp starts the logging, Speed stops the logging, and Dist adds a marker into the log file at the moment it is pressed, in case I ever need to look up a certain part of the log file. On the far right, I used the Clock button which shuts down the rPi properly. With the rPi using an SD card for its operating system, you don't really want to be just turning the power off (essentially pulling the power lead from your computer), as its quite common for the SD card to corrupt.
Once up to this point I was testing the application on the car, and remembered this data could actually be overlaid on videos from track days, making them a bit more interesting. In addition to the live engine data, I wanted to see if it was possible to add GPS data into the same log file, which would also give you a true speed reading, not just somewhere close like the ECU/Speedo do. I picked up a small GPS chip that runs on the same voltage as the rPi, and mounted it at the bottom of the windscreen inside the car. This particular model gets a fix within 30 seconds, and just outputs a serial stream of GPS data at 10hz constantly after getting a fix. The only part left was to incorporate another background thread in my application which would read the latest GPS data from the stream, and insert it into each row with the engine data.
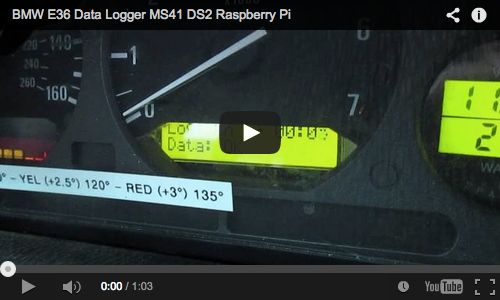
https://www.youtube.com/watch?v=SvatceQG1rU
The whole thing takes about 20 seconds to boot up, which is automatic when you turn the power on. The software application then automatically starts and outputs to the LCD. The Code LED on the keypad illuminates once everything is ready, and the buttons are disabled up to this point. Once you start the logging, the Limit LED flashes to indicate logging is currently in progress. When you stop the logging, the flashing stops. In addition to this, the LCD displays the current logging status, and the length of the current log.
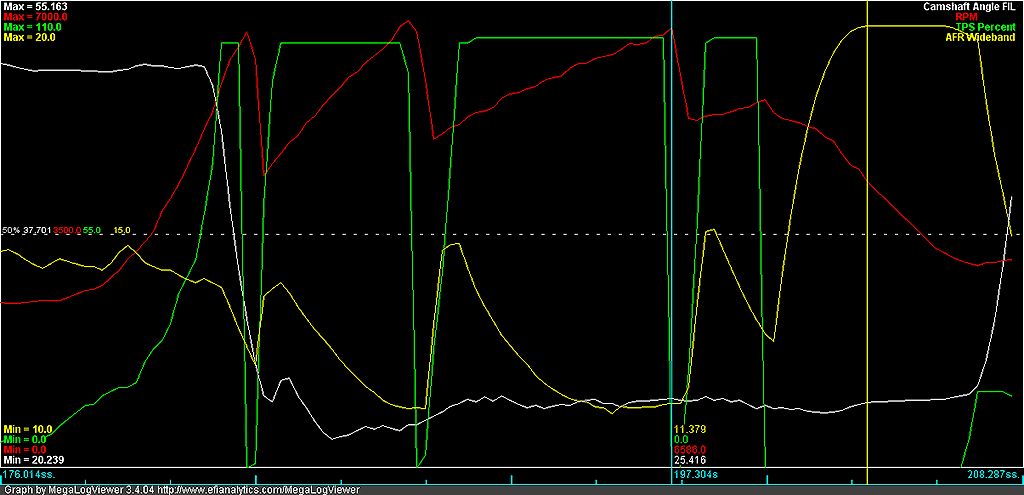
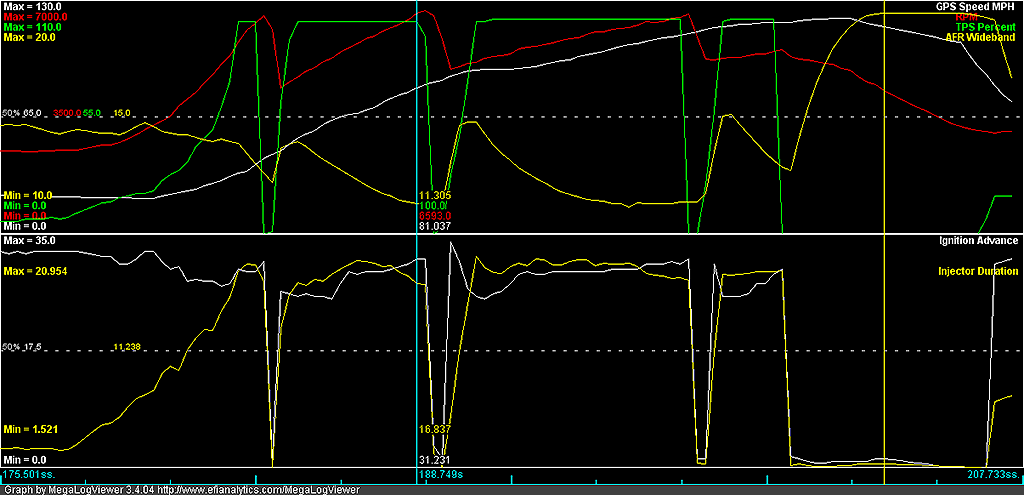
With everything working, I began to run the engine in and once it had a few miles clocked up did a few pulls and then plotted the data..
2nd > 3rd > 4th Gear Pull - Camshaft Angle (Degrees), RPM, Throttle Position (%), AFR
2nd > 3rd > 4th Gear Pull - Speed, RPM, Throttle Position (%), AFR, Ignition Advance (Degrees) and Injector Duration (m/s)
2nd > 3rd > 4th Gear Pull - Speed, RPM, Throttle Position (%), AFR, Coolant Temperature (C), Intake Temperature (C)
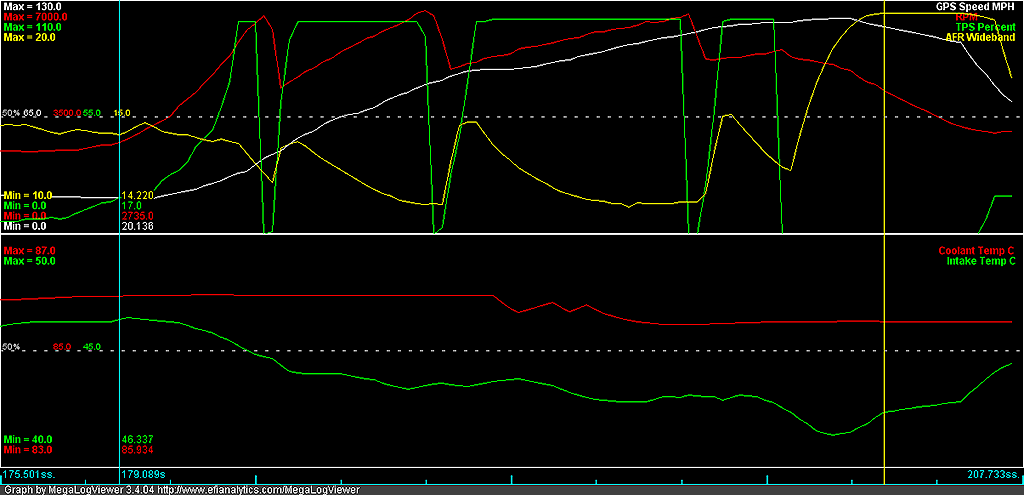
The speed is delayed somewhat, due to the delay with GPS. When I get some time I will add a feed from the differential sensor to get the actual wheel speed.
From running the engine in, you can can really see (and feel) where the M54B30 inlet cam comes alive at 2700rpm or so, and the RPMs increase so much quicker than the M52B28 ever did. Plenty more sensor values that can be added and compared, will be good for fault finding along with everything else. which will be easy enough back on a PC.
So after more miles, a few different tweaks to the calibration on the ECU (as the MAF compensation table is pretty good anyway), it was at a stage where I wanted to run it on a dyno. The M54B30 in stock form produces 228hp, 221lb/ft, so somewhere around that figure would have been nice. Generally the ones you see in the US do anywhere from 230-240hp, excluding the dreamer figures that people seem to think it will give you over 300hp... not even an S50B30 produces that.
The parts/spec of the engine now as it stands: M50 Iron Block, M54B30 Crank, M54B30 Pistons + Rods, M52 Cylinder Head, M54 Inlet Camshaft, M52 Exhaust Camshaft, Refurbished B28/M3 'Pinktop' Injectors, M50 Inlet Manifold, M50 Throttle Body, M20 Lightweight Flywheel, M3 3.2 Exhaust Manifolds and Single 2.5" Exhaust System (No Cat), Stock M52B28 Airbox and MAF, Stock M52B28 'Siemens MS41' ECU with modified calibration file.
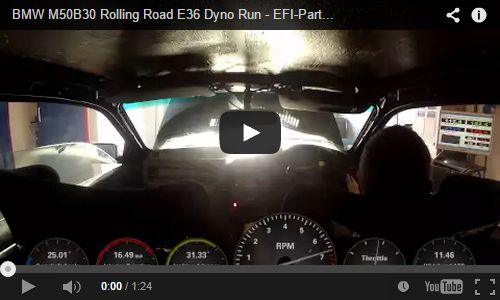
Here is the dyno run, with the data log over the top of the video:
https://www.youtube.com/watch?v=jXFZ8N0Jgt8
..and the graph, plotted against the old engine (M52B28) results:
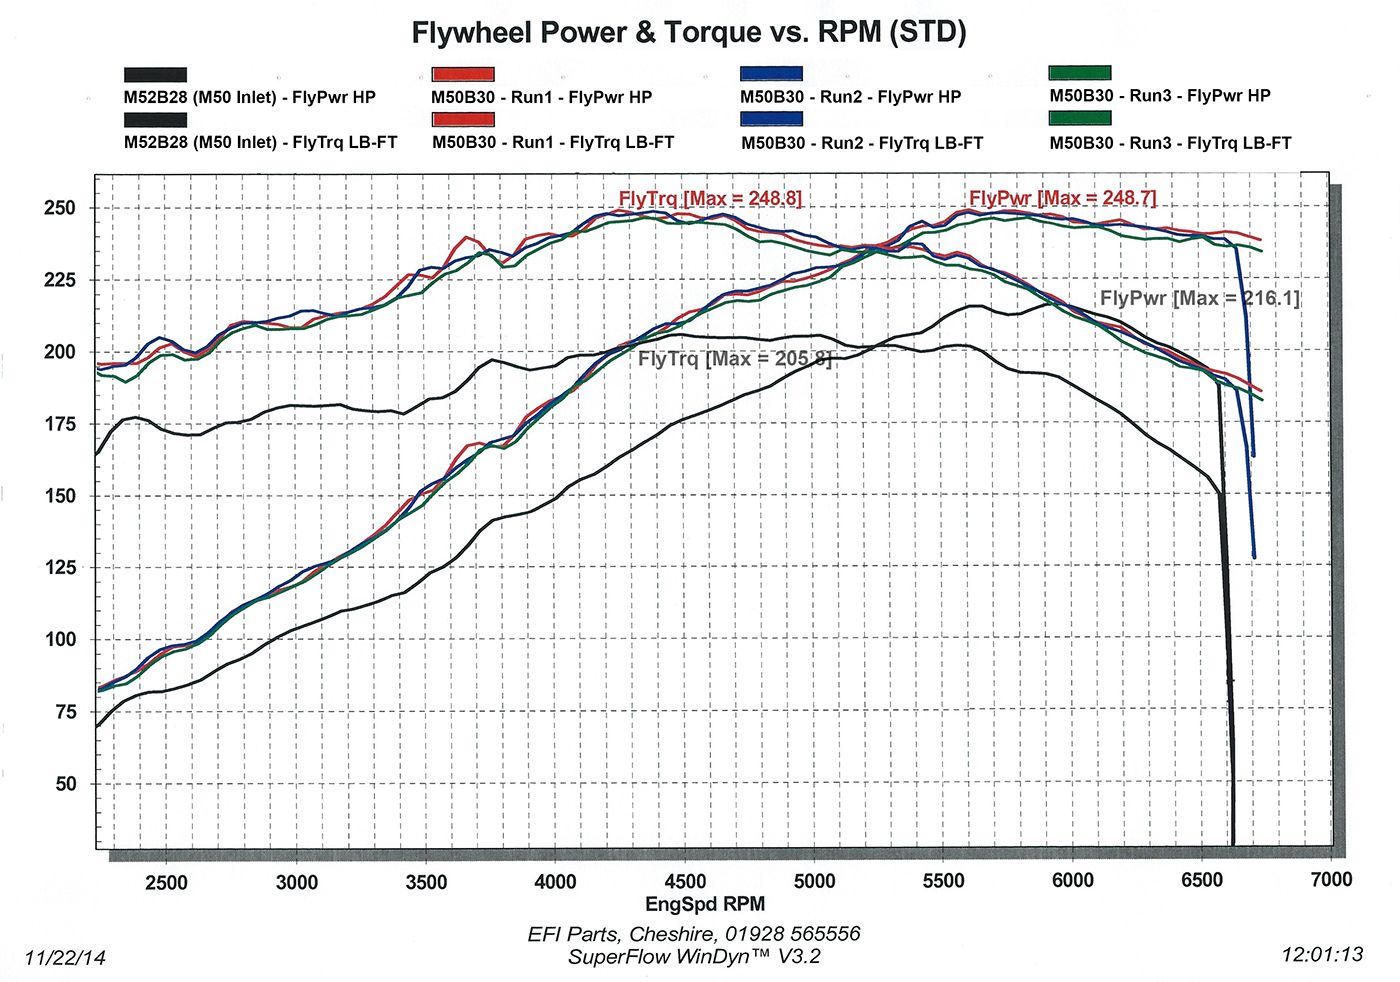
It could probably gain a tiny bit more with a bit less fuel at the top end, but everything seems well as is so I don't want to mess around with it too much just yet. The peak power holds much better after 5500rpm when compared to the old 2.8, as does the big increase in torque throughout the RPM range. The power delivery is much better.
With all said and done, it was about time to take it back on track again...
These days many people know about the BMW INPA software, which is used for fault code reading/sensor value reading on the older BMW models. You can use this on a Windows laptop with a VAGCOM KKL cable and a BMW 20pin (diagnostic) adaptor, which works fine. Inside INPA, you can view live sensor data and do various sensor/actuator tests, which is handy. The problem is, the refresh rate on this data is terribly slow, 1 update per second, if that. The E36 is not technically OBD, it will report simple fault codes in generic OBD language to off the shelf code readers, but if you want to read sensor data BMW use a different type, being the DS2 protocol.

Essentially when you are using a VAGCOM cable, the driver on your computer installs it as a COM port. With this in mind, the INPA data goes backwards and forwards over this COM port. Next step was to use a COM port monitor to view the raw binary data going over this port, and it may give a clue to how the software is talking to the ECU. I started INPA and got the Analog Sensor Values screen up, which shows information for most of the sensors you would want to see, then started monitoring.
The same request was being sent by the software to the ECU, and a long reply coming back every time, containing sensor data. Although, we're still in binary here, so the values actually mean nothing.

I won't go into too much detail on the actual language, if you are interested how the data is constructed let me know - as I really struggled to find any information out there about the DS2 format, especially for a BMW. I ended up spending weeks working everything out manually, as every byte represents a different sensor, and each has a multiplication factor, sometimes even two.
Before I looked into working out which byte was which sensor, I wanted to try and manually talk to the ECU using a COM port terminal, to see if I got a response without any other software running. I used a virtual machine (running Linux), connected using the same cable, at 9600baud, and sent the same command as above. I then read the contents of the serial buffer to find the ECU responded with the full string of data. This essentially meant I could communicate with the ECU directly over the COM port, without the need for any of the INPA software. Because you are missing out the software layer that INPA uses with the above, you can send this command to the ECU over the COM port and read the responses much quicker. I quickly wrote a small script and managed to get the request sent/data string back from the ECU 6-7 times per second (6-7 times quicker than INPA can) before I getting 'ECU Busy' responses. Not a bad rate of data at all.
With that in mind, next was to decide what hardware and software to use for building something. It had to be small form factor, quick, efficient and accept different types of inputs, especially USB for the VAGCOM cable. I ended up going with a RaspberryPi, as they offer good performance, decent RAM and very small form factor.

I only had two things in mind for the software to begin with - logging the data as quickly as possible and writing it to a CSV file for use in data log explorer/viewers. Databases are not really quick enough on a rPi to be writing data 5+ times a second without filling up a buffer and using more CPU time, so I stuck with flat files. Luckily there are plenty of libraries in Python for doing these sort of things.
Luckily the AEM Wideband outputs a serial stream of data also, which could also be fed into the RaspberryPi, and logged at the same time as all the other sensor data. After a short while and finding some of the multiplication factors for some of the sensor values, I had a starting point..

(Time, RPM, Wideband, Volts)
After a couple of weeks, I had worked out/found all the factors for each value, and which byte represented which sensor. The easily accessible ones (at any sort of speed) are:
- RPM - x 1000
- AFR - AEM Wideband
- Air Intake Temperature - Degrees C
- Coolant Temperature - Degrees C
- Ignition Advance - Degrees
- Injector Duration - ms
- Camshaft Angle - Degrees
- Engine Load - mg/Stroke
- Air Mass - kg/h
- Idle Control Valve - Current Position %
- Battery Voltage - Volts
- TPS Voltage - Volts
- TPS Percent - Calculated Value Based on TPS Voltage, between 0-100%
- Speed - KPH
- Lambda Bank 1 - Volts
- Lambda Bank 2 - Volts
- Lambda Heater Bank 1 - %
- Lambda Heater Bank 2 - %
After a bit more time on the application and a few tweeks, I had it running on the RaspberryPi, which was powered from a 12v > 5v converter. The resulting log file appeared to show everything was working well:
Time;Date Time;RPM;AFR;Intake Temperature;Coolant Temperature;Ignition Advance;Injector Duration;Camshaft Angle;Engine Load;Idle Control Valve;Battery Voltage;TPS Voltage;TPS Percent
113.593333;01/01/70 01:01:53;0;15.7;18095.000000000004;32.39999999999999;5.866999999999997;0.0;0.0;0.0;12.038039999999999;11.729999999999999;0.663;0
113.822107;01/01/70 01:01:53;0;15.7;18095.000000000004;32.39999999999999;5.866999999999997;0.0;0.0;0.0;12.038039999999999;11.729999999999999;0.663;0
114.050493;01/01/70 01:01:54;0;15.7;18095.000000000004;31.950000000000003;5.866999999999997;0.0;0.0;0.0;12.14514;11.729999999999999;0.663;0
114.278498;01/01/70 01:01:54;0;15.7;18095.000000000004;31.950000000000003;5.866999999999997;0.0;0.0;0.0;12.14514;11.729999999999999;0.663;0
Now it was running on the Raspberry Pi, I needed some way of starting/stopping the logging, and knowing what its current status is. Originally I planned on just having a switch and a single LED, as the rPi has input/output pins available for use, which is ideal for things like that. I then decided make use of the 18 button OBC already in the car, and have those buttons control the logging. My OBC did not work properly anyway, so I pulled it apart and started tracing the circuit board inside.
I hacked up a bit of the OBC, and added a rocker switch to the far left, which controls the power going to the rPi. I then set up Temp, Speed and Dist as the control buttons for the application. Temp starts the logging, Speed stops the logging, and Dist adds a marker into the log file at the moment it is pressed, in case I ever need to look up a certain part of the log file. On the far right, I used the Clock button which shuts down the rPi properly. With the rPi using an SD card for its operating system, you don't really want to be just turning the power off (essentially pulling the power lead from your computer), as its quite common for the SD card to corrupt.
Once up to this point I was testing the application on the car, and remembered this data could actually be overlaid on videos from track days, making them a bit more interesting. In addition to the live engine data, I wanted to see if it was possible to add GPS data into the same log file, which would also give you a true speed reading, not just somewhere close like the ECU/Speedo do. I picked up a small GPS chip that runs on the same voltage as the rPi, and mounted it at the bottom of the windscreen inside the car. This particular model gets a fix within 30 seconds, and just outputs a serial stream of GPS data at 10hz constantly after getting a fix. The only part left was to incorporate another background thread in my application which would read the latest GPS data from the stream, and insert it into each row with the engine data.

https://www.youtube.com/watch?v=SvatceQG1rU
The whole thing takes about 20 seconds to boot up, which is automatic when you turn the power on. The software application then automatically starts and outputs to the LCD. The Code LED on the keypad illuminates once everything is ready, and the buttons are disabled up to this point. Once you start the logging, the Limit LED flashes to indicate logging is currently in progress. When you stop the logging, the flashing stops. In addition to this, the LCD displays the current logging status, and the length of the current log.
With everything working, I began to run the engine in and once it had a few miles clocked up did a few pulls and then plotted the data..
2nd > 3rd > 4th Gear Pull - Camshaft Angle (Degrees), RPM, Throttle Position (%), AFR

2nd > 3rd > 4th Gear Pull - Speed, RPM, Throttle Position (%), AFR, Ignition Advance (Degrees) and Injector Duration (m/s)

2nd > 3rd > 4th Gear Pull - Speed, RPM, Throttle Position (%), AFR, Coolant Temperature (C), Intake Temperature (C)

The speed is delayed somewhat, due to the delay with GPS. When I get some time I will add a feed from the differential sensor to get the actual wheel speed.
From running the engine in, you can can really see (and feel) where the M54B30 inlet cam comes alive at 2700rpm or so, and the RPMs increase so much quicker than the M52B28 ever did. Plenty more sensor values that can be added and compared, will be good for fault finding along with everything else. which will be easy enough back on a PC.
So after more miles, a few different tweaks to the calibration on the ECU (as the MAF compensation table is pretty good anyway), it was at a stage where I wanted to run it on a dyno. The M54B30 in stock form produces 228hp, 221lb/ft, so somewhere around that figure would have been nice. Generally the ones you see in the US do anywhere from 230-240hp, excluding the dreamer figures that people seem to think it will give you over 300hp... not even an S50B30 produces that.
The parts/spec of the engine now as it stands: M50 Iron Block, M54B30 Crank, M54B30 Pistons + Rods, M52 Cylinder Head, M54 Inlet Camshaft, M52 Exhaust Camshaft, Refurbished B28/M3 'Pinktop' Injectors, M50 Inlet Manifold, M50 Throttle Body, M20 Lightweight Flywheel, M3 3.2 Exhaust Manifolds and Single 2.5" Exhaust System (No Cat), Stock M52B28 Airbox and MAF, Stock M52B28 'Siemens MS41' ECU with modified calibration file.
Here is the dyno run, with the data log over the top of the video:

https://www.youtube.com/watch?v=jXFZ8N0Jgt8
..and the graph, plotted against the old engine (M52B28) results:

It could probably gain a tiny bit more with a bit less fuel at the top end, but everything seems well as is so I don't want to mess around with it too much just yet. The peak power holds much better after 5500rpm when compared to the old 2.8, as does the big increase in torque throughout the RPM range. The power delivery is much better.
With all said and done, it was about time to take it back on track again...
Edited by f0xy on Sunday 4th January 18:42
Gassing Station | Readers' Cars | Top of Page | What's New | My Stuff


