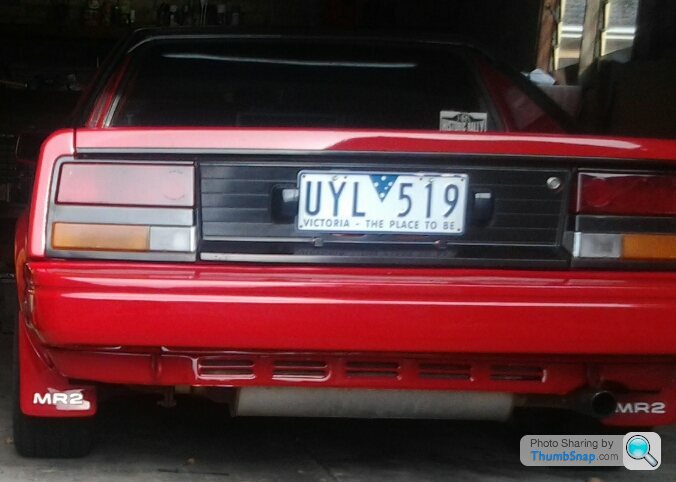
1986 Toyota MR2 (AW11)
Discussion


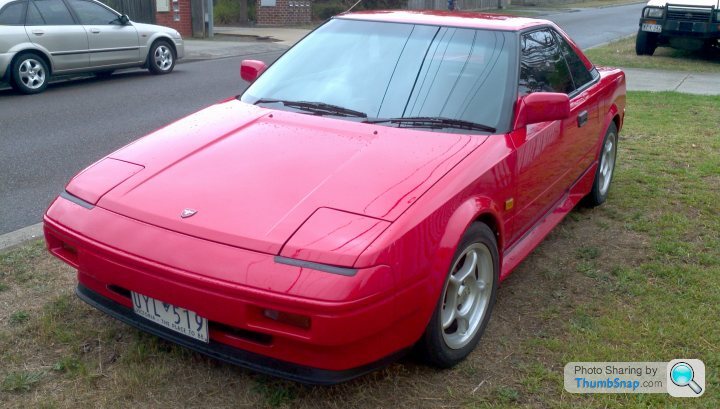
At 1:00 an (AUS time), I drove the mr2 out of the shed and hosed off several years worth of dust.
No pictures, coz it's dark out.
The car is an early Japanese market AW11 (mk1a) but has been fairly professionally fitted with mk1b air intake and other exterior trim.
I purchased it 7 or 8 years ago, and it was lowered, loud exhaust, etc., front tyres rubbed the guards on hard cornering, and it overheated the first time I drove it up the hills.
On the other hand it has electric windows, "climate control" aircon, central locking and cruise control - not bad for 1986!
Flushing and then properly bleeding the cooling system cured the overheating permanently the next day.
First step was new standard height springs and Tokico strut inserts - it was when the rears didn't fit I worked out it was an early model.
I drove it like that for a couple of years, had new sychros fitted to the gearbox but otherwise unchanged.
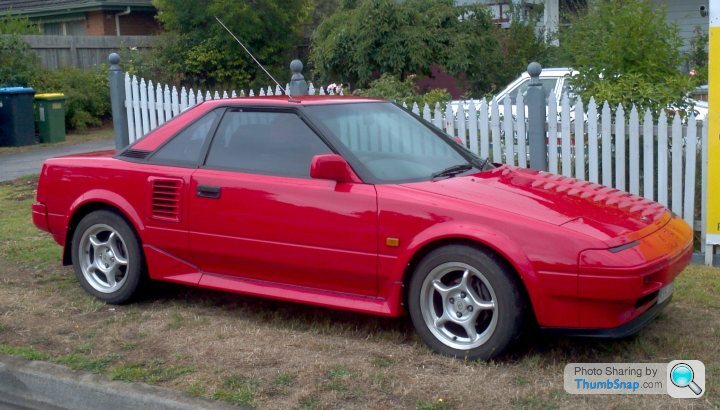
At some stage I took the "TOYOTA" decals and rear wing off, and decided it looked better that way.
I took the mr2 on a trip to Tasmania with my wife - it was a squeeze, but we got a week's worth of gear onboard . I decided I didn't like the gear ratios - it was fine when pressing on, but there was an annoying gap between 2nd and 3rd when cruising in the twisty hilly bits.
I ended up importing a six speed, torsen lsd gearbox from a the last and hottest of the 4age powered corollas - a 1999 Levin BZR.
Man maths meant I actually imported a half-cut, which included the "blacktop" engine. It's a 5-valve 1600, with variable cam timing, factory quad throttle bodies and a tubular 4-2-1 exhaust. 120 kW @7,800 rpm stock (with a good exhaust).
The engine drops right in, but I had to modify the gearbox so the shifter comes out the other side, which I managed to do using a selection of parts from different Toyota geaboxes. I had to drill the case and fit a seal carrier that I designed and had machined.
We also had to make one gearbox mount from scratch, which took a while to tack together in situ, but turned out well.
I bought a premade loom from the US to adapt the new engine wiring and computer to the body harness : I had to swap one pin in a plug, but otherwise it just worked.
I also bought a kit exhaust out of the US to mate up to the factory 4-2 manifold, but modified it to extend the secondary length. I got it welded up at work for a bottle of Jim Beam, and Shaun did a very nice job. It is wearing the biggest muffler that can fit across the car, and sounds fine without droning.
The result is a hoot : 160 hp in (allegedly) 970 kg, and it redlines at 8250 rpm. It is happies on 100 octane.
It's real party piece is the induction howl.
Unfortunately, about 9 months after the swap, the front pulley nut came loose, and it chewed up the keyway in the crank .
.
I managed to find a 2nd hand crank and front pulley, and man-maths said a full rebuild was a good idea, so I did that.
So I drove it round for a while, but the faded paint, creased fender and rusty windshield surround was annoying me, so I stripped all the exterior trim, bumpers etc., and sent it off to have all the rust removed and be resprayed.
It sat in the shed for a while, but I have repaired and repainted all the trim, and refitted it with new rubbers. I also fixed all the underbody plastic guards.
So it's 2:30 am and I'm blethering on a forum, but it is finally finished and it is red and shiny, and I get to drive it tomorrow!
No pictures, coz it's dark out.
The car is an early Japanese market AW11 (mk1a) but has been fairly professionally fitted with mk1b air intake and other exterior trim.
I purchased it 7 or 8 years ago, and it was lowered, loud exhaust, etc., front tyres rubbed the guards on hard cornering, and it overheated the first time I drove it up the hills.
On the other hand it has electric windows, "climate control" aircon, central locking and cruise control - not bad for 1986!
Flushing and then properly bleeding the cooling system cured the overheating permanently the next day.
First step was new standard height springs and Tokico strut inserts - it was when the rears didn't fit I worked out it was an early model.
I drove it like that for a couple of years, had new sychros fitted to the gearbox but otherwise unchanged.
At some stage I took the "TOYOTA" decals and rear wing off, and decided it looked better that way.
I took the mr2 on a trip to Tasmania with my wife - it was a squeeze, but we got a week's worth of gear onboard
. I decided I didn't like the gear ratios - it was fine when pressing on, but there was an annoying gap between 2nd and 3rd when cruising in the twisty hilly bits.I ended up importing a six speed, torsen lsd gearbox from a the last and hottest of the 4age powered corollas - a 1999 Levin BZR.
Man maths meant I actually imported a half-cut, which included the "blacktop" engine. It's a 5-valve 1600, with variable cam timing, factory quad throttle bodies and a tubular 4-2-1 exhaust. 120 kW @7,800 rpm stock (with a good exhaust).
The engine drops right in, but I had to modify the gearbox so the shifter comes out the other side, which I managed to do using a selection of parts from different Toyota geaboxes. I had to drill the case and fit a seal carrier that I designed and had machined.
We also had to make one gearbox mount from scratch, which took a while to tack together in situ, but turned out well.
I bought a premade loom from the US to adapt the new engine wiring and computer to the body harness : I had to swap one pin in a plug, but otherwise it just worked.
I also bought a kit exhaust out of the US to mate up to the factory 4-2 manifold, but modified it to extend the secondary length. I got it welded up at work for a bottle of Jim Beam, and Shaun did a very nice job. It is wearing the biggest muffler that can fit across the car, and sounds fine without droning.
The result is a hoot : 160 hp in (allegedly) 970 kg, and it redlines at 8250 rpm. It is happies on 100 octane.
It's real party piece is the induction howl.
Unfortunately, about 9 months after the swap, the front pulley nut came loose, and it chewed up the keyway in the crank
.I managed to find a 2nd hand crank and front pulley, and man-maths said a full rebuild was a good idea, so I did that
.So I drove it round for a while, but the faded paint, creased fender and rusty windshield surround was annoying me, so I stripped all the exterior trim, bumpers etc., and sent it off to have all the rust removed and be resprayed.
It sat in the shed for a while, but I have repaired and repainted all the trim, and refitted it with new rubbers. I also fixed all the underbody plastic guards.
So it's 2:30 am and I'm blethering on a forum, but it is finally finished and it is red and shiny, and I get to drive it tomorrow!


Added some 80s bling - the mudflaps had "MR2" picked out in reflective lettering, so I went out and bought some safety tape :
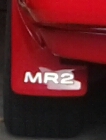
Not as neat as I would have liked, but I got the required effect.
I may redo it one day, but I have already traced and cut out the number "2" four times, and this is good enough for now.
Not as neat as I would have liked, but I got the required effect.
I may redo it one day, but I have already traced and cut out the number "2" four times, and this is good enough for now.
I give you the mk1 MR2 olding cupholder :

The flash makes it look shinier that it actually is.
It still needs a base added if I want to use it for cans, but my test takeaway coffee cup fits perfectly.
Updated : I used it this morning, and no spillage even under hard braking. Success!
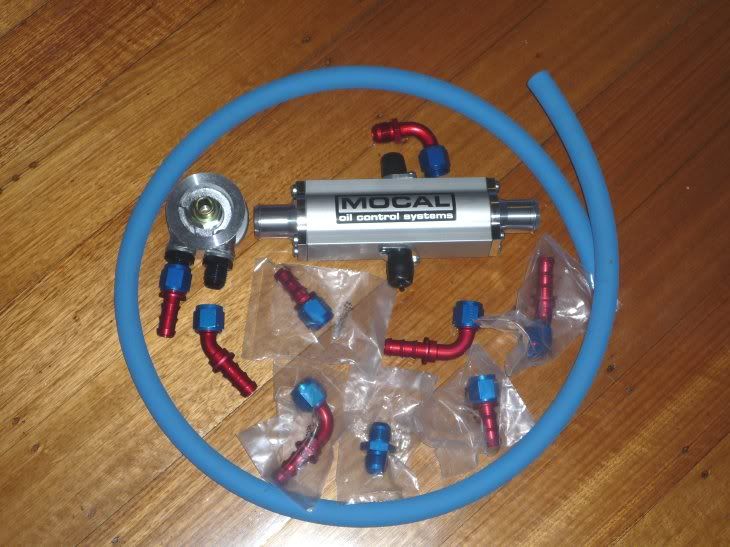
Off to order parts from around the world to sort the front suspension knock.
The flash makes it look shinier that it actually is.
It still needs a base added if I want to use it for cans, but my test takeaway coffee cup fits perfectly.
Updated : I used it this morning, and no spillage even under hard braking. Success!
Off to order parts from around the world to sort the front suspension knock.
Time for an update.
First a picture :
Out and about on it's new mk3 wheels
Since my last visit I have replaced every wearing part in the front end :
Steering column lower universal
Steering rack inner bush
Rack ends and boots
Rack mounts
Tie rod ends
Ball joints
Lower control arm bushes
Radius arm bushes
Sway bar bushes
Sway bar links
That sorted out the vague steering : now I am starting to collect the parts for the rear.
I have never been happy with the 15x7" wheels that came with the car, so it was time to do something about that.
The mk3 wheels are light, look good, and have the right offset and centre bore, but are different sizes front to rear :
15x6" front, 15x6.5 rear.
So I bought a set locally :
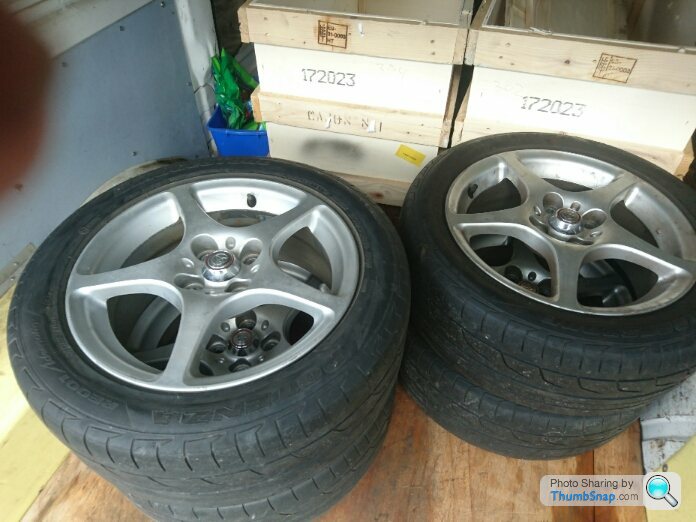
And one from 1500 km away! (Work had to deliver something in the area, so they came back in the empty work ute).
That gives me one set of 6" and one of 6.5"
I am running the wheels with the best tyres for now, while I decide what tyres to fit - the fronts are 185x55, which feel about right, and the rears are 205x50, which are too wide.
I also got the front parking lights to work (they were wired to an alarm that's no longer there).
The other big job was rewiring the headlights, but that's another post.
First a picture :
Out and about on it's new mk3 wheels
Since my last visit I have replaced every wearing part in the front end :
Steering column lower universal
Steering rack inner bush
Rack ends and boots
Rack mounts
Tie rod ends
Ball joints
Lower control arm bushes
Radius arm bushes
Sway bar bushes
Sway bar links
That sorted out the vague steering : now I am starting to collect the parts for the rear.
I have never been happy with the 15x7" wheels that came with the car, so it was time to do something about that.
The mk3 wheels are light, look good, and have the right offset and centre bore, but are different sizes front to rear :
15x6" front, 15x6.5 rear.
So I bought a set locally :
And one from 1500 km away! (Work had to deliver something in the area, so they came back in the empty work ute).
That gives me one set of 6" and one of 6.5"
I am running the wheels with the best tyres for now, while I decide what tyres to fit - the fronts are 185x55, which feel about right, and the rears are 205x50, which are too wide.
I also got the front parking lights to work (they were wired to an alarm that's no longer there).
The other big job was rewiring the headlights, but that's another post.

Sillyhatday said:
Super, must be a riot with that much power.
By any chance you don't have this on another forum?
The power is nice, but the main fun is having 8300 rpm to play with. The LSD is also a nice thing to have, although now when it breaks traction both rear wheels let go - I haven't spun it yet, but it gets a bit squirrely in the wet at full throttle.By any chance you don't have this on another forum?
I started the whole engine swap because I didn't like the gap between 2nd and 3rd gear, so started looking into what gearbox I could fit, and things sort of snowballed.
Regarding other forums, I did a full write up on the gearbox conversion (part numbers, photos and all) on toymods, but I haven't been on there for a while.
Dyno run from when I first fitted the Blacktop : 95 kw (128 hp) at the wheels

Modified tacho to suit :


SlimJim16v said:
I had 6.5x15s on ours with 205/50s and they fitted, looked and worked well. Suspension was std though.
Nice work on the conversion.
Thanks.Nice work on the conversion.
I'm planning on 195/50 at the moment, but have an endless list of minor things to do.
The trip meter has just stopped working, so I intend to fit a '90s Corolla electronic speedo & sender.
That means a trip to the wrecker next RDO.
Well things have taken a decided turn for the worse
I decided (on advice from a very experienced tuner) to load the engine up a bit on the dyno at work.
To cut to the chase, it dropped to 3 cylinders, and #4 sparkplug came out with a broken insulator at the tip. Tuner (and NGK) say that's a sign of detonation.
Replaced #4 plug, still only running on 3.
Removed plug, and it's slightly oily.
I will now trailer the car home (probably this weekend) and remove the cam cover. I have a vain hope that the broken spark plug end is holding a valve open, but it is more likely a damaged piston.
Since I don't have a spare thousand dollars (pistons, head bolts and gaskets add up to about $750), it look like the MR2 will be garaged for a while.
BenWRXSEi said:
Ditto. Hope it's not terminal.
Nothing is terminal, just expensive. I'm in way to deep to give up on this car now
 .
.Whatever I broke, it will get fixed, but it may take a few months to get all the parts if I have killed a piston and need to strip it down.
To cheer myself up, I have been daydreaming -
1) Tomai do a set of cams that are supposed to be good for an extra 15 or so hp, and they are one of our customers, so I will get the boss to ask them for a trade price. He may even sell them an upgrade, and kill two birds at once.
2) A friend has recently totalled his rally car, and now has a spare aftermarket ECU to sell...
...If I have to rebuild the engine, it would be a shame not to upgrade it
.The ECU is the more likely upgrade - I still don't know why the car detonated so badly, but the factory ECU is now nearly 20 years old, and there are definitely gains to be made with a better ECU. Some of the factory ECUs have had issues with leaking caps and failing transistors, so I should at least open the case and have a look.
I will probably pull the head off this weekend, and will then know how bad it is.
I did a compression test on Friday night, and had no measurable compression on #4.
I stripped the top end over the weekend, and went to undo the head bolts, only to find my 12 point hex drive for the head bolts was missing - still in a mates shed.
I picked it up after work tonight, and lifted the head.
Step one - where's the damaged piston I was expecting?
Ok, find a container for 20 cam followers in order, pull the followers and shims, and flip the head over.
I think I can see where all the compression has gone :

See the exhaust valve at bottom right?
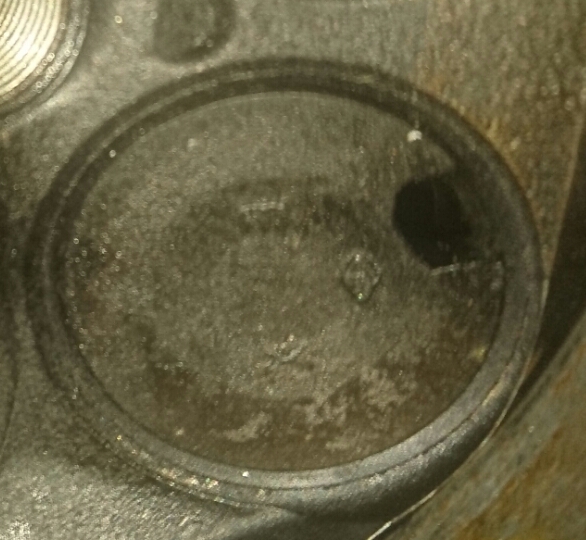
I don't think that piece should be missing.
I am taking the head to work for someone with more experience than me to look at, but I may get off comparitively lightly.
As an added bonus, all 10 headbolts (and the 10 I replaced when I last had the head off) measure up within factory spec, so I can re-use them. That saves several hundred dollars.
Now to find out what I'm up for the head - I would like to just get that valve replaced and reseated, but it depends what the head shop says.
Replacing 20 valves won't be cheap.
I stripped the top end over the weekend, and went to undo the head bolts, only to find my 12 point hex drive for the head bolts was missing - still in a mates shed.
I picked it up after work tonight, and lifted the head.
Step one - where's the damaged piston I was expecting?
Ok, find a container for 20 cam followers in order, pull the followers and shims, and flip the head over.
I think I can see where all the compression has gone :
See the exhaust valve at bottom right?
I don't think that piece should be missing
.I am taking the head to work for someone with more experience than me to look at, but I may get off comparitively lightly.
As an added bonus, all 10 headbolts (and the 10 I replaced when I last had the head off) measure up within factory spec, so I can re-use them. That saves several hundred dollars.
Now to find out what I'm up for the head - I would like to just get that valve replaced and reseated, but it depends what the head shop says.
Replacing 20 valves won't be cheap.
So I parked the car last year while I got some cash together.
Since then
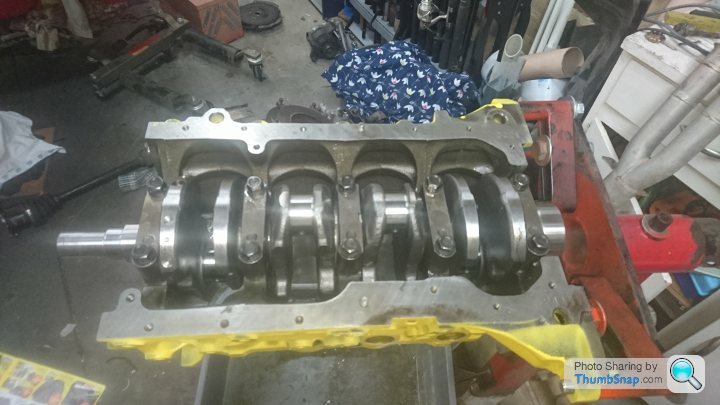
Block bored and honed 0.5mm oversize.
Crank checked and linished.
Head porting cleaned up, and fitted with 1mm oversized stainless valves.
I ordered numbered bearings from Toyota after measuring everything - 4 x #3 and 1 x #4 mains, 4 x #2 big ends.
The mains all plastiguaged to 0.025mm (spec is 0.015-0.045), so the mains are assembly lubed and torqued home.
Pistons & head tomorrow.
I have replaced heads before, but this is my first full rebuild, so I am checking everything twice

Since then
Block bored and honed 0.5mm oversize.
Crank checked and linished.
Head porting cleaned up, and fitted with 1mm oversized stainless valves.
I ordered numbered bearings from Toyota after measuring everything - 4 x #3 and 1 x #4 mains, 4 x #2 big ends.
The mains all plastiguaged to 0.025mm (spec is 0.015-0.045), so the mains are assembly lubed and torqued home.
Pistons & head tomorrow.
I have replaced heads before, but this is my first full rebuild, so I am checking everything twice


Veeayt said:
Have you replaced the ECU?
I am currently running the Japanese blacktop ECU that came with the engine.I had been thinking of fitting an aftermarket one this year, but that budget went on pistons, valves and machining
.I did open the ECU to check the capacitors, and fit a heatsink to the VVT switching transistor.
So It's summer down here and the MR2 is back in service!
Th aircon failed last summer due to an electrical fault of some kind : the a/c relay would just chatter continually.
A small coupe with a steeply sloped windscreen and charcoal interior is no fun in 40+ weather, at least in traffic, so it got parked up, and stayed parked up over winter.
I got a 1998 Subaru Outback (that's practically new for me!) and it's a great winter hack.
Anyway I fired it up a few weeks ago, and it was running ok, but had a nasty hesitation at light throttle openings. The general consensus on t'internet is that these engines are very finicky about oxygen sensors - mine tested ok, but a bit slow, and it was carboned up from all the oil the old engine burnt.
Time for a new sensor, but an OE Denso replacement is over $150 - for a narrowband sensor
After a lot of digging, I found the Bosch equivalent sensor element, then scoured the catalog until I found one with the correct plug and lead length - ironically a Subaru one. However, it is a screw-in type, and the exhaust fitting is bolt-on. No problem - I dismantled an old bolt on sensor to get the stainless flange, and Lindsay at work tig welded a boss on it and tapped to size:
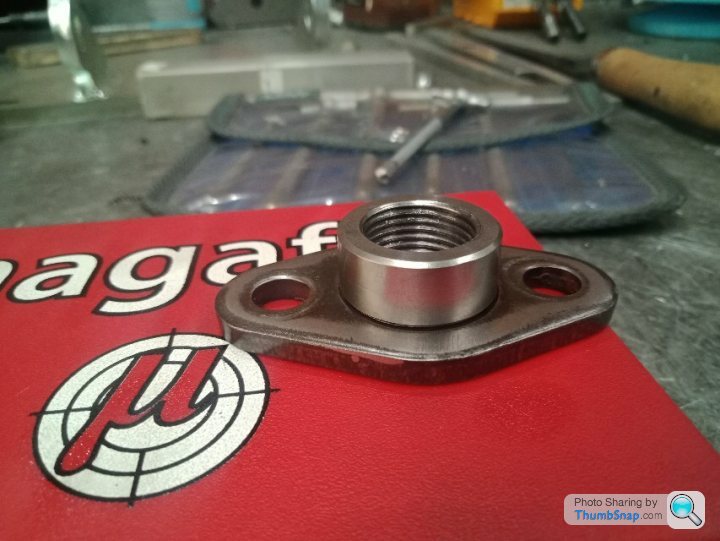
Then it was milled down to about a 5mm boss.
Works a charm. The sensor fits perfectly and the hesitation is gone.
Now if only I knew why it's idling pig-rich. I've tested the air and water temp sensors, and they're both ok.
Th aircon failed last summer due to an electrical fault of some kind : the a/c relay would just chatter continually.
A small coupe with a steeply sloped windscreen and charcoal interior is no fun in 40+ weather, at least in traffic, so it got parked up, and stayed parked up over winter.
I got a 1998 Subaru Outback (that's practically new for me!) and it's a great winter hack.
Anyway I fired it up a few weeks ago, and it was running ok, but had a nasty hesitation at light throttle openings. The general consensus on t'internet is that these engines are very finicky about oxygen sensors - mine tested ok, but a bit slow, and it was carboned up from all the oil the old engine burnt.
Time for a new sensor, but an OE Denso replacement is over $150 - for a narrowband sensor
After a lot of digging, I found the Bosch equivalent sensor element, then scoured the catalog until I found one with the correct plug and lead length - ironically a Subaru one. However, it is a screw-in type, and the exhaust fitting is bolt-on. No problem - I dismantled an old bolt on sensor to get the stainless flange, and Lindsay at work tig welded a boss on it and tapped to size:
Then it was milled down to about a 5mm boss.
Works a charm. The sensor fits perfectly and the hesitation is gone.
Now if only I knew why it's idling pig-rich
. I've tested the air and water temp sensors, and they're both ok.Small update.
I had to replace a noisy front wheel bearing, and noticed the front brake disks are at their wear limit, so I've a new set of disks & pads on order. Since the mk1a is slightly different to the more common 87-89 model, it took a bit of research to ensure they're the correct ones.
I've also ordered some completely unnecessary bling, but have no idea when they'll arrive :
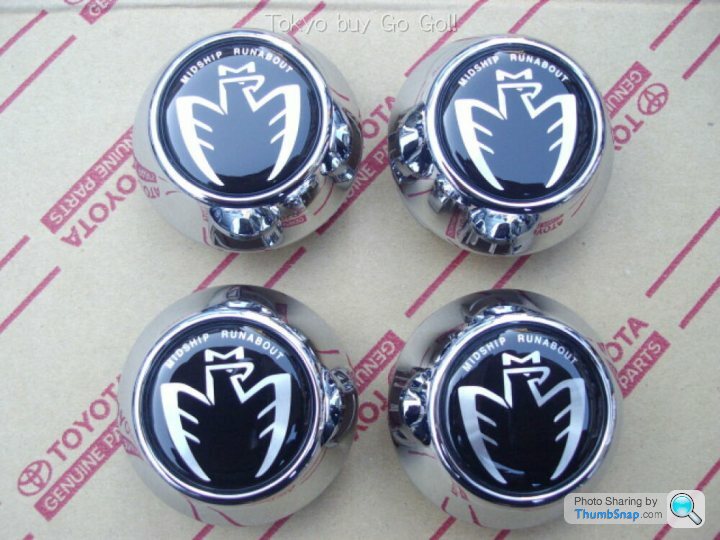
They are JDM wheel caps to suit the mk3 wheels I'm using.
Next spendy bit - new tyres all round. Probably going to be Pilot Sports. The current Pirellis are now rock-hard with age, although legal tread depth.
Then - rear suspension refresh. I've got new Tokico inserts, but need bushes / balljoints / rod ends.
I doubt this car will ever be 'finished', but as long as it's drivable, who cares?
I have another project underway - setting up an Arduino to drive an electronic speedo movement from a Celica so I can ditch the tired cable driven one.
That can wait for winter hibernation, as I'll have to remove the instrument cluster and hack the circuit board around a bit.
I had to replace a noisy front wheel bearing, and noticed the front brake disks are at their wear limit, so I've a new set of disks & pads on order. Since the mk1a is slightly different to the more common 87-89 model, it took a bit of research to ensure they're the correct ones.
I've also ordered some completely unnecessary bling, but have no idea when they'll arrive :
They are JDM wheel caps to suit the mk3 wheels I'm using.
Next spendy bit - new tyres all round. Probably going to be Pilot Sports. The current Pirellis are now rock-hard with age, although legal tread depth.
Then - rear suspension refresh. I've got new Tokico inserts, but need bushes / balljoints / rod ends.
I doubt this car will ever be 'finished', but as long as it's drivable, who cares?
I have another project underway - setting up an Arduino to drive an electronic speedo movement from a Celica so I can ditch the tired cable driven one.
That can wait for winter hibernation, as I'll have to remove the instrument cluster and hack the circuit board around a bit.
Gassing Station | Readers' Cars | Top of Page | What's New | My Stuff