Caterham Seven 360R
Discussion


Thank you for all the kind words of encouragement. It's great to get positive feedback from likeminded petrol-heads when my friends (bar a few) and family think I'm mad.
I'm not a million miles away from Huddersfield if that tempts any seasoned spanner wielders...?
Progress has been fairly slow so far. Most of it has been spent reading instructions and rummaging around in boxes trying to identify parts / identify what is missing.
My DIY mechanic skills have up until now, extended as far as fitting exhausts so assembling a Caterham is a big leap for me. So identifying said parts hasn't come naturally. Although I do know what a de-dion tube looks like and that was definitely missing!
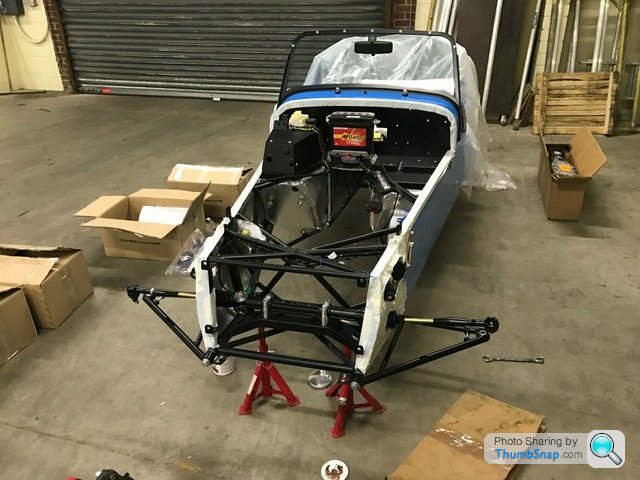
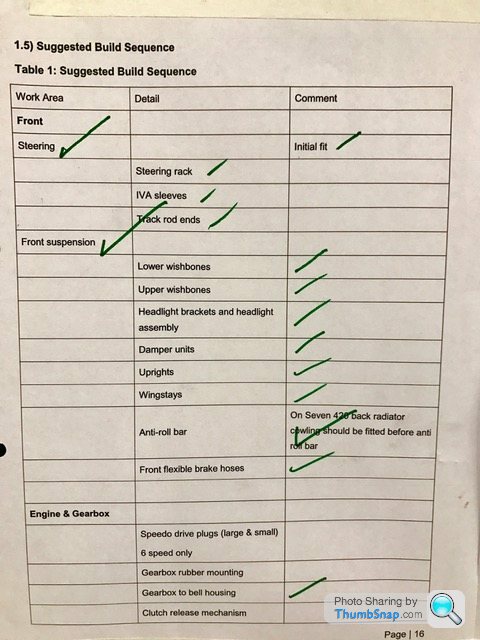
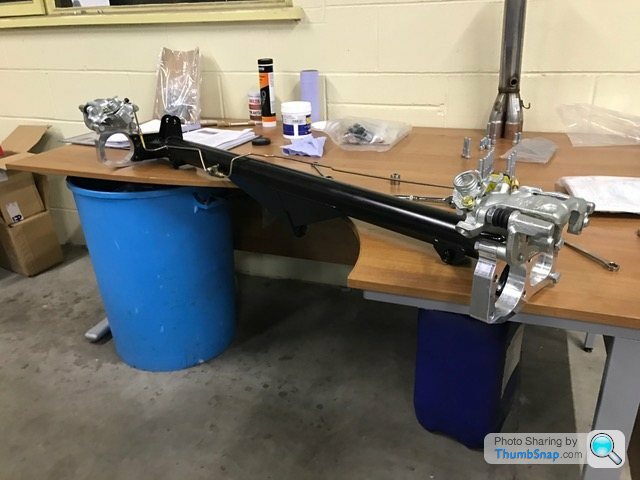
As the flaky instructions recommend, I started at the front and fitted the steering rack first.
There are two sets of paired clamps that...well...clamp the rack to the chassis. IVA sleeves slide over the steering arms followed by the track rod ends. All pretty straight forward.
A minor hiccup being I only realised the clamps were paired once I'd mixed them up! Nothing a bit of measuring couldn't solve.


Now time for the front suspension paraphernalia.
Lower wishbones simply bolt into place with a few washers inserted (read hammered) either side of each bush.

Upper wishbones were slightly more tricky as the instructions request you to insert a bush into the bush on the rear leg of the wishbone. To me a bush is something made from rubber, so it took me a while to realise that a little metal sleeve in an unmarked bag was the part for the job.
A bit of copper grease later and we have both rear legs of each upper wishbone bolted onto the chassis.

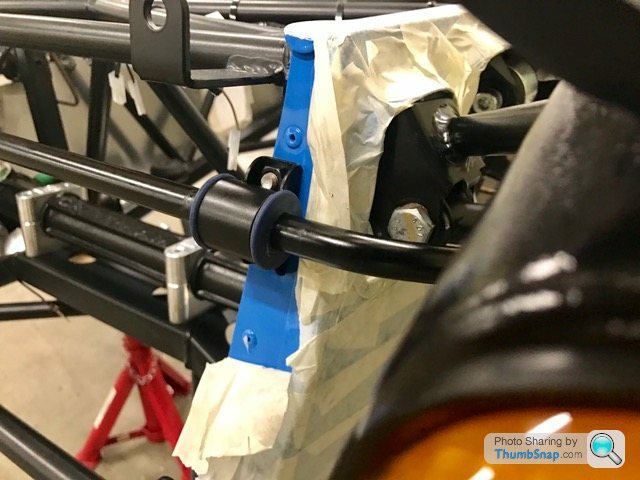
The front leg of the upper wishbones now require bolting to the chassis but not before you have assembled the headlight and indicator units and fitted them to their corresponding brackets. The brackets then slot onto the same bolts used to secure the wishbones.
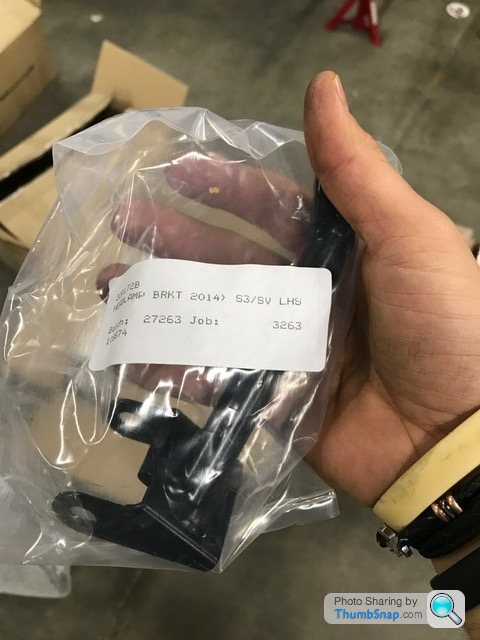
I eventually found the left hand bracket deep in the bottom of a random box but not the right hand one. It was late in the evening now so I called it a day.
The missing bracket should arrive in the post tomorrow so I can continue (and hopefully finish!!) the front suspension.
Bit of a boring and lacking update....sorry. More next time!
I'm not a million miles away from Huddersfield if that tempts any seasoned spanner wielders...?
Progress has been fairly slow so far. Most of it has been spent reading instructions and rummaging around in boxes trying to identify parts / identify what is missing.
My DIY mechanic skills have up until now, extended as far as fitting exhausts so assembling a Caterham is a big leap for me. So identifying said parts hasn't come naturally. Although I do know what a de-dion tube looks like and that was definitely missing!
As the flaky instructions recommend, I started at the front and fitted the steering rack first.
There are two sets of paired clamps that...well...clamp the rack to the chassis. IVA sleeves slide over the steering arms followed by the track rod ends. All pretty straight forward.
A minor hiccup being I only realised the clamps were paired once I'd mixed them up! Nothing a bit of measuring couldn't solve.
Now time for the front suspension paraphernalia.
Lower wishbones simply bolt into place with a few washers inserted (read hammered) either side of each bush.
Upper wishbones were slightly more tricky as the instructions request you to insert a bush into the bush on the rear leg of the wishbone. To me a bush is something made from rubber, so it took me a while to realise that a little metal sleeve in an unmarked bag was the part for the job.
A bit of copper grease later and we have both rear legs of each upper wishbone bolted onto the chassis.
The front leg of the upper wishbones now require bolting to the chassis but not before you have assembled the headlight and indicator units and fitted them to their corresponding brackets. The brackets then slot onto the same bolts used to secure the wishbones.
I eventually found the left hand bracket deep in the bottom of a random box but not the right hand one. It was late in the evening now so I called it a day.
The missing bracket should arrive in the post tomorrow so I can continue (and hopefully finish!!) the front suspension.
Bit of a boring and lacking update....sorry. More next time!
Thanks everyone!
I'm a bit pedantic so maybe flakey is a strong word.
Sometimes the instructions will say "use bolt (3) from fixings pack 30DAZ6" for example. When actually it means 30DAZ5. A minor detail but one that makes me convince myself I'm doing something wrong.
It can also sometimes tell you to fit a part that doesn't come with your car which can be misleading.
Don't forget, I'm a complete novice when it comes to spannering. I'd imagine the instructions would be fine for someone with a bit more DIY nous.
There's some talk of Caterham releasing a new instruction manual which is inspired by Lego-Technics. This sounds perfect for me!
I'm away this weekend so no updates until next week :-(
scz4 said:
When do you hope to have the kit finished?
I'm virtually swaying between 360R and 420R, so look forward to your thoughts once up and running. I love the idea of upgrading a 360R over many years of ownership. But I'm also a fairly impatient guy and would probably end up upgrading to 420 spec after 6 months, wasting thousands in the process.
Thank you! I'm virtually swaying between 360R and 420R, so look forward to your thoughts once up and running. I love the idea of upgrading a 360R over many years of ownership. But I'm also a fairly impatient guy and would probably end up upgrading to 420 spec after 6 months, wasting thousands in the process.
Edited by scz4 on Thursday 12th January 22:30
Hoping to be on the road by Easter. Fingers crossed that's not an ambitious dream!
I was swaying between this or a 310. Went for the 360 because it excited/frightened me the most on the test drive round a very damp and greasy Donnington. Plus the 310 is (realistically) at the top of its tuning potential, whereas there's room for more power in the 360 if I ever need it.
Between the 360 and 420 - I read the latter can be a bit more tricky on the limit. Something a tinker with the geometry could sort out no doubt.
Tazio77 said:
Get some lengths of foam pipe insulation to put on the diagonals in the engine bay to protect them too.
And enjoy the process...read the installation manual, then read it again, don't try and get ahead of yourself.
Join the L7Club, loads of advice to be had over there.
Thank you for the advice. I'll be sure to join the club soon!And enjoy the process...read the installation manual, then read it again, don't try and get ahead of yourself.
Join the L7Club, loads of advice to be had over there.
Feirny said:
I'm local if you require some decent snaps of it some time, in build or completed.
I'll follow the progress regardless, as it looks great.
That would be awesome! Cheers. I'll follow the progress regardless, as it looks great.
DaveK-S1 said:
Enjoy fitting the top wishbone rear bolt, they can be quite challanging
Hmm, I've done this without much of a fight.... Perhaps a stroke of luck or I've done something wrong?!jdwoodbury said:
OP - Car looks stunning, bookmarked....hope you get it on the road for the spring 
Thank you very much. Me too! Little bit of progress last night...
The missing headlight bracket arrived through the post on Monday allowing me to crack on where I left off.
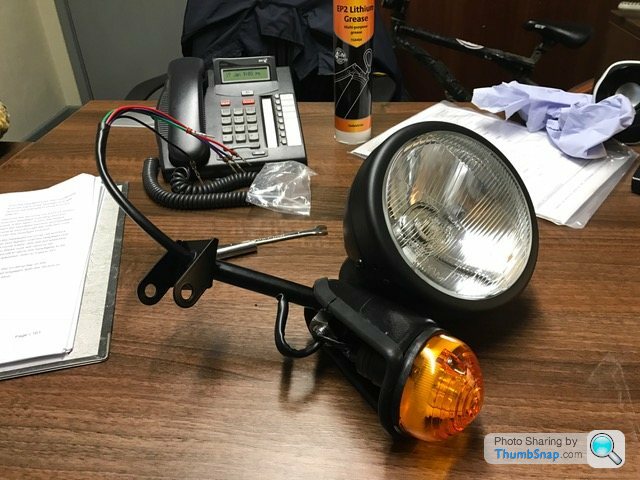
Headlight assembly was pretty easy if a bit fiddly. It requires you to pass the indicator earth wire up into the headlight bowl and secure it to an earth bolt. The live wire (is that what they're called?) then needs to be fed down the sleeve containing the wires for the headlight. This all then gets pushed through the headlight bracket ready to bolt onto the upper wishbone front mount.
With it being so fiddly, it took me over an hour. I thought it was going to be a ten minute job! Have a feeling I'll be saying that a lot during the build...
Anyway, I now have two of these:
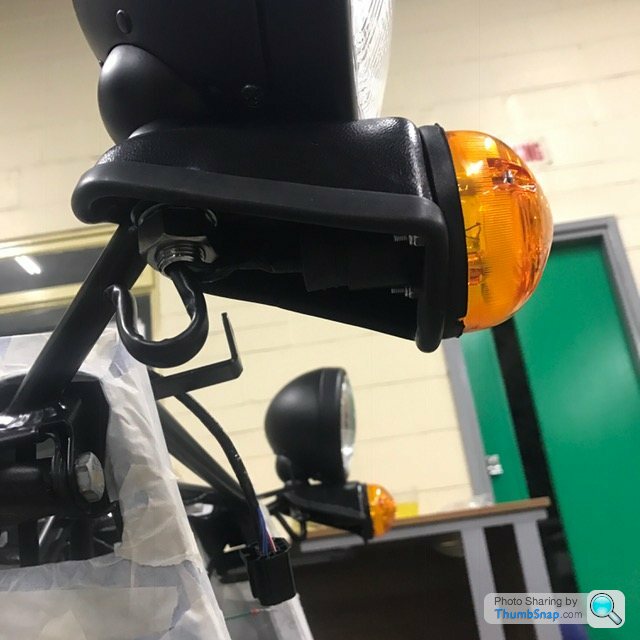
Next up was bolting them to the chassis using the same bolt that secure the upper wishbone front leg. The headlight bracket put up a little bit of a fight but nothing major:

Notice the rubber strip (lovingly applied by me) running round the indicator cone. This is for IVA purposes.... Just in case you cut someone with the sharp plastic edge whilst you run them over.
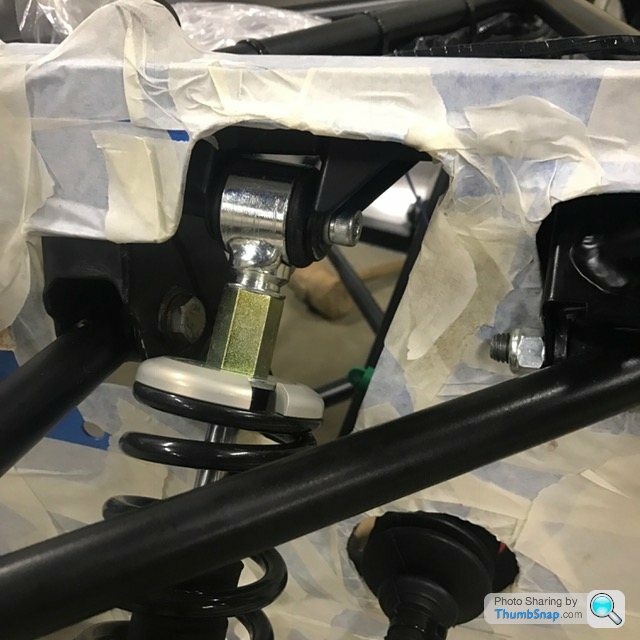
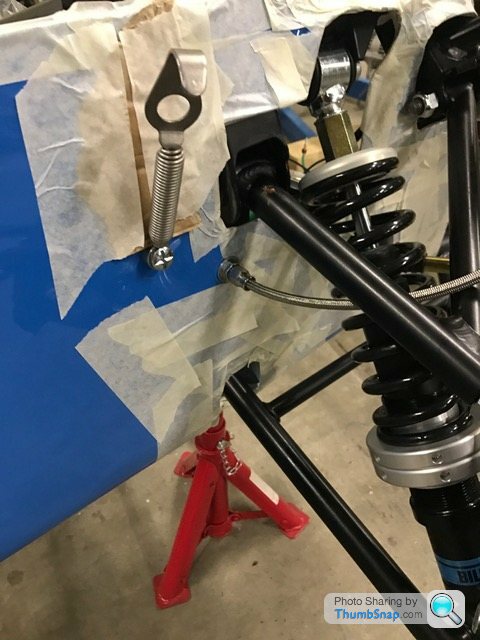
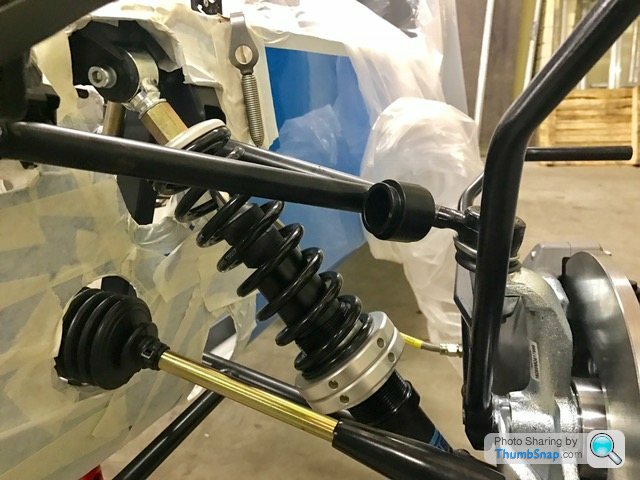
Now time to fit the spring/damper units.
More inserting metal bushes within bushes. As some of you will know, I've encountered these metal sleeves before so now know what I'm looking for!
The cap head bolt screws into a captive nut in the chassis so all you have to do is unscrew it, line the damper up, and screw back in. Only problem is, the bodywork is in the way.. This requires a gentle push giving you enough room to gradually quarter turn an allen key. It also needs torqueing to 11nm... no way a torque wrench will fit in there so I've used my best judgement. Maybe I'll come across an action man sized torque wrench one day!
Next was fitting the lower damper bush (within a bush) onto the lower wishbone. Another cap head bolt with plenty of room round it this time. The bracket the damper sits in is very tight so a fair bit of 'persuading' was need for it to slot into place.

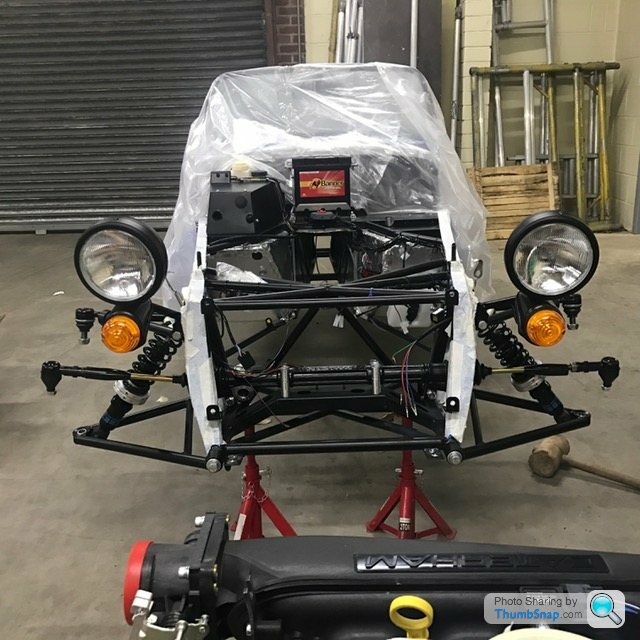
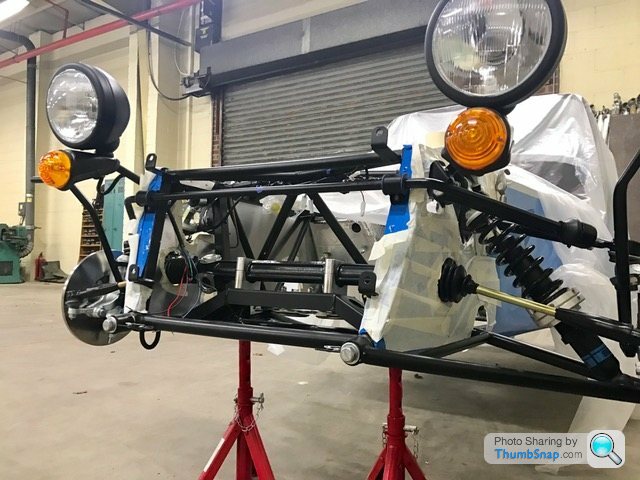
Both sides on and it's starting to look a bit more like a car now. Albeit one without an engine, gearbox or rear end...oh, and wheels. Hopefully this will be rectified soon!
More green ticks on a very long 'to do' list:

More tonight.
The missing headlight bracket arrived through the post on Monday allowing me to crack on where I left off.
Headlight assembly was pretty easy if a bit fiddly. It requires you to pass the indicator earth wire up into the headlight bowl and secure it to an earth bolt. The live wire (is that what they're called?) then needs to be fed down the sleeve containing the wires for the headlight. This all then gets pushed through the headlight bracket ready to bolt onto the upper wishbone front mount.
With it being so fiddly, it took me over an hour. I thought it was going to be a ten minute job! Have a feeling I'll be saying that a lot during the build...
Anyway, I now have two of these:
Next up was bolting them to the chassis using the same bolt that secure the upper wishbone front leg. The headlight bracket put up a little bit of a fight but nothing major:
Notice the rubber strip (lovingly applied by me) running round the indicator cone. This is for IVA purposes.... Just in case you cut someone with the sharp plastic edge whilst you run them over.
Now time to fit the spring/damper units.
More inserting metal bushes within bushes. As some of you will know, I've encountered these metal sleeves before so now know what I'm looking for!
The cap head bolt screws into a captive nut in the chassis so all you have to do is unscrew it, line the damper up, and screw back in. Only problem is, the bodywork is in the way.. This requires a gentle push giving you enough room to gradually quarter turn an allen key. It also needs torqueing to 11nm... no way a torque wrench will fit in there so I've used my best judgement. Maybe I'll come across an action man sized torque wrench one day!
Next was fitting the lower damper bush (within a bush) onto the lower wishbone. Another cap head bolt with plenty of room round it this time. The bracket the damper sits in is very tight so a fair bit of 'persuading' was need for it to slot into place.
Both sides on and it's starting to look a bit more like a car now. Albeit one without an engine, gearbox or rear end...oh, and wheels. Hopefully this will be rectified soon!
More green ticks on a very long 'to do' list:
More tonight.
Edited by ECG1000 on Wednesday 18th January 13:38
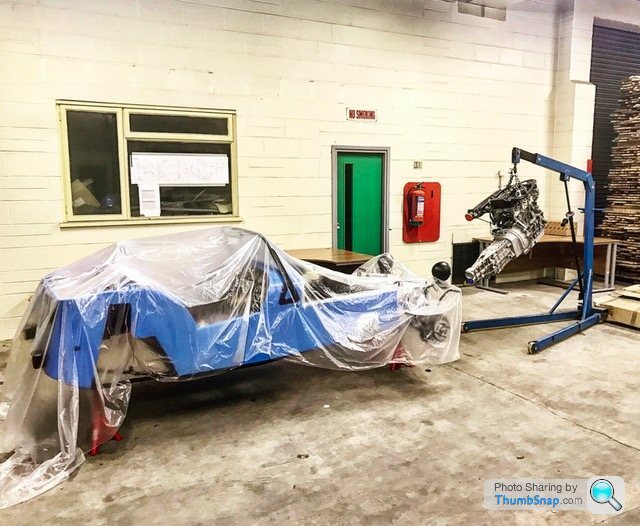
Small update from last night's effort.
The plan was to get this slotted in:
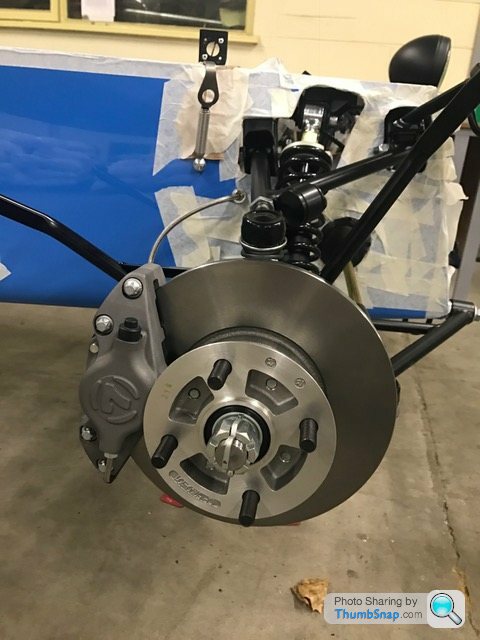
But first of all, I wanted to finish off the suspension/wishbone assembly once and for all.
This started off as fastening the upright into the lower wishbone. Then the nut and washer on the stub axle had to come off with the washer being replaced by the wing-stay with a new nyloc nut securing it.
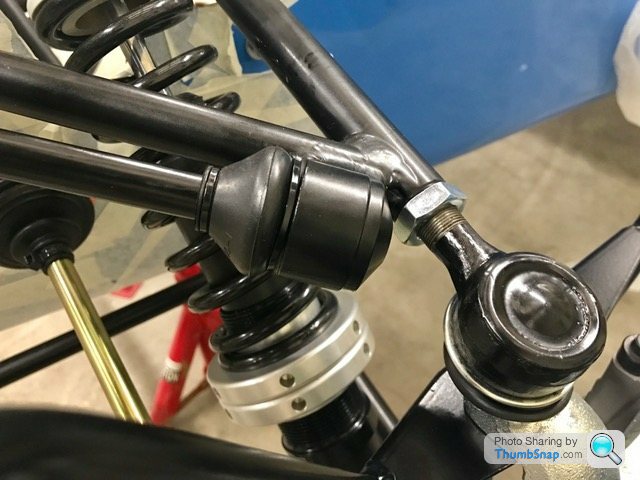
Next the upper wishbone has to be leant on with a fair bit of force, pushed through the top of the upright and wingstay then secured by another nyloc nut. And finally fitting the steering arm into place at the front of the upright.
End result:
All pretty straight forward stuff. One minor snag... the nut that secures the upper wishbone into the upright has very little room below it but requires a deep socket due to the ball joint bolt being so long. I got it as far as it would go with a 'shallow' socket and a thin wrench half in, then had to finish the rest off with an adjustable spanner.
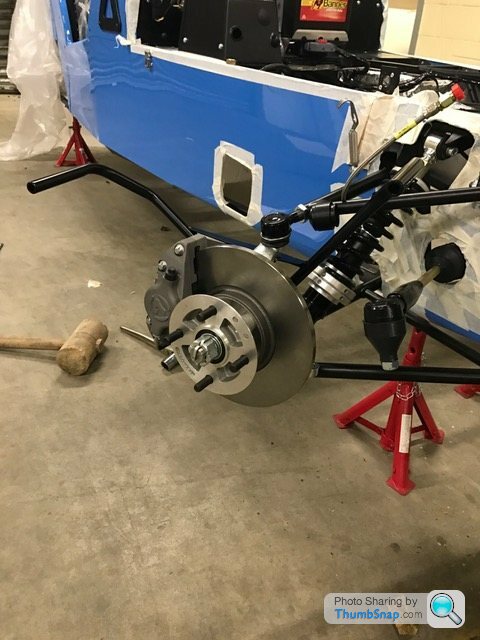
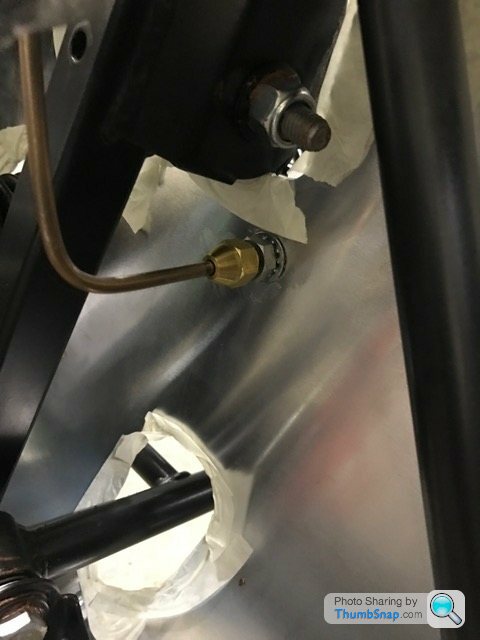
Next up, brake lines.
Nice simple, straight forward step. Flexible hose screwed into the caliper, then into a hole on the outside of the car body, secured by a nut on the inside. Then simply screw the copper brake pipe onto the braided line end protruding from the outside in.
The last part of the front suspension system is the anti-roll bar. It slots into the cups on the front legs of the upper wishbones. I got a bit heavy handed here and broke one of the ARB ball ends so rain stopped play so to speak. As soon as the replacement from Caterham arrives, this will be fitted and finished
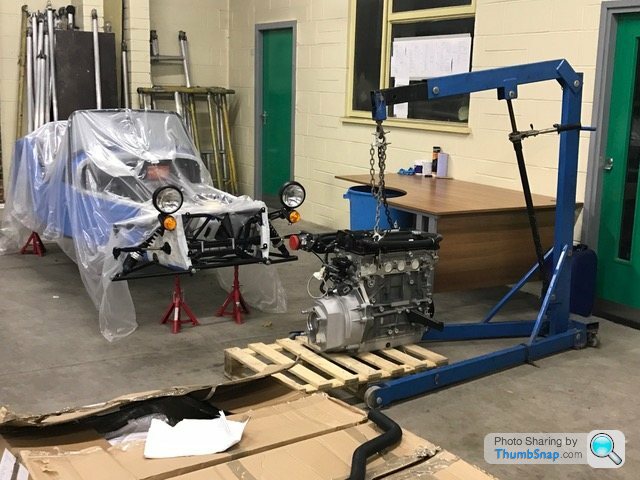
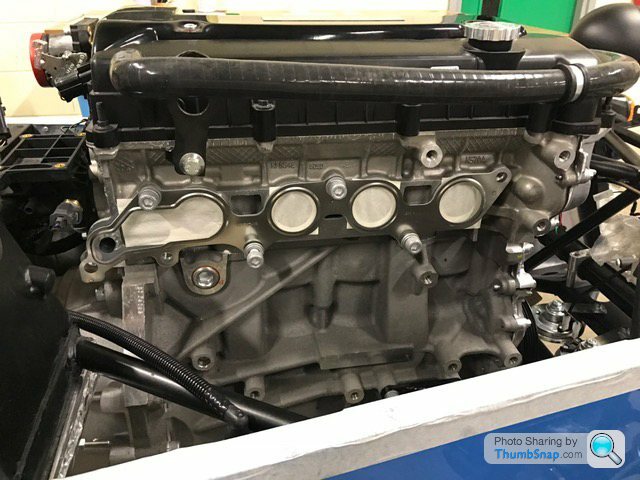
Engine in...well almost.
I had someone (who knows what they're doing) help me with this due to it being in my opinion, the most important step of the assembly.
First off, the bell-housing bolts need torqueing up. For some reason Caterham leave these finger tight despite the instructions telling you not to remove the bell-housing.
The gearbox slotted in fairly easily and most of the bolts torqued up without fuss. There were a few that required an allen key to be cut short allowing proper access.
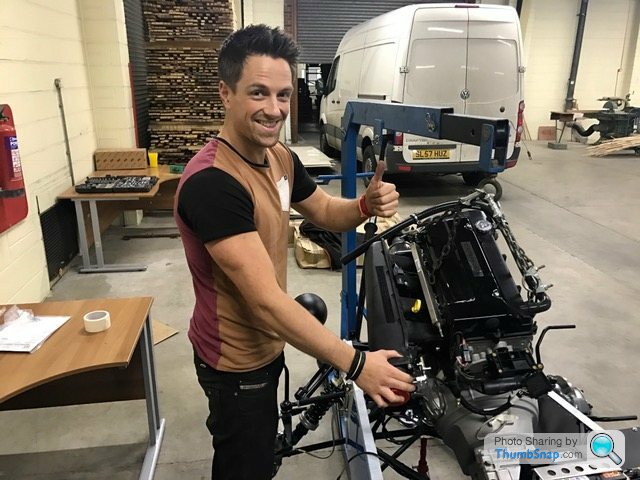
Me getting creative with torqueing methods:
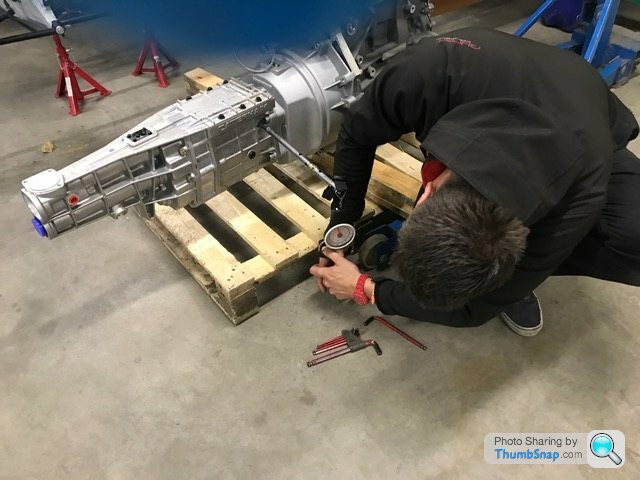
Now here's where we both got confused. The instructions 'instruct' you to remove the alternator and starter motor before fitting the engine but on the next page where it talks about plumbing the cooling pipes (again before fitting), it says the alternator and starter motor must be attached...
The words that are supposed to guide you on how to plumb all the hoses around the engine are pretty poor and misguiding to be honest. We spent a fair amount of time scratching our heads at this point. Then a bright idea was sparked to fit the engine with the majority of the pipes detached and worry about it later.
I've since found a very good map/plan of the cooling system so hopefully will know what I'm doing next time!
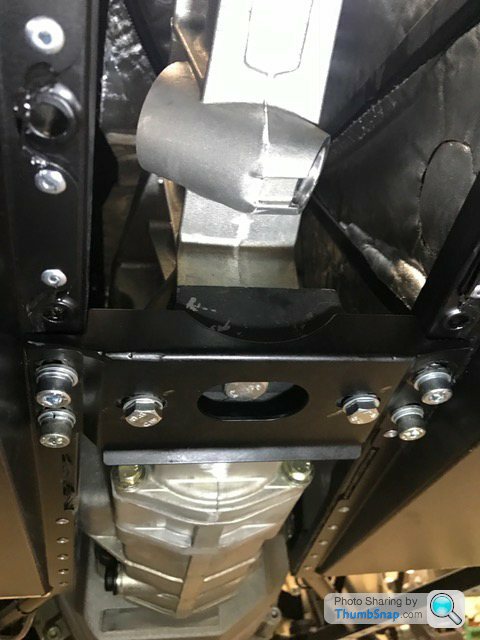
So, horns (no access to do this after fitting engine), rubber mounts and earth lead bolted into chassis. Now where is the bolt that secures the gearbox to the gearbox mount? Ah, it's missing...
It was nearing midnight at this point so we called it a day.
A slightly fruitful and slightly frustrating evening...
Hopefully the next update will be a more interesting affair with better words and photos!
Soon.....
The plan was to get this slotted in:
But first of all, I wanted to finish off the suspension/wishbone assembly once and for all.
This started off as fastening the upright into the lower wishbone. Then the nut and washer on the stub axle had to come off with the washer being replaced by the wing-stay with a new nyloc nut securing it.
Next the upper wishbone has to be leant on with a fair bit of force, pushed through the top of the upright and wingstay then secured by another nyloc nut. And finally fitting the steering arm into place at the front of the upright.
End result:
All pretty straight forward stuff. One minor snag... the nut that secures the upper wishbone into the upright has very little room below it but requires a deep socket due to the ball joint bolt being so long. I got it as far as it would go with a 'shallow' socket and a thin wrench half in, then had to finish the rest off with an adjustable spanner.
Next up, brake lines.
Nice simple, straight forward step. Flexible hose screwed into the caliper, then into a hole on the outside of the car body, secured by a nut on the inside. Then simply screw the copper brake pipe onto the braided line end protruding from the outside in.
The last part of the front suspension system is the anti-roll bar. It slots into the cups on the front legs of the upper wishbones. I got a bit heavy handed here and broke one of the ARB ball ends so rain stopped play so to speak. As soon as the replacement from Caterham arrives, this will be fitted and finished
Engine in...well almost.
I had someone (who knows what they're doing) help me with this due to it being in my opinion, the most important step of the assembly.
First off, the bell-housing bolts need torqueing up. For some reason Caterham leave these finger tight despite the instructions telling you not to remove the bell-housing.
The gearbox slotted in fairly easily and most of the bolts torqued up without fuss. There were a few that required an allen key to be cut short allowing proper access.
Me getting creative with torqueing methods:
Now here's where we both got confused. The instructions 'instruct' you to remove the alternator and starter motor before fitting the engine but on the next page where it talks about plumbing the cooling pipes (again before fitting), it says the alternator and starter motor must be attached...
The words that are supposed to guide you on how to plumb all the hoses around the engine are pretty poor and misguiding to be honest. We spent a fair amount of time scratching our heads at this point. Then a bright idea was sparked to fit the engine with the majority of the pipes detached and worry about it later.
I've since found a very good map/plan of the cooling system so hopefully will know what I'm doing next time!
So, horns (no access to do this after fitting engine), rubber mounts and earth lead bolted into chassis. Now where is the bolt that secures the gearbox to the gearbox mount? Ah, it's missing...
It was nearing midnight at this point so we called it a day.
A slightly fruitful and slightly frustrating evening...
Hopefully the next update will be a more interesting affair with better words and photos!
Soon.....
Very small update...
The replacement for the ARB ball end that I broke the other day arrived in the post this morning.
Quick 10 minute job over lunchtime.
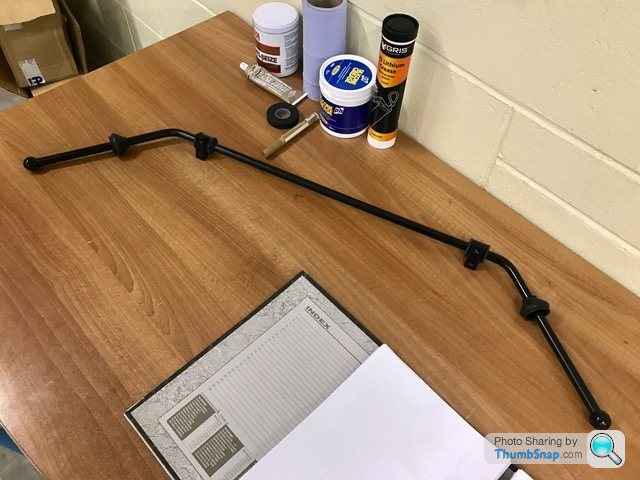
Assembled ARB ready to go on.
Cup on wishbone the ball sits in.
Brackets bolt to chassis:
Finally in place with a bit of gentle persuasion.
That's a big tick through front suspension section at long last! Plenty more to do on the rest of the car now!
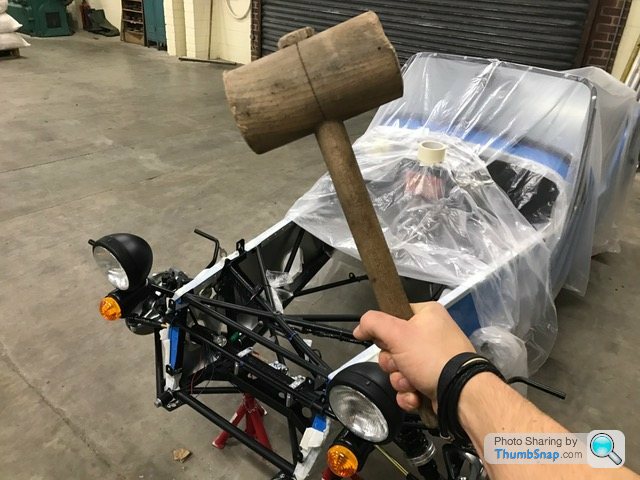
Think it's about time I introduce my most trusted tool, always there for me in times of need.
Ladies and Gentlemen.... The Persuader:
The replacement for the ARB ball end that I broke the other day arrived in the post this morning.
Quick 10 minute job over lunchtime.
Assembled ARB ready to go on.
Cup on wishbone the ball sits in.
Brackets bolt to chassis:
Finally in place with a bit of gentle persuasion.
That's a big tick through front suspension section at long last! Plenty more to do on the rest of the car now!
Think it's about time I introduce my most trusted tool, always there for me in times of need.
Ladies and Gentlemen.... The Persuader:
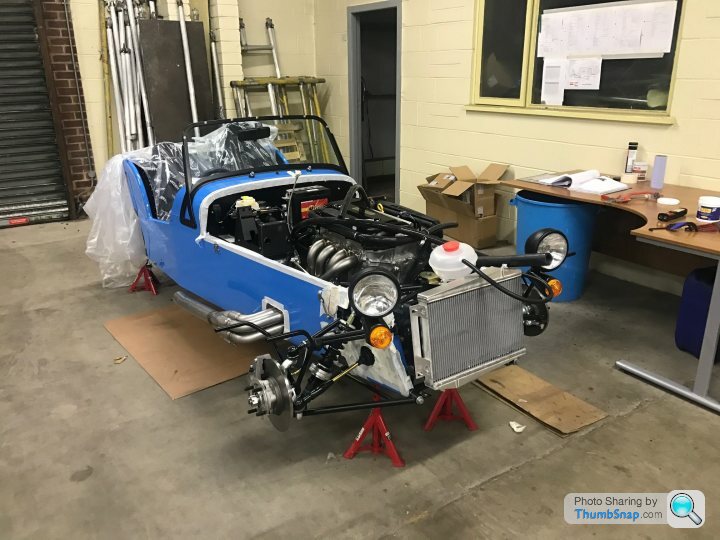
Something quite big has been shoehorned into the car...

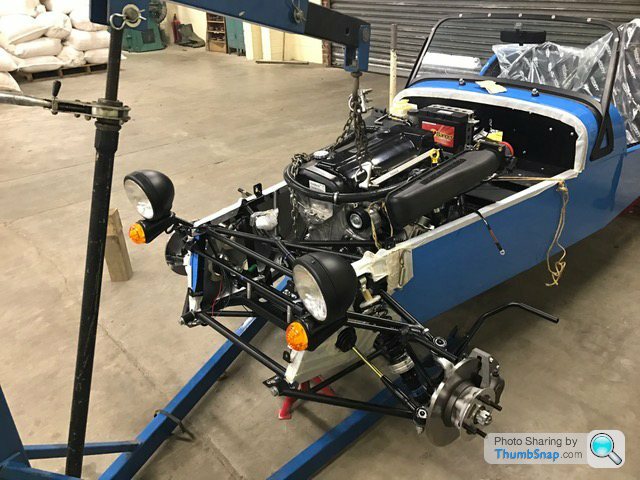
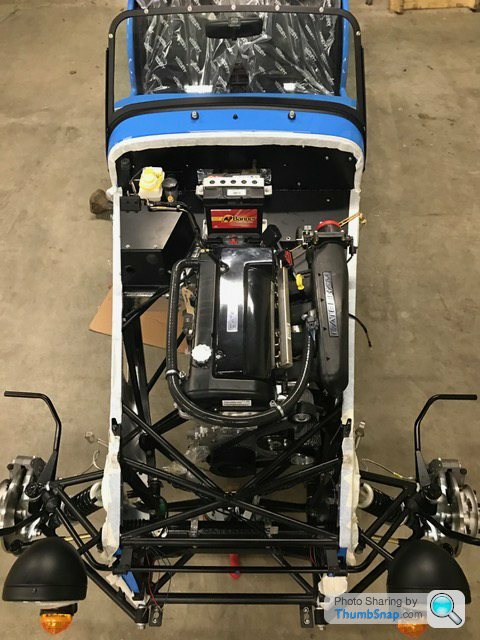
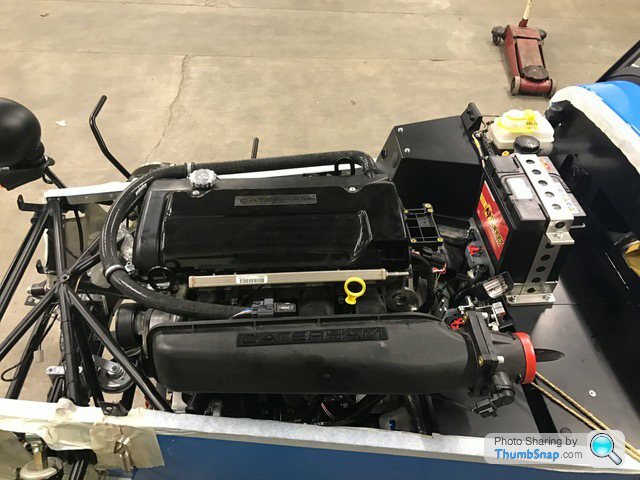
Wasn't as daunting as I expected it to be. I suppose this is at the easier end of the scale looking at a modern car where the engine disappears off into the bulkhead. Never the less, a milestone for me.
The instructions advise you to take off the starter motor and alternator. We decided we knew better and removed the right hand engine mount instead. This plan was semi-scuppered when the engine was about a third of the way in. So humble pie was eaten, alternator off, followed by a lot of toing and froing, then eventually the engine was on its mounts.
Whilst lowering the block in, the thought did cross my mind how mental this thing is going to be to drive. To me, a Caterham is basically a load of square section welded around an engine that's far too big for the car! God knows what a 620 would be like!
I wasn't home and dry just yet. It was now time for the gearbox mount to be bolted to the chassis, then the gearbox to the mount. All pretty straight forward although there was an hour's worth of fiddling about trying to get the gearbox to sit centrally in the transmission tunnel. This involved me lying underneath the car with The Persuader and a wooden door wedge. Got there in the end with the helps of some measuring callipers.
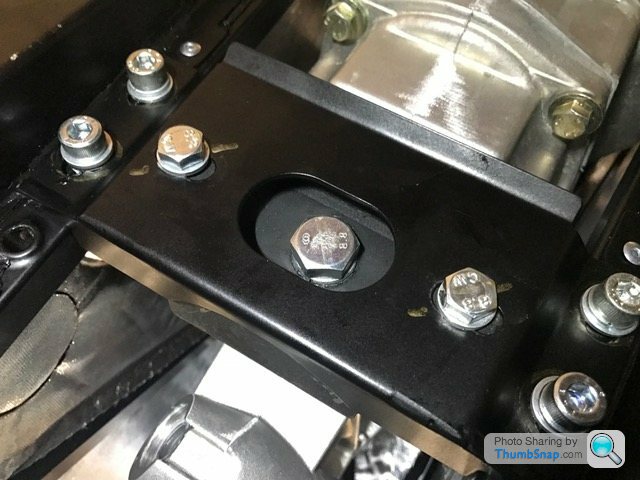
After this, everything was torqued up and the alternator bolted back into place.
Felt pretty chuffed having 'done a big thing' so celebratory doughnuts were called upon:
https://www.youtube.com/watch?v=iXKTtbTQDtU
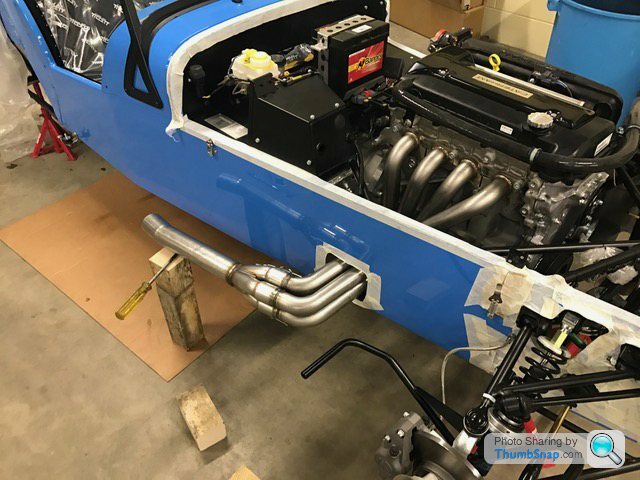
I should really have sorted the cooling system out at this point but am still struggling to figure out what pipes go where! Plus, I couldn't ignore the pile of shiny exhaust bits could I?
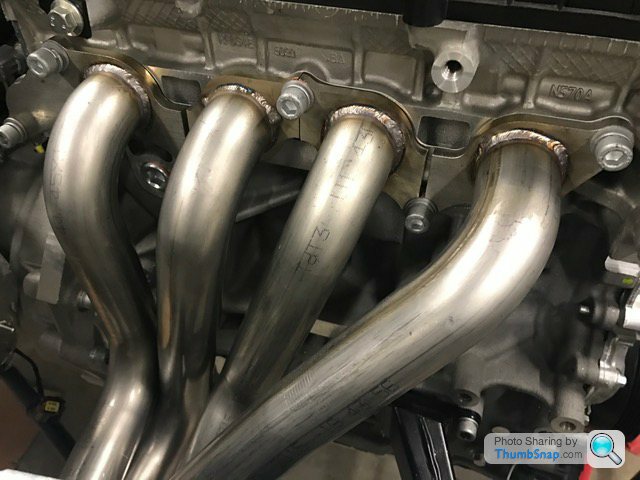
On with the manifold first, or primaries as the instructions call them. The manifold is in 4 separate bits that require feeding through a hole in the side of the car in a certain sequence. All went pretty smooth until the last pipe which was a bit of a squeeze.
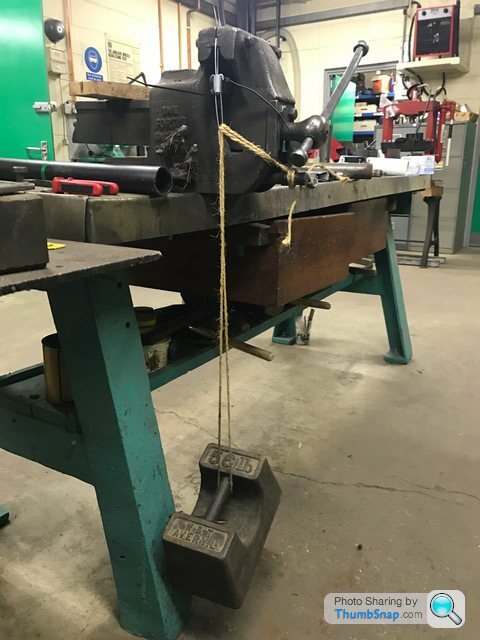
Then the collector pipe slots onto the manifold on the outside of the car. It's held in place by two spring clamp things. The springs require completely compressing before they can fit over the tabs on the manifold and collector.
Luckily a vice and an old weight were close to hand:
 |http://thumbsnap.com/4TED9A2l[/url]
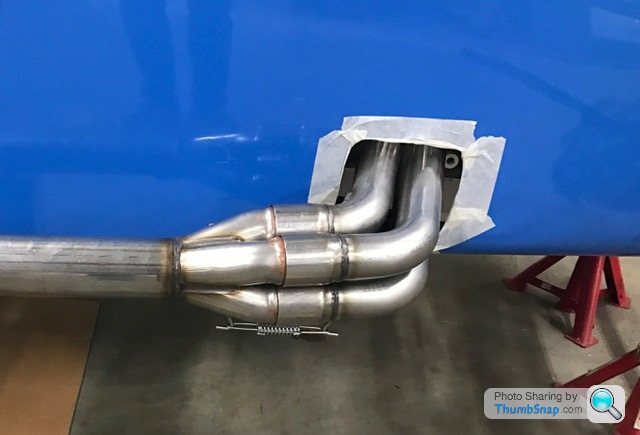
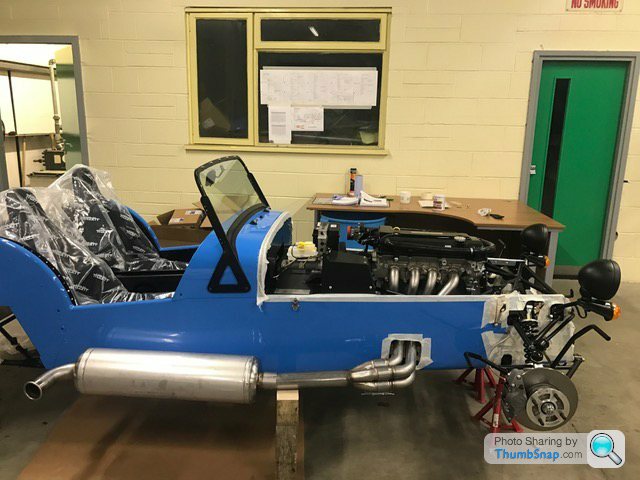
Had to slip the silencer on for the full effect:
Now to tackle the steering columns and wheel.
I'd previously read on someone's blog that this is a royal pain in the arse, and I couldn't agree more!
The universal joint slips over the spline on the rack and a bolt slots through the joint holding everything in place. The bolt will go through one hole fine bit is misaligned with next. Even using mole grips to squeeze the joint together didn't help. In the end I took the bolt to a grinder to make a nice chamfered end then got The Persuader out again. This did the trick!
Then I slid the lower steering column through the dashboard, pedal box, engine bay and into the universal joint. The bolt went through very easily at that end.
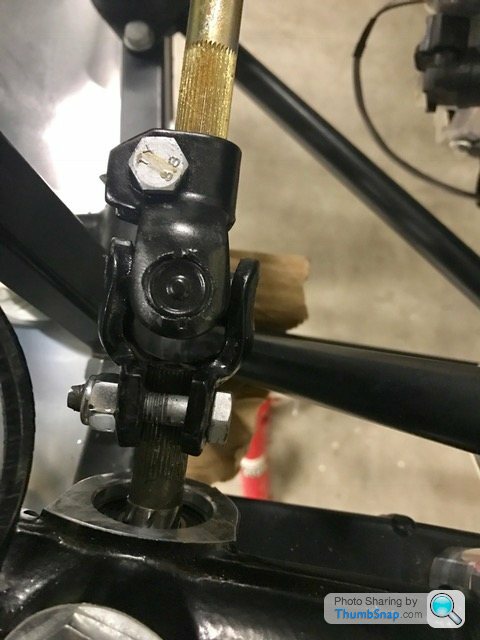
Next, the upper steering column had to follow the route of the lower to connect to it. With it having a larger diameter than the lower column this proved tricky. The problem being the lower bush inside the dashboard tunnel the column has to slide through. Every time I tried this, a plastic sleeve kept on falling out of the bush. I wrestled with this problem for a good hour which I was not happy about. Eventually luck prevailed and the upper column mated with the lower. Clamped into place:

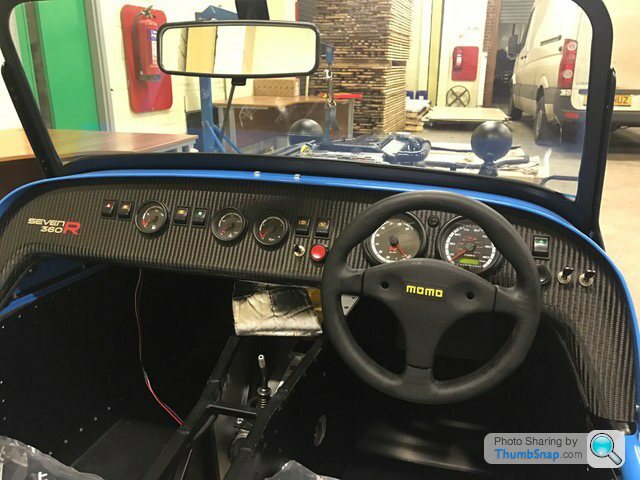
Not a bad view:
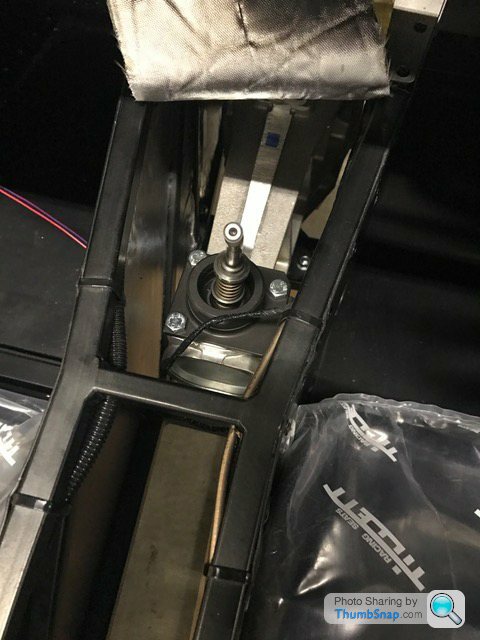
Whilst I was in the cockpit, I screwed the gearstick into the gearbox:
That's it for now!
Apologies for the posing pictures... When submitting for an IVA test you have to present photos of you working on the car to prove it's an amateur build.
More next time...
Wasn't as daunting as I expected it to be. I suppose this is at the easier end of the scale looking at a modern car where the engine disappears off into the bulkhead. Never the less, a milestone for me.
The instructions advise you to take off the starter motor and alternator. We decided we knew better and removed the right hand engine mount instead. This plan was semi-scuppered when the engine was about a third of the way in. So humble pie was eaten, alternator off, followed by a lot of toing and froing, then eventually the engine was on its mounts.
Whilst lowering the block in, the thought did cross my mind how mental this thing is going to be to drive. To me, a Caterham is basically a load of square section welded around an engine that's far too big for the car! God knows what a 620 would be like!
I wasn't home and dry just yet. It was now time for the gearbox mount to be bolted to the chassis, then the gearbox to the mount. All pretty straight forward although there was an hour's worth of fiddling about trying to get the gearbox to sit centrally in the transmission tunnel. This involved me lying underneath the car with The Persuader and a wooden door wedge. Got there in the end with the helps of some measuring callipers.
After this, everything was torqued up and the alternator bolted back into place.
Felt pretty chuffed having 'done a big thing' so celebratory doughnuts were called upon:
https://www.youtube.com/watch?v=iXKTtbTQDtU
I should really have sorted the cooling system out at this point but am still struggling to figure out what pipes go where! Plus, I couldn't ignore the pile of shiny exhaust bits could I?
On with the manifold first, or primaries as the instructions call them. The manifold is in 4 separate bits that require feeding through a hole in the side of the car in a certain sequence. All went pretty smooth until the last pipe which was a bit of a squeeze.
Then the collector pipe slots onto the manifold on the outside of the car. It's held in place by two spring clamp things. The springs require completely compressing before they can fit over the tabs on the manifold and collector.
Luckily a vice and an old weight were close to hand:
|http://thumbsnap.com/4TED9A2l[/url]Had to slip the silencer on for the full effect:
Now to tackle the steering columns and wheel.
I'd previously read on someone's blog that this is a royal pain in the arse, and I couldn't agree more!
The universal joint slips over the spline on the rack and a bolt slots through the joint holding everything in place. The bolt will go through one hole fine bit is misaligned with next. Even using mole grips to squeeze the joint together didn't help. In the end I took the bolt to a grinder to make a nice chamfered end then got The Persuader out again. This did the trick!
Then I slid the lower steering column through the dashboard, pedal box, engine bay and into the universal joint. The bolt went through very easily at that end.
Next, the upper steering column had to follow the route of the lower to connect to it. With it having a larger diameter than the lower column this proved tricky. The problem being the lower bush inside the dashboard tunnel the column has to slide through. Every time I tried this, a plastic sleeve kept on falling out of the bush. I wrestled with this problem for a good hour which I was not happy about. Eventually luck prevailed and the upper column mated with the lower. Clamped into place:
Not a bad view:
Whilst I was in the cockpit, I screwed the gearstick into the gearbox:
That's it for now!
Apologies for the posing pictures... When submitting for an IVA test you have to present photos of you working on the car to prove it's an amateur build.
More next time...
Edited by ECG1000 on Sunday 22 January 13:52
md. said:
Fantastic build thread, would love to partake in something like this with my son and my old man, both would be in their element!
Might be wrong, but I Don't think I've seen a thread on here like it before, be fantastic to see a video of the first startup attempt and driving it out of the workshop for the maiden voyage!
Keep the updates coming!
Thank you very much! Might be wrong, but I Don't think I've seen a thread on here like it before, be fantastic to see a video of the first startup attempt and driving it out of the workshop for the maiden voyage!
Keep the updates coming!
It is a lot of fun but can be quite frustrating at times especially when you're stuck due to a vague description in the instructions. But once you solve the problem and assemble another step of the car, it's a good sense of satisfaction.
I'll be making a video at the first turn of the key (or should I say push of the button) for sure.
Peanut Gallery said:
Cracking thread, congrats!
Would love to help - but could you just move your workshop up to NE Scotland please?
Enjoy!
Thank you Would love to help - but could you just move your workshop up to NE Scotland please?
Enjoy!

I'll definitely be venturing up to Scotland once it's built!
Spent most of yesterday afternoon and evening messing about with pipes. Yep, it was time to tackle the cooling system I'd been putting off all weekend.
I didn't take any 'during' photos due to it being so fiddly and instructions so unclear.
Luckily (as mentioned earlier) I found a drawn out plan of where the pipes are supposed to go. A fellow builder very kindly made it during their struggle:

Once I'd worked out where everything went the main frustration was the hose clips provided. When completely opened up, they were barely big enough to fit over some of the connected pipes. Undoing them further resulted in them popping open completely.
Luckily we use a lot of hose clips on the machines at work so I robbed a few slightly bigger ones when faced with a stubborn hose!
After a good few hours wrestling about on the floor I ended up with this:
The eagle eyed amongst you will notice a few hoses too long and a couple not connected. Some require cutting down so I just wanted to double check with Caterham I've done everything right before I start slicing.
More next time...
Edited by ECG1000 on Monday 23 January 14:46
 Haha! The same thought did cross through my mind the first time I looked at it. Once you've got a couple of hoses on it begins to make sense.
Greg_D said:
what a thread, love it.
i'm half thinking of getting myself a caterham and you're saying nothing to dissuade me, it looks like brilliant fun.
keep at it, i'll eagerly devour your updates.
Thank you very much.i'm half thinking of getting myself a caterham and you're saying nothing to dissuade me, it looks like brilliant fun.
keep at it, i'll eagerly devour your updates.
You should definitely get one!
I'll be updating as much as I can

Greg_D said:
Plumbing, nah....i'm not scared. 
Woah, that looks like a headache!jdwoodbury said:
Coming together nicely now. I see how the exhaust install was a breeze, I guess the exit hole was pre-cut for you? I cant tell you how nerve-racking it is cutting into a pristine body shell when you have to do it yourself 
Yep, nicely pre-cut for me! Wouldn't have enjoyed cutting into bodywork that's for sure!CaptainSensib1e said:
Great thread!
How are finding the spannering OP? Do you need to be reasonably competent, or is it just a big meccano set?
Would love to do this myself one day!
Not too bad to be fair. It can get a bit awkward at times but nothing too taxing. Like you say, it's a big meccano set.How are finding the spannering OP? Do you need to be reasonably competent, or is it just a big meccano set?
Would love to do this myself one day!
Definitely something I'd recommend to any petrol head. I can happily use a whole day working non stop on it without losing interest.
Krikkit said:
It sounds like most of it is reasonably straight-forward, with the odd tricky bit thrown in for obscured/awkward angles etc.
Don't forget everything is brand spanking new, so no awkward rusted bolts etc.
Couldn't agree more!Don't forget everything is brand spanking new, so no awkward rusted bolts etc.
I've been greasing up every bolt that goes near the car in an effort to preserve 'newness' if it needs to come apart again.
SeanEP3 said:
Nice build. Love watching it come together.
Cheers hora said:
I'm not a million miles from Hudds. Look forward to spotting you over the tops
Make sure you wave Finished tidying up the plumbing last night and made a start on getting everything wired up. A slight point of confusion is that there are quite a few connections around the car that aren't used anymore according to Caterham. Why bother putting them there then?
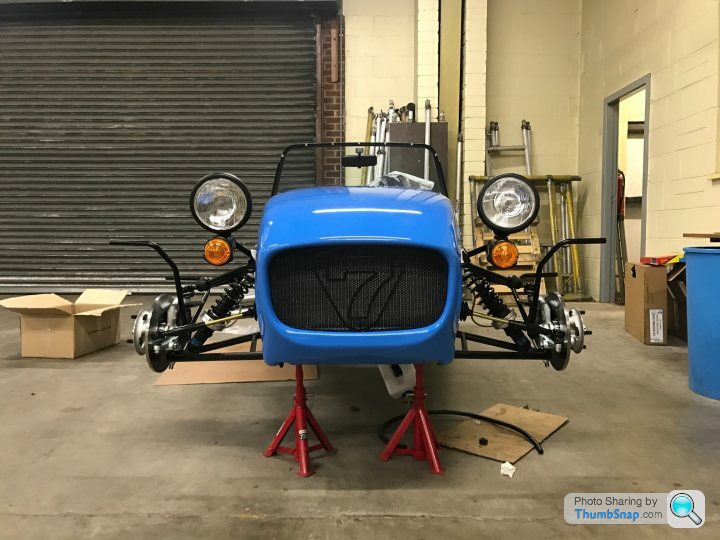
Also, slotted the nose cone on to make sure it clears the header tank. It does....just.
scz4 said:
Tuning in each day for your updates I'll need to PDF it when complete, just in-case I need to reference it one day and the photos are long gone.
Small point, but can you fit clear front indicators with orange bulbs, or is the amber a requirement for IVA and can be changed later? Do you have the clear lights at the rear? Not sure what new Caterhams are shipped with..
Any plans for stripes? Would look great against Riviera blue blue, but £300 is a lot of money to stomach from Caterham.
Any other post IVA changes planned?
I think you can fit cleat front indicators. I've seen someone else with them on. The rears are your standard red and amber - look like they belong on a trailer... I'll need to PDF it when complete, just in-case I need to reference it one day and the photos are long gone. Small point, but can you fit clear front indicators with orange bulbs, or is the amber a requirement for IVA and can be changed later? Do you have the clear lights at the rear? Not sure what new Caterhams are shipped with..
Any plans for stripes? Would look great against Riviera blue blue, but £300 is a lot of money to stomach from Caterham.
Any other post IVA changes planned?
I'll definitely be putting some orange stripes on it, although not one's from Caterham. There's a sign design company near me who'll sort it out for little money.
frankenstein12 said:
I note in one of your earlier posts you are going for the Morgan squinty eyes look....albeit with yours its more the lazy eye look..
Haha! They'll be straight and true once it's up and running.RDMcG said:
Great and informative post. Love it - keep it coming!
cheers dudePeanut Gallery said:
ECG, how many people are working on it? - just by yourself for the most of it?
I had help mating the gearbox to the engine and then slotting the engine into the chassis but otherwise it all been me. Would have been a mission getting the engine in by myself!Smitters said:
Great build - really enjoying it. I have one already (k series), but I love tinkering.
.
There's a chap popped up on the facebook Caterham group called Herberts Vinyls who's offering stripes, side stripes etc at very reasonable prices, though you fit them yourself. I've got a set, but I'm yet to fit as it's too cold in the garage and the vinyl's a bit brittle when very cold, apparently.
Thank you very much!.
There's a chap popped up on the facebook Caterham group called Herberts Vinyls who's offering stripes, side stripes etc at very reasonable prices, though you fit them yourself. I've got a set, but I'm yet to fit as it's too cold in the garage and the vinyl's a bit brittle when very cold, apparently.
Great shout on Herbert's Vinyl's. Will definitely be getting some stripes there! Saves the faff of having to measure.

Smitters said:
No worries. I really like the idea of a man who hasn't finished building the car, but is already considering the modifications...
I'd considered the idea before even buying the car No updates for a week or so now. Got a busy couple of nights ahead of me then off away for a week. I'll make up for it upon my return.
Oh...almost forgot. Fitted the handbrake and cable last night. A very minor job so didn't bother with photographs
Thank you for the kind words.
Managed to finally spend some time on the Caterham again having been out of the country for a week and busy with other stuff open my return.
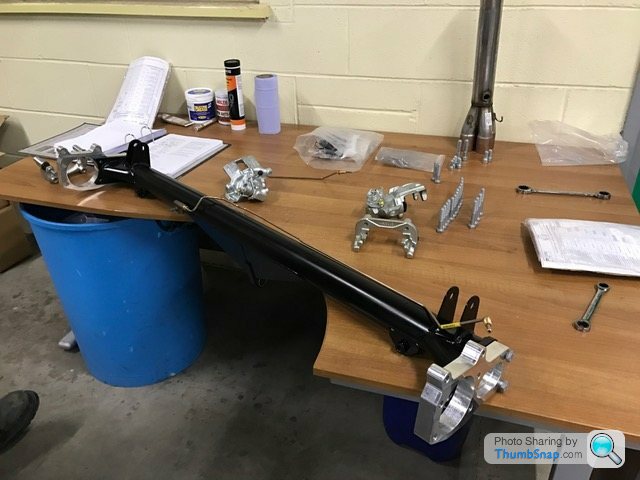
The next stage on the advised build sequence is to prepare and fit the (dreaded) diff. From what I've read, this is a two person job unless you are fortunate enough to have three arms.
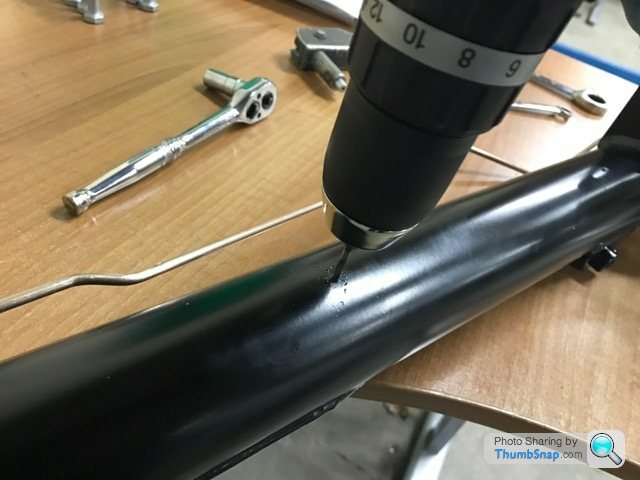
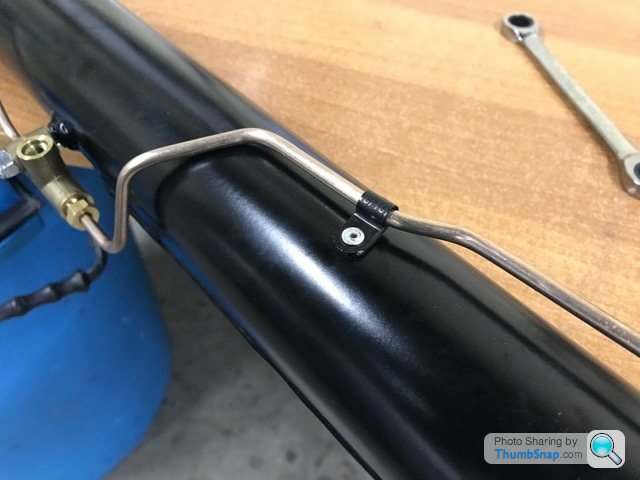
So whilst I waited for help to arrive, I decided to rivet the brake lines to the de-dion tube for fitment after the diff.
This required loosely bolting on the de-dion ears:
Followed by the brake calipers:
The calipers and ears have to come off again afterwards to make it easier slotting the tube through the chassis. The initial fitment is necessary to ensure the brake lines are lined up properly before riveting them.
There are pre-drilled holes in the tube but they need a tiny bit of opening out (due to paint) to accept the rivets:
All done:
Now onto the dreaded diff...
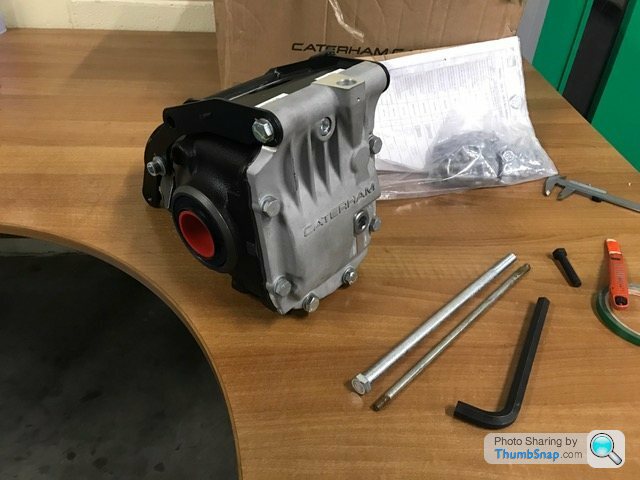
I've heard a lot of horror stories about this being a tw4t of a job so was braced for impact!
First, the prop shaft needs inserting into the transmission tunnel. Impossible to do if the engine and diff are bolted to the car already. Worth remembering if you are doing a build!
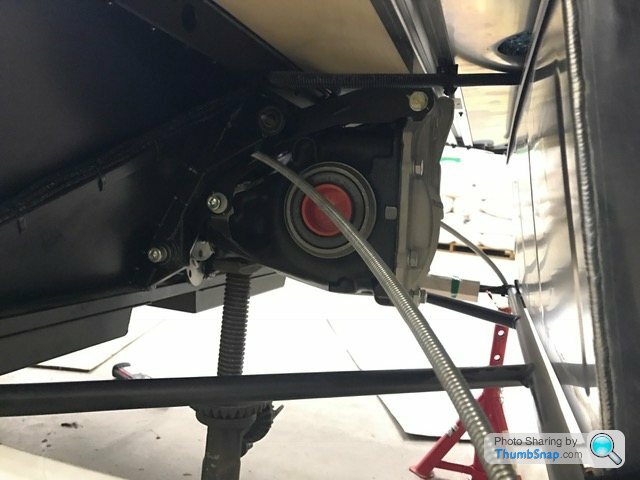
Then the diff needs jacking up to its mounts in the chassis. The instructions advise slotting a thin bar or long screwdriver through the uppermost mount to get the diff roughly into position. A bit awkward due to tiny clearances...
We did this, then screwed the lower cap head bolts into the lower mounts. More awkwardness here getting the diff to line up with the chassis mounts.
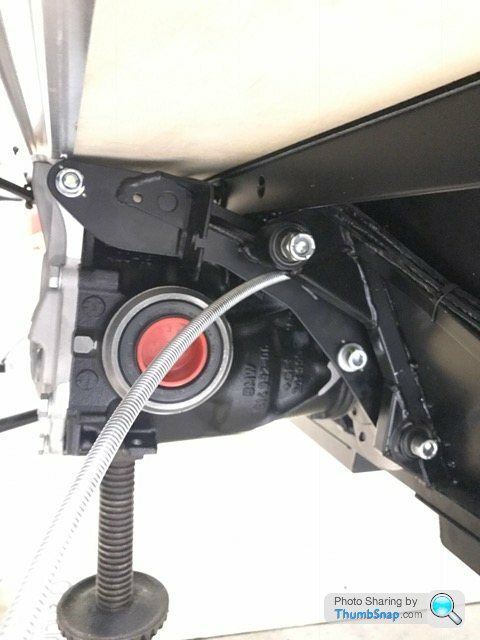
Got there eventually:
At this point the jack had been discarded in favour of an old pillar jack thing that was lying around at work. I suspect Noah used this when building his boat! Turned out to be very useful in the end.
Now with the two lower bolts in, it was measuring time. The diff needs to be as central as possible.

After an hour or so of lying on my back messing about with shim washers, we were 1mm out, which is within tolerance!
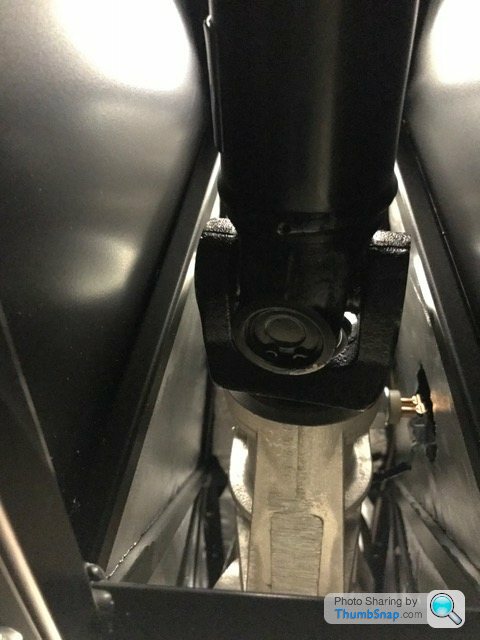
Now time for the even more dreaded top bolt. Every blog I've read describes this as being an impossible job. With the lower bolts in, the diff gets pulled down which miss-aligns it with the upper mount, making it impossible to shove the long bolt through.
I slackened off the lower bolts a bit and lined up a torch so it was shining through the upper mounts of the chassis and diff. Then, using the pillar jack (thing), I jacked the diff up a few turns so I could see light all the way through the mounts, then a bit more to get everything lined up as centrally as possible. This actually worked out quite well and allowed for the long bolt to be shoved though one side of the diff....but not all the way through.
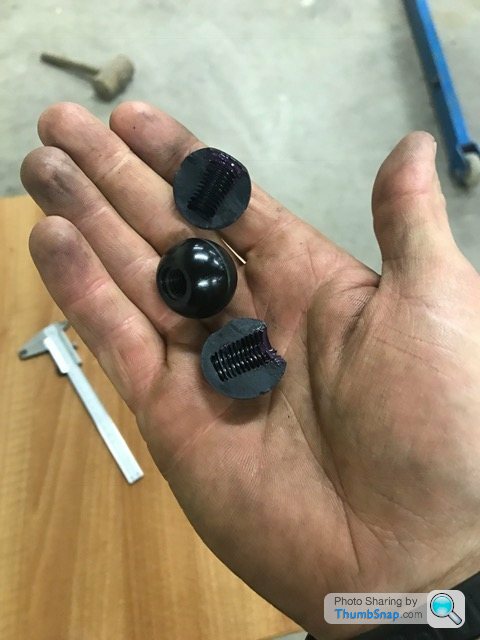
While this was happening, my trusty assistant was on the lathe making these:
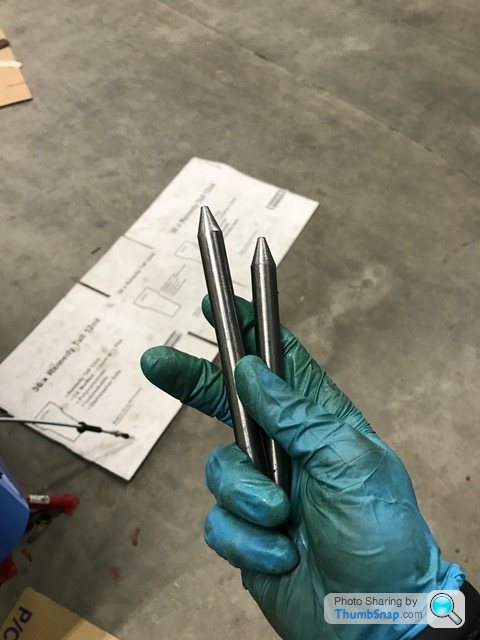
Inch diameter stakes (same diameter at the long bolt).
The idea was to hammer these in either side of the diff to get everything lined up correctly, then chase one side through with the long bolt.
Turned out to be a good idea because it worked first time! I'd even remembered to put the shim washers in before the stakes so it was job done.
I do have a slight nagging feeling I've done something wrong due to how smoothly it went. No doubt this will be highlighted in the post build inspection...
Now to bolt the prop-shaft to the diff. Fairly easy, if a little tight. Really helped having someone above putting the car into and out of gear to help torque the bolts up.
Job jobbed... as they say:
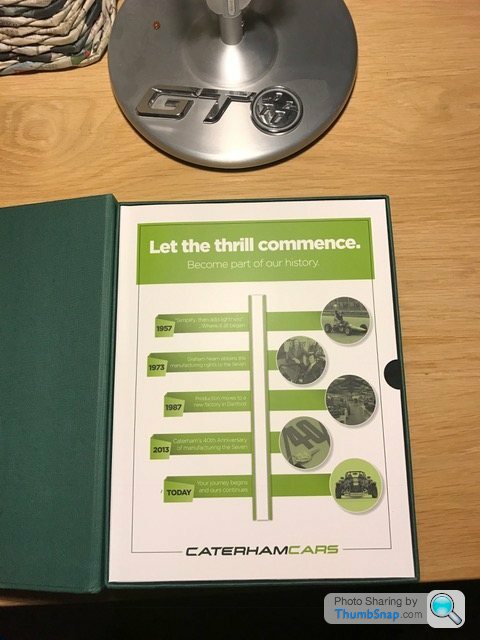
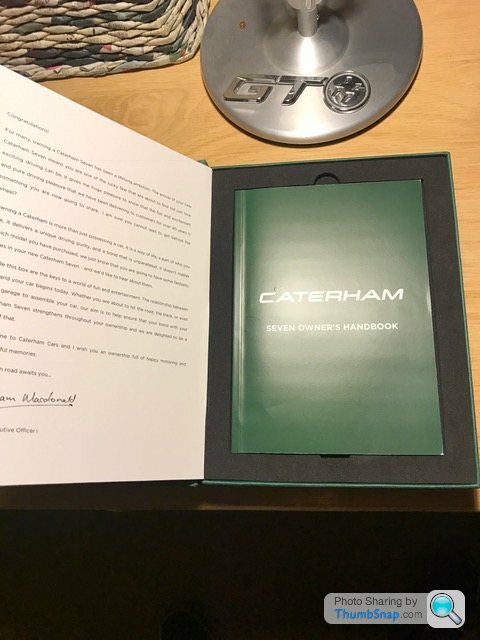
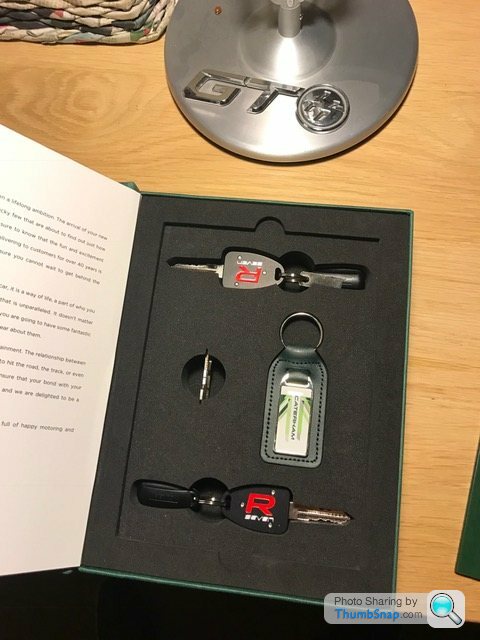
Then it was off home for bed. Although I was greeted with a parcel from the Caterham dealer. They had forgotten to give me the keys for my car when I collected it...!
I quite like the presentation of the key box so thought I'd share it:
More next time...
- ******************************************************************
Managed to finally spend some time on the Caterham again having been out of the country for a week and busy with other stuff open my return.
The next stage on the advised build sequence is to prepare and fit the (dreaded) diff. From what I've read, this is a two person job unless you are fortunate enough to have three arms.
So whilst I waited for help to arrive, I decided to rivet the brake lines to the de-dion tube for fitment after the diff.
This required loosely bolting on the de-dion ears:
Followed by the brake calipers:
The calipers and ears have to come off again afterwards to make it easier slotting the tube through the chassis. The initial fitment is necessary to ensure the brake lines are lined up properly before riveting them.
There are pre-drilled holes in the tube but they need a tiny bit of opening out (due to paint) to accept the rivets:
All done:
Now onto the dreaded diff...
I've heard a lot of horror stories about this being a tw4t of a job so was braced for impact!
First, the prop shaft needs inserting into the transmission tunnel. Impossible to do if the engine and diff are bolted to the car already. Worth remembering if you are doing a build!
Then the diff needs jacking up to its mounts in the chassis. The instructions advise slotting a thin bar or long screwdriver through the uppermost mount to get the diff roughly into position. A bit awkward due to tiny clearances...
We did this, then screwed the lower cap head bolts into the lower mounts. More awkwardness here getting the diff to line up with the chassis mounts.
Got there eventually:
At this point the jack had been discarded in favour of an old pillar jack thing that was lying around at work. I suspect Noah used this when building his boat! Turned out to be very useful in the end.
Now with the two lower bolts in, it was measuring time. The diff needs to be as central as possible.
After an hour or so of lying on my back messing about with shim washers, we were 1mm out, which is within tolerance!
Now time for the even more dreaded top bolt. Every blog I've read describes this as being an impossible job. With the lower bolts in, the diff gets pulled down which miss-aligns it with the upper mount, making it impossible to shove the long bolt through.
I slackened off the lower bolts a bit and lined up a torch so it was shining through the upper mounts of the chassis and diff. Then, using the pillar jack (thing), I jacked the diff up a few turns so I could see light all the way through the mounts, then a bit more to get everything lined up as centrally as possible. This actually worked out quite well and allowed for the long bolt to be shoved though one side of the diff....but not all the way through.
While this was happening, my trusty assistant was on the lathe making these:
Inch diameter stakes (same diameter at the long bolt).
The idea was to hammer these in either side of the diff to get everything lined up correctly, then chase one side through with the long bolt.
Turned out to be a good idea because it worked first time! I'd even remembered to put the shim washers in before the stakes so it was job done.
I do have a slight nagging feeling I've done something wrong due to how smoothly it went. No doubt this will be highlighted in the post build inspection...
Now to bolt the prop-shaft to the diff. Fairly easy, if a little tight. Really helped having someone above putting the car into and out of gear to help torque the bolts up.
Job jobbed... as they say:
Then it was off home for bed. Although I was greeted with a parcel from the Caterham dealer. They had forgotten to give me the keys for my car when I collected it...!
I quite like the presentation of the key box so thought I'd share it:
More next time...
Edited by ECG1000 on Thursday 9th February 16:44
FELIX_5 said:
Great thread, really enjoying it! That key box is lovely, but can't believe they forgot to give you the keys when you picked the car up!! Pretty crucial.... 
I know what you mean. However, having got to this stage, it really didn't surprise me. Let's called it "British Flair"Gassing Station | Readers' Cars | Top of Page | What's New | My Stuff