Rover 75 CDTi Tourer
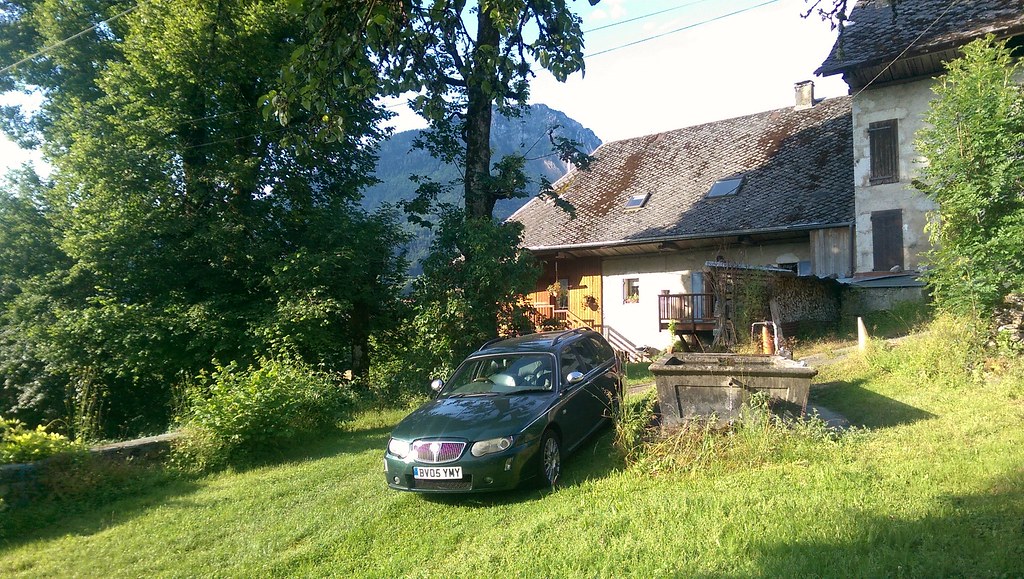
Discussion


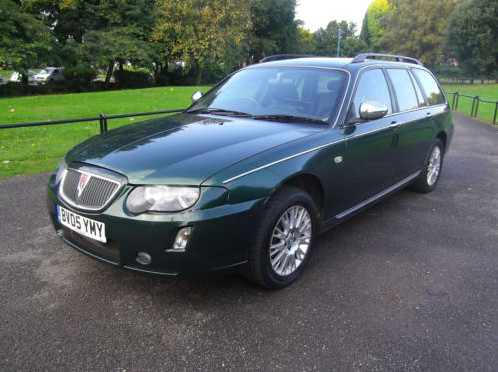
As the Rover 75 / MG ZT is getting a bit more affection these days, I'm going to take a tenth of a brave pill and post up our facelift Tourer.
 Screen shot 2014-02-27 at 20.16.34 by Clifton Tausberger, on Flickr
As it does the lion's share of the mileage in our household, no expense (or swearword) has been spared in it's upkeep. It's also my fiancee's car, which I suggested as a purchase, so to justify my unquestionable judgement I constantly treat it to all manner of upgrades. The 75/ZT forums are great, but there's not an easy-to-navigate list of all the fixes, improvements and tweaks required for the indomitable CDTi, so I'll document three years of persistence here.
We have had a number of Rovers, but in 2014 my fiancee took over a business and needed to replace our champagne (read: prosecco) Rover 600 with an estate for lugging stock.
 2017-12-26_10-05-34 by Clifton Tausberger, on Flickr
Requirements included: leather seats, high mpg, massive boot, manual box, as much wood trim as possible and green. It had to be green. My fiancee shares my interest in classic cars, and is drawn to chrome, wood and the 'retro' looking examples.
We dismissed all manner of estates from other manufacturers, the 75 being an early favourite given its classic looks, parts availability, community support and price. The Jaguar X Type estates we saw, for instance, were deathtraps. Finding a decent 75 proved difficult, so we stretched the budget and packed our passports for Wales to secure a clean example with moderate mileage (about 105k I believe in 2014), a solid maintenance history and the Connoisseur trim. Yes, we identified a number of common issues (turbo boost, tired suspension) but a short haggle later it was ours.
 2017-12-26_10-06-00 by Clifton Tausberger, on Flickr
Then, the laundry list of fixes began...
Screen shot 2014-02-27 at 20.16.34 by Clifton Tausberger, on FlickrAs it does the lion's share of the mileage in our household, no expense (or swearword) has been spared in it's upkeep. It's also my fiancee's car, which I suggested as a purchase, so to justify my unquestionable judgement I constantly treat it to all manner of upgrades. The 75/ZT forums are great, but there's not an easy-to-navigate list of all the fixes, improvements and tweaks required for the indomitable CDTi, so I'll document three years of persistence here.
We have had a number of Rovers, but in 2014 my fiancee took over a business and needed to replace our champagne (read: prosecco) Rover 600 with an estate for lugging stock.
2017-12-26_10-05-34 by Clifton Tausberger, on FlickrRequirements included: leather seats, high mpg, massive boot, manual box, as much wood trim as possible and green. It had to be green. My fiancee shares my interest in classic cars, and is drawn to chrome, wood and the 'retro' looking examples.
We dismissed all manner of estates from other manufacturers, the 75 being an early favourite given its classic looks, parts availability, community support and price. The Jaguar X Type estates we saw, for instance, were deathtraps. Finding a decent 75 proved difficult, so we stretched the budget and packed our passports for Wales to secure a clean example with moderate mileage (about 105k I believe in 2014), a solid maintenance history and the Connoisseur trim. Yes, we identified a number of common issues (turbo boost, tired suspension) but a short haggle later it was ours.
2017-12-26_10-06-00 by Clifton Tausberger, on FlickrThen, the laundry list of fixes began...
Haddock82 said:
I am biased because of my job, but these are cracking cars.
In my experience the earlier ZT/75 pre-facelift tend to be slightly better (still BMW at that time and before the cost cuttings) however the later cars are also not bad too
Look after it and it'll serve you well :-)
Pre-Project Drive cars are correctly sought after, but (as you'll see here...) don't pass up a later example that ticks expensive boxes. Almost everything from the earlier models can be retro-fitted, if you'll pardon the pun.In my experience the earlier ZT/75 pre-facelift tend to be slightly better (still BMW at that time and before the cost cuttings) however the later cars are also not bad too
Look after it and it'll serve you well :-)
littlebasher said:
Looking forward to the photographic evidence!
Be careful what you wish for! I have just trawled through my old phones and unearthed all sorts of jobs, many of which had been forgotten, and also my trusty hand-written notes.Purging the Exxon Valdese
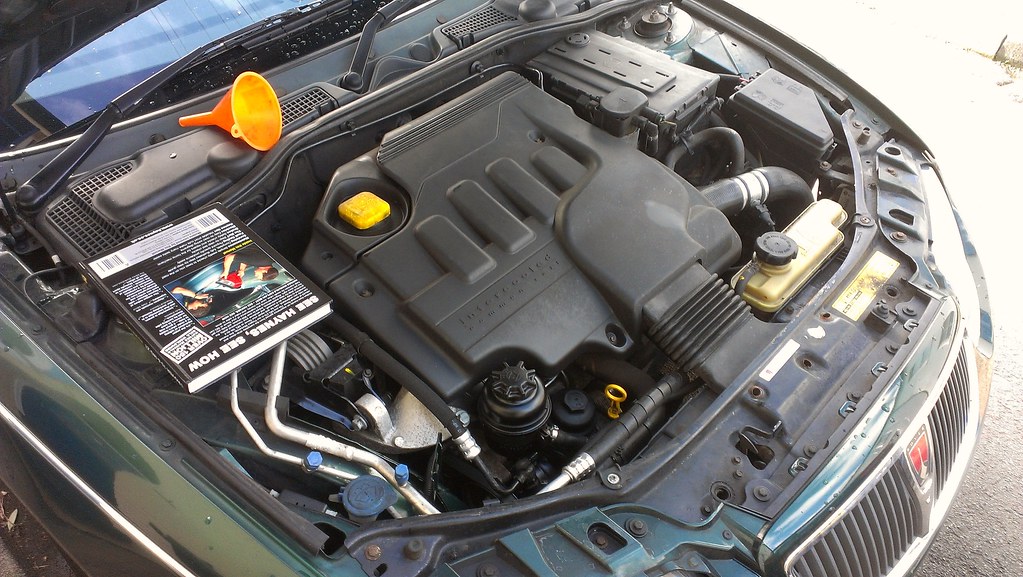
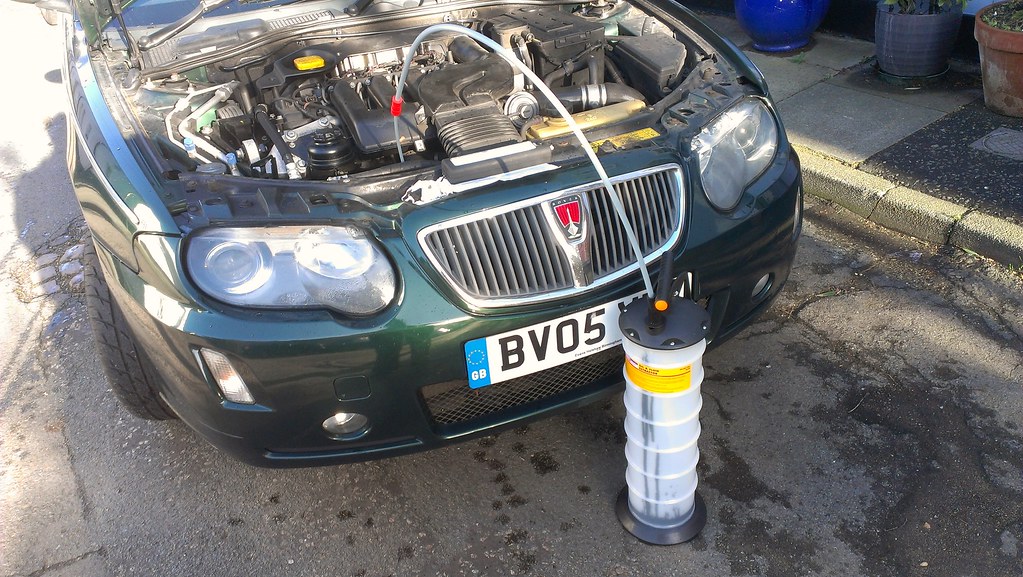
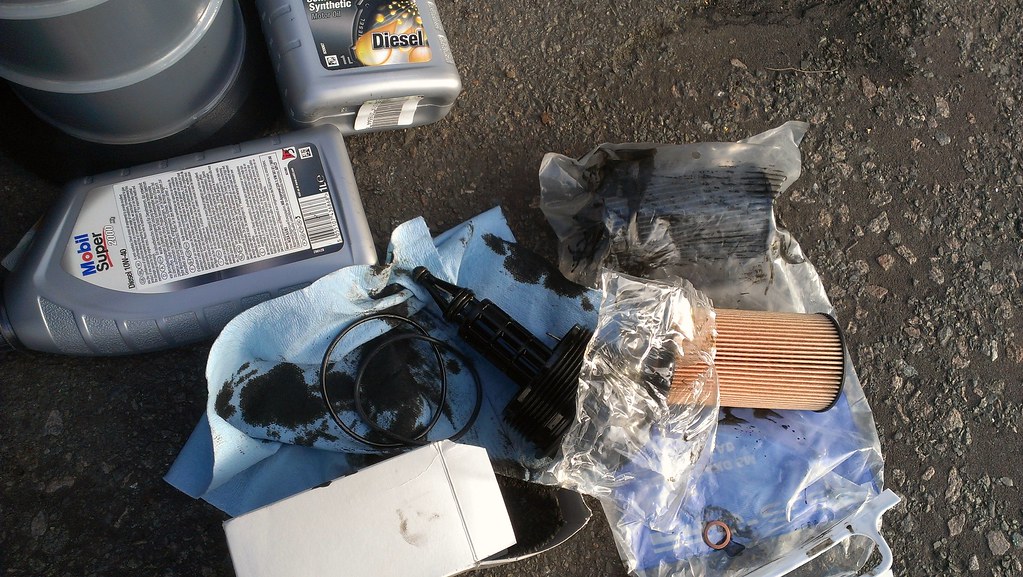
First up, a simple oil change. At the time I had no driveway, so I purchased a Pela vacuum pump, 6litres of 10w40, a new filter cartridge and a 36mm socket.
Quite tidy under here:
 2017-12-26_10-06-22 by Clifton Tausberger, on Flickr
Dipstick out and oil filter access here. Open the oil cap on the top of the engine too. Ensure the alternator and surrounding area are well protected with rags. I've done this three times now and still can't get away with a clean change.
 2017-12-26_10-06-33 by Clifton Tausberger, on Flickr
In goes the extractor, and a cup of tea for me:
 2017-12-26_10-06-45 by Clifton Tausberger, on Flickr
Once drained, a 36mm socket opens the oil filter housing by the dipstick above.
 2017-12-26_10-07-25 by Clifton Tausberger, on Flickr
As it's plastic, take care to loosen it smoothly. Extracting the filter assembly comes with the lid and (probably) some washers. New filter on, new washers and seals on, screw it all back together and put however much oil came out back in.
 2017-12-26_10-07-14 by Clifton Tausberger, on Flickr
Edited by Spinakerr on Wednesday 10th January 21:49
The Tale Of The Thermostat Anaconda
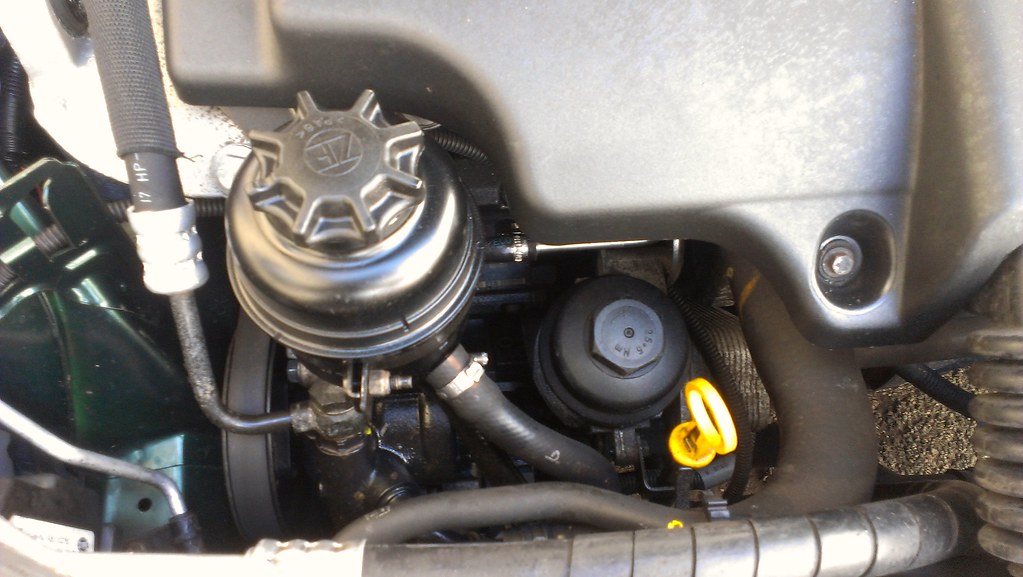
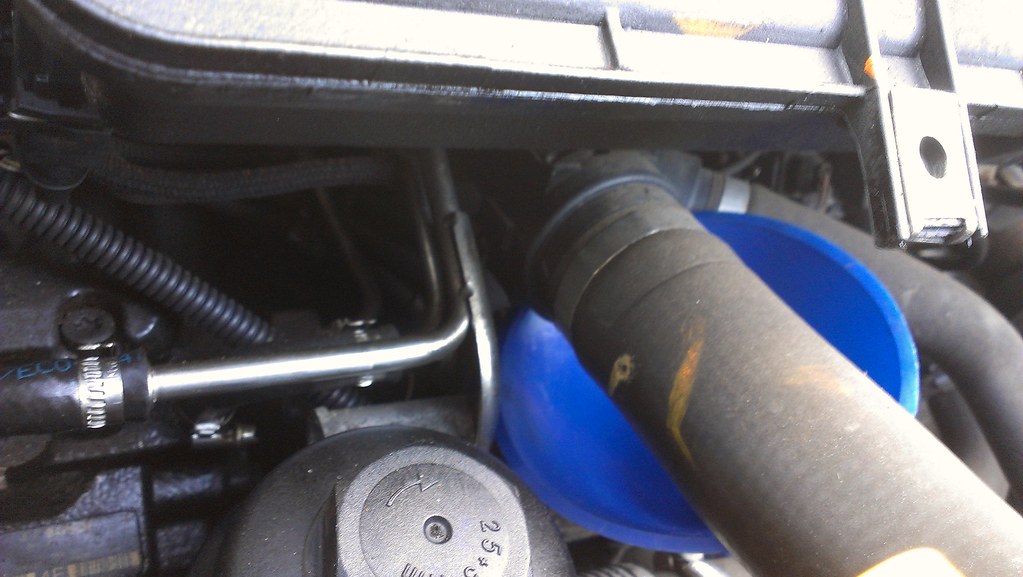
Next up, one haggling point at sale was the cool running - luckily this is a well known CDTi fault of a stuck thermostat. Replacement is an involved process that often recurs within a year, so the community suggest leaving the housing alone and adding a secondary thermostat in the system.
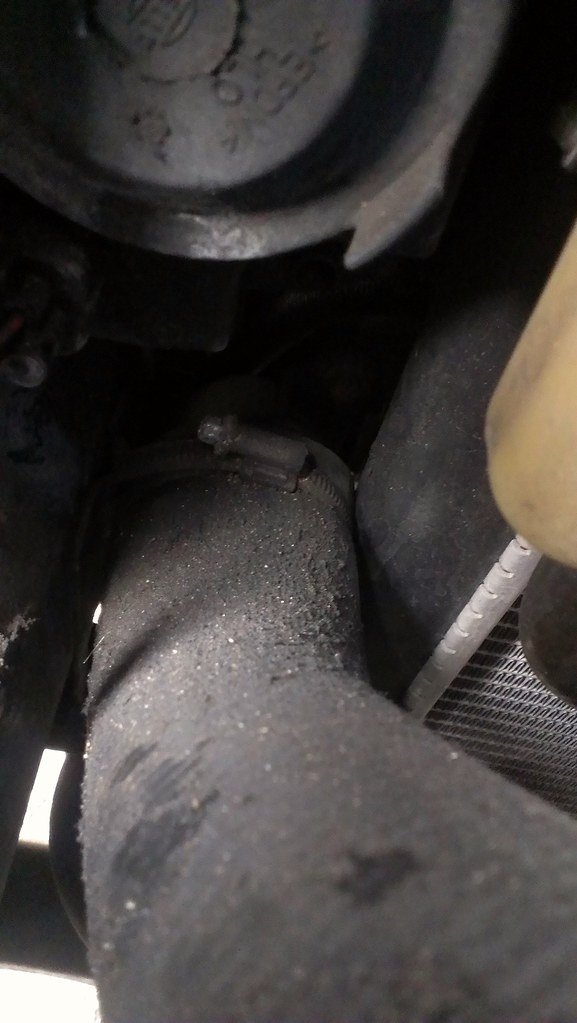
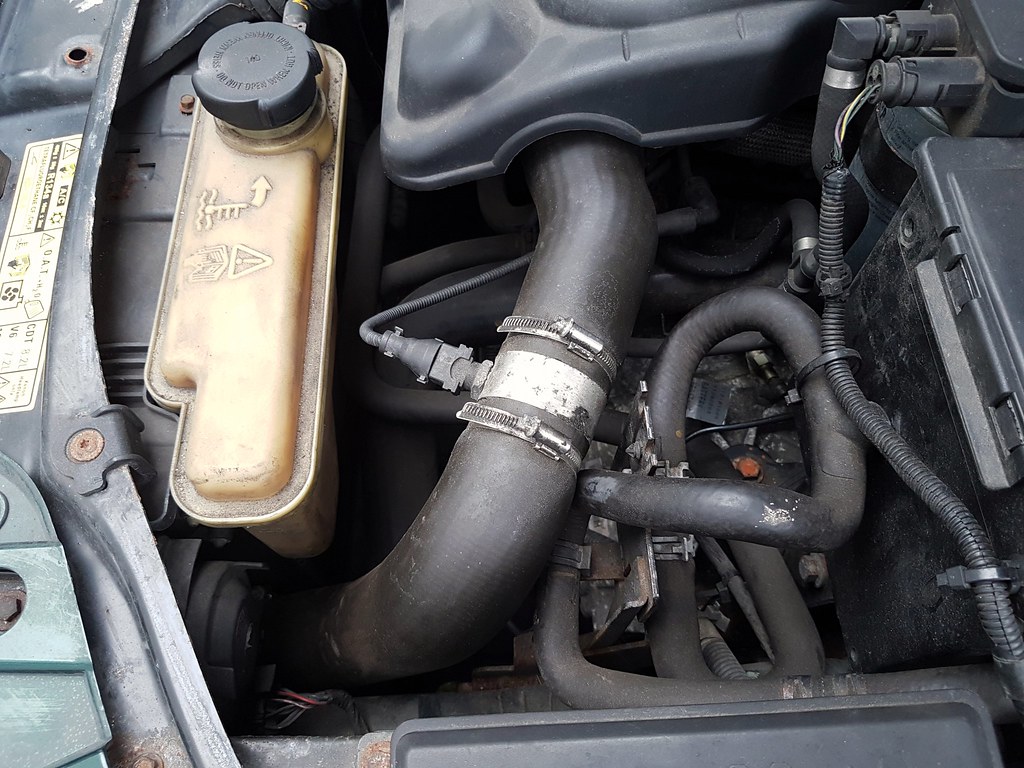
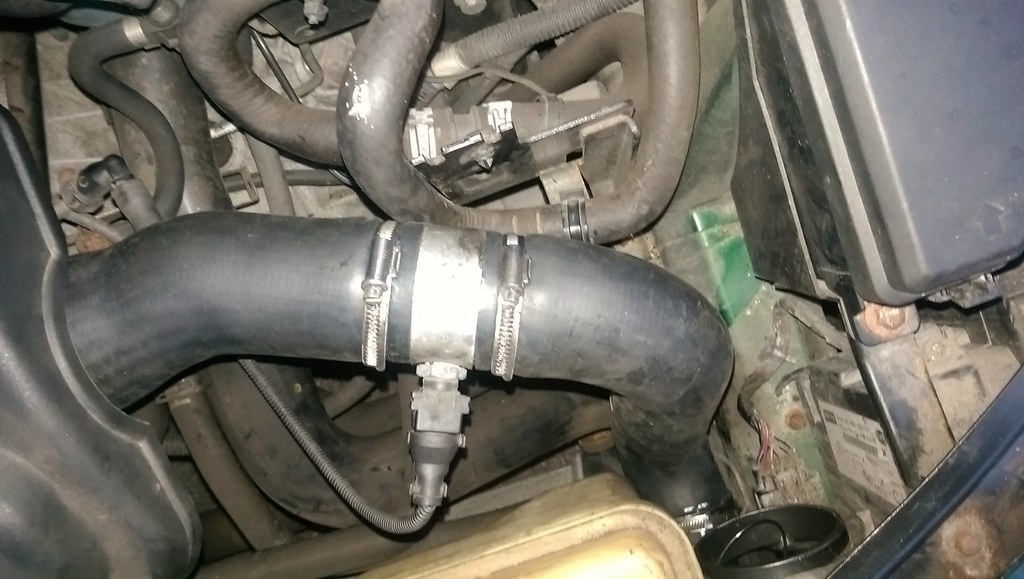
Here's the candidate - a top hose above the oil filter. Ensure you have a funnel and bottle to catch coolant (red OAT), then dremel off the retainer by the engine.
 2017-12-26_10-08-14 by Clifton Tausberger, on Flickr
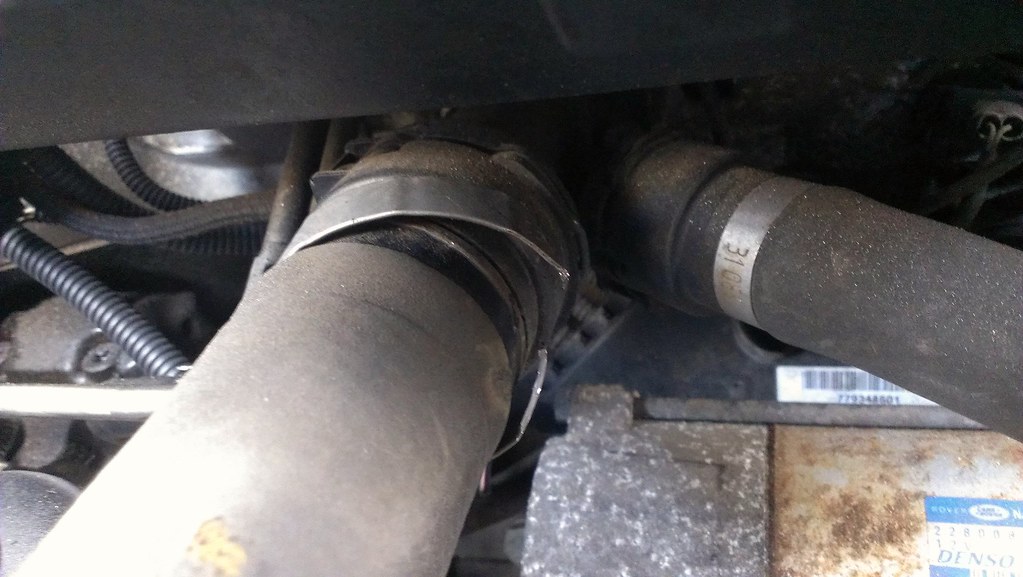 2017-12-26_10-08-24 by Clifton Tausberger, on Flickr
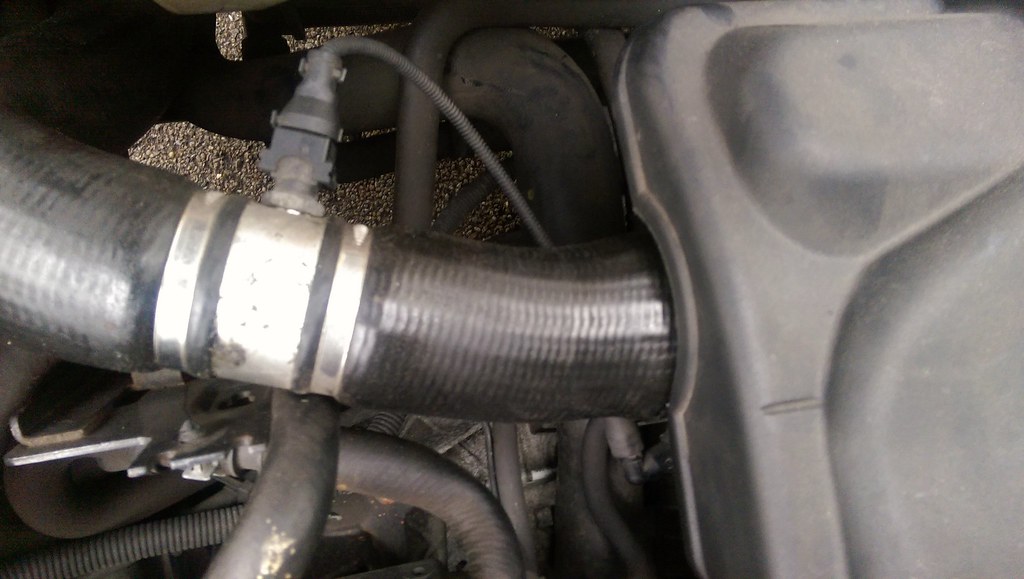
With brute force, patience and chanting a Renault 5 88 degree thermostat will fill down the hose, with the thin end pointing towards the block. Don't be tempted to use any lubricant as this will contaminate the system.
 2017-12-26_10-09-46 by Clifton Tausberger, on Flickr
This far will do, not I removed the radiator-side clip as well for better purchase.
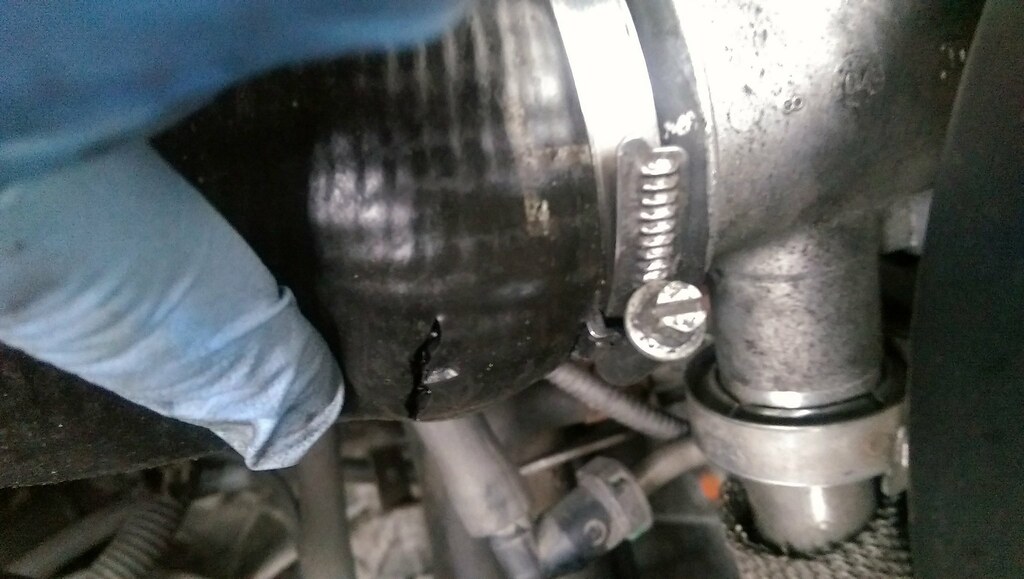
 2017-12-26_10-09-56 by Clifton Tausberger, on Flickr
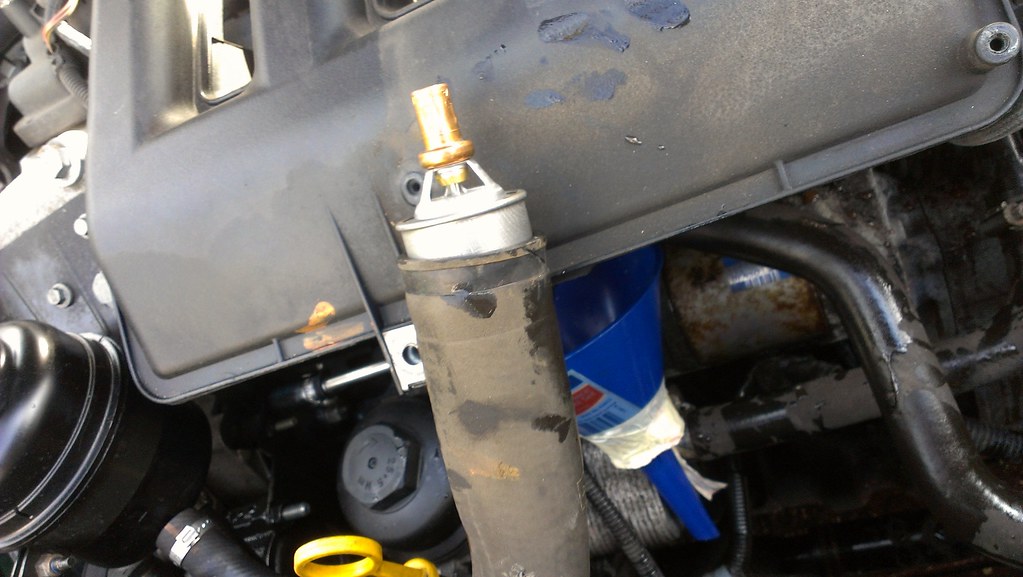
The slightly anaconda-like hose now in place, add a new 38-45mm jubilee clip and you should be all set. Instantly our car got better mpg and of course was happier in the winter.
Edited by Spinakerr on Wednesday 10th January 21:51
bungz said:
Old diesel dagdag estate with loads of broken bits

This has provided much merriment to my household, thank you.The Predictably Grotty Story Of Turbo Seals and EGuRgh Cleaning
The BMW diesel lump in the 75/ZT is a solid, chain driven beast that is capable of Lexus-like mileage. Of course, give a vehicle to a member of the general public and they will treat it like a fridge, and they predictably suffer. With the aforementioned oil resembling the tar that killed Tasha Yar, I was prepared for the worst in exhaust gas recirculation nastiness. Access is good, and several jubilee clips later the main air intake pipes were off:
 2017-12-26_10-10-32 by Clifton Tausberger, on Flickr
Allowing an inspection of the EGR. Mmm.
 2017-12-26_10-11-44 by Clifton Tausberger, on Flickr
Lovely.
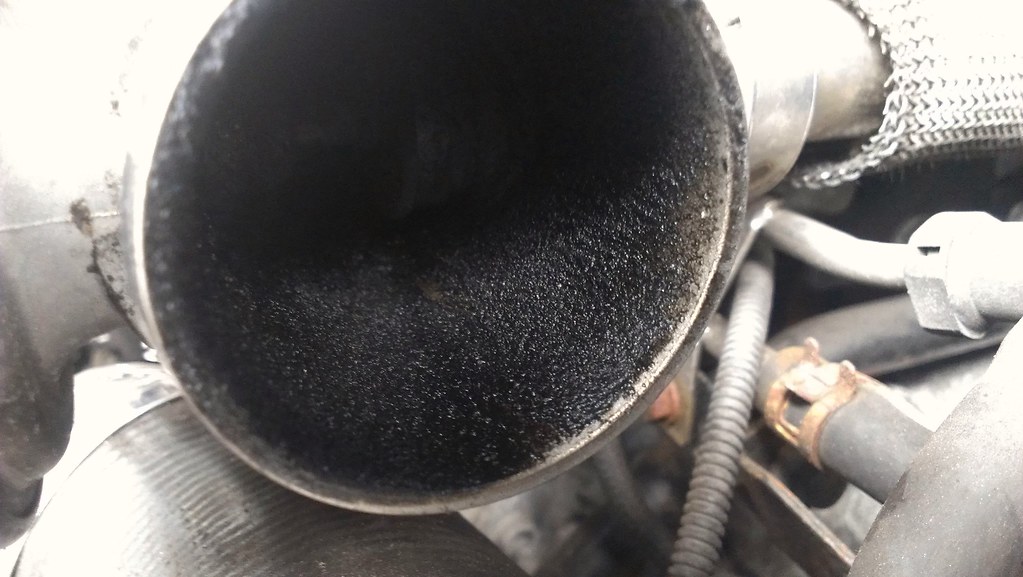 2017-12-26_10-10-42 by Clifton Tausberger, on Flickr
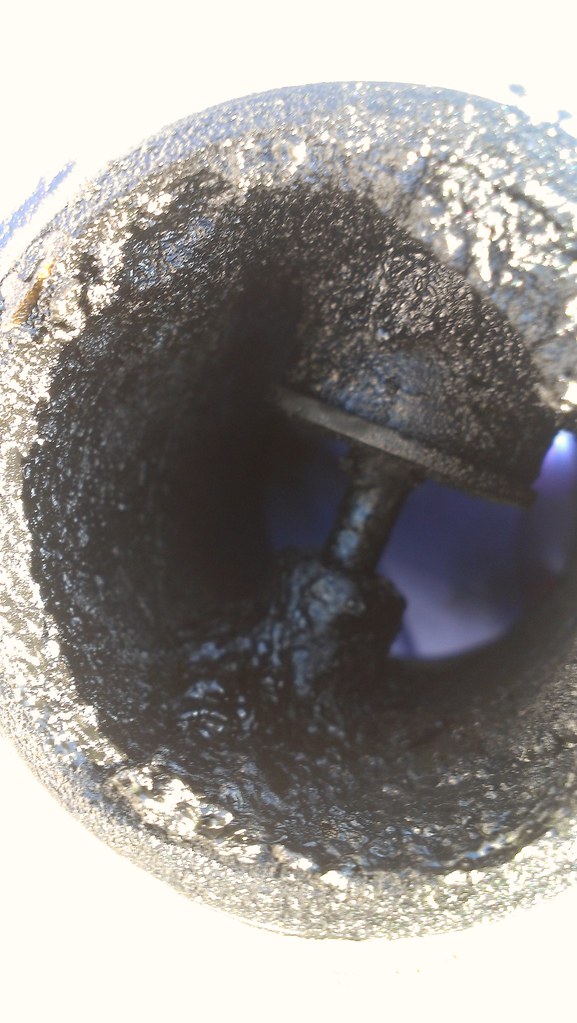
Unbolting the EGR entirely, you can see the thickness of the grot:
 2017-12-26_10-12-16 by Clifton Tausberger, on Flickr
A healthy spray of carb cleaner, a blunt screwdriver and a toothbrush brought it up clean as a (diesel) train whistle:
 2017-12-26_10-12-28 by Clifton Tausberger, on Flickr
I also block off the EGR pipe with a screw and crimped the EGR intake closed.
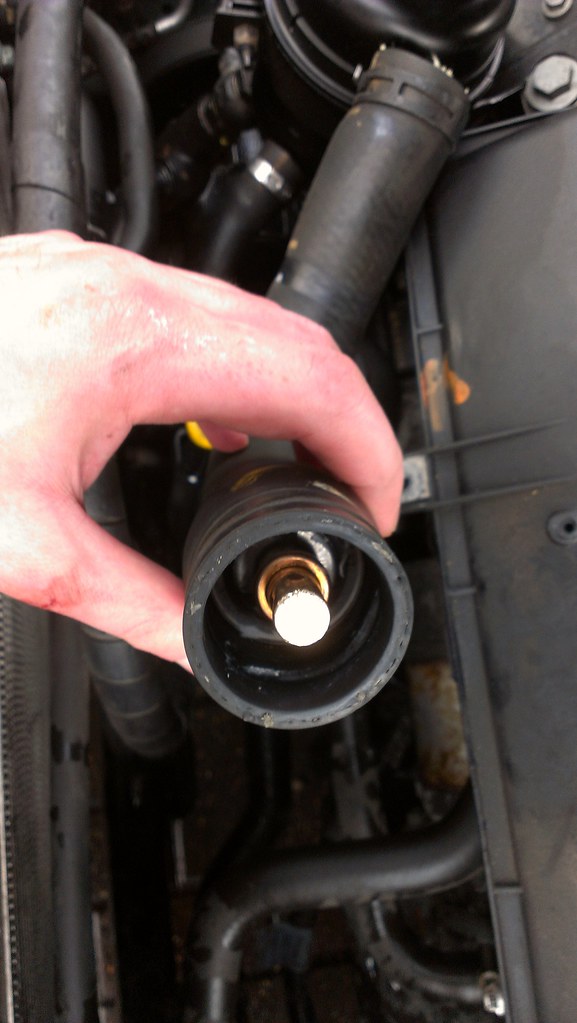
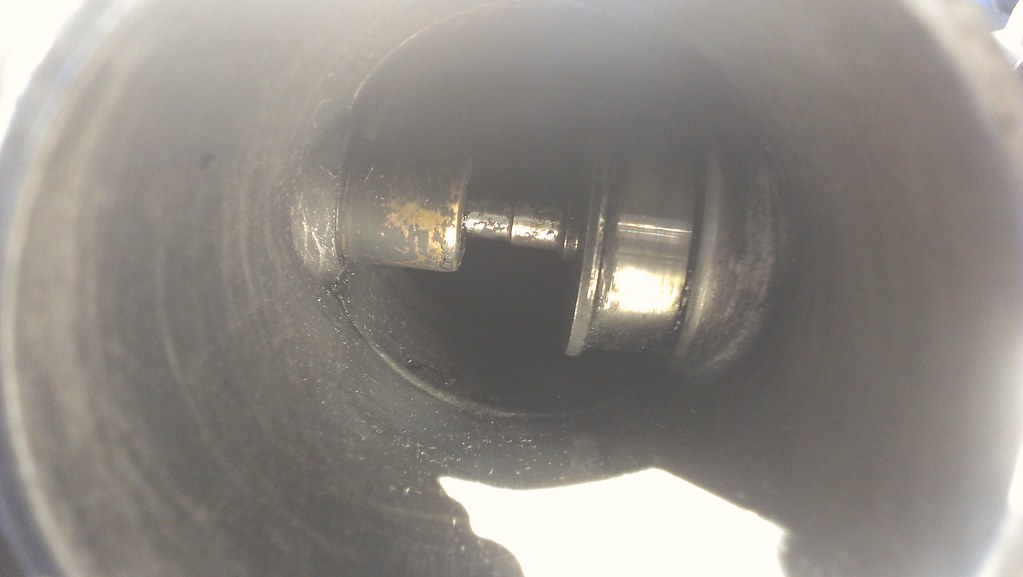
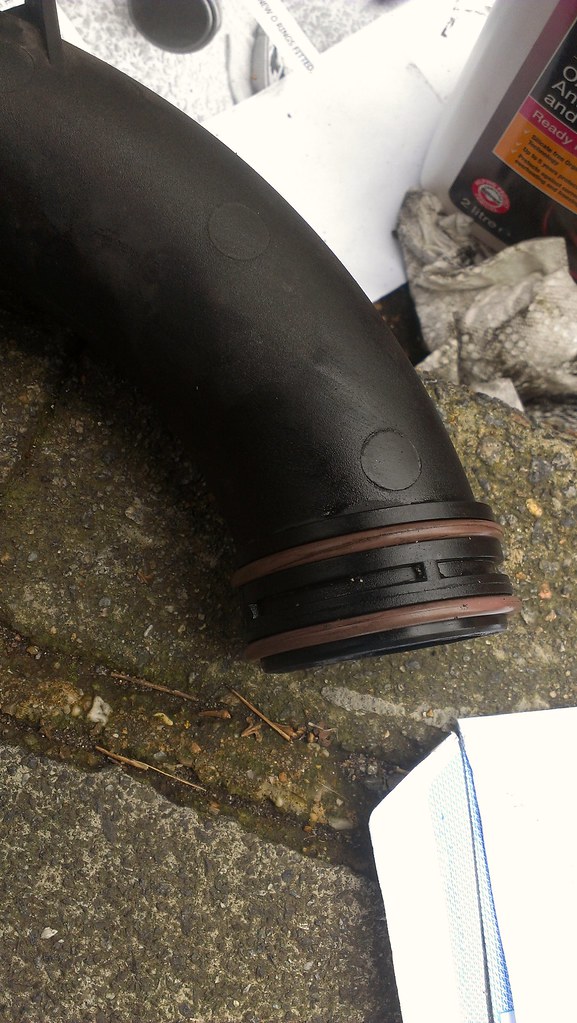
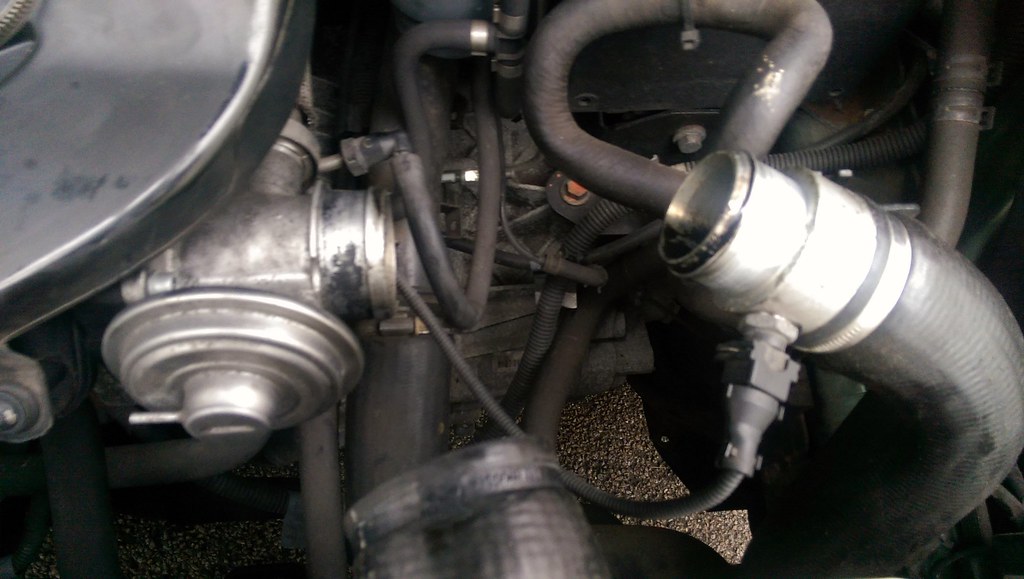
Next up, turbo intercooler seals. A very common issue on these cars, the nitrile seals at the intercooler elbow, just under the left headlight, deform over time and pop out. Our 75 lost boost on hard acceleration and made a nasty hissing noise. Telltale oil spray when viewed from above:
 2017-12-26_10-10-52 by Clifton Tausberger, on Flickr
With some contortionist spannering you can get both the flexible hose and the solid plastic elbow out without removing the grill/bumper/headlight. My original seals weren't too bad, but were clearly letting air past. Top:
 2017-12-26_10-11-03 by Clifton Tausberger, on Flickr
Bottom:
 2017-12-26_10-11-13 by Clifton Tausberger, on Flickr
It's important not to replace like for like, so I ordered new viton seals (the smaller brown one, black old one for comparison) from the 75 experts:
 2017-12-26_10-11-22 by Clifton Tausberger, on Flickr
Neat and clean:
 2017-12-26_10-11-34 by Clifton Tausberger, on Flickr
The elbow pops back into the intercooler, then pipework can be reattached. This cured our hiss and some boostiness, but the power still arrived in one Saab 900-like shove. Further investigation was needed...
ECU Overfloweth
By this stage the 75 had done a few months and several thousand miles, and we were digging in to the preventative fixes and service items with gusto.
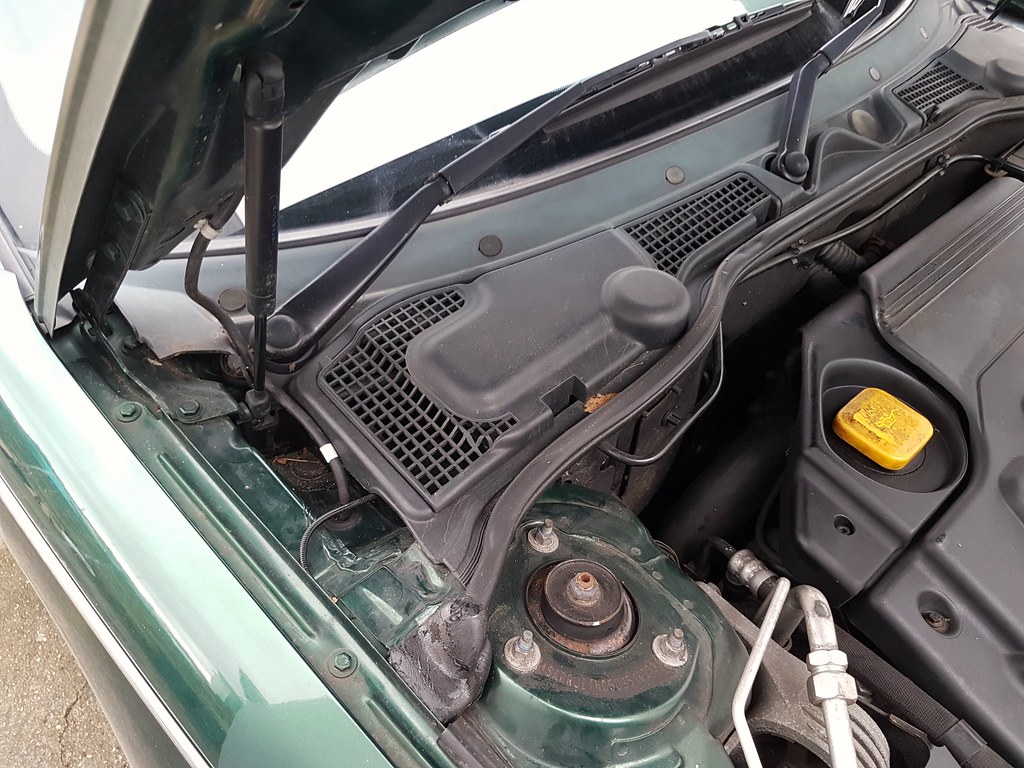
One very important upgrade from the community is a small L shaped piece of plastic that sits in the scuttle. As the ECU is located in front of the bulkhead, if any of the trains are blocked with leaves the water cascades into the ECU area on the driver's side.
 2018-01-13_12-28-54 by Clifton Tausberger, on Flickr
This is one of the major causes of 75 death. Step one - remove crud, clear drains with coat hanger:
 2018-01-13_12-29-29 by Clifton Tausberger, on Flickr
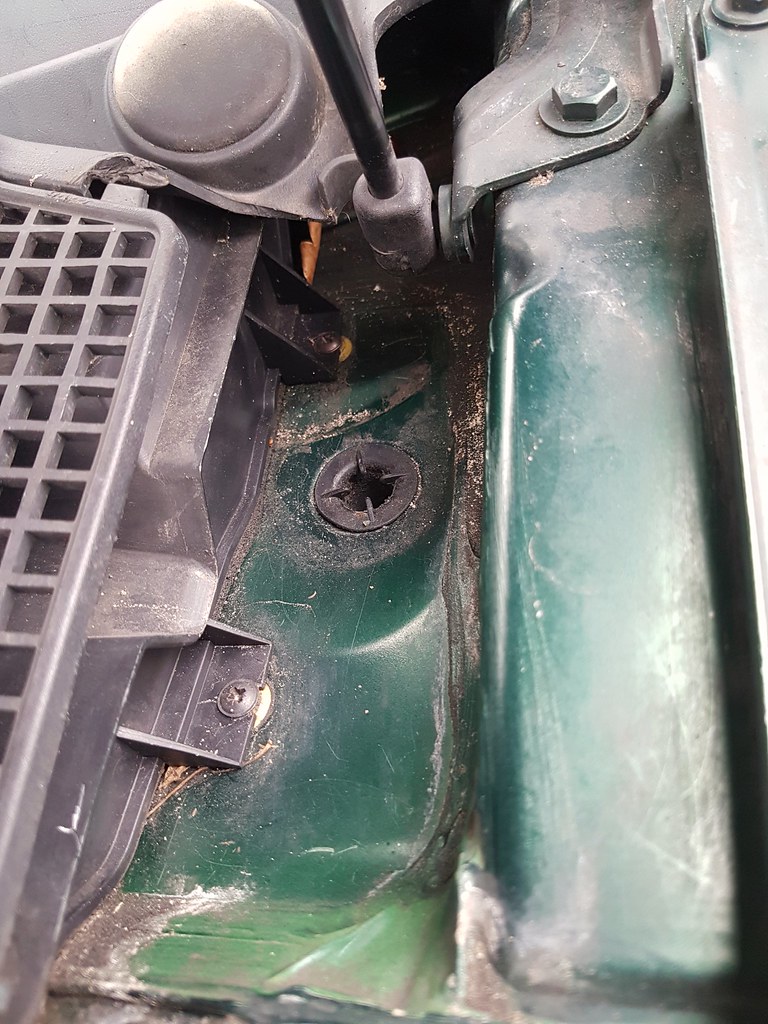
Step two - add plastic drain for a few pounds on the driver's side:
 2018-01-13_12-29-15 by Clifton Tausberger, on Flickr
Step three - feel better.
By this stage the 75 had done a few months and several thousand miles, and we were digging in to the preventative fixes and service items with gusto.
One very important upgrade from the community is a small L shaped piece of plastic that sits in the scuttle. As the ECU is located in front of the bulkhead, if any of the trains are blocked with leaves the water cascades into the ECU area on the driver's side.
2018-01-13_12-28-54 by Clifton Tausberger, on FlickrThis is one of the major causes of 75 death. Step one - remove crud, clear drains with coat hanger:
2018-01-13_12-29-29 by Clifton Tausberger, on FlickrStep two - add plastic drain for a few pounds on the driver's side:
2018-01-13_12-29-15 by Clifton Tausberger, on FlickrStep three - feel better.
Turbo Selecta
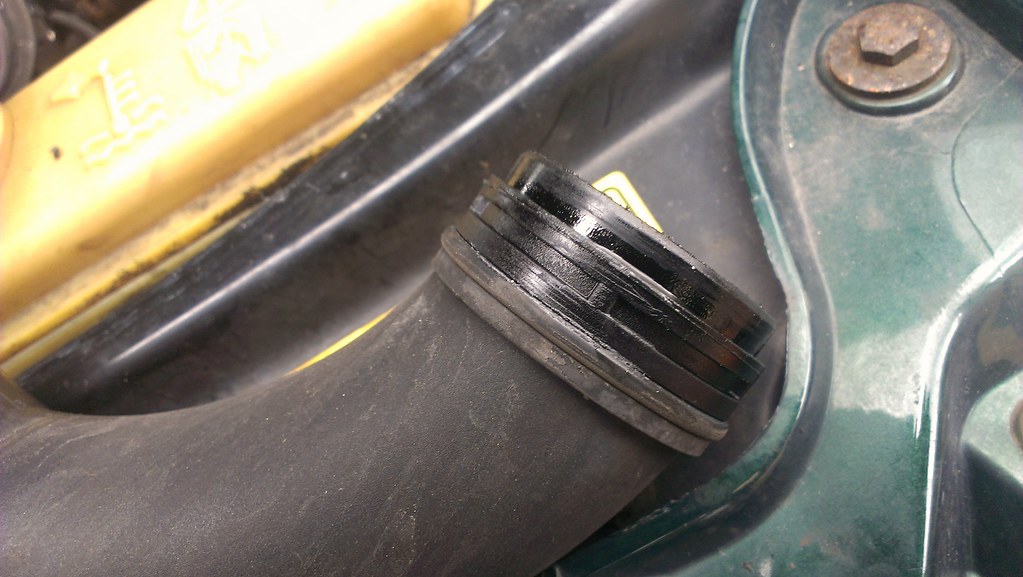
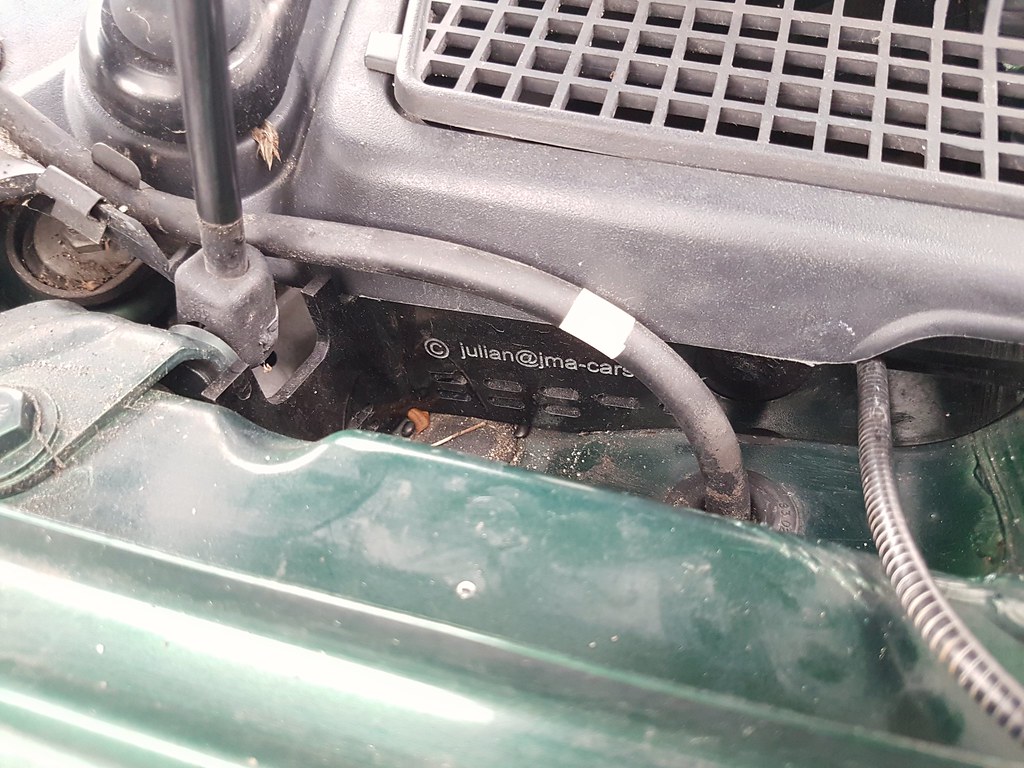
The turbo issue was starting to grate, so I went through a number of items that are probably causes. First off, a tear in the intercooler pipe:
 2018-01-13_12-30-08 by Clifton Tausberger, on Flickr
The big plastic engine cover had rubber through on the top half of that picture. In the earlier years this was a single pipe, but later on the silver sensor section in the middle was added, changing the angle:
 2018-01-13_12-34-45 by Clifton Tausberger, on Flickr
Cover removed:
 2018-01-13_12-35-00 by Clifton Tausberger, on Flickr
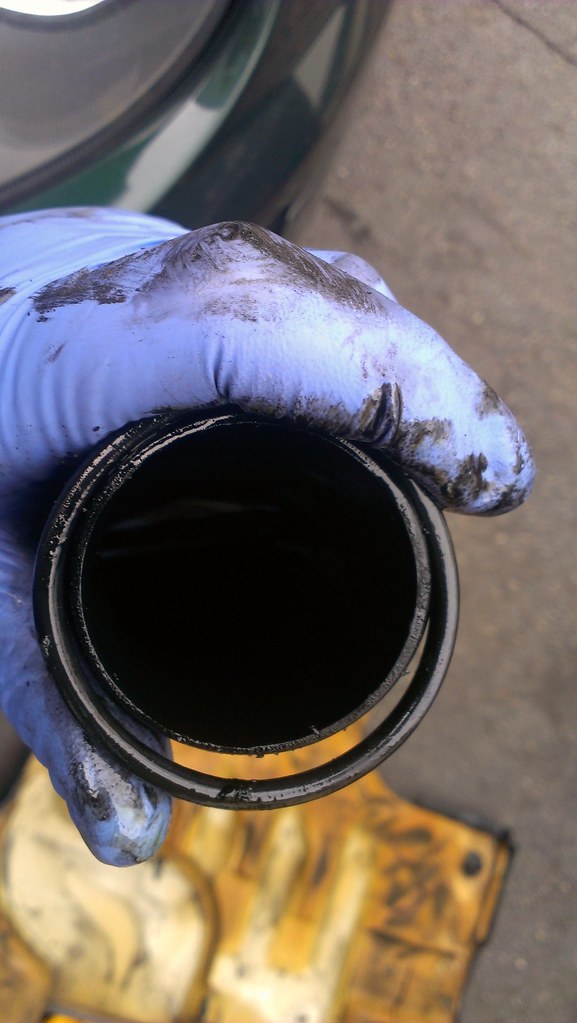
Out came the section:
 2018-01-13_12-35-12 by Clifton Tausberger, on Flickr
Top tip - the original version of the hose can be bought and just cut into two sections, don't bother trying to track down just one section!
 2018-01-13_12-35-24 by Clifton Tausberger, on Flickr
The plastic cover was then judiciously trimmed to prevent reoccurence. Did it help?
No. But I felt better.
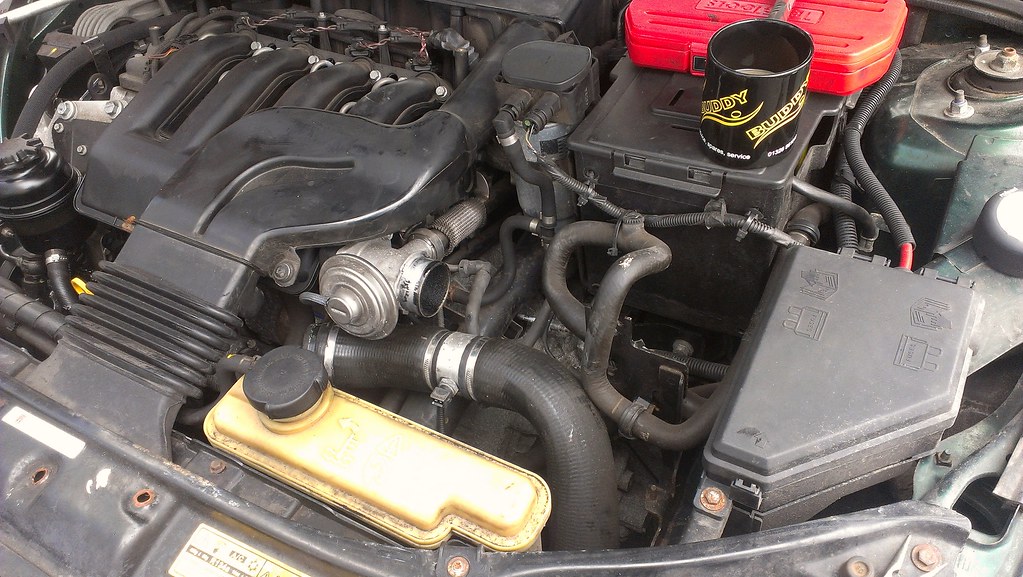
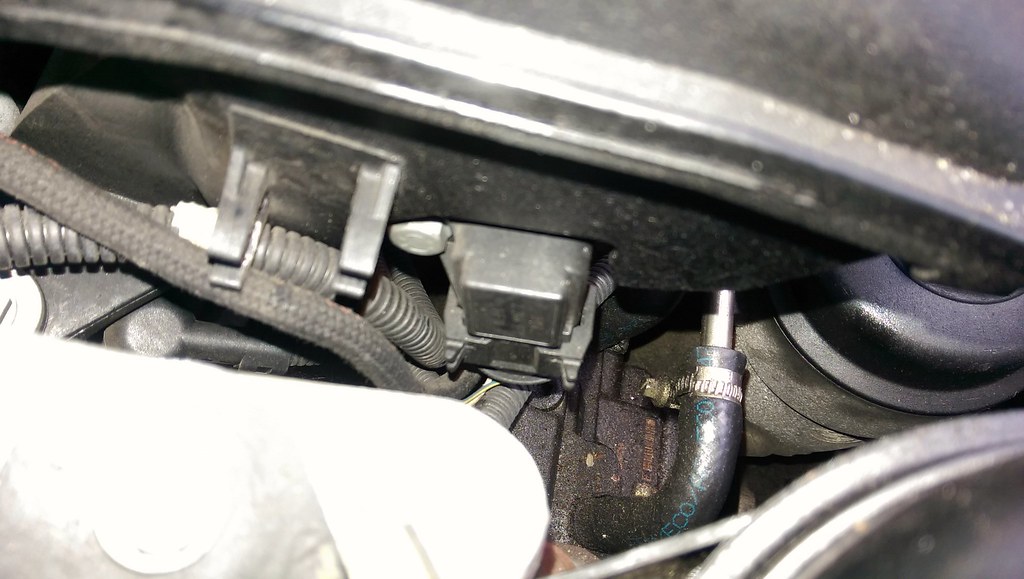
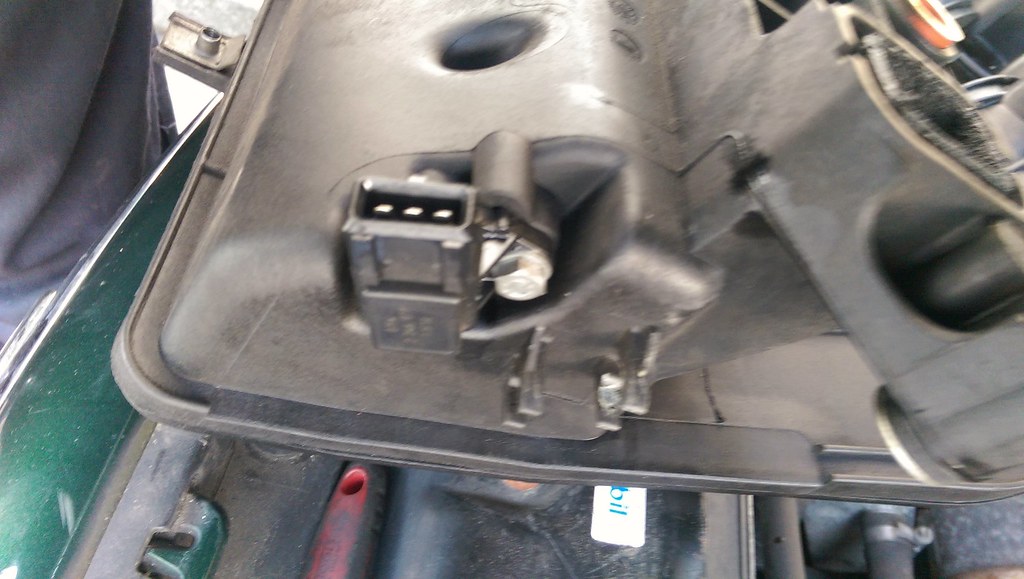
Next up - the boost pressure sensor, which can get blocked. Given the state of the EGR detritus, this was likely. It's on the bottom left of the manifold. This could never be described as a pretty engine:
 2017-12-26_10-20-49 by Clifton Tausberger, on Flickr
Here it is:
 2017-12-26_10-20-40 by Clifton Tausberger, on Flickr
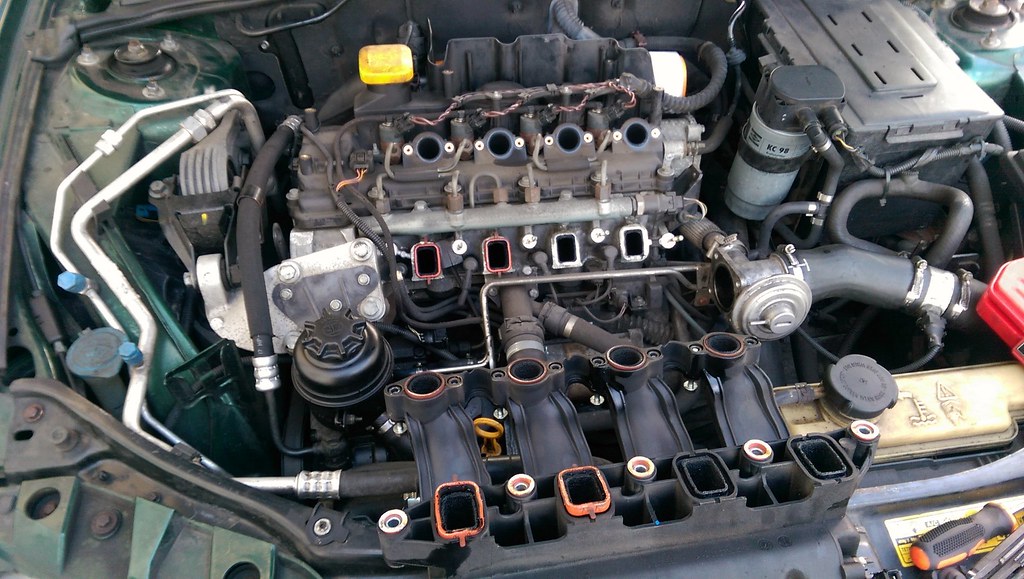
Unfortunately the angles are not ideal for tools, so I just unbolted the whole intake (13 bolts, some of which are captive). Make sure all the orange gaskets are saved and don't drop into the engine:
 2017-12-26_10-21-17 by Clifton Tausberger, on Flickr
Easier access:
 2017-12-26_10-21-32 by Clifton Tausberger, on Flickr
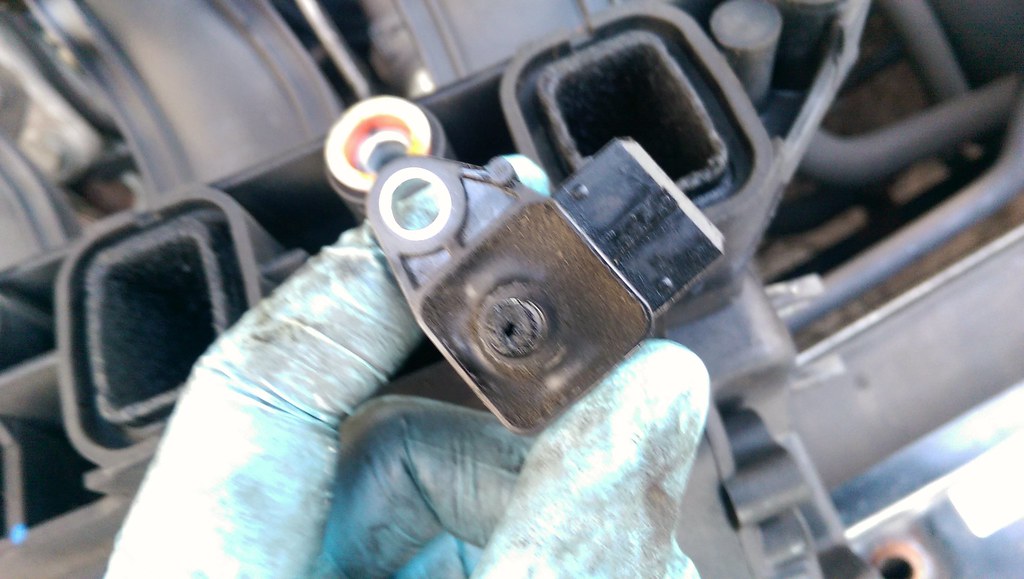
Despite being utterly filthy, it was unblocked. Trouble items often resemble one of those ancient 'draw a beard with iron filings' toys:
 2017-12-26_10-21-46 by Clifton Tausberger, on Flickr
Cleaned and reassembled, no change. Blast.
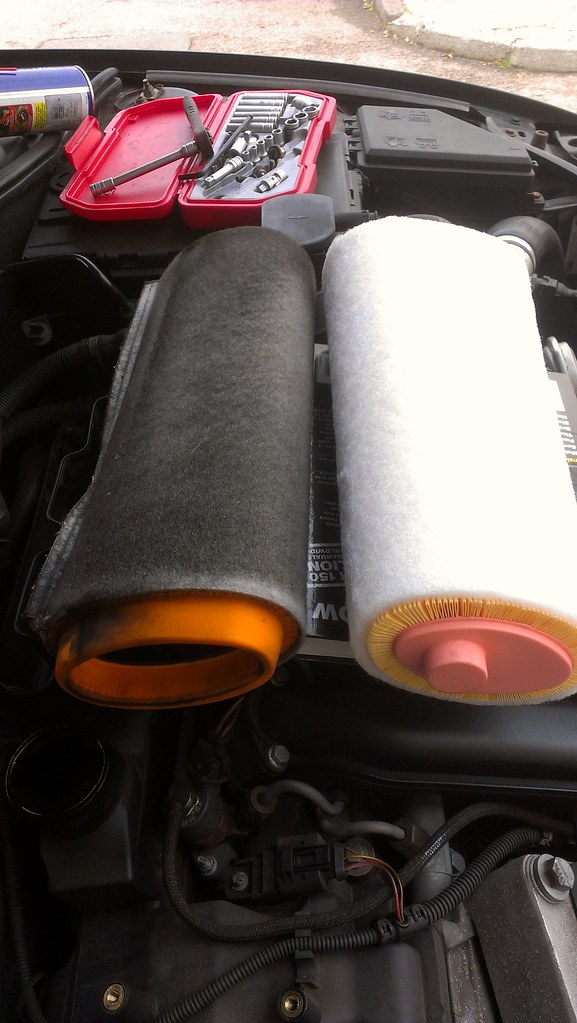
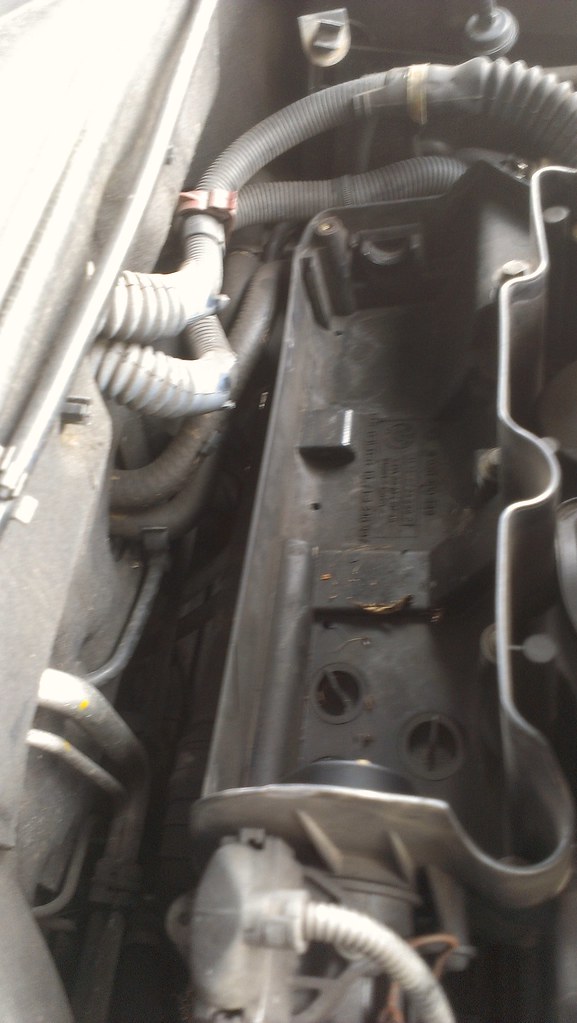
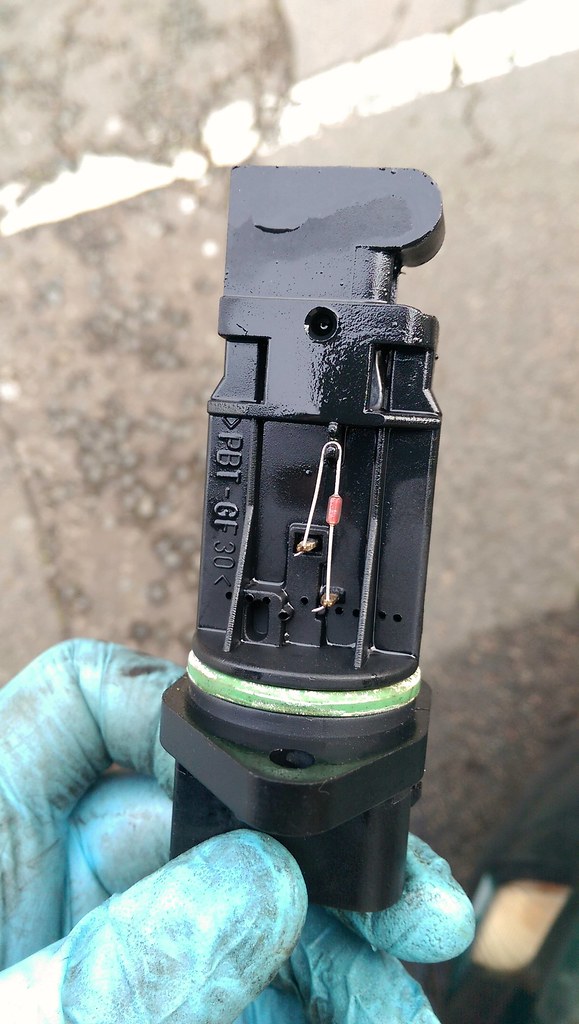
The air filter needed a change anyway, and as the PCV filter is not a service item on the Rover service schedules they always need a change, plus I could clean the MAF while the top of the engine was out. Curiously, the PCV is a service item for the BMW Minis that share the engine. Fun fact, I know (snore...).
Engine cover off, oil filler cap off, three captive bolts for the air filter cover:
 2017-12-26_10-13-04 by Clifton Tausberger, on Flickr
Old and new:
 2017-12-26_10-13-13 by Clifton Tausberger, on Flickr
Also, hoover out the airbox:
 2017-12-26_10-13-22 by Clifton Tausberger, on Flickr
MAF connection at the bottom of that picture (unclip, two star bolts, easy).
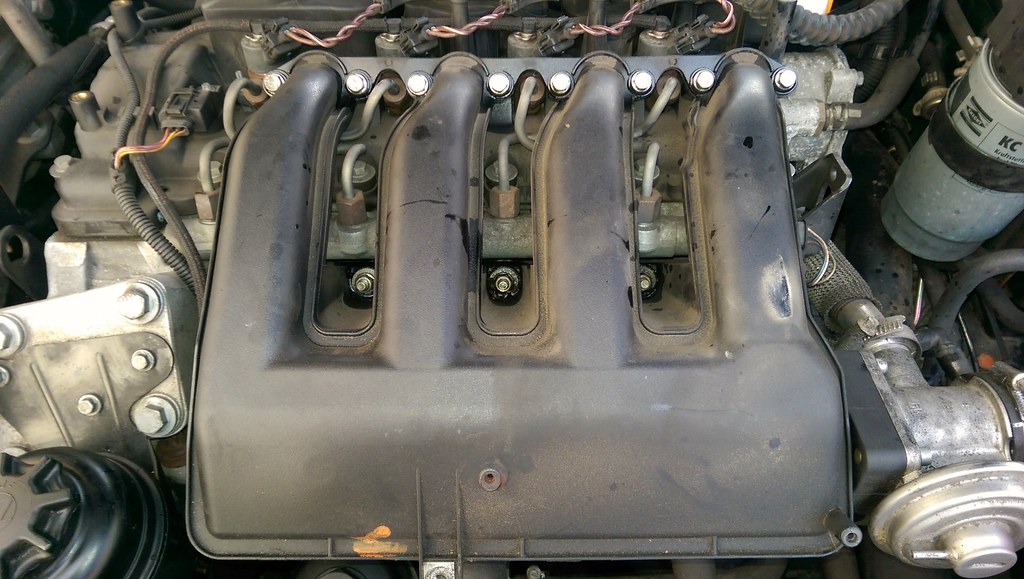
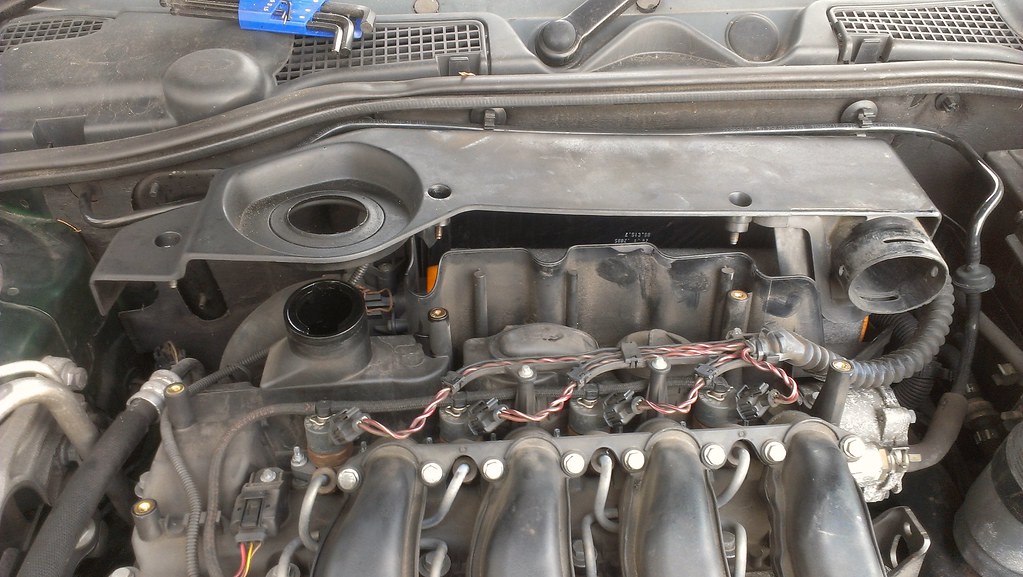
Next up remove injector harness. PCV filters are in the domes at the back of this picture:
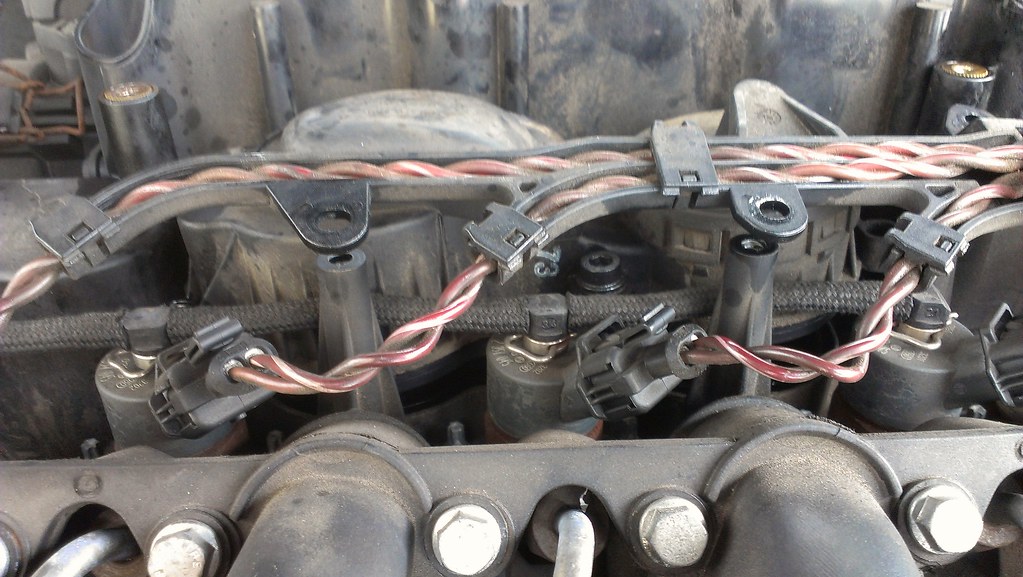 2017-12-26_10-13-32 by Clifton Tausberger, on Flickr
Lovely:
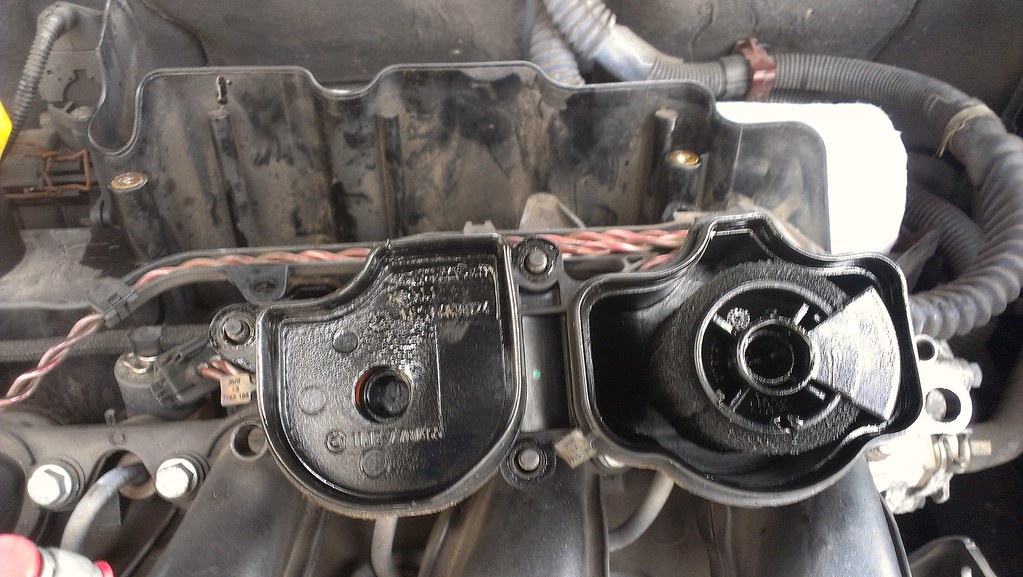 2017-12-26_10-13-42 by Clifton Tausberger, on Flickr
Similar to the oil filter housing, unclip, change filter, change seals:
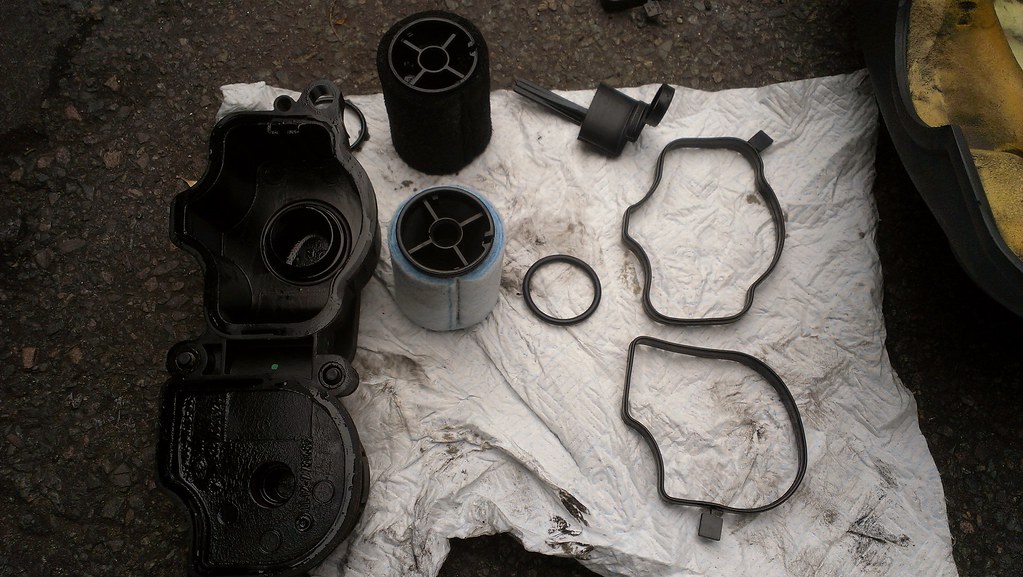 2017-12-26_10-13-52 by Clifton Tausberger, on Flickr
Some contact cleaner on the MAF (carefully):
 2017-12-26_10-19-56 by Clifton Tausberger, on Flickr
...and put it all back together. No change. Double drat.
I got talking to the Rover beards and luckily had my photos to hand. 'Not a real MAF that' one of the older wizards sniffed.
Sure enough, it was a poor copy of the Bosch one. Copies are so prevalent they had worker their way into some of the bigger suppliers, and the Rover community have ended up contact Bosch directly for their approved suppliers. A week or so later a German parcel arrived. Here's the difference. Note the numbers present, seal colour and (trust me on this) a better quality of plastic:
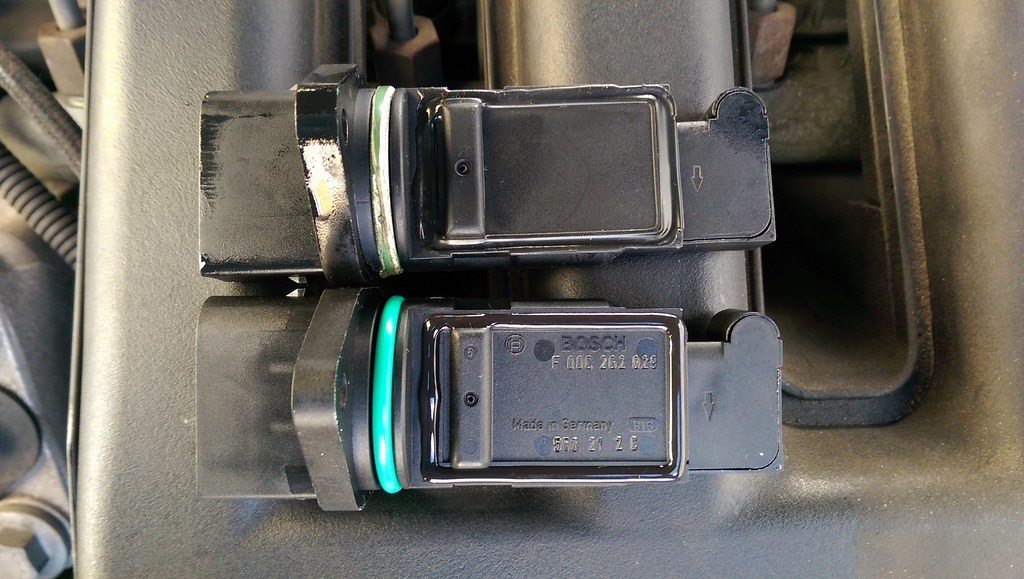 2017-12-26_10-20-11 by Clifton Tausberger, on Flickr
I will forever remember F 00C 2G2 029. All diesel owners, I encourage you to check yours. The difference was incredible! No shove but smooth boost, efficiency climbed by a few mpg and no sudden hiccups under acceleration. It only took a few months of frittering and 200GBP of parts...
The turbo issue was starting to grate, so I went through a number of items that are probably causes. First off, a tear in the intercooler pipe:
2018-01-13_12-30-08 by Clifton Tausberger, on FlickrThe big plastic engine cover had rubber through on the top half of that picture. In the earlier years this was a single pipe, but later on the silver sensor section in the middle was added, changing the angle:
2018-01-13_12-34-45 by Clifton Tausberger, on FlickrCover removed:
2018-01-13_12-35-00 by Clifton Tausberger, on FlickrOut came the section:
2018-01-13_12-35-12 by Clifton Tausberger, on FlickrTop tip - the original version of the hose can be bought and just cut into two sections, don't bother trying to track down just one section!
2018-01-13_12-35-24 by Clifton Tausberger, on FlickrThe plastic cover was then judiciously trimmed to prevent reoccurence. Did it help?
No. But I felt better.
Next up - the boost pressure sensor, which can get blocked. Given the state of the EGR detritus, this was likely. It's on the bottom left of the manifold. This could never be described as a pretty engine:
2017-12-26_10-20-49 by Clifton Tausberger, on FlickrHere it is:
2017-12-26_10-20-40 by Clifton Tausberger, on FlickrUnfortunately the angles are not ideal for tools, so I just unbolted the whole intake (13 bolts, some of which are captive). Make sure all the orange gaskets are saved and don't drop into the engine:
2017-12-26_10-21-17 by Clifton Tausberger, on FlickrEasier access:
2017-12-26_10-21-32 by Clifton Tausberger, on FlickrDespite being utterly filthy, it was unblocked. Trouble items often resemble one of those ancient 'draw a beard with iron filings' toys:
2017-12-26_10-21-46 by Clifton Tausberger, on FlickrCleaned and reassembled, no change. Blast.
The air filter needed a change anyway, and as the PCV filter is not a service item on the Rover service schedules they always need a change, plus I could clean the MAF while the top of the engine was out. Curiously, the PCV is a service item for the BMW Minis that share the engine. Fun fact, I know (snore...).
Engine cover off, oil filler cap off, three captive bolts for the air filter cover:
2017-12-26_10-13-04 by Clifton Tausberger, on FlickrOld and new:
2017-12-26_10-13-13 by Clifton Tausberger, on FlickrAlso, hoover out the airbox:
2017-12-26_10-13-22 by Clifton Tausberger, on FlickrMAF connection at the bottom of that picture (unclip, two star bolts, easy).
Next up remove injector harness. PCV filters are in the domes at the back of this picture:
2017-12-26_10-13-32 by Clifton Tausberger, on FlickrLovely:
2017-12-26_10-13-42 by Clifton Tausberger, on FlickrSimilar to the oil filter housing, unclip, change filter, change seals:
2017-12-26_10-13-52 by Clifton Tausberger, on FlickrSome contact cleaner on the MAF (carefully):
2017-12-26_10-19-56 by Clifton Tausberger, on Flickr...and put it all back together. No change. Double drat.
I got talking to the Rover beards and luckily had my photos to hand. 'Not a real MAF that' one of the older wizards sniffed.
Sure enough, it was a poor copy of the Bosch one. Copies are so prevalent they had worker their way into some of the bigger suppliers, and the Rover community have ended up contact Bosch directly for their approved suppliers. A week or so later a German parcel arrived. Here's the difference. Note the numbers present, seal colour and (trust me on this) a better quality of plastic:
2017-12-26_10-20-11 by Clifton Tausberger, on FlickrI will forever remember F 00C 2G2 029. All diesel owners, I encourage you to check yours. The difference was incredible! No shove but smooth boost, efficiency climbed by a few mpg and no sudden hiccups under acceleration. It only took a few months of frittering and 200GBP of parts...
I can definitely vouch for reliability, but there's a good laundry list of stuff to keep them healthy that is fortunately relatively cheap and easy to learn.
Loyly said:
A great thread. I have enjoyed all these pictures and in-depth facts on the car. I love reading on owners who really get stuck into a car like this.
Thanks - It's really enjoyable to keep a car going, especially as this one is so well catered for both in parts and advice. I thought I wouldn't enjoy working on it but it's the least 'modern' of modern cars I have got into. BrettMRC said:
You need to inspect the ECU as a priority - from past experience these are usually sitting in a bath of water in front of the firewall....
Amen. Can't stress this enough. Resistance Is Futile
As summer in the first year of ownership kicked off, my girlfriend ticked over about 5k in as many months and we took our first holiday down to Cornwall. Somewhat unbelievably, the air conditioning did just need a regas, as the original advert said, and we wafted down in relative comfort. This is the first car she has owned with working air con, and we felt very nouveau-rich indeed, following our shed-laden couple history.
Here it is at Fowey:
 2017-12-26_10-16-01 by Clifton Tausberger, on Flickr
No holiday is complete without me bringing a bag of bits to attach to the car. It's a great incentive, knowing that if you get it wrong with limited tools on a driveway by the beach that you might not be able to leave.
Fuel filter is dead simple: under the bonnet, unplug some plugs, position rags to catch diesel and unbolt a 10mm nut to loosen the bracket. Keep the filter level when removing to minimise spillage.
 2017-12-26_10-14-02 by Clifton Tausberger, on Flickr
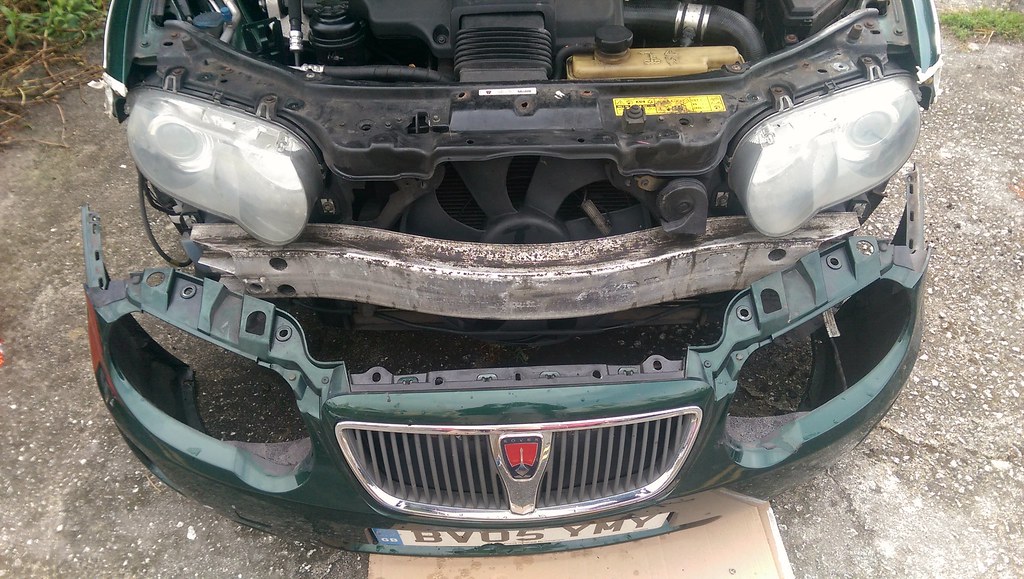
On to something more tricky - the fan resistor. 75s have form in their cooling circuit, loosing speeds or failing entirely. The Mk2 has a two speed fan, but ours either ran full speed (very noisy) or off, and sometimes cycled between the two in quick succession. The Rover community have a prominent member, Jules, who supplies a resistor replacement to (more often than not) bring the circuit back to the correct behavior.
First off, unbolt 412 bolts and plastic retainers, be surprised at the weight of the bumper:
 2017-12-26_10-15-20 by Clifton Tausberger, on Flickr
You can see I had already unscrewed the resistor in the pic, it sits behind the fan.
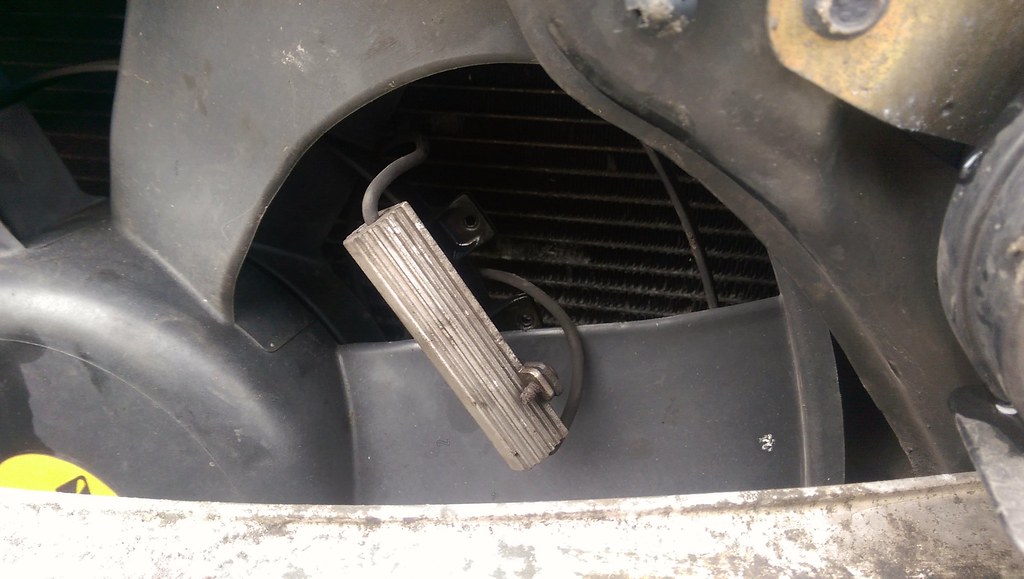 2017-12-26_10-15-31 by Clifton Tausberger, on Flickr
If you have time and want to do a perfect job you can unbolts more bits and solder the leads on. I took the shorter route (hey, the pub was opening, don't judge me!) and fitted some new connectors to the wires, screw it all back down and then began the tiresome rebolting procedure.
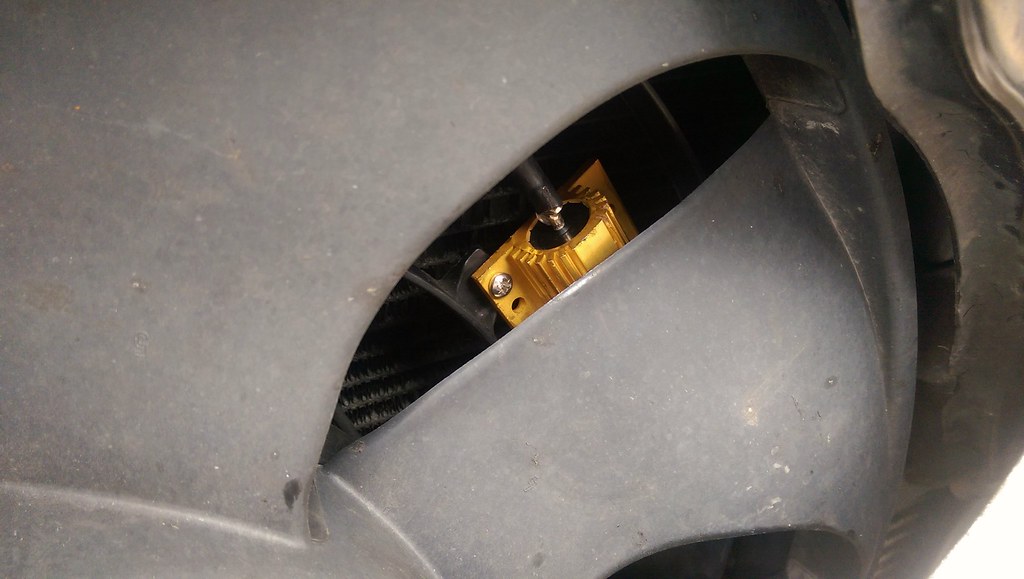 2017-12-26_10-15-48 by Clifton Tausberger, on Flickr
It's gold and shiny, it must be better.
Primed the fuel system for 15 seconds before starting, fan kicked in with the AC and all was well. Blissful whisper replaced narcoleptic banshee.
As summer in the first year of ownership kicked off, my girlfriend ticked over about 5k in as many months and we took our first holiday down to Cornwall. Somewhat unbelievably, the air conditioning did just need a regas, as the original advert said, and we wafted down in relative comfort. This is the first car she has owned with working air con, and we felt very nouveau-rich indeed, following our shed-laden couple history.
Here it is at Fowey:
2017-12-26_10-16-01 by Clifton Tausberger, on FlickrNo holiday is complete without me bringing a bag of bits to attach to the car. It's a great incentive, knowing that if you get it wrong with limited tools on a driveway by the beach that you might not be able to leave.
Fuel filter is dead simple: under the bonnet, unplug some plugs, position rags to catch diesel and unbolt a 10mm nut to loosen the bracket. Keep the filter level when removing to minimise spillage.
2017-12-26_10-14-02 by Clifton Tausberger, on FlickrOn to something more tricky - the fan resistor. 75s have form in their cooling circuit, loosing speeds or failing entirely. The Mk2 has a two speed fan, but ours either ran full speed (very noisy) or off, and sometimes cycled between the two in quick succession. The Rover community have a prominent member, Jules, who supplies a resistor replacement to (more often than not) bring the circuit back to the correct behavior.
First off, unbolt 412 bolts and plastic retainers, be surprised at the weight of the bumper:
2017-12-26_10-15-20 by Clifton Tausberger, on FlickrYou can see I had already unscrewed the resistor in the pic, it sits behind the fan.
2017-12-26_10-15-31 by Clifton Tausberger, on FlickrIf you have time and want to do a perfect job you can unbolts more bits and solder the leads on. I took the shorter route (hey, the pub was opening, don't judge me!) and fitted some new connectors to the wires, screw it all back down and then began the tiresome rebolting procedure.
2017-12-26_10-15-48 by Clifton Tausberger, on FlickrIt's gold and shiny, it must be better.
Primed the fuel system for 15 seconds before starting, fan kicked in with the AC and all was well. Blissful whisper replaced narcoleptic banshee.
xcseventy said:
Great thread and looks a good example.
Owned our 75 for just over 3 years and 35k. It's a 2003 cdt saloon, with 140k on the clock. Had that thermostat issue for 3 years and never looked at it... Don't quite have the confidence to start unbolting stuff. It's just been resigned to "2nd car" as i've a new work car, so it doesn't get used that much any more.
Go on, treat that car to 20 minutes and thermostat - it's dead easy to fit the Renault one as above. Or if you're ever in SW london, send me a note, I thnk I have a few spares now having done it for a 75s since.Owned our 75 for just over 3 years and 35k. It's a 2003 cdt saloon, with 140k on the clock. Had that thermostat issue for 3 years and never looked at it... Don't quite have the confidence to start unbolting stuff. It's just been resigned to "2nd car" as i've a new work car, so it doesn't get used that much any more.
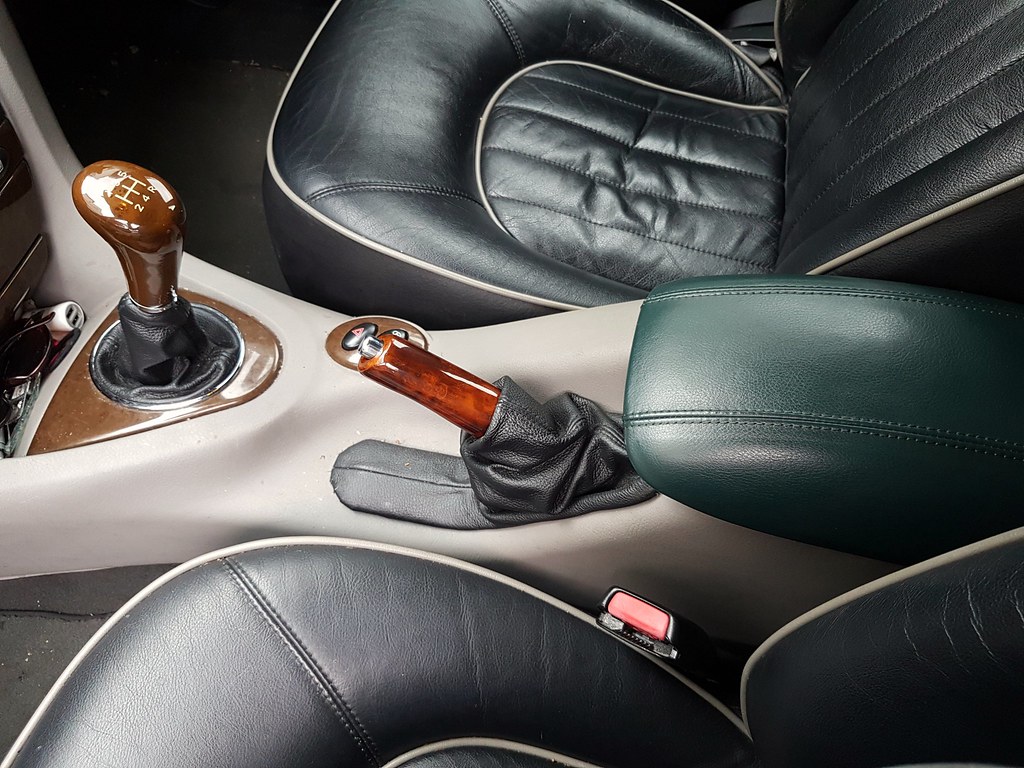
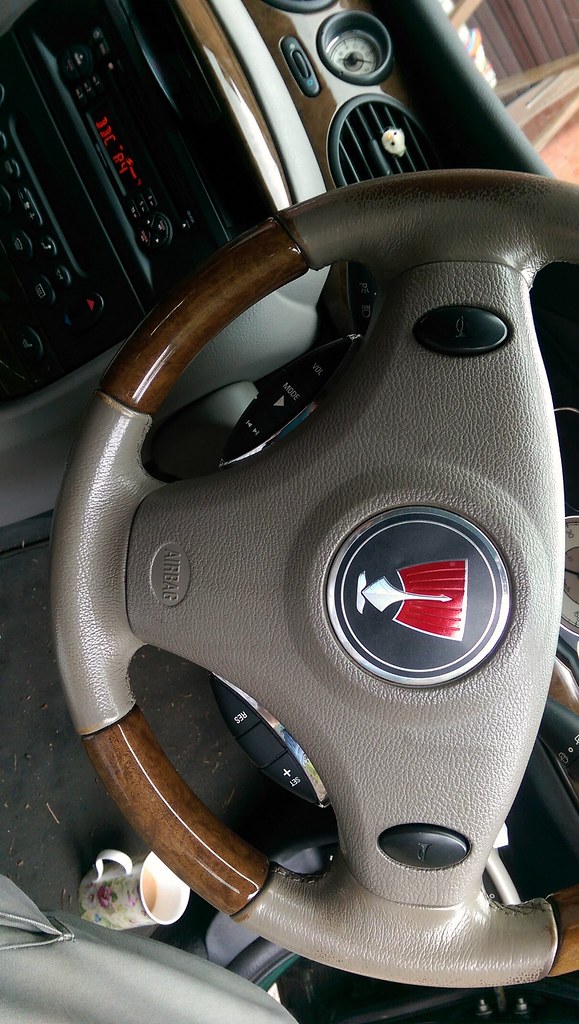
A summary of interior upgrades. Remember the original brief? A matching wooden gearknob was her birthday present that year (I know, I care too much) and this was swapped with brute force. Never position your eye socket directly over the thing you're trying to yank off - I had a courageous tale of besting a rogue leather gearknob to accompany my black eye.
The wooden handbrake is as rare as rocking unicorn teeth for the 75, but the Freelander item fits with a bit of careful fettling. This goes some way to explain the gangs of Rover beards that can be found sniffing early Freelanders in junkyards and eBay, and hence prices have similarly shot up. I ended up getting lucky at a local breaker, but unfortunately it was the incorrect wood grain. An easy fit once adjusted.
The green leather armrest just popped up one day for a few pounds. The ideal item, one day, would be the signature green leather interior, a very rare option, but I'm still not sure any were produced for the Tourer.
I also replaced the gaitors with some cheap items. Many infuriated minutes with the correct glues and scissors were spent, coincidentally disqualifying my Blue Peter presenter application.
 2018-01-13_12-30-24 by Clifton Tausberger, on Flickr
Next up, delving into the clutch system...
The wooden handbrake is as rare as rocking unicorn teeth for the 75, but the Freelander item fits with a bit of careful fettling. This goes some way to explain the gangs of Rover beards that can be found sniffing early Freelanders in junkyards and eBay, and hence prices have similarly shot up. I ended up getting lucky at a local breaker, but unfortunately it was the incorrect wood grain. An easy fit once adjusted.
The green leather armrest just popped up one day for a few pounds. The ideal item, one day, would be the signature green leather interior, a very rare option, but I'm still not sure any were produced for the Tourer.
I also replaced the gaitors with some cheap items. Many infuriated minutes with the correct glues and scissors were spent, coincidentally disqualifying my Blue Peter presenter application.
2018-01-13_12-30-24 by Clifton Tausberger, on FlickrNext up, delving into the clutch system...
surveyor said:
I tried one of these once. It broke me..
I sold it for half of what I paid for it in the end (which was not a huge loss), mainly to keep my relationship...
Sorry to hear that, they definitely need a set list of 'expensive item' checks at purchase, plus the 'preventative maintenance' list before piling on the miles. Plus there are plenty of rotters out there.I sold it for half of what I paid for it in the end (which was not a huge loss), mainly to keep my relationship...
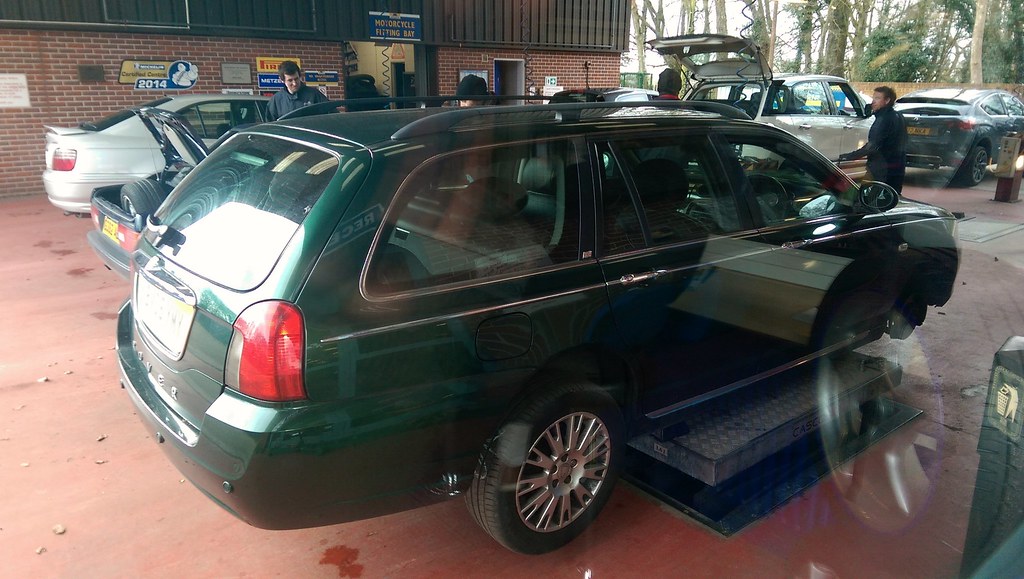
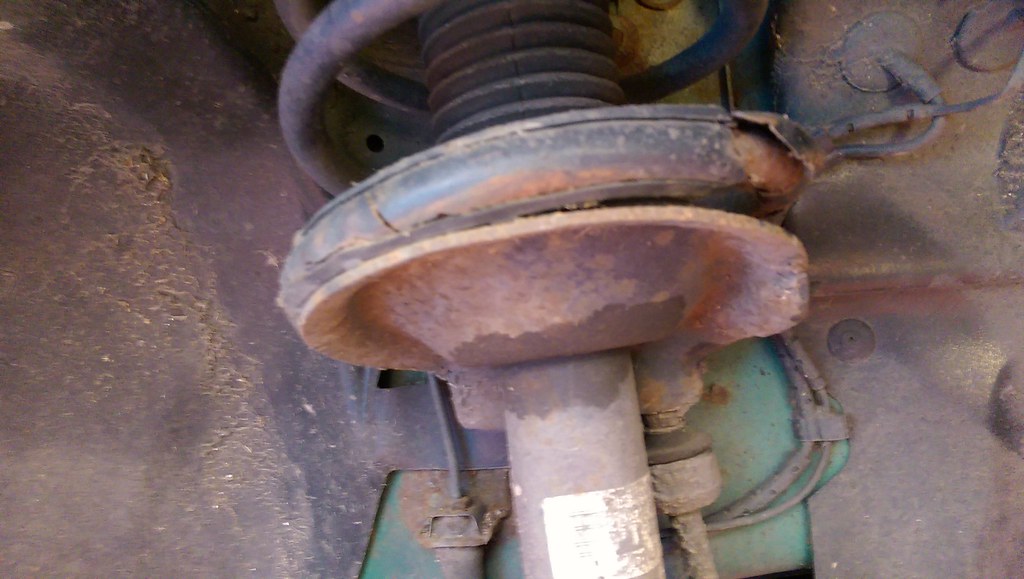
I did forget to mention that at purchase we had the strange combination of two very worn Michelin Primacy 215/55/R16s on the front and two ditchfinders on the rear, brand new. I can't abide by budget tyres, especially as my girlfriend was spending more time on the M3 than with me, so on went four matching Michelins at my favourite tyre repository, Micheldever. No issues with alignment or tracking but the rear springs were looking shoddy.
 2017-12-26_10-23-11 by Clifton Tausberger, on Flickr
 The Expensive Journey To Colwyn Bay
Coming up the anniversary of purchase the 75 was doing sterling service - workhorse during the week, often laden with furniture and art supplies, then our long distance chariot for the weekends around the UK. About 15,000 miles in, the clutch started to give classic symptoms associated with the model - requiring pumping, floppy at start up in the morning, and general behavour befitting the 130k total mileage.
We made the decision to invest in the car, as the jobs all seemed to be a known quantity and the old girl was ingratiating itself into our lives as a indispensable asset.
I arranged to see a Rover 75 specialist in Colwyn Bay, set up some AirBnb room goodness for two nights and headed off with a list.
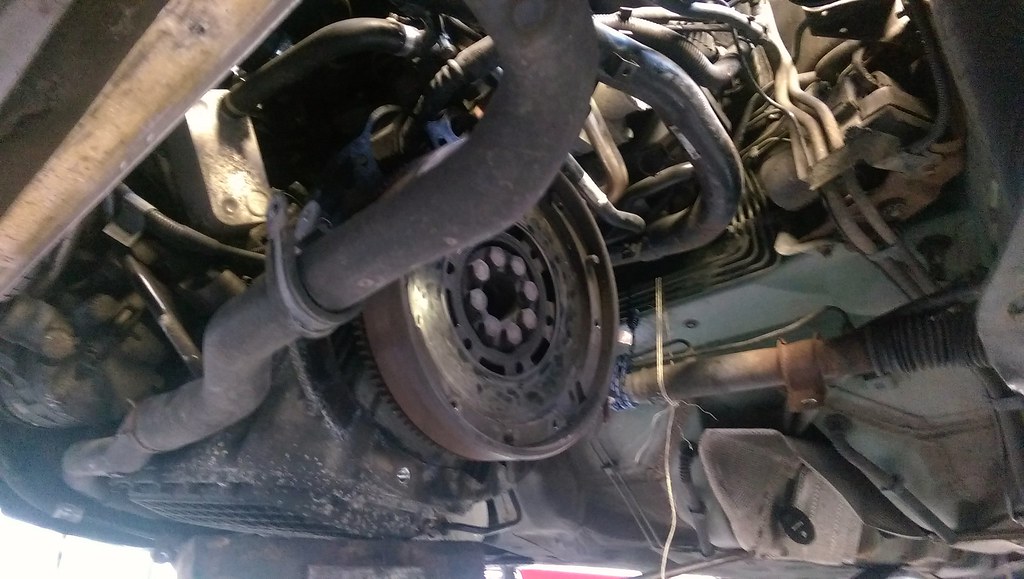
First up - the dreaded clutch. All sorts of reports of failure are common with the 75. Parts quality and installer skill plays a big part in the results, so I entrusted the legendary Jules to apportion the work to local experts. When you turn up to an idyllic Welsh hilside to this view, you know you are in the right place:
 2017-12-26_10-19-12 by Clifton Tausberger, on Flickr
Subframe removal allows better access:
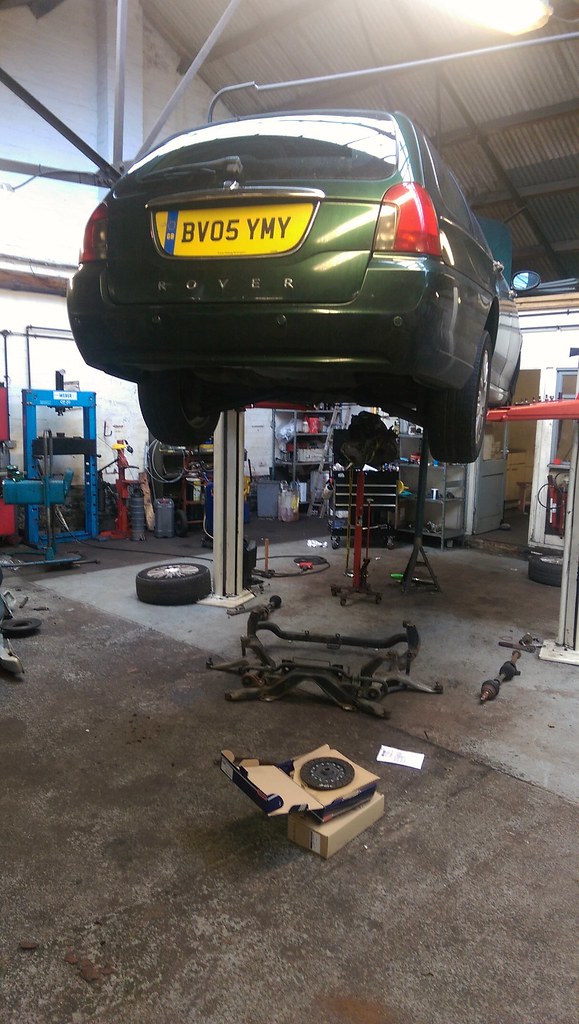 2017-12-26_10-18-10 by Clifton Tausberger, on Flickr
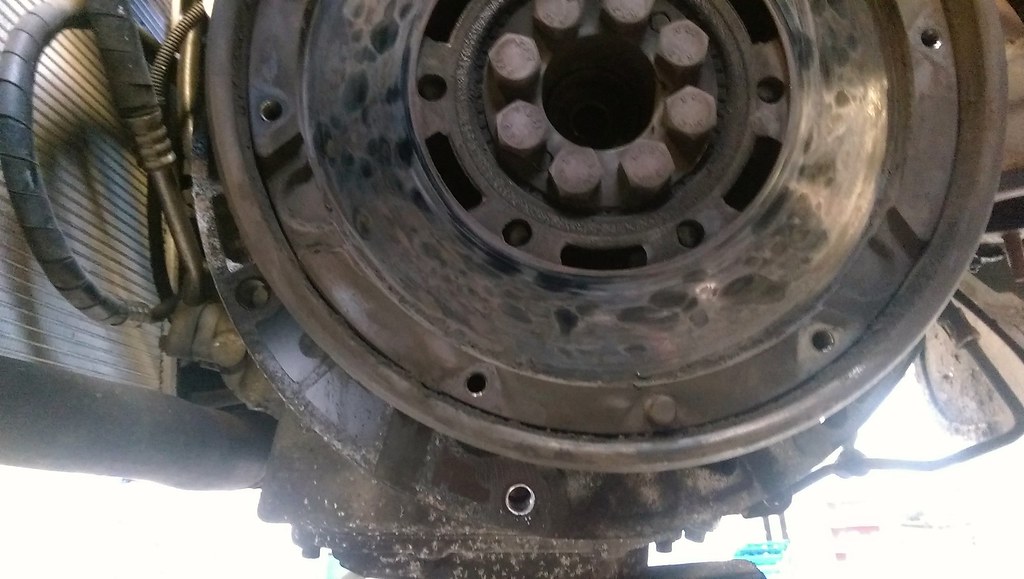
Clutch miserable, dual mass flywheel knackered:
 2017-12-26_10-17-32 by Clifton Tausberger, on Flickr
 2017-12-26_10-17-42 by Clifton Tausberger, on Flickr
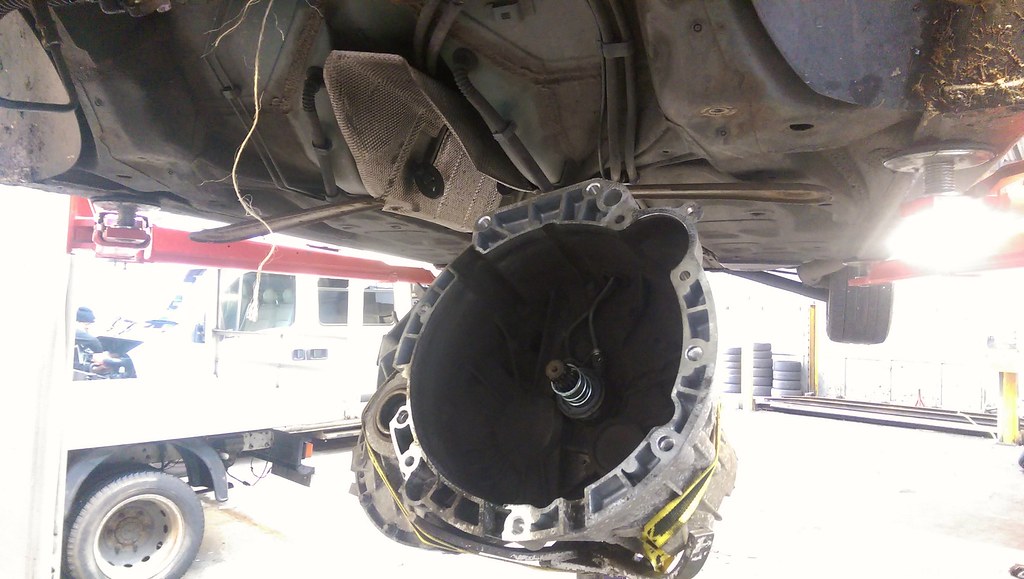
I left this to the experts - the slave cylinder had also gone, a common issue with the original plastic unit, so a Borg & Beck metal replacement was installed. I aspire to this level of knowledge (and workshop space), but the job was done so efficiently it was wonderful to watch:
 2017-12-26_10-17-52 by Clifton Tausberger, on Flickr
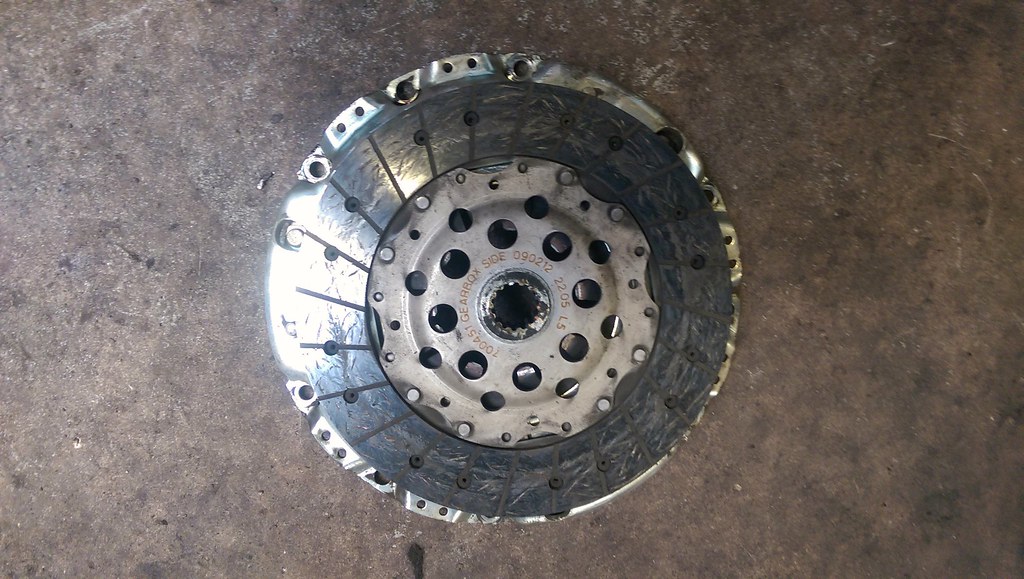
Love the text 'GEARBOX SIDE':
 2017-12-26_10-18-00 by Clifton Tausberger, on Flickr
When you have such 75 experts on hand, the car up on a life, a good mug of tea and an expert's store of parts, you do of course end up getting some other bits and pieces.
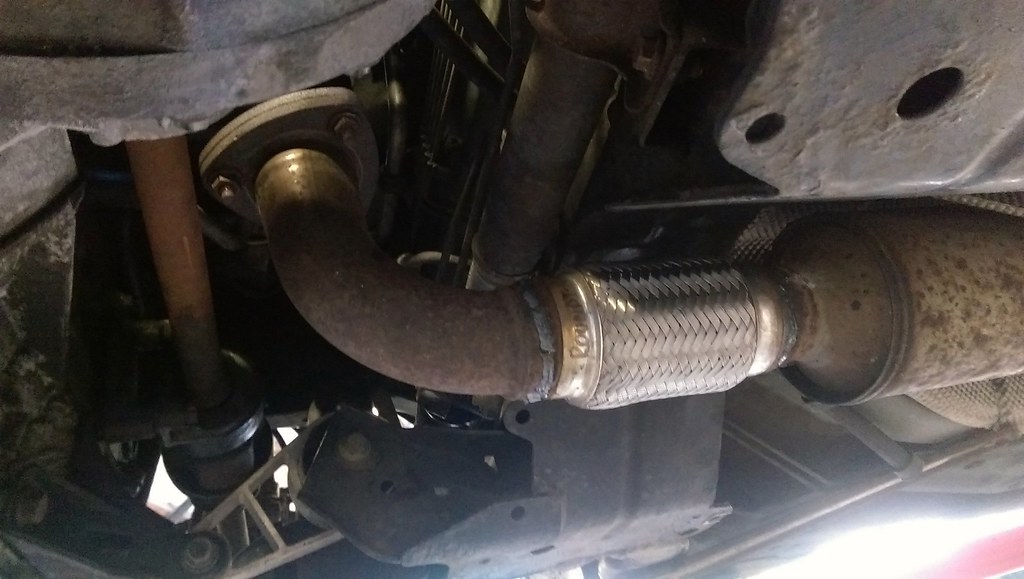
The original exhaust flexi had some gaps, so a new item was welded in:
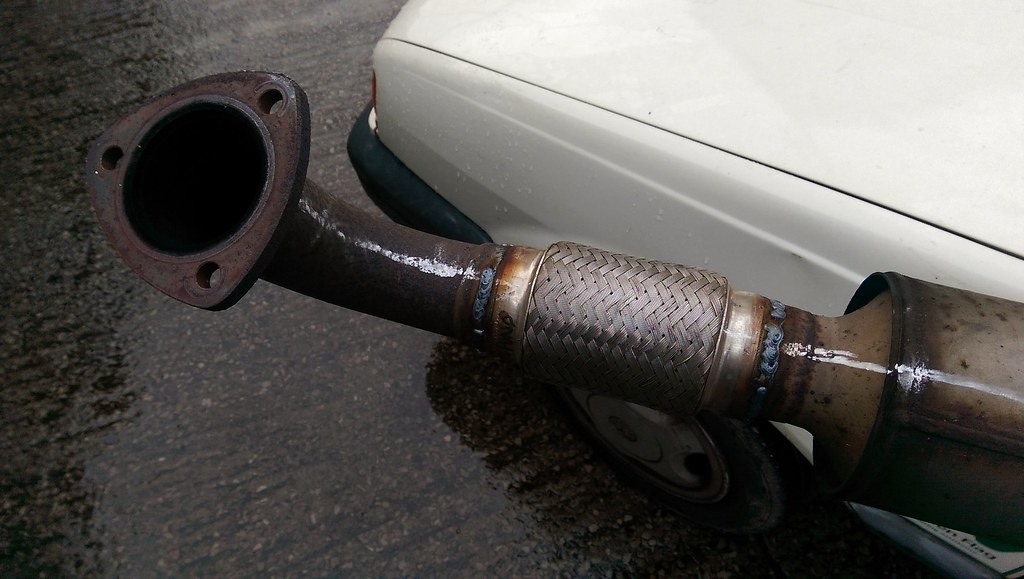 2017-12-26_10-18-32 by Clifton Tausberger, on Flickr
Rear section was also looking decidedly past its best. Many biscuits were consumed debating if it was the original factory item. I was just glad to see the back of it:
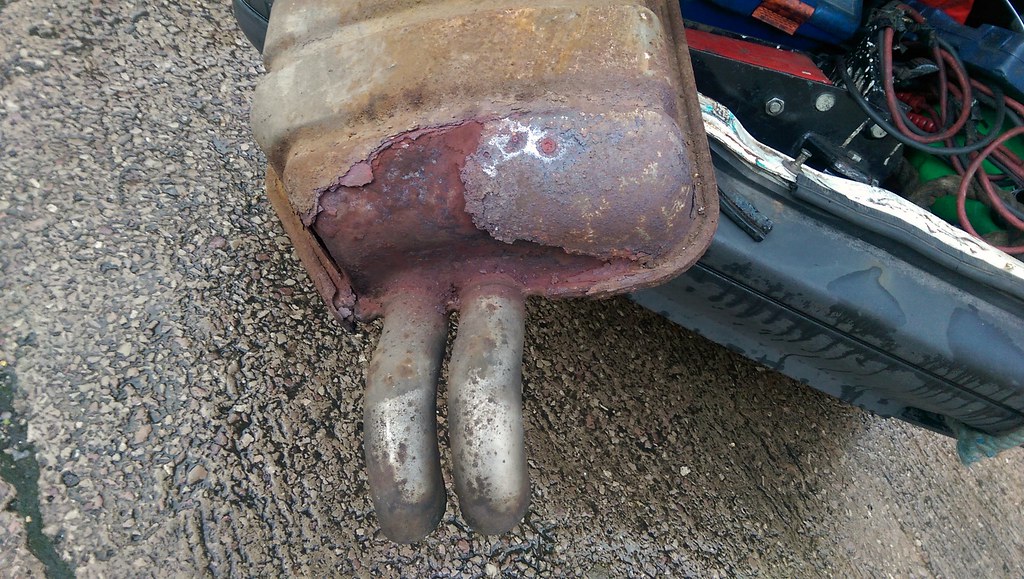 2017-12-26_10-18-41 by Clifton Tausberger, on Flickr
Standard exhaust transit option:
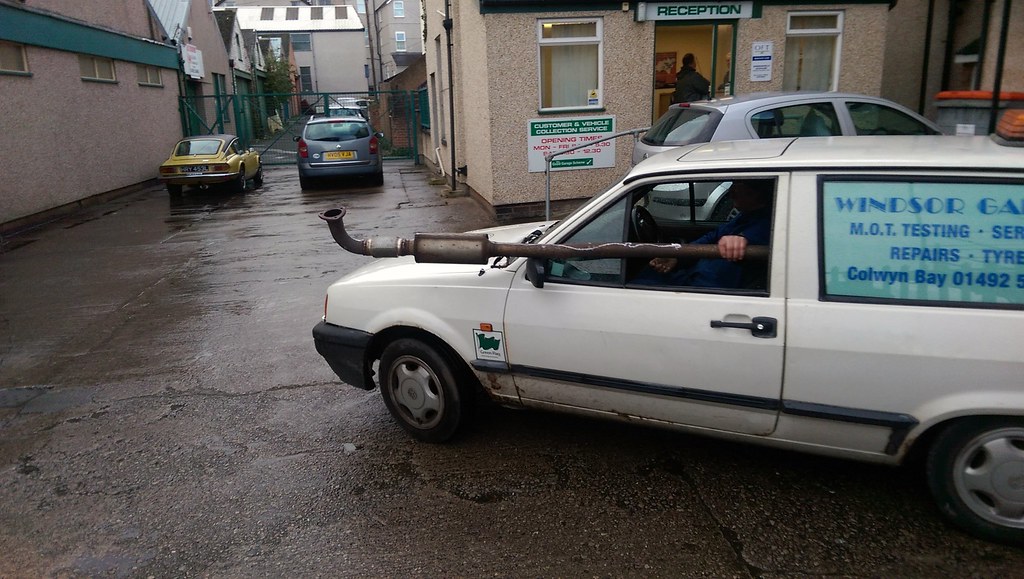 2017-12-26_10-18-23 by Clifton Tausberger, on Flickr
All back together:
 2017-12-26_10-18-50 by Clifton Tausberger, on Flickr
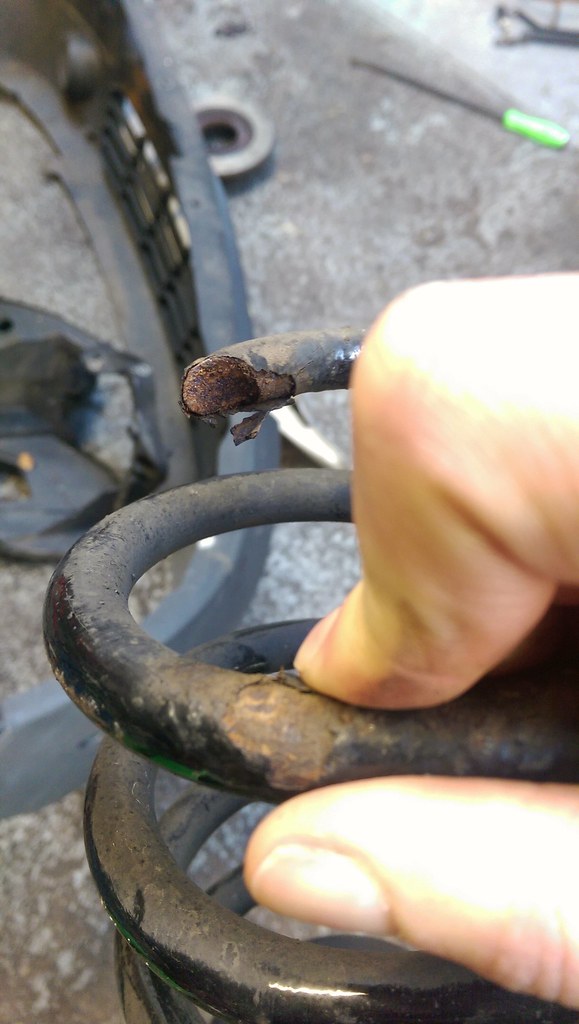
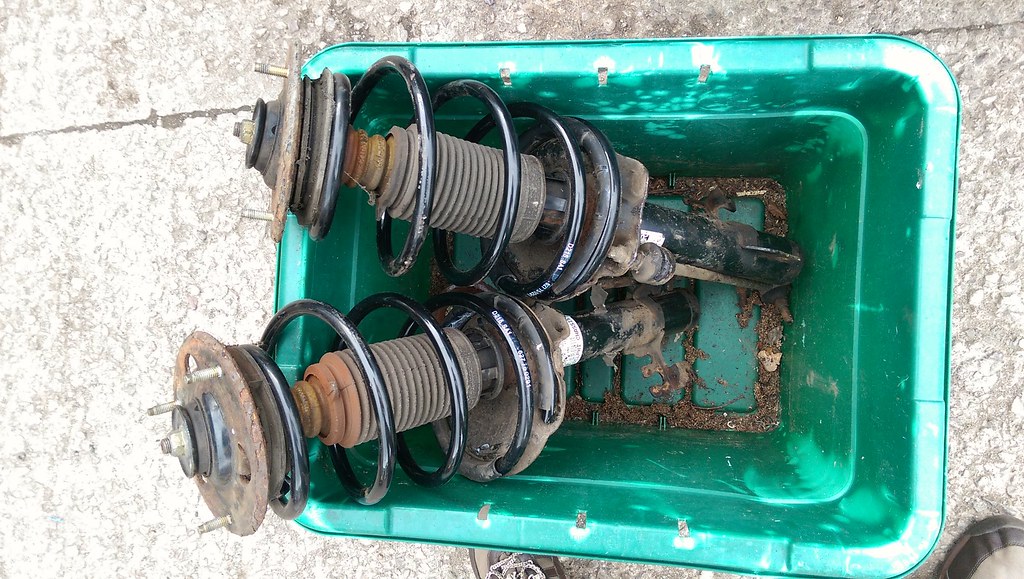
Next up: rear springs. A combination of heavy loads and dreadful surfacing of the M3 had finally snapped the old springs, another common 75 problem. I don't have a before picture, but trust me when I say it looked fully loaded with nothing in it.
 2017-12-26_10-19-01 by Clifton Tausberger, on
Finally, the only advisory on the MOT, another part of Rover 75 folklore - an inefficient handbrake. This is often down to a mild steel/cheesium compensator which stretches and obstinately obstructs further adjustment. The 75 community have a stainless steel modification that was installed after an elongated (and not photographed) interior part removal. Success, an effective brake!
This was a large bill, but given the parts installed and the sheer amount of effort over two days I was exceedingly happy. The Rover was renewed and left Wales without rear clonks or driver-side exhaust gas, and most importantly with the smoothest gear change of any Rover I have owned.
No more bills for a while right?
Er...something like that...
Coming up the anniversary of purchase the 75 was doing sterling service - workhorse during the week, often laden with furniture and art supplies, then our long distance chariot for the weekends around the UK. About 15,000 miles in, the clutch started to give classic symptoms associated with the model - requiring pumping, floppy at start up in the morning, and general behavour befitting the 130k total mileage.
We made the decision to invest in the car, as the jobs all seemed to be a known quantity and the old girl was ingratiating itself into our lives as a indispensable asset.
I arranged to see a Rover 75 specialist in Colwyn Bay, set up some AirBnb room goodness for two nights and headed off with a list.
First up - the dreaded clutch. All sorts of reports of failure are common with the 75. Parts quality and installer skill plays a big part in the results, so I entrusted the legendary Jules to apportion the work to local experts. When you turn up to an idyllic Welsh hilside to this view, you know you are in the right place:
2017-12-26_10-19-12 by Clifton Tausberger, on FlickrSubframe removal allows better access:
2017-12-26_10-18-10 by Clifton Tausberger, on FlickrClutch miserable, dual mass flywheel knackered:
2017-12-26_10-17-32 by Clifton Tausberger, on Flickr2017-12-26_10-17-42 by Clifton Tausberger, on FlickrI left this to the experts - the slave cylinder had also gone, a common issue with the original plastic unit, so a Borg & Beck metal replacement was installed. I aspire to this level of knowledge (and workshop space), but the job was done so efficiently it was wonderful to watch:
2017-12-26_10-17-52 by Clifton Tausberger, on FlickrLove the text 'GEARBOX SIDE':
2017-12-26_10-18-00 by Clifton Tausberger, on FlickrWhen you have such 75 experts on hand, the car up on a life, a good mug of tea and an expert's store of parts, you do of course end up getting some other bits and pieces.
The original exhaust flexi had some gaps, so a new item was welded in:
2017-12-26_10-18-32 by Clifton Tausberger, on FlickrRear section was also looking decidedly past its best. Many biscuits were consumed debating if it was the original factory item. I was just glad to see the back of it:
2017-12-26_10-18-41 by Clifton Tausberger, on FlickrStandard exhaust transit option:
2017-12-26_10-18-23 by Clifton Tausberger, on FlickrAll back together:
2017-12-26_10-18-50 by Clifton Tausberger, on FlickrNext up: rear springs. A combination of heavy loads and dreadful surfacing of the M3 had finally snapped the old springs, another common 75 problem. I don't have a before picture, but trust me when I say it looked fully loaded with nothing in it.
2017-12-26_10-19-01 by Clifton Tausberger, on Finally, the only advisory on the MOT, another part of Rover 75 folklore - an inefficient handbrake. This is often down to a mild steel/cheesium compensator which stretches and obstinately obstructs further adjustment. The 75 community have a stainless steel modification that was installed after an elongated (and not photographed) interior part removal. Success, an effective brake!
This was a large bill, but given the parts installed and the sheer amount of effort over two days I was exceedingly happy. The Rover was renewed and left Wales without rear clonks or driver-side exhaust gas, and most importantly with the smoothest gear change of any Rover I have owned.
No more bills for a while right?
Er...something like that...
Thanks for the notes - Jules is definitely one of the best, he seems to have his pick of jobs and a proper idyll to work in.
Travs said:
I have one of these that has sat forlornly for 4 years after our local garage buggered it up sufficiently for the engine to seize. I'm finally going to get round to having it taken away but if you want to trawl round it and take anything useful you're welcome to. It's an 04 facelift CDTi auto in blue with a light coloured interior. I'm based in West Sussex.
PM sent - thanks!GIYess said:
Almost bought a 2003 with 45k miles last year but the missus didn't like the sea of beige inside and everything was slightly crusty un the engine bay and underneath. Still regret it a wee bit as they seem to be a decent commuter. Thanks for the write up. I miss having a car that's easily tinkered with.
Cream leather always seems attractive, but depending on the quality and the care expended previously they can look truly awful.We have the black set in this car and it has aged gracefully. There's still time to secure one for the price of a good bathtub...
The Surprisingly Easy Addition Of Cruise Control
As the 75 had become our long distance barge, delving into the forums had yielded the good news that a cruise control module could be retro-fitted with some DIY.
The booking of a European adventure galvanised me into action, booking a visit to Jules to replaced the dog-eared front springs, check any items I may have missed and hopefully assist with any issues that arose from the cruise control fitting.
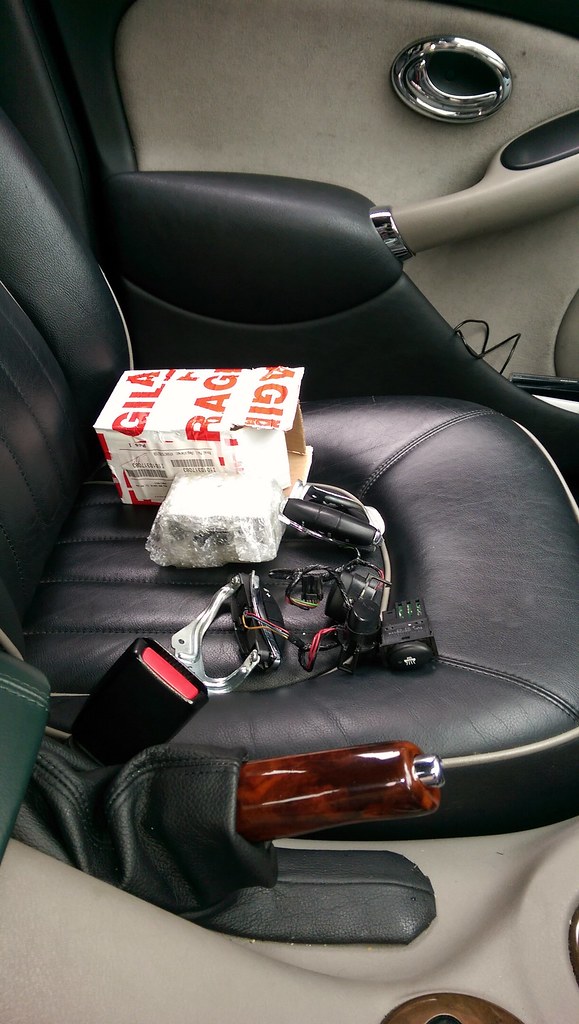
For the 75, you will need: a cruise control ECU & bracket, the steering wheel controls and the button/module for the dash. There are two versions of the cruise ECU, so make sure you get the one for your engine (diesel M47 is SCB100211). Sets are readily available at present.
 2017-12-26_10-28-09 by Clifton Tausberger, on Flickr
As with a lot of modern cars, the cabling is likely to be present in the loom but unless the original buyer checked the box the actual end bits weren't fitted. It seems the later the 75, the more likely the bits to be in place in the loom. A late facelift such as ours had everything in place ready to plug and play, which was fortunate.
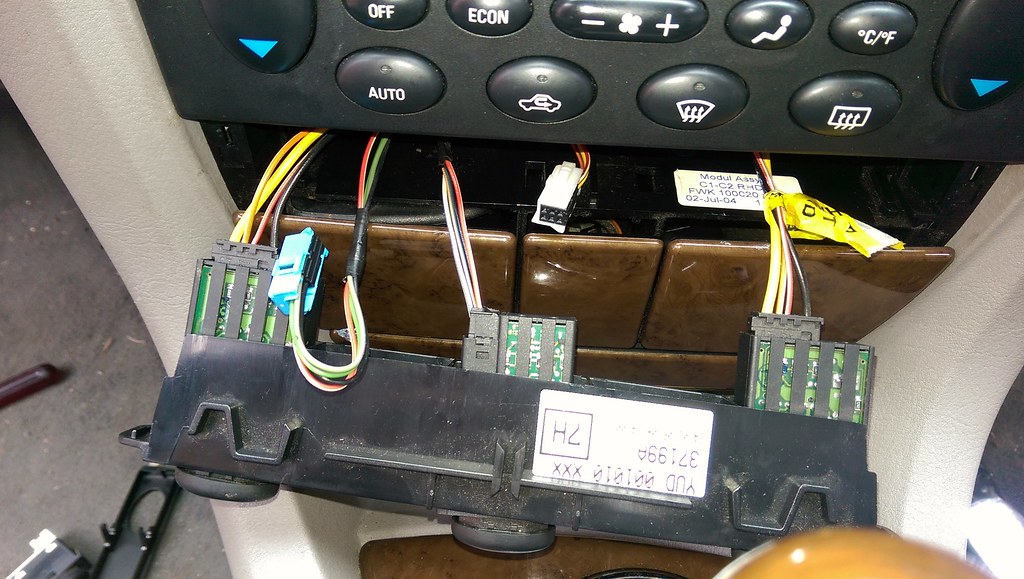
The below-radio 'lozenge section' in 75s had many variants determining the number of button holes - ours had three in total - heated seats (that's another story) and an '{i}' button. This button was designed to be an early version of 'traffic assist' or some such. In our car, if pushed it would announce the start of the congestion charging zone, and on one occasion a repeat few presses actually called BMW's tech department. We can do without that.
Disconnect the battery. Leave for a while, and approach the steering wheel and the airbag area at the end!
First up, the mounting of the new ECU (no picture, apologies) required the removal of the glovebox and the screwing in of a bracket by the passenger fuses. The screw are already present, so simple to locate. The ECU plug was ready to go in, very simple, there's no options here!
Next, the button itself. Prise out the central trim, and ensure the new switch is seated with the cruise control connector (the black clip connected here is for cruise):
 2017-12-26_10-28-18 by Clifton Tausberger, on Flickr
Next, take out the central steering wheel section by removing the Torx screws:
 2017-12-26_10-28-28 by Clifton Tausberger, on Flickr
All the wiring was present, so the only task as to carefully cut the aperture for the switches in the plastic boss.
I did this with a hacksaw then trimmed with a stanley knife and sanded (for no reason):
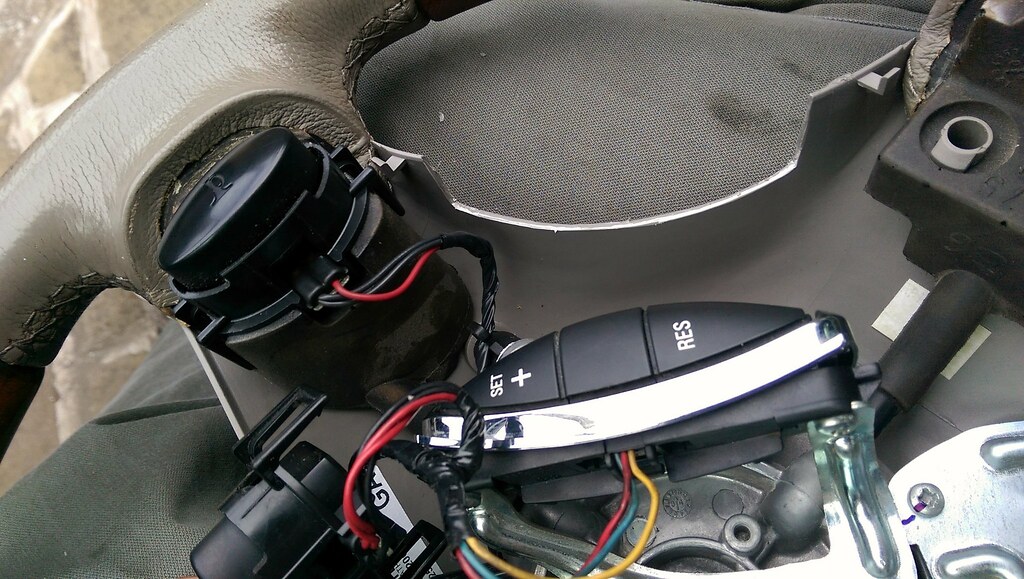 2017-12-26_10-28-37 by Clifton Tausberger, on Flickr
There will be holes for new self-tappers to attached the unit, and only one possible connector.
The Jules booted up the plug-in T4 on the laptop and ensured it was fully enabled, and we has stumbled, blinking and twitching, into functionality expected by Americans since the seventies. Yay. It's been used pretty much every trip since, I have no idea how we lived without it.
 2017-12-26_10-28-48 by Clifton Tausberger, on Flickr
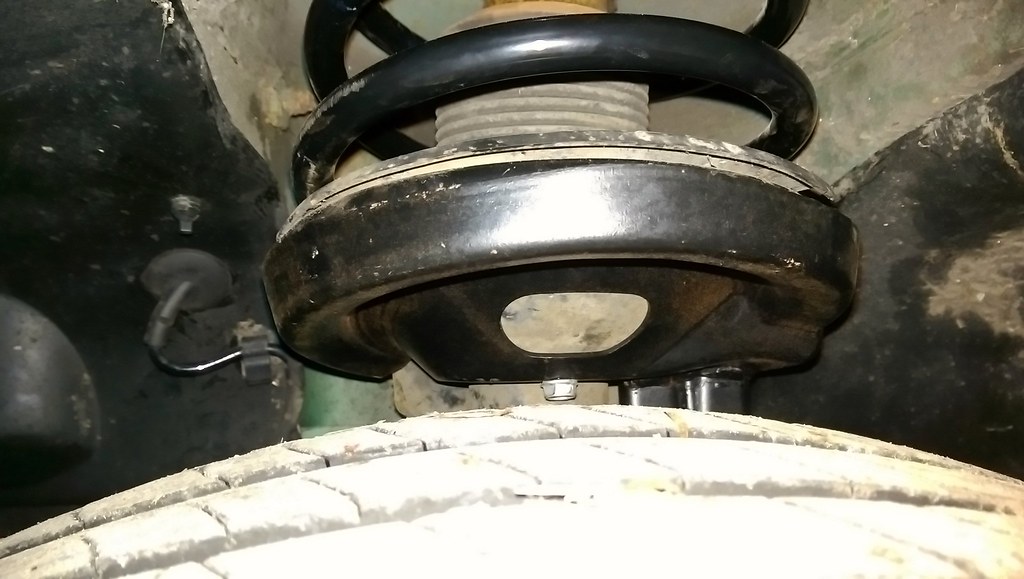
Of course, it wouldn't be a trip to Jules with some other maintenance. Front springs before:
 2017-12-26_10-22-29 by Clifton Tausberger, on Flickr
And after:
 2017-12-26_10-26-59 by Clifton Tausberger, on Flickr
 2017-12-26_10-27-33 by Clifton Tausberger, on Flickr
He also replaced the AC belt, which was attempting to resemble a difficult level of Frogger:
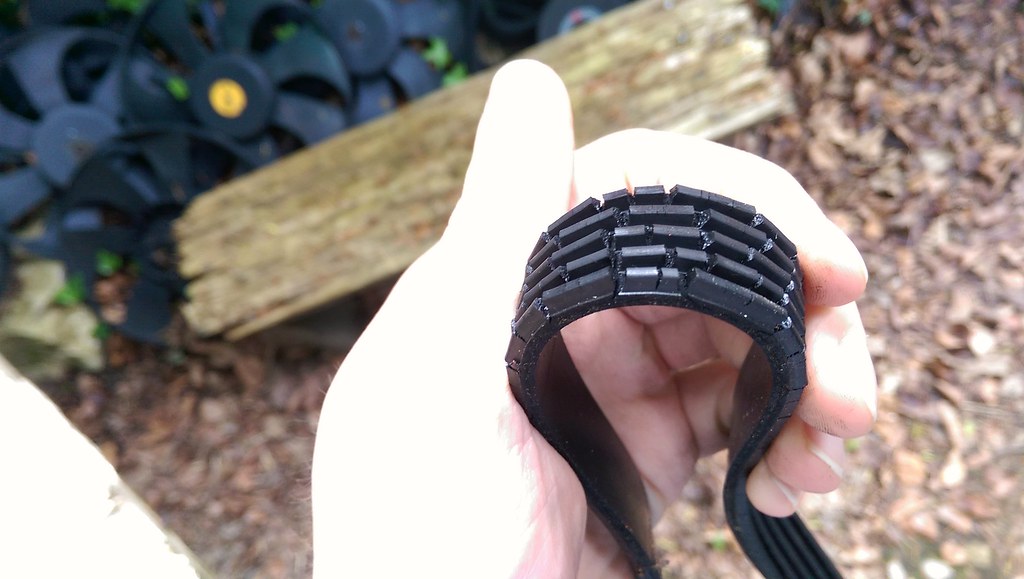 2017-12-26_10-27-23 by Clifton Tausberger, on Flickr
Suitable revitalised, and with fresh AC gas, the 75 of course dispatched over 1500 miles of French noodling:
 2017-12-26_10-30-21 by Clifton Tausberger, on Flickr
I thought the rear spring change had made a difference as they had actually broken, but the fronts really moved the handling into better-than-expected. Less like a barge, though it couldn't match our travel companion in the windy bits of the Alps:
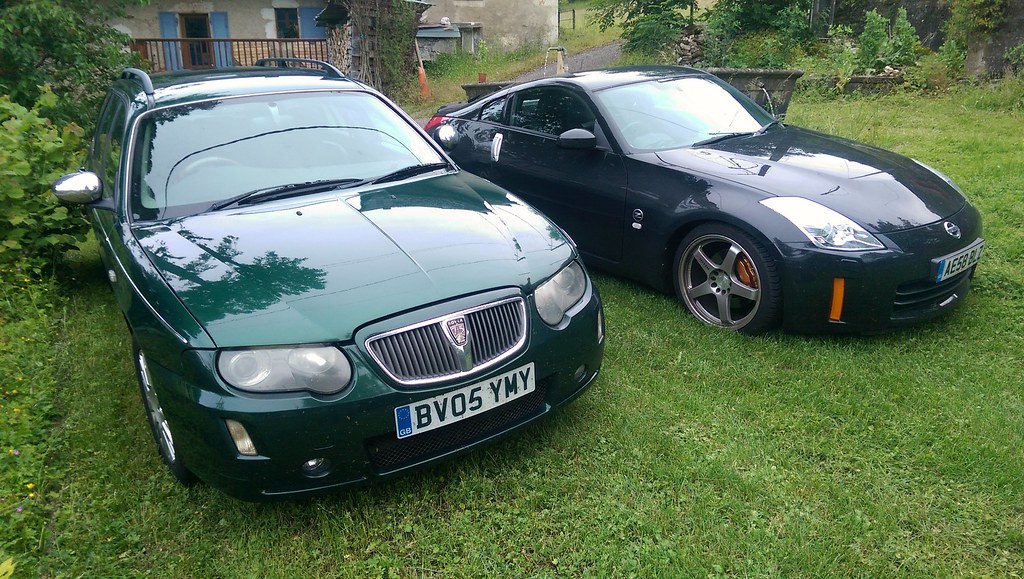 2017-12-26_10-29-54 by Clifton Tausberger, on Flickr
As the 75 had become our long distance barge, delving into the forums had yielded the good news that a cruise control module could be retro-fitted with some DIY.
The booking of a European adventure galvanised me into action, booking a visit to Jules to replaced the dog-eared front springs, check any items I may have missed and hopefully assist with any issues that arose from the cruise control fitting.
For the 75, you will need: a cruise control ECU & bracket, the steering wheel controls and the button/module for the dash. There are two versions of the cruise ECU, so make sure you get the one for your engine (diesel M47 is SCB100211). Sets are readily available at present.
2017-12-26_10-28-09 by Clifton Tausberger, on FlickrAs with a lot of modern cars, the cabling is likely to be present in the loom but unless the original buyer checked the box the actual end bits weren't fitted. It seems the later the 75, the more likely the bits to be in place in the loom. A late facelift such as ours had everything in place ready to plug and play, which was fortunate.
The below-radio 'lozenge section' in 75s had many variants determining the number of button holes - ours had three in total - heated seats (that's another story) and an '{i}' button. This button was designed to be an early version of 'traffic assist' or some such. In our car, if pushed it would announce the start of the congestion charging zone, and on one occasion a repeat few presses actually called BMW's tech department. We can do without that.
Disconnect the battery. Leave for a while, and approach the steering wheel and the airbag area at the end!
First up, the mounting of the new ECU (no picture, apologies) required the removal of the glovebox and the screwing in of a bracket by the passenger fuses. The screw are already present, so simple to locate. The ECU plug was ready to go in, very simple, there's no options here!
Next, the button itself. Prise out the central trim, and ensure the new switch is seated with the cruise control connector (the black clip connected here is for cruise):
2017-12-26_10-28-18 by Clifton Tausberger, on FlickrNext, take out the central steering wheel section by removing the Torx screws:
2017-12-26_10-28-28 by Clifton Tausberger, on FlickrAll the wiring was present, so the only task as to carefully cut the aperture for the switches in the plastic boss.
I did this with a hacksaw then trimmed with a stanley knife and sanded (for no reason):
2017-12-26_10-28-37 by Clifton Tausberger, on FlickrThere will be holes for new self-tappers to attached the unit, and only one possible connector.
The Jules booted up the plug-in T4 on the laptop and ensured it was fully enabled, and we has stumbled, blinking and twitching, into functionality expected by Americans since the seventies. Yay. It's been used pretty much every trip since, I have no idea how we lived without it.
2017-12-26_10-28-48 by Clifton Tausberger, on FlickrOf course, it wouldn't be a trip to Jules with some other maintenance. Front springs before:
2017-12-26_10-22-29 by Clifton Tausberger, on FlickrAnd after:
2017-12-26_10-26-59 by Clifton Tausberger, on Flickr2017-12-26_10-27-33 by Clifton Tausberger, on FlickrHe also replaced the AC belt, which was attempting to resemble a difficult level of Frogger:
2017-12-26_10-27-23 by Clifton Tausberger, on FlickrSuitable revitalised, and with fresh AC gas, the 75 of course dispatched over 1500 miles of French noodling:
2017-12-26_10-30-21 by Clifton Tausberger, on FlickrI thought the rear spring change had made a difference as they had actually broken, but the fronts really moved the handling into better-than-expected. Less like a barge, though it couldn't match our travel companion in the windy bits of the Alps:
2017-12-26_10-29-54 by Clifton Tausberger, on Flickr[b] Opaque Reckoning [b]
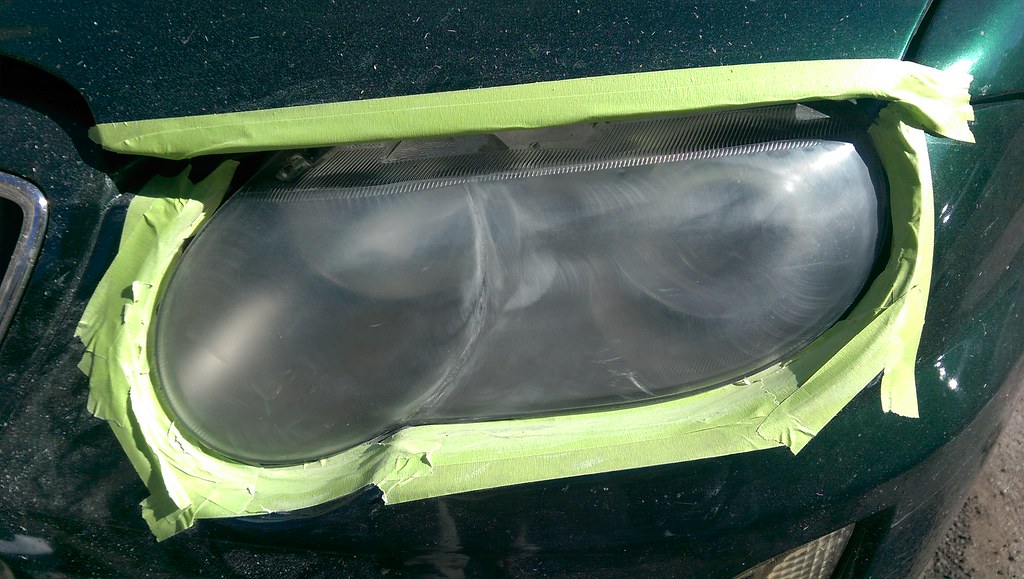
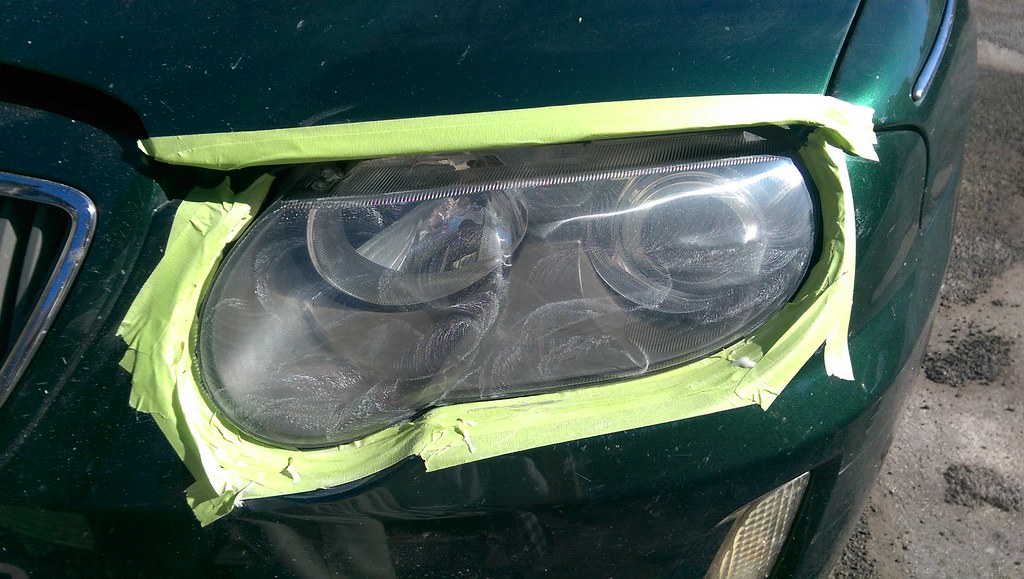
Another common ailment of all Rover 75s, and indeed a lot of cars with plastic headlight lenses, is the external fogging of headlights. On our example they were particularly opaque:
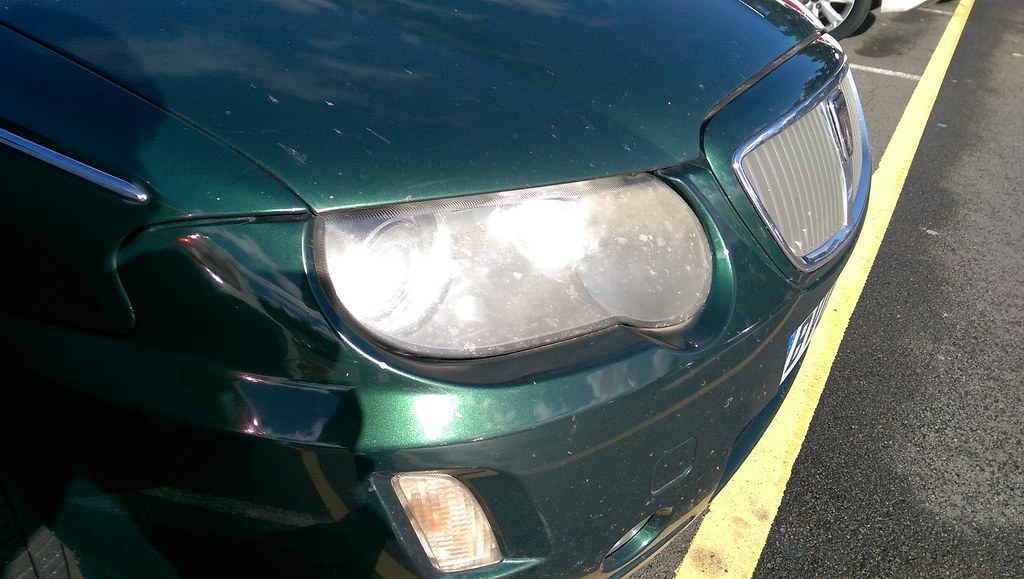 IMAG3966 by Clifton Tausberger, on Flickr
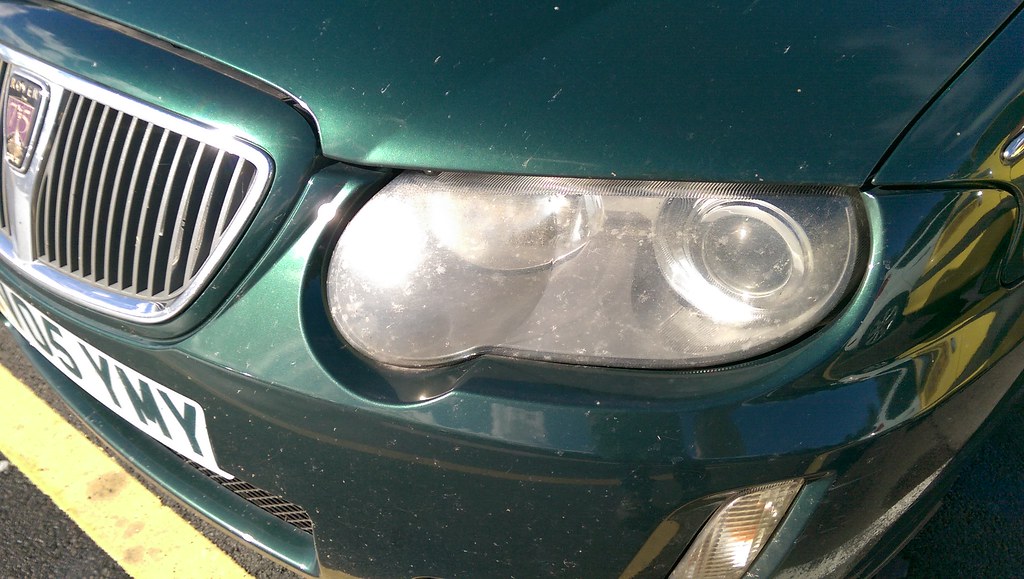 IMAG3965 by Clifton Tausberger, on Flickr
I purchased the 3M kit following some examination of examples in the 75 community, and dug out a proper corded drill from the 80s (none of this plastic chuck malarkey):
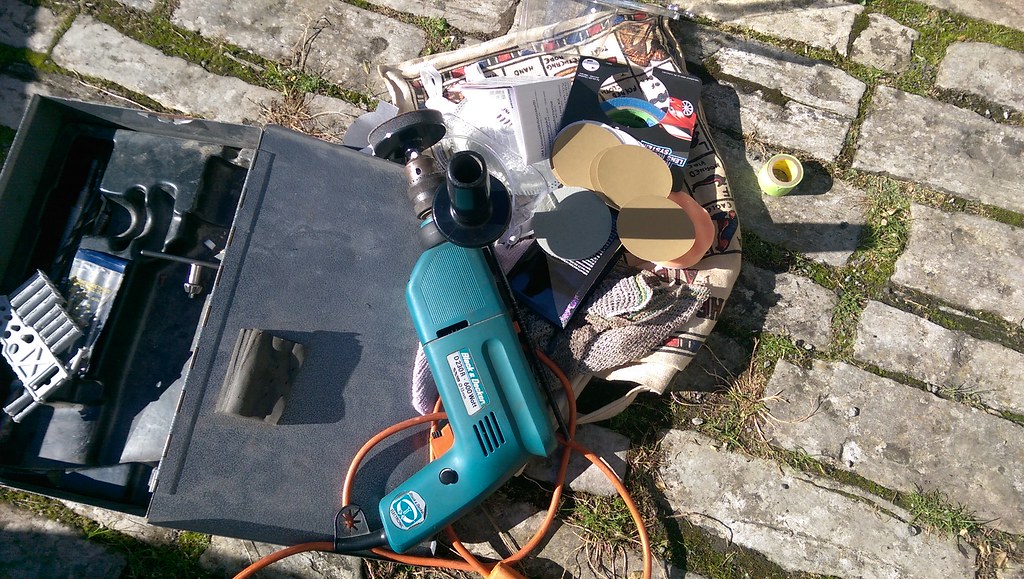 IMAG3977 by Clifton Tausberger, on Flickr
The kit has several grades of sandpaper and polish, and clear instructions. I would advise any future uses to get extra masking tape/protection for the bodywork around the lights, and to make sure you move over the entire light relatively quickly. It's easy to focus on a place with a blemish and before you know it, the sandpaper has expired. I'll spare you all a court deposition of each stage, here's some pictures:
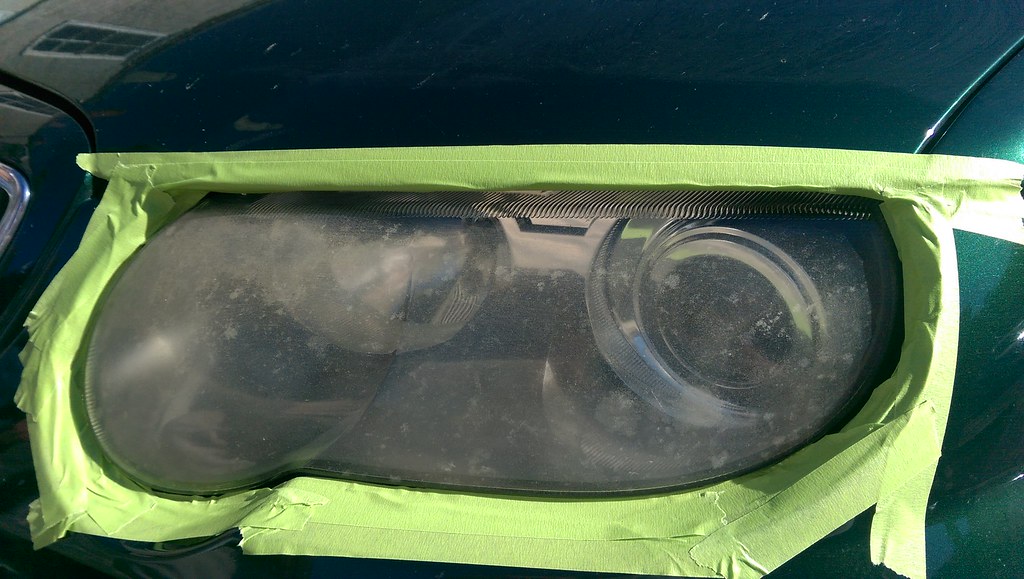 IMAG3975 by Clifton Tausberger, on Flickr
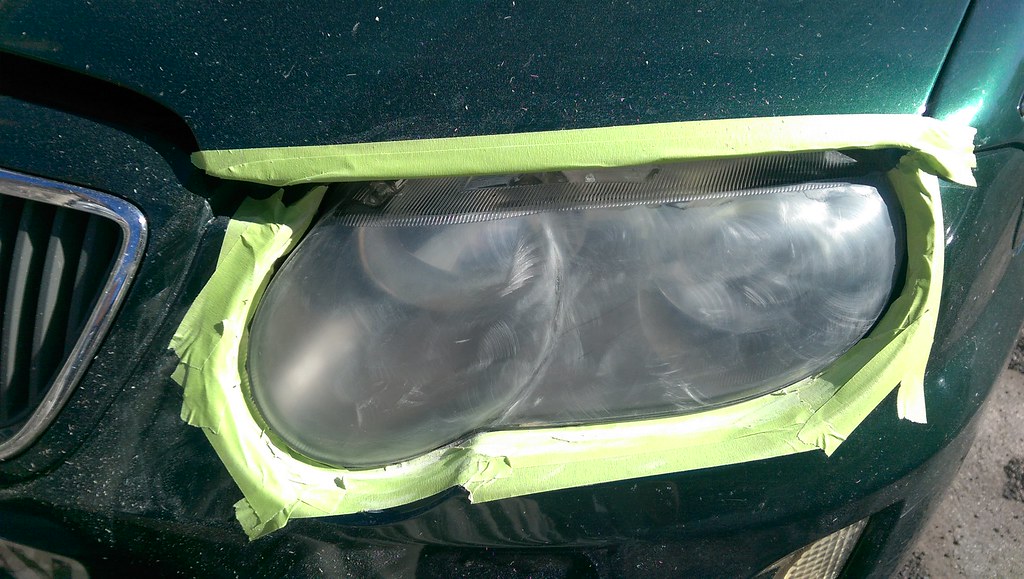 IMAG3978 by Clifton Tausberger, on Flickr
 IMAG3979 by Clifton Tausberger, on Flickr
 IMAG3980 by Clifton Tausberger, on Flickr
 IMAG3983 by Clifton Tausberger, on Flickr
Et voila! Clarity. I was extremely happy with the results, and treated the lights to some Rain-X with UV protection afterwards. Much better.
Another common ailment of all Rover 75s, and indeed a lot of cars with plastic headlight lenses, is the external fogging of headlights. On our example they were particularly opaque:
IMAG3966 by Clifton Tausberger, on FlickrIMAG3965 by Clifton Tausberger, on FlickrI purchased the 3M kit following some examination of examples in the 75 community, and dug out a proper corded drill from the 80s (none of this plastic chuck malarkey):
IMAG3977 by Clifton Tausberger, on FlickrThe kit has several grades of sandpaper and polish, and clear instructions. I would advise any future uses to get extra masking tape/protection for the bodywork around the lights, and to make sure you move over the entire light relatively quickly. It's easy to focus on a place with a blemish and before you know it, the sandpaper has expired. I'll spare you all a court deposition of each stage, here's some pictures:
IMAG3975 by Clifton Tausberger, on FlickrIMAG3978 by Clifton Tausberger, on FlickrIMAG3979 by Clifton Tausberger, on FlickrIMAG3980 by Clifton Tausberger, on FlickrIMAG3983 by Clifton Tausberger, on FlickrEt voila! Clarity. I was extremely happy with the results, and treated the lights to some Rain-X with UV protection afterwards. Much better.
Thank you all - it seems the affection for 75s is far-reaching and growing...if only Rover had this amount of faithful in 2005 it may have survived! Love the video with old Tiff, the V6 is a hoot.
 2018-03-18_11-43-43 by Clifton Tausberger, on Flickr
Time to hunt down a good one!
I have ordered some new bonnet struts as I received a wake-up knock on my soft cranium earlier - the gas is finally on the wane.
Also there seems to be a slight exhaust leak somewhere in the system, audible at low revs, so that'll need some investigation on a ramp. Stainless Longlife for £350 you say? Hmm....
qwertina said:
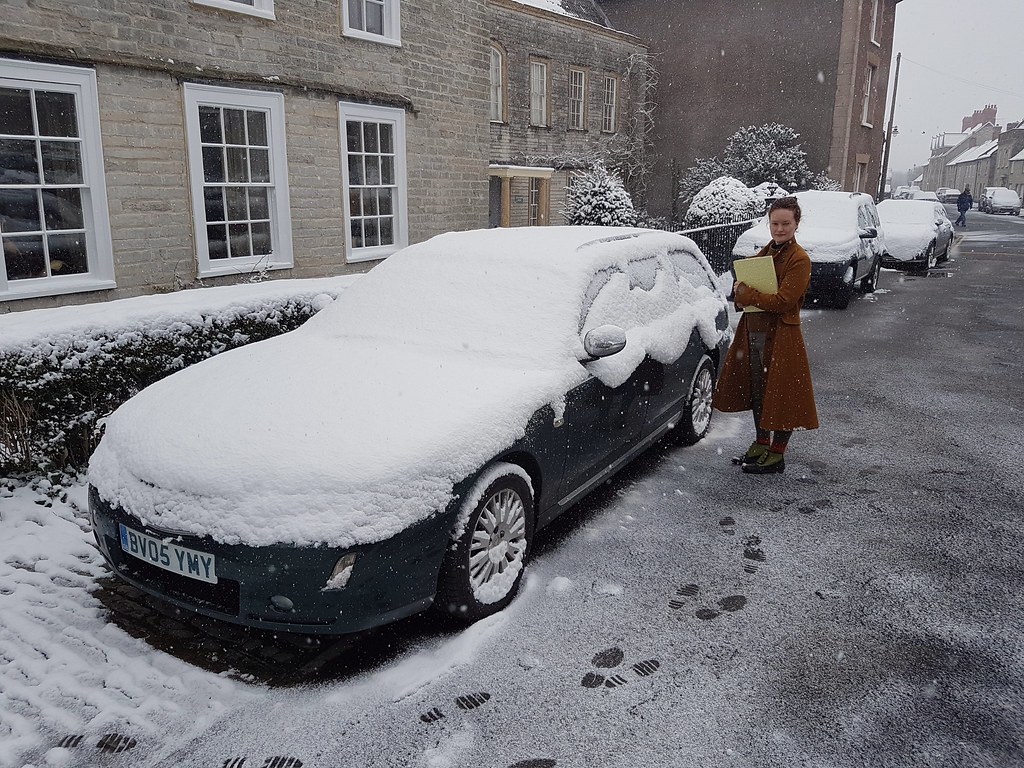
I would happily go out and buy a Tourer tomorrow, unfortunately my wife thinks they're an old mans car!
Evidence to the contrary this morning with a proud owner about to tackle the snow:2018-03-18_11-43-43 by Clifton Tausberger, on FlickrTime to hunt down a good one!
I have ordered some new bonnet struts as I received a wake-up knock on my soft cranium earlier - the gas is finally on the wane.
Also there seems to be a slight exhaust leak somewhere in the system, audible at low revs, so that'll need some investigation on a ramp. Stainless Longlife for £350 you say? Hmm....
Muddle238 said:
This is an excellent thread and an excellent car.
I too decided to put a second thermostat in mine, seemed more logical than fiddling with the original if it were only to go wrong again. Amazingly simple, yet boosted my economy by 7-10mpg.
I am intrigued by the cruise control addition, my Club SE Tourer doesn't have it and it's the one thing I wish it had. Was it relatively easy to do or would you advise an expert to look at it? Also after retrofitting, was Testbook required to enable it or did it work straight from the box, so to speak?
Looking forward to more updates with this thread
Yes the R5 thermostat in the diesel is hands down the best mpg-to-gbp ratio improvement I have ever made to a car. Good stuff.I too decided to put a second thermostat in mine, seemed more logical than fiddling with the original if it were only to go wrong again. Amazingly simple, yet boosted my economy by 7-10mpg.
I am intrigued by the cruise control addition, my Club SE Tourer doesn't have it and it's the one thing I wish it had. Was it relatively easy to do or would you advise an expert to look at it? Also after retrofitting, was Testbook required to enable it or did it work straight from the box, so to speak?
Looking forward to more updates with this thread
I see your earlier green tourer thread - looks great. I'll have to let you know where the secret R75 caches are for the decent parts! Make sure you check the scuttle and unblock all the drains/purchase a leave barrier from Jules Anderson if you haven't already.
Cruise control - it's easy if the wiring is in place (as was the case in my facelift version). My advice would be - break down the front console and diagnose if you have the wiring in place. If it's there, and you're not adverse to unbolting steering wheel/cutting dash items and sourcing bits & bobs, you should be fine. If there is no wiring in place, either prep well, read lots of guides and prepare a weekend for wiring, or drive up to Wales after booking in with Jules. The diesel is the easiest to retro-fit in either case.
Here's some useful guides and user experiences from the community:
https://www.the75andztclub.co.uk/forum/showthread....
http://www.mgf.ultimatemg.com/ztt/cruise_control/
https://the75andztclub.co.uk/forum/showthread.php?...
Good luck!
Edited by Spinakerr on Saturday 24th March 12:13
Yes the KV6 needs a vacuum pump and pipe for cruise control, whereas the diesel is 'fly by wire' and so requires less parts. They are usually advertised as kits complete from a car being broken, so I would recommend just getting a single lot that was working before being excised!
The contradictory Ford 4.6 V8 in a Rover (eh?) had cruise control as standard I believe.
The contradictory Ford 4.6 V8 in a Rover (eh?) had cruise control as standard I believe.
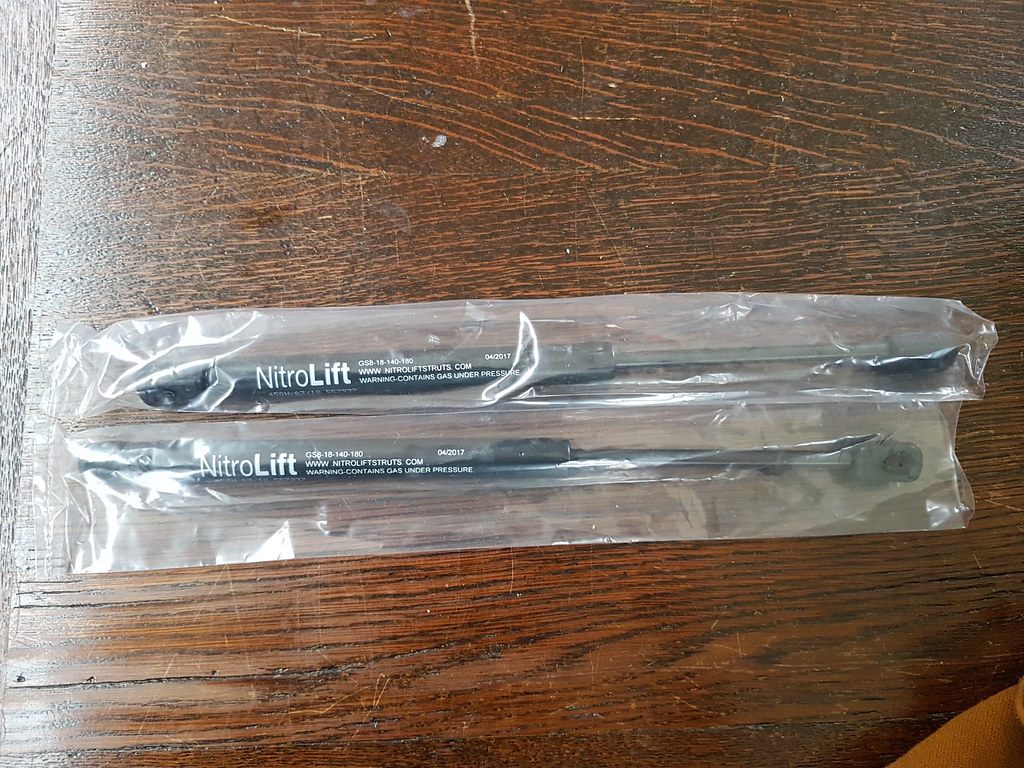
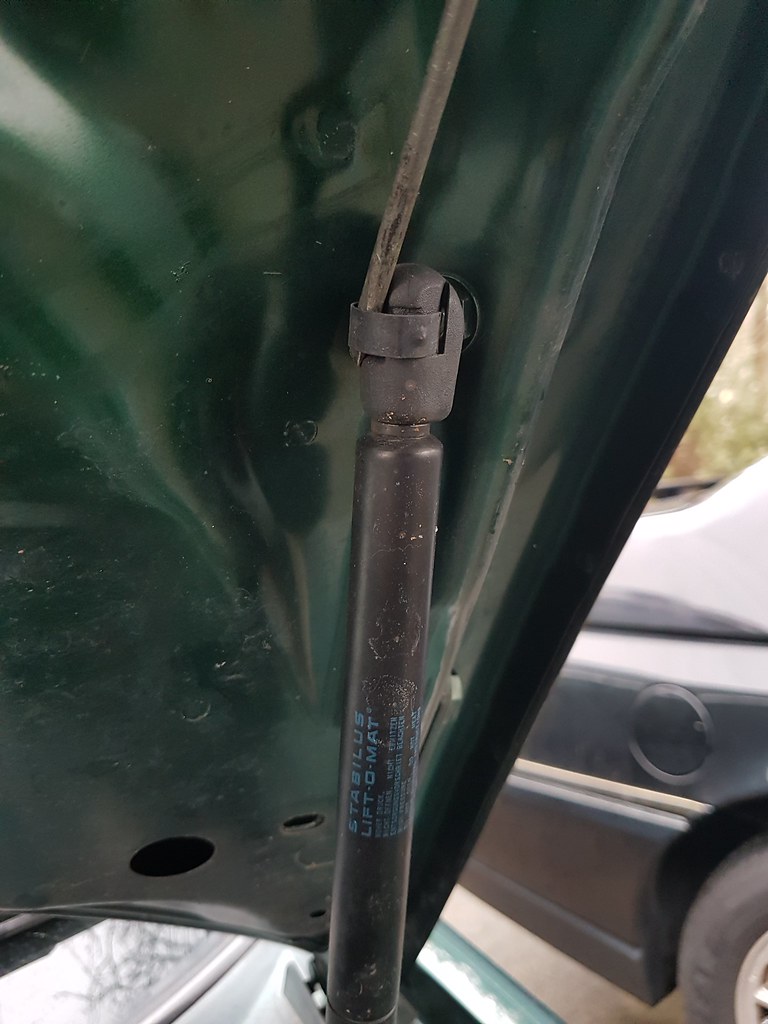
During the MOT yesterday the failed gas struts claimed another victim - the tester! If there's ever anything to nudge an MOT into fail territory, actual bodily harm by the vehicle is likely top of the list. Luckily he walked off the pain with a few choice phrases, but the struts arrived at home and I took a few minutes to attach them. 60 second job.
New struts from SGS - nitrolift are the correct size:
 20180324_095312 by Clifton Tausberger, on Flickr
Hold up bonnet with suitable prop, long thin-bladed screwdriver into the retainer clip:
 20180324_095610 by Clifton Tausberger, on Flickr
Simply tap the new struts on.
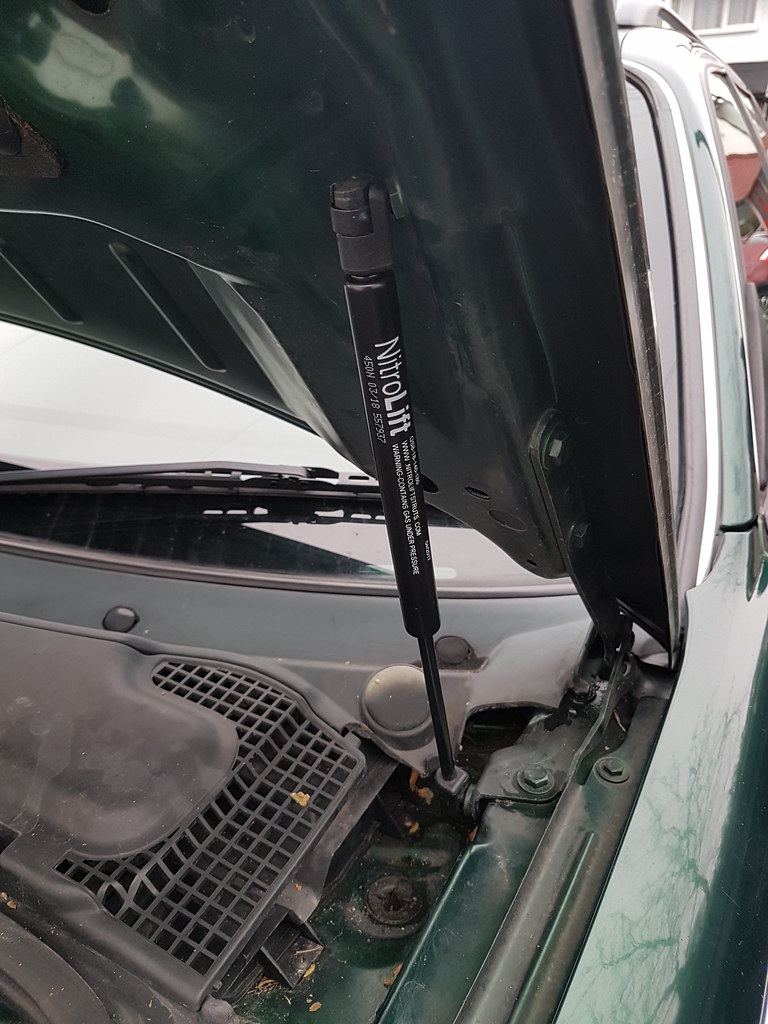 20180324_095842 by Clifton Tausberger, on Flickr
 20180324_100152 by Clifton Tausberger, on Flickr
Done. Only problem now is the bonnet needs quite a slam!
New struts from SGS - nitrolift are the correct size:
20180324_095312 by Clifton Tausberger, on FlickrHold up bonnet with suitable prop, long thin-bladed screwdriver into the retainer clip:
20180324_095610 by Clifton Tausberger, on FlickrSimply tap the new struts on.
20180324_095842 by Clifton Tausberger, on Flickr20180324_100152 by Clifton Tausberger, on FlickrDone. Only problem now is the bonnet needs quite a slam!
Gassing Station | Readers' Cars | Top of Page | What's New | My Stuff