BMW E36 M3 - Reckless Restoration
Discussion


Hi All
So firstly a bit about the car and it’s owner. The car: it’s a 1998 E36 M3 Evolution, manual in Estoril Blue with Silver grey leather and has covered 103k in the last 20 years. I bought it as as a thoroughly usable example about two and a half years ago for a shade over 3 grand.
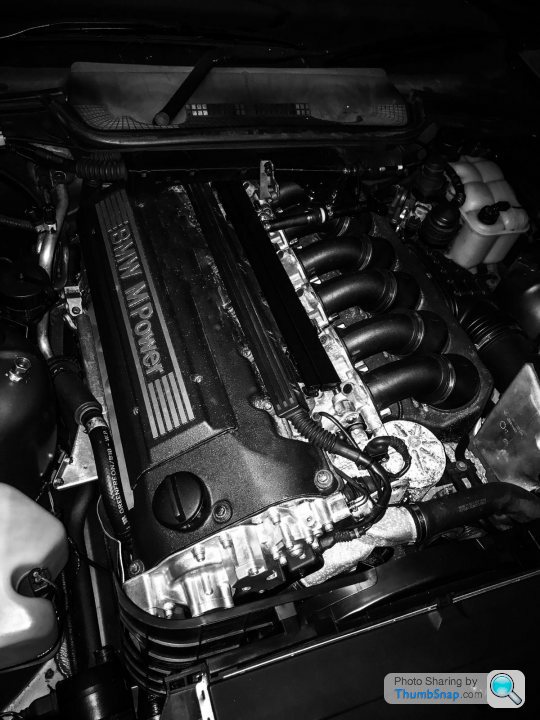
Me: well, it’s my second E36 M3 in 7 years after a 3 year affair with a Porsche 911. When I started my apprenticeship with BMW in 1998, the E36 M3 was the first M car I PDI’d and drove - so these things have special place in my heart despite being rather unloved by the rest of the world. That engine especially.
So after 6 months of reliable use, I decided to take it off the road to do “a few jobs”..... 2 Years later; I’m not even close to being finished underneath.
Kinda sums it up:

Anyway on with the story and my apologies for being a precious iPhone - I don’t wanna touch my precious device with oily mitts - sort of loser. In other words: no photos of the oily works ??.
Engine work:
1. Remove inlet manifold and replace every piece of (decaying) rubber under there - damn there’s a lot.

2. Replace knock sensor as cracked and give it all a jolly good clean.
3. Whip the VANOS solenoids out, test, replace the seals and cover bolts & gaskets.
4. Cam cover off next and check valve clearances - only 2x out of spec, new shims sourced and replaced. Apply extra selant to rear of new cam cover gasket and refit. New water pump and thermostat:

5. Next, s t got serious! Drop the front axle. In a single garage. On my own. In winter. The start of the illness you might say.
6. Sump & oil pump removed (wipe oil out of eyes, ears etc.), inspect crank, measure clearances are to spec, replace big end bearing shells and fit uprated ARP bolts. Reassemble. Bathe in swarfega, explain oily marks on pillow case to the wife.
7. Pull front axle apart and paint, powder coat or replace everything that wasn’t perfect (that is everything). Update ARB bushes and wishbone mounts. Also I decided to test my hydraulic press on pushing the ball joints out of the lower arms - Reading 15t before they moved; a very squeaky trouser moment!!! Yay more images found:
Hi ho it’s off to the powdercoaters we go!

Sub frame

One side assembled

8. Front wheel arches cleaned back, rust treated and coated with Bilt Hamber products (excellent stuff IMO) and fresh stonechip applied. new arch liners fitted as the old ones were smashed to bits:

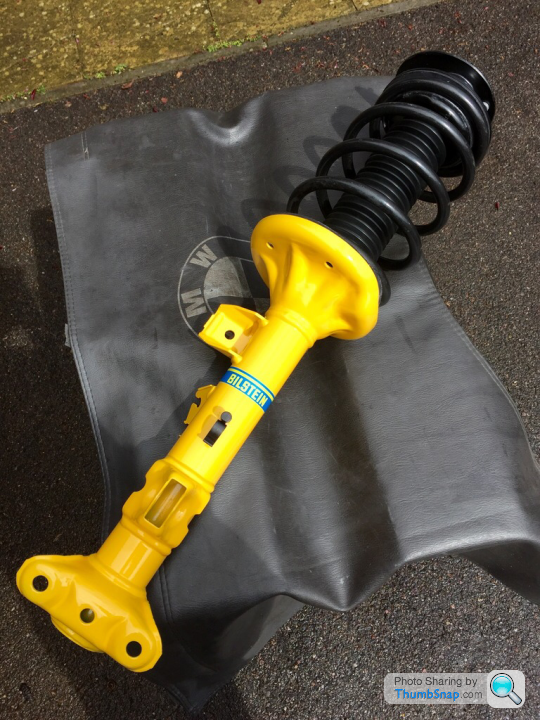
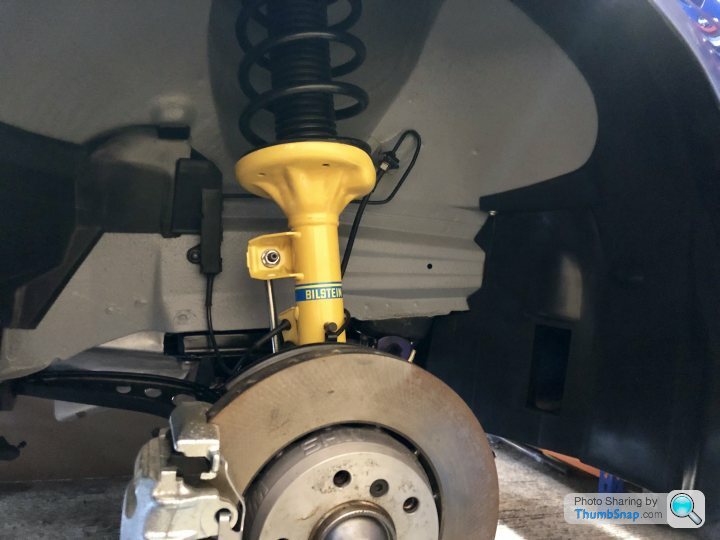
9. The car came with a Bilstein B12 kit fitted, which had covered only a few thousand miles but god was the yellow paint in poor shape! Shocking really as they really enhance the car over the standard equipment. So rub back and repaint was in order - even found some replacement Bilstein stickers
Painted, rebuilt with new spring rubbers, topmounts and hardware.
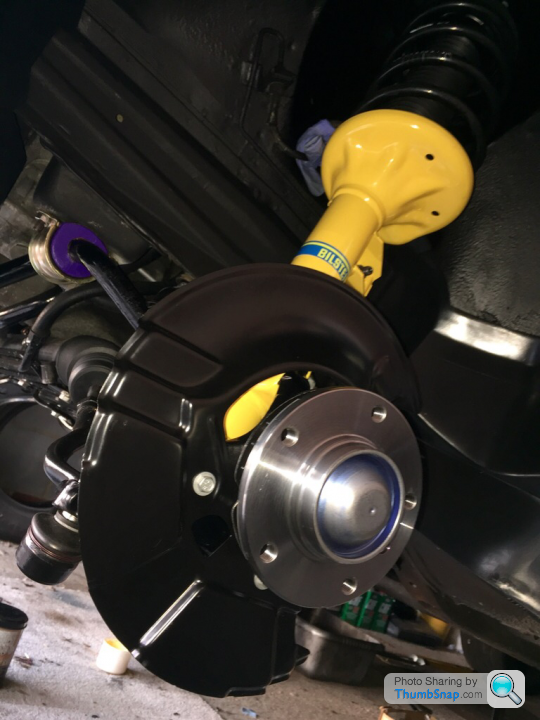
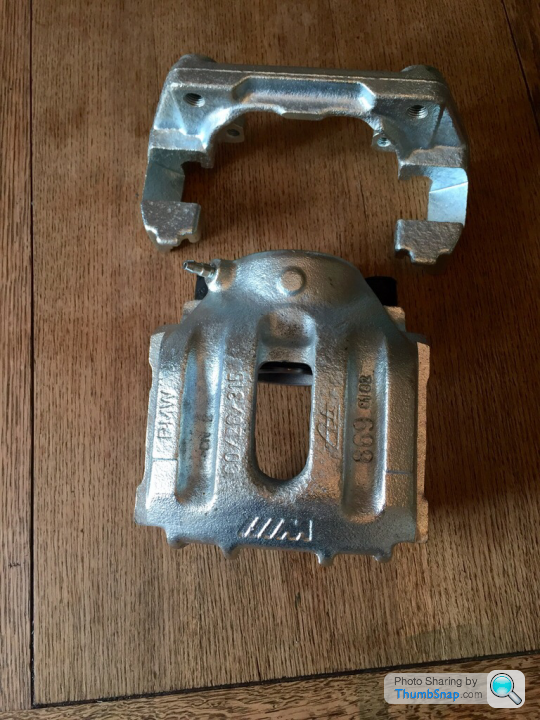
10. So struts onto the car along with new bearings, tie rods, discs and brake hoses:

And those calipers? Are they New you might ask, well no, but the guys at BigRed did a phenomenal job in rebuilding them with new seals and apply the factory zinc coating for than original look.
Before:
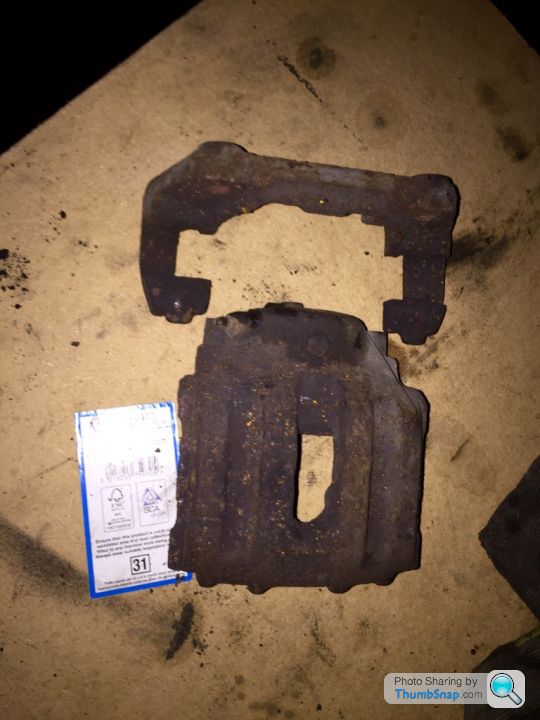
After ??:
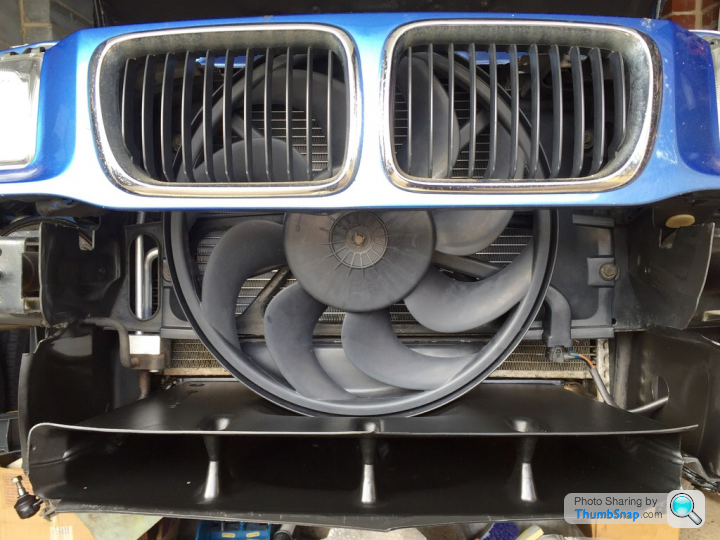
11. Another couple of random jobs whilst the front bumper was off (crack in bracket repaired). Condenser replaced as it was rotten and leaking AC oil, drier replaced (open to the atmosphere due to leaking condenser), electrical fan completely disassembled, cleaned, bearings greased and rebuilt, missing outside temp sensor and wiring replaced with scrapyard donor parts, everything thoroughly cleaned and coated with Bilt Hamber Dynax to keep the water out:

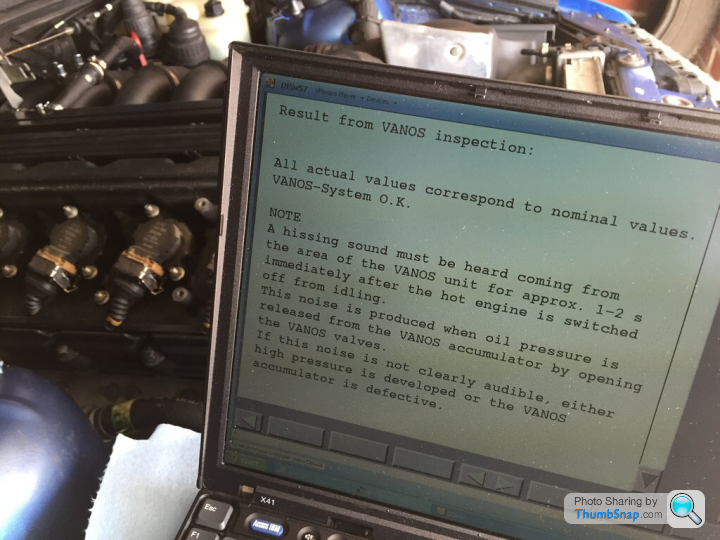
12. Run Car up to temp and check everything! With heart in mouth, listening for the slighted mechanical whimper! Like an expectant father...
VANOS Test passed!
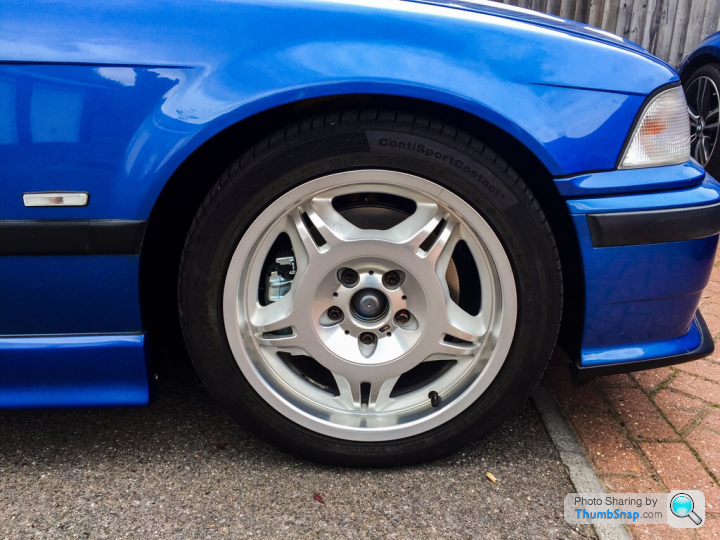
Back down on her wheels after what seemed like an eternity.
Nice day for a drive? Nah, have you seen under the back of this thing! Time to spin her around and get on with everything that needs doing from the A-post back....

TBC (assuming anyone is interested of course).
So firstly a bit about the car and it’s owner. The car: it’s a 1998 E36 M3 Evolution, manual in Estoril Blue with Silver grey leather and has covered 103k in the last 20 years. I bought it as as a thoroughly usable example about two and a half years ago for a shade over 3 grand.
Me: well, it’s my second E36 M3 in 7 years after a 3 year affair with a Porsche 911. When I started my apprenticeship with BMW in 1998, the E36 M3 was the first M car I PDI’d and drove - so these things have special place in my heart despite being rather unloved by the rest of the world. That engine especially.
So after 6 months of reliable use, I decided to take it off the road to do “a few jobs”..... 2 Years later; I’m not even close to being finished underneath.
Kinda sums it up:
Anyway on with the story and my apologies for being a precious iPhone - I don’t wanna touch my precious device with oily mitts - sort of loser. In other words: no photos of the oily works ??.
Engine work:
1. Remove inlet manifold and replace every piece of (decaying) rubber under there - damn there’s a lot.
2. Replace knock sensor as cracked and give it all a jolly good clean.
3. Whip the VANOS solenoids out, test, replace the seals and cover bolts & gaskets.
4. Cam cover off next and check valve clearances - only 2x out of spec, new shims sourced and replaced. Apply extra selant to rear of new cam cover gasket and refit. New water pump and thermostat:
5. Next, s
t got serious! Drop the front axle. In a single garage. On my own. In winter. The start of the illness you might say.6. Sump & oil pump removed (wipe oil out of eyes, ears etc.), inspect crank, measure clearances are to spec, replace big end bearing shells and fit uprated ARP bolts. Reassemble. Bathe in swarfega, explain oily marks on pillow case to the wife.
7. Pull front axle apart and paint, powder coat or replace everything that wasn’t perfect (that is everything). Update ARB bushes and wishbone mounts. Also I decided to test my hydraulic press on pushing the ball joints out of the lower arms - Reading 15t before they moved; a very squeaky trouser moment!!! Yay more images found:
Hi ho it’s off to the powdercoaters we go!
Sub frame
One side assembled
8. Front wheel arches cleaned back, rust treated and coated with Bilt Hamber products (excellent stuff IMO) and fresh stonechip applied. new arch liners fitted as the old ones were smashed to bits:
9. The car came with a Bilstein B12 kit fitted, which had covered only a few thousand miles but god was the yellow paint in poor shape! Shocking really as they really enhance the car over the standard equipment. So rub back and repaint was in order - even found some replacement Bilstein stickers
Painted, rebuilt with new spring rubbers, topmounts and hardware.
10. So struts onto the car along with new bearings, tie rods, discs and brake hoses:
And those calipers? Are they New you might ask, well no, but the guys at BigRed did a phenomenal job in rebuilding them with new seals and apply the factory zinc coating for than original look.
Before:
After ??:
11. Another couple of random jobs whilst the front bumper was off (crack in bracket repaired). Condenser replaced as it was rotten and leaking AC oil, drier replaced (open to the atmosphere due to leaking condenser), electrical fan completely disassembled, cleaned, bearings greased and rebuilt, missing outside temp sensor and wiring replaced with scrapyard donor parts, everything thoroughly cleaned and coated with Bilt Hamber Dynax to keep the water out:
12. Run Car up to temp and check everything! With heart in mouth, listening for the slighted mechanical whimper! Like an expectant father...
VANOS Test passed!
Back down on her wheels after what seemed like an eternity.
Nice day for a drive? Nah, have you seen under the back of this thing! Time to spin her around and get on with everything that needs doing from the A-post back....
TBC (assuming anyone is interested of course).
Edited by T-bagger on Wednesday 14th February 00:45
TroubledSoul said:
Brilliant. Mine has been on stands 2 and a half years now and no closer to being finished but I am still planning to do so 
I now need to get it rolling soon thanks to a relationship break down meaning it will need to be moveable. Nothing like a good bit of motivation eh?
Best of luck with yours. How's the tail panel on yours under the plastic that covers the area around the boot latch? Mine's rusted to bits and is one of the bigger jobs it needs...
Thanks everyone for your kind comments and encouragement! I now need to get it rolling soon thanks to a relationship break down meaning it will need to be moveable. Nothing like a good bit of motivation eh?
Best of luck with yours. How's the tail panel on yours under the plastic that covers the area around the boot latch? Mine's rusted to bits and is one of the bigger jobs it needs...
Regarding the the area around the boot catch, yes that all stripped out and is fortunately fine - will be getting a good coat of cavity wax though!
And so to the rest of the car.....
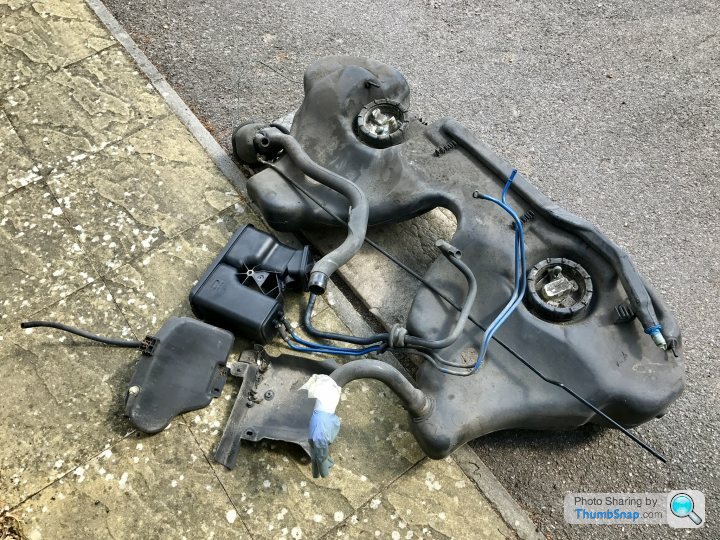
First job was the remove the rear axle and the fuel tank, aswell as all of the gubbins inbetween. The boot was stripped and the tank venting system removed aswell.
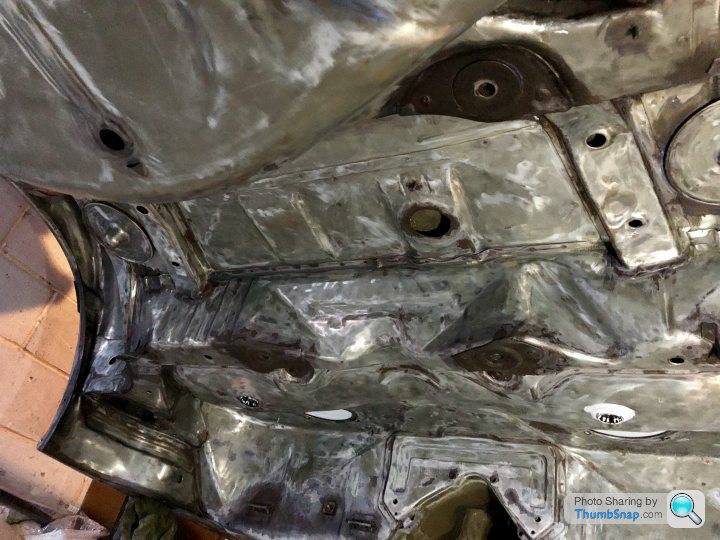
You see; E36s although fine in appearance underneath, rot under the rubberised underseal. The body seams expand and contract over a period of years and so gradually cause delamination between the undeseal and the body. Water creeps in along the seams through capillary action and the rot sets in. I was lucky enough to catch the rust before any major damage was caused, but it could have been much worse.
View of the underside, underseal reasonable, diff output shaft seals leaking and causing residue.

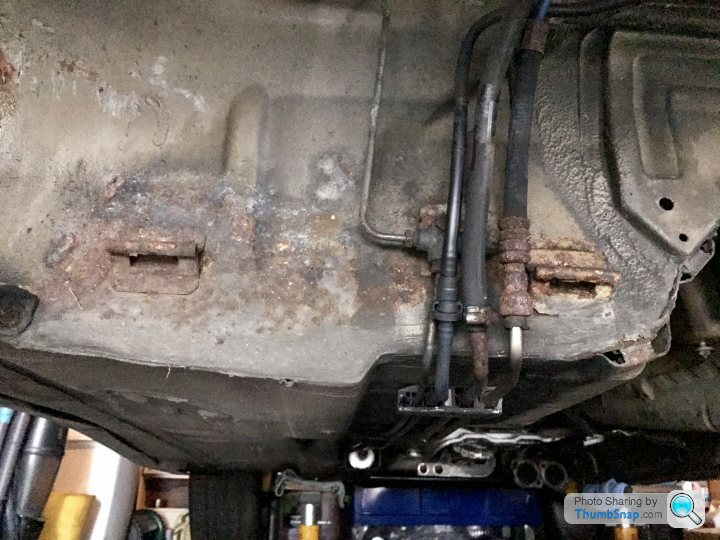
A sorry state but not unsalvageable.
14: time to disassemble the rear axle components and send them off for powdercoating. Not before drilling, hammering, burning and swearing at every piece of nasty split rubber. A serious test of stamina. In addition the wheel bearings were removed from each trailing arm and the drive shafts stripped, cleaned and inspected.
Parts of the rear axle:

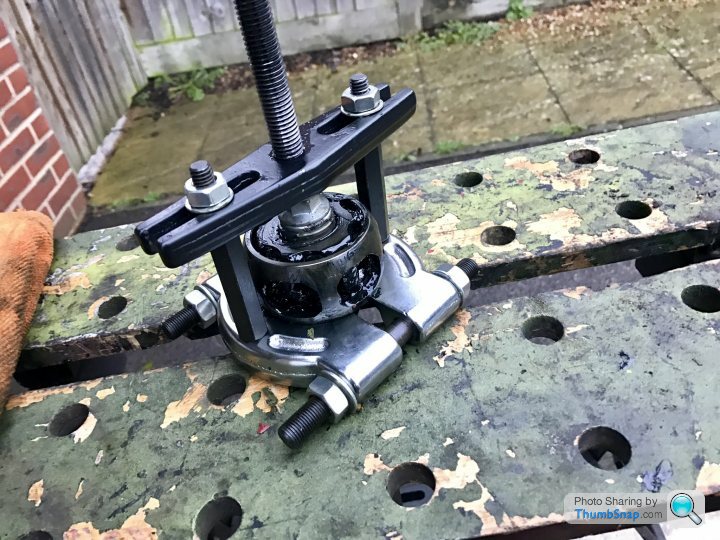
Subframe mounting bushes removed:

Pesky wheel bearings freed:

Removing the CV joint inners from the shafts:
15: again off we go to the powdercoaters:

16: now whilst the parts are away being rejuvenated, it was time for the serious work to begin. Exploratory scraping of the under body had revealed unpredictability unstable areas, so biting the metaphorical bullet, I decided to strip the lot back to bare metal. Yep, the lot.
Armed with no small amount of PPE, a large angle grinder and several (8 in total) wire wheels.
In progress:
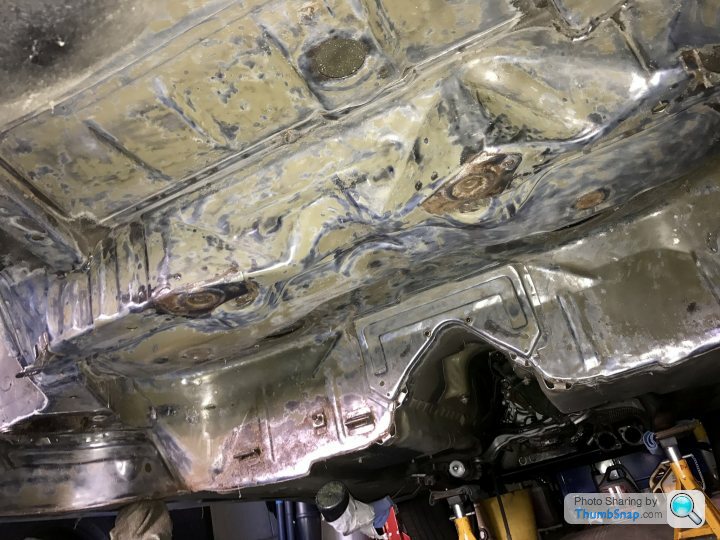
Getting there

Rear left wheel arch:

Jacking points not too bad:
Not just the underside:

The front left wing, too perforated to save, was replaced with a genuine BMW part. I get a good discount on genuine parts through my current employer
Inner wing rust proofing:
New wing hung, aligned and fettled for best possible fitment (it came down another couple of mm after this photo):

Next; prep that bare metal for the 4 stage protection process. Stay tuned!
First job was the remove the rear axle and the fuel tank, aswell as all of the gubbins inbetween. The boot was stripped and the tank venting system removed aswell.
You see; E36s although fine in appearance underneath, rot under the rubberised underseal. The body seams expand and contract over a period of years and so gradually cause delamination between the undeseal and the body. Water creeps in along the seams through capillary action and the rot sets in. I was lucky enough to catch the rust before any major damage was caused, but it could have been much worse.
View of the underside, underseal reasonable, diff output shaft seals leaking and causing residue.
A sorry state but not unsalvageable.
14: time to disassemble the rear axle components and send them off for powdercoating. Not before drilling, hammering, burning and swearing at every piece of nasty split rubber. A serious test of stamina. In addition the wheel bearings were removed from each trailing arm and the drive shafts stripped, cleaned and inspected.
Parts of the rear axle:
Subframe mounting bushes removed:
Pesky wheel bearings freed:
Removing the CV joint inners from the shafts:
15: again off we go to the powdercoaters:
16: now whilst the parts are away being rejuvenated, it was time for the serious work to begin. Exploratory scraping of the under body had revealed unpredictability unstable areas, so biting the metaphorical bullet, I decided to strip the lot back to bare metal. Yep, the lot.
Armed with no small amount of PPE, a large angle grinder and several (8 in total) wire wheels.
In progress:
Getting there
Rear left wheel arch:
Jacking points not too bad:
Not just the underside:
The front left wing, too perforated to save, was replaced with a genuine BMW part. I get a good discount on genuine parts through my current employer
Inner wing rust proofing:
New wing hung, aligned and fettled for best possible fitment (it came down another couple of mm after this photo):
Next; prep that bare metal for the 4 stage protection process. Stay tuned!
Edited by T-bagger on Wednesday 14th February 23:03
Edited by T-bagger on Wednesday 14th February 23:05
Edited by T-bagger on Wednesday 14th February 23:06
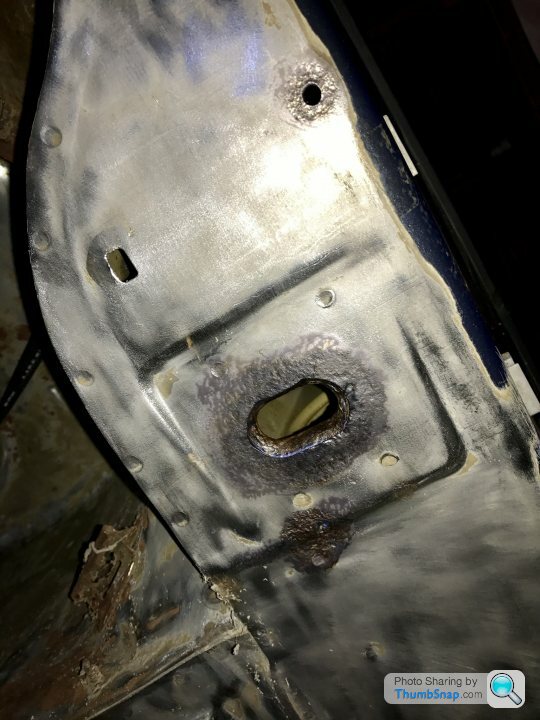
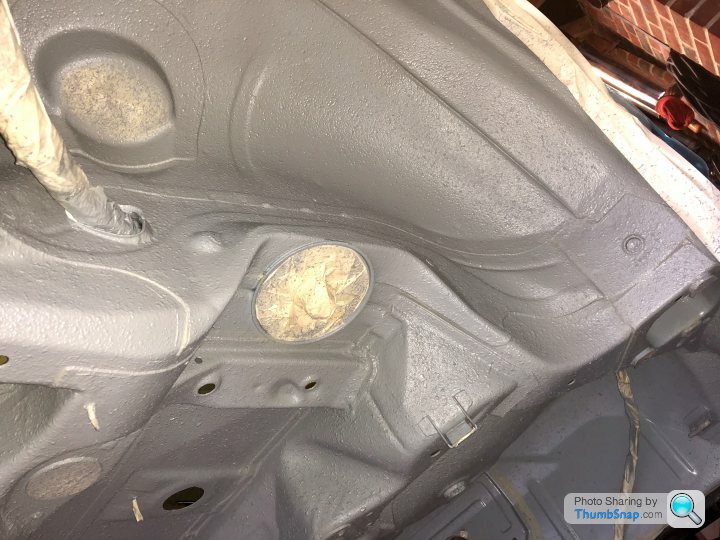
Thanks again for the interest guys. Managed to spend a little bit of time on it today tackling a couple of small jobs, mainly the body plugs that seem to have attracted a fair amount corrosion. Location wise, this has meant removing both front seats, pulling carpets up and replacing the nasty loose metal plugs with a new BMW plastic versions fitted with some good PU body sealant.
Some images of the plugs under the rear seat above where the fuel tank fits.
It also became immediately apparent that someone had had a go in the past with some No More Nails - didn’t last too long though!
Before:

After:

Hope to get some more coats on the underbelly in the next week.
Some images of the plugs under the rear seat above where the fuel tank fits.
It also became immediately apparent that someone had had a go in the past with some No More Nails - didn’t last too long though!
Before:
After:
Hope to get some more coats on the underbelly in the next week.
Update: last week’s snow put pay to much in the way of garage time and progress on the M3. Managed to get a few hours in over this week to deal with a few of the last scabby bits prior to a coat of zinc based primer.

Another nasty, loose body plug removed
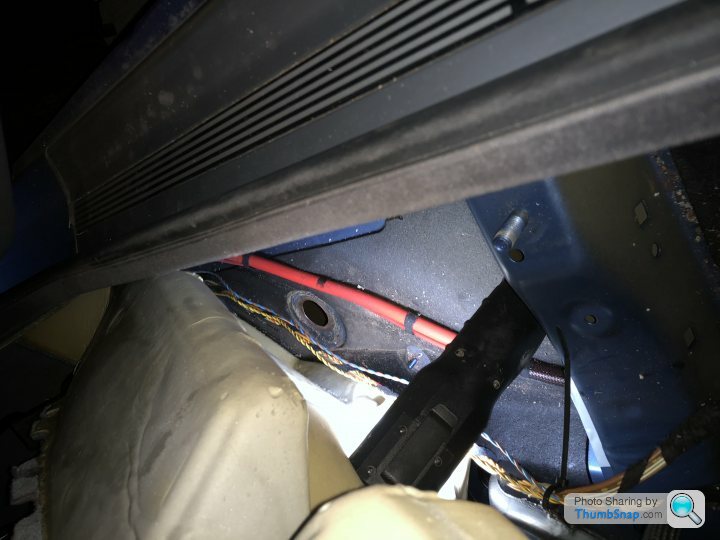
Not the easiest place to get to!

The last one done
Last areas of surface rust treated ready for primer
Boring stuff almost over, another update soon.
Another nasty, loose body plug removed
Not the easiest place to get to!
The last one done
Last areas of surface rust treated ready for primer
Boring stuff almost over, another update soon.
TroubledSoul said:
What did you use to strip back to bare metal underneath OP? Mine doesn't look anywhere near that well stripped even after many sessions with the grinder and wire cup brush...
I used an angle grinder and after trying several different attachments, these seemed the most effective from Screwfix. Used about 8 or them in total.
Dust mask, goggles and very strong leather gloves are a must though!
Thanks again for everybody’s encouraging comments. I’ve used the Bilt Hamber De-Ox gel to pull the rust out, that rear right jacking point was really the worst. Fingers crossed with the coating and plenty of good cavity wax, the corrosion will not progress.
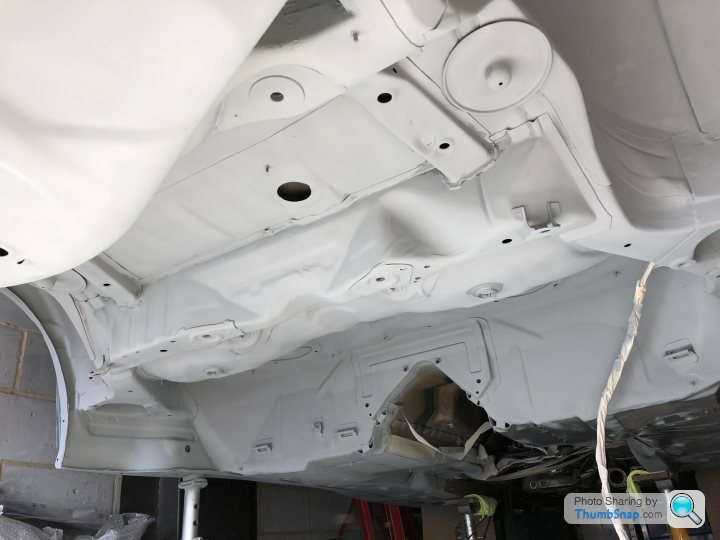
I managed to grab a few hours yesterday to finish priming the bare metal underbody with a zinc rich primer. It’s a good feeling when you start to add layers after all of the prep work. Took 4x 400ml cans

Dressed like I’m ready for a guided tour of the Russian Embassy, but a decent mask and goggles is a must when you’re spraying 2 inches from you face!

Depending on the temperature, I hope to get a good coat of epoxy mastic paint on tomorrow.
I managed to grab a few hours yesterday to finish priming the bare metal underbody with a zinc rich primer. It’s a good feeling when you start to add layers after all of the prep work. Took 4x 400ml cans
Dressed like I’m ready for a guided tour of the Russian Embassy, but a decent mask and goggles is a must when you’re spraying 2 inches from you face!
Depending on the temperature, I hope to get a good coat of epoxy mastic paint on tomorrow.
Had the day off work today, so got stuck in with the grey epoxy mastic paint to cover that primer up. Absolutely horrible arm aching job on the floor with a small foam roller and an inch paintbrush. It’s essential to get into all of the crevices and seams (of which there are many!) but I must say it looks great! Next to hit it with seam sealer and cover it all up with grey rubberised stone-chip.


Hi all, thanks for the continued support and love for the project!
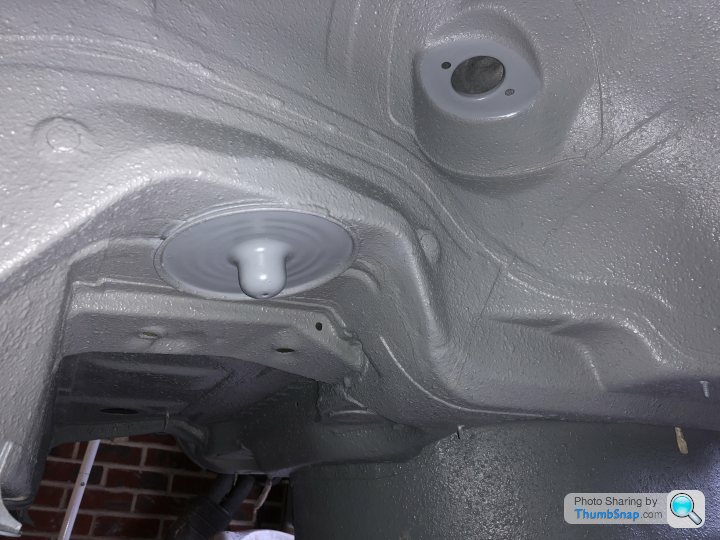
Now brace yourselves for another grey underbody photo; this time the final layer of stone chip. What a messy job! It’s my first go applying this stuff with a Schutz gun hooked up to an air compressor and after rebuilding the ancient, borrowed Schutz gun with new seals I got started.
I am so very pleased that I spend 2hrs masking everything up, pity I forgot to mask myself up! On a positive note; I am now stone proof....
As for the finished job, it’s not perfect and certainly more textured than the factory coating. Not pretty but hopefully effective in protecting the old girl.
Not wanting to climb any further under here are some (grey) photos of the rear.
Decent weather and the wife and child going out for the day meant, joy of joys, I could start actually putting things back on the old girl. Basically spent most of the day cleaning and repairing the fuel tank vent system then fitting it into the boot and pipes routed I got the spare wheel cleaned (need to get a five spoke as it’s a sunflower). Little bit of surface rust encountered on a seam above the left tail light, now all treated.
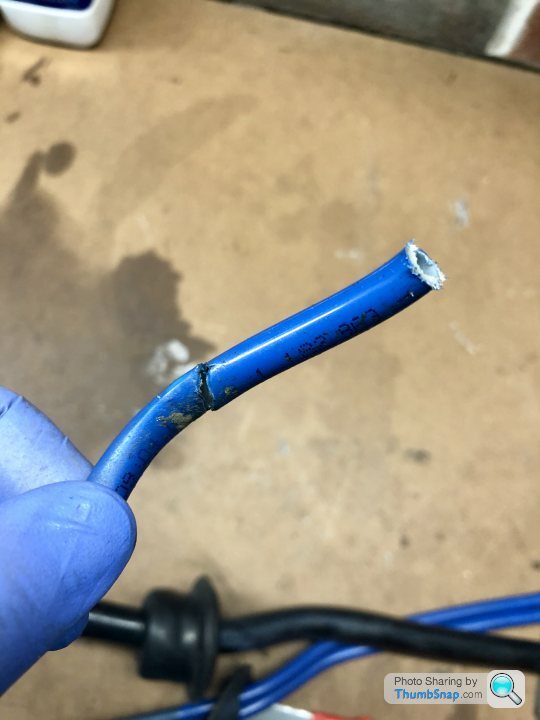
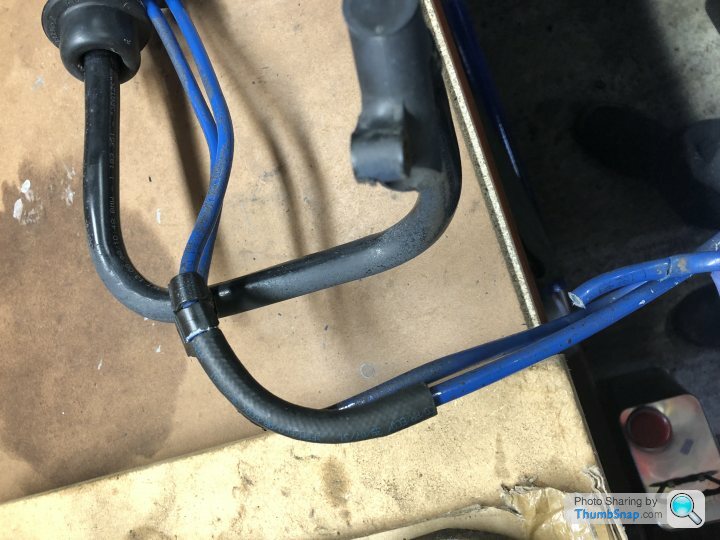
Tank vent hose split, so cut out and a piece of fuel pipe put in. I’ll secure it when all done.
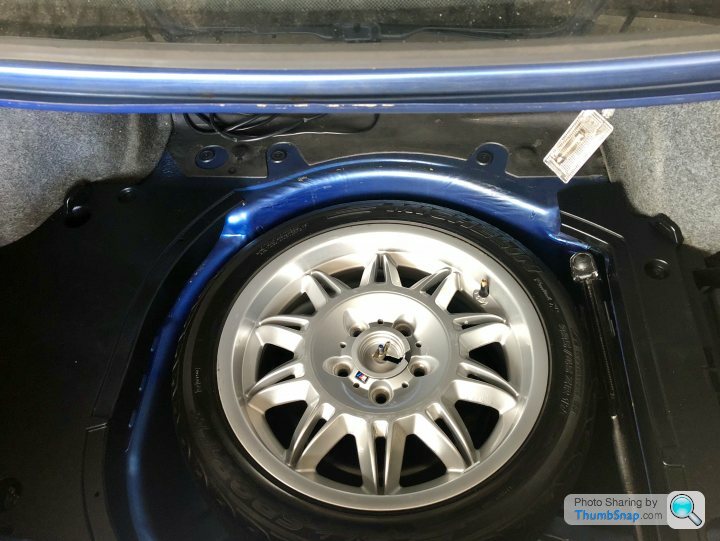
Nice and clean
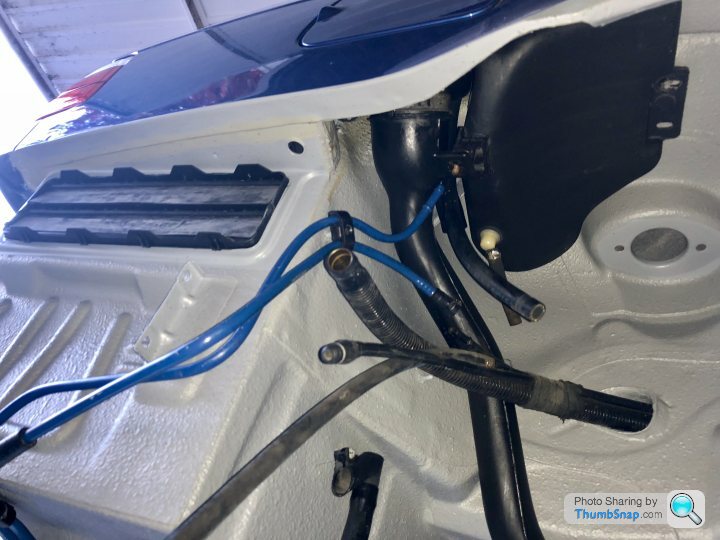
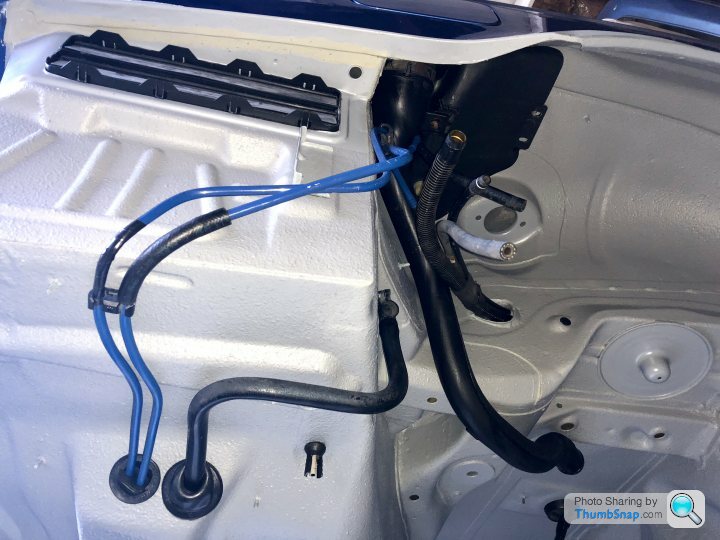
Tank vent system cleaned, refurbed and going back in
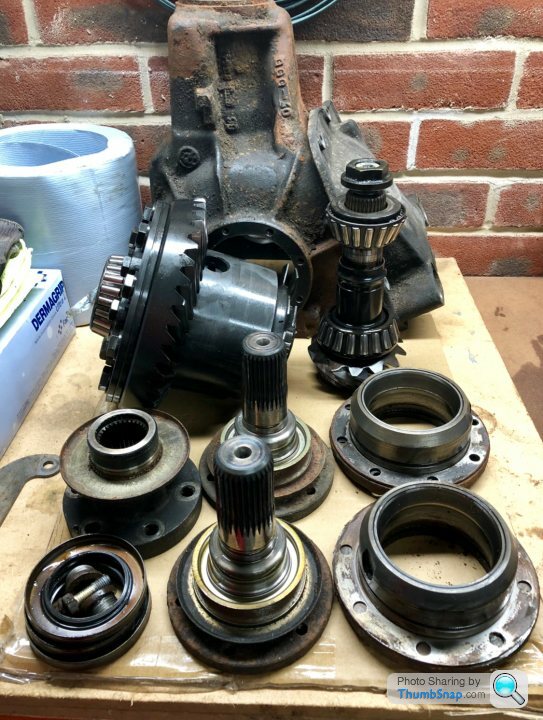
Last job of the day: stripped down the diff - just when you thought progress was being made!
Casing going off for powdercoatering this week meantime I’ll be cracking open the LSD unit to give it a once over and replace the clutch plates. All seals and bearings will also be replaced.
Tank vent hose split, so cut out and a piece of fuel pipe put in. I’ll secure it when all done.
Nice and clean
Tank vent system cleaned, refurbed and going back in
Last job of the day: stripped down the diff - just when you thought progress was being made!
Casing going off for powdercoatering this week meantime I’ll be cracking open the LSD unit to give it a once over and replace the clutch plates. All seals and bearings will also be replaced.
H20DJY said:
Great work! Are you planning to have the car painted as well, or is it clean enough up top? Certainly didn't seem any worse underneath than my e46 really.
It’s pretty scruffy up top to be honest, not terrible but I can’t have the underside looking better than the top! Also the new front left wing will need need paint in any case.Thanks for all the motivational comments!
After so much bodywork it was good to get on with more mechanical work, not to mention the nice feeling that comes with putting this thing back together! I can almost remember where everything goes....
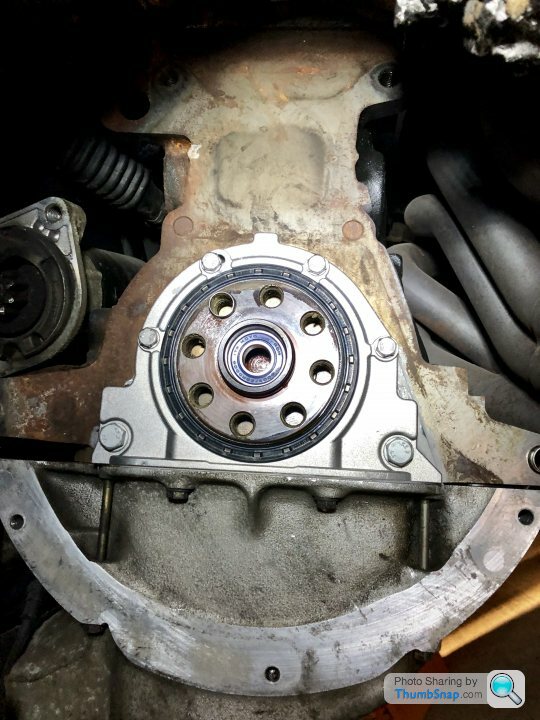
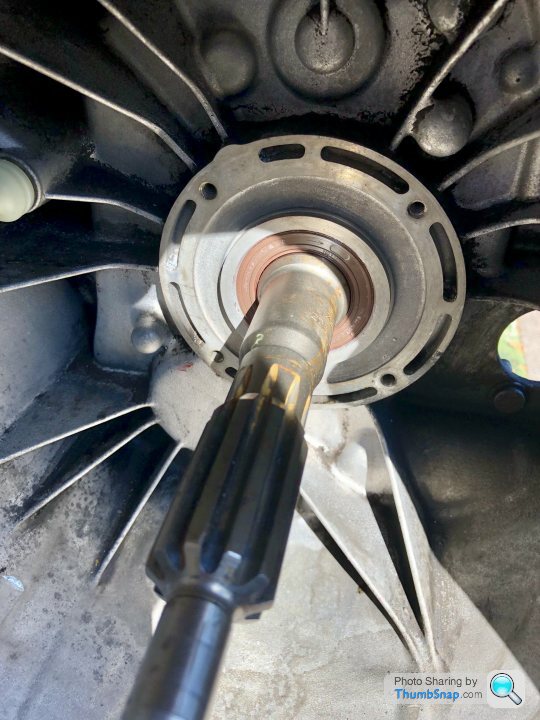
So pulled the ‘box out to replace the weeping rear main crank seal with a modified type. Whilst out it made sense to replace the pilot bearing, that is after the ordeal of pulling the bloody thing out of the end of the crank.
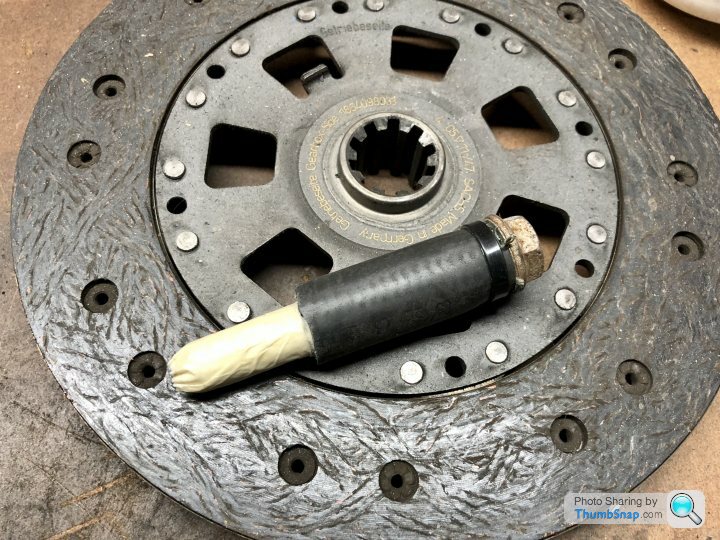
Then in with the new clutch. Realised I didn’t have a friction plate aligning tool and knowing the pain in the butt that comes with lifting a heavy gearbox in only to have the input shaft not fall in. So a large bolt, a piece of hose and some tape later; the finest bespoke tool!
And then onto the gearbox itself. I changed the output and selector shaft seals a couple of years back, so for peace of mind I replaced the input shaft seal - besides it was weeping like an Italian widow.
Next up, replace the transmission tunnel insulation and heave the ‘box back in.
So pulled the ‘box out to replace the weeping rear main crank seal with a modified type. Whilst out it made sense to replace the pilot bearing, that is after the ordeal of pulling the bloody thing out of the end of the crank.
Then in with the new clutch. Realised I didn’t have a friction plate aligning tool and knowing the pain in the butt that comes with lifting a heavy gearbox in only to have the input shaft not fall in. So a large bolt, a piece of hose and some tape later; the finest bespoke tool!
And then onto the gearbox itself. I changed the output and selector shaft seals a couple of years back, so for peace of mind I replaced the input shaft seal - besides it was weeping like an Italian widow.
Next up, replace the transmission tunnel insulation and heave the ‘box back in.
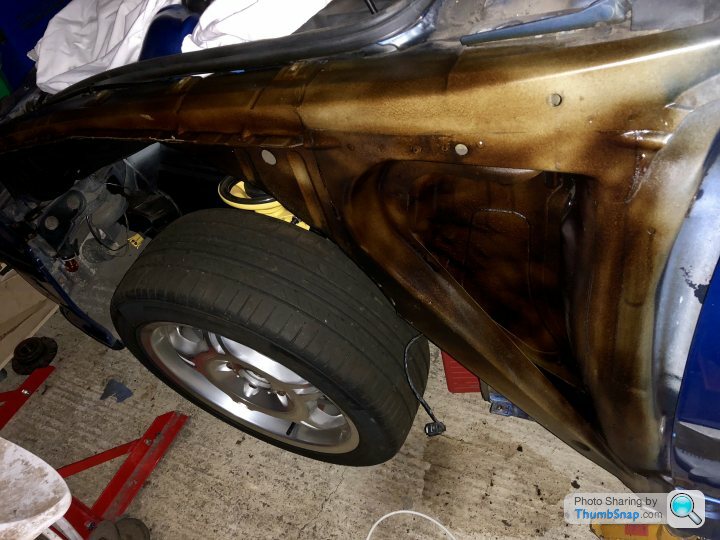
I’ve had this niggling feeling every time I walked to the front of the car. Actually I mean stumble and climb over car parts rather than walk, but you get the idea. Anyway this niggling feeling has been creeping into my head and it’s down to the finish in the front wheel arches. When I did that end of the car about 18months back, i couldn’t get hold of the 3m grey stone chip that i wanted - the best match to the factory finish. So I used black........ rationale being that the arch liners cover most of it and I could at least crack on with the restoration. Would anyone ever notice, apart from the spiders?
Fast forward to the present evening. This happened:
Lovingly rebuilt front suspension carefully removed, arches stripped back, primered and ready for the GREY stone chip.
I guess the “niggling” got too much. Or maybe it was the 8 eyed look of accusation for doing a half arsed job, that spider on the garage floor gave me?
I feel better now.
Edited by T-bagger on Wednesday 6th June 00:36
TroubledSoul said:
I've decided to get back on with mine OP. But it won't be done to this level so I'm going to go with my original plan of tracking it. Get it clean, get it protected, get some enjoyment out of it. I was on the cusp of giving up and selling it in all honesty but people milling around it showing interest has motivated me
If you've got any close up pics of the spot welds in the front inner arch I'd appreciate more of those as I have to remove the front part of mine and replace it.
I am properly struggling to remove the rubbery underseal stuff above the rear axle and fuel tank, despite using a grinder and wire wheel. Also managed to put a hole in one of the tank vent pipes as I tried to work around them FFS
Which part of the front arch? I’ll see what I have or can zoom in on and re upload.If you've got any close up pics of the spot welds in the front inner arch I'd appreciate more of those as I have to remove the front part of mine and replace it.
I am properly struggling to remove the rubbery underseal stuff above the rear axle and fuel tank, despite using a grinder and wire wheel. Also managed to put a hole in one of the tank vent pipes as I tried to work around them FFS
Removing the under seal is bloody hard work, I used the knitted wire wheels you can get from Screwfix, they’re about the best i’d found but still not a pleasant process.
Post Le Mans recovery day today, so after unloading the 5 series of all trip related paraphernalia I got a few hours on the M3. Interesting that this year was BMW’s return to the GTE Pro class and so the Friday car show at Saint Saturnin had a BMW theme. E21s, Z1s, M4s and even E30 M3s a plenty, didn’t see one E36 M3 all weekend. Outnumbered even by Lamborghinis - never have I wished i’d had the old girl up running and on the road more!
Anyway, a pretty productive day squeezed into the garage today:
Front suspension and arch liners refitted after redoing the under seal.

With the input shaft seal replaced, release fork pivot and clip replaced, new release bearing the ‘box is ready for re-mating to the engine.
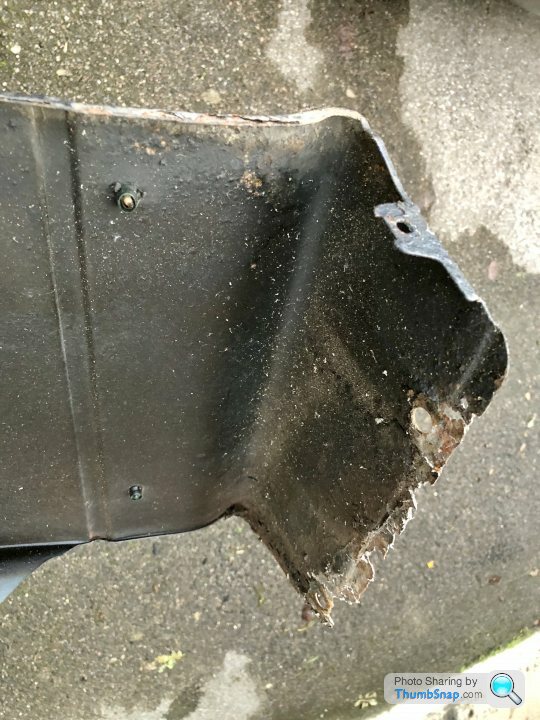
Fuel tank venting system fully fitted with new stainless steel hose clamps, fixings and a new cover - the old one being cracked.
Next up, fabricating a replacement for the disintegrated transmission tunnel insulation. Glad people are enjoying the build.
Anyway, a pretty productive day squeezed into the garage today:
Front suspension and arch liners refitted after redoing the under seal.
With the input shaft seal replaced, release fork pivot and clip replaced, new release bearing the ‘box is ready for re-mating to the engine.
Fuel tank venting system fully fitted with new stainless steel hose clamps, fixings and a new cover - the old one being cracked.
Next up, fabricating a replacement for the disintegrated transmission tunnel insulation. Glad people are enjoying the build.
Zombie said:
Very nice work OP!
What kind of product did you use as seal sealant & stone chip? TIA
Mainly Bilt Hamber products. Our paint chemist at work recommended them and he knows his stuff, anyway into the products:What kind of product did you use as seal sealant & stone chip? TIA
1.BH Hydrate 80 rust killer
2.BH Electrox zinc primer
3.BH Grey epoxy mastic paint
4.BH seam sealer
5.3M Body Guard grey stone chip
Ruskie said:
Great write up, and what a car to do a resto job on. I was curious what your job was to get the skill level you have...clicking on your profile solved that!
Thanks. Not actually been so hands on at Goodwood for a good 7 Years - must update my profile. Only time I get my hands dirty these days is if my pen leaks! Doing this allows me to keep my hand in and is a surprisingly good way to relax (if it’s all going right!).Today I have mostly been insulating. As mentioned in one of my previous updates, the insulation on the underside of the transmission tunnel was, well, knackered and as is common fallen down onto the gearbox and propshaft. No amount of tape/wire/screws/prayer was going to bring it back to life.
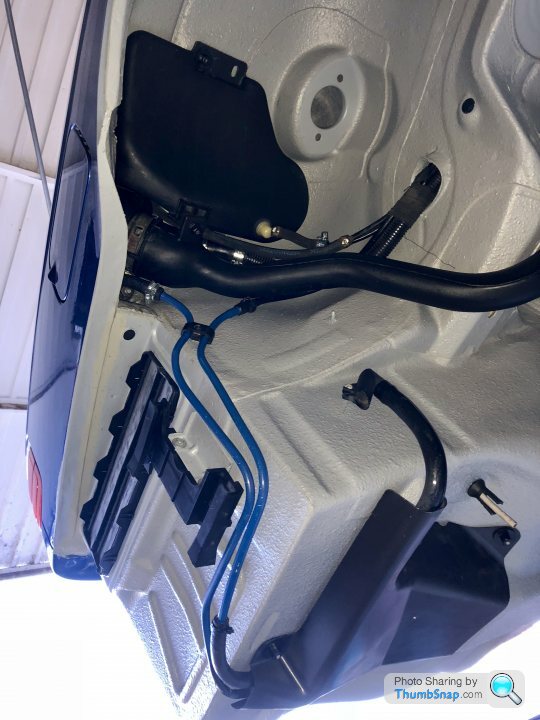
First problem; the insulation is one piece that goes right up the bulkhead in the engine bay and as such is a absolute pain to replace as master cylinder, steering spindle and everything has to come out.
Second problem; (somewhat fixes the first problem) the insulation is not available from BMW for the time being, with no delivery date. Dropping a line to a colleague in BMW Classic in Munich confirmed that a new supply route had been found but still no delivery date.
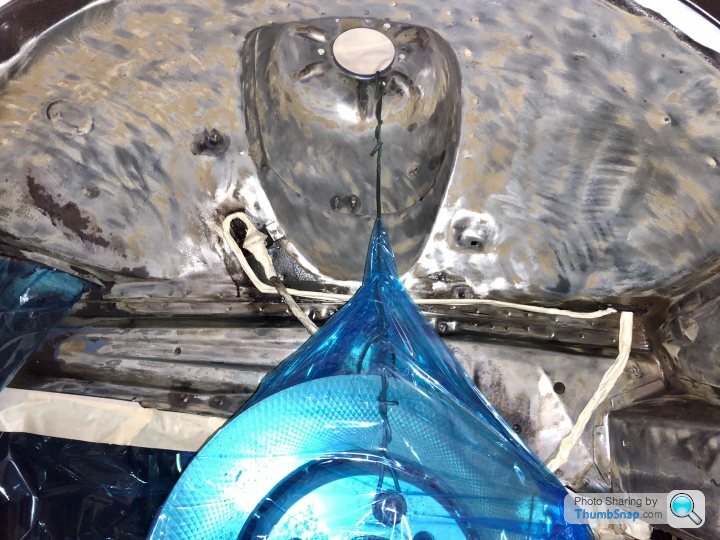
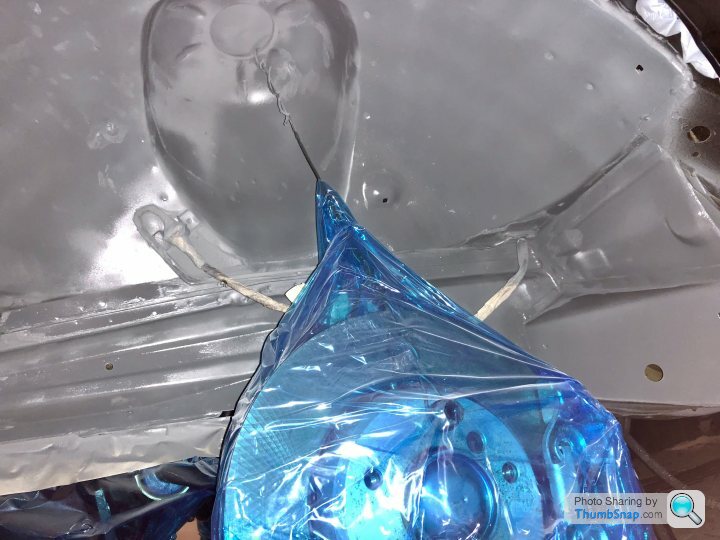
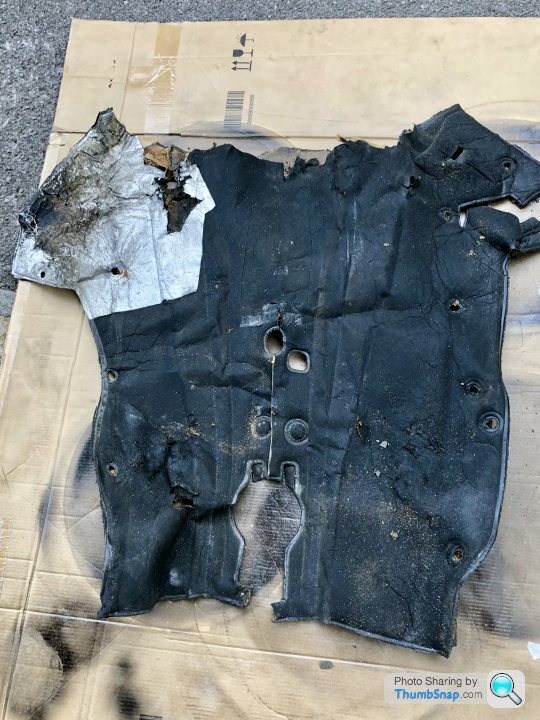
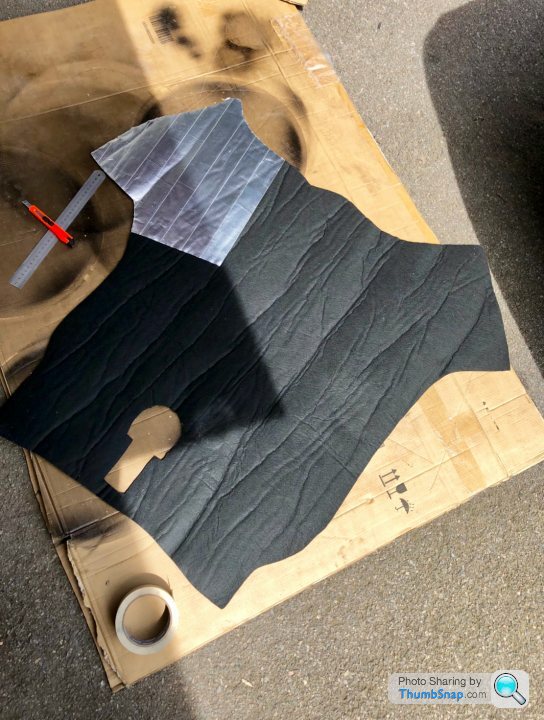
Not wanting to delay refitting the gearbox for an undisclosed amount of time and with the insulation on the bulkhead being in good condition, I scoured the internet for suitable sheet insulation. Enter Car Insulation.co.uk who provided me with a couple of metres of suitable self adhesive insulation sheet and some heatproof, glass reinforced tape.
Perhaps a little “Blue Peter” but I’m fairly content that the result is both functional and looks close to factory. Oh and this stuff sticks like OJ Simpson to an alibi.
Old insulation cut off at the joint to the bulkhead section - nasty!
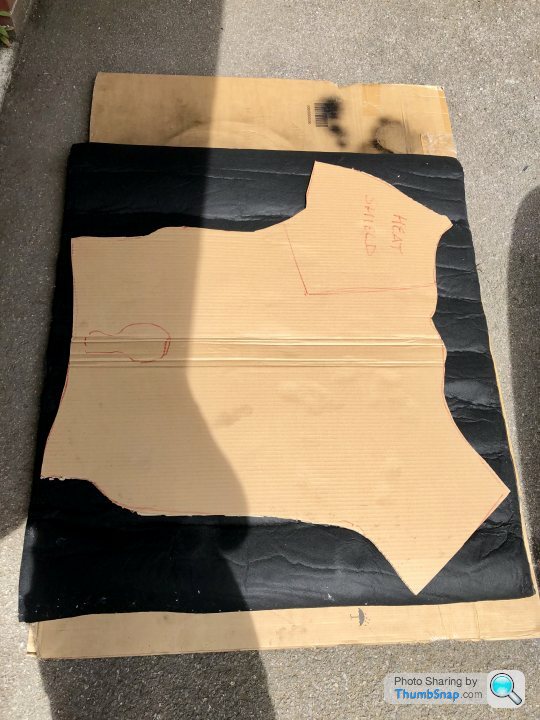
Cardboard template made and laid on the new sheet
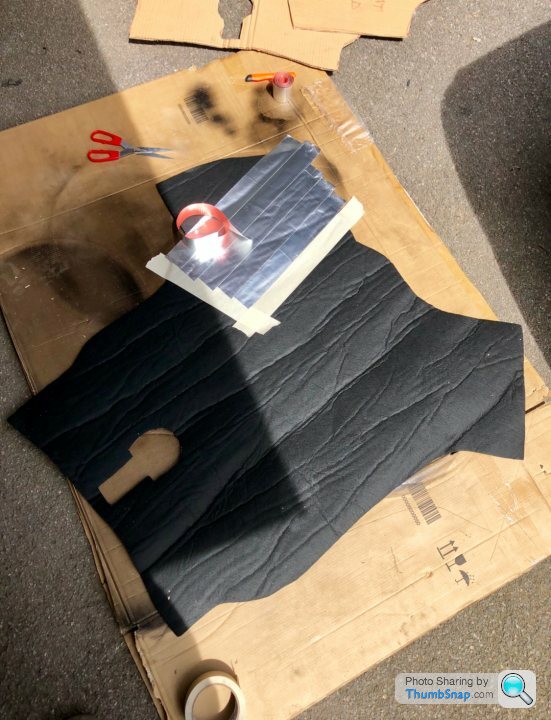
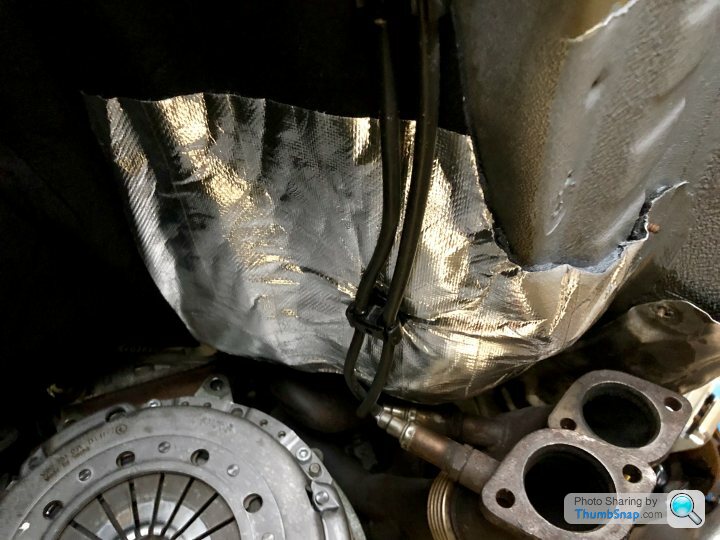
Cut out, heat protection area marked and tape being applied
Finished part
And finally fitted
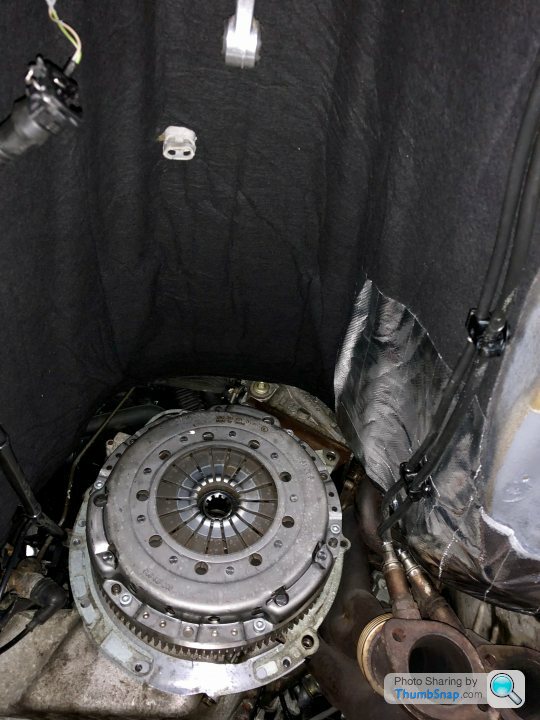
And believe me that stuff sticks! It is not coming off in a hurry.
First problem; the insulation is one piece that goes right up the bulkhead in the engine bay and as such is a absolute pain to replace as master cylinder, steering spindle and everything has to come out.
Second problem; (somewhat fixes the first problem) the insulation is not available from BMW for the time being, with no delivery date. Dropping a line to a colleague in BMW Classic in Munich confirmed that a new supply route had been found but still no delivery date.
Not wanting to delay refitting the gearbox for an undisclosed amount of time and with the insulation on the bulkhead being in good condition, I scoured the internet for suitable sheet insulation. Enter Car Insulation.co.uk who provided me with a couple of metres of suitable self adhesive insulation sheet and some heatproof, glass reinforced tape.
Perhaps a little “Blue Peter” but I’m fairly content that the result is both functional and looks close to factory. Oh and this stuff sticks like OJ Simpson to an alibi.
Old insulation cut off at the joint to the bulkhead section - nasty!
Cardboard template made and laid on the new sheet
Cut out, heat protection area marked and tape being applied
Finished part
And finally fitted
And believe me that stuff sticks! It is not coming off in a hurry.
Gassing Station | Readers' Cars | Top of Page | What's New | My Stuff