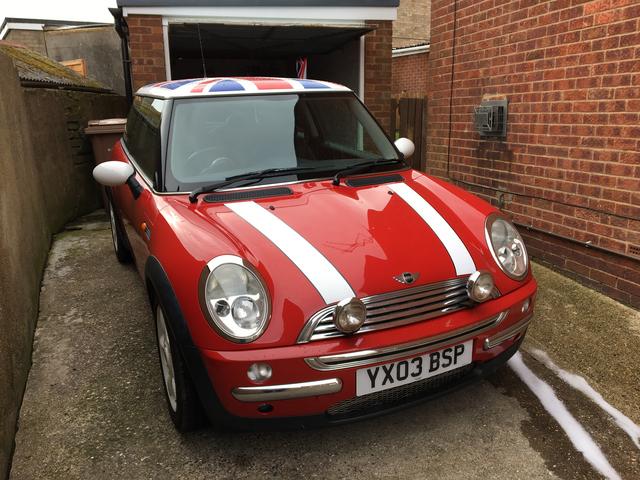
2003 Mini Cooper.
Discussion


My girlfriend just bought a little Mini. Well it's not THAT little, oh no, I've had few of those! Had enough of them too.. for now!
It struck me just how cheap these early R50's have become! With the new cars becoming a parody of themselves, these cars are actually looking quite retro now! I bet that's something you didn't expect to hear come from a classic Mini guy now is it? But hang on a minute the Mini R50 is a truly British car is it not..
It certainly feels like one; shoot me for saying this but it feels like a Rover 75 come MGF and certainly not as much BMW DNA as one would expect! Then again if you are aware of the conception of this little car it's hardly surprising this car feels like a Rover! It was even destined for the K-Series engine although that wasn't to be; the gearbox did however make on the early ones! If anyone is truly interested on the conception of this car; I cannot think of a more detailed guide than this one https://www.aronline.co.uk/cars/bmw-mini/mini-2/mi...
It's certainly an eye opener for sure!
Enough background on this car anyway, it's the second car she has owned and she loves it! Not as much as her Saxo VTS (coincidently newer by a very small margin) but still this is the daily and the Saxo is a slow burner tucked away for another day! Here's the thread.. https://www.pistonheads.com/gassing/topic.asp?t=16...
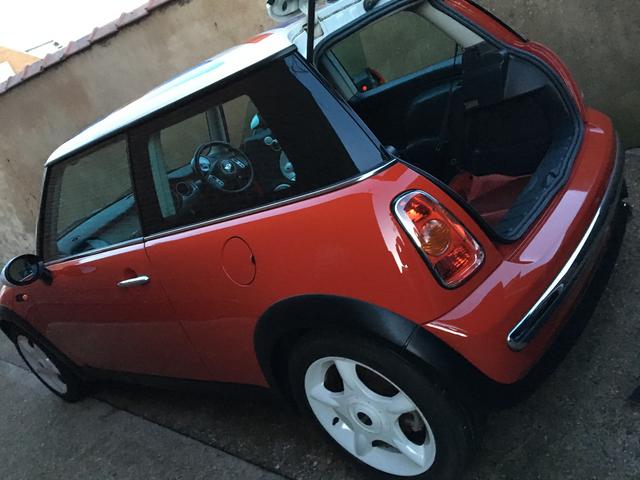
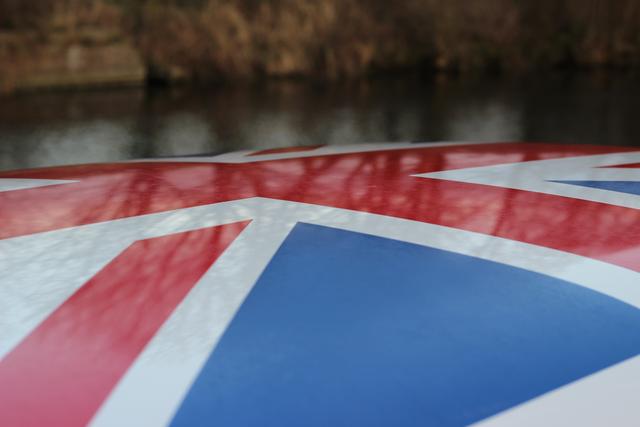
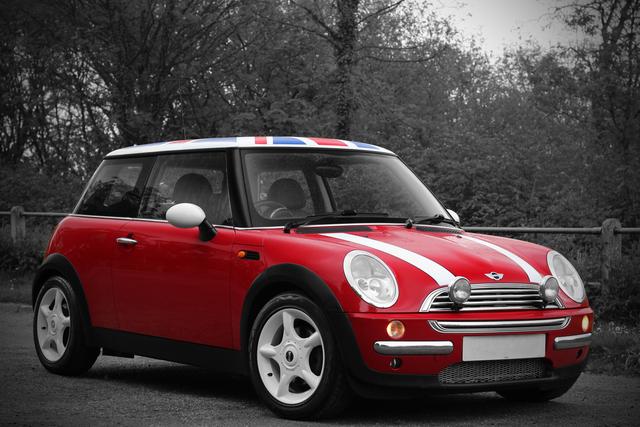
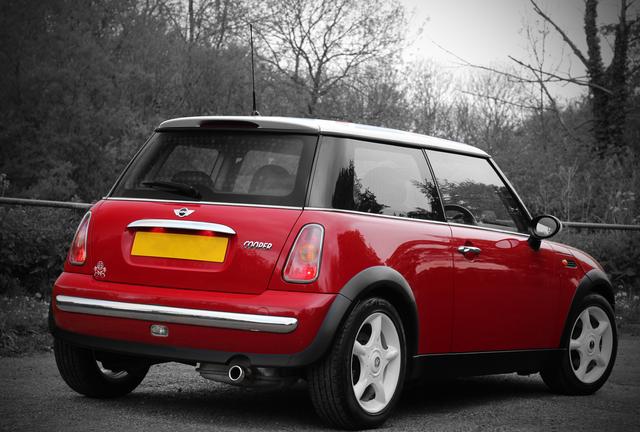
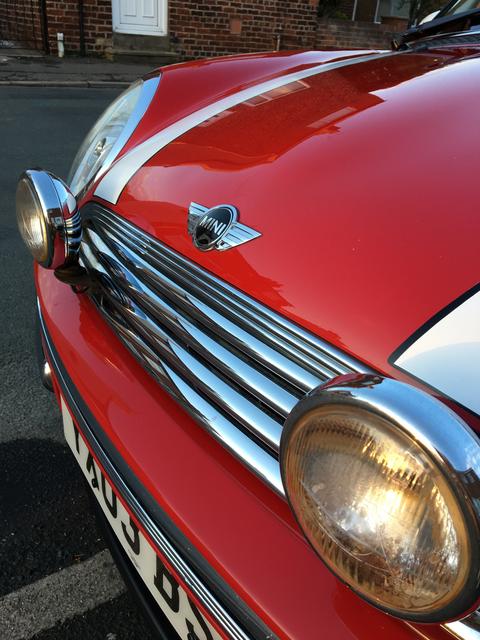
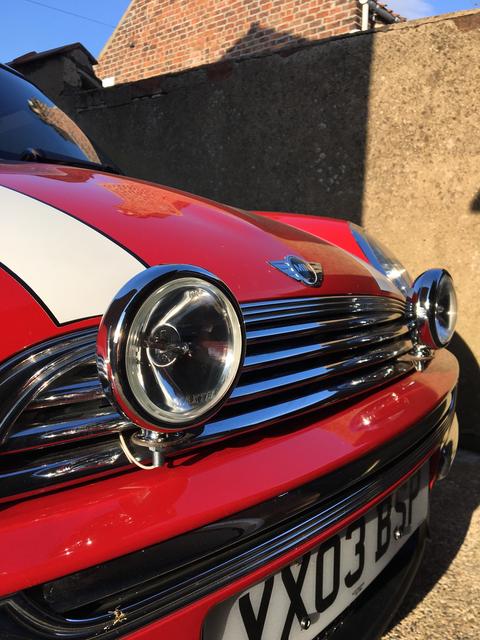
This particular car has low family ownership, 51,000 miles and is loaded with extra spec! Most notably are the bonnet stripes, Union Jack and spot lights!
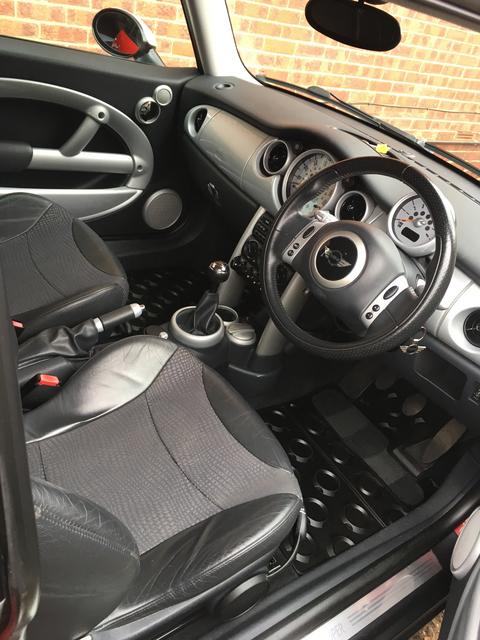
As I am OCD and the better half just goes with the flow we decided to strip the whole interior out the day she bought it and use my brand new toy.. a Sealy wet vac! This machine is the dogs and I would recommend to any of my friends who are as anal as I am.. Sadly I have none which fit that criteria so I will instead recommend to anyone on here whom I have yet to meet who are inclined as I am.
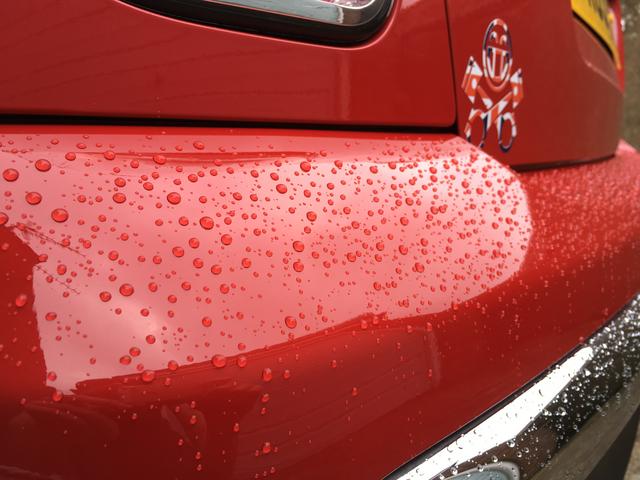
I started first with a 'quick' wash and polish as the exterior was looking dull and didn't look like it had seen a polish in a good while. I couldn't see the wood for the trees and just wanted to know what I was up against basically!
This was my starting point!
First it got a snow foam everywhere!

Some trusty AG Magma on the wheels!
I noticed heavy contamination on the paintwork so I attacked with a bit of magma (which is acceptable to use on paint and glass too)


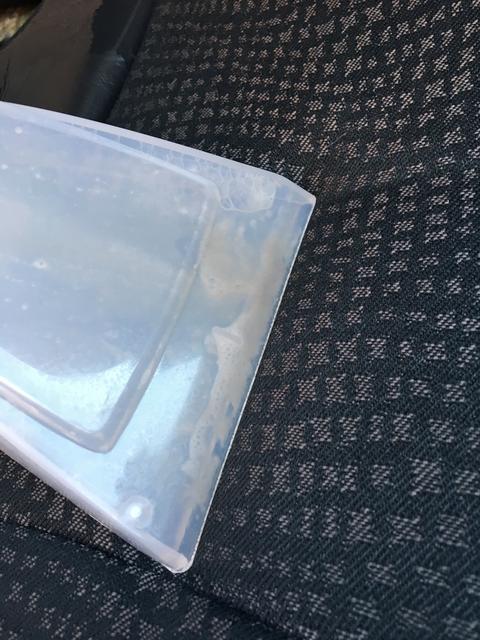
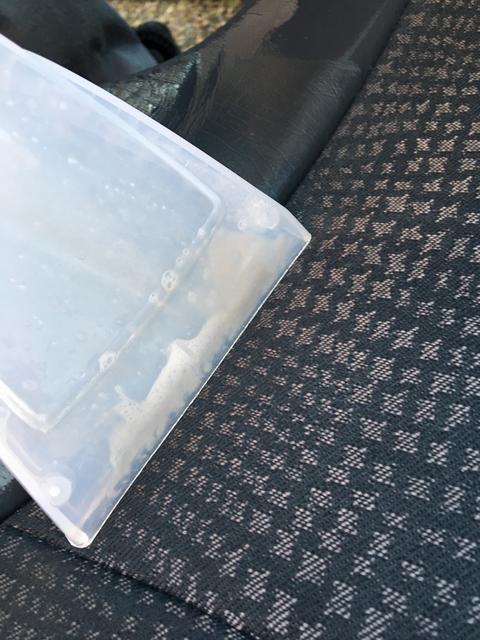
The Magma is great stuff but the contamination on the paint needed agitating! There was quite a lot of tar on the paintwork and tree fallout on the roof! I figured it was going to be a waste of time to just polish over this grime and this is how it escalated to a full clay of the paintwork!
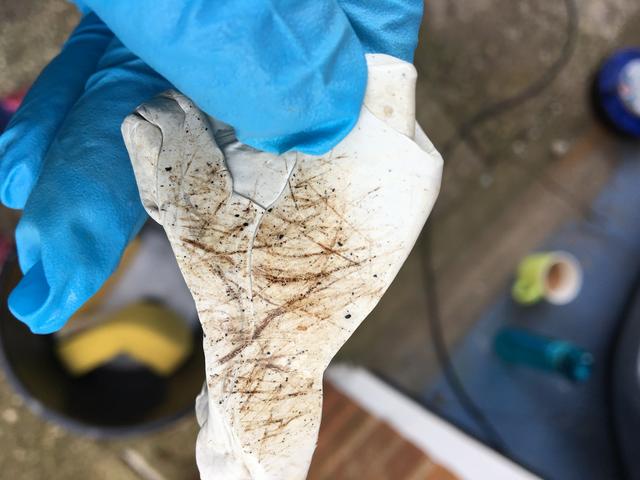
The results on the bar speak for themselves and the paint is 90% less contaminated than before although the remaining 10% will be more troublesome and time consuming I will leave that for when I do a focused exterior detail!
With the paint feeling much more cleansed I gave it a standard polish with super resin and a quick wax to protect until I get chance for a deeper cut. This will probably wait until it gets warmer and less damp in the air.
While busy doing a job I wasn't supposed to be doing, I set my girlfriend on with pre vacuuming the car out before the interior strip down!
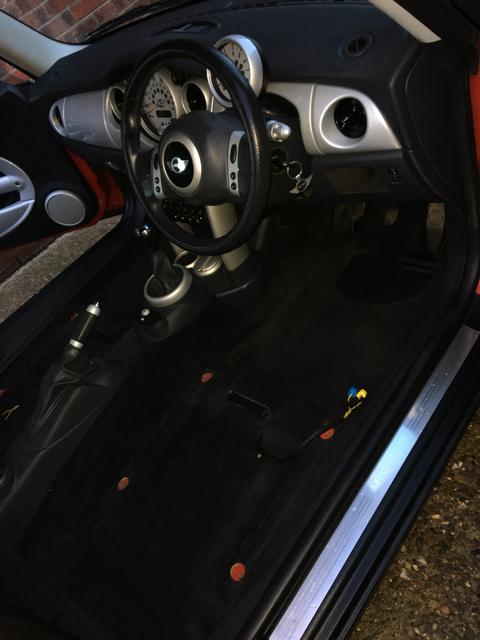
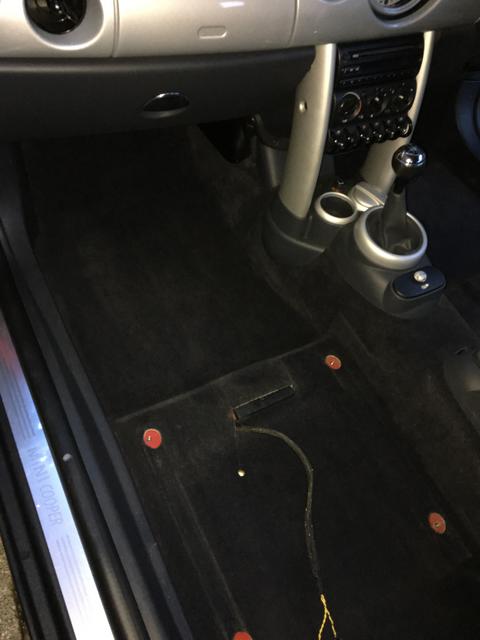
Here's what we was up against, nothing too nasty just signs of dogginess and general grime!
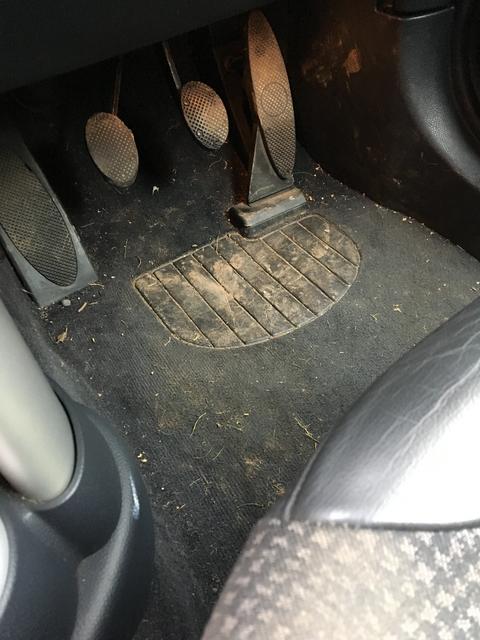
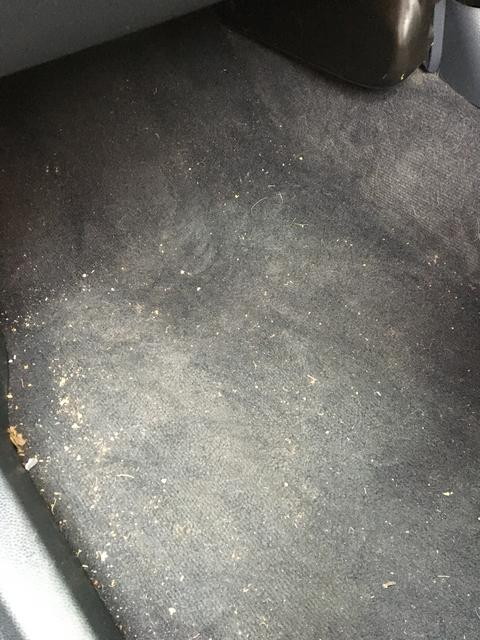
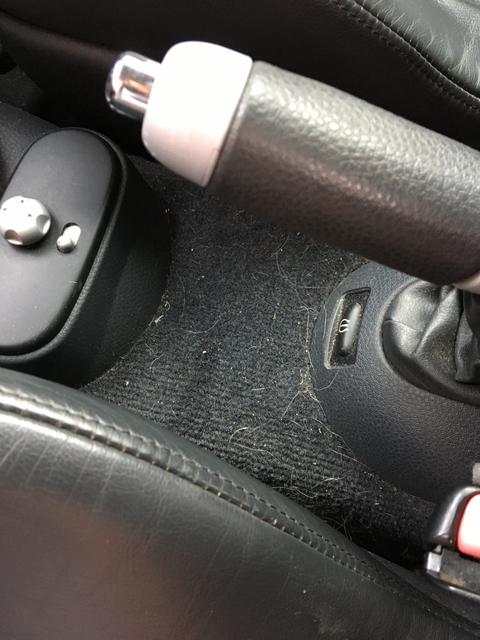
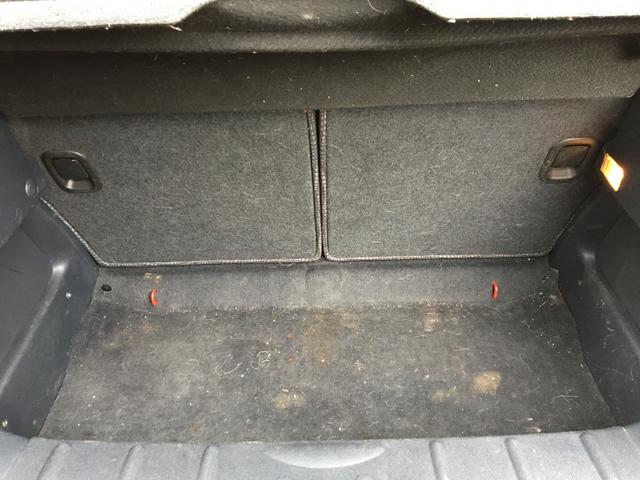
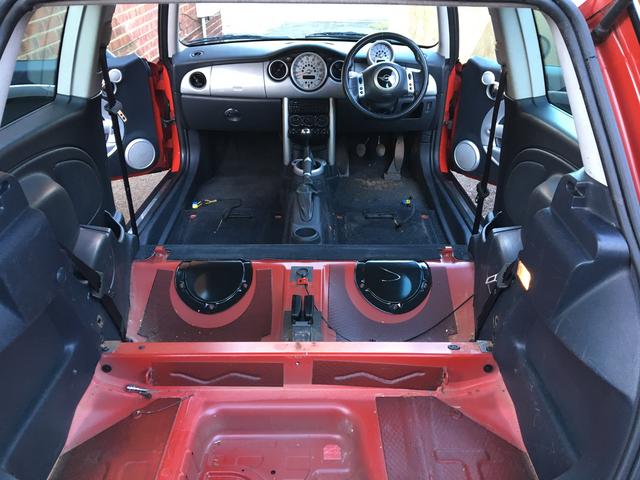
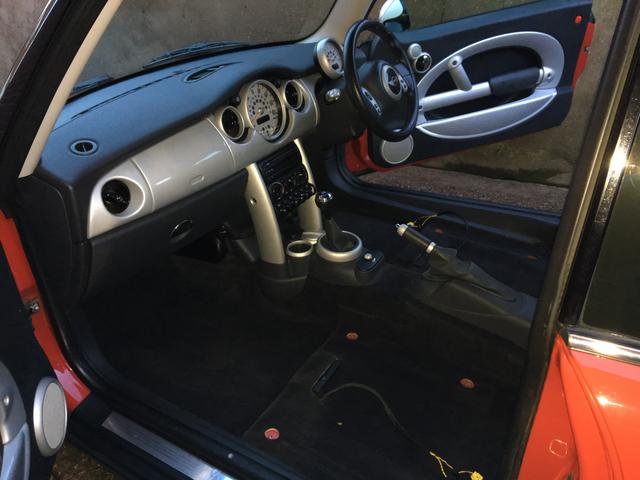
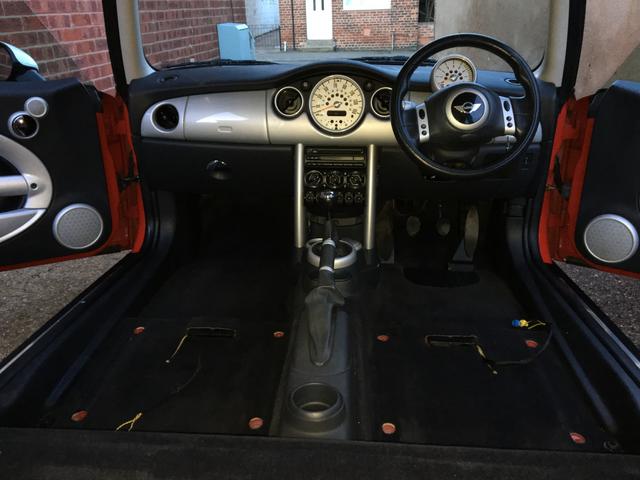
So we stripped the interior!
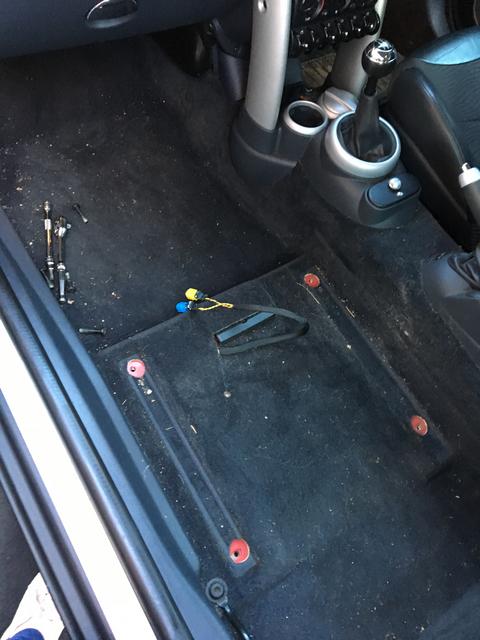
Subsequent to us (by us I mean me) over running on the paintwork; the day was threatening to close so not many pictures were taken during the clean!
Et voila
With all the carpets, seats and trim wet vacced. The plastics wiped down and all glass polished; gone was the doggy smell and the car looked a lot more respectable! Also treated some of the leather which made a difference! Unfortunately someone *ahem* didn't think to take ANY pictures of the seats what so ever! Ha ha.
Thats our first update! If you found this remotely interesting more updates will be on their way.. Detailing, road tripping and general maintenance will be in store; although the next update will focus on fault finding! (It's a Rover of course there are)!
For now though that is me!
Please take a minute to read my other threads which are often neglected to be updated..!
https://www.pistonheads.com/gassing/topic.asp?h=0&...
Danny.
It struck me just how cheap these early R50's have become! With the new cars becoming a parody of themselves, these cars are actually looking quite retro now! I bet that's something you didn't expect to hear come from a classic Mini guy now is it? But hang on a minute the Mini R50 is a truly British car is it not..
It certainly feels like one; shoot me for saying this but it feels like a Rover 75 come MGF and certainly not as much BMW DNA as one would expect! Then again if you are aware of the conception of this little car it's hardly surprising this car feels like a Rover! It was even destined for the K-Series engine although that wasn't to be; the gearbox did however make on the early ones! If anyone is truly interested on the conception of this car; I cannot think of a more detailed guide than this one https://www.aronline.co.uk/cars/bmw-mini/mini-2/mi...
It's certainly an eye opener for sure!
Enough background on this car anyway, it's the second car she has owned and she loves it! Not as much as her Saxo VTS (coincidently newer by a very small margin) but still this is the daily and the Saxo is a slow burner tucked away for another day! Here's the thread.. https://www.pistonheads.com/gassing/topic.asp?t=16...
This particular car has low family ownership, 51,000 miles and is loaded with extra spec! Most notably are the bonnet stripes, Union Jack and spot lights!
As I am OCD and the better half just goes with the flow we decided to strip the whole interior out the day she bought it and use my brand new toy.. a Sealy wet vac! This machine is the dogs and I would recommend to any of my friends who are as anal as I am.. Sadly I have none which fit that criteria so I will instead recommend to anyone on here whom I have yet to meet who are inclined as I am.
I started first with a 'quick' wash and polish as the exterior was looking dull and didn't look like it had seen a polish in a good while. I couldn't see the wood for the trees and just wanted to know what I was up against basically!
This was my starting point!
First it got a snow foam everywhere!
Some trusty AG Magma on the wheels!
I noticed heavy contamination on the paintwork so I attacked with a bit of magma (which is acceptable to use on paint and glass too)
The Magma is great stuff but the contamination on the paint needed agitating! There was quite a lot of tar on the paintwork and tree fallout on the roof! I figured it was going to be a waste of time to just polish over this grime and this is how it escalated to a full clay of the paintwork!
The results on the bar speak for themselves and the paint is 90% less contaminated than before although the remaining 10% will be more troublesome and time consuming I will leave that for when I do a focused exterior detail!
With the paint feeling much more cleansed I gave it a standard polish with super resin and a quick wax to protect until I get chance for a deeper cut. This will probably wait until it gets warmer and less damp in the air.
While busy doing a job I wasn't supposed to be doing, I set my girlfriend on with pre vacuuming the car out before the interior strip down!
Here's what we was up against, nothing too nasty just signs of dogginess and general grime!
So we stripped the interior!
Subsequent to us (by us I mean me) over running on the paintwork; the day was threatening to close so not many pictures were taken during the clean!
Et voila
With all the carpets, seats and trim wet vacced. The plastics wiped down and all glass polished; gone was the doggy smell and the car looked a lot more respectable! Also treated some of the leather which made a difference! Unfortunately someone *ahem* didn't think to take ANY pictures of the seats what so ever! Ha ha.
Thats our first update! If you found this remotely interesting more updates will be on their way.. Detailing, road tripping and general maintenance will be in store; although the next update will focus on fault finding! (It's a Rover of course there are)!
For now though that is me!
Please take a minute to read my other threads which are often neglected to be updated..!
https://www.pistonheads.com/gassing/topic.asp?h=0&...
Danny.
Another update on the (not so) MINI!
One of the first things I noticed when driving the MINI was the steering wasn't as slick and smooth as it should have been. When low speed manoeuvring it was particularly noticeable with a distinct creaking and notchy steering action. As a 21st century MINI rookie, I turned to the internet! After sifting through numerous complaints of power steering noises and issues; which I was certain wasn't the case, I came across this article which was very helpful.
http://minicooper.wikia.com/wiki/Steering_Column_B...
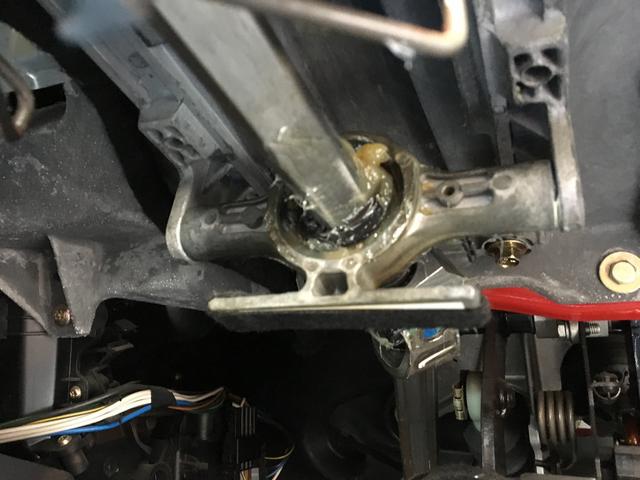
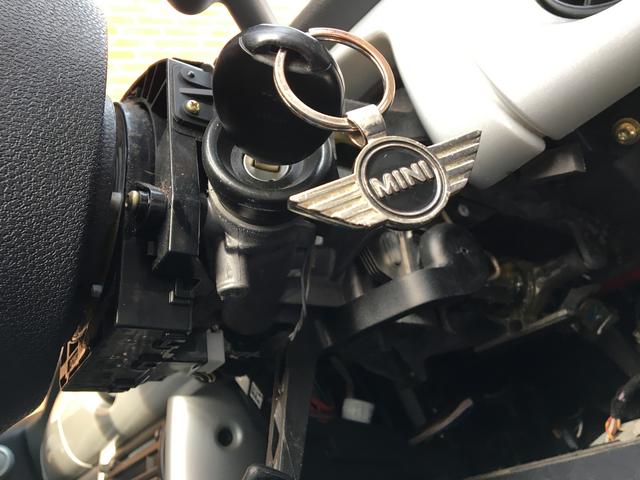
I removed the steering column plastics to reveal the bearing in question which I lathered in grease!
I then brought out my latest detailing gizmo!
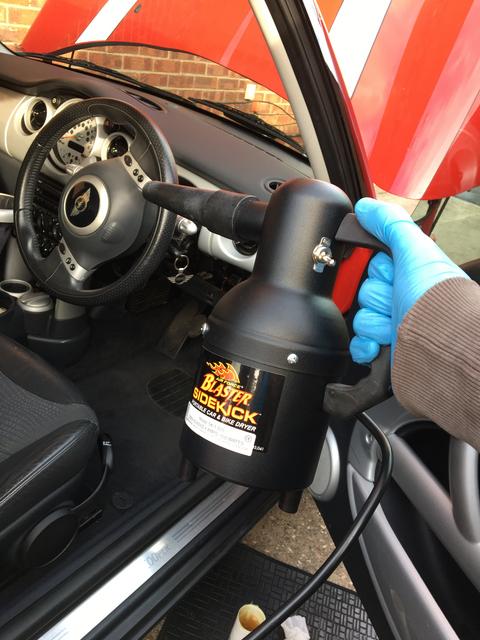
Behold the Sidekick Blaster, all the way from America land!
It's like an air blower you'd attach to a compressed air line but runs off the mains. Its extremely handy for displacing water in grilles, door shuts and wheels arches etc. It's also brilliant for displacing dust from air vents, door pockets or in the case in between plastics!
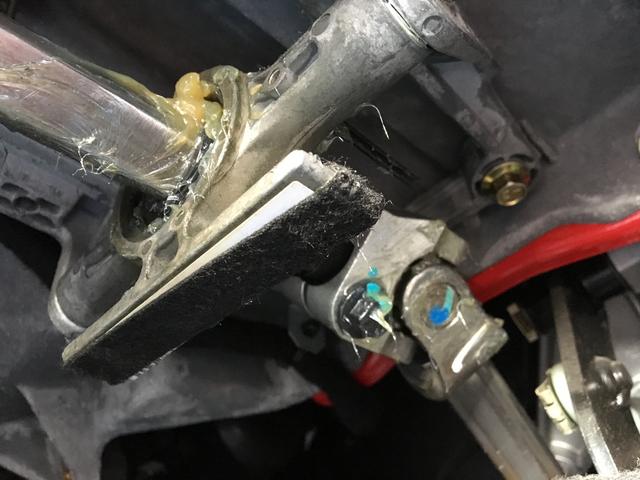
I used the sidekick to blast any debris from the rotary coupler which can also make the steering action feel notchy. I then sprayed some silicone spray to ensure frictionless action!
I greased the lower column bearing too as a matter of 'while I'm here'. I discovered the gator was misfitted which shows signs that someone may have tried to remedy the creaking steering in the past! Fitting this gator correctly also cured engine noise in the cabin; which sounded as if you was sat in the cabin of a mid engined car..!
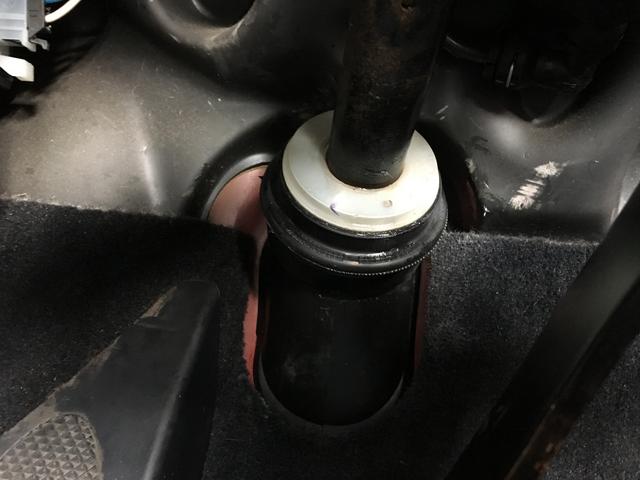
Next on the list to remedy was a stiff gearshift!
From experience I went for the ball/ socket on the gearstick as a first port of call.
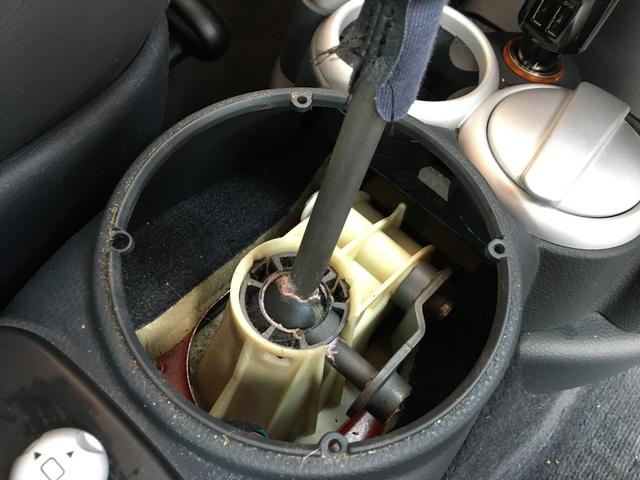
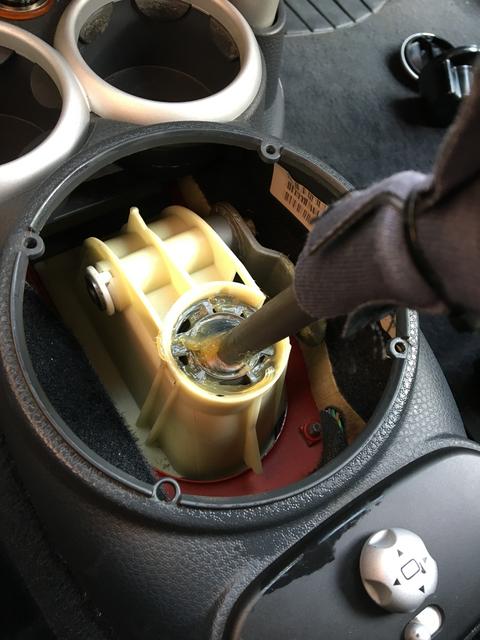
After cleaning, blasting and greasing it looked much better and the shift action was much improved!
I was going to spray some spray grease on the selectors on top of the gearbox too but as battery removal was necessary I will save that for when I service it!
I also noticed a brake light bulb was out which was promptly replaced and while the lamps were removed I was sure to clean in and around the area!

The little jobs all add up!
There are a fair few to do in the future. The drivers door check strap is buggered, central locking doesn't work on either doors, missing and or damaged trims etc a couple of intermittent warning lamps and rattles! The cars also in need of a good service too!
So enough to keep me busy then (as well as other projects)! However as this is a daily and my girlfriends at that; so this is taking priority at this point!
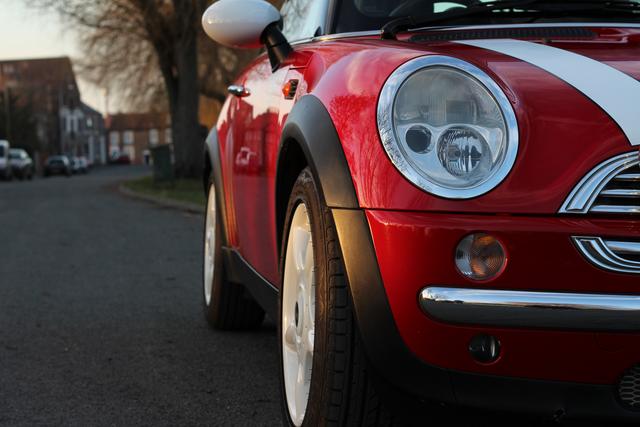
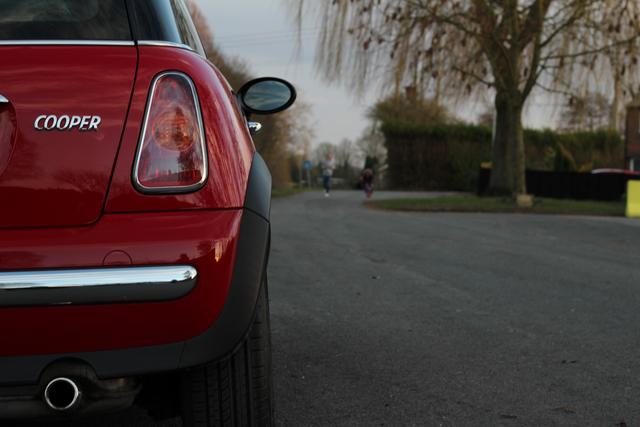
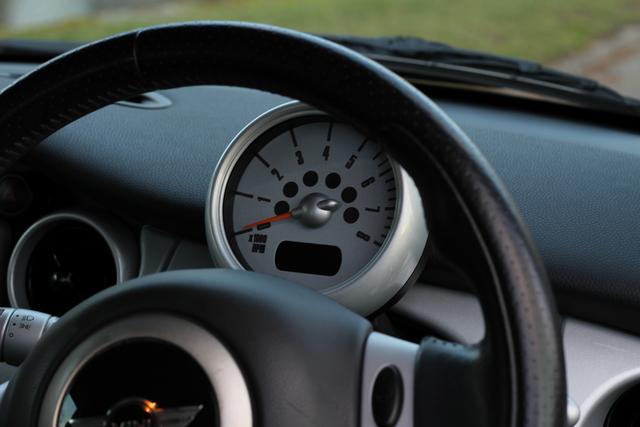
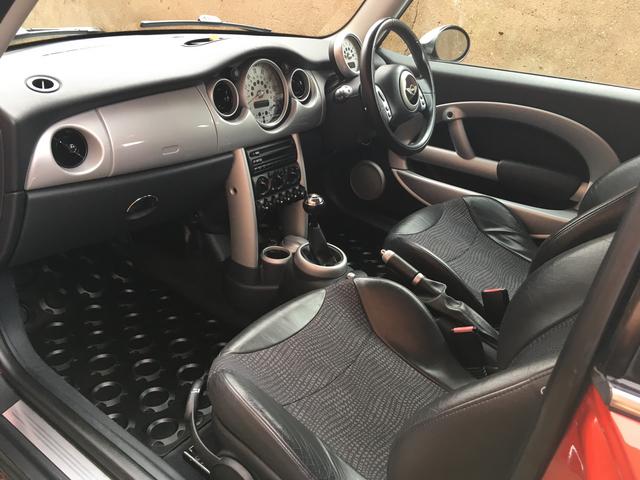
After a few little jobs we managed to take some nice pictures; focusing on the clever design which was ultra modern and forward thinking at the time; still standing the test of time very well and looking almost retro in an early 2000's kind of way!

More updates soon!
One of the first things I noticed when driving the MINI was the steering wasn't as slick and smooth as it should have been. When low speed manoeuvring it was particularly noticeable with a distinct creaking and notchy steering action. As a 21st century MINI rookie, I turned to the internet! After sifting through numerous complaints of power steering noises and issues; which I was certain wasn't the case, I came across this article which was very helpful.
http://minicooper.wikia.com/wiki/Steering_Column_B...
I removed the steering column plastics to reveal the bearing in question which I lathered in grease!
I then brought out my latest detailing gizmo!
Behold the Sidekick Blaster, all the way from America land!
It's like an air blower you'd attach to a compressed air line but runs off the mains. Its extremely handy for displacing water in grilles, door shuts and wheels arches etc. It's also brilliant for displacing dust from air vents, door pockets or in the case in between plastics!
I used the sidekick to blast any debris from the rotary coupler which can also make the steering action feel notchy. I then sprayed some silicone spray to ensure frictionless action!
I greased the lower column bearing too as a matter of 'while I'm here'. I discovered the gator was misfitted which shows signs that someone may have tried to remedy the creaking steering in the past! Fitting this gator correctly also cured engine noise in the cabin; which sounded as if you was sat in the cabin of a mid engined car..!
Next on the list to remedy was a stiff gearshift!
From experience I went for the ball/ socket on the gearstick as a first port of call.
After cleaning, blasting and greasing it looked much better and the shift action was much improved!
I was going to spray some spray grease on the selectors on top of the gearbox too but as battery removal was necessary I will save that for when I service it!
I also noticed a brake light bulb was out which was promptly replaced and while the lamps were removed I was sure to clean in and around the area!
The little jobs all add up!
There are a fair few to do in the future. The drivers door check strap is buggered, central locking doesn't work on either doors, missing and or damaged trims etc a couple of intermittent warning lamps and rattles! The cars also in need of a good service too!
So enough to keep me busy then (as well as other projects)! However as this is a daily and my girlfriends at that; so this is taking priority at this point!
After a few little jobs we managed to take some nice pictures; focusing on the clever design which was ultra modern and forward thinking at the time; still standing the test of time very well and looking almost retro in an early 2000's kind of way!
More updates soon!
The most recent focus for the MINI was the wheels and arches! I'm in the school of thought that wheels can either make or break the look of a car! The same applies for cleanliness as well as aesthetics! I've seen many 'clean' car where the inner wheels and arches have been totally overlooked and in my opinion it shows a lack of attention to detail!
I think it's as important to have clean wheels and arches on a daily as it is a show piece as it not only looks a cut above the rest but is preventative protection from the nasty elements!
With that in mind I started with a basic service wash! A bonus of this wash is I got to use a new AutoGlym product. The so called 'instadry' hybrid microfibre cloth! I was very impressed at it's ability to leave a streak free finish with minimal effort.
Below are a few examples!
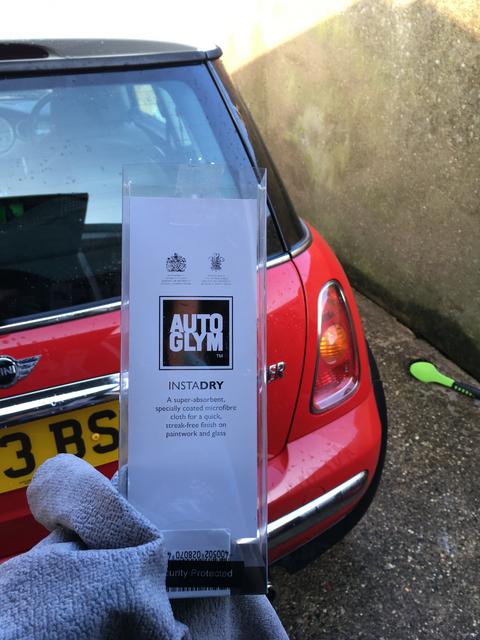
I would highly recommend one if you are in the market! I finished the drying off with my Sidekick blaster previously mentioned!
It was the first time I had removed the wheels and I'm always interested to see as it gives you a great insight into your cars previous life. Despite the sole purpose today being just to clean, I'm always taking note of what I find!
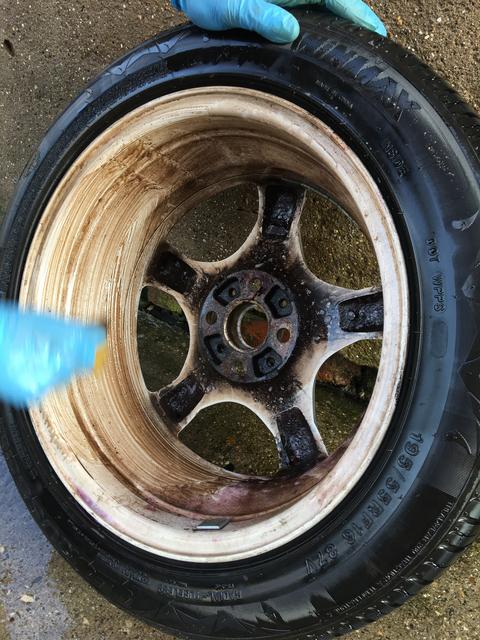
Here are some before pictures!
Post wash!
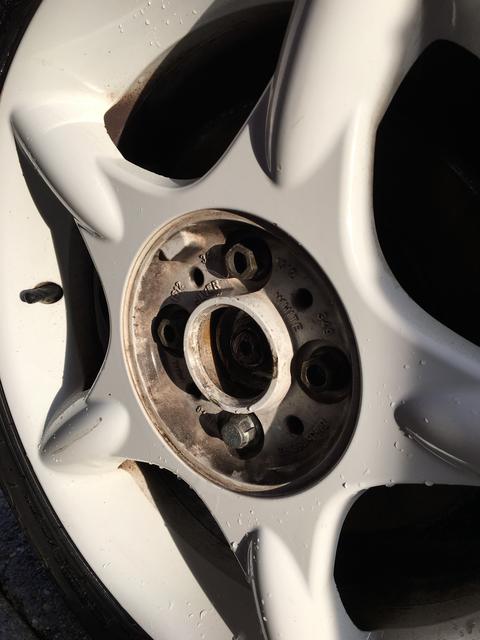
Locking wheel nut present and bolts are in good condition! Always a plus!
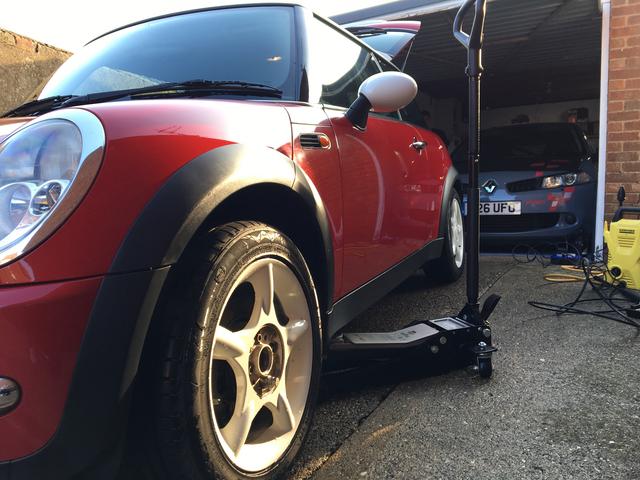
Jacking up!
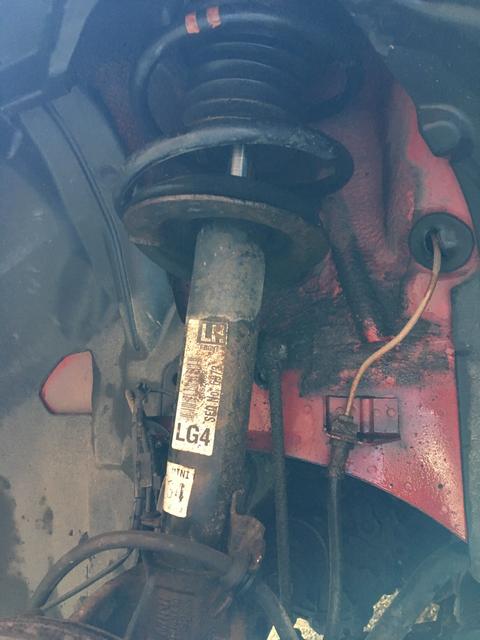
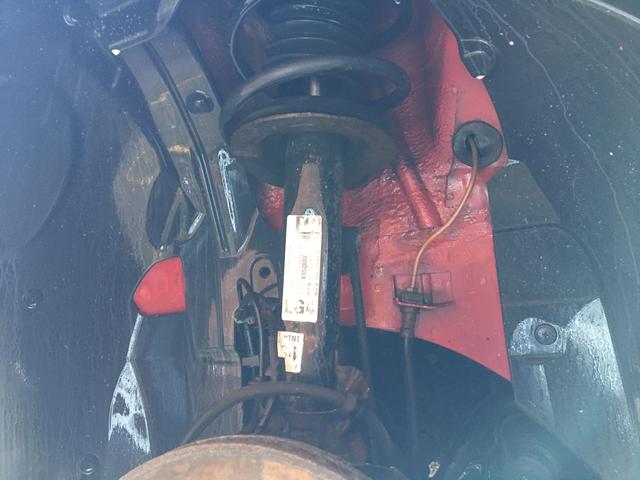
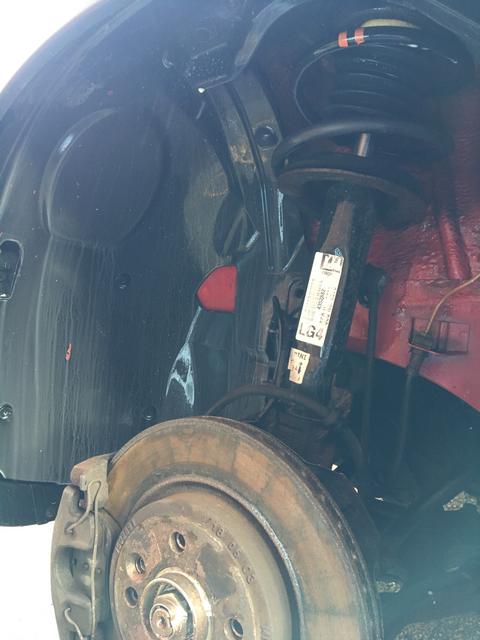
The suspension components while dirty look pretty corrosion free as does the visible bodywork! Do note the replacement brake pipe, this is the only brake pipe to have been replaced on the car.
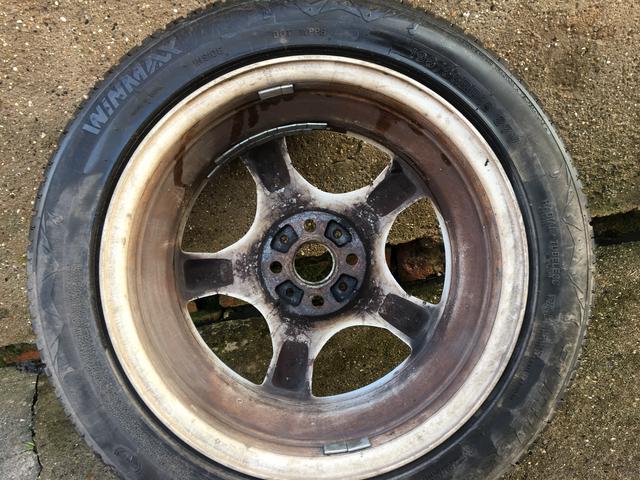
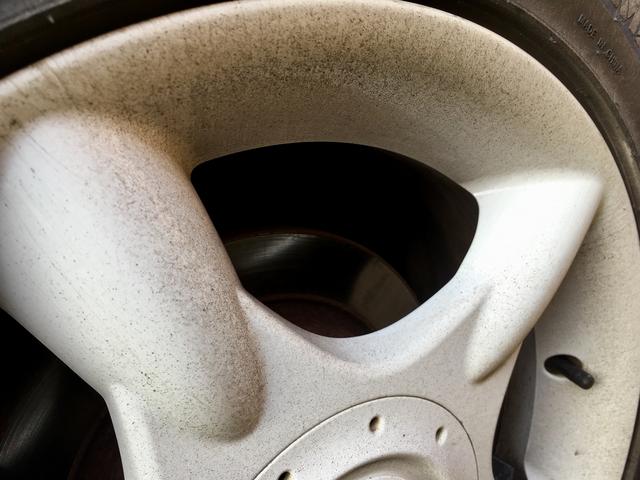
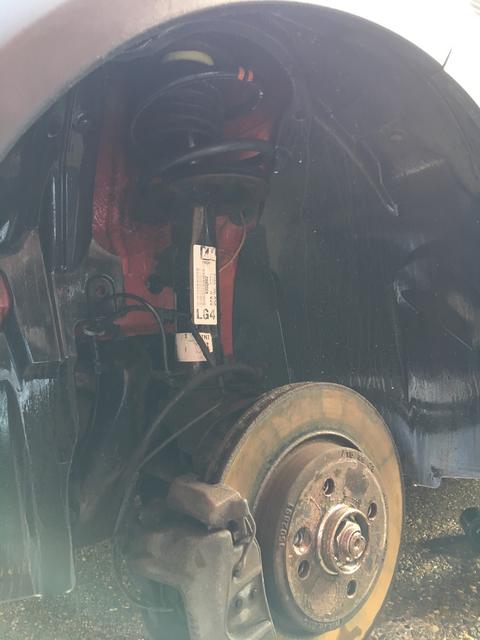
The wheels off; revealing years of baked on brake dust!
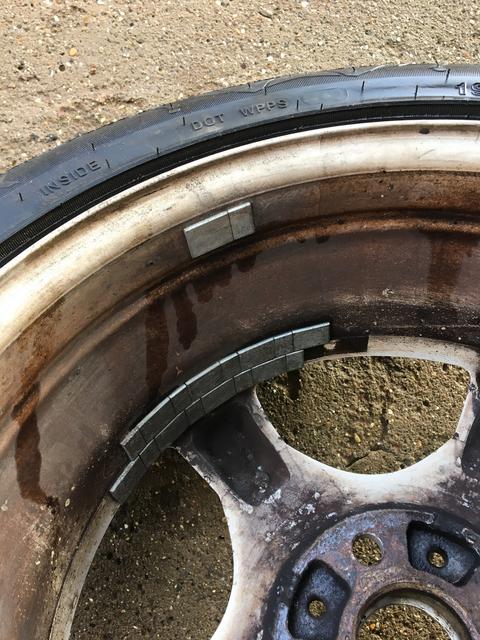
I noticed the disgusting amount of balance weights. I imagine it's been to a budget tyre garage! Fitted to the wheels just before purchase unfortunately are a set of new 'Wingmax' Runflats. That will be sorted in time!
Present in the arches was lots and lots of tar!
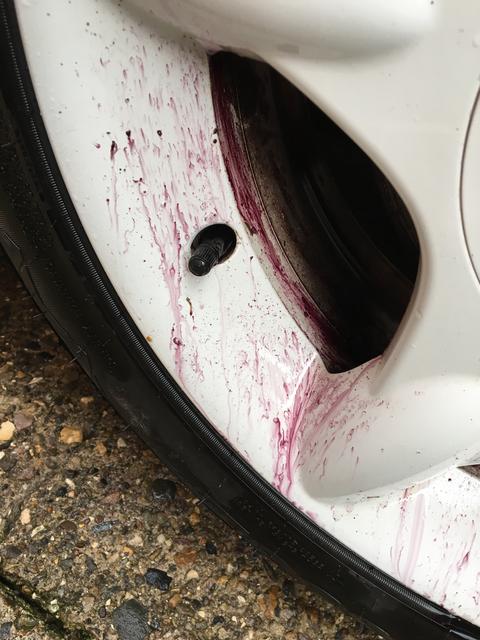
So for the wheels I pre washed with soap which while is terrible for paintwork; is great for cutting brake dust! Once washed I used a mildly abrasive wheel cleaning pad and some trust AutoGlym Magma! Here are some images during!
Scrubbing away at the brake dust.
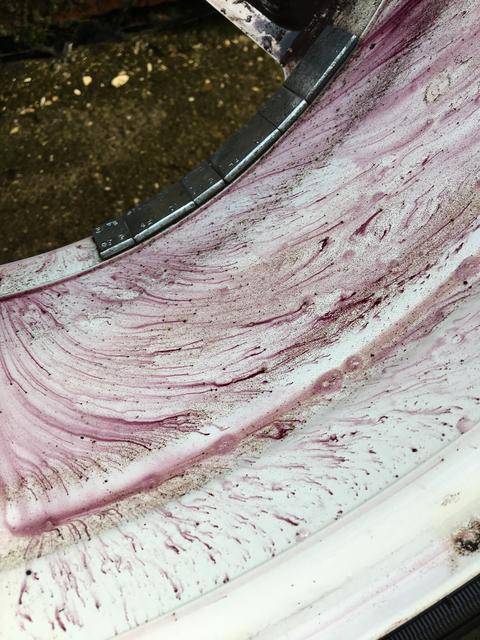
Then let the Magma cut years of fallout and iron!
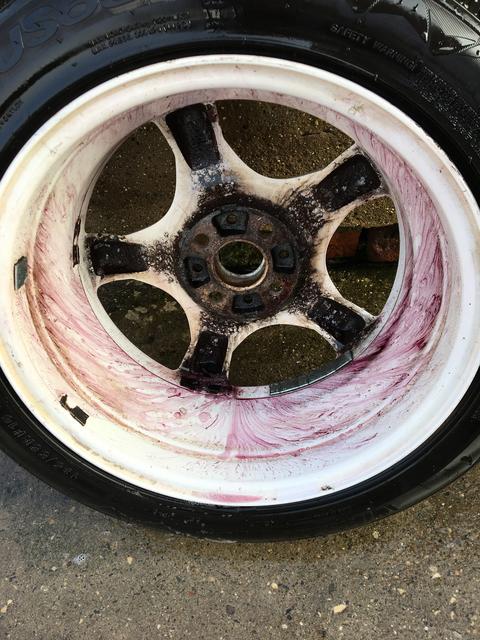
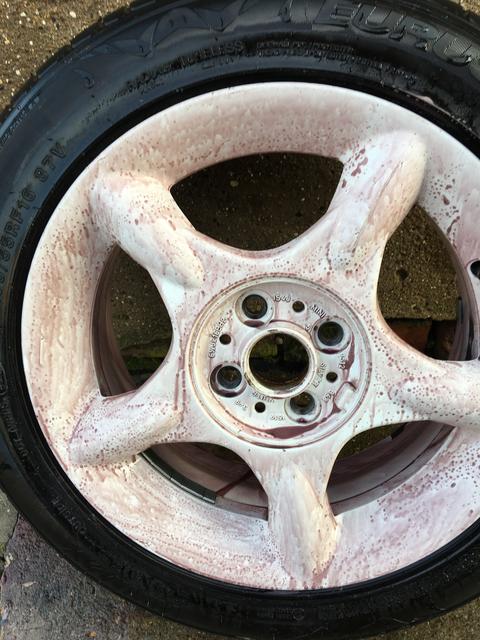
Agitating the Magma with a high tec wheel brush!
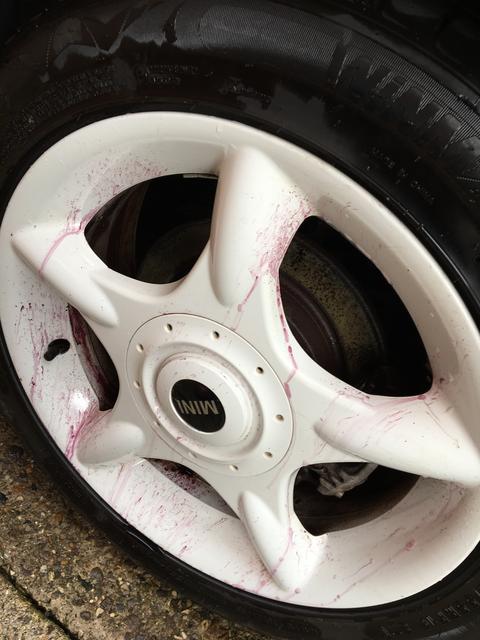
So after a couple of rounds and some elbow grease here are some results!
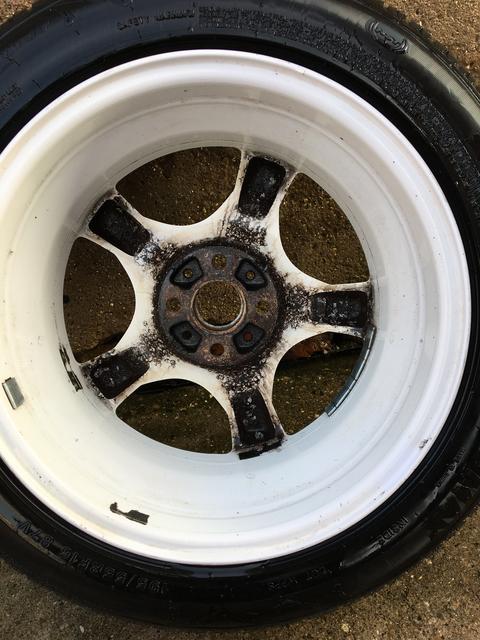
90% better than before! At first I was mildly impressed with the result but looking at the before pictures and considering how little love these have ever had; it's satisfying to know that the first attempt went so well! I will give them another go and I imagine I can get them 95% better eventually!
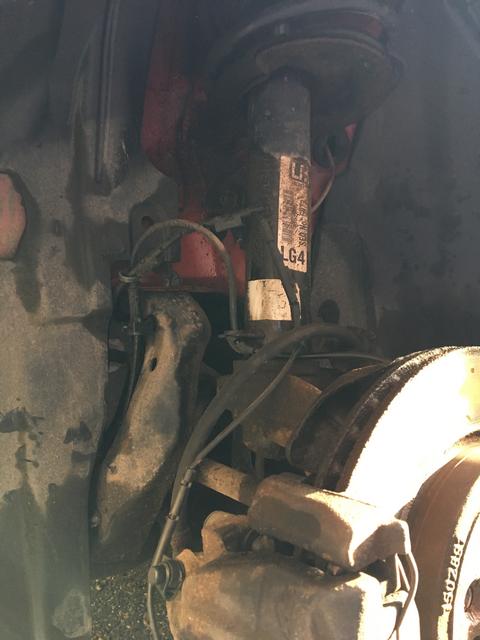
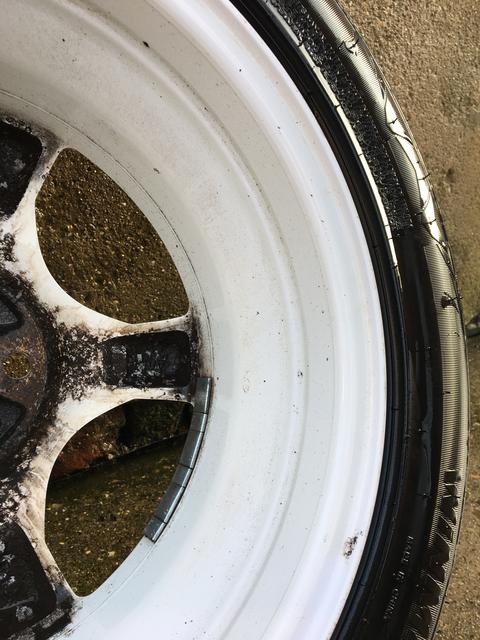
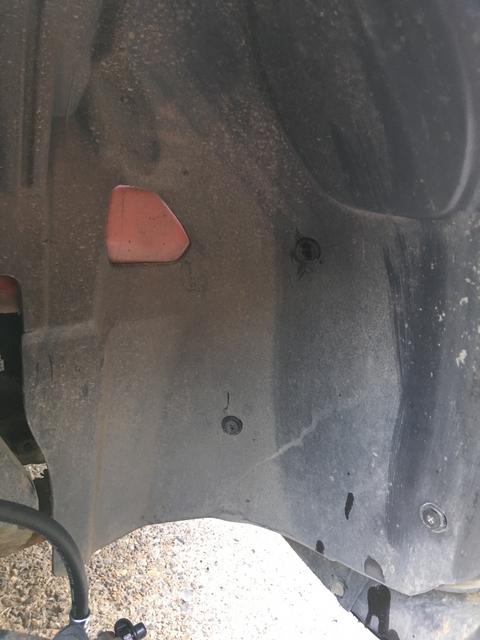
As for the arches I used lots of AutoGlym tar remover and a high tec wheel brush to agitate! I was sure to pressure was all in the callipers which is always satisfying! The brakes could do with a strip and clean, possibly some new discs! Also there is an intermittent fault with the brake pad warning light so I suspect, as the pads are plentiful, that there is an issue with the fragile pad warning wire. Also noted were missing arch liner clips. Suspension components were looking great and in fine fettle! Mechanicals will be covered in a later post!
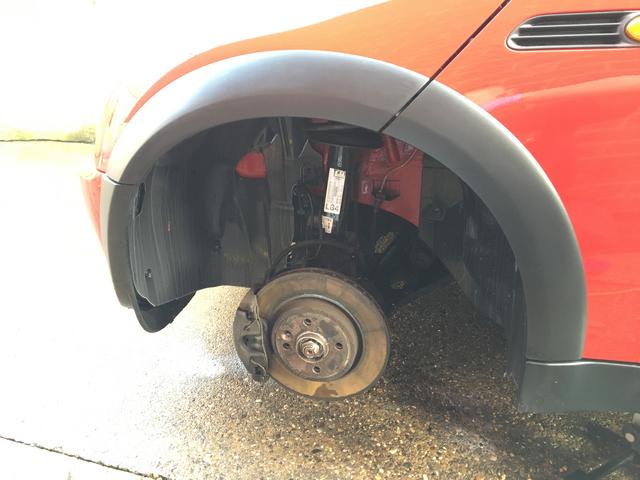
Focusing on the front N/S arch, the rest provided similar results! As can be seen the tar has been greatly reduced! It could do with the liners removing, clips replacing and a clay and another go to make perfect! Then I could also get to the bodywork hidden behind the plastics! One has to start somewhere though so for a few hours progress I feel satisfied!
With the wheels on and tourqed up, there was just enough time to fit a little present I'd got for the MINI. *ahem* I mean my girlfriend.
If you're not asleep by now; more updates will be on their way!
Danny.
I think it's as important to have clean wheels and arches on a daily as it is a show piece as it not only looks a cut above the rest but is preventative protection from the nasty elements!
With that in mind I started with a basic service wash! A bonus of this wash is I got to use a new AutoGlym product. The so called 'instadry' hybrid microfibre cloth! I was very impressed at it's ability to leave a streak free finish with minimal effort.
Below are a few examples!
I would highly recommend one if you are in the market! I finished the drying off with my Sidekick blaster previously mentioned!
It was the first time I had removed the wheels and I'm always interested to see as it gives you a great insight into your cars previous life. Despite the sole purpose today being just to clean, I'm always taking note of what I find!
Here are some before pictures!
Post wash!
Locking wheel nut present and bolts are in good condition! Always a plus!
Jacking up!
The suspension components while dirty look pretty corrosion free as does the visible bodywork! Do note the replacement brake pipe, this is the only brake pipe to have been replaced on the car.
The wheels off; revealing years of baked on brake dust!
I noticed the disgusting amount of balance weights. I imagine it's been to a budget tyre garage! Fitted to the wheels just before purchase unfortunately are a set of new 'Wingmax' Runflats. That will be sorted in time!
Present in the arches was lots and lots of tar!
So for the wheels I pre washed with soap which while is terrible for paintwork; is great for cutting brake dust! Once washed I used a mildly abrasive wheel cleaning pad and some trust AutoGlym Magma! Here are some images during!
Scrubbing away at the brake dust.
Then let the Magma cut years of fallout and iron!
Agitating the Magma with a high tec wheel brush!
So after a couple of rounds and some elbow grease here are some results!
90% better than before! At first I was mildly impressed with the result but looking at the before pictures and considering how little love these have ever had; it's satisfying to know that the first attempt went so well! I will give them another go and I imagine I can get them 95% better eventually!
As for the arches I used lots of AutoGlym tar remover and a high tec wheel brush to agitate! I was sure to pressure was all in the callipers which is always satisfying! The brakes could do with a strip and clean, possibly some new discs! Also there is an intermittent fault with the brake pad warning light so I suspect, as the pads are plentiful, that there is an issue with the fragile pad warning wire. Also noted were missing arch liner clips. Suspension components were looking great and in fine fettle! Mechanicals will be covered in a later post!
Focusing on the front N/S arch, the rest provided similar results! As can be seen the tar has been greatly reduced! It could do with the liners removing, clips replacing and a clay and another go to make perfect! Then I could also get to the bodywork hidden behind the plastics! One has to start somewhere though so for a few hours progress I feel satisfied!
With the wheels on and tourqed up, there was just enough time to fit a little present I'd got for the MINI. *ahem* I mean my girlfriend.
If you're not asleep by now; more updates will be on their way!
Danny.
Mr Tidy said:
They're great cars - nice to see one getting so much love. 
And although they're much bigger than a classic Mini, at least the 1st two generations look right - the next one just doesn't!
Mrs Tidy had a new R50 One in 2003, then replaced it with a new Red R56 Cooper in 2006 which she still has.
3 years ago I found an 06 plate Cooper (also Red) for my sister - no wonder she never got on with the OH!
I'm in the same school of thought Mr Tidy. To say a lot of money was spent on research and development is an understatement. This was the most important release of the new Millennium; something not many other cars will ever be able to boast! Not perfect but a brilliant little car and mega futuristic in design and thesis at the time. Somehow slipped under the radar currently but I believe the R50 is a sure fire modern classic! R56 built upon that success and was the first 'true' BMW MINI product. Disappointing the supercharger was binned in the 'S' but from thereon downhill with all the SUV ugly giants currently on offer! And although they're much bigger than a classic Mini, at least the 1st two generations look right - the next one just doesn't!
Mrs Tidy had a new R50 One in 2003, then replaced it with a new Red R56 Cooper in 2006 which she still has.
3 years ago I found an 06 plate Cooper (also Red) for my sister - no wonder she never got on with the OH!
Danny.
Court_S said:
I’m a massive fan of the early BMW MINI’s (had a Cooper, then an S and then a One when I changed jobs and needed to save some cash). I think they’ve aged well and are very pretty with lovely proportions. Whilst I loved m Cooper S, it did seem to spend a lot of time back at the dealers (new clutch, steering rack, track rods and alarm / immobiliser). The supercharger noise was very addictive and the whine from the steering very distinctive.
I never really ‘got’ the R56. They didn’t appeal to me at the time, but the S does look pretty good now. My other half has a current F56 Cooper and I quite like it. The interior is better than the older ones, as is the little three cylinder engine. I really don’t like the steering though; it doesn’t really feedback anything. The Cooper is better looking than the S (in my view).
Your MINI looks great and it’s nice to see one getting some love. I guess at their age they’re on the verge of falling into shed / neglected territory. Chilli red is a great colour (my Cooper was red with white wheels and roof).
Historically I've always been a classic Mini man and still truly am. Because of this fact I was put off the R50 MINI. It was pure chance really that we ended up with this. I was wrong to pre judge as while the Chrysler engine is slightly disappointing and characterless and the steering lacks a little feedback; the overall package is impressive and timeless. Time has been kind to the design and is now looking decidedly retro. A friend of mine has a Cooper S, all be a convertible and that was great fun, as you say the noises very distinctive! I never really ‘got’ the R56. They didn’t appeal to me at the time, but the S does look pretty good now. My other half has a current F56 Cooper and I quite like it. The interior is better than the older ones, as is the little three cylinder engine. I really don’t like the steering though; it doesn’t really feedback anything. The Cooper is better looking than the S (in my view).
Your MINI looks great and it’s nice to see one getting some love. I guess at their age they’re on the verge of falling into shed / neglected territory. Chilli red is a great colour (my Cooper was red with white wheels and roof).
The R56 is much more uniform BMW than the first gen; there are some needed improvements and some less so! The F56 is great but no drivers car sadly. I'd agree and say because the F56 already looks fairly bulbous, the Cooper S kit looks a bit overkill!
The R50 has already fallen into shed territory and while not at risk of extinction and never will be; good examples will unfortunately become more rare and inevitably expensive! Thanks for your comments!
Andy665 said:
Great work - I follow a similar process on my purchases really enjoy it
Hood looking car - so much prettier than the current Mini
I like to make a car feel like my own; little details are essential to me!Hood looking car - so much prettier than the current Mini
Yes; the design has aged much better than anyone at the time expected and true petrolheads have finally come to appreciate these!
So, progress comes in all forms. Good and bad!
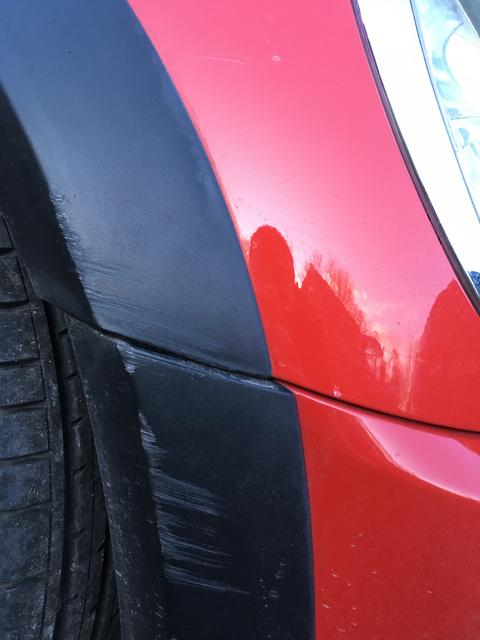
We'll start with the bad; while doing a tricky manoeuvre my girlfriend managed to catch a wall. Unlike some drivers, this isn't usual practice, in fact its a first! Luckily it's on the plastic which is all removable and the front bumper has previous damage anyway! A new bumper and all associated trims will be sourced and replaced in time!
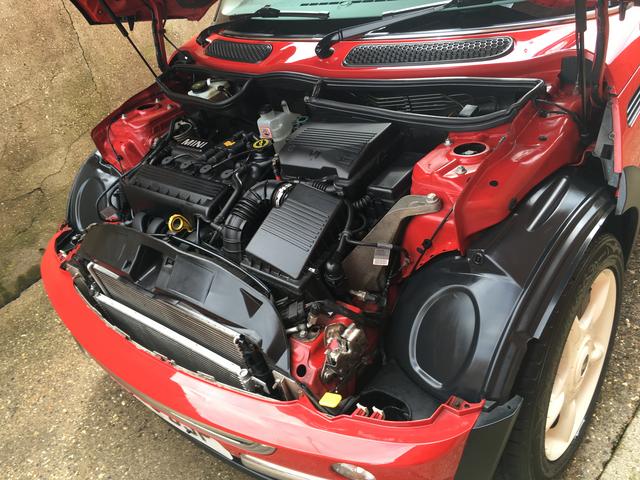
Moving swiftly on, I gave the MINI a quick oil change however I couldn't get the filter off at the risk of rounding the head off the filter top or even worse breaking the nut off of the cast casing. Nasty! This is a common thing as access without the correct tool is limited; wether it has been over tightened in the past or the metals have reacted and seized it's unclear; however as I'd already dropped the oil before discovering the filter top was stuck, I had to refill with the old filter for now! I have a slim socket on order which should make the job much easier and next time I drop the oil; there is no question I'll be doing the filter!
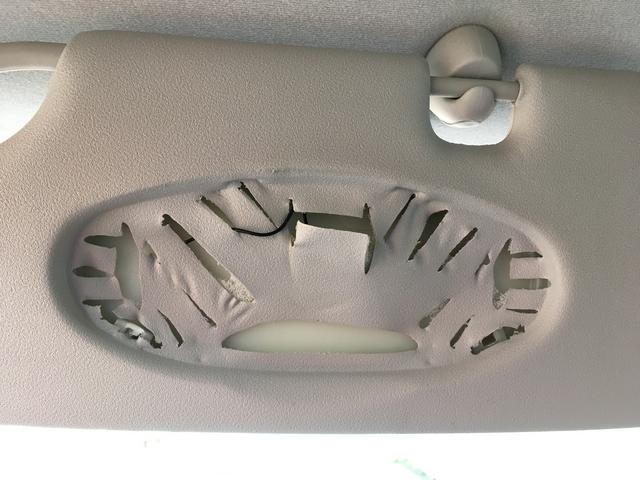
Next on the down side; I tried to replace a bulb in the vanity mirror.. the switch wasn't great too, on lifting the flap the lights didn't always stay illuminated which is apparently a common issue. I did my research and was confident I could remove the electronics from the sun visor. With a gentle prise the mirror smashed and I may have swore although I don't recall..! So another part to add to the list!
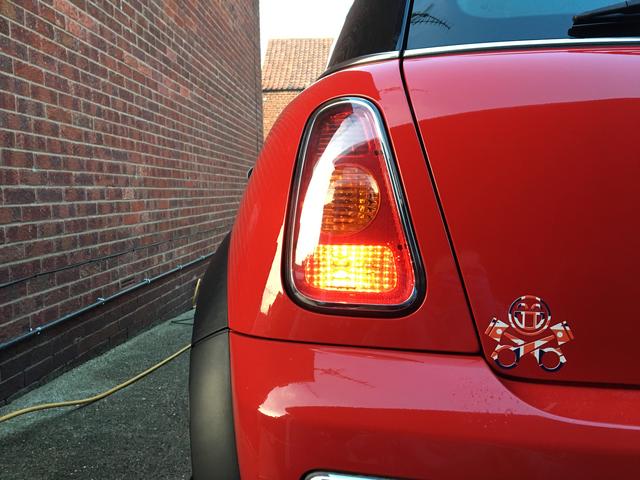
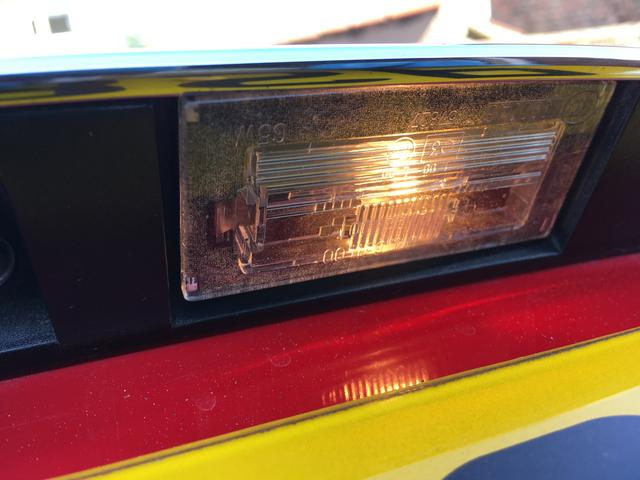
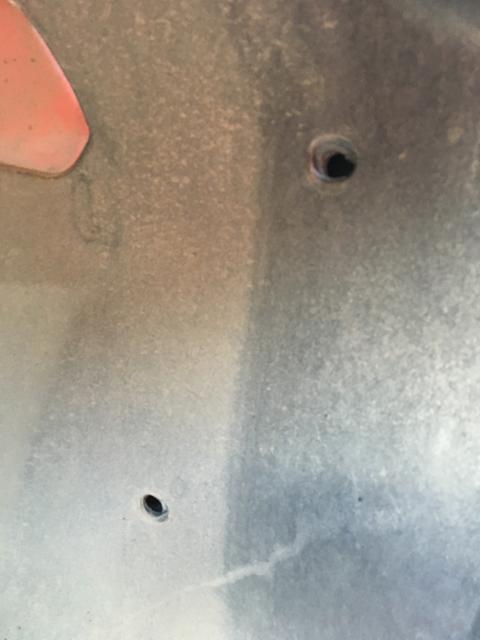
Finally on my list of moans, there was a numberplate light bulb cap missing! Un able to source one second hand I ordered a new genuine one.
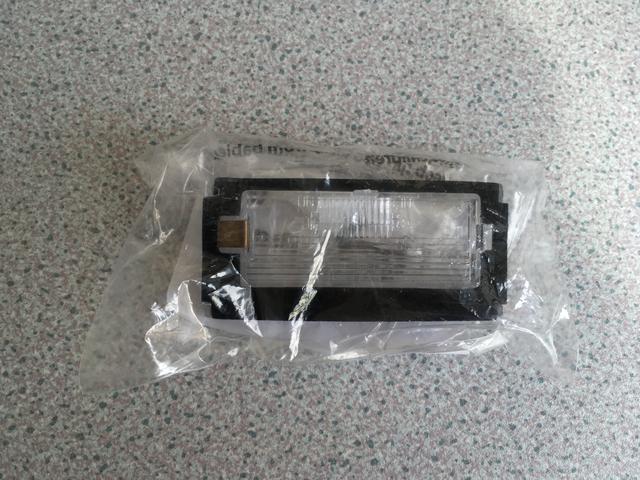
When it came I had terrible trouble getting it to fit and had to bend the metal clip to get the cap to stay put! Turn the clock forward a couple of days and I noticed the cap from the other side had gone walkies..! Annoying you may think; but even more infuriating was a day later the genuine cap I had bought had also gone missing! So the car now has no lamp protectors on the number plate bulbs. Now, I've fit hundreds of bulbs over time and never has this happened.. Can anyone shine a light (no pun intended!) on this; are the caps a bad design or is this an issue exclusive to our MINI?!
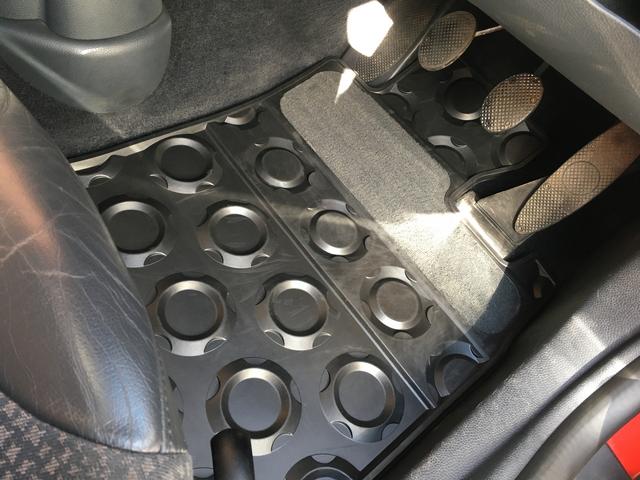
So finally on the brighter side of things.. Progress has overtaken mishaps I can assure you! We managed to source some genuine mats; always a bonus!

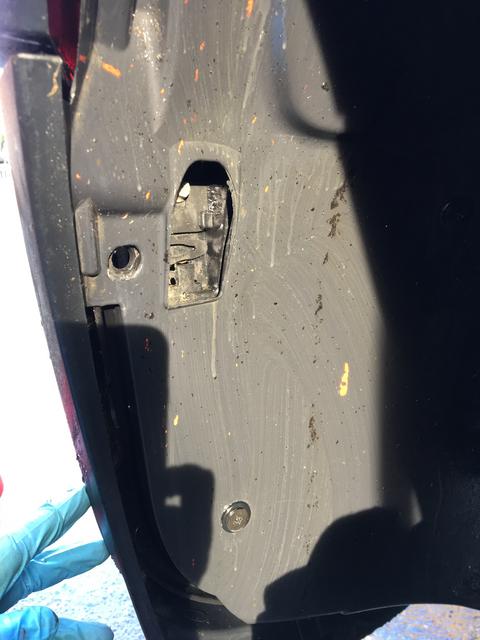
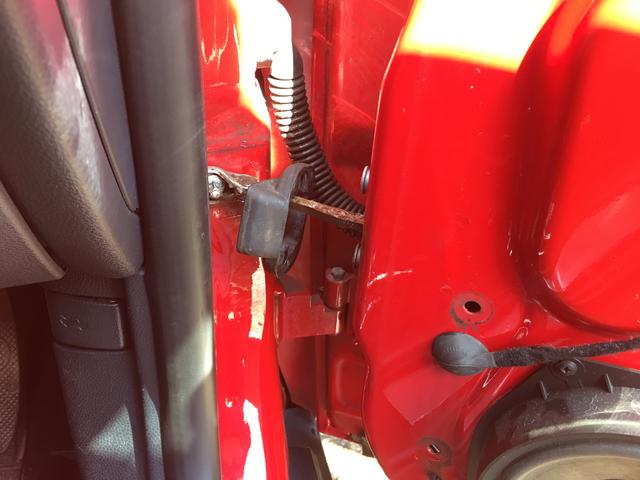
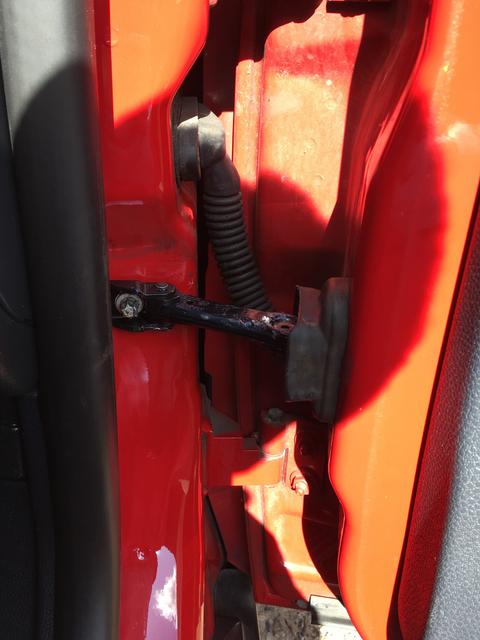
I finally managed to sort the clicky check strap on the drivers door; something that makes a car feel aged like you wouldn't believe! Ordered a genuine part which is now nylon instead of metal! The passenger door already has a recent replacement on; however it's funny the passenger side failed before the drivers?! To remove it required removal of the door card, which couldn't be any simpler! Once the door card is off you are greeted with a very simple inner door!
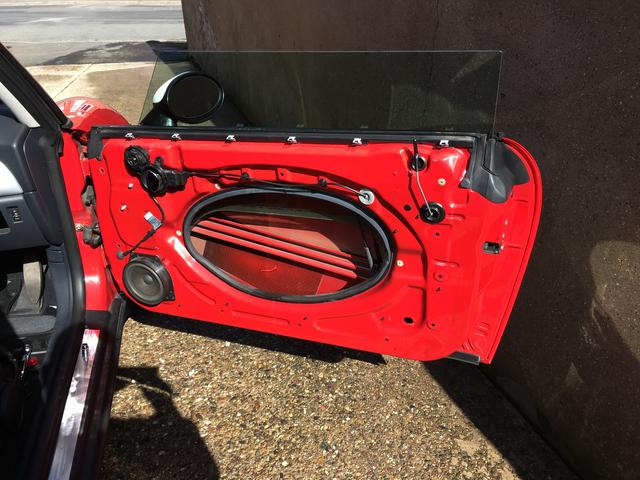
After a quick wipe down behind the door card, simply remove one bolt on the A pillar and two on the door and feed the check strap through the door!
Comparison below!
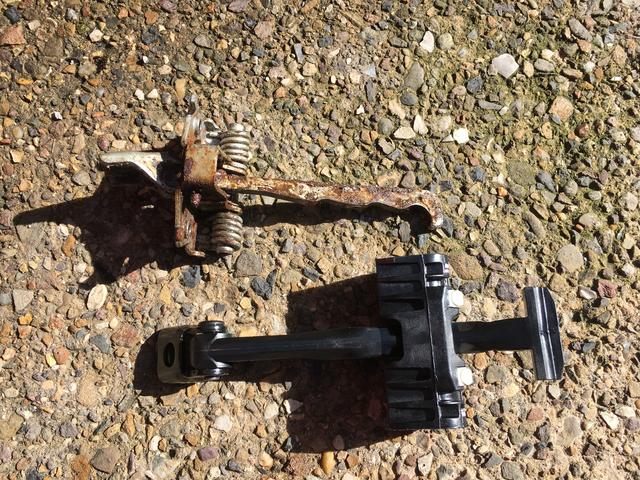
Replacement couldn't be easier simply feed the new item back through and bolt it back on! Replace the door card and grease the new strap and your car instantly feels much less broken!
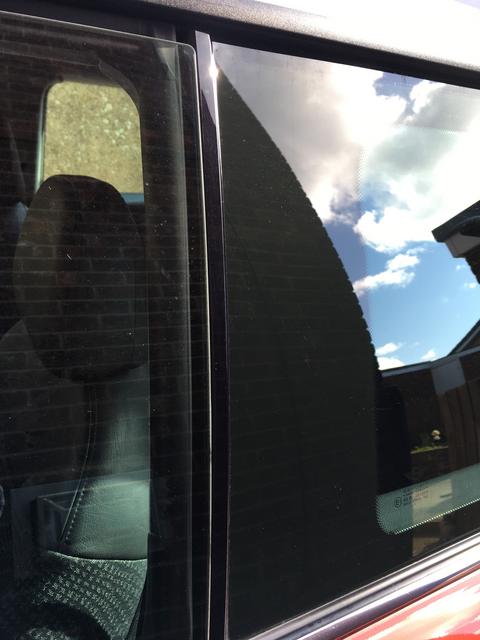
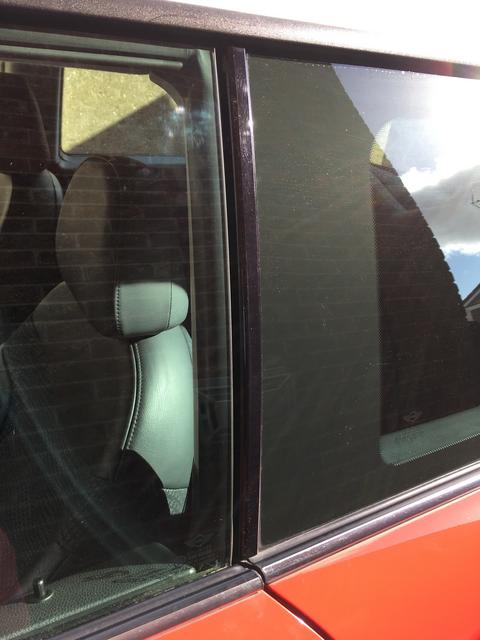
My other half duly noted the passenger window caught on the bodywork when opening the door! My first thoughts were that the door had dropped which can be common if leaned on or blown in the wind etc! On further inspection though I realised that in fact the window was just poorly adjusted! Being a frameless door; window adjustment is critical to stop water ingress and other issues! Looking through the history I realised the passenger window regulator has been recently replaced (alongside the check strap funnily enough). Removing the passenger door card I could see the mechanism clearly thanks to the door design (praised also above). To adjust the window glass is supposed to require a special tool. Alternatively you can drop the window enough to access the bottom of the glass and simply get a 5mm Alan key and undo the grips very slightly so you can adjust the glass and hold its position when you let go. I straightened the glass up and closed the door to confirm all was good.. Take a look for yourselves!
Next on the list was a blocked rear wash/ wipe another common issue! Quite a few common issues really! (they all do that sir)! I simply ran a small drill bit down the hole and out came a black stream of rubbish then just like magic it's fixed!
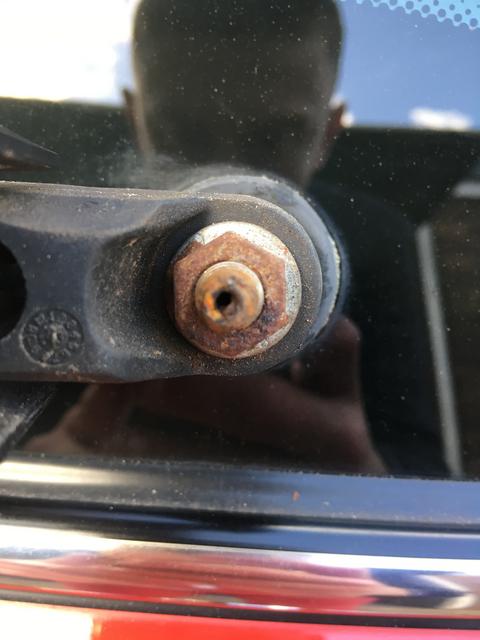

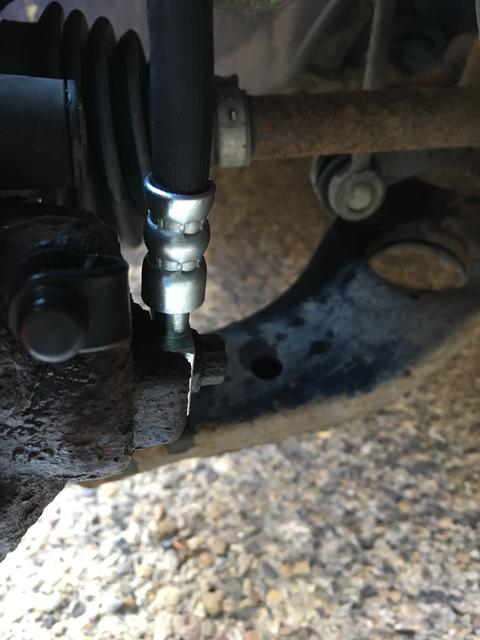
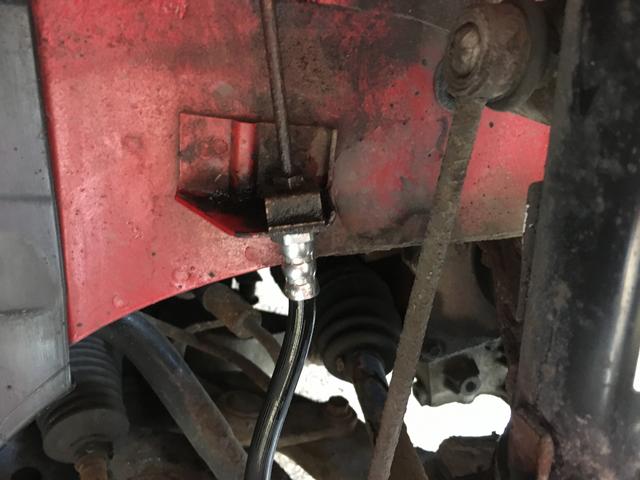
When I had the wheel off, I noticed the brake pipe on the offside was very questionable; take a look!
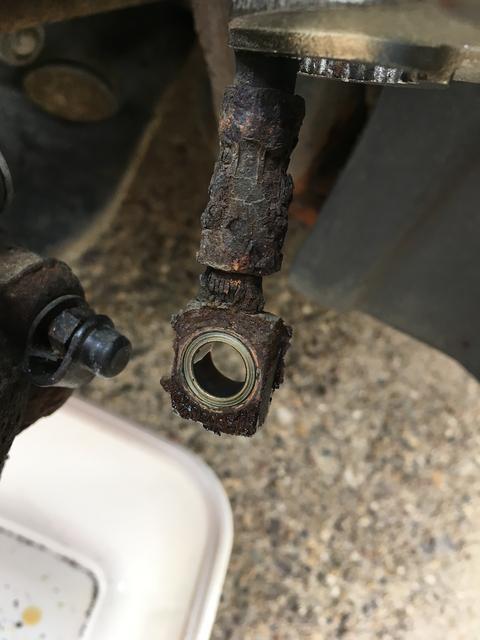
With that I bet you can guess where this is going.. yes I replaced it with a shiny new part! Again the passenger side flexi had already been replaced (bit of a theme here) so no worries there!
Finally; I replaced those little arch liner clips that were missing. It's sometimes the little things!
So; as stated at the start, progress comes in many flavours. Such is life! The MINI is starting to feel much better but improvements will continue and hopefully this time with less setbacks!
Next post.. Machine polishing!
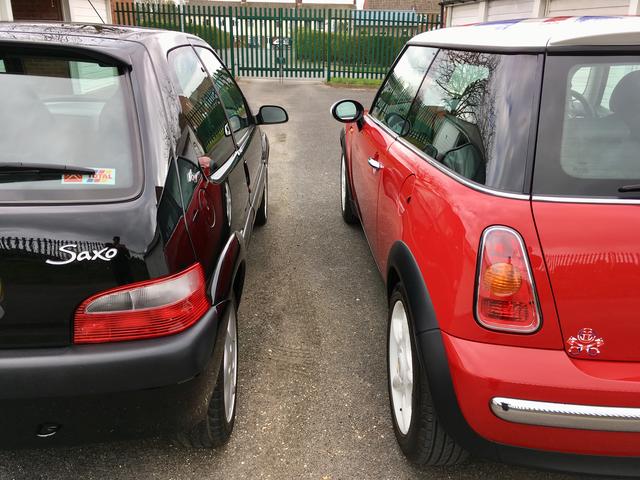
Same age, different generation!
Danny.
We'll start with the bad; while doing a tricky manoeuvre my girlfriend managed to catch a wall. Unlike some drivers, this isn't usual practice, in fact its a first! Luckily it's on the plastic which is all removable and the front bumper has previous damage anyway! A new bumper and all associated trims will be sourced and replaced in time!
Moving swiftly on, I gave the MINI a quick oil change however I couldn't get the filter off at the risk of rounding the head off the filter top or even worse breaking the nut off of the cast casing. Nasty! This is a common thing as access without the correct tool is limited; wether it has been over tightened in the past or the metals have reacted and seized it's unclear; however as I'd already dropped the oil before discovering the filter top was stuck, I had to refill with the old filter for now! I have a slim socket on order which should make the job much easier and next time I drop the oil; there is no question I'll be doing the filter!
Next on the down side; I tried to replace a bulb in the vanity mirror.. the switch wasn't great too, on lifting the flap the lights didn't always stay illuminated which is apparently a common issue. I did my research and was confident I could remove the electronics from the sun visor. With a gentle prise the mirror smashed and I may have swore although I don't recall..! So another part to add to the list!
Finally on my list of moans, there was a numberplate light bulb cap missing! Un able to source one second hand I ordered a new genuine one.
When it came I had terrible trouble getting it to fit and had to bend the metal clip to get the cap to stay put! Turn the clock forward a couple of days and I noticed the cap from the other side had gone walkies..! Annoying you may think; but even more infuriating was a day later the genuine cap I had bought had also gone missing! So the car now has no lamp protectors on the number plate bulbs. Now, I've fit hundreds of bulbs over time and never has this happened.. Can anyone shine a light (no pun intended!) on this; are the caps a bad design or is this an issue exclusive to our MINI?!
So finally on the brighter side of things.. Progress has overtaken mishaps I can assure you! We managed to source some genuine mats; always a bonus!
I finally managed to sort the clicky check strap on the drivers door; something that makes a car feel aged like you wouldn't believe! Ordered a genuine part which is now nylon instead of metal! The passenger door already has a recent replacement on; however it's funny the passenger side failed before the drivers?! To remove it required removal of the door card, which couldn't be any simpler! Once the door card is off you are greeted with a very simple inner door!
After a quick wipe down behind the door card, simply remove one bolt on the A pillar and two on the door and feed the check strap through the door!
Comparison below!
Replacement couldn't be easier simply feed the new item back through and bolt it back on! Replace the door card and grease the new strap and your car instantly feels much less broken!
My other half duly noted the passenger window caught on the bodywork when opening the door! My first thoughts were that the door had dropped which can be common if leaned on or blown in the wind etc! On further inspection though I realised that in fact the window was just poorly adjusted! Being a frameless door; window adjustment is critical to stop water ingress and other issues! Looking through the history I realised the passenger window regulator has been recently replaced (alongside the check strap funnily enough). Removing the passenger door card I could see the mechanism clearly thanks to the door design (praised also above). To adjust the window glass is supposed to require a special tool. Alternatively you can drop the window enough to access the bottom of the glass and simply get a 5mm Alan key and undo the grips very slightly so you can adjust the glass and hold its position when you let go. I straightened the glass up and closed the door to confirm all was good.. Take a look for yourselves!
Next on the list was a blocked rear wash/ wipe another common issue! Quite a few common issues really! (they all do that sir)! I simply ran a small drill bit down the hole and out came a black stream of rubbish then just like magic it's fixed!
When I had the wheel off, I noticed the brake pipe on the offside was very questionable; take a look!
With that I bet you can guess where this is going.. yes I replaced it with a shiny new part! Again the passenger side flexi had already been replaced (bit of a theme here) so no worries there!
Finally; I replaced those little arch liner clips that were missing. It's sometimes the little things!
So; as stated at the start, progress comes in many flavours. Such is life! The MINI is starting to feel much better but improvements will continue and hopefully this time with less setbacks!
Next post.. Machine polishing!
Same age, different generation!
Danny.
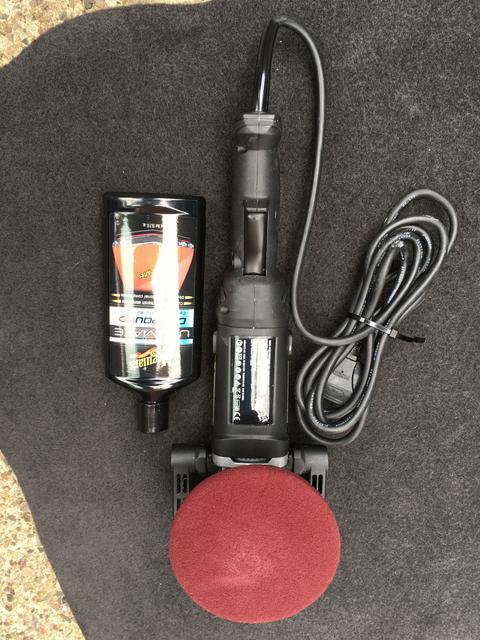
So, the paintwork on the car had annoyed me from day one! A very straight car with no signs of previous repair was one of the points that really sealed the deal when checking the car over for my girlfriend. The very first day we got the car, the car was washed and clayed and the interior was stripped bare however I'd never got round to touching it with the DA polisher.
I am a nut case when it comes to the details and seeing the paintwork glimmer in the light after a wash should be a feeling to behold! Unless of course your paint has swirl marks in. It's usually years of incorrect washing with incorrect products at the hands of people who don't know any better or even worse who didn't care! In the case of this little MINI judging by the good condition of the car I would imagine thankfully that it's the former; the owners didn't know any better than to do anything but keep it clean with a bit of fairy liquid and a household sponge pad.
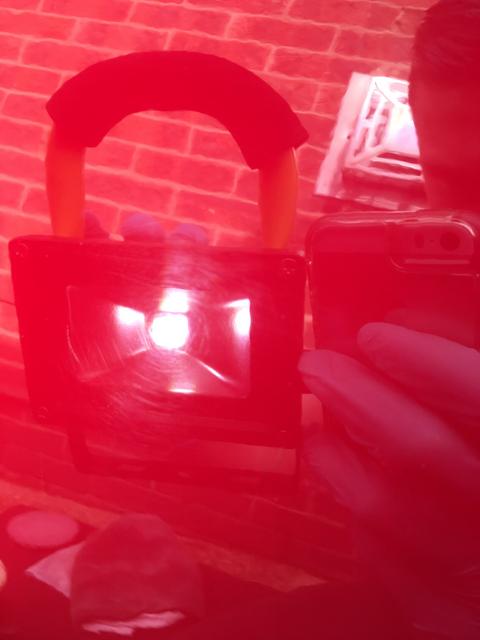
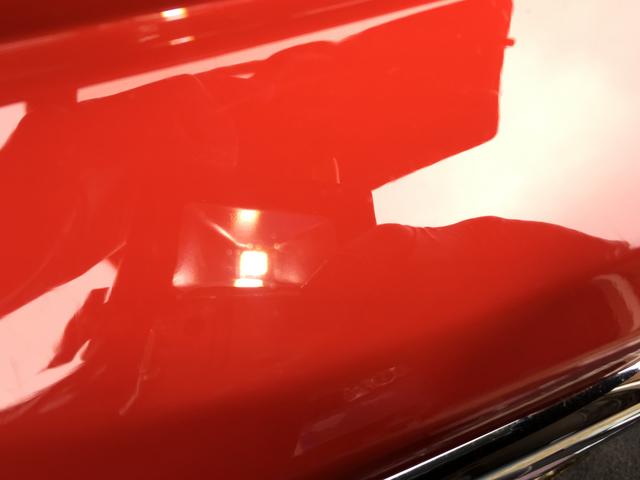
Here is the best shot I could get of the worst points, baring in mind how difficult paintwork can be to photograph!
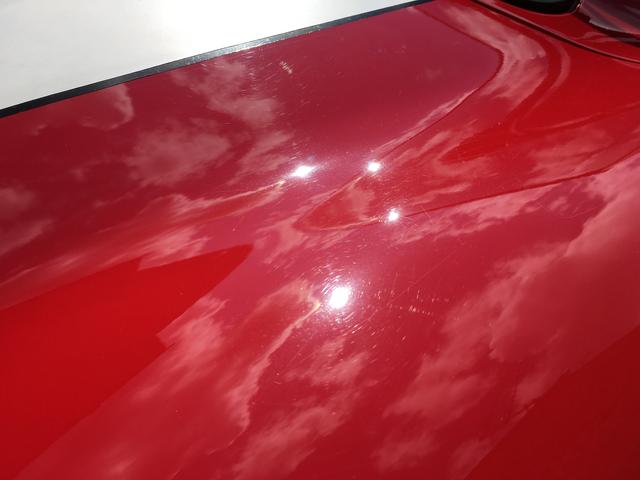
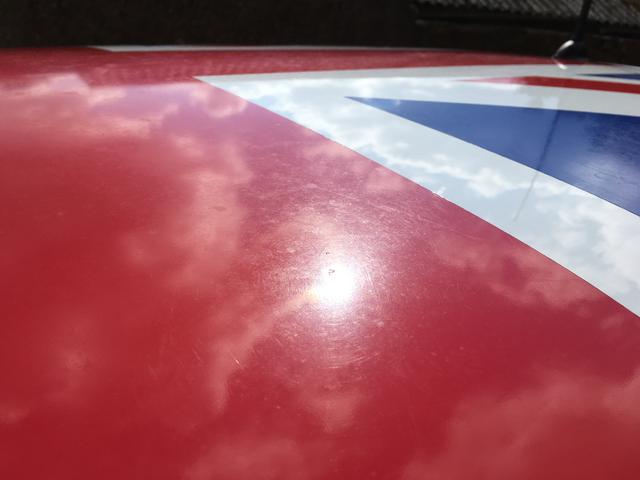
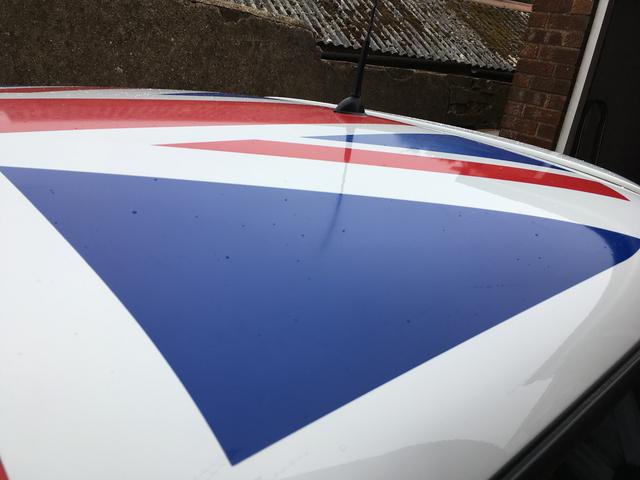
Swirls to the bonnet viewed in the sun.

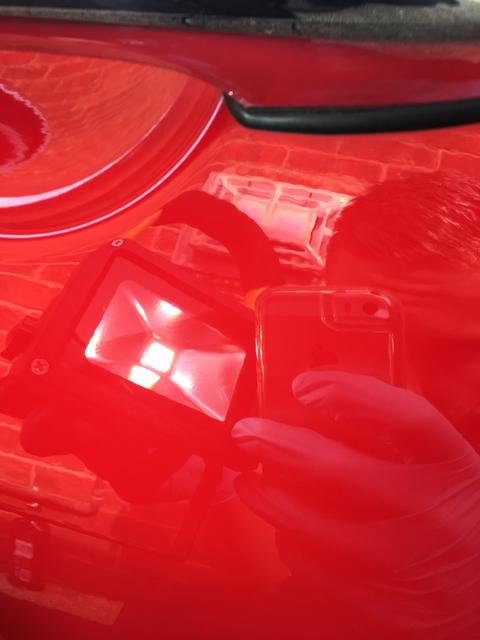
Scuffs to boot lip loading area.
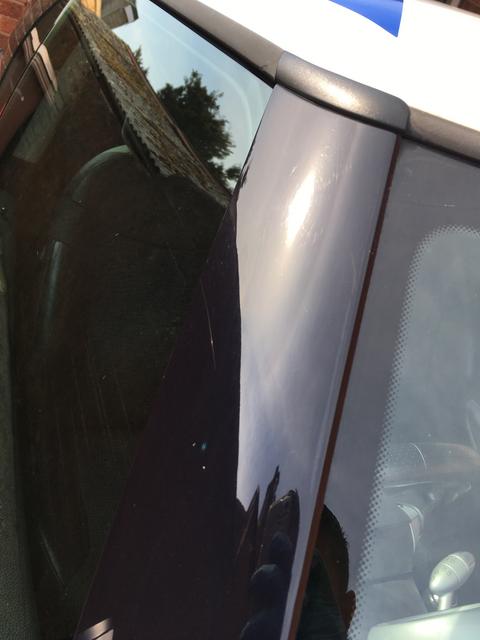
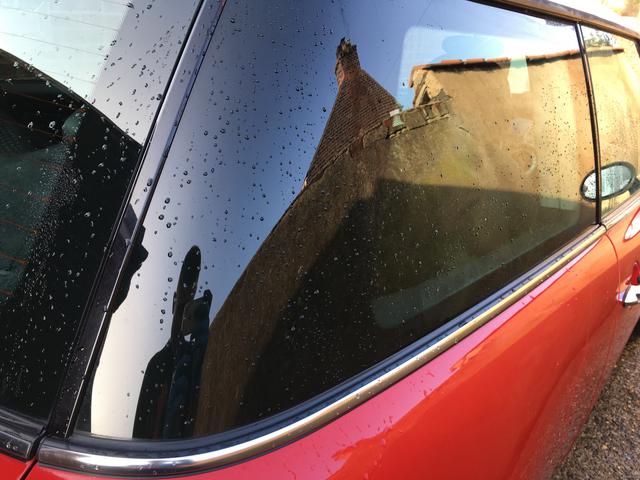
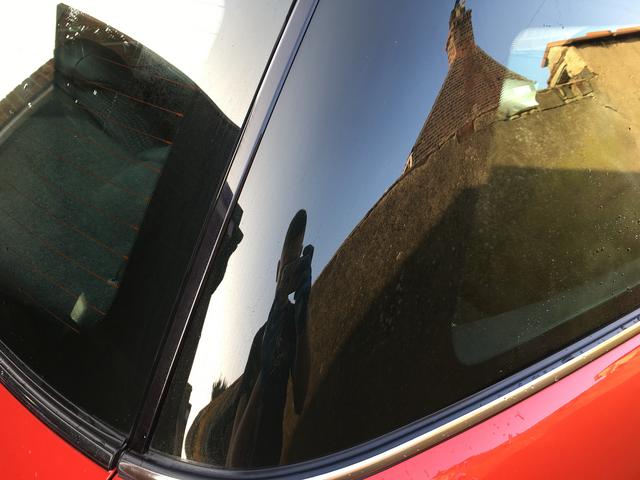
Swirls to A Pillars. (Very visible in person, almost impossible to photograph)!
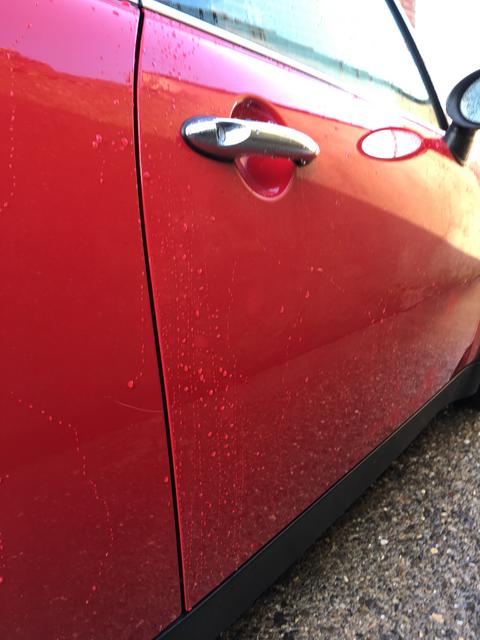
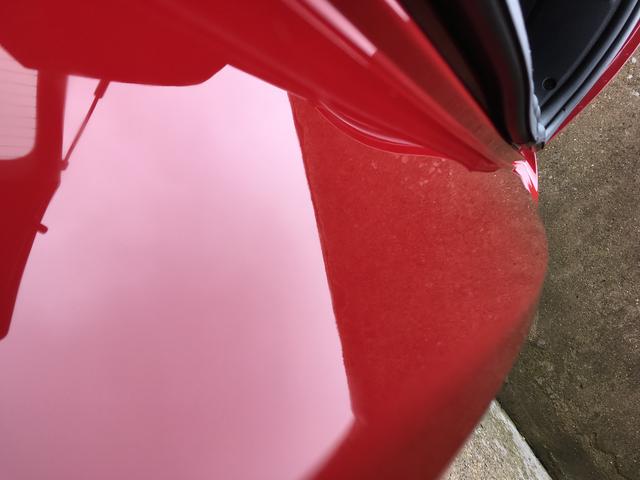
Light swirling on sides of car. (Passanger door near door handle pictured)
Hazy and water mark stained graphics (Not holding out much hope for these).
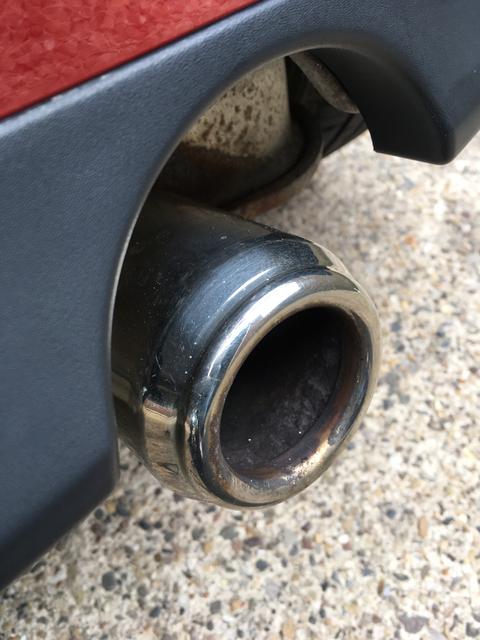
Exhaust tip!
So it began!
First was the rear bumper!

Looking much better after a few stages!
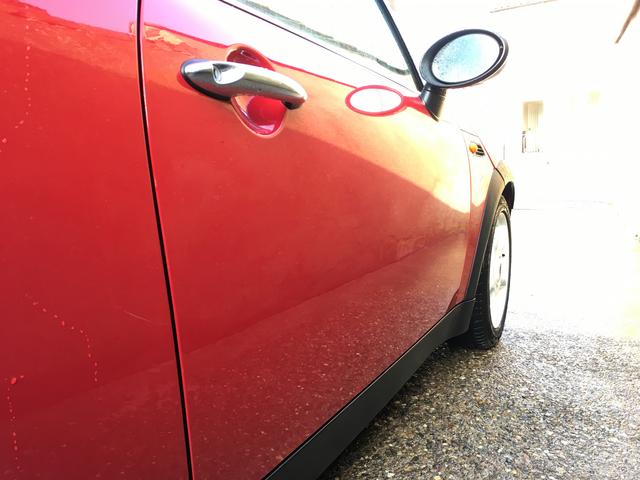
The passenger door around the door handle, a particularly bad area which looked perfect after a few sessions!
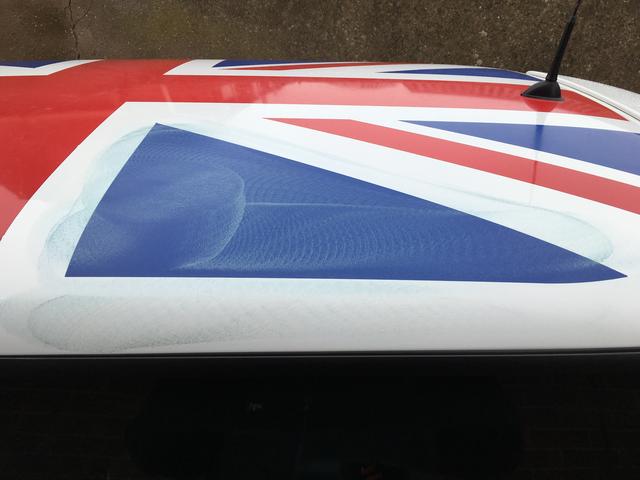
Putting as much heat into the graphics as I possibly dare!
The roof stickers looking better than expected but truthfully still not totally hiding the 16 years of the elements!
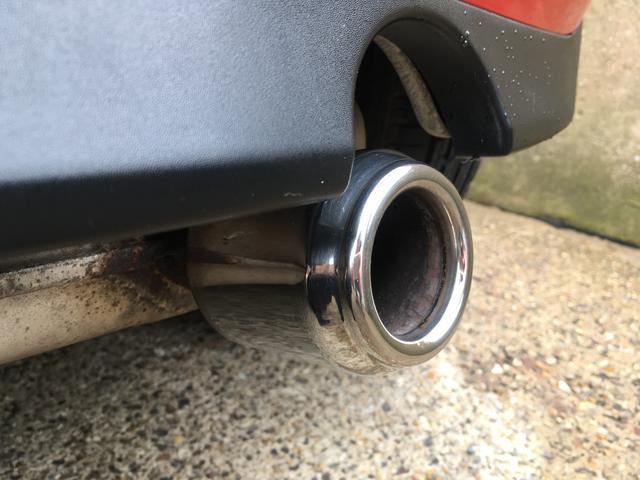
The exhaust tip looking much improved after a whizz round; little details as such always leave a car looking more youthful!
So, what more can I say really! Hours of work produced some amazing results. The cars are painted to a very good standard and as such the paint responded extremely well to a machine polish! The Chilli Red is so vibrant and if the car didn't already have the credentials to stand out from a crowd it certainly does now. Overall very impressed but very hard to offer a better pictures at this time unfortunately!
Hope you enjoyed the paint transformation; more updates and fixes are due soon!
Danny.
I am a nut case when it comes to the details and seeing the paintwork glimmer in the light after a wash should be a feeling to behold! Unless of course your paint has swirl marks in. It's usually years of incorrect washing with incorrect products at the hands of people who don't know any better or even worse who didn't care! In the case of this little MINI judging by the good condition of the car I would imagine thankfully that it's the former; the owners didn't know any better than to do anything but keep it clean with a bit of fairy liquid and a household sponge pad.
Here is the best shot I could get of the worst points, baring in mind how difficult paintwork can be to photograph!
Swirls to the bonnet viewed in the sun.
Scuffs to boot lip loading area.
Swirls to A Pillars. (Very visible in person, almost impossible to photograph)!
Light swirling on sides of car. (Passanger door near door handle pictured)
Hazy and water mark stained graphics (Not holding out much hope for these).
Exhaust tip!
So it began!
First was the rear bumper!
Looking much better after a few stages!
The passenger door around the door handle, a particularly bad area which looked perfect after a few sessions!
Putting as much heat into the graphics as I possibly dare!
The roof stickers looking better than expected but truthfully still not totally hiding the 16 years of the elements!
The exhaust tip looking much improved after a whizz round; little details as such always leave a car looking more youthful!
So, what more can I say really! Hours of work produced some amazing results. The cars are painted to a very good standard and as such the paint responded extremely well to a machine polish! The Chilli Red is so vibrant and if the car didn't already have the credentials to stand out from a crowd it certainly does now. Overall very impressed but very hard to offer a better pictures at this time unfortunately!
Hope you enjoyed the paint transformation; more updates and fixes are due soon!
Danny.
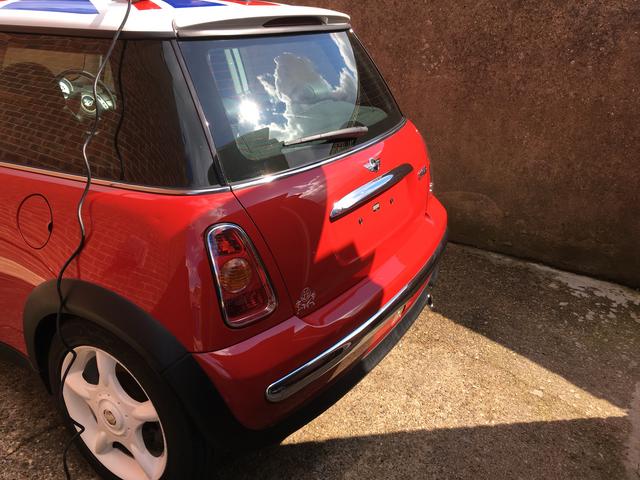
The MINI has been succeeding at its daily duties and all with a smile on our faces! Nothing really to report; the car has being behaving and averaging about 35 MPG (Not bad for these)! Milage is up to 54,000 and plans for more tidying up work continue! For now I thought I'd just post a few pictures of what our progress looks like so far after a recent clean..

Danny.
Danny.
TheAngryDog said:
You've put a lot of effort into this car and the results speak for themselves. Excellent work sir. The R50 is a good looking car and the modern ones are like it's very ugly sister. I wish I had your drive to do the jobs you have in my own car. I'll pop it round next time I am back home In Hull, let you do some cleaning of it 
Any other plans for the MINI?
They R50/R53’s are looking decidedly retro these days somehow! Probably helped by the bulbous new models as you mention! Any other plans for the MINI?
I hope to get a new front bumper as the current has a few scars, going to consider a few different wheel and tyre combinations as the current with the RFT’s make the ride incredibly punishing! Other than that routine work!
It has the infamous early ‘midland’ gearbox so not sure if that is going to cause any issues in the future.
I will be dropping the gearbox oil sometime in the near future so that should give me a good indicator into the health of the box!
Regards Danny.
Vince70 said:

I bought an nice little minty early R50 cooper about 6 months ago with a full ticket for £350 as my winter hack as I wanted to give my BMWs a rest from the road salt and what a great car.
The only problem I find with the cooper is the suspension on run flats and sportsplus suspension as it really knocks your fillings out and my brother has a R50 one on 15s and is a much more softer nicer ride and have bought a new set of wheels to go on.
Do get the gearbox oil changed though sooner rather than later as you wouldn’t believe the amount of fillings come off the magnetic drain plug even on low mileage examples and it’s worth throwing some molyslip in there while at it.
Also on the Chilli Red be careful if you pressure wash as my brother found out with his as he took some lacquer off the bonnet and I carefully had to dab some more back in with a brush.
We are looking at the 15 inch pepper pots fitted as standard to some Coopers; they look lovely and retro and I imagine should make the ride much more forgiving, possibly even make the handling more characteristic with a bit of sidewall give. A bonus is they should drastically improve corner weight too!
The gearbox oil is certainly on my radar to do next! Along with another engine oil and the blooming filter which sadly couldn’t change as it was stuck on and had no tool (sorted a tool now)!
Lacquer peel has started on the windscreen panel ever so slightly!
Going to dab it in with the touch up pens we just got! I don’t pressure wash the car very often so shouldn’t be too much of an issue and when I do so it’s usually underside and arches.
Regards, Danny.
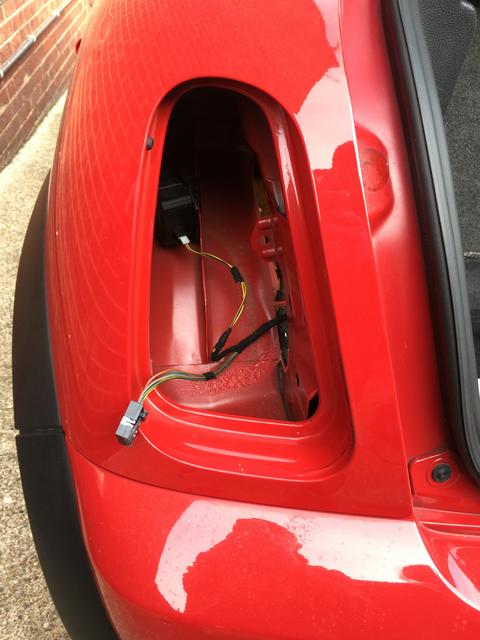
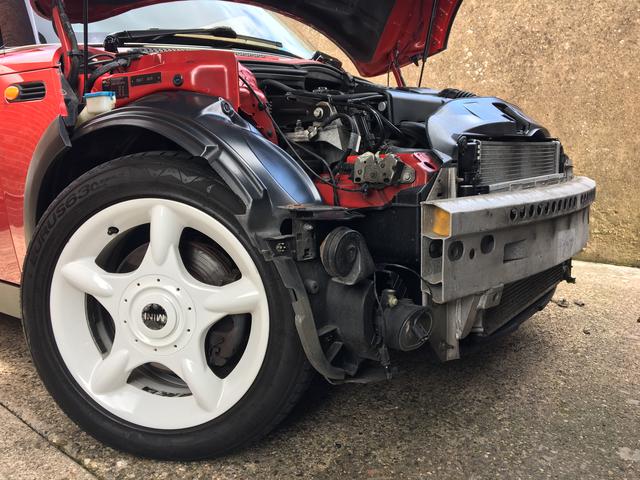
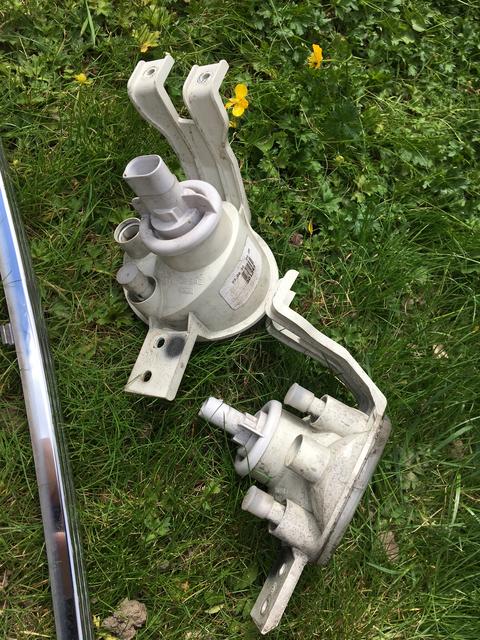
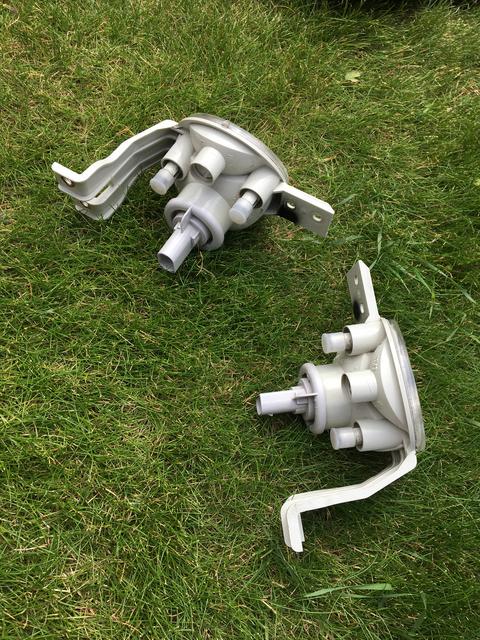
Quite a bit of progress recently! First of all the rotten spot lamps had to go! We found a replacement set on eBay; brand new and while not genuine, they looked the part and were an easy fitment! Wiring required slight modification as there was no earth wire. A simple ring terminal to the fog lamp mounting and some tidying up saw the wiring looking OE once more!
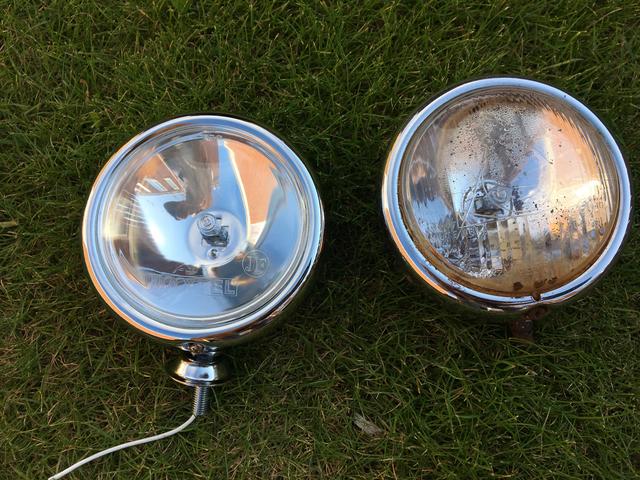
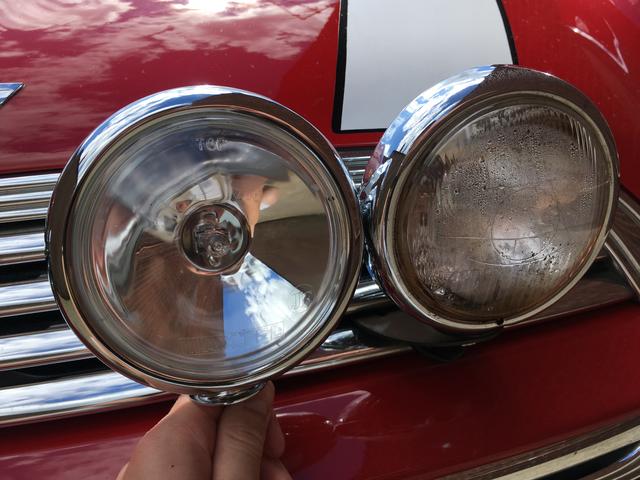
Looking much tidier with the new lamps!
Next on the list was the front bumper! As with many car this age; it had been in the wars.. The splitter ruined, the bumper shell cracked and the side plastics scuffed. It really ruined what was otherwise a tidy front end!
We started with a new bumper..
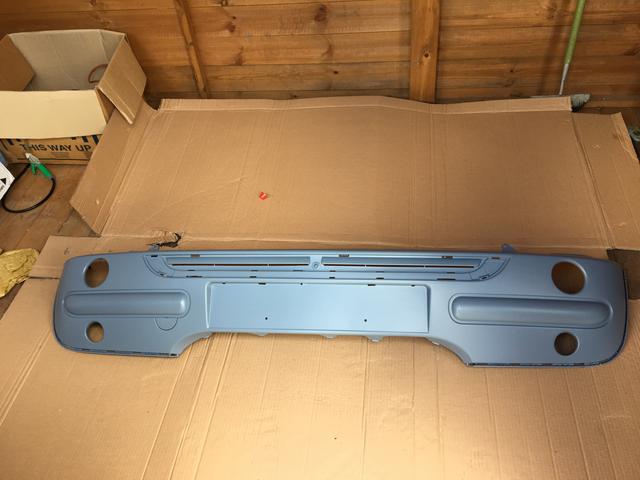
Painted it with three layers of Chilli Red base colour.
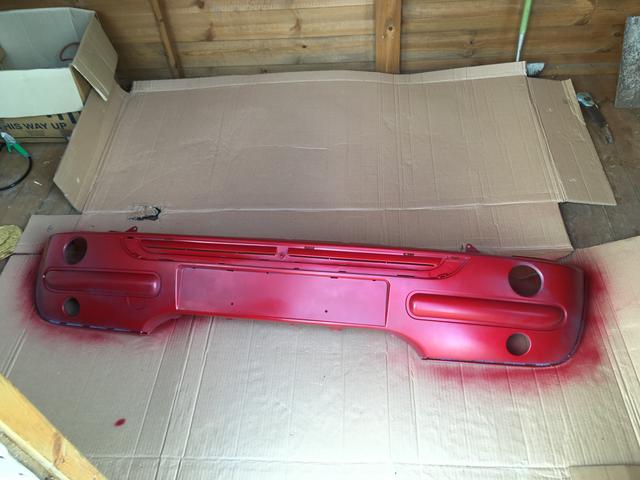
After a week drying; we flatted it back with 1,2 and 3000 grit.
Lacquered it and left it another week!
Flatted it back again in preparation to machine up to mirror shine!

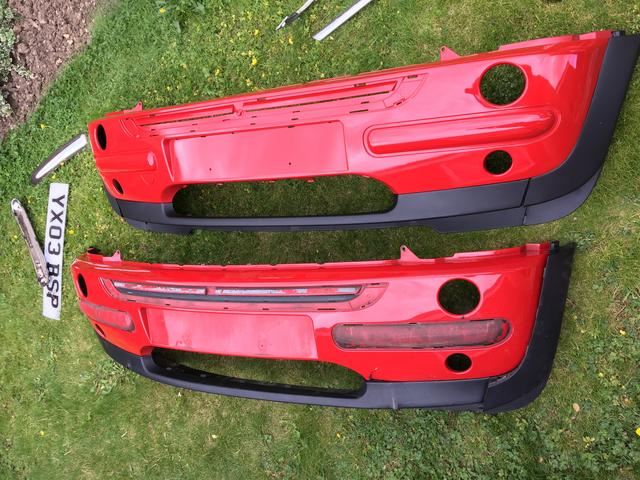
We then removed the old bumper which was so simple!!
Once the new bumper was polished up; we built up the plastics on to it and then offered it up to the old one for a comparison! Looking much better..!
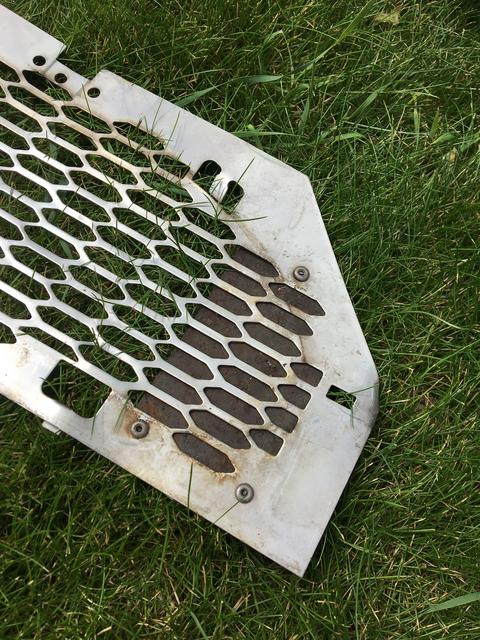
We then removed all of the trims and grilles from the old bumper, some easier than others..!
Sticking by the theory of 'while it's off'; we proceeded to clean the bits up..
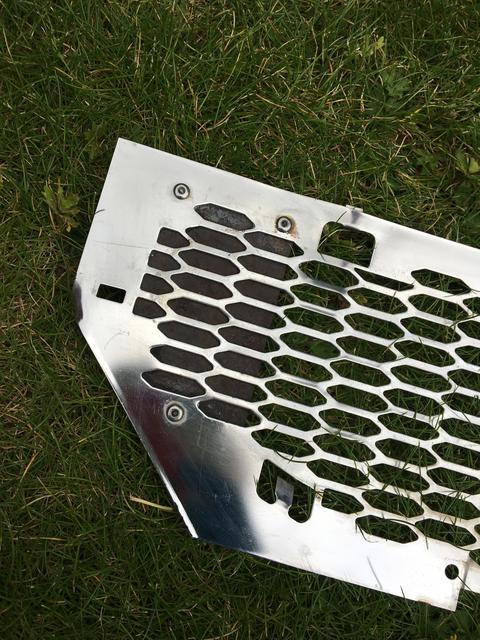
Bits cleaned up, we then assembled the bumper which again was ridiculously easy!

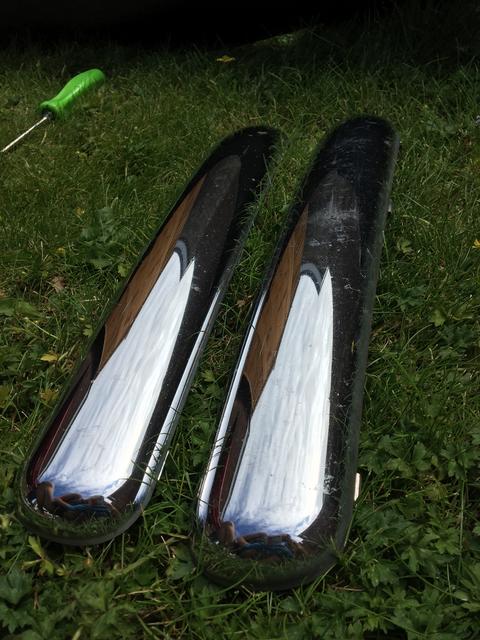
The only thing we left off was the chrome bump strips as there are no holes for the clips in the new bumper! What I am going to do is cut the clips off and bond the bump strips onto the new bumper!
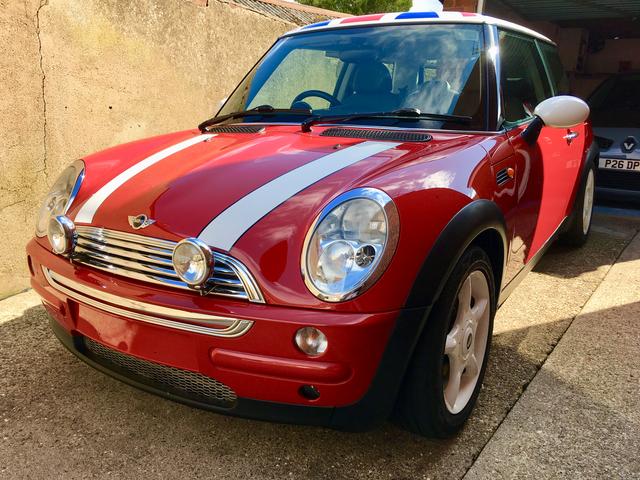
Today I polished the rest of the car up to match the shiny new bumper!
Not bad for a rattle can finish! That's all for now; more adventures planned soon!
Danny.
Edited by Willo26 on Sunday 14th July 21:18
Edited by Willo26 on Sunday 14th July 21:23
Gassing Station | Readers' Cars | Top of Page | What's New | My Stuff