Lancia Beta Spyder 2000 - 7 Year Full Restoration
Discussion


Hi everyone,
It’s been a long time since I last posted here with a build thread - my 400bhp supercharged Citroen Berlingo sleeper is now sold as of last year so I’ve had time to focus solely on finishing my Lancia.
This is a long, picture-heavy post. I’ve taken over 2,000 photos since starting the restoration so it’s been hard to concentrate these down, but I’ve done my best to hopefully show the main ones! The project started in 2013, but due to time and financial constraints it has taken until August this year to get the car restored and on the road!
As a bit of background, the car is a 1981 model and has been in my family since it was a year old and owned by my Mum who used it daily up until 1991 (a year before I was born!). No one can remember quite why it came off the road but it proceeded to be stored in my grandparents garage up until 2013 when my family were discussing scrapping the car. Myself with no prior knowledge at the time, felt it would be criminal to scrap such a rare and beautiful car so decided to try and save it and take on restoring it to its former glory. I had no idea the scale of what I was taking on, but eagerly began.
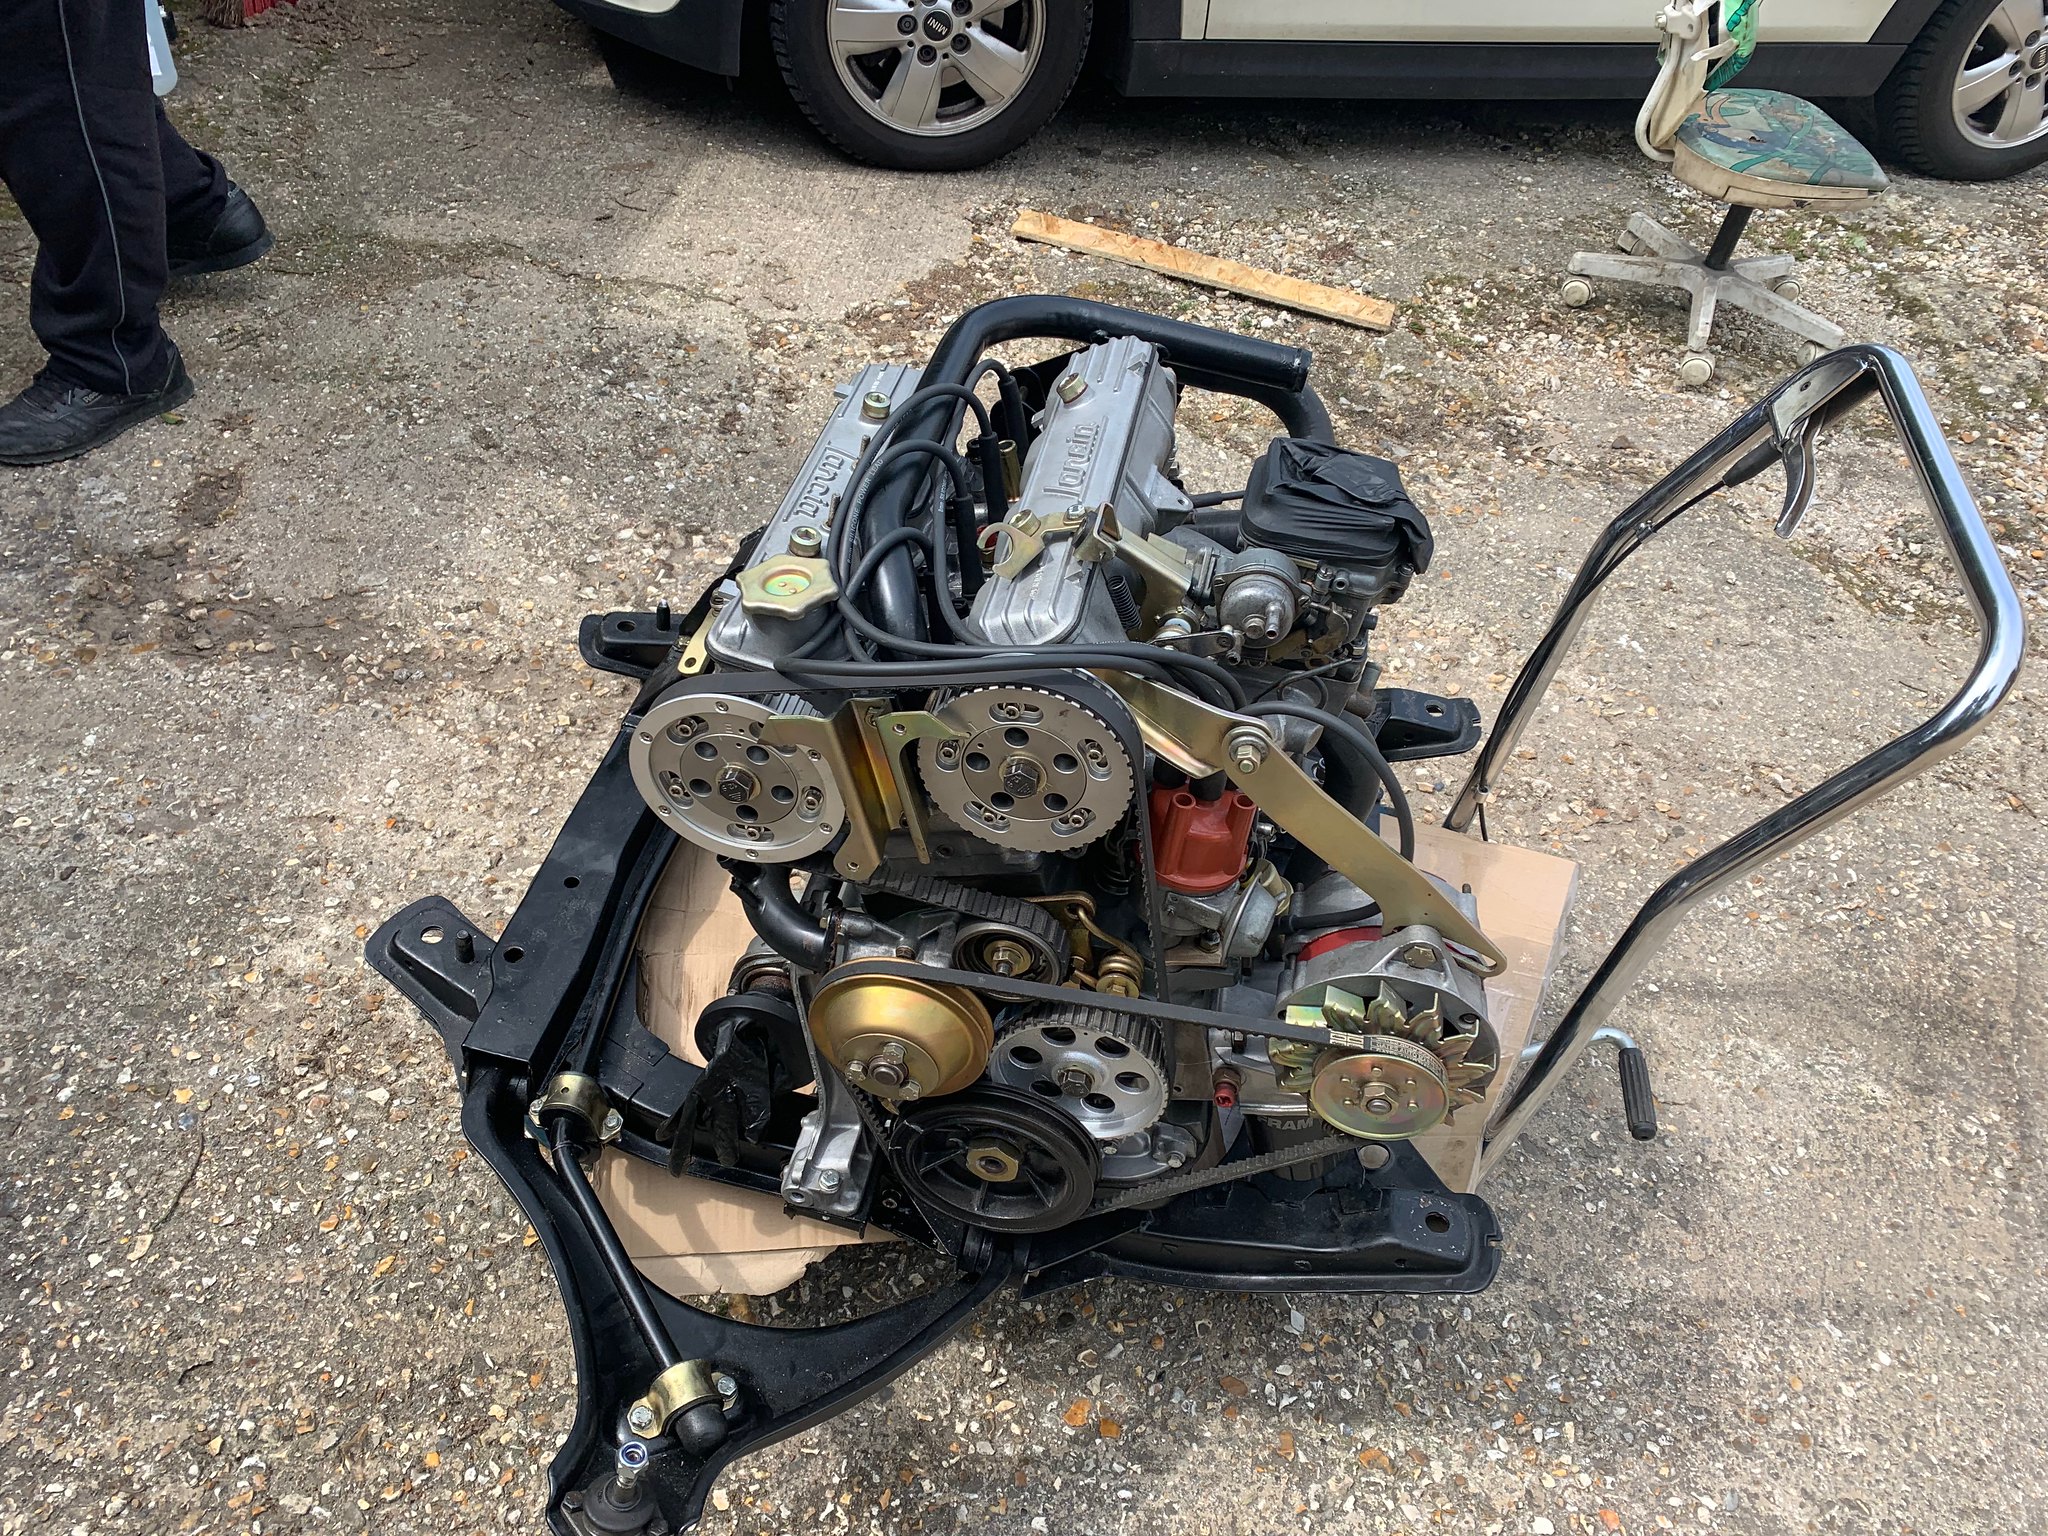
Unfortunately I don’t have any photos of the complete car prior to starting the restoration. The earliest I have is removing the engine.


Wings, interior and engine removed. Car pushed outside and saw daylight for the first time in 22 years!

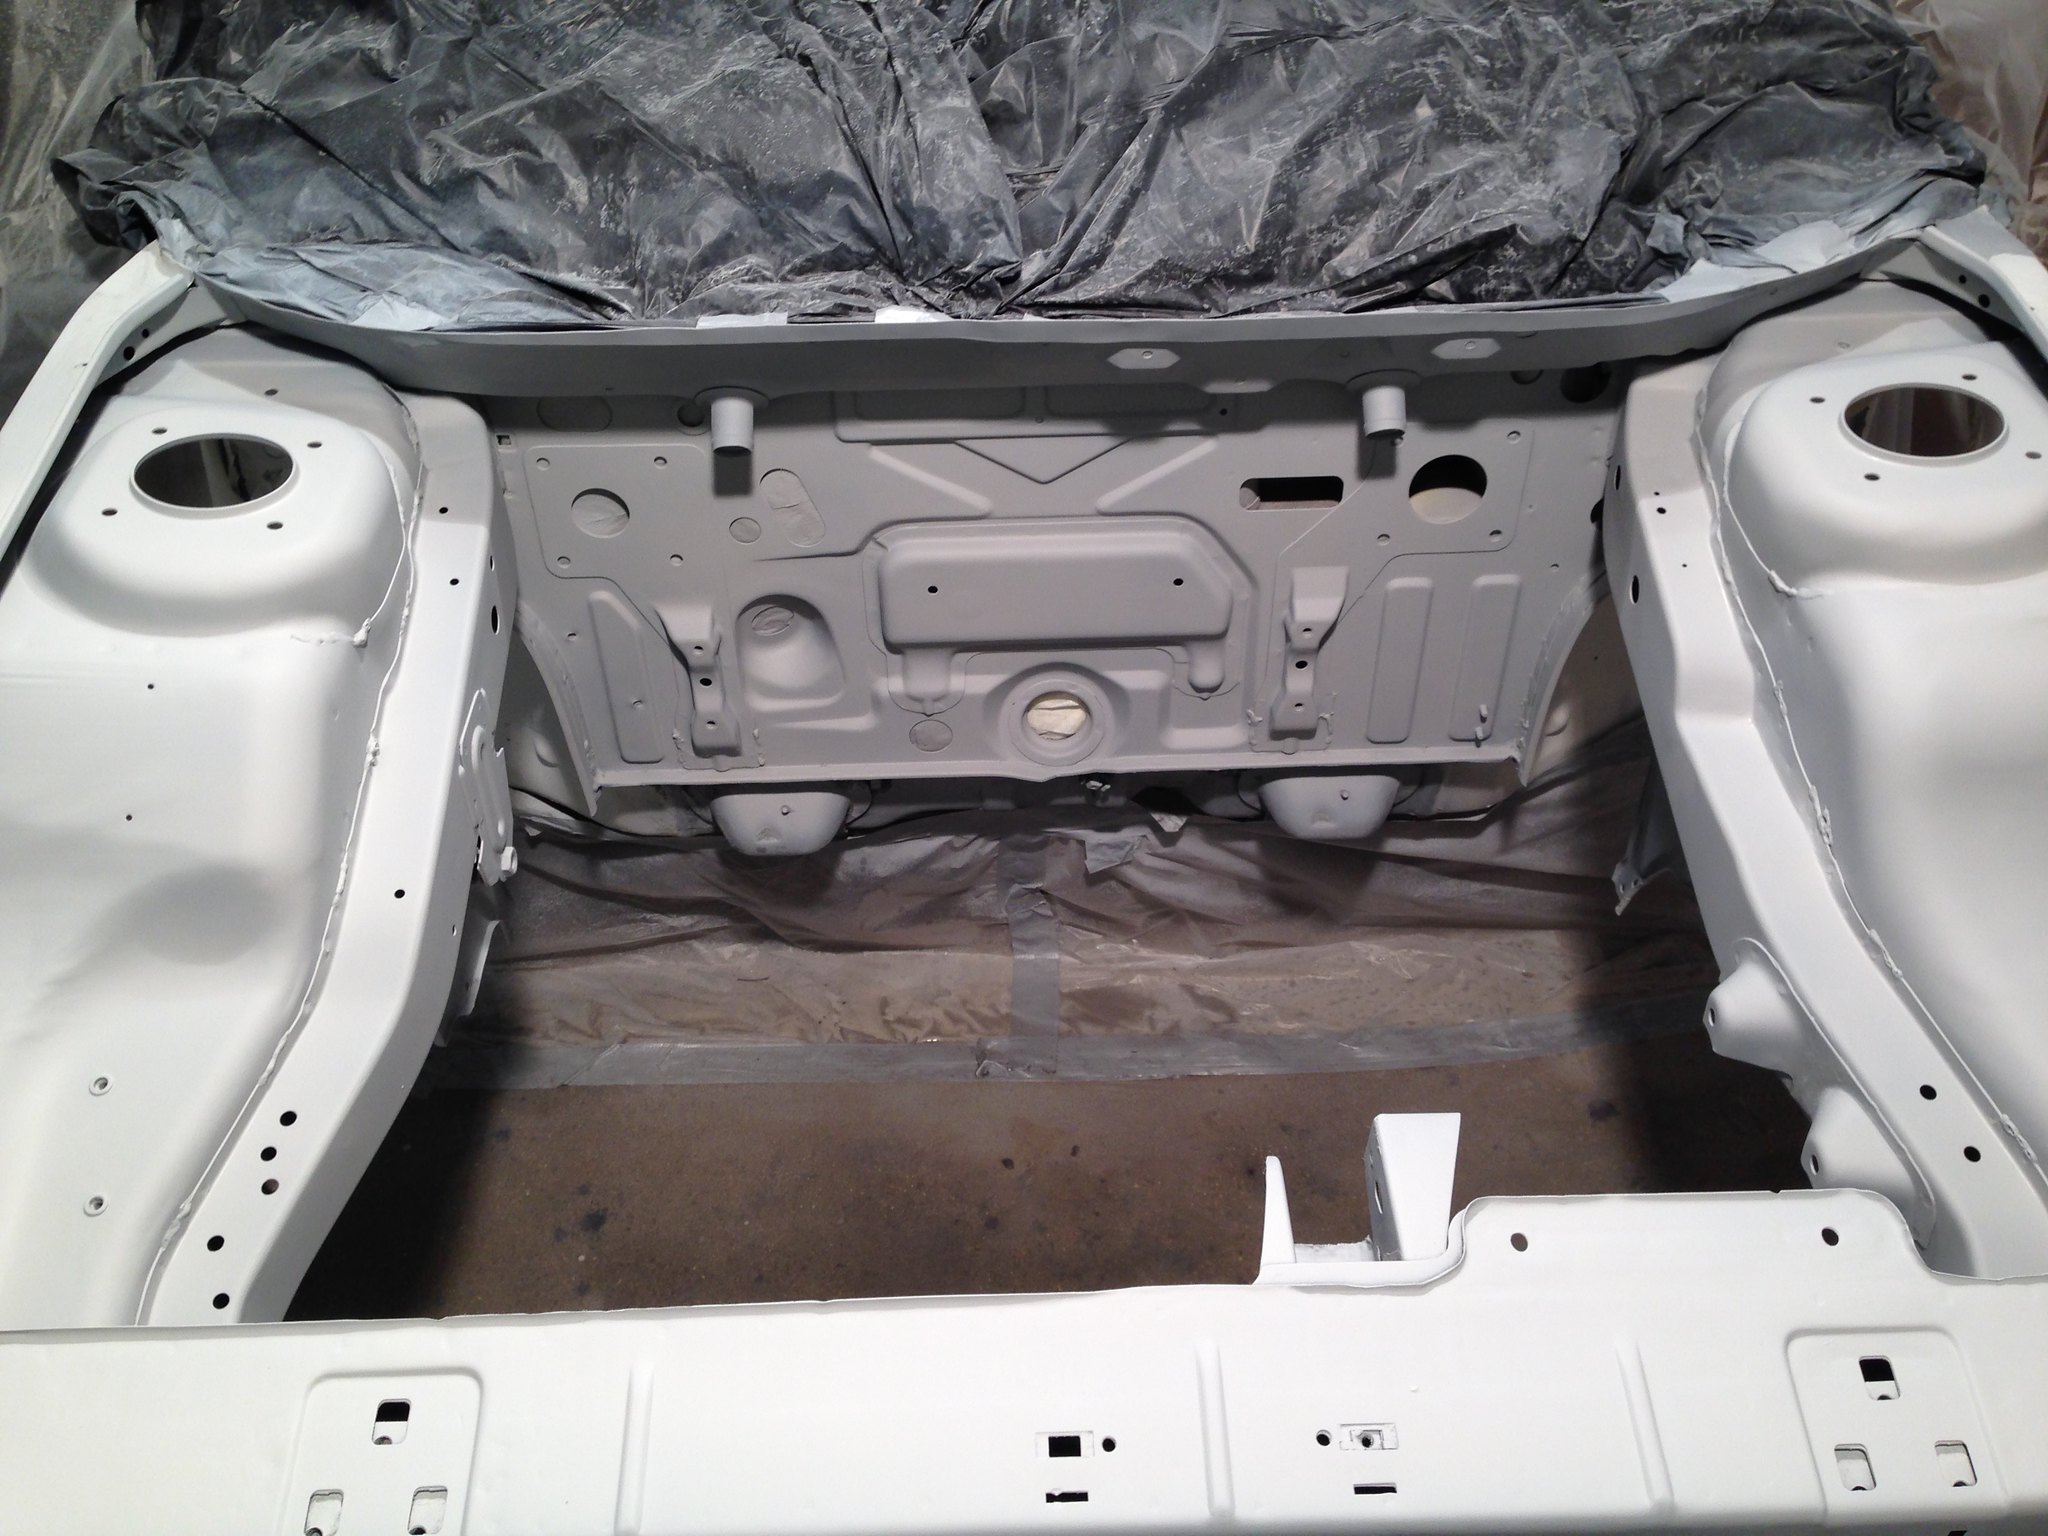
I started with what I could do and painstakingly remove all the waxoyl and paint from the engine bay and inner wings, then prepped these with paint.


The rest of the bodywork however was a bit out of my depth, so arrangements were made with a local body shop to complete the rest of the shell.


Car arrives at the bodyshop and work begins

Lots and lots of welding takes places around the whole car. I haven’t included any more pictures of this as its quite repetitive! But every time we thought all the rust had been found, some more appeared!

Welding complete and onto filler/shaping

Epoxy primer applied

Ready for top coat

Top coat is applied!

I then had the wheels refurbished in a bright silver. I opted for the brightest available since I wasn’t a huge fan of the original colour and felt it would help make them stand out better, especially since they are quite small wheels by todays standards! Also pictured are new (slightly uprated) polyurethane bushes and springs (which were promptly painted black).

I got as many parts as possible blasted and either powder coated or gold zinc plated, as per their original finishes. Here is the subframe and suspension.

Then started organising all the nuts and bolts to try and match them up after plating!

Finally some parts start going on the car! Suspension, brake lines, fuel tank, and more…


Body mouldings and trims started to go back on

Throughout all this my Dad had been working on the engine in his machine shop. The engine has been lightly breathed upon with; higher compression, balanced pistons/conrods, gas flowed cylinder head, intake & exhaust manifold work, re-profiled cams and adjustable cam pulleys.
Red oxide primer went on

Block was painted as close to the original colour as possible, along with the restored components going on


Engine was now timed up and mostly assembled

Almost ready to fit!

Back to the car again… lots of waxoyling took place and sorting out the wiring

Interior started going together with new custom headlining

The lights were rebuilt with all their restored components


The rear lights weren’t in great shape and took many years of ebaying to find a spare lens to replace the cracked indicator (they only ever came on the Spyder so difficult to find)! For some reason this one was covered in overspray before I even started work on the car.

Cleaning up and repainting the insides

Restored and ready for fitting

The following pictures are now all from this year (2021). The big day arrives - engine ready to be installed!
Engine goes in the car.

Fuel lines, coolant hoses, etc. are connected up

All the other components starting to come together

Car drives outside under its own power for the first time in 30 years! (August 2021)

Then off for its MOT

Shortly followed by an alignement

I then took it to a local car show


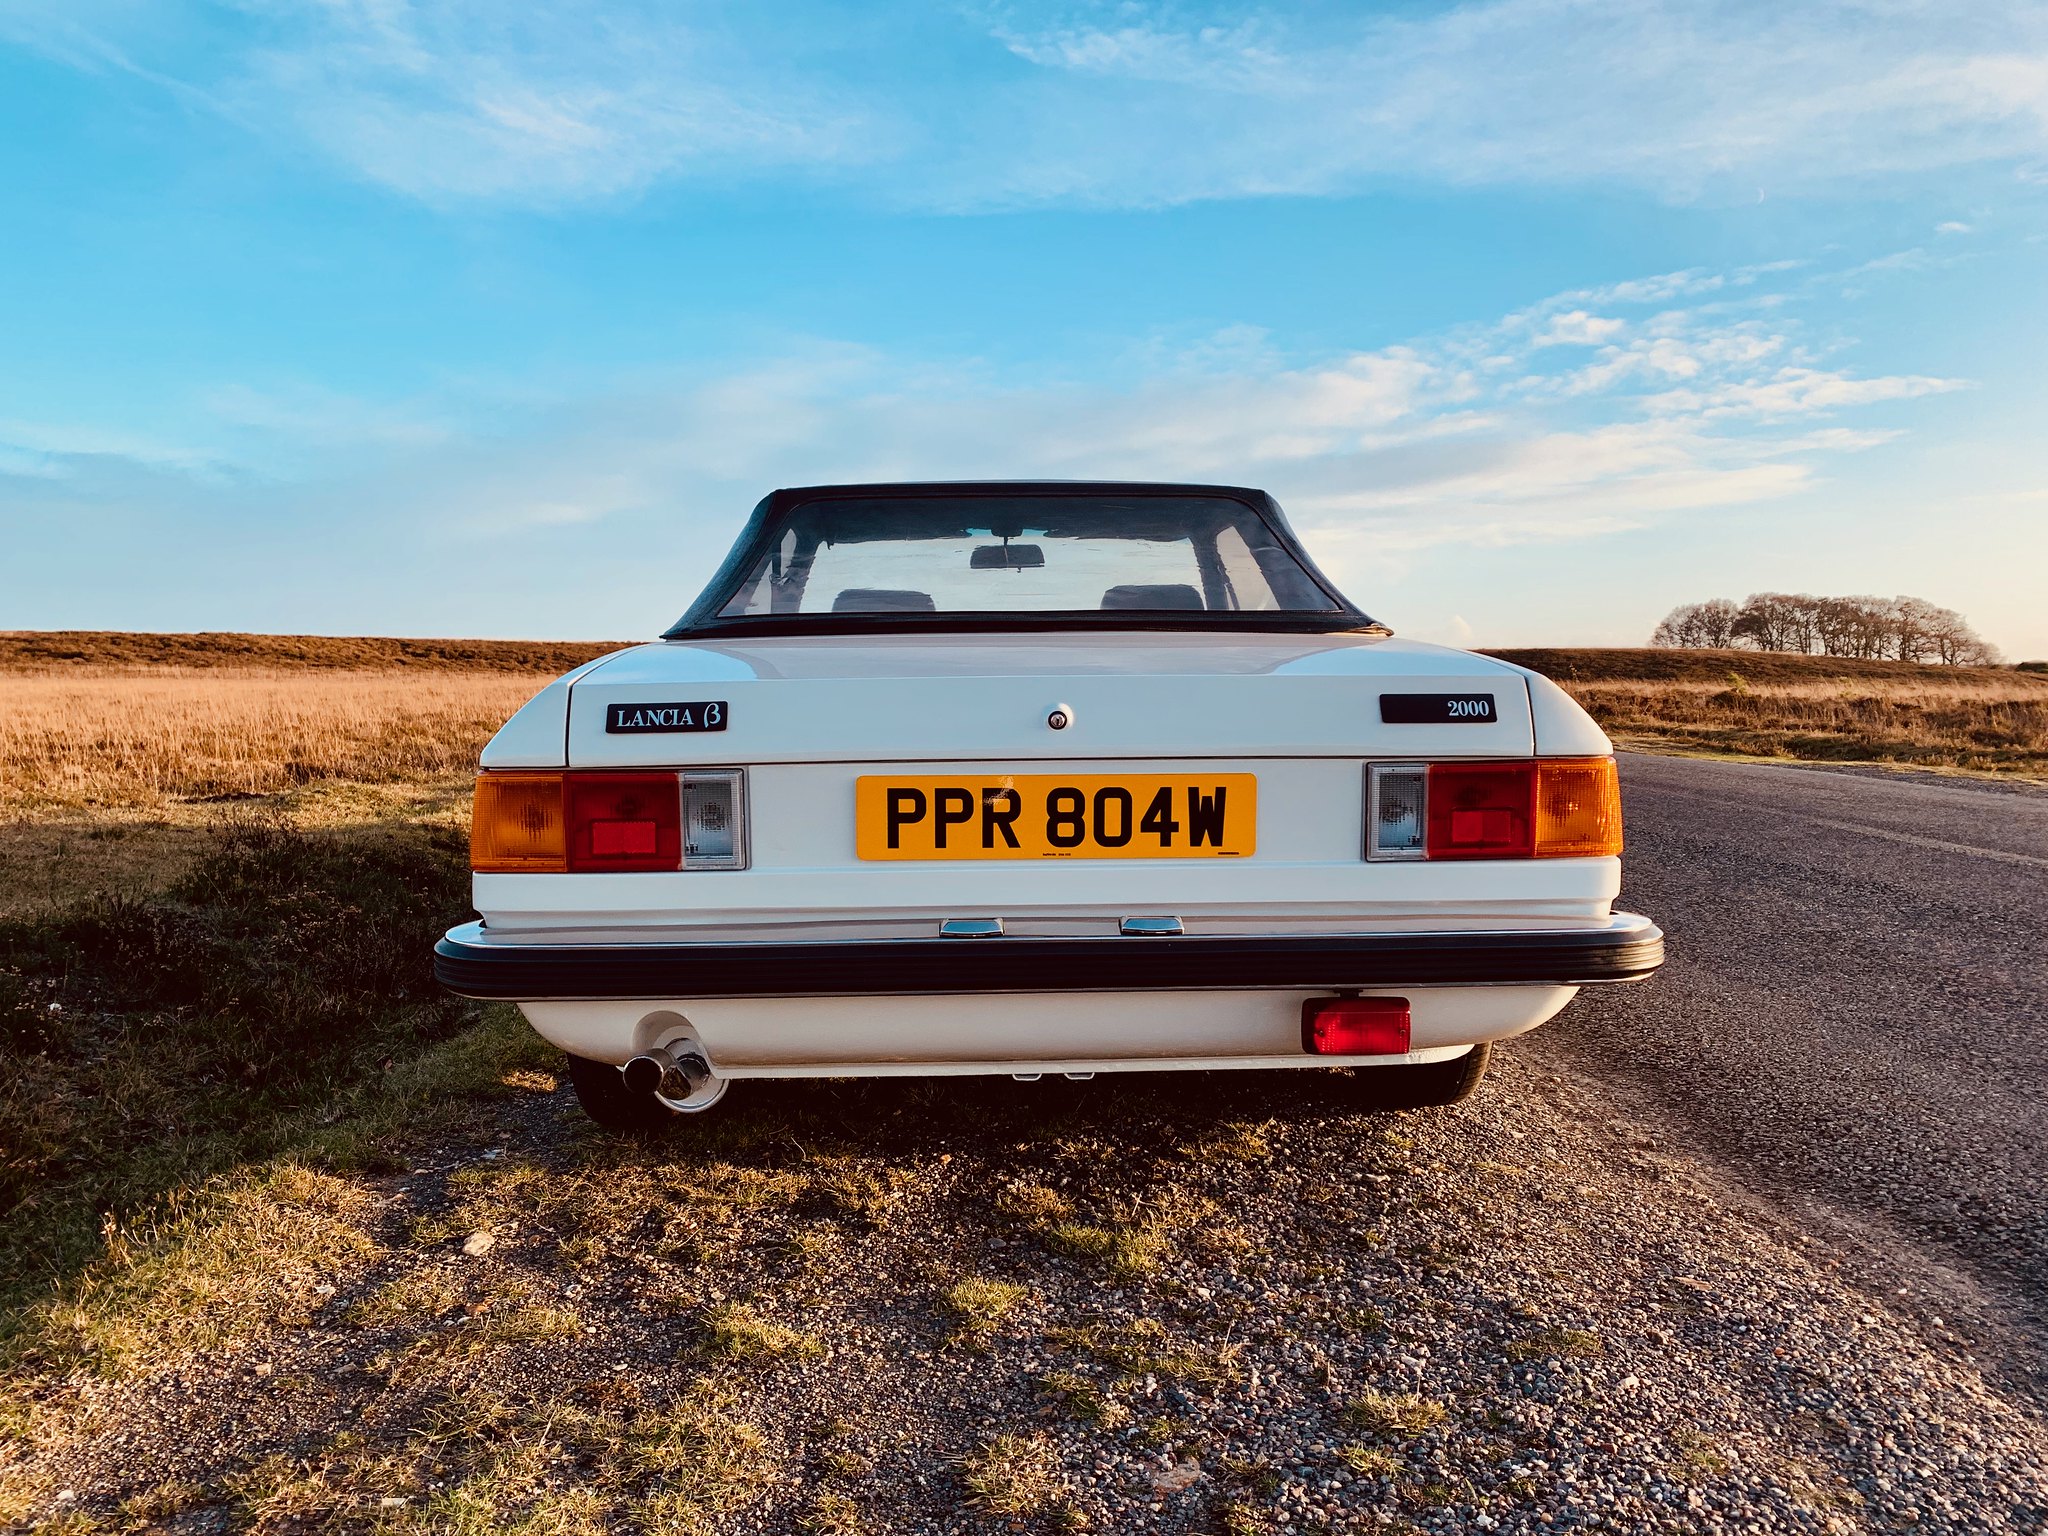
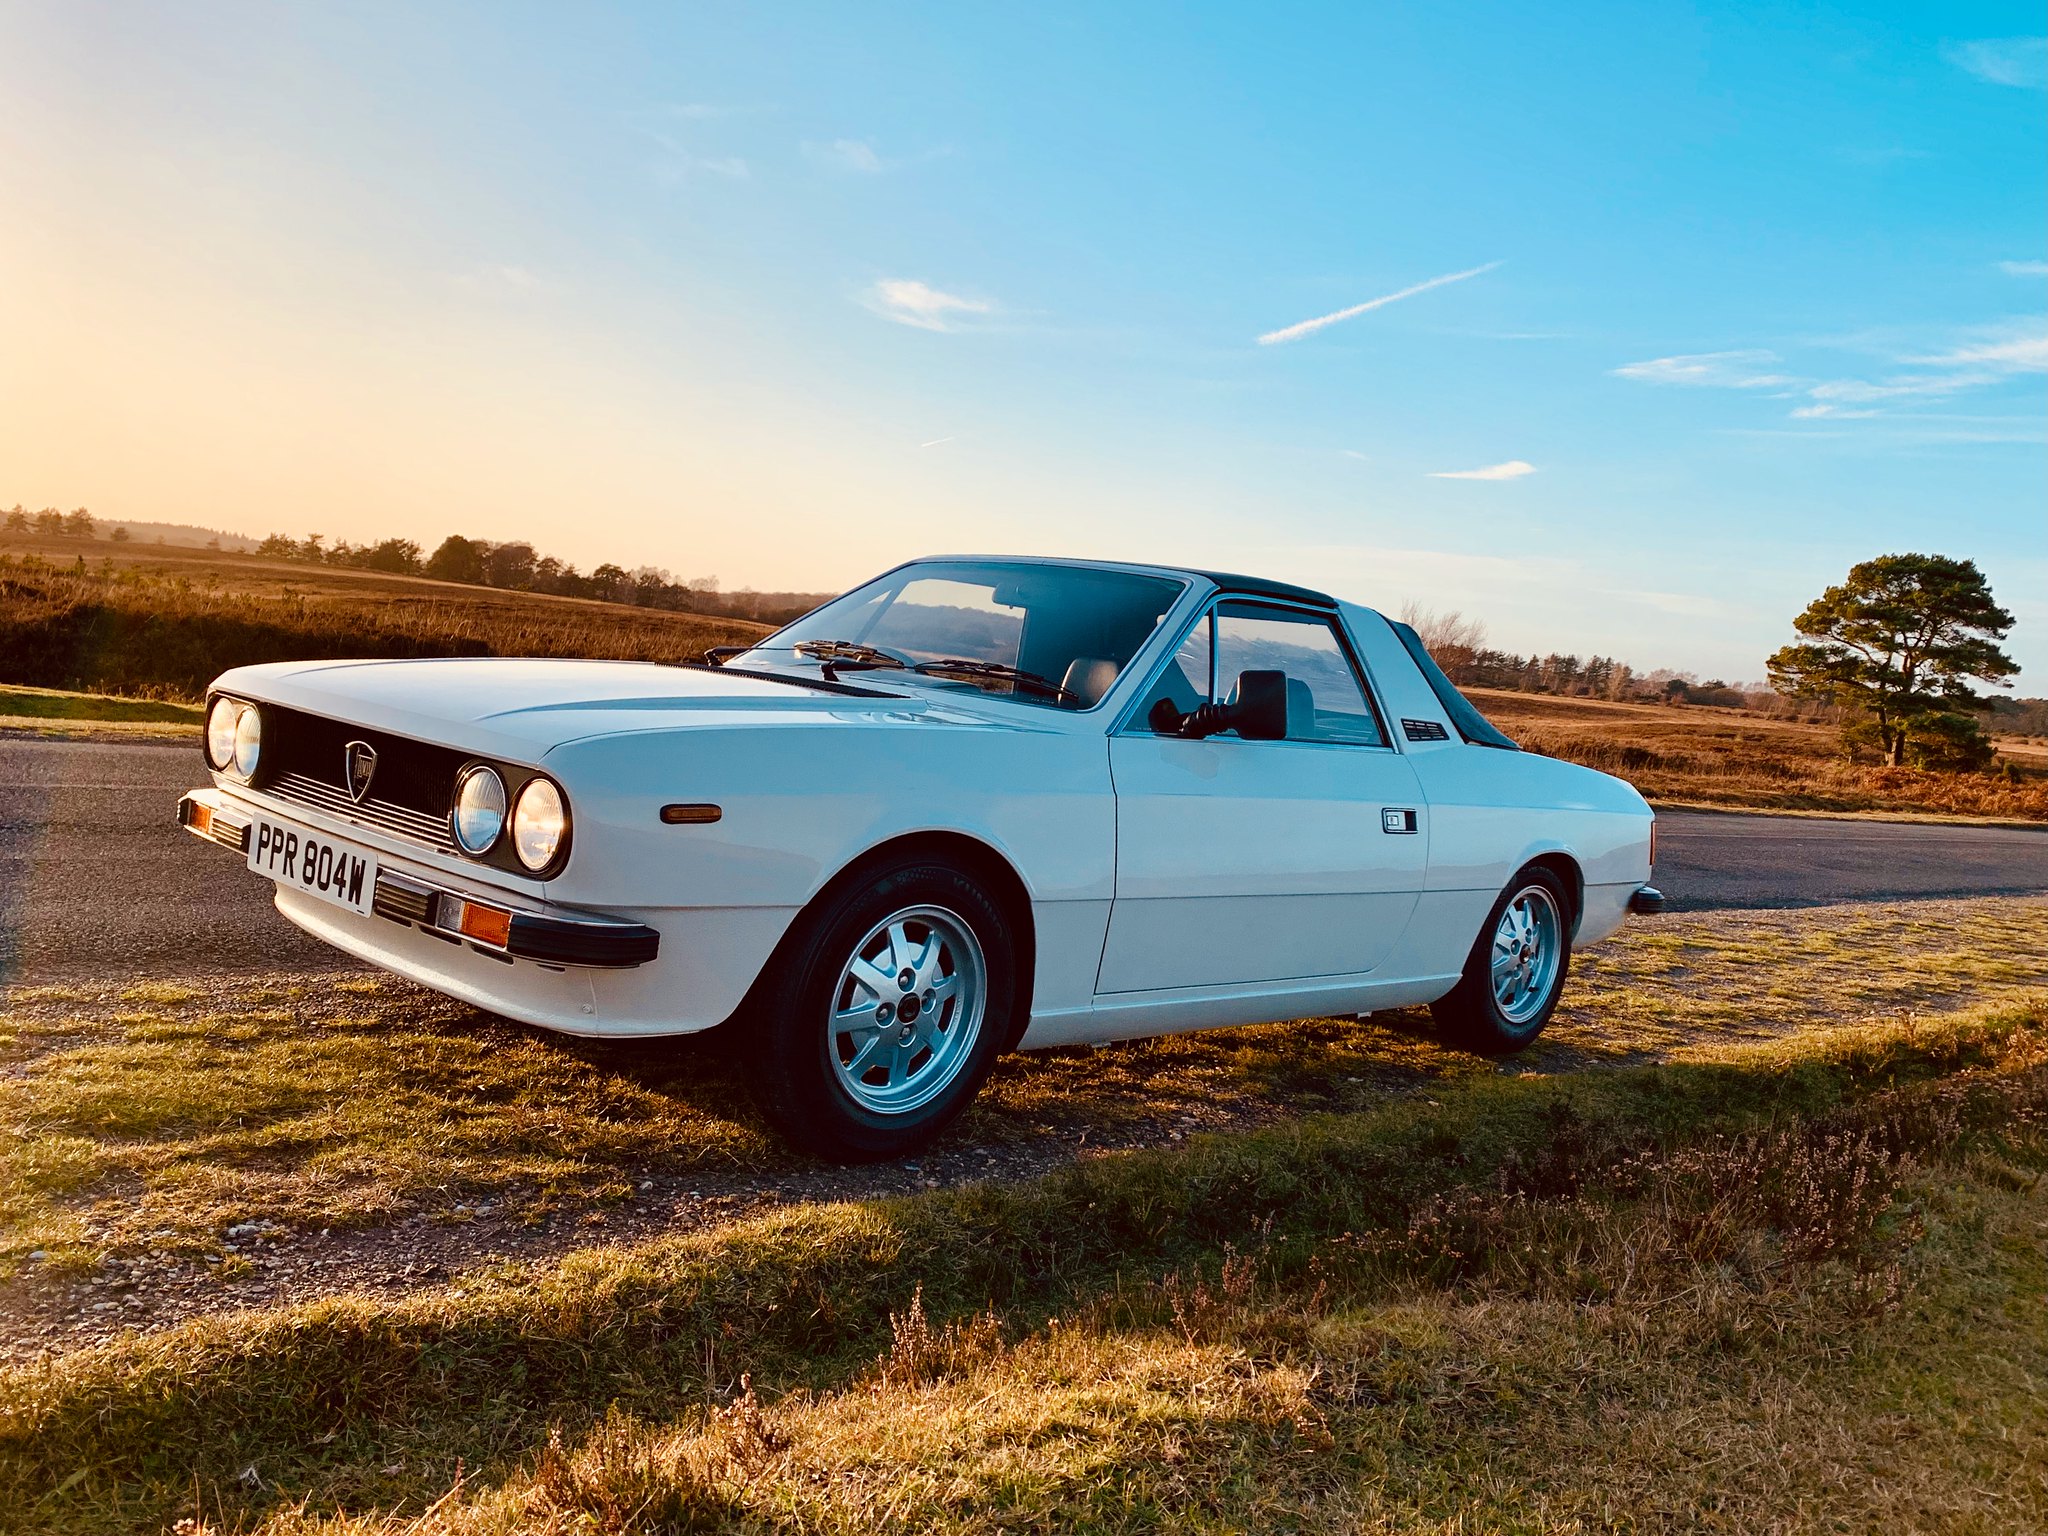
And a few pictures out and about over the past few weeks!


I would like to just finish this post by giving a big thank you to family/friends who have helped make this possible!
Thanks for reading! I welcome your comments/feedback!
It’s been a long time since I last posted here with a build thread - my 400bhp supercharged Citroen Berlingo sleeper is now sold as of last year so I’ve had time to focus solely on finishing my Lancia.
This is a long, picture-heavy post. I’ve taken over 2,000 photos since starting the restoration so it’s been hard to concentrate these down, but I’ve done my best to hopefully show the main ones! The project started in 2013, but due to time and financial constraints it has taken until August this year to get the car restored and on the road!
As a bit of background, the car is a 1981 model and has been in my family since it was a year old and owned by my Mum who used it daily up until 1991 (a year before I was born!). No one can remember quite why it came off the road but it proceeded to be stored in my grandparents garage up until 2013 when my family were discussing scrapping the car. Myself with no prior knowledge at the time, felt it would be criminal to scrap such a rare and beautiful car so decided to try and save it and take on restoring it to its former glory. I had no idea the scale of what I was taking on, but eagerly began.
Unfortunately I don’t have any photos of the complete car prior to starting the restoration. The earliest I have is removing the engine.
Wings, interior and engine removed. Car pushed outside and saw daylight for the first time in 22 years!
I started with what I could do and painstakingly remove all the waxoyl and paint from the engine bay and inner wings, then prepped these with paint.
The rest of the bodywork however was a bit out of my depth, so arrangements were made with a local body shop to complete the rest of the shell.
Car arrives at the bodyshop and work begins
Lots and lots of welding takes places around the whole car. I haven’t included any more pictures of this as its quite repetitive! But every time we thought all the rust had been found, some more appeared!
Welding complete and onto filler/shaping
Epoxy primer applied
Ready for top coat
Top coat is applied!
I then had the wheels refurbished in a bright silver. I opted for the brightest available since I wasn’t a huge fan of the original colour and felt it would help make them stand out better, especially since they are quite small wheels by todays standards! Also pictured are new (slightly uprated) polyurethane bushes and springs (which were promptly painted black).
I got as many parts as possible blasted and either powder coated or gold zinc plated, as per their original finishes. Here is the subframe and suspension.
Then started organising all the nuts and bolts to try and match them up after plating!
Finally some parts start going on the car! Suspension, brake lines, fuel tank, and more…
Body mouldings and trims started to go back on
Throughout all this my Dad had been working on the engine in his machine shop. The engine has been lightly breathed upon with; higher compression, balanced pistons/conrods, gas flowed cylinder head, intake & exhaust manifold work, re-profiled cams and adjustable cam pulleys.
Red oxide primer went on
Block was painted as close to the original colour as possible, along with the restored components going on
Engine was now timed up and mostly assembled
Almost ready to fit!
Back to the car again… lots of waxoyling took place and sorting out the wiring
Interior started going together with new custom headlining
The lights were rebuilt with all their restored components
The rear lights weren’t in great shape and took many years of ebaying to find a spare lens to replace the cracked indicator (they only ever came on the Spyder so difficult to find)! For some reason this one was covered in overspray before I even started work on the car.
Cleaning up and repainting the insides
Restored and ready for fitting
The following pictures are now all from this year (2021). The big day arrives - engine ready to be installed!
Engine goes in the car.
Fuel lines, coolant hoses, etc. are connected up
All the other components starting to come together
Car drives outside under its own power for the first time in 30 years! (August 2021)
Then off for its MOT
Shortly followed by an alignement
I then took it to a local car show
And a few pictures out and about over the past few weeks!
I would like to just finish this post by giving a big thank you to family/friends who have helped make this possible!
Thanks for reading! I welcome your comments/feedback!
Thanks everyone for the great comments, it’s really nice to see people appreciating the car and work that’s gone into it.
Miocene said:
Is that Christchurch pictured for the car show? If so, I'll keep an eye out.
Yes it is Christchurch, I’m trying to get out and enjoy the car as much as possible (weather dependant) so you may well see it around.Thank you everyone for the great comments. I will sort through my photos and start posting some more details over time of the restoration process.
RC1807 said:
I thought I recognised it as Christchurch. I grew up in Northbourne & West Parley... not too far away. 
I wonder then, if the car's local too, was the original dealer Modern Lights?
The car was actually in West Parley when I started the restoration, I moved to Christchurch more recently this year. I’m not sure who the original dealer was, though it was purchased from Horizon Honda.I wonder then, if the car's local too, was the original dealer Modern Lights?
honevo said:
I loved these cars when I was younger and still do.
I'd love to know what your Mum/family think of your work
It really is a work of art
Thank you - I’ve taken my Mum out and she is amazed by the transformation. The rest of my family never thought it would be finished, so are quite surprised by the end result.I'd love to know what your Mum/family think of your work
It really is a work of art
As a quick update, I recently picked up a set of twin Weber DCNF carburettors to complement the engine work. They need a fair bit of work but I got them locally for a very good price. The manifold I found separately which I’m hoping will clear the distributor as there’s not much clearance. I hope to have these fitted and working for spring in the new year.


Edited by Badonde on Wednesday 29th December 23:58
TwoStrokeNut said:
jeff666 said:
TwoStrokeNut said:
Wow, that is beautiful great job.
So happy you used epoxy primer, that's great stuff.
What a beautiful engine too.
Agreed,So happy you used epoxy primer, that's great stuff.
What a beautiful engine too.
but ideally the epoxy should go under the filler for a better longer lasting job.
Mikebentley said:
Bwavo Bwyan bwhat a bwunderful bwestoration.
Haha thank you!unclejam said:
Beautiful job mate, love the "Old English" white colour too. I have a 1980 2.0 Spyder which I'd love to strip to a bare shell to root out the rust - the Spyder has some unique double-skinned areas in the chassis I'm told, (for strengthening) which means more places rust can hide. Was that your experience?
Sorry for such a slow reply. I browse these forums daily but rarely sign in/post (I probably should do more). I believe the only areas which are unique to the Spyder are the strengthened sills. I didn’t have any issues with these, they were all solid. Main areas were the inner arches front and rear on mine. Are you on the Beta/Lancia club?Edited by Badonde on Tuesday 18th April 18:30
Gassing Station | Readers' Cars | Top of Page | What's New | My Stuff