Tony's Gilbern
Discussion


- I wasn't sure if this should go in Classic Fibreglass or Classics and Heroes. Maybe the Mods can decide -..
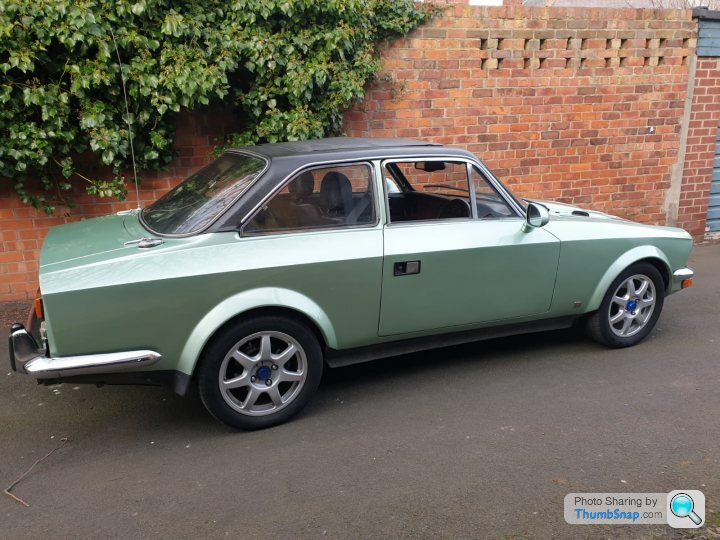
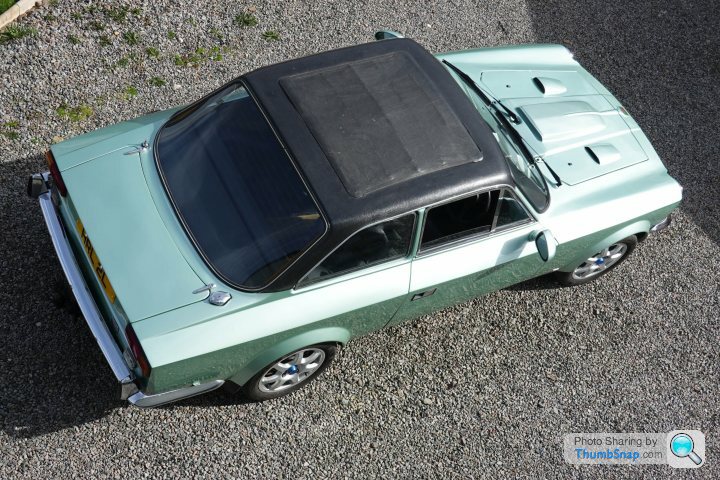
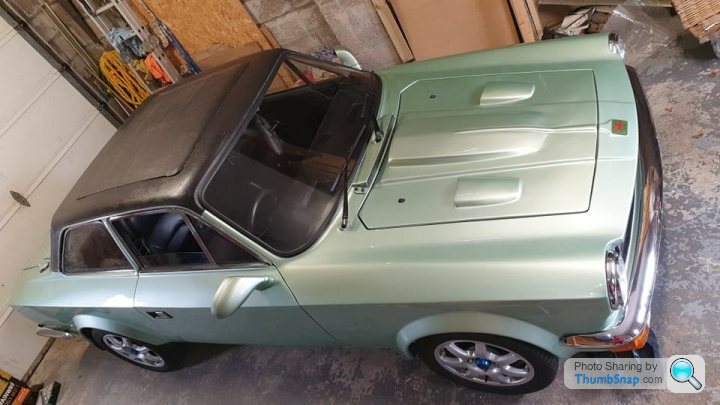
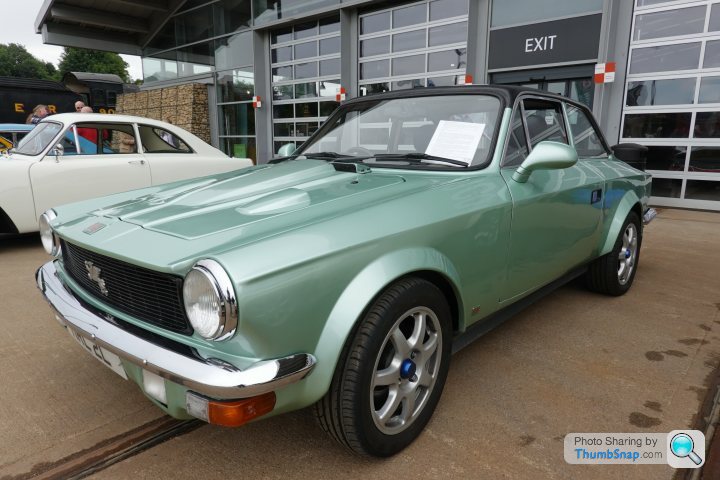
Go back to the mid 1970s, I'm the proud owner of an MG Midget or maybe a Hillman Imp. I'd drive every day, up the A1058 Coast Road from Tynemouth to Newcastle for work. Nearly every day I'd see, and often get passed by a green Gilbern Invader Mark 3. I loved the look of that car.
Turned out it was owned by a fellow car enthusiast called Tony who lived not far from me. I used to bump into him in later years and have a chat.
Jump forward now to 2023. I'd moved around quite a bit and now live in Scotland. A pal points out that there's an advert for a Gilbern in Tynemouth. It's the same car and very sadly Tony has passed away. He'd owned the car for 48 years. He'd pampered it, modified it, it had been his hobby, his passion.
You can guess what's coming next. A 500 mile round trip to view it, a slightly hiccuppy test ride as the car having mostly stood for a few years with limited mileage wasn't quite on song, a long and protracted, head v heart discussion with myself, an offer and the car was mine!
Money paid, transport arranged, it arrived at my home a few of days later. Of course it wouldn't start and we had to push it into the garage. And there it languishes at the moment. It's not a standard set up, Three Jenvey down draughts, Emerald management set up and a lot of wiring and plumbing for a guy who is more "carbs and dizzies" (me). I'm working from basics as there's an electrical fault somewhere with power not getting to where it should, it's a project, it needs a new headlining and the interior retrimming etc, once I get it started that is. But that car that I so admired nearly 50 years ago is now mine. It'll always be known as Tony's Gilbern however....RIP Tony, I'll try to look after it.
Edited by Skyedriver on Saturday 18th March 07:43
Thanks for the comments, more photos will be put up once I get it started and running.
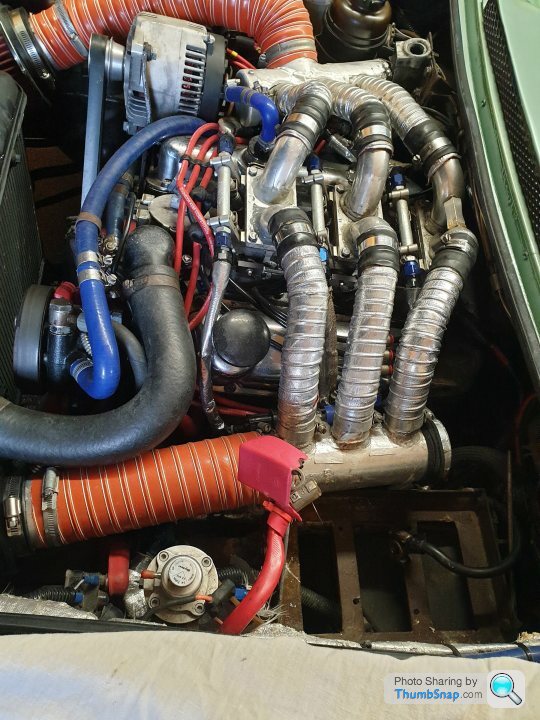
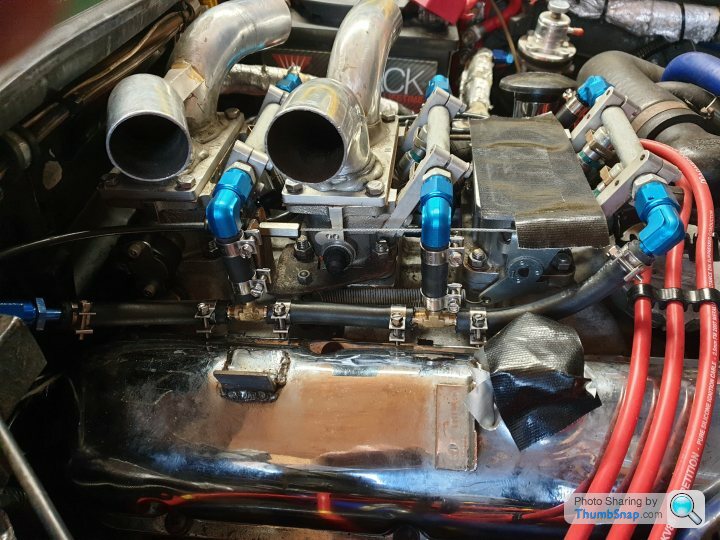
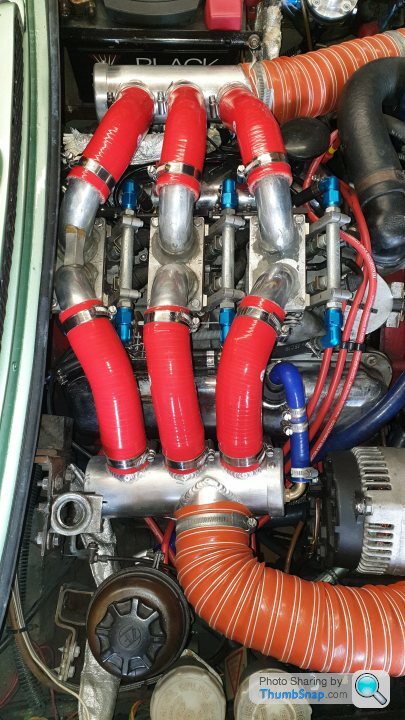
Here's one I took yesterday of the engine bay. Suggestions for a simpler plenum/filter are welcome. You can't do a simple flat based box as the fuel rails are higher then the throttle bodies. But I need to get it running first.

Here's one I took yesterday of the engine bay. Suggestions for a simpler plenum/filter are welcome. You can't do a simple flat based box as the fuel rails are higher then the throttle bodies. But I need to get it running first.
Panamax said:
As the car was previously running but lumpy I'd start by replacing the fuel filter and work from there. Often a problem area if a car's been left standing.
I'd also drain the old fuel (not clamp the line) while doing the filter and get some fresh petrol in there. If the old fuel looks OK when it's settled I'd eventually put it back in the tank (or your mower) a bit at a time so that it's blended with fresh. If the fuel's full of rust you'll probably be looking for a new fuel tank or proper refurb.
That's the plan once I get it started.I'd also drain the old fuel (not clamp the line) while doing the filter and get some fresh petrol in there. If the old fuel looks OK when it's settled I'd eventually put it back in the tank (or your mower) a bit at a time so that it's blended with fresh. If the fuel's full of rust you'll probably be looking for a new fuel tank or proper refurb.
Now have power to the ignition switch and it'll either spin over and try and start or blow a 30A fuse. The tacho seems to suddenly jump to 2K revs and stop there until ignition totally off. Plugs out now, soaking wet iridium ones.
Not raining today so got on with paving outside, back on the Gilbern tomorrow.
An update, a little longer since the original postfor which I apologise.
(New fence, paving, and countless other little tasks to sort but I have been busy).
Firstly, thanks to the folk who offered knowledge and enthusiast in the "Engine & Transmission" pages. The info and advice they offered was invaluable. I now know a heck of a lot more about ECUs, throttle bodies and fuel Injection, fuel line fittings and filters. I was a PITA over there but hey saw me through it.
So where were we. I got the car into the garage and spent an age trying to understand what was going on. A broken wire, a duff fuse, a second fuse blew straight away which was worrying and a set of iridium spark plugs that went in the bin. Apparently once they are wet due to flooding they're as good as knackered. Cleaning with a wire brush is the final coffin nail. New set of BP6ES fitted (have you tried buying spark plugs these days? Local shop had 4. Asked about BP7ES they had three! Halfords may stock them but that reference is a "Lawnmower plug". Fortunately Burton Power keep them even if you have to pay rather a lot in postage.
The result: it runs and sounds sweet. Oil pressure good too. So what next. Well I wasn't happy with either the feeds to the 3 throttle bodies nor the air filter arrangements. These weren't exactly applauded on the Engine pages either.
Tony was a first class Engineer and I could see exactly why he had done what he had done but it wasn't the best. Everything was in the way of the spark plugs and even the dip stick was difficult to access. I don't like braided hoses as you can't see what's underneath, even more so with the heat shielding in place so out that all came and fresh R9 fuel hose and good old fashioned "T"s and hose clips realigned the fuel feeds alongside the throttle bodies. Tony was concerned about heat build up under the bonnet, I'll have to see if that's a problem up here in Scotland.
Air filter wise, I'm still not sure, there's very limited room and the rear TB sits almost under the bulkhead. I have as Baldrick said, a plan. It's about Plan D or E, A, B & C having already been dropped.
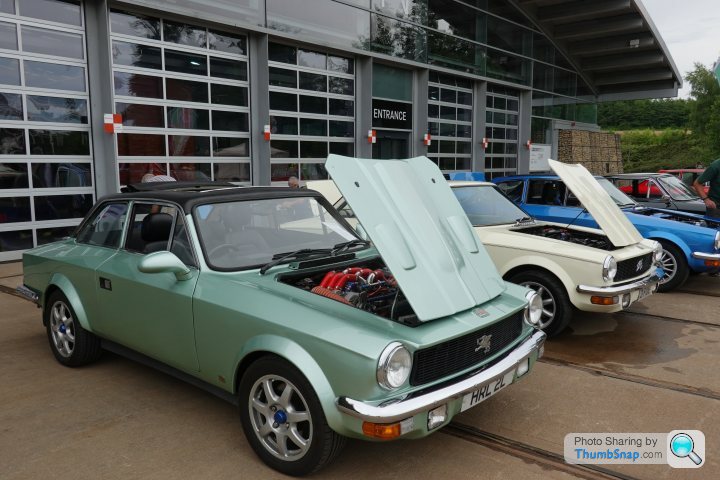
So out the garage it came this afternoon for a couple of photos. I think I may have a fuel leak from the LH tank area, there's two tanks, one in each rear wing. Further investigations shortly after I finish the fuel hoses and air filers in the engine bay. Then it's onto the interior. Headlining if 50 years old and won't see 51. There's a couple of side panels to redo and maybe replace the carpet. The wood dash will look bad once everything else is sorted so that's another project. Fortunately the front seats (MX5) are perfect except sitting too high and the rear seats were retrimmed in leather to match the fronts. MX5 seats are wonderful, comfortable and supportive, I had them in my TVR Chimaera. The problem with them is they tend to sit high in either car. On the Gilbern the problem is compounded by stuff under the seats (Emerald ECU on one side and a brake balance adjuster on the driver side).
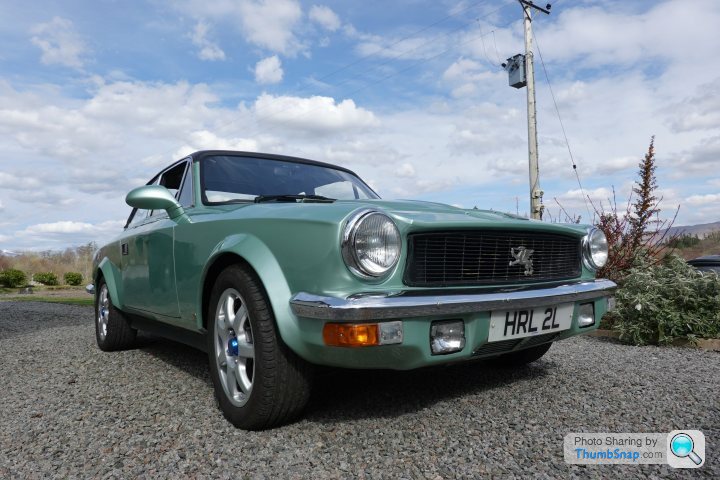
Curiously for those who have got this far, Tony & I have the same christian name and even our surnames start with the same letter H, sadly the registration bears no obvious link to either of us.
(New fence, paving, and countless other little tasks to sort but I have been busy).
Firstly, thanks to the folk who offered knowledge and enthusiast in the "Engine & Transmission" pages. The info and advice they offered was invaluable. I now know a heck of a lot more about ECUs, throttle bodies and fuel Injection, fuel line fittings and filters. I was a PITA over there but hey saw me through it.
So where were we. I got the car into the garage and spent an age trying to understand what was going on. A broken wire, a duff fuse, a second fuse blew straight away which was worrying and a set of iridium spark plugs that went in the bin. Apparently once they are wet due to flooding they're as good as knackered. Cleaning with a wire brush is the final coffin nail. New set of BP6ES fitted (have you tried buying spark plugs these days? Local shop had 4. Asked about BP7ES they had three! Halfords may stock them but that reference is a "Lawnmower plug". Fortunately Burton Power keep them even if you have to pay rather a lot in postage.
The result: it runs and sounds sweet. Oil pressure good too. So what next. Well I wasn't happy with either the feeds to the 3 throttle bodies nor the air filter arrangements. These weren't exactly applauded on the Engine pages either.
Tony was a first class Engineer and I could see exactly why he had done what he had done but it wasn't the best. Everything was in the way of the spark plugs and even the dip stick was difficult to access. I don't like braided hoses as you can't see what's underneath, even more so with the heat shielding in place so out that all came and fresh R9 fuel hose and good old fashioned "T"s and hose clips realigned the fuel feeds alongside the throttle bodies. Tony was concerned about heat build up under the bonnet, I'll have to see if that's a problem up here in Scotland.
Air filter wise, I'm still not sure, there's very limited room and the rear TB sits almost under the bulkhead. I have as Baldrick said, a plan. It's about Plan D or E, A, B & C having already been dropped.
So out the garage it came this afternoon for a couple of photos. I think I may have a fuel leak from the LH tank area, there's two tanks, one in each rear wing. Further investigations shortly after I finish the fuel hoses and air filers in the engine bay. Then it's onto the interior. Headlining if 50 years old and won't see 51. There's a couple of side panels to redo and maybe replace the carpet. The wood dash will look bad once everything else is sorted so that's another project. Fortunately the front seats (MX5) are perfect except sitting too high and the rear seats were retrimmed in leather to match the fronts. MX5 seats are wonderful, comfortable and supportive, I had them in my TVR Chimaera. The problem with them is they tend to sit high in either car. On the Gilbern the problem is compounded by stuff under the seats (Emerald ECU on one side and a brake balance adjuster on the driver side).
Curiously for those who have got this far, Tony & I have the same christian name and even our surnames start with the same letter H, sadly the registration bears no obvious link to either of us.
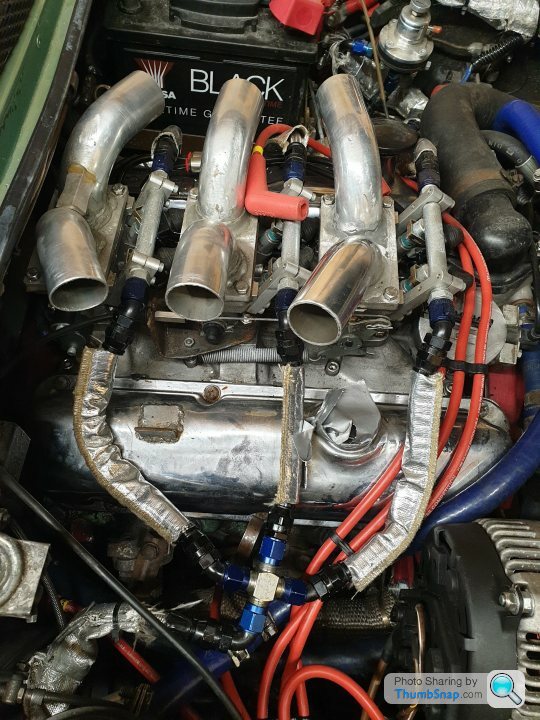
The good and the bad today.
First the good: the revised fuel to the TBs
And the bad: investigated a fuel leak at the rear. All connections tight, spot a fuel drip from the LH drain plug. Literally touch it with a spanner, no attempt to turn it and:
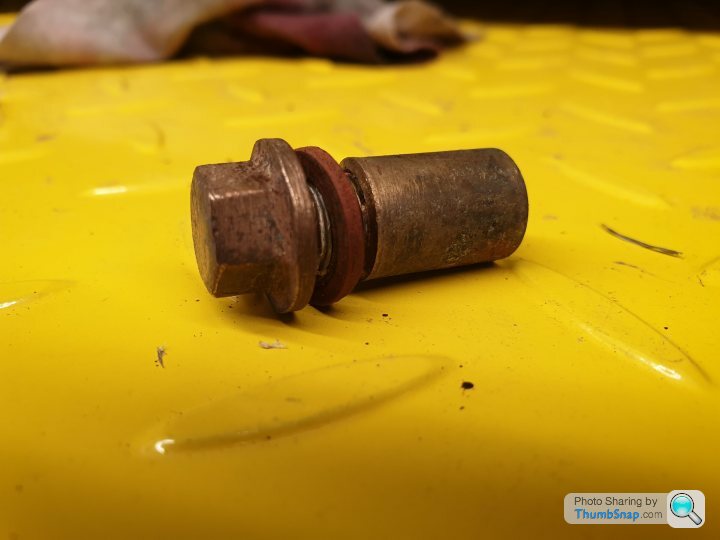
Followed by 5 or 6 gallon of 99RON E5 making a sharp exit and me scurrying round looking for containers....
First the good: the revised fuel to the TBs
And the bad: investigated a fuel leak at the rear. All connections tight, spot a fuel drip from the LH drain plug. Literally touch it with a spanner, no attempt to turn it and:
Followed by 5 or 6 gallon of 99RON E5 making a sharp exit and me scurrying round looking for containers....
Well I'm still trying to decide on the best method of attaching air filters i the very limited space I have and also waiting for the postie to drop off some Loctite 243 to make sure the fuel tank drain plug stays plugged so yesterday and this afternoon I set to with the interior.
The seats have all been retrimmed by the late departed previous owner and look fine. The fronts are MX5 replacements and the rears are the original under the new covering.
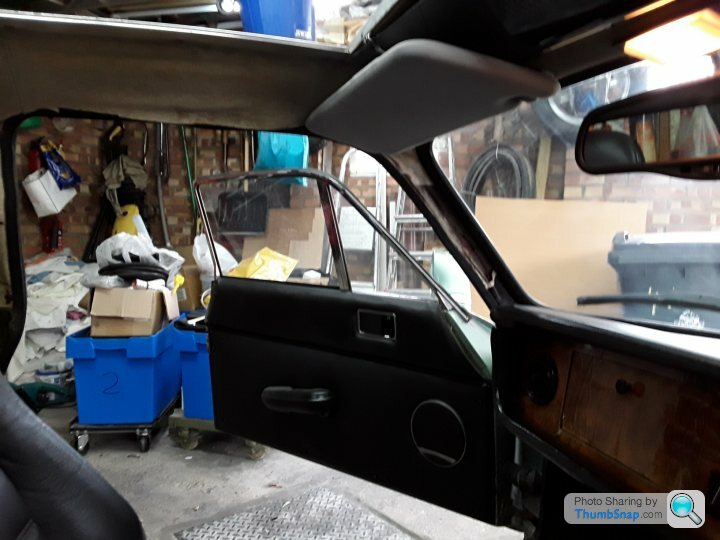
The headlining however is in tatters and is to be replaced, so I first removed the sun roof and side rails.
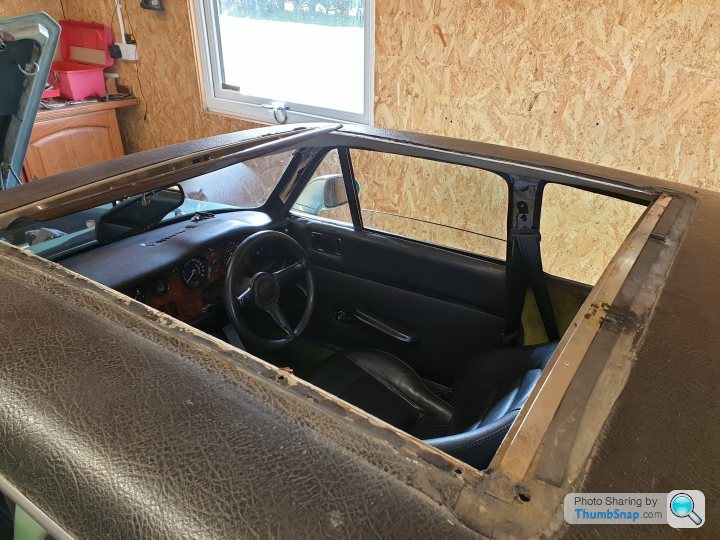
Then the seats came out. These need modification as they seem to be high even for a sub 6 footer like myself. They've got beautifully made subframes but I'm going to have to redo them. Tony must have been a damn good welder of aluminium unless he subbied it out.
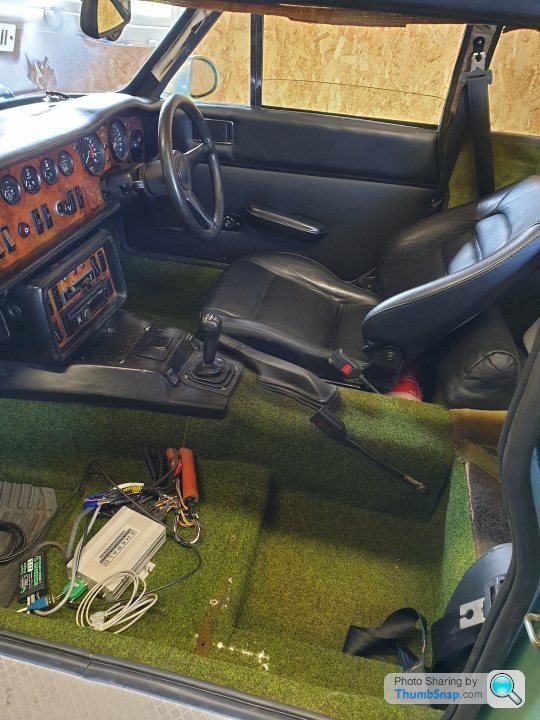
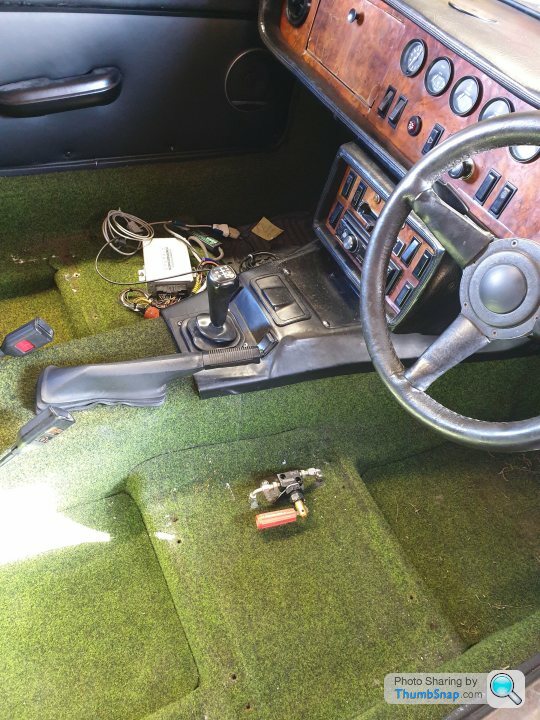
Under the seats sit one one side the Emerald ECU and the other side is the home for a brake balance kit. With upgraded brakes front & rear I guess that may be needed. Lowering the seats will compromise access to both but that's the price I'll have to pay.
Carpets are a horrible interwoven carpet material but are not worn so I'm not sure whether to recarpet or leave but maybe try to recolour? Not sure I like the green.
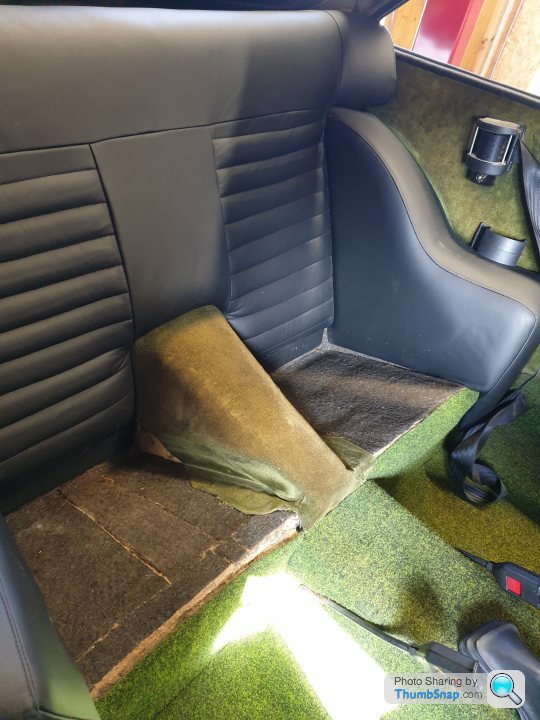
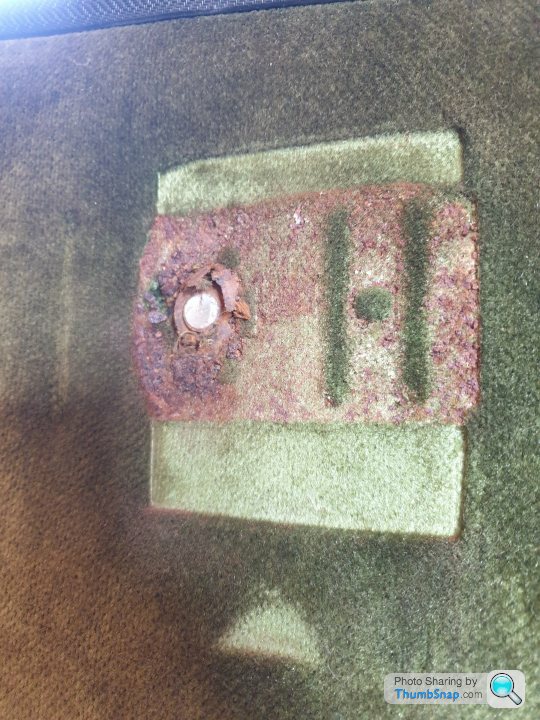
Speaking of green, the side panels in the rear are or rather were a bright green velour which has faded and dirtied over the last 50 years. I toyed with the idea of just recolouring but decided to replace. U fortunately the retractable bit of the front seat belts is bolted through the middle of them. Drivers side unbolted easily. Passenger side wouldn't budge, should I go back to the recolour plan, no let's get the damn thing off. It's only a bolt.
Sometimes I don't know my own strength.
Left the garage on a bit of a low.....
The seats have all been retrimmed by the late departed previous owner and look fine. The fronts are MX5 replacements and the rears are the original under the new covering.
The headlining however is in tatters and is to be replaced, so I first removed the sun roof and side rails.
Then the seats came out. These need modification as they seem to be high even for a sub 6 footer like myself. They've got beautifully made subframes but I'm going to have to redo them. Tony must have been a damn good welder of aluminium unless he subbied it out.
Under the seats sit one one side the Emerald ECU and the other side is the home for a brake balance kit. With upgraded brakes front & rear I guess that may be needed. Lowering the seats will compromise access to both but that's the price I'll have to pay.
Carpets are a horrible interwoven carpet material but are not worn so I'm not sure whether to recarpet or leave but maybe try to recolour? Not sure I like the green.
Speaking of green, the side panels in the rear are or rather were a bright green velour which has faded and dirtied over the last 50 years. I toyed with the idea of just recolouring but decided to replace. U fortunately the retractable bit of the front seat belts is bolted through the middle of them. Drivers side unbolted easily. Passenger side wouldn't budge, should I go back to the recolour plan, no let's get the damn thing off. It's only a bolt.
Sometimes I don't know my own strength.
Left the garage on a bit of a low.....
JB99 said:
Oh dear!
That is going to take some shifting.
I would centre punch as near centre as possible, then drill through with a small drill, increase the size of dril until either all out or the remains heat up enough to free off and will wind out. With either option, it's a b d of a job.
4 drill bits in and not at the full depth of the bolt yet, did increase bit size as I went though. One bit slowly blunted and started to glow red so I kept on going and the bolt became cherry red too, all in the hope that the heat would help. Release fluid too inc a special one provided by a supplier to the trade which I'll keep dowsing the bolt with. Had a hammer and chisel (screwdriver) at it too in an attempt to start it off but it ain't shifting.That is going to take some shifting.
I would centre punch as near centre as possible, then drill through with a small drill, increase the size of dril until either all out or the remains heat up enough to free off and will wind out. With either option, it's a b
d of a job.Beginning to wonder if it was the right bolt and it's cross threaded as well as rusted?
Patience, Patience, Patience.
JB99 said:
I have only had to do this once, on a caliper bolt at that. The third increase in size saw the bolt remains colapse as I had failed to centre punch in the centre and the remains wound out. But I had the advantage of being able to clamp the caliper carrier in my bench vice!
I guess that you cannot get behind the offender?
Would you be able to Dremil a slot across it, to give your....hopefully old....screwdriver something to dig in to?
One of the last resorts is cutting the fibreglass to get behind but not sure that'll actually help. For some reason this is seriously rusted in and the thread is close to 35 - 40mm in length. A little concerned about how it's rusted when it's theoretically enclosed in body panels. Was going to get a set of "easy-outs" today but to be honest it needs to be relatively free for them to work. I'm trying to drift it out (anticlockwise). Hoping the release stuff and multiple good clouts free it off. (Local hospital phone number at the ready for when I hammer my hand!)I guess that you cannot get behind the offender?
Would you be able to Dremil a slot across it, to give your....hopefully old....screwdriver something to dig in to?
The good news is that there was a sleeve over the first part of the bolt which when freed came off leaving me about 25mm of thread to attach two nuts tightened together to extract the remains in classic fashion.
The bad news is that no matter how tight I jam the two nuts together before attempting to unscrew, the remains of the bolt remains in the mounting even after dowsing in vast quantities of industrial release fluid.
I need another plan, where's Baldrick?
The bad news is that no matter how tight I jam the two nuts together before attempting to unscrew, the remains of the bolt remains in the mounting even after dowsing in vast quantities of industrial release fluid.
I need another plan, where's Baldrick?
Baldrick arrived with a very cunning plan.
Abandon the old mount and create a new one. The original was a (seized) bolt into a captive nut which is welded to a steel frame that also has the door catch attached. New mount created immediately adjacent utilising existing steel frame etc.
So for a bit of light relief and since a giant parcel had arrived from Woolies (that's the trimming place not the superb bakery on Arran or the old pick & mix store Woolworths) i decided to start the headlining and pillar trims. No pics yet but the headlining material is cut, partially in place, and I have a lot of Trim Fix to remove from my fingers.
It would be so much simpler if I could have turned the car upside down, gravity working rather against my wishes. Still it's better than a job I did many years ago when expanding foam in cans was new to the market. That job involved a trip to the hairdressers to get a load of it cut out from my hair!
If anyone tells you it'll be easy, gluing headlining material to the underside of a car roof, don't believe them.
The complex curves throw everything out of alignment, gravity is the number one enemy and even measuring twice & cutting twice if no longer appropriate.
I did my Lotus Excel a couple of years ago but most of the roof was separate f/g panels and sections that I covered first then installed. The Gilbern (hasn't a name yest but I called it a few last night) is a different matter, compounded by the 800mm x 800mm sunroof hole.
Would have tried for photos but most of the time I was under the material dressed a bit like a ghost in Scooby Doo!
Need some material to mask a dodgy joint and tidy a cut line. It's the Haberdashery shop for me today.
Still no pics I'm afraid, no work done either but have been shopping.
Not happy with the headlining material or the way I'd put it up.
Joins showing and to quote the bloke in the haberdashery shop "if I got a scone with cream that colour I'd send it back".
Yesterday we tried a multitude of options to improve the dodgy joint (of my making) and the slight error around one window without success until he suggested cutting strips off some Harris Tweed. One look at the tweed and I was sold on redoing the roof in it. Took a sample home to play, glue doesn't show through it, you can but joint it and it blends almost seamlessly, and it sticks well to the foam backed headlining I've just put up and looks super classy.
Today I bought 2.4m (all they had of that colour) and also a little cutting wheel thing (which according to my wife they all use on some sewing TV prog) and he was using in the shop.
Progress report:
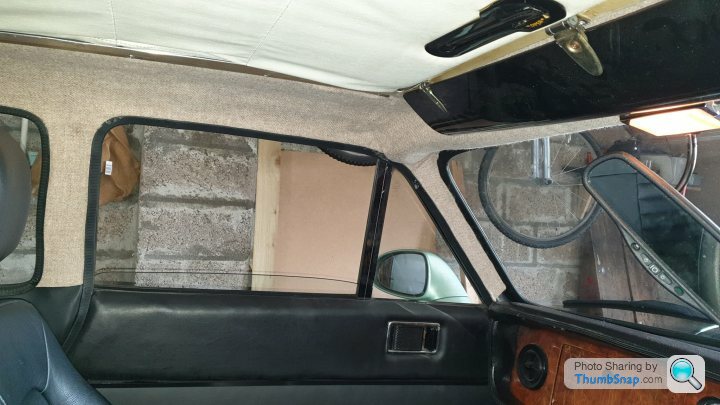
New Harris Tweed headlining in, needs a bit of a tidy up and trim of threads around the back but it's a lot better than the rotted out torn old headlining.
50 year old headlining
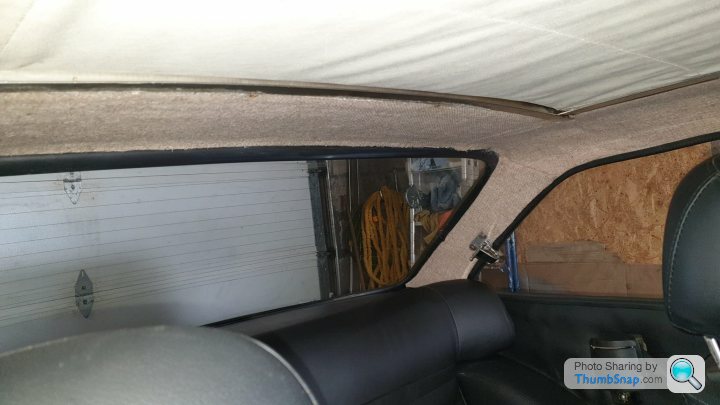
New headlining (needs a final trim & tuck).
Car moved today under it's own steam, all seats back in, need to fix the mirror(!) and the fuel gauge isn't registering, either I've dislodged the wires putting the LH tank back in or it needs more than half a gallon to register.
Waiting for some 45 degree silicone bends to sort out the air intake set up. Having looked at all the options (plenum, top horiz air filter on a new air box, two "panier" filters from ITG/K&N/Ramair etc I've gone back to the way Tony was thinking but am hopefully neatening it a little.
Every job I've looked at on this car I've thought I can redesign that but eventually fallen back to his design ideas. He knew what he was doing. As another example, the replacement MX5 seats sit a little high for me, on a beautifully made sub frame. I was desperate to lower them but he's got the Emerald control box under the passenger seat and a brake balance under the driver seat, each with about 3mm clearance.
New Harris Tweed headlining in, needs a bit of a tidy up and trim of threads around the back but it's a lot better than the rotted out torn old headlining.
50 year old headlining
New headlining (needs a final trim & tuck).
Car moved today under it's own steam, all seats back in, need to fix the mirror(!) and the fuel gauge isn't registering, either I've dislodged the wires putting the LH tank back in or it needs more than half a gallon to register.
Waiting for some 45 degree silicone bends to sort out the air intake set up. Having looked at all the options (plenum, top horiz air filter on a new air box, two "panier" filters from ITG/K&N/Ramair etc I've gone back to the way Tony was thinking but am hopefully neatening it a little.
Every job I've looked at on this car I've thought I can redesign that but eventually fallen back to his design ideas. He knew what he was doing. As another example, the replacement MX5 seats sit a little high for me, on a beautifully made sub frame. I was desperate to lower them but he's got the Emerald control box under the passenger seat and a brake balance under the driver seat, each with about 3mm clearance.


Mercdriver said:
I nearly bought one of these many years ago, it had the same green velour trim, I would have had to replace it.
In the end I did not buy the car, the balance pipe? Connecting the twin fuel tanks Across the rear of the boot put me off, fire risk in a rear shunt. Are they still like that or was the design changed on safety grounds?
Edited to clarify what the balance pipe is connecting
Still there on my 1973 Mark 3.In the end I did not buy the car, the balance pipe? Connecting the twin fuel tanks Across the rear of the boot put me off, fire risk in a rear shunt. Are they still like that or was the design changed on safety grounds?
Edited to clarify what the balance pipe is connecting
Edited by Mercdriver on Wednesday 19th July 20:38
Thanks for reading
Gassing Station | Readers' Cars | Top of Page | What's New | My Stuff