Craig's 328i Sport - e36 Track Car Build Thread
Discussion
I decided in late 2009 that I was going to go ahead and build a track car after many years of talking about it, but never actually doing it. At first I was going to use my daily driver at the time; an EP3 Civic Type-R, however I really wasn’t convinced by it, as all I have ever really drove on track is RWD cars. As good as the Civic was, and don’t get me wrong out the box they are an awesome car, I just could never warm to the fact it was FWD and hankered for another BMW after my short lived ownership of an M3 CSL.
So in October 2009 I started looking into what to choose, the obvious been an e36 M3 but a little more research brought up another contender, an e36 328i Sport. Not only was insurance one third of the cost, the Sports are a lot lighter at the front end which on tighter tracks meant less under steer, sure it’d be 100bhp down but I was convinced it’d be a good base car to start with.
Roll on December and I’d found a 328i Sport I really like the look of, however it wasn’t for sale I’d just seen the pictures on a forum that both myself and the owner are members of. I decided to ask the owner, Jon, a few questions... just about what he thought of the car, and if he had to do it again would he buy another. Anyway, one thing lead to another and it turned out due to driving excessive miles that Jon was considering selling the car for a more eco-friendly option.
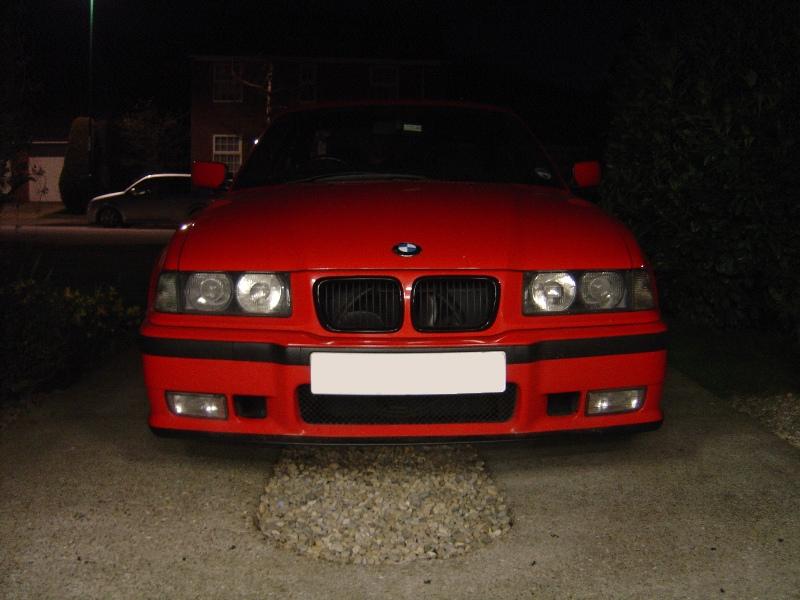
I jumped at the chance and agreed to come and view the car, snow however put a stop to that for a few weeks but by mid-January I was the proud owners of a Hellrot Red 328i Sport which had covered a mere 167,000 miles!!! Yes that’s right 167,000 miles but don’t let that put you off, apart from a few stone chips and a small bit of rust on the front drivers side wing (which has since got worse due to salt!) this car was by far the best conditioned example I have ever viewed and came with EVERY single receipt for parts/work carried out dating back to when the car was first registered in August 1998.
Here are some pictures of the car after I got it home and gave it a quick clean;
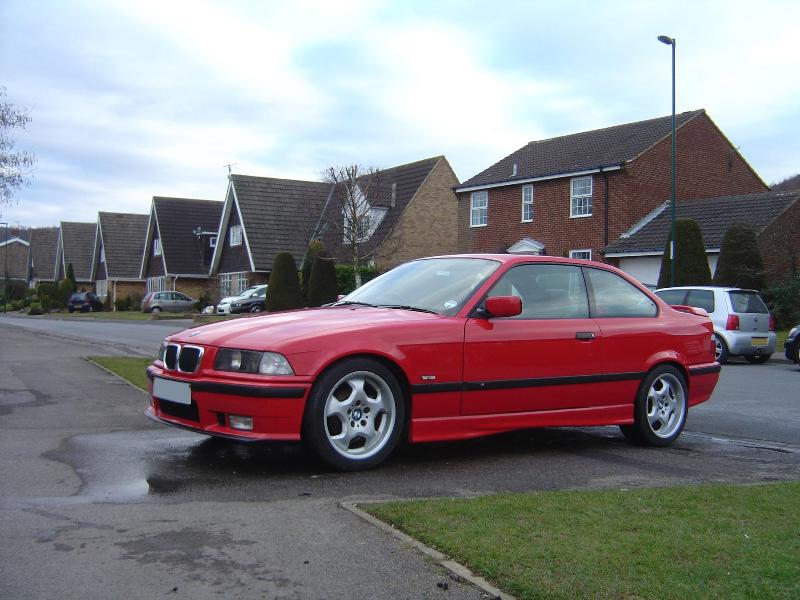
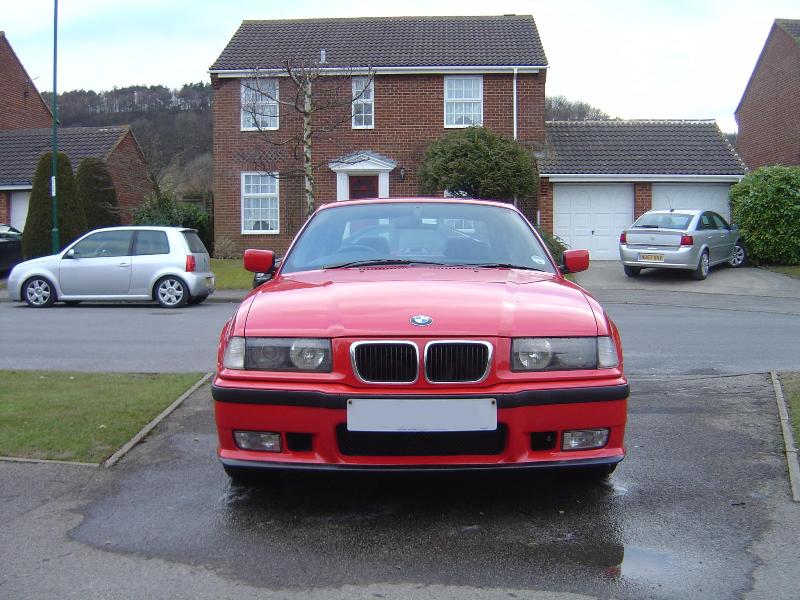
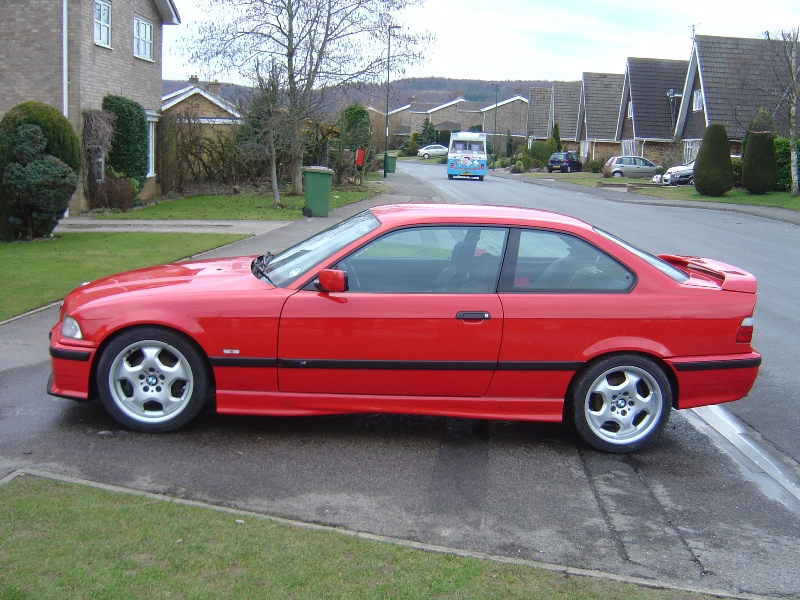
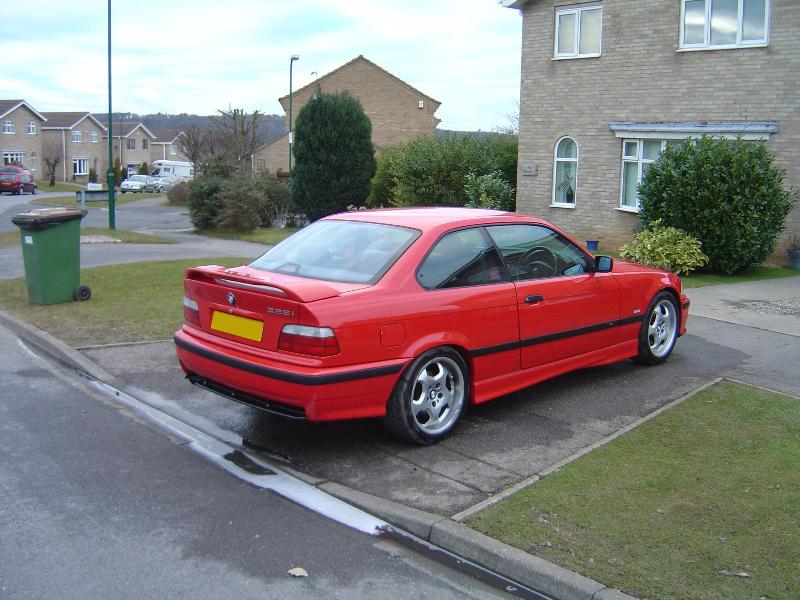
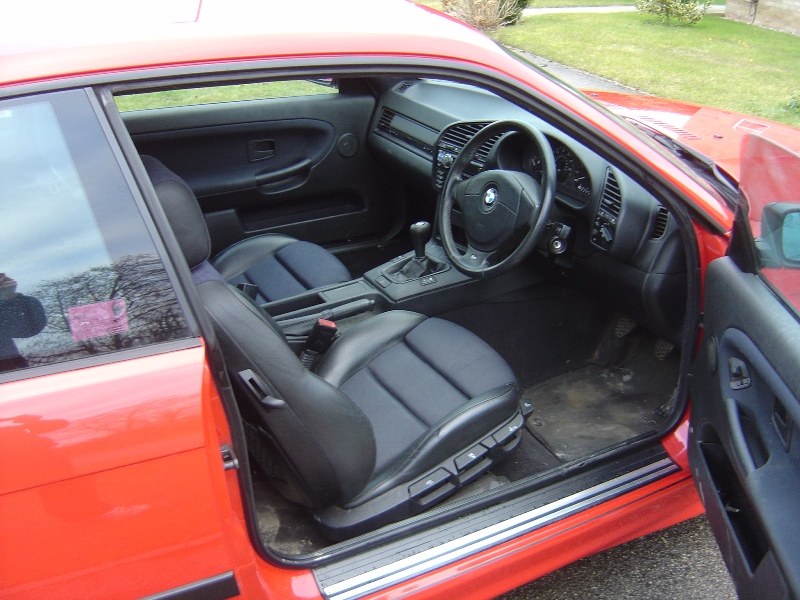
The car came with both the current winter wheels; M3 Saloon Contour II’s plus a set of standard BBS RC042 wheels in need of a bit of refurbishment, mainly due to water getting under the lacquer.
For the first few weeks of ownership I was debating whether to actually spend money on the car, or just leave it as an un-abused example, I had even sold my Type-R and given the 328i Sport ‘daily driver’ status.
In February, a few friends and I decided it would be a good idea to kick the track day season into action and booked up to go to Oulton Park on the 24th. The journey down was wet and miserable but our spirits were not dampened, we got there signed on and went out on a very wet and slippery track. But something rare happened, for the first time of 2010 the sun actually shined and by the afternoon the track was dry and I started to enjoy the car a lot more, this was bad news for my bank balance as I had now decided to bite the bullet and get cracking on re-freshing a 12 year old car to make it a bit more track friendly.
Lots of plans run through my head, and also so did many £ signs. But I decided to start work on planning the chassis, brakes and running gear, leaving the engine and interior for the time being. Due to the car been a later car it had the good alusil engine without the nikasil worries, however it was lacking a limited slip differential a small price to pay I guess for peace of mind.
I decided at first just to keep everything 328i and just fit a 3.0 M3 diff and swap the input flanges over so I could use the standard 328i prop shaft and fit some quality discs and pads to the standard callipers. The plans were to keep everything to a budget, hence the name ‘Project Credit Crunch’ but I decided to go a bit further, still sticking to the plans of a budget track build, however getting it right first time, instead of spending money on parts that would later be replaced by superior parts.
By March the list of work to do was as follows; replace all bushes, upgrade the brakes, upgrade the suspension, fit a limited slip diff and a X-brace off a convertible. So the spending begun.... The parts started rolling in, and the final list of parts to be fitted before my next track day on the 19th of April at the Nurburgring was as follows;
- Eibach Pro-Street S Coilovers
- Camber Adjustable Top Mounts
- Rogue Engineering Rear Top Mounts
- M3 Convertible Front X-Brace
- M3 Evolution Front Wishbones
- M3 Evolution Front Hubs / King Pins
- M3 Evolution Front Brake Set-Up
- M3 Evolution Rear Trailing Arms
- M3 Evolution Rear Brake Set-Up
- M3 Evolution Rear Diff Carrier w/ 3.23 Limited Slip
- M3 Evolution Rear Drive Shafts
- M3 Evolution Brake Servo + Master Cylinder
- Powerflex Black Rear Trailing Arm Bushes
- Powerflex Rear Subframe Bushes
- Powerflex Concentric Front Wishbone Bushes
- Powerflex 25mm Front Anti-Roll Bar Bushes
- Powerflex 19mm Rear Anti-Roll Bar Bushes
- HEL Braided Clutch Line
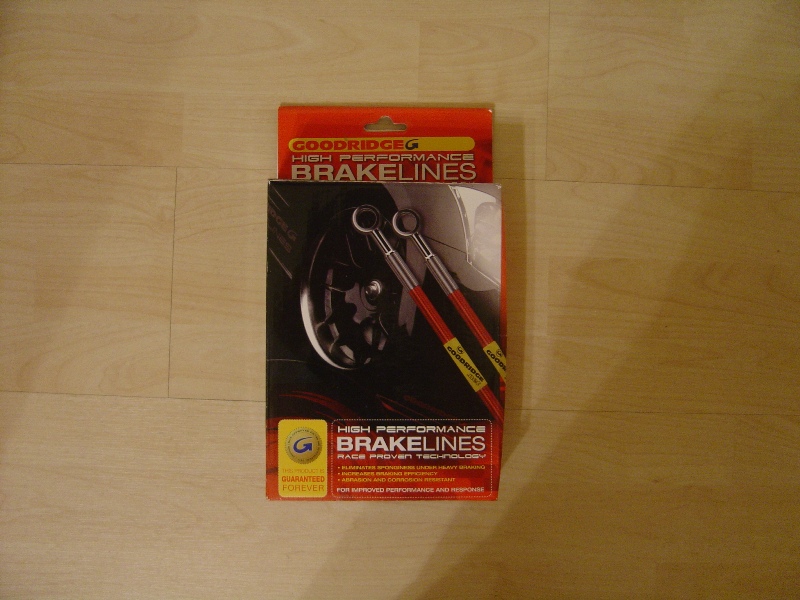
- Goodridge Braided Brake Lines
- Z3M Short Shifter
- Replacement Gear Selector Bushes
- Replacement Bolts for Rear Trailing Arms
- Replacement Exhaust Bolts + Studs
- Redline ATF Gearbox Oil
- Castrol SAF-XJ Differential Oil
- Mobil Engine Oil
- Silkolene DOT4 Brake Fluid
So I had a lot of work ahead of me, with a short amount of time to do it all. In fact I only had 5 days off work in between ordering the parts and the track day so it was going to be tight, remember this car is my daily driver too!!!
As I waited for the part’s to arrive I decided to give the underside of the car a little clean, as I really didn’t want to be laid under a car with dirt dropping into my eyes every 5 seconds, and I only had a 3 day window to fit most the above parts so I wanted to asses everything thoroughly first.
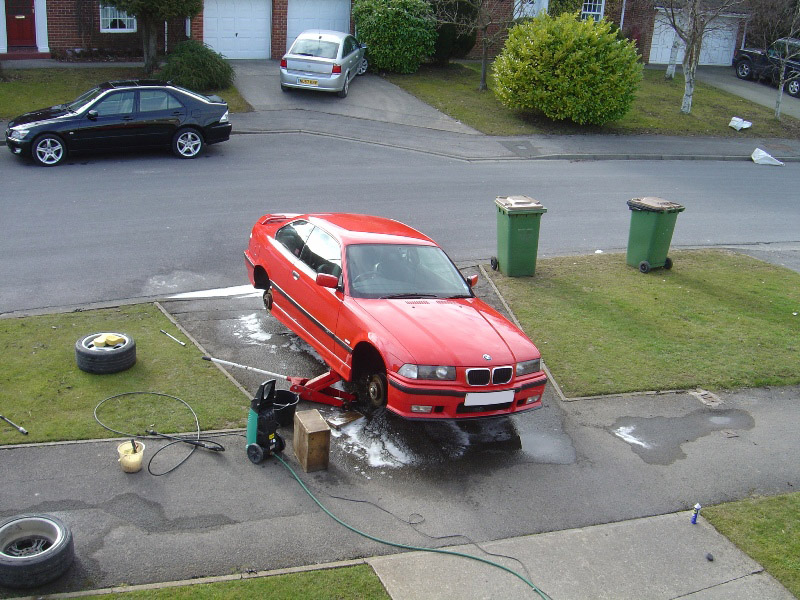
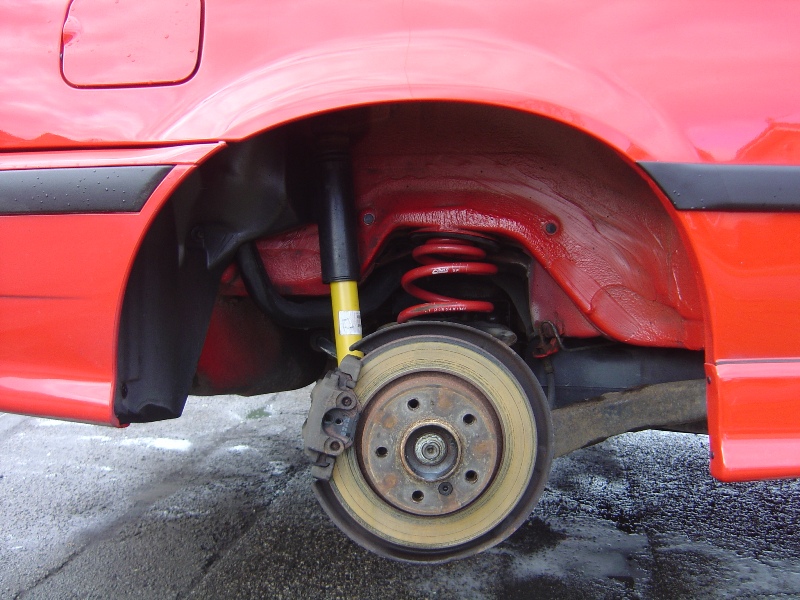
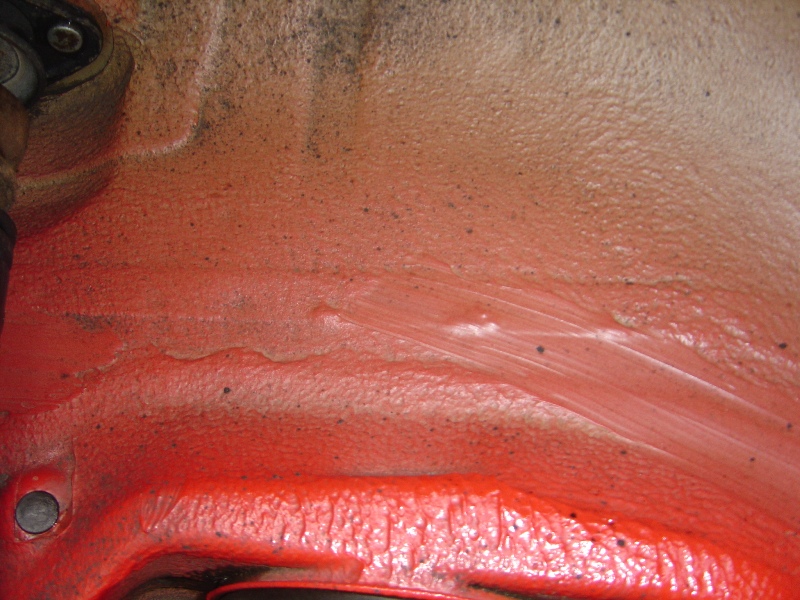
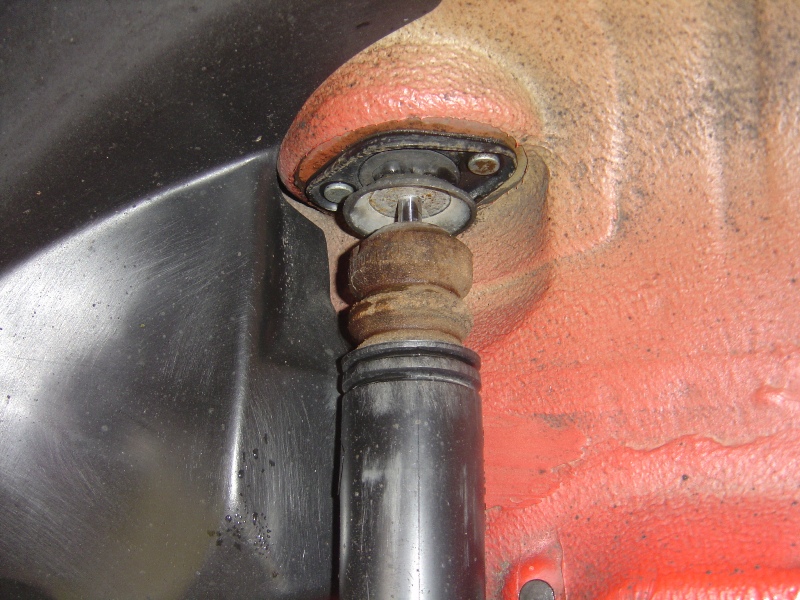
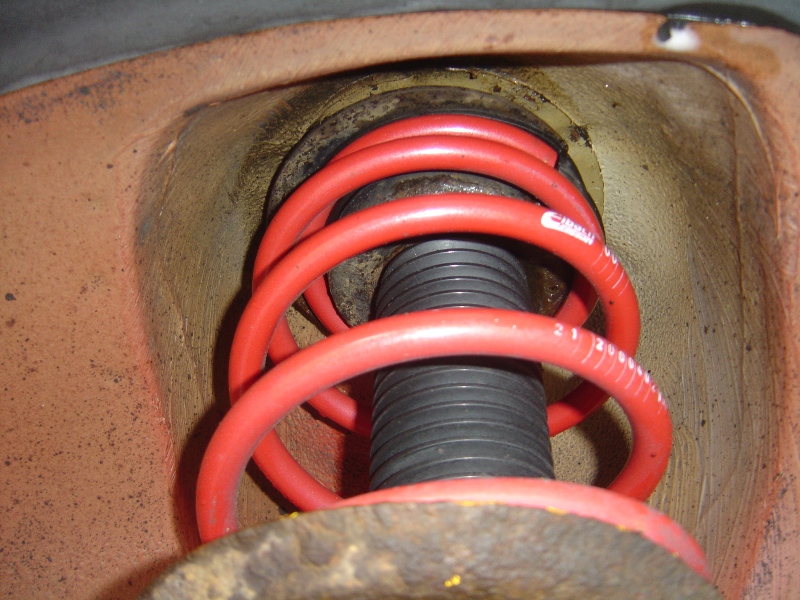
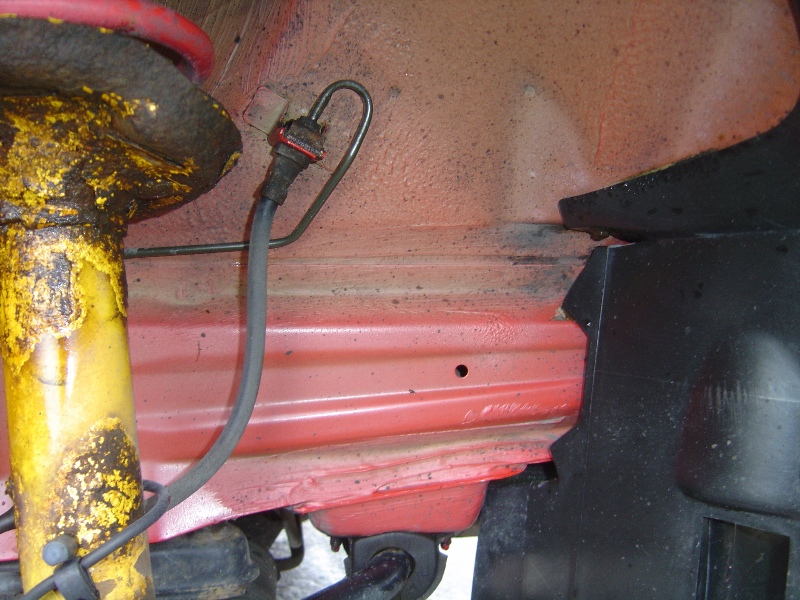
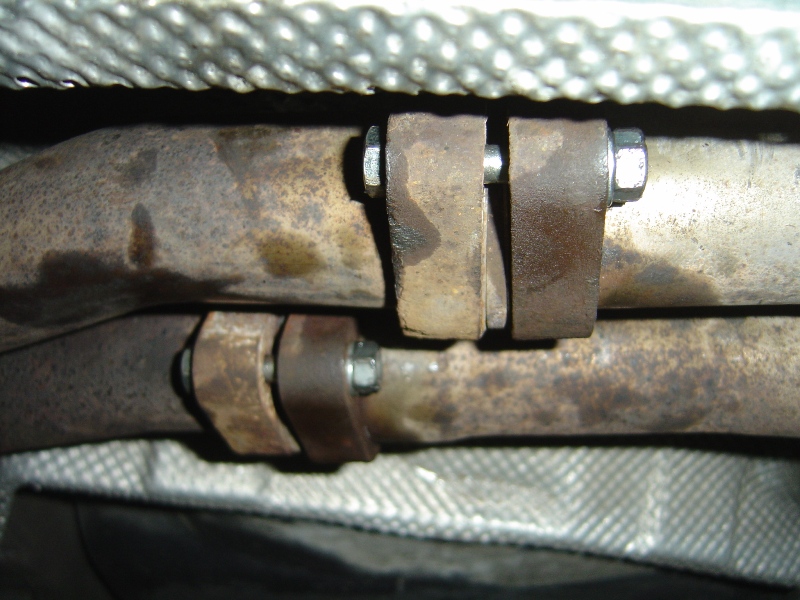
As well as cleaning I decided to free off all the old bolts and copper grease them to speed up the dismantling process, I also decided to remove and temporarily replace the heavily corroded exhaust bolts as this would save time in the long run and keep my stress levels low on the day of fitting the new back axel.
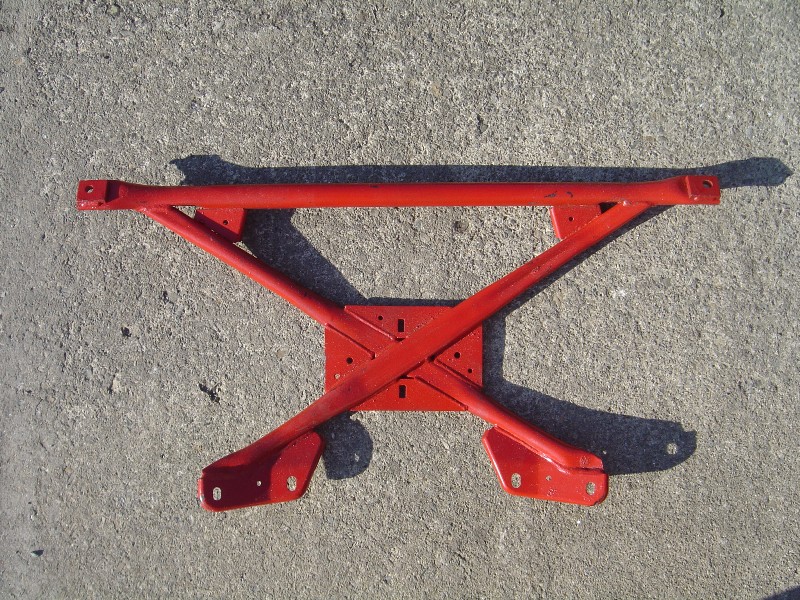
Now the first parts stared arriving at the door, most were useless without other parts accompanying them however the BMW X-Brace wasn’t and I decided to fit this straight away. Fitment was simple, you need to make some bolts up that will help compress the riv-nuts but other than that it was straight forward.
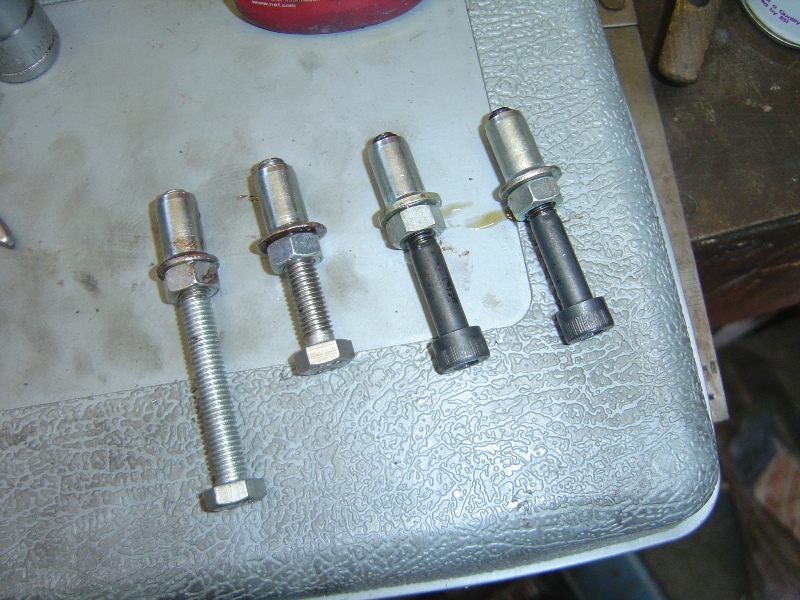
The bolts that compress the riv-nuts, be careful when doing this you need to apply some lock tight to the riv-nut to stop it turning, thus allowing it to compress. All went fine until the 4th nut, the lock tight had hardened so much that when removing the bolt it sheared and we had to carefully drill it out without causing any damaged to the riv-nut threads.
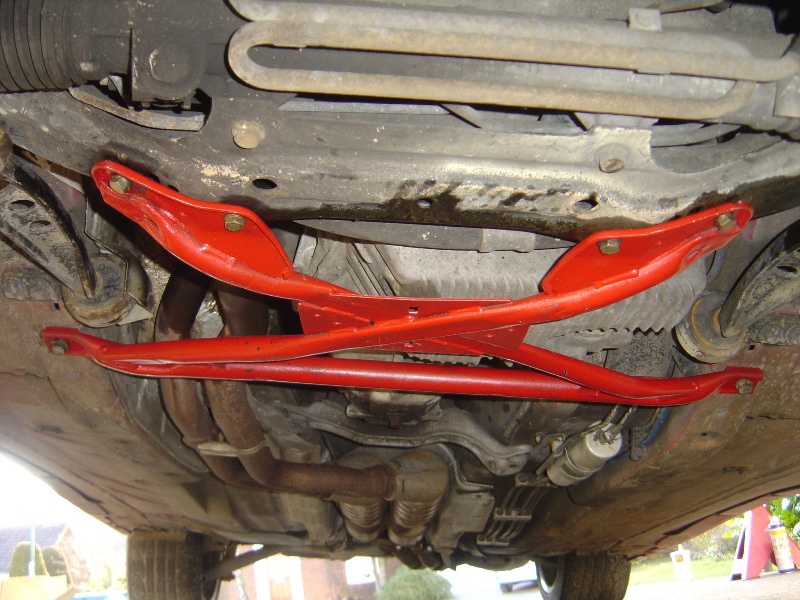
All fitted and in place, hopefully this should stop a little bit of front end twist.
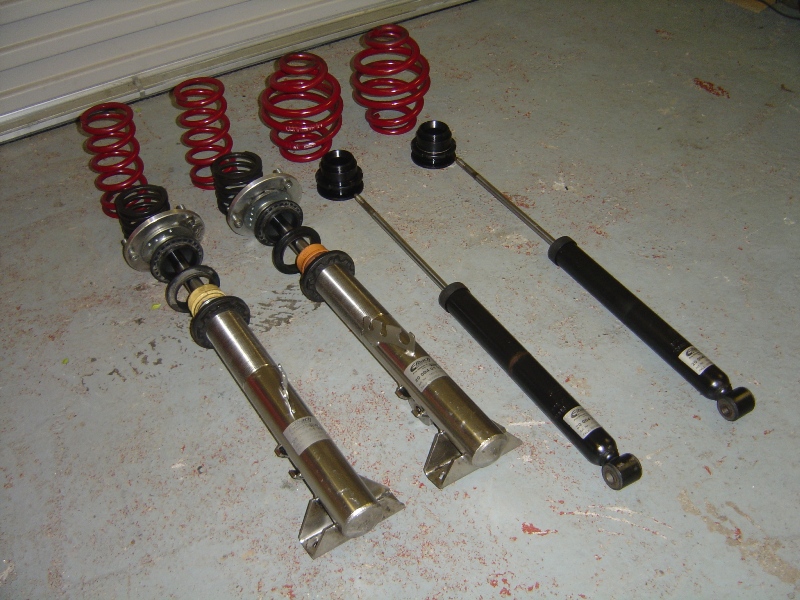
Next to arrive was the coilovers and top mounts, I rebuilt the top mounts making sure that all bolts had a good dose of copper grease to stop any corrosion, and made sure the spherical bearing had a good coating of white lithium grease. Same for the coilovers, these were stripped down and rebuilt with copper grease applied to the threads to stop corrosion, a bit pointless since their stainless steel but it’s just become habit.
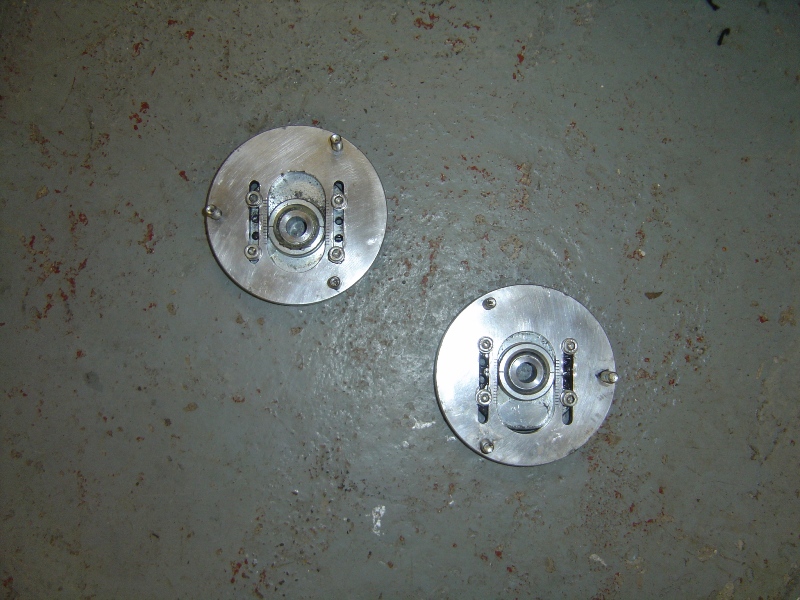
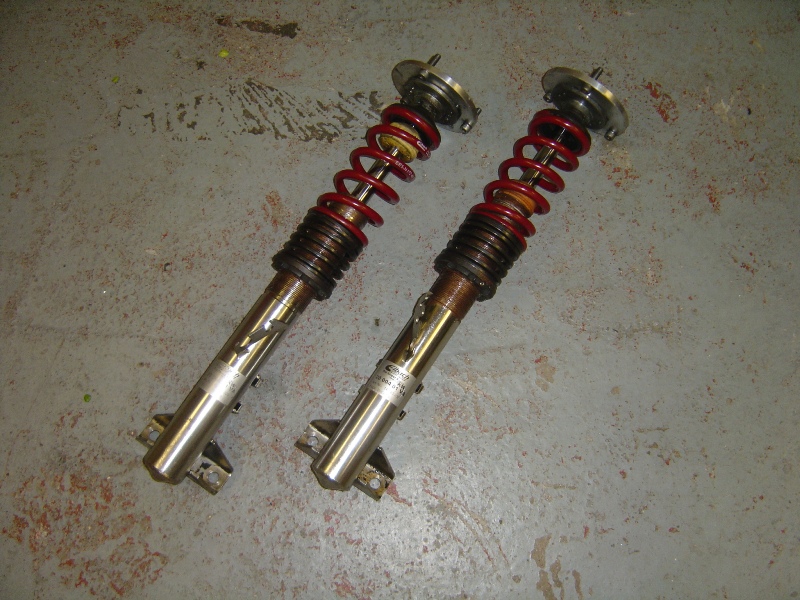
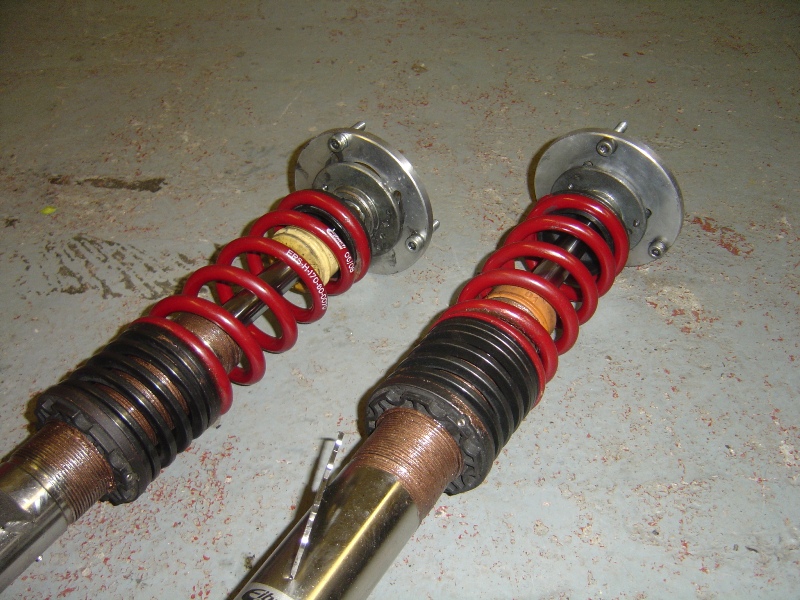
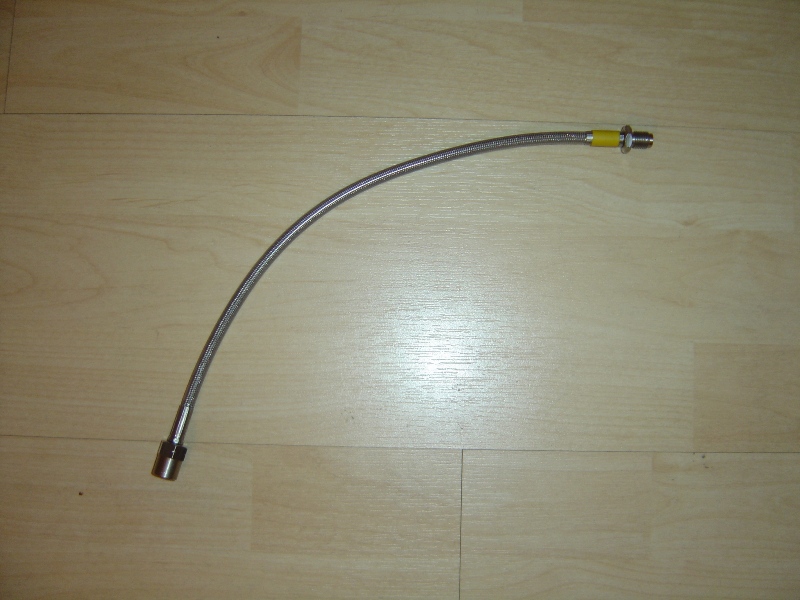
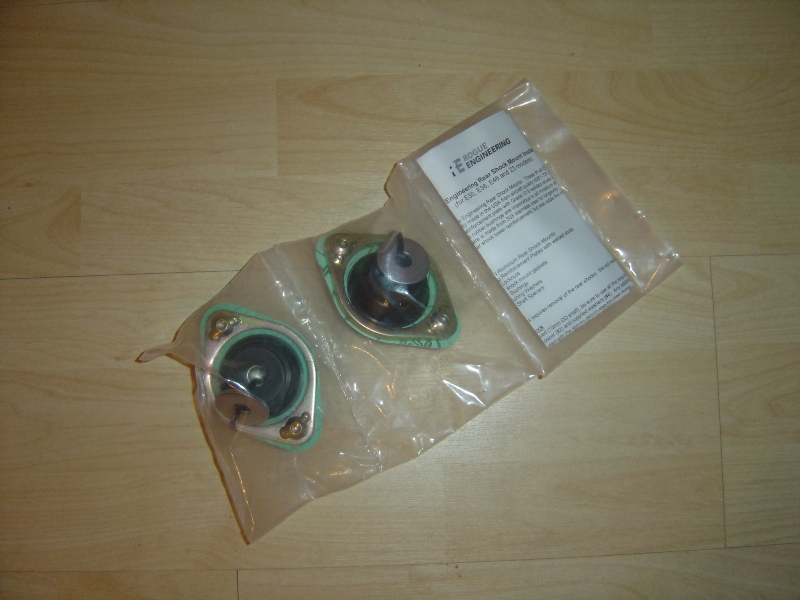
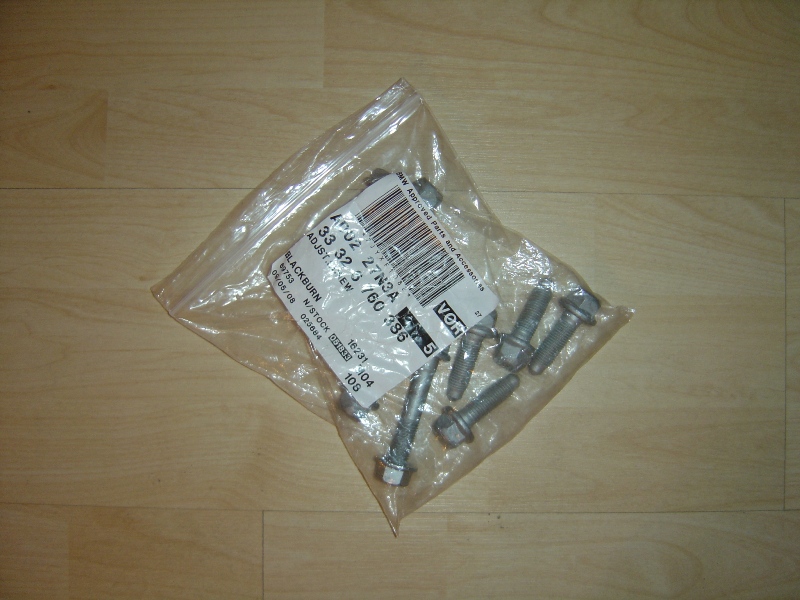
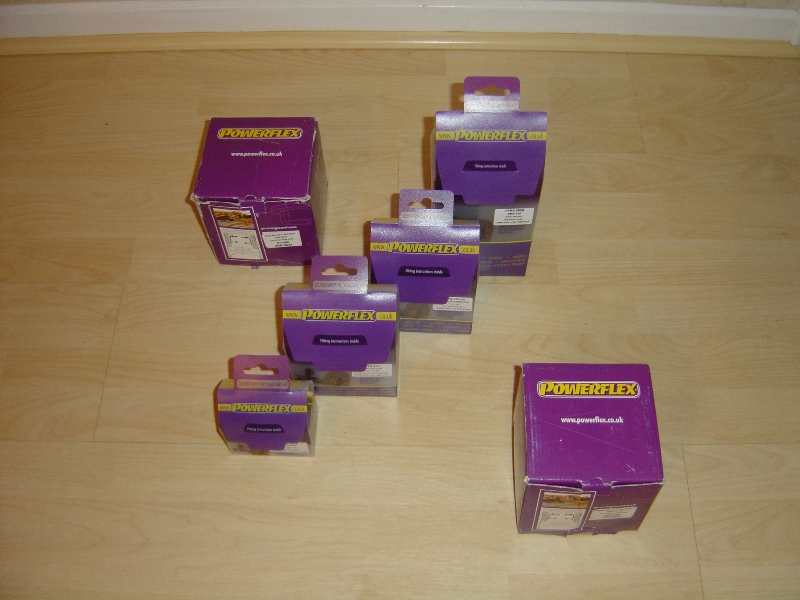
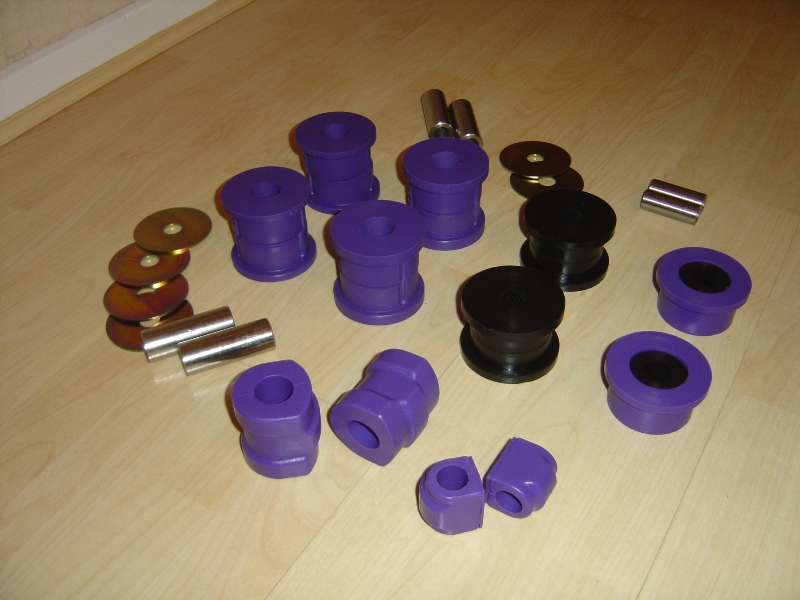
Here’s some more pictures of the parts, braided clutch line, rear top mounts, replacement bolts, polyurethane bushes and braided brake lines.


Halleluiah!!!!!!!!!!!!!!!!!!!!!!!!!!!!!!!!!!!!!!!!!!!!!!!!!!
Finally all the long awaited M3 Evolution parts arrived, work got pretty much straight under way with these bits, I even called in a few favours at work and used the press in the fabrication shop to speed up the removal of the old trailing arm, wishbone and diff carrier bushes. Time was not on my side, I had a few hours in between shifts to get everything ready and painted for my weekend off (19th March) but I managed it, just!
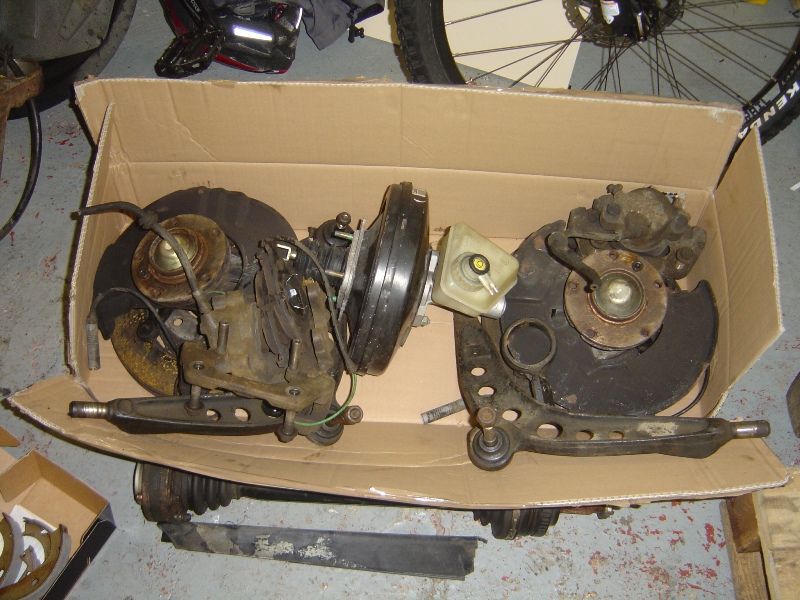
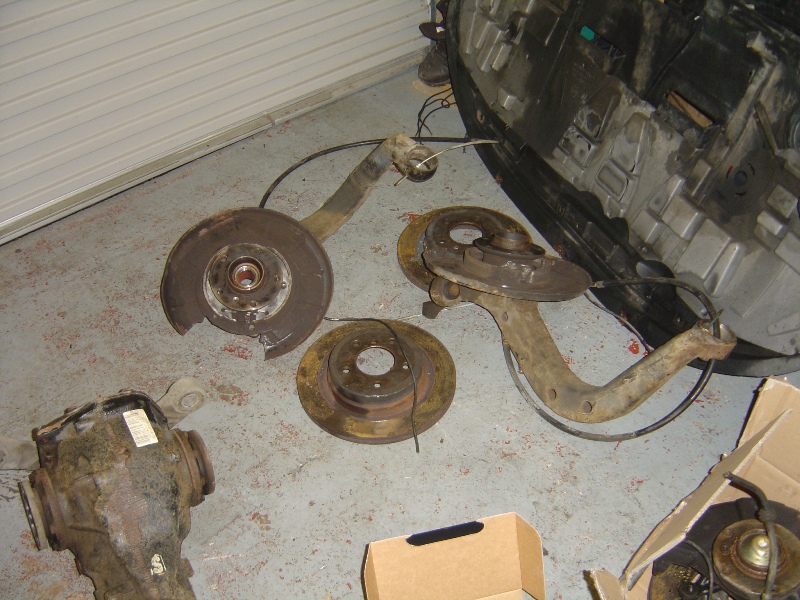
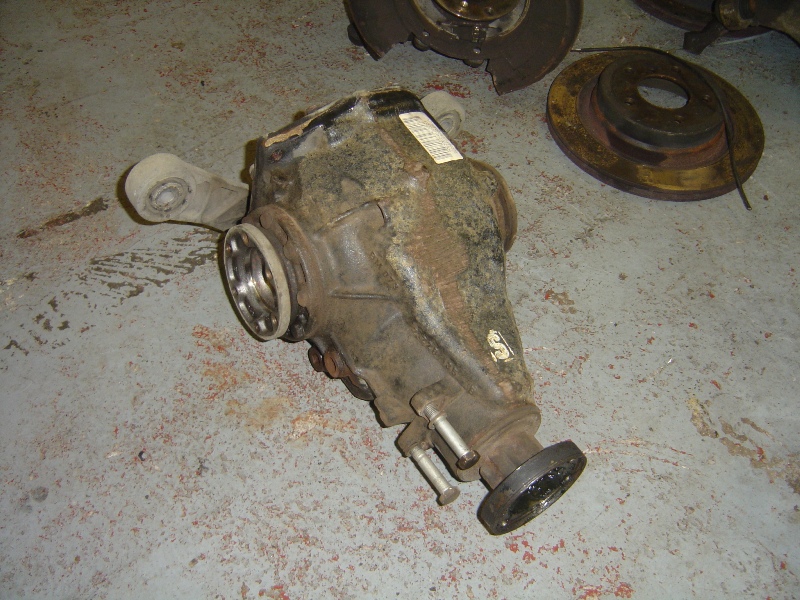
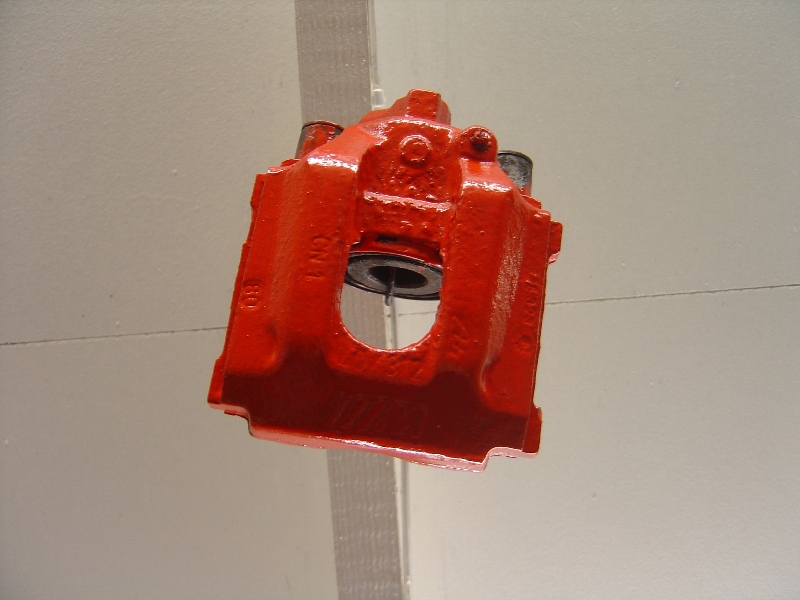
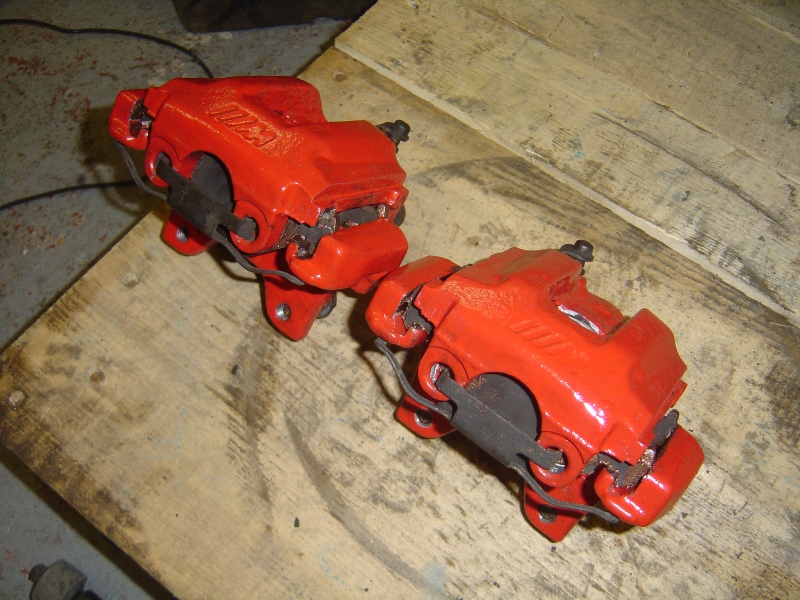
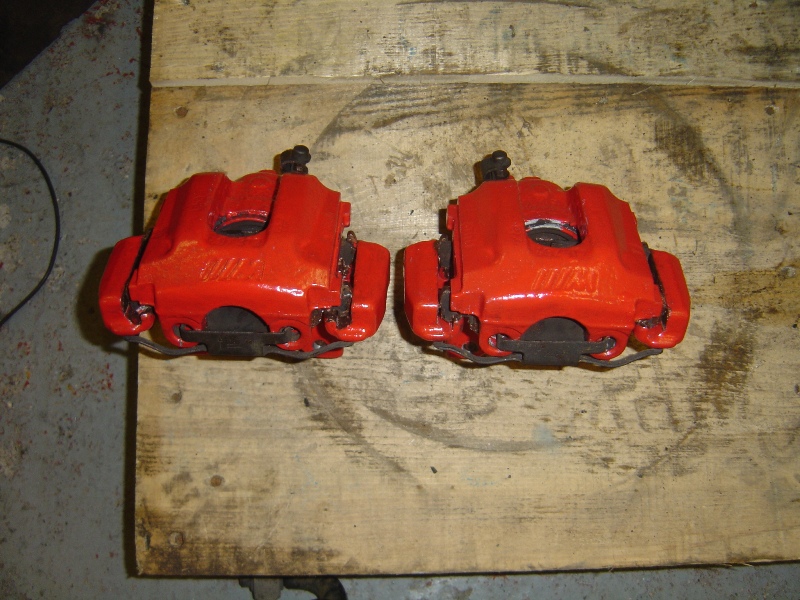
Callipers after been given a lick of paint and a good once over, what can I say I’m a tart and really like red brakes and think it will go well with the red and black theme that will eventually end up been carried out on the car.
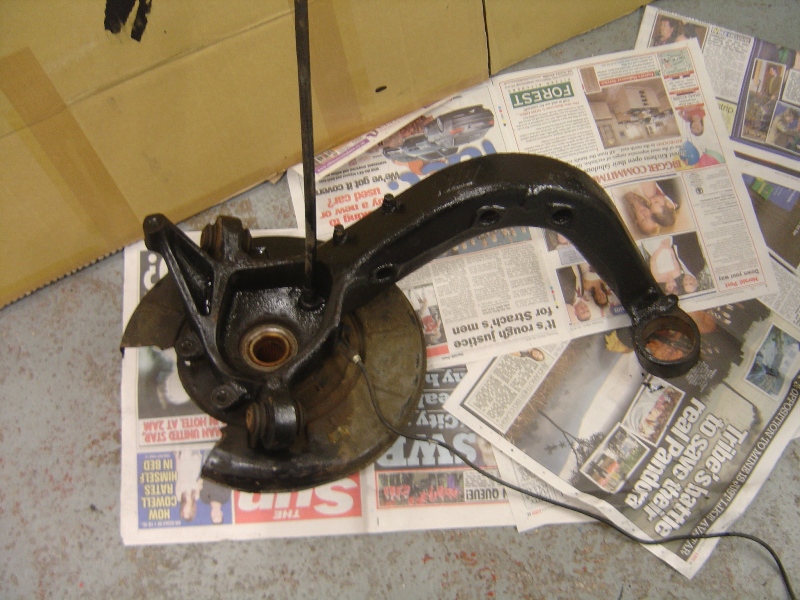
Now came the painting of all the rear axle parts, I opted for boring black because I like things also looking OEM and not screaming look at me.
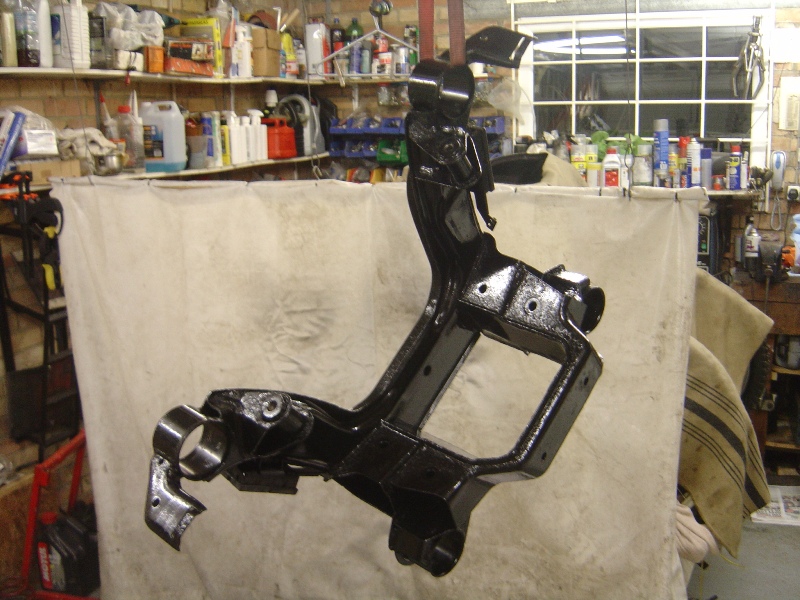
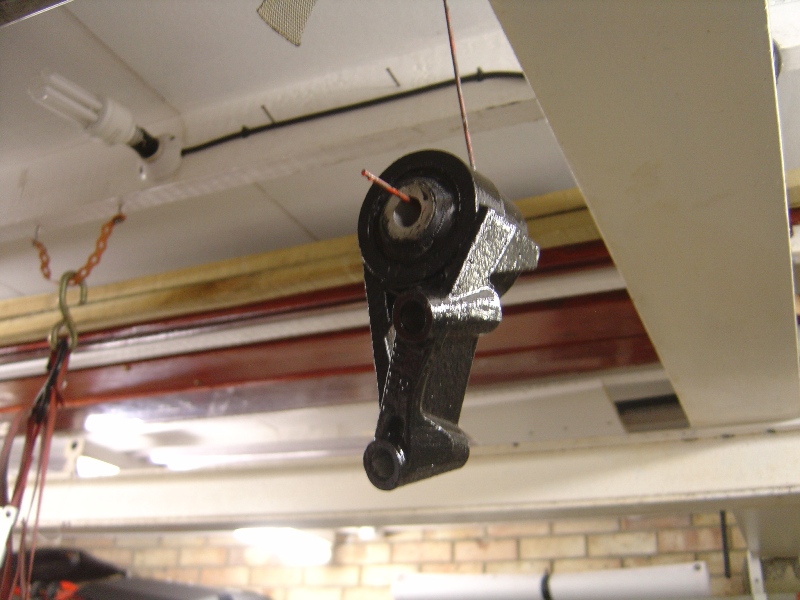
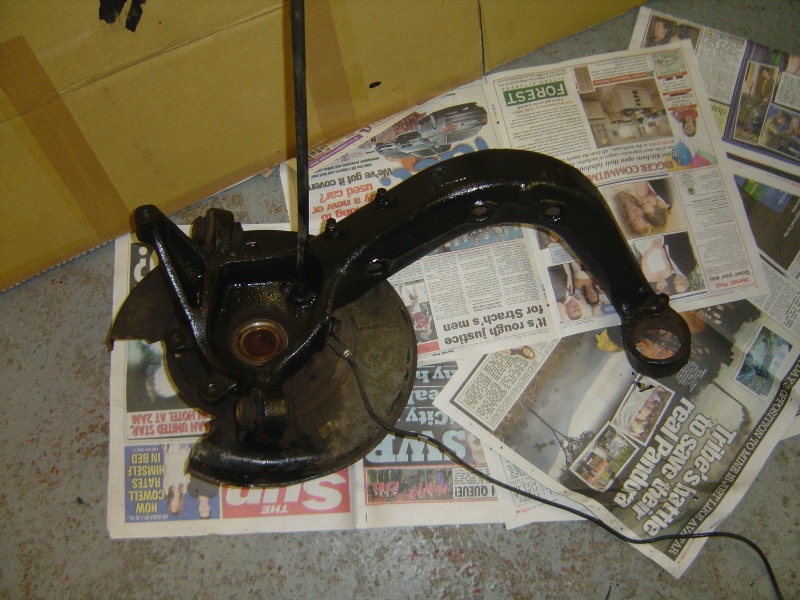
Now came for re-assembly of part of the rear axle ready for bolting straight up to the car, I decided to leave the trailing arms off for the time being to reduce the overall weight of the axel when moving it around and of course offering it up to the car.
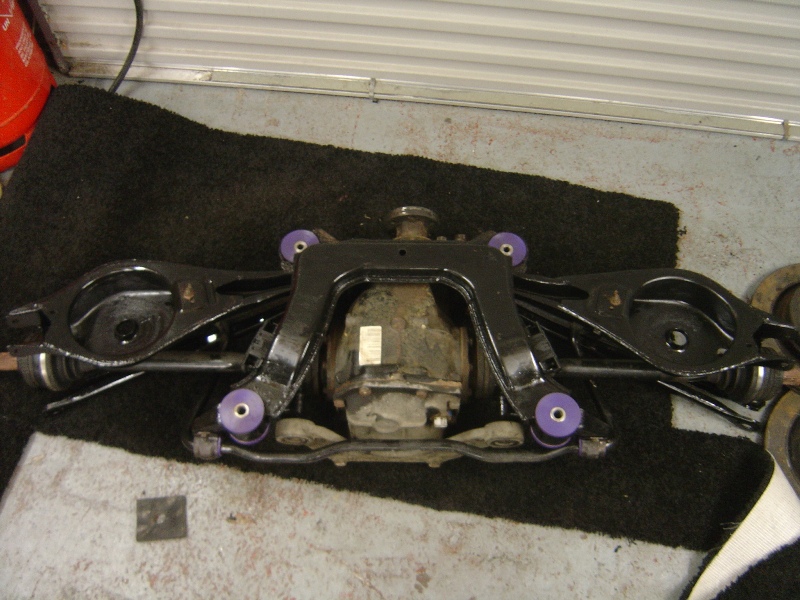
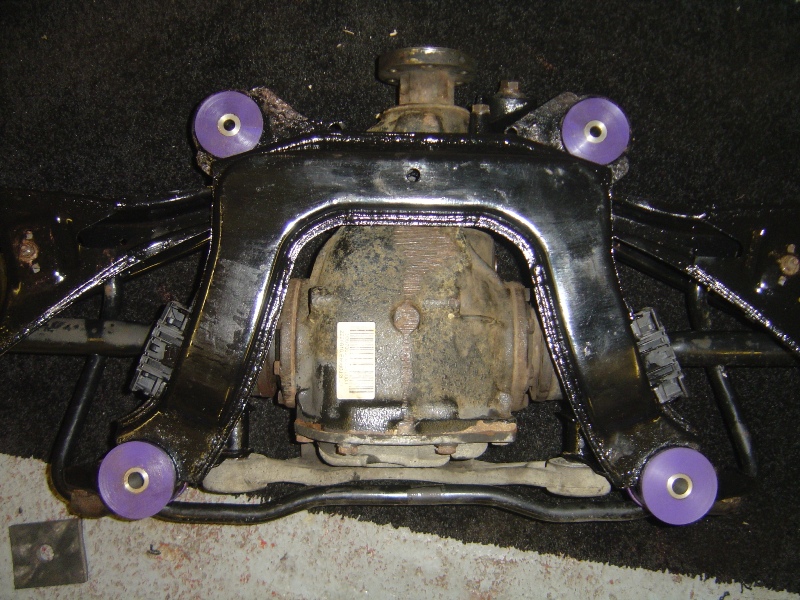
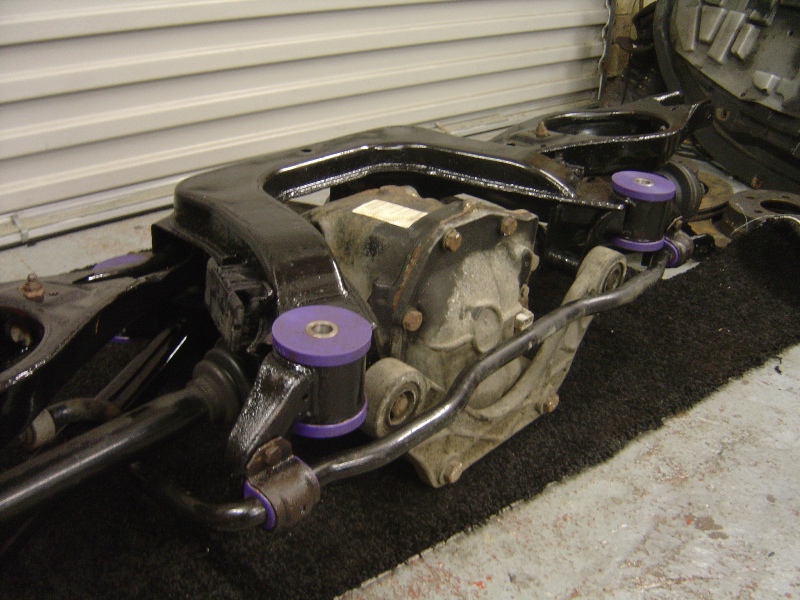
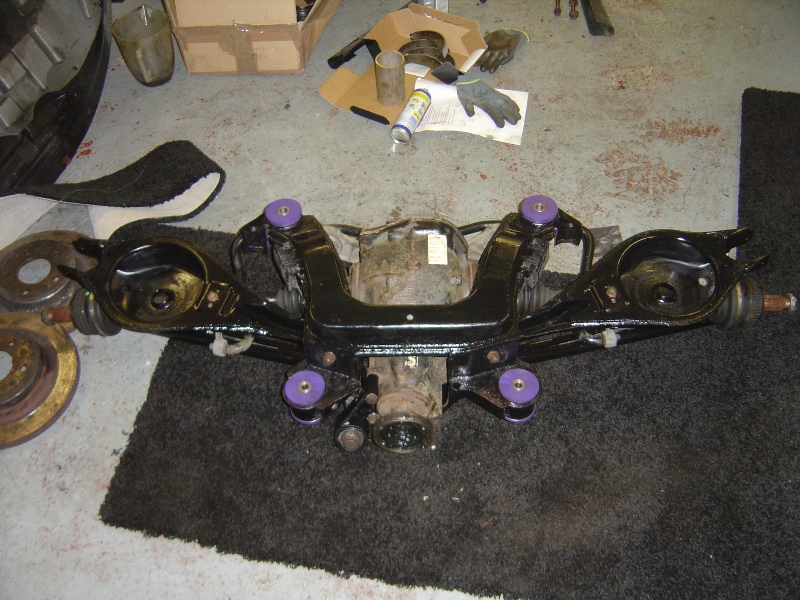
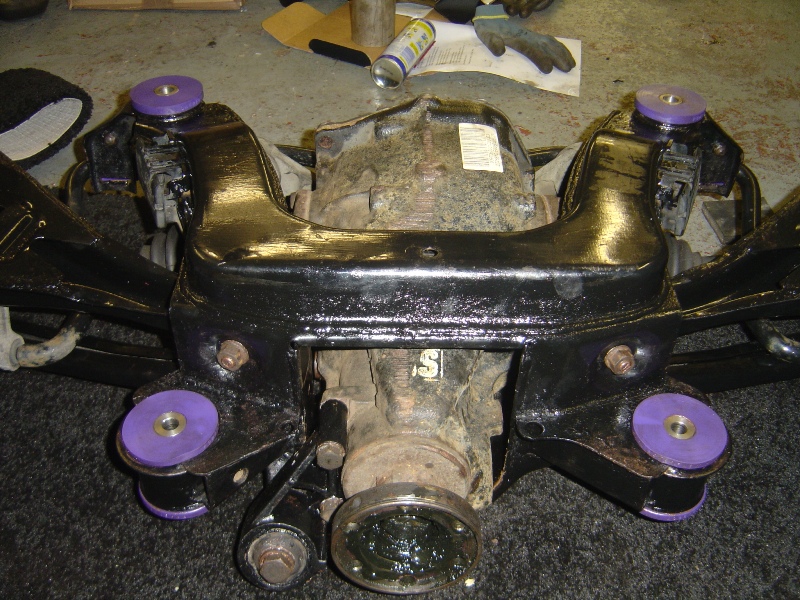
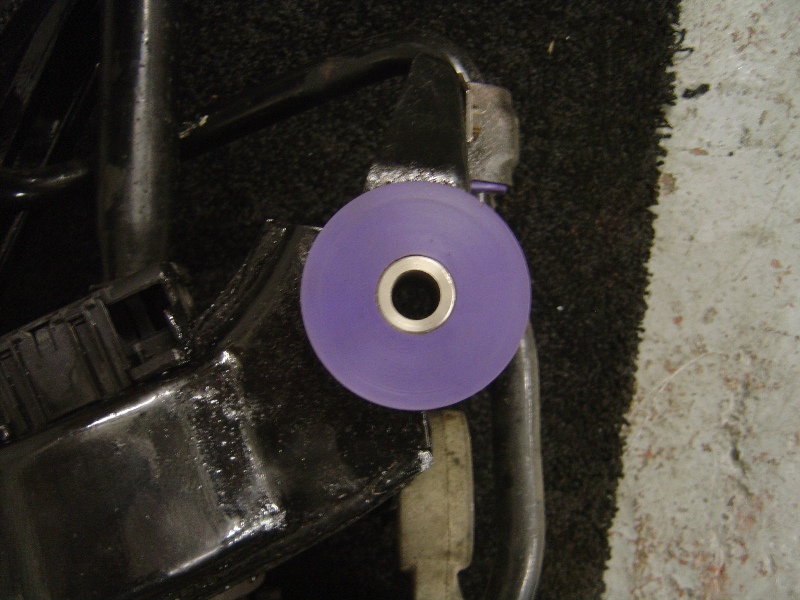
I’d just scraped the deadline, finished work at 22:00 on the 18th and went straight home to rebuild the axel ready for my 3 days off where I had planned to at the very least get the rear axle, gear shifter bushes and rear brakes done. Everything was now set for an early morning start, time for bed!
Well I say everything, there was only one gamble, I still had not received the M3 3.0 prop shaft... so on Wednesday night I spoke to Russ @ M3 Spares and asked if he had any, he did and promised to send it out on Thursday via 24 hour, it was a gamble as if it didn’t arrived I would be without transport on Monday when I was due back at work.
Morning loomed and the weather was on my side, I got the car right up in the air and secured on 4 large axel stands. First to come off was the rear wheels, then disconnect the brake lines, the abs sensors and the rear pad wear sensor. Then onto removing the X-brace to gain access to the exhaust, my previous fitting off new bolts speeded up this process and all was off within an hour or two.

Next up was to drop the rear axle, again planning in advance and removing and copper greasing all the bolts ensured everything came free without any drama, I’d also previously WD40’d the brake lines to help when it came to splitting them too.
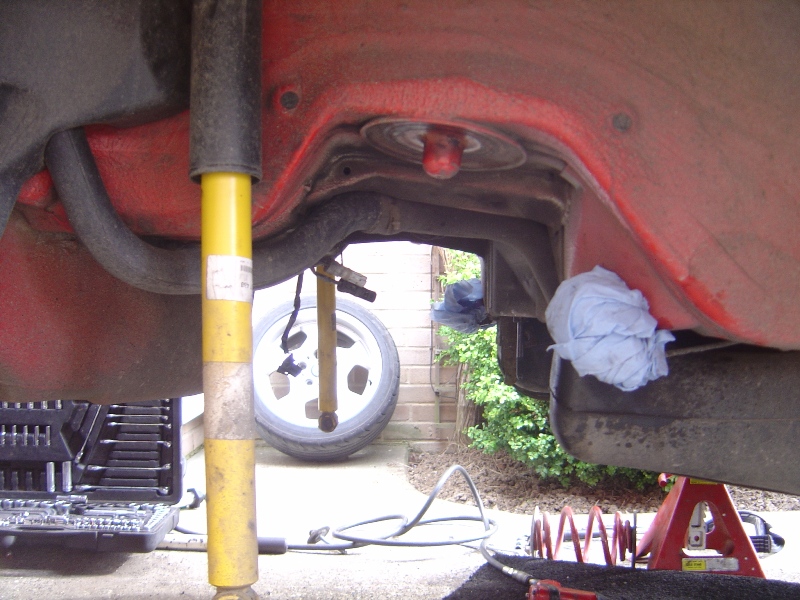
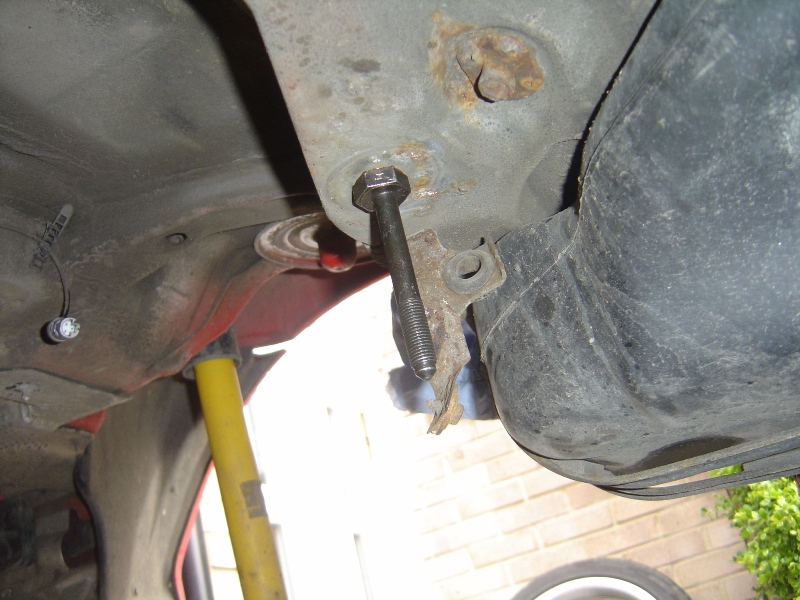
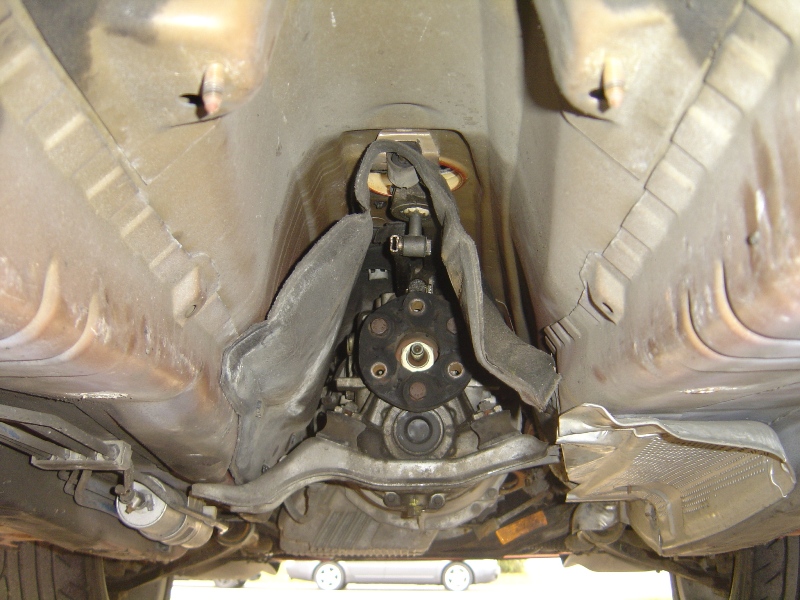
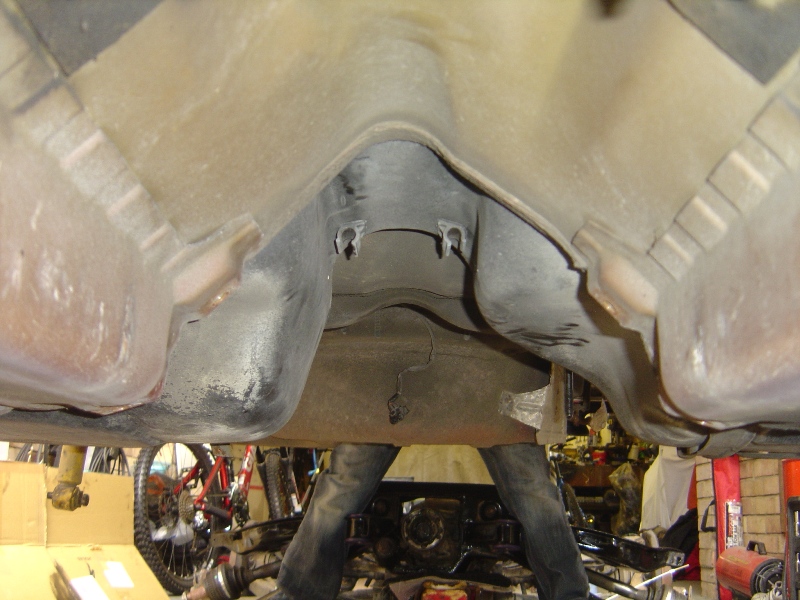
We were only a few hours into it and already we were ready to bolt up the new axel, from here the picture get a little vague as we just concentrated on the job in hand, and guess what... the prop shaft arrived!!! *PHEW*
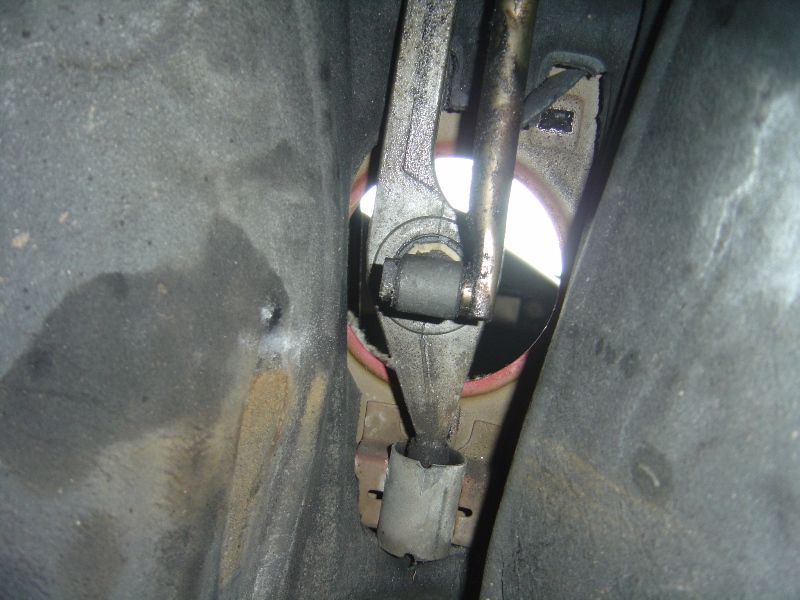
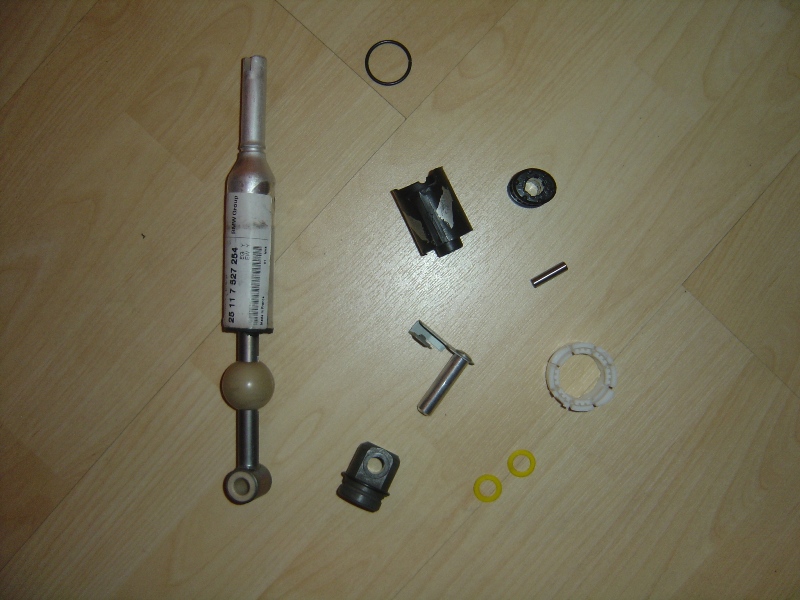
Once the rear axle and trailing arms were on, along with all the rear callipers, drive shafts and hand brake cables in situ I decided to crack on and fit the Z3M shift and replace all old bushes with brand new ones to remove any slop from the shift, after all the car has done 167,000 miles remember.
This was a very fiddly job, especially in the dark, laid on my back working on a gearbox that was still in position. The top clip which needed removing was a case of working blind simply by feel, but after 20 minutes I had got it to release. The whole process probably took an hour or two but there was no rushing about it was nearly mid-night by this point. It was worth doing though as even without driving the car the shifting was much tighter and the Z3M shifter had made the shift a lot more precise.

Saturday morning and it was pissing down, but I carried on with the help of some friends we got the prop-shaft fitted, re-fitted the heat shields and exhaust as well as fit the Eibach Pro-Street rear dampers and springs, along with the Rogue Engineering top mounts.
All was going well, but then we hit a snag when bleeding the brakes one of the unions was not sealing correctly, it looked like the threads were shot and at this point I decided to call it a day as I was soaked through and loosing my temper.
Onto Sunday, I had access to a brake pipe flaring tool and got hold of some copper pipe and unions, but things did not look good. To run a line correctly the prop shaft and exhaust would have to be re-removed and also the fuel tank dropped. Fortunately luck was on my side, on further inspection only a tiny bit of the lower thread was damaged and this was stopping it making a perfect seal, after a little rub over with a thread file all was fine and my blood pressure returned back to normal.
We bled the brakes through and proceeded to also fit and bleed the braided clutch line, as well as adjust the handbrake correctly. All was done, after a lot of hard work and the help of a few good friends we had successfully achieved what we had planned.
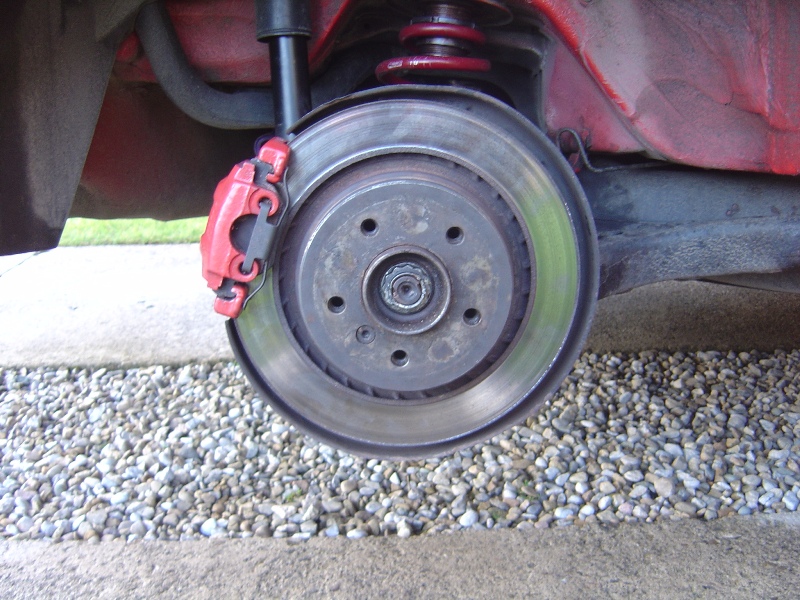
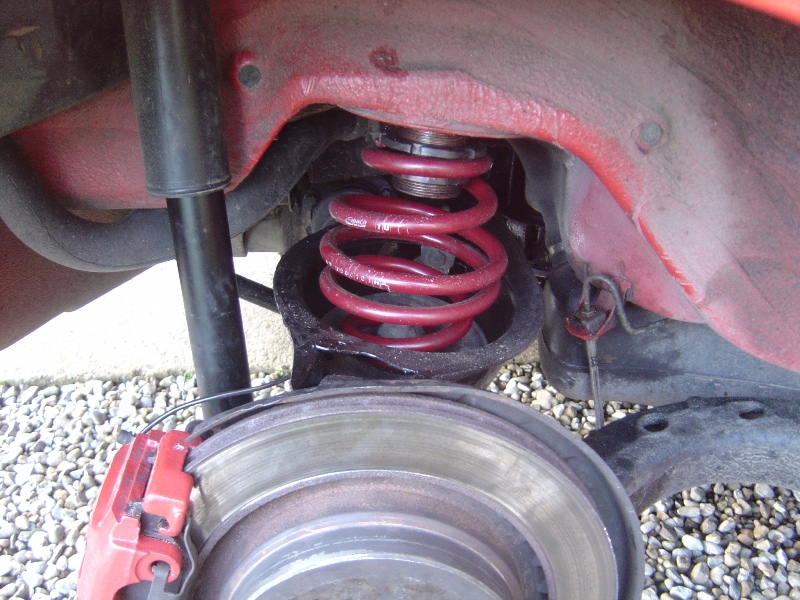
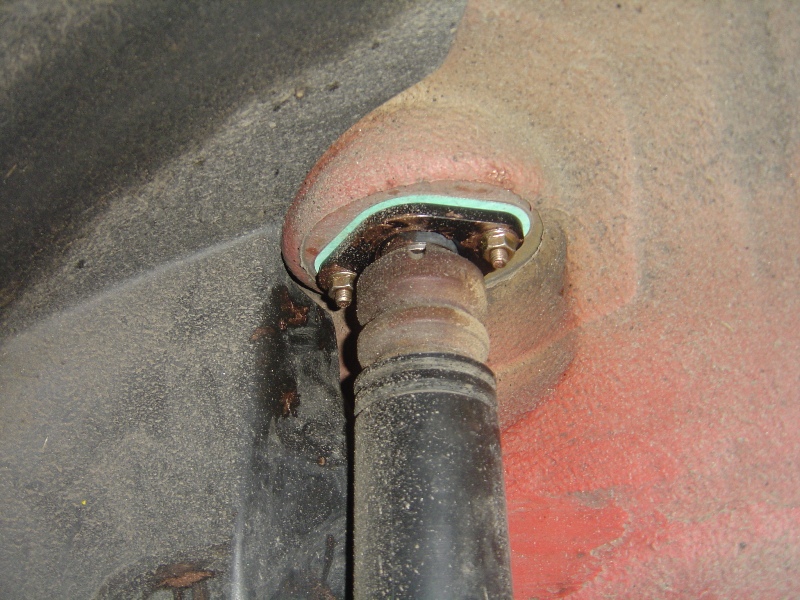
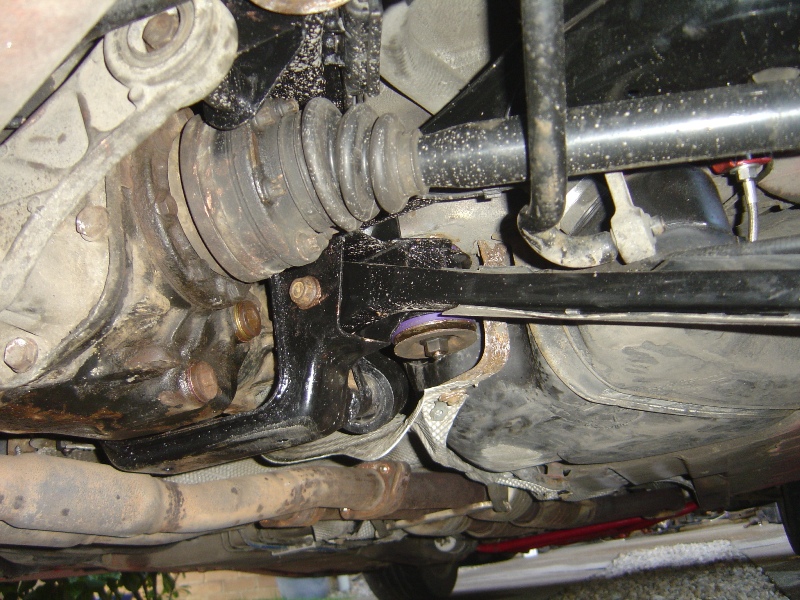
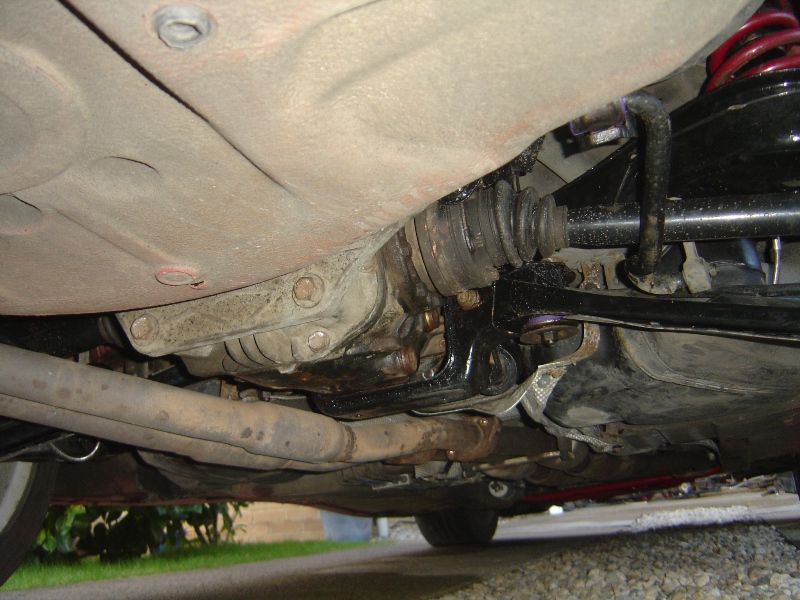
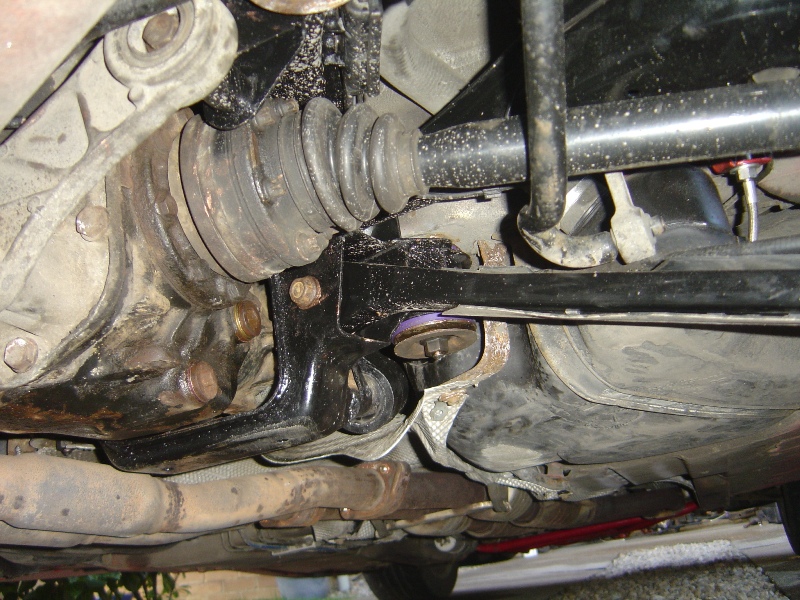
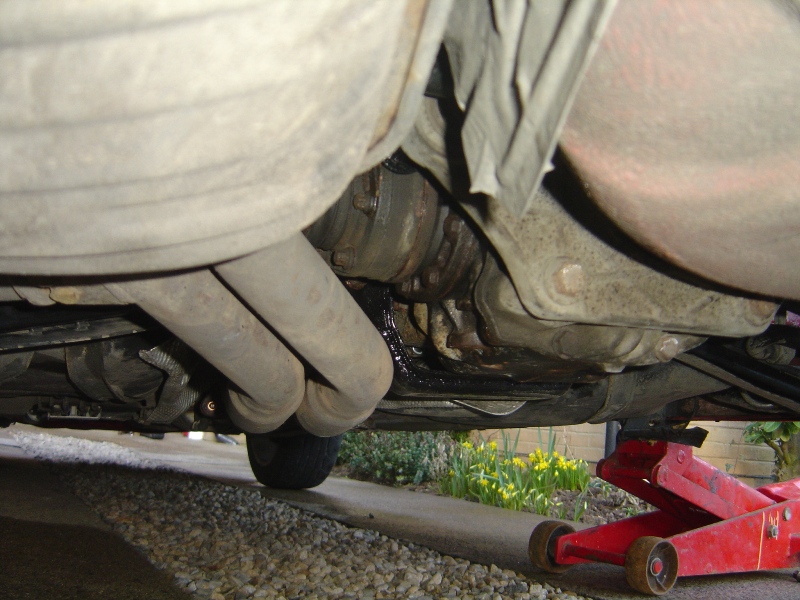
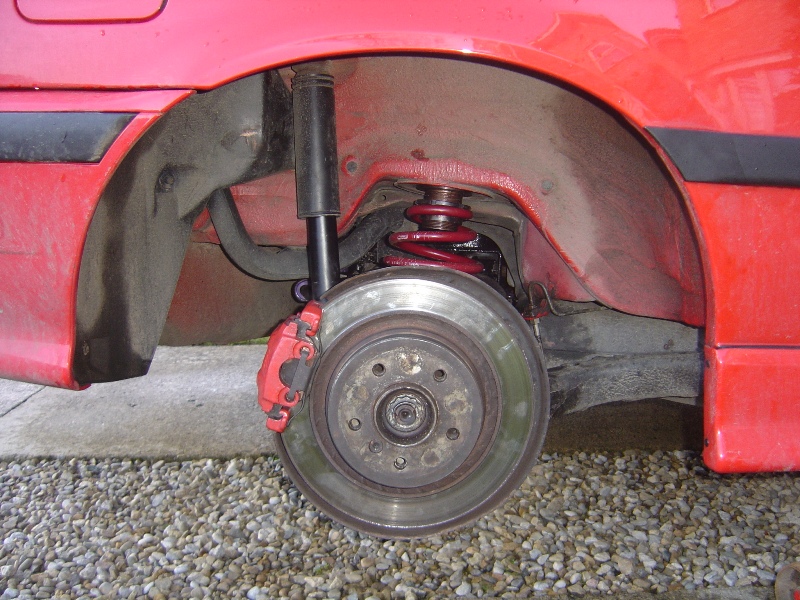
Upon driving the car the back end is so much tighter, the diff really is noticeable and the brake feel is good, soon to be further improved when the fronts are fitted. The shifting is perfect, the car feels like a brand new car, and removing the stupid delay valve and fitting a braided line has done wonders for the feel of the clutch.
So far I’m seeing a lot of potential from this car on track, I’m going to be fitting all the front end parts next Monday and Tuesday, and then hopefully I’ll be all set for Germany in a few weeks time. I’ll be posting updates as and when work is carried out, so be sure to check this post again soon!!
So in October 2009 I started looking into what to choose, the obvious been an e36 M3 but a little more research brought up another contender, an e36 328i Sport. Not only was insurance one third of the cost, the Sports are a lot lighter at the front end which on tighter tracks meant less under steer, sure it’d be 100bhp down but I was convinced it’d be a good base car to start with.
Roll on December and I’d found a 328i Sport I really like the look of, however it wasn’t for sale I’d just seen the pictures on a forum that both myself and the owner are members of. I decided to ask the owner, Jon, a few questions... just about what he thought of the car, and if he had to do it again would he buy another. Anyway, one thing lead to another and it turned out due to driving excessive miles that Jon was considering selling the car for a more eco-friendly option.
I jumped at the chance and agreed to come and view the car, snow however put a stop to that for a few weeks but by mid-January I was the proud owners of a Hellrot Red 328i Sport which had covered a mere 167,000 miles!!! Yes that’s right 167,000 miles but don’t let that put you off, apart from a few stone chips and a small bit of rust on the front drivers side wing (which has since got worse due to salt!) this car was by far the best conditioned example I have ever viewed and came with EVERY single receipt for parts/work carried out dating back to when the car was first registered in August 1998.
Here are some pictures of the car after I got it home and gave it a quick clean;
The car came with both the current winter wheels; M3 Saloon Contour II’s plus a set of standard BBS RC042 wheels in need of a bit of refurbishment, mainly due to water getting under the lacquer.
For the first few weeks of ownership I was debating whether to actually spend money on the car, or just leave it as an un-abused example, I had even sold my Type-R and given the 328i Sport ‘daily driver’ status.
In February, a few friends and I decided it would be a good idea to kick the track day season into action and booked up to go to Oulton Park on the 24th. The journey down was wet and miserable but our spirits were not dampened, we got there signed on and went out on a very wet and slippery track. But something rare happened, for the first time of 2010 the sun actually shined and by the afternoon the track was dry and I started to enjoy the car a lot more, this was bad news for my bank balance as I had now decided to bite the bullet and get cracking on re-freshing a 12 year old car to make it a bit more track friendly.
Lots of plans run through my head, and also so did many £ signs. But I decided to start work on planning the chassis, brakes and running gear, leaving the engine and interior for the time being. Due to the car been a later car it had the good alusil engine without the nikasil worries, however it was lacking a limited slip differential a small price to pay I guess for peace of mind.
I decided at first just to keep everything 328i and just fit a 3.0 M3 diff and swap the input flanges over so I could use the standard 328i prop shaft and fit some quality discs and pads to the standard callipers. The plans were to keep everything to a budget, hence the name ‘Project Credit Crunch’ but I decided to go a bit further, still sticking to the plans of a budget track build, however getting it right first time, instead of spending money on parts that would later be replaced by superior parts.
By March the list of work to do was as follows; replace all bushes, upgrade the brakes, upgrade the suspension, fit a limited slip diff and a X-brace off a convertible. So the spending begun.... The parts started rolling in, and the final list of parts to be fitted before my next track day on the 19th of April at the Nurburgring was as follows;
- Eibach Pro-Street S Coilovers
- Camber Adjustable Top Mounts
- Rogue Engineering Rear Top Mounts
- M3 Convertible Front X-Brace
- M3 Evolution Front Wishbones
- M3 Evolution Front Hubs / King Pins
- M3 Evolution Front Brake Set-Up
- M3 Evolution Rear Trailing Arms
- M3 Evolution Rear Brake Set-Up
- M3 Evolution Rear Diff Carrier w/ 3.23 Limited Slip
- M3 Evolution Rear Drive Shafts
- M3 Evolution Brake Servo + Master Cylinder
- Powerflex Black Rear Trailing Arm Bushes
- Powerflex Rear Subframe Bushes
- Powerflex Concentric Front Wishbone Bushes
- Powerflex 25mm Front Anti-Roll Bar Bushes
- Powerflex 19mm Rear Anti-Roll Bar Bushes
- HEL Braided Clutch Line
- Goodridge Braided Brake Lines
- Z3M Short Shifter
- Replacement Gear Selector Bushes
- Replacement Bolts for Rear Trailing Arms
- Replacement Exhaust Bolts + Studs
- Redline ATF Gearbox Oil
- Castrol SAF-XJ Differential Oil
- Mobil Engine Oil
- Silkolene DOT4 Brake Fluid
So I had a lot of work ahead of me, with a short amount of time to do it all. In fact I only had 5 days off work in between ordering the parts and the track day so it was going to be tight, remember this car is my daily driver too!!!
As I waited for the part’s to arrive I decided to give the underside of the car a little clean, as I really didn’t want to be laid under a car with dirt dropping into my eyes every 5 seconds, and I only had a 3 day window to fit most the above parts so I wanted to asses everything thoroughly first.
As well as cleaning I decided to free off all the old bolts and copper grease them to speed up the dismantling process, I also decided to remove and temporarily replace the heavily corroded exhaust bolts as this would save time in the long run and keep my stress levels low on the day of fitting the new back axel.
Now the first parts stared arriving at the door, most were useless without other parts accompanying them however the BMW X-Brace wasn’t and I decided to fit this straight away. Fitment was simple, you need to make some bolts up that will help compress the riv-nuts but other than that it was straight forward.
The bolts that compress the riv-nuts, be careful when doing this you need to apply some lock tight to the riv-nut to stop it turning, thus allowing it to compress. All went fine until the 4th nut, the lock tight had hardened so much that when removing the bolt it sheared and we had to carefully drill it out without causing any damaged to the riv-nut threads.
All fitted and in place, hopefully this should stop a little bit of front end twist.
Next to arrive was the coilovers and top mounts, I rebuilt the top mounts making sure that all bolts had a good dose of copper grease to stop any corrosion, and made sure the spherical bearing had a good coating of white lithium grease. Same for the coilovers, these were stripped down and rebuilt with copper grease applied to the threads to stop corrosion, a bit pointless since their stainless steel but it’s just become habit.
Here’s some more pictures of the parts, braided clutch line, rear top mounts, replacement bolts, polyurethane bushes and braided brake lines.
Halleluiah!!!!!!!!!!!!!!!!!!!!!!!!!!!!!!!!!!!!!!!!!!!!!!!!!!
Finally all the long awaited M3 Evolution parts arrived, work got pretty much straight under way with these bits, I even called in a few favours at work and used the press in the fabrication shop to speed up the removal of the old trailing arm, wishbone and diff carrier bushes. Time was not on my side, I had a few hours in between shifts to get everything ready and painted for my weekend off (19th March) but I managed it, just!
Callipers after been given a lick of paint and a good once over, what can I say I’m a tart and really like red brakes and think it will go well with the red and black theme that will eventually end up been carried out on the car.
Now came the painting of all the rear axle parts, I opted for boring black because I like things also looking OEM and not screaming look at me.
Now came for re-assembly of part of the rear axle ready for bolting straight up to the car, I decided to leave the trailing arms off for the time being to reduce the overall weight of the axel when moving it around and of course offering it up to the car.
I’d just scraped the deadline, finished work at 22:00 on the 18th and went straight home to rebuild the axel ready for my 3 days off where I had planned to at the very least get the rear axle, gear shifter bushes and rear brakes done. Everything was now set for an early morning start, time for bed!
Well I say everything, there was only one gamble, I still had not received the M3 3.0 prop shaft... so on Wednesday night I spoke to Russ @ M3 Spares and asked if he had any, he did and promised to send it out on Thursday via 24 hour, it was a gamble as if it didn’t arrived I would be without transport on Monday when I was due back at work.
Morning loomed and the weather was on my side, I got the car right up in the air and secured on 4 large axel stands. First to come off was the rear wheels, then disconnect the brake lines, the abs sensors and the rear pad wear sensor. Then onto removing the X-brace to gain access to the exhaust, my previous fitting off new bolts speeded up this process and all was off within an hour or two.
Next up was to drop the rear axle, again planning in advance and removing and copper greasing all the bolts ensured everything came free without any drama, I’d also previously WD40’d the brake lines to help when it came to splitting them too.
We were only a few hours into it and already we were ready to bolt up the new axel, from here the picture get a little vague as we just concentrated on the job in hand, and guess what... the prop shaft arrived!!! *PHEW*
Once the rear axle and trailing arms were on, along with all the rear callipers, drive shafts and hand brake cables in situ I decided to crack on and fit the Z3M shift and replace all old bushes with brand new ones to remove any slop from the shift, after all the car has done 167,000 miles remember.
This was a very fiddly job, especially in the dark, laid on my back working on a gearbox that was still in position. The top clip which needed removing was a case of working blind simply by feel, but after 20 minutes I had got it to release. The whole process probably took an hour or two but there was no rushing about it was nearly mid-night by this point. It was worth doing though as even without driving the car the shifting was much tighter and the Z3M shifter had made the shift a lot more precise.
Saturday morning and it was pissing down, but I carried on with the help of some friends we got the prop-shaft fitted, re-fitted the heat shields and exhaust as well as fit the Eibach Pro-Street rear dampers and springs, along with the Rogue Engineering top mounts.
All was going well, but then we hit a snag when bleeding the brakes one of the unions was not sealing correctly, it looked like the threads were shot and at this point I decided to call it a day as I was soaked through and loosing my temper.
Onto Sunday, I had access to a brake pipe flaring tool and got hold of some copper pipe and unions, but things did not look good. To run a line correctly the prop shaft and exhaust would have to be re-removed and also the fuel tank dropped. Fortunately luck was on my side, on further inspection only a tiny bit of the lower thread was damaged and this was stopping it making a perfect seal, after a little rub over with a thread file all was fine and my blood pressure returned back to normal.
We bled the brakes through and proceeded to also fit and bleed the braided clutch line, as well as adjust the handbrake correctly. All was done, after a lot of hard work and the help of a few good friends we had successfully achieved what we had planned.
Upon driving the car the back end is so much tighter, the diff really is noticeable and the brake feel is good, soon to be further improved when the fronts are fitted. The shifting is perfect, the car feels like a brand new car, and removing the stupid delay valve and fitting a braided line has done wonders for the feel of the clutch.
So far I’m seeing a lot of potential from this car on track, I’m going to be fitting all the front end parts next Monday and Tuesday, and then hopefully I’ll be all set for Germany in a few weeks time. I’ll be posting updates as and when work is carried out, so be sure to check this post again soon!!
Yeh, apart from the front wing which has got progressivly worse the car is stunning... even the first aid kit is still in its cellophane wrapping, and there was a brand new un-used spare split rim in the boot!
I decided to go for the 3.2 wishbones due to the additional castor, I could also then use normal concentric bushes and not worry about them twisting around in the 'lollipops' plus I also wanted the floating front discs too. I always run with TC turned off, however have looked into removing the system along with ABS and just running bias valves, this will happen with time.
I decided to go for the 3.2 wishbones due to the additional castor, I could also then use normal concentric bushes and not worry about them twisting around in the 'lollipops' plus I also wanted the floating front discs too. I always run with TC turned off, however have looked into removing the system along with ABS and just running bias valves, this will happen with time.
Yeh, I know what you mean regarding the wishbones and brakes off the 3.0 M3, but instead of buying bits here and bits there, I wanted everything off the same car so decided to find a low mileage Evo that someone was breaking due to panel damage on the side.
Spoke to Chris a few times, but un-fortunatly he didn't have anything at the time I was looking.
Spoke to Chris a few times, but un-fortunatly he didn't have anything at the time I was looking.
Forward thinking was needed if everything was going to get done in such a small space of time!
Regarding traction, its a throttle cut system (very crude!) so it doesnt have any control over the braking of the wheels. I personally don't like the system, I mean harsh cutting the power mid slide can never be a good thing.
Regarding traction, its a throttle cut system (very crude!) so it doesnt have any control over the braking of the wheels. I personally don't like the system, I mean harsh cutting the power mid slide can never be a good thing.
Just a small update, the weather put a stop to play Monday / Tuesday as did a little hiccup. At the moment the old beam is blocking access to my garage and I really didn’t fancy working out in the rain, so I decided to do something about the beam in case this rain stays for the next few weeks!
Here’s the beam in all its former glory;
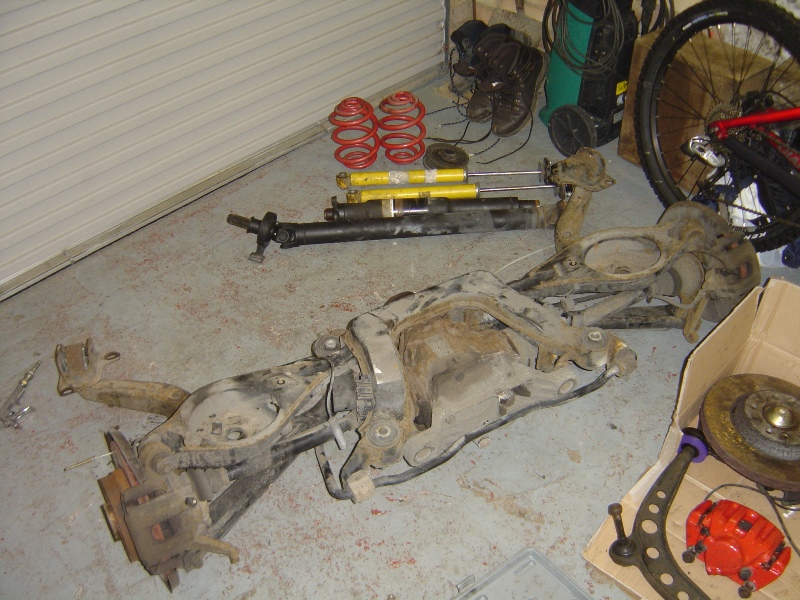
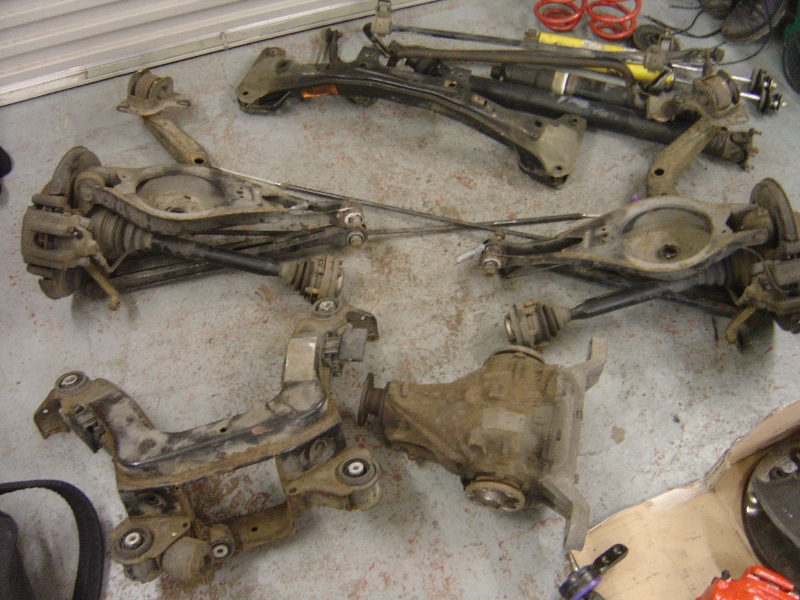
Now it has been reduced down to parts, to be moved to a more appropriate places before I get round to selling it on, speaking of which by the time the front end is done I’ll have the following kicking about; Rear Axel, Drive Shafts, Open Diff, Prop-Shaft, Rear Brake Set-Up, Front Wishbones, Front Brake Set-Up, Front Hubs and some Bilstein Suspension w/ Eibach Springs.
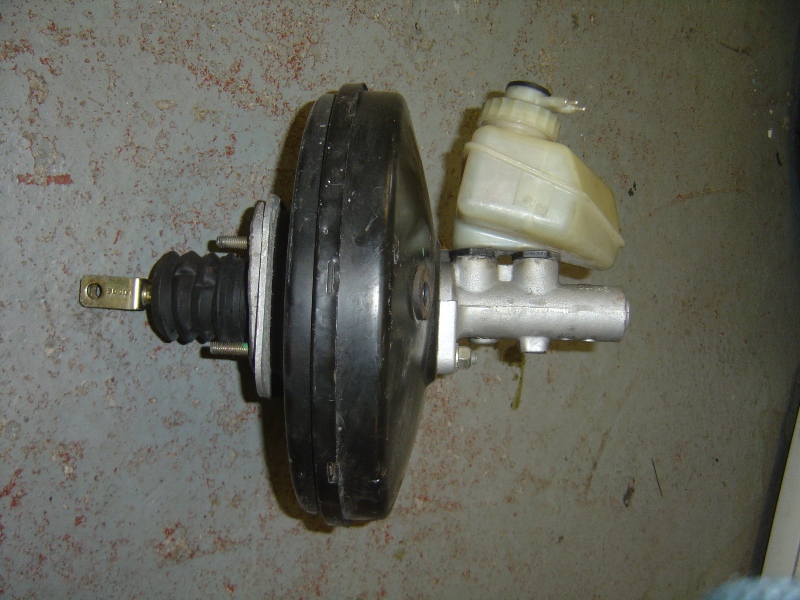
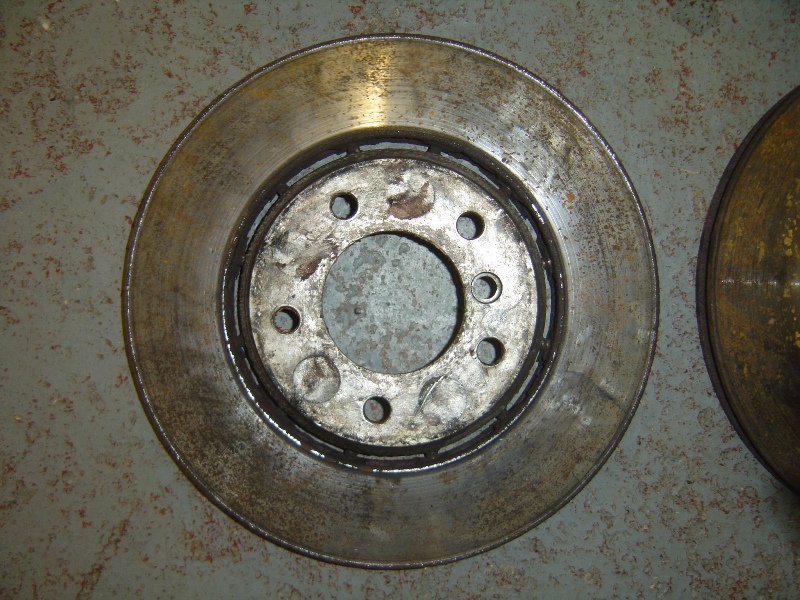
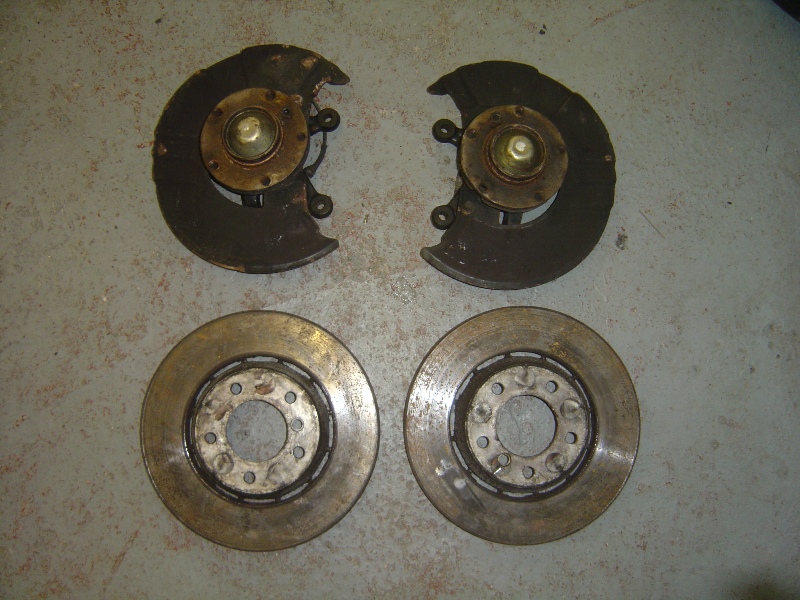
Cleaned and prepared some of the front end parts in my free time, below we have pictured the 3.2 Master Cylinder + Servo, 3.2 Floating Front Discs and of course the 3.2 Front Hubs.
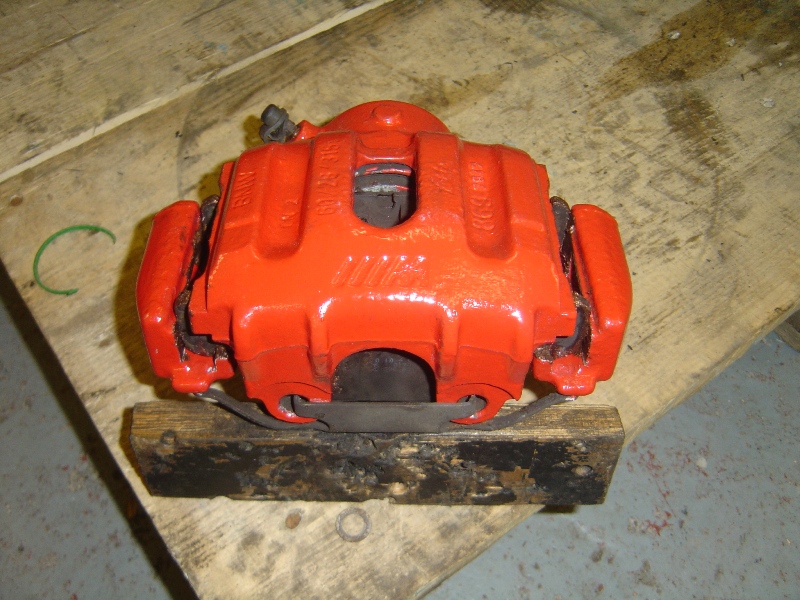
I also got round to painting the front callipers and re-assembling them with copper grease in all the right areas. Please note I did paint every inch of metal, then once dry I proceeded to remove the paint from surfaces that made contact with the pads of front hubs as I didn’t want the paint to cause sticking of the pads.
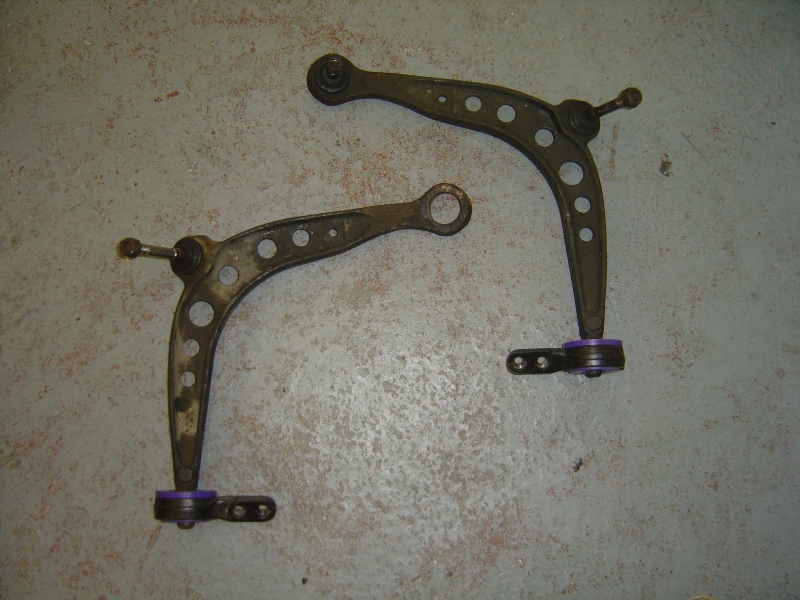
I also got round to fitting the front Powerflex bushes into the ‘lollipops’ and placing them on the wishbones. Also the little hiccup mentioned above can be spotted in the below pictures too, guessed what it is yet?
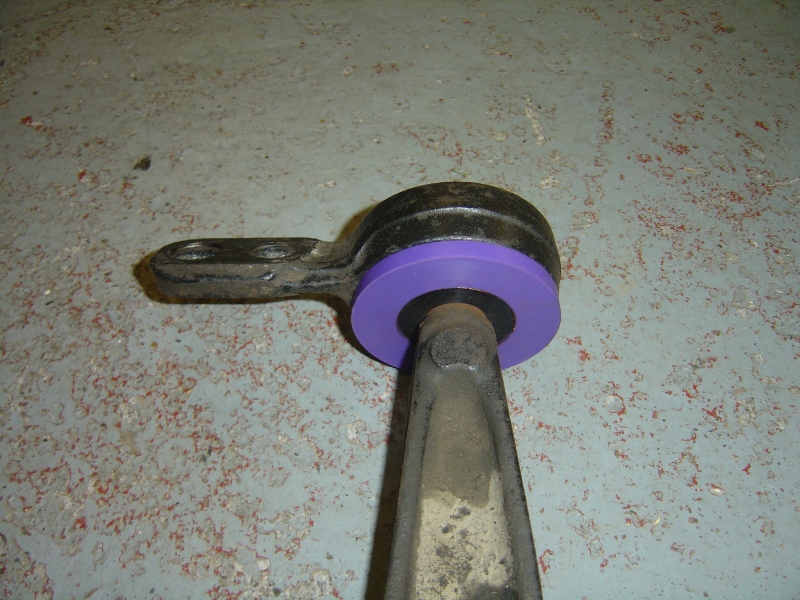
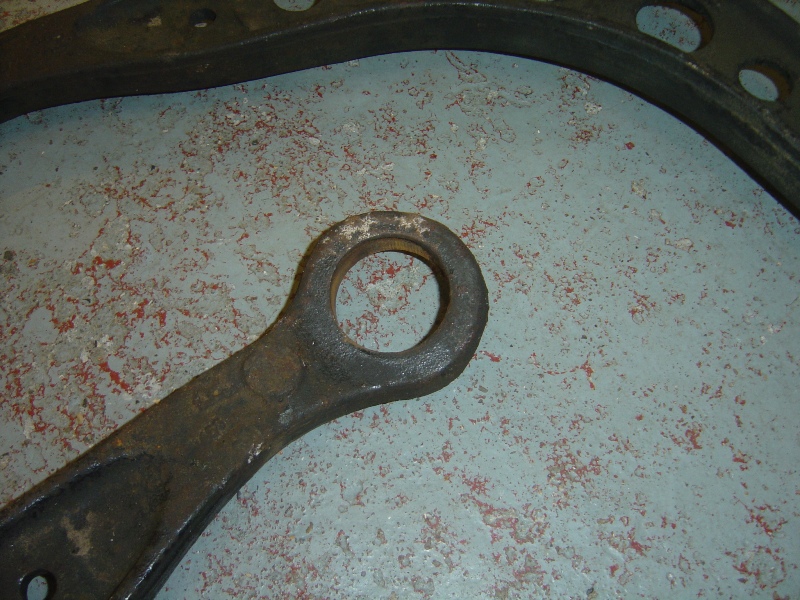
That’s right, spotted the ball joint rubber boot had a crack in it, no problem I’ll press out the old ball joint and order another one. Ball joint came out without any issues, but hey most things would come out without issue with the size of the press I used. Ordered a replacement Lemforder (OEM Spec) ball joint from ECP, only to find out it’s the wrong size and will not fit my wishbone!?!
Anyway, to cut a long story short it turns out the M3 wishbone ball joints are not replaceable and BMW want £150.00 for a new arm... HOWEVER all is not lost, I may have come up with a solution to the problem. After measuring an old E30 ball joint it seems its identical to the E36 M3 one, so I have ordered one in (due tomorrow!) and will press that into the E36 M3 wishbone. The quality of the E30 one may not be as long lasting as the standard E36 ones, but after all it’s a car that will be kept on top of maintenance wise.
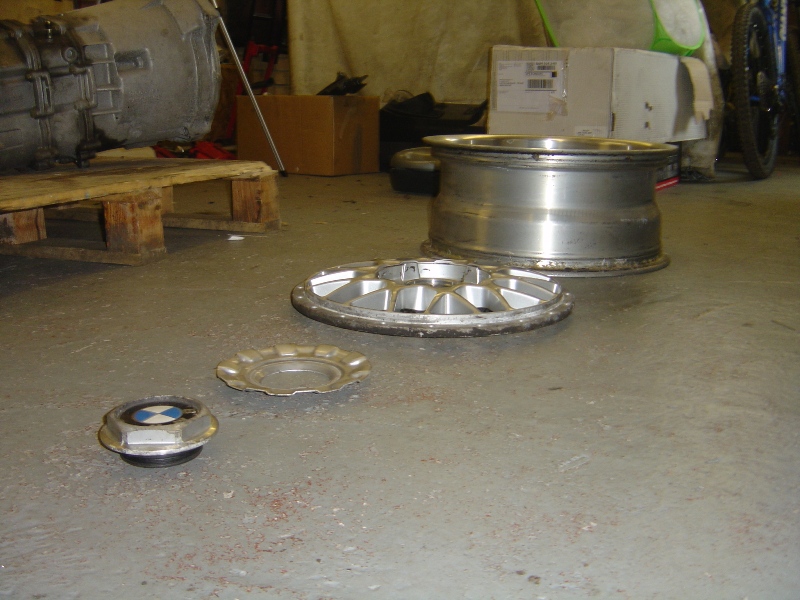
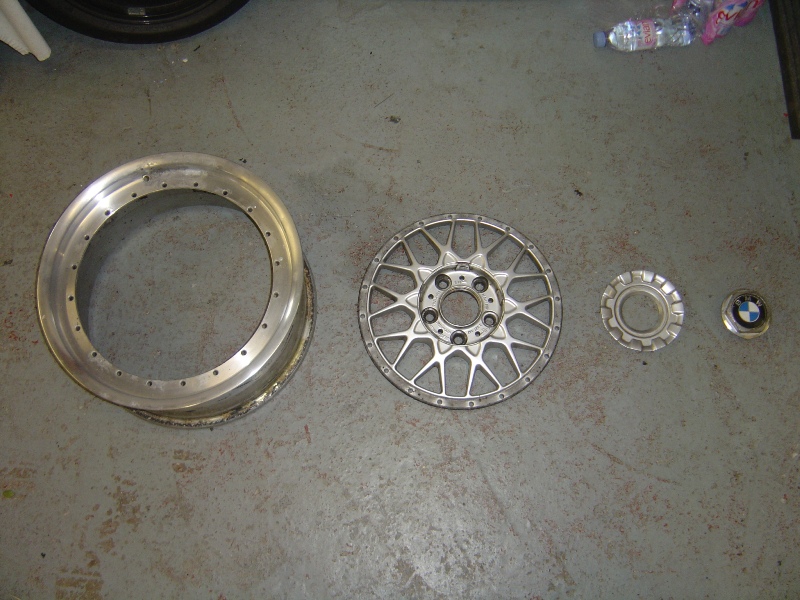
Next up is just a few shots of the BBS RC041’s split down ready for paint, I’m going to keep them track friendly by painting them black, however there’s a little twist. I’m going to do the centres matt black and the outer rims gloss giving them the effect of a polished rim with a painted centre like OEM finish just black.
I just need to find a company willing to powder coat or paint the pieces at a reasonable cost, a local places wanted £40.00 + VAT per item that would bring the total to £640.00 + VAT, sod that!!! If I get time I might look into firing up ye ‘ole spray gun and going for a bit of DIY paint action too.
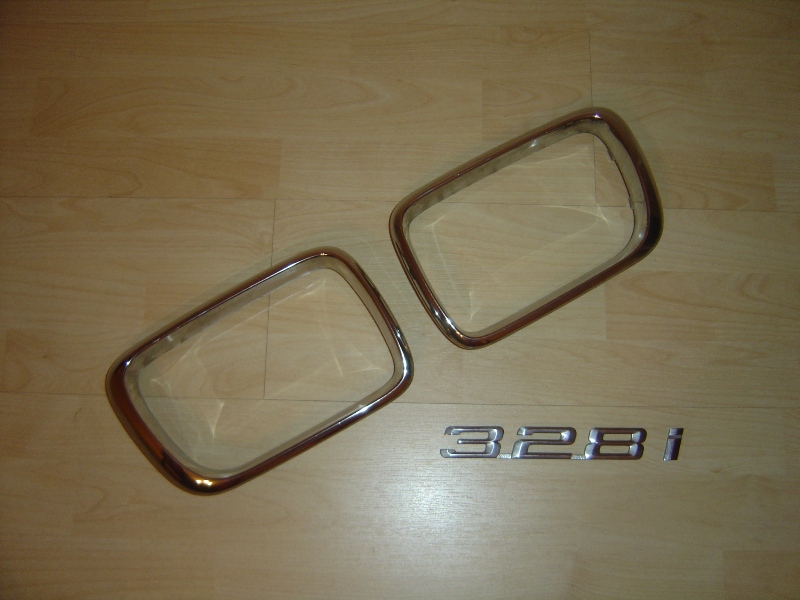
Also to keep with the red and black theme I have also picked up a second hand set of face lift kidney grills and a 328i badge, these are both going gloss black too. More details on these bits when I get round to painting them, at the moment the front end is going to take priority!!!
Here’s the beam in all its former glory;
Now it has been reduced down to parts, to be moved to a more appropriate places before I get round to selling it on, speaking of which by the time the front end is done I’ll have the following kicking about; Rear Axel, Drive Shafts, Open Diff, Prop-Shaft, Rear Brake Set-Up, Front Wishbones, Front Brake Set-Up, Front Hubs and some Bilstein Suspension w/ Eibach Springs.
Cleaned and prepared some of the front end parts in my free time, below we have pictured the 3.2 Master Cylinder + Servo, 3.2 Floating Front Discs and of course the 3.2 Front Hubs.
I also got round to painting the front callipers and re-assembling them with copper grease in all the right areas. Please note I did paint every inch of metal, then once dry I proceeded to remove the paint from surfaces that made contact with the pads of front hubs as I didn’t want the paint to cause sticking of the pads.
I also got round to fitting the front Powerflex bushes into the ‘lollipops’ and placing them on the wishbones. Also the little hiccup mentioned above can be spotted in the below pictures too, guessed what it is yet?
That’s right, spotted the ball joint rubber boot had a crack in it, no problem I’ll press out the old ball joint and order another one. Ball joint came out without any issues, but hey most things would come out without issue with the size of the press I used. Ordered a replacement Lemforder (OEM Spec) ball joint from ECP, only to find out it’s the wrong size and will not fit my wishbone!?!
Anyway, to cut a long story short it turns out the M3 wishbone ball joints are not replaceable and BMW want £150.00 for a new arm... HOWEVER all is not lost, I may have come up with a solution to the problem. After measuring an old E30 ball joint it seems its identical to the E36 M3 one, so I have ordered one in (due tomorrow!) and will press that into the E36 M3 wishbone. The quality of the E30 one may not be as long lasting as the standard E36 ones, but after all it’s a car that will be kept on top of maintenance wise.
Next up is just a few shots of the BBS RC041’s split down ready for paint, I’m going to keep them track friendly by painting them black, however there’s a little twist. I’m going to do the centres matt black and the outer rims gloss giving them the effect of a polished rim with a painted centre like OEM finish just black.
I just need to find a company willing to powder coat or paint the pieces at a reasonable cost, a local places wanted £40.00 + VAT per item that would bring the total to £640.00 + VAT, sod that!!! If I get time I might look into firing up ye ‘ole spray gun and going for a bit of DIY paint action too.
Also to keep with the red and black theme I have also picked up a second hand set of face lift kidney grills and a 328i badge, these are both going gloss black too. More details on these bits when I get round to painting them, at the moment the front end is going to take priority!!!
Very small update;
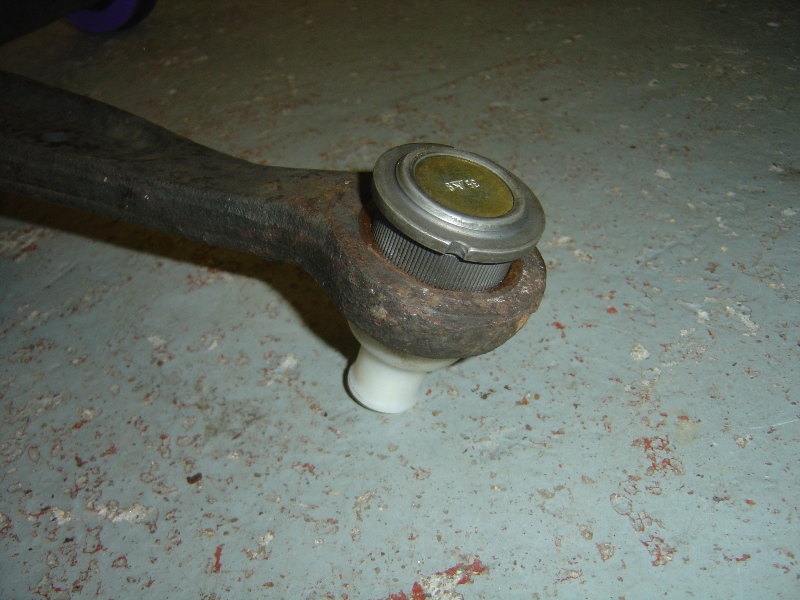
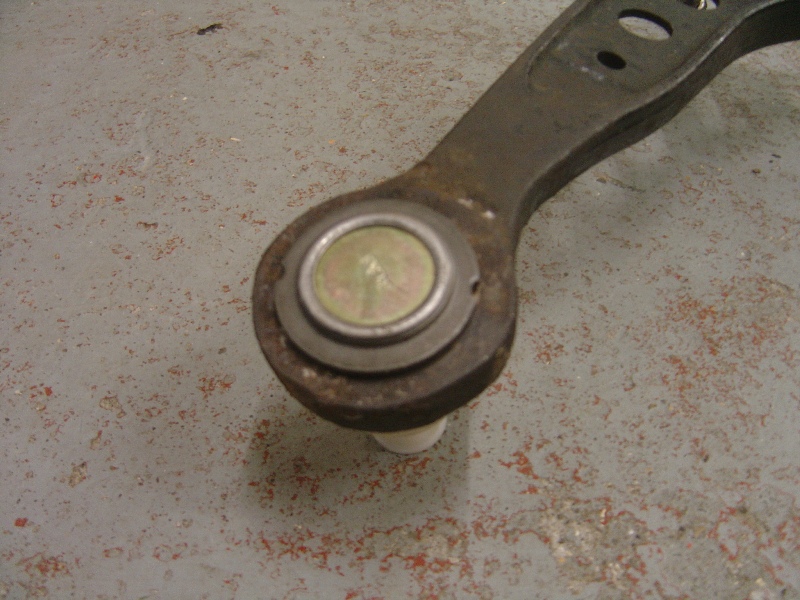
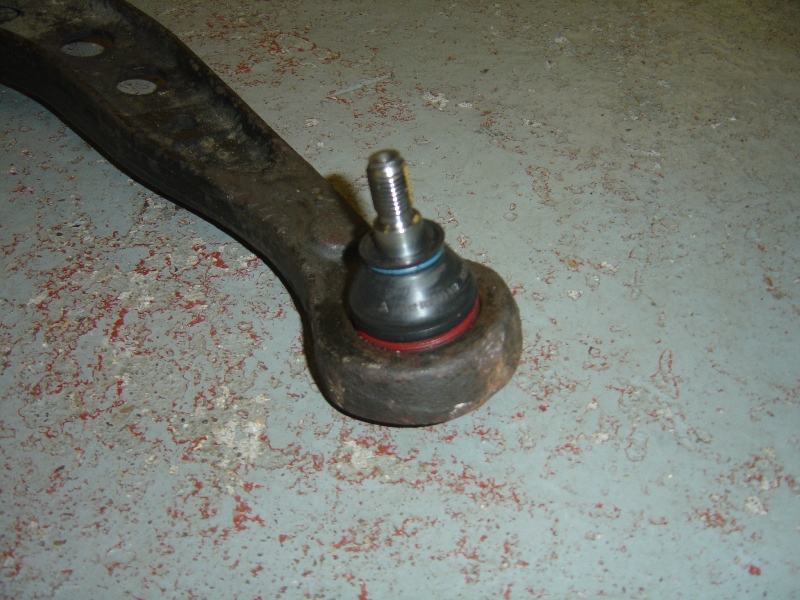
Ball joint idea worked a treat, first two pictures show the E30 ball joint lined up in the wishbone ready to be pressed in and the last two show the ball joint all pressed in and functional. Sat side by side with a normal un-craigified wishbone the height and thread length all match up perfectly, job well done if I do say so myself.
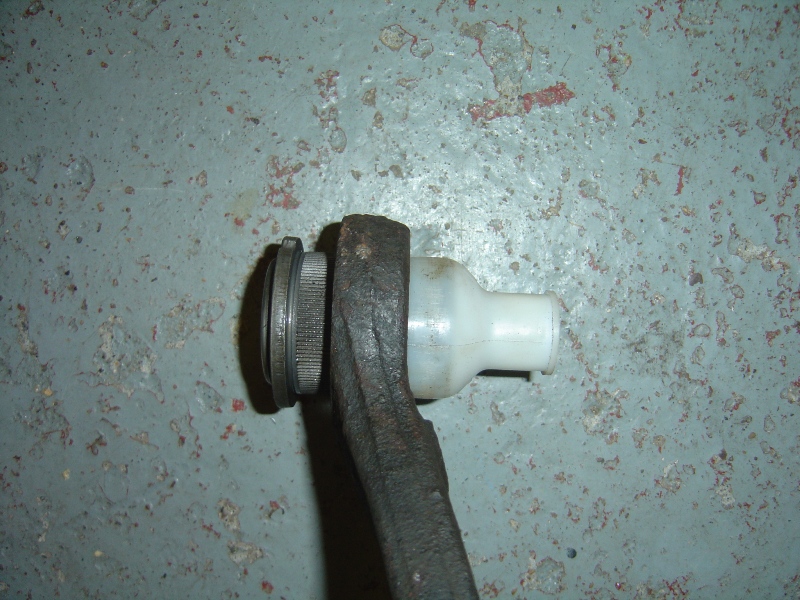
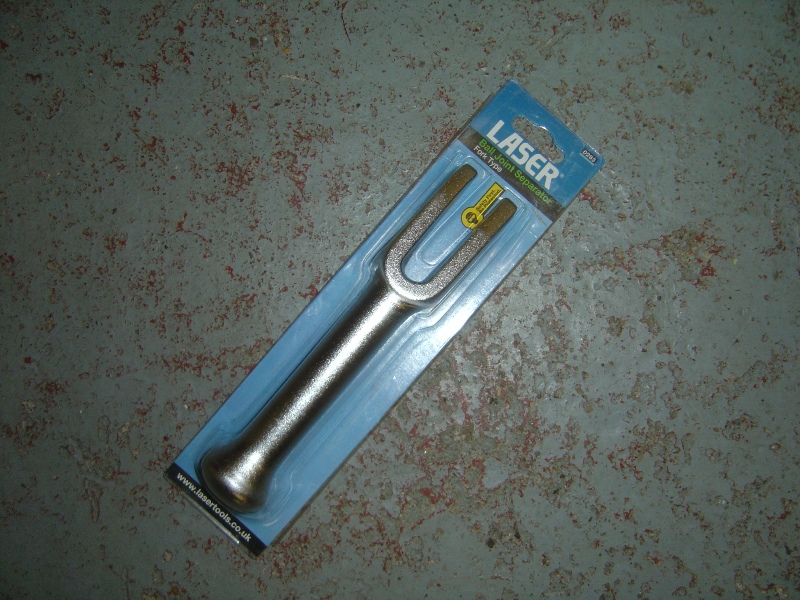
Also had an hour spare yesterday so checked everything would come apart, all seems fine but the inner ball joint looks like it’s going to need a gentle bit of persuasion and a normal ball joint splitter won’t suffice. So picked up this little beauty, a ball joint fork it should do the trick!
Hopefully I’ll be posting here on Wednesday saying how the front end work is complete and the car’s all set for Germany on the 16th of April.
Ball joint idea worked a treat, first two pictures show the E30 ball joint lined up in the wishbone ready to be pressed in and the last two show the ball joint all pressed in and functional. Sat side by side with a normal un-craigified wishbone the height and thread length all match up perfectly, job well done if I do say so myself.
Also had an hour spare yesterday so checked everything would come apart, all seems fine but the inner ball joint looks like it’s going to need a gentle bit of persuasion and a normal ball joint splitter won’t suffice. So picked up this little beauty, a ball joint fork it should do the trick!
Hopefully I’ll be posting here on Wednesday saying how the front end work is complete and the car’s all set for Germany on the 16th of April.
Woohoo, as planned today was the day and all the front end work has been carried out. Of course it wouldn’t be modifying without the dramas of incorrect fitting parts and having to use your noggin to overcome small problems.
First started by getting the car up in the air and making it secure, then sprayed everything that needed to be freed off with WD40. Everything came apart with ease, brake unions cracked straight away and the ball joint fork was a god send and made splitting the inner ball joint a doddle. Normal ball joint splitter on the tie rod end ball joint, and a range of sockets and all the parts were off within an hour.
Here’s everything fitted and working as it should be;
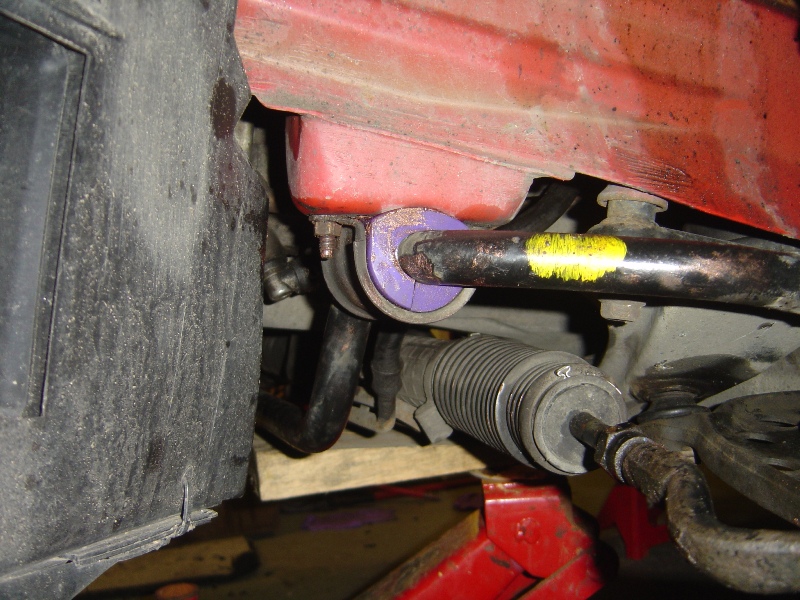
Powerflex front anti-roll bar bushes in place, the 328i Sport requires a 25mm bush and it only took a few minutes to fit, much easier than fitting the rear’s as they were a really tight fit, in fact a little too tight.
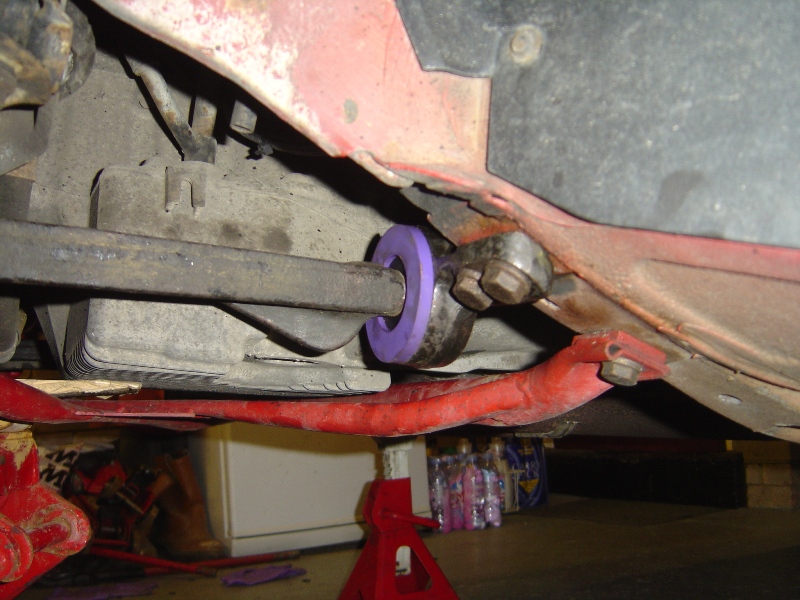
Concentric Powerflex rear wishbone bushes to suit the M3 3.2 Evo wishbones... again really easy to fit, fits nice and tight however no presses were required and it all lined up fit without any adjustments needed anywhere.
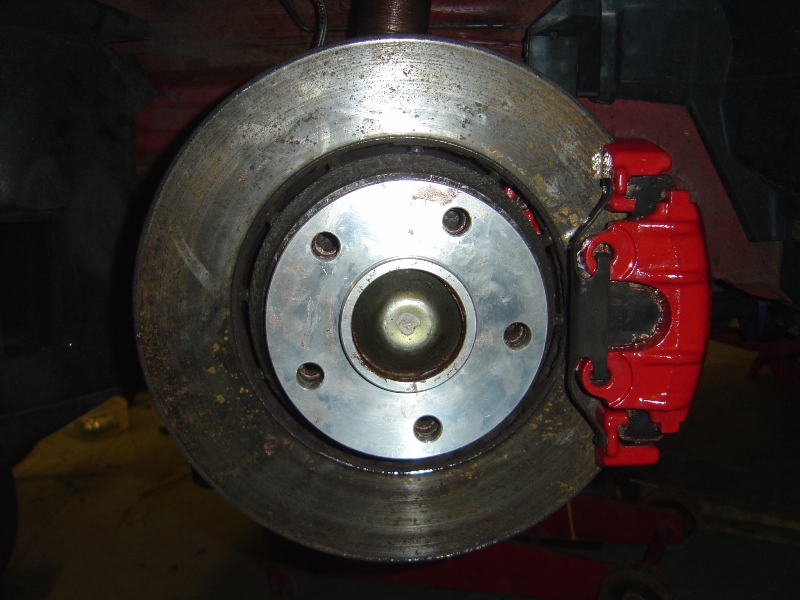
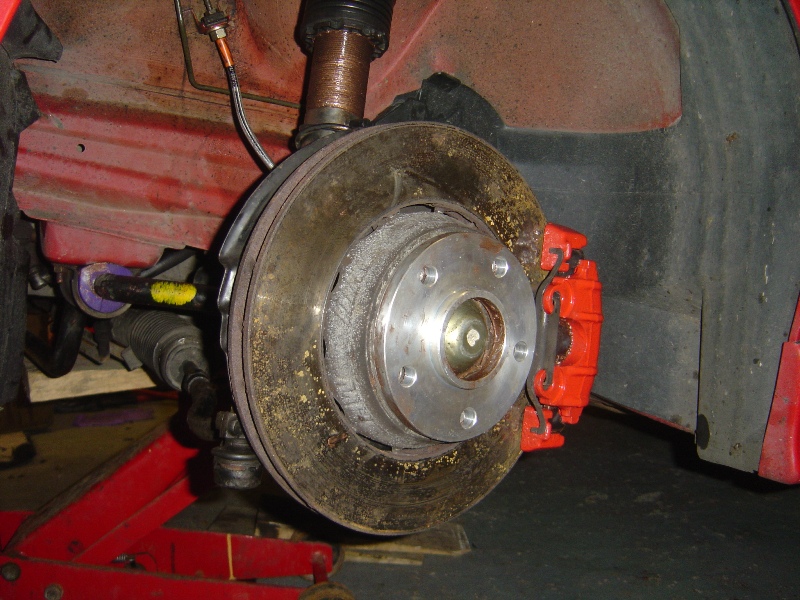
M3 3.2 Evo front brakes with floating discs, also 10mm hub-centric spacers. This is where the problems arose, the spacers although nicely machined were not perfect, the inner bore that sits onto the hub lug had been machined 2mm too short causing a gap between the spacer and hub face. A trip to Halfords to get some emergency 9mm spacers (needed to clear the coilovers) paid off as they had some 3mm spacers on the shelf which fit fine behind the spacers causing a tight fit and also still retaining the use of the hub-centric lug.
Not ideal but it’ll have to do, next I’ll look into getting some 12mm spacers. I also found out I need even longer bolts, I ordered 35mm thread length but due to the extra 3mm spacer I’m going to have to find some 38~40mm bolts tomorrow.
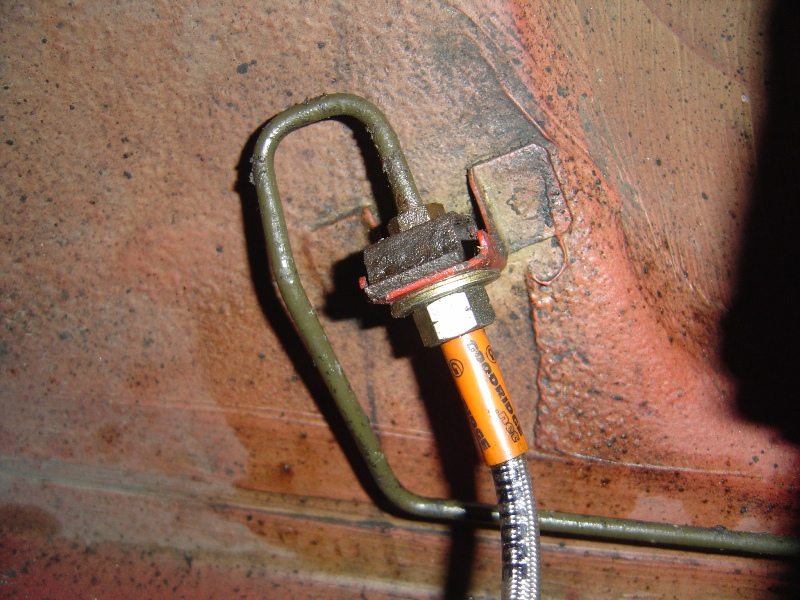
Goodridge braided front brake lines in place, I used the existing rubber brake line bung to secure the brake line to the strut like OEM fitment. Also a big thanks to my friend James for helping me bleed the brakes and also provide emergency transport to get to Halfords for the spacers.
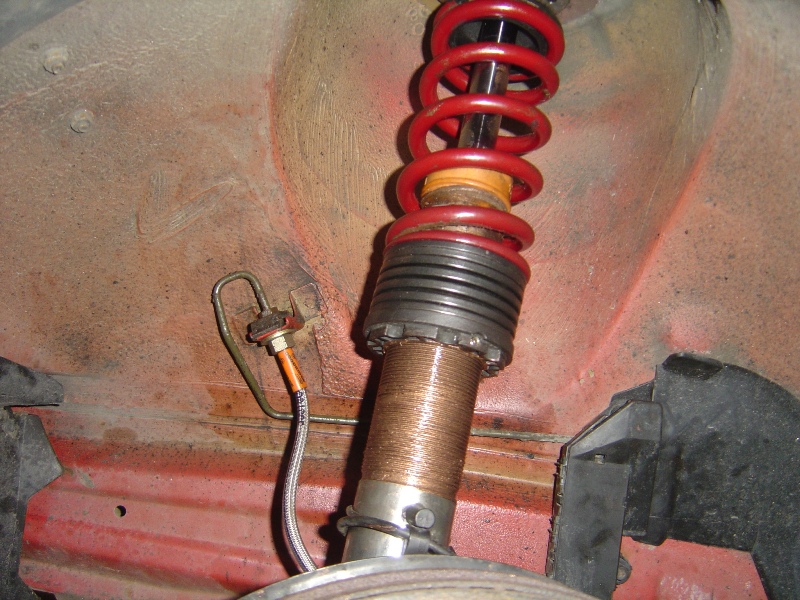
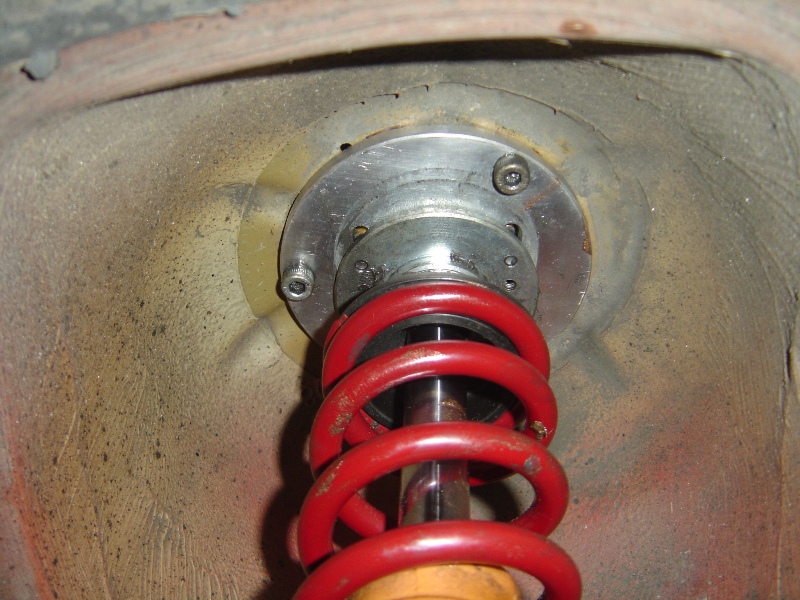
Eibach Pro-Street coilovers in place, let’s hope there up to the job.
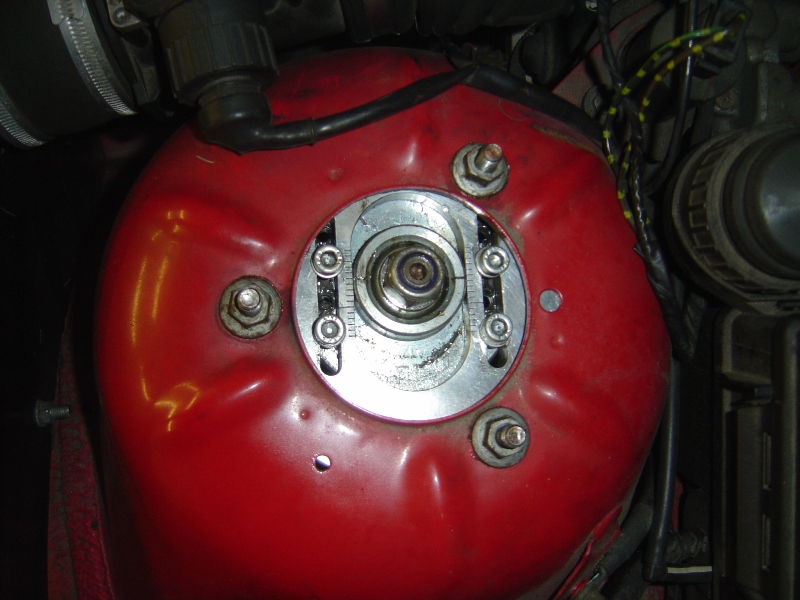
Camber adjustable top mounts in position I still have to set the geometry up.
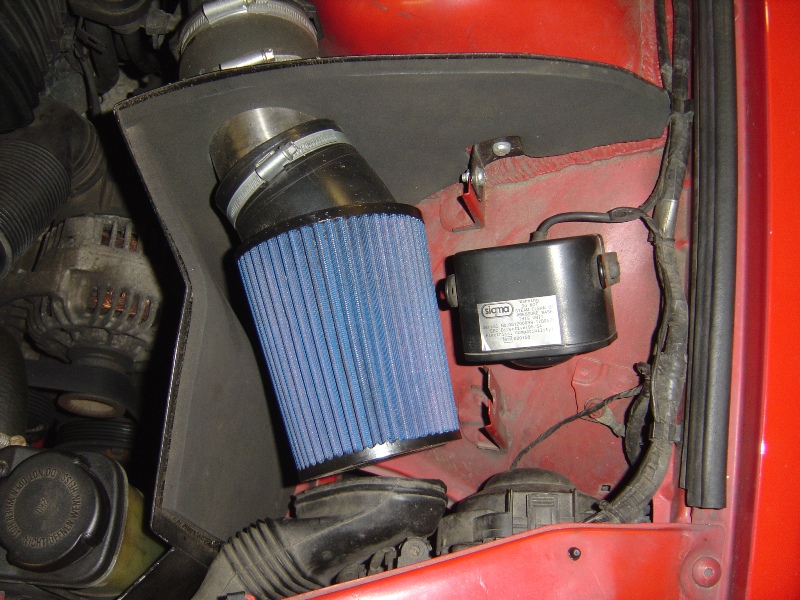
Now coming from a M3 CSL something was lacking from the 6 pots engine tone, it needed a bit of induction noise and the DaveF filter did the trick. OK it’s not as aggressive sounding as the CSL, but it gives a great tone and brings out the true induction noise of the M52B28 engine.
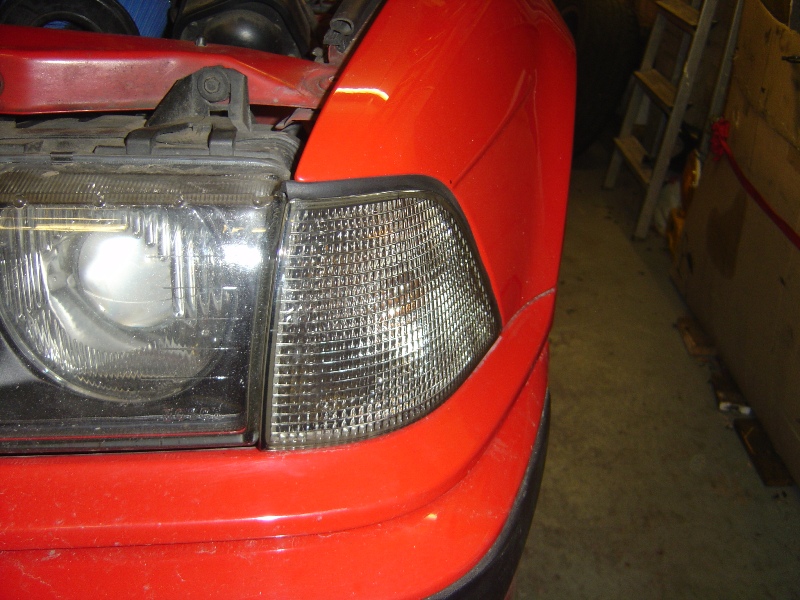
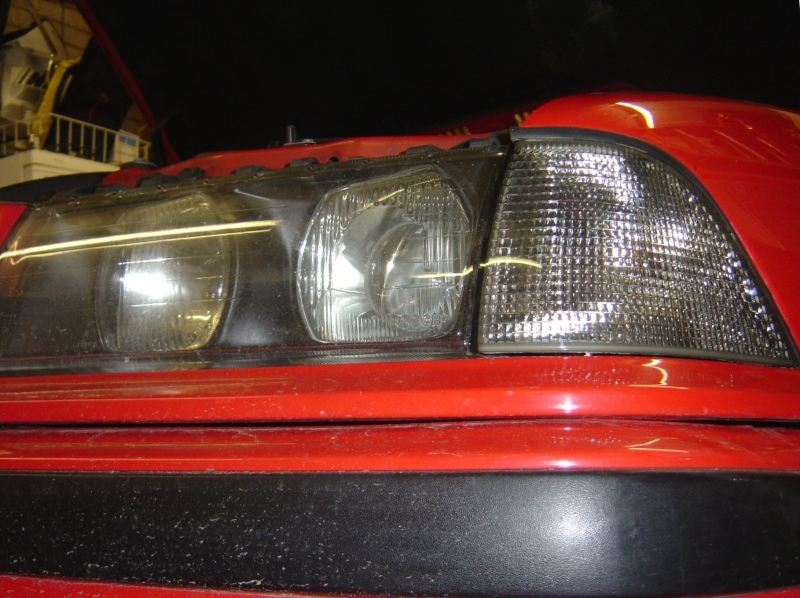
After spending hours staring at the car in the works car park I decided it needed something, I just couldn’t put my finger on what it was then it hit me, the front lights are very dark inside however the clear indicators although much better than tango units just stuck out a little too much. I decided it needed some smoked corner indicators so tracked down some Auto-Lamp lenses.
The fit is good, it’s not OEM perfect but as far as aftermarket indicators go there fine and will tie in nicely with the red and black theme going on.
Next up is to set the geometry, I’m going to just set it up roughly for the moment but hopefully on Saturday will be able to spend some time setting the camber and toe up ready to hit the track.
First started by getting the car up in the air and making it secure, then sprayed everything that needed to be freed off with WD40. Everything came apart with ease, brake unions cracked straight away and the ball joint fork was a god send and made splitting the inner ball joint a doddle. Normal ball joint splitter on the tie rod end ball joint, and a range of sockets and all the parts were off within an hour.
Here’s everything fitted and working as it should be;
Powerflex front anti-roll bar bushes in place, the 328i Sport requires a 25mm bush and it only took a few minutes to fit, much easier than fitting the rear’s as they were a really tight fit, in fact a little too tight.
Concentric Powerflex rear wishbone bushes to suit the M3 3.2 Evo wishbones... again really easy to fit, fits nice and tight however no presses were required and it all lined up fit without any adjustments needed anywhere.
M3 3.2 Evo front brakes with floating discs, also 10mm hub-centric spacers. This is where the problems arose, the spacers although nicely machined were not perfect, the inner bore that sits onto the hub lug had been machined 2mm too short causing a gap between the spacer and hub face. A trip to Halfords to get some emergency 9mm spacers (needed to clear the coilovers) paid off as they had some 3mm spacers on the shelf which fit fine behind the spacers causing a tight fit and also still retaining the use of the hub-centric lug.
Not ideal but it’ll have to do, next I’ll look into getting some 12mm spacers. I also found out I need even longer bolts, I ordered 35mm thread length but due to the extra 3mm spacer I’m going to have to find some 38~40mm bolts tomorrow.
Goodridge braided front brake lines in place, I used the existing rubber brake line bung to secure the brake line to the strut like OEM fitment. Also a big thanks to my friend James for helping me bleed the brakes and also provide emergency transport to get to Halfords for the spacers.
Eibach Pro-Street coilovers in place, let’s hope there up to the job.
Camber adjustable top mounts in position I still have to set the geometry up.
Now coming from a M3 CSL something was lacking from the 6 pots engine tone, it needed a bit of induction noise and the DaveF filter did the trick. OK it’s not as aggressive sounding as the CSL, but it gives a great tone and brings out the true induction noise of the M52B28 engine.
After spending hours staring at the car in the works car park I decided it needed something, I just couldn’t put my finger on what it was then it hit me, the front lights are very dark inside however the clear indicators although much better than tango units just stuck out a little too much. I decided it needed some smoked corner indicators so tracked down some Auto-Lamp lenses.
The fit is good, it’s not OEM perfect but as far as aftermarket indicators go there fine and will tie in nicely with the red and black theme going on.
Next up is to set the geometry, I’m going to just set it up roughly for the moment but hopefully on Saturday will be able to spend some time setting the camber and toe up ready to hit the track.
Cheer guys, its nice to be heavily tweeking again, I mean I did a fair few things to the Exige S but never to the extream as I am with the e36.... roughly set the geometry up today aswell, going to do some fine tuning at the weekend then its just about ready to go. Going to add a few small cosmetic tweeks ready for next weekend but don't think I'll be able to pull off a wheel colour change in time, but who knows.
Well I managed to spend a few days playing about on the car doing some finishing touches and generally giving it a good once over. First off came the painting of the grills and rear badges, I like to try things different so instead of the usual satin black I thought I would give gloss black ago, the idea behind it is everything that was chrome will now be gloss black. Excuse the bug splatter haven’t got round to cleaning the car this week.
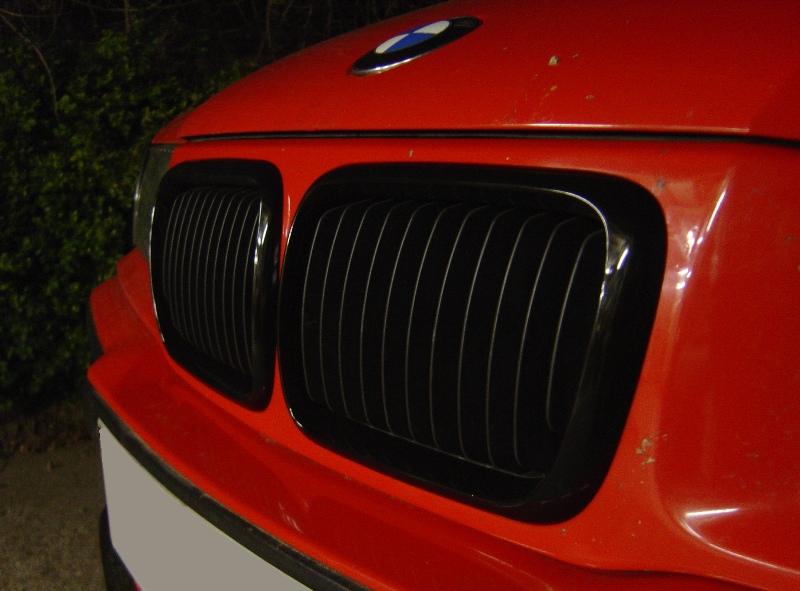
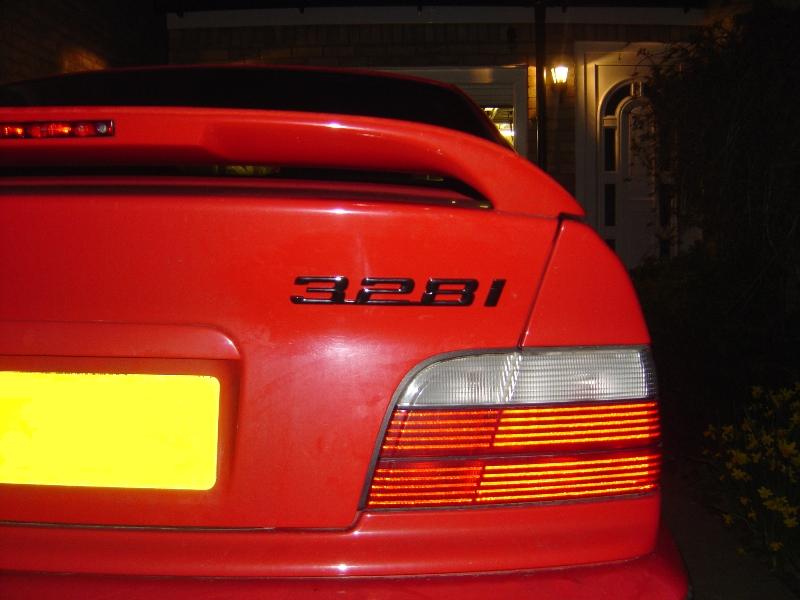
If I’m honest, I’m not convinced on the look however I’ll leave it for the time being and see if it grows on me, the kidney’s look OK however the rear badge just doesn’t look right at times, maybe black on a darker colour might have gave the effect I was looking for, I also think it clashes with the silver chrome details on the rear BMW roundel.
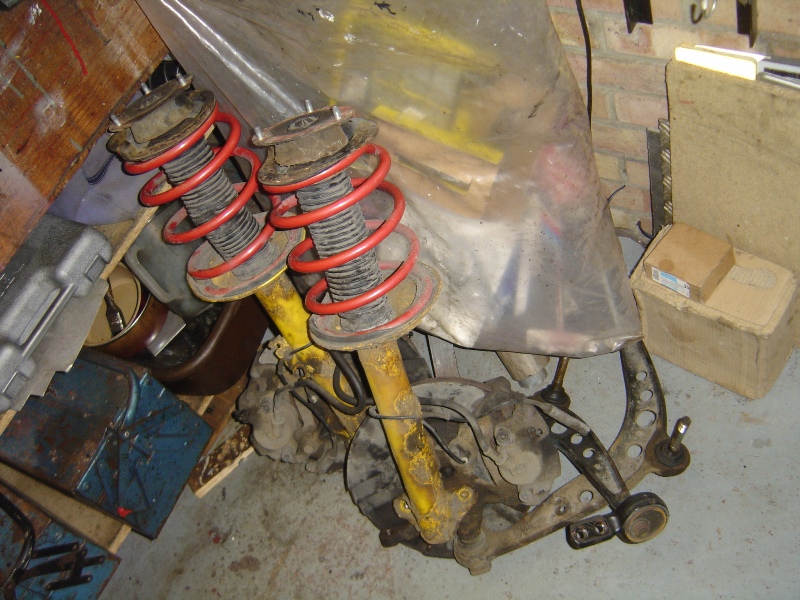
Next up was to tidy the garage and gather up the old front end parts, needed to make room for the possibilities of doing the geometry in the garage if the weather didn’t hold out.
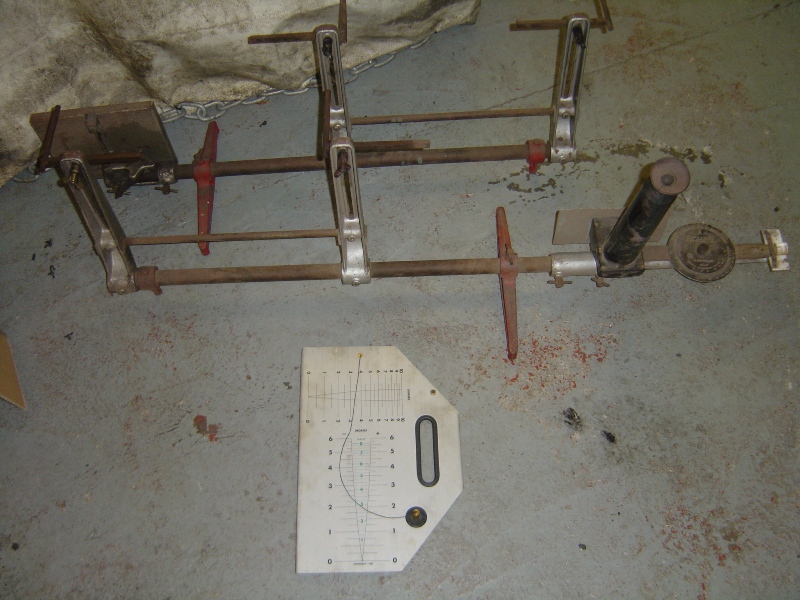
Fortunately for me if I don’t have the equipment my friends do, and they were ever so kind to lend me these alignment gauges. First been a Dunlop optical alignment gauge for setting the toe, the other a camber gauge.
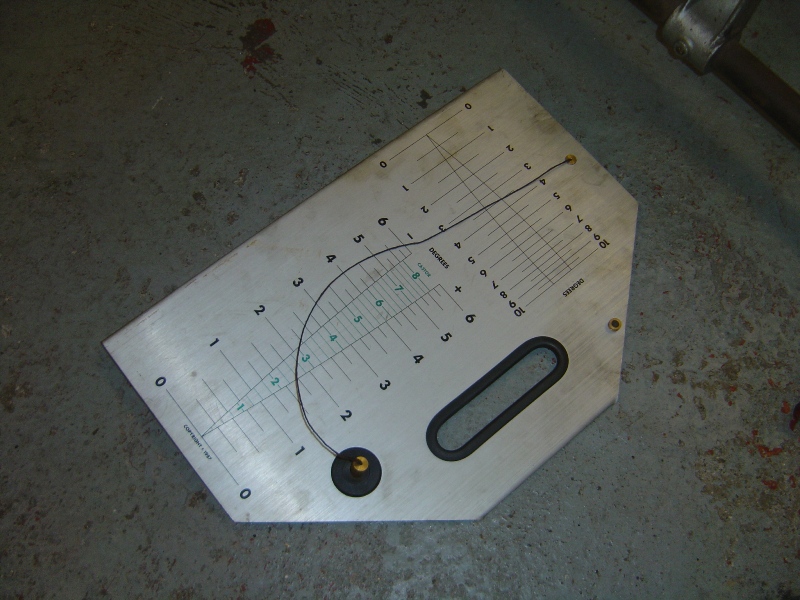
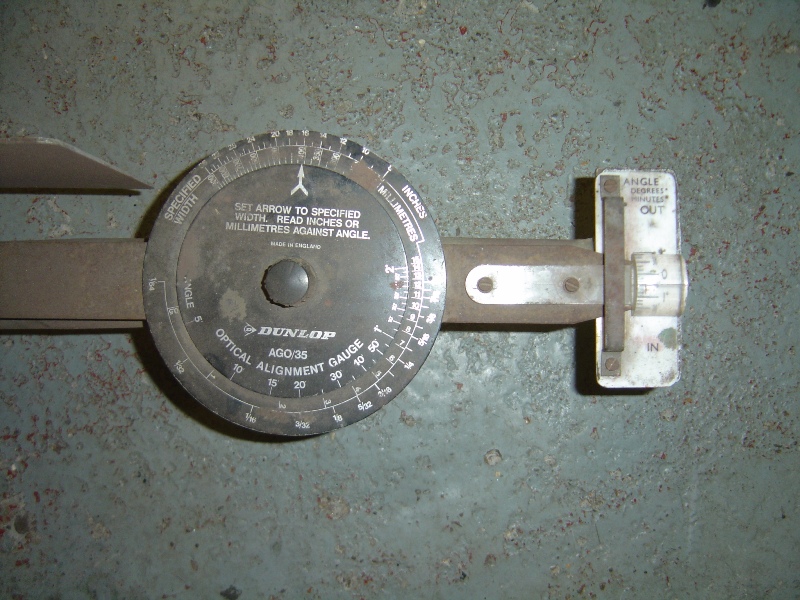
I didn’t get any pictures of the process, but to start with I balanced up the suspension height all round, setting it at 305mm wheel centre to arch at the rear, and 320mm wheel centre to arch at the front. Once the height was set I took it for a test drive to let the suspension settle itself and then double checked the measurements.
Next up was the camber, at the rear this was set to -1.5 degrees and at the front -2.5 was dialled in, the adjustable top mounts really did make it easy to set the camber. Once the camber was set we could then move onto the toe; remember to set camber before toe.
The rear toe was pretty much spot on, a small bit of toe in which would be fine. Next was the front, at first this was toe’ing out heavily, once I’d managed to free off the track rod ends I then set about balancing both sides up by eye to give 0.0 toe. A quick test drive and the car really has been transformed over these last few weeks, but there was a little dead spot in the steering suggesting toe out was still present. Got back and set the toe properly using the optical alignment gauge, ended up setting it at 0.5 degree of toe in.
Final test drive and the car is now perfect, I’m really happy with how it drives and for the first time in weeks am looking forward to getting it out on track. Between now and this Friday there maybe a little update with the latest tyre choice and maybe one of two other track enhancements but until then it’s all set for next weekend, the deadline I keep going on, and on about.
Once back from Germany I’ll then start to plan the interior and get to work on that, more on that subject at a later date.....
If I’m honest, I’m not convinced on the look however I’ll leave it for the time being and see if it grows on me, the kidney’s look OK however the rear badge just doesn’t look right at times, maybe black on a darker colour might have gave the effect I was looking for, I also think it clashes with the silver chrome details on the rear BMW roundel.
Next up was to tidy the garage and gather up the old front end parts, needed to make room for the possibilities of doing the geometry in the garage if the weather didn’t hold out.
Fortunately for me if I don’t have the equipment my friends do, and they were ever so kind to lend me these alignment gauges. First been a Dunlop optical alignment gauge for setting the toe, the other a camber gauge.
I didn’t get any pictures of the process, but to start with I balanced up the suspension height all round, setting it at 305mm wheel centre to arch at the rear, and 320mm wheel centre to arch at the front. Once the height was set I took it for a test drive to let the suspension settle itself and then double checked the measurements.
Next up was the camber, at the rear this was set to -1.5 degrees and at the front -2.5 was dialled in, the adjustable top mounts really did make it easy to set the camber. Once the camber was set we could then move onto the toe; remember to set camber before toe.
The rear toe was pretty much spot on, a small bit of toe in which would be fine. Next was the front, at first this was toe’ing out heavily, once I’d managed to free off the track rod ends I then set about balancing both sides up by eye to give 0.0 toe. A quick test drive and the car really has been transformed over these last few weeks, but there was a little dead spot in the steering suggesting toe out was still present. Got back and set the toe properly using the optical alignment gauge, ended up setting it at 0.5 degree of toe in.
Final test drive and the car is now perfect, I’m really happy with how it drives and for the first time in weeks am looking forward to getting it out on track. Between now and this Friday there maybe a little update with the latest tyre choice and maybe one of two other track enhancements but until then it’s all set for next weekend, the deadline I keep going on, and on about.
Once back from Germany I’ll then start to plan the interior and get to work on that, more on that subject at a later date.....
Well I made the deadline, only just mind and with quite a few minor incidents along the way. However there is a few shock instalments to this update that I bet no one (me included) was expecting.
First shock update is the interior, although this is a temporary measure I really didn’t expect to have the time to make the seat sub-frames let alone get it all fitted and functional. It started a few days before departure for Rotterdam, a friend and I were sat staring at his current project; a Pegueot 306 Rally track car, which he’d just bought some new seats for. So surplus to his requirements were these seats;
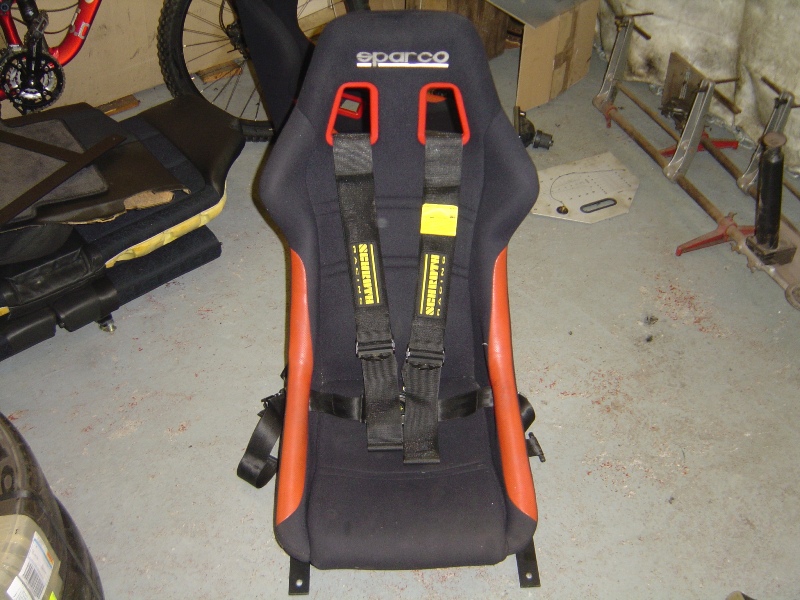
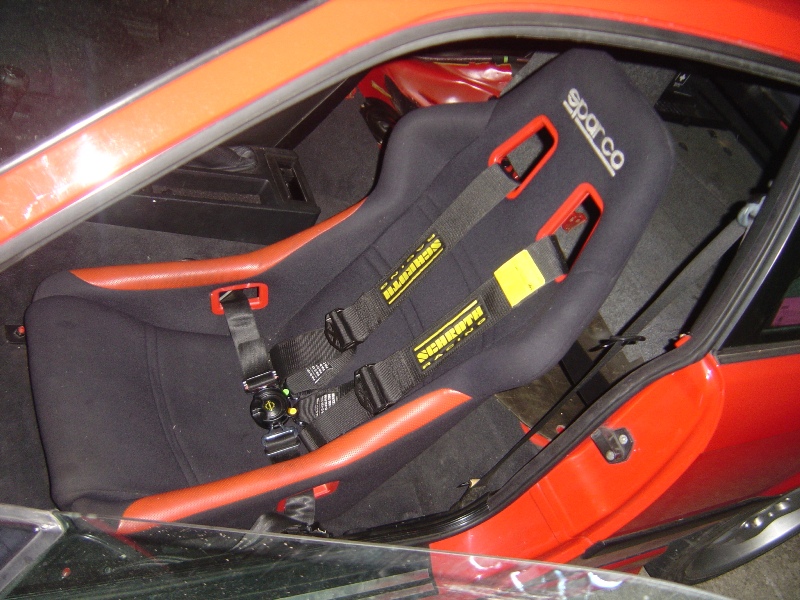
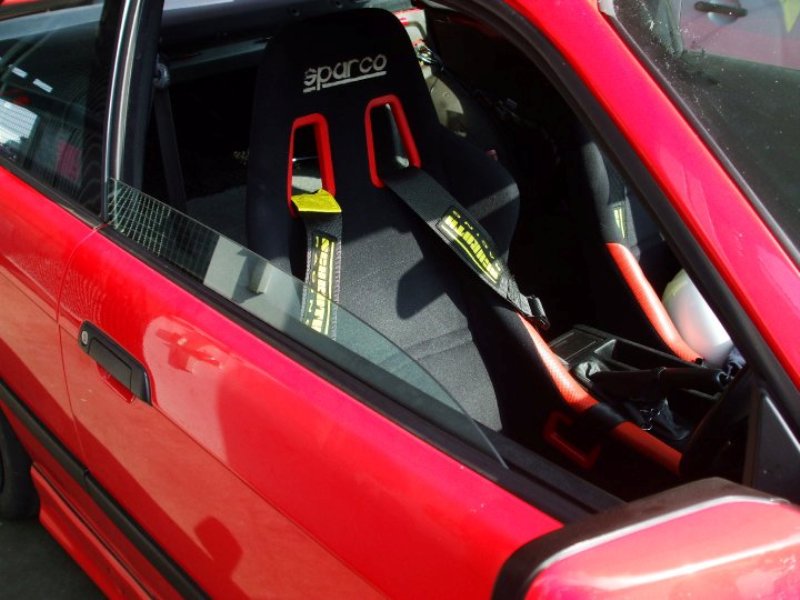
They are Sparco Sprint seats, not the world’s most elusive set of sports seats but they’d certainly do a better job of holding me in than the current OEM 328i Sport seats. One thing that was noted is that they have a strung base and are not hard backed. This actually made them really comfortable for long journeys and was a huge relief from the normal pain and discomfort endured for hundreds of miles.
First up once the standard seats was removed was to work out how we were going to make the seat sub-frames. We decided to stick to a basic 5mm flat bar steel square frame which would incorporate the factory mounting points, and we would later space the seat to the correct height.
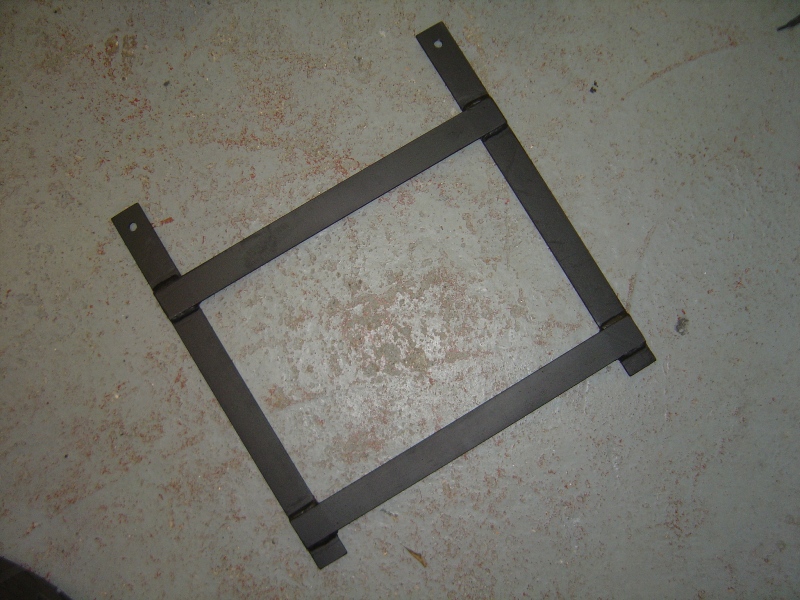
Once the frame shape was made and welded up the holes were drilled and the frames painted satin black. The above frame as you can see is not quiet finished, there was four holes drilled from the frame to floor mounting, and a further four for the frame to seat mounting points.
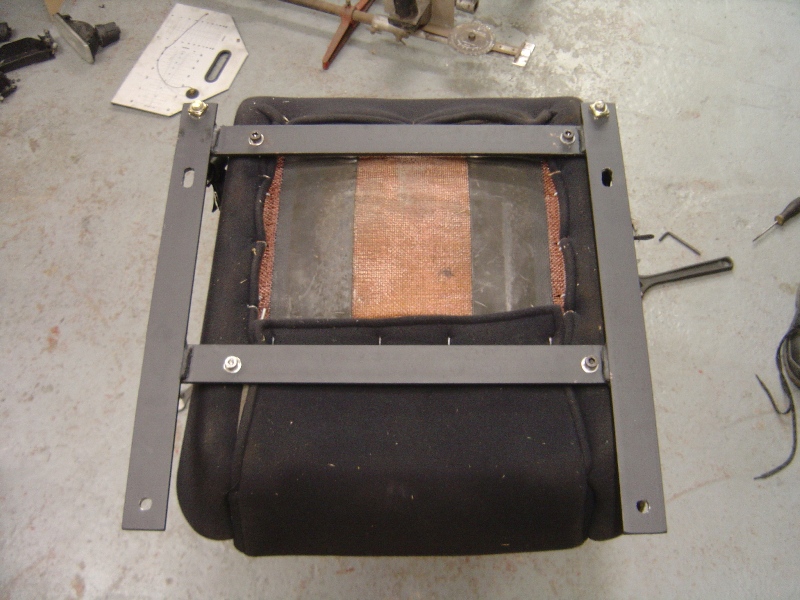
It’s worth noting that the seats are off set and should sit as near to the centre tunnel as physically possible, with the passengers frame (above) this wasn’t too essential however on the drivers frame due to the centre position of the steering wheel it is. On the drivers frame (not pictured) the near side seat holes were actually drilled into the flat bar that run from the front to back of the car, due to the lack of space between the frame and carpet to fit nuts and bolts underneath, the welded bar that was now 10mm thick was threaded with an M8 thread.
The drivers seat has a sliding runner fitted which was 12mm thick, and it also required a further 25mm of spacing to get the correct height. The passengers seat sits really low, I need to raise this at a later date.
Here is the two seats mounted in situ complete with some Schroth Profi-II ASM 4-Point harnesses.
Next up was the tyres, the current Hankook RS2’s were running a little low so decided to fit a fresh set of rubber all round, I couldn’t quite decide what to run but eventually settled on a set of Kumho V70a semi-slick tyres, they are in the same league as R888’s however I had never tried them before so didn’t know what to expect.
I went for the usually 225/45/17 and 245/40/17 staggered fitment sizes.
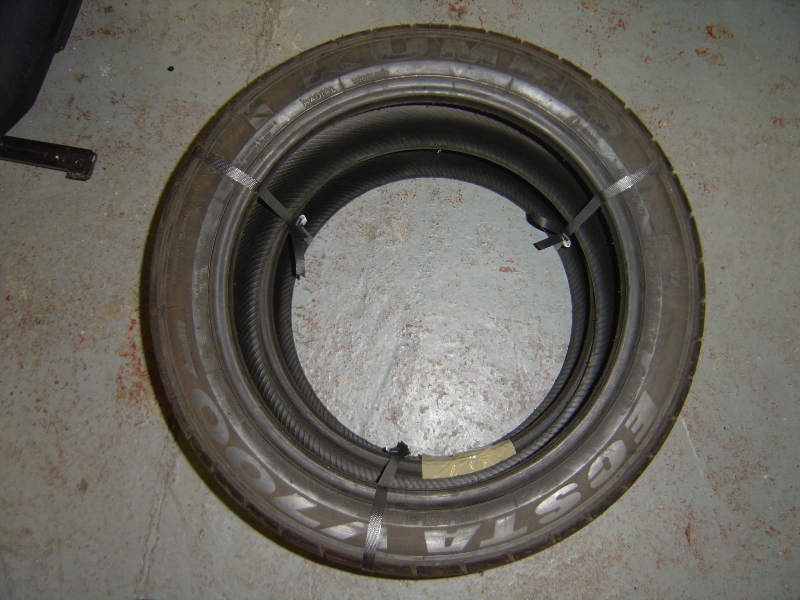
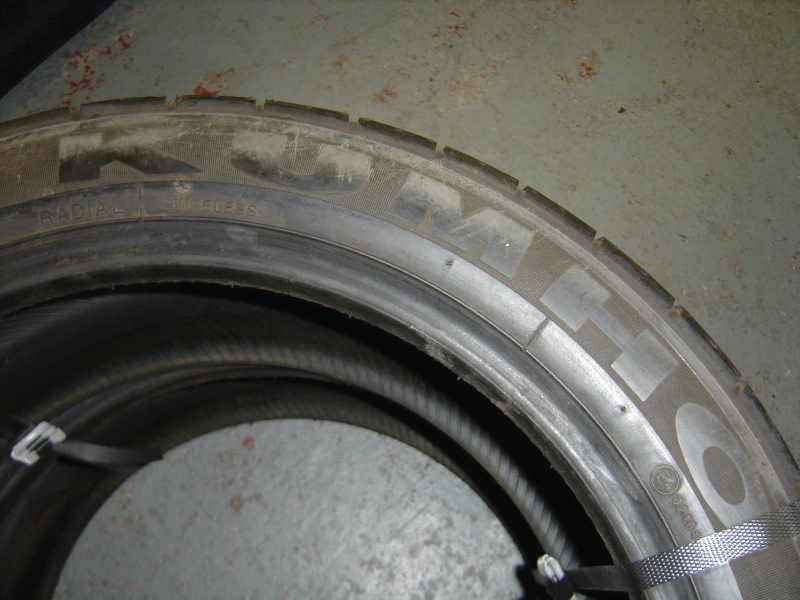
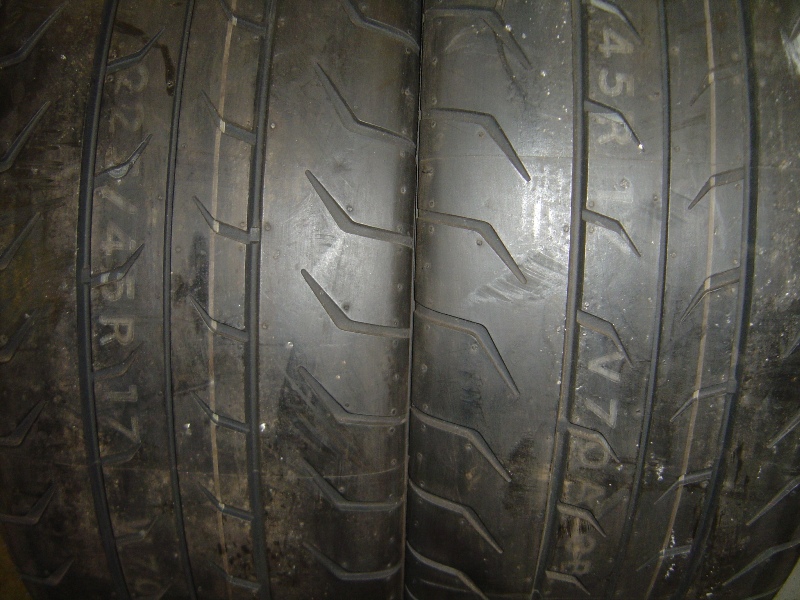
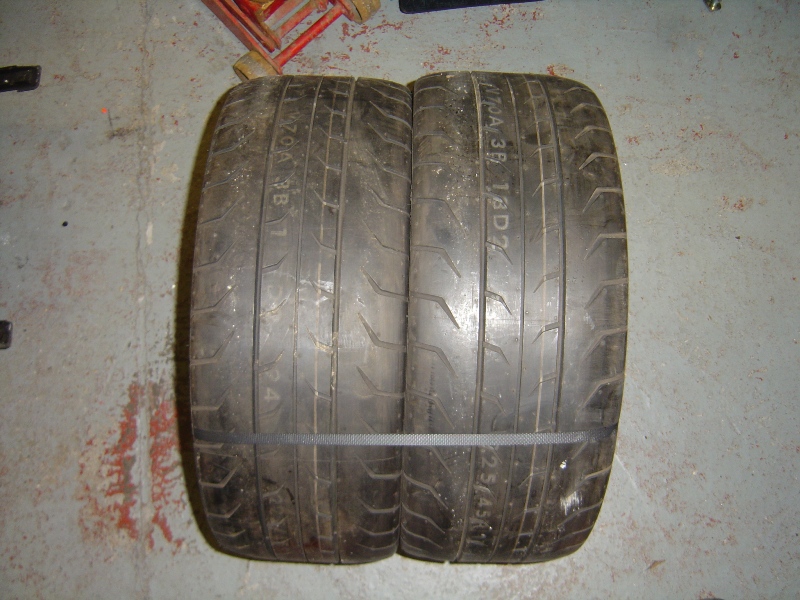
This is where the problems started it was 36 hours before I was due to leave for Germany and I only had 2 front tyres, the rears still hadn’t arrived. I also decided that if I was paying for the tyres to be fitted, I might as well offset the cost and get the wheels re-furbished at the same time, a risky chance that would hopefully pay off.
Thursday morning arrived and the rear’s were no where to be seen so I dropped off all 4 wheels and tyres at a local refurb company that is just in the process of setting themselves up. They said they would refurb the wheels and fit and balance my new tyres all within the previously set price, which was great if I had 4 tyres to fit!!!!
Stress levels went through the roof during the course of the day, however a phone call at 16:15 to say the rear tyres have arrived brought them back to normal. At 17:30 the car was ready to be collected, I was at work so a friend offered to collect it and bring it home. Looking good if I do say so myself...
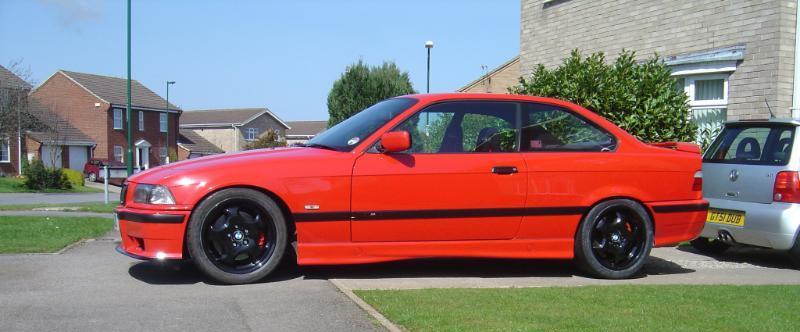
Got home from work and was really happy with how the car had transformed in the space of a month, give the car the final once over ready for the morning, I say morning, I was giving the car the once over at 3am so it already was morning.
All was fine until I checked the front wheels, one spacer had been fitted arse over tit (refer to above spacer problems) they has fitted the 10mm first and then the 2mm spacer and proceeded to tighten it right down to the point the hub-centric lug sheared off the spacer. Balls, I had all but a few hours to get this problem sorted, it wasn’t going to happen, or was it....
I placed an urgent plea out for anyone who may know of a set of hub-centric spacers kicking about either in the UK or Germany, or anywhere on route. Fortunately for me Darren Langeveld who was organising the Nurburgring track day (www.destination-nurburgring.com) knew of a place in Coventry who would have some on the shelf, he offered to pick them up on route to the ferry and give them to me on board, so I would have them in time for the track day. Perfect, this was the news that I was waiting for and I could finally relax and enjoy the holiday.
Finally boarded the ferry Friday and was on the continent by the morning, stopped by Spa in Belgium to have a nosey round the Porsche Club Francorchamps track day on the Saturday morning and was in Nurburg by later afternoon. I won’t turn this topic into a trip report, there will be a separate topic for this another day.
Monday came and the weather was perfect, the car was ready and so was I. The track day was on the full Nordschleife + GP Circuit so it was going to be a good day, here’s a few select pictures from the trip, I do apologise for the quality of some pictures my brothers laptop broke after the trip so all pictures had to be downloaded off the likes of Facebook & Photobucket.
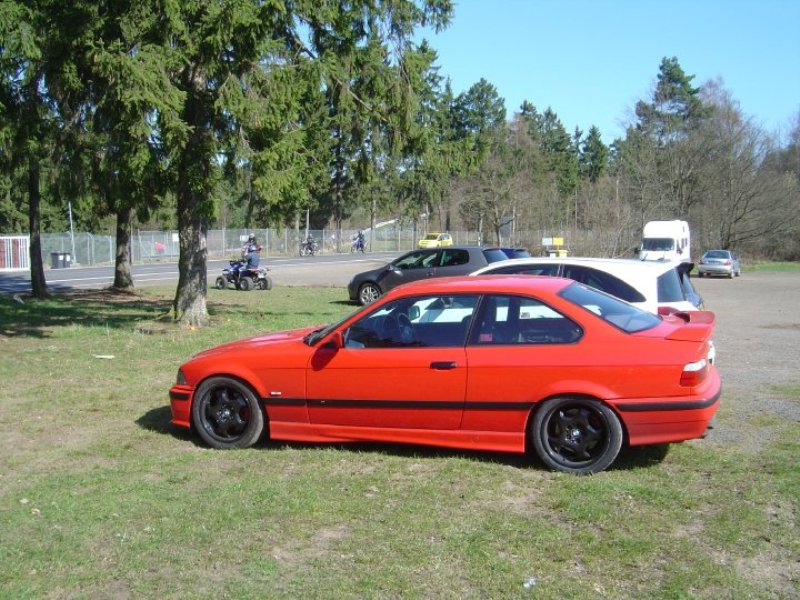
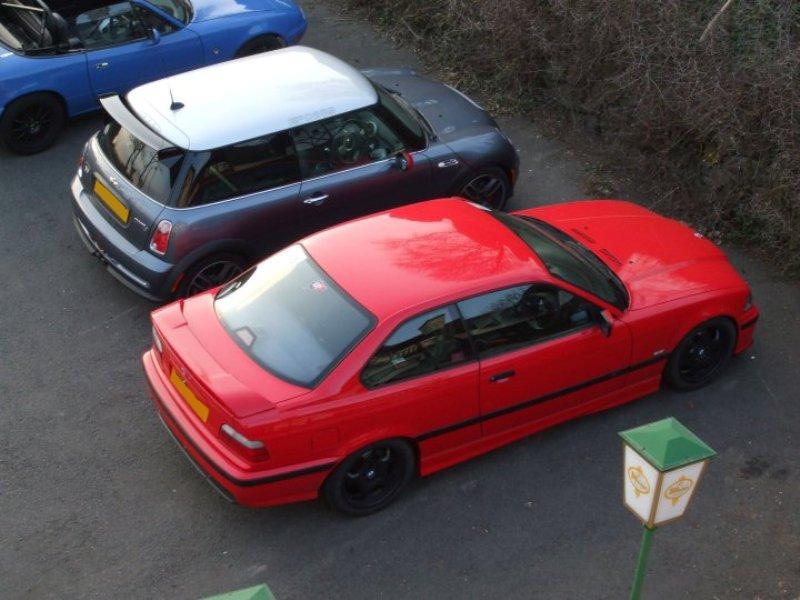
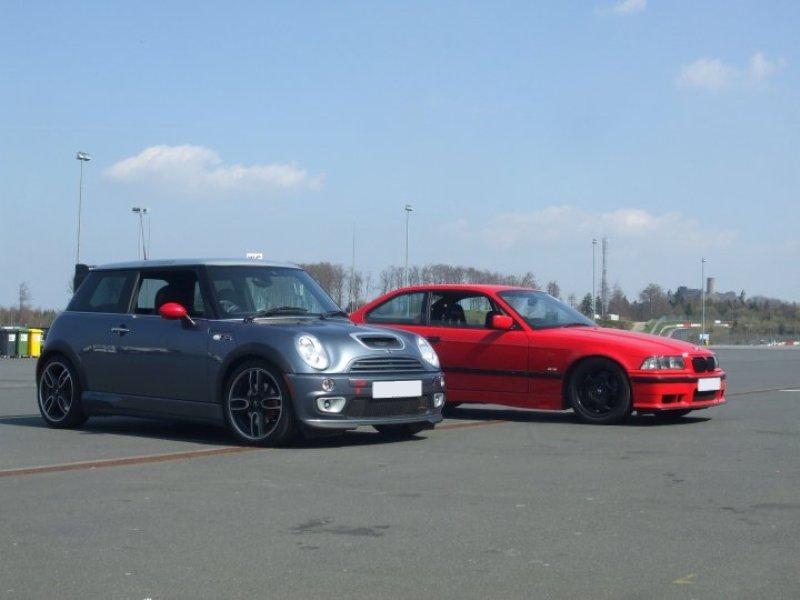
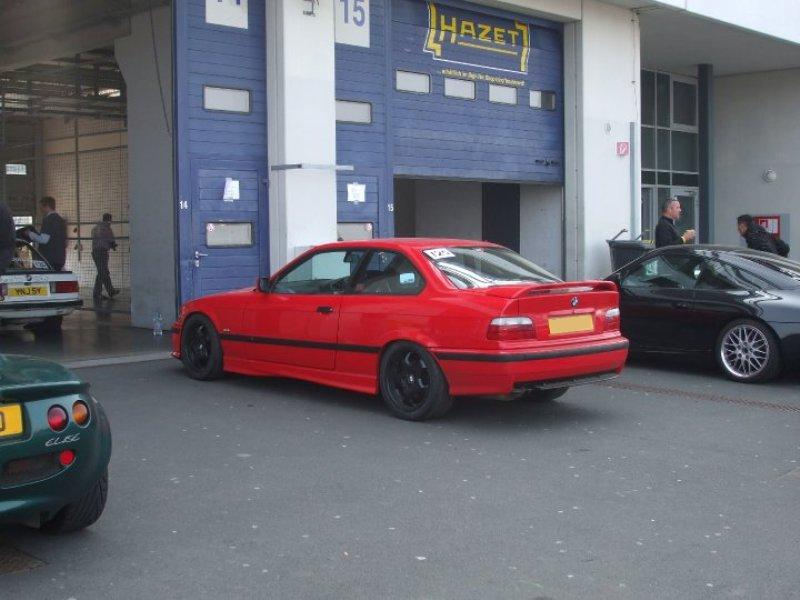
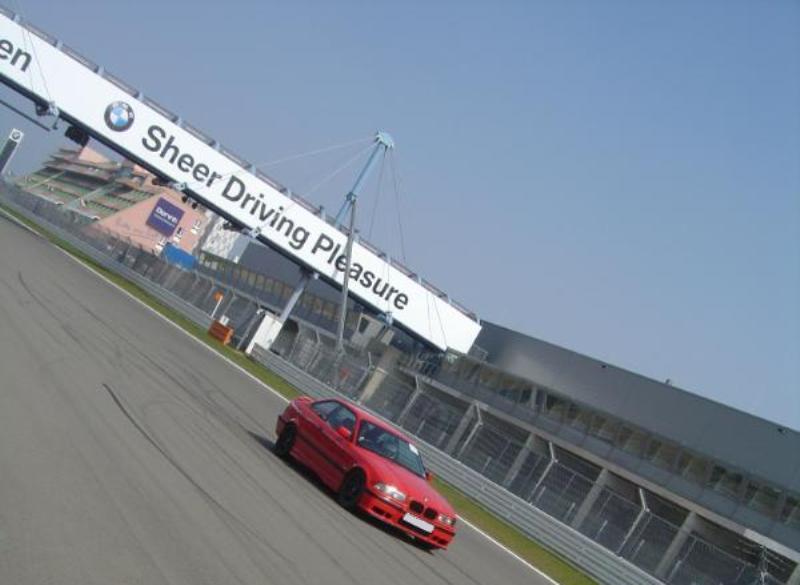
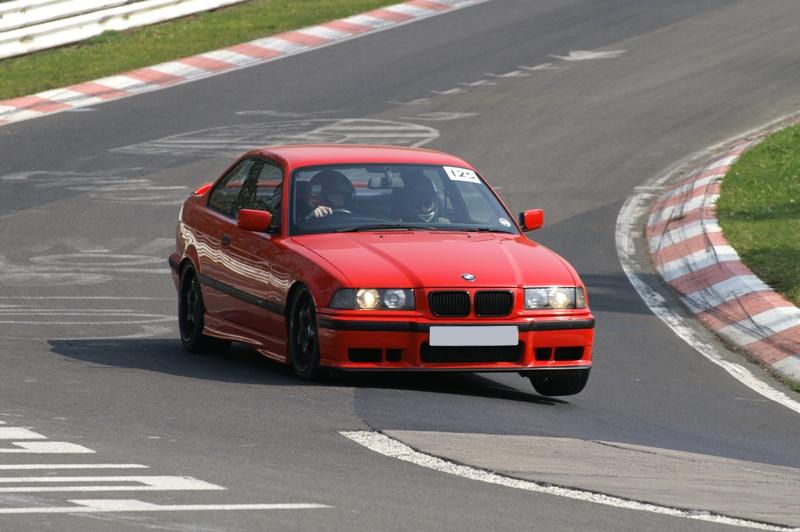
Really am impressed with the car and its set up, after 15 laps at 17.5 miles a lap all was still running fine. The tyres I can really say are worth considering over the R888’s especially with the price difference these days, and the brakes pads which are Mintex 1155 at the front and 1144 at the rear really do work well with the M3 Evo callipers and discs.
Since getting back I’ve give the car a once over and the only problem to report is one of the lower rear trailing arm ball joints has a small bit of play in it, this is the same joint I was suspected of it having a minute bit of play before I left for Germany anyway, so there’s no shocks there. I’m going to replace the ball joint and use the car for the next few months as it is, will concentrate on taking a bit of weight out of the car and also decide what the final plans will be.
Hope you’re still awake after reading all the above! :P
First shock update is the interior, although this is a temporary measure I really didn’t expect to have the time to make the seat sub-frames let alone get it all fitted and functional. It started a few days before departure for Rotterdam, a friend and I were sat staring at his current project; a Pegueot 306 Rally track car, which he’d just bought some new seats for. So surplus to his requirements were these seats;
They are Sparco Sprint seats, not the world’s most elusive set of sports seats but they’d certainly do a better job of holding me in than the current OEM 328i Sport seats. One thing that was noted is that they have a strung base and are not hard backed. This actually made them really comfortable for long journeys and was a huge relief from the normal pain and discomfort endured for hundreds of miles.
First up once the standard seats was removed was to work out how we were going to make the seat sub-frames. We decided to stick to a basic 5mm flat bar steel square frame which would incorporate the factory mounting points, and we would later space the seat to the correct height.
Once the frame shape was made and welded up the holes were drilled and the frames painted satin black. The above frame as you can see is not quiet finished, there was four holes drilled from the frame to floor mounting, and a further four for the frame to seat mounting points.
It’s worth noting that the seats are off set and should sit as near to the centre tunnel as physically possible, with the passengers frame (above) this wasn’t too essential however on the drivers frame due to the centre position of the steering wheel it is. On the drivers frame (not pictured) the near side seat holes were actually drilled into the flat bar that run from the front to back of the car, due to the lack of space between the frame and carpet to fit nuts and bolts underneath, the welded bar that was now 10mm thick was threaded with an M8 thread.
The drivers seat has a sliding runner fitted which was 12mm thick, and it also required a further 25mm of spacing to get the correct height. The passengers seat sits really low, I need to raise this at a later date.
Here is the two seats mounted in situ complete with some Schroth Profi-II ASM 4-Point harnesses.
Next up was the tyres, the current Hankook RS2’s were running a little low so decided to fit a fresh set of rubber all round, I couldn’t quite decide what to run but eventually settled on a set of Kumho V70a semi-slick tyres, they are in the same league as R888’s however I had never tried them before so didn’t know what to expect.
I went for the usually 225/45/17 and 245/40/17 staggered fitment sizes.
This is where the problems started it was 36 hours before I was due to leave for Germany and I only had 2 front tyres, the rears still hadn’t arrived. I also decided that if I was paying for the tyres to be fitted, I might as well offset the cost and get the wheels re-furbished at the same time, a risky chance that would hopefully pay off.
Thursday morning arrived and the rear’s were no where to be seen so I dropped off all 4 wheels and tyres at a local refurb company that is just in the process of setting themselves up. They said they would refurb the wheels and fit and balance my new tyres all within the previously set price, which was great if I had 4 tyres to fit!!!!
Stress levels went through the roof during the course of the day, however a phone call at 16:15 to say the rear tyres have arrived brought them back to normal. At 17:30 the car was ready to be collected, I was at work so a friend offered to collect it and bring it home. Looking good if I do say so myself...
Got home from work and was really happy with how the car had transformed in the space of a month, give the car the final once over ready for the morning, I say morning, I was giving the car the once over at 3am so it already was morning.
All was fine until I checked the front wheels, one spacer had been fitted arse over tit (refer to above spacer problems) they has fitted the 10mm first and then the 2mm spacer and proceeded to tighten it right down to the point the hub-centric lug sheared off the spacer. Balls, I had all but a few hours to get this problem sorted, it wasn’t going to happen, or was it....
I placed an urgent plea out for anyone who may know of a set of hub-centric spacers kicking about either in the UK or Germany, or anywhere on route. Fortunately for me Darren Langeveld who was organising the Nurburgring track day (www.destination-nurburgring.com) knew of a place in Coventry who would have some on the shelf, he offered to pick them up on route to the ferry and give them to me on board, so I would have them in time for the track day. Perfect, this was the news that I was waiting for and I could finally relax and enjoy the holiday.
Finally boarded the ferry Friday and was on the continent by the morning, stopped by Spa in Belgium to have a nosey round the Porsche Club Francorchamps track day on the Saturday morning and was in Nurburg by later afternoon. I won’t turn this topic into a trip report, there will be a separate topic for this another day.
Monday came and the weather was perfect, the car was ready and so was I. The track day was on the full Nordschleife + GP Circuit so it was going to be a good day, here’s a few select pictures from the trip, I do apologise for the quality of some pictures my brothers laptop broke after the trip so all pictures had to be downloaded off the likes of Facebook & Photobucket.
Really am impressed with the car and its set up, after 15 laps at 17.5 miles a lap all was still running fine. The tyres I can really say are worth considering over the R888’s especially with the price difference these days, and the brakes pads which are Mintex 1155 at the front and 1144 at the rear really do work well with the M3 Evo callipers and discs.
Since getting back I’ve give the car a once over and the only problem to report is one of the lower rear trailing arm ball joints has a small bit of play in it, this is the same joint I was suspected of it having a minute bit of play before I left for Germany anyway, so there’s no shocks there. I’m going to replace the ball joint and use the car for the next few months as it is, will concentrate on taking a bit of weight out of the car and also decide what the final plans will be.
Hope you’re still awake after reading all the above! :P
Thanks for the kind words guys, it really is worth considering a 328i as a track car you don't need M3 power although it is nice. Budget wise well it's certainly gone over what was first planned but then I did expect that, I do have a cost break down of every penny spent on the car to date and its just over £6k at the moment including tyres, tax, test and insurance.
Labour on the diff would vary depending on if you're fitting all the rear trailing arms and other associated parts. I'd reccomend going 3.2 trailing arms and hollow drive shafts whilst you've got the car in bits. Also note that you need a 3.0 prop shaft NOT a 3.2 Evo one, the Evo one is too short due to the 6 speed box that the 3.2 comes supplied with. I'd say its a worthy upgrade for track use, however it will increase fuel amounts due to the gear ratio been changed.
I have only had the one piece M3 Saloon wheels re-furbished so far, going to have the splits done shortly thought so will post an update about that at a later date.
M3 arm off a 3.0 will be a direct swap, but remember they run a different calliper spacing so you're going to need to replace pairs and fit new rear brakes, if memory serves me right the 3.2 trailing arms have larger rear bearings not sure if this means you'll need 3.2 drive shafts aswell as I never got round to comparing the drive shafts and I knew from day one I'd be fitting the hollow 3.2 ones.
Modified prop shaft should work just fine, swapping the diff carrier and fitting just the rear diff won't be too bad of a job but I wouldnt like to guesstimate what a garage would charge.
Modified prop shaft should work just fine, swapping the diff carrier and fitting just the rear diff won't be too bad of a job but I wouldnt like to guesstimate what a garage would charge.
Well as I mentioned in my last update; the passenger’s side rear trailing arm lower ball joint was showing signs of wear and I thought it was best to replace it. Although it probably would never have caused an issue on the road, with me going back to the Nurburgring on the 20th of May I wasn’t going to risk it.
I’ll be honest I wasn’t looking forward to attempting the task, and had visions of me having to drop the rear trailing arm to be able to remove the bush with a press. I did a bit of research and there was mixed responses, some people had managed it with the arm in situ, some had not. Anyway I set aside this weekend to complete the job giving myself time to get the arm to a hydraulic press should I require the use of one.
Started the day by removing the rear camber arm and dropping that out the way, once that was out the way I also removed the rear calliper, rear disc, rear handbrake shoes and then removed the bolts holding the heat shield on to allow a bit more clearance underneath. With all the above items out of the way I then gave the ball joint a few quick squirts of WD40 in the hope it would free things up.
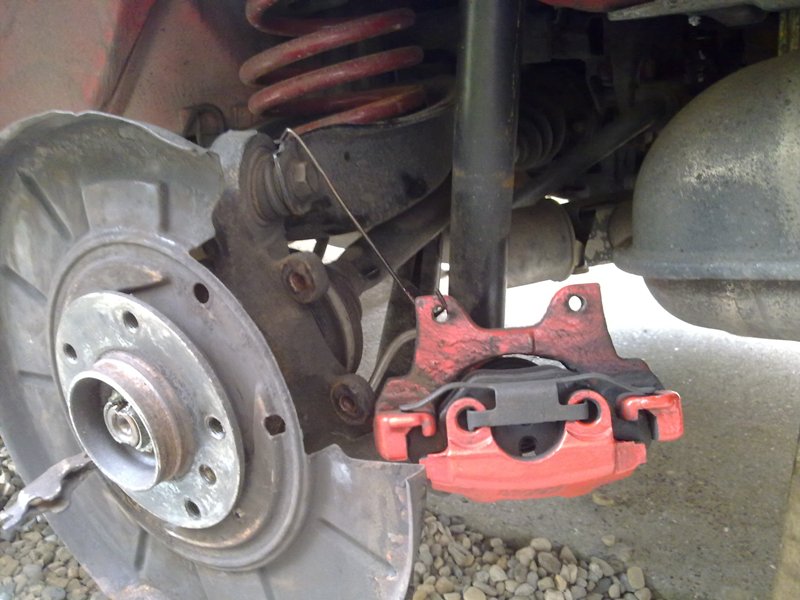
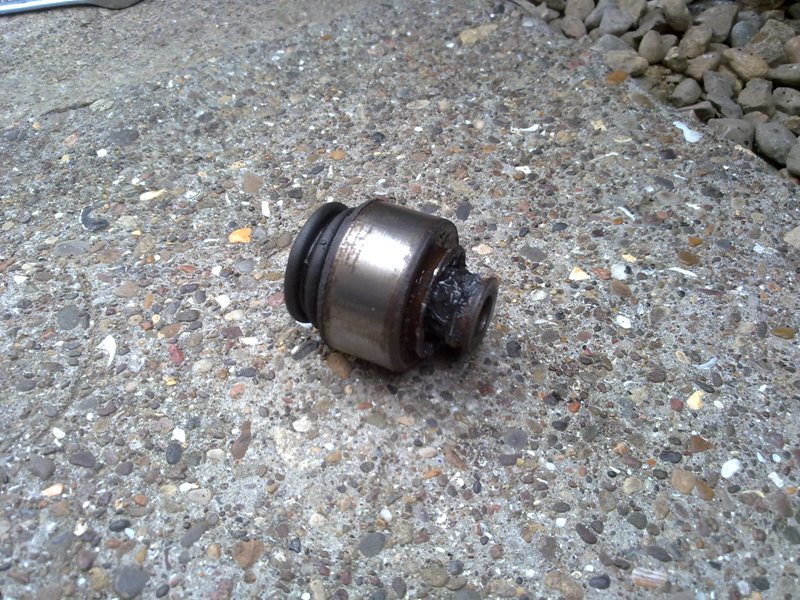
I then set about finding a suitable sized socket to aid the removal of the ball joint, I found with the rubber boot of the joint removed a 1 1/4” socket would fit fine, tapped the socket into place and gave the ball joint a few swift hammer blows. To my surprise the bush was moving so I continued to bash at it until it was free, failing this the tool I made to fit the new ball joint (more on this below) would also double up as an extraction tool.
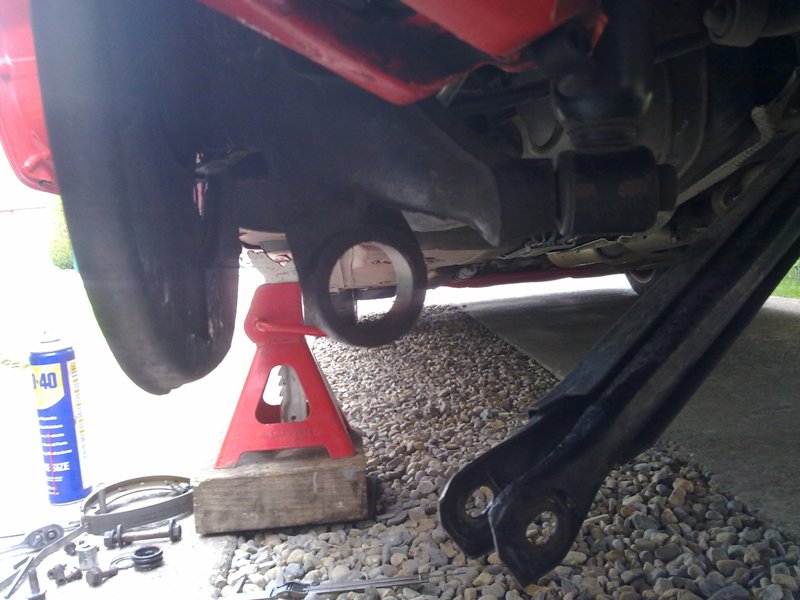
Next step was to fit the new ball joint, I constructed a tool consisting of a bit of tubing, some 5mm steel plate, 10mm threaded bar a 36mm socket and a few 18mm nuts and washers. I drilled a 10mm hole into the steel plate and mounted a length of threaded bar to it with nuts and washers either side to hold it in place, then I welded the steel tube centre of the threaded bar. This would allow the ball joint to be extracted into the tube, if you were removing the ball joint you’d use this with a 1 1/4” socket, but to fit the new ball joint I used a 36mm socket.
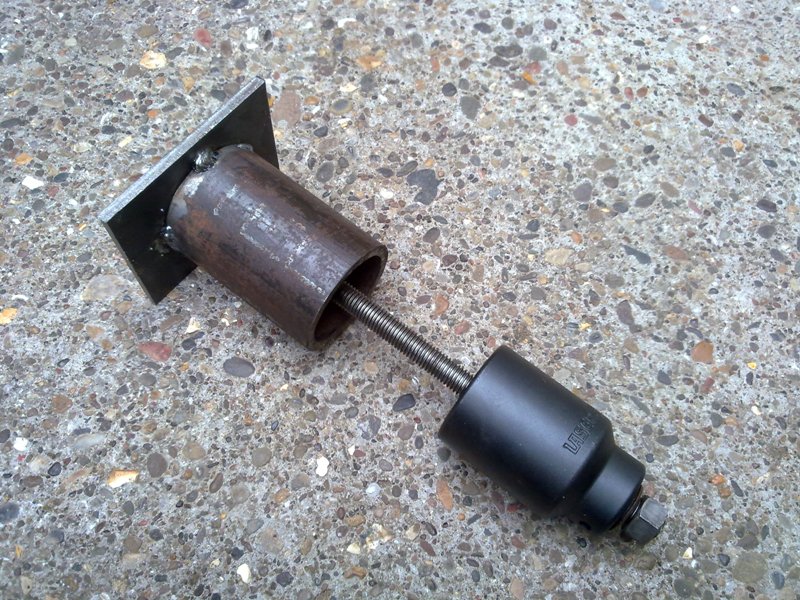
Fitment was simple, place the tool to the back of the hole on the trailing arm, slide the bush along the threaded bar and offer it up to the front of the arm, fit the 36mm socket and then a washer and an 18mm nut. Then simply tighten the nut down until the ball joint is in place.
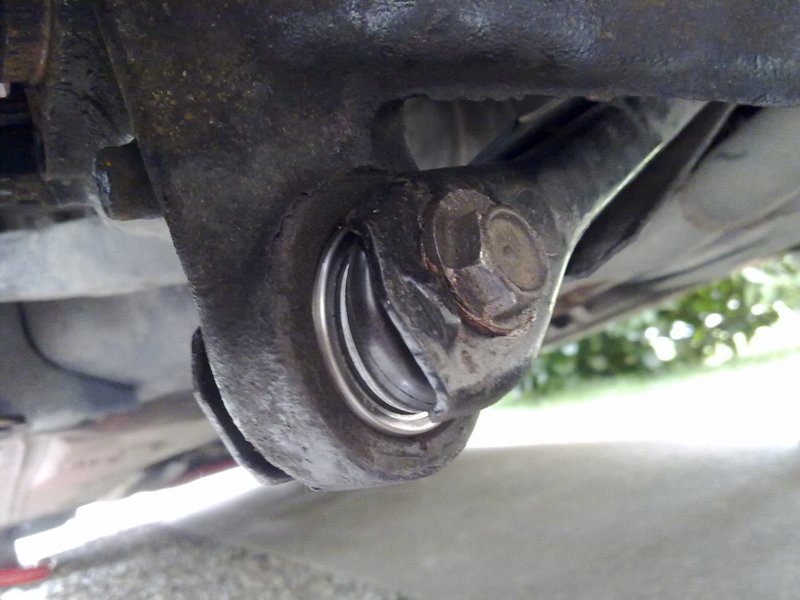
Job done... even had time to pick myself up a new set of NGK spark plugs and fit those too, I went for the bog standard BKR6EK as at the end of the day they’ll get replaced often enough so ‘enhanced’ platinum plugs were not required.
I’ll be honest I wasn’t looking forward to attempting the task, and had visions of me having to drop the rear trailing arm to be able to remove the bush with a press. I did a bit of research and there was mixed responses, some people had managed it with the arm in situ, some had not. Anyway I set aside this weekend to complete the job giving myself time to get the arm to a hydraulic press should I require the use of one.
Started the day by removing the rear camber arm and dropping that out the way, once that was out the way I also removed the rear calliper, rear disc, rear handbrake shoes and then removed the bolts holding the heat shield on to allow a bit more clearance underneath. With all the above items out of the way I then gave the ball joint a few quick squirts of WD40 in the hope it would free things up.

I then set about finding a suitable sized socket to aid the removal of the ball joint, I found with the rubber boot of the joint removed a 1 1/4” socket would fit fine, tapped the socket into place and gave the ball joint a few swift hammer blows. To my surprise the bush was moving so I continued to bash at it until it was free, failing this the tool I made to fit the new ball joint (more on this below) would also double up as an extraction tool.


Next step was to fit the new ball joint, I constructed a tool consisting of a bit of tubing, some 5mm steel plate, 10mm threaded bar a 36mm socket and a few 18mm nuts and washers. I drilled a 10mm hole into the steel plate and mounted a length of threaded bar to it with nuts and washers either side to hold it in place, then I welded the steel tube centre of the threaded bar. This would allow the ball joint to be extracted into the tube, if you were removing the ball joint you’d use this with a 1 1/4” socket, but to fit the new ball joint I used a 36mm socket.

Fitment was simple, place the tool to the back of the hole on the trailing arm, slide the bush along the threaded bar and offer it up to the front of the arm, fit the 36mm socket and then a washer and an 18mm nut. Then simply tighten the nut down until the ball joint is in place.

Job done... even had time to pick myself up a new set of NGK spark plugs and fit those too, I went for the bog standard BKR6EK as at the end of the day they’ll get replaced often enough so ‘enhanced’ platinum plugs were not required.
Well today the car was finally committed to the realms of the track car, the weight loss started. I’ll let the pictures do most the talking...
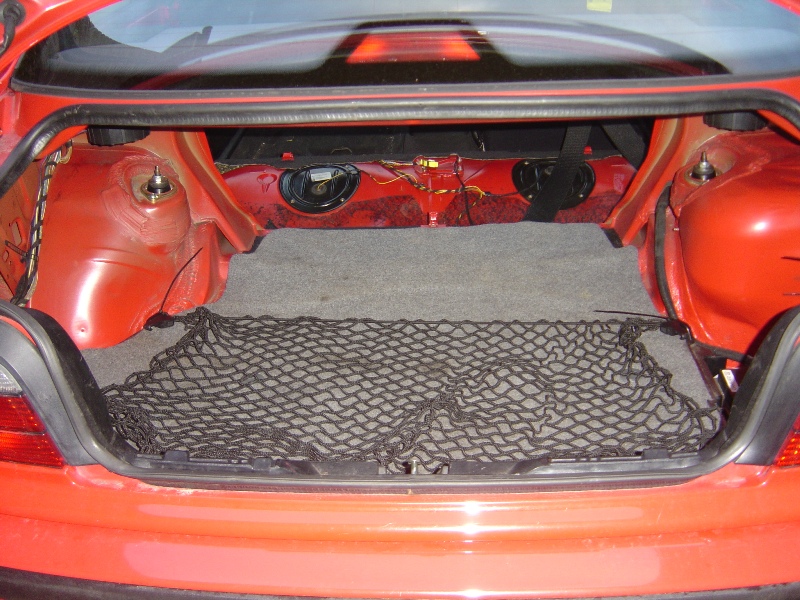
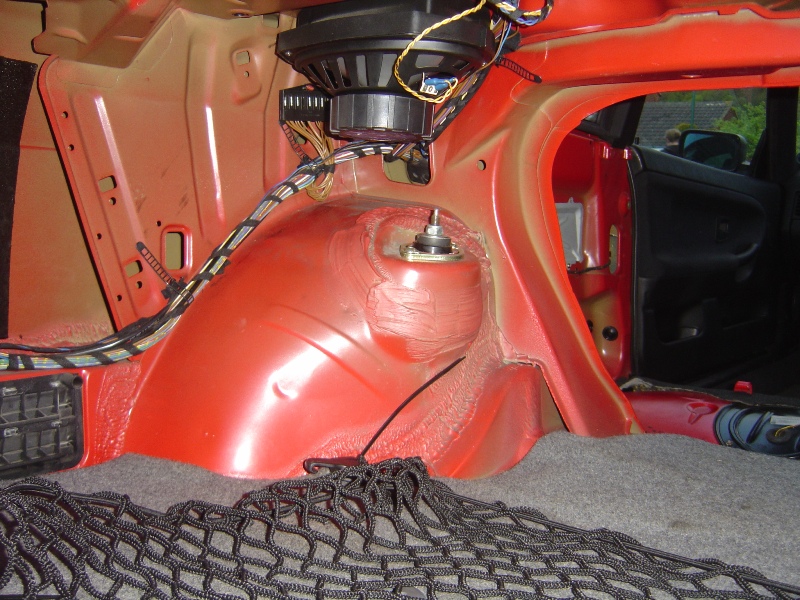
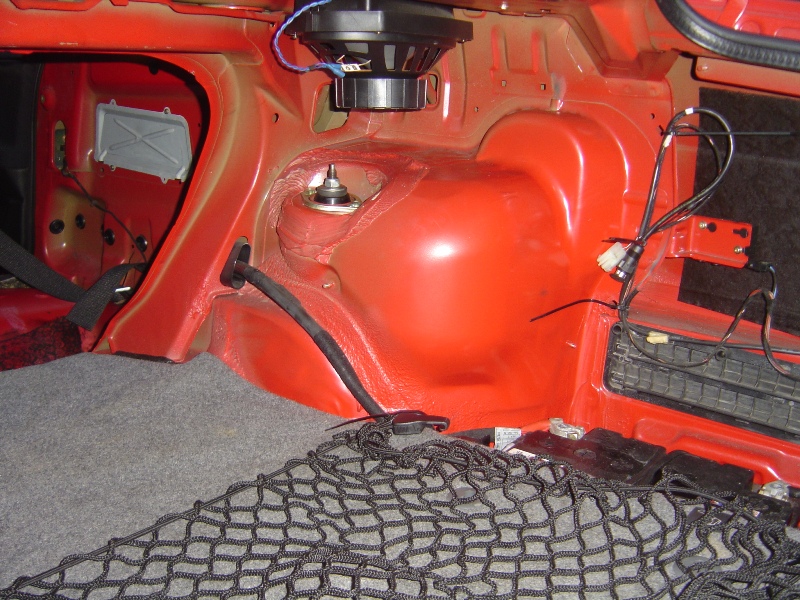
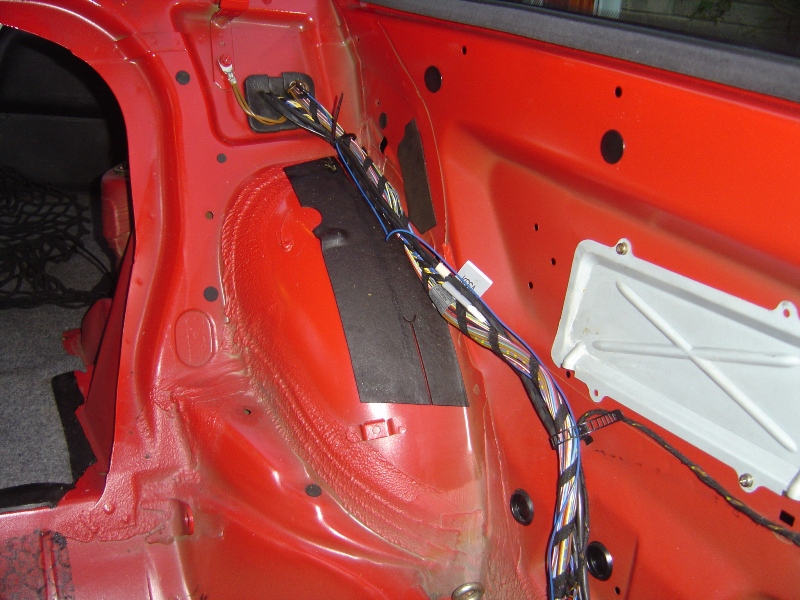
I decided to remove all the carpets from the back, also all the carpet underlay and any other un-needed items in the cabin. The front seat belts were removed including the B-Pillar slide adjuster however I did keep the B-Pillar cover.
The plans are; whilst the car is still used as a daily driver the interior is to be finished in a ‘Club Sport’ spec. I’ve removed the bulk of the weight, and will continue to remove un-needed items including the tar sound deadening (more on that below) but I will be keeping the thin boot carpets just without any of the additional sound proofing under layers. I will remove un-needed brackets however I am going to keep the head lining and A/B/C pillar covers, then once the roll cage has been fitted I’ll trim the rear bench and fire wall with a thin black carpet.
The idea is to remove as much weight as possible whilst keeping the car within reasonable comfort for travelling in, at this moment in time the car will not be racing so there is no need for drastic weight loss and the few hill climbs and sprints the car will compete in will purely be for enjoyment at the moment.
Now onto the tar sound deadening, this stuff is easily removed with a bit of heat and then solvents can be used to clear up the mess left by the glue. I turned to my, well my friends, trusty heat gun to help with the tar removal.
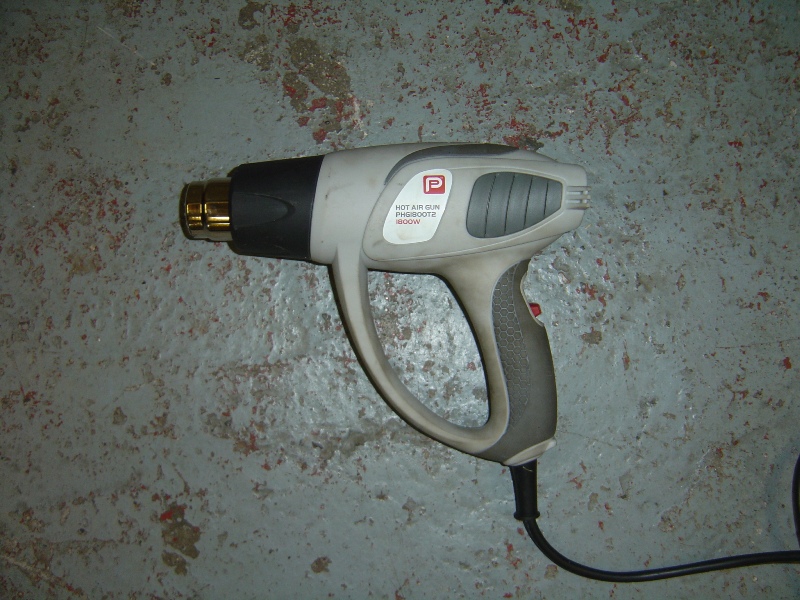
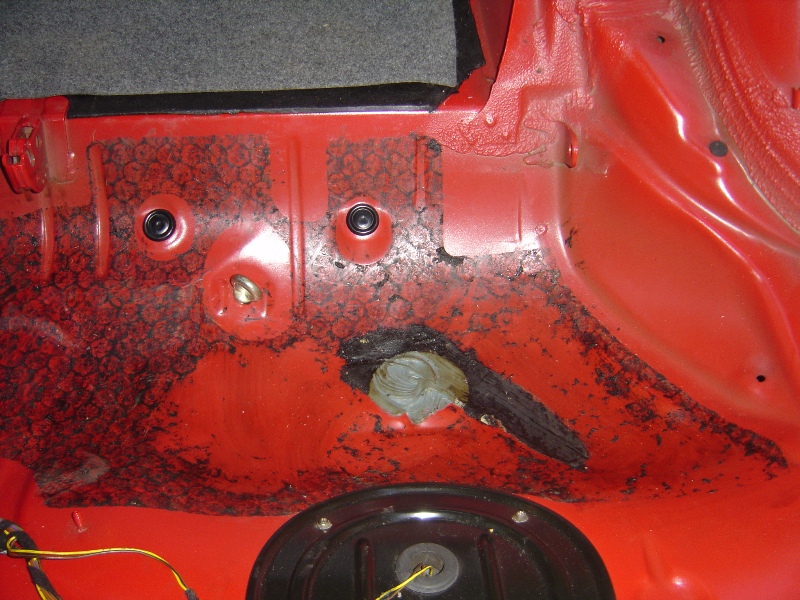
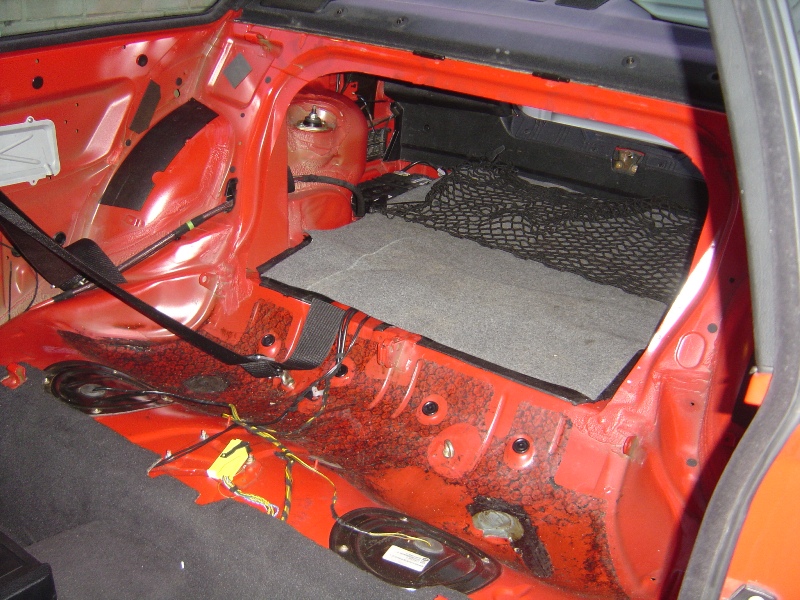
More on this at a later date, sometime in the summer I’ll also remove the main carpet and remove all the tar from under there too.
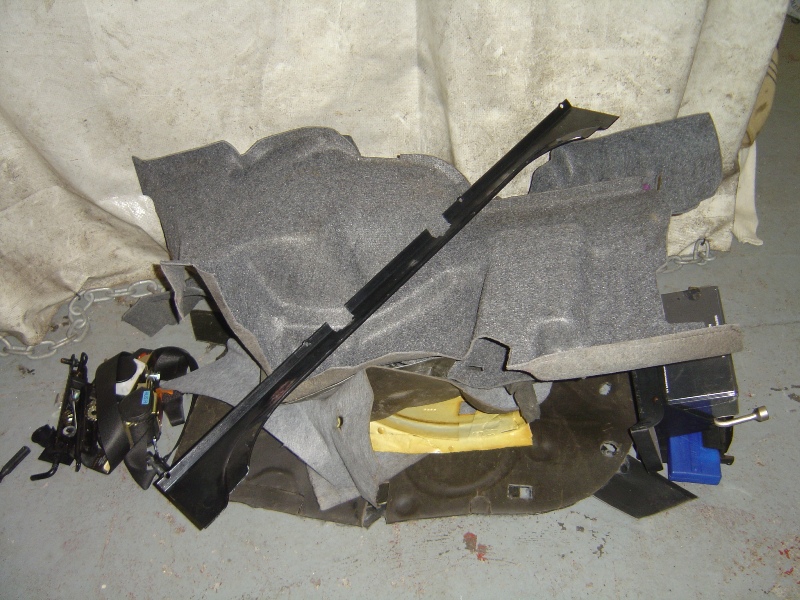
All the junk removed, only the thin grey boot carpeting and the plastic boot trays will be re-fitted. Going to carry on with more work tomorrow, I’m thinking of just using hair dryer heat on the tar that is affixed to the inside of the body panels such as the doors and rear quarters.


I decided to remove all the carpets from the back, also all the carpet underlay and any other un-needed items in the cabin. The front seat belts were removed including the B-Pillar slide adjuster however I did keep the B-Pillar cover.
The plans are; whilst the car is still used as a daily driver the interior is to be finished in a ‘Club Sport’ spec. I’ve removed the bulk of the weight, and will continue to remove un-needed items including the tar sound deadening (more on that below) but I will be keeping the thin boot carpets just without any of the additional sound proofing under layers. I will remove un-needed brackets however I am going to keep the head lining and A/B/C pillar covers, then once the roll cage has been fitted I’ll trim the rear bench and fire wall with a thin black carpet.
The idea is to remove as much weight as possible whilst keeping the car within reasonable comfort for travelling in, at this moment in time the car will not be racing so there is no need for drastic weight loss and the few hill climbs and sprints the car will compete in will purely be for enjoyment at the moment.
Now onto the tar sound deadening, this stuff is easily removed with a bit of heat and then solvents can be used to clear up the mess left by the glue. I turned to my, well my friends, trusty heat gun to help with the tar removal.


More on this at a later date, sometime in the summer I’ll also remove the main carpet and remove all the tar from under there too.

All the junk removed, only the thin grey boot carpeting and the plastic boot trays will be re-fitted. Going to carry on with more work tomorrow, I’m thinking of just using hair dryer heat on the tar that is affixed to the inside of the body panels such as the doors and rear quarters.
Yes I have, and funny you mention it as I have just asked a friend tonight where I can find some as I have a banging head ache after removing all the residue last night and earlier on today with petrol, thinking the dry ice method for under the main carpet if I can get my hands on some.
Good to meet you, I'll drop you an e-mail later with my details incase you're over again this year?
Ref: Wheels Bolts... Just to explain to others that after coming out of the mini-karoussell it sounded like a wheel bearing had collapsed. The rumble was an odd one especially as it never made any noise below 60mph, anyway cut a long story short the powder coat on the back of the wheels had melted obviously causing a gap between the hub and the wheel. Remember, this car in April did 17 laps without issue, and the previous day in May did 6 without issue (was checked the night before for tightness, and the usual checks). SO, it must have just got a little bit hotter than normal and melted, check your wheels after a refurb, I'll be removing all traces of paint on the hub to wheel interface tomorrow.
More of an update will follow, but the ickle 328i is really punching above its weight at the 'Ring, there is another video of a silver Subaru behind me (I got shown the video later at the hotel) which completes an 8:38 lap and the BMW actually passes the gantry a few seconds before that!!
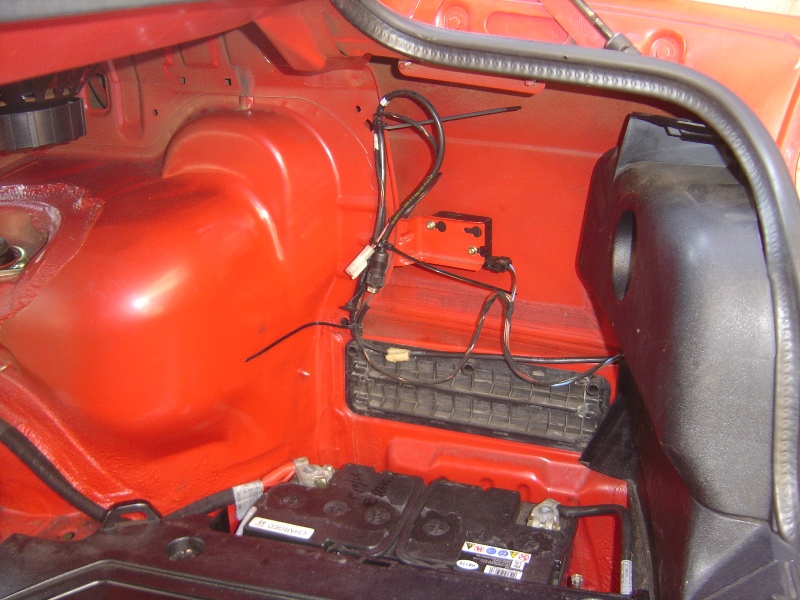
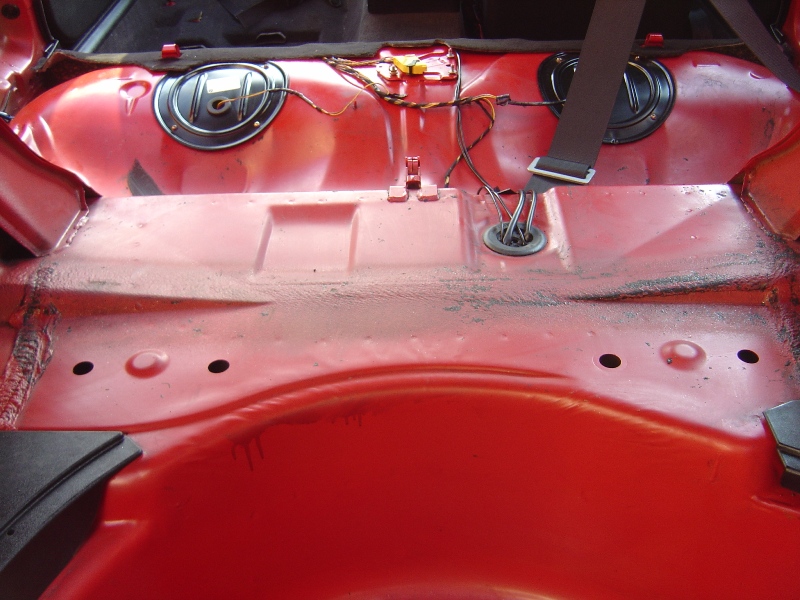
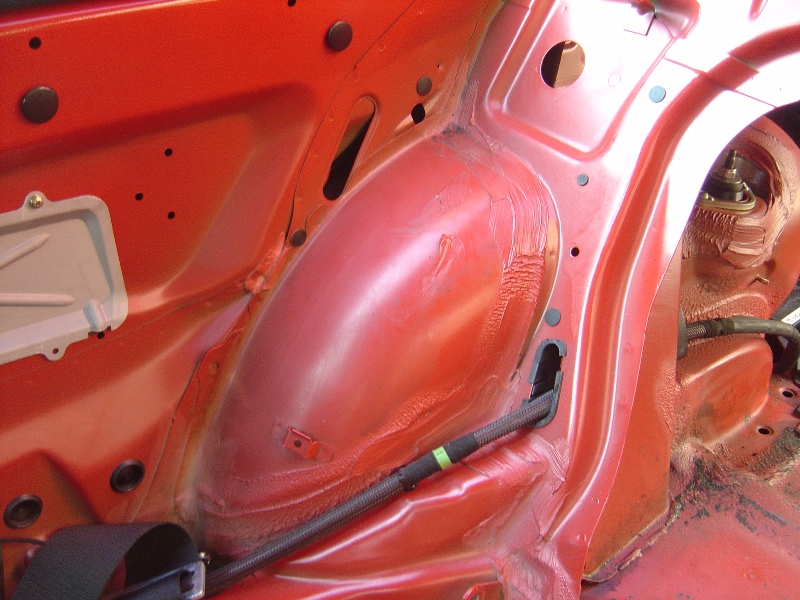
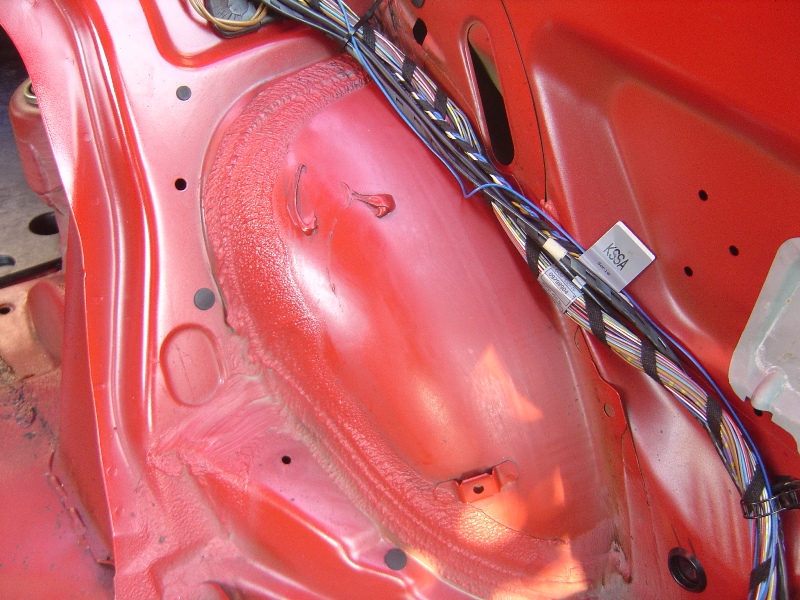
Here's a little update which also reflects on the stories above; Well the tar removal carried on and the following pieces were removed; Spare Wheel Well, Rear Quarters, Rear Bench, Rear Boot Panel and Inner Arches. I also re-fitted the grey rear boot carpeting and my cargo net which secures down anything in the boot as with the seats removed there is no form of rear bulkhead.

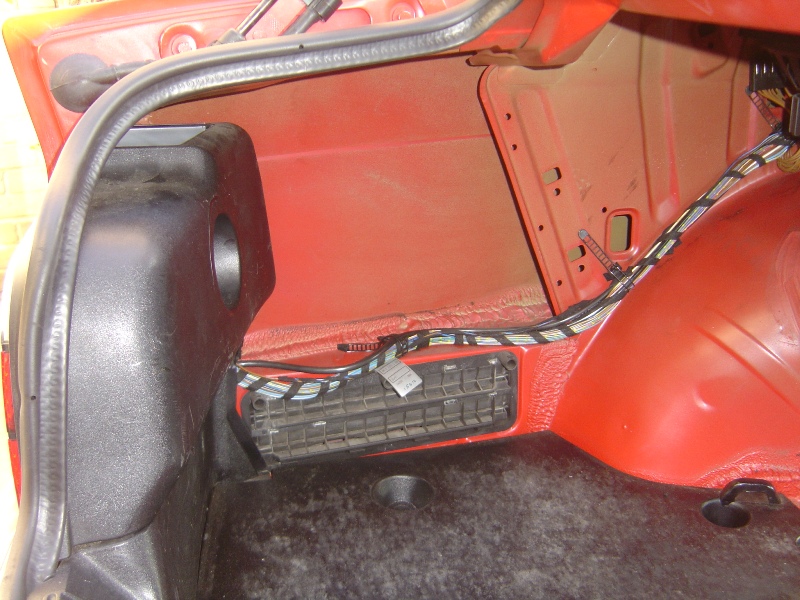
I then decided to treat the car to a nice holiday in Germany, here’s some pictures from a few of the small towns around Nurburg where we stopped for lunch. The first two pictures are of the car in Cochem the next two were taken in Altenahr, both places are worth visiting if you are in the area!!
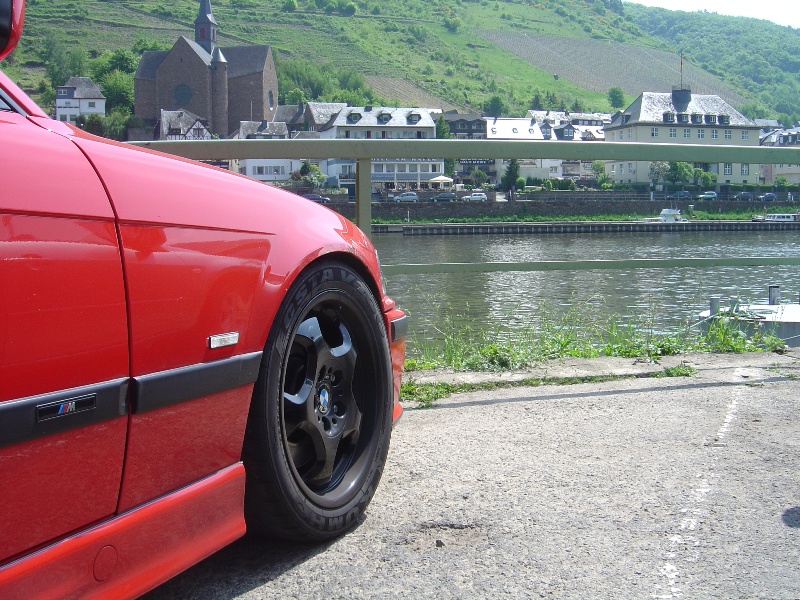
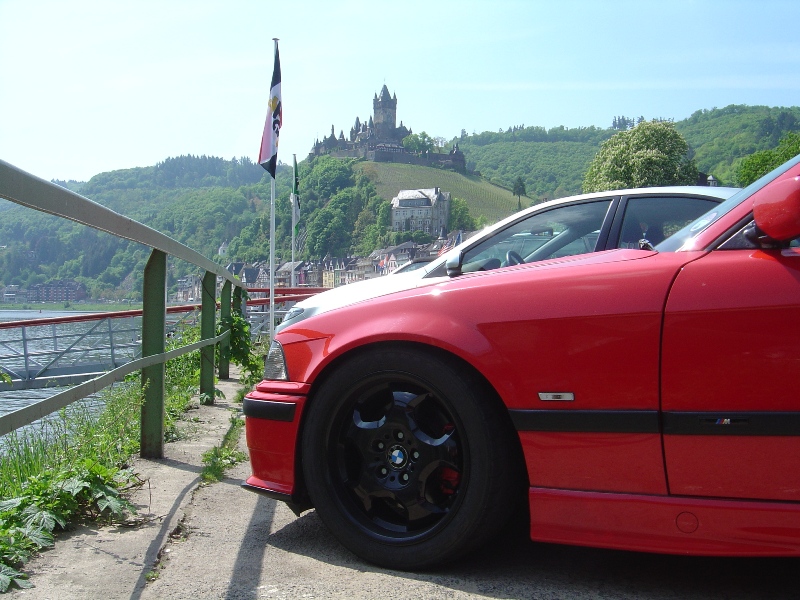
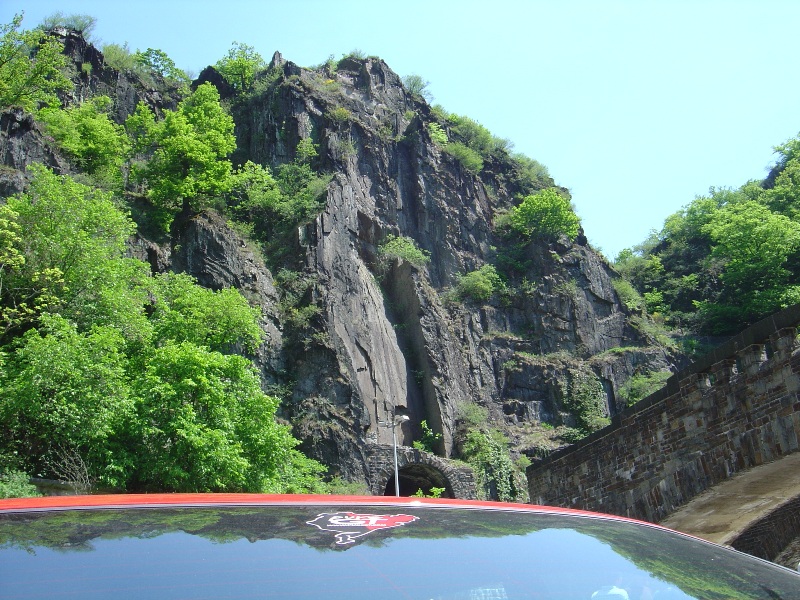
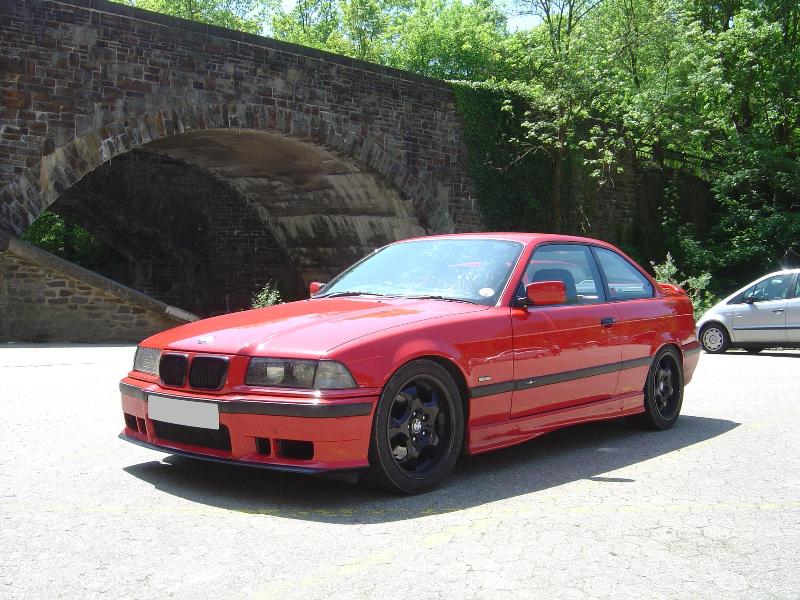
The car was performing near faultlessly all weekend, and it really is punching above its own weight considering it’s meant to be the underdog compared to the M3. The turn in is very sharp, very little feel of under steer and phenomenal levels of mechanical grip. Of course the extra 100bhp would be nice when it comes to the fast uphill sections, but apart from that I am taken back by the capability of this car.
I’m not into timing, however one passenger I took out timed me doing an 8:59 in traffic, the same person also followed the 328i out for a lap in manic Sunday traffic and got a 9:11 with plenty of hold ups. The big surprise came when it turned out a Subaru behind me on a quiet lap had a camera sneakily mounted to a motor, he was behind me the whole lap and his video shows him completing an 8:38 with me crossing the gantry a few seconds before him.
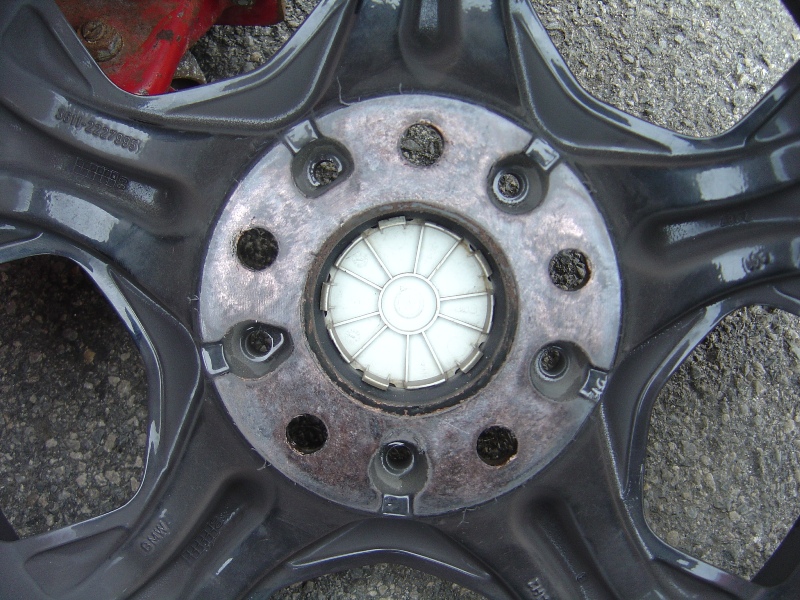
The one small niggle I did have was a minor one, but it could have lead to a major problem if it wasn’t spotted in its early stages. On one outing, after coming out of Schwalbenschwanz it sounded like a rear bearing had collapsed, coasted off and noticed that below 60mph the noise wasn’t there. Upon further inspection you could see that when the wheels had been refurbished the backs of the wheels which touch the hub had also been painted. Now in April this did not prove to be a problem, however in May with the temperatures a little higher you could see where the paint had gone soft and ‘squeezed’ itself from the back of the bur causing in effect the wheel to come loose. A quick tighten and all was fine, this is one to keep on top of and if need be the paint will be removed. The picture below shows the little strands of paint that have been forced out between the gap.
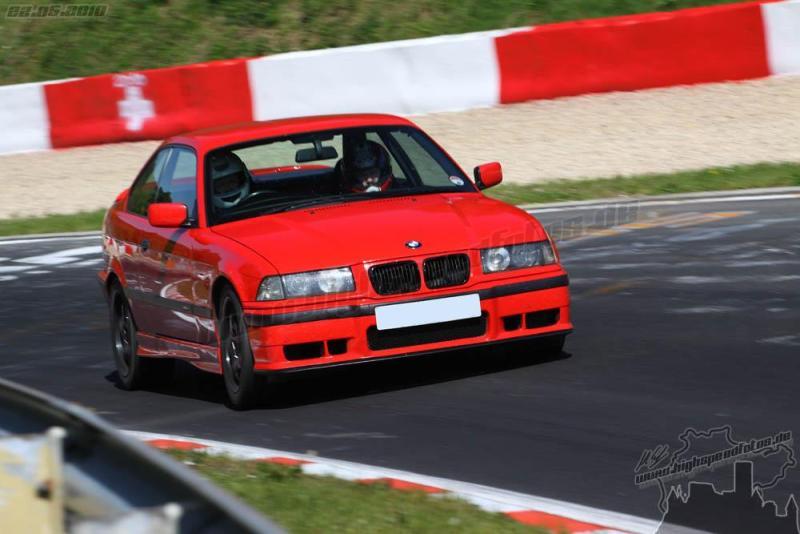
Below, some all important action shots.
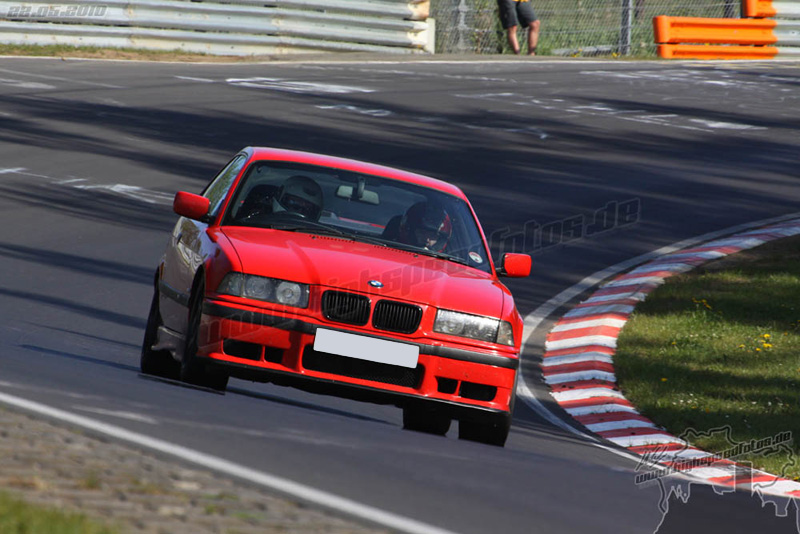
The car has since made it home and been given the once over, all bushes and bearings have been checked plus the brakes have been stripped down and inspected; the front pads have around 25% wear and the rears around 50%. The BMW seems to wear pads at the rate of roughly two rears to every one set of fronts, the pads are wearing well given they have completed over 600 track miles.
The only problem of concern which came to light during the trip home is the from passengers side wheel bearing rumbles a little, upon further inspection it sounds dry however there is no play... this will be replaced within the next few weeks as a matter of course.


I then decided to treat the car to a nice holiday in Germany, here’s some pictures from a few of the small towns around Nurburg where we stopped for lunch. The first two pictures are of the car in Cochem the next two were taken in Altenahr, both places are worth visiting if you are in the area!!


The car was performing near faultlessly all weekend, and it really is punching above its own weight considering it’s meant to be the underdog compared to the M3. The turn in is very sharp, very little feel of under steer and phenomenal levels of mechanical grip. Of course the extra 100bhp would be nice when it comes to the fast uphill sections, but apart from that I am taken back by the capability of this car.
I’m not into timing, however one passenger I took out timed me doing an 8:59 in traffic, the same person also followed the 328i out for a lap in manic Sunday traffic and got a 9:11 with plenty of hold ups. The big surprise came when it turned out a Subaru behind me on a quiet lap had a camera sneakily mounted to a motor, he was behind me the whole lap and his video shows him completing an 8:38 with me crossing the gantry a few seconds before him.
The one small niggle I did have was a minor one, but it could have lead to a major problem if it wasn’t spotted in its early stages. On one outing, after coming out of Schwalbenschwanz it sounded like a rear bearing had collapsed, coasted off and noticed that below 60mph the noise wasn’t there. Upon further inspection you could see that when the wheels had been refurbished the backs of the wheels which touch the hub had also been painted. Now in April this did not prove to be a problem, however in May with the temperatures a little higher you could see where the paint had gone soft and ‘squeezed’ itself from the back of the bur causing in effect the wheel to come loose. A quick tighten and all was fine, this is one to keep on top of and if need be the paint will be removed. The picture below shows the little strands of paint that have been forced out between the gap.

Below, some all important action shots.


The car has since made it home and been given the once over, all bushes and bearings have been checked plus the brakes have been stripped down and inspected; the front pads have around 25% wear and the rears around 50%. The BMW seems to wear pads at the rate of roughly two rears to every one set of fronts, the pads are wearing well given they have completed over 600 track miles.
The only problem of concern which came to light during the trip home is the from passengers side wheel bearing rumbles a little, upon further inspection it sounds dry however there is no play... this will be replaced within the next few weeks as a matter of course.
Edited by Craig! on Friday 28th May 19:30
Gassing Station | Readers' Cars | Top of Page | What's New | My Stuff


