D.I.Y. Ceramic Coating
Discussion


D.I.Y. Ceramic Coating
I’ve thought about having a ceramic coating on my 2016 white Cayman for some time now, but have been put off by the likely cost – around £1,000.I researched lots of products online and watched loads of YouTube videos, and eventually plumped for one in particular. Hopefully, what follows below will save some of you from having to sift through the plethora of detailing products for your cherished Porsche.
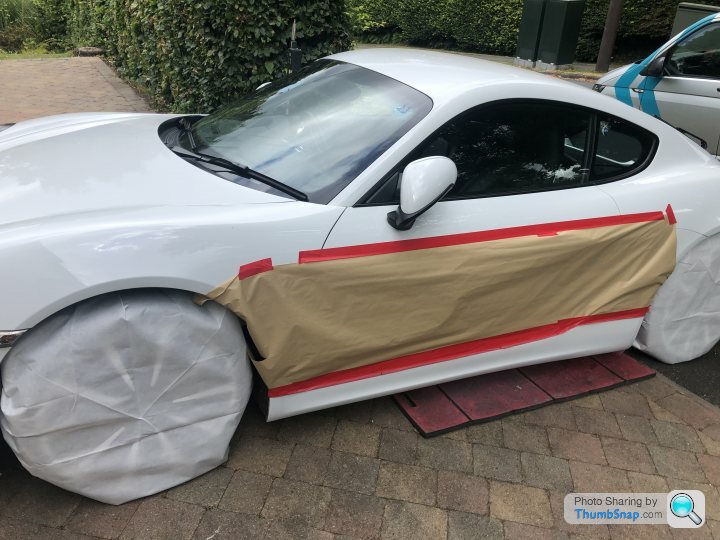
I had a couple of scrapes on my valences – curse those high kerbs! -- and Chips Away in Plymouth sorted them out on my driveway, which couldn’t have been more convenient.
url]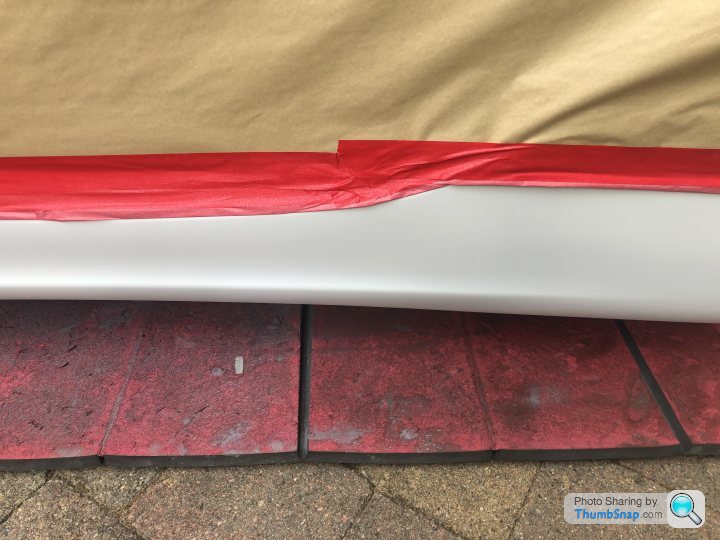 |https://thumbsnap.com/o7D7iqmO[/url]
[
Their operator, Lee, did a fantastic job. I had to wait about six weeks for the repair to fully harden before I could do any coating work, but I didn’t want to rush it and jeopardise his craftsmanship.
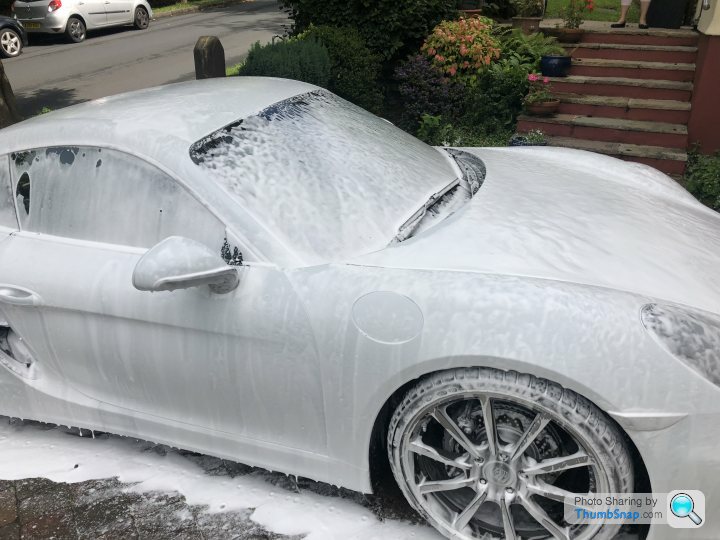
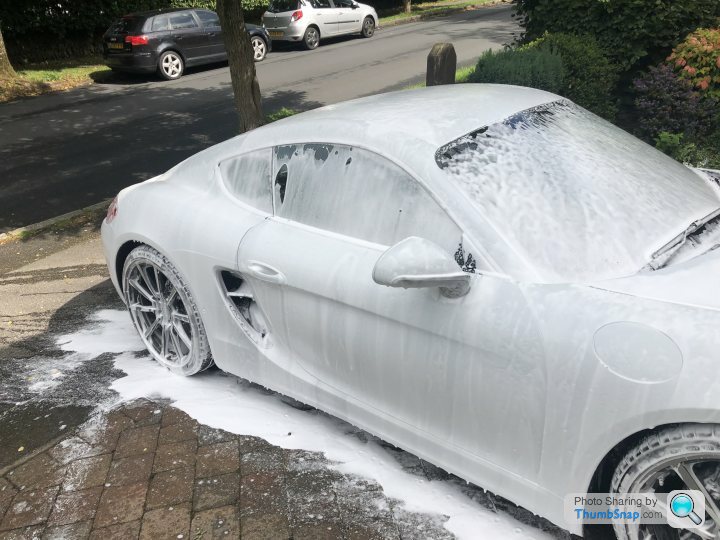
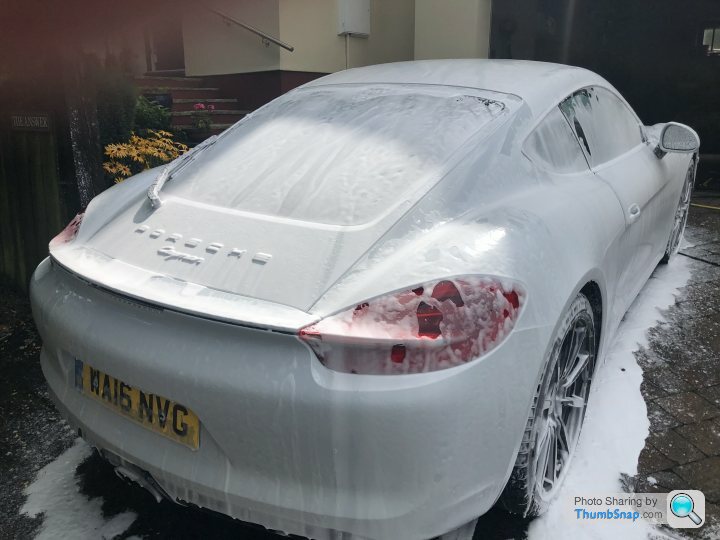
The first thing you have to do to prepare the car is to strip off any old wax and dirt. I have the Autobrite snow foam lance and only use their own snow foam product.

It really works well and after hosing down the car with water, the snow foam goes on and then you wait 20 minutes for it to work its magic.
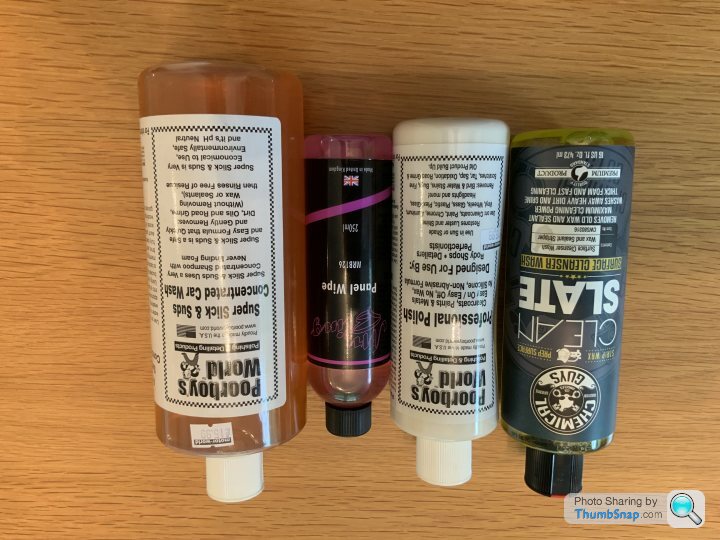
Rinse off and get your two buckets ready for the wash. I used Chemical Guys’ Clean Slate wash. There are plenty of others but this one was fine. I then used a clay bar, and finished with a Meguiar’s oscillating machine, using Poorboy’s wax free polish. You must not use a polish which contains additives – especially wax. You have been warned!
When you’re ready to apply the liquid coating, you have to wipe down each panel, or part of a panel depending on how big the area is, with an IPA panel wipe alcohol spray. I used Mr Bling’s panel wipe.
I split the roof into halves and the bonnet into three sections, then the doors, wings, etc, and used a print of a generic car plan so I didn’t forget how far I’d got.

The IPA wipe is used just prior to each panel’s treatment, and take care when using this or you may end up seeing pink elephants!
After some research, I decided to use AvalonKing’s Armor Shield IX nano ceramic coating.
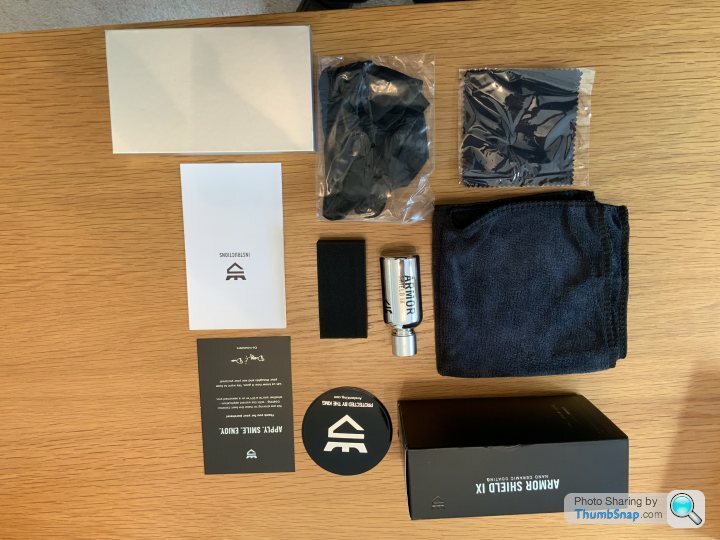
Their website contains a wealth of easy-to-follow instructions and videos, also their very fast response to emails is a reassuring bonus.

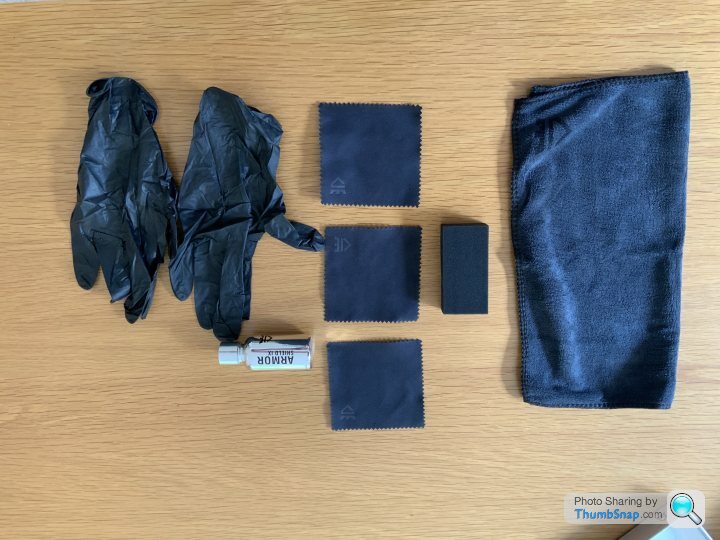
When it’s time to use the coating, have everything to hand and as the small bottle is easily overturned, designate a safe spot to put it down. Shake the bottle, and with the supplied small cloth wrapped around the sponge applicator, apply six or seven drops and wipe gently up and down and then across entire small area you’re treating to ensure it’s all covered. The cloth is a bit small and does get slippery, so it requires a little care not to drop it. But they give you three, so you can always use another.
You’ll know when the pad needs refreshing as it loses its slipperiness and starts to grab, so just put a few more drops on. Just make sure all the area has a very thin coating on.
Now you have to wait for it to start to dry. The instructions suggest some times depending on temperature, but working in a dry garage, I found it took about five or six minutes before it was ready to buff out. It’s tempting to spend that time just admiring the Cayman’s pristine bodywork, but I used the drying time to apply IPA on the next panel I’d be working on. When buffing, use REALLY LIGHT pressure. Just gently skim the supplied microfibre cloth over the surface – don’t try to polish it, just a light buffing can pick up any high spots or remaining wetness – and this will get the paintwork gleaming. After buffing, mark up your car diagram and move on to the next panel.
After finishing, I let it rest for a couple of hours, then reapplied the coating again to the entire car, to give it the recommended two coats. You don’t need to use the IPA again. I found that one bottle of the ceramic coating was sufficient to treat my Cayman twice, and though I didn’t treat my wheels, there was some left over so perhaps I could have done them too.
Getting this treatment right is not a quick job, but it’s worth taking the time to be methodical over it. Here’s how long each step took me, excluding the repair job:
Foam 45 mins
Dewax 45 mins
Clay 1 hr
Polish 3 hrs
CC(1) 1 hr 15 mins
Wait 2 hrs
CC(2) 1 hr
So about 10 hours in total, and the cost, excluding my snow foam lance, machine polisher and pressure washer, was about £100. A fantastic saving from an anticipated £1,000, and after leaving the car in the garage for a week to make sure it didn’t get wet, I found the finish hardened into a glass-like covering. It feels so smooth and solid that I am delighted with the result. AvalonKing says it should work for at least two years, but if the car is garaged, I reckon it should last a lot longer.
Now when the car needs a clean, and after just using the snow foam, (unless the car is really dirty after a long wet drive), I usually don’t have to wash it with the shampoo as the snow foam appears to remove all the dirt. The shampoo I use now is Poorboy’s Super Slick Suds, which doesn’t contain additives or waxes. After a drive, any bugs can be removed very easily with a detailing spray and microfibre cloth.
So there you have it. It’s very satisfying to see the results – any rain or water just runs off the car. I think it was a job well done.
I’d be delighted to see any feedback you have about this review, and I hope it will be of some use to you.
SWS
I’ve thought about having a ceramic coating on my 2016 white Cayman for some time now, but have been put off by the likely cost – around £1,000.I researched lots of products online and watched loads of YouTube videos, and eventually plumped for one in particular. Hopefully, what follows below will save some of you from having to sift through the plethora of detailing products for your cherished Porsche.
I had a couple of scrapes on my valences – curse those high kerbs! -- and Chips Away in Plymouth sorted them out on my driveway, which couldn’t have been more convenient.
url]
|https://thumbsnap.com/o7D7iqmO[/url][
Their operator, Lee, did a fantastic job. I had to wait about six weeks for the repair to fully harden before I could do any coating work, but I didn’t want to rush it and jeopardise his craftsmanship.
The first thing you have to do to prepare the car is to strip off any old wax and dirt. I have the Autobrite snow foam lance and only use their own snow foam product.
It really works well and after hosing down the car with water, the snow foam goes on and then you wait 20 minutes for it to work its magic.
Rinse off and get your two buckets ready for the wash. I used Chemical Guys’ Clean Slate wash. There are plenty of others but this one was fine. I then used a clay bar, and finished with a Meguiar’s oscillating machine, using Poorboy’s wax free polish. You must not use a polish which contains additives – especially wax. You have been warned!
When you’re ready to apply the liquid coating, you have to wipe down each panel, or part of a panel depending on how big the area is, with an IPA panel wipe alcohol spray. I used Mr Bling’s panel wipe.
I split the roof into halves and the bonnet into three sections, then the doors, wings, etc, and used a print of a generic car plan so I didn’t forget how far I’d got.
The IPA wipe is used just prior to each panel’s treatment, and take care when using this or you may end up seeing pink elephants!
After some research, I decided to use AvalonKing’s Armor Shield IX nano ceramic coating.
Their website contains a wealth of easy-to-follow instructions and videos, also their very fast response to emails is a reassuring bonus.
When it’s time to use the coating, have everything to hand and as the small bottle is easily overturned, designate a safe spot to put it down. Shake the bottle, and with the supplied small cloth wrapped around the sponge applicator, apply six or seven drops and wipe gently up and down and then across entire small area you’re treating to ensure it’s all covered. The cloth is a bit small and does get slippery, so it requires a little care not to drop it. But they give you three, so you can always use another.
You’ll know when the pad needs refreshing as it loses its slipperiness and starts to grab, so just put a few more drops on. Just make sure all the area has a very thin coating on.
Now you have to wait for it to start to dry. The instructions suggest some times depending on temperature, but working in a dry garage, I found it took about five or six minutes before it was ready to buff out. It’s tempting to spend that time just admiring the Cayman’s pristine bodywork, but I used the drying time to apply IPA on the next panel I’d be working on. When buffing, use REALLY LIGHT pressure. Just gently skim the supplied microfibre cloth over the surface – don’t try to polish it, just a light buffing can pick up any high spots or remaining wetness – and this will get the paintwork gleaming. After buffing, mark up your car diagram and move on to the next panel.
After finishing, I let it rest for a couple of hours, then reapplied the coating again to the entire car, to give it the recommended two coats. You don’t need to use the IPA again. I found that one bottle of the ceramic coating was sufficient to treat my Cayman twice, and though I didn’t treat my wheels, there was some left over so perhaps I could have done them too.
Getting this treatment right is not a quick job, but it’s worth taking the time to be methodical over it. Here’s how long each step took me, excluding the repair job:
Foam 45 mins
Dewax 45 mins
Clay 1 hr
Polish 3 hrs
CC(1) 1 hr 15 mins
Wait 2 hrs
CC(2) 1 hr
So about 10 hours in total, and the cost, excluding my snow foam lance, machine polisher and pressure washer, was about £100. A fantastic saving from an anticipated £1,000, and after leaving the car in the garage for a week to make sure it didn’t get wet, I found the finish hardened into a glass-like covering. It feels so smooth and solid that I am delighted with the result. AvalonKing says it should work for at least two years, but if the car is garaged, I reckon it should last a lot longer.
Now when the car needs a clean, and after just using the snow foam, (unless the car is really dirty after a long wet drive), I usually don’t have to wash it with the shampoo as the snow foam appears to remove all the dirt. The shampoo I use now is Poorboy’s Super Slick Suds, which doesn’t contain additives or waxes. After a drive, any bugs can be removed very easily with a detailing spray and microfibre cloth.
So there you have it. It’s very satisfying to see the results – any rain or water just runs off the car. I think it was a job well done.
I’d be delighted to see any feedback you have about this review, and I hope it will be of some use to you.
SWS
Gassing Station | Porsche General | Top of Page | What's New | My Stuff