Body off restoration
Discussion


Hi, I started the process of removing the body a while ago and due to work commitments it's taken a while. Tonight it was finally removed so I thought I'd start a thread to show the progress.
It's a 2001 tuscan that was being kept outside by the previous owner and was also kept outside and used in all weather by myself. I now have a garage and second car hence the restoration begins.
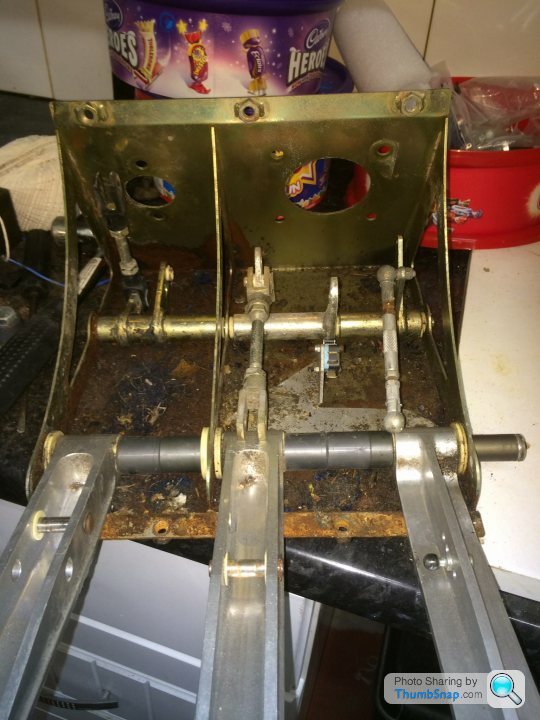
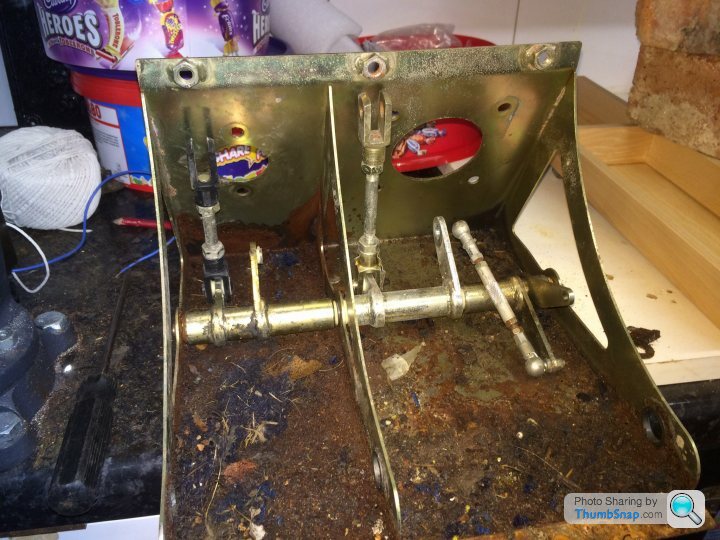
Being kept outside it did leak from time to time and this didn't do the pedal box much good.
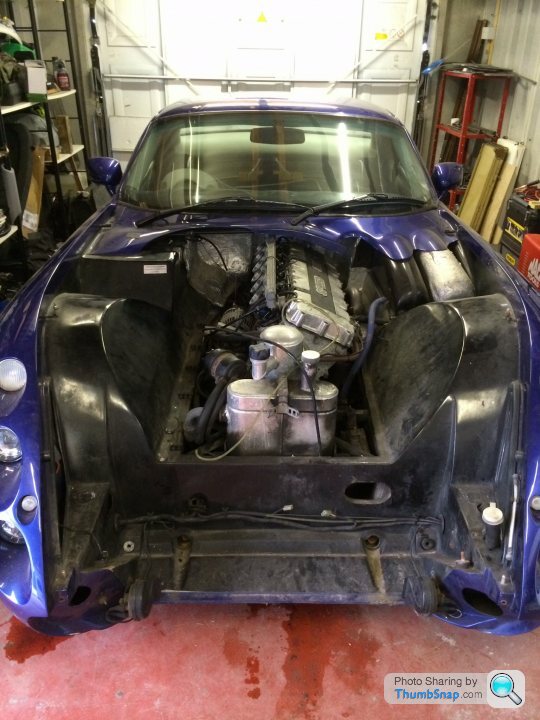
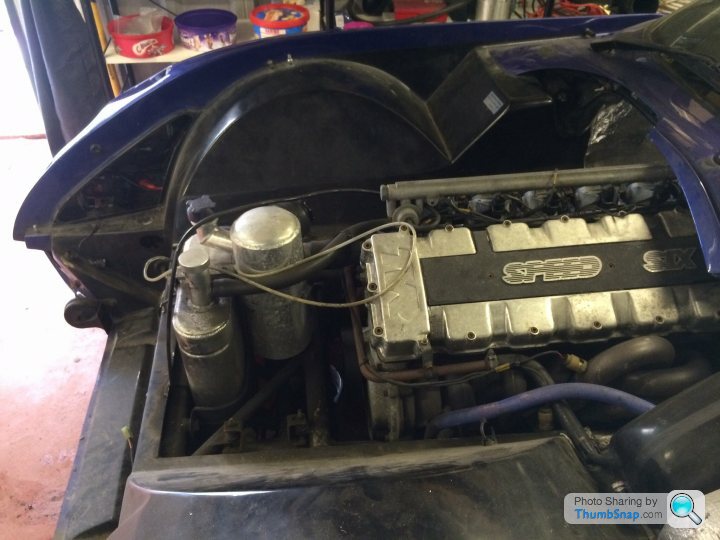
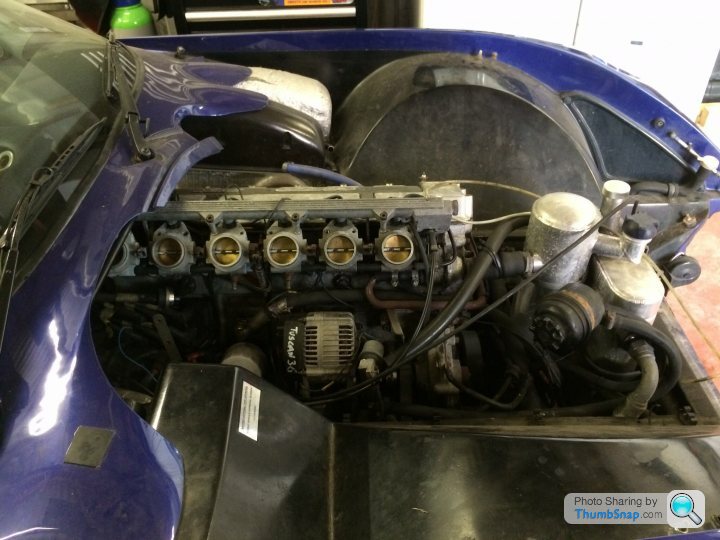
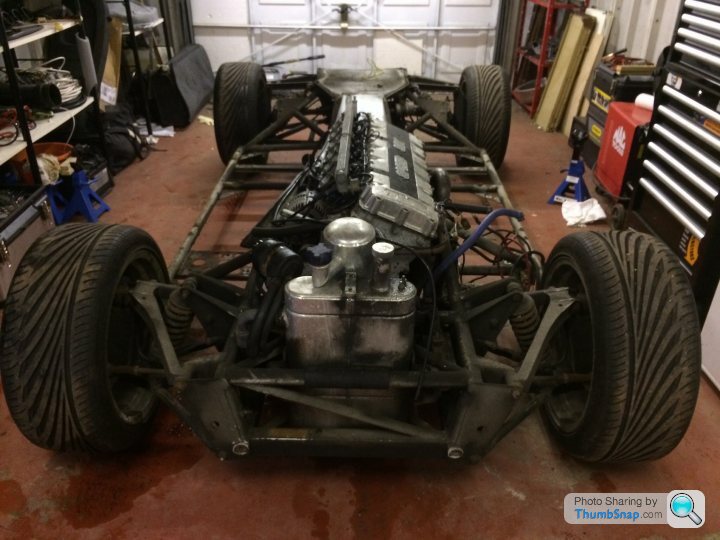
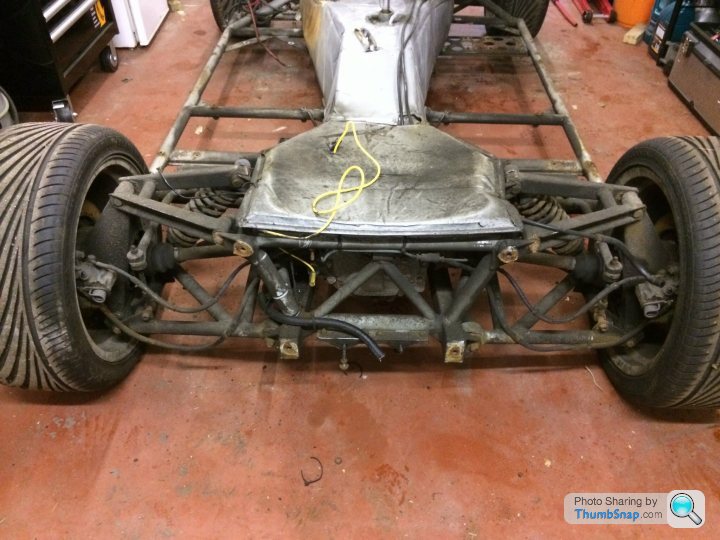
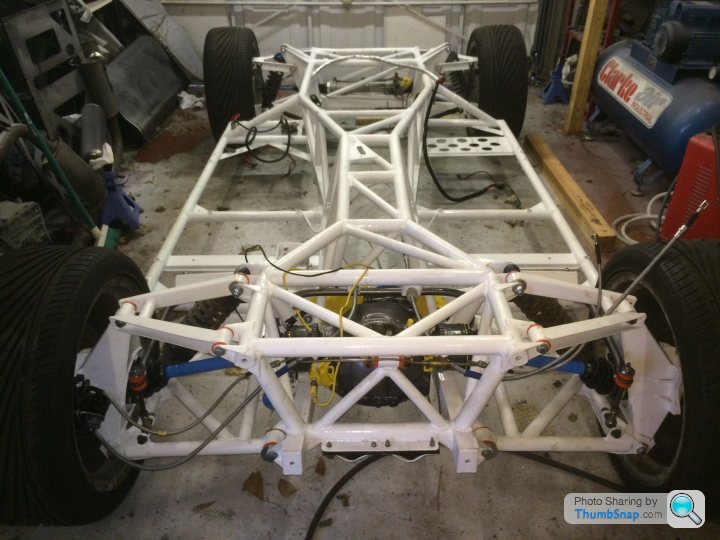
Now the body is off, on initial inspection it doesn't look as bad as I thought it might.
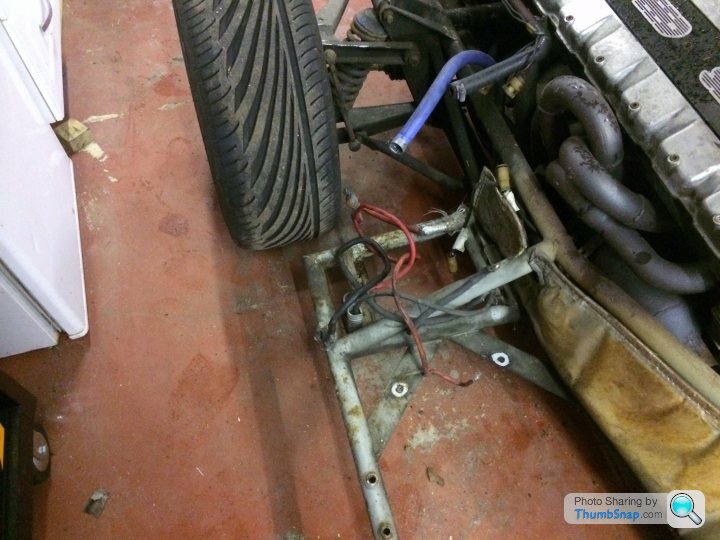
The pedal box cleaned of rust and undercoat applied.
It's a 2001 tuscan that was being kept outside by the previous owner and was also kept outside and used in all weather by myself. I now have a garage and second car hence the restoration begins.
Being kept outside it did leak from time to time and this didn't do the pedal box much good.
Now the body is off, on initial inspection it doesn't look as bad as I thought it might.
The pedal box cleaned of rust and undercoat applied.
You have sharp eyes, your right it is a 4 Ltr. I recently changed the alternator as mine failed. It took a good few evenings to get to that stage. It was relatively straight forward apart from removing the bolts in the gearbox tunnel that require part of the fibre glass to be cut away and removing the bolts in the boot. This requires the fuel tank to be removed and I ended up cutting some of the fuel pipes. Not too big an issue as I plan on replacing them all as part of the restoration.
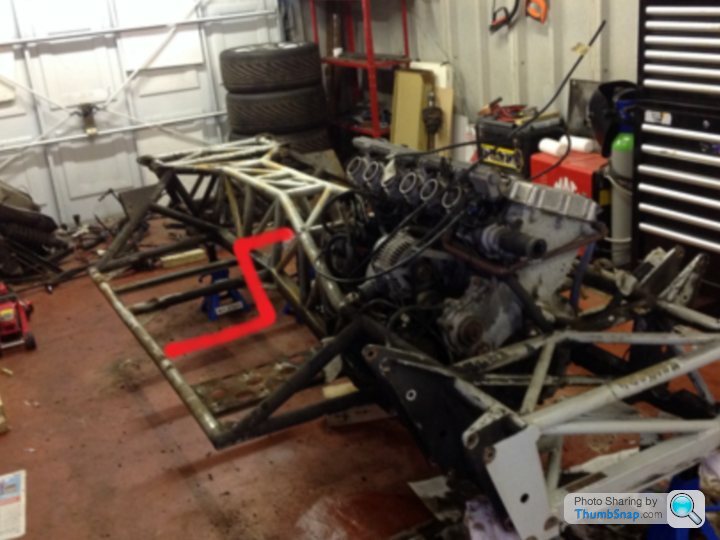
After a slow day yesterday with the oil pipes and steering rack giving me a few problems, I had a productive day today and have removed everything bar the engine. Just waiting to borrow my mates engine lift.
I was surprised how easy the suspension components came apart after 13 years. The only thing that needed to be angle ground off was a rusty brake pipe fitting.
Now for the seemingly endless task of cleaning off the wax oil.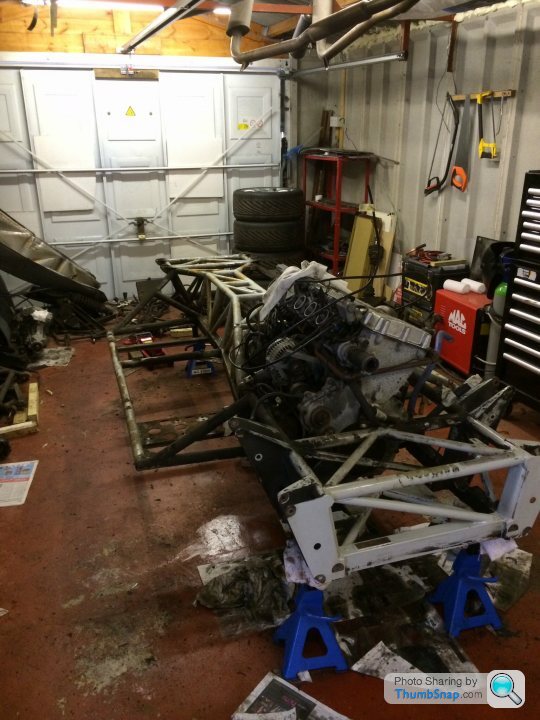

I was surprised how easy the suspension components came apart after 13 years. The only thing that needed to be angle ground off was a rusty brake pipe fitting.
Now for the seemingly endless task of cleaning off the wax oil.
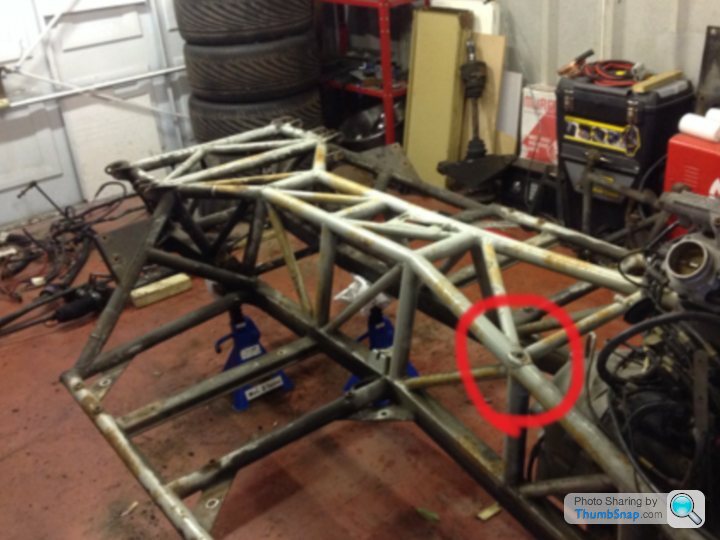
Just a quick update. The chassis is still wating to go to the shot blasters and that is planned for next week, hopefully it will start to get a bit more interesting then. In the mean time I have installed a compressor with an air tools line and a clean air line for spray painting the chassis. Could have done with the air tools for stripping it down really.

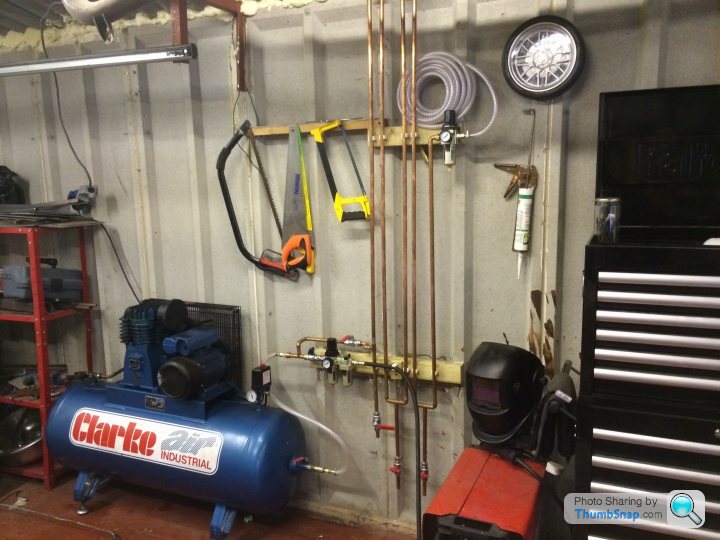
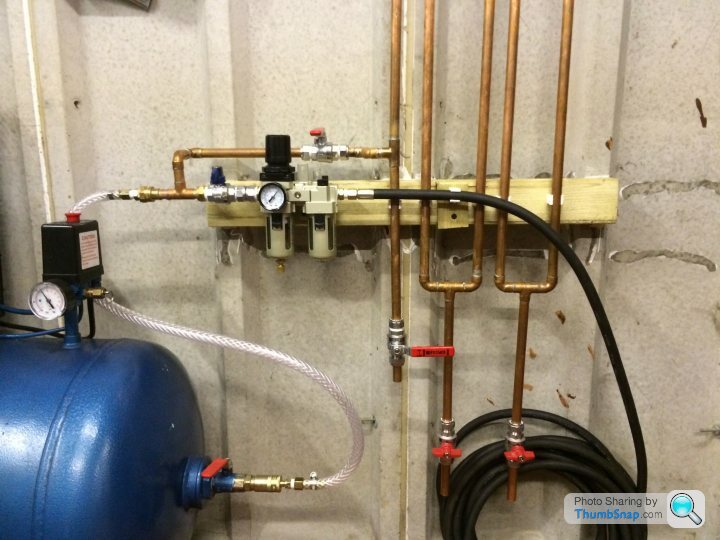
Just a quick update. The chassis is still wating to go to the shot blasters and that is planned for next week, hopefully it will start to get a bit more interesting then. In the mean time I have installed a compressor with an air tools line and a clean air line for spray painting the chassis. Could have done with the air tools for stripping it down really.
I'm an electronics technician by trade but have been spannering for years, with the amount of information available on here and the Internet in general then if you have basic skills and label everything properly then I don't think you can go too far wrong.
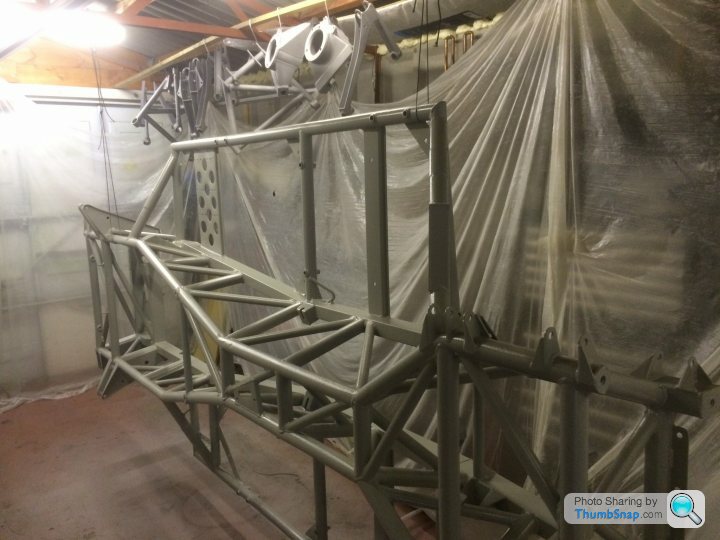
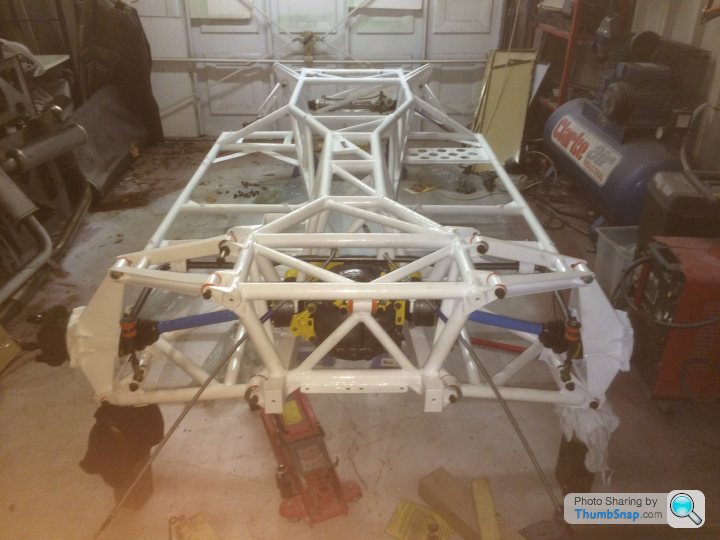
The chassis is now ready to go to the shot blasters tomorrow.
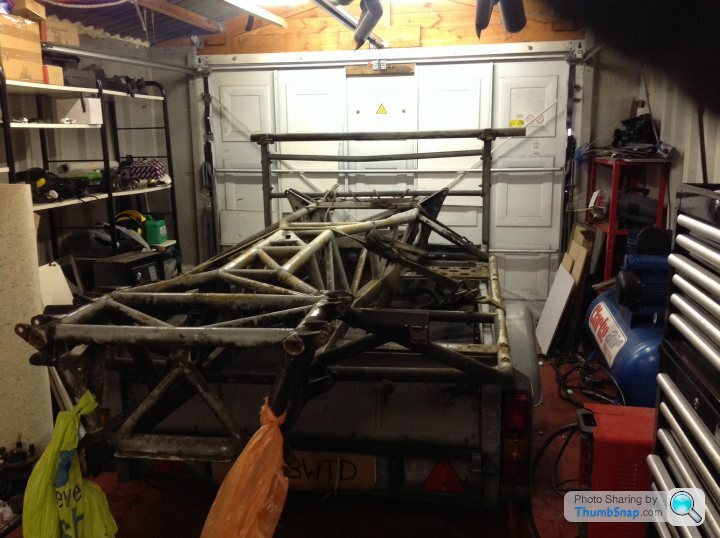
The chassis is now ready to go to the shot blasters tomorrow.
Hi,
From inside I removed the seats, centre console/armrest and only as much carpet as necessary. On the outside I removed both bonnets and the radiator and hoses. At the back I had to remove the fuel tank . I left the boot and doors and roof on.
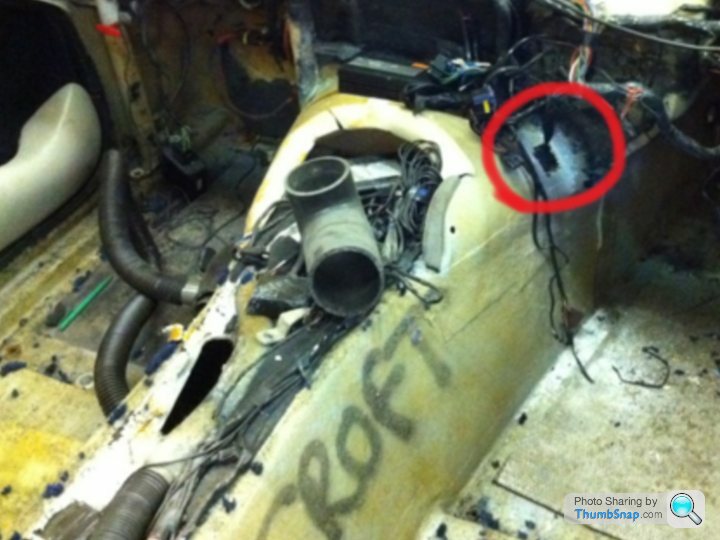
Most of the bolts are obvious from looking underneath the car apart from the ones behind the fuel tank and the ones located in the transmission tunnel. For the bolts in the transmission tunnel you have to cut away some of the fibreglass, I used a dremel and a small cutting disk, there is an excellent pic on another thread that shows where they are and by using that I cut in exactly the right place. I'll have a look for it and put a link up.
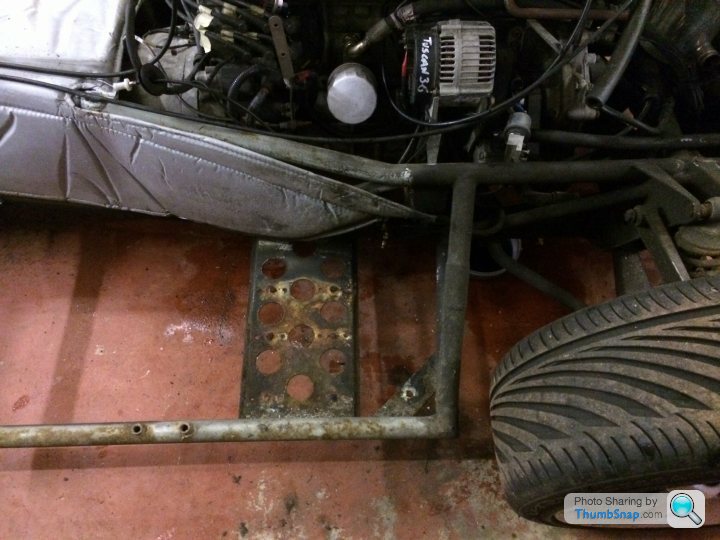
After that it's a case of working your way around the car disconnecting everything like battery cables, brake lines, clutch line, the vacume pipe on the back of the brake master cylinder, steering linkage, handbrake cable, accelerator cable and earth cables. You also need to remove the pedal box and because of the way the the bolts are secured, if the nuts are tight they just end up spinning. I had to angle grind 4 out of the 6 off.
I think the only thing I removed that I didn't need to was the "T" shaped piece of carpet behind the seats, I was convinced there were a couple of bolts hiding underneath it but they were the ones behind the fuel tank.
I then started to work the body loose. I chocked the wheels and then stuck blocks of wood on top of the wheels underneath the arches and this slowly lifted the body putting larger blocks between the wheels and arches. Once I had it high enough to make sure everything was disconnected (I had missed an earthing cable at the front) and for the engine bay to clear the exhaust manifolds, this is the tightest bit. I then got 8 of my mates to lift the body off. It was still pretty heavy with 8 of us.
When I removed the fuel tank I removed the fuel gauge sender to syphon the tank and then ended up cutting the fuel hoses off, this wasn't a problem for me as part of the restoration was to replace any rubber fuel hoses.
Hope this helps a bit and your back on the road soon.
From inside I removed the seats, centre console/armrest and only as much carpet as necessary. On the outside I removed both bonnets and the radiator and hoses. At the back I had to remove the fuel tank . I left the boot and doors and roof on.
Most of the bolts are obvious from looking underneath the car apart from the ones behind the fuel tank and the ones located in the transmission tunnel. For the bolts in the transmission tunnel you have to cut away some of the fibreglass, I used a dremel and a small cutting disk, there is an excellent pic on another thread that shows where they are and by using that I cut in exactly the right place. I'll have a look for it and put a link up.
After that it's a case of working your way around the car disconnecting everything like battery cables, brake lines, clutch line, the vacume pipe on the back of the brake master cylinder, steering linkage, handbrake cable, accelerator cable and earth cables. You also need to remove the pedal box and because of the way the the bolts are secured, if the nuts are tight they just end up spinning. I had to angle grind 4 out of the 6 off.
I think the only thing I removed that I didn't need to was the "T" shaped piece of carpet behind the seats, I was convinced there were a couple of bolts hiding underneath it but they were the ones behind the fuel tank.
I then started to work the body loose. I chocked the wheels and then stuck blocks of wood on top of the wheels underneath the arches and this slowly lifted the body putting larger blocks between the wheels and arches. Once I had it high enough to make sure everything was disconnected (I had missed an earthing cable at the front) and for the engine bay to clear the exhaust manifolds, this is the tightest bit. I then got 8 of my mates to lift the body off. It was still pretty heavy with 8 of us.
When I removed the fuel tank I removed the fuel gauge sender to syphon the tank and then ended up cutting the fuel hoses off, this wasn't a problem for me as part of the restoration was to replace any rubber fuel hoses.
Hope this helps a bit and your back on the road soon.
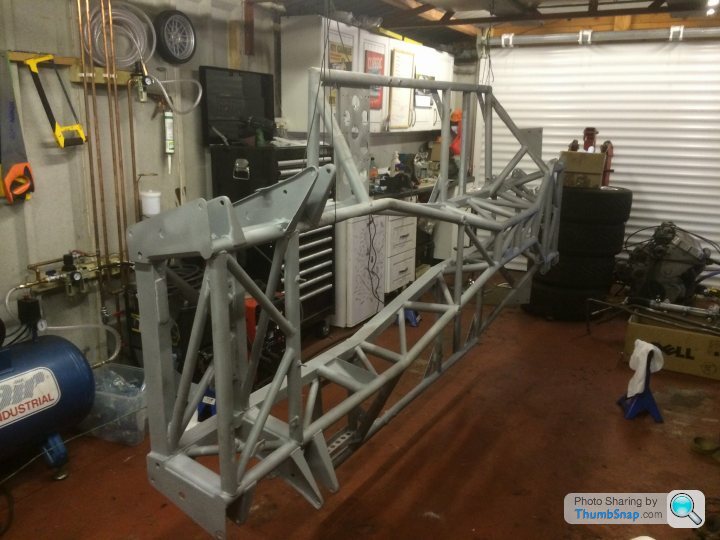
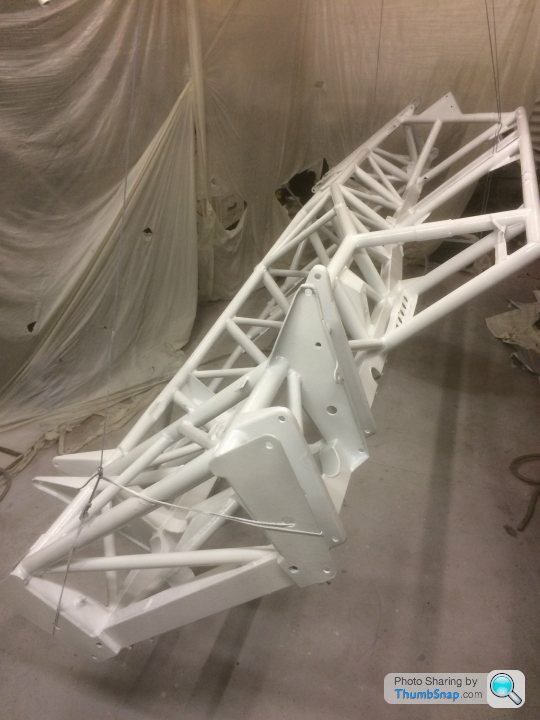
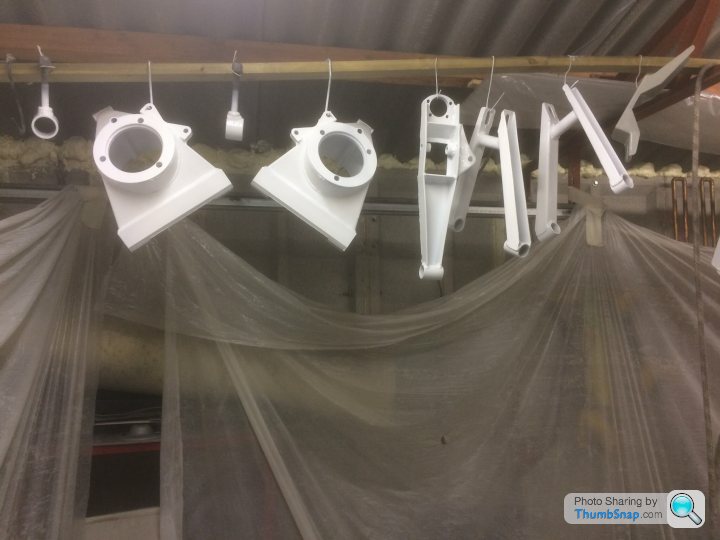
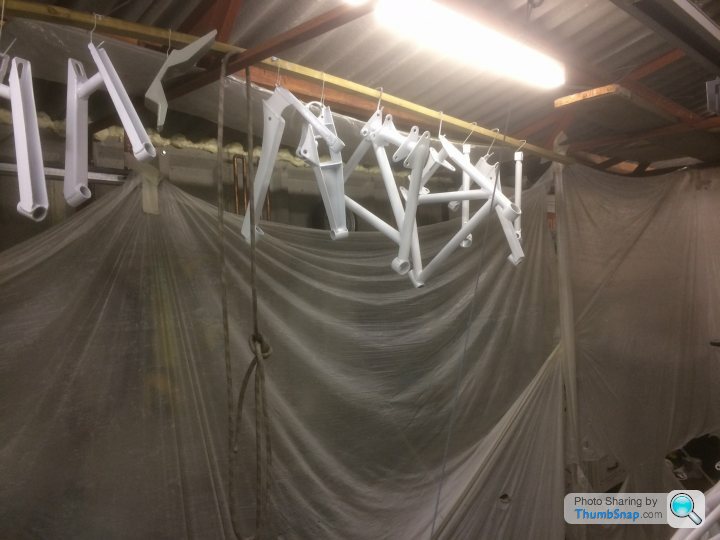
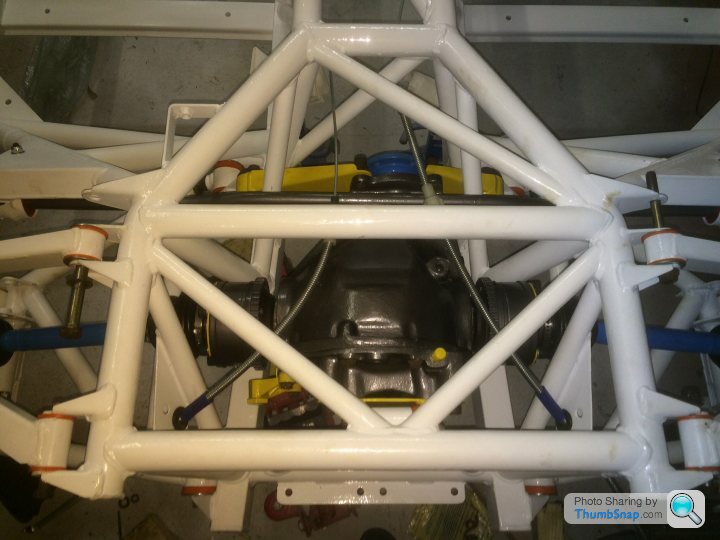
Well it's been a while since my last update. Everything has now had a couple of coats of epoxy mastic and the chassis and suspension have just had the first coat of white top coat. I should be getting a new set of bushes next week so it shouldn't be too long before it starts to go back together.

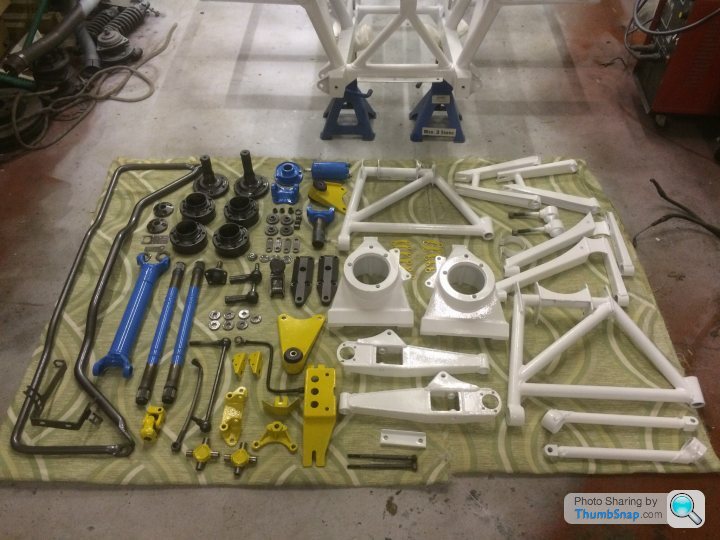
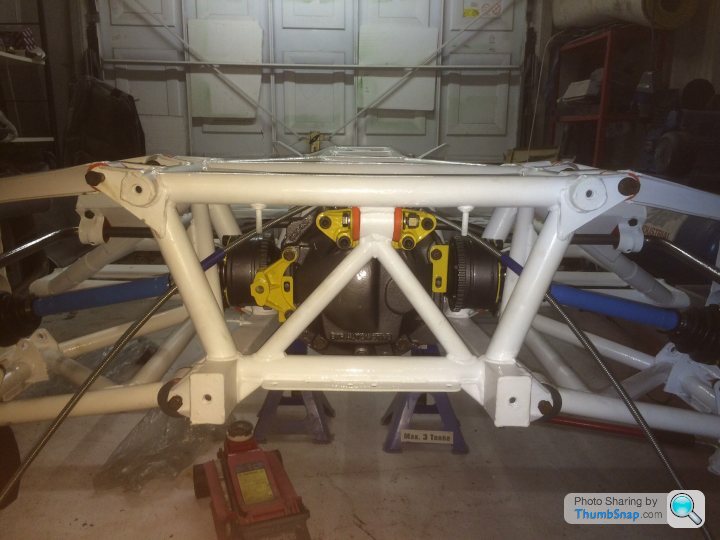
A quick update, it's all going back together ok, all the new bolts have been fitted after putting it together with the old bolts to save any threads getting damaged. Just got the right hand brake calipers to paint and fit, then check the engine valve clearances as part of the service before it goes back in. Also need fit a couple of wire thread inserts for the cam cover bolts.

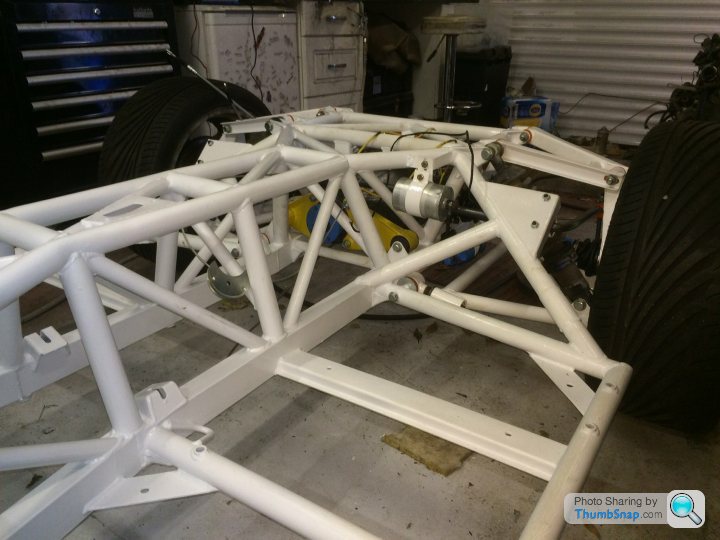
A quick update, it's all going back together ok, all the new bolts have been fitted after putting it together with the old bolts to save any threads getting damaged. Just got the right hand brake calipers to paint and fit, then check the engine valve clearances as part of the service before it goes back in. Also need fit a couple of wire thread inserts for the cam cover bolts.
Gassing Station | Tuscan | Top of Page | What's New | My Stuff