'98 Cerbera, chassis restoration.
Discussion


In July 2017 TwinKam said:
It started as an engine bay 'refresh' while the engine was out. Having spent the past 3 months of weekends stripping every vestige of paint off my chassis from the gearbox mounts forward (body still on), prepping it with POR15 Degreaser and then their Metal Prep, then two coats of their Rust Preventative Paint yesterday.... which I find today has reacted and bubbled up (high humidity?). So I now have to start all over again... I'm pretty pissed off right now, as you can imagine.
So, question time:
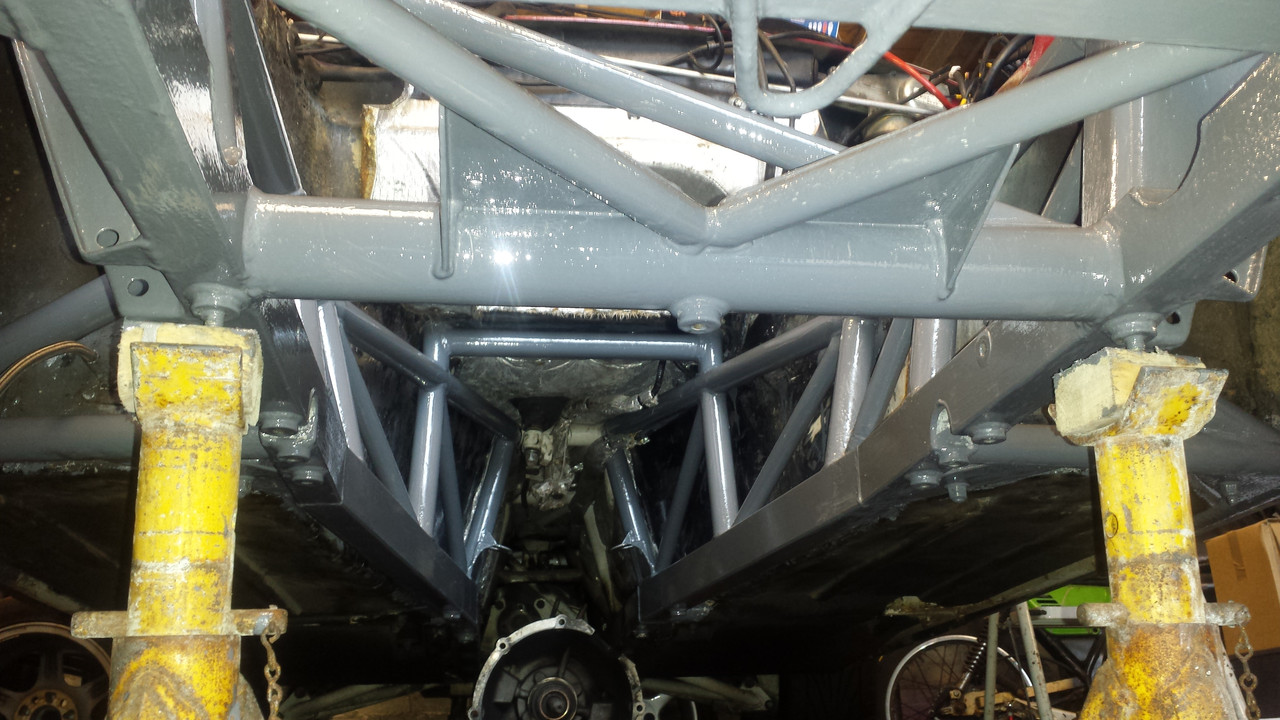
Here's where I'm at: I have already removed engine, box, zorsts, rads and all plumbing, front susp incl rack, column & brake pipes. You can see where I'm going with this... just a rear brake pipe, handbrake cable, speed sensor wire... and a dozen bolts? Rear suspension & diff off and then I could get the chassis blasted and recoated properly with no further need to attend to it in my lifetime (possibly).
Downside is that I am (well, was...) only a couple of weeks off being back on the road and this will add probably a couple of months to that...
Could anyone that's done this please advise what bolts are at the rear (presumably hidden behind the fuel tank?) and inside (do the carpets and dash all have to come out?) Really didn't want to do this now, but if I knew in March what I know now... I would've happily done it then! I hate POR15, it's so bloody pernickity... I swear I'll never use it again!
Probable cost of blasting/zinc & powder coating? Recommendations in the South? General tips and body lifting points?
Thanks,
Rik
So, question time:
Here's where I'm at: I have already removed engine, box, zorsts, rads and all plumbing, front susp incl rack, column & brake pipes. You can see where I'm going with this... just a rear brake pipe, handbrake cable, speed sensor wire... and a dozen bolts? Rear suspension & diff off and then I could get the chassis blasted and recoated properly with no further need to attend to it in my lifetime (possibly).
Downside is that I am (well, was...) only a couple of weeks off being back on the road and this will add probably a couple of months to that...
Could anyone that's done this please advise what bolts are at the rear (presumably hidden behind the fuel tank?) and inside (do the carpets and dash all have to come out?) Really didn't want to do this now, but if I knew in March what I know now... I would've happily done it then! I hate POR15, it's so bloody pernickity... I swear I'll never use it again!
Probable cost of blasting/zinc & powder coating? Recommendations in the South? General tips and body lifting points?
Thanks,
Rik
A month later TwinKam said:
Right, my head's in a better place now.
Thank you all for your advice and good wishes, especially Tanguero, who from the start advised me against using POR15 (or Satan's Spittle as I now call it).
I am proceding with a full body lift and professional recoating of the chassis. I will be back some time later!
It has taken me, initially for health reasons and later due to inertia tbh, almost three and a half years to get to write the next line.Thank you all for your advice and good wishes, especially Tanguero, who from the start advised me against using POR15 (or Satan's Spittle as I now call it).
I am proceding with a full body lift and professional recoating of the chassis. I will be back some time later!
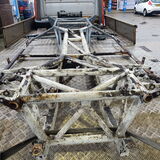
But I am happy to say that, on Jan 2nd, I finally separated body and chassis. The chassis is off to the blasters this Thursday.

Heartfelt thanks to those who have kept my interest up and encouraged me along the way, you know who you are

Happy New Year all!
Rik


ARRRGGHH! You're going to make me relive my nightmare now, Phil!
My initial thought was too high an ambient temperature, that the POR15 was skinning before the solvent had finished gassing, so minute bubbles were popping and leaving craters on the surface. But I believe it also cures with humidity, so maybe it was too humid, the floor boards (pit cover) were possibly still damp from washing off the (POR15) degreaser. Or maybe I was putting it on too thick, not drawing it out sufficiently; I was working fast as it was a massive and intricate area to cover and, like Hammerite, there are time constraints on recoating, it has to either be done within a few hours, or you have to leave it to fully cure for many days. Or maybe I prepped the surface too well; POR stands for 'Paint -over-rust' (shudder!) and I had removed all the rust.
However, the first (silver) coat went on fine, the problems lay in the second (grey) coat.
So maybe I broke one (or more) of the critical criteria. If so, if the planets weren't perfectly aligned that day, if I was wearing the wrong aftershave, then it's simply too fussy a paint for me.
But others on here love and the stuff...
Whatever, the experience certainly persuaded me that the only way to go was to remove the chassis and have it professionally blasted and painted, which is where I am at now.
Poopdog said:
You won't regret doing the body off refurb, Its the only way to do it properly and there's plenty of help on here and Facebook.
Are you powder coating or painting?
I agree, it's a once-only job so I'm doing it right. I'm following Southways of Fareham's advice and their preferred method is thermal zinc spray followed by 2-pack polyurethane wet spray.Are you powder coating or painting?


Nice one Mark, I'd not seen that thread before... so you know all about projects going over time too! End result looks lovely, you must be pleased.
My chassis really isn't too bad (compared to how yours was in 2012) but, putting a positive spin on things, that POR episode has actually done me a massive favour. Had it all gone on smoothly, I'd've had an immaculate looking front half, but an ever deteriorating rear half, necessitating another more comprehensive strip down anyway.
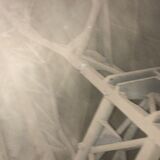
I'll post up some pics of the corrosion on mine later but, apart from general flakiness, there are only two perforations (pre blasting...).
My chassis really isn't too bad (compared to how yours was in 2012) but, putting a positive spin on things, that POR episode has actually done me a massive favour. Had it all gone on smoothly, I'd've had an immaculate looking front half, but an ever deteriorating rear half, necessitating another more comprehensive strip down anyway.
I'll post up some pics of the corrosion on mine later but, apart from general flakiness, there are only two perforations (pre blasting...).
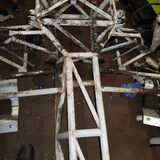
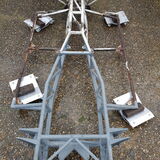
Steady as she goes
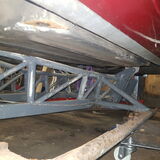
Down and out
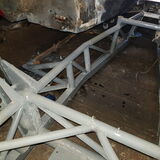
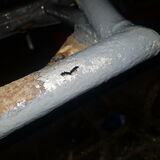
The usual place, OSF corner
And not far away, again OSF
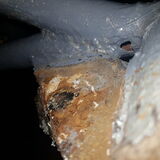
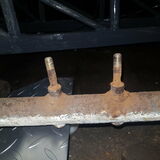
The only bolts that snapped were these, NSF.
Fortunately they were only seized in the outrigger, not the internal cage sleeves, so didn't prevent the drop.
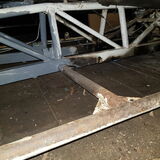
Rear end, tatty but not rotten after 23 years

Down and out
The usual place, OSF corner
And not far away, again OSF
The only bolts that snapped were these, NSF.
Fortunately they were only seized in the outrigger, not the internal cage sleeves, so didn't prevent the drop.
Rear end, tatty but not rotten after 23 years
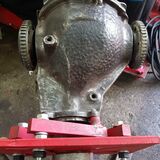
Yeah, good spot, it's a poly so it popped out easily enough, was new in 2012 like every other bush on the car.
I see that these are now supplied as a two-piece, which must make in situ renewal so much easier.
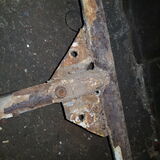
Something odd about both diff front brackets though, in places they are worn really thin. Only thing I can imagine is that they were recoated when the bushes were done, and the blasting was a tad heavy-handed??..
I see that these are now supplied as a two-piece, which must make in situ renewal so much easier.
Something odd about both diff front brackets though, in places they are worn really thin. Only thing I can imagine is that they were recoated when the bushes were done, and the blasting was a tad heavy-handed??..


notaping said:
It's very disheartening when you're stripping it down and just keep finding more problems, but once you turn the corner and start re-building - it's a great feeling. Good luck with it all, and if you need any reference photos, there're a bundle on a flickr page I set up - http://flic.kr/s/aHsmLDRx9C
Wow, thanks Gordon, that's a valuable resource.My blasted (!) chassis is now in the capable hands of Rich at Southways.
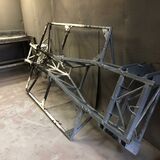
An initial look over suggests that it might not even need full outrigger replacement, and interestingly that the top rails adjacent to the headers have previously been renewed.
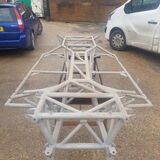
Funny how much nicer things look when they are all one colour.
An initial look over suggests that it might not even need full outrigger replacement, and interestingly that the top rails adjacent to the headers have previously been renewed.
Funny how much nicer things look when they are all one colour.


The rear uprights, however, appear to have never been removed from the car, so they're off being blasted along with a few other bits.
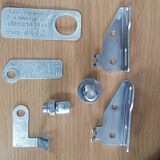
Diff front brackets and ARB brackets being renewed (very thin in places) also top rear arms as the camber adjusting slots have been mullered by the bush inner tube due to a lack of vital washers.

I must remember to grind some excess metal off the ends of that ARB, it's worn holes into the rear of the inner wheel arches both sides
Diff front brackets and ARB brackets being renewed (very thin in places) also top rear arms as the camber adjusting slots have been mullered by the bush inner tube due to a lack of vital washers.
I must remember to grind some excess metal off the ends of that ARB, it's worn holes into the rear of the inner wheel arches both sides

Great news Paul. 
So which is the correct orientation for the bush in the rear toe adjuster? I have one of each
Metal washer and extended bush facing rearwards...
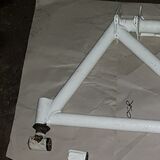
...or forwards?

Does one apply the same theory as for the front drag strut, where the extra cushion and metal washer face rearwards to take the load of the body leaning on it under braking?
So which is the correct orientation for the bush in the rear toe adjuster? I have one of each
Metal washer and extended bush facing rearwards...
...or forwards?
Does one apply the same theory as for the front drag strut, where the extra cushion and metal washer face rearwards to take the load of the body leaning on it under braking?
Edited by TwinKam on Sunday 7th March 12:53
Edited by TwinKam on Sunday 7th March 12:54
Gassing Station | Cerbera | Top of Page | What's New | My Stuff