How-to separate and reseal your rear lights
Discussion


We've all had the condensation issue and been told "they're sealed units" and must either be drilled or replaced. Well I didn't believe it and am correct not to have done. Anyway drilling isn't fixing the damn cause AM!
What you'll need:
New sealant, either: this stuff, or this
Screwdriver or two
Gardening gloves
Oven
Rubber tipped G-Clamps or a good stack of books
Optional
Rear Lamp Foam Kit
Disclaimer: My offside light has had condensation and a flicker for a while, in my head I wrote it off before starting down this route. Its now all drying out and I'm hopeful it'll be as good as new soon.
Step 1:
Remove your rear light from the car, its very easy,
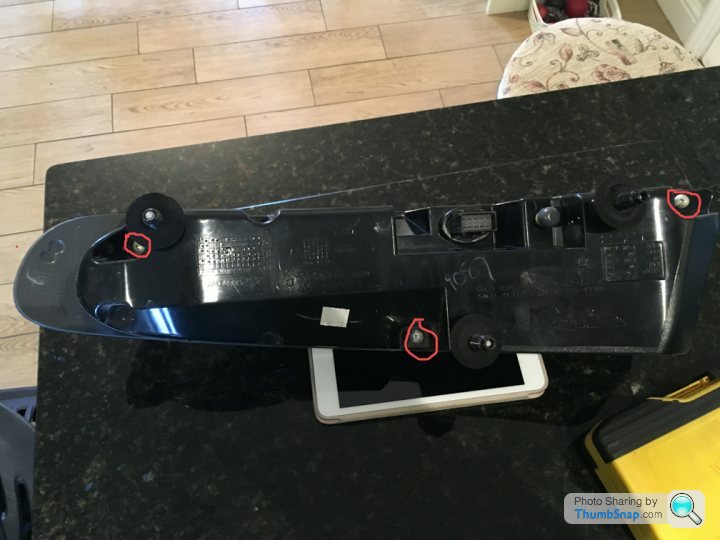
- remove the 3 large metal spherical caps from the light.
- then the nuts and grip washers.
- push the light away from the car
- slide the red clip on the electrical connector towards the outside edge of the light and remove
Step 2:
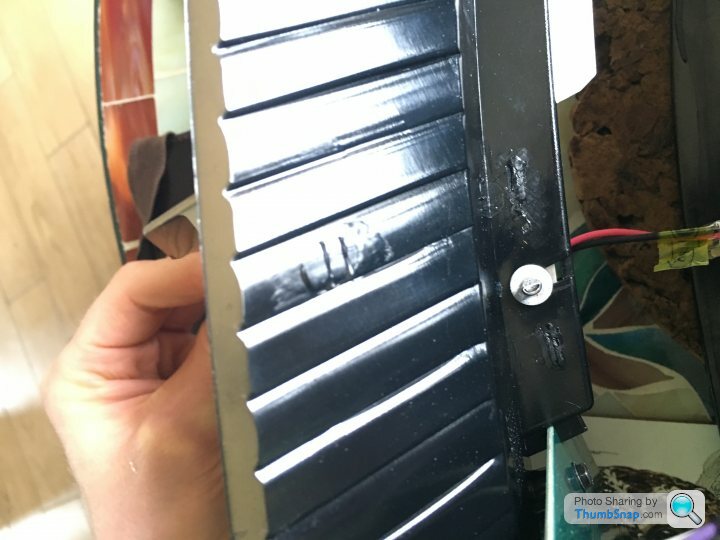
Remove the rubber/sponges from the bolts that hold the light to the chassis
Remove the 3 little screws that hold the lights internals together (they have a rubber grommet so don't loose them!)
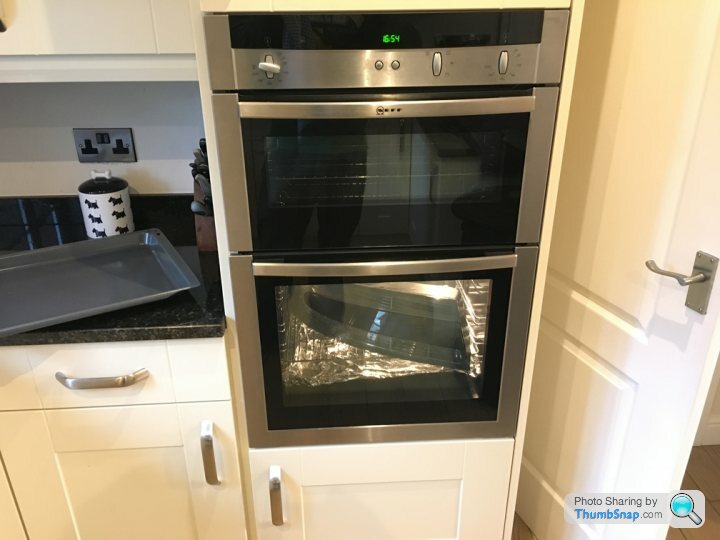
Set oven to 100 degrees celsius, put some foil on the bottom (just in case anything leaks out - it shouldn't)
Put light in oven (don't preheat it) - avoid family members that think you've lost the plot
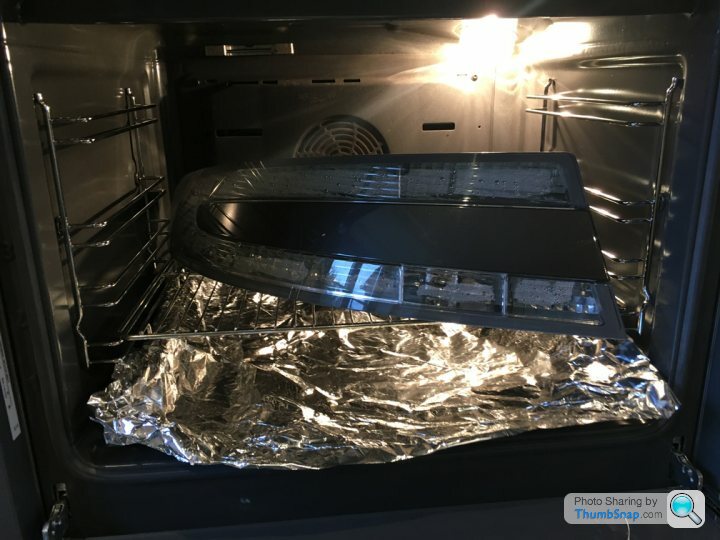
Leave it in there for 15 minutes (if next step fails give it another 5)
Remove light from oven with gloves on, the metal bits will be hot.
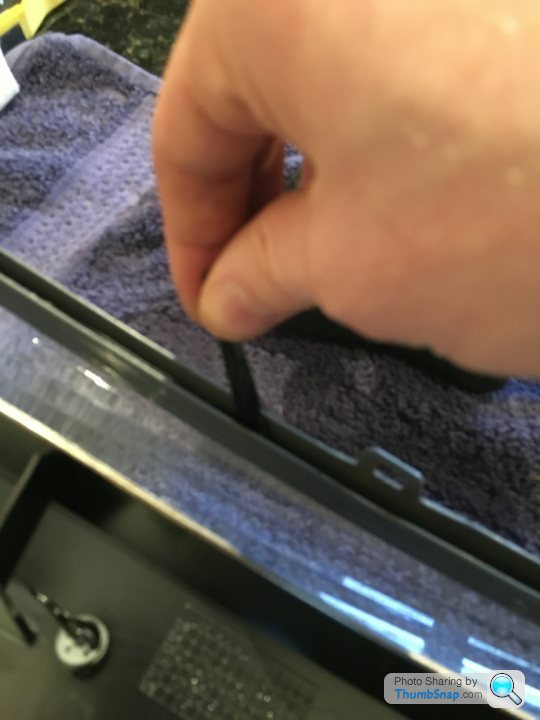
Start at the narrower side and slide the screwdriver gently under clip. Once under gently push to the side and push forward, the light should start to separate without too much effort.
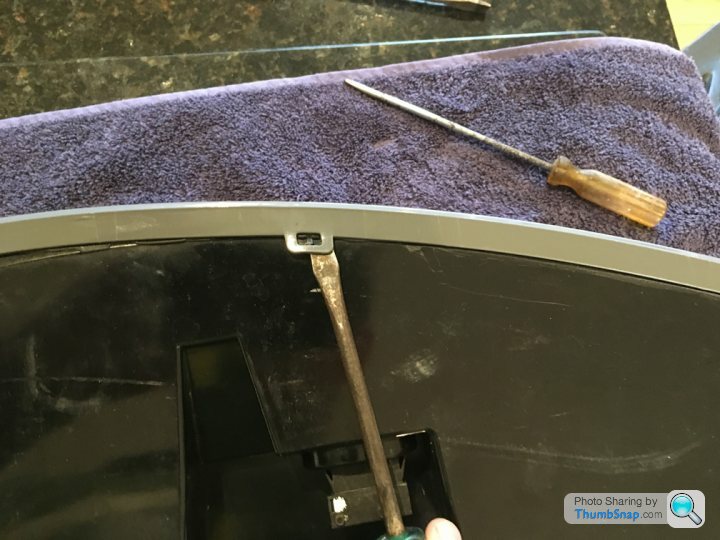
Once you get a small opening at the corner end it'll pry open pretty easily, just be sure to keep checking the little clips are ok.

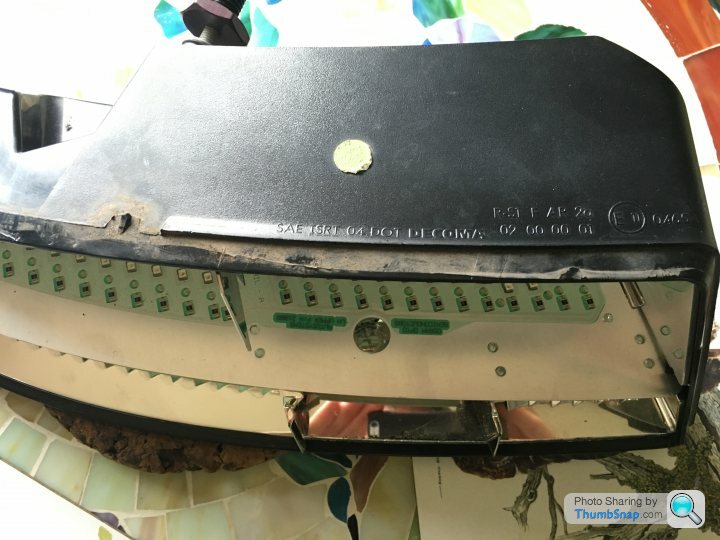
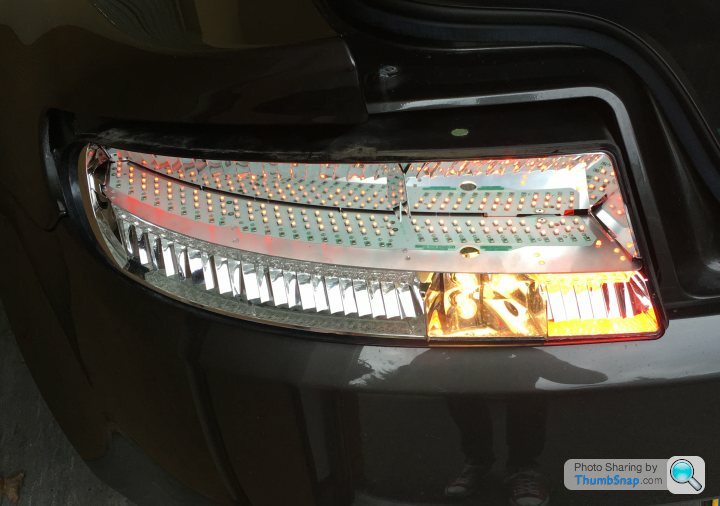
Its hard to see from this pic but even after the oven session my lights had a pool of water at the back of them (the three little screws removed allow you to pull the electric assembly out:

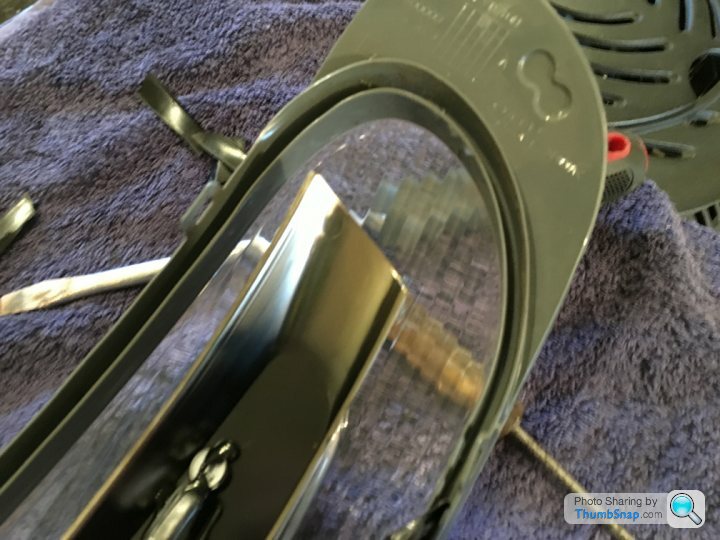
Next I started to remove the old seal, this really looks like some crappy kind of double tape.....
I found the best way of doing this was to get a screw driver/trim tool under the tape while pulling with your other hand, gently scrape with the screw driver. If its being awkward then pop the cover back in the oven for two minutes (I did this twice)
Once all the sealant is out, reassemble the unit, put it back into the oven and turn the oven off. Leave it to cool. This will help any clips and the lens reform to a good shape if any deformation occurred during separation.
Step 3:
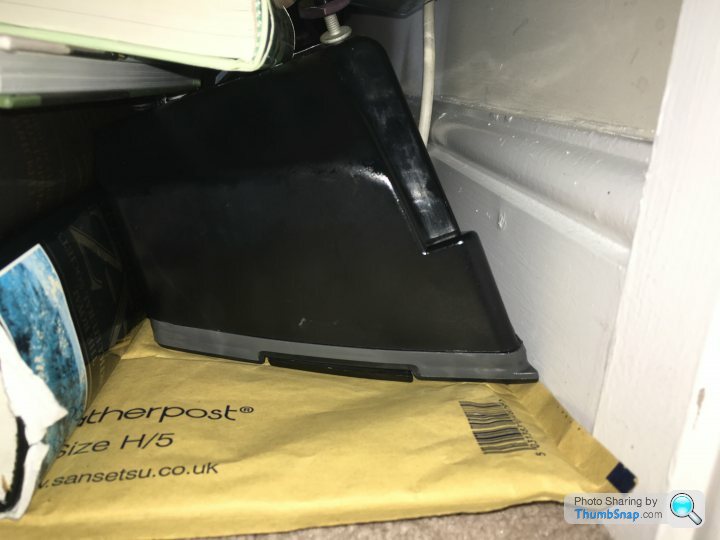
Clean it, dry it, stick it all on the airing cupboard.
Step 4:
Reseal:
First I wiped the entire light down with white spirit, this'll clean away any grime / grease.
Next get the lens and fill the put the new tape in there. Here's a guide on how to use it:
https://www.youtube.com/watch?v=duFXYRt_nD0
Now put just the lens in the oven for 2/3 minutes, this will make it a little more malleable.
Reassemble the light. Put the whole thing into the oven for 5 minutes.
Next attach gclamps if you have them, use a hockey puck or something to spread the force evenly over the face of the lens. I didn't have two g-clamps that would fit (future addition to my toolset). So I used a great big pile of books.
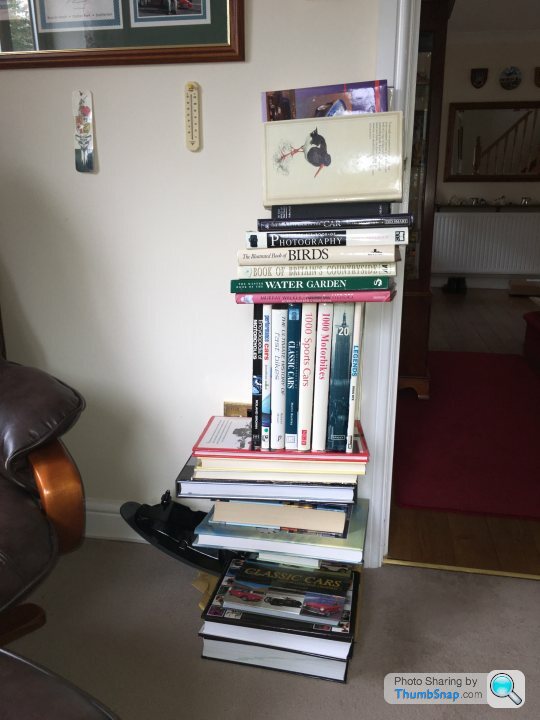
Leave it like this for 24 hours.
Step 5
Refit:
Make sure the metal washers are in place/are handy, they can fall behind the carpet when you remove the light in step one. You can also use this as a chance to renew the little foam pads if you'd like to.
Refitting is fiddly but with a bit of patience you can get the panel gap back to normal.
Stand back and admire your work
Total time, from car to airing cupboard, about 1 hour. Add another hour to reassemble and refit.
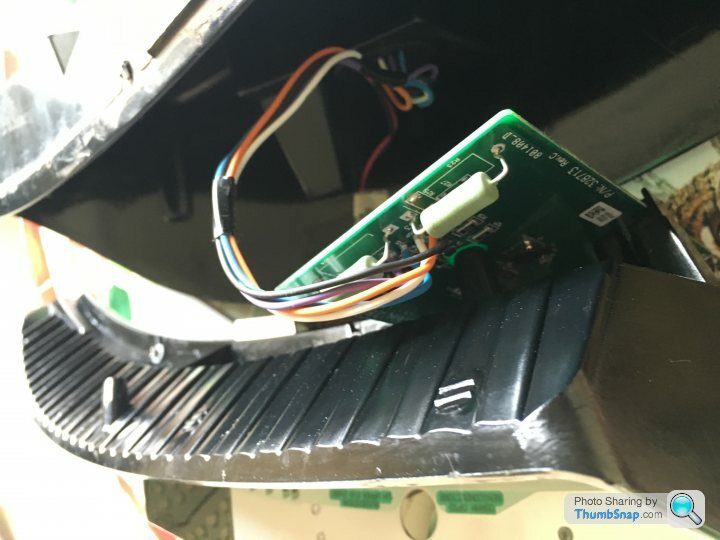
I took a couple of other snaps to show how the circuit board is mounted for anyone that maybe interested:
What you'll need:
New sealant, either: this stuff, or this
Screwdriver or two
Gardening gloves
Oven
Rubber tipped G-Clamps or a good stack of books
Optional
Rear Lamp Foam Kit
Disclaimer: My offside light has had condensation and a flicker for a while, in my head I wrote it off before starting down this route. Its now all drying out and I'm hopeful it'll be as good as new soon.
Step 1:
Remove your rear light from the car, its very easy,
- remove the 3 large metal spherical caps from the light.
- then the nuts and grip washers.
- push the light away from the car
- slide the red clip on the electrical connector towards the outside edge of the light and remove
Step 2:
Remove the rubber/sponges from the bolts that hold the light to the chassis
Remove the 3 little screws that hold the lights internals together (they have a rubber grommet so don't loose them!)
Set oven to 100 degrees celsius, put some foil on the bottom (just in case anything leaks out - it shouldn't)
Put light in oven (don't preheat it) - avoid family members that think you've lost the plot
Leave it in there for 15 minutes (if next step fails give it another 5)
Remove light from oven with gloves on, the metal bits will be hot.
Start at the narrower side and slide the screwdriver gently under clip. Once under gently push to the side and push forward, the light should start to separate without too much effort.
Once you get a small opening at the corner end it'll pry open pretty easily, just be sure to keep checking the little clips are ok.
Its hard to see from this pic but even after the oven session my lights had a pool of water at the back of them (the three little screws removed allow you to pull the electric assembly out:
Next I started to remove the old seal, this really looks like some crappy kind of double tape.....
I found the best way of doing this was to get a screw driver/trim tool under the tape while pulling with your other hand, gently scrape with the screw driver. If its being awkward then pop the cover back in the oven for two minutes (I did this twice)
Once all the sealant is out, reassemble the unit, put it back into the oven and turn the oven off. Leave it to cool. This will help any clips and the lens reform to a good shape if any deformation occurred during separation.
Step 3:
Clean it, dry it, stick it all on the airing cupboard.
Step 4:
Reseal:
First I wiped the entire light down with white spirit, this'll clean away any grime / grease.
Next get the lens and fill the put the new tape in there. Here's a guide on how to use it:
https://www.youtube.com/watch?v=duFXYRt_nD0
Now put just the lens in the oven for 2/3 minutes, this will make it a little more malleable.
Reassemble the light. Put the whole thing into the oven for 5 minutes.
Next attach gclamps if you have them, use a hockey puck or something to spread the force evenly over the face of the lens. I didn't have two g-clamps that would fit (future addition to my toolset). So I used a great big pile of books.
Leave it like this for 24 hours.
Step 5
Refit:
Make sure the metal washers are in place/are handy, they can fall behind the carpet when you remove the light in step one. You can also use this as a chance to renew the little foam pads if you'd like to.
Refitting is fiddly but with a bit of patience you can get the panel gap back to normal.
Stand back and admire your work
Total time, from car to airing cupboard, about 1 hour. Add another hour to reassemble and refit.
I took a couple of other snaps to show how the circuit board is mounted for anyone that maybe interested:
Edited by dbs2000 on Tuesday 8th May 08:15
Edited by dbs2000 on Tuesday 8th May 12:01
The last steps will be easy if it's just condensation, it's new sealant and reassembly. Sadly if the water has damaged my driving light circuit beyond recovery I'll be throwing mine away. The electric boards are riveted, so if the dry out doesn't sort the circuit I'll be into a new step of repairing he circuit board. Hopefully just a reseal will prevent this for you guys.
I'm tempted to reseal with some silicone packets in too 👍🏻
I'm tempted to reseal with some silicone packets in too 👍🏻
So after a night in the airing cupboard, I decided to test it.
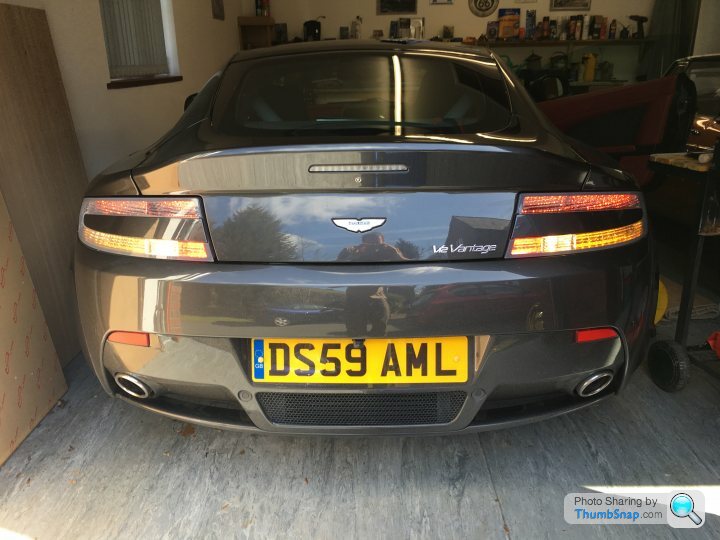
The part that was dead (driving light) has life once more, a test of all the indicators, fog, brake, reversing is successful and the disco effect has gone. I'll reseal it at Easter (next time I'm back in Wales with the car) and update this thread with a how to on that. £500 saved and feeing pretty smug
The part that was dead (driving light) has life once more, a test of all the indicators, fog, brake, reversing is successful and the disco effect has gone. I'll reseal it at Easter (next time I'm back in Wales with the car) and update this thread with a how to on that. £500 saved and feeing pretty smug
old phart said:
Never understood why it's all LEDs except for backup bulb. Would it be worth it to replace bulb as long as it was open?
Great write up by the way. Still working on replacing my rear turn indicators with Audi innards.
I did think about this. I may swap it for an LED reverse bulb, however I'm pretty sure the halogens give off a more usable light.Great write up by the way. Still working on replacing my rear turn indicators with Audi innards.
I'd be interested on hearing about your Audi turn signal swap
WBlohm said:
Once you got the light open would it be possible to change out the LED strips used inside?
My drivers side indicator has just gone and noticed a bit of condensation, not a lot, but wondered if this method would save me buying a new light
From what I've seen in the rears the led strips can probably be detached, I'll get some more photos before I reassemble and refit next Thursday. They were riveted so that would need to be drilled out and redone once you were happy.My drivers side indicator has just gone and noticed a bit of condensation, not a lot, but wondered if this method would save me buying a new light
WBlohm said:
Also if you clear light stops working, could you put your clear lenses onto your red light that does work?
I don't know the colour of the LEDs in the red housed lights I'm afraid. I'd assume they're probably all white.cayman-black said:
I think you will know how to rebuild that Aston of yours soon ds.
Great job!
Haha I've not done anything that difficult on it. I leave the engine and fibre electronics alone and to the experts Great job!
- truth is I've done a lot of work on old cars / trackcar projects, the Aston is actually easier to work on that most of those Jap motors.KiwiSG said:
So how do you re-seal? what is the best method to ensure you don't get the same issue again ?
If you use a sealant then you won't be able to open it again, so is there another type of rubber seal to put back into the gap ?
I'll be doing that on Thursday, I'm going to use a bond / sealant all in one to reseal. The issue shouldn't return as I'm going to pack it in there and also see if I can hide a couple of silica bags as well. If the condensation does come back then it can be re-opened up via the oven/heatgun/heatbox approach once more.If you use a sealant then you won't be able to open it again, so is there another type of rubber seal to put back into the gap ?
JonnyCJ said:
I’m afraid that’s wrong. A lot of people have been very successful doing this. Those who get deformed lenses clearly have the oven too hot, or leave the lens in too long.
Mind you, it’s the same with cakes. Put them in at the wrong temperature or for too long and they’ll be ruined.
No one ever said don’t bake a cake because you’ll burn it…
This.Mind you, it’s the same with cakes. Put them in at the wrong temperature or for too long and they’ll be ruined.
No one ever said don’t bake a cake because you’ll burn it…
Sorry you've warped your lights a bit but I've done 3 now without issue. The old oven technique for lights has been around way before this thread.
Gassing Station | Aston Martin | Top of Page | What's New | My Stuff