Ducati 996 engine custom build
Discussion


Thought I would start a new build thread on my ST4s custom now the Multistrada build is finished. Here is a link to the last build…
https://www.pistonheads.com/gassing/topic.asp?h=0&...
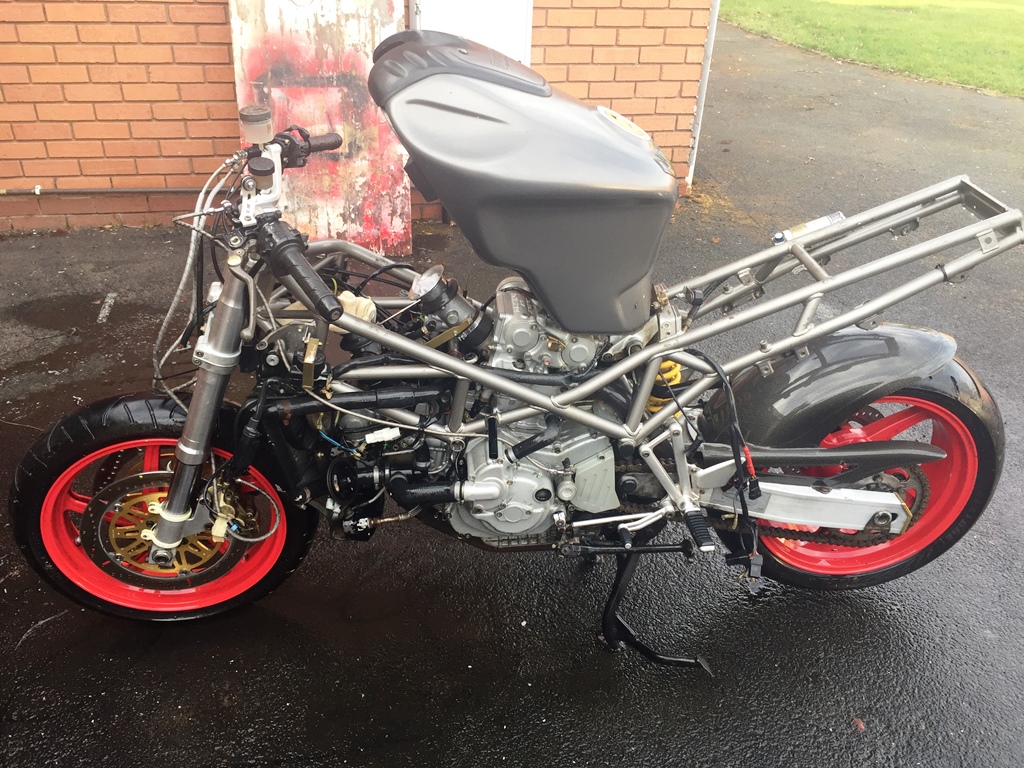
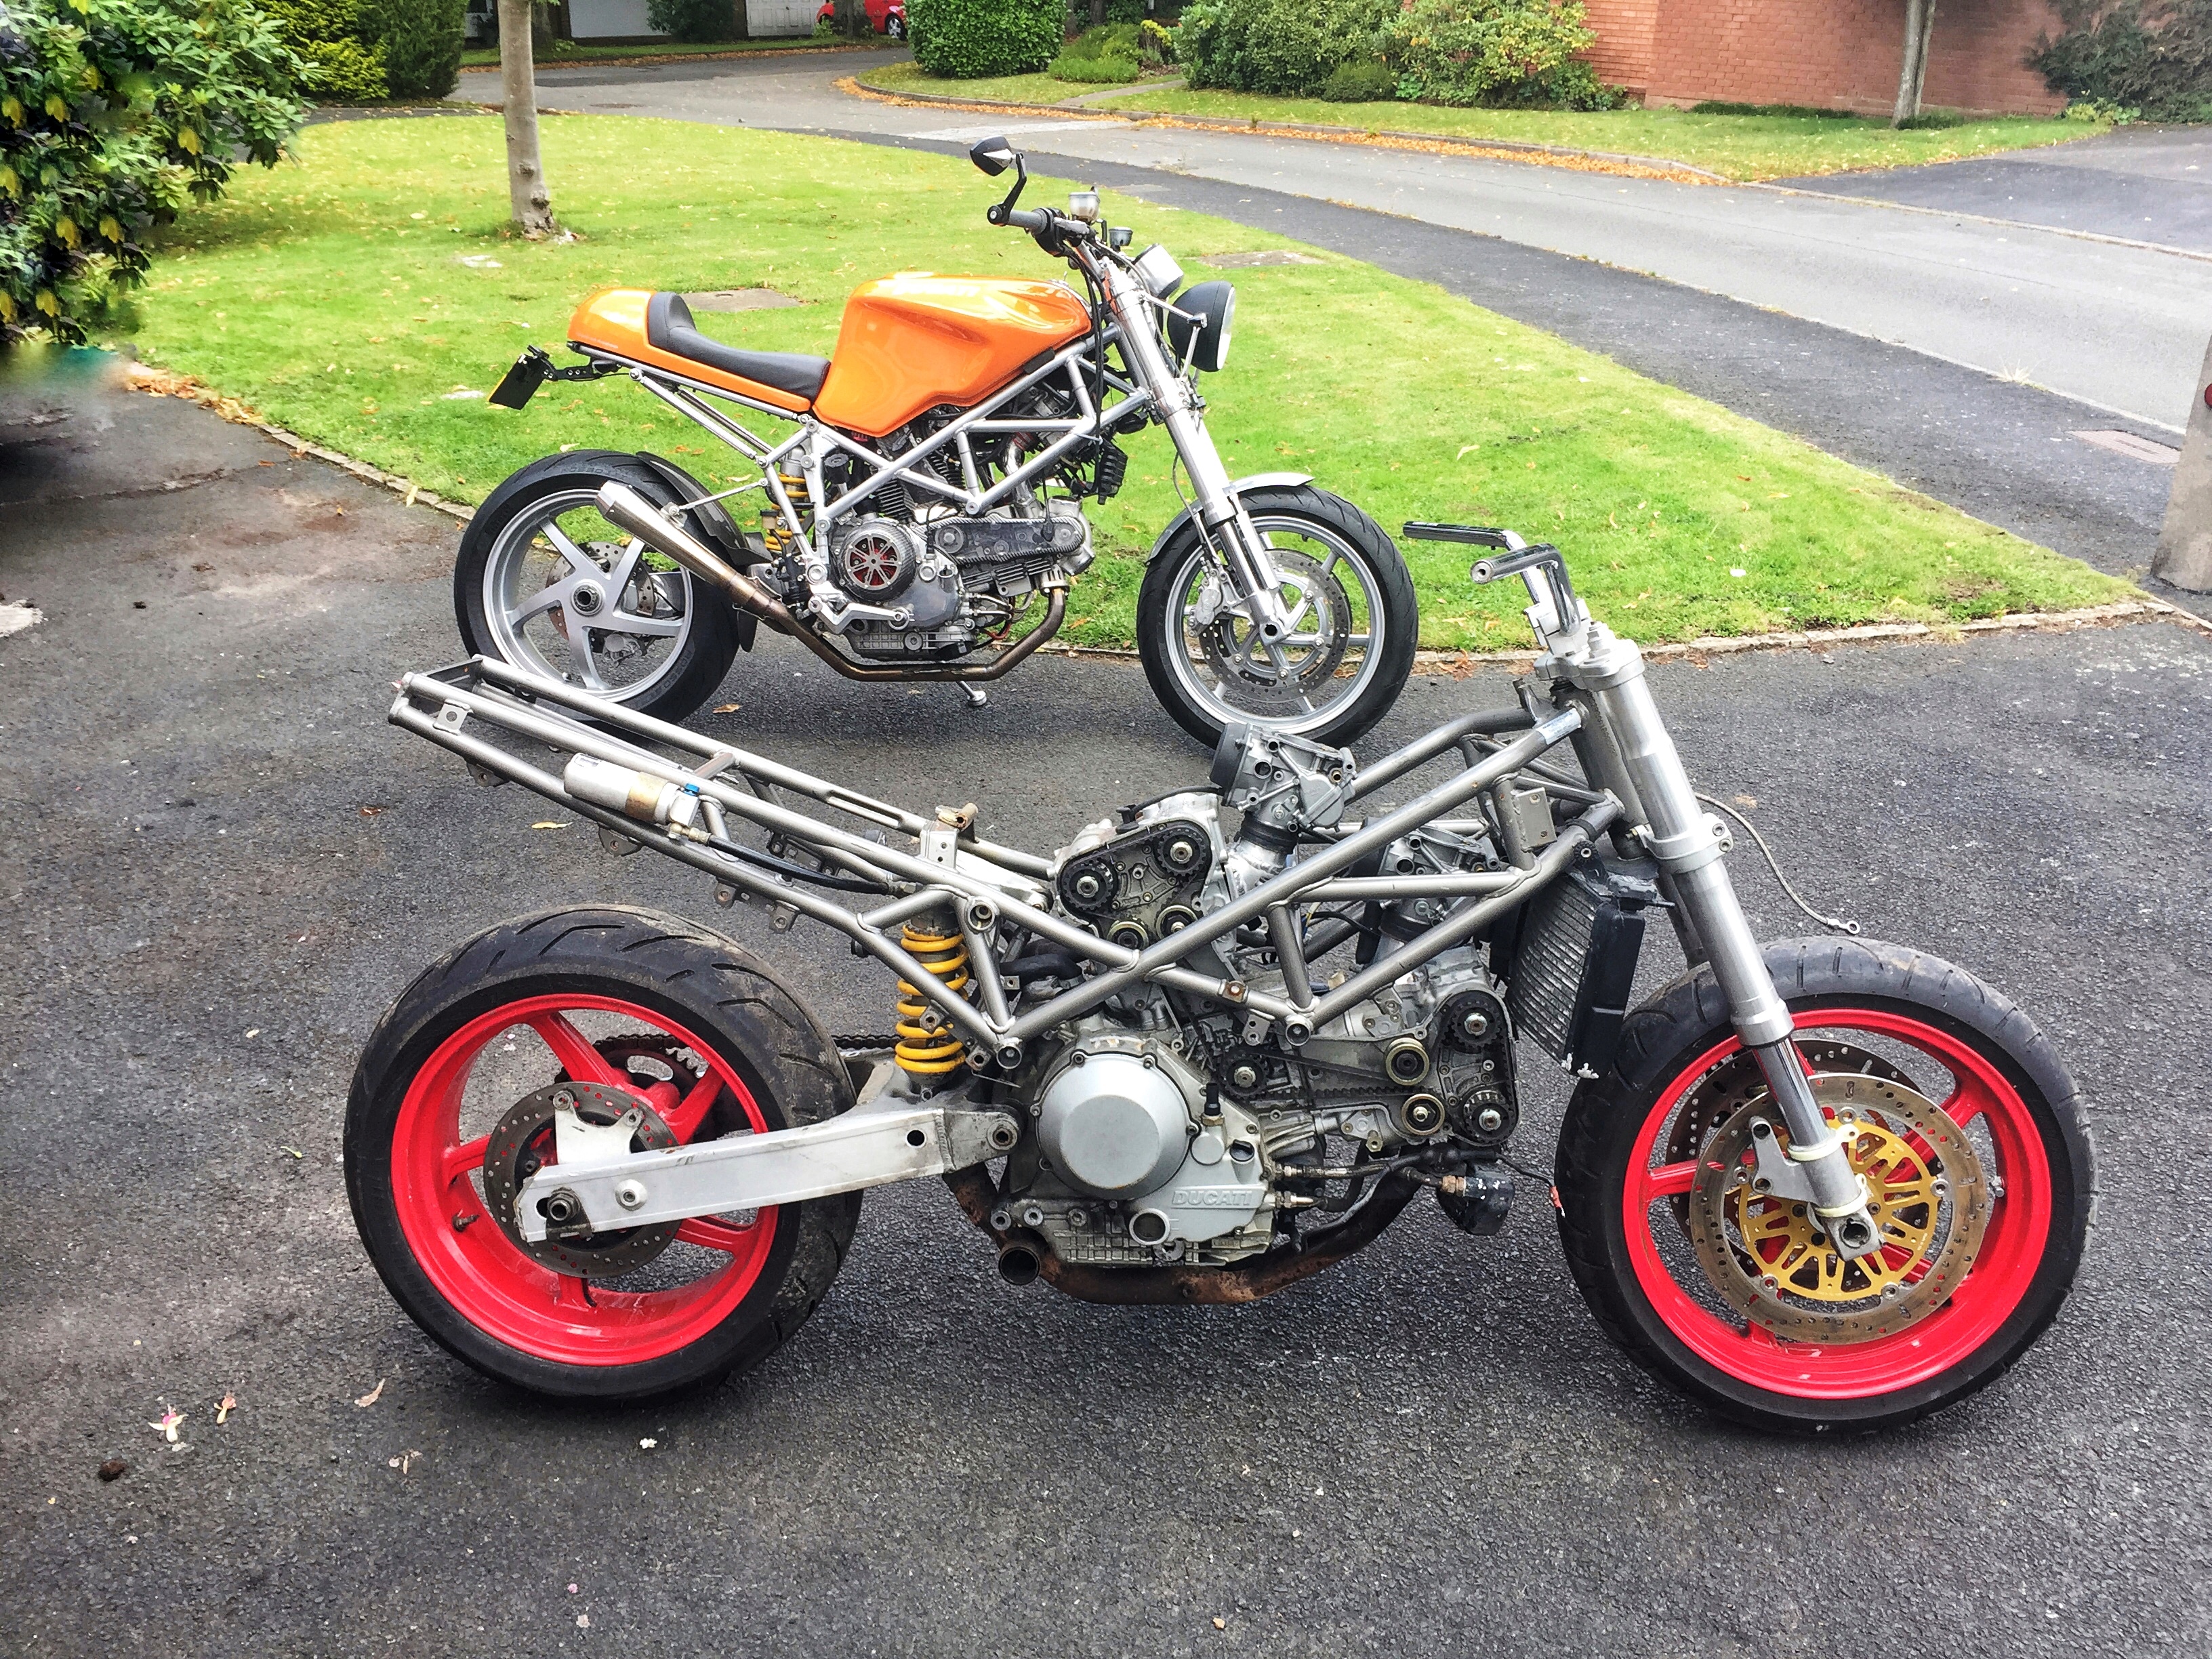
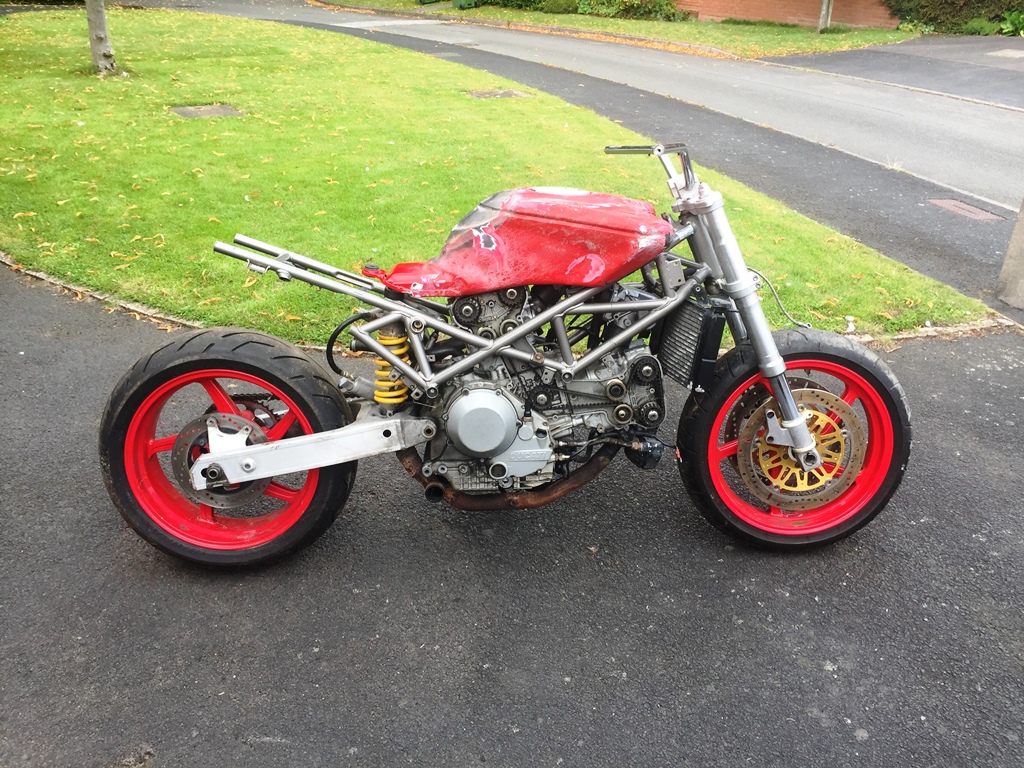
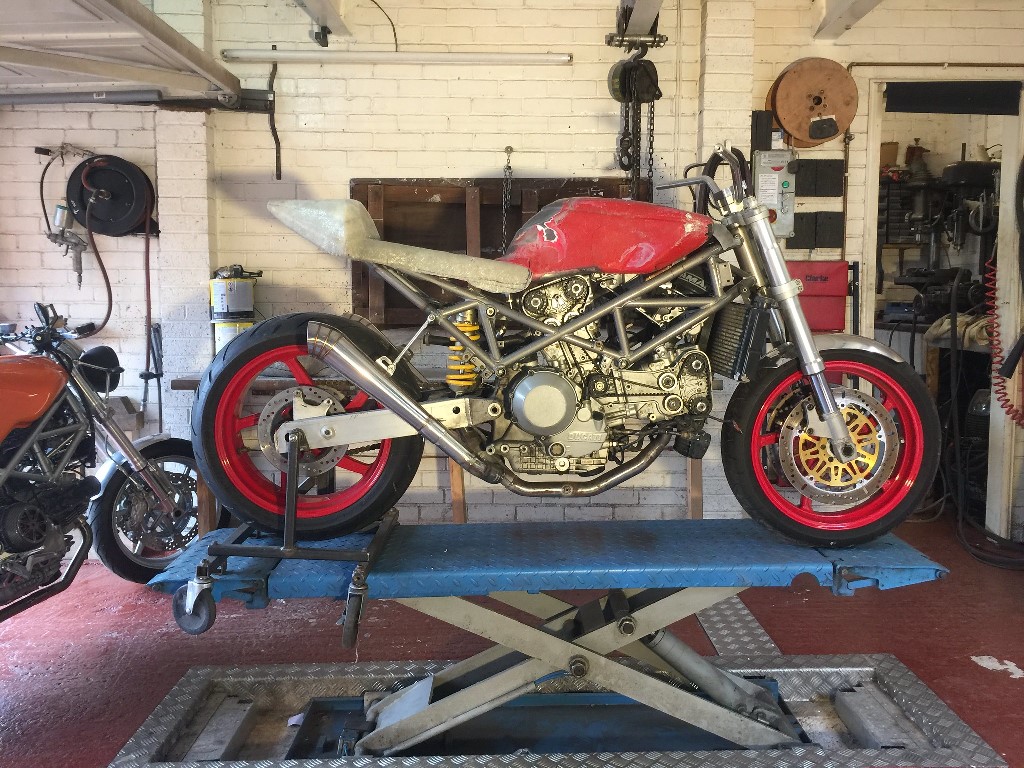
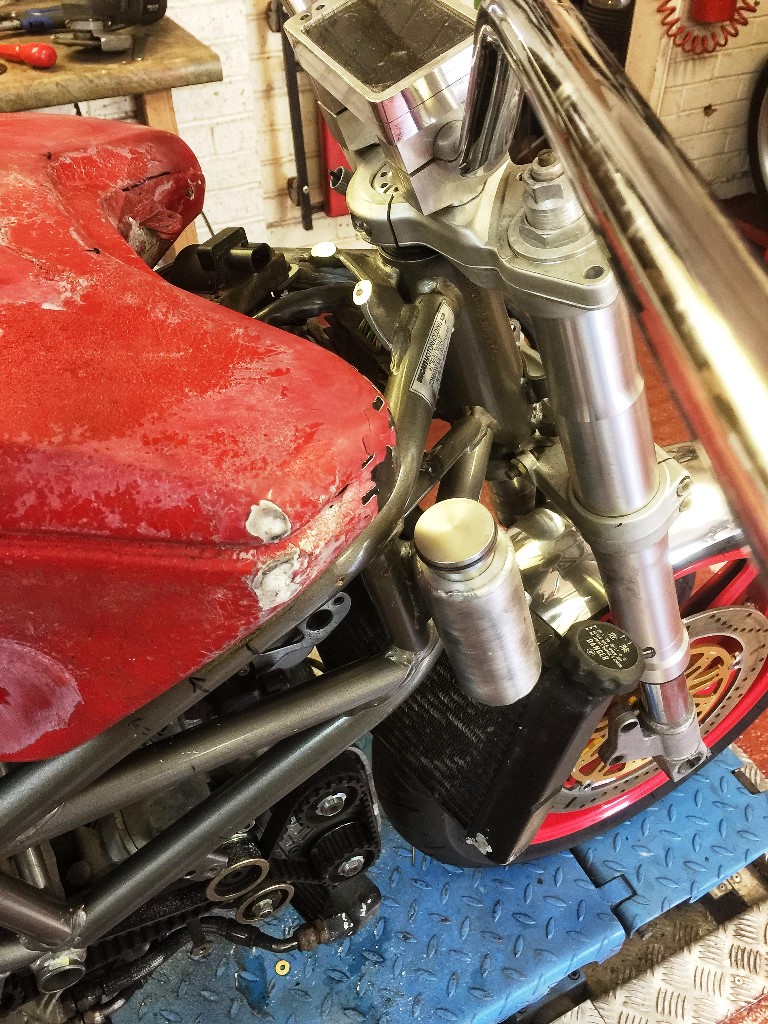
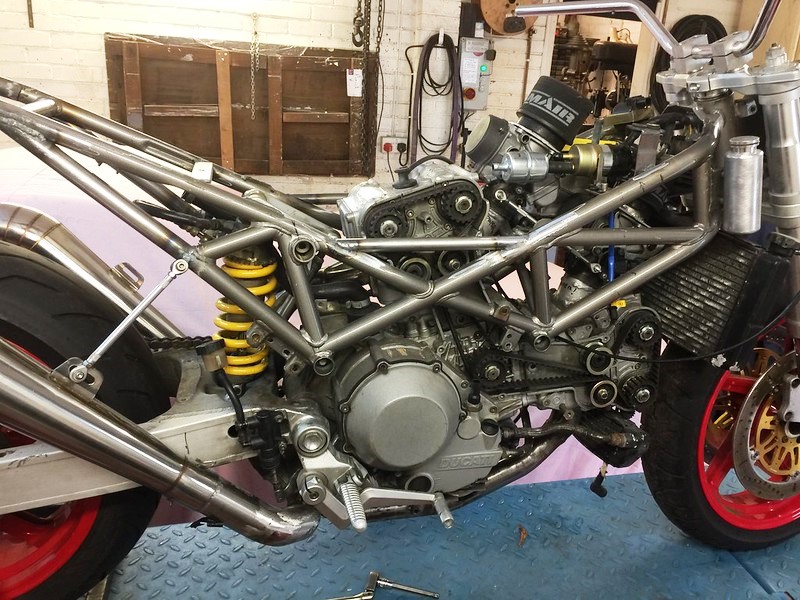
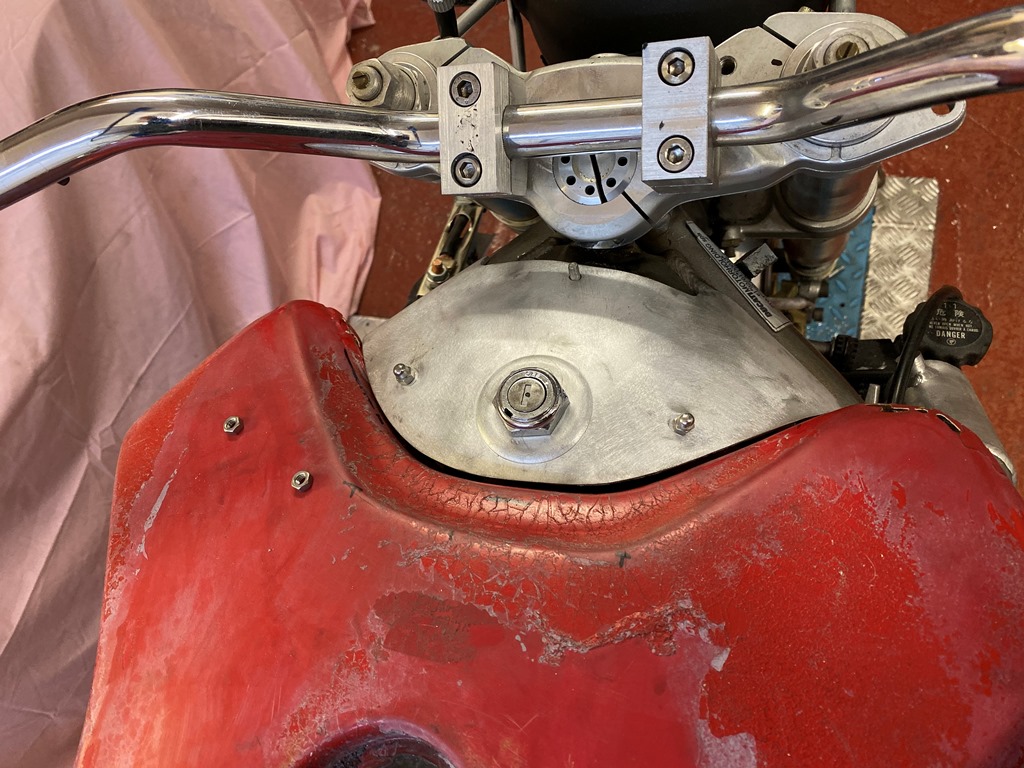
So here it is as it arrived. It’s a running bike with 22k on the clock. it’s not as tidy as it looks in the pictures, the paintwork in particular lets it down. It’s a runner, but it had some electrical issues, which were easy to trace, the loom was a mess!
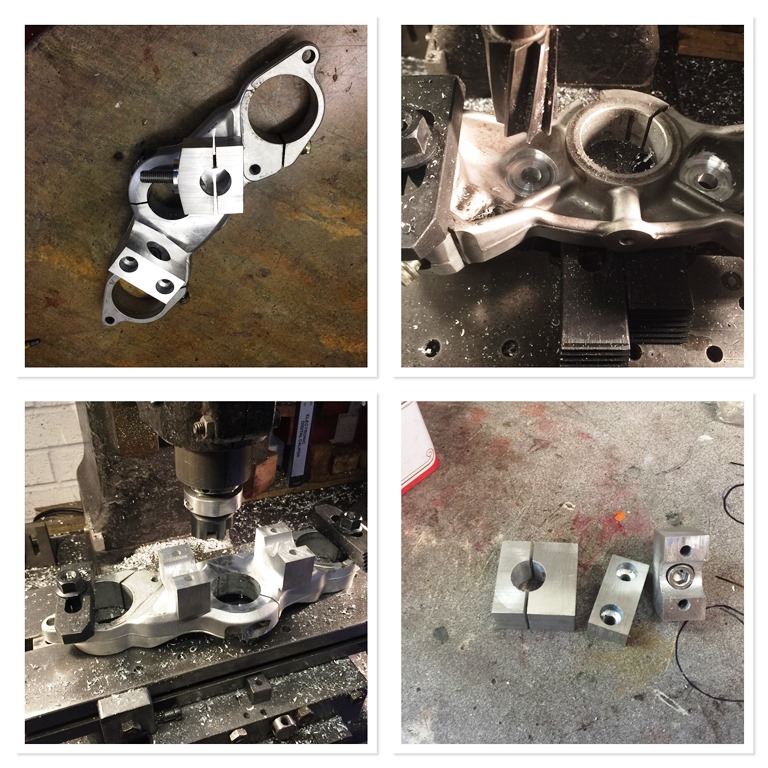
I have now stripped off all the parts that I definitely know I won’t use, and these are being sold to fund some of the build. First little job has been to machine the top yoke and rough some clamps out so I can fit conventional handlebars, to make it easier for me to move it around, and so I can sell the originals.
I am not sure yet on the style this will end up, but it needs to be reasonably easy to ride, no clip ons! I am also going to make a tank in alloy this time, and work is already underway designing and making an English wheel which I am quite excited about.
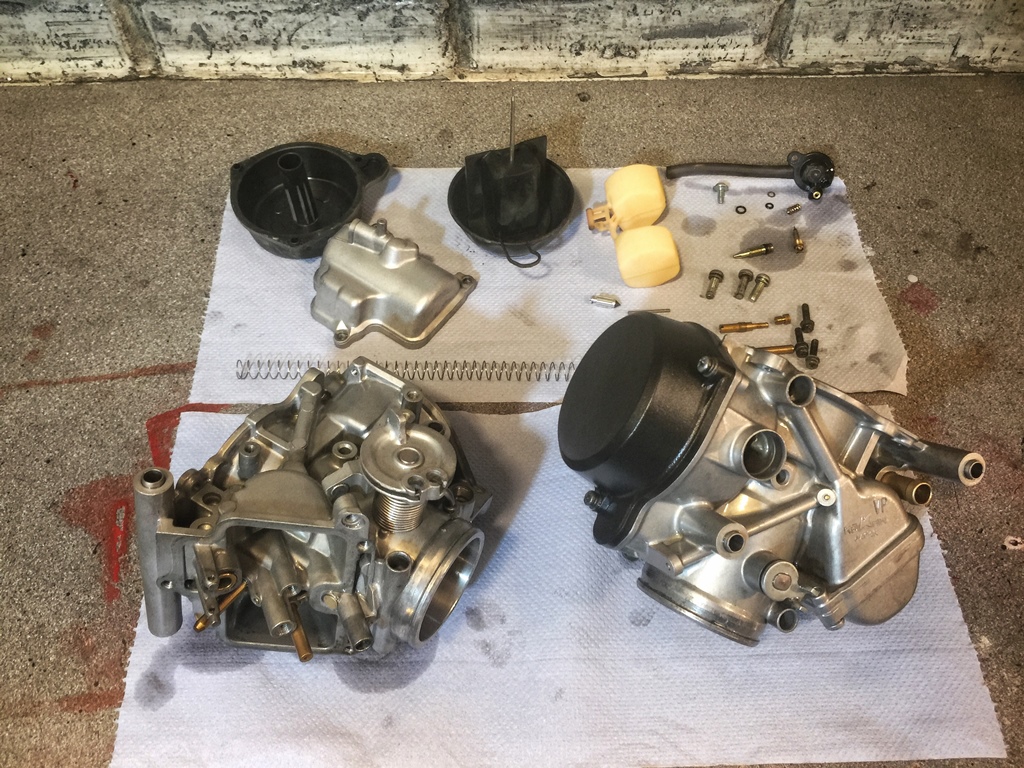
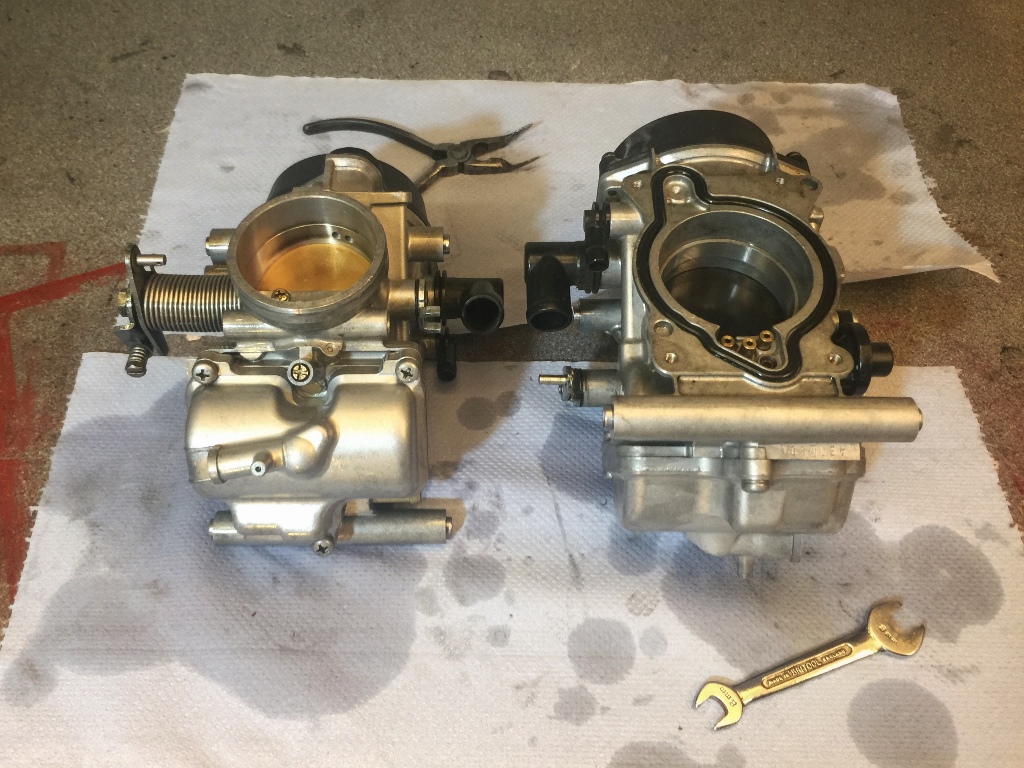
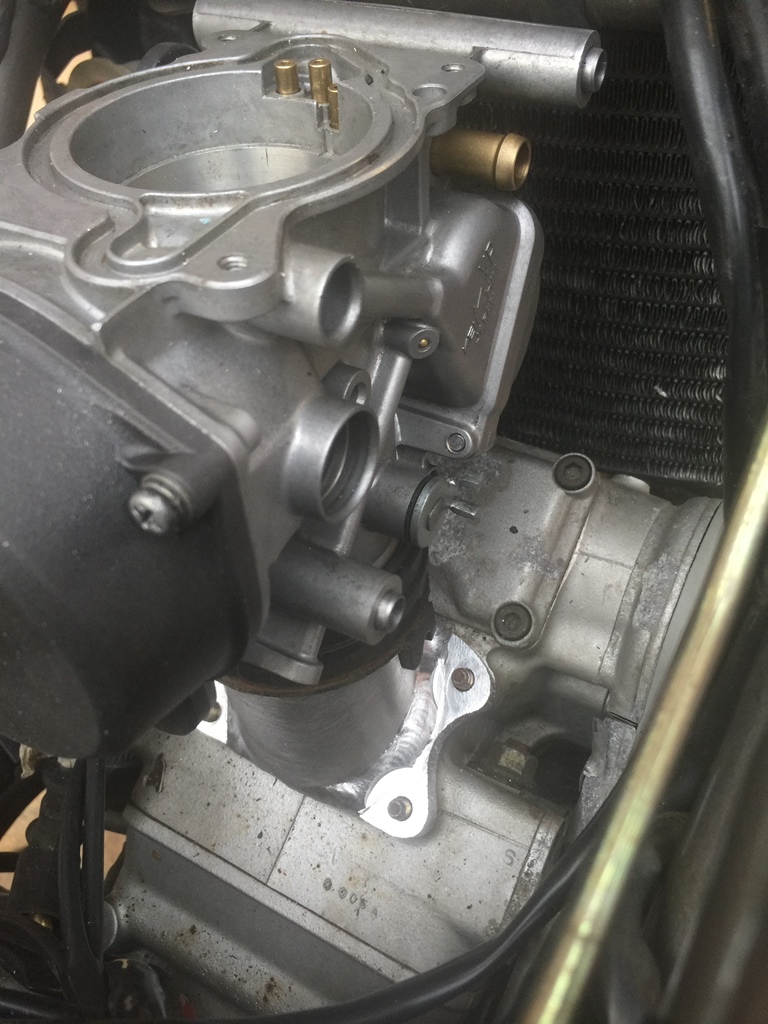
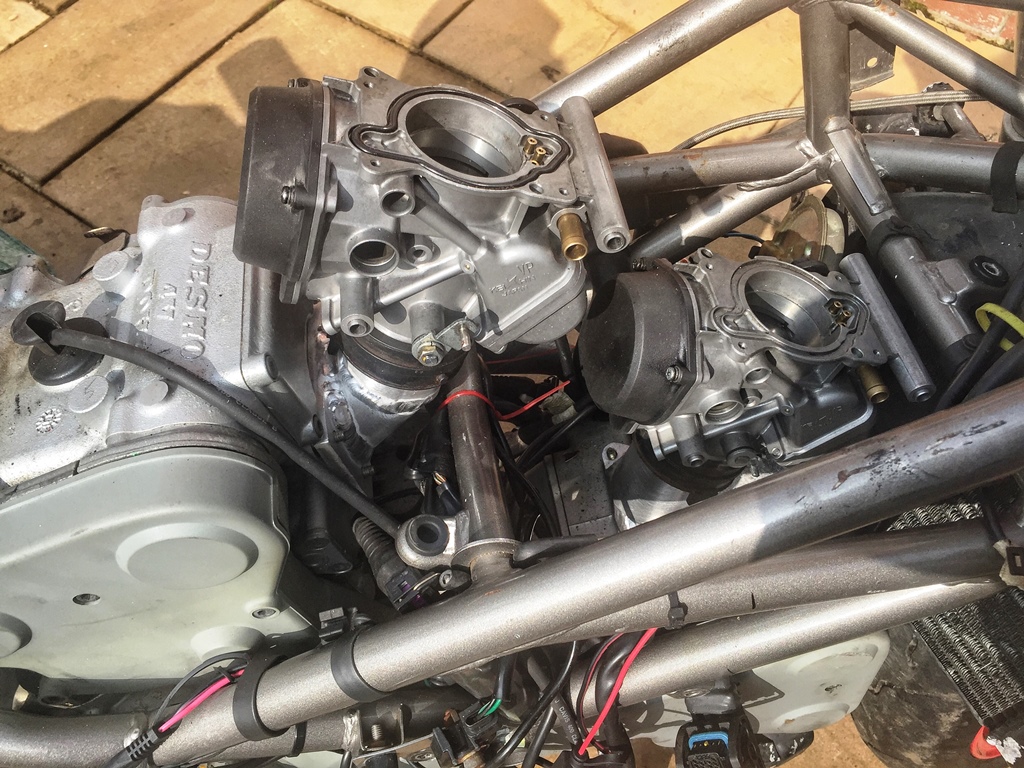
I took the Multi out yesterday for its first short ride and was REALLY pleased with the way it run on the new ignition and carbs... and that got me thinking... I don't think anyone has done a 996 engine on carbs...(most will say why the hell would you!!) I like the idea! So I have sourced a pair of nice flat slide 48 mm carburettors! Watch this space!


https://www.pistonheads.com/gassing/topic.asp?h=0&...
So here it is as it arrived. It’s a running bike with 22k on the clock. it’s not as tidy as it looks in the pictures, the paintwork in particular lets it down. It’s a runner, but it had some electrical issues, which were easy to trace, the loom was a mess!
I have now stripped off all the parts that I definitely know I won’t use, and these are being sold to fund some of the build. First little job has been to machine the top yoke and rough some clamps out so I can fit conventional handlebars, to make it easier for me to move it around, and so I can sell the originals.
I am not sure yet on the style this will end up, but it needs to be reasonably easy to ride, no clip ons! I am also going to make a tank in alloy this time, and work is already underway designing and making an English wheel which I am quite excited about.
I took the Multi out yesterday for its first short ride and was REALLY pleased with the way it run on the new ignition and carbs... and that got me thinking... I don't think anyone has done a 996 engine on carbs...(most will say why the hell would you!!) I like the idea! So I have sourced a pair of nice flat slide 48 mm carburettors! Watch this space!

Motorsport3 said:
What is the benefit/significance of fitting carburetors? I thought the injections were more efficient way of running an engine both in terms of consumption and maintenance.
Injection is brilliant... However, on old bikes like this the electronics fail. the ECU's fail, as do the LCD clocks, and the sensors, immobiliser issues... the cost of replacement is high and not worth it on older bikes like this. Its a way of going back to a "back to basics" bike. I know I will drop a few BHP... but to be honest I cant cope with what I already have these days 
scarble said:
Another buzzer build
I can understand FI is a lot more initial effort to set up if you're not using the original electronics and imagine you don't baulk at the idea of occasionally stripping and cleaning carbs like some of us do.
Your threads do make me look forward to retirement. Few years yet.
yea, another buildI can understand FI is a lot more initial effort to set up if you're not using the original electronics and imagine you don't baulk at the idea of occasionally stripping and cleaning carbs like some of us do.
Your threads do make me look forward to retirement. Few years yet.
Edited by scarble on Monday 8th April 16:32
but its now on hold until late September though... I have already covered it up out of sight so as not to tempt me! I want to spend the summer driving and riding, and holidays... we have quite a few planned... Florida tomorrow, Cuba cruise, New York, west coast USA cruise, Bermuda, and then in September a big one. South America, Peru, Mattu Picchu (been on bucket list for years) and the Galapagos... so not much time for project builds!
I love retirement!
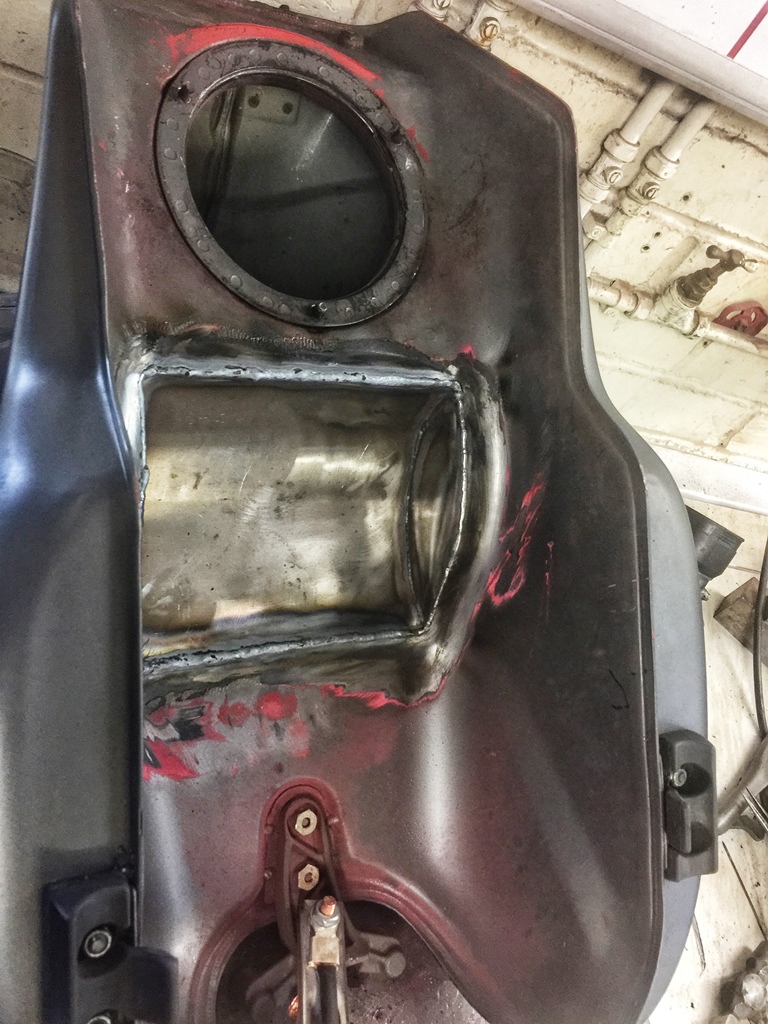
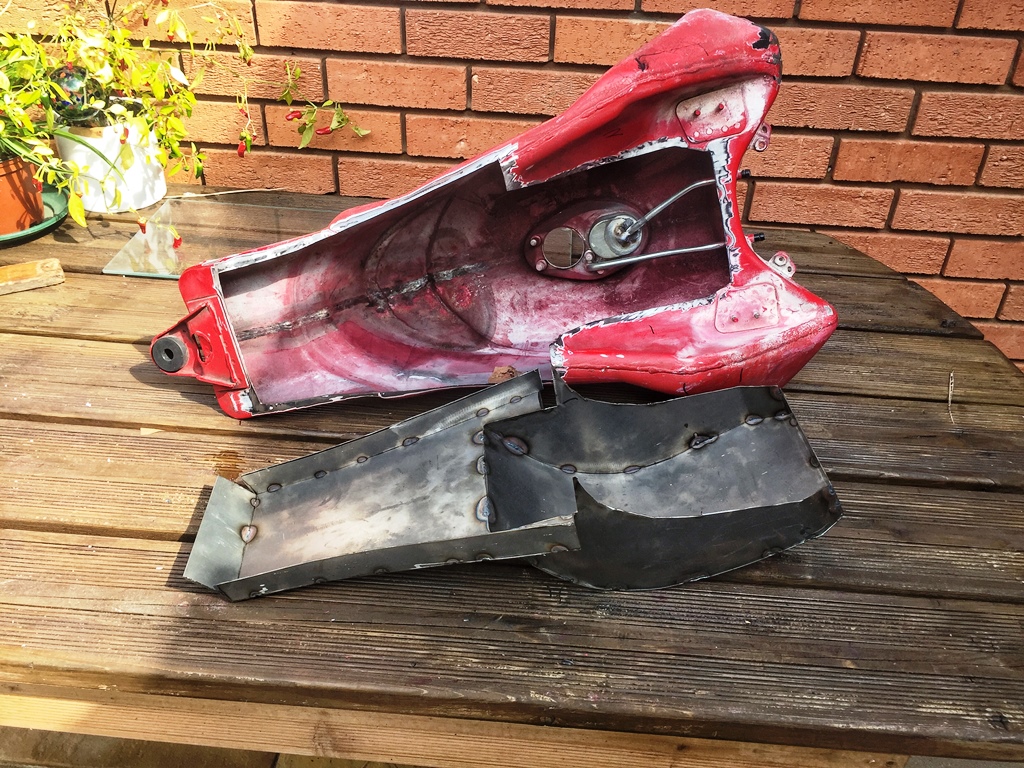
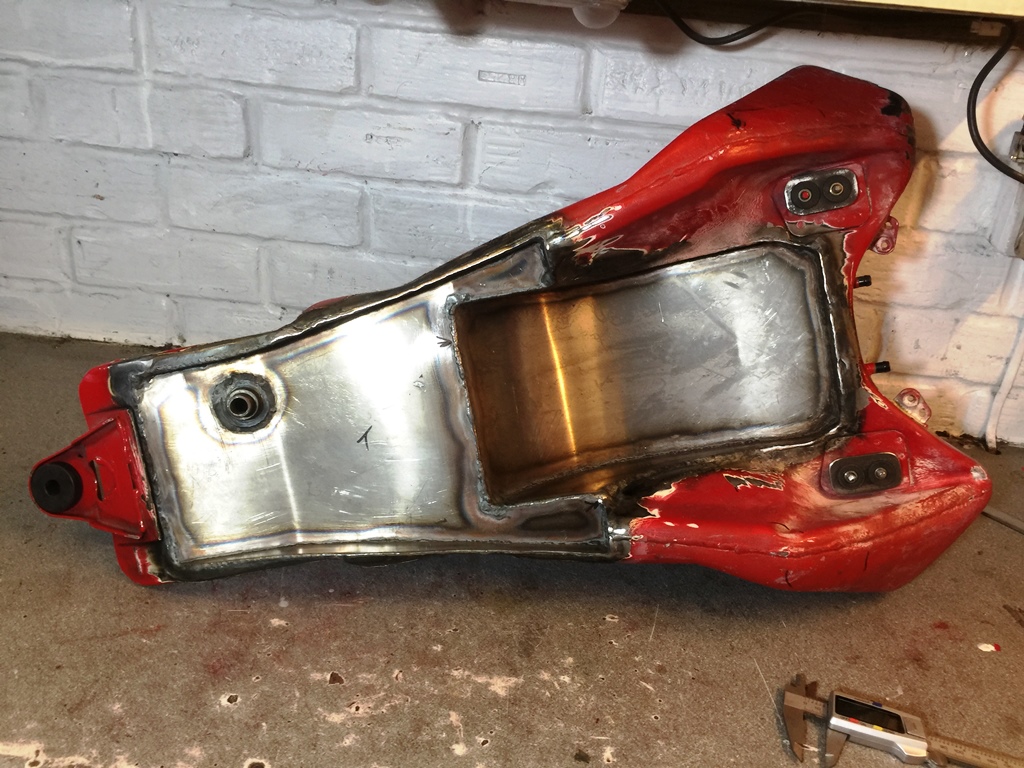
Late August and the weather is terrible… so I have made a start… for a few weeks before we go on holiday anyway no going back now as I have had the angle grinder out on the rear of the frame. I really don't want to use the ST4 tank though so I have managed to find a badly dented Ducati alternative in a breakers, which seems to fit after a bit of under tank surgery!
dibblecorse said:
Bloody hell, hate to think what the rest of that 999 that that tank came from looks like.
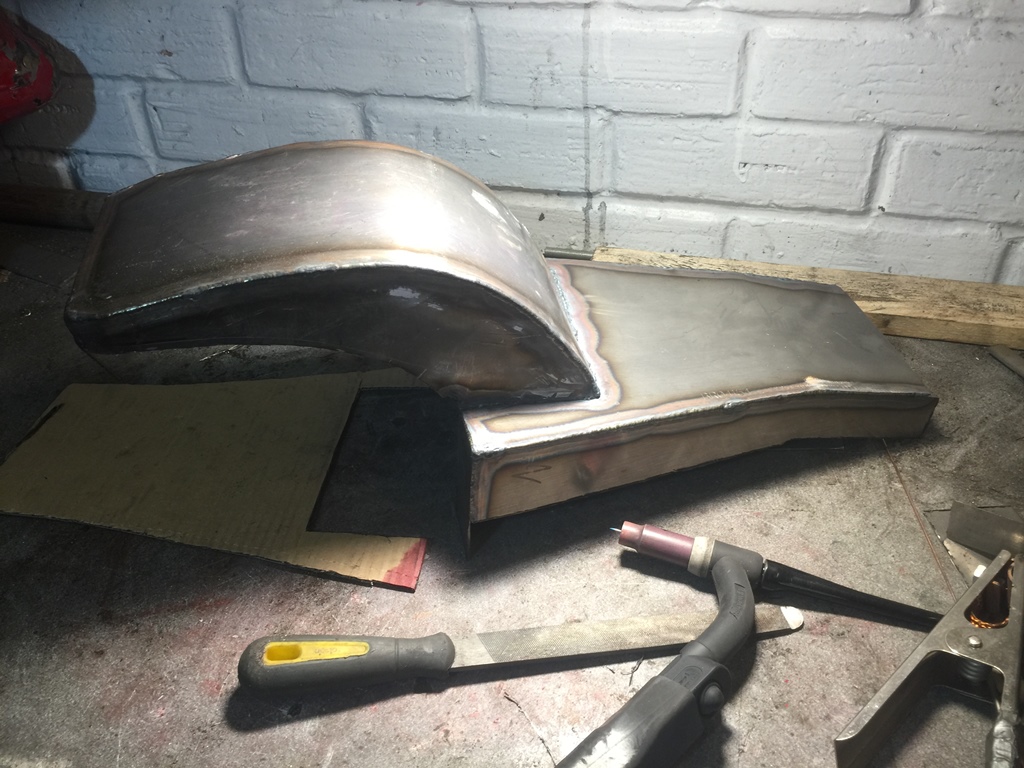
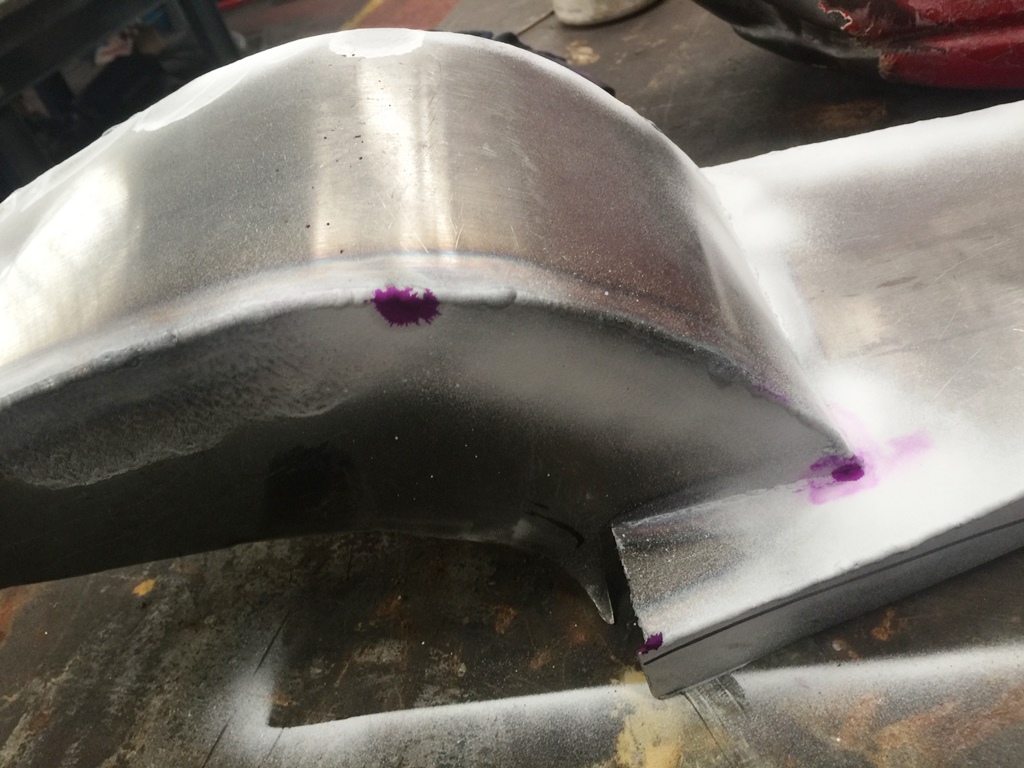
you should see it now! I was going to try to make a tank, but I really like the 999 one i have picked up cheap... but its taking quite a bit of work to modify to fit over the carbs. I have had to cut the bottom out and fabricate a new base. some of the welding is done, and I thought it best to dye pen the joints as its easier to correct leak on the outside of a joint, rather than inside when its all welded up... good job i did as there were two leaks. Dye penetration works amazingly well as you can see.
Biker's Nemesis said:
Wish I had skills like yours. Top work that man.
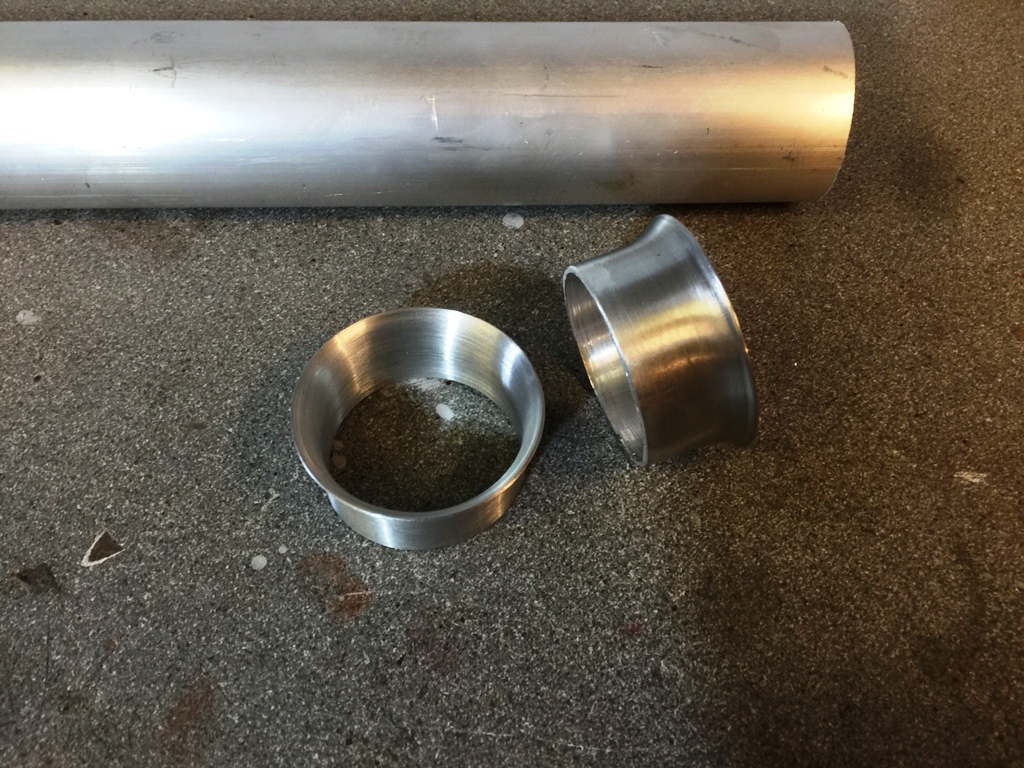
Thanks! skills have been learned over many years... I have always had good mates who were always happy to transfer knowledge, well before the internet and YouTube days!Finished the fabrication on the bottom of the tank, all pressure tested and no leaks! I have had problems finding a fuel tap big enough... most are 8 mm but the Honda carbs require 10mm pipe, they were a thirsty beast! found one in the end... but I wont be running a reserve. Also made a couple of short bellmouths to fit under the pod filters. they were made out of tube, and spun in the lathe to bell the ends out. to do this you need to soften the alloy first by annealing it. I have struggled with this in the past as you need to get the temperature right, but if you go too far, it suddenly melts into s a blob! the answer is simple, a trick picked up from a mate... scribble on the alloy with a sharpie pen... heat until the pen marks disappear, and stop heating! then let it cool. it works a treat!
horico said:
Love this, great work already! - what sort of capacity will you be left with on the tank vs std?
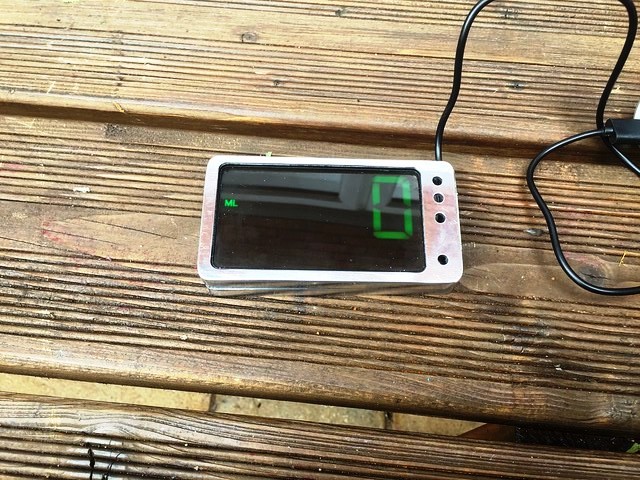
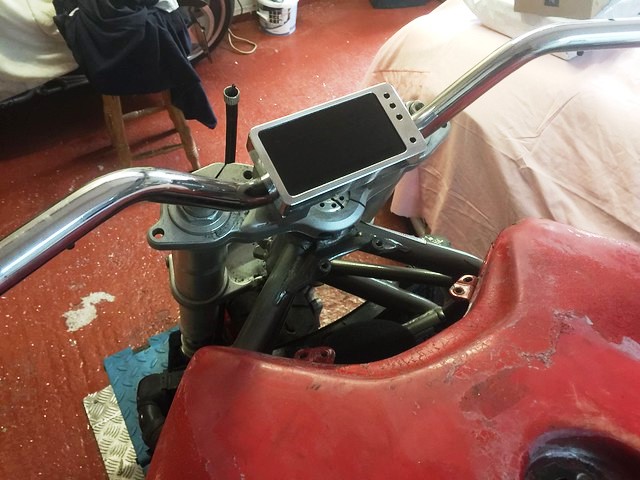
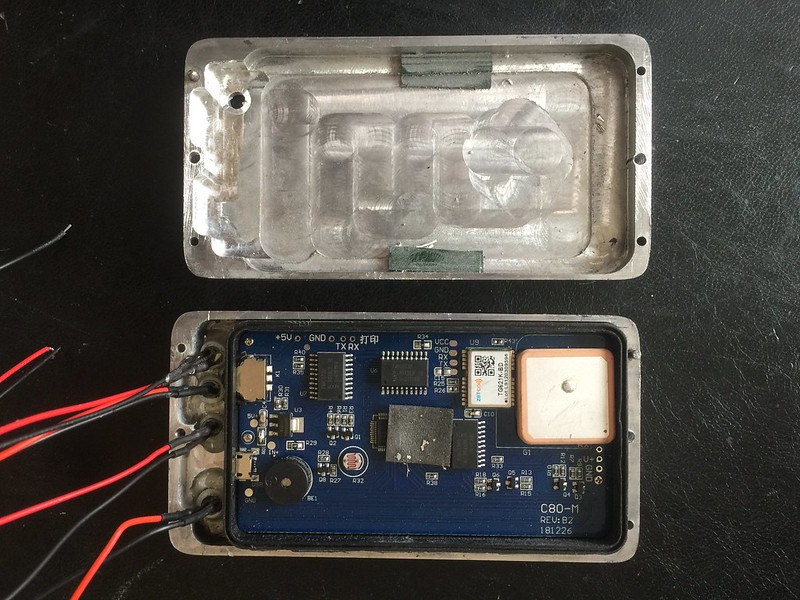
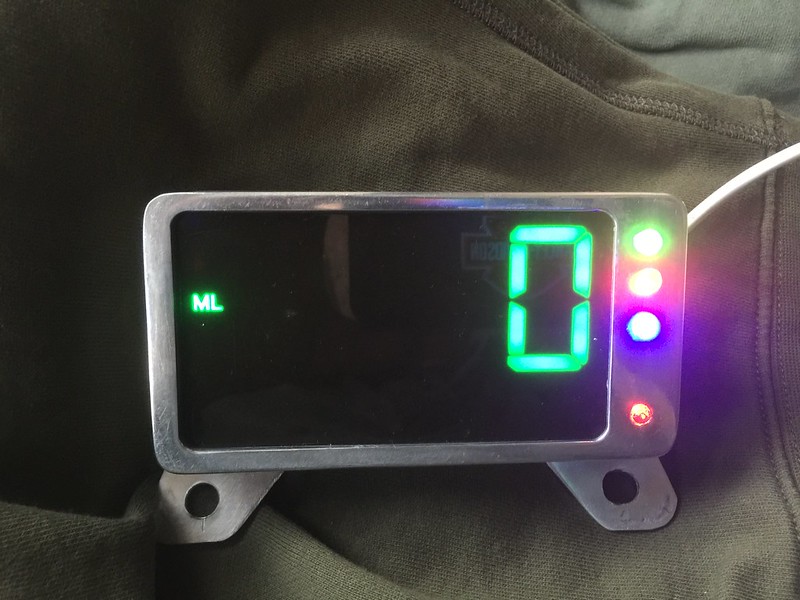
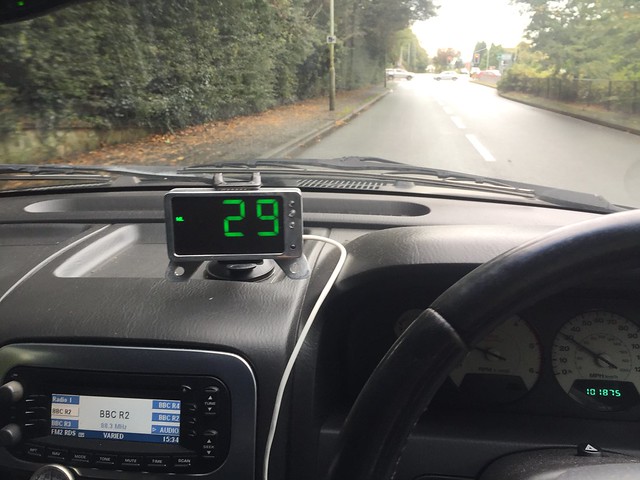
No idea yet, but I will fill it with water soon to see!sometimes you make stuff but are not sure… this is an example. I wanted the front of the bike to be clean looking… so I made this speedometer using a cheap GPS module that will come on automatically when the ignition is on. the holes are for some warning LED’s… not sure if I will use it yet. I am aware that technically its no legal to have a GPS speedo… but…!! Whats peoples opinions on the look?
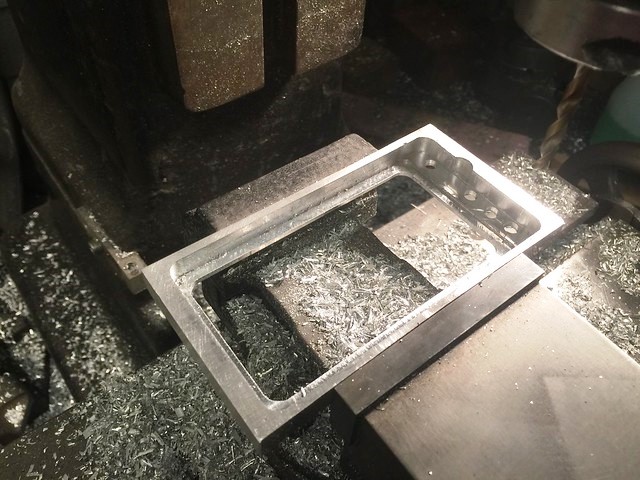
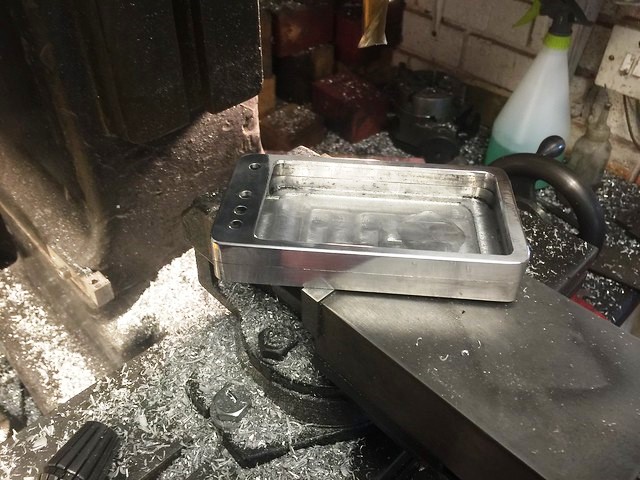
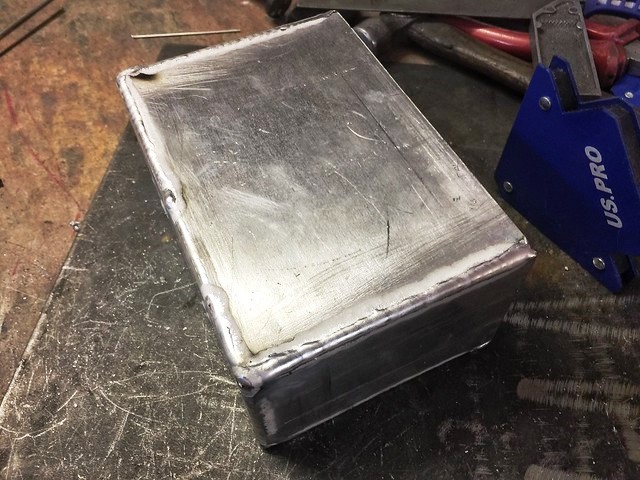
Also been practising my alloy welding with my new TIG welder to make a battery box for under the tank.
The exhausts are now fabricated, as is the seat, but I may shorten that a bit.. and I am undecided on the moto GP or the mega style of silencer, I guess I have plenty of time to decide.
The seat was made out of insulation foam, and cut and sanded to shape, which is VERY easy to do. its then covered with a few layers of glass mat and resin. I also had the headlight brackets water jet cut, they came out really well!
No updates for a while as we are off on holiday for a few weeks!

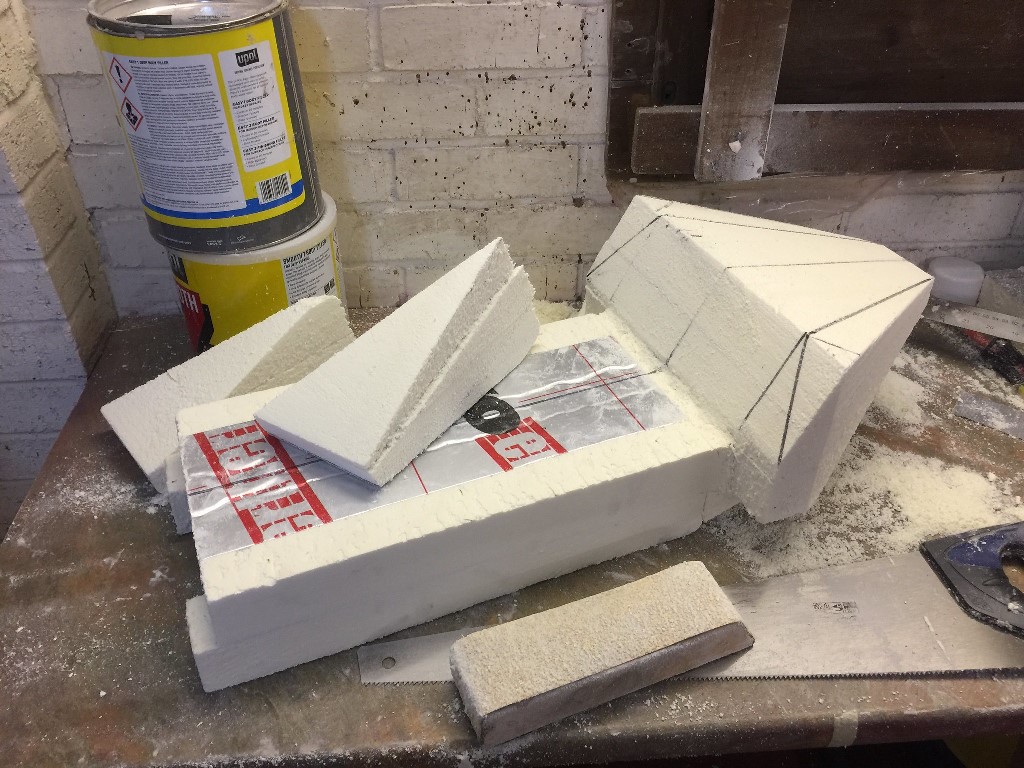
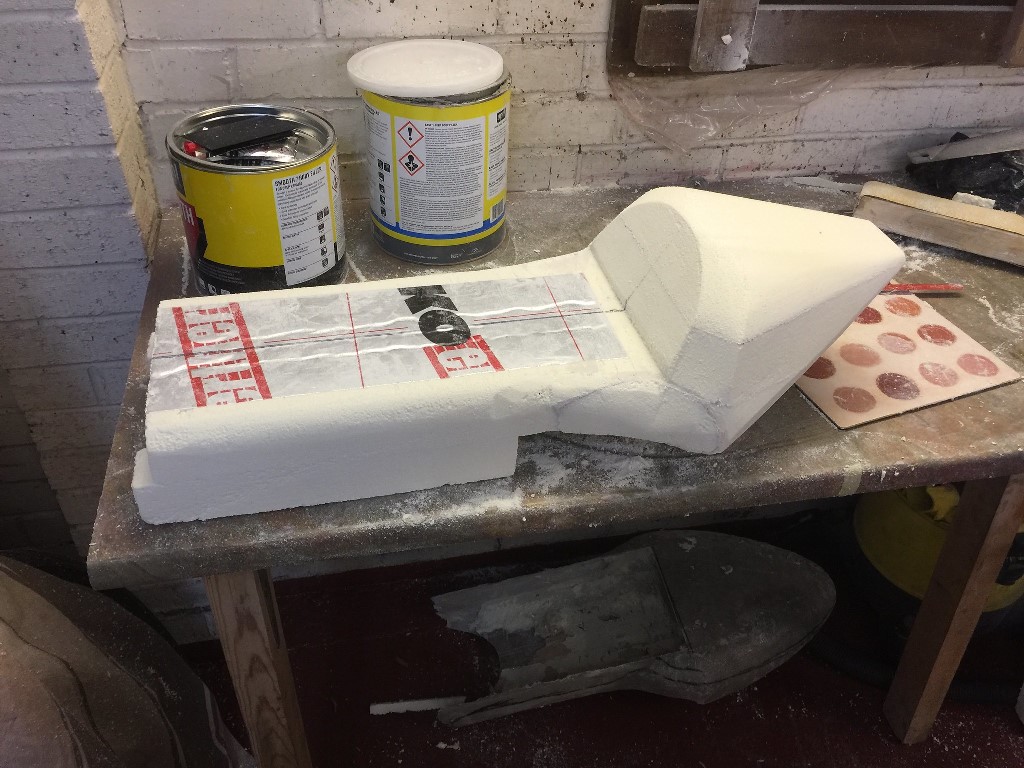
The seat was made out of insulation foam, and cut and sanded to shape, which is VERY easy to do. its then covered with a few layers of glass mat and resin. I also had the headlight brackets water jet cut, they came out really well!
No updates for a while as we are off on holiday for a few weeks!
poo at Paul's said:
Your build expertise and quality is beyond reproach, but can I just say I prefer the lines and proportions of this one already over the orange one!!
This will be a proper cracker!
Oh and do it the Ducati Yellow with the old skool logos, not red, orange or purple! lol
yes, I learned a lot after the last build... not sure on the colours yet...This will be a proper cracker!
Oh and do it the Ducati Yellow with the old skool logos, not red, orange or purple! lol
Edited by poo at Paul's on Friday 20th September 12:47
poo at Paul's said:
er what do you mean...…? I just told you the colour! 
Seriously Yellow will look awesome on it, and very "period" too!
it's going to be a terrific looking bike
I can't do yellow... I just...NO! well OK.... once its finished ready for the strip down I will take some pictures and play around in photoshop..Seriously Yellow will look awesome on it, and very "period" too!
it's going to be a terrific looking bike
there wont be any updates now for a while... she has forced me to take a holiday... off to the Peru and the Galapagos islands for three weeks...


I sat for a long time in the garage, imagining how I could make the footrests. I knew exactly where they should be as I want the riding position to be “just Right” like my other bike. one important factor was some sort of rubber mounting. the design proved to be difficult, and after mocking some up in plywood, I came to the conclusion it would actually be quite difficult. In the end I have used the footrest assemblies off a Multistarada, which combine all the attributes I wanted, with the bonus they were an easy fit! I have also braced the frame. A considered decision… so many of these bikes break their crankcases. hopefully this will prevent that.
The throttle linkage is also now done… The right throttle action can make the world of difference to how a bike rides. I bought a cheap twist grip and played around with different diameters until it felt right. I will make a replacement now to the correct dimensions.
Sign the weather is getting cooler... I have moved to the other side of the garage, near the radiators!
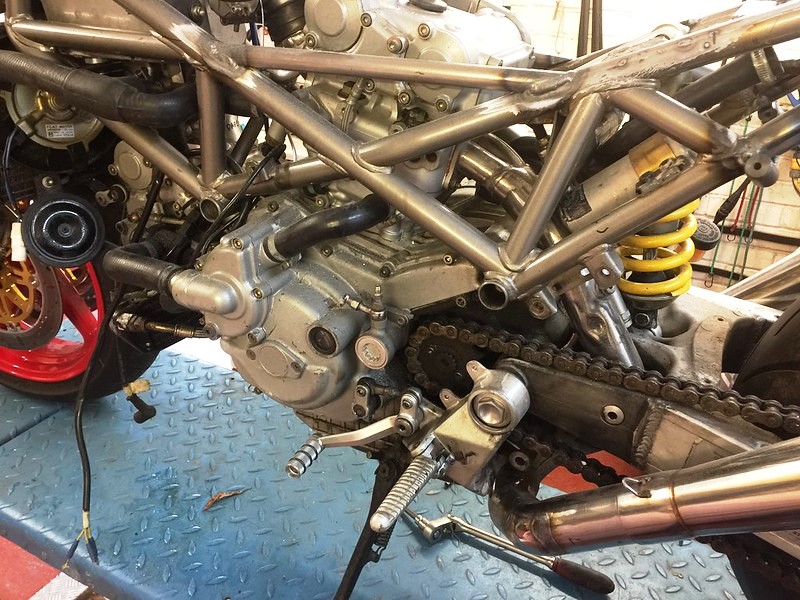
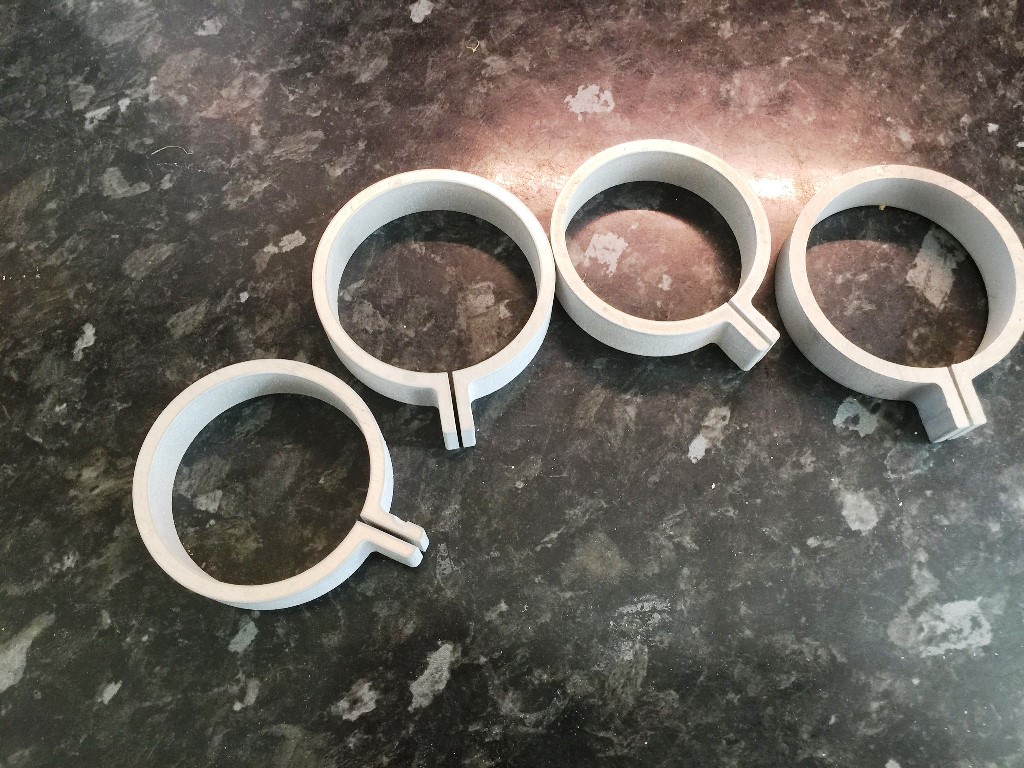
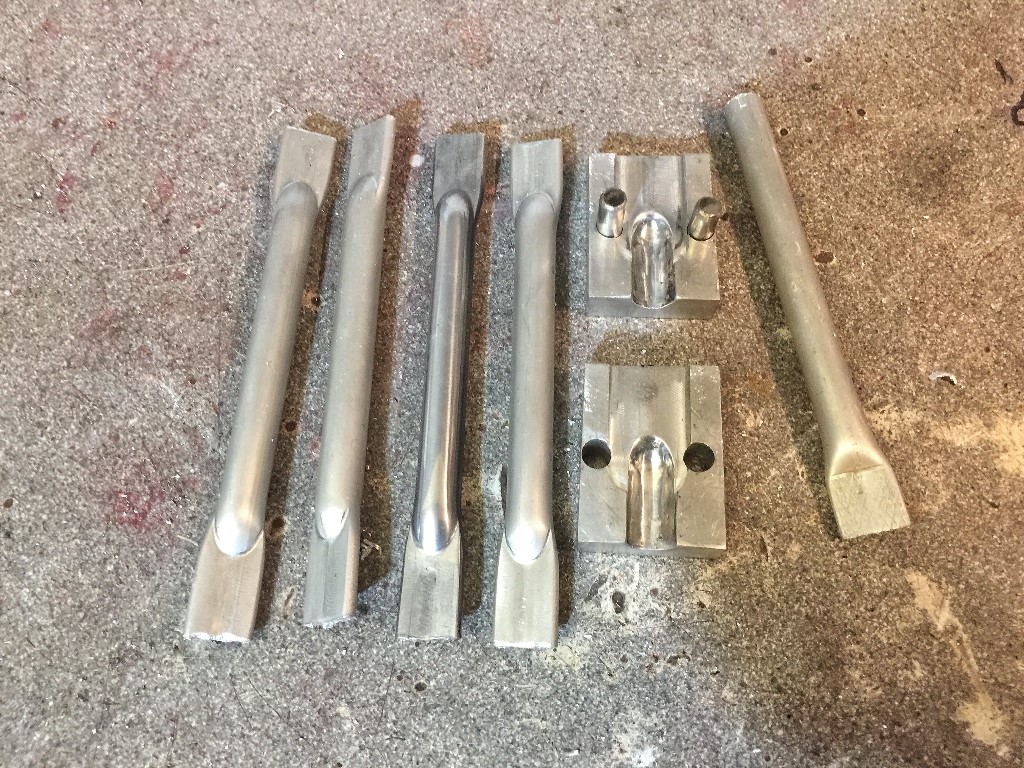
Made a couple of items in the last few days... first I have mounted the front mudguard, made some stays out of alloy tube, complete with formed ends to make them look better, and also less prone to cracking.
Also finished off the tank plate and mounted the ignition switch. this took a while as I panel beat it out of some alloy plate into a compound curve. I made a tool to press the raised portion to add a little strength, and make it look a little better. I have mounted it with some 5mm anti vibration rubbers. Of course all will need a polish, but that all comes after the mock up stage!
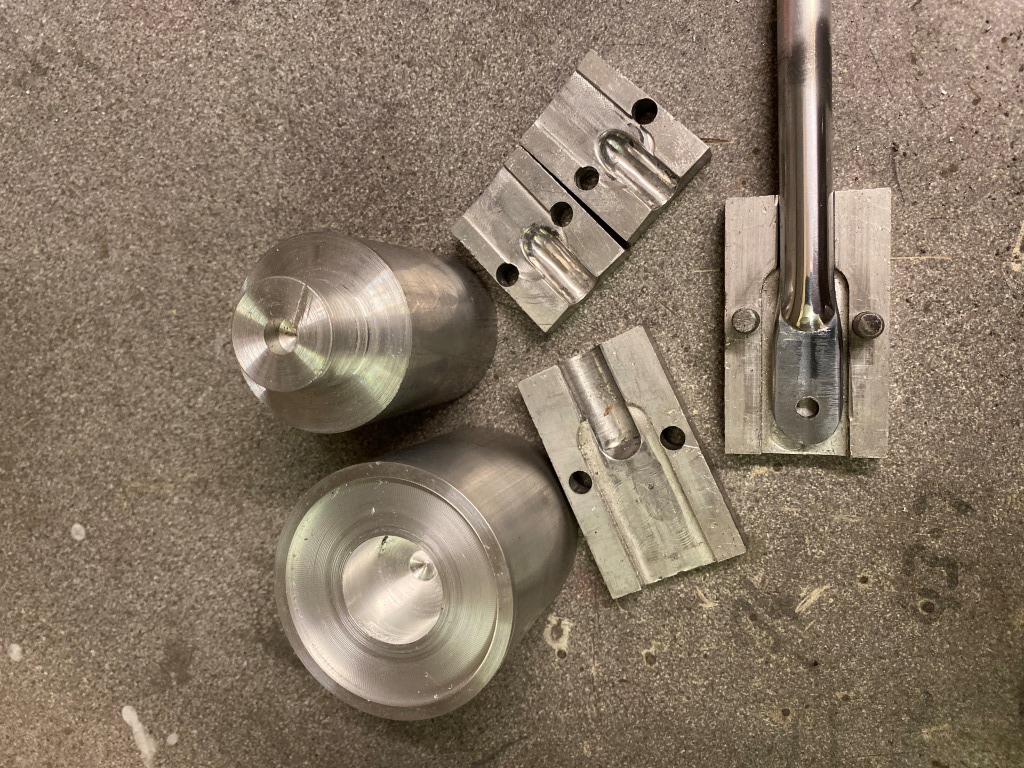

Also finished off the tank plate and mounted the ignition switch. this took a while as I panel beat it out of some alloy plate into a compound curve. I made a tool to press the raised portion to add a little strength, and make it look a little better. I have mounted it with some 5mm anti vibration rubbers. Of course all will need a polish, but that all comes after the mock up stage!
poo at Paul's said:
Liking the tank front cover thing, very nice.
The mudguard mountings, not so keen on. Not sure how else you can do them, and may look totally different when painted? I thnk its the spacing relative to the fork tube that looks odd. Front one looks a bit tight!!
there is plenty of clearance, its the angle I took the picture at... I pondered a long time how to mount it... it was the best I can come up with. we will see...The mudguard mountings, not so keen on. Not sure how else you can do them, and may look totally different when painted? I thnk its the spacing relative to the fork tube that looks odd. Front one looks a bit tight!!
Edited by poo at Paul's on Friday 1st November 09:18
Biker's Nemesis said:
Outstanding fabrication skills
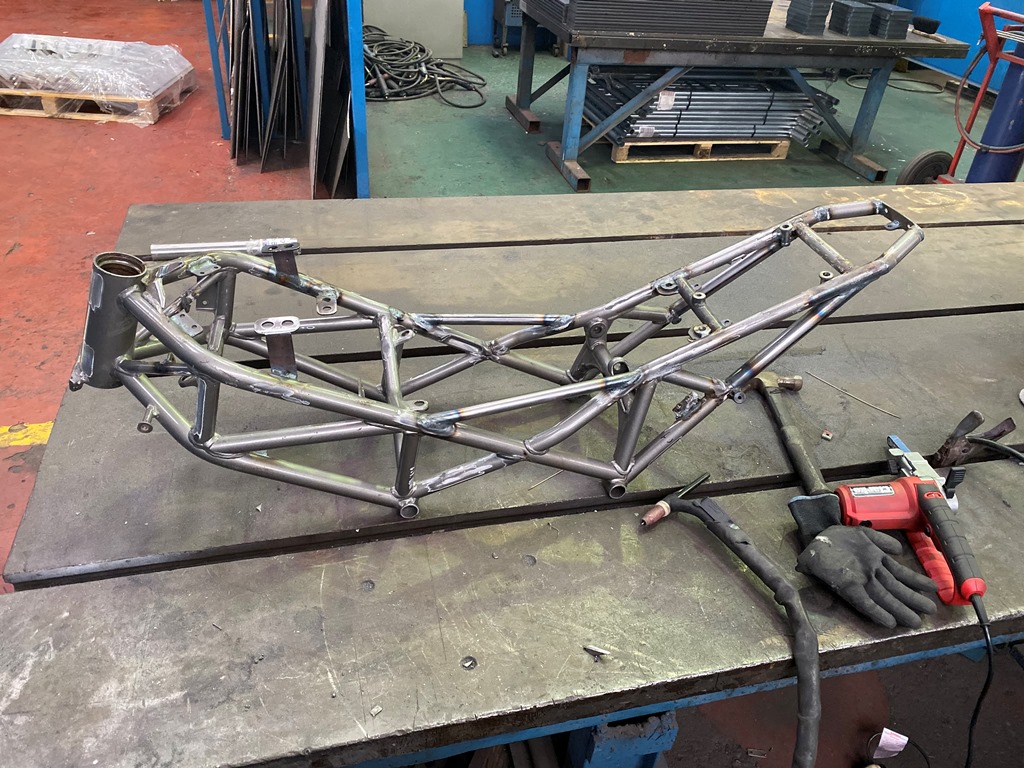
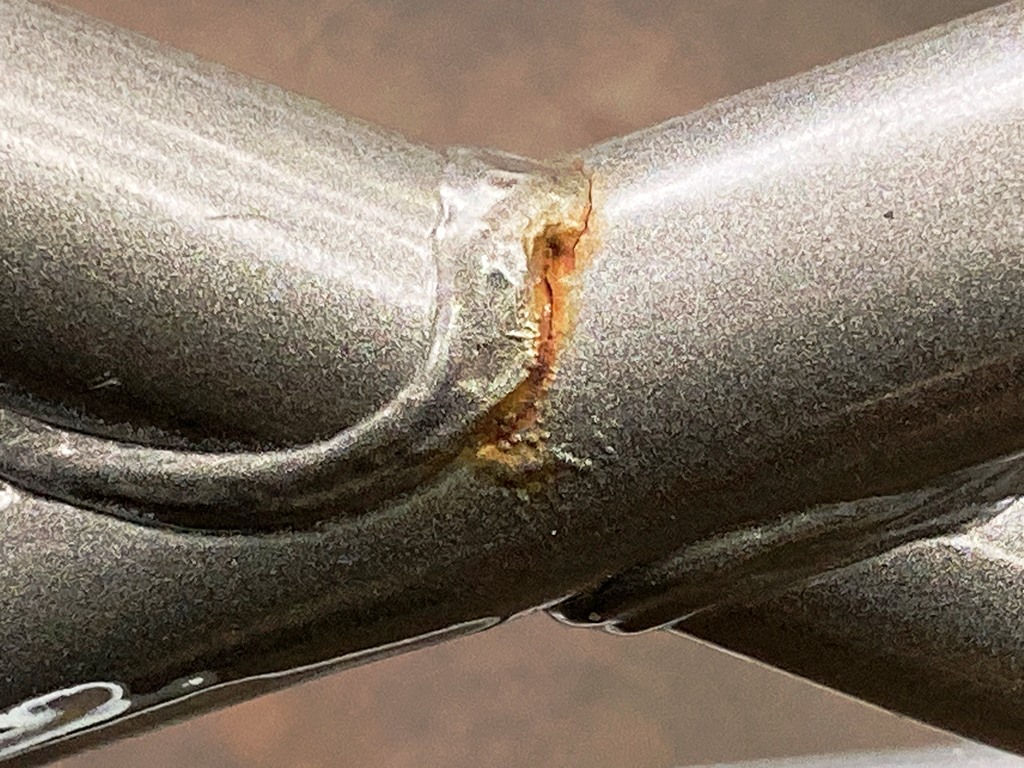
Thanks!Took the frame in to my mates factory today to fully weld it… its easier on the big bench, and his gas is a 10th of the cost of my small bottle at home! I noticed the cracks on the underside of the cross over frame tubes, both sides! really glad that I braced it now. I don’t feel its the best designed frame… and it seems to be a common fault
Gassing Station | Biker Banter | Top of Page | What's New | My Stuff