Ducati custom build thread
Discussion


June 2020. I normally build bikes over the winter months... but with Corvid -19 we are not going on any holidays or getting out much so my wife suggested I start my winter project early! I think she prefers me in the garage!
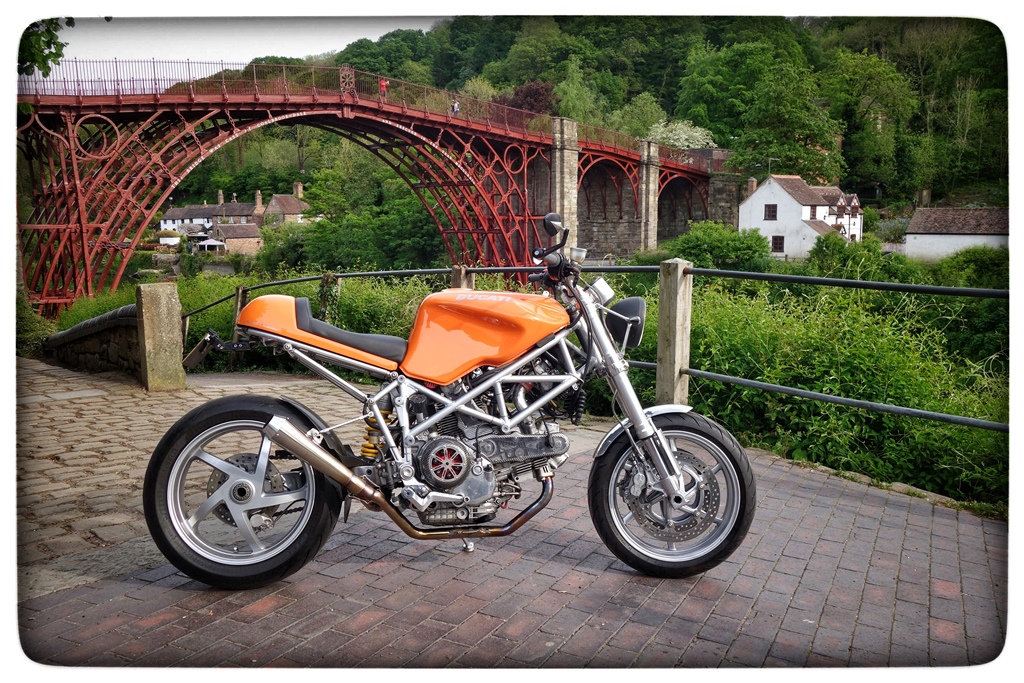
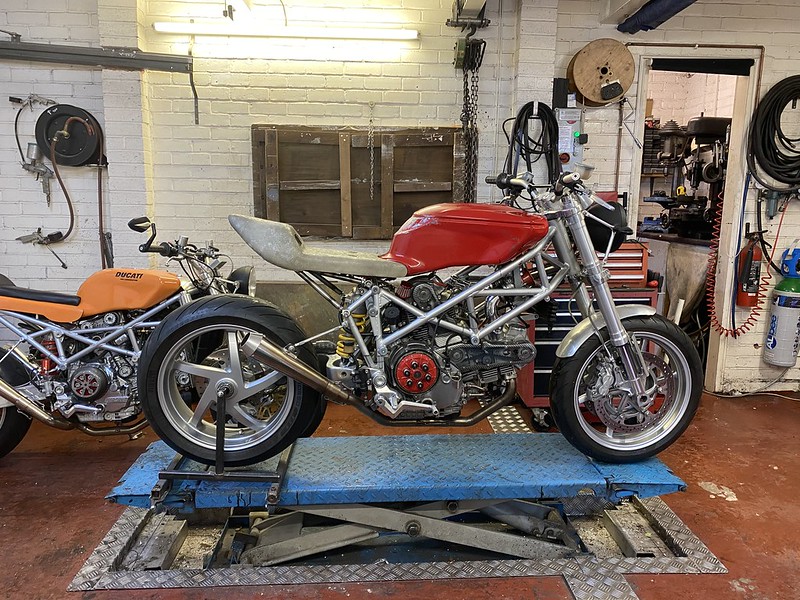
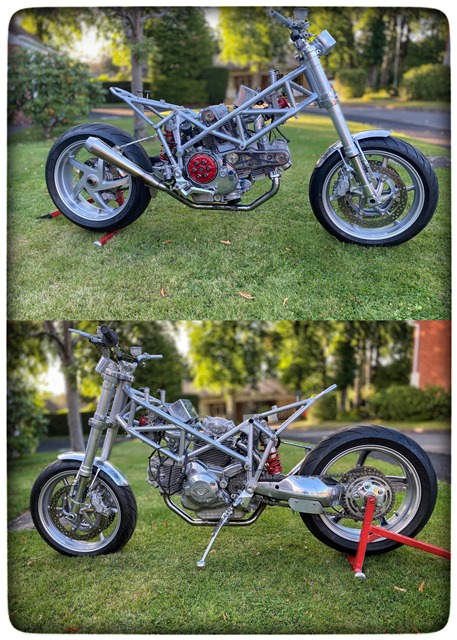
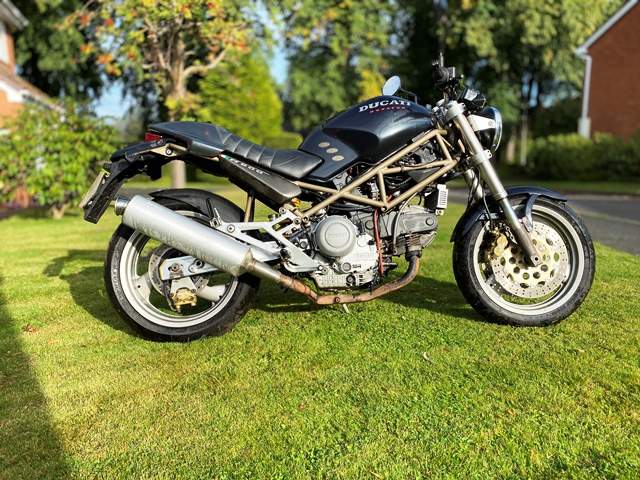
I bought this bike a few years ago... and over the winter 2018/19 I built it into this you see below... over the summer of 2019 I put quite a few miles on it... and actually loved the bike! it feels light and nimble, handles and brakes really well! I normally sell my bikes on, but this time I decided to keep it. A couple of things bugged me though... The tank I used was a compromise, it looks wrong to me, and although the carb conversion worked well... I felt the Monster 38mm Mikuni CV carbs held it back performance wise.
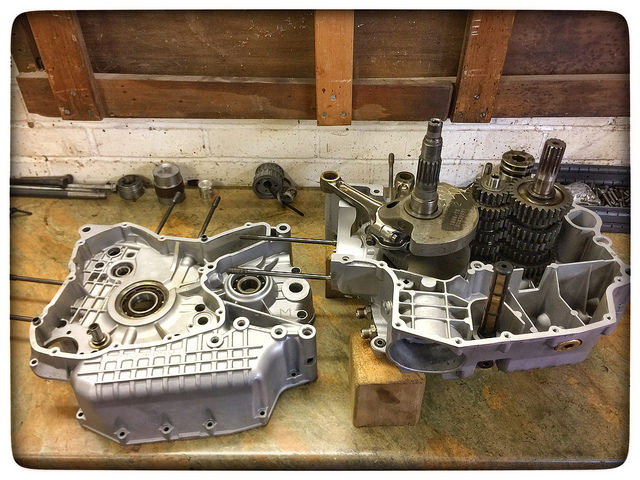
So its in for another rebuild/refresh... cosmetic only as I did the engine last time, and that is running well. I will be fitting some 41mm FCR carbs, a new tank (999) and making a new seat. And maybe change the exhaust...
this build will take some time... but I guess that depends on how corvid 19 affects daily life!


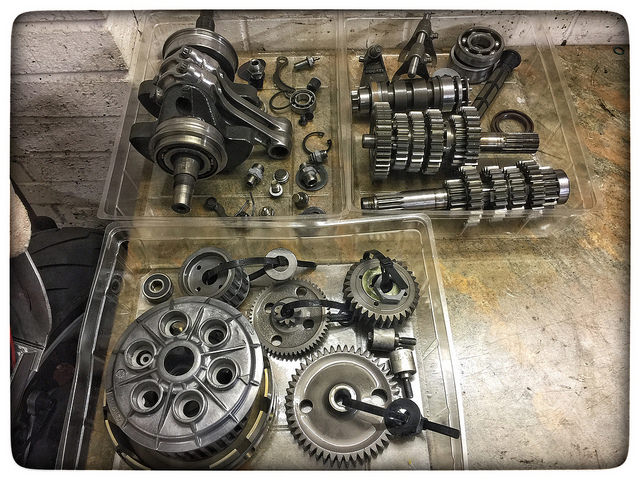
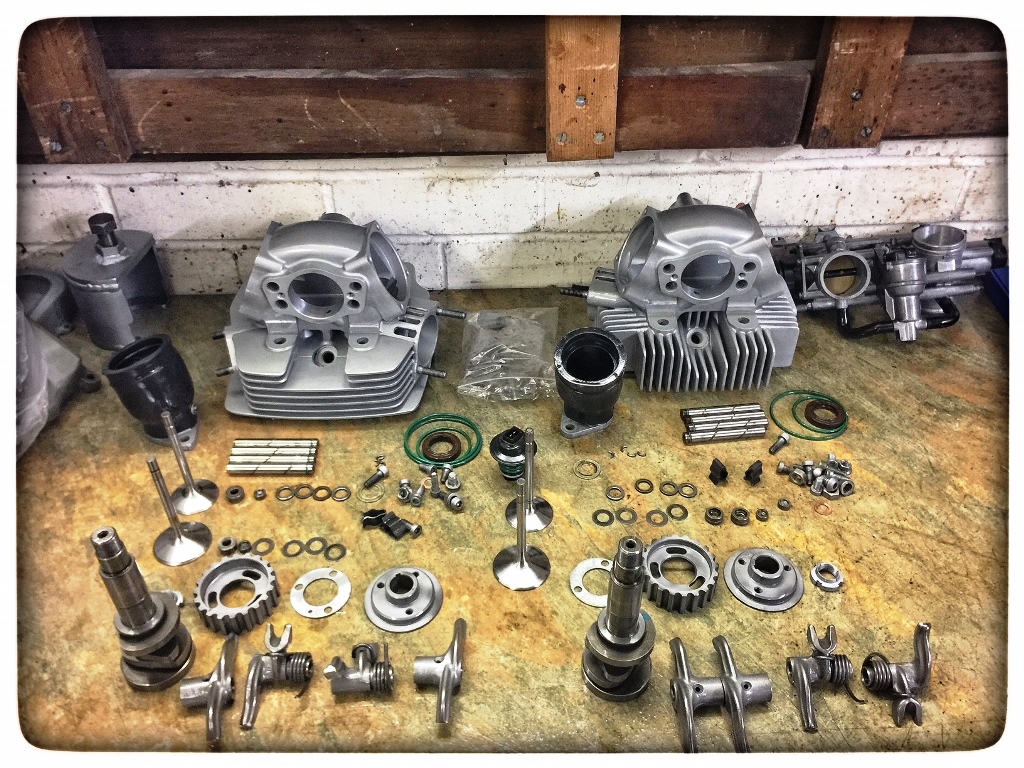
Here are a few pictures from the first rebuild...


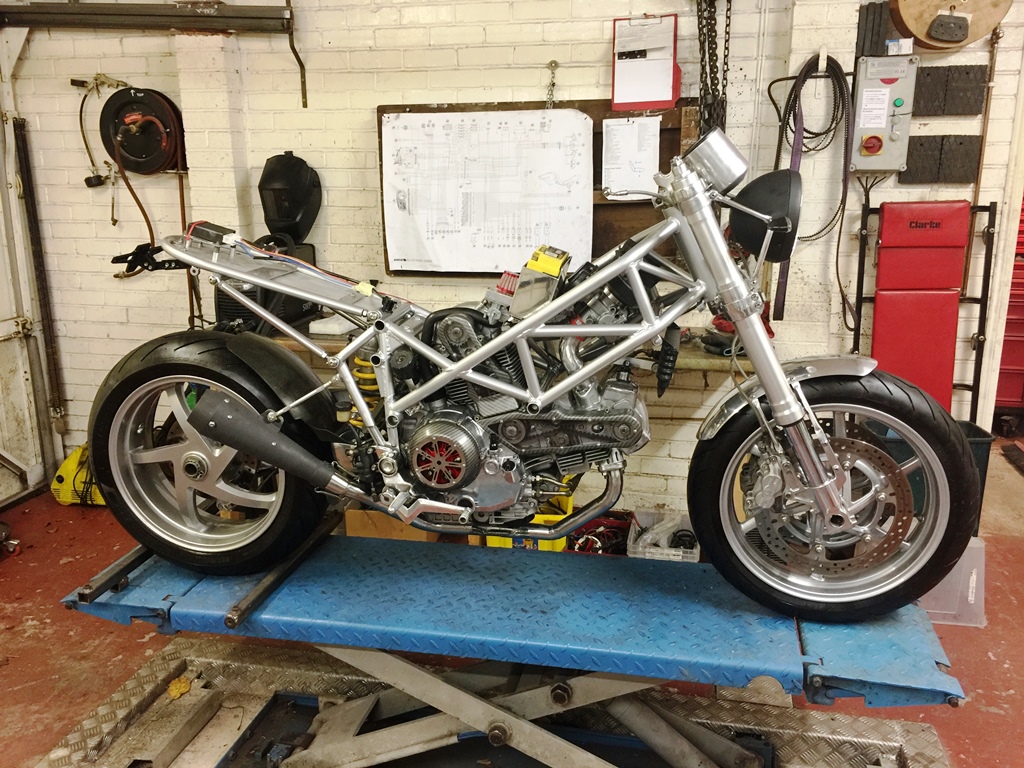


I bought this bike a few years ago... and over the winter 2018/19 I built it into this you see below... over the summer of 2019 I put quite a few miles on it... and actually loved the bike! it feels light and nimble, handles and brakes really well! I normally sell my bikes on, but this time I decided to keep it. A couple of things bugged me though... The tank I used was a compromise, it looks wrong to me, and although the carb conversion worked well... I felt the Monster 38mm Mikuni CV carbs held it back performance wise.
So its in for another rebuild/refresh... cosmetic only as I did the engine last time, and that is running well. I will be fitting some 41mm FCR carbs, a new tank (999) and making a new seat. And maybe change the exhaust...
this build will take some time... but I guess that depends on how corvid 19 affects daily life!
Here are a few pictures from the first rebuild...
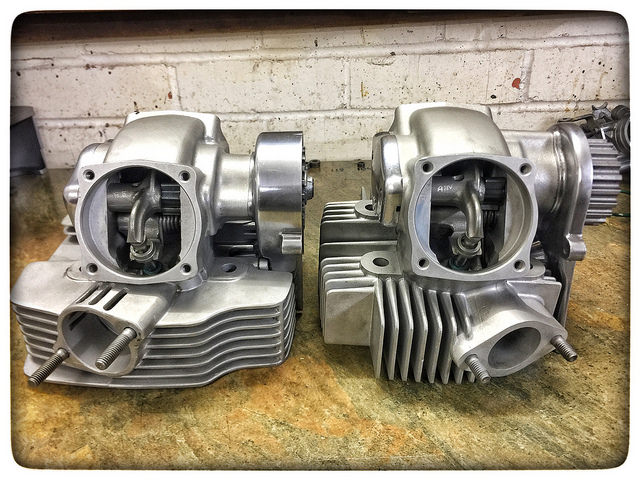
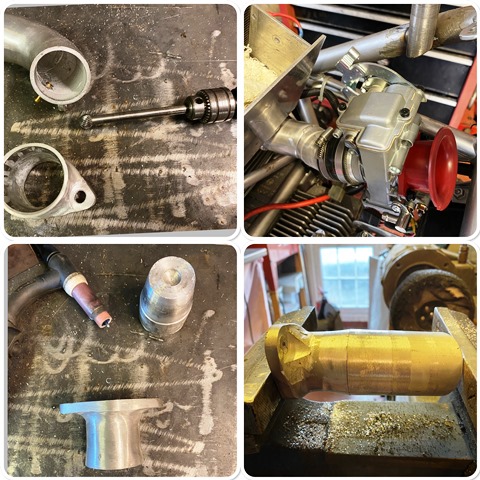
Been working on making the manifolds from scratch… it’s been quite difficult to get the shape and angles right, while maintaining approximately the same length.. there now though and I am pleased with the results. took a while to smooth the bore with the die grinder where I had penetrated with the TIG welds....

been a while since I updated...here is the subframe i have been making the last few days… I have deliberately kept it short as this will be a short single seat, which is the next job to do… I have used Rose Joints for no other reason than I just like the look of them!

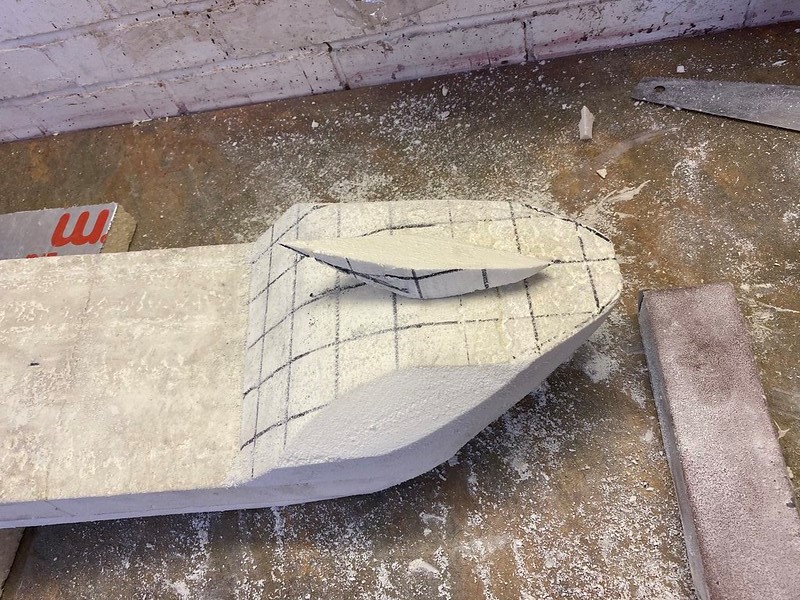
Next the messy job of making a seat, well I actually made two as I couldn’t decide on shape! Its the one thing many people ask how I do it, so I have written a tutorial on it rather than post all of it here.
here is the link to my blog page
https://jtccc.wordpress.com/projects-2/tank-and-se...
So just a few pictures…

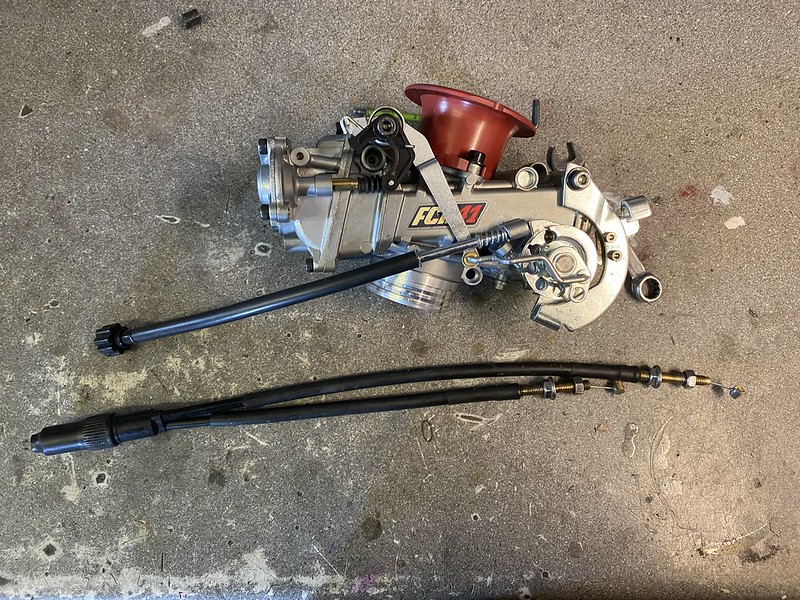
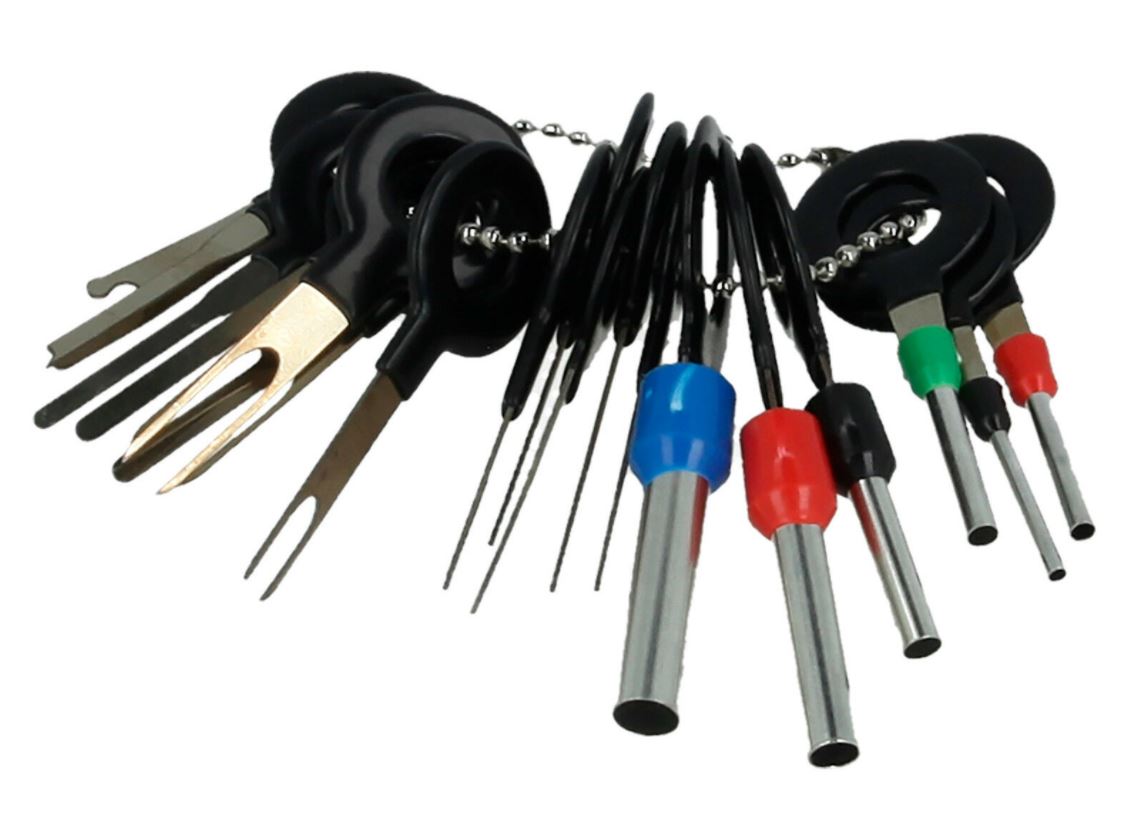
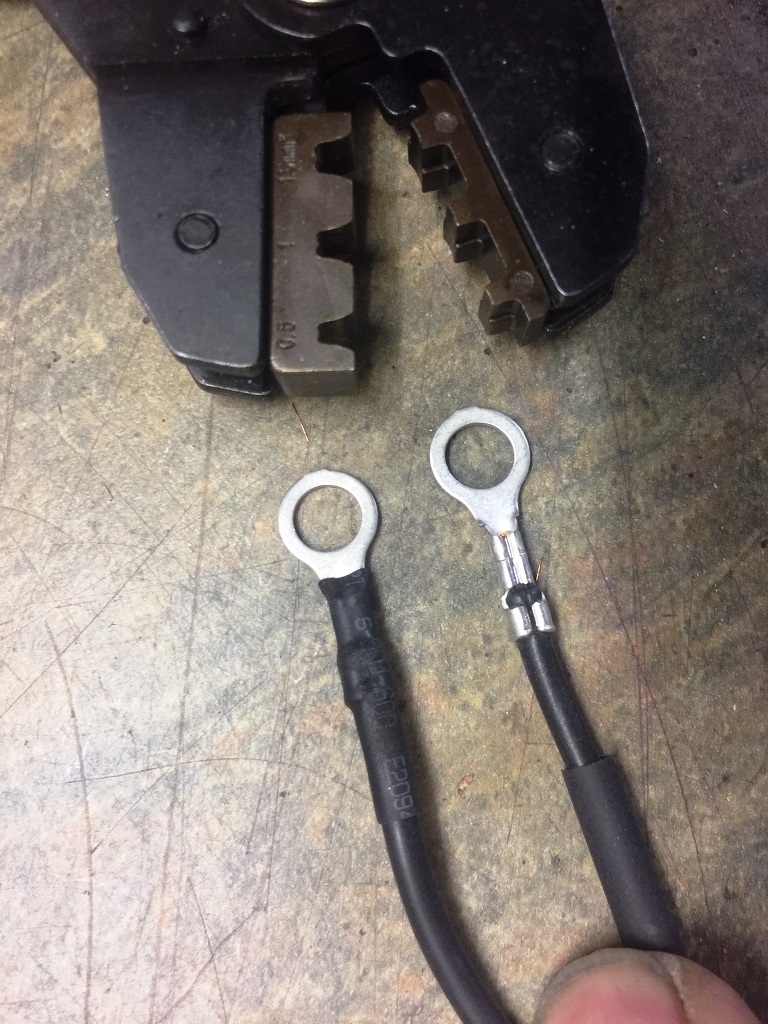
I made up some cables for the FCR’s. as they are split I have used a cable junction box, and made up the cables from scratch, including the brass nipples which I have soldered on.
here is a link to a video to see the action...
https://youtu.be/f0Xjr0e7Ukw
Next the messy job of making a seat, well I actually made two as I couldn’t decide on shape! Its the one thing many people ask how I do it, so I have written a tutorial on it rather than post all of it here.
here is the link to my blog page
https://jtccc.wordpress.com/projects-2/tank-and-se...
So just a few pictures…
I made up some cables for the FCR’s. as they are split I have used a cable junction box, and made up the cables from scratch, including the brass nipples which I have soldered on.
here is a link to a video to see the action...
https://youtu.be/f0Xjr0e7Ukw
8IKERDAVE said:
Wow! Great skills you have there sir, lovely work!
thanks!One of the things I have always struggled to get done is plating... I have had some terrible jobs done in the past, and lost critical small parts to the bottom of someone's plating vat!
so about 4 years ago I bought a plating kit to do zinc... Have to say it's VERY good and I have used it time and time again! its a bit time consuming, but time is something I have, particularly at the moment...
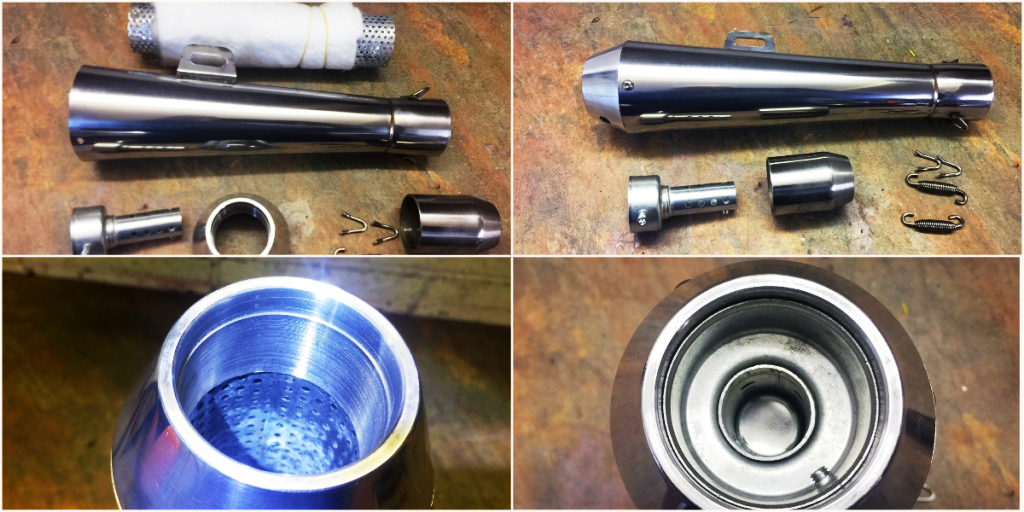
Here are the results for my latest build. the kit can do clear and yellow passivation, you can see the difference.


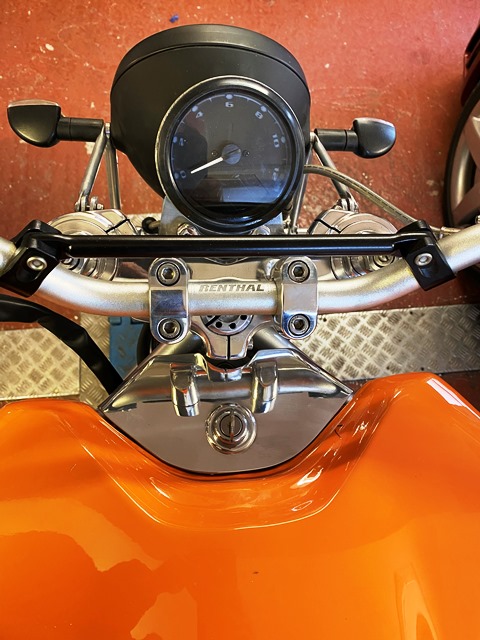
Now for the nice bit… putting it all back together! the frame came back from the powder coaters and as ever its a superb job! I know its a 50 mile round trip to this guy but his work is worth it, especially after the poor jobs I have had done in the past at local companies… Must be the easiest engine to put in a frame!


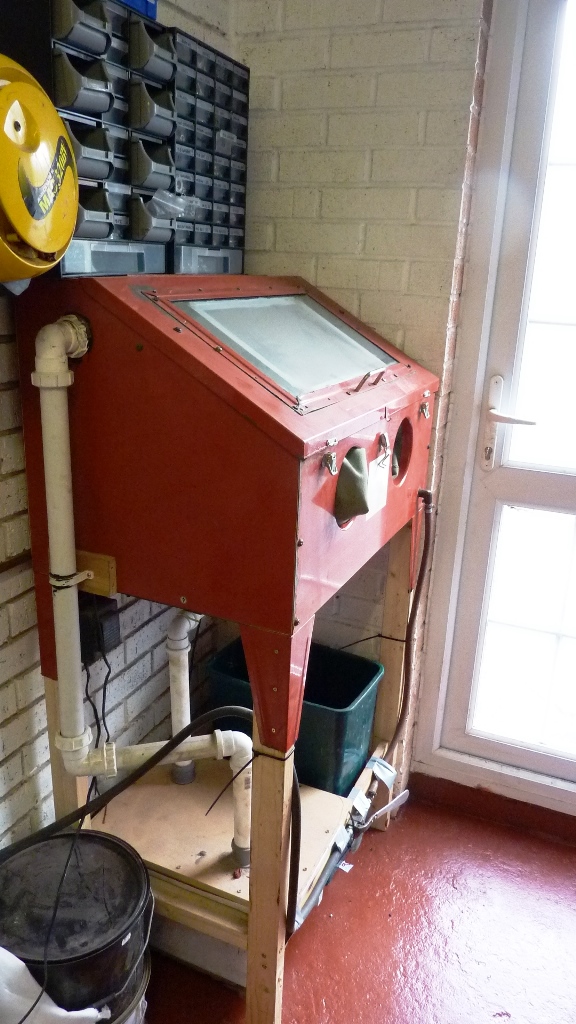
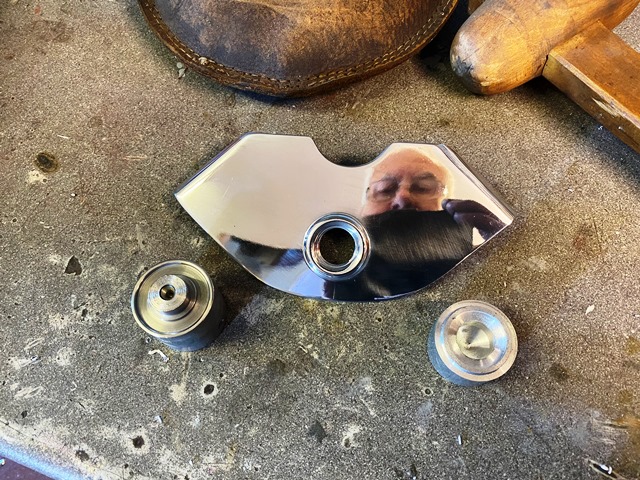
One of the benefits of having a blast cabinet is the ability to clean parts up easily... But I have always struggled to get that nice shiny finish the professionals manage to get with glass bead. I went to the bead supplier a while ago and said that I was having problems, and he asked what pressure I was blasting at, to which I replied 120 PSI. he said that's your problem... its too high and you are shattering the glass beads and the broken beads are giving you a matt finish! he said to turn the pressure right down, and then up until you got the finish you want! its so much better, you can see the difference in the reservoir caps! it also gives a closed finish that dirty finger prints just wipe off, on the matt surface they are difficult to remove!


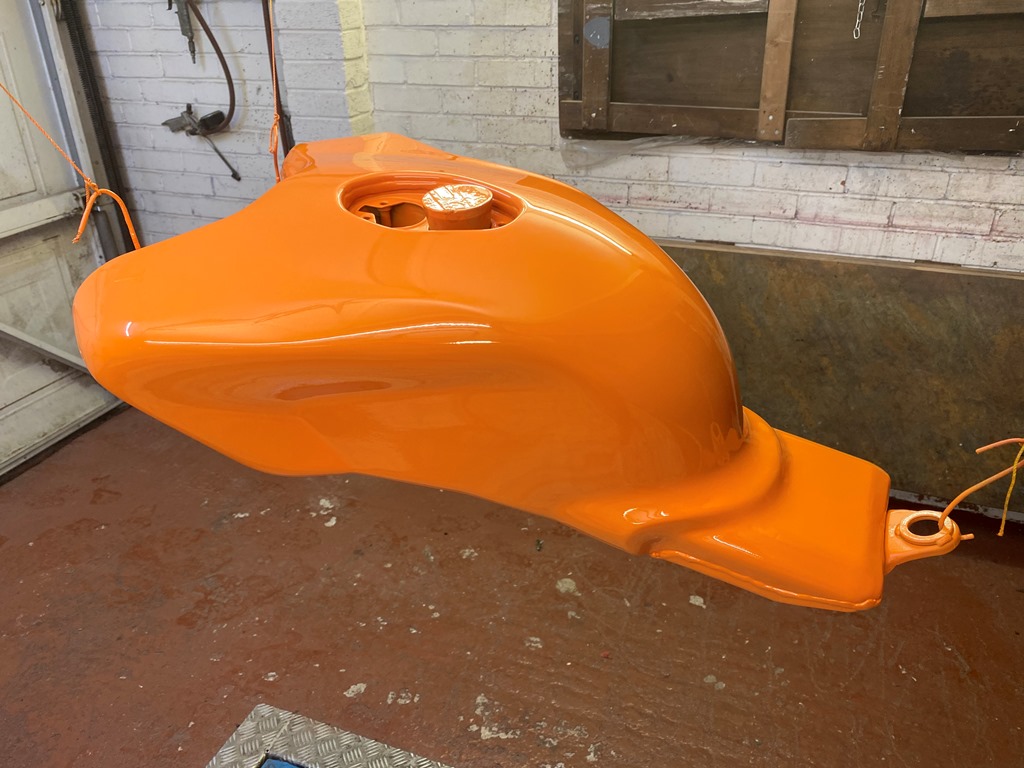
been painting the tank and seat today... one of the tips I picked up many years ago is that when spraying small items, use a torch in your other hand and shine it from below... you can see where you are wetting out the paint... I love the way 2K lacquer glosses from the gun these days!
link to video here...
https://youtu.be/umG5TAFmm7A

link to video here...
https://youtu.be/umG5TAFmm7A
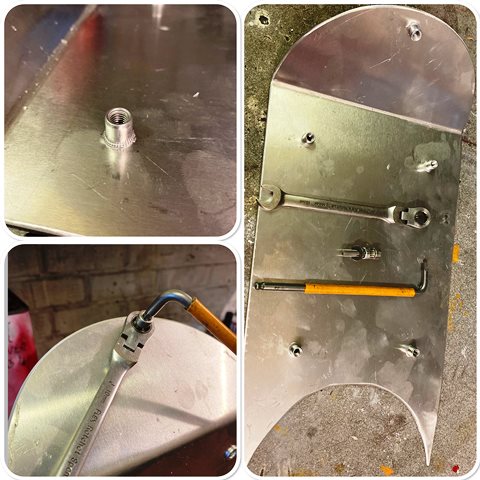
started work on the seat base. I have cut it to shape and added the Rivinuts to hold it on. I have used aluminum ones as these are much easier to pull in with a nut and bolt if you don’t have the special tool to draw them in…
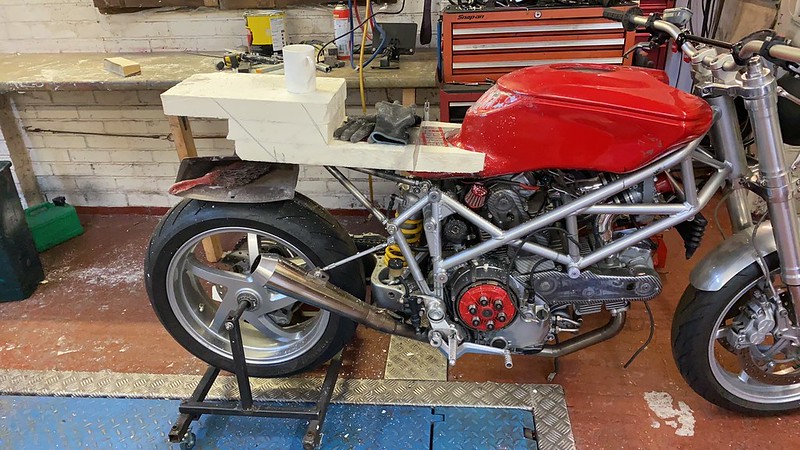
Also a picture of how its looking... I know this build will finish well before Spring next years so I have bought another project to see me through the dark months of winter... watch this space!

Also a picture of how its looking... I know this build will finish well before Spring next years so I have bought another project to see me through the dark months of winter... watch this space!
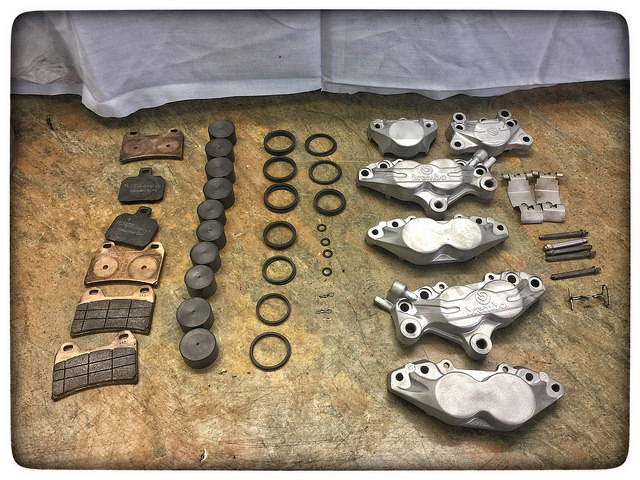
The front one started life as a multistrada and the rear one an ST4s...
More details of my builds on my blog 👍
Www.Jtccc.Wordpress.Com
More details of my builds on my blog 👍
Www.Jtccc.Wordpress.Com
 t thats blown my mind, thats crazy talent you have to make something so hideous (in my opinion!) into something so cool. Will definitely be checking out the blog
crofty1984 said:
Can I ask - What is the width of the frame?
I have a race fairing that is quite narrow and was thinking of getting a monster to put it on.
the width of the frame is 11"I have a race fairing that is quite narrow and was thinking of getting a monster to put it on.
Still in the middle of a build of a multistrada special when a bike i have always wanted came up at a bargain price… an early Ducati Monster. With the prospect of limited going out and no holidays due to Corvid, and the fact the current build will be finished before winter, I decided to buy it! here it is… It's a bit tatty, but it runs well and sounds sweet. Ripe for restoration its going to the back of the garage for a while… this will be a straight restoration though, probably red as I like red monsters!

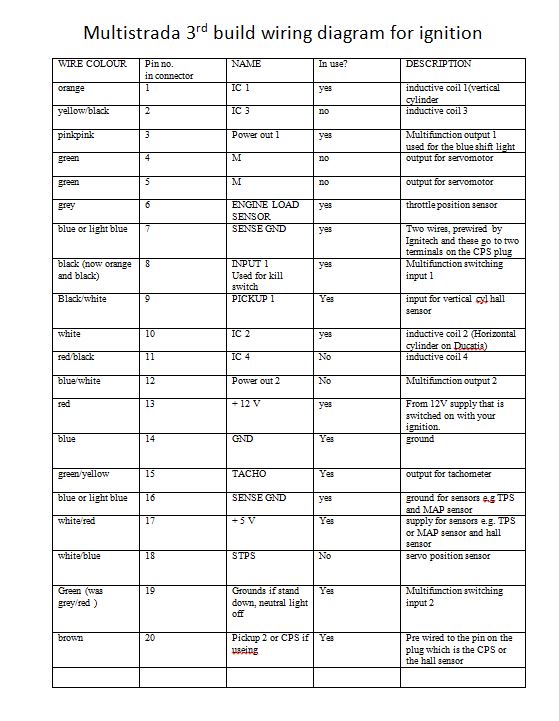
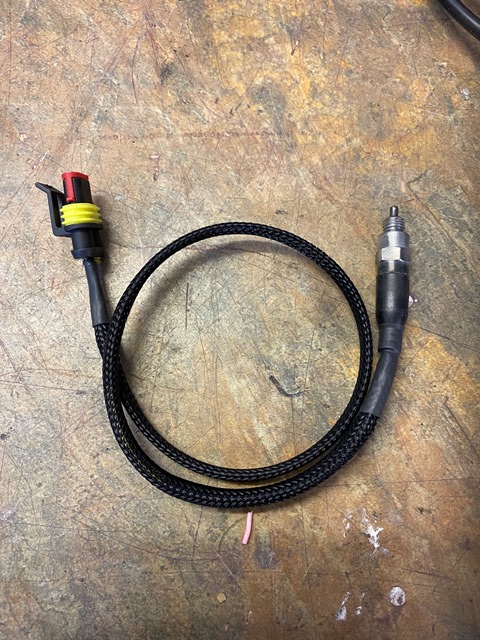
On the last couple of builds where I have converted from EFI to carbs I have used an Ignitech ignition unit that utilised the original induction sensor. While the bikes ran OK, I had to make adjustments in the software to compensate for the fact that the values in the software differed from what was actually happening on the bike, plus the tick over was not as steady as I would have liked… This irritated me, and Ignitech themselves refused to answer emails for advice… so I investigated a hall effect setup.
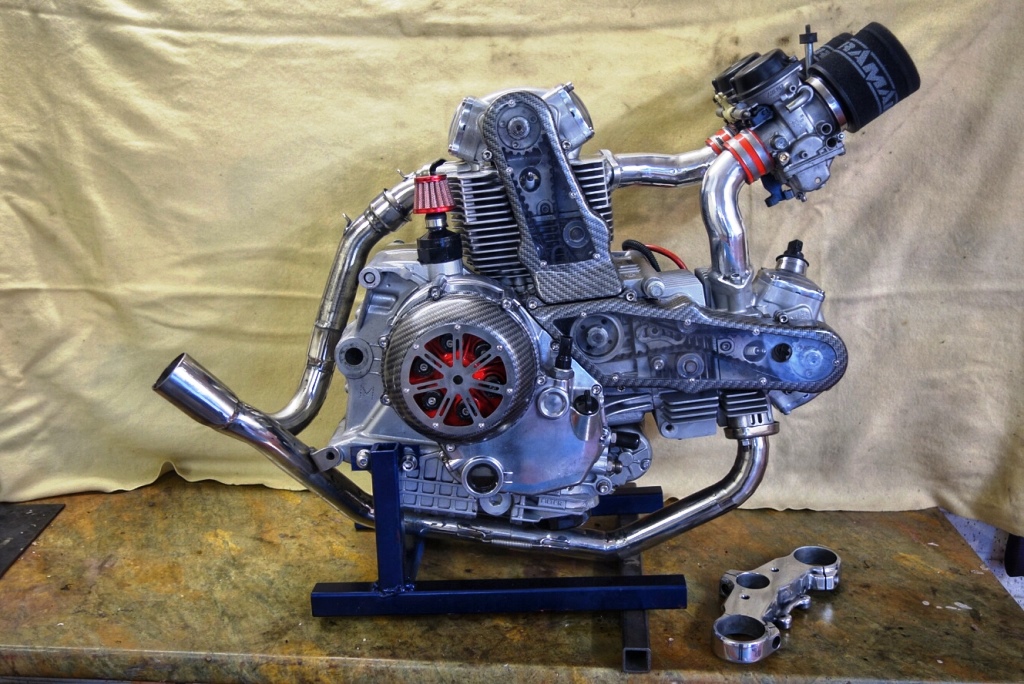
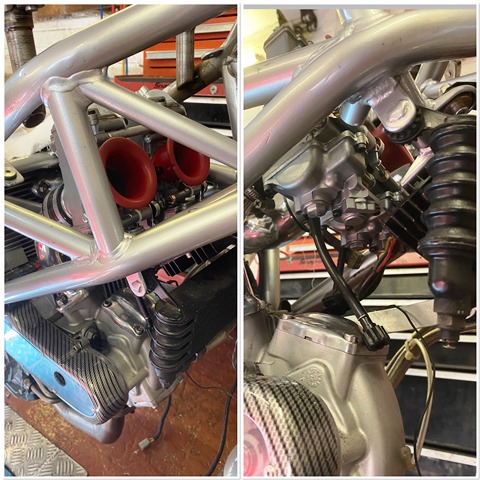
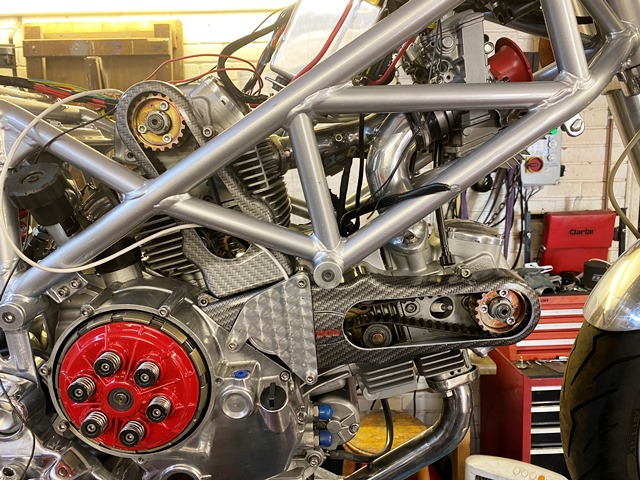
I read about it on the fastbikegear website (Liam has been VERY helpful) and decided to give it a go… The sensors are tiny, and sense two small magnets in the cam wheel through a couple of 3mm holes in the alloy plate. South Pole switches it on, north off, so it’s important to get them the right way round, hence the magnet and phone! Here is how I made it, took a while! The values in the software now match the actual advance when checked with a strobe, and the tick over is rock solid! I have shown it here on the 996 engine as that bike is on the road…
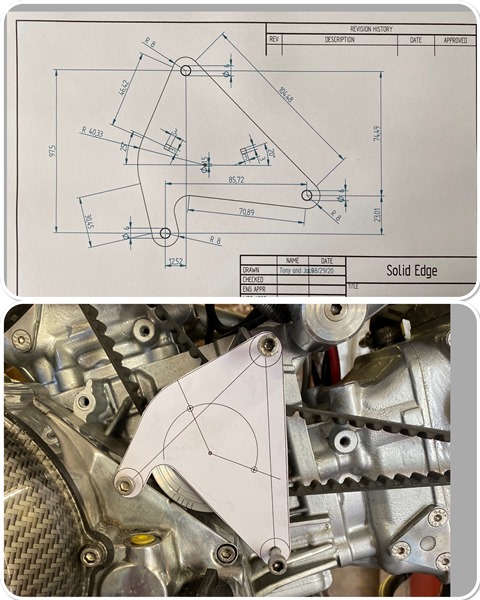
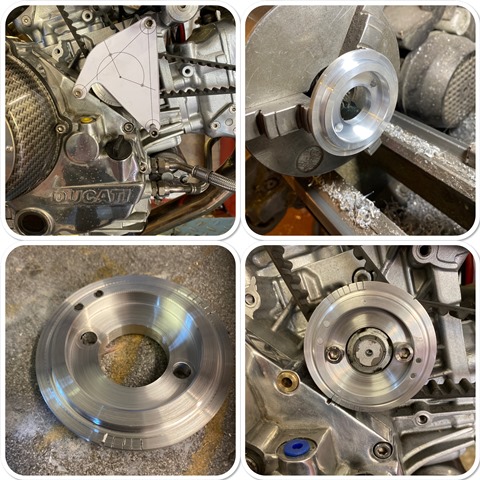
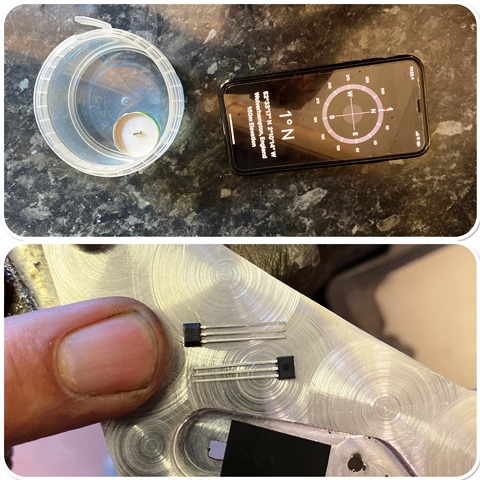
I read about it on the fastbikegear website (Liam has been VERY helpful) and decided to give it a go… The sensors are tiny, and sense two small magnets in the cam wheel through a couple of 3mm holes in the alloy plate. South Pole switches it on, north off, so it’s important to get them the right way round, hence the magnet and phone! Here is how I made it, took a while! The values in the software now match the actual advance when checked with a strobe, and the tick over is rock solid! I have shown it here on the 996 engine as that bike is on the road…
well its running really well now, and its got a very stable tickover... dry clutch always sounds like a bag of spanners through!
here is a short video...
https://youtu.be/M_b45UEcvsA
here is a short video...
https://youtu.be/M_b45UEcvsA

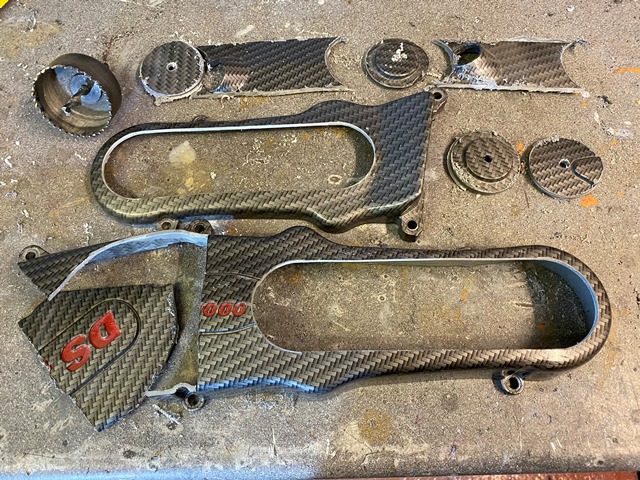
Run out of a few wire connectors so moved onto the cam belt covers till they come… I made some of these a few years ago and they worked well… but this time I have made the holes oval and I think they look better. used a hole saw to cut the circles, and a saw in the dremel to cut the straight bits. just got to carbon dip them now and make the polycarbonate windows…
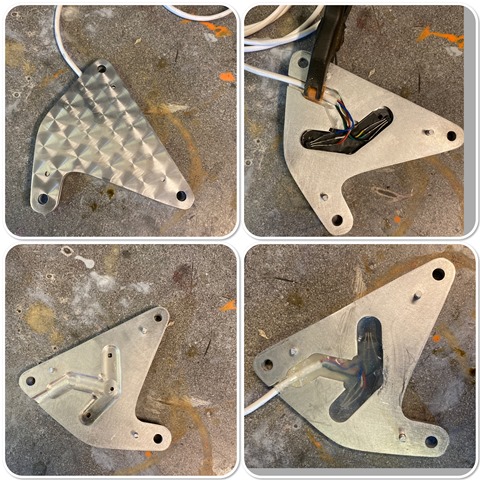
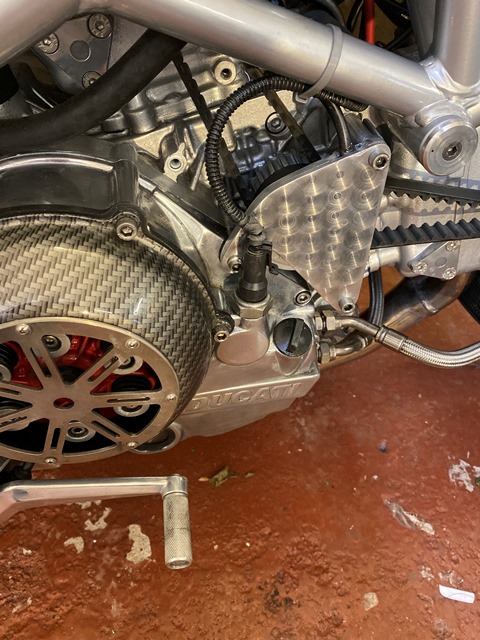
Also mounted the plate that holds the hall sensors
Also mounted the plate that holds the hall sensors
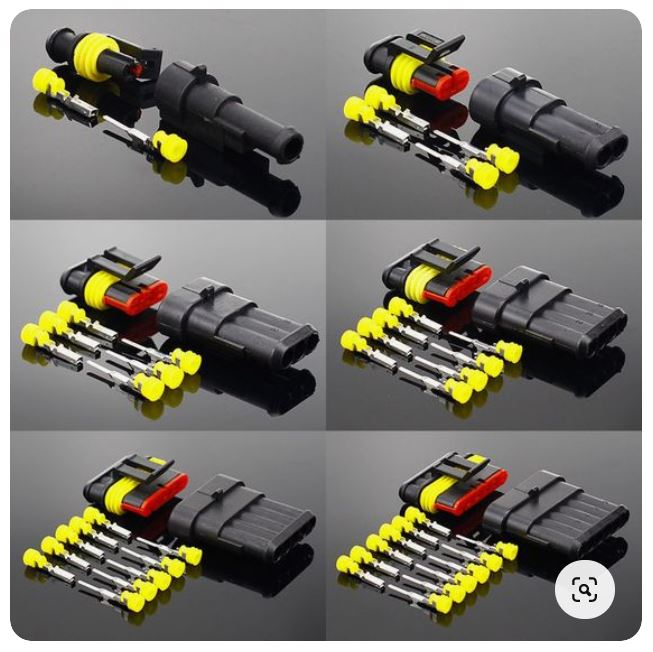
for some parts of the loom I have used this braided sheathing... its a bit fiddly to do but the results are good. I notice a lot of cars use this now on the loom.
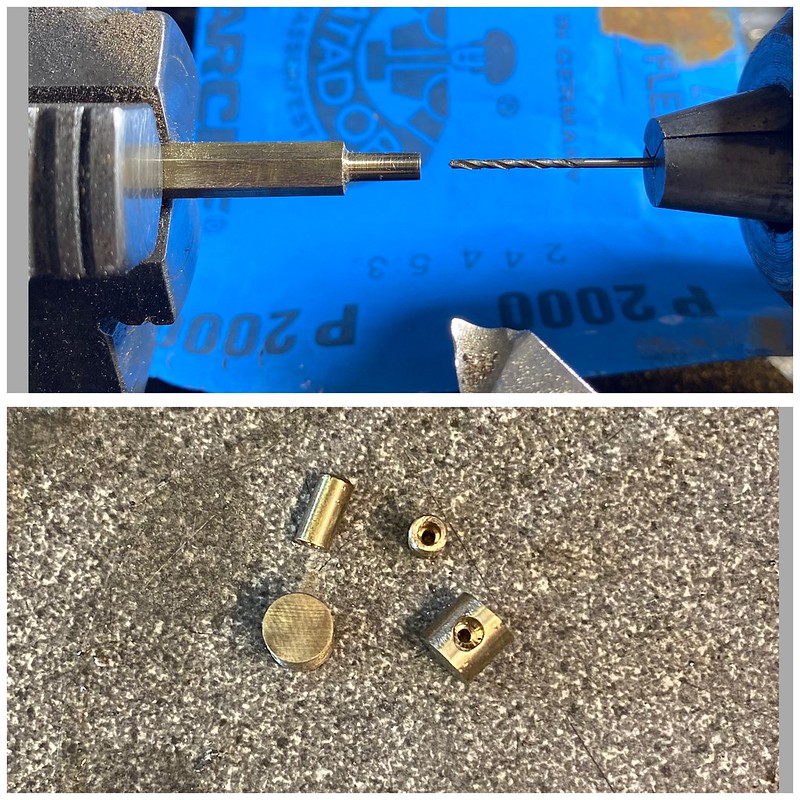
Another job I have been meaning to get around to... The FCR carbs need a one into two cable setup. I was going to use a junction box off an old British bike, but all the ones I could see were either too short on the pull distance, or terrible quality, so I decided to make one. I was going to make it out of aluminum but had difficulty getting nice threads, probably due to the grade of alloy bar I had. so brass it is. It also allowed me to put longer holes to retain the cables, all the ones I looked at only had short holes.
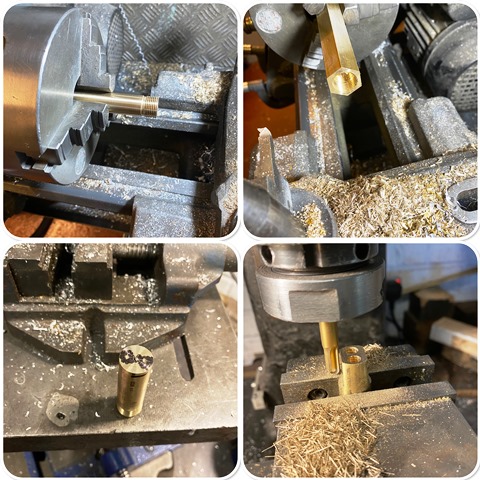
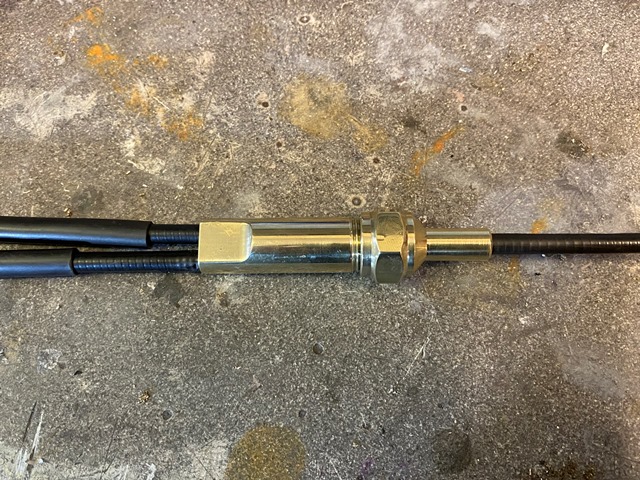
Another job I have been meaning to get around to... The FCR carbs need a one into two cable setup. I was going to use a junction box off an old British bike, but all the ones I could see were either too short on the pull distance, or terrible quality, so I decided to make one. I was going to make it out of aluminum but had difficulty getting nice threads, probably due to the grade of alloy bar I had. so brass it is. It also allowed me to put longer holes to retain the cables, all the ones I looked at only had short holes.
Gassing Station | Biker Banter | Top of Page | What's New | My Stuff