How to service a Ducati 750ss - Documented with pictures
Discussion


Its time for me to service my new Ducati, so i thought i would document on here everything i do incase it helps anybody else who wishes to do the same jobs themselves or inspires anyone to maintain their bikes at home and save a few quid.
The Ducati will be treated to a full major service, and each this will be documented here with a step by step as well as lots of pics.
The service will include:
-Engine oil and filter change
-Spark plug replacement
-Fuel filter replacement
-Throttle and choke cable freeplay check
-Air filter replacement
-Brake check
-Brake fluid replacement
-Clutch fluid replacement
-Suspension check
-Wheel bearings check
-Fuel system checks
-Front fork oil replacement
-Control cables and pivot points lubrication
-Cam belt replacement
-Valve clearances (check and adjust)
The parts i needed for all of this came to around £160, a minor service would have cost around £60 (Much better than £800 quoted from a Ducati dealer!)
I will also be removing the alternator casing to repaint it as it is corroded and looks a mess at present.
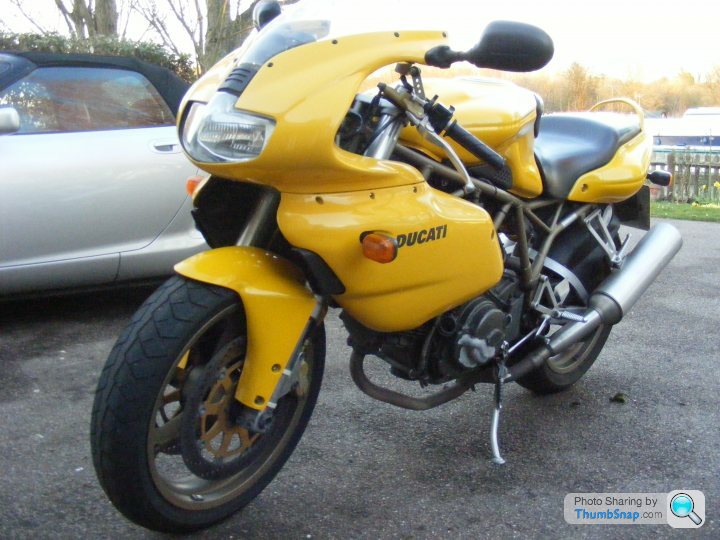
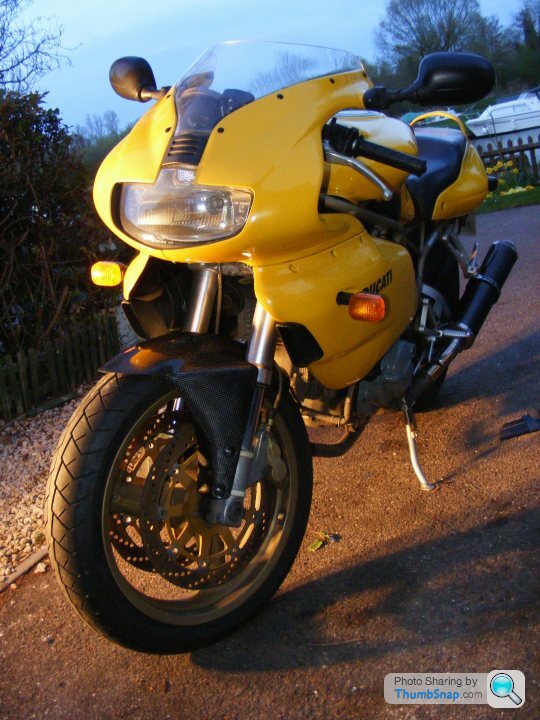
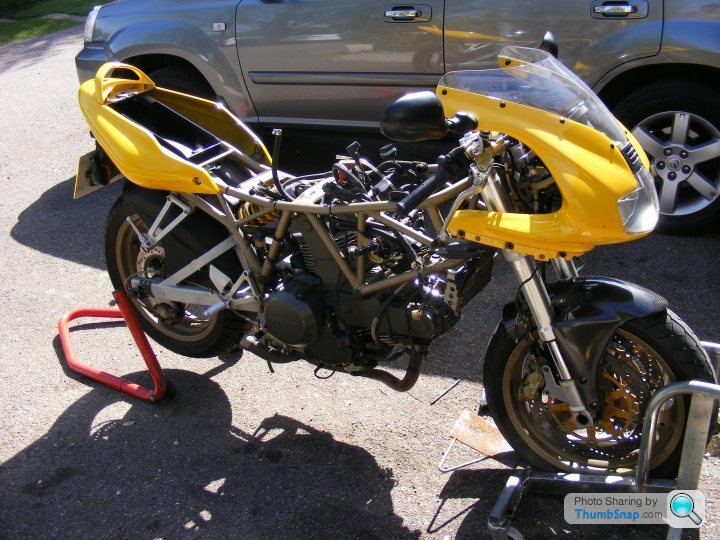
Here is the bike in question:
The Ducati will be treated to a full major service, and each this will be documented here with a step by step as well as lots of pics.
The service will include:
-Engine oil and filter change
-Spark plug replacement
-Fuel filter replacement
-Throttle and choke cable freeplay check
-Air filter replacement
-Brake check
-Brake fluid replacement
-Clutch fluid replacement
-Suspension check
-Wheel bearings check
-Fuel system checks
-Front fork oil replacement
-Control cables and pivot points lubrication
-Cam belt replacement
-Valve clearances (check and adjust)
The parts i needed for all of this came to around £160, a minor service would have cost around £60 (Much better than £800 quoted from a Ducati dealer!)
I will also be removing the alternator casing to repaint it as it is corroded and looks a mess at present.
Here is the bike in question:
Edited by lewis s on Friday 25th March 21:56
Job 1 - Oil and filter change
-I did this just after getting back from work so the engine was nice and hot, this will thin the oil and mean that more will get drained out
-Put the bike on the paddock stand
-Got a totally unsuitable oil container (a cut open milk carton) and placed it under the engine
-Removed the drain plug and let the oil drain out into the container (being careful of the exhaust and other hot engine parts)
-Once it had stopped dripping, i placed the container under the spin on oil filter and removed, again letting any more oil drip into the container. This required an oil filter removal tool because it was tight.
-When all of the oil was drained out, i replaced the drain plug using a new sealing washer (Supplied with the new oil filter)
-I applied some clean engine oil to the rubber seal of the new oil filter and spun it on. i tightenened this up hand tight to avoid damaging the seal
-Normally i would then refill the engine with new oil until up to the full marker, run the engine and rechecked, but because i had to remove the alternator cover i left the oil drianed out. The Ducati requires 3 litres of 10W40 Semi-Synth.
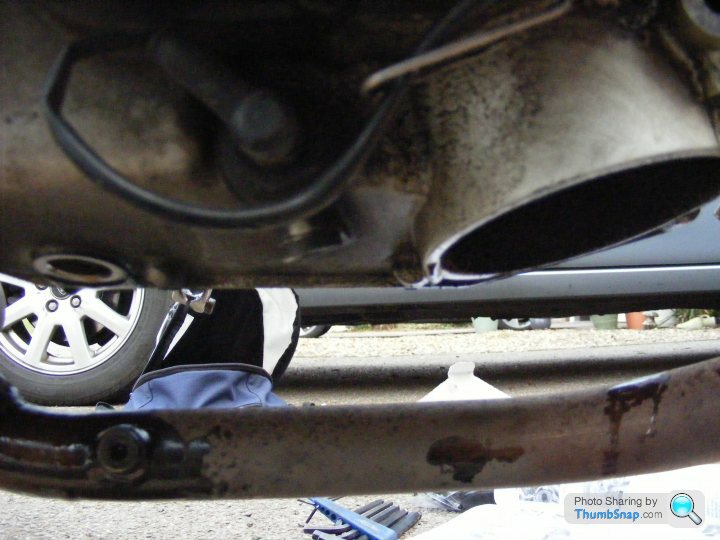
The drain plug can be seen on the left of this picture and the oil filter housing on the right
My makeshift oil container (which turned out to be too small hence the mess). You can see in this photo the old oil filter in the container. The muppet who changed it last time for some bizarre reason put the drain plug washer on top of the oil filter before screwing it on. You can see it resting on top of the filter in the picture. This also meant the drain plug was sealing with no washer
 You can also see the oil level marker on the side of clutch cover.
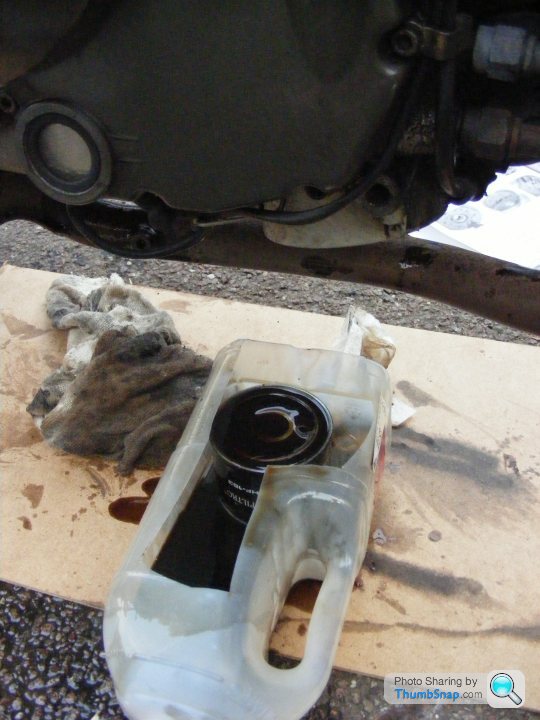
Edited by lewis s on Friday 25th March 22:04
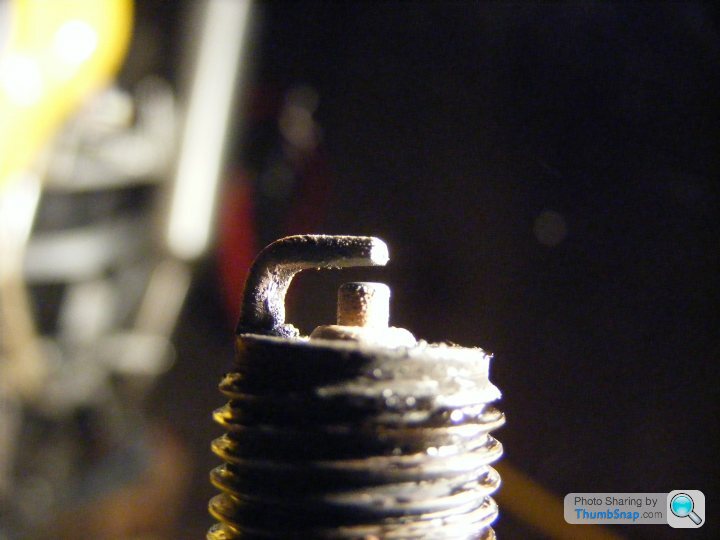
Job 2 - Spark Plugs
Easy one this

-I started off by pulling off the HT leads
-Then i unscrewed the old plugs using a plug spanner
-Took a few old vs. new photos
-Screwed in the new spark plugs, nipped them up and pushed back on the HT leads
Old Vs. New
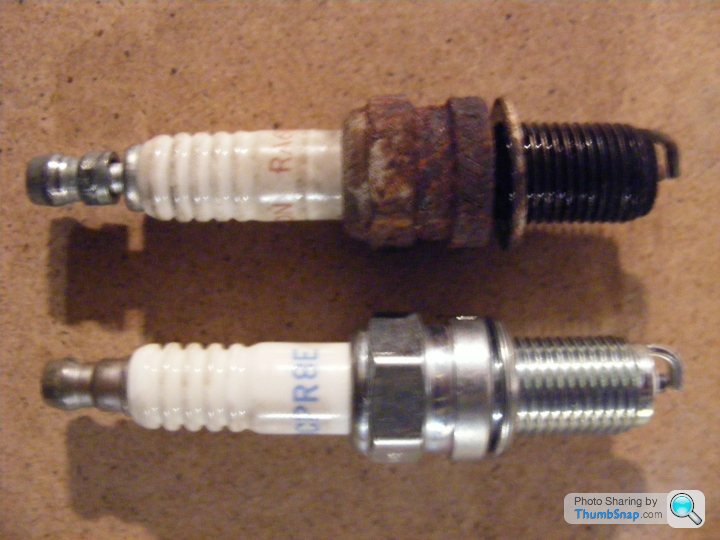
Old spark plug. Hard to see in this picture but the tip had started to deteriorate
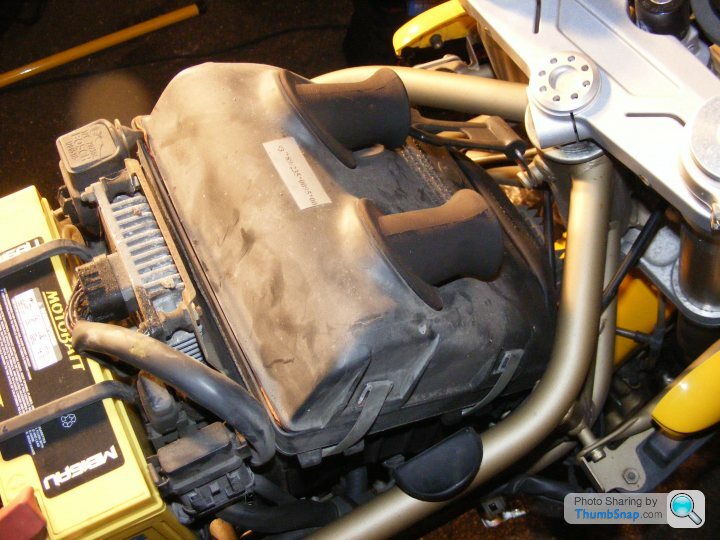
Job 3 - Air Filter Replacement
-Removed the seat
-Unclipped the front of the tank and hinged it back
-Popped off the 4 clips around the top of the air box
-Removed the lid and took out the old filter
-Put in the new filter and reassemble
Air box
Old oil filter in the lid
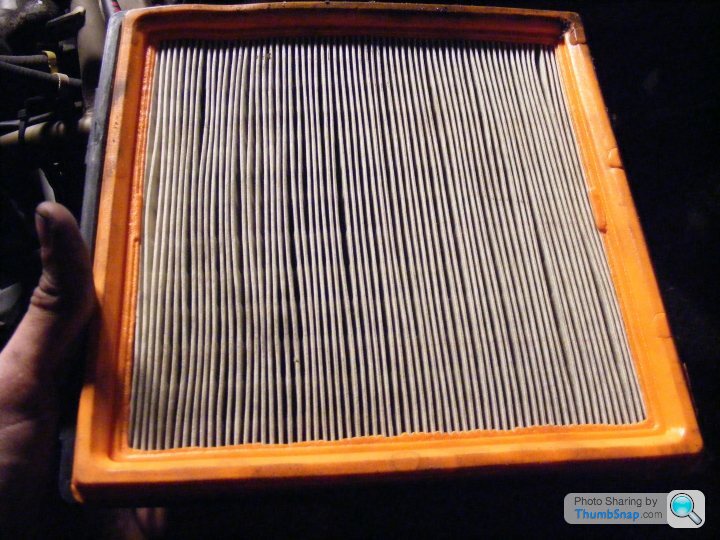
New air filter in place

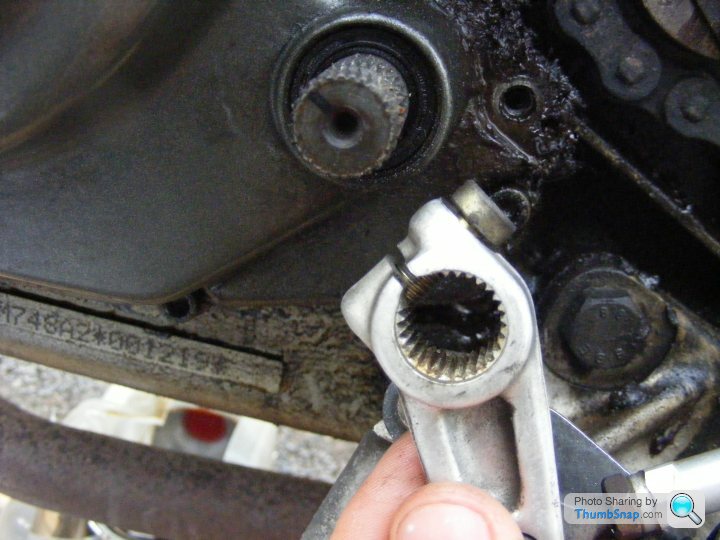
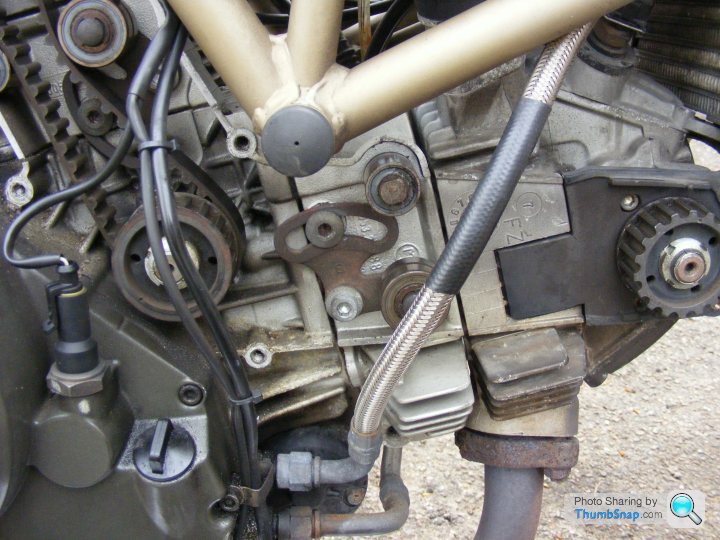
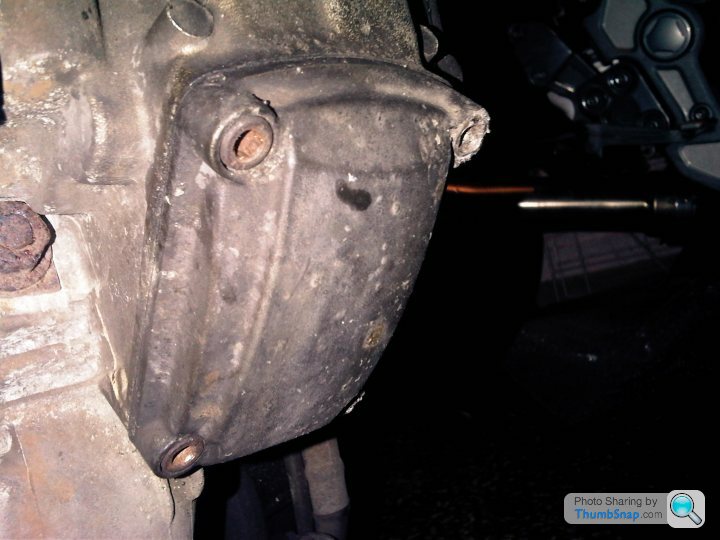
Job 4 - Alternator Casing Removal
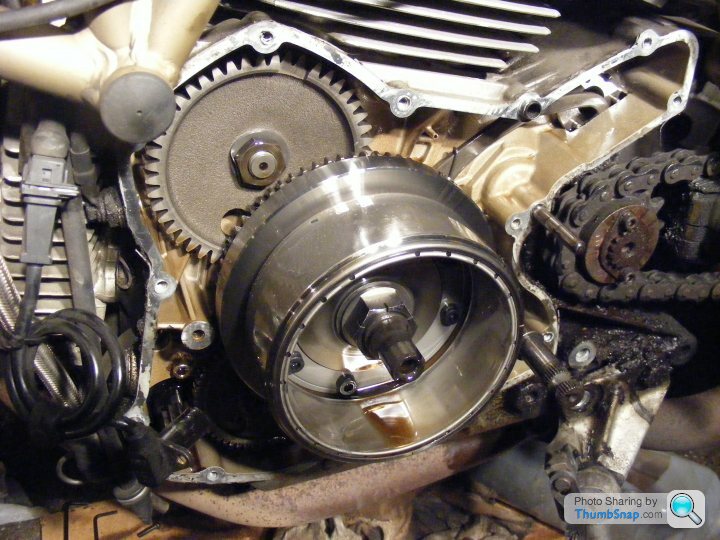
I had to take off the alternator because it looked like this:

I started by marking up the gear linkage to make sure i put it back on in the same place. I then removed the holding bolt and took the linkage off
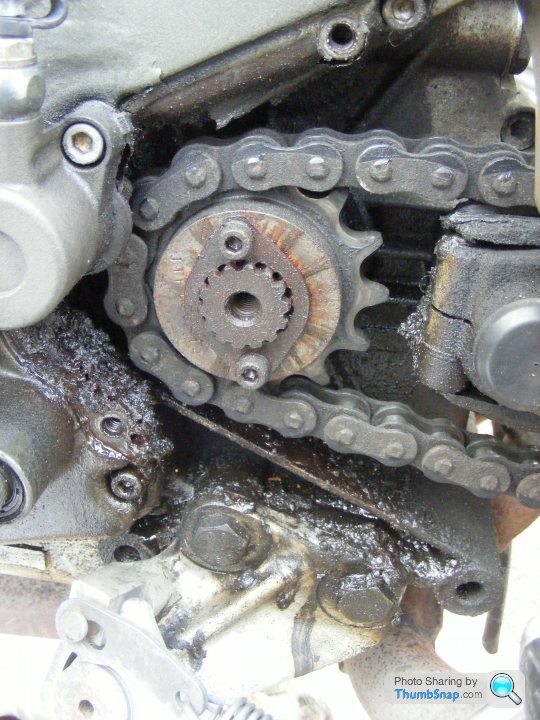
I then removed the front sprocket cover (mmmm gunky
 )
)
Removed the clutch release cylinder
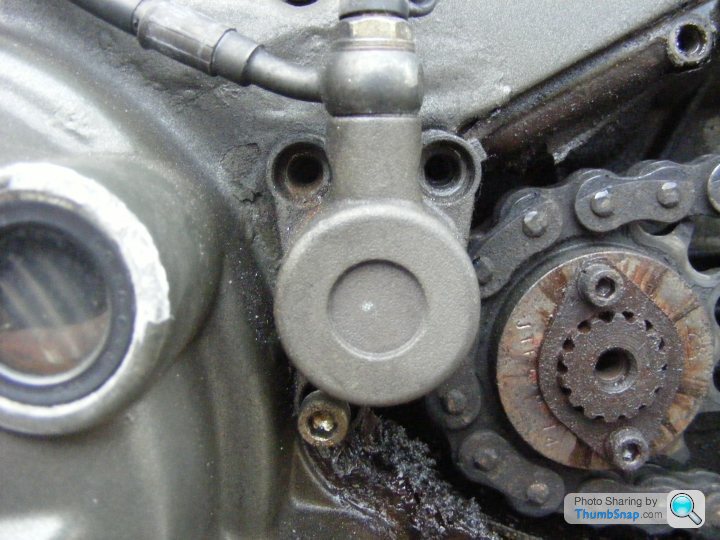
Removed the side stand
I then traced the alternator wiring back to the right hand side of the bike and disconnected the wiring plug, and cut off all of the cable ties holing it to the frame.
I took off all of the bolts around the case. And realised by reading the manual that i needed a puller to remove the casing. This is because the shaft goed into a bearing that is mounted in the casing, so it needs to be pulled off square to avoid any damage to the bearing.
I quickly bodged up this puller (better than having to buy a Ducati tool) and the case popped off in no time

And now at the end of the night i am left with this:
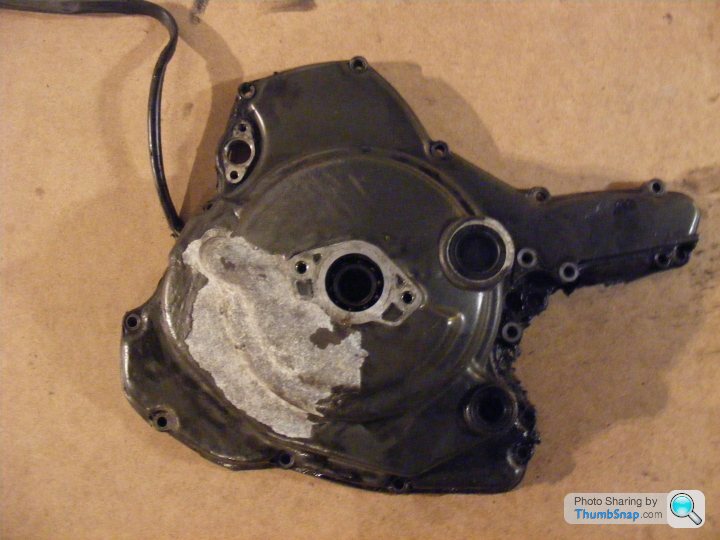
And this:
I started to rub down the casing and remove the old paint. I will finish this off and update with some more stuff tomorrow
Job 5 - Fuel filter replacement
Bit of a pig this one and quite fiddly. I started by removing the caphead bolts around the filler cap (2 are only there for decoration). There is also another bolt inside the filler which you can get to by opening it up.
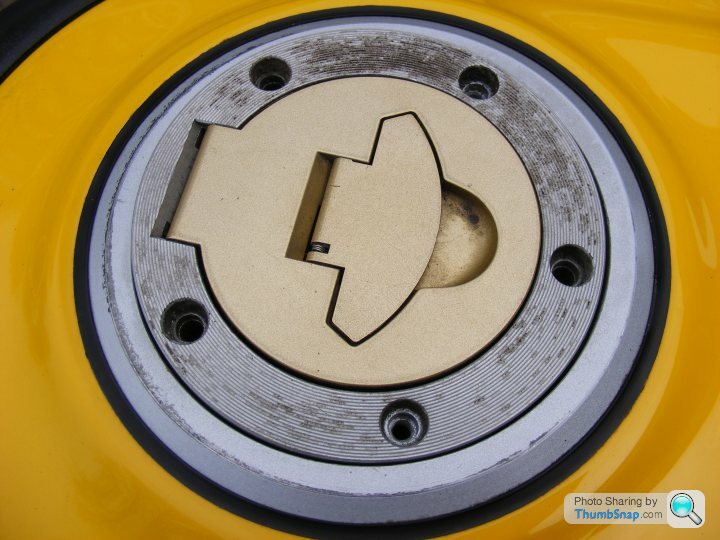
Once the filler cap is removed, i removed all of the grub screws around the remaining frame. These were starting to get a bit rounded, so replaced these with better caphead bolts on reassembly.
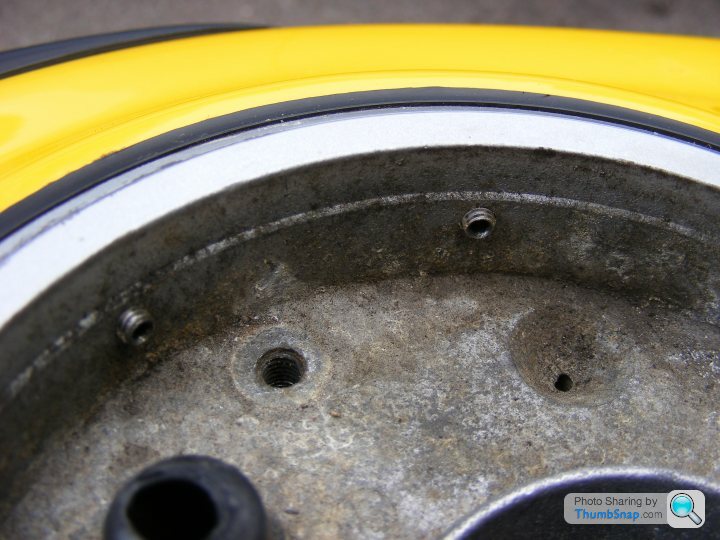
You can now pop out the metal frame / insert. This was a pig to get out and was really tight. There are 2 breathers connected which you can take off to remove it completely from the tank. Now you can see right inside the tank. I then unclipped the hose at the fuel filter.
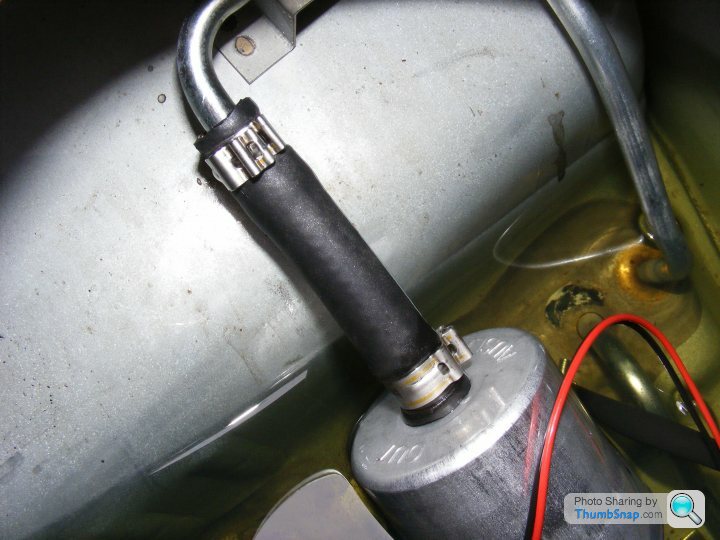
Then i unclipped the fuel pump with filter still attached
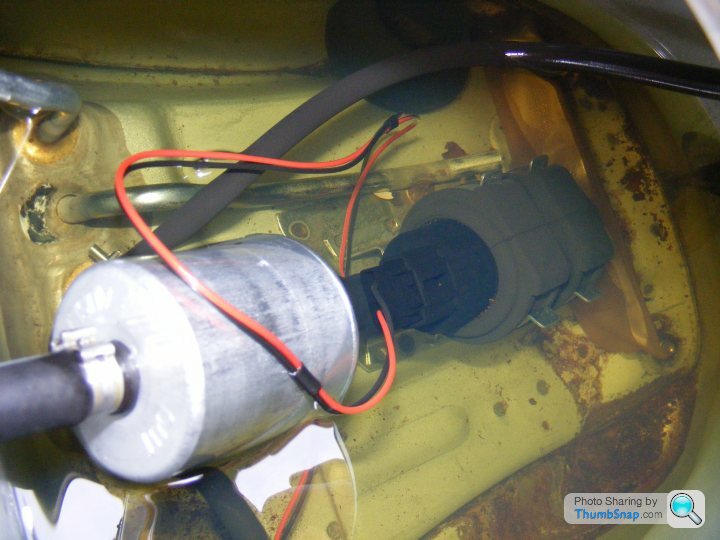
And removed the whole assembly
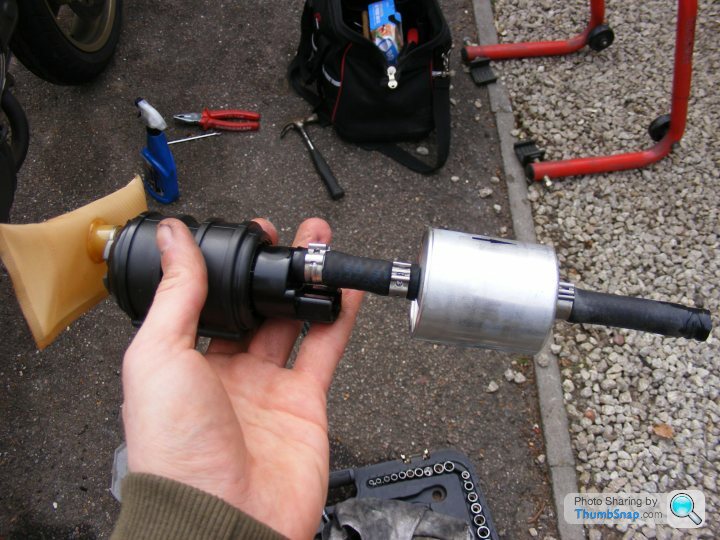
I then just changed the fuel filter and put everthing back together. A smear of vaseline around the ring (ooeer) really helped the insert pop back in

Job 6 - Throttle and choke cable adjustment
Both adjusters are on the right hand side of the engine, with another adjuster on the throttle cable just like a bicycle. I moved the throttle and choke back and forth looking at the amount of slack in the movement. Both were quite bad so required adjustment. All quite self explanatory really

The top is the throttle cable and lower the choke
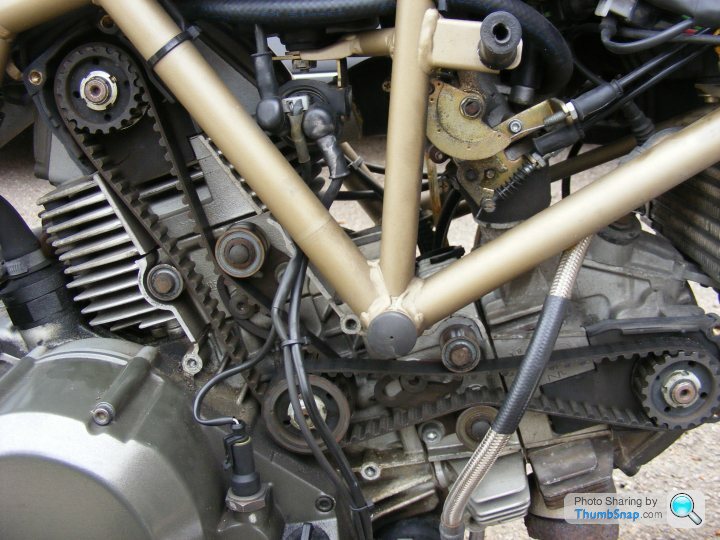
Job 7 - Cambelt Replacement
Surprisingly easy, and only took about an hour all in. I started by removing the cambelt covers.
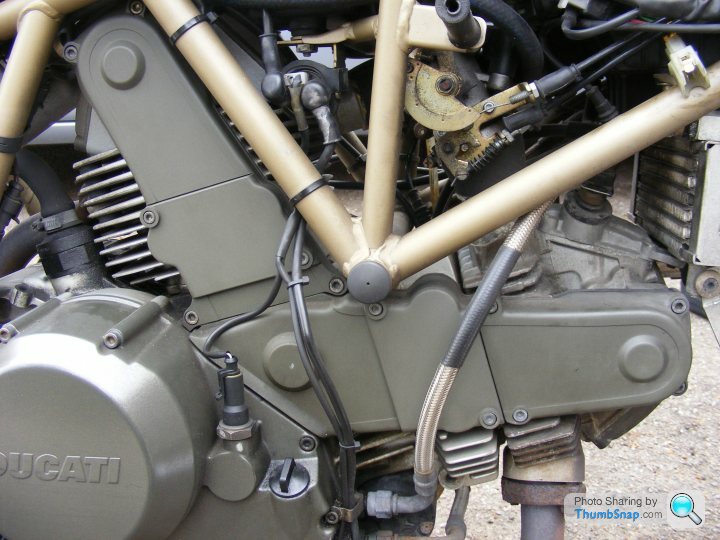
The horizontal cylinder was almost totally slack

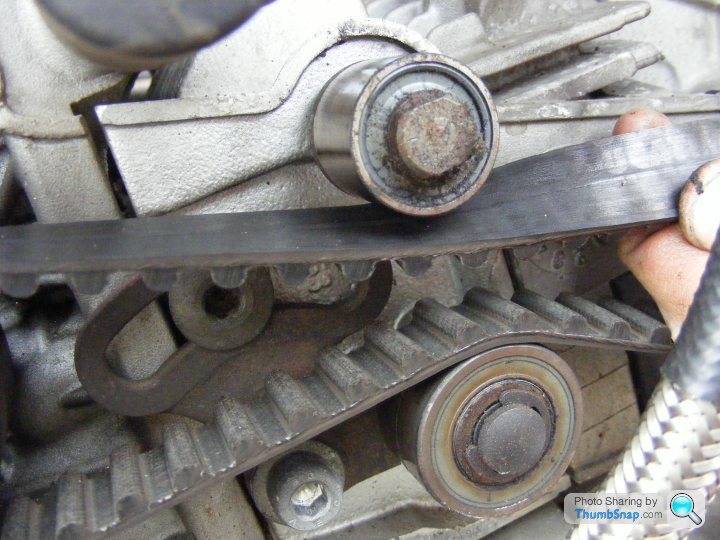
I then turned the engine over by removing the spark plugs, putting the bike in gear and turning the rear wheel. I did this until the timing marks on all 3 pulleys lined up with the parks on the casings.

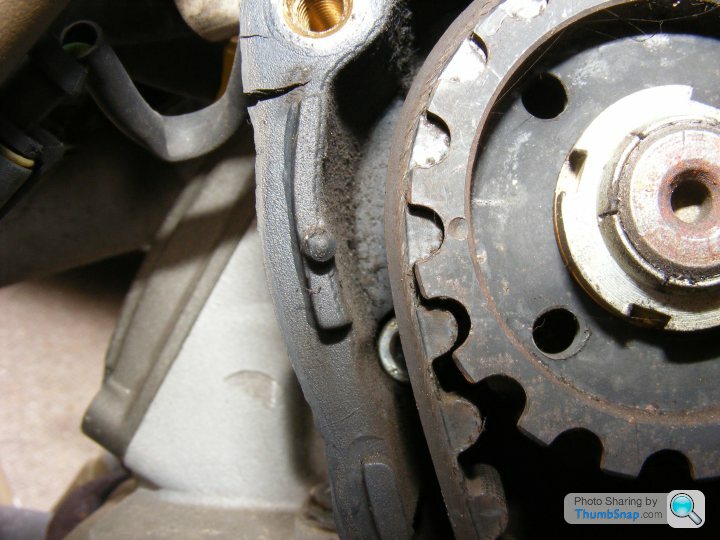
After slackening the tensioners, i carefully removed both of the belts
I then put on the 2 new belts, insuring that the timing marks remained lined up
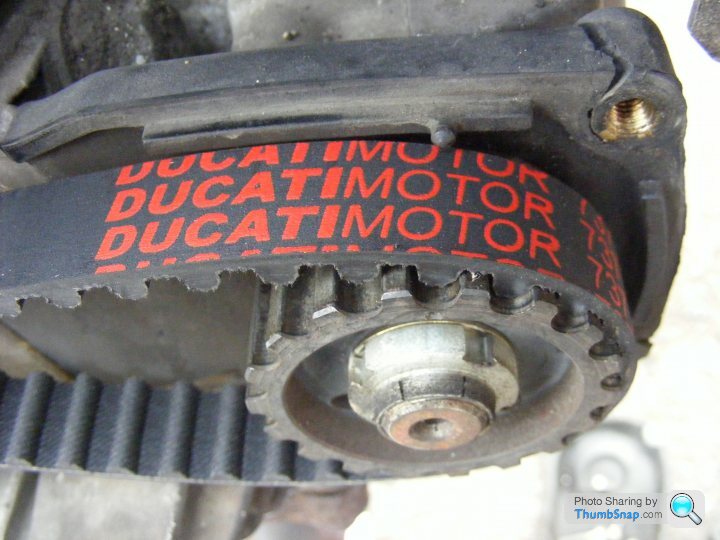
I tensioned the belts so that they can twist no more than 45 degrees between the tensioner and end pulley. Once this was achieved i tightened all of the tensioner bolts

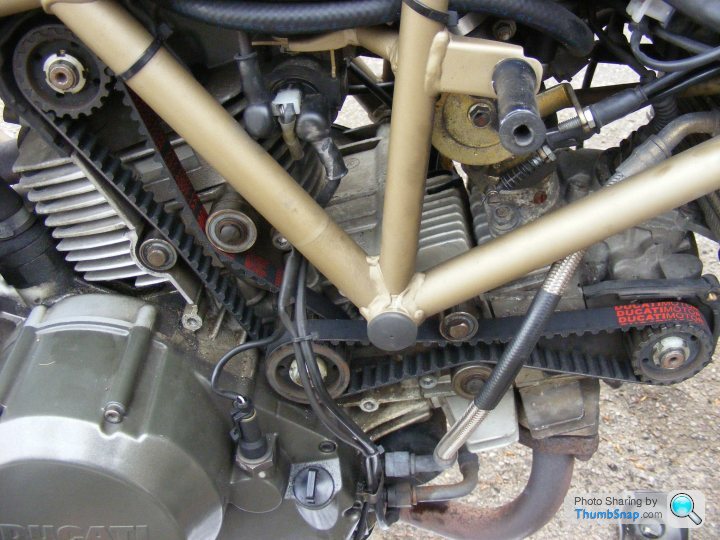
New belts all tensioned up, ready for the covers to go back on
Job 8 - Brake and Clutch fluid change
Only time for a bit of progress tonight. First job was to collect all of the necessary bits

I then put the ring end of the spanner over the caliper bleed nipple and attached the clear hose with the other end in the tub of choice (measuring jug for me)

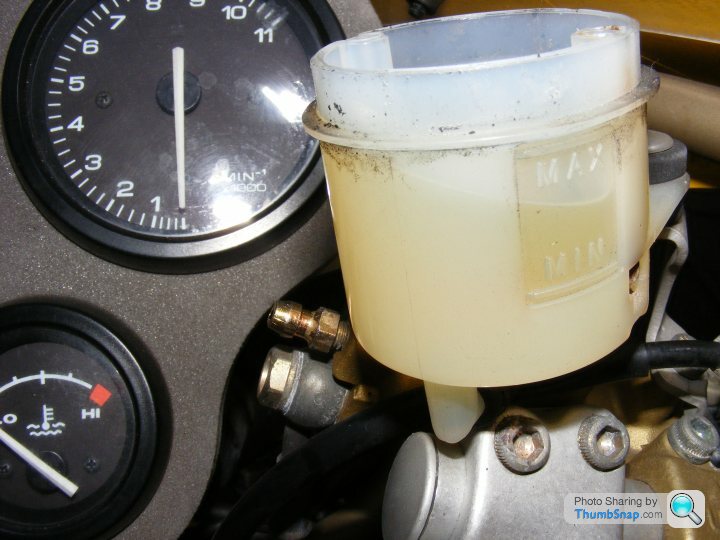
I also removed the lid from the fluid resevoir and proceeded to pull fluid through the brakes. The process was:
-Open bleed nipple 1/4 of a turn
-Pull brake lever (but make sure you hold it in)
-Close bleed nipple
-Release brake lever
I repeated this until the resevoir started to get low, and then topped up the resevoir with the fresh fluid. I kept repeating this process for about 4 resevoirs worth of fluid to ensure all of the old was flushed out. After doing the same to the other front caliper and the master cylinder on the handlebars, i made sure both bleed nipples were tight and then finally topped up the fluid resevoir and replaced the lid.
The same process is used on the rear brake and clutch (unless you shear the bleed nipple on the clutch release cylinder trying to open it
)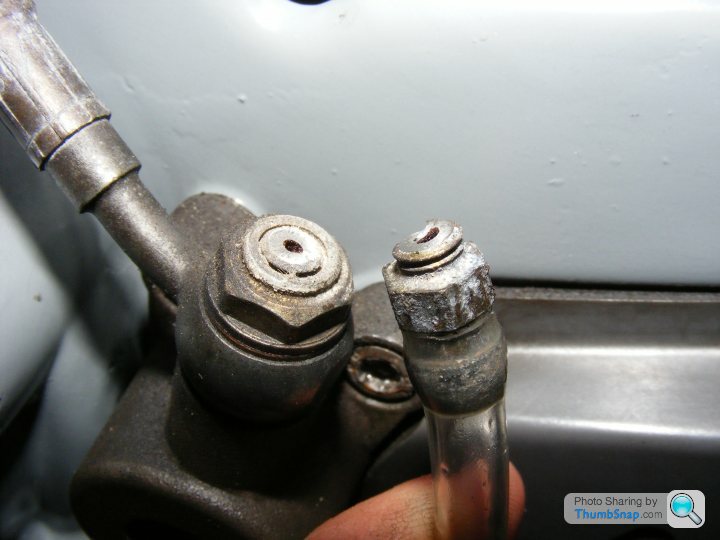
Looks like ive got some more shopping to do

(And beware of brake fluid, it is a paint stripper!)
Edited by lewis s on Monday 28th March 20:15
No i left it and finished off my wine
What is the part called that it is snapped off into (banjo bolt??) so i can look for a new one?
It didn't take too long in the end really. A lot quicker than a car because you can do the whole lot yourself. I had a bad experience with the TVR with an Easibleed though (the type that pressurizes the resevoir with the spare wheel) The lid failed and sprayed brake fluid all over the engine bay
I do it the slow and steady way now

Ruttager said:
Cheers for the write up. 
No worries, i know i like looking at other peoples oily bits so though it may be of interest to some 
Back to clutch news, this looks promising:
http://cgi.ebay.co.uk/ws/eBayISAPI.dll?ViewItem&am...
It was airline tubing for a fish tank. What i found worked well on the car when the tube was too small for the nipples, i got a cup of boiling water, dipped the end 5mm of tube in the water until its soft and then quickly got it over the nipple. It then cools and hardens and be a nice snug fit
The brakes are not too bad, once you have all the bits to hand it only takes 30 minutes or so
The brakes are not too bad, once you have all the bits to hand it only takes 30 minutes or so
Edited by lewis s on Thursday 11th August 00:39
Job 9 - Valve Clearances (finally)
Should have been a fairly easy on ethis, but alas, it was not
Its a bit difficult to explain fully myself, but there is an excellent web page below which describes in much more detail the process than i can and goes into the workings of the Ducati Desmodromic valvetrain. In simple terms though instead of having a valve spring to close the valve, there is a second rocker which lifts the valve back into place. This is the link below:
http://www.ducatisuite.com/valves.html
All of my troubles came from seized bolts. 3 in the rocker covers and 1 for the oil cooler.
http://www.pistonheads.co.uk/gassing/topic.asp?h=0...
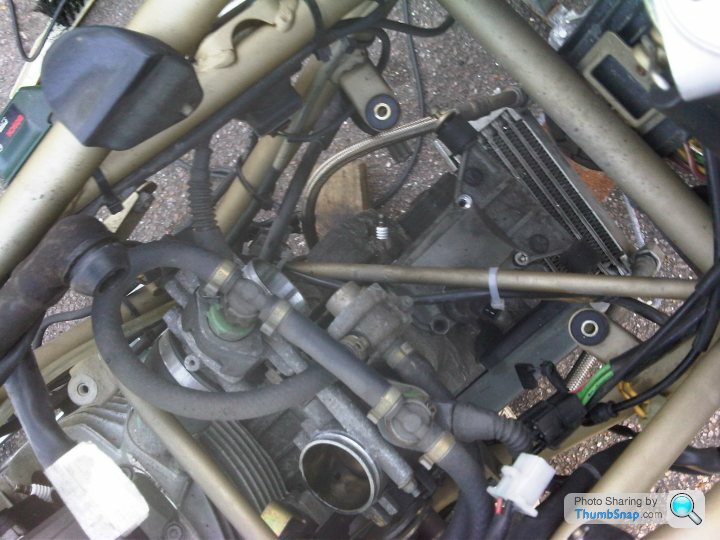
The horizontal cylinder is apparently the easy one, but this is where the 3 bolts for the rocker covers were seized i guess due to being splattered with road crud its whole life. For this cylinder you should be able to just remove the side fairings, detach the oil cooler and remove the 2 rocker covers (one for each rocker)
I on the other hand had to remove the seat, tank, battery, oil cooler, airbox and ECU to be able to drill out the seized bolts
One of the offending covers:
The view through where the tank / airbox used to be to drill the second cover:
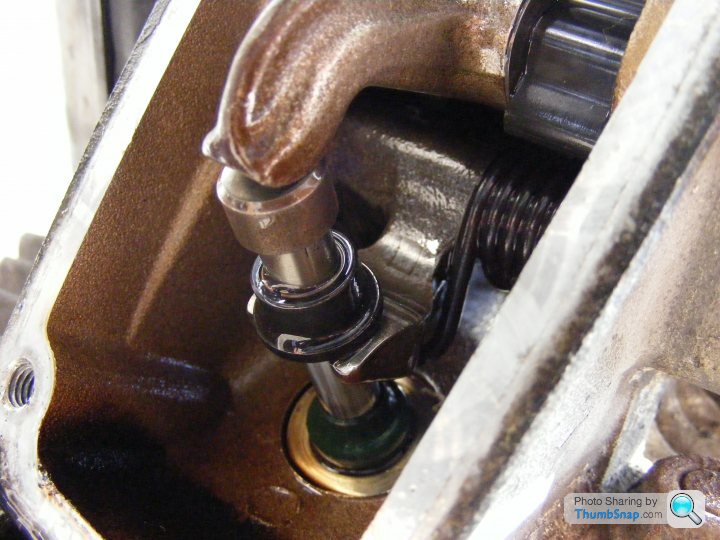
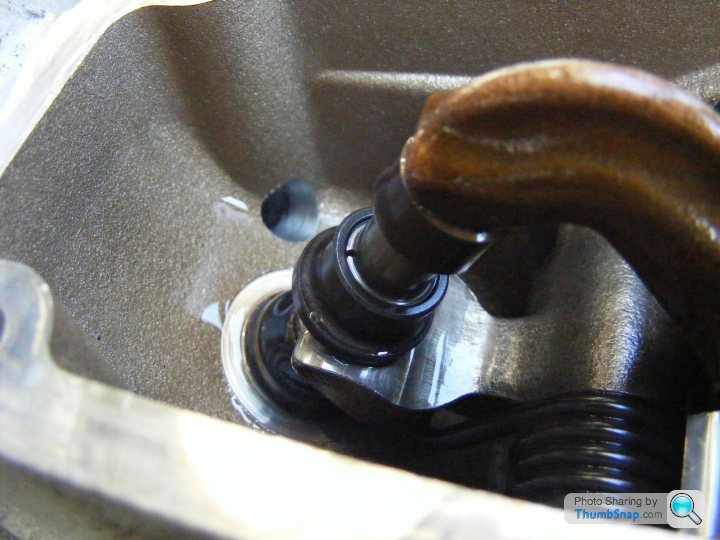
With the covers removed this is what you see (note the 2 rockers)
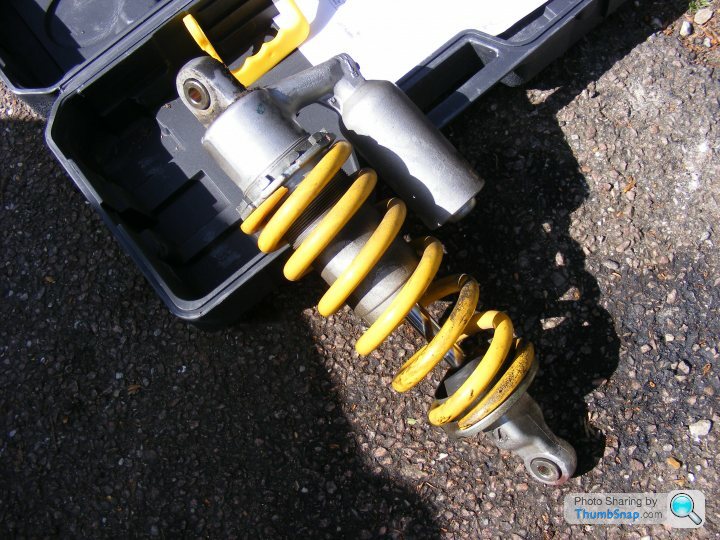
To do the vertical cylinder you also need to remove the shock. This is what the bike looked like at this point!
Shock removed
The actual business of cheching the clearances is pretty simple really. You have to get the cylinder you are working on to top dead centre (described well in the link above) and then using feeler guages check the clearance between the top rocker and shim. Then apply pressure to the bottom rocker and measure again. The before gap minus the gap when pushed down gives the clearance of the closing rocker. Sorry if this sounds a bit confusing but it is described better in the other link.
My clearances were as follows:
Horizontal Cylinder
Exhaust Opening - 0.05mm
Exhaust Closing - 0.05mm
Inlet Opening - 0.10mm
Inlet Closing - 0.05mm
Vertical Cylinder
Exhaust Opening - 0.15mm
Exhaust Closing - 0.05mm
Inlet Opening - 0.10mm
Inlet Closing - 0.05mm
So after all that work they were all in spec and i did'nt have to do anything
This took me pretty much this whole weekend, but without the seized bolts i imagine it could be done easily in 4 hours or so.
I finished putting the bike back together around 3:00pm today and the bike started first thumb of the button and all is working well
Overall a very frustrating job and i don't really fancy doing it again in a hurry, although all the bolts are now stainless with plenty of copperslip so i shouldnt experience the same issues again hopefully.
Gassing Station | Biker Banter | Top of Page | What's New | My Stuff