Rear Number Plate Light Mod
Discussion


For the new translucent number plate, thought I'd take the opportunity to also upgrade the poor dim plate lighting.
Nothing new really with the clear brackets and lighting options cropping up a number of times in several threads.
However, was looking for a cleaner, and more uniform type of illumination, rather than the patchy one which the existing lights gave - even with the transparent brackets installed (and festoon leds).
Didn't fancy the foil tape solution either - and with good led lighting should not really be required.
A clear acrylic CRT monitor and keyboard stand (sitting in the attic for over 10 years) was a perfect starting point for the brackets...knew it would be useful one day!
(Though the intention was to use clear acrylic to maximise light/minimise shadowing etc, in the end given my final solution, clear was not really necessary - see below).
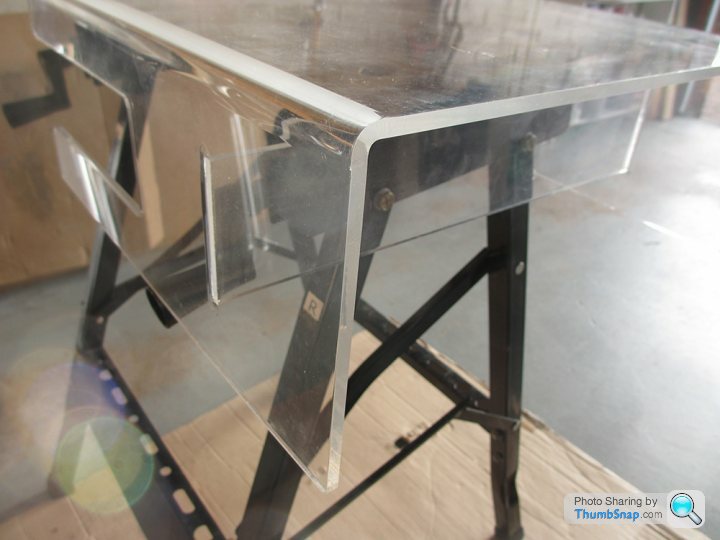
A bit of sawing and polishing later....(the 90 degree bracket angle also needed bending with the aid of hot air to around 88-89deg to account for the slight rear curve)

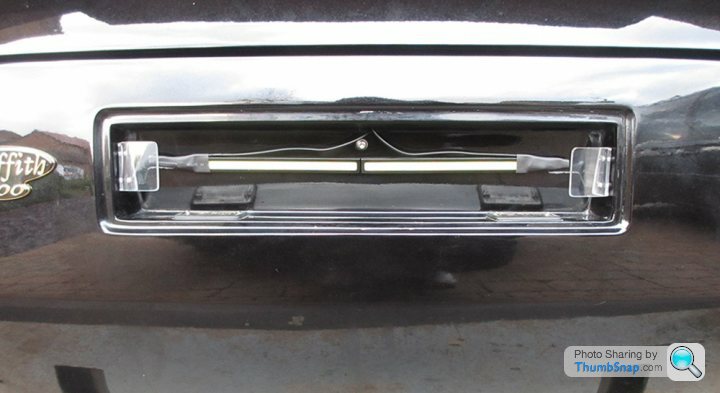
I know they are out of sight, but also replaced the (yellow) dirty rear plate light covers with new Stag / TR6 ones.
LED strip lights at less than £2 each posted....
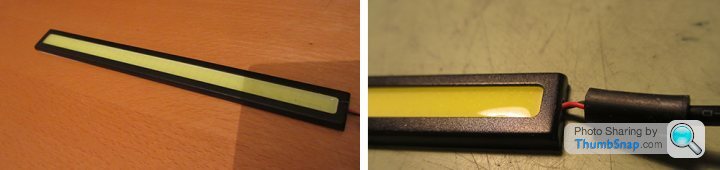
A bit of modifying and reinforcing the somewhat 'weak' wire connection with some heatshrink and silicone tubing etc.

LEDs and existing lights for comparsion - interesting. The lights gave a superb result.

An existing hole in the soffit of the recess was used for the cable routing.

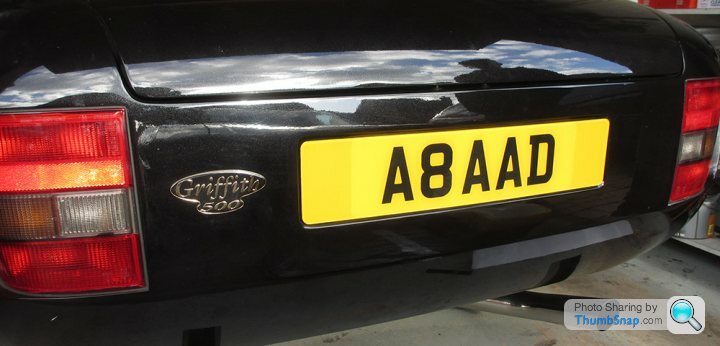
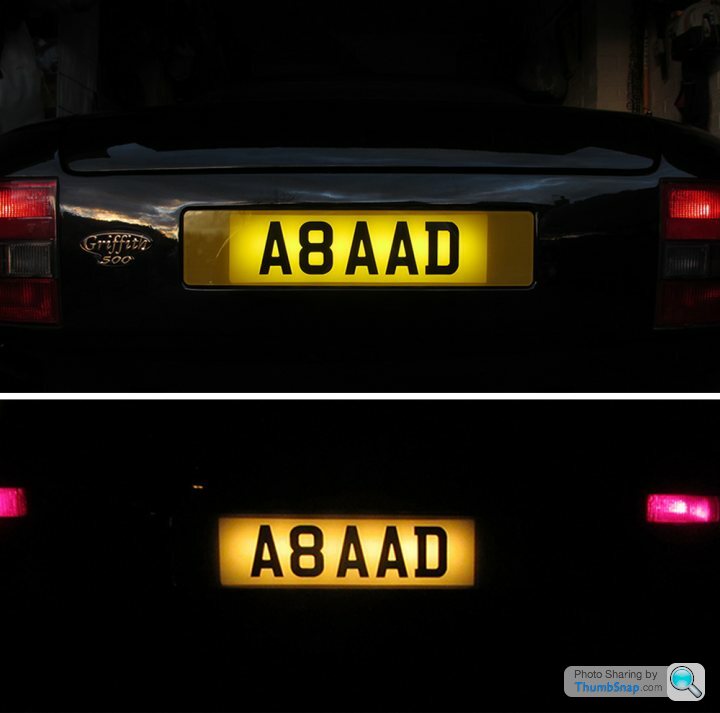
Daytime
Top- Dusk, Botton - Darkness (through sunglasses!) - some strategically placed black opaque vinyl (just visible in daytime above pic) to the rear of the plate gives a better night time focus on the plate number.
Nothing new really with the clear brackets and lighting options cropping up a number of times in several threads.
However, was looking for a cleaner, and more uniform type of illumination, rather than the patchy one which the existing lights gave - even with the transparent brackets installed (and festoon leds).
Didn't fancy the foil tape solution either - and with good led lighting should not really be required.
A clear acrylic CRT monitor and keyboard stand (sitting in the attic for over 10 years) was a perfect starting point for the brackets...knew it would be useful one day!
(Though the intention was to use clear acrylic to maximise light/minimise shadowing etc, in the end given my final solution, clear was not really necessary - see below).
A bit of sawing and polishing later....(the 90 degree bracket angle also needed bending with the aid of hot air to around 88-89deg to account for the slight rear curve)
I know they are out of sight, but also replaced the (yellow) dirty rear plate light covers with new Stag / TR6 ones.
LED strip lights at less than £2 each posted....
A bit of modifying and reinforcing the somewhat 'weak' wire connection with some heatshrink and silicone tubing etc.
LEDs and existing lights for comparsion - interesting. The lights gave a superb result.
An existing hole in the soffit of the recess was used for the cable routing.
Daytime
Top- Dusk, Botton - Darkness (through sunglasses!) - some strategically placed black opaque vinyl (just visible in daytime above pic) to the rear of the plate gives a better night time focus on the plate number.
Edited by Storm Guy on Thursday 18th February 22:57
Take your pic - http://www.ebay.co.uk/sch/sis.html?_nkw=17cm+Water...
Plenty of choice. 2 x 17cm or a single strip.
Get a festoon adapter or make up your own wiring/plug with something like this...
http://www.ebay.co.uk/sch/sis.html?_nkw=1%2F5x+Car...
HTH
Plenty of choice. 2 x 17cm or a single strip.
Get a festoon adapter or make up your own wiring/plug with something like this...
http://www.ebay.co.uk/sch/sis.html?_nkw=1%2F5x+Car...
HTH
Gassing Station | Griffith | Top of Page | What's New | My Stuff