Discussion


I havent had a mini for years but always regretted not keeping my cooper injection. So last year I decided I would get myself a mini as a bit of a project. Only thing stopping me was an old wooden garage that wasnt big enough or practical enough to do it in.
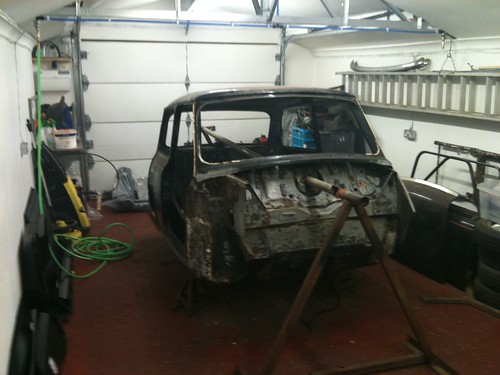
So this time last year I knocked down the old garage and built a new one in its place. Took me tilla few months ago to finish the garage inside and out. Then it was time for the project car finally.
It looked like this when it first arrived
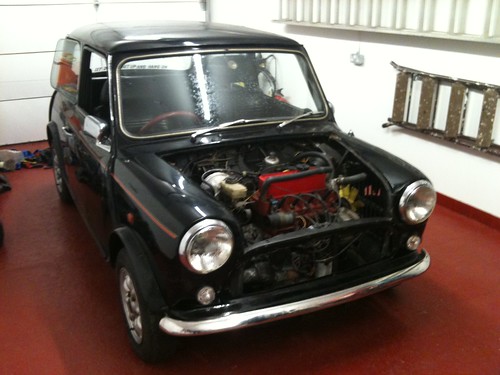
8/6/11.2 by russell.grant, on Flickr
Doesnt looked to bad at first glance but it has all the usual rust and some rough repairs covered up by a paint job. Still not in bad condition considering it hadnt turned a wheel in 9 years
So this time last year I knocked down the old garage and built a new one in its place. Took me tilla few months ago to finish the garage inside and out. Then it was time for the project car finally.
It looked like this when it first arrived
8/6/11.2 by russell.grant, on Flickr
Doesnt looked to bad at first glance but it has all the usual rust and some rough repairs covered up by a paint job. Still not in bad condition considering it hadnt turned a wheel in 9 years
Next was the easy stuff like the stripping down and cutting out

12/6/11 by russell.grant, on Flickr
Pulled the subframes off and sandblasted then painted them
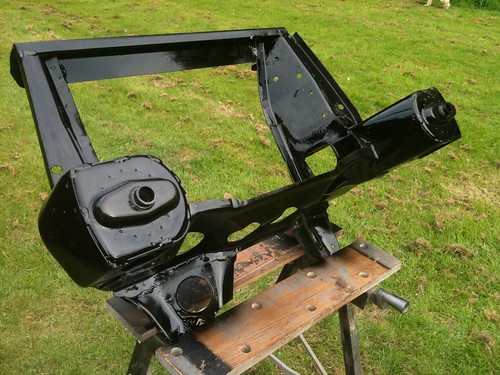
27/11.2 by russell.grant, on Flickr
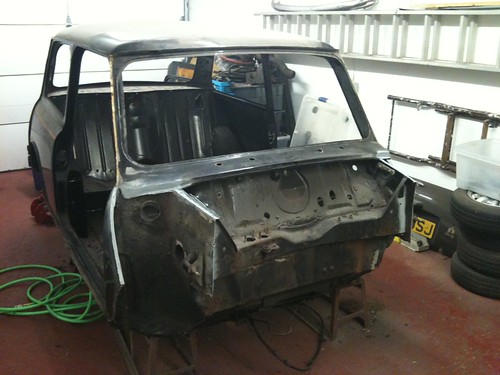
Then a picture of the bodyshell before the real work started with some sandblasted and painted suspension components in the picture too before they got boxed up for safe keeping

11/7/11 by russell.grant, on Flickr
12/6/11 by russell.grant, on Flickr
Pulled the subframes off and sandblasted then painted them
27/11.2 by russell.grant, on Flickr
Then a picture of the bodyshell before the real work started with some sandblasted and painted suspension components in the picture too before they got boxed up for safe keeping
11/7/11 by russell.grant, on Flickr
Then the real fun began
19/7/11 by russell.grant, on Flickr
Decide to replace the frontend with a 1 piece flip front so the angle grinder soon made short work of the rotten old front end
19/7/11 by russell.grant, on Flickr
Decide to replace the frontend with a 1 piece flip front so the angle grinder soon made short work of the rotten old front end
More pictures of the sory so far ;
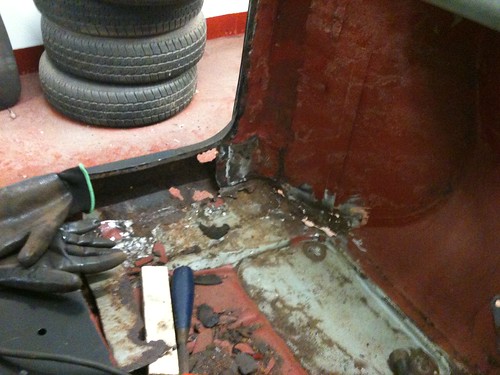
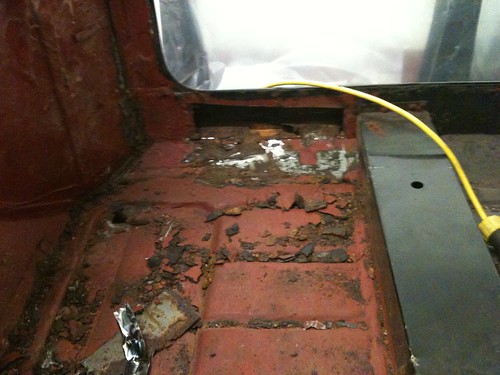
Had a dig about at some of the usual rust spots
Untitled by russell.grant, on Flickr
Untitled by russell.grant, on Flickr
24/7/11.2 by russell.grant, on Flickr
26/7/11.1 by russell.grant, on Flickr
Had a dig about at some of the usual rust spots
Untitled by russell.grant, on Flickr
Untitled by russell.grant, on Flickr
24/7/11.2 by russell.grant, on Flickr
26/7/11.1 by russell.grant, on Flickr
Decided after a bit of hacking that I better start adding some new metal before the was nothing left.
26/7/11.3 by russell.grant, on Flickr
26/7/11.4 by russell.grant, on Flickr
Same story on the offside too.
Then I fixed a few minor points and stripped back some paint & underseal while waiting on parts

28/7/11 by russell.grant, on Flickr
A few days later and the first of the parts deliverys arrived
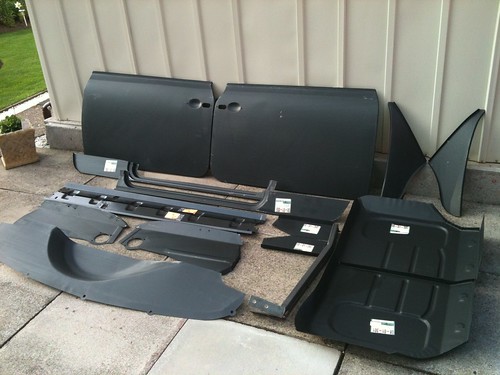
3/8/11 by russell.grant, on Flickr
26/7/11.3 by russell.grant, on Flickr
26/7/11.4 by russell.grant, on Flickr
Same story on the offside too.
Then I fixed a few minor points and stripped back some paint & underseal while waiting on parts
28/7/11 by russell.grant, on Flickr
A few days later and the first of the parts deliverys arrived
3/8/11 by russell.grant, on Flickr
Cooperman said:
Are you sure you want a 'flip-front'>
It will probably reduce the strength and crash-worthiness of the car overall and could require you to have an IVA inspection as it is a structural modification.
The flip-front isn't set in stone yet although it would make access to the engine bay easier. I was considering perhaps fitting replacement inner wings and adding subframe brace bars for extra strength with a flip front but I'm working on the rest of the bodywork just now anyway and intend on doing the front end last. Haven't purchased any bodywork panels forward of the a panels yet anyway. It will probably reduce the strength and crash-worthiness of the car overall and could require you to have an IVA inspection as it is a structural modification.
Edited by RussellG on Saturday 10th September 12:58
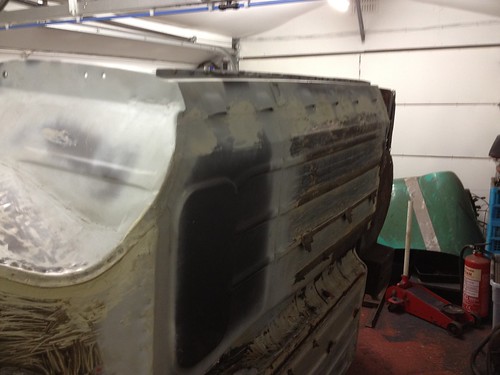
Next thing was to make a spit for doing the car bodywork on
4/8/11 by russell.grant, on Flickr
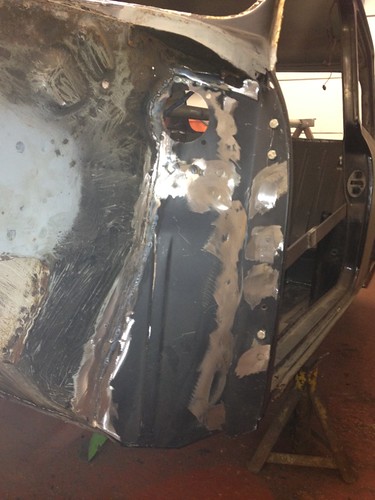
Then I made a start to the osf floorpan, spot welded inside and out the stitch welded in when i was hapy with the fit
11/8/11.1 by russell.grant, on Flickr
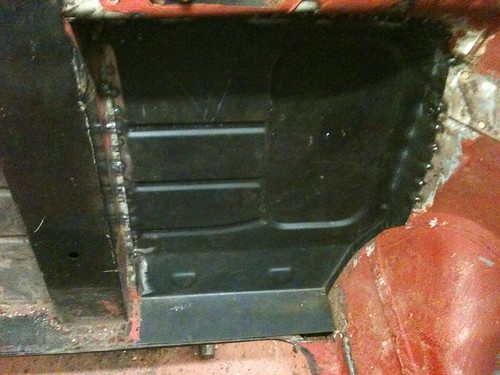
11/8/11.3 by russell.grant, on Flickr
4/8/11 by russell.grant, on Flickr
Then I made a start to the osf floorpan, spot welded inside and out the stitch welded in when i was hapy with the fit
11/8/11.1 by russell.grant, on Flickr
11/8/11.3 by russell.grant, on Flickr
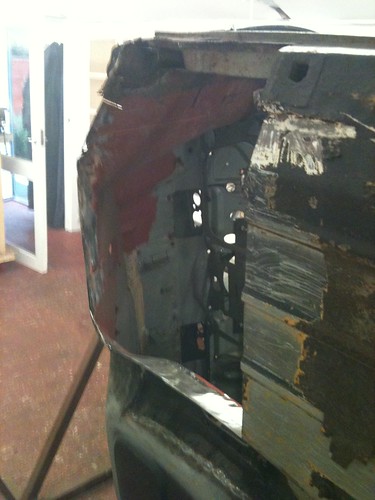
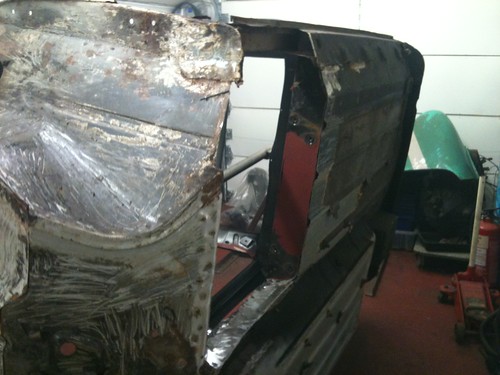
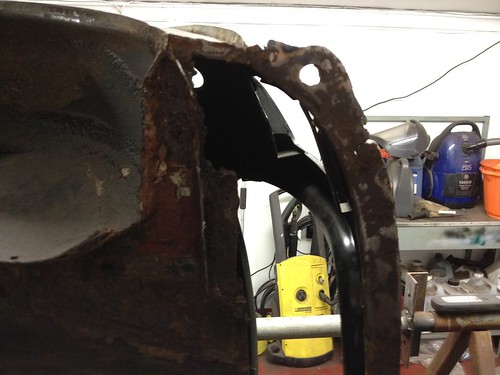
Then it was time to cut out the badly repaired flitch panel on the same side and replace it
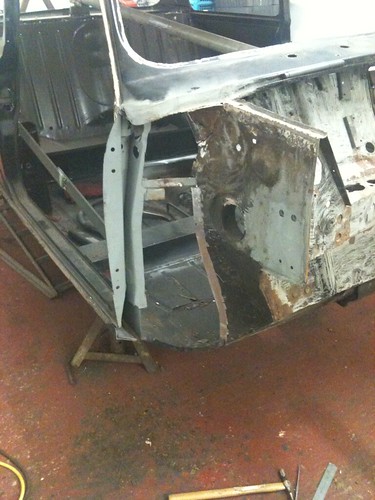
20/8/11.1 by russell.grant, on Flickr
20/8/11.3 by russell.grant, on Flickr

21/8/11.2 by russell.grant, on Flickr
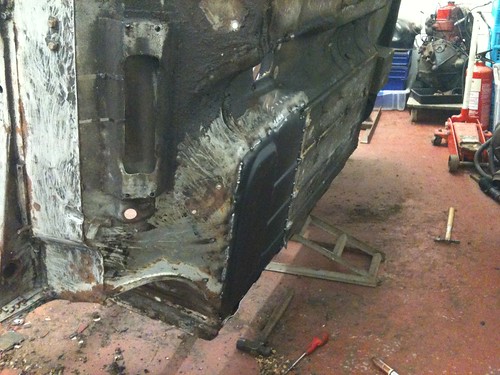
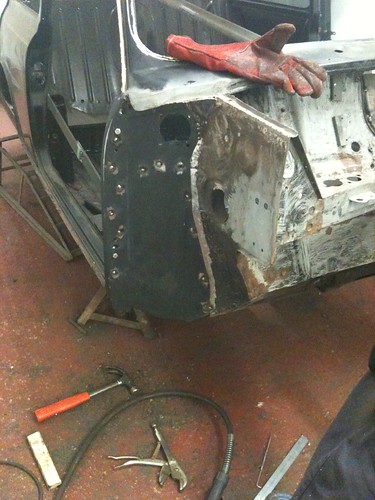
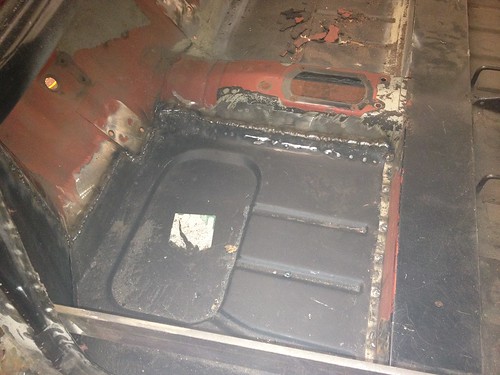
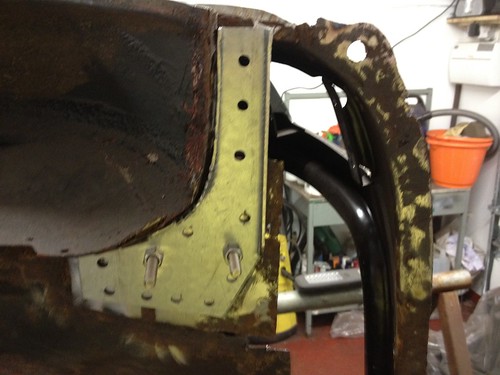
That takes me to the stage im at now. I have cut out the os doorstep/lower rear 1/4 panel and replaced it. Now i Have removed the oversill a previous owner had fitted amd the original rotting sill below it (plus a couple of rotting section that were hidden by the oversill.

21/8/11.4 by russell.grant, on Flickr
28/8/11.1 by russell.grant, on Flickr
Im now at the point where I will be dressing of the floor where the oversill was attached & tackling the replacement of the end of the heelboard on the same side before plating up the hole I have cut and fitting a standard replacement sill.
20/8/11.1 by russell.grant, on Flickr
20/8/11.3 by russell.grant, on Flickr
21/8/11.2 by russell.grant, on Flickr
That takes me to the stage im at now. I have cut out the os doorstep/lower rear 1/4 panel and replaced it. Now i Have removed the oversill a previous owner had fitted amd the original rotting sill below it (plus a couple of rotting section that were hidden by the oversill.
21/8/11.4 by russell.grant, on Flickr
28/8/11.1 by russell.grant, on Flickr
Im now at the point where I will be dressing of the floor where the oversill was attached & tackling the replacement of the end of the heelboard on the same side before plating up the hole I have cut and fitting a standard replacement sill.
Havent posted any updates for a while. truth be told I havent beeen able to spend nearly as much time as I would have liked to on the car recently. something else always seems to come up.
Anyway I have a few pictures to help get the thread back up to speed.
01/10/11.1 by russell.grant, on Flickr
01/10/.2 by russell.grant, on Flickr
17/10/11.2 by russell.grant, on Flickr
17/10/11.1 by russell.grant, on Flickr
7/12/11.5 by russell.grant, on Flickr
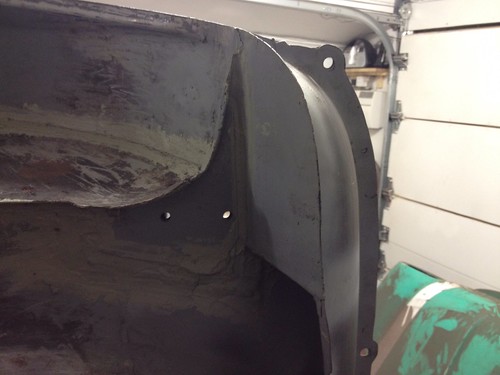
front floor sections and flitch panels have been replaced on both sides now, inner sills have been repaired and the old outer sills and over sills have been removed, the floor has been repaired at the rear where required and new standard sills have been fitted. I have also replace the lower sections of both door frames but forgot to photograph these.
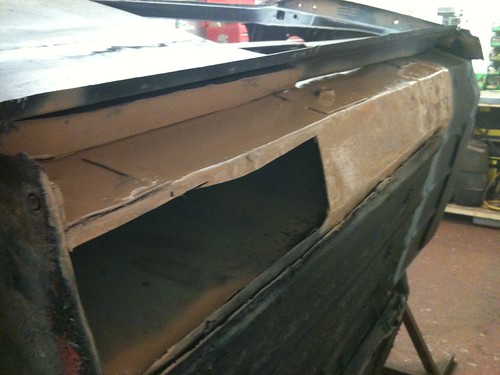
Started on the boot section next which needed a repair panel in the boot floor, repairs in both wheel arches and a new rear valance and closing panels. Havent quite finished this yet but just have a bit of dressing up the welding left.

7/12/11.1 by russell.grant, on Flickr
7/12/11.1 by russell.grant, on Flickr
7/12/11.3 by russell.grant, on Flickr
7/12/11.4 by russell.grant, on Flickr

4/1/12.1 by russell.grant, on Flickr
4/1/12.2 by russell.grant, on Flickr
4/1/12.3 by russell.grant, on Flickr

4/1/12.4 by russell.grant, on Flickr
I fitted repair sections to both sides of the heel board as well but cant find the pictures I took of that. Will try and get some picutres of that at the weekend when hopefully I can get a bit more down.
Anyway I have a few pictures to help get the thread back up to speed.
01/10/11.1 by russell.grant, on Flickr
01/10/.2 by russell.grant, on Flickr
17/10/11.2 by russell.grant, on Flickr
17/10/11.1 by russell.grant, on Flickr
7/12/11.5 by russell.grant, on Flickr
front floor sections and flitch panels have been replaced on both sides now, inner sills have been repaired and the old outer sills and over sills have been removed, the floor has been repaired at the rear where required and new standard sills have been fitted. I have also replace the lower sections of both door frames but forgot to photograph these.
Started on the boot section next which needed a repair panel in the boot floor, repairs in both wheel arches and a new rear valance and closing panels. Havent quite finished this yet but just have a bit of dressing up the welding left.
7/12/11.1 by russell.grant, on Flickr
7/12/11.1 by russell.grant, on Flickr
7/12/11.3 by russell.grant, on Flickr
7/12/11.4 by russell.grant, on Flickr
4/1/12.1 by russell.grant, on Flickr
4/1/12.2 by russell.grant, on Flickr
4/1/12.3 by russell.grant, on Flickr
4/1/12.4 by russell.grant, on Flickr
I fitted repair sections to both sides of the heel board as well but cant find the pictures I took of that. Will try and get some picutres of that at the weekend when hopefully I can get a bit more down.
Pixel-Snapper said:
Wow Russ looking good there fella.
You dont hang about either do you.

Feel like I haven't achieved much in the last couple of months but it's all starting to come Together now. Got doors to repair and new door skins to fit once the odds and ends are finished off at the rear. Then I need to figure out what to do with the front end. You dont hang about either do you.
Saw your thread earlier and the van is looking good as well. Can't wait till I get to the primer stage of the build.
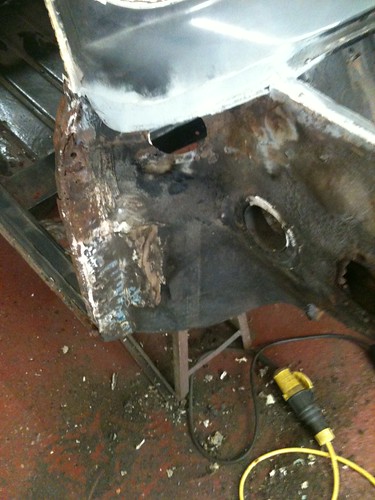
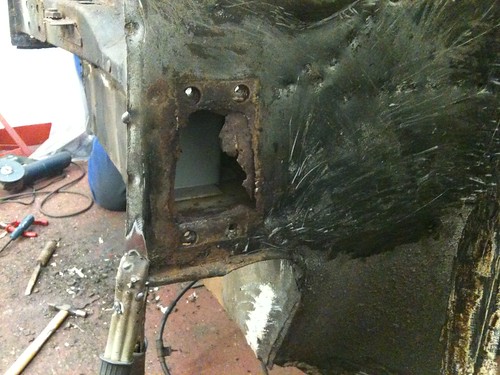
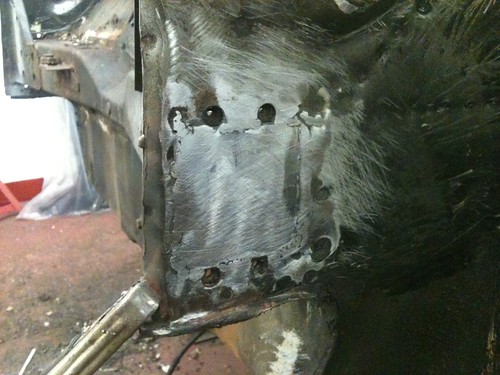
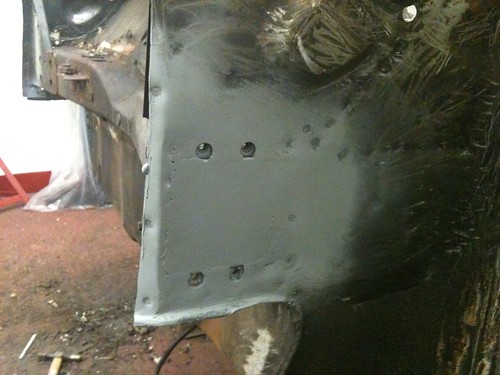
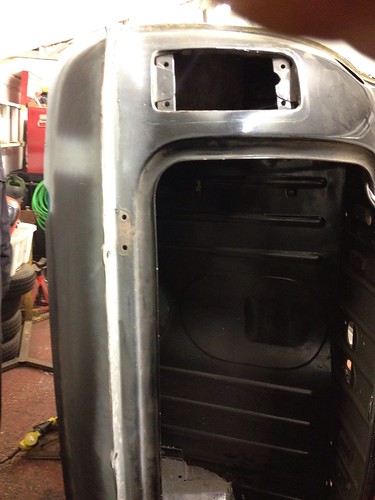
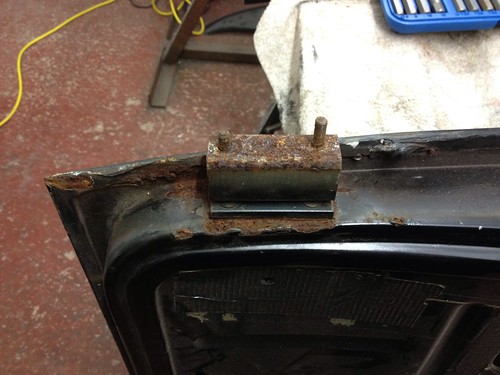
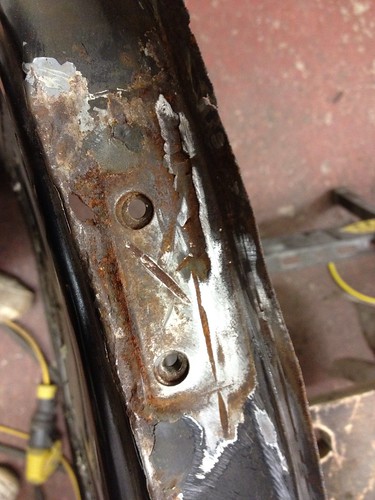
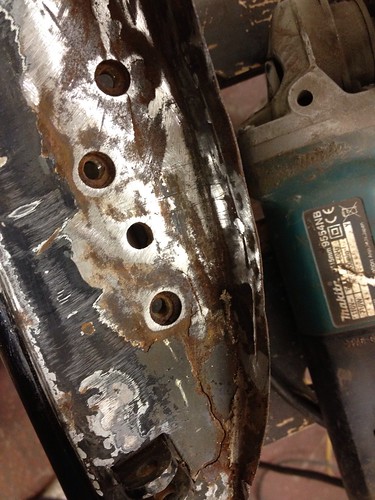
Finished off all the welding on the rear end today, refitted the petrol tank bracket and dressed off all the welding as well. Then moved onto the bulk head which had big rust patches around where the original bonnet hinges mount, So I have cut out those and welded in a plain steel section to both sides, Also welded up the cold air intakes on both flitch panels because I would prefer a cleaner look there with a flip front.
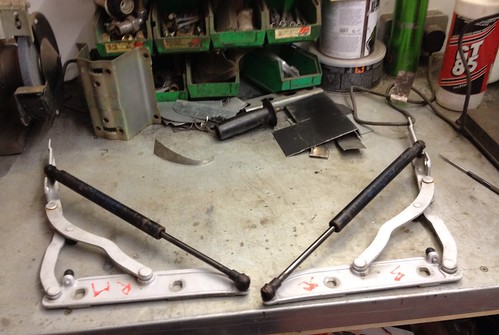
Been online tonight and ordered a pair of BMW e46 boot hinges to use as the hinges for my new front end. Im going to make a metal flip front for the car and will probably order the panels for this during the week. I will take same pictures and put them up soon.
Been online tonight and ordered a pair of BMW e46 boot hinges to use as the hinges for my new front end. Im going to make a metal flip front for the car and will probably order the panels for this during the week. I will take same pictures and put them up soon.
Hinges arrived today so hopefully i can get some time to get the door skins done this weekend and then get cracked on with making the hinges fit and work.
10/1/12 by russell.grant, on Flickr
10/1/12 by russell.grant, on Flickr
A few hour today
From this
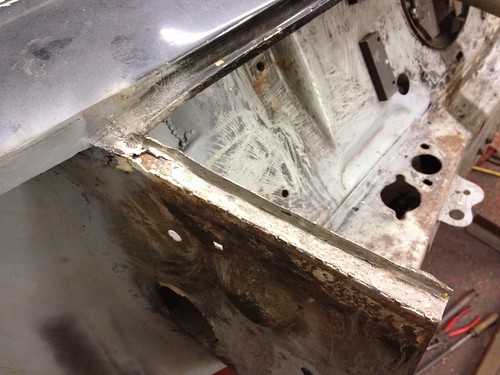
14/1/11.1 by russell.grant, on Flickr

14/1/12.2 by russell.grant, on Flickr
To this

14/1/12/4 by russell.grant, on Flickr
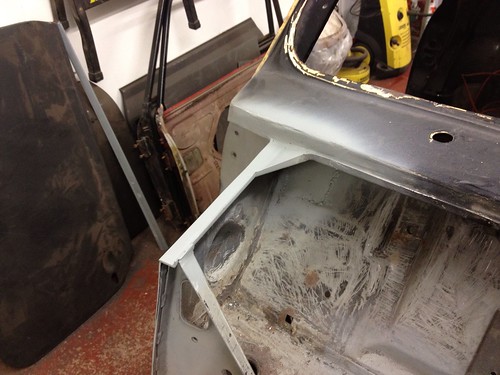
14/1/12.5 by russell.grant, on Flickr
Then onto the nearside

14/1/11.3 by russell.grant, on Flickr
work in progress
14/1/12.6 by russell.grant, on Flickr
I will finish it tomorrow and get back to the door repairs.
From this
14/1/11.1 by russell.grant, on Flickr
14/1/12.2 by russell.grant, on Flickr
To this
14/1/12/4 by russell.grant, on Flickr
14/1/12.5 by russell.grant, on Flickr
Then onto the nearside
14/1/11.3 by russell.grant, on Flickr
work in progress
14/1/12.6 by russell.grant, on Flickr
I will finish it tomorrow and get back to the door repairs.
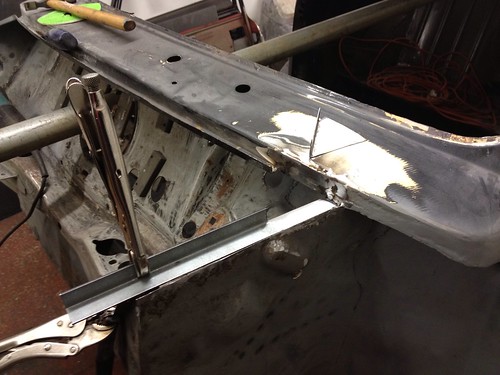
Todays updates
Finished the top of the ns inner wing from yesterday
15/1/12.1 by russell.grant, on Flickr
Then went back to the door, cut out the bulk of the rot on the nearside one

15/1/12.2 by russell.grant, on Flickr
15/1/12.3 by russell.grant, on Flickr
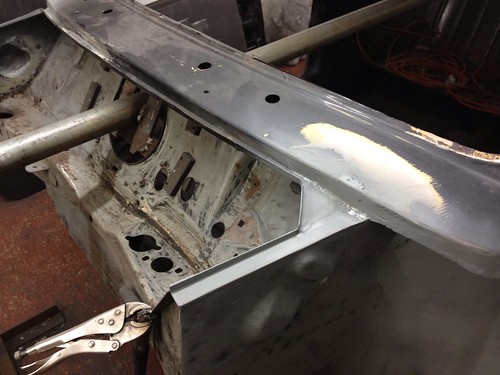
Then time to replace the missing metal and dress it all off
15/1/12.4 by russell.grant, on Flickr
15/1/12.5 by russell.grant, on Flickr
A quick dusting of primer and thats the nearside door fixed just to fit the door skin now
15/1/12.6 by russell.grant, on Flickr

15/1/12.7 by russell.grant, on Flickr
It was at this point that the diesel heater in the garage decided to stop working so I wasted a couple of hours today stripping it down and getting it working again. I did eventually get round to starting to fit the door skin. I have managed to position it correctly and weld it in place at the top. I just need to fold the rest of the skin over the frame to finish this door. Pictures of this will follow soon.
Should hopefully manage a couple of nights in the garage this week to finish that and start the other door
Finished the top of the ns inner wing from yesterday
15/1/12.1 by russell.grant, on Flickr
Then went back to the door, cut out the bulk of the rot on the nearside one
15/1/12.2 by russell.grant, on Flickr
15/1/12.3 by russell.grant, on Flickr
Then time to replace the missing metal and dress it all off
15/1/12.4 by russell.grant, on Flickr
15/1/12.5 by russell.grant, on Flickr
A quick dusting of primer and thats the nearside door fixed just to fit the door skin now
15/1/12.6 by russell.grant, on Flickr
15/1/12.7 by russell.grant, on Flickr
It was at this point that the diesel heater in the garage decided to stop working so I wasted a couple of hours today stripping it down and getting it working again. I did eventually get round to starting to fit the door skin. I have managed to position it correctly and weld it in place at the top. I just need to fold the rest of the skin over the frame to finish this door. Pictures of this will follow soon.
Should hopefully manage a couple of nights in the garage this week to finish that and start the other door
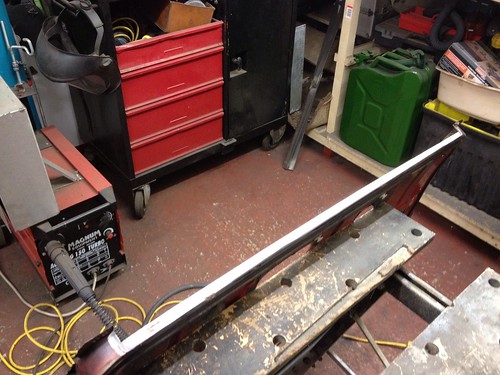
Done a bit more work tonight
17/1/12.1 by russell.grant, on Flickr
17/1/12.2 by russell.grant, on Flickr
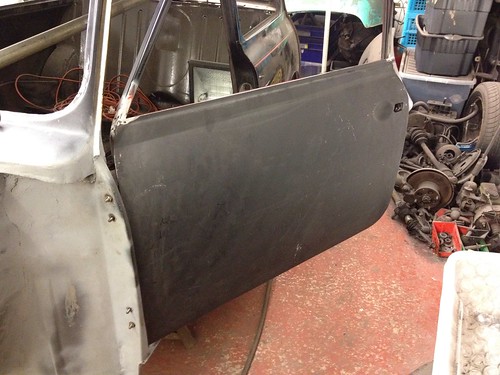
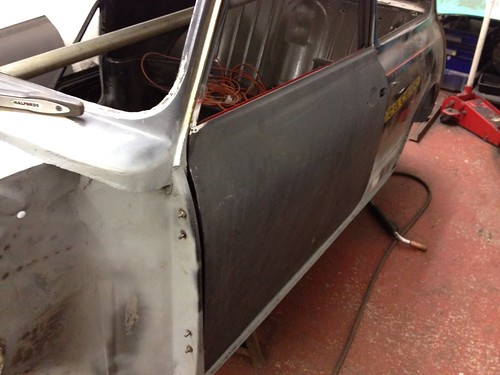
Door skins on now just needs a bit of fine tuning and an a panel fitted, you cant tell from the pictures but the panel gaps look ok so far
17/1/12.1 by russell.grant, on Flickr
17/1/12.2 by russell.grant, on Flickr
Door skins on now just needs a bit of fine tuning and an a panel fitted, you cant tell from the pictures but the panel gaps look ok so far
Havent had anymore than a few hours on the mini since the last batch of pictures. Works halted on the ns now till the new hinge screws are delivered, then I can get back to fitting the door and A-panel up correctly.
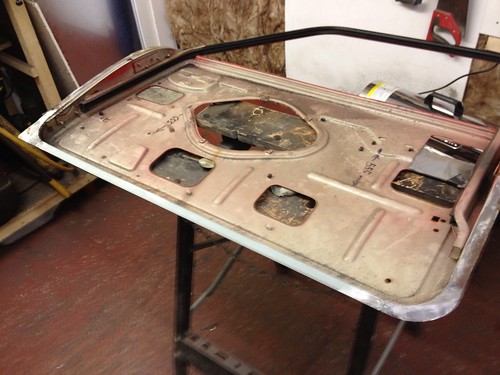
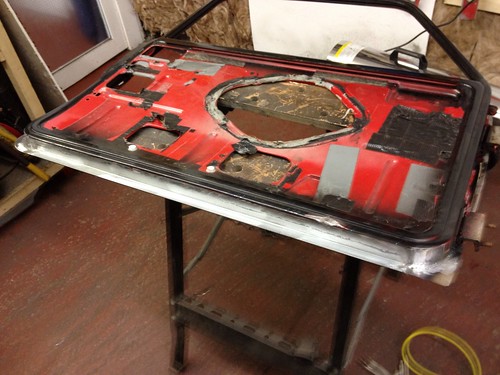
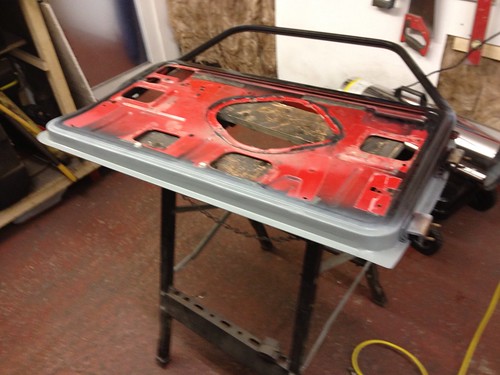
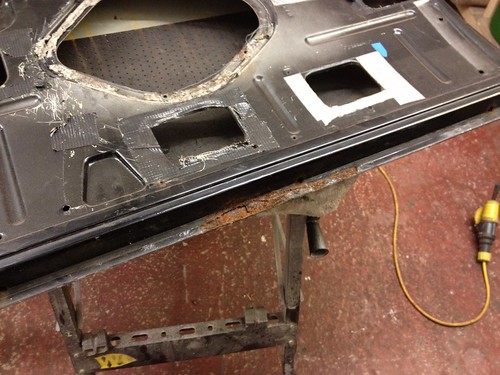
Until then I decided to make a start on the os door. First thing I noticed when lifting it up onto the workbench was that its a bit heavier than I remember any mini doors being but the next couple of pictures should explain why
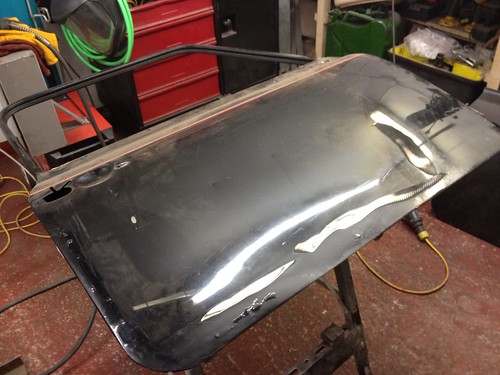
30.1.12.1 by russell.grant, on Flickr
30.1.12.6 by russell.grant, on Flickr
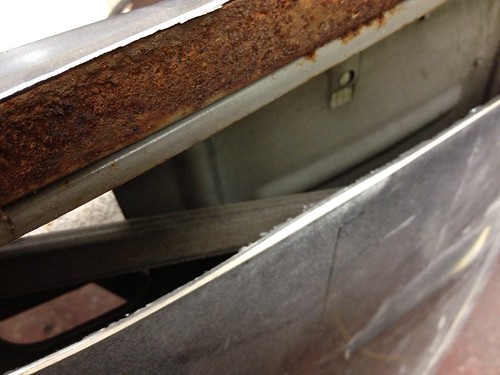
I quick survey of the rest of the door reveals the usual rusty areas(although not as bad as the other door was) and the section the upper hinge is fitted to badly twisted and cracked. Which probably explains why someone has done a botch job of the old door skin with tons of filler.
30.1.12.2 by russell.grant, on Flickr
30.1.12.3 by russell.grant, on Flickr

30.1.12.4 by russell.grant, on Flickr
30.1.12.5 by russell.grant, on Flickr
30.1.12.7 by russell.grant, on Flickr
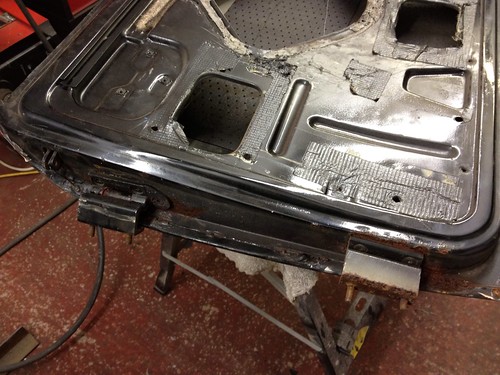
Managed to straighten up the damage, made a start to welding up the cracks and dressed them as I went along
30.1.12.8 by russell.grant, on Flickr

30.1.12.9 by russell.grant, on Flickr
Bit more work to do yet on it but thats for another night
Until then I decided to make a start on the os door. First thing I noticed when lifting it up onto the workbench was that its a bit heavier than I remember any mini doors being but the next couple of pictures should explain why
30.1.12.1 by russell.grant, on Flickr
30.1.12.6 by russell.grant, on Flickr
I quick survey of the rest of the door reveals the usual rusty areas(although not as bad as the other door was) and the section the upper hinge is fitted to badly twisted and cracked. Which probably explains why someone has done a botch job of the old door skin with tons of filler.
30.1.12.2 by russell.grant, on Flickr
30.1.12.3 by russell.grant, on Flickr
30.1.12.4 by russell.grant, on Flickr
30.1.12.5 by russell.grant, on Flickr
30.1.12.7 by russell.grant, on Flickr
Managed to straighten up the damage, made a start to welding up the cracks and dressed them as I went along
30.1.12.8 by russell.grant, on Flickr
30.1.12.9 by russell.grant, on Flickr
Bit more work to do yet on it but thats for another night
Gassing Station | Classic Minis | Top of Page | What's New | My Stuff