Progress thread 2001 Mercedes SLK230
Discussion


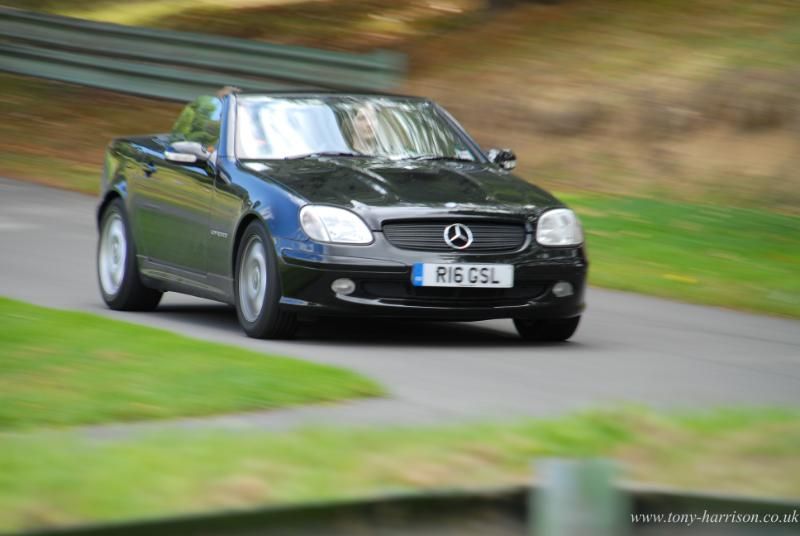
Following on from This thread
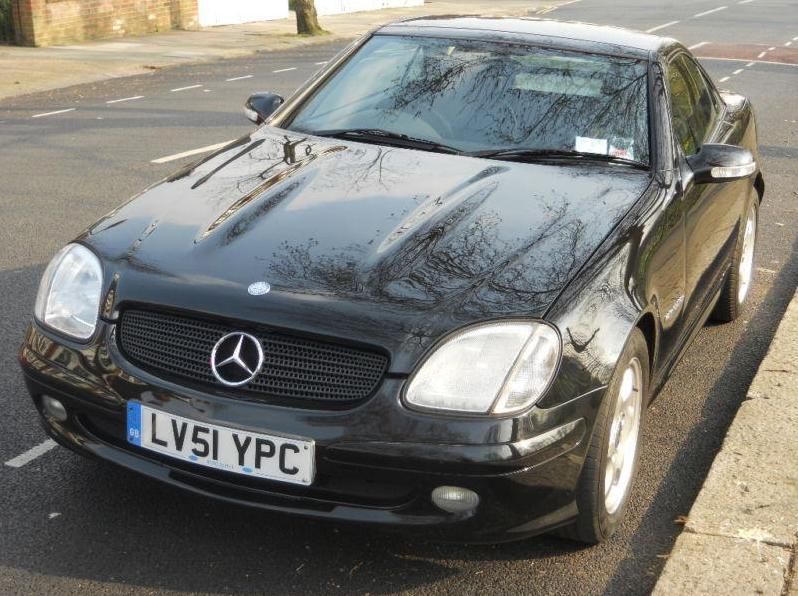
I became the owner of a 2001 SLK
Looked nice but there are a number of jobs to do on the car - thought I'd keep it all tidy and in one thread rather than bump the original thread I started.
When I view the car it wasn't perfect but for a near 100K miles and 1 owner from new it was the best I'd looked at, honest seller and an honest car that needed a few bits sorting to meet my requiremnts
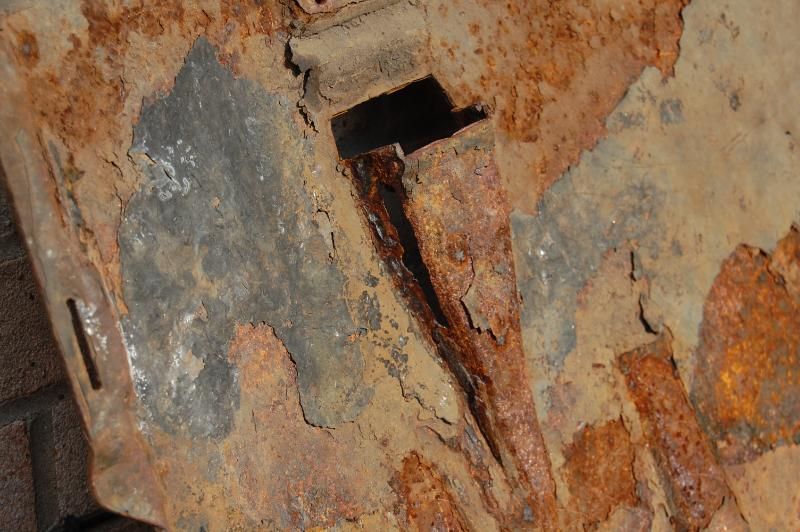
Aside from a little rust on the arches and boot lid I'd spotted a bit of peeling paint on the engine side of bash plate that protects the underside of the engine bay - the were also some big scrapes on the road side too so it obviously serves some usefull purpose so I planned to remove it, treat it, re-paint and re-fit it.
First thing to mention is by god it's heavy
This is what a little bit of peeling paint looked like when the bash plate was removed
Road side
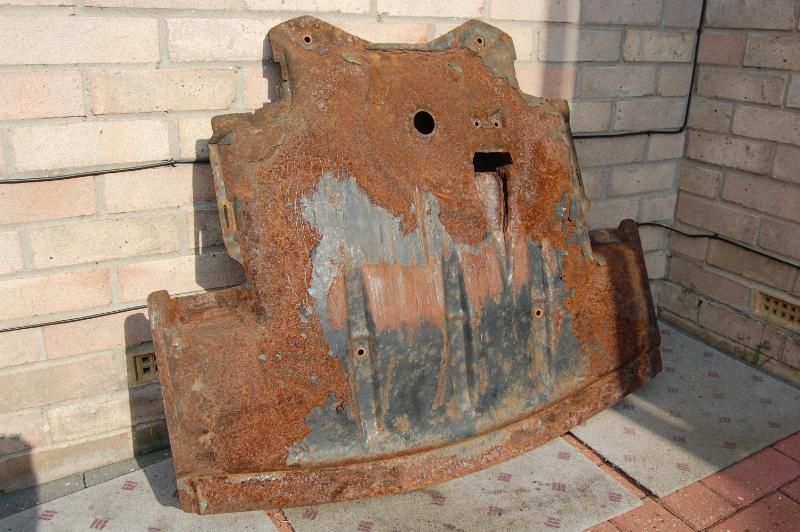
Engine side
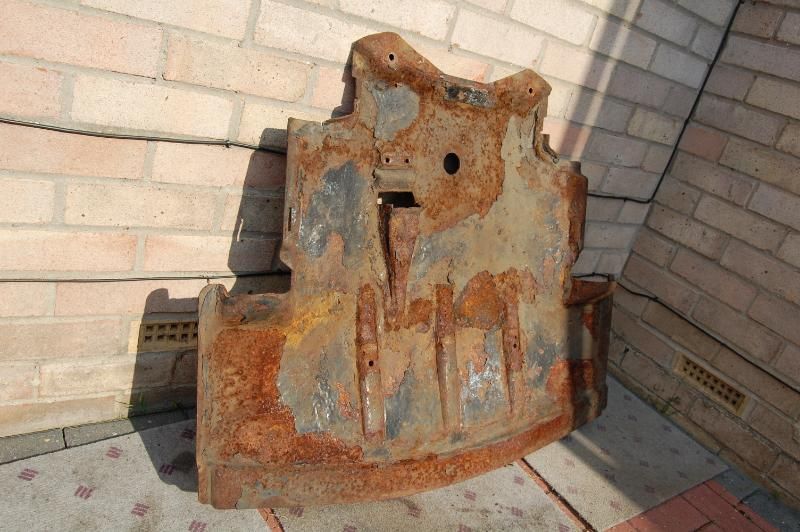
It's pretty much 2-3mm plate and had rusted thro in 3 places - worst bit shown below
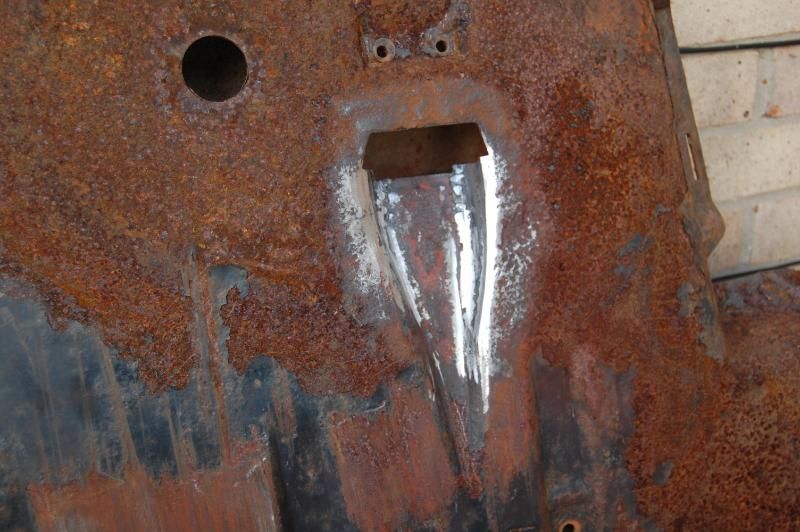
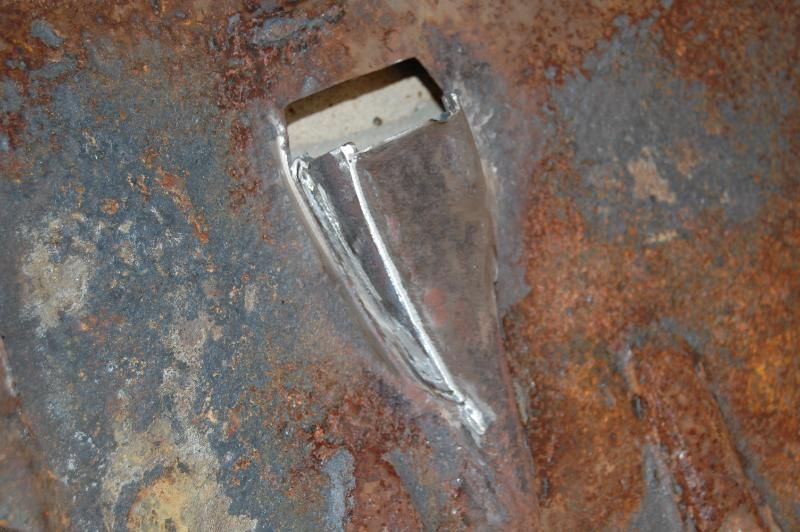
Ok so maybe a bit more than a wire brush and repaint - time to get busy with the miggy first
3 areas repaired
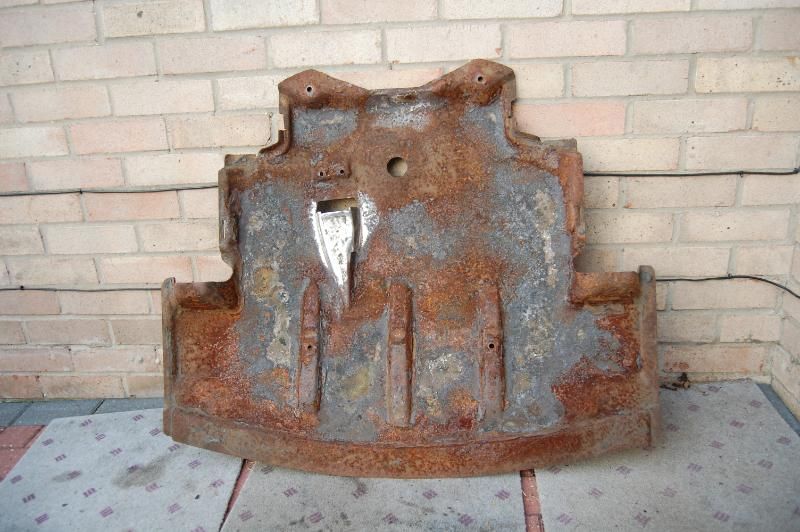
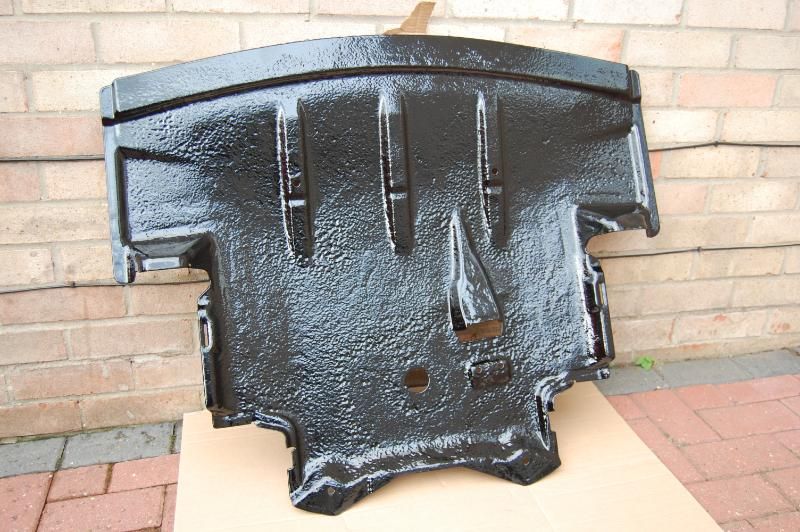
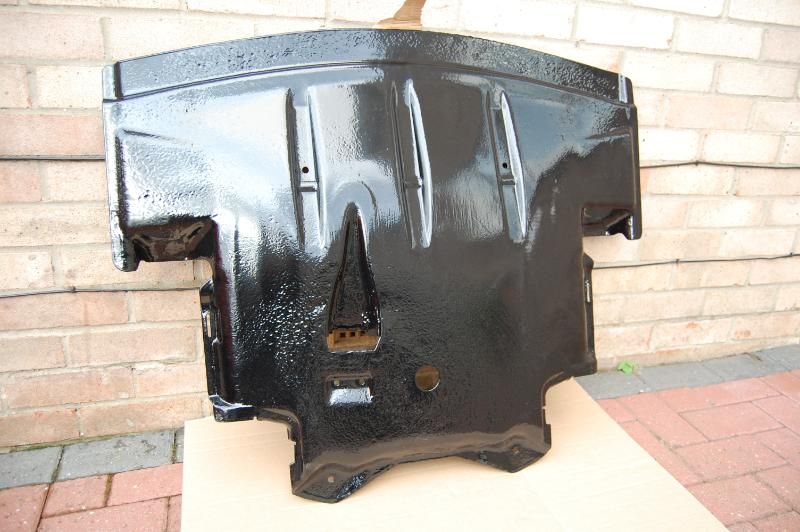
So dropped it of with my local shotblaster for blasting, hot zinc galvanising and then a powdercoat in gloss black
I'll pop some pictures up when I've got it back all sorted if people are interested.....
I became the owner of a 2001 SLK
Looked nice but there are a number of jobs to do on the car - thought I'd keep it all tidy and in one thread rather than bump the original thread I started.
When I view the car it wasn't perfect but for a near 100K miles and 1 owner from new it was the best I'd looked at, honest seller and an honest car that needed a few bits sorting to meet my requiremnts
Aside from a little rust on the arches and boot lid I'd spotted a bit of peeling paint on the engine side of bash plate that protects the underside of the engine bay - the were also some big scrapes on the road side too so it obviously serves some usefull purpose so I planned to remove it, treat it, re-paint and re-fit it.
First thing to mention is by god it's heavy
This is what a little bit of peeling paint looked like when the bash plate was removed
Road side
Engine side
It's pretty much 2-3mm plate and had rusted thro in 3 places - worst bit shown below
Ok so maybe a bit more than a wire brush and repaint - time to get busy with the miggy first
3 areas repaired
So dropped it of with my local shotblaster for blasting, hot zinc galvanising and then a powdercoat in gloss black
I'll pop some pictures up when I've got it back all sorted if people are interested.....
Edited by B'stard Child on Thursday 7th July 01:03
SLacKer said:
What is wrong with some tough plastic?
r129sl said:
It looks like your car was ordered with the optional sump guard: usually the under-engine cover is plastic. I have always thought this is a useful option to have and have looked at retrofitting it to some of my other cars, especially my TE which gets rough treatment from time to time.
Ahh I wondered if it was an option - a couple of cars I looked at didn't even have anything. It's certainly had some scrapes
r129sl said:
Anyway, I don't know how much the shot blasting is costing but it may be that a new sump guard can be had cheaply enough from the Mercedes dealer. It should be about £105 inc VAT.
Refurbishment costs I'll happily reveal up when I've got it back - likely to be less than £50 and it won't rust like a new one will either - I had the same treatment done to my Monza track car trailing arms - they are now stone chipped to heck but no rust 
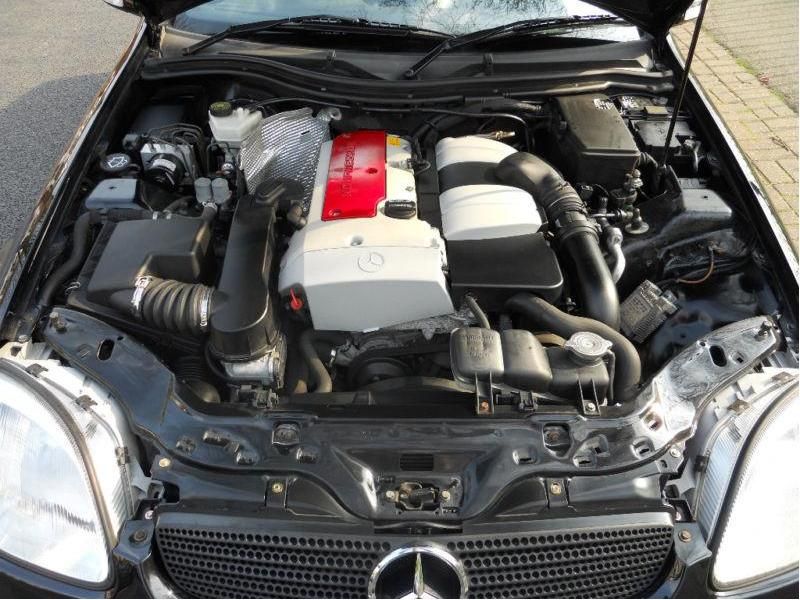
Oh and while it's off I'd better do and oil and filter change as it'll be a lot easier than after it's fitted

r129sl said:
It's option code 481. All good points you make about having it refurbished. It amazes me how cheaply one can have very good quality metal treatments carried out, shot-blasting, galvanising, powder coating or nickel-plating and the like.
The local place I use do me a set of wheels any size/width shot blasted and powder coated in any colour of choice for £120......Do a nice job too - not "spit and polish" or "lepsons" nice but perfectly acceptable. One set I had done 8 years ago still wash up like new.....
Popped into the blasting place today on the off chance it was ready before the weekend - it's blasted and no new holes so no more repairs needed - will be ready for collection Monday £30 was the agreed price.....
I'd struggle to buy zip wheels, rust "eater" treatment, primer and top coat for that money..... (not even considering how I would value my hours taken to do it)
I'd struggle to buy zip wheels, rust "eater" treatment, primer and top coat for that money..... (not even considering how I would value my hours taken to do it)
Oil and filter change done - took me longer to find the oil filter than it did to change it
Collected undertray today and it's now fitted - should stay rust free longer than the car now - up on ramps I can see I'll need to do a few other parts soon - nothing as bad as the undertray but some bits definately need attention.
Anyway pics as promised
OK surface finish isn't fantastic in the pictures but it was a crusty old lump
The nice bit for me is now when looking into the engine bay from above it all looks nice and clean and whilst no-one will notice whats been done I'll know it.....
Edited by B'stard Child on Wednesday 13th July 01:22
Ha ha
Next job has been triggered by topping up the washer reservoir
8L required
2L on the floor.......
D/S front wheel needs to come off and the wheel arch liner needs to be removed so I can understand what the issue is.
Still it's a job (wheel arch liner removal - clean and refit) I always do with recently purchased cars now I have another reason to do it
OK a little update
Been mainly cleaning drains and they are a bit of a PITA but I can say now that the fuel flap, two rear boot drains and the three front scuttle drains are all now draining properly - they weren't before....
Fuel economy has been very impressive
Average 35 mpg (UK Gal) 29.1 mpg (US Gal) 8.07 L/100 km
Best 38 mpg (UK Gal) 31.6 mpg (US Gal) 7.43 L/100 km
Worst 32mpg (UK Gal) 26.6 mpg (US Gal) 8.83 L/100 km
Worst was on a PH hoon around east anglia
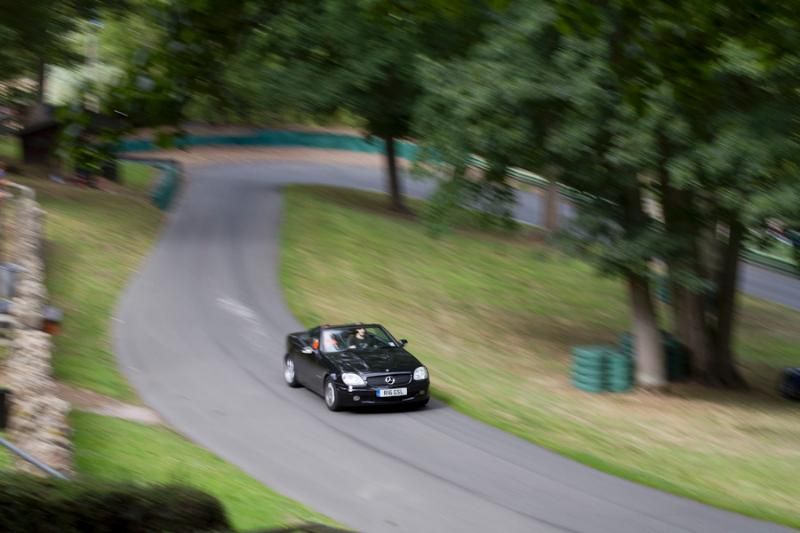
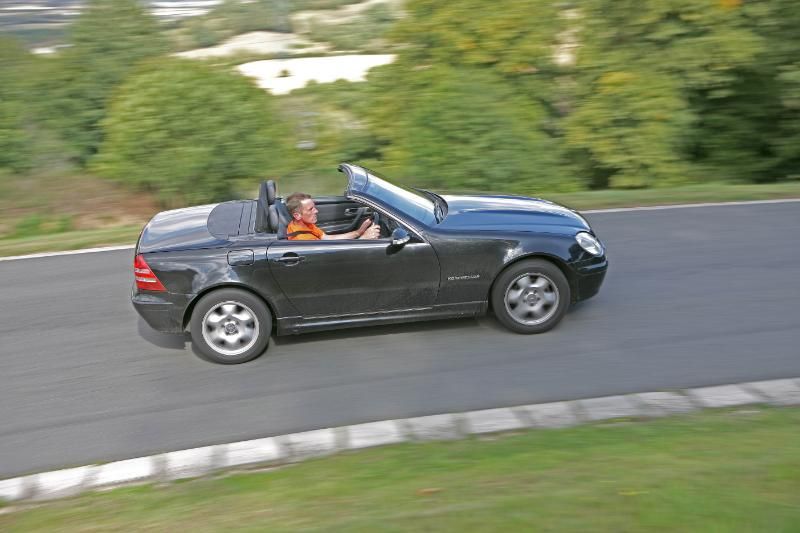
And it's been up the hill at Prescott and once I'd turned the nanny state off it did rather well (not as focused as my track car but still quite lively and fun)
Might have some pictures of that to add latter

Been mainly cleaning drains and they are a bit of a PITA but I can say now that the fuel flap, two rear boot drains and the three front scuttle drains are all now draining properly - they weren't before....
Fuel economy has been very impressive
Average 35 mpg (UK Gal) 29.1 mpg (US Gal) 8.07 L/100 km
Best 38 mpg (UK Gal) 31.6 mpg (US Gal) 7.43 L/100 km
Worst 32mpg (UK Gal) 26.6 mpg (US Gal) 8.83 L/100 km
Worst was on a PH hoon around east anglia
And it's been up the hill at Prescott and once I'd turned the nanny state off it did rather well (not as focused as my track car but still quite lively and fun)
Might have some pictures of that to add latter
Edited by B'stard Child on Friday 2nd September 15:55
Blimey haven't update this in a while
Expenditure since last update has been limited to fuel and oil changes although new tyres are on the cards soon.....
Last year I noticed the water was collecting around the boot seal so I cleaned all the drains and sorted that
Never been happy with the engine temp sits at 80deg on the guage so new thermostat was sourced
In the recent colder weather the boot struts haven't been offering much in the way of support turning the boot lid into a perfect guilotine when you least expect it - Two struts at £11.50 from the local Merc dealership
Typically the front drains have blocked up in the recent cold weather damn screen was fogging up when parked up after a run and the car had a slight whiff of compost occasionally.
I'd ordered and collected a new cabin filter at the same time as the boot struts so fitting that was also on the agenda
So tonight I stripped the wipers off and removed the scuttle cover and was greated by quite a large quantity of leaf debris blocking all three drains
Having learnt a good technique from the rear drain fun time I didn't even bother to try and rod them out - just ull out what debris I could untill the holes were clear then 100 mls or so of Jizer down the holes
Go and have dinner
On return follow the jizer with a hose pipe on pluse squeeze the pipe release and repeat and shortly all the drains coul cope with a full bore hose.
Old thermostat removed and replaced with new thermost.
Scuttle back on and wipers re-fitted cabin filter replaced - seems like the last one fitted was probably aftermarket as the merc sourced one was a much better construction
Took the bottom of the fan unit and wasn't surprised by the contents a nice mug sized ammount of wet and nasty leaf debris
so that'll be why the screen has been misting up!
All done and quick run round the dual carriage way reveals that the new operating temp is about 5 deg higher on the dash - the blower seems far more effective and it is odourless again
Next job the spring Oil and filter change and I think I'll probably change the coolant too...
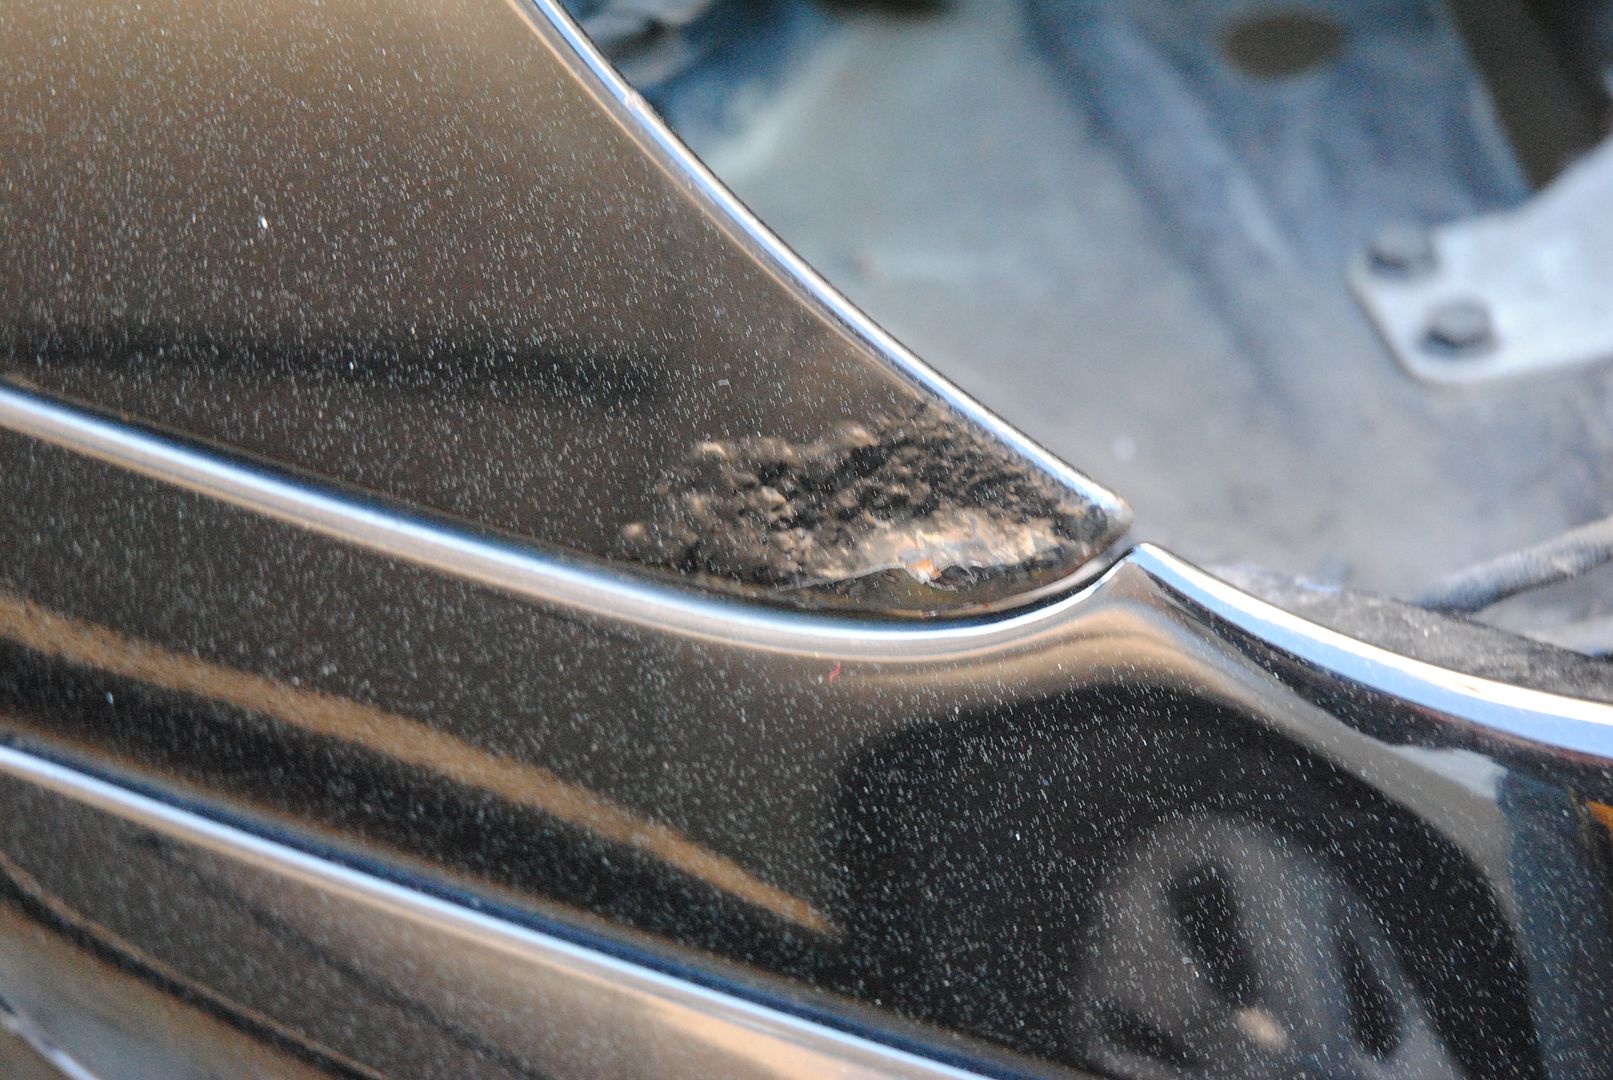
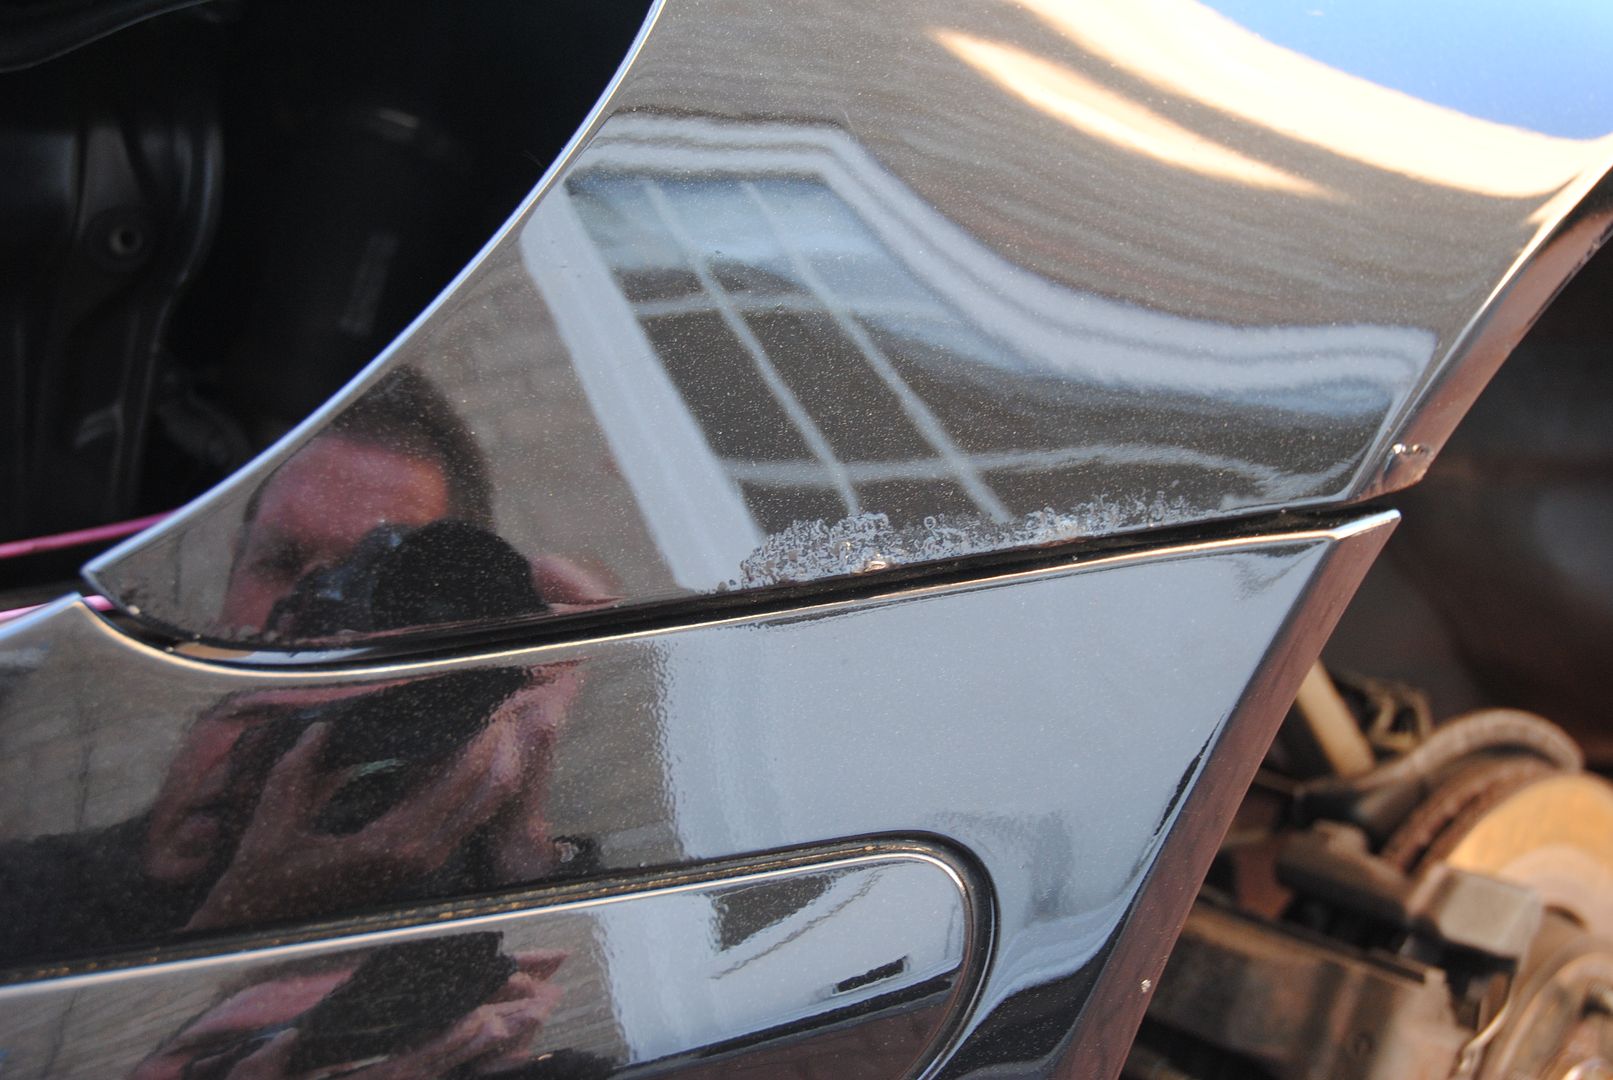
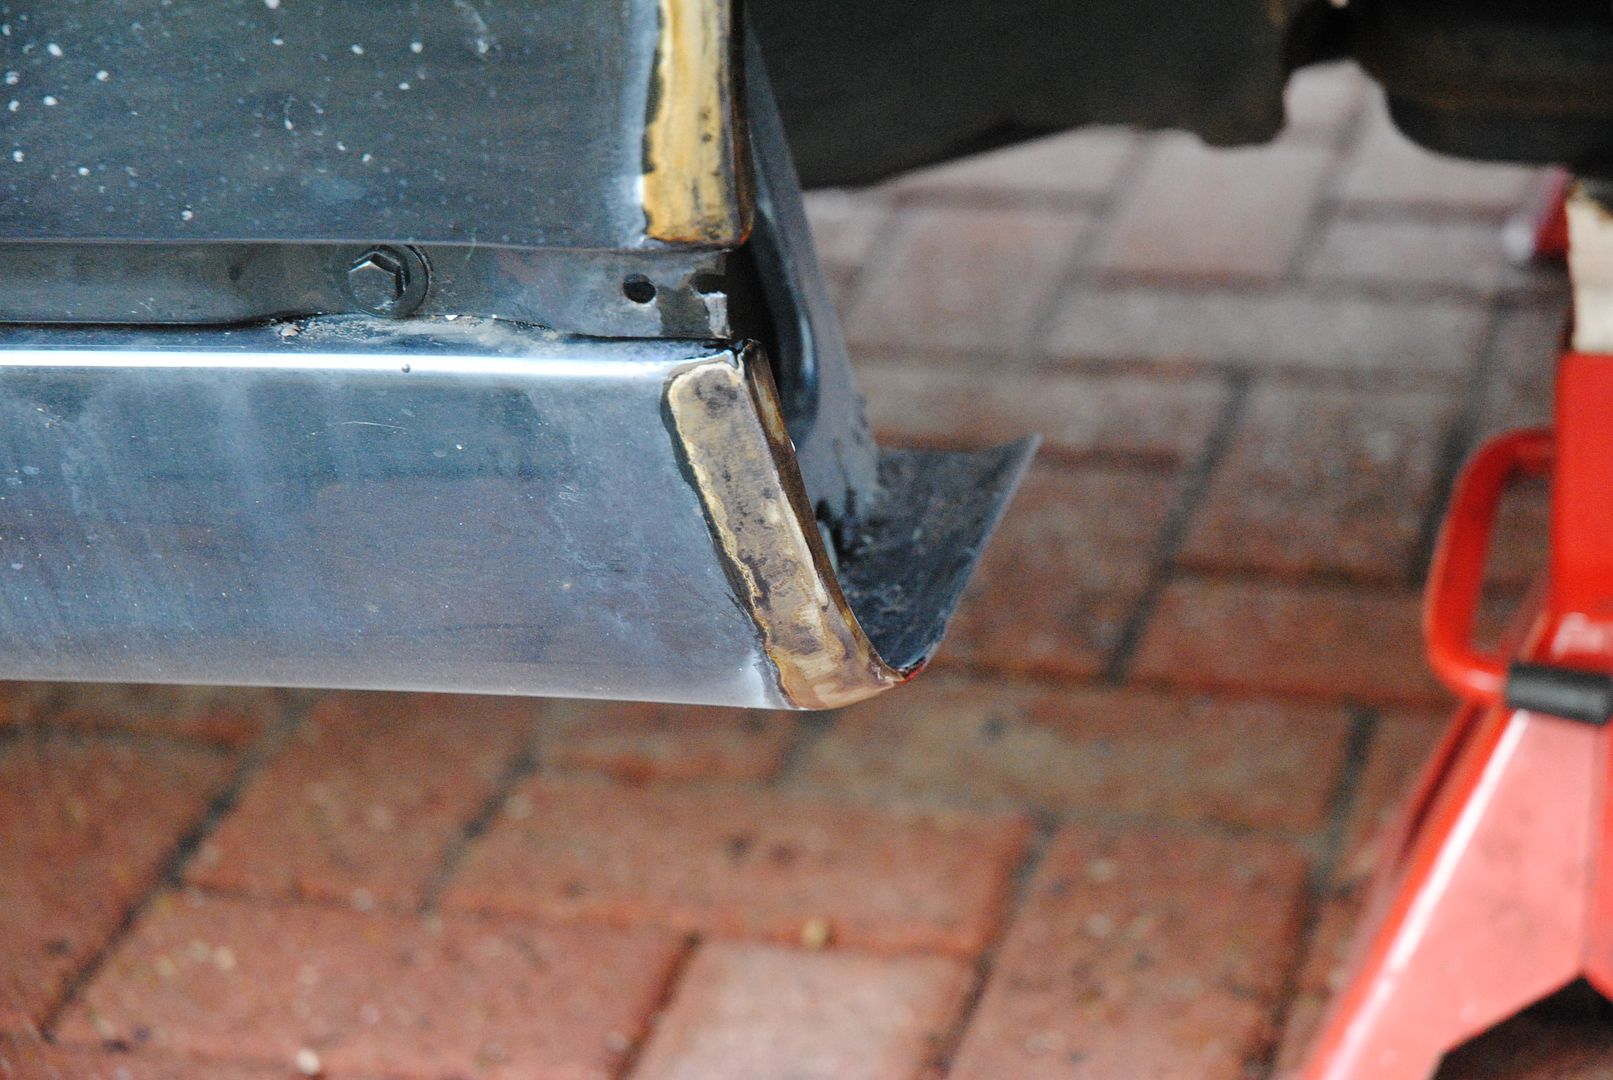
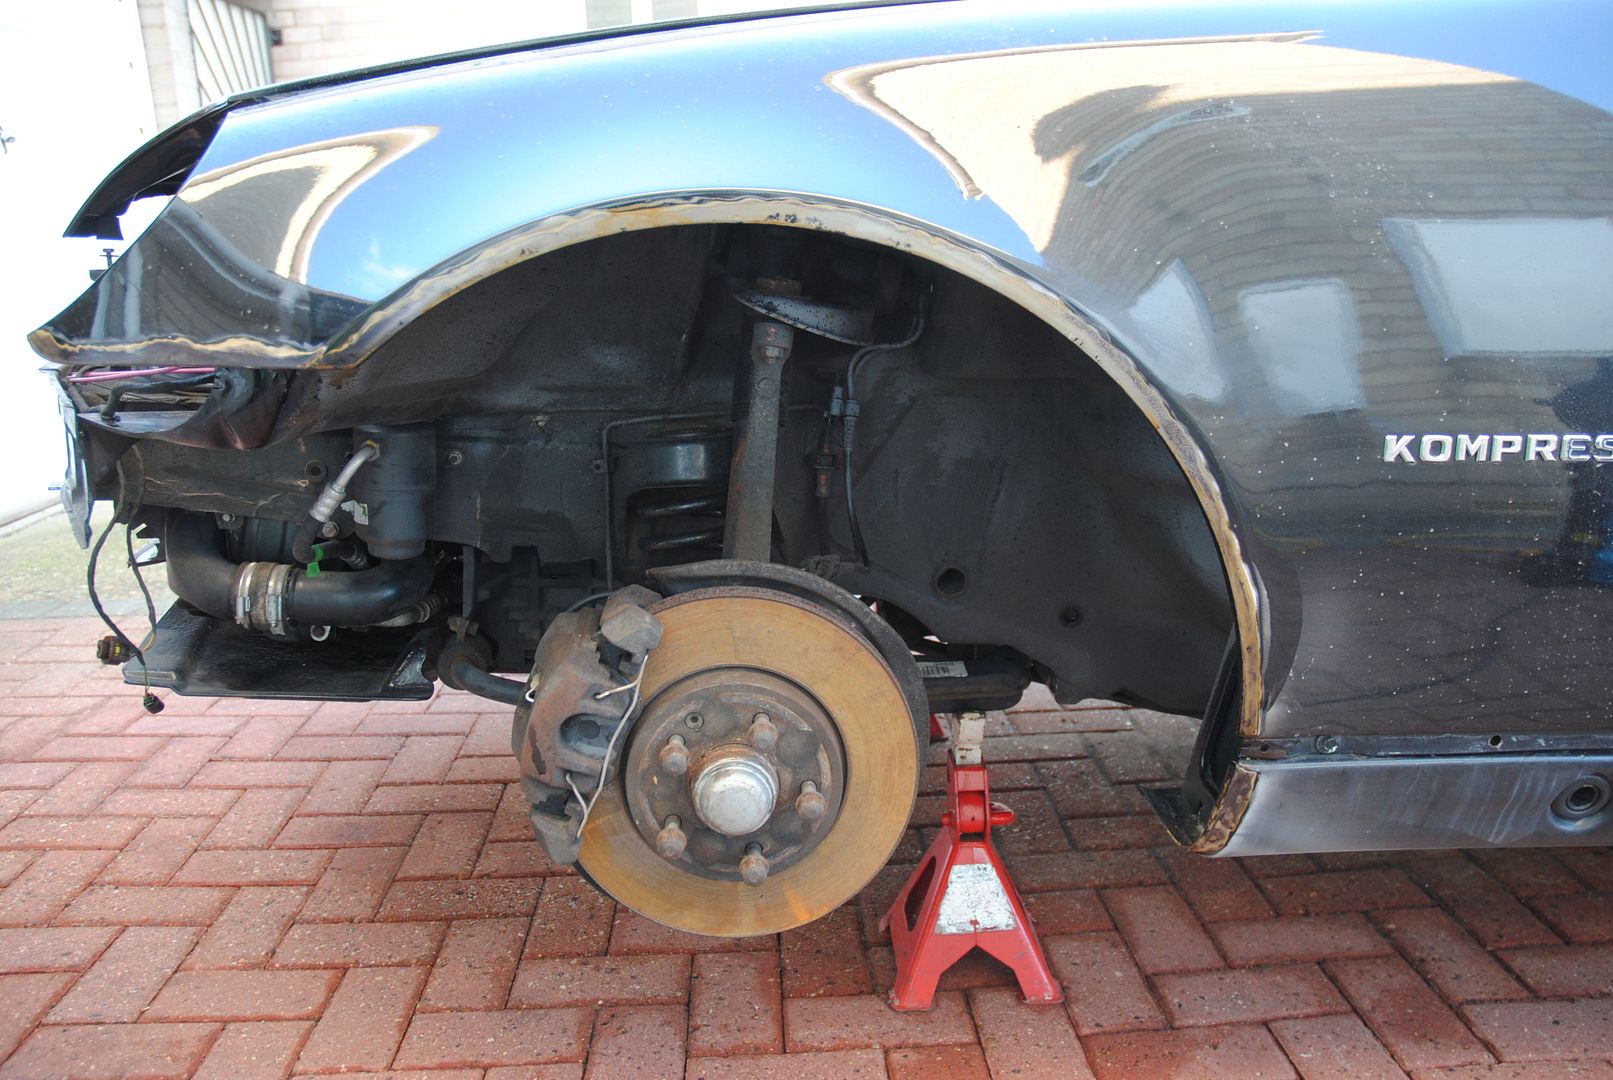
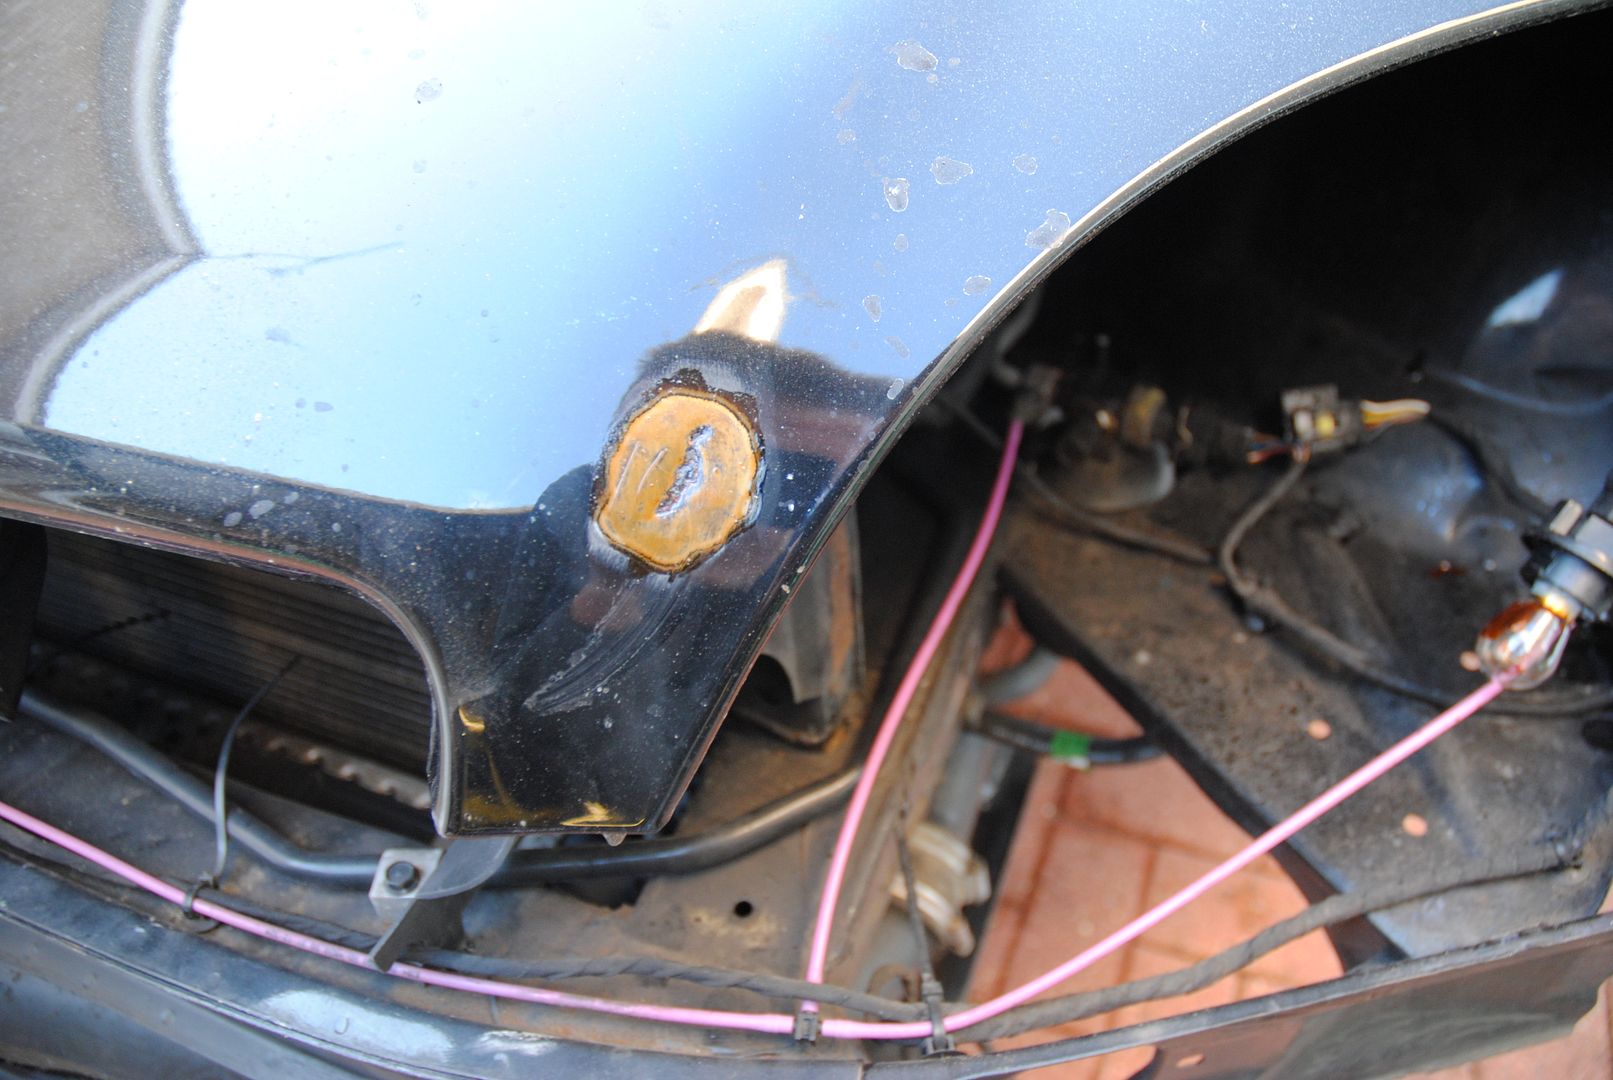
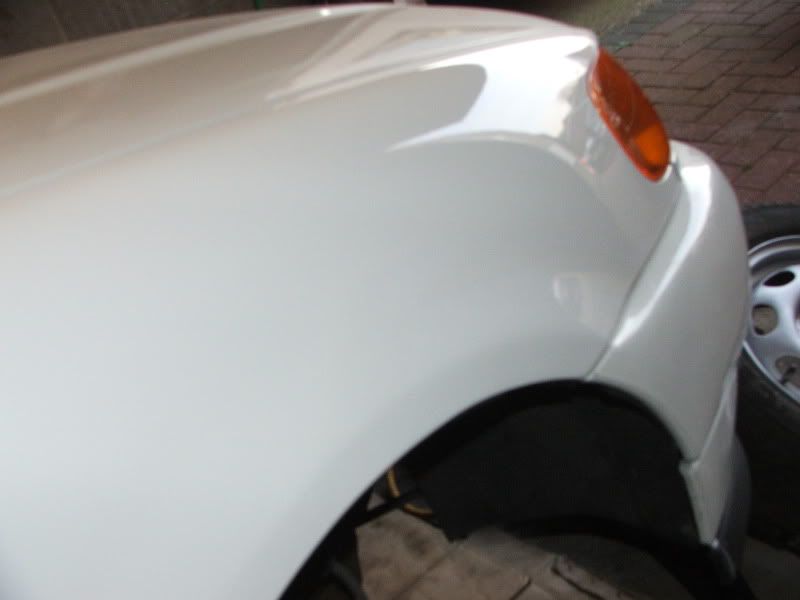
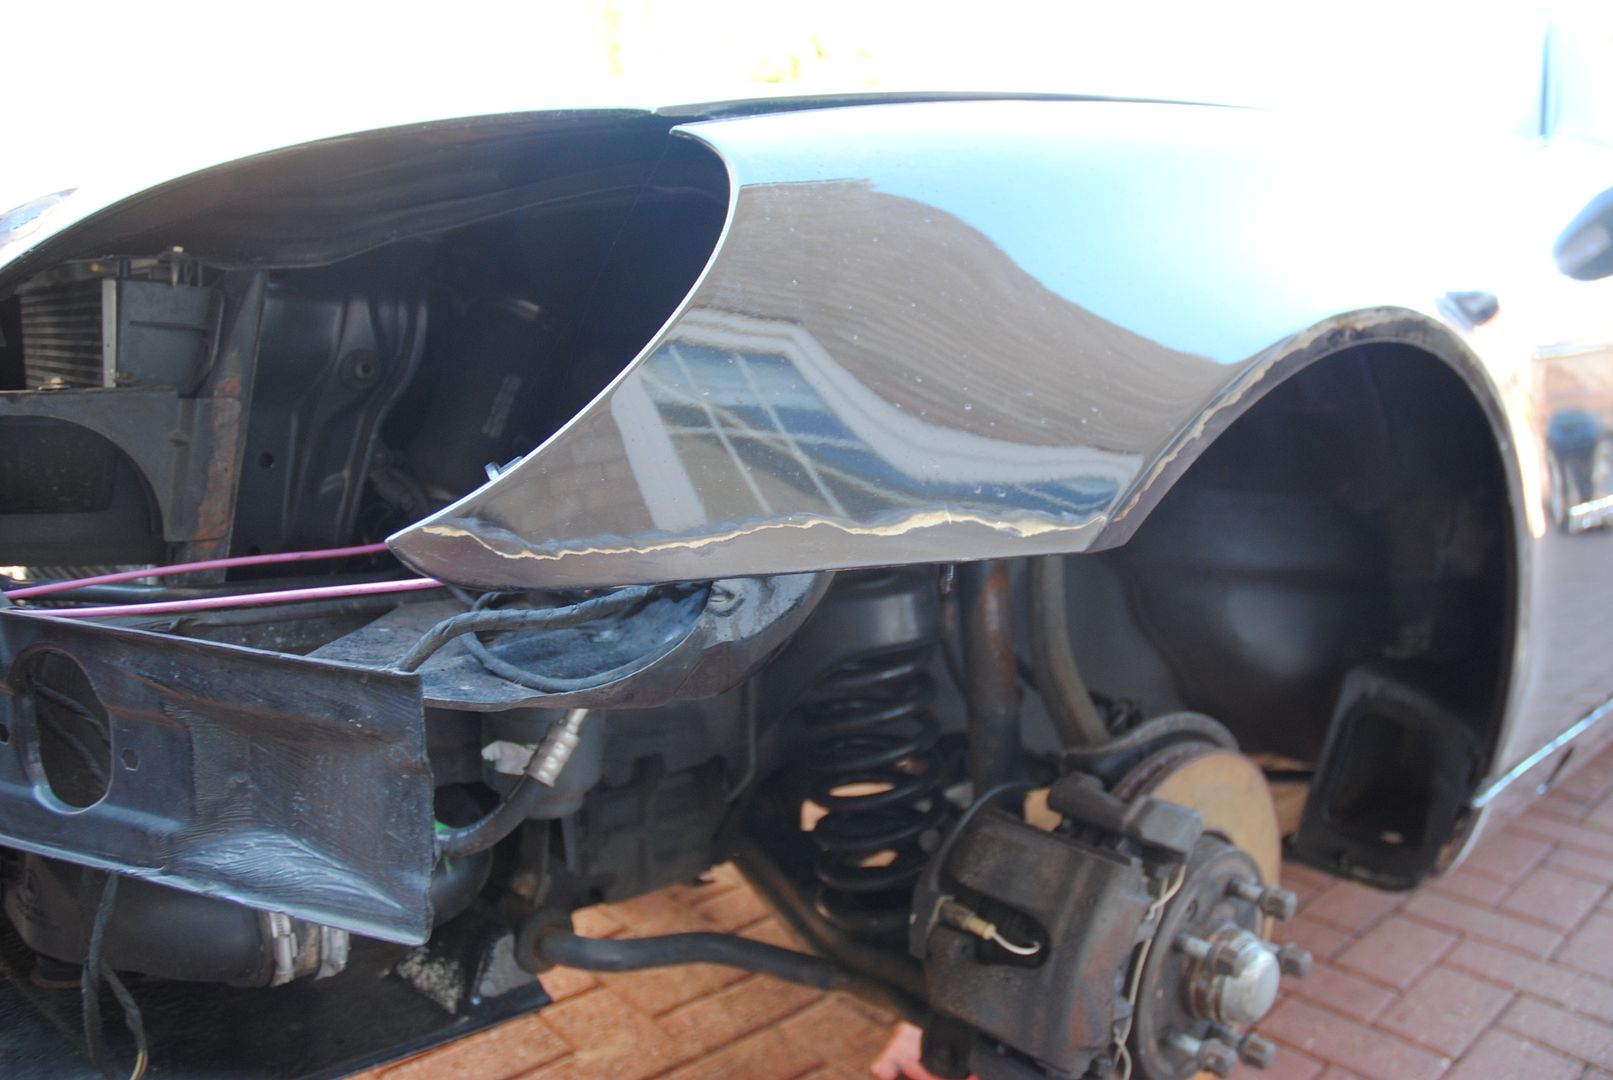
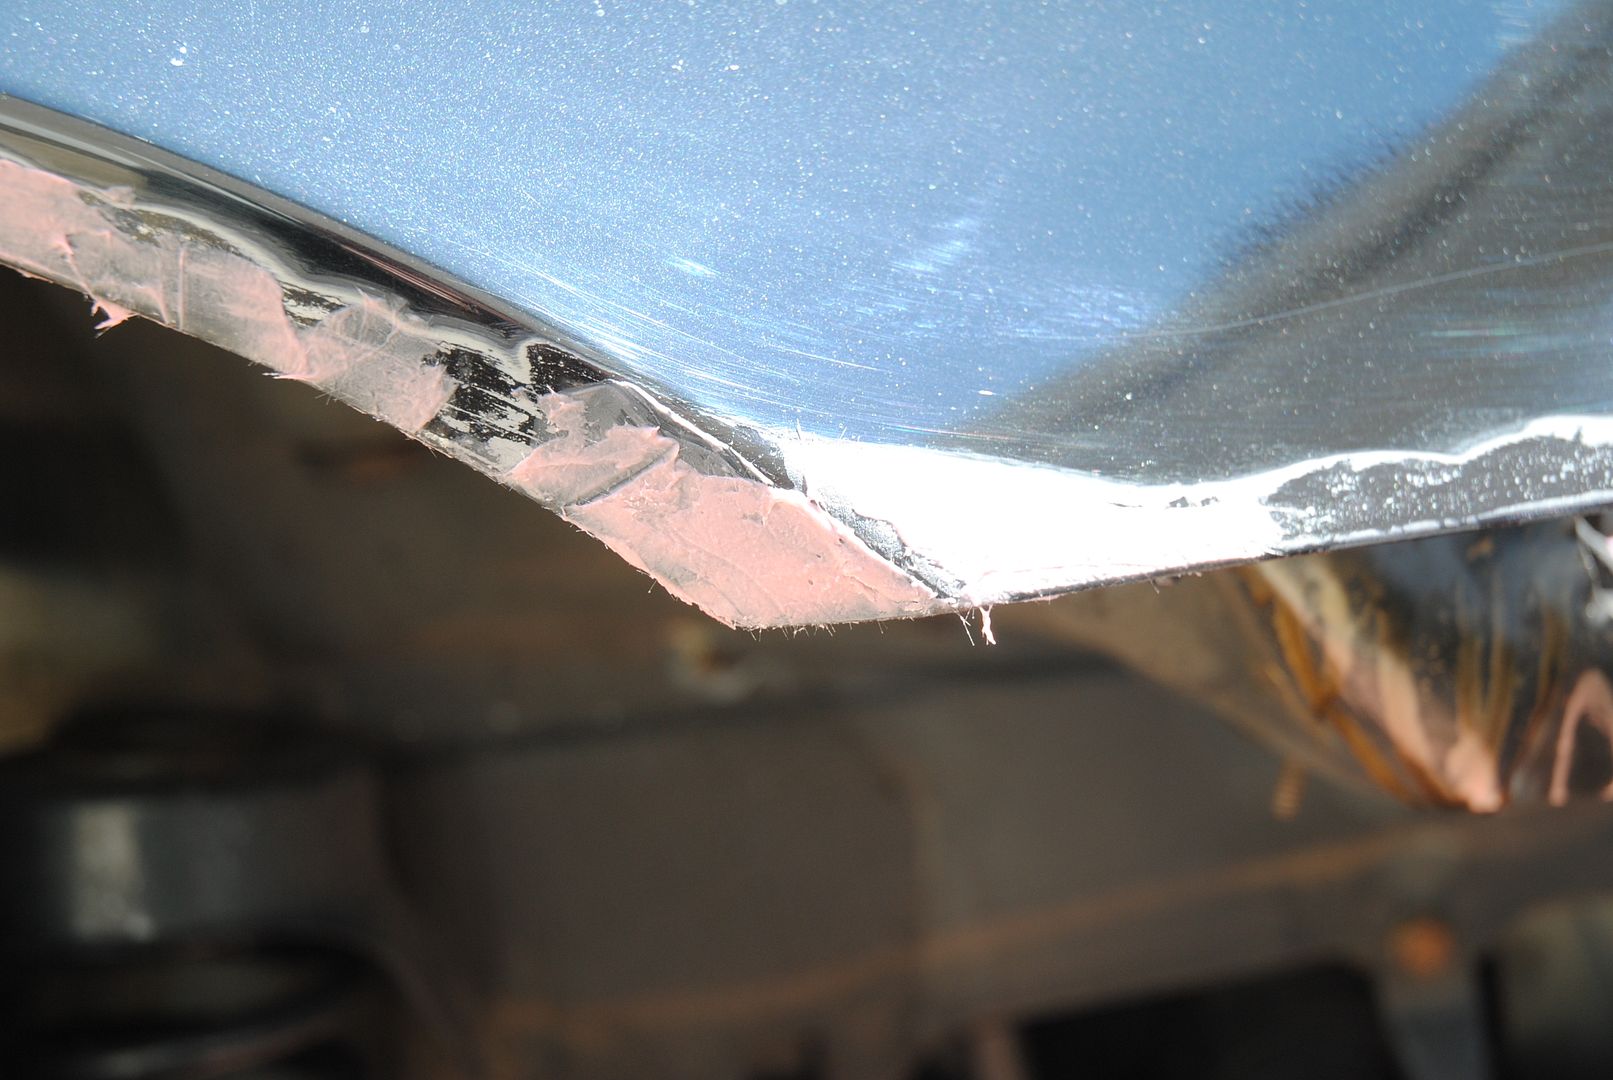
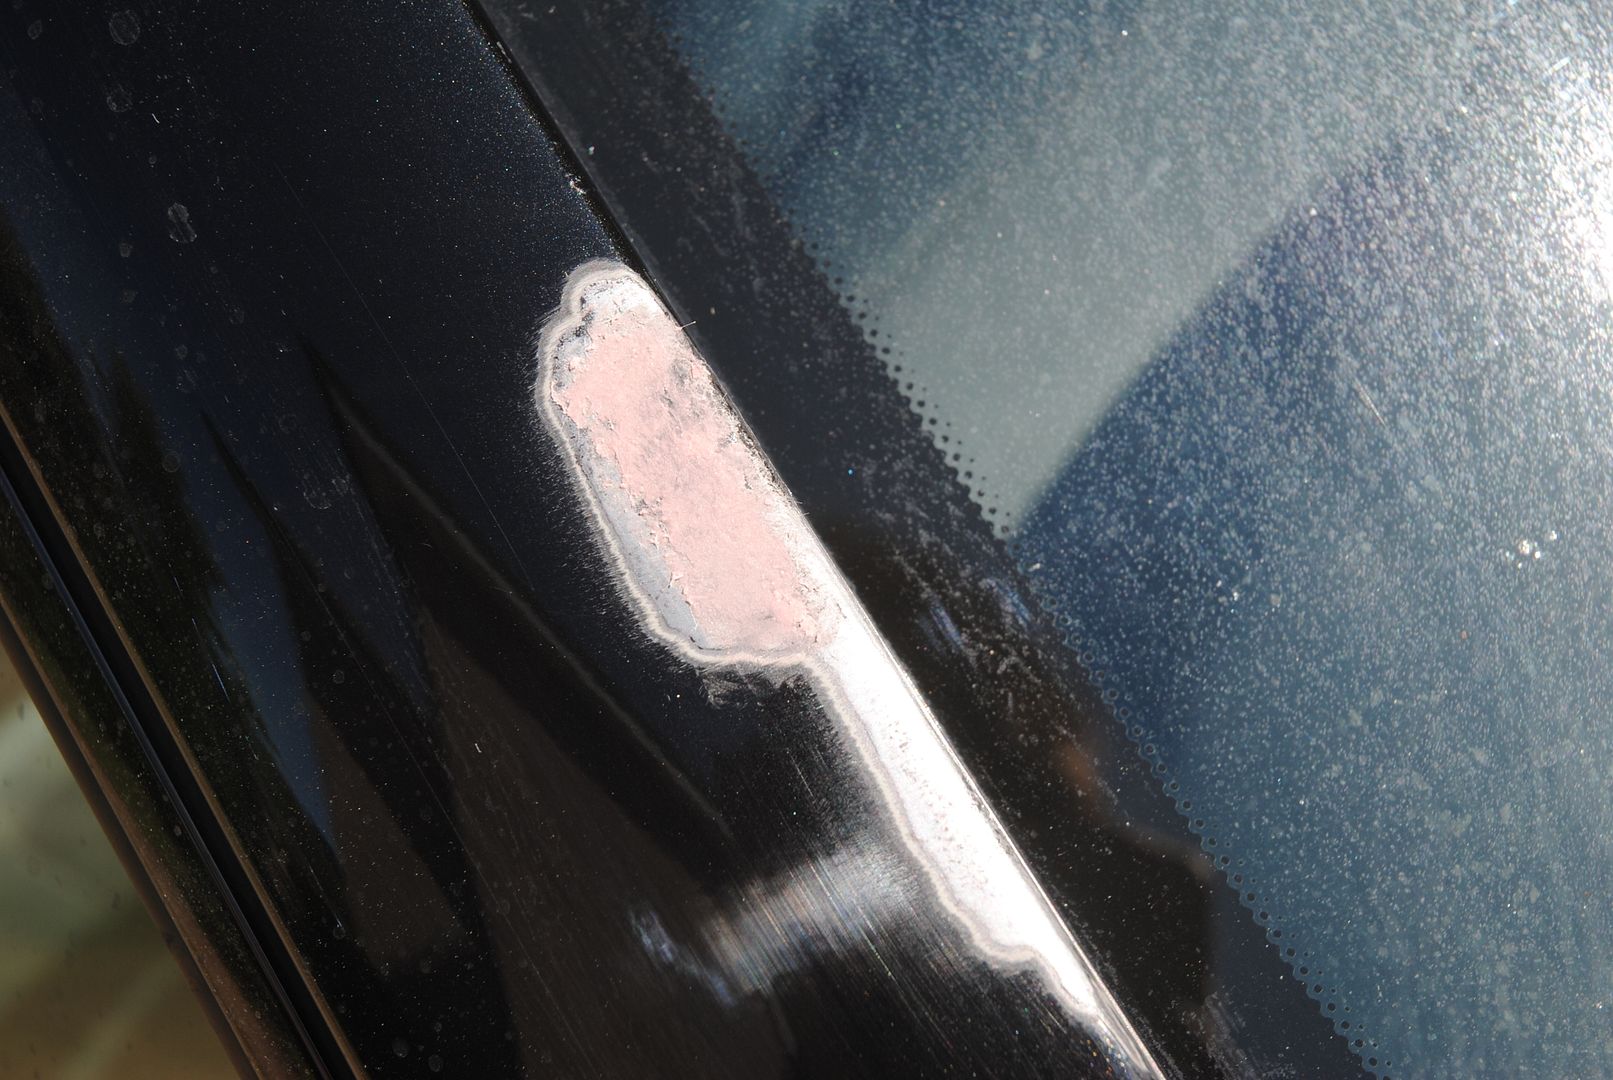
Time to sort the paintwork irritations out (legacy of when the bean counters took control of Mercedes)
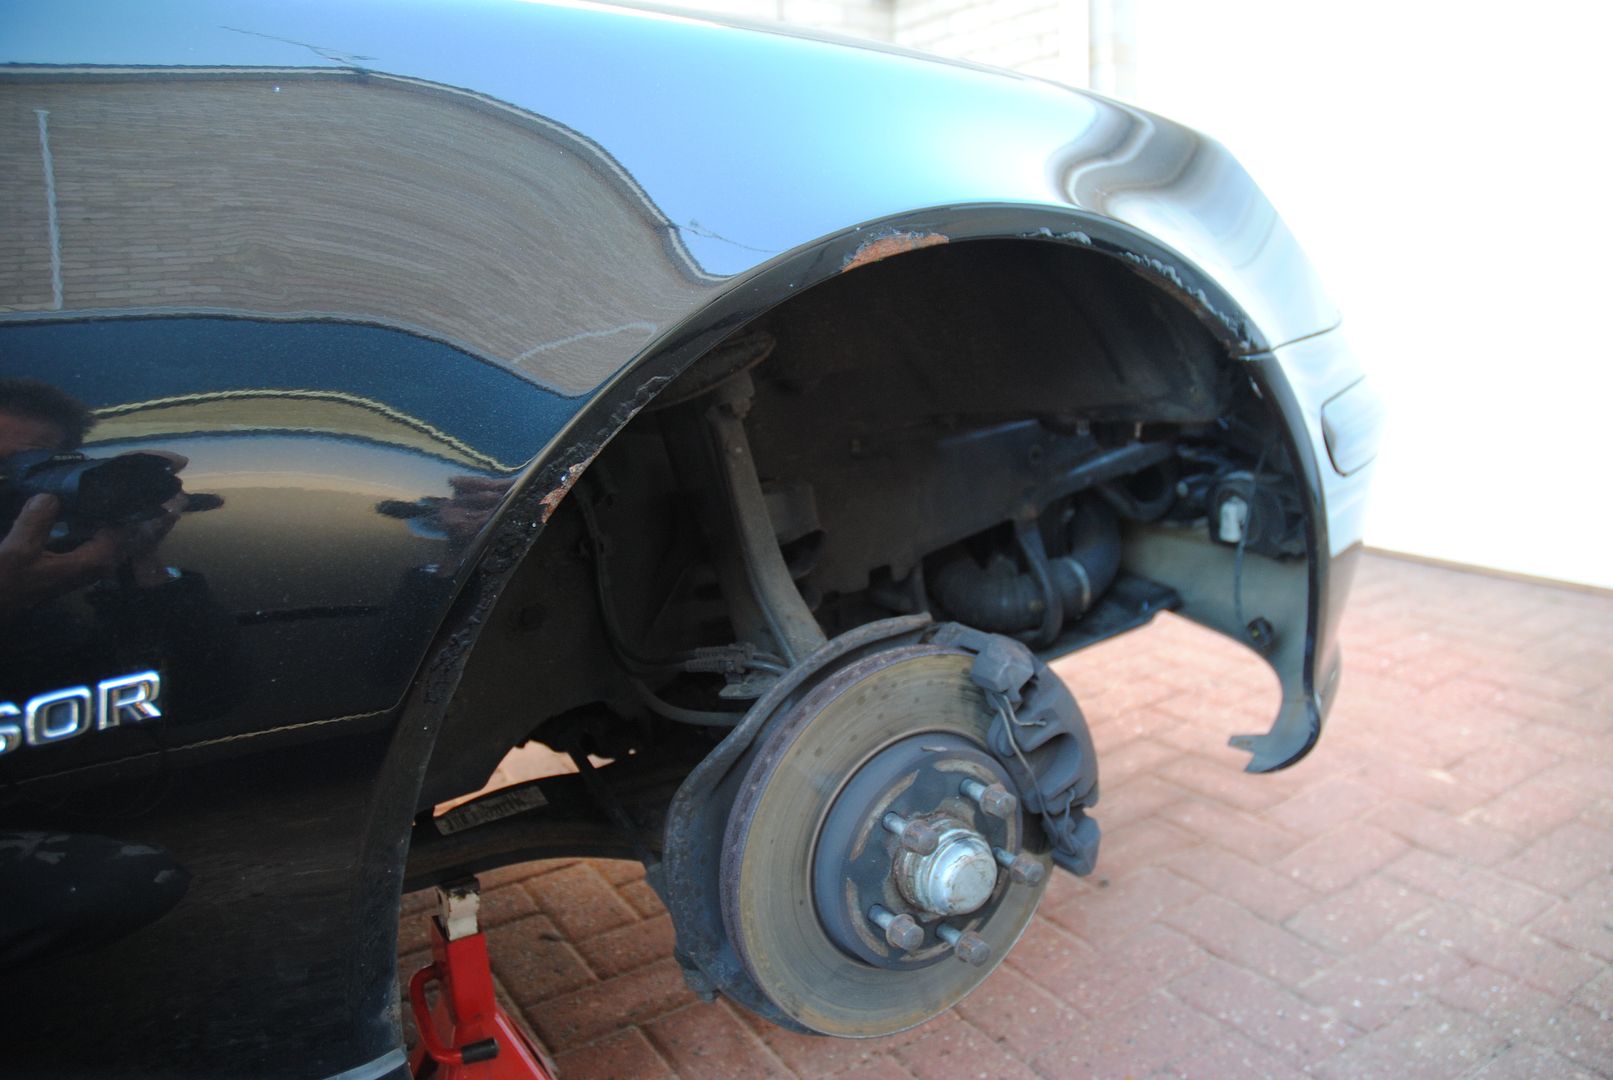
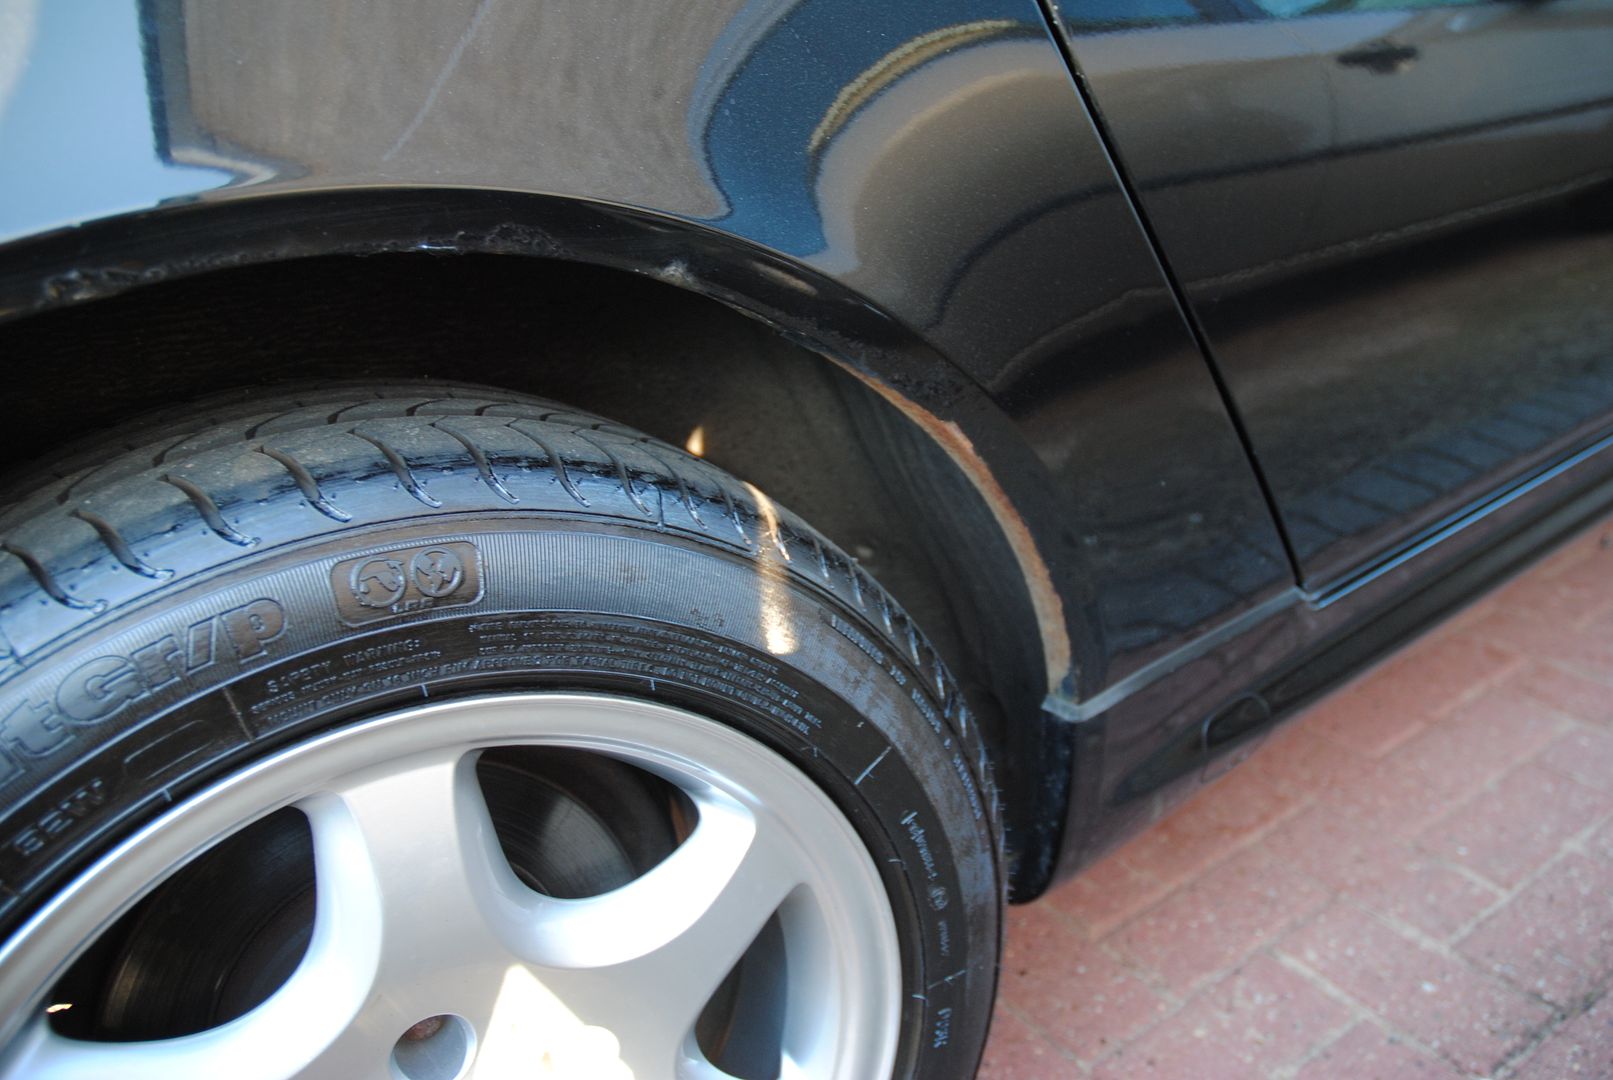
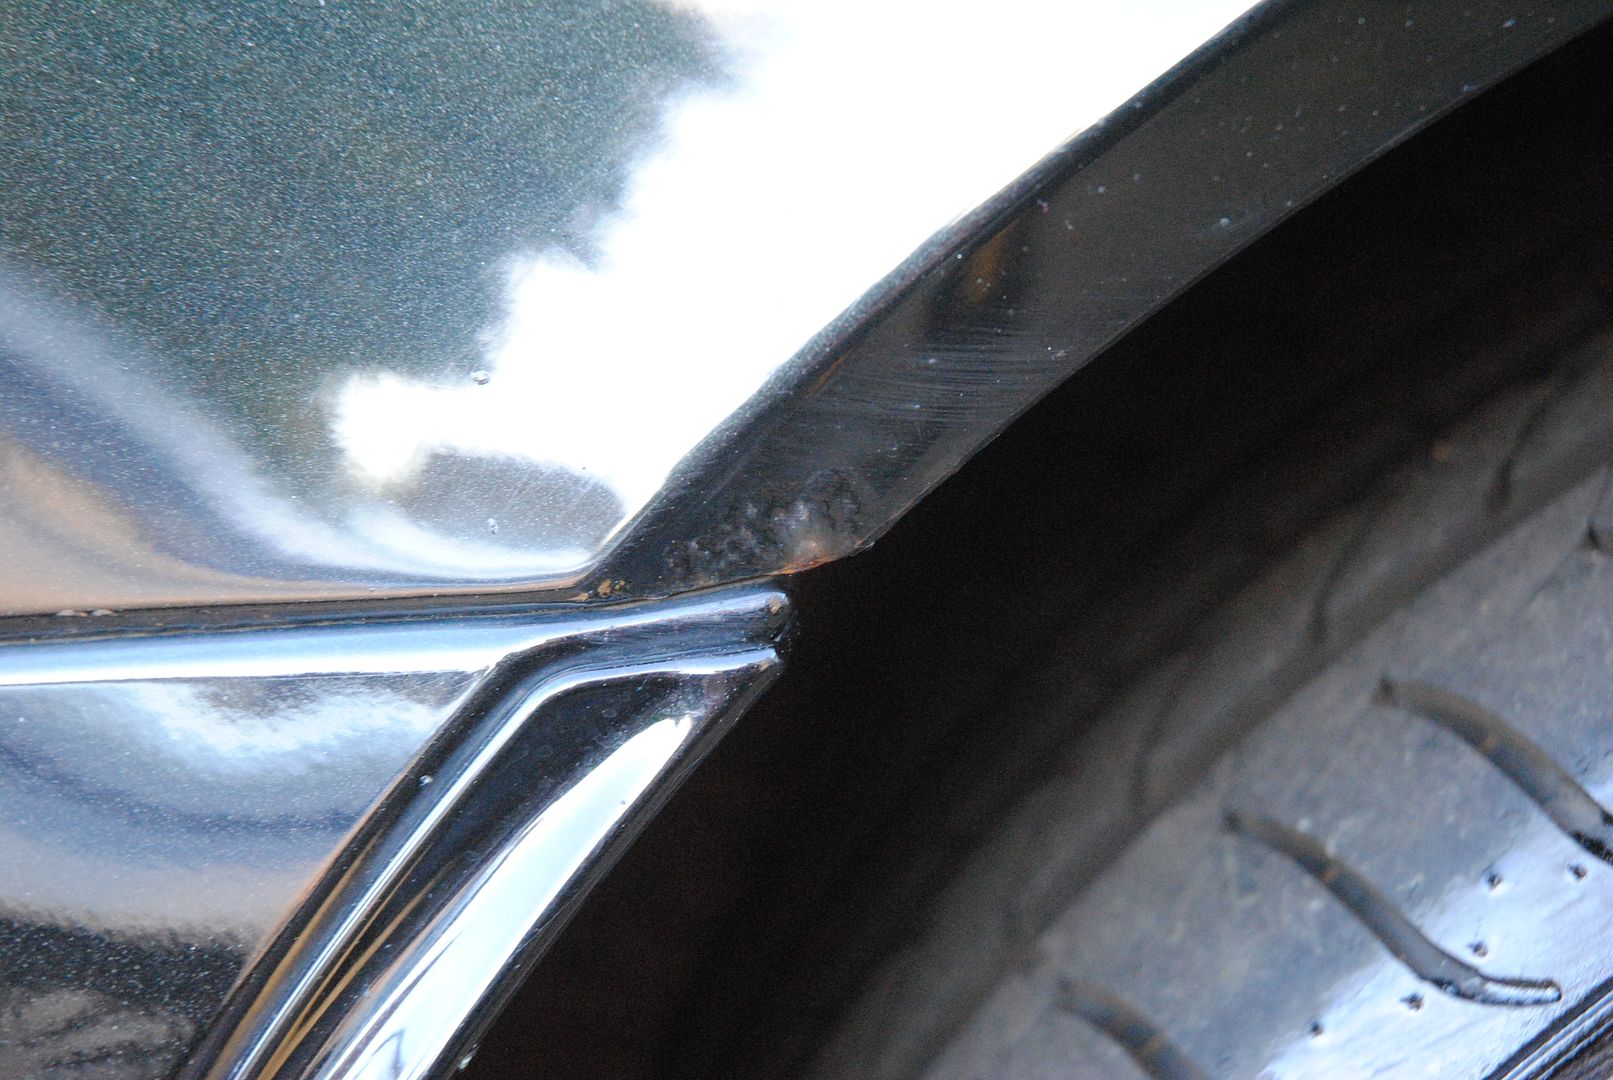
3 out of 4 arches are dreadfull and the front edges of the wings aren't great either
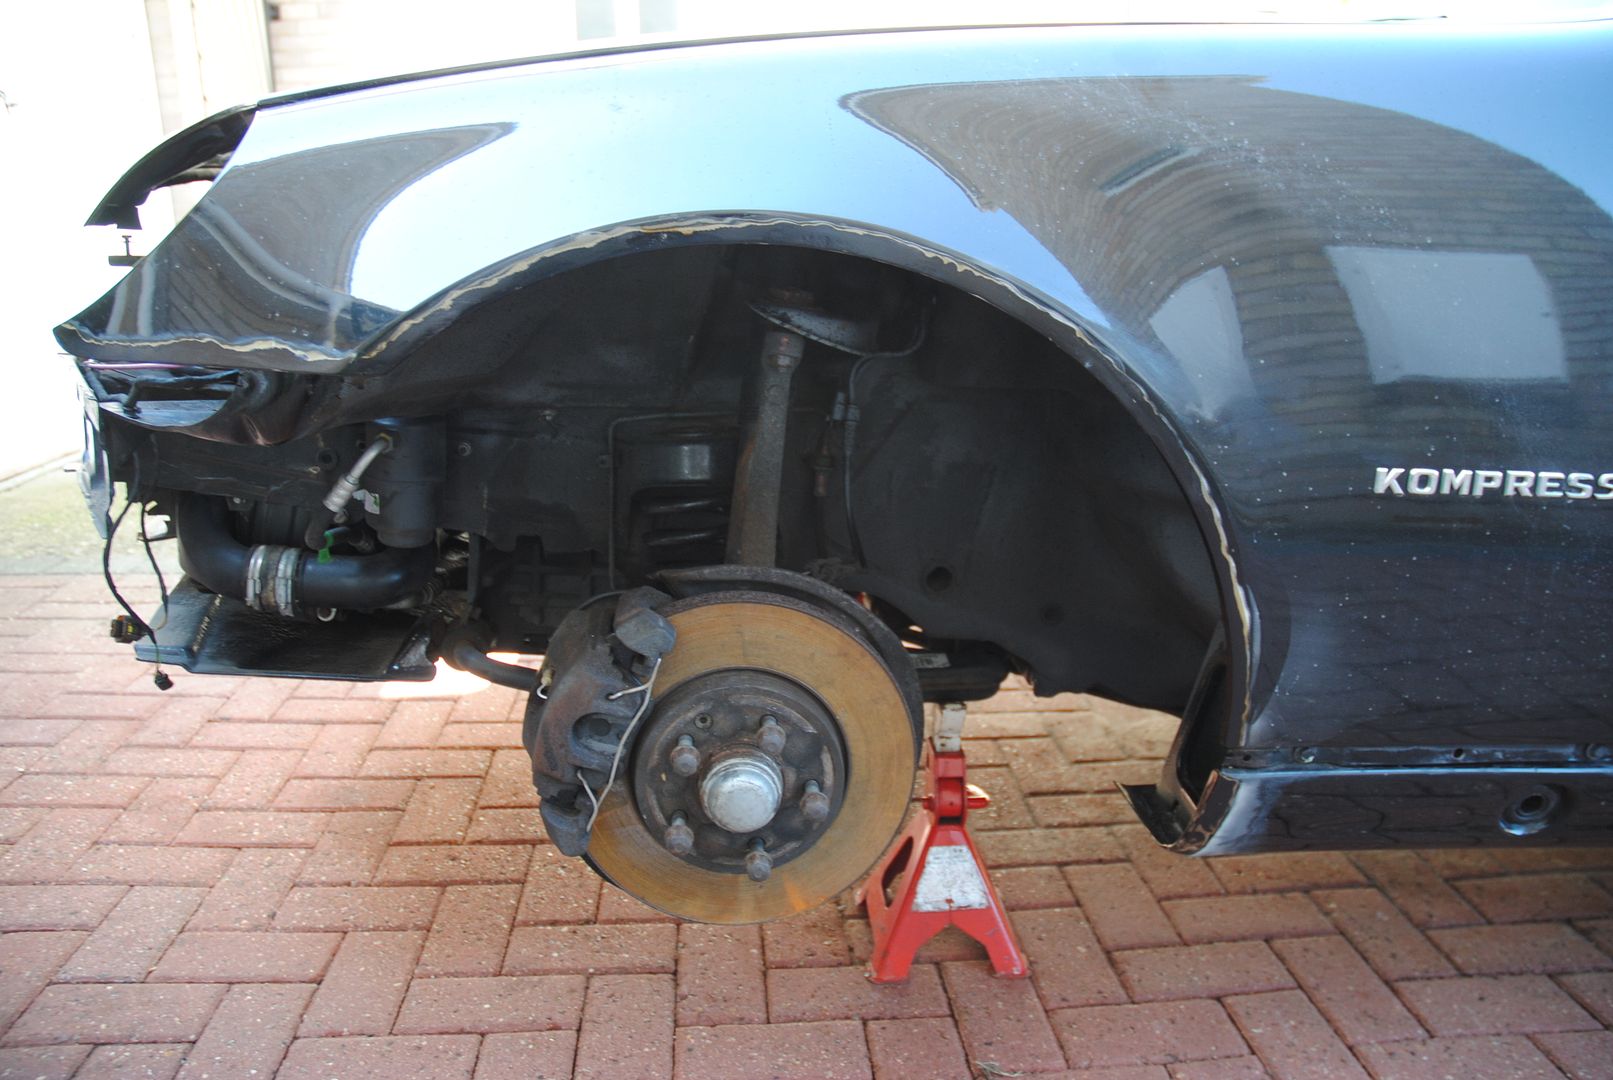
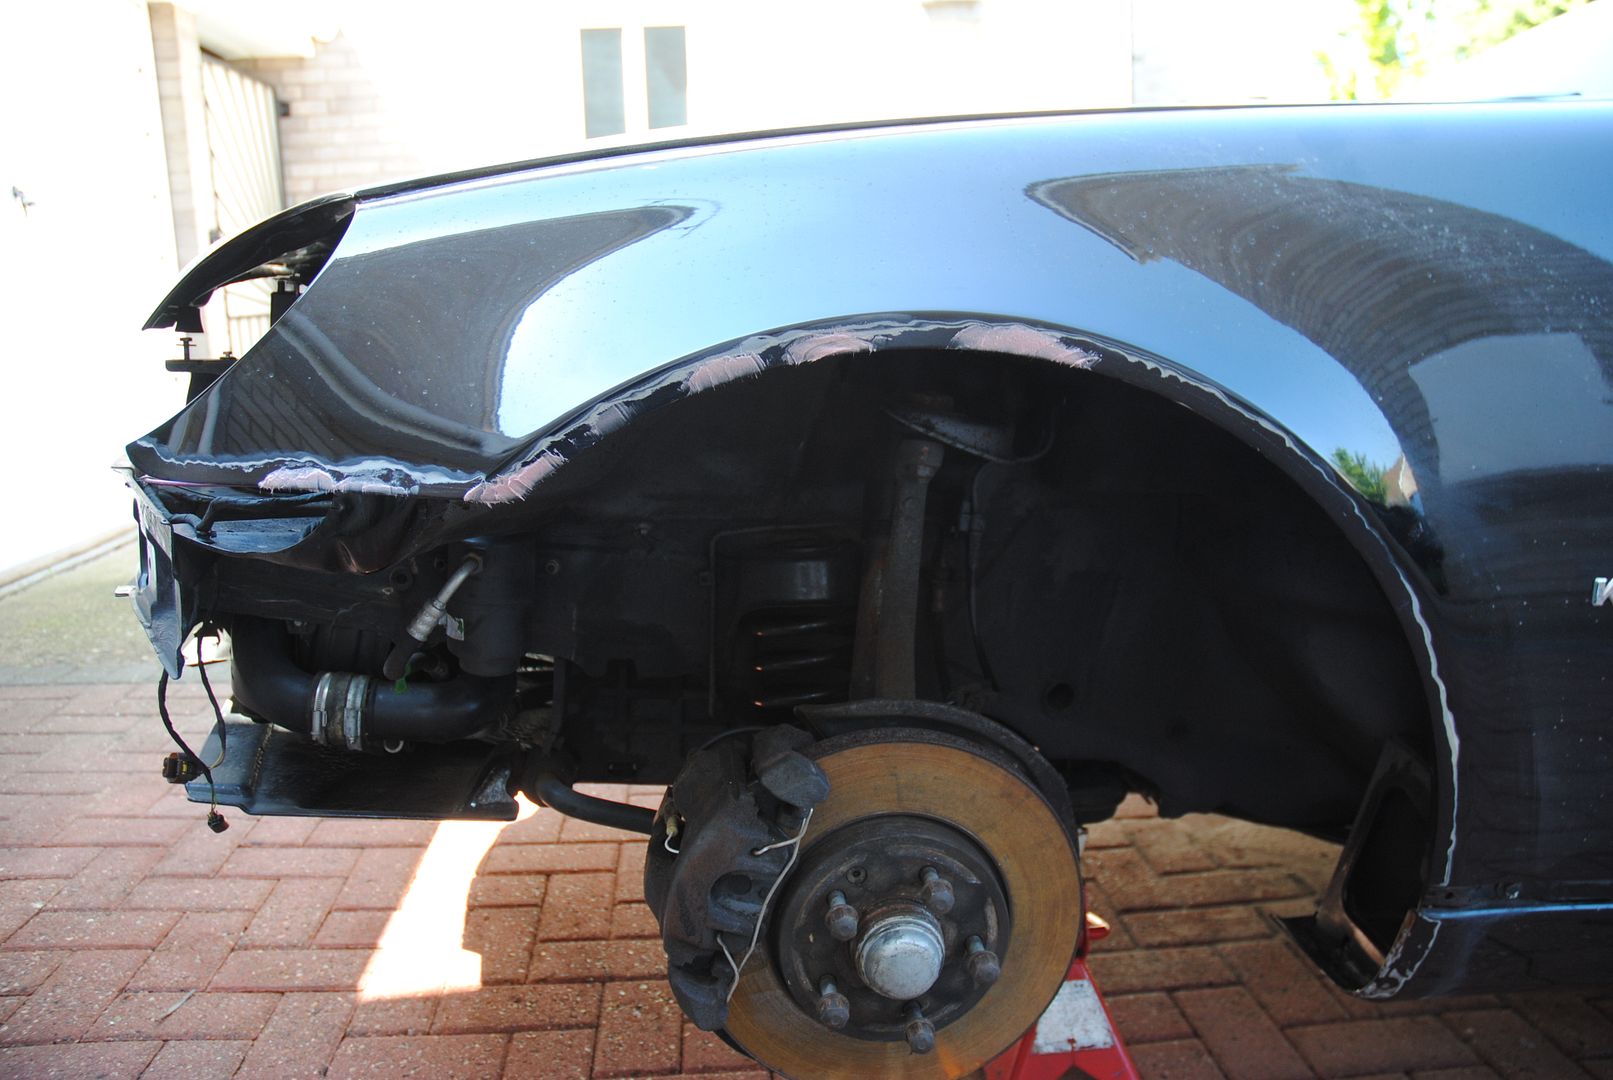
Headlights and indicators out
Chock the rear wheels
Jack the front up to make the working height a bit easier
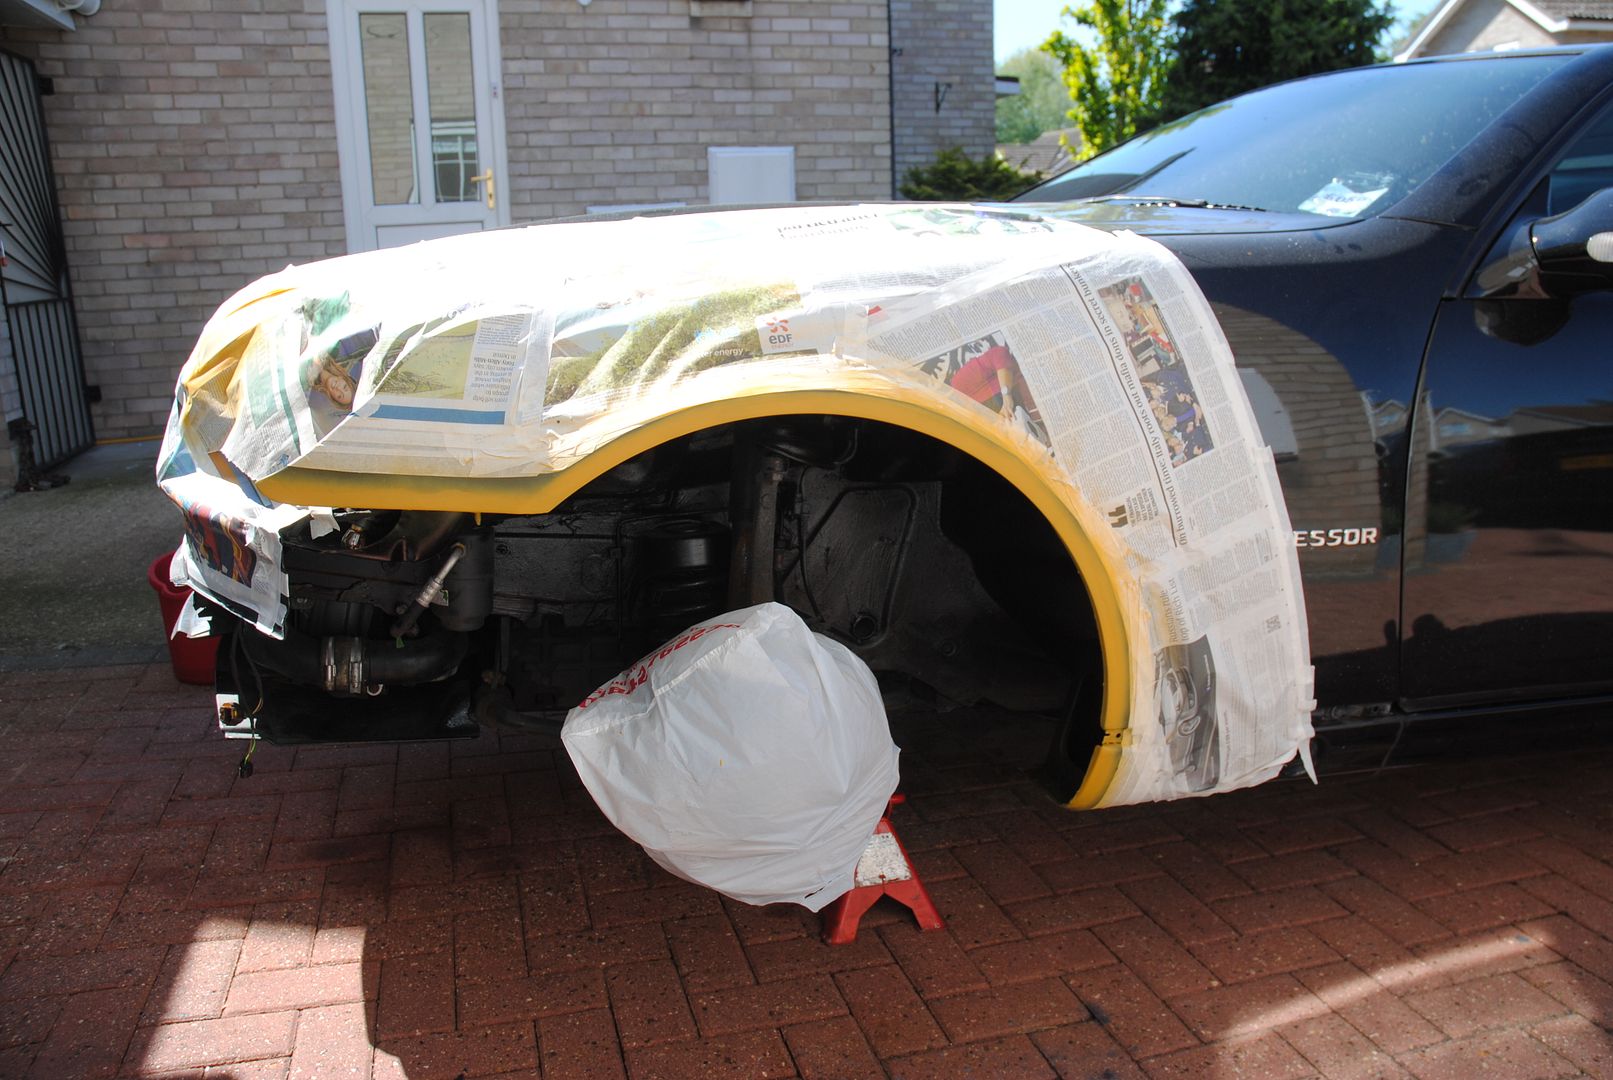
wheels off (good time to clean the backs)
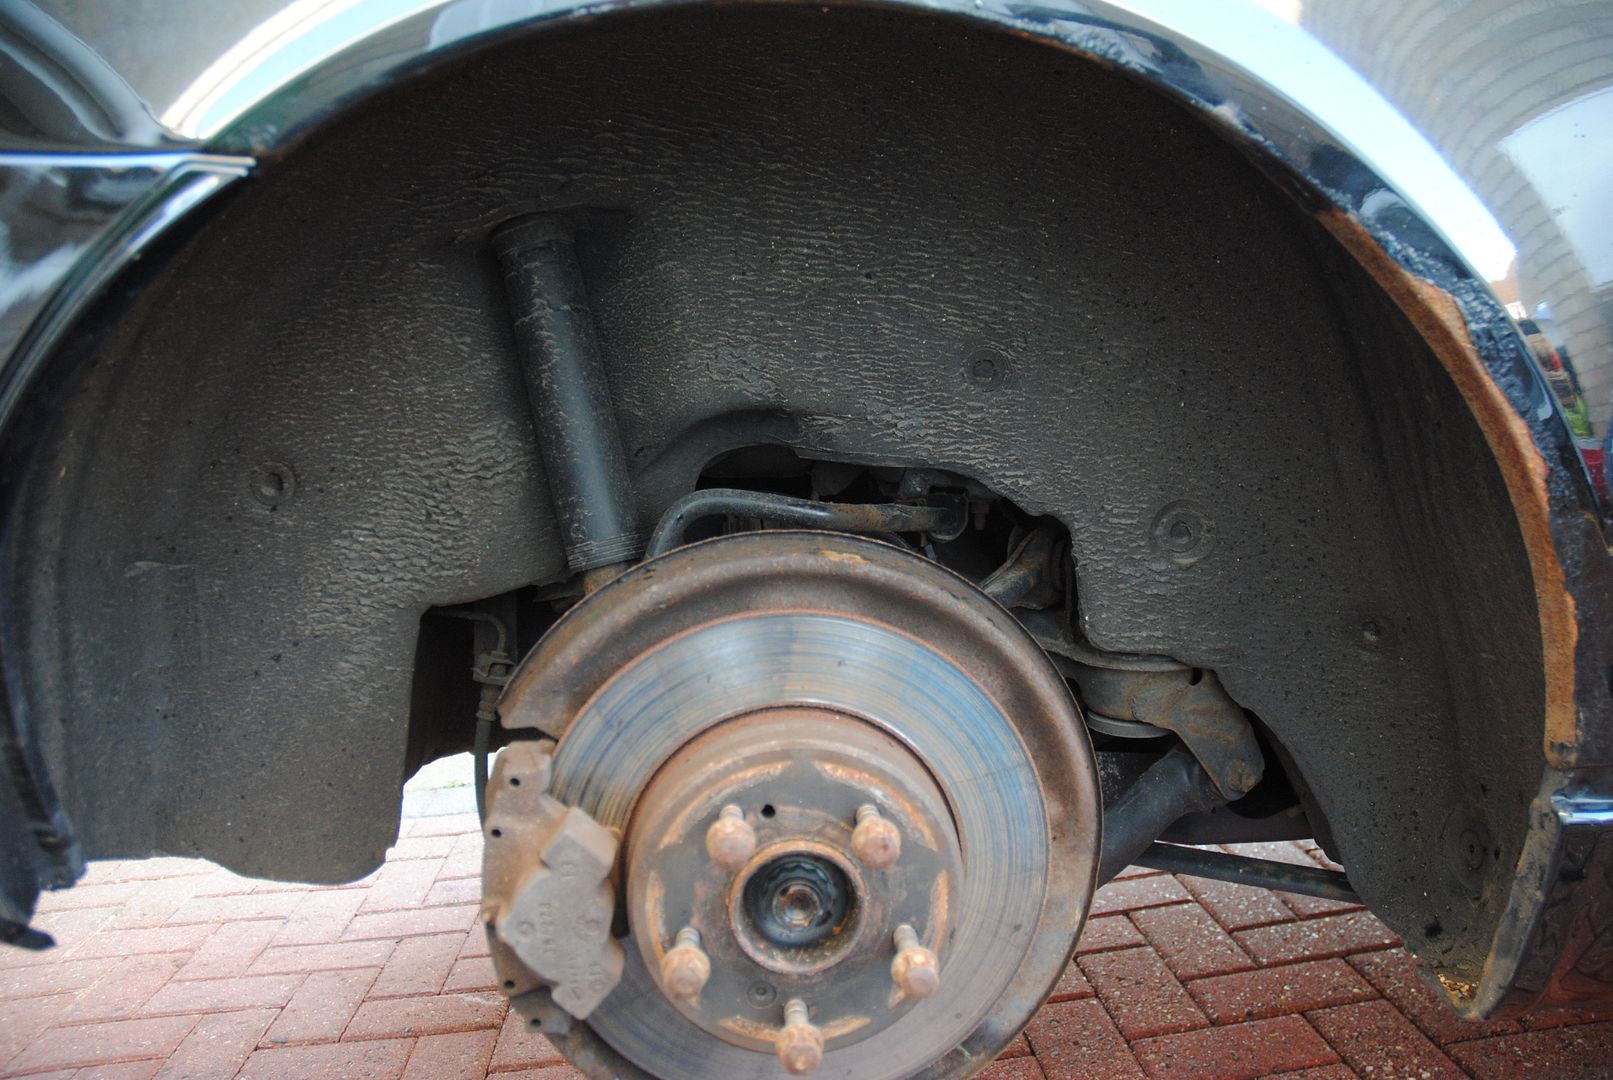
Wheel arch liners out both sides
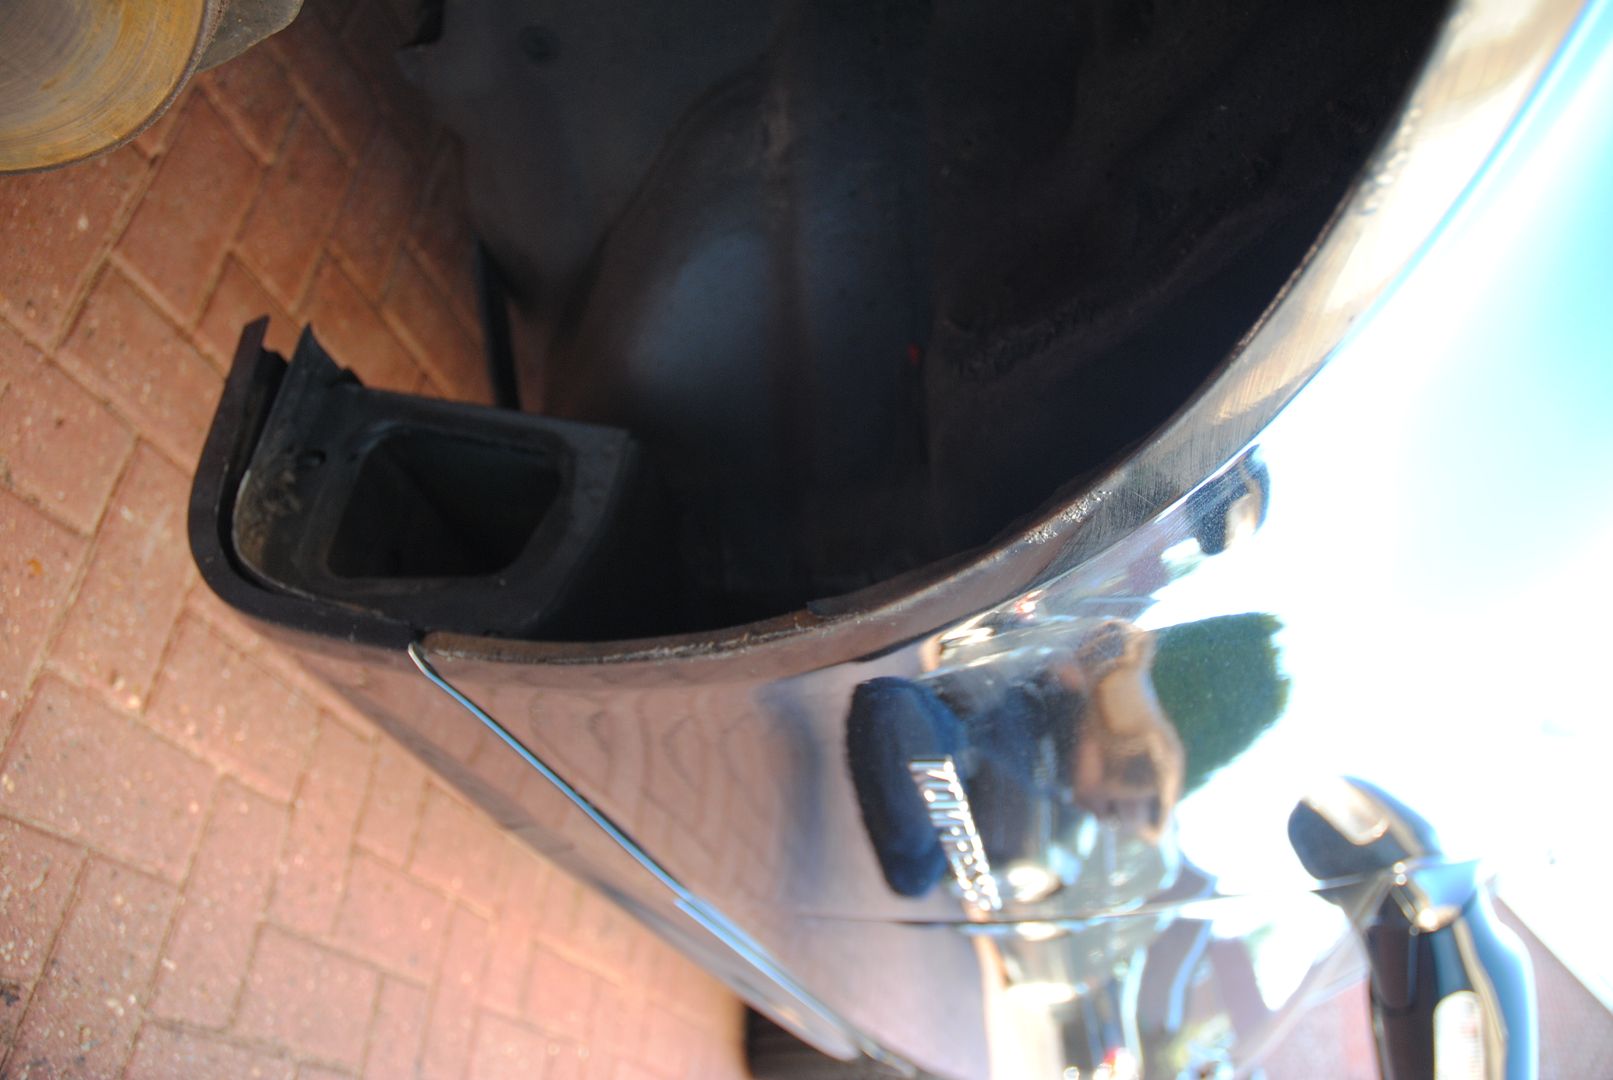
Grill out and bumper nearly read to come off
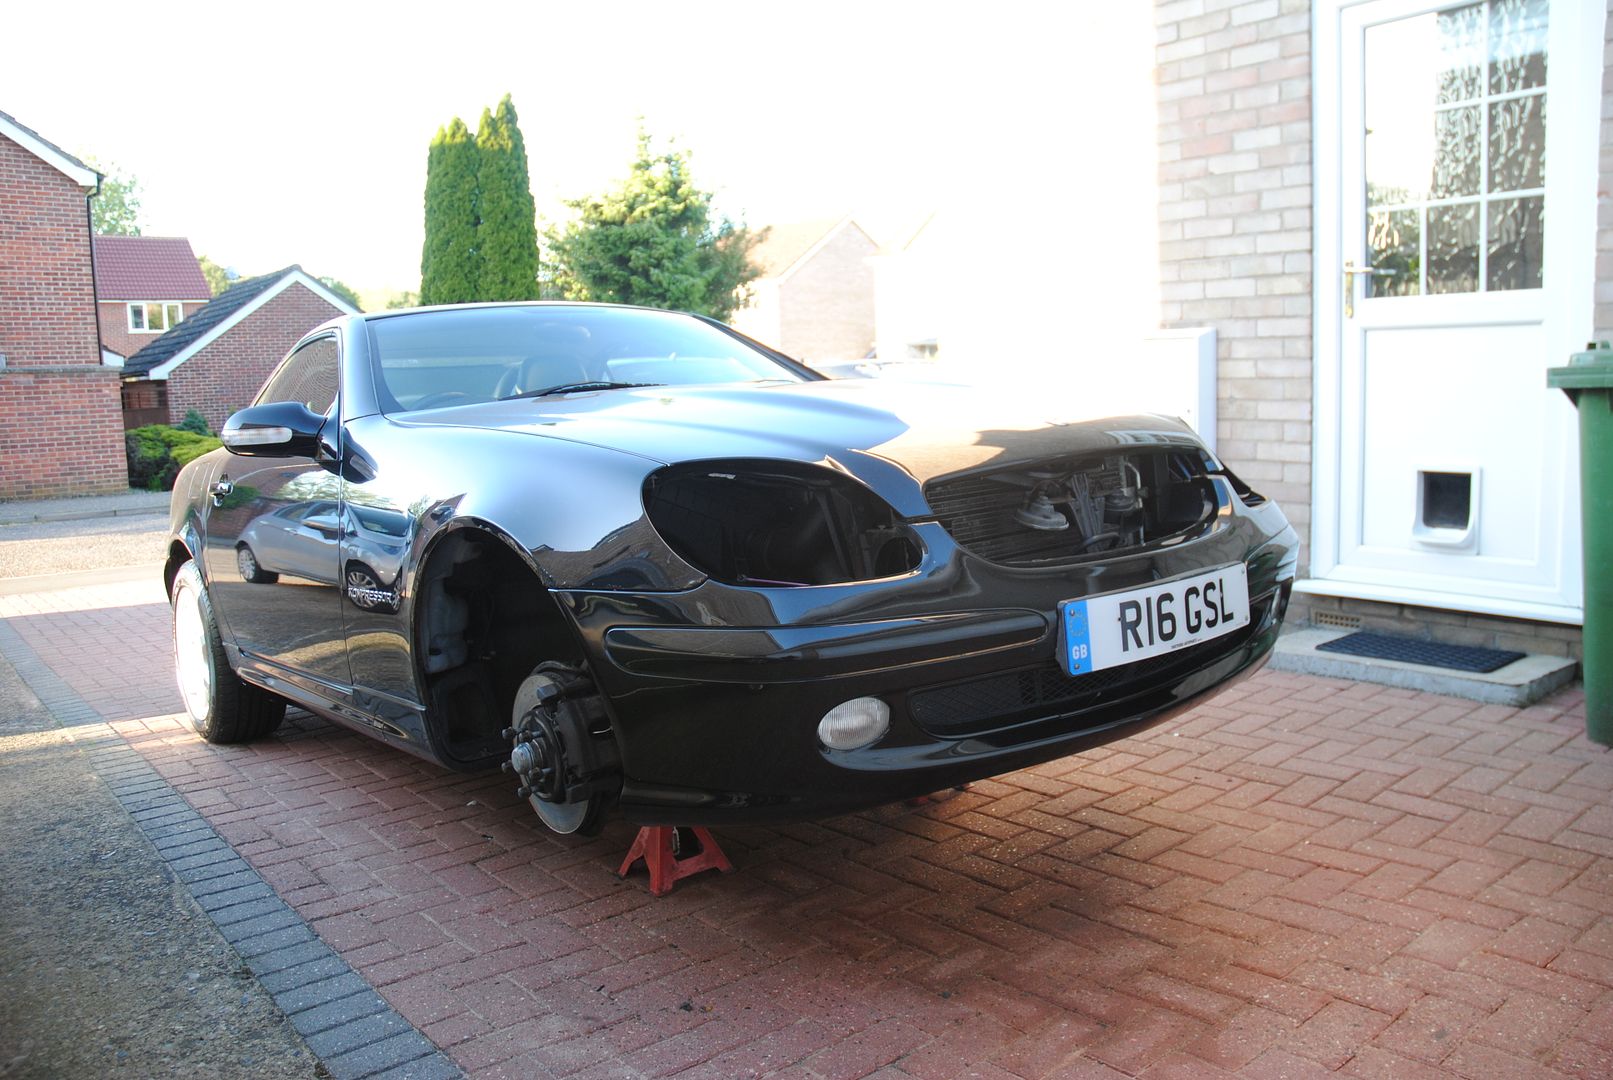
My neighbours probably think i'm mad!! (actually there is no probably about it)
Few pictures of the rust bubbles
The rear will be next
I know it the best weather for using a drop top but it's also the best weather for drying paint
3 out of 4 arches are dreadfull and the front edges of the wings aren't great either
Headlights and indicators out
Chock the rear wheels
Jack the front up to make the working height a bit easier
wheels off (good time to clean the backs)
Wheel arch liners out both sides
Grill out and bumper nearly read to come off
My neighbours probably think i'm mad!! (actually there is no probably about it)
Few pictures of the rust bubbles
The rear will be next
I know it the best weather for using a drop top but it's also the best weather for drying paint
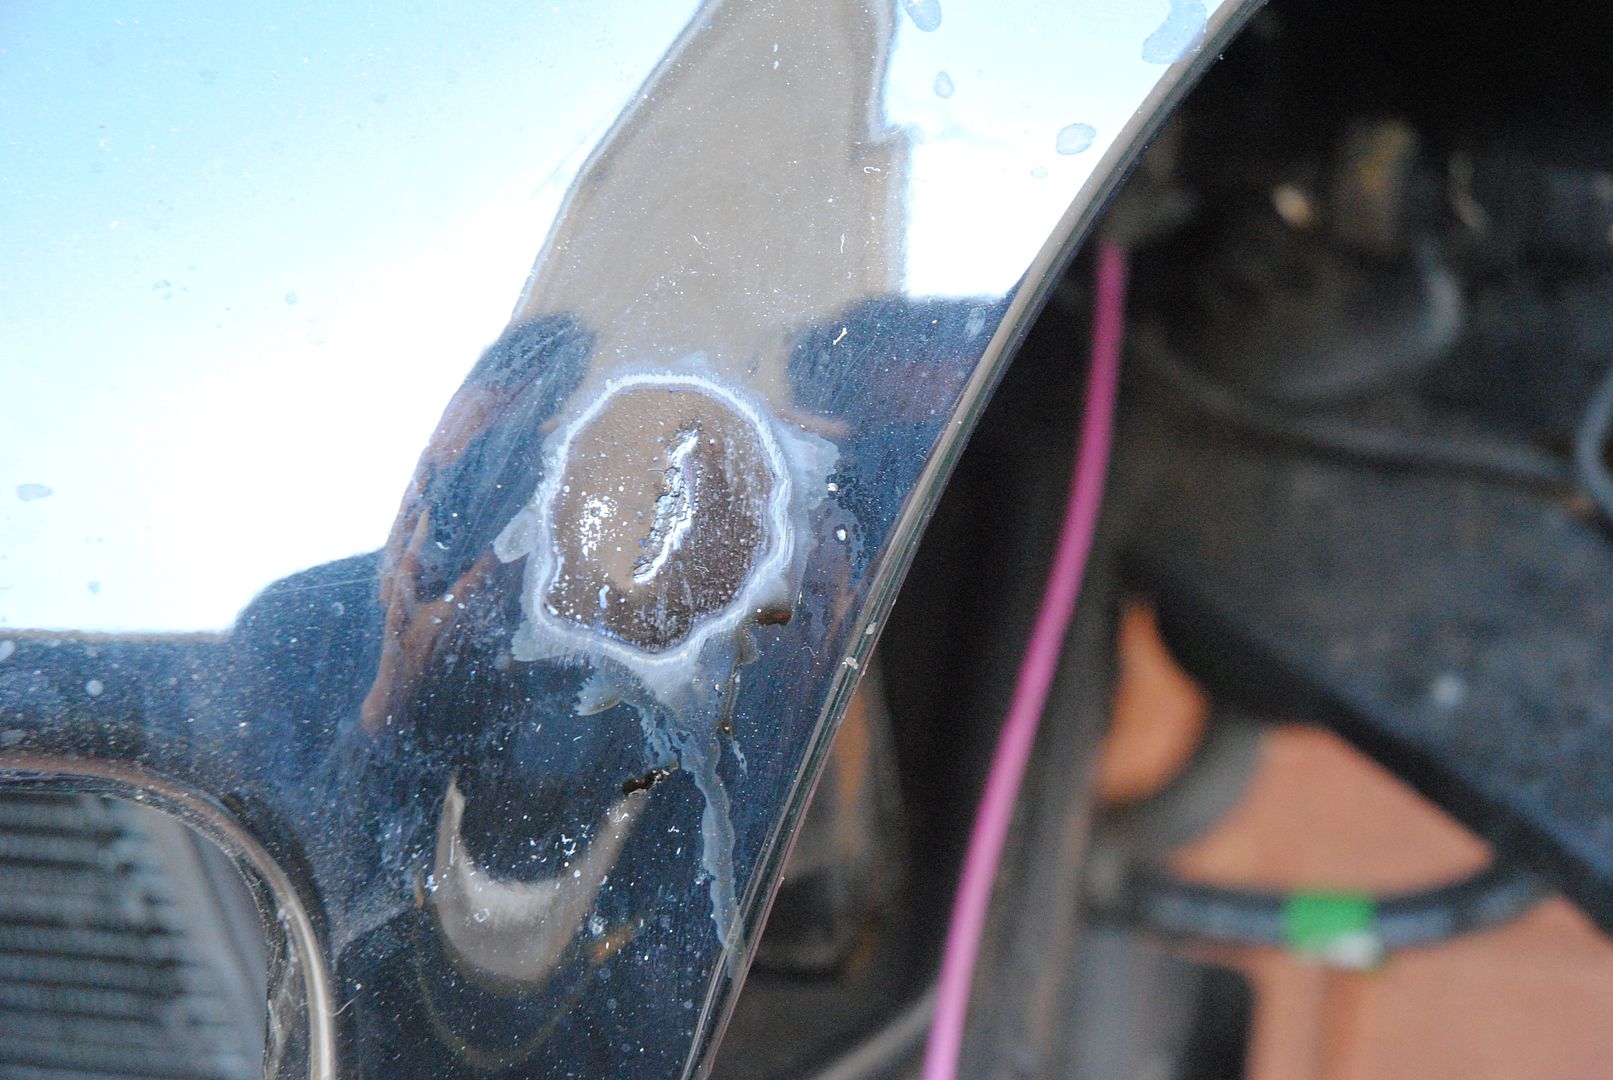
Kidders said:
Thats seen its fair share of paint over the years, I can spot a fisheye in that bottom picture!
Shows lack of knowledge about these things - what's a fish eye?Previous owner had it from new and declared he had two incidents in it
Van driver hit the passenger door in traffic - repaint is not as "flat" as the rest of the car but I have to look hard to see it
He ran into the back of a car (also in traffic) and the front bumper got repaired and painted
I thought the pics would be hand Gareth
sanguinary said:
I'll be interested how you get on with the painting. My other half's 2002 230 is in similar condition; all arches need tidying, as does the lip on the bonnet and the boot, above the handle.
I'll be pulling it apart on the driveway too...
I'll take a few more pictures then (inc materials used) if that's any help to you?I'll be pulling it apart on the driveway too...
Boot lock area need doing but the leading edge of the bonnet is fine (even underneath) - just a nasty stone chip on the top of the bonnet that erupted like a 13 year olds face over the winter
Rollcage said:
"Fish eye" is when you get little circular marks on paintwork where the paint hasn't adhered - usually caused by silicone contamination.
A lot of cleaning products contain silicone, such as "Back to black" type stuff.
Thanks for the explanationA lot of cleaning products contain silicone, such as "Back to black" type stuff.
Anyway progress continues
Today I've been mainly using an angle grinder with various discs
(80 grit flap wheels)


Abrasive discs (great for stripping paint without thining metal)


And for fine work 120 grit paper discs

They don't last long but luckily I just use them last
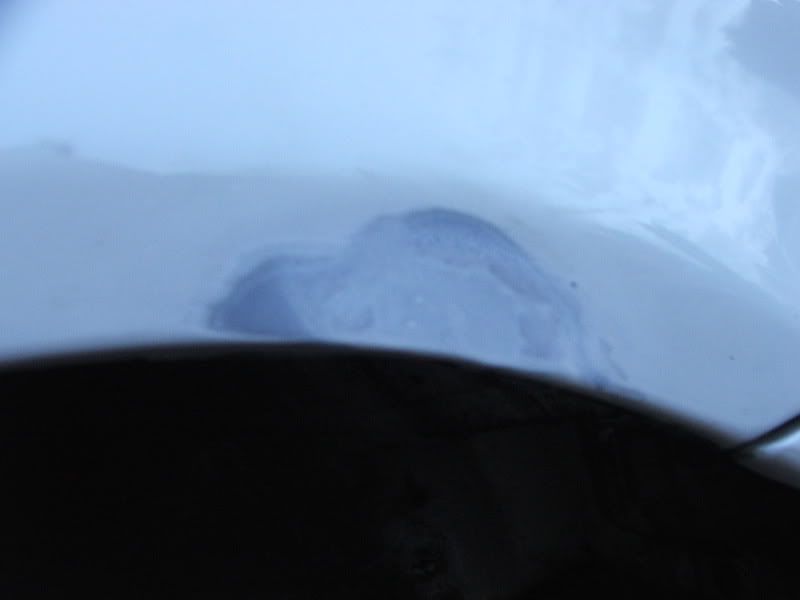
Once cleaned and stripped back I used a chemical rust treatment
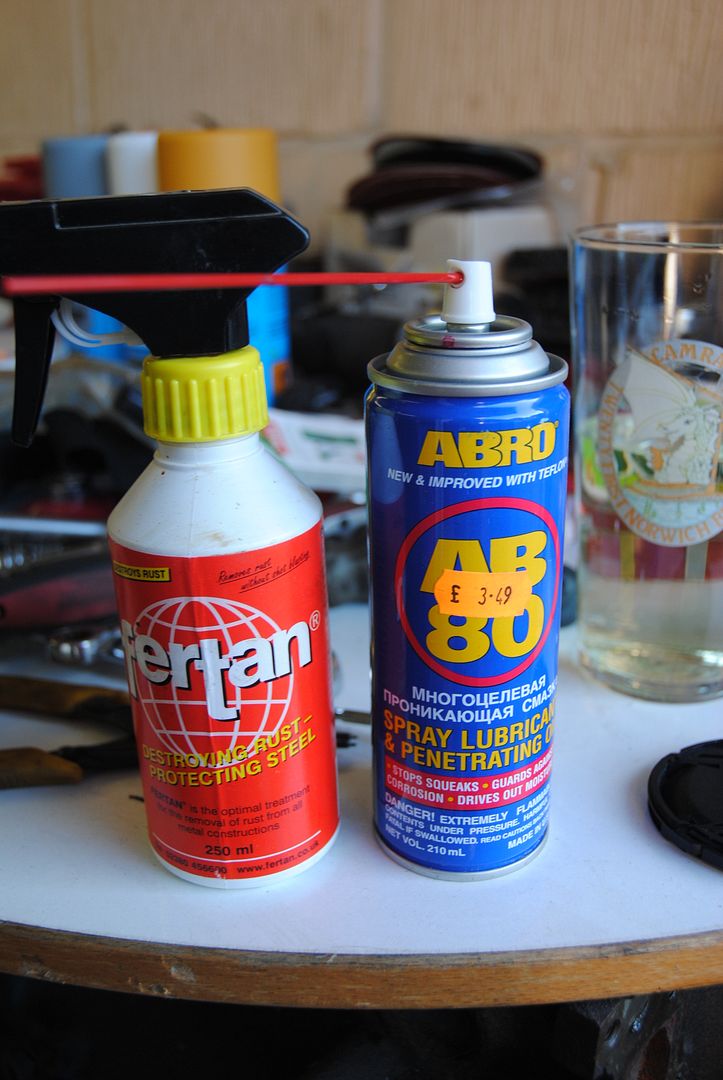
After 1 hr all the rust pitting that I can't grind back turns black
Drivers side


Passenger side

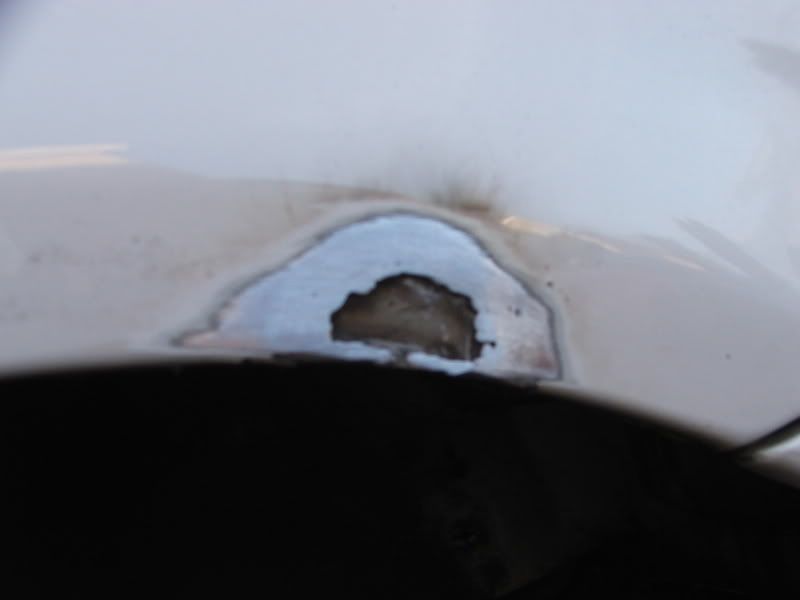
Bonnet scab
Windscreen Pillar

Just leaving the chemical on overnight
r129sl said:
This is really interesting. Will the converted rust stay away or will it come back eventually? I ask because in the past it has come back on my cars but proper preparation may prevent that or at least prolong the repair.
All the rust treatments work in a similar way and in the case of this one I don't know - I've used Jenolite (which is phosphoric acid based) in the past with some success but I couldn't get hold of any so I'm using what a friend said he's been using for a while and found to be very good.I'd really prefer to get all the pits out with a grinder or cut the metal out and let in new with a welder but I'm loath to "cut up" what is for me the newest car on the fleet......
I did a repaitr and repaint a small hole in her VW Polo about 4 years ago
This was a tiny rust bubble after I hit it with a flap wheel - not such a small hole
I cut a plate to suit and "mig'd" it in

A grind back of the high spots (welds) -Bit of rust treatment - then had to use a little filler (and I don't like using that either)

then some primer, Flat back and I light dusting of top coat to make sure it looks OK
Then a bit more paint and cut back
The Polo went to a young member of her family so I still see it on a regular basis - no sign of rust coming back thro so that method works for me but as I said I'd rather not cut metal out of the Merc
I spoke to Kidders about the job and he quite rightly stated that he wouldn't guaruntee any repairs where he was painting over rust - so I decided I'd prepare the arches for paint myself - then the only person I can blame if it doesn't work out is myself
r129sl said:
And I live at the beach so there is a very harsh atmosphere. Please keep posting: as I say, this is very interesting.
I so know what that's like - years ago I bought an MG Midget WUA 828S that spent most of it's life on the north Norfolk coast (Cromer) - looked wonderful but sheesh did that turn out to be rotten!!Edited by B'stard Child on Thursday 6th June 10:28

So start of the day see how the rust treatment had got on
The rust treatment stuff had gone off like paint - damn good colour match too
Nearside wing
Bonnet scab
Offside wing

Windscreen Pilar

So a little filler for the pits


Then I had some time to kill
So a pot of this
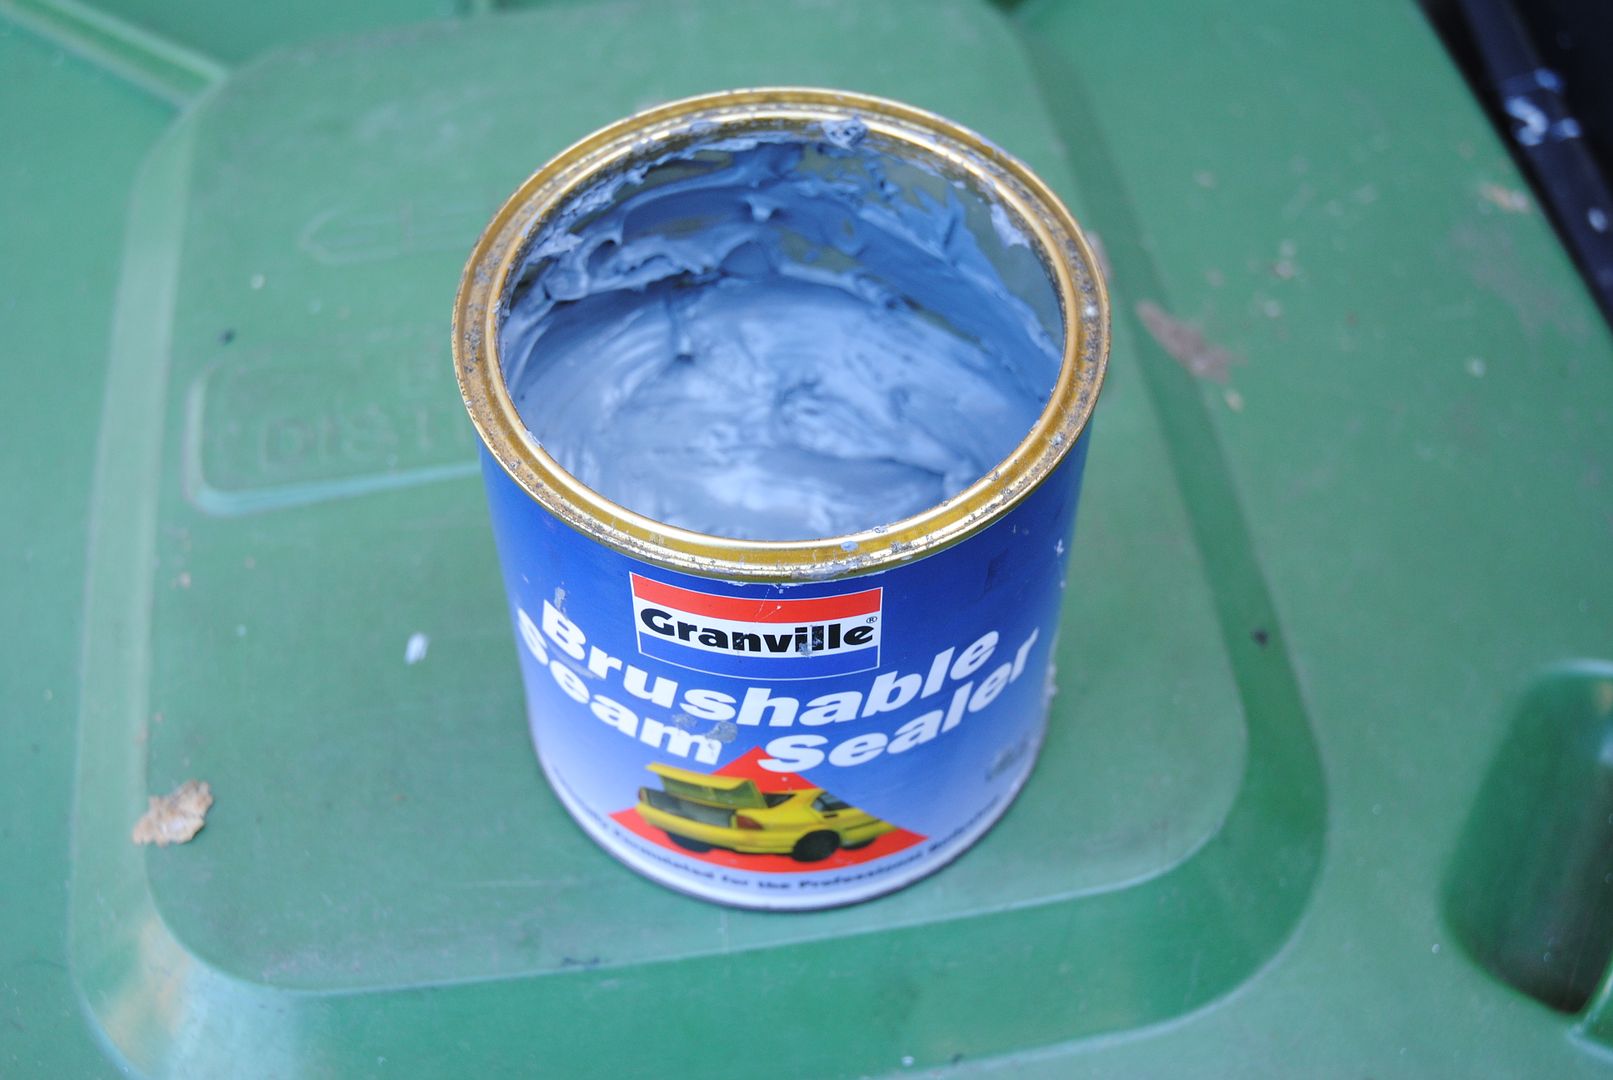
Brushable is fine but for what I wanted a finger was better
Rubbish picture

Better ones


I wanted to stop the water laying in the inside edge of the wheel arch lip (and salt etc) so created a little chamfer with seam sealer
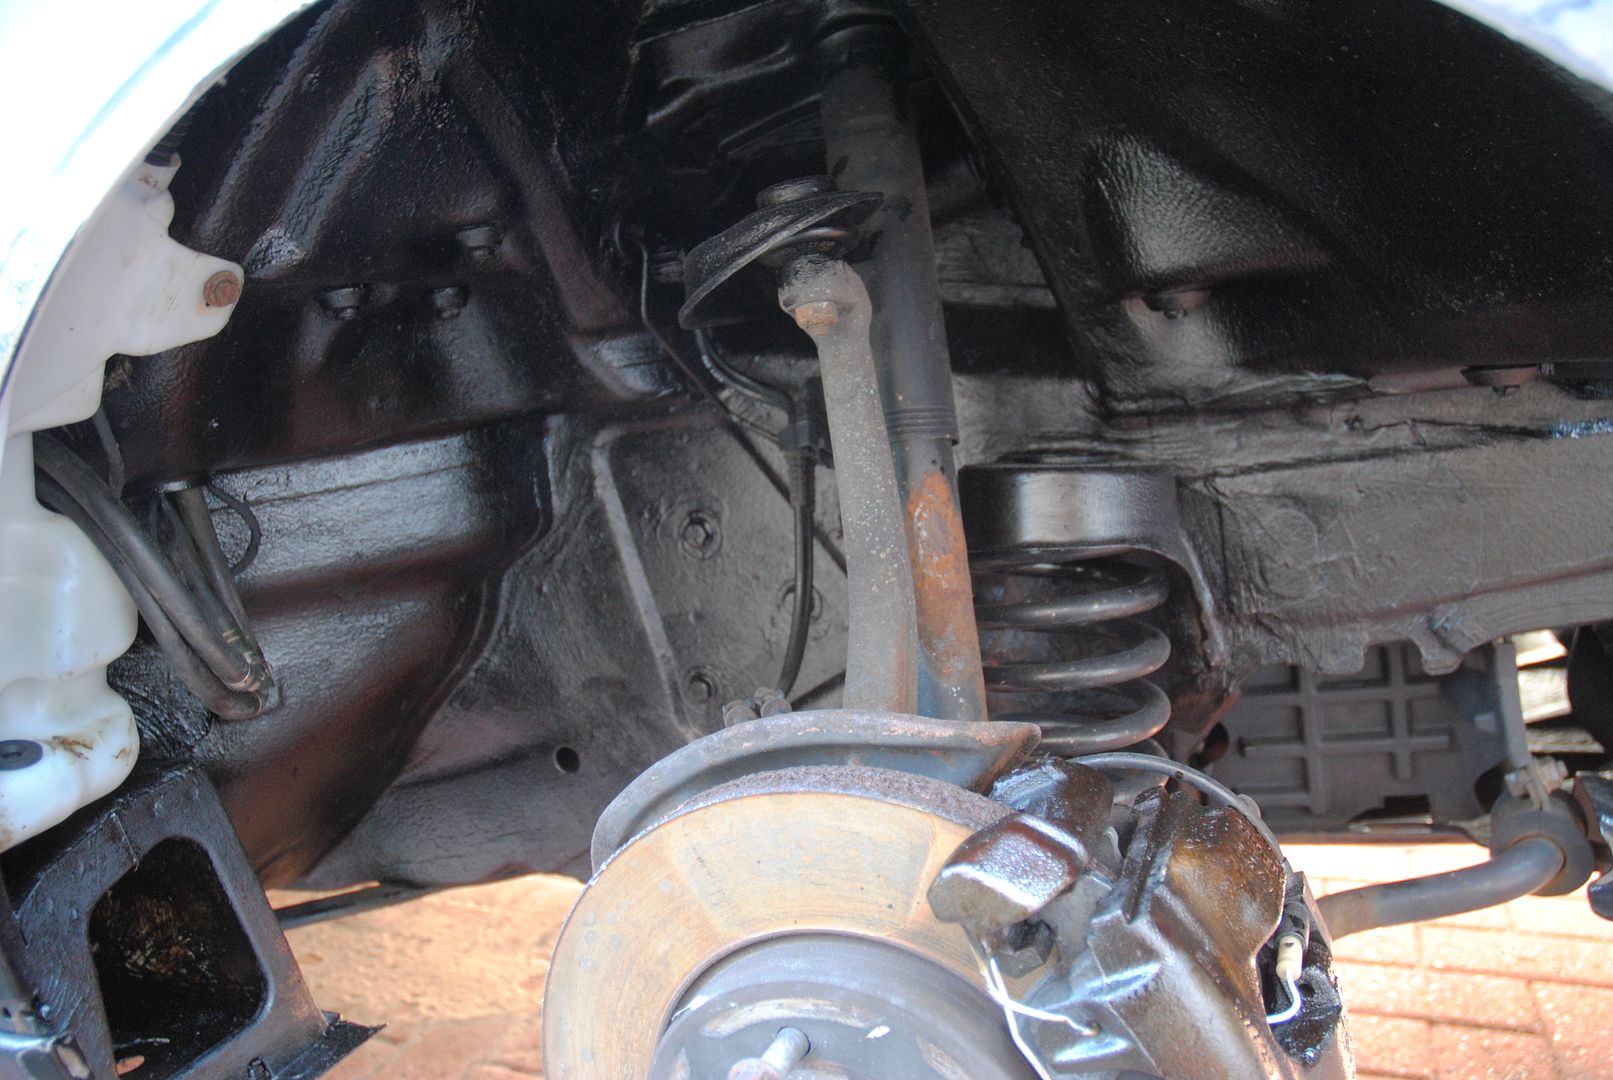
Still waiting for filler to go nice and hard - time to underseal everything I could
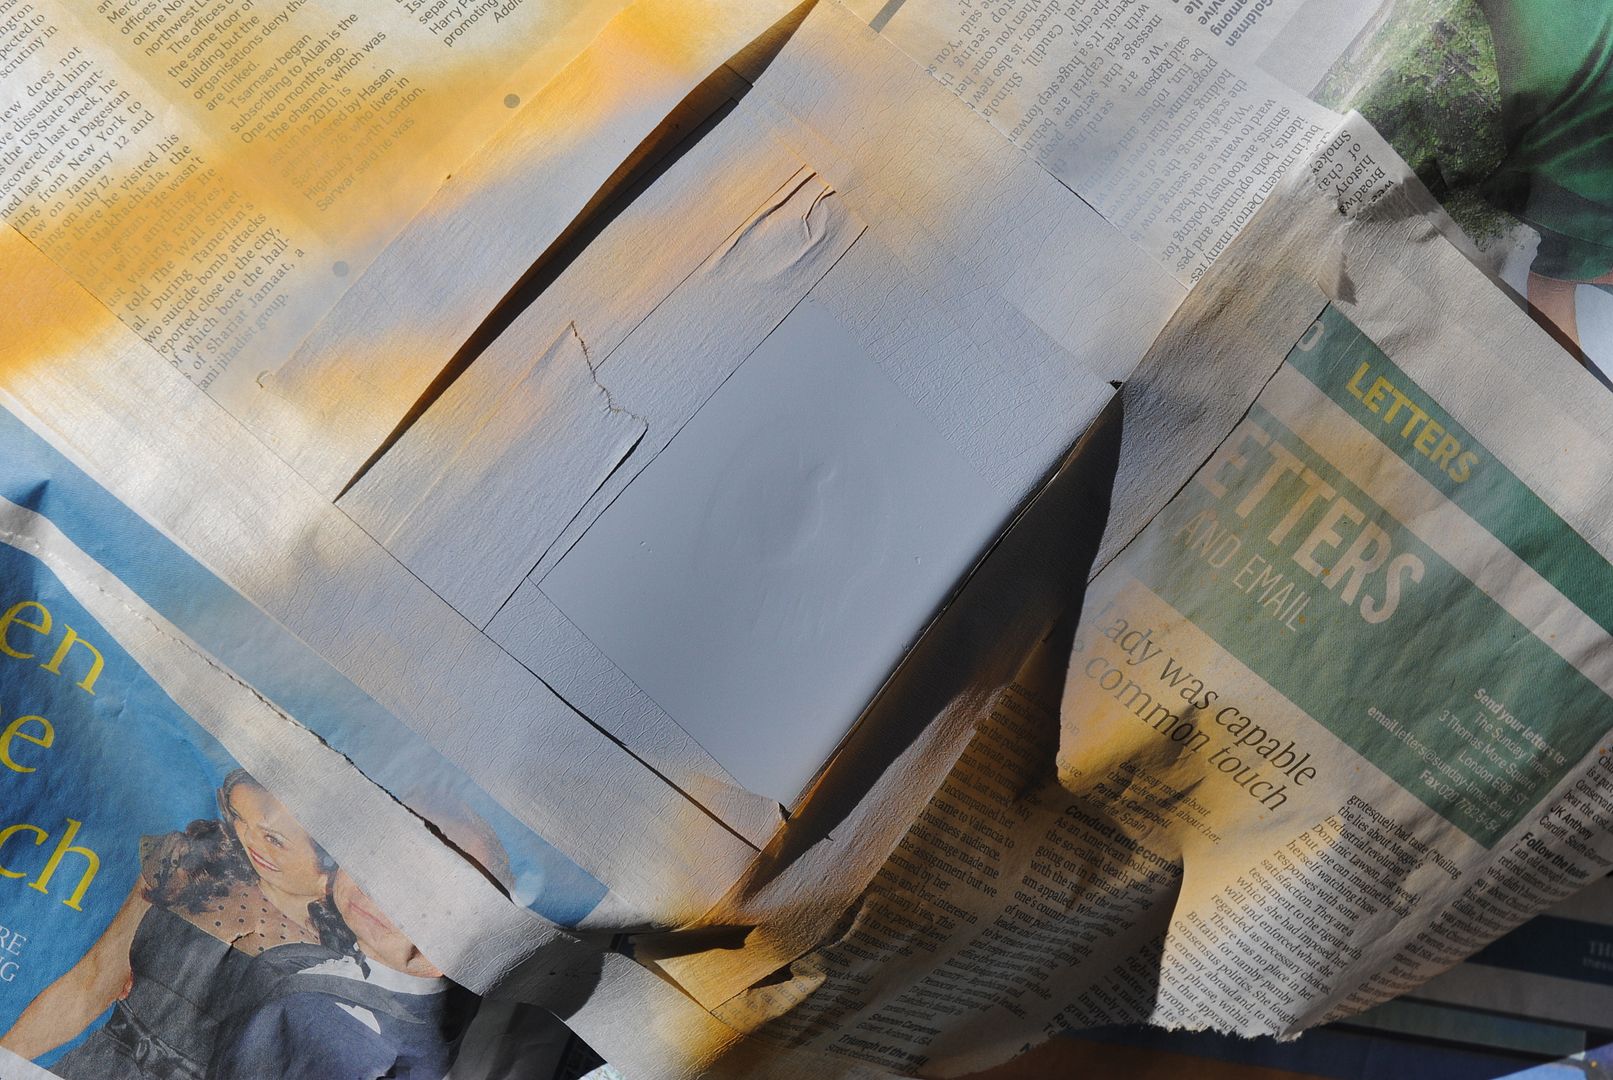
A quick rub down of the filler and mask up time - Daily Telegraph of course - big pages

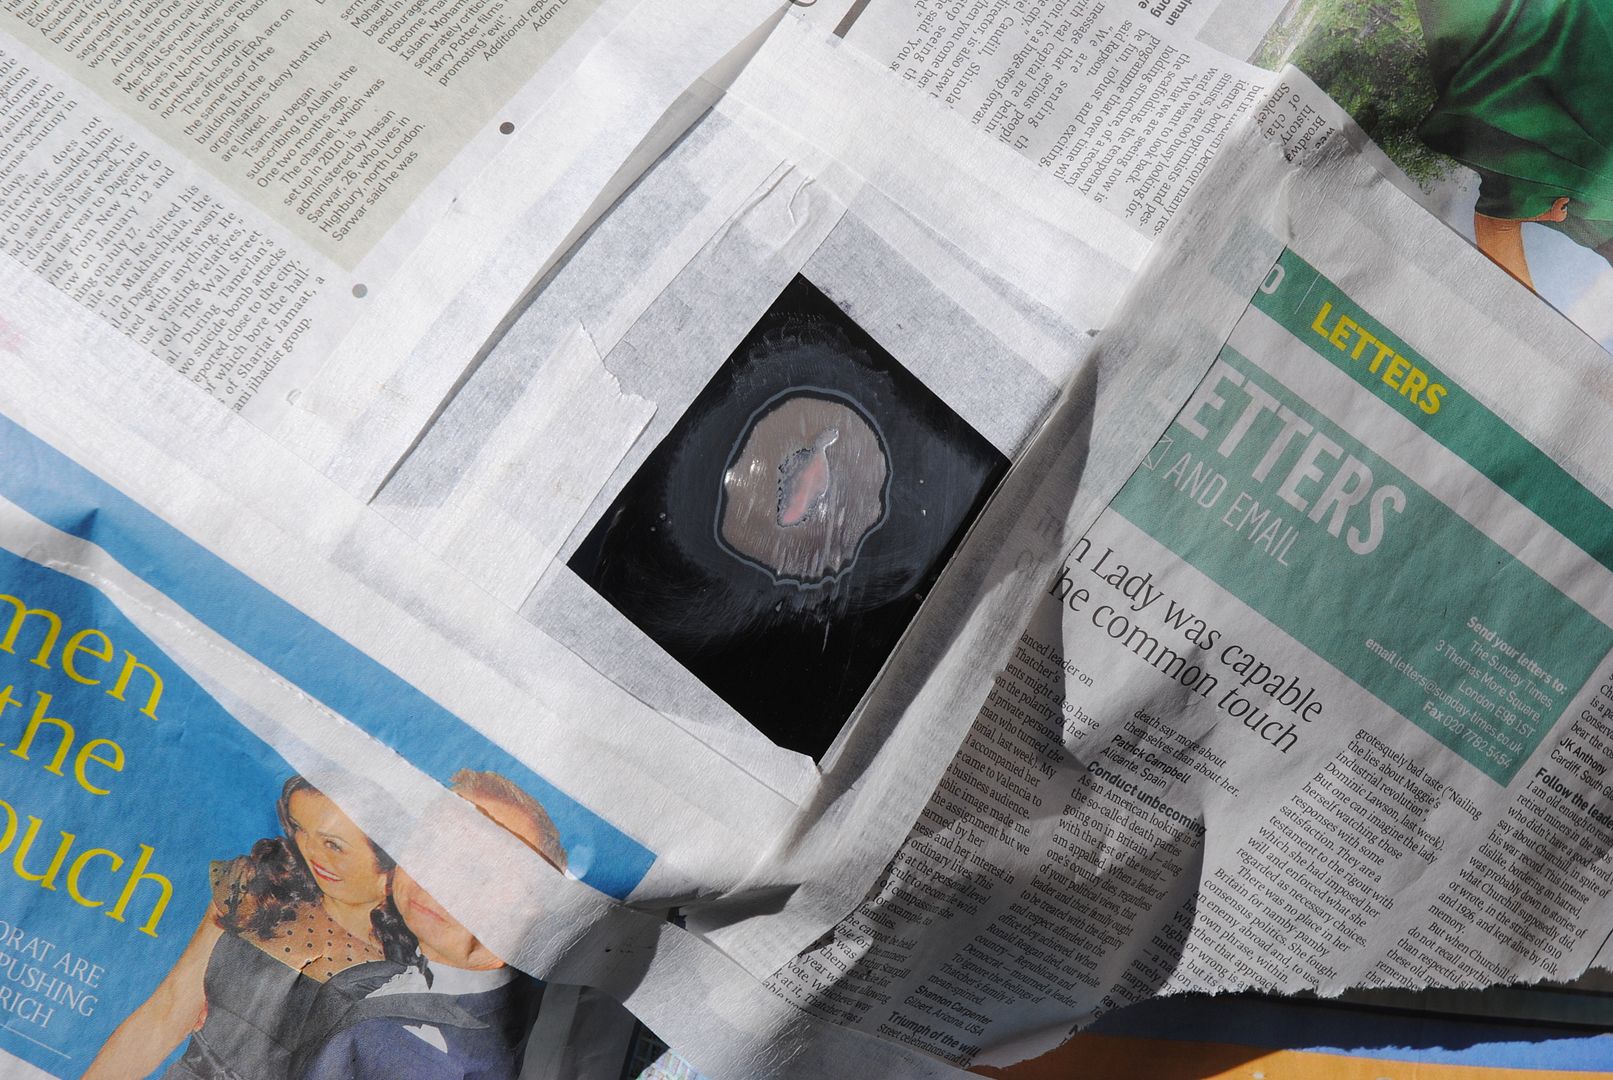
Filler primer

Then light flat back and some grey

Then get on with the other side but as it's all a repeat no pictures of that
Once finished time to put the wheels back on turn it around and then get ready to start the back end
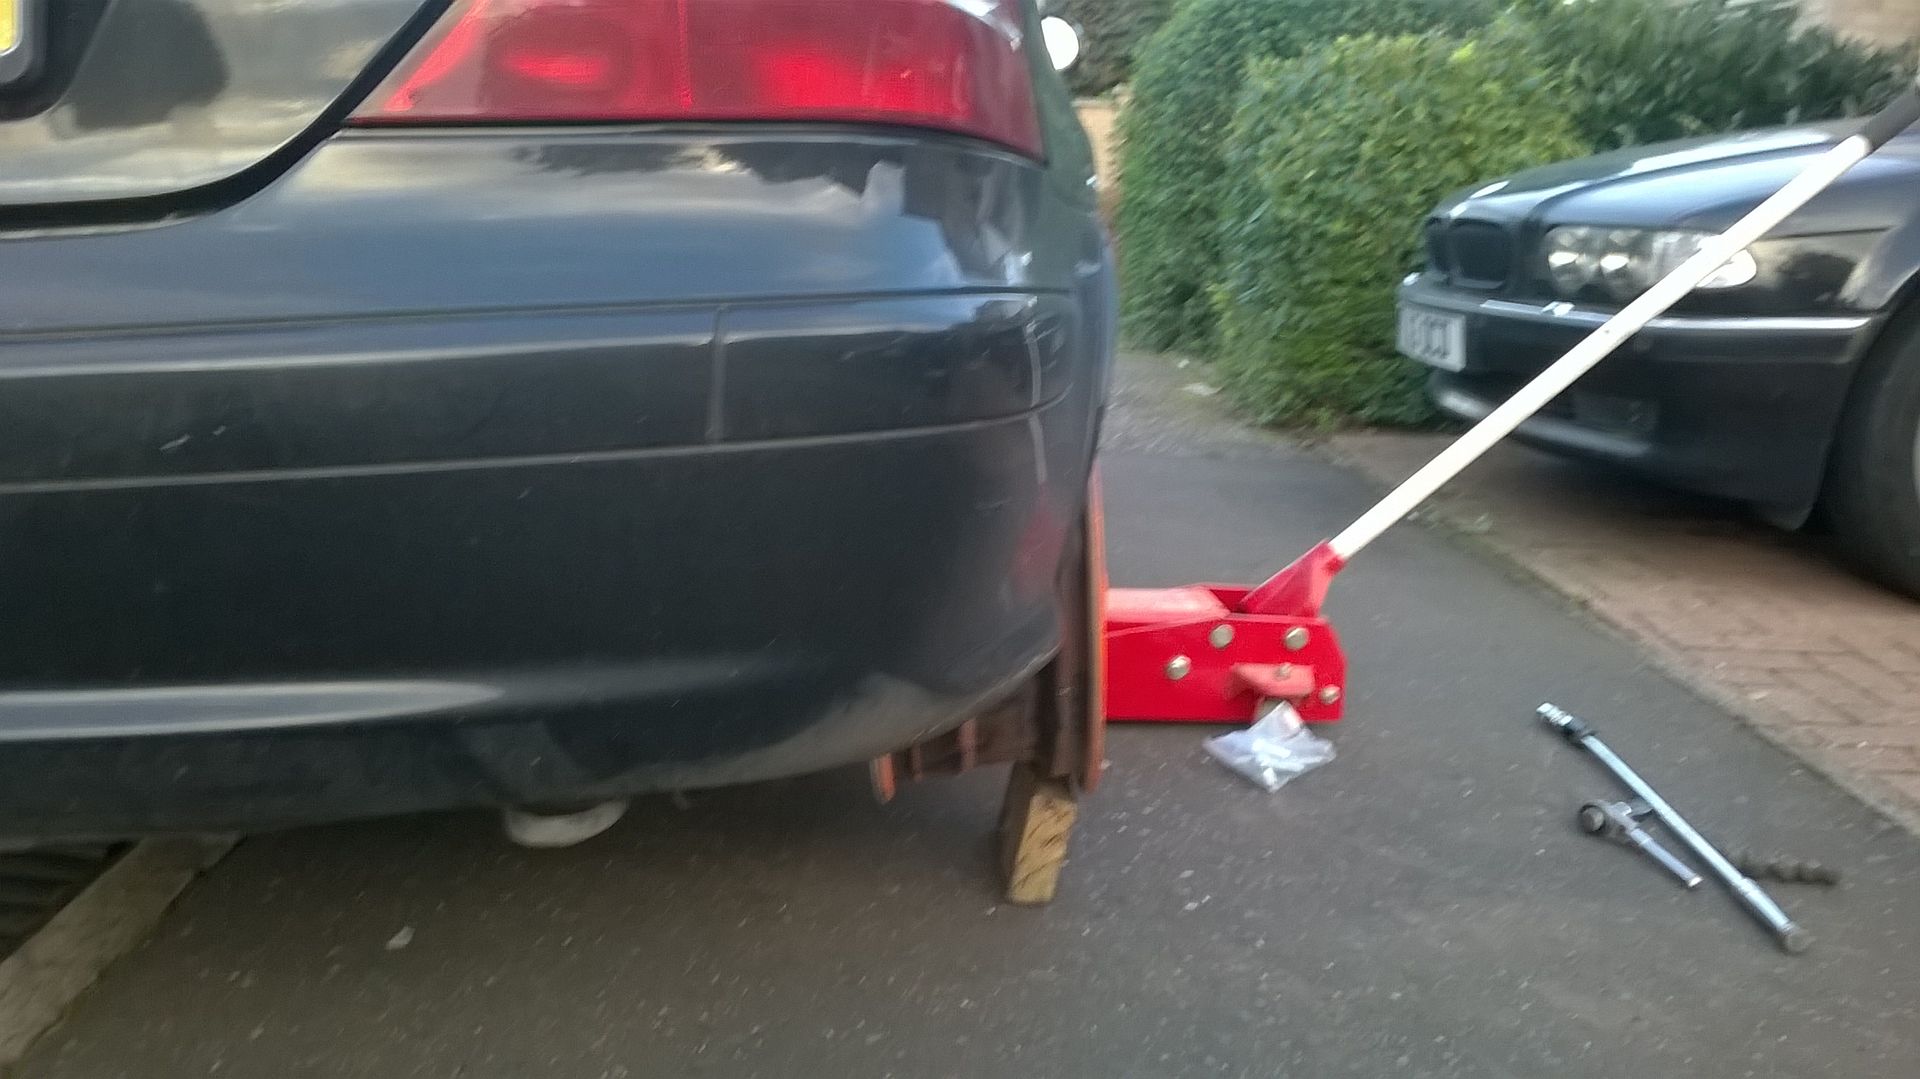
Front chocked - jacked up and axle stands under and wheels removed

Jet wash the arches and called it a day(it's got time to dry out ready for tomorrow)
Actually I was surprised hiow much muck had built up in the arches considering I cleaned them last year and try to rinse them off everytime I wash the car
The rust treatment stuff had gone off like paint - damn good colour match too
Nearside wing
Bonnet scab
Offside wing
Windscreen Pilar
So a little filler for the pits
Then I had some time to kill
So a pot of this
Brushable is fine but for what I wanted a finger was better
Rubbish picture
Better ones
I wanted to stop the water laying in the inside edge of the wheel arch lip (and salt etc) so created a little chamfer with seam sealer
Still waiting for filler to go nice and hard - time to underseal everything I could
A quick rub down of the filler and mask up time - Daily Telegraph of course - big pages
Filler primer
Then light flat back and some grey
Then get on with the other side but as it's all a repeat no pictures of that
Once finished time to put the wheels back on turn it around and then get ready to start the back end
Front chocked - jacked up and axle stands under and wheels removed
Jet wash the arches and called it a day(it's got time to dry out ready for tomorrow)
Actually I was surprised hiow much muck had built up in the arches considering I cleaned them last year and try to rinse them off everytime I wash the car
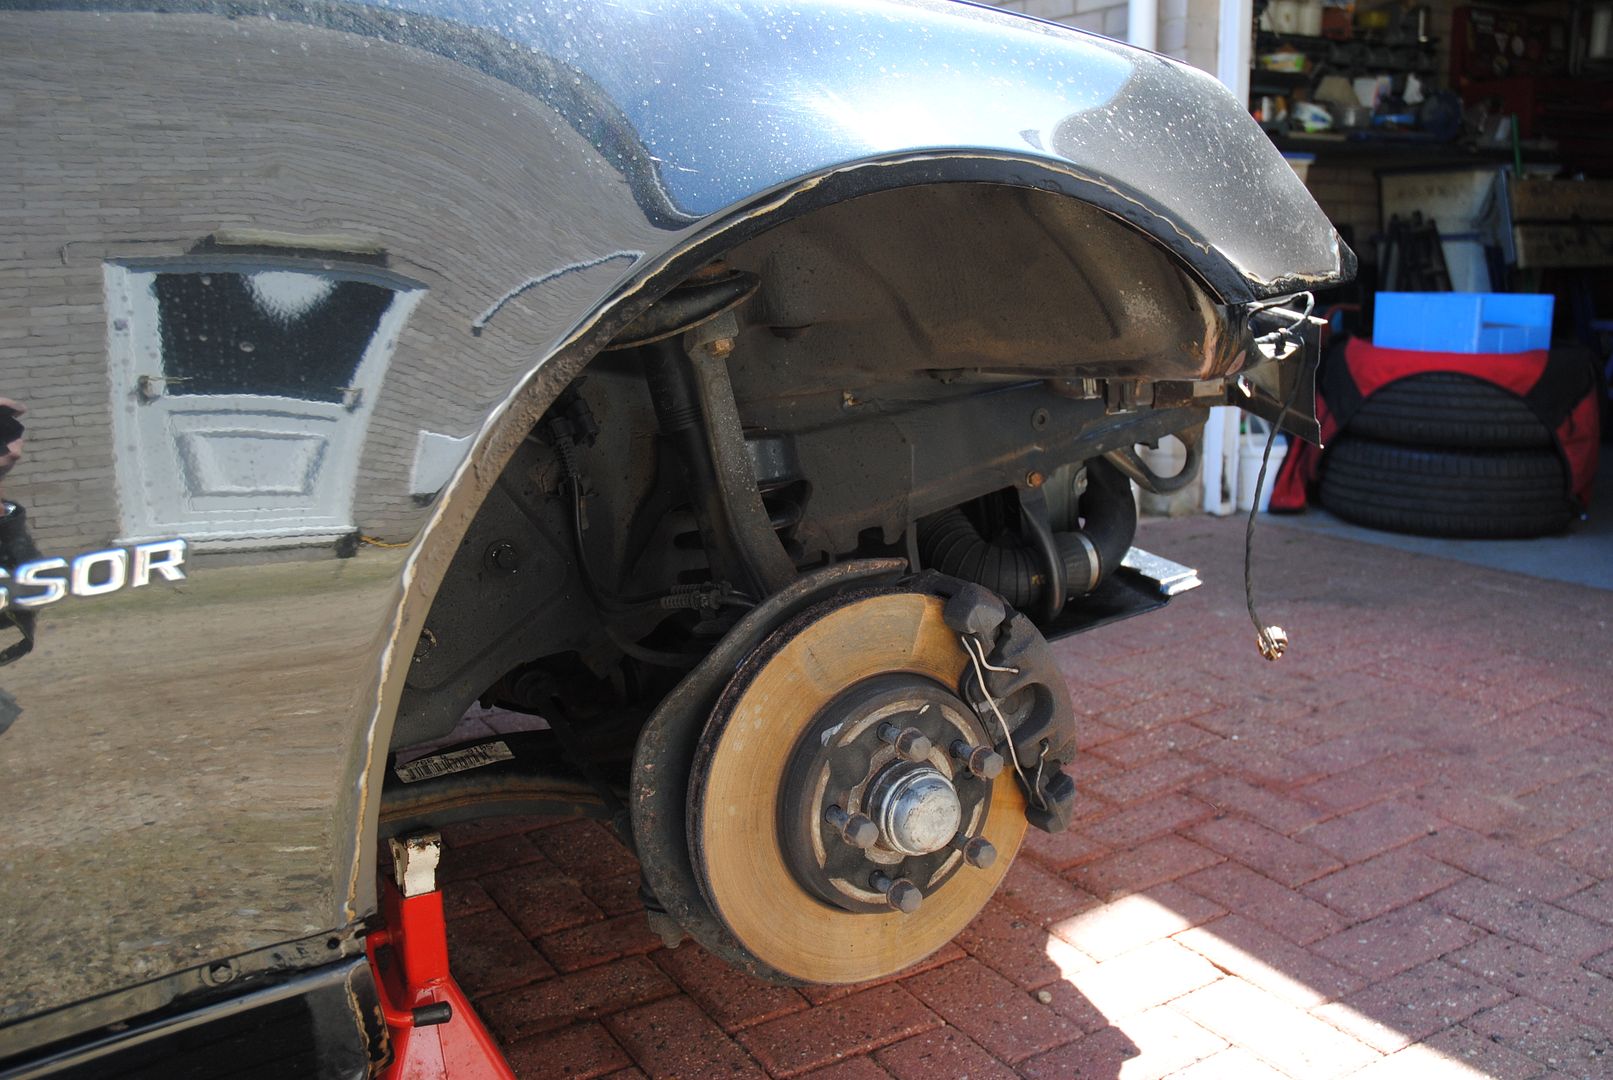
Back on it's wheels again at last had a bit of a nightmare with the wheel arch liner fixings as several of the threaded posts had already sheared and i managed to shear the remaining ones during the strip down. Anyway the merc got intimately acquainted with my portamig and all is good now with a full compliment of fixings.
Seems this thread is due an update..... by several years.....
It's really grown on me this little SLK - the temporary rust remedy stopped the worst of it spreading except on the bonnet and my intentions to get it painted properly remained just that intentions.....
With the Monza-dore in dry dock (becoming a long term project) I was short of a track car for a Marham track day so a few more stone chips aren't going to make much difference.
My issue was wheels and tyres - for the Monza I had probably 3 or 4 sets of 17 inch wheels all with tyres ranging from treaded to slicks - I also tend to stockpile 17 inch slicks (buying them when they are cheap) and the SLK has 16 inch wheels and the current tyres are way too good to wreck on a trackday
Cue some sillyness with some dirt cheap nasty aftermarket alloys sourced from a scrapyard in Merc Fitment

Got rid of the worst of the kerbing marks and scabby paint finish
Hi build primer

And then a silly topcoat

Now some spacers were required to correct the offset but no nuns or kittens were harmed
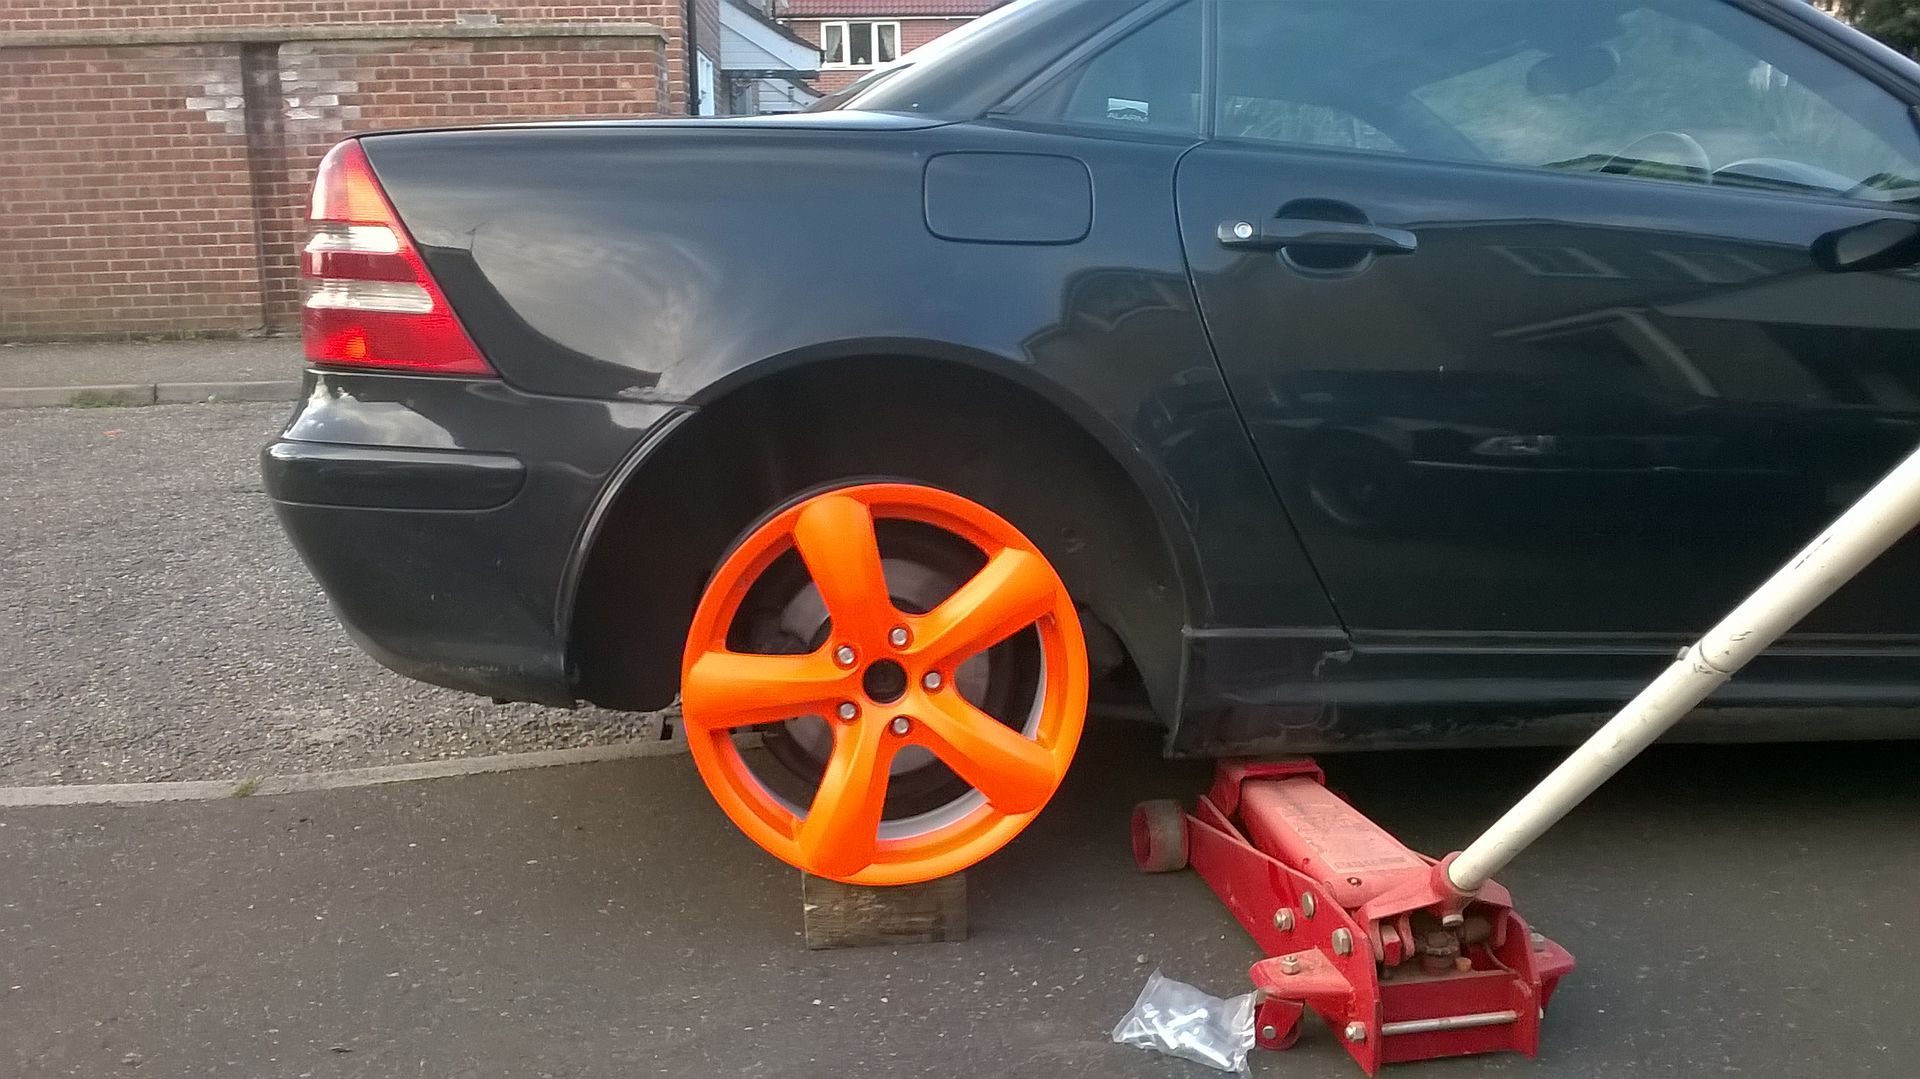
The SLK is wonderfully versatile 4 wheels shod with slicks and a trolley jack and other bits and pieces fit in the boot with a bungy cord holding it down
Performed faultlessly all day about 120 track miles roof down for better weight distribution

Silly centre caps

Only downside was turning the Traction/Stability control off (what I call the nanny state) actually doesn't turn it off - just decreases the level of intervention - utterpiffle has since told me the "hotwire" alternative to stop it being such a interfering nanny so if I ever put it on track again I'll be sure to do that first.
It continues to return mid 30's mpg commuting with low 40's on a run and apart from regular oil and filter changes it's not needed much doing to it at all
The only blot on it's book is the cup holder because a permanently out feature after a bit of plastic in the dash broke - so it's wedged shut - never used it anyway!!!
So having caught up with the thread - there will be some activity very soon as the paintwork needs resolution now - the 16 inch wheels are going to be converted to winters now the tyres are worn out and some 17's have been sourced and will be refurbed shod with new tyres and fitted once the paint has been renovated.
It's really grown on me this little SLK - the temporary rust remedy stopped the worst of it spreading except on the bonnet and my intentions to get it painted properly remained just that intentions.....
With the Monza-dore in dry dock (becoming a long term project) I was short of a track car for a Marham track day so a few more stone chips aren't going to make much difference.
My issue was wheels and tyres - for the Monza I had probably 3 or 4 sets of 17 inch wheels all with tyres ranging from treaded to slicks - I also tend to stockpile 17 inch slicks (buying them when they are cheap) and the SLK has 16 inch wheels and the current tyres are way too good to wreck on a trackday
Cue some sillyness with some dirt cheap nasty aftermarket alloys sourced from a scrapyard in Merc Fitment

Got rid of the worst of the kerbing marks and scabby paint finish
Hi build primer

And then a silly topcoat

Now some spacers were required to correct the offset but no nuns or kittens were harmed


The SLK is wonderfully versatile 4 wheels shod with slicks and a trolley jack and other bits and pieces fit in the boot with a bungy cord holding it down

Performed faultlessly all day about 120 track miles roof down for better weight distribution


Silly centre caps

Only downside was turning the Traction/Stability control off (what I call the nanny state) actually doesn't turn it off - just decreases the level of intervention - utterpiffle has since told me the "hotwire" alternative to stop it being such a interfering nanny so if I ever put it on track again I'll be sure to do that first.
It continues to return mid 30's mpg commuting with low 40's on a run and apart from regular oil and filter changes it's not needed much doing to it at all
The only blot on it's book is the cup holder because a permanently out feature after a bit of plastic in the dash broke - so it's wedged shut - never used it anyway!!!
So having caught up with the thread - there will be some activity very soon as the paintwork needs resolution now - the 16 inch wheels are going to be converted to winters now the tyres are worn out and some 17's have been sourced and will be refurbed shod with new tyres and fitted once the paint has been renovated.
Smokey32 said:
My dad has a 2003 slk230 in red. Nice car.
He took the wings off and sorted the brackets out that were rusty, its what causes the rust you can see, as the bracket touches the bodywork and theres nothing stopping it rotting through given enough time. Take them off and shotblast em and paint em up.
Mine were past shotblast and paint but the were still available from mercedes so I bought new ones and painted them before fitting. Explains the rust in two places but they rust in way more than that, sill ends and boot lid for startersHe took the wings off and sorted the brackets out that were rusty, its what causes the rust you can see, as the bracket touches the bodywork and theres nothing stopping it rotting through given enough time. Take them off and shotblast em and paint em up.


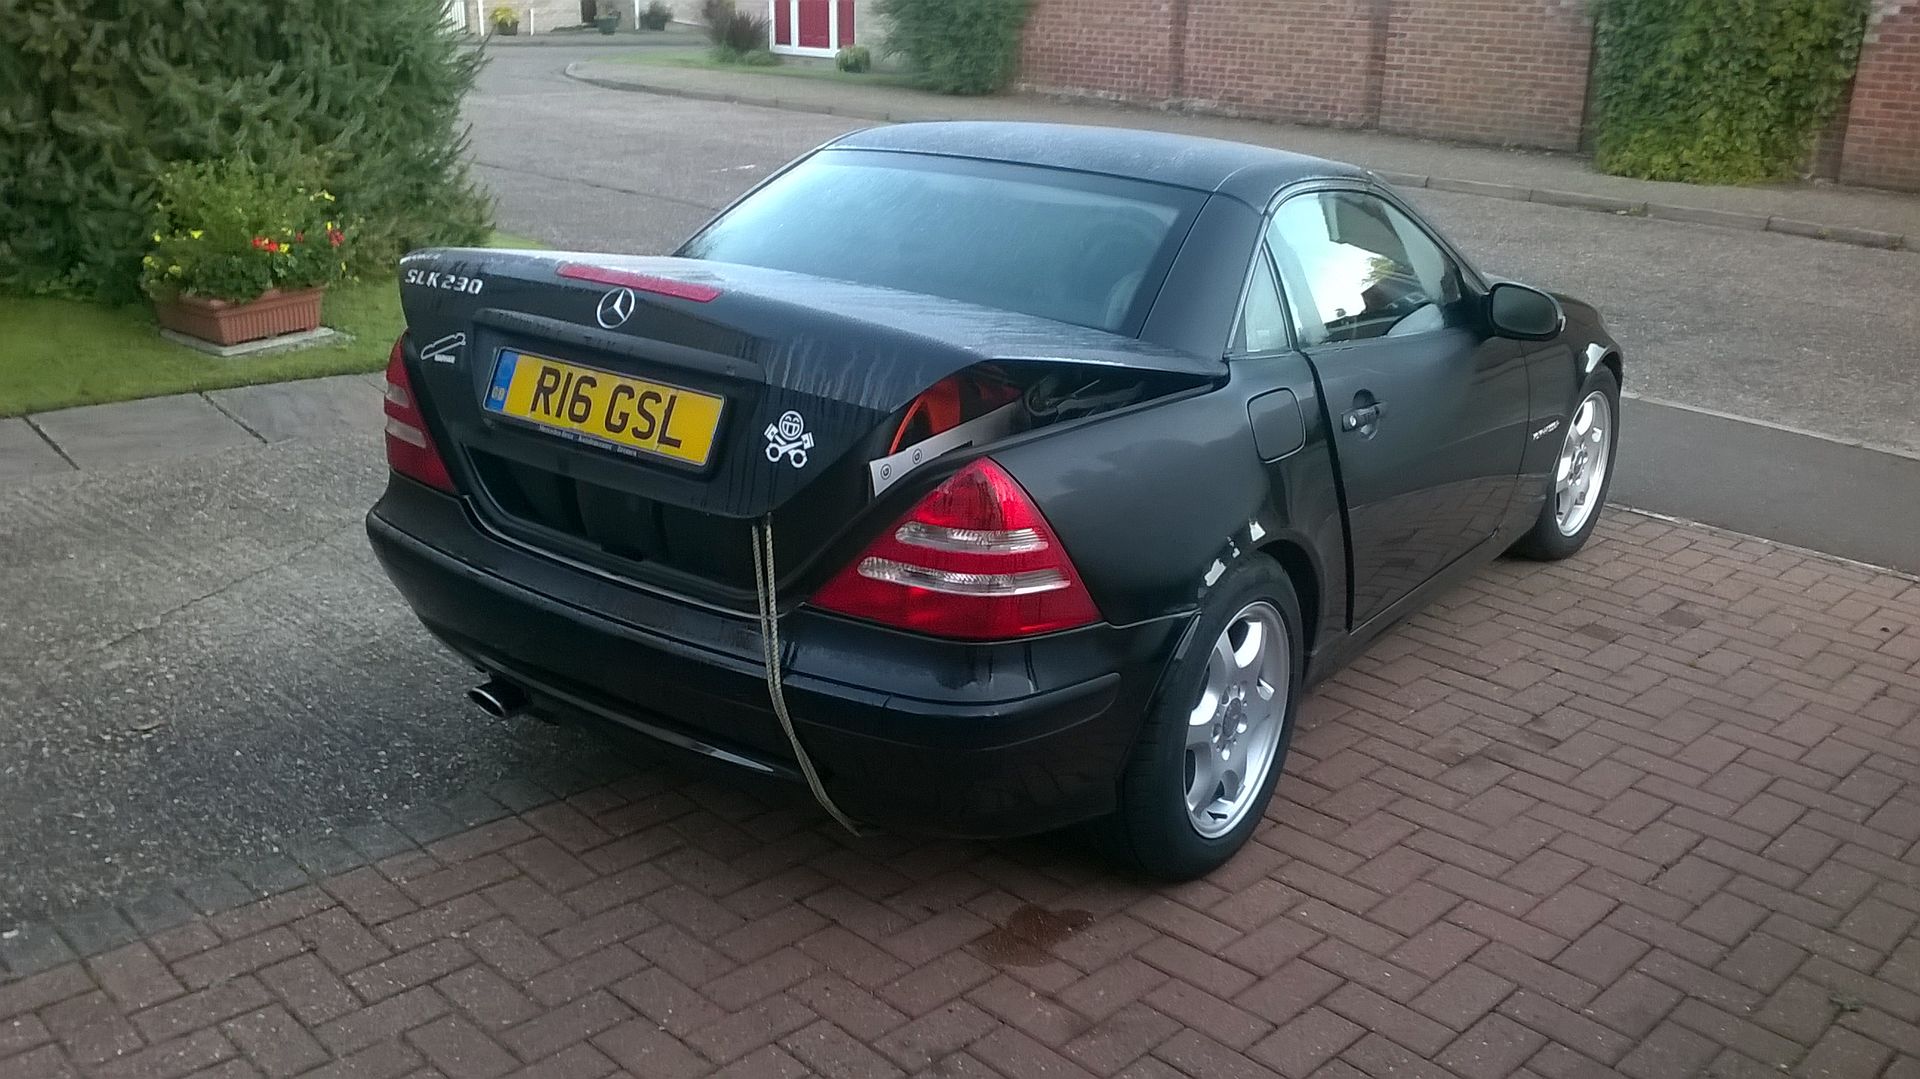
Boot light issue resolved
So progress pictures
Bonnet had a huge scab on it
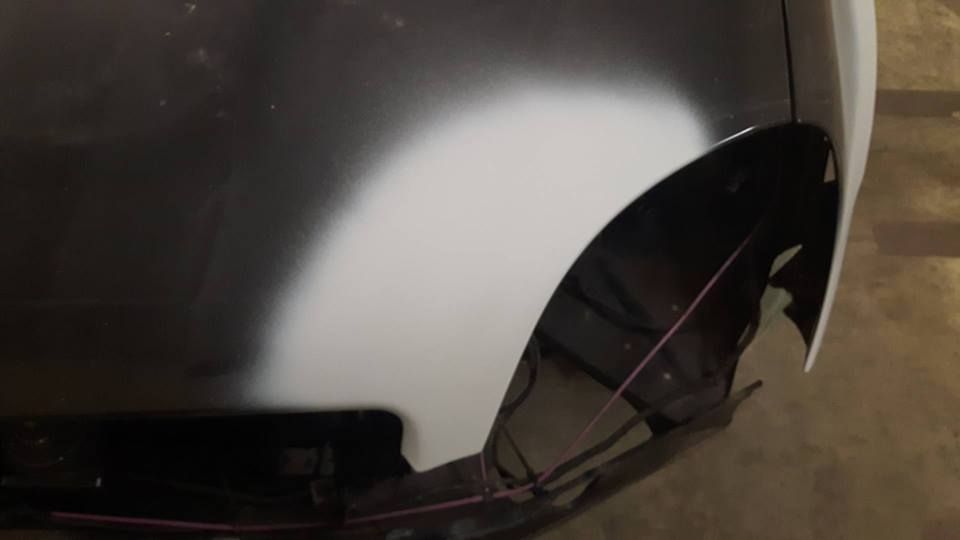
My temporary work had saved any further corrosion so no new metal needed on any of the arches - all came back to bare metal without thinning out the metal


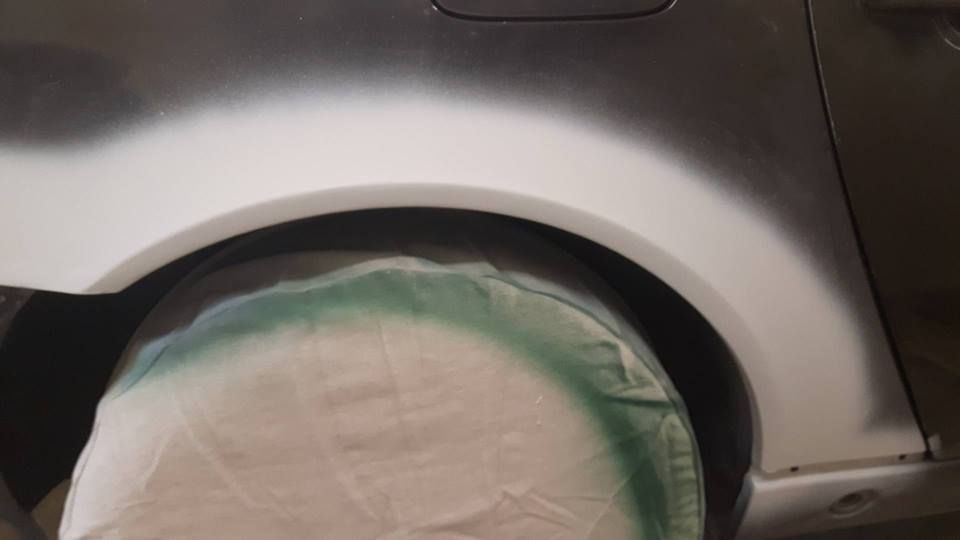
Next step is flat that and all the rest of the body and bumpers ready for proper paint
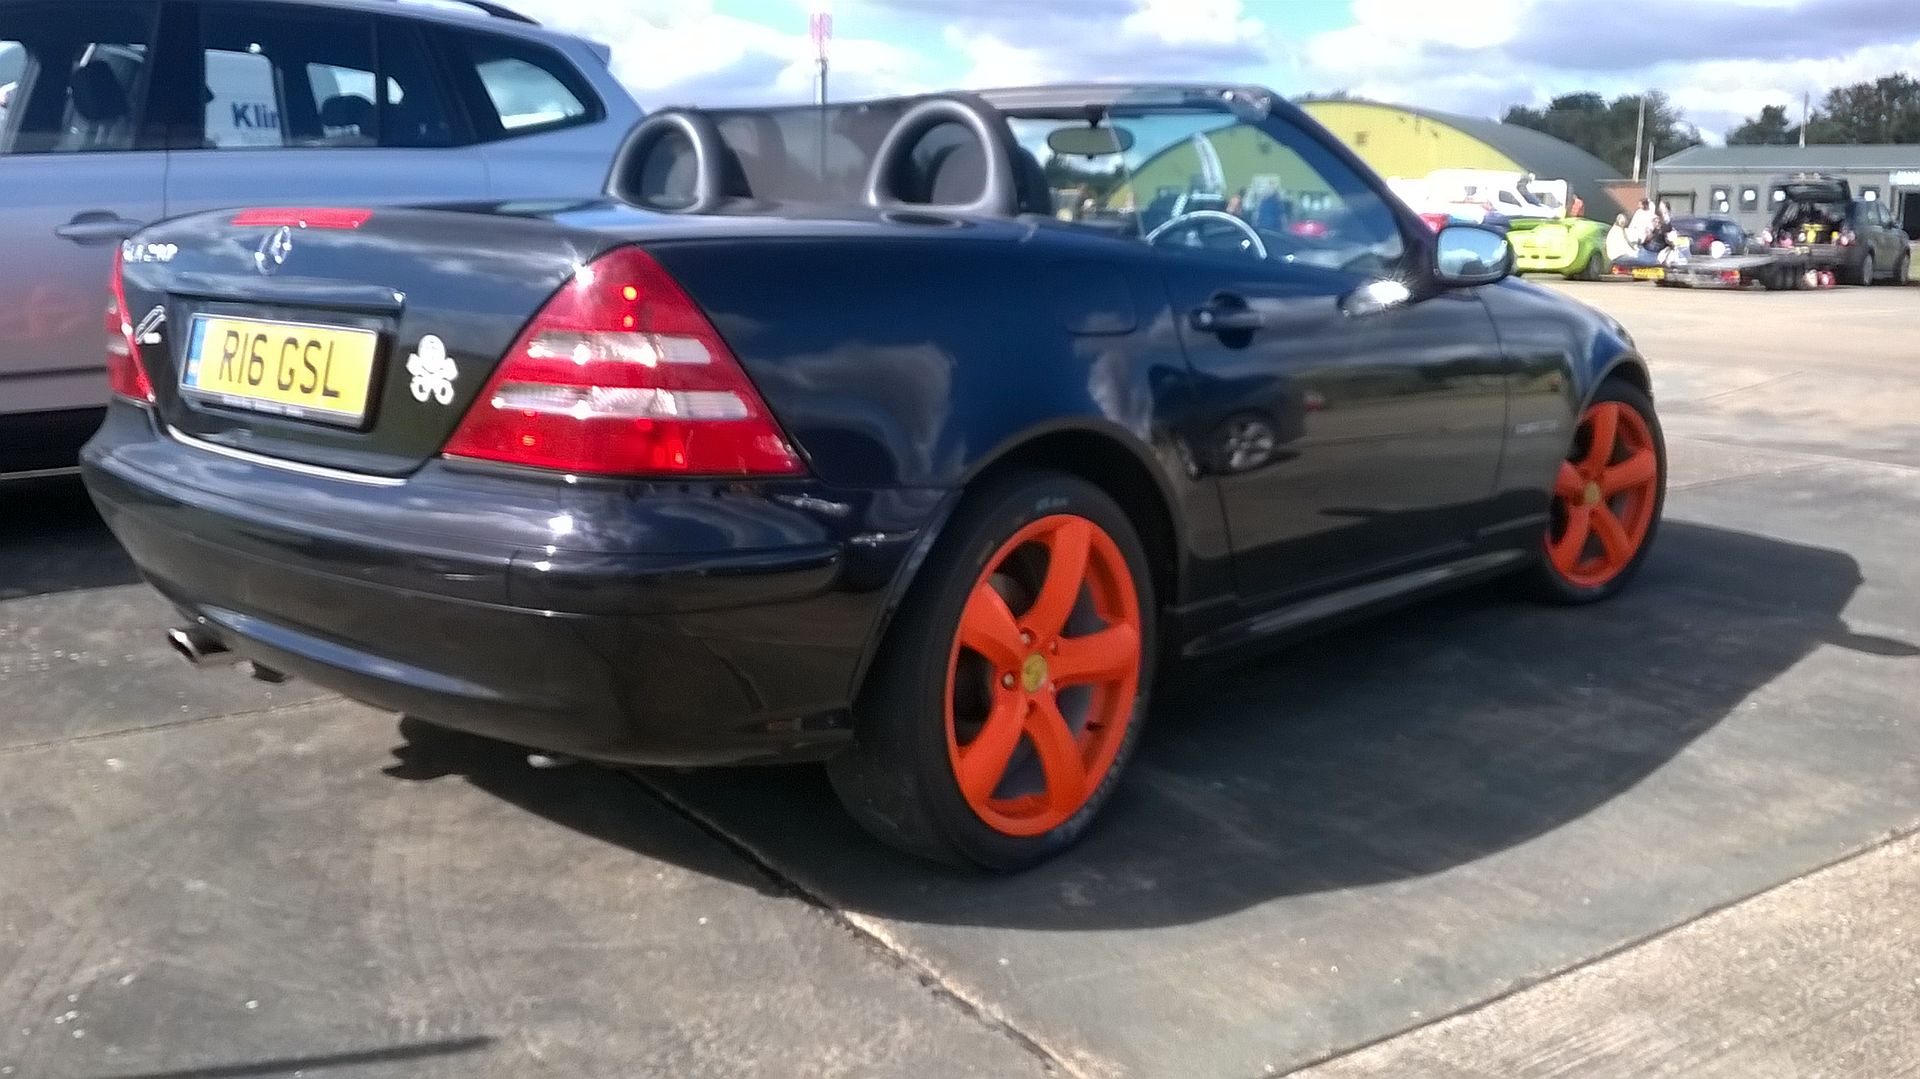
New OE Mercedes wheels (well new to me) now being blasted and powder coated in a non std shade
New tyres ordered delivered and ready for fitment
So progress pictures
Bonnet had a huge scab on it

My temporary work had saved any further corrosion so no new metal needed on any of the arches - all came back to bare metal without thinning out the metal


Next step is flat that and all the rest of the body and bumpers ready for proper paint
New OE Mercedes wheels (well new to me) now being blasted and powder coated in a non std shade
New tyres ordered delivered and ready for fitment
Gassing Station | Mercedes | Top of Page | What's New | My Stuff