Airfix 1/24 Spitfire Mk VB
Discussion


Sadly not 
Will fix the wheel in place then - thanks!
It will certainly be matt.
And yes - the pilot has to be 'weathered' as well - mould the harness into shape etc. add some shading....not a fan of that pre-printed PE though - on the Mossie I was able to temper the PE and bend far more easily...
Will fix the wheel in place then - thanks!
It will certainly be matt.
And yes - the pilot has to be 'weathered' as well - mould the harness into shape etc. add some shading....not a fan of that pre-printed PE though - on the Mossie I was able to temper the PE and bend far more easily...
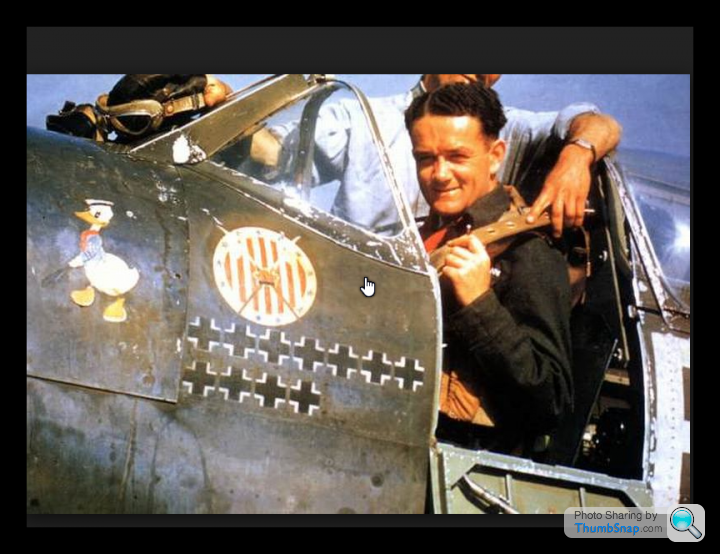
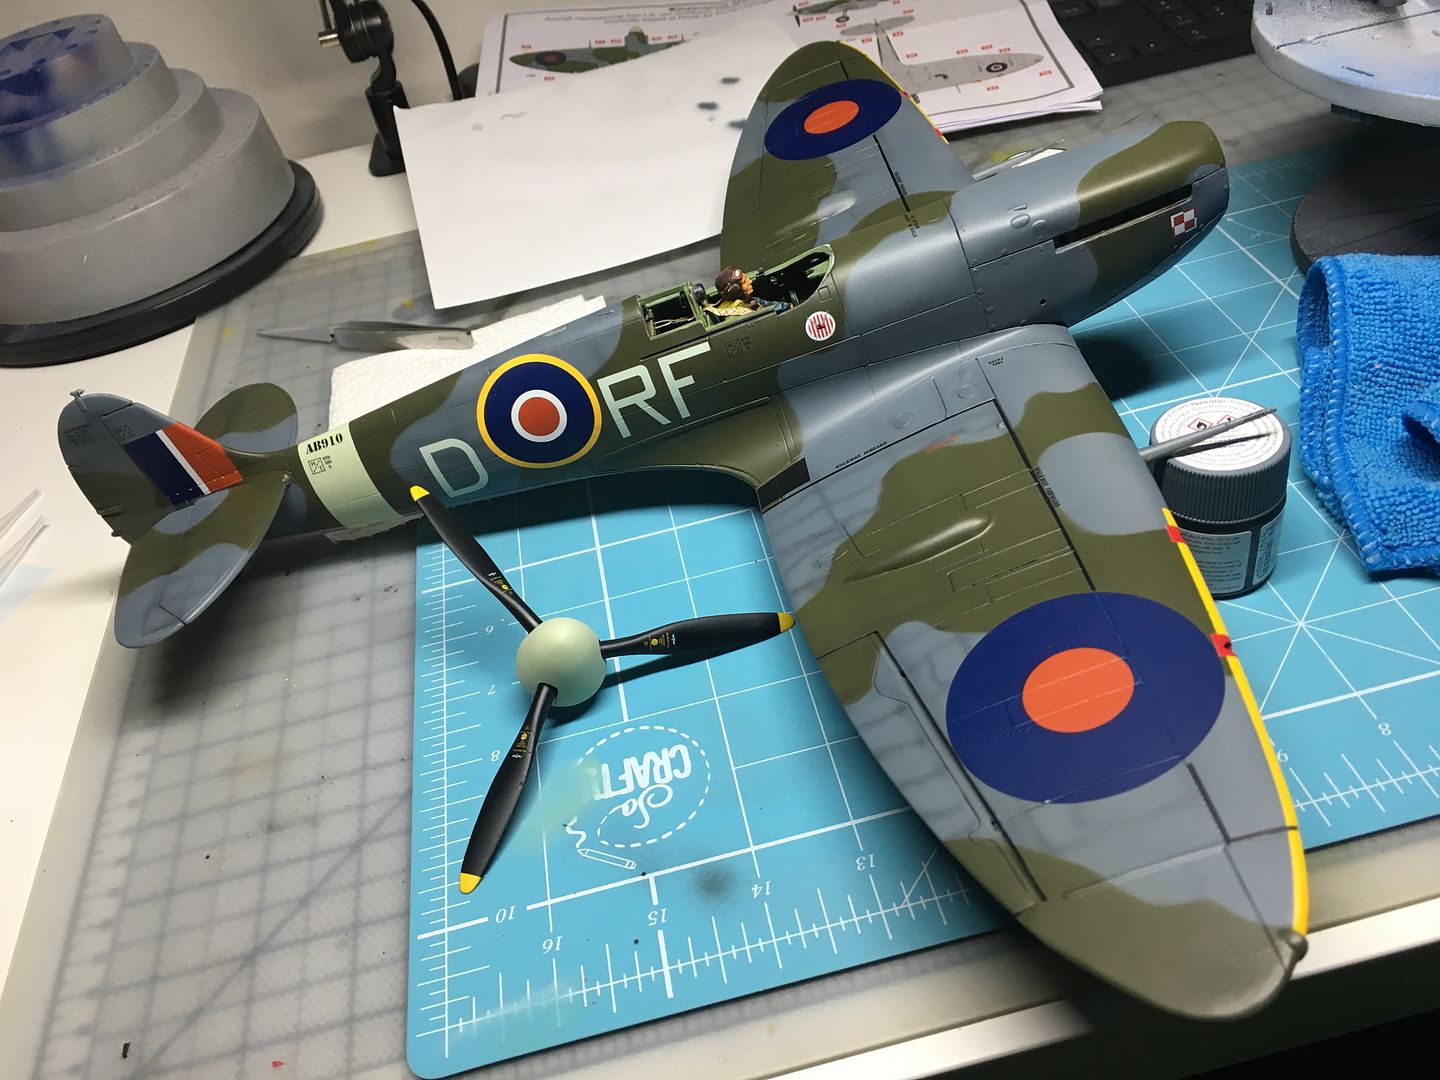
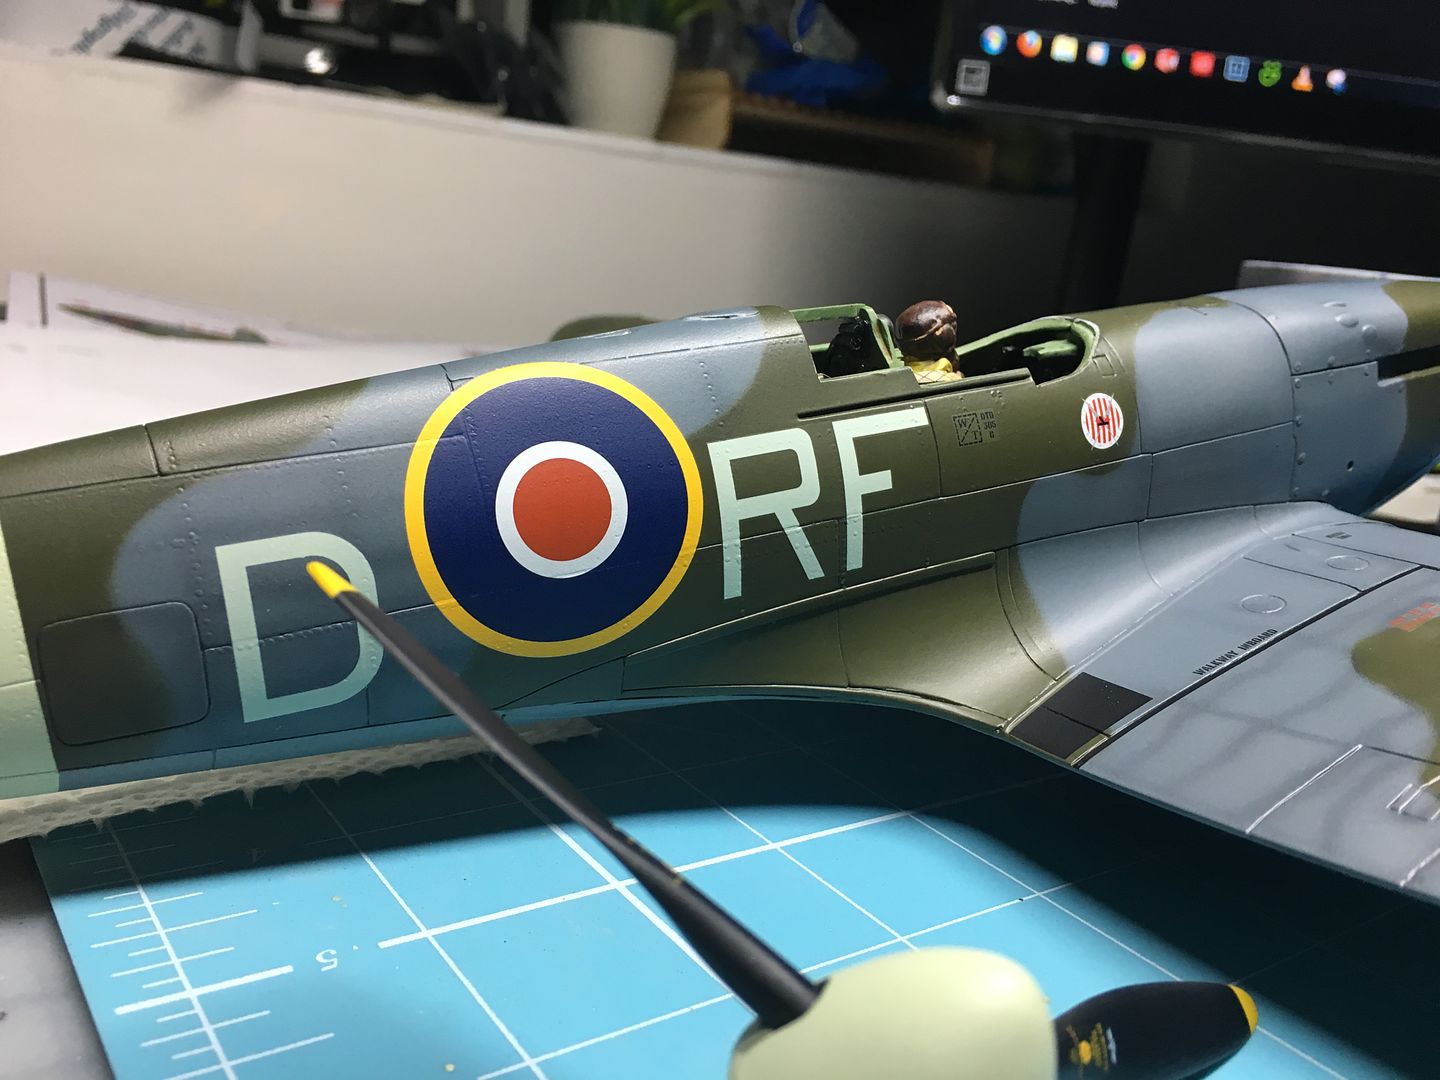
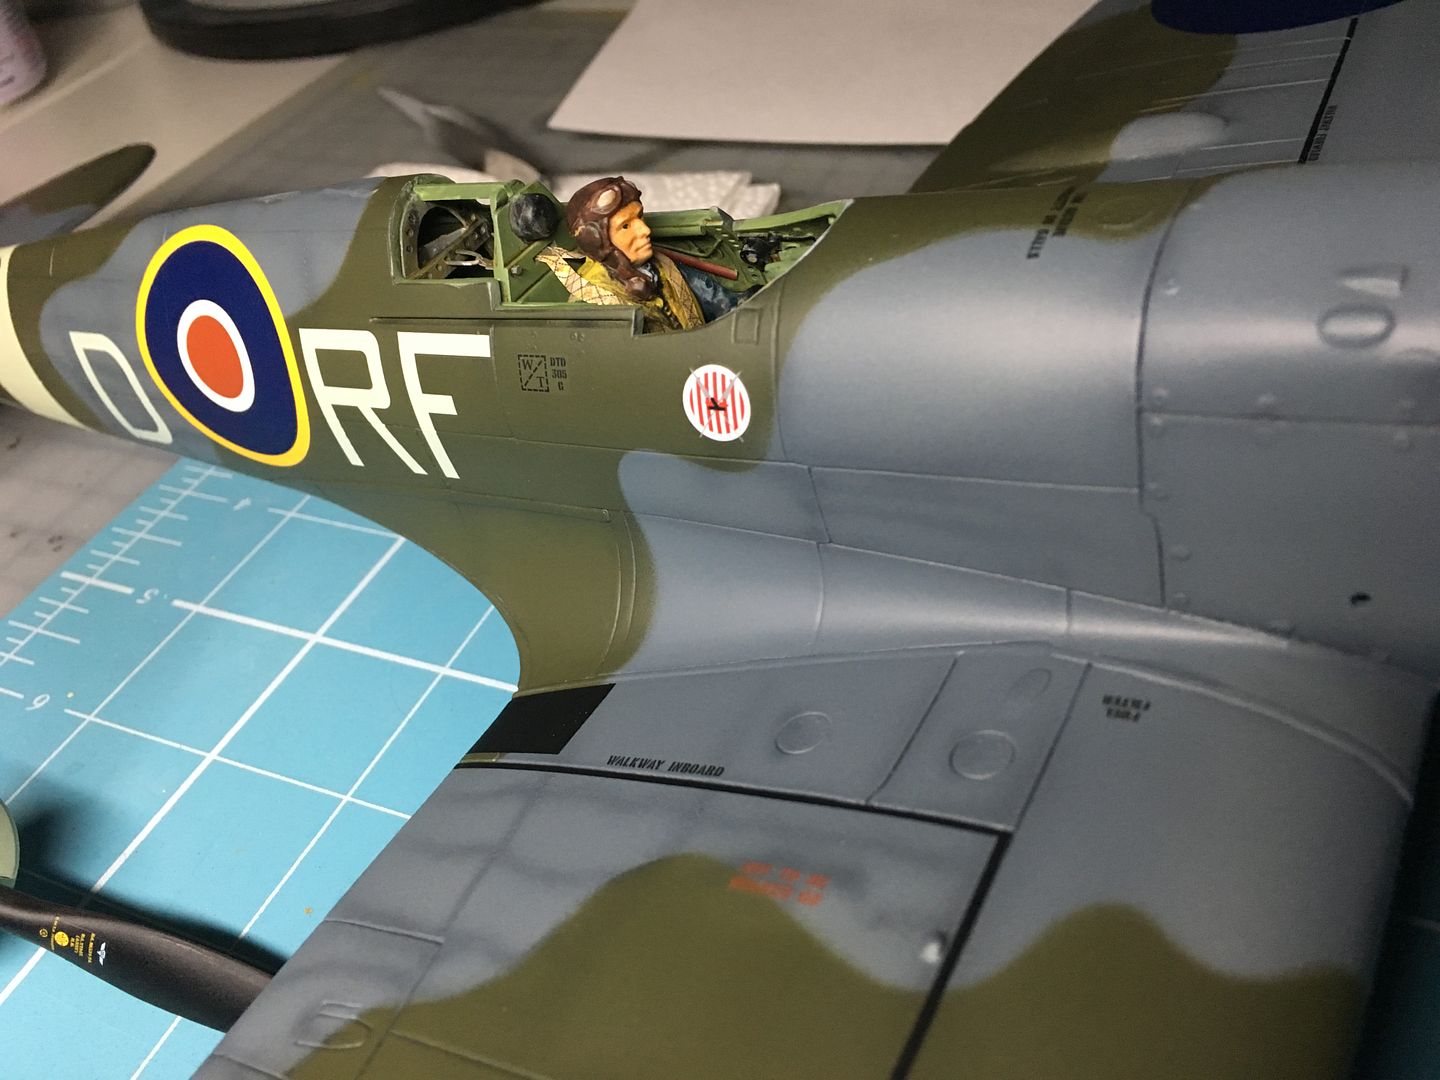
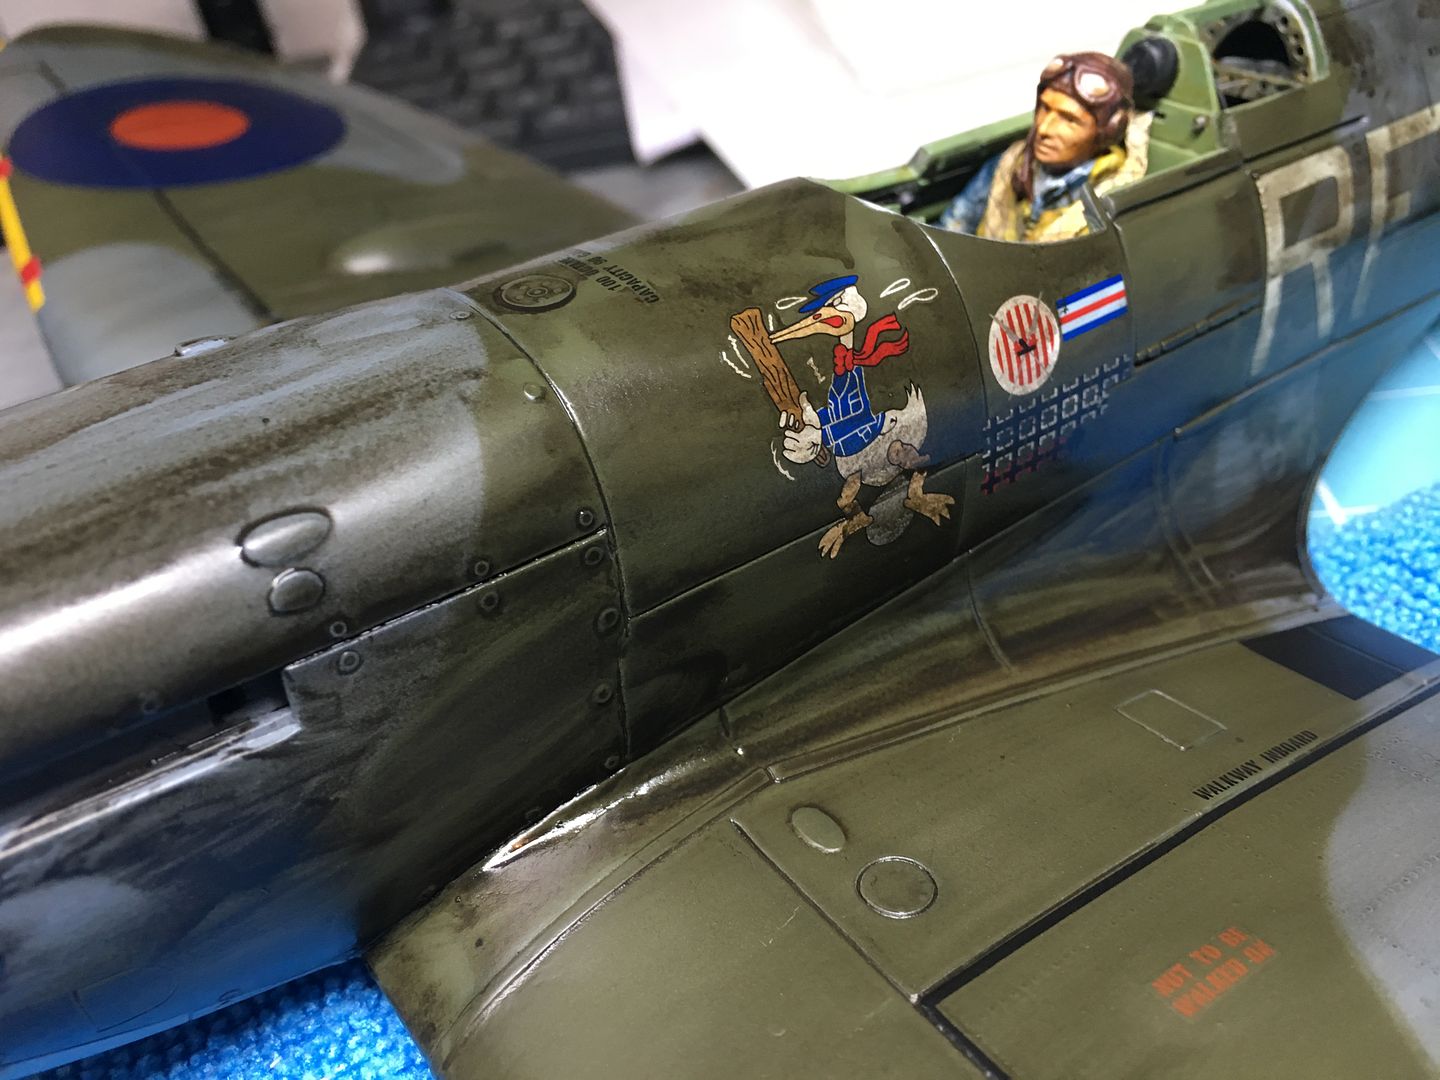
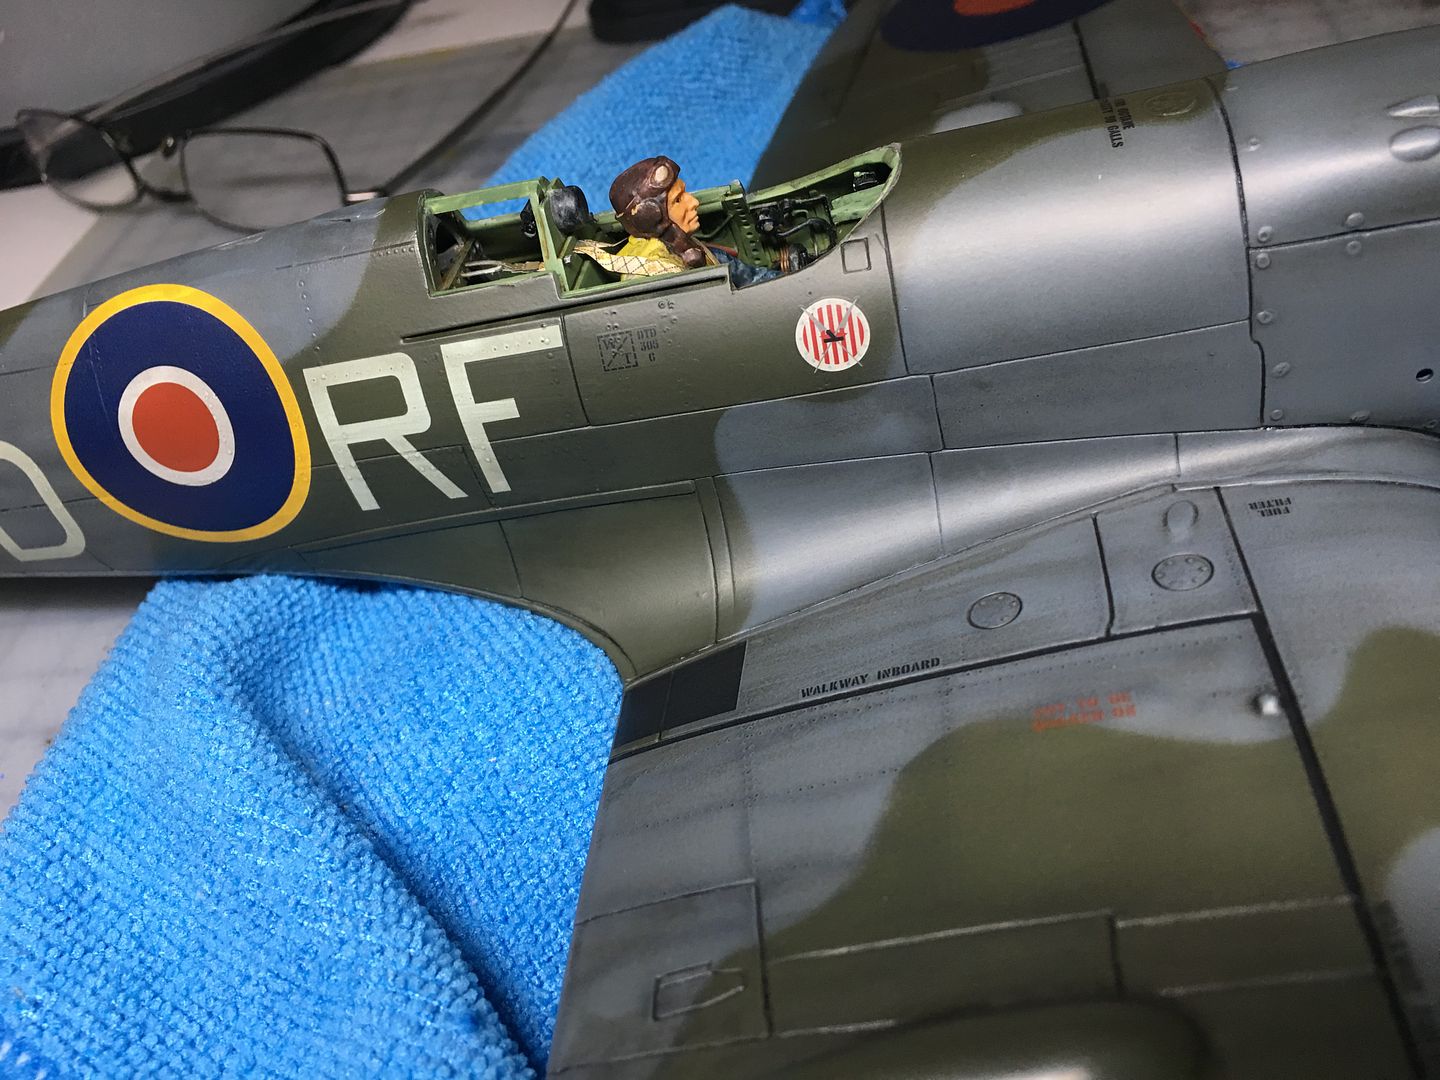
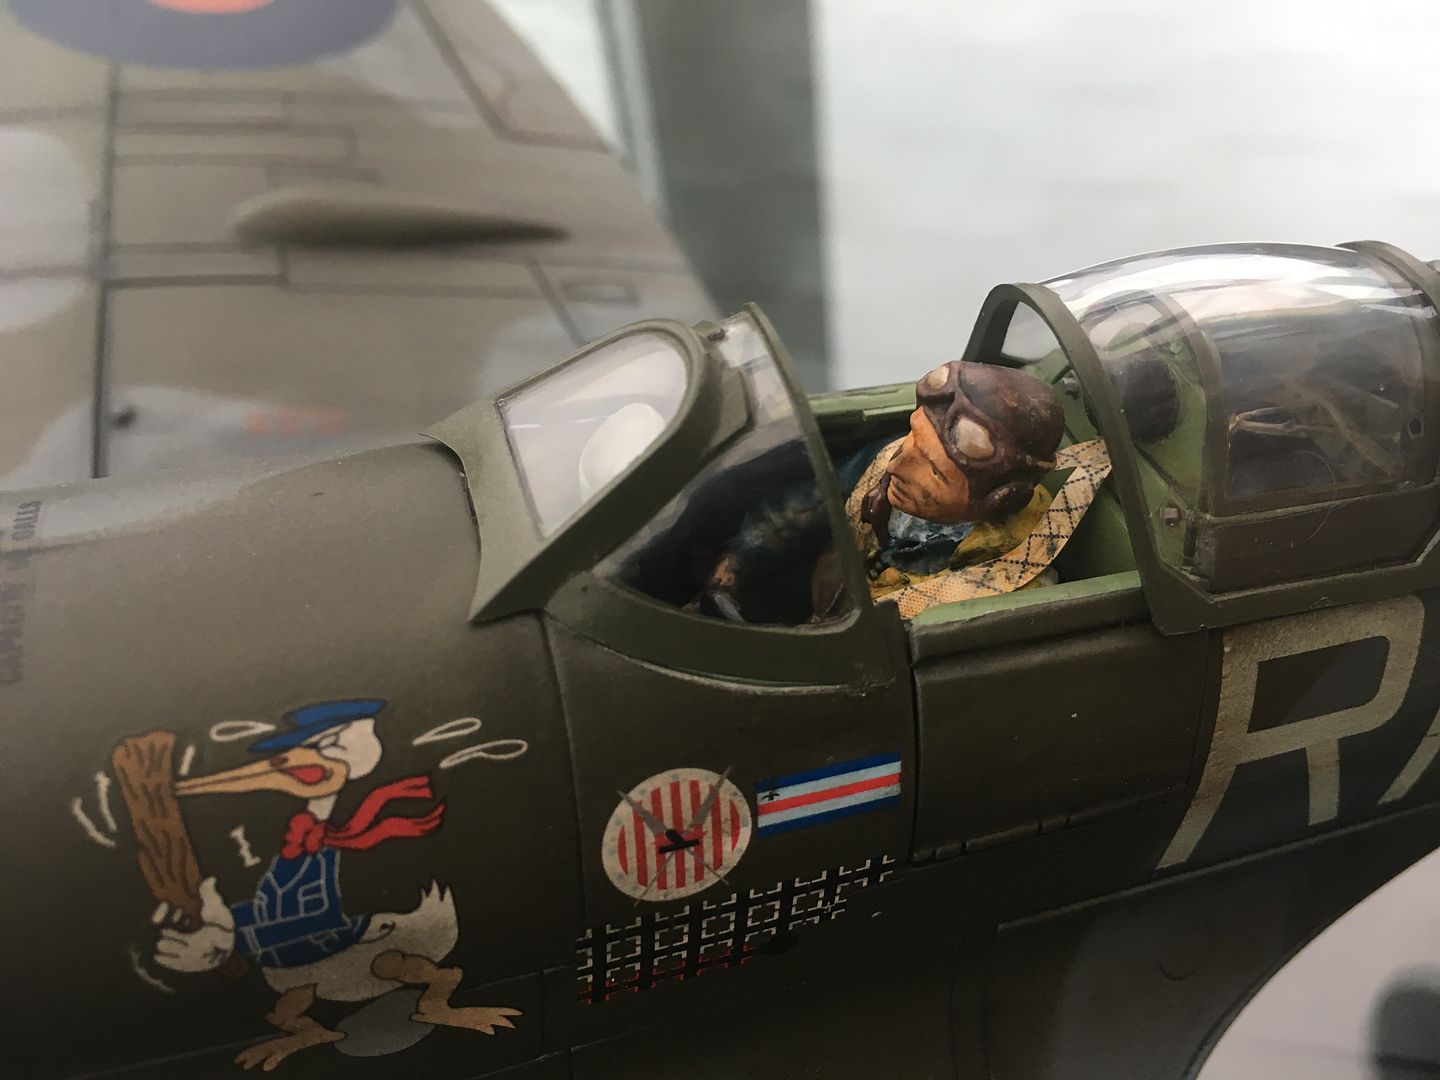
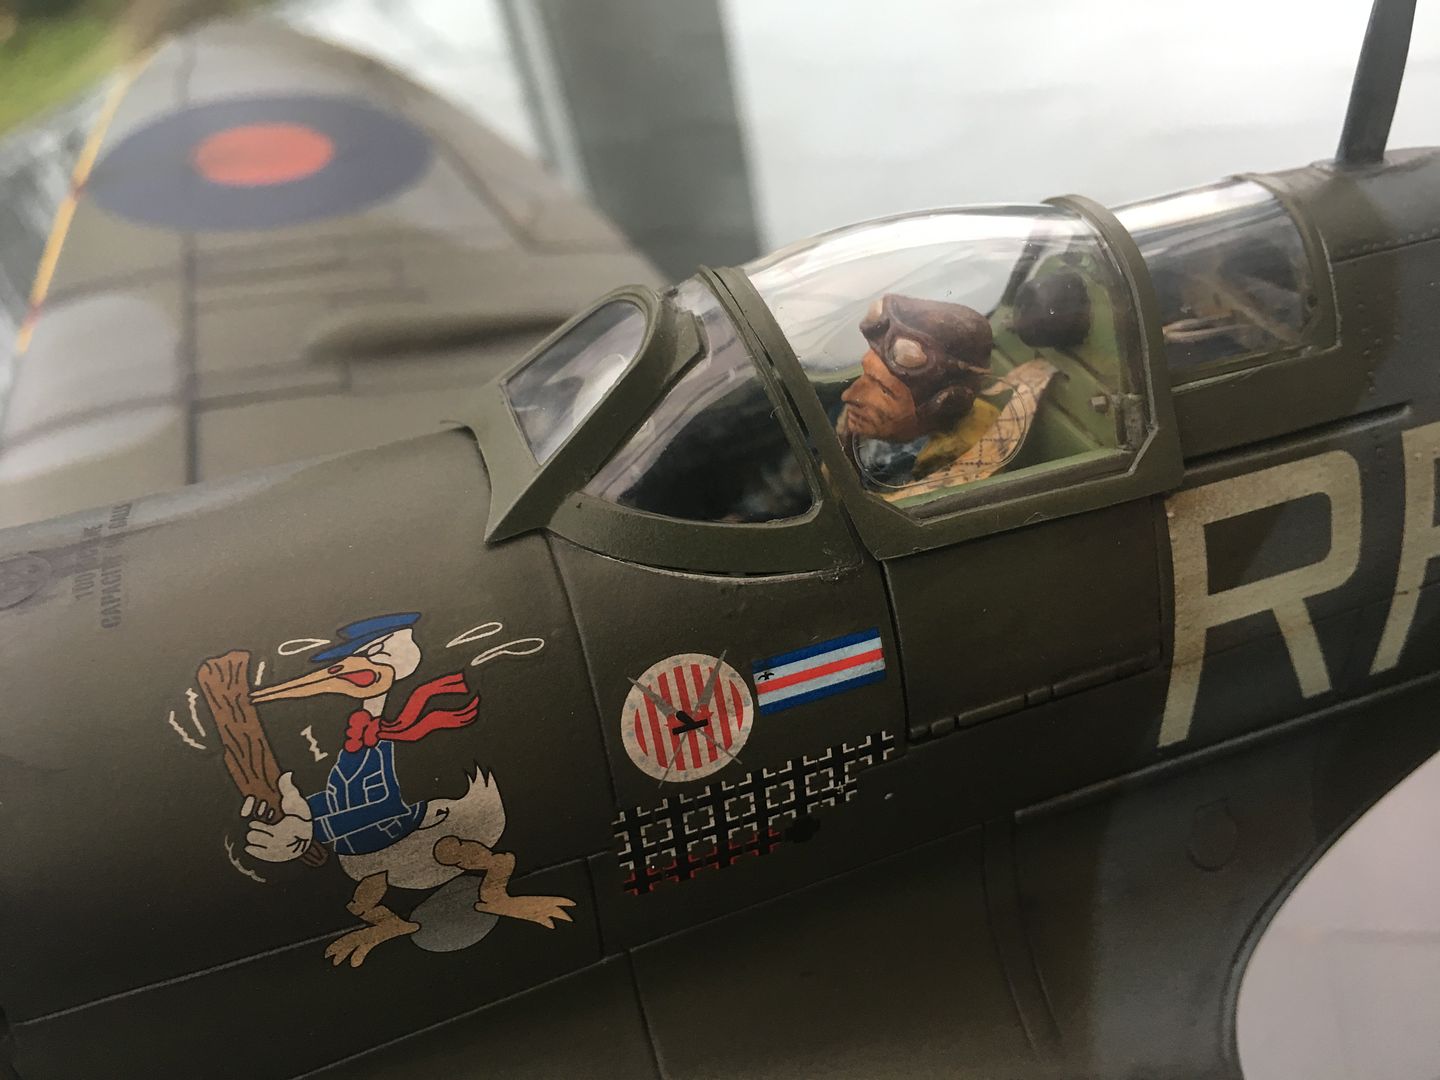
Yes - ITS NOT FINISHED lol - the kit part was...chunky - so I added that piece later...
Lots of little things to finish/add - nav. lights, tidy up the cockpit area and 'weather' - exhausts etc etc - and add 'glass' to Gingers goggles! Bomb sight needs fixing - and the rear view mirror!
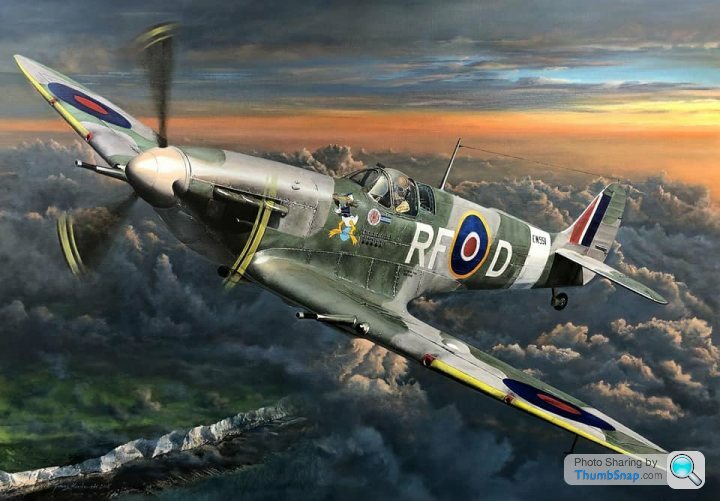
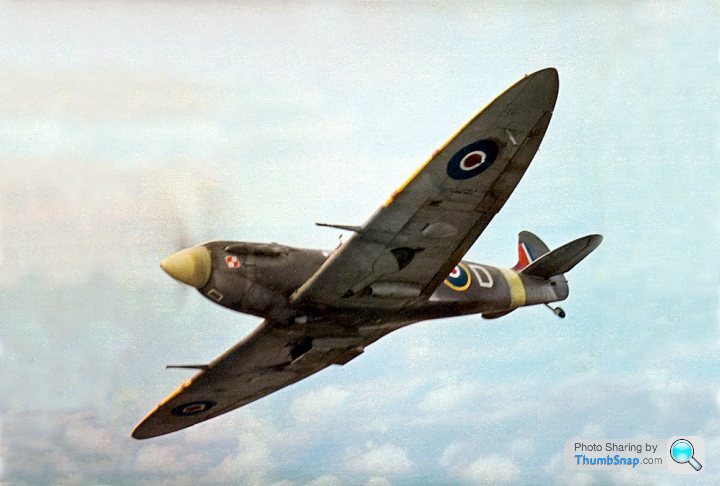
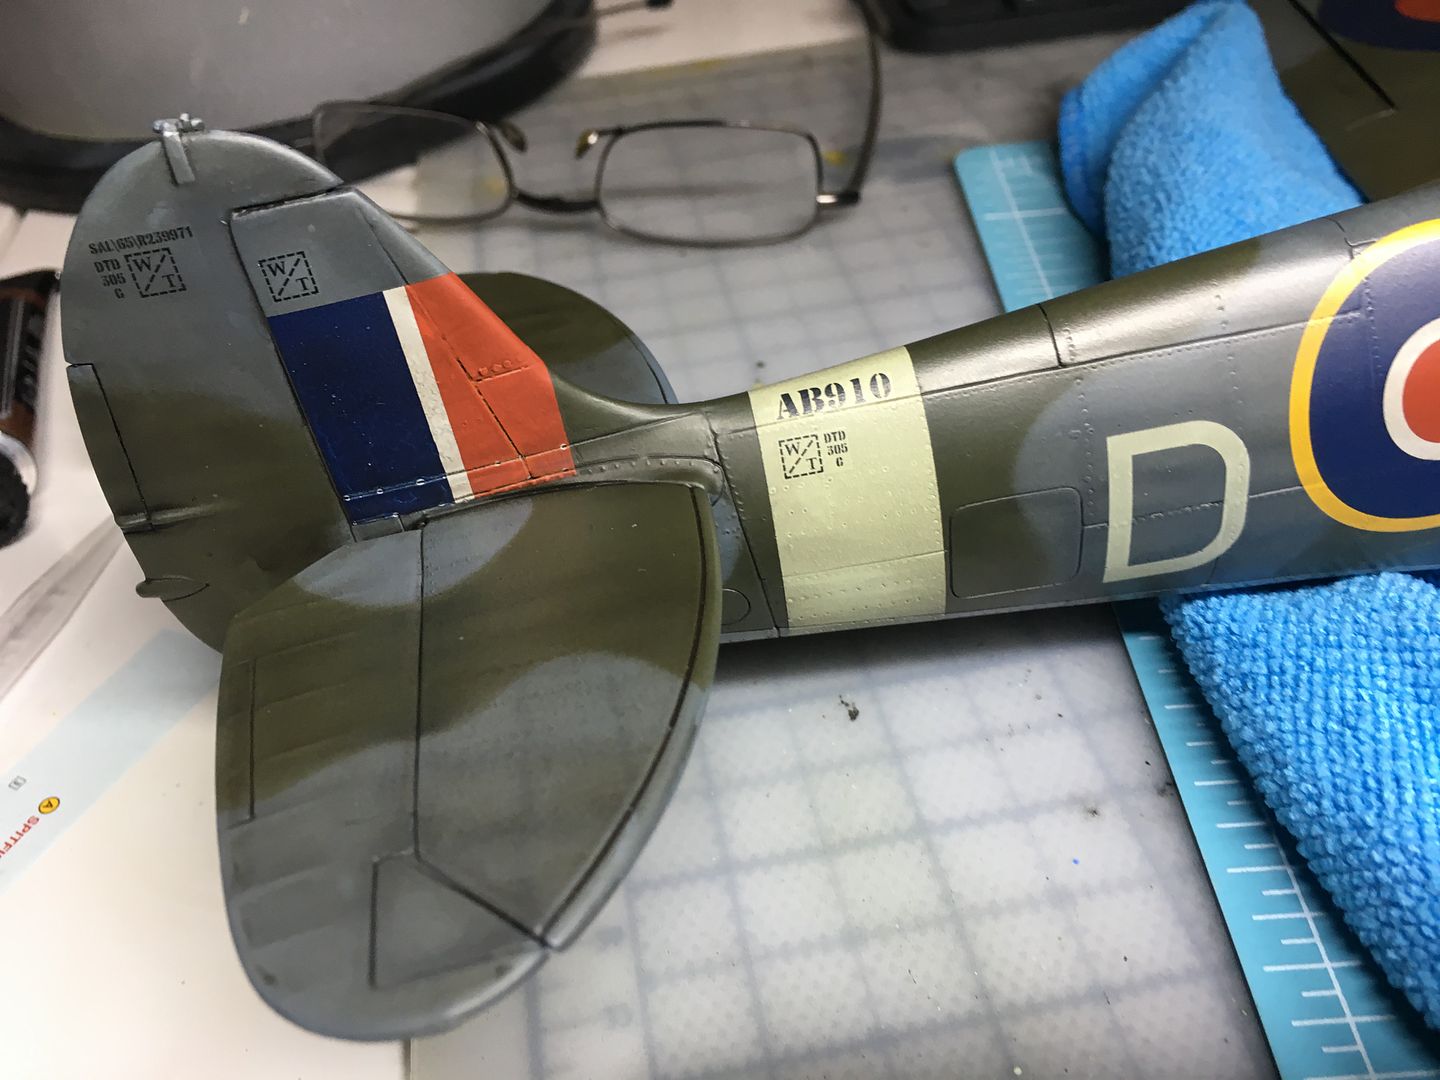
Anyone know if/what type of aerial this model had - I have seen various types - single from the mast to the tail, seem some from the wings or tail plane to the fuselage, and some with no wire......(yet to be fitted - I'm too afraid I'm going to knock it off whilst painting - prop is only held on with blutack for the photos lol)
Lots of little things to finish/add - nav. lights, tidy up the cockpit area and 'weather' - exhausts etc etc - and add 'glass' to Gingers goggles! Bomb sight needs fixing - and the rear view mirror!
Anyone know if/what type of aerial this model had - I have seen various types - single from the mast to the tail, seem some from the wings or tail plane to the fuselage, and some with no wire......(yet to be fitted - I'm too afraid I'm going to knock it off whilst painting - prop is only held on with blutack for the photos lol)
caterhamnut said:
Yes - ITS NOT FINISHED lol - the kit part was...chunky - so I added that piece later...
Lots of little things to finish/add - nav. lights, tidy up the cockpit area and 'weather' - exhausts etc etc - and add 'glass' to Gingers goggles! Bomb sight needs fixing - and the rear view mirror!
Anyone know if/what type of aerial this model had - I have seen various types - single from the mast to the tail, seem some from the wings or tail plane to the fuselage, and some with no wire......(yet to be fitted - I'm too afraid I'm going to knock it off whilst painting - prop is only held on with blutack for the photos lol)
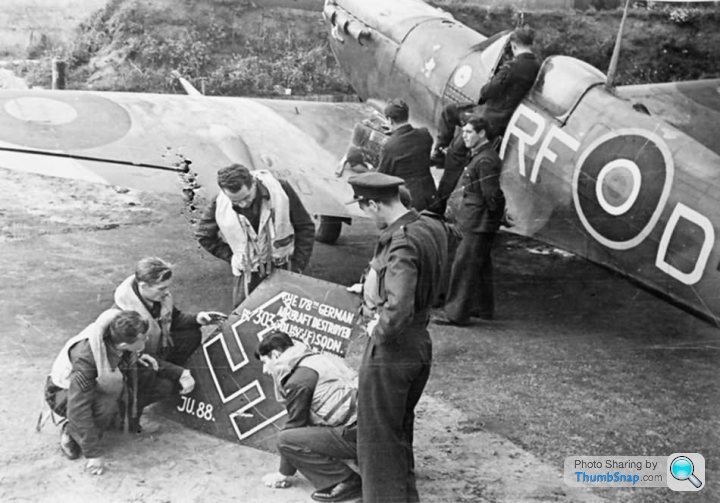
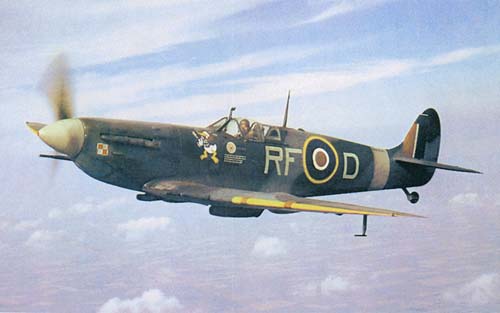
I don't think that variant would have any wires from the mast (unlike the box art). It may have had a couple of IFF antenna wires from around the fuselage centre roundels to the tips of the tailplanes, but without some decent period photographs of that particular aircraft it would probably be difficult to say for certain. Lots of little things to finish/add - nav. lights, tidy up the cockpit area and 'weather' - exhausts etc etc - and add 'glass' to Gingers goggles! Bomb sight needs fixing - and the rear view mirror!
Anyone know if/what type of aerial this model had - I have seen various types - single from the mast to the tail, seem some from the wings or tail plane to the fuselage, and some with no wire......(yet to be fitted - I'm too afraid I'm going to knock it off whilst painting - prop is only held on with blutack for the photos lol)

dr_gn said:
caterhamnut said:
Yes - ITS NOT FINISHED lol - the kit part was...chunky - so I added that piece later...
Lots of little things to finish/add - nav. lights, tidy up the cockpit area and 'weather' - exhausts etc etc - and add 'glass' to Gingers goggles! Bomb sight needs fixing - and the rear view mirror!
Anyone know if/what type of aerial this model had - I have seen various types - single from the mast to the tail, seem some from the wings or tail plane to the fuselage, and some with no wire......(yet to be fitted - I'm too afraid I'm going to knock it off whilst painting - prop is only held on with blutack for the photos lol)
I don't think that variant would have any wires from the mast (unlike the box art). It may have had a couple of IFF antenna wires from around the fuselage centre roundels to the tips of the tailplanes, but without some decent period photographs of that particular aircraft it would probably be difficult to say for certain. Lots of little things to finish/add - nav. lights, tidy up the cockpit area and 'weather' - exhausts etc etc - and add 'glass' to Gingers goggles! Bomb sight needs fixing - and the rear view mirror!
Anyone know if/what type of aerial this model had - I have seen various types - single from the mast to the tail, seem some from the wings or tail plane to the fuselage, and some with no wire......(yet to be fitted - I'm too afraid I'm going to knock it off whilst painting - prop is only held on with blutack for the photos lol)
Dr Jekyll said:
dr_gn said:
caterhamnut said:
Yes - ITS NOT FINISHED lol - the kit part was...chunky - so I added that piece later...
Lots of little things to finish/add - nav. lights, tidy up the cockpit area and 'weather' - exhausts etc etc - and add 'glass' to Gingers goggles! Bomb sight needs fixing - and the rear view mirror!
Anyone know if/what type of aerial this model had - I have seen various types - single from the mast to the tail, seem some from the wings or tail plane to the fuselage, and some with no wire......(yet to be fitted - I'm too afraid I'm going to knock it off whilst painting - prop is only held on with blutack for the photos lol)
I don't think that variant would have any wires from the mast (unlike the box art). It may have had a couple of IFF antenna wires from around the fuselage centre roundels to the tips of the tailplanes, but without some decent period photographs of that particular aircraft it would probably be difficult to say for certain. Lots of little things to finish/add - nav. lights, tidy up the cockpit area and 'weather' - exhausts etc etc - and add 'glass' to Gingers goggles! Bomb sight needs fixing - and the rear view mirror!
Anyone know if/what type of aerial this model had - I have seen various types - single from the mast to the tail, seem some from the wings or tail plane to the fuselage, and some with no wire......(yet to be fitted - I'm too afraid I'm going to knock it off whilst painting - prop is only held on with blutack for the photos lol)
It’s more difficult to tell if it was fitted with the diagonal IFF wires though.
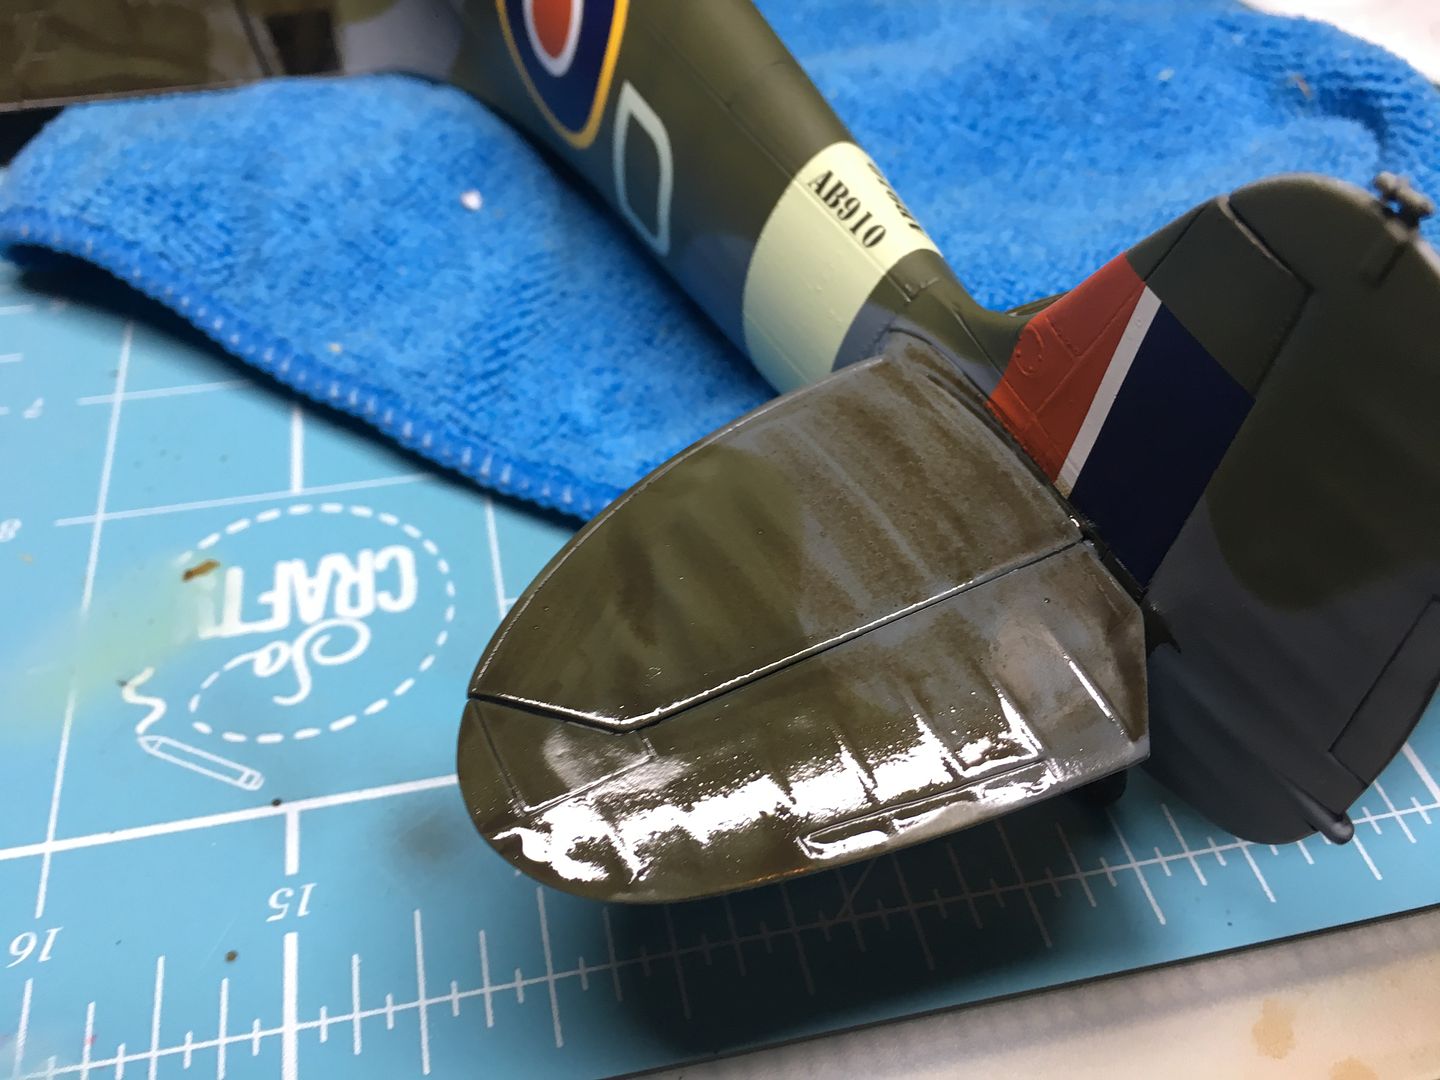
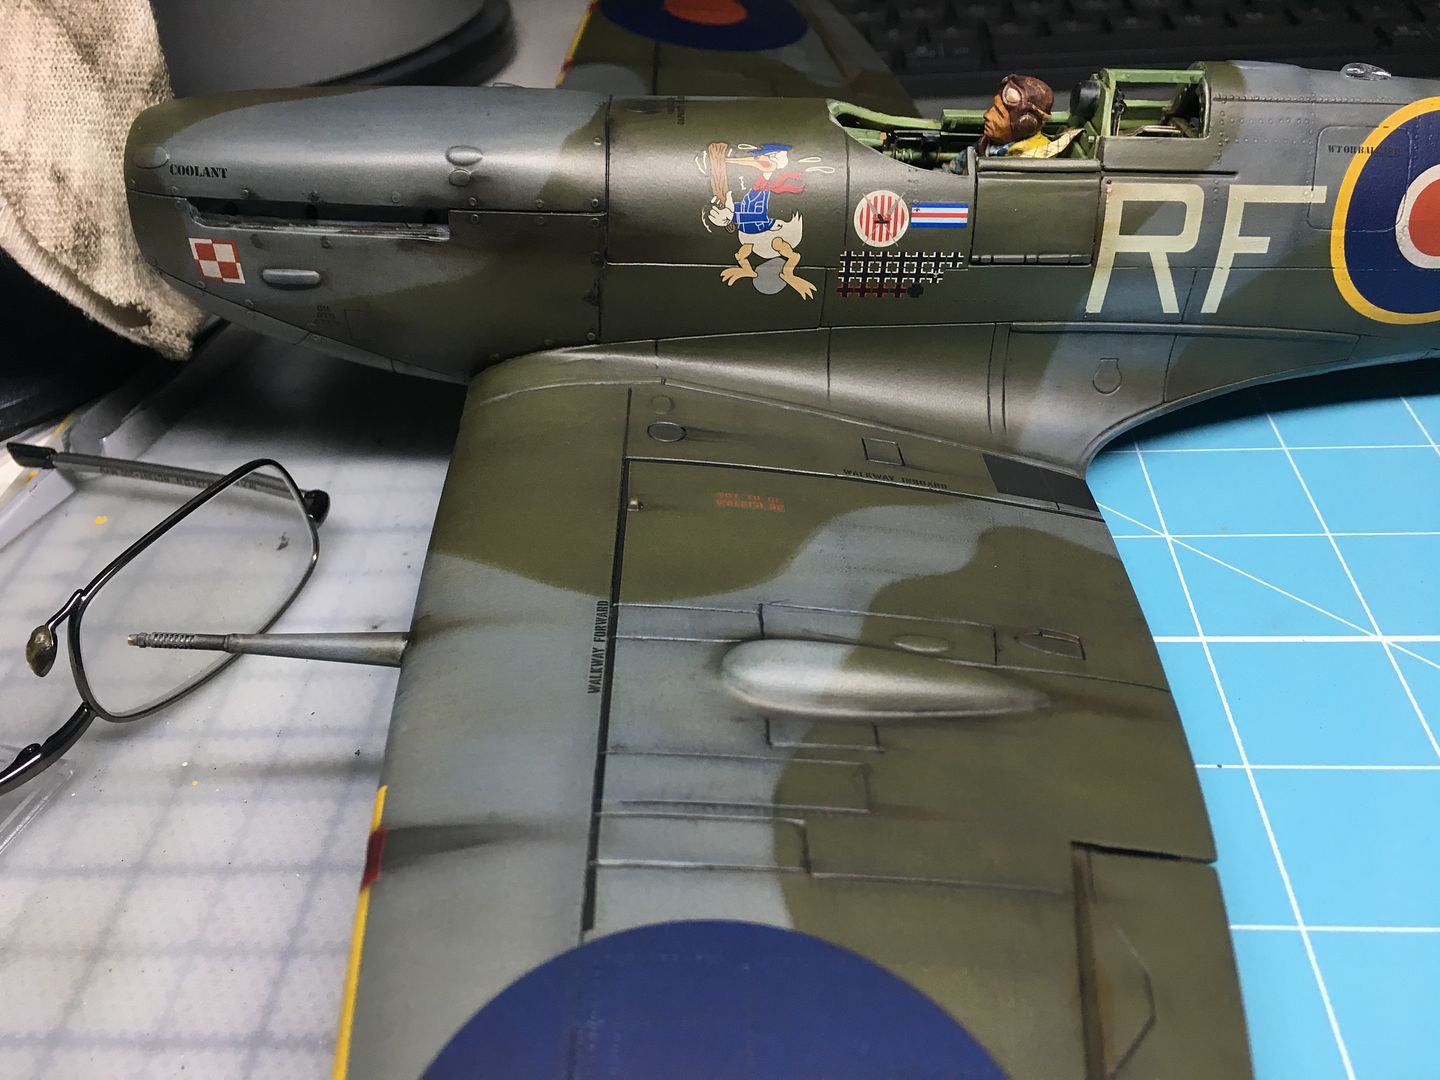
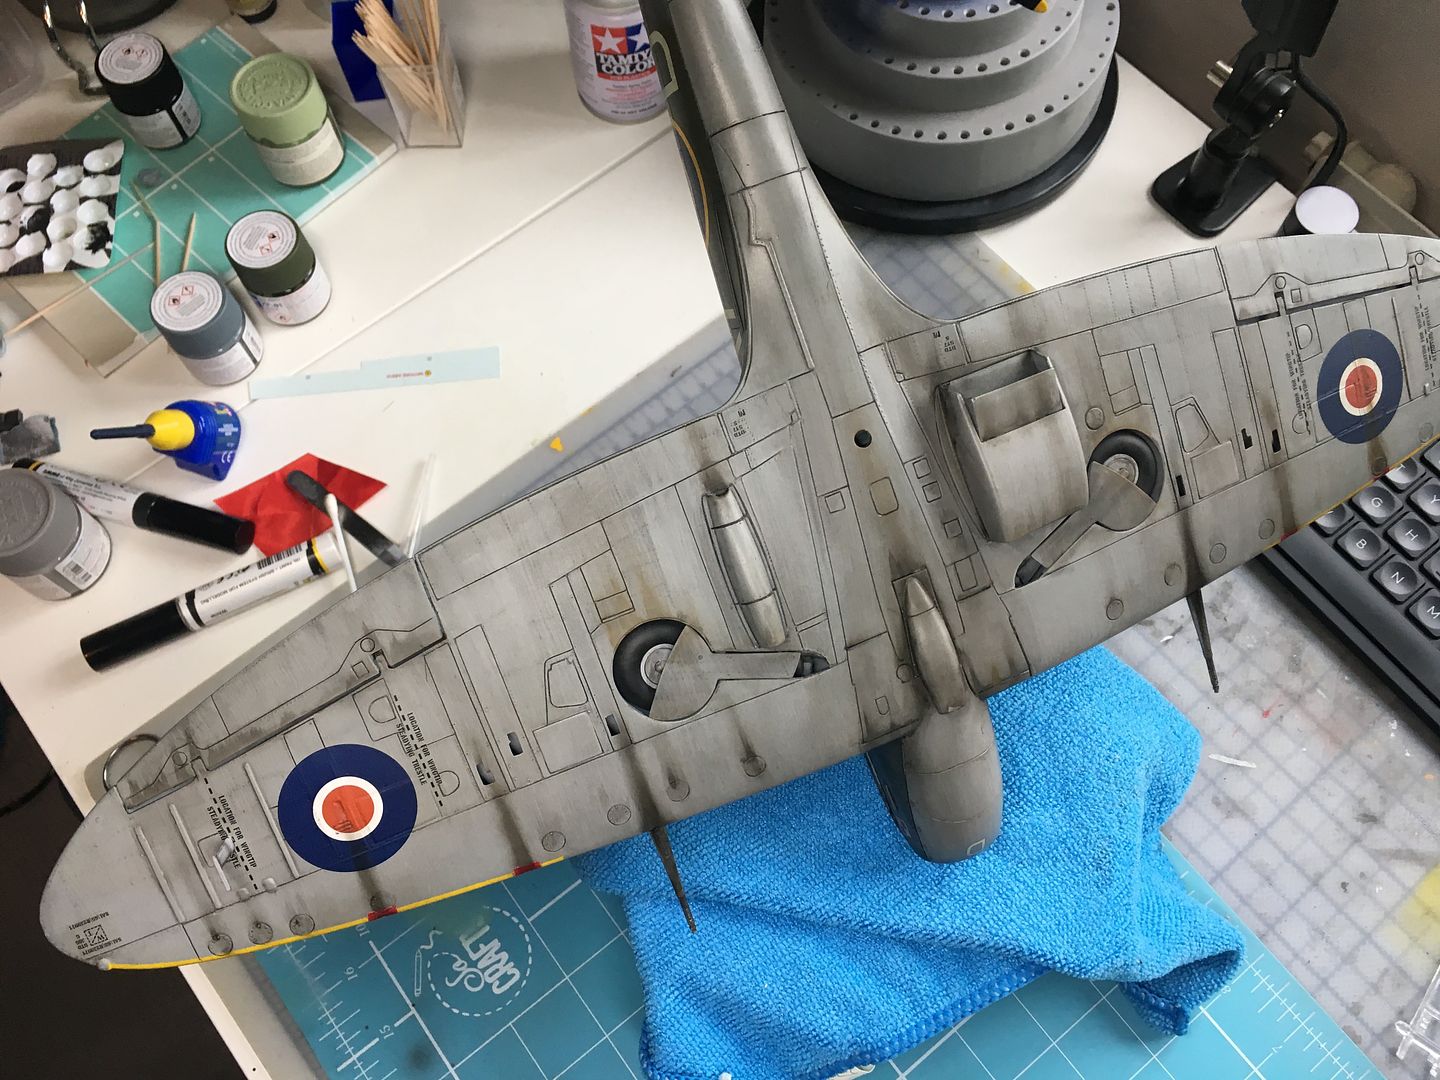
So looked much better in matt...

...so it was on to some weathering. I've only ever done one other, so I am sticking to what I know at this point - so th end result will be a 'used' Spitfire - as opposed to a polished-to-perfection version! I am very aware that half the skill during this next stage is knowing when to stop...
I'm missing my Tamiya Panel Gap wash (waaaay too dangerous for the UK apparently!) which worked very well, so it is straight to the oils....
...always a bit scary this bit...
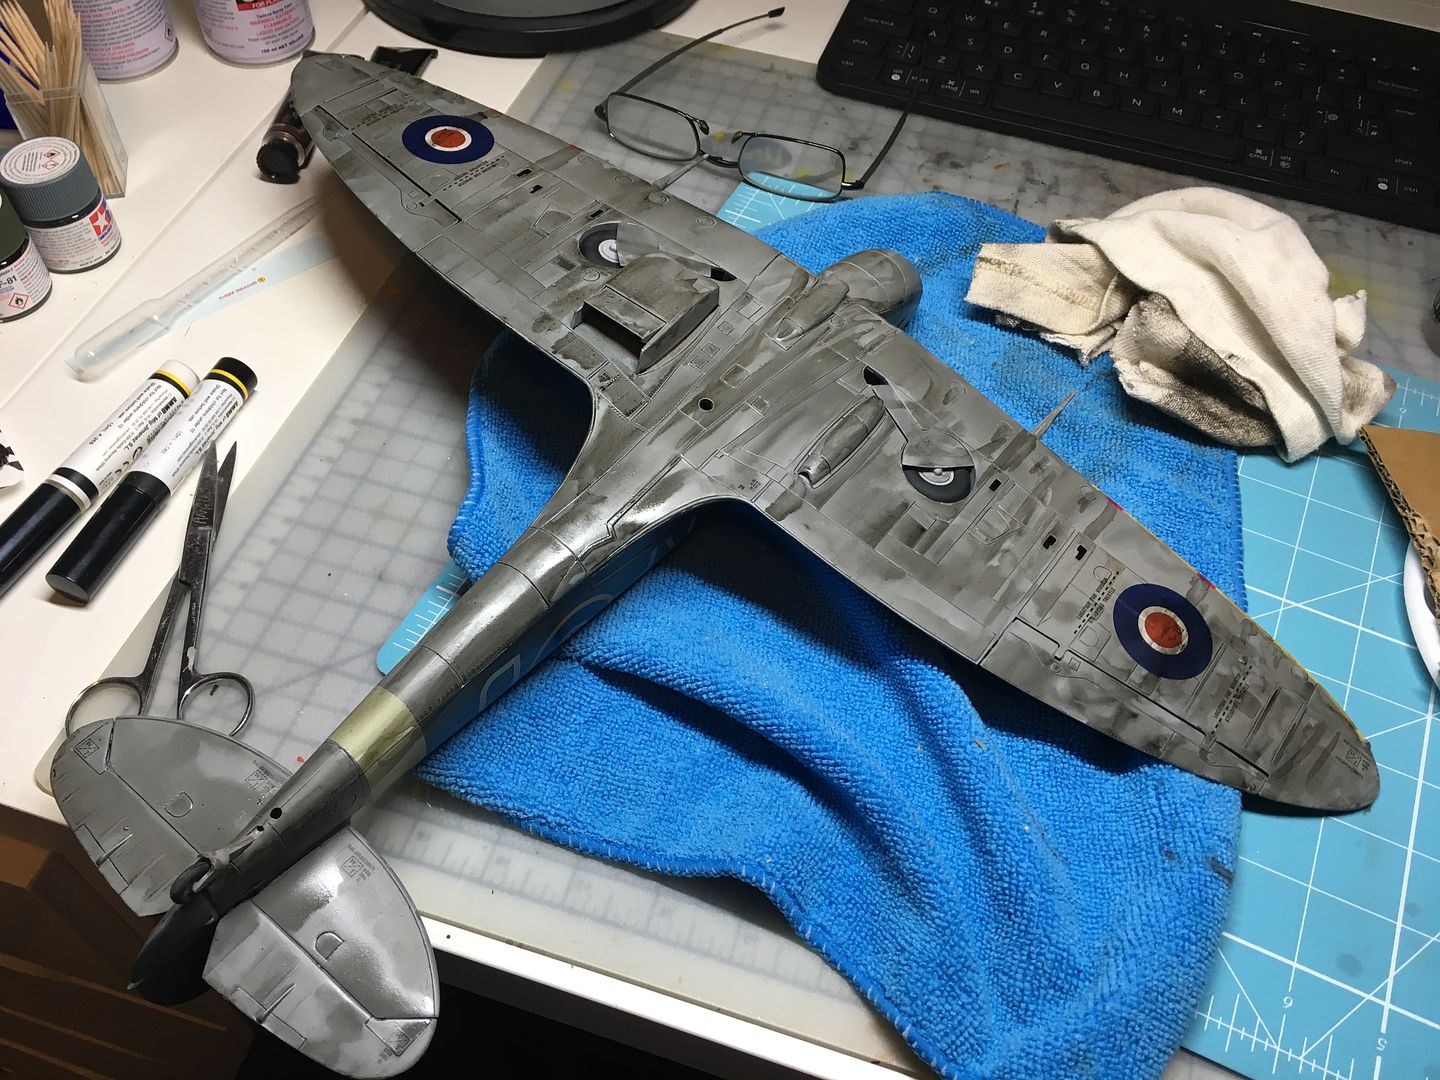
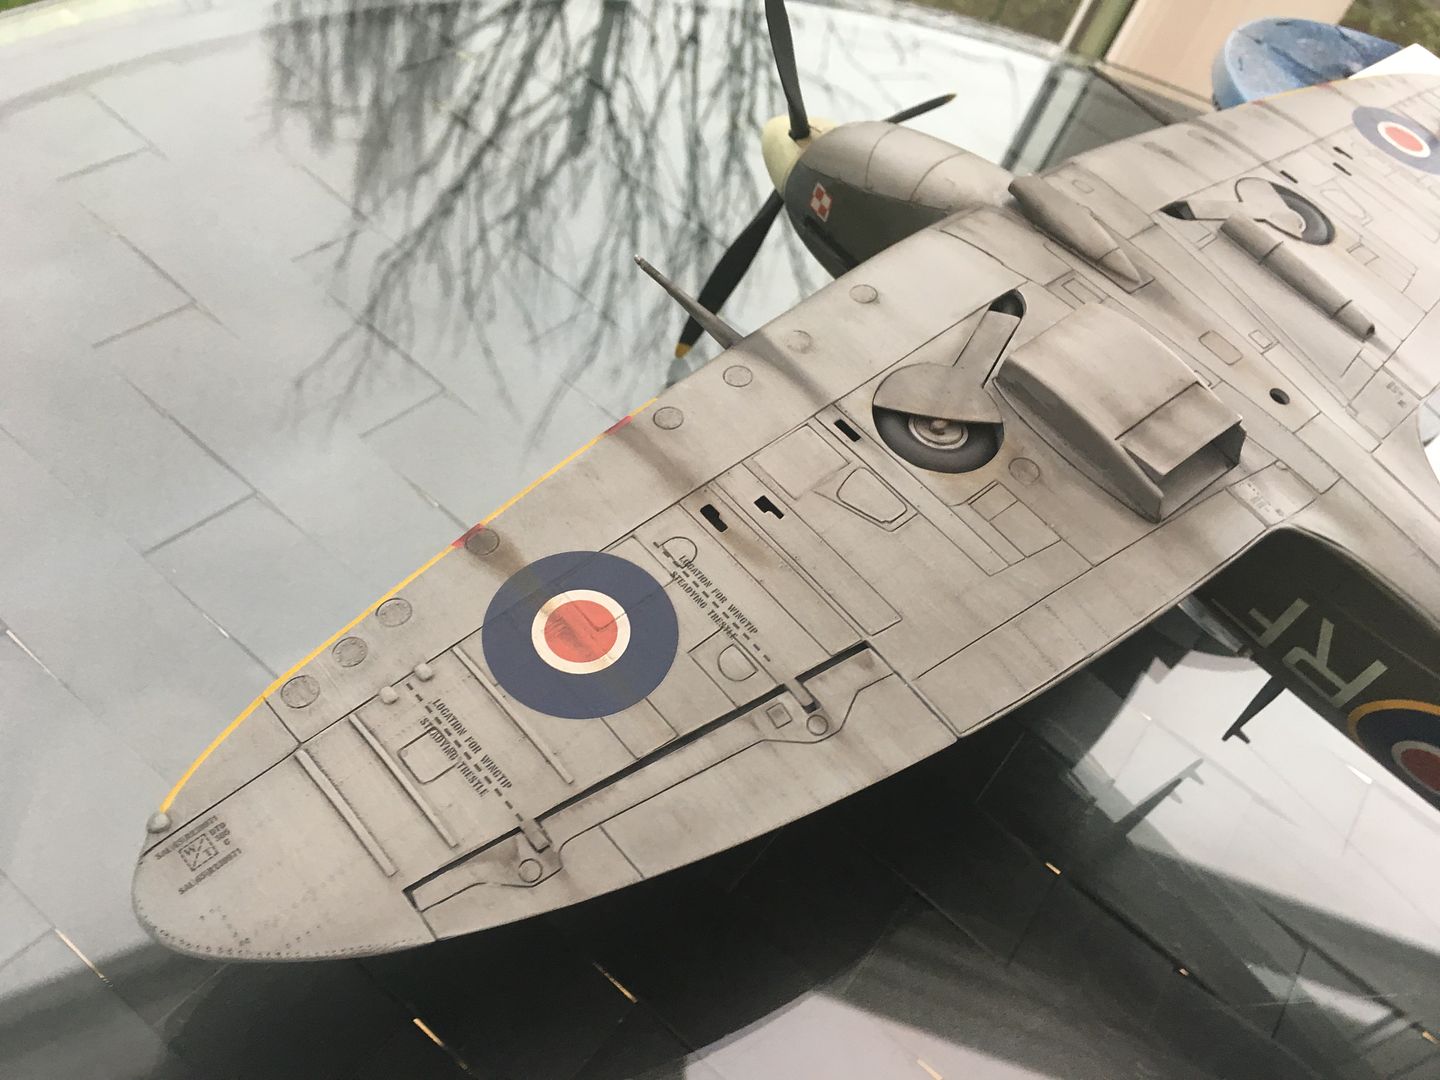
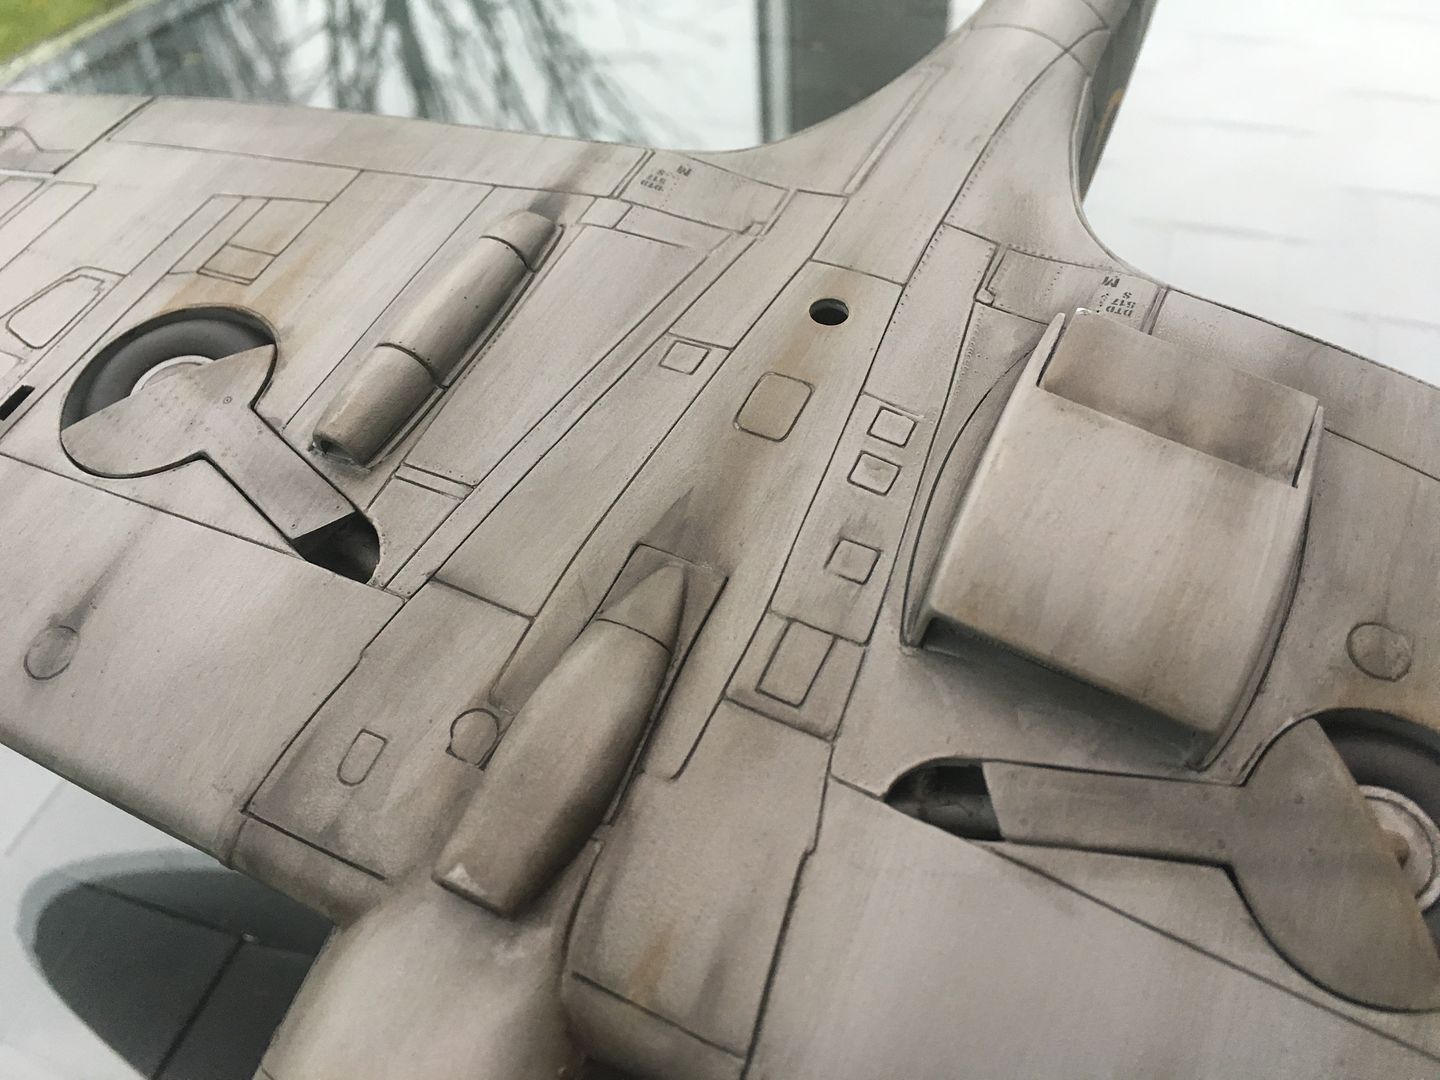
...and then wipe off, hopefully leaving some detail behind! I wipe in the 'direction' of the airflow. The molded rivets did not hold much black - but I think it turned out ok.
I pretty quickly started on adding localised detail, in the form of stains, smoke trails, exhaust etc...again using oils. I dotted oil on and brushed with a 'dry' brush. Used a mix of black and some burnt umber.

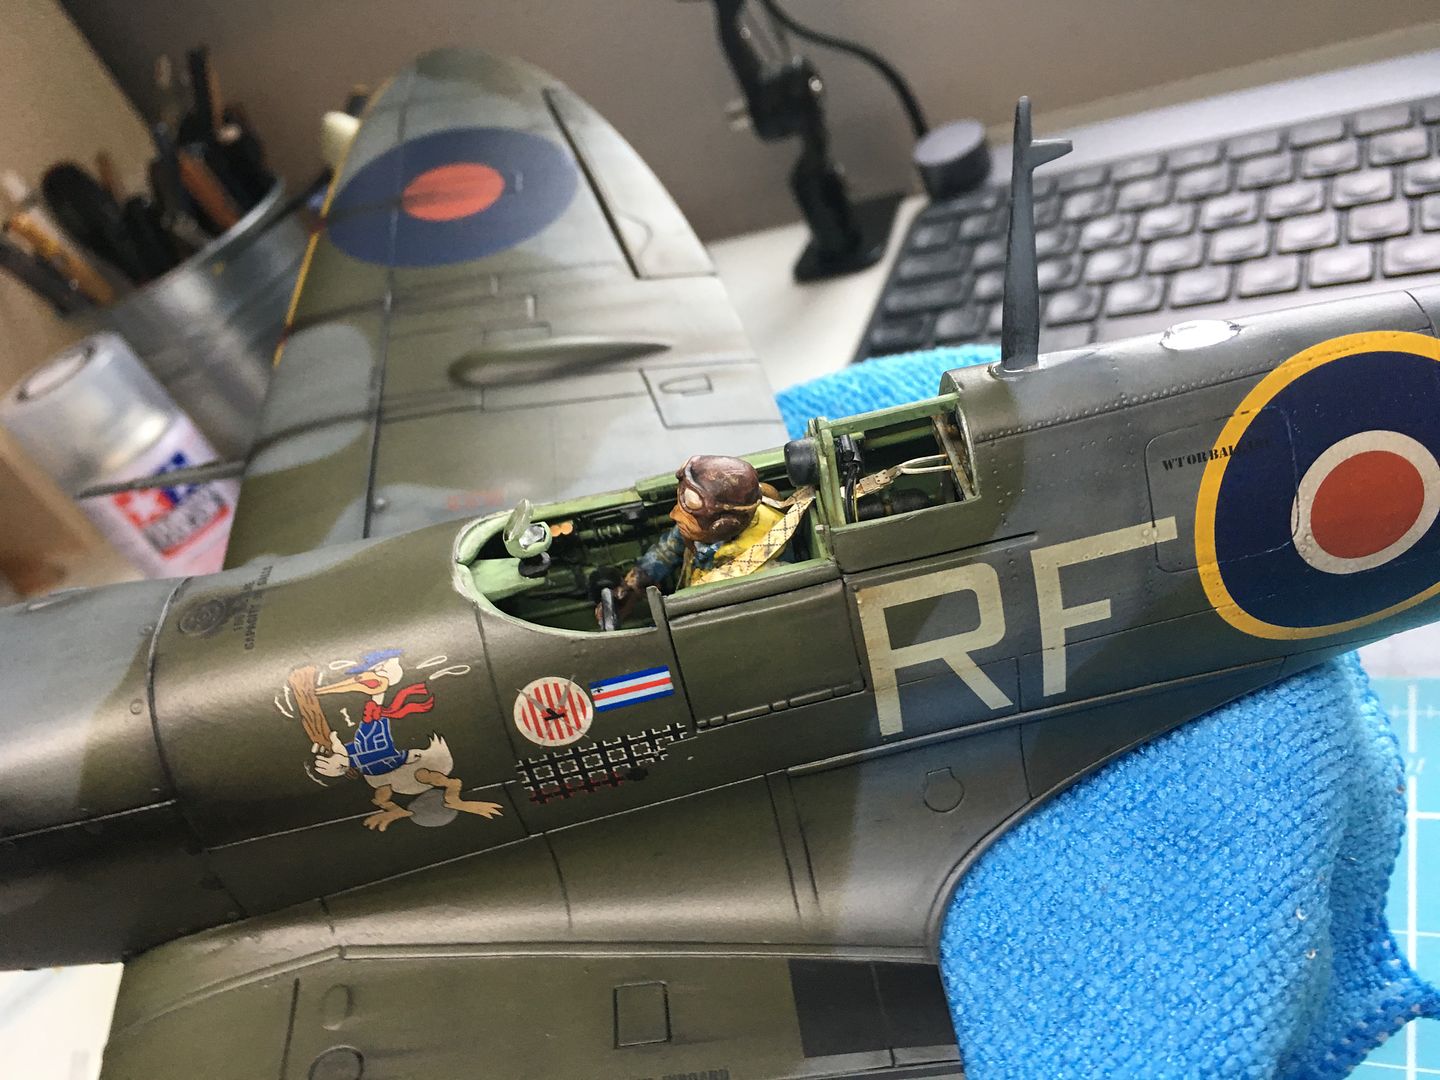


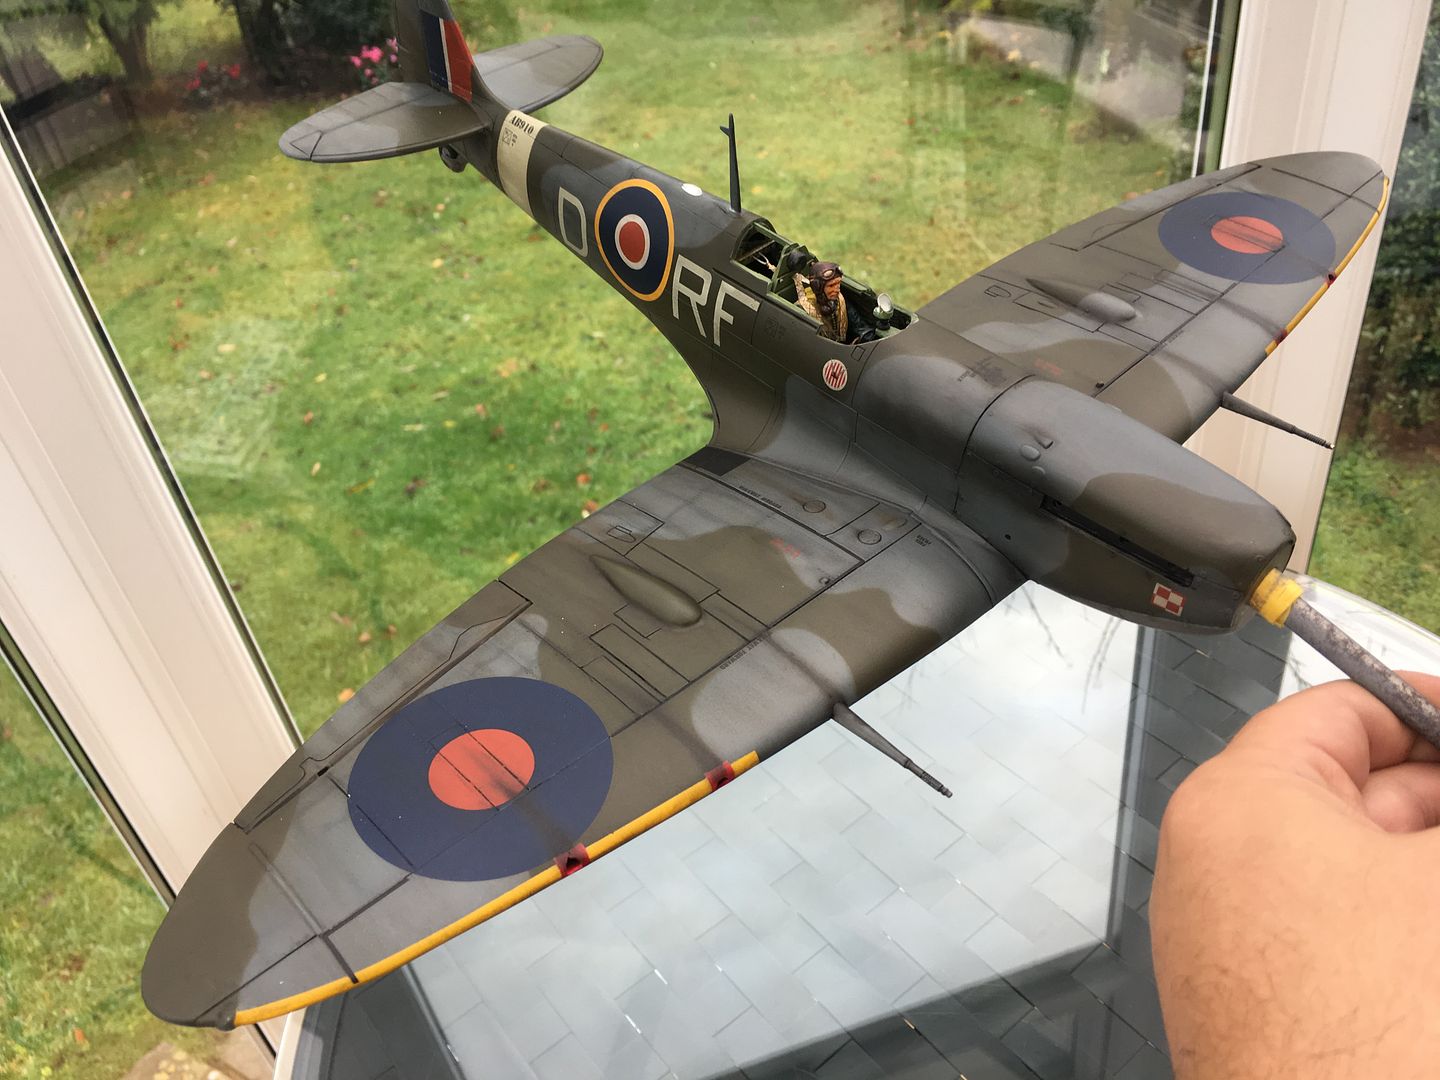

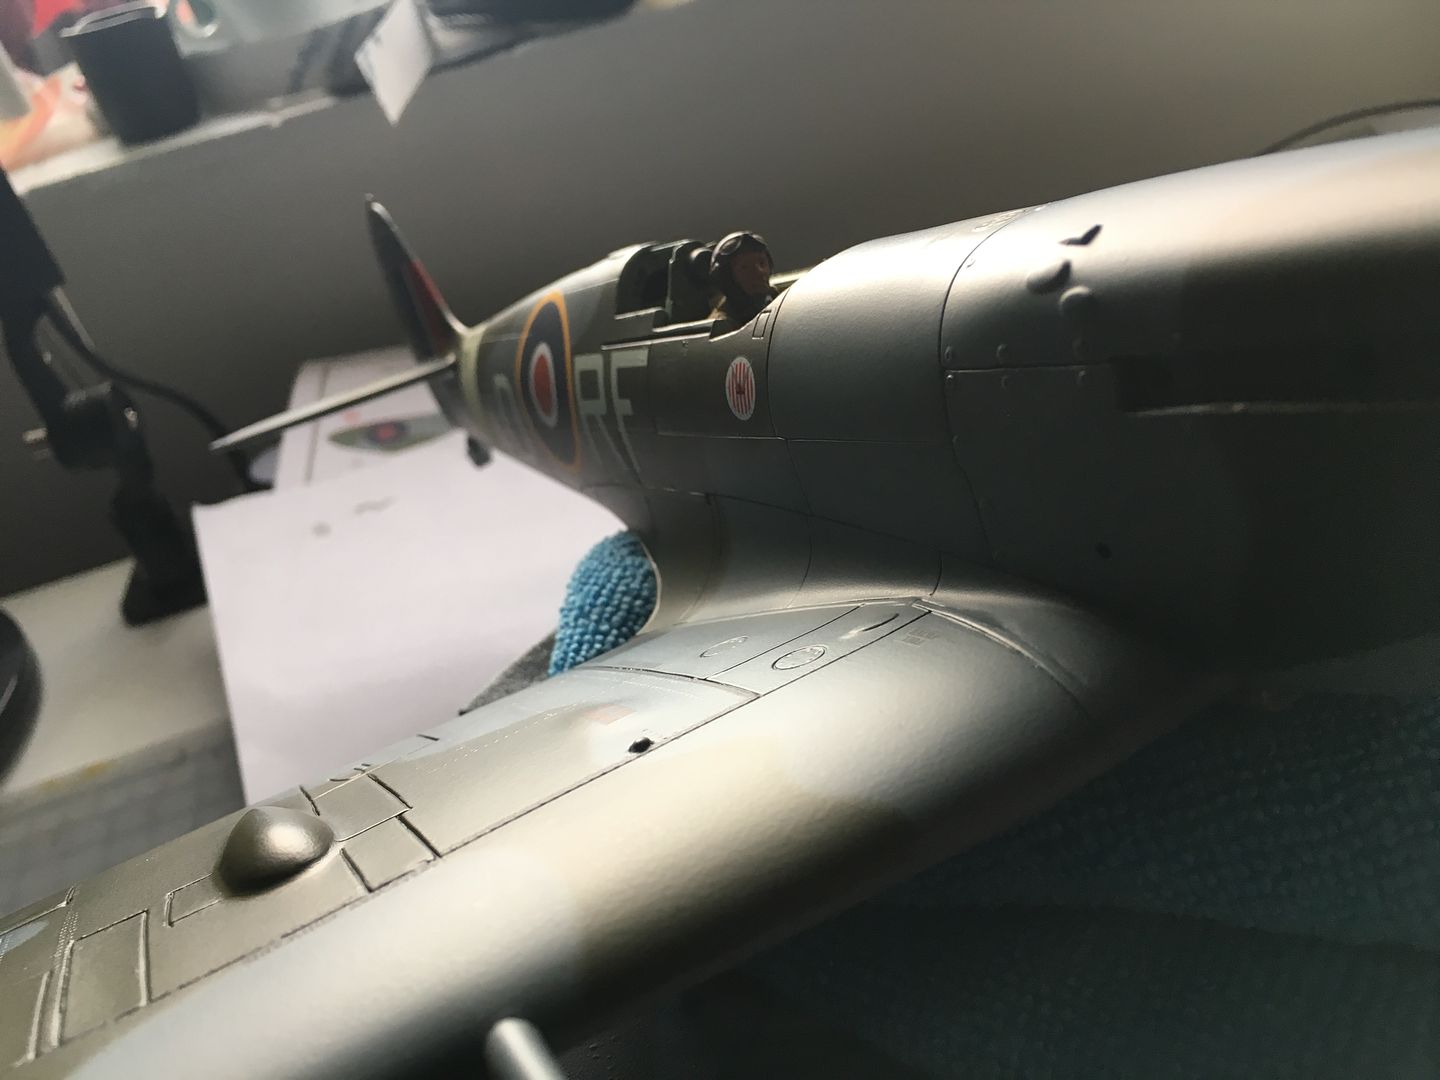
You can see I have added some more parts - the light behind the cockpit, and the aerial mast.
I added the cockpit canopy - fitted surprisingly well, and the sliding bit...slides!

At this point I also glued the prop on, and the airspeed tube on th eunderside of the wing (if that is what it is) - I also added an aerial wire - I AM AWARE THIS MAY NOT BE PERIOD/CORRECT - but it is a nice detail - I was showing my 'customer/mate' a little later yesterday, so I wanted all the fine stuff on - I'll probably take the wire back off again though...
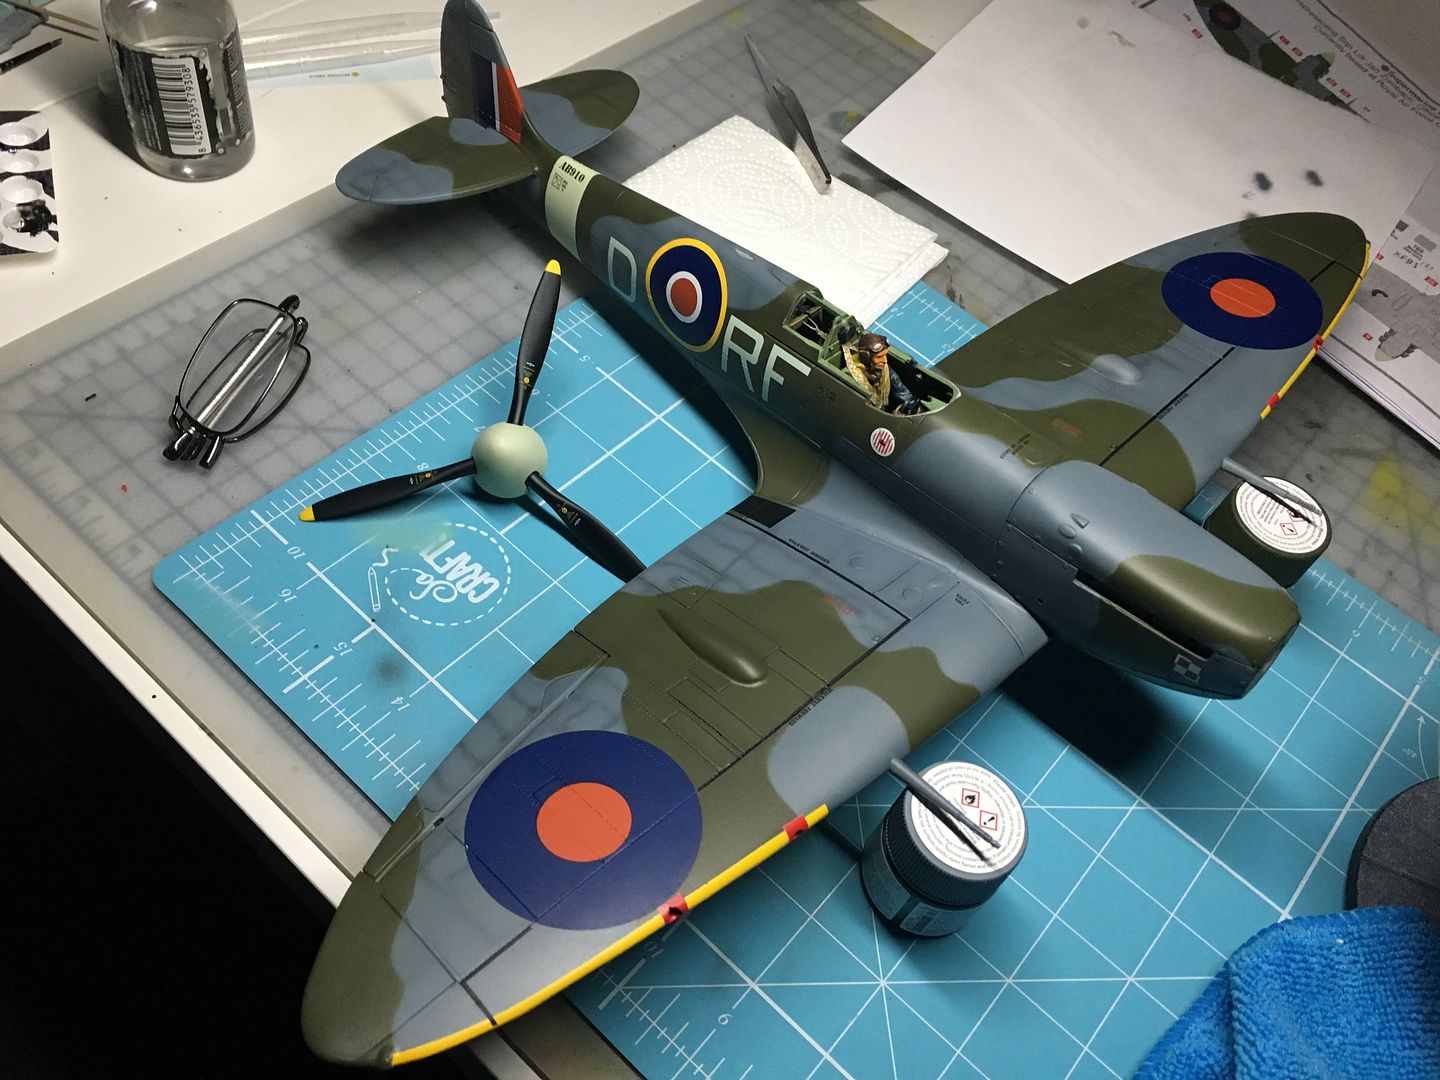
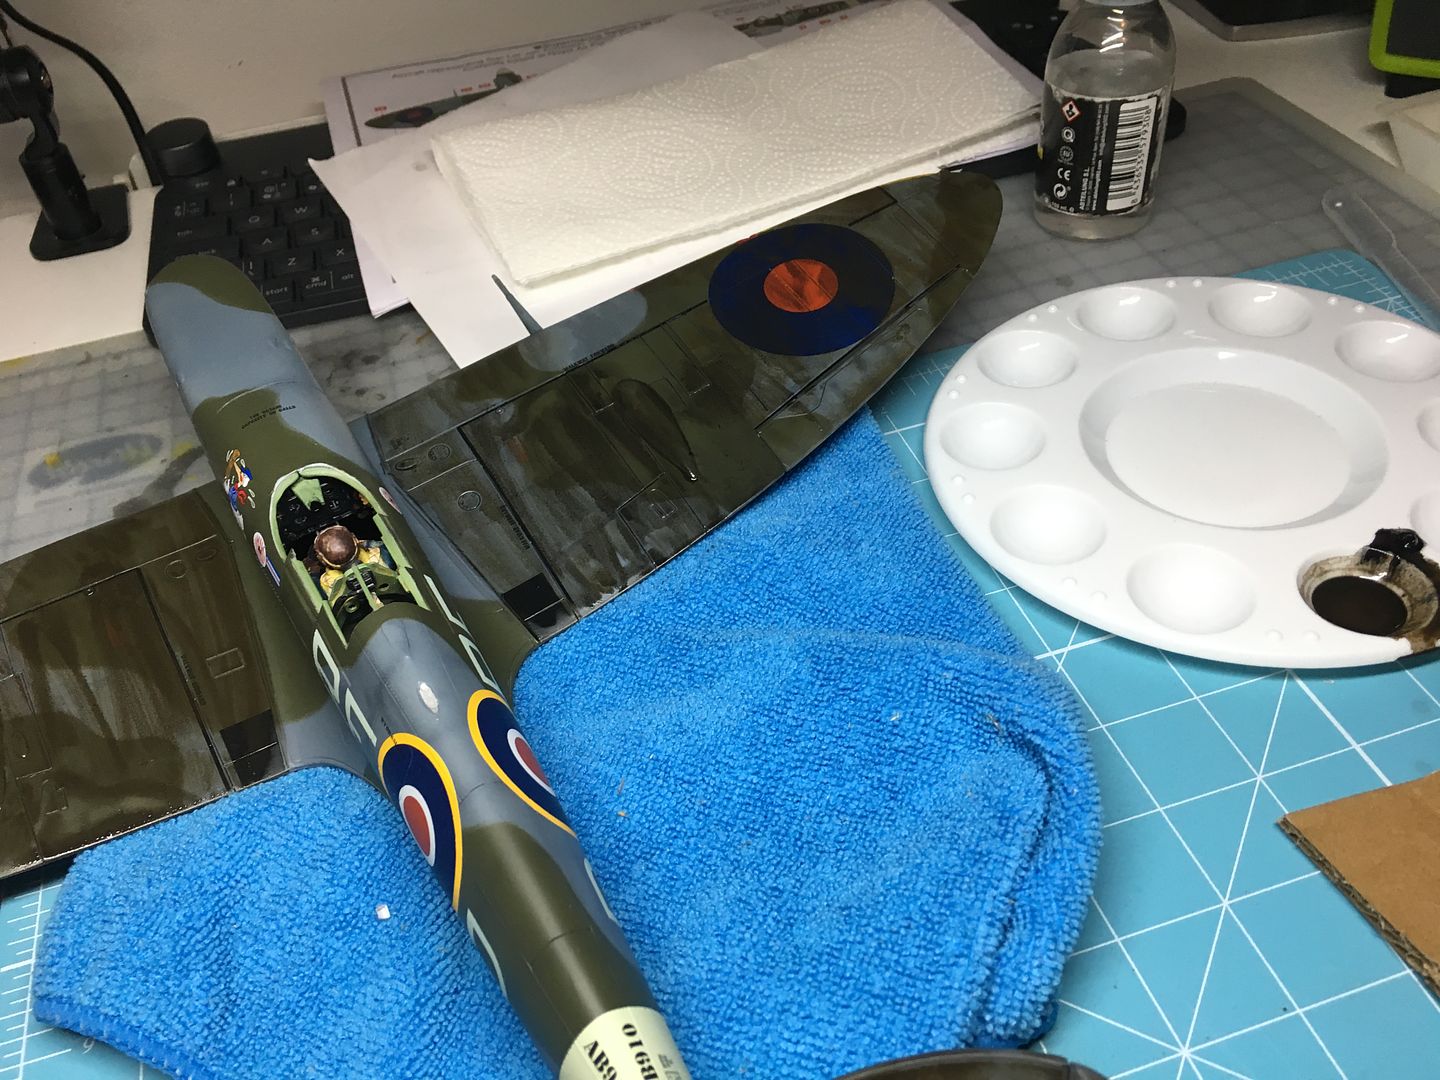
I used Tamiya flat clear sprayed from the can between various layers of oil etc - otherwise finger marks will show. The only main parts missing on these final photos are the exhausts - although I have added the exhaust staining. So very almost there! Just got to figure out how to mount it (in flight) but I do want to show it 'banking' as opposed to in level flight.
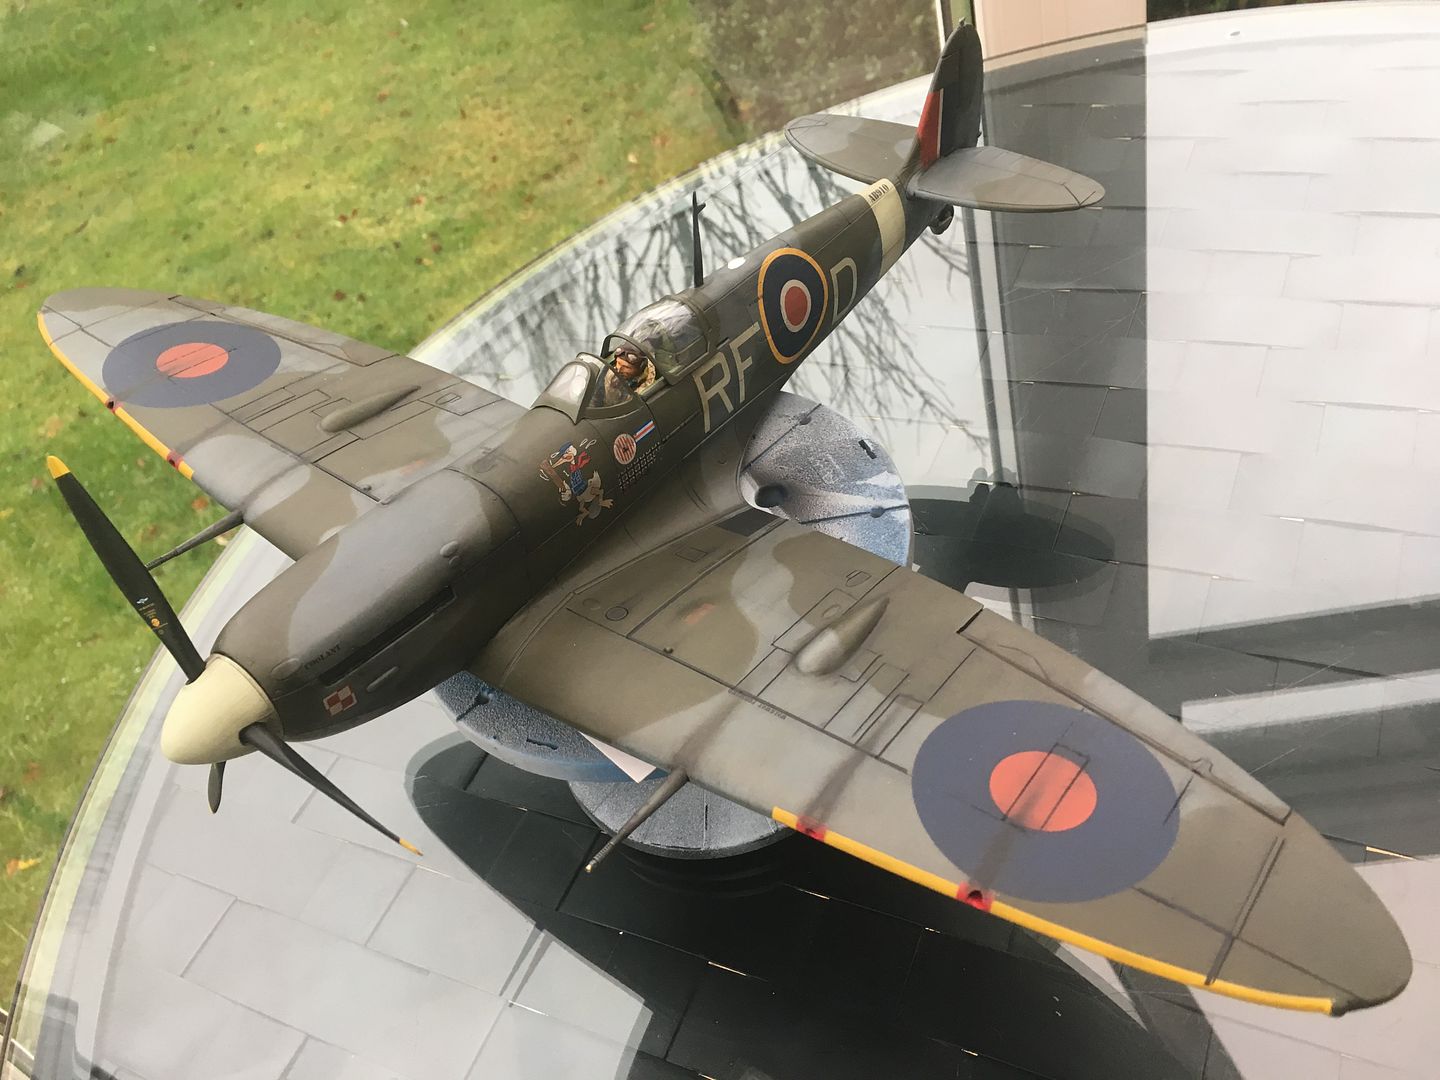


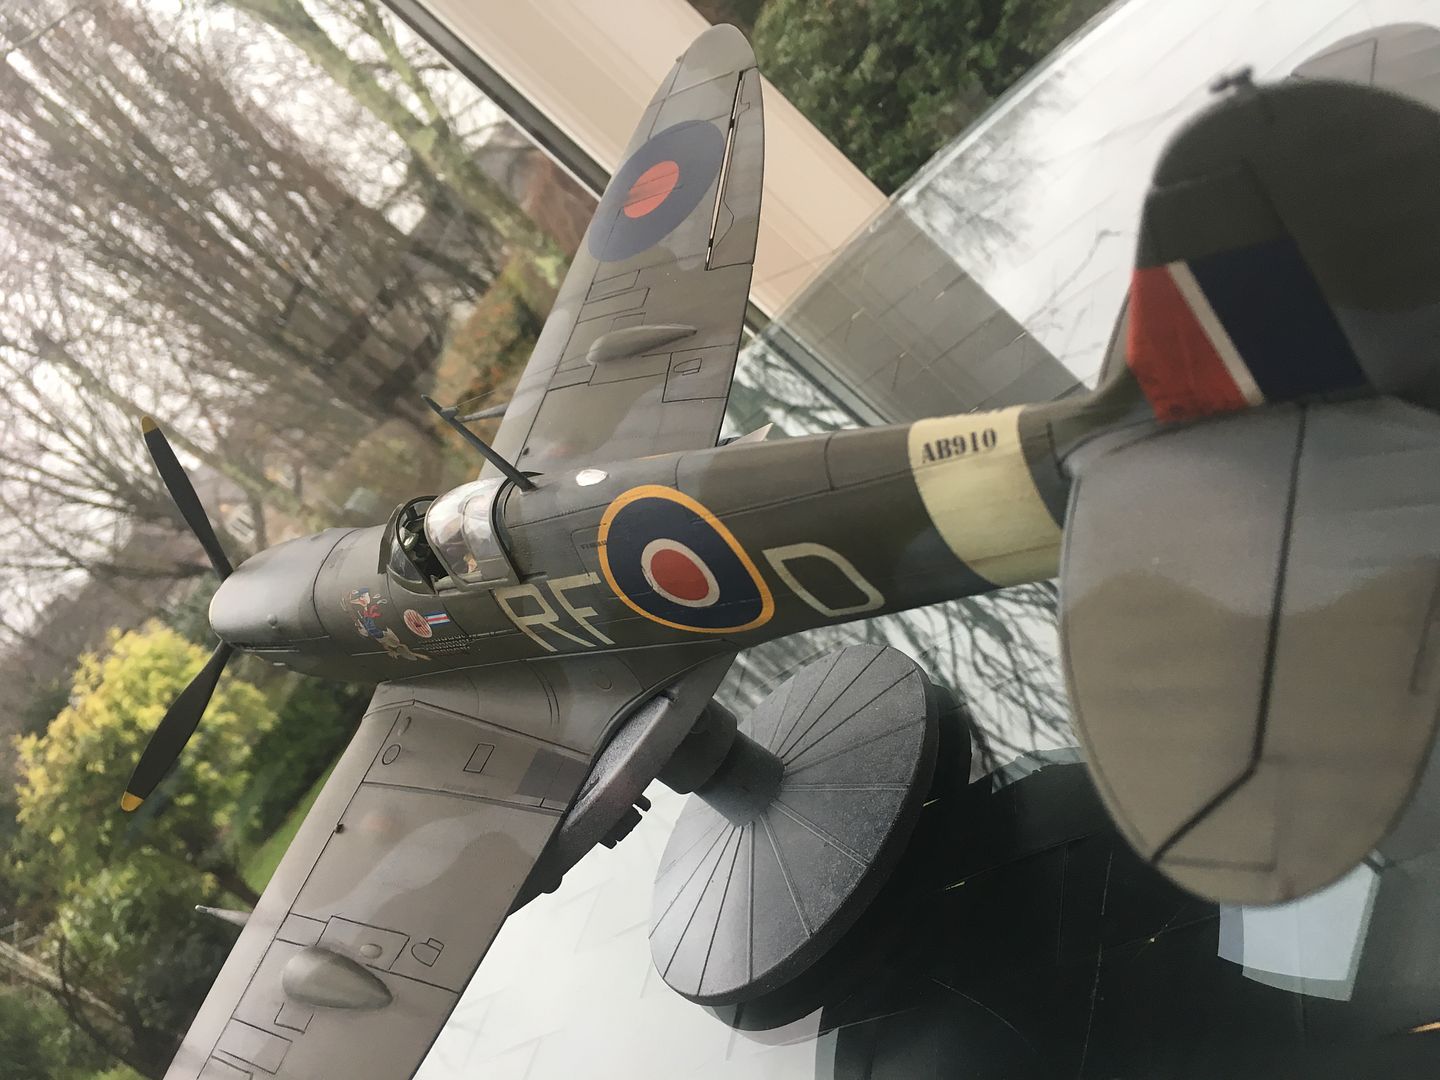
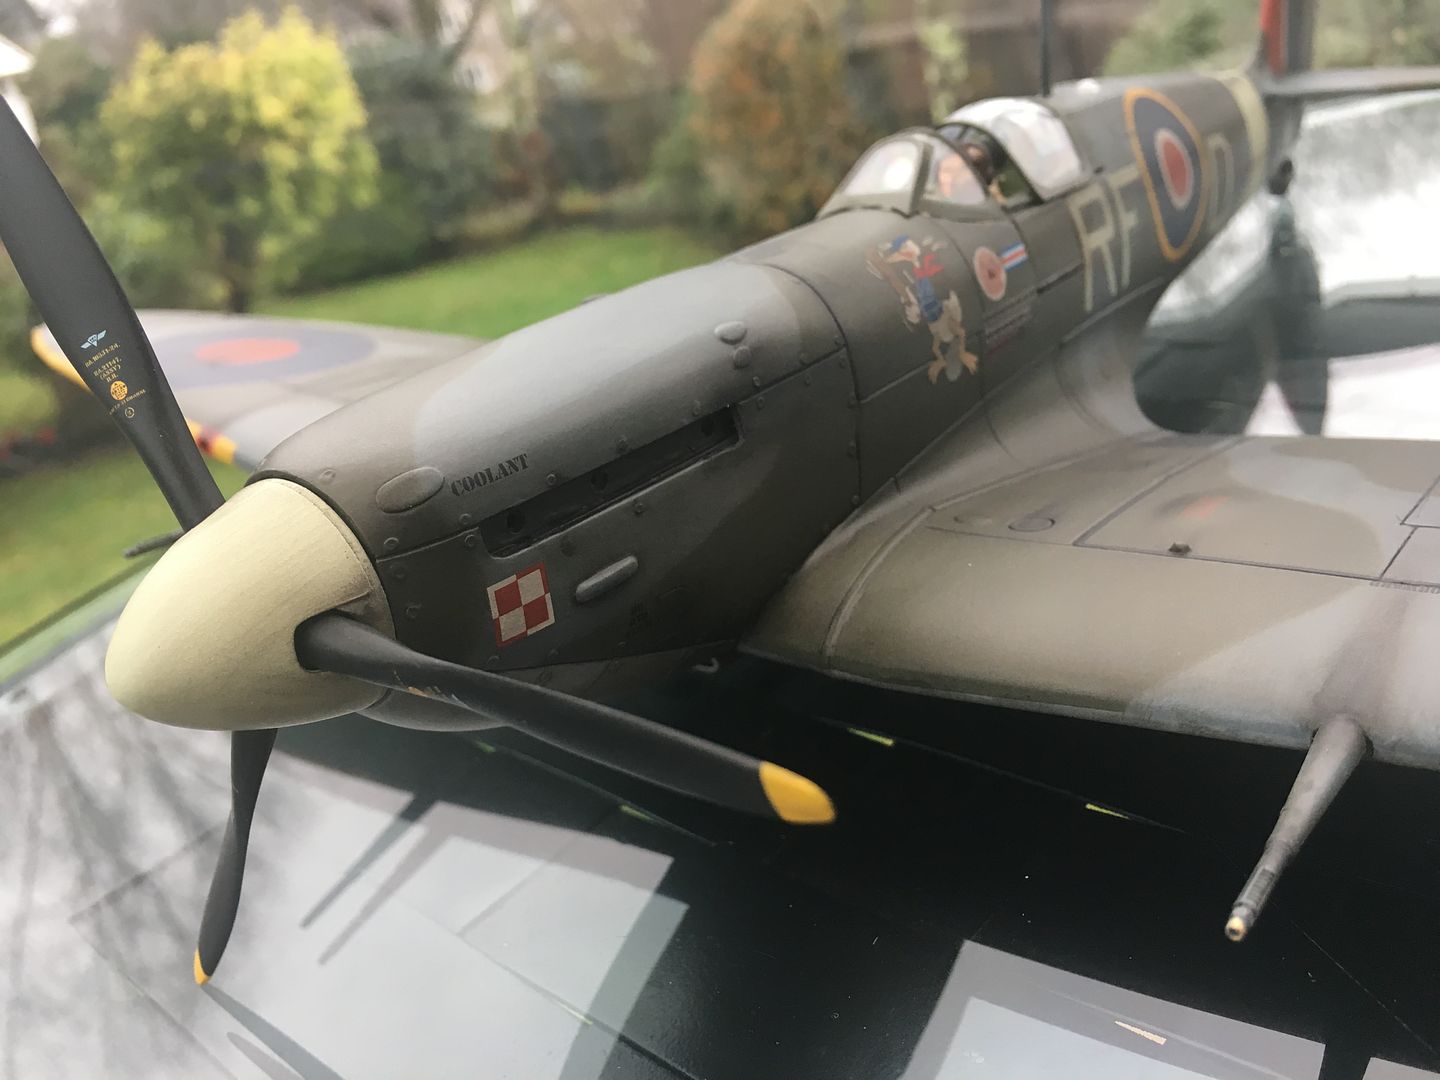

For such a much-maligned kit, I'm pretty chuffed with the end result...when it is 100% finished, I want to take some proper pictures of it - it is big though! I may even try some taken at the old WW2 airfield that is a few miles away - Harrowbeer, Yelverton.

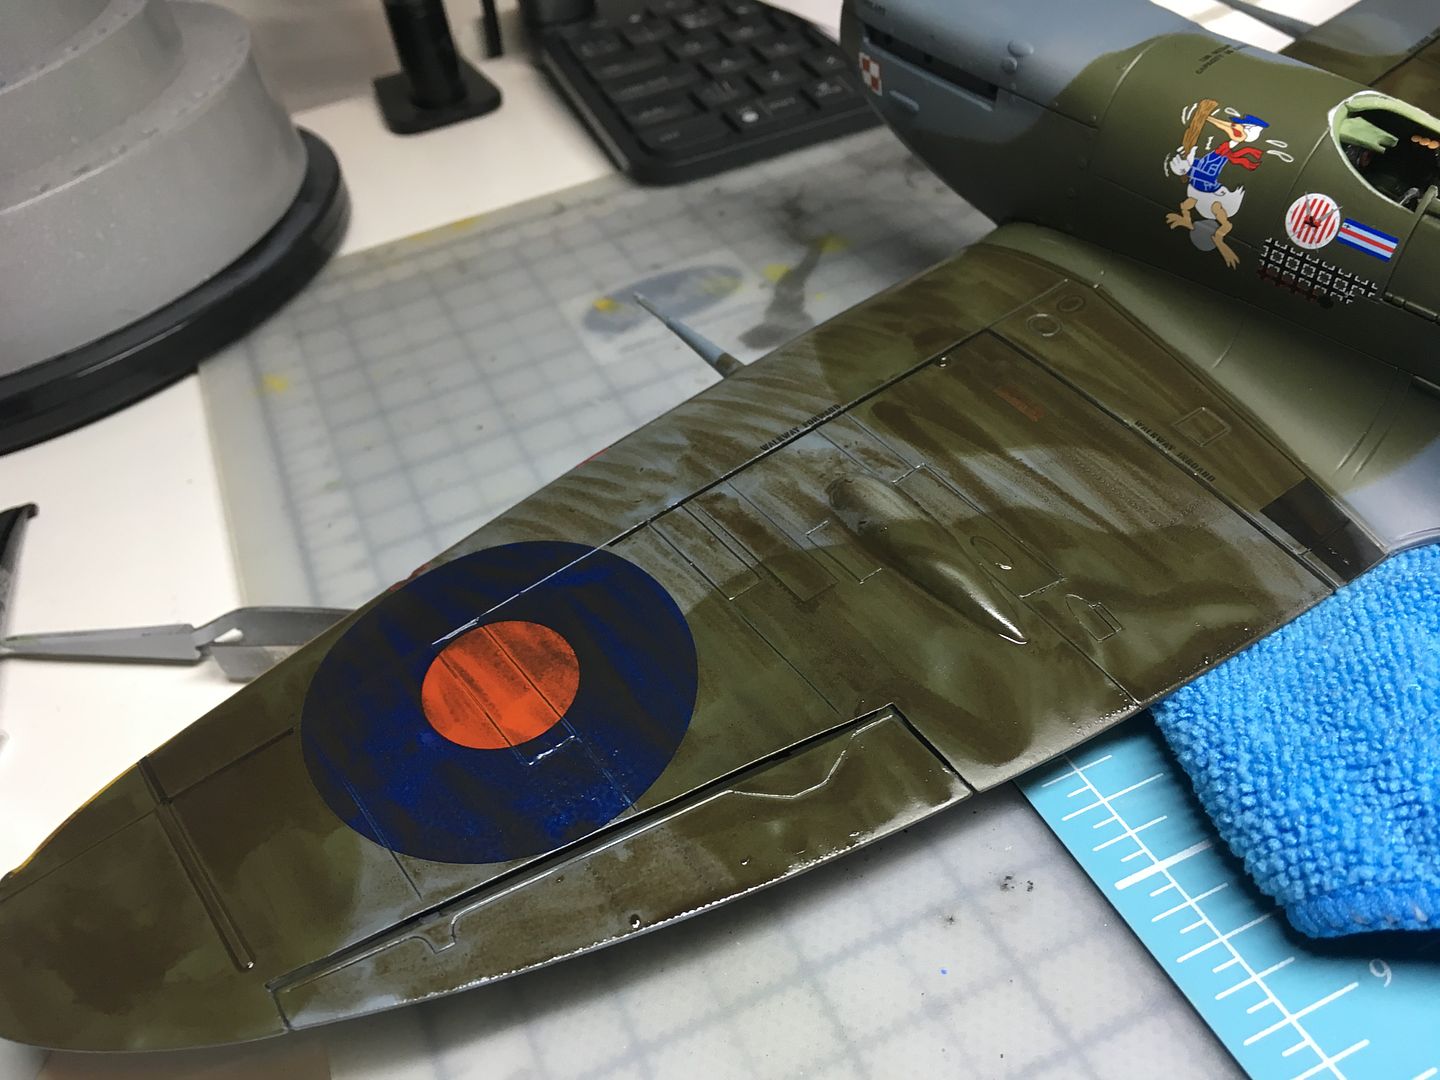
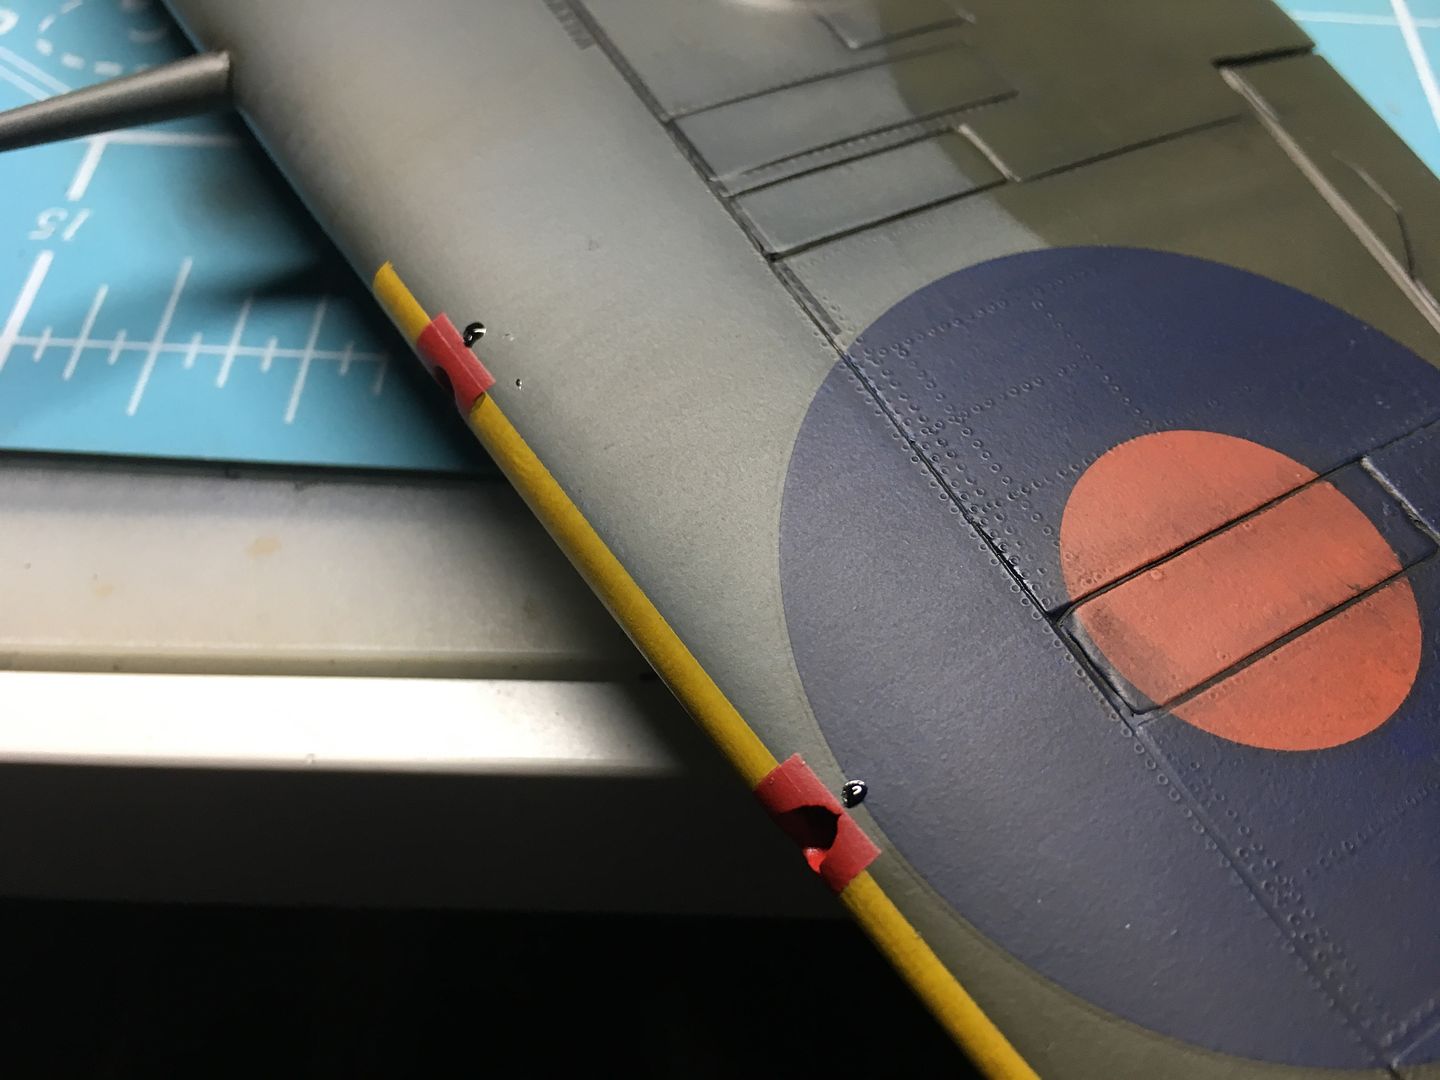
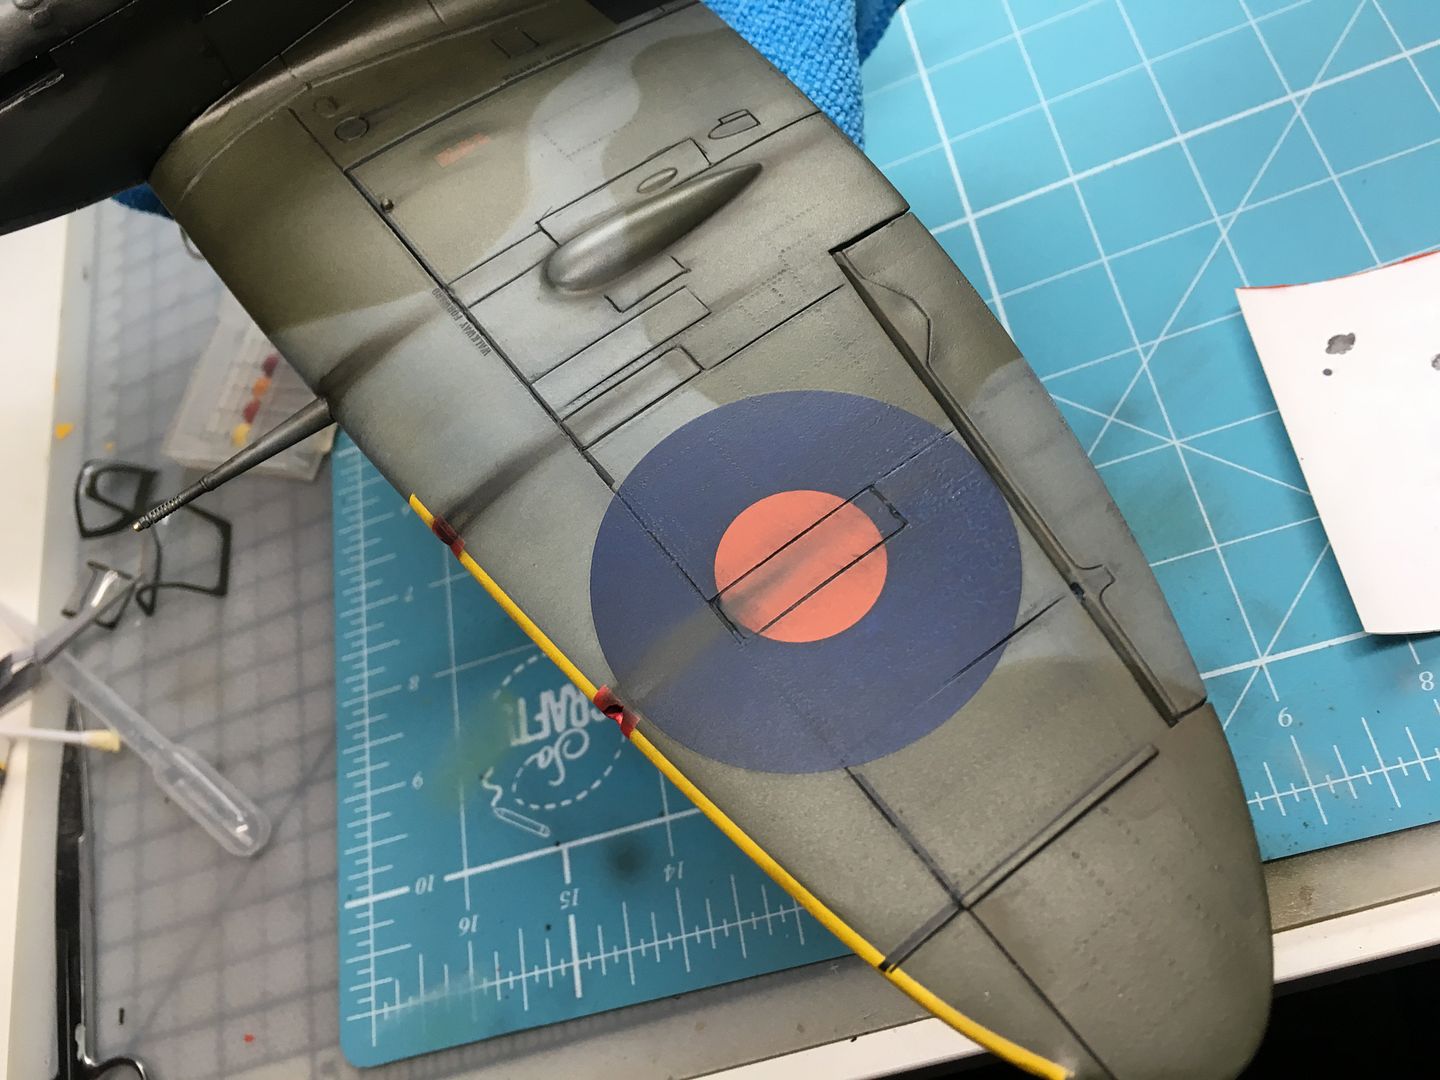
ooh yes - I am also going to add the red fabric squares over the gun ports!
...so it was on to some weathering. I've only ever done one other, so I am sticking to what I know at this point - so th end result will be a 'used' Spitfire - as opposed to a polished-to-perfection version! I am very aware that half the skill during this next stage is knowing when to stop...
I'm missing my Tamiya Panel Gap wash (waaaay too dangerous for the UK apparently!) which worked very well, so it is straight to the oils....
...always a bit scary this bit...
...and then wipe off, hopefully leaving some detail behind! I wipe in the 'direction' of the airflow. The molded rivets did not hold much black - but I think it turned out ok.
I pretty quickly started on adding localised detail, in the form of stains, smoke trails, exhaust etc...again using oils. I dotted oil on and brushed with a 'dry' brush. Used a mix of black and some burnt umber.
You can see I have added some more parts - the light behind the cockpit, and the aerial mast.
I added the cockpit canopy - fitted surprisingly well, and the sliding bit...slides!
At this point I also glued the prop on, and the airspeed tube on th eunderside of the wing (if that is what it is) - I also added an aerial wire - I AM AWARE THIS MAY NOT BE PERIOD/CORRECT
- but it is a nice detail - I was showing my 'customer/mate' a little later yesterday, so I wanted all the fine stuff on - I'll probably take the wire back off again though...I used Tamiya flat clear sprayed from the can between various layers of oil etc - otherwise finger marks will show. The only main parts missing on these final photos are the exhausts - although I have added the exhaust staining. So very almost there! Just got to figure out how to mount it (in flight) but I do want to show it 'banking' as opposed to in level flight.
For such a much-maligned kit, I'm pretty chuffed with the end result...when it is 100% finished, I want to take some proper pictures of it - it is big though! I may even try some taken at the old WW2 airfield that is a few miles away - Harrowbeer, Yelverton.
ooh yes - I am also going to add the red fabric squares over the gun ports!
When you say "oil" for weathering, what kind of oil, is it a model product or literally "oil"? Also, when the oil has been applied and wiped off, it enhances the panels lines (or seems to, to my untrained eye), does that negate the need for the pre-shading stage?
I used to build models years ago as a kid and always wanted the accented panel lines that seemed so clear in the Tamiya catalogue, but with limited resources/funds to learn such techniques it always evaded me.
Although I don't do any modelling anymore, I absolutely love these threads to see how you guys do such things and see them come together, I find it fascinating, thanks to all the modellers on here for putting their build threads up.
Oil paint - heavily diluted with thinners (for the 'wash') or dabbed as a tiny dot and then dry brushed for stronger effects.
I'm learning - but as far as I see it, the pre-shading creates the subtle shading of pillowed ali panels, the curves of edges constrained by rivets etc - the panel gap highlighting is specifically - gaps! I really liked the Tamiya panel wash that you would just dab on the end of a groove/slot, and capillary action sucks it along - it is impossible to get in the UK, unless you get from HK etc on ebay - but I'm sourcing some as I find it better than my diluted oil for that particular use!
I'm learning - but as far as I see it, the pre-shading creates the subtle shading of pillowed ali panels, the curves of edges constrained by rivets etc - the panel gap highlighting is specifically - gaps! I really liked the Tamiya panel wash that you would just dab on the end of a groove/slot, and capillary action sucks it along - it is impossible to get in the UK, unless you get from HK etc on ebay - but I'm sourcing some as I find it better than my diluted oil for that particular use!
caterhamnut said:
Oil paint - heavily diluted with thinners (for the 'wash') or dabbed as a tiny dot and then dry brushed for stronger effects.
I'm learning - but as far as I see it, the pre-shading creates the subtle shading of pillowed ali panels, the curves of edges constrained by rivets etc - the panel gap highlighting is specifically - gaps! I really liked the Tamiya panel wash that you would just dab on the end of a groove/slot, and capillary action sucks it along - it is impossible to get in the UK, unless you get from HK etc on ebay - but I'm sourcing some as I find it better than my diluted oil for that particular use!
You can get MiG and AK Interactive easily enough over here, but I found the Tamiya ones easier to use because of the integreal brush in the cap.I'm learning - but as far as I see it, the pre-shading creates the subtle shading of pillowed ali panels, the curves of edges constrained by rivets etc - the panel gap highlighting is specifically - gaps! I really liked the Tamiya panel wash that you would just dab on the end of a groove/slot, and capillary action sucks it along - it is impossible to get in the UK, unless you get from HK etc on ebay - but I'm sourcing some as I find it better than my diluted oil for that particular use!
Gassing Station | Scale Models | Top of Page | What's New | My Stuff