BMW E36 "M3 LTW"
Discussion


I've been stock piling to do the whole back end in one swoop
 Untitled by Sam Ratcliffe, on Flickr
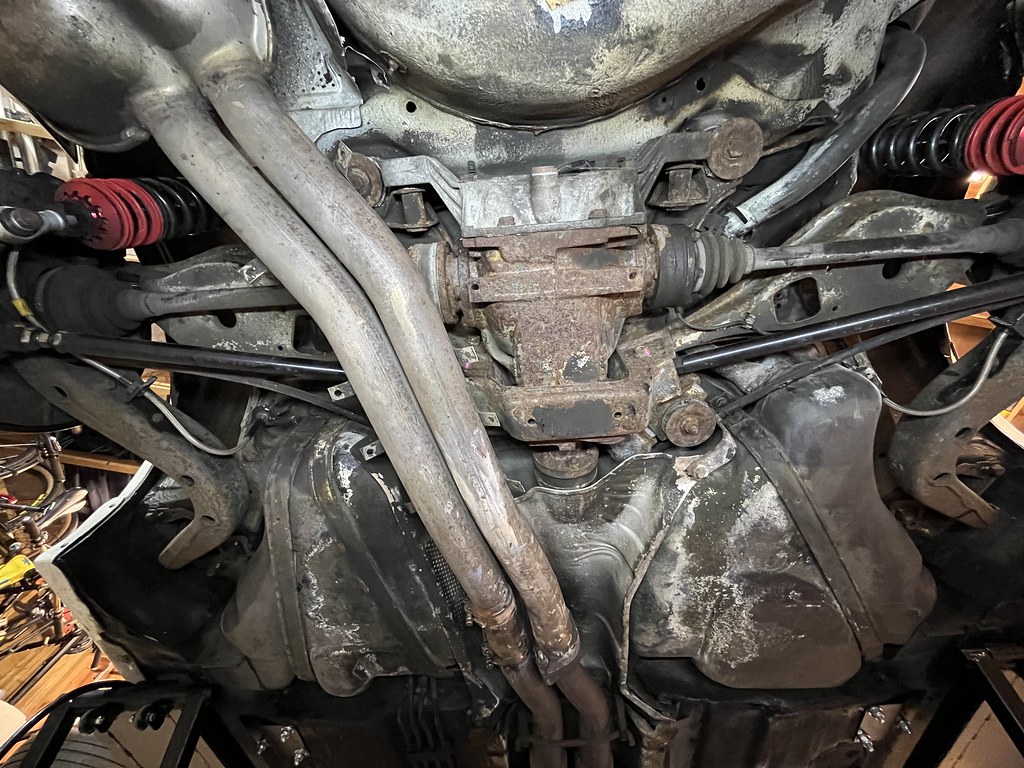
What we had - A crusty stock 3.0 M3 back end with 29 year old bushes
 Untitled by Sam Ratcliffe, on Flickr
ACS Eibach rear Anti-roll-bar had already been removed to be powder coated ahead of time
 Untitled by Sam Ratcliffe, on Flickr
Stripped - tank yet to be dropped. I know it doesn't look pretty but there was no rot and no cracks
 Untitled by Sam Ratcliffe, on Flickr
3mm plates on all subframe mounts and trailing arm pockets, seam sealed and Raptor painted
 Untitled by Sam Ratcliffe, on Flickr
 Untitled by Sam Ratcliffe, on Flickr
New rear brake lines - the old ones were in fine condition but had been routed badly, so new ones with all new clips
 Untitled by Sam Ratcliffe, on Flickr
With the tank down I could redo the fuel system, it had been upgraded to a twin pump system but clearly done with the tank in place
What it looked like before - I'll be honest I couldn't even tell what was what
Drivers before
 Untitled by Sam Ratcliffe, on Flickr
Passenger before
 Untitled by Sam Ratcliffe, on Flickr
Drivers after
 Untitled by Sam Ratcliffe, on Flickr
Passenger after
 Untitled by Sam Ratcliffe, on Flickr
I got rid of a factory external return line as it went right to left, into the pump then back right again. New lines & clips and a new pumps (reused the drivers side housing)
Much neater
 Untitled by Sam Ratcliffe, on Flickr
Tank back up - still yet to finish cleaning it - why only 2 out of the 3 straps.
 Untitled by Sam Ratcliffe, on Flickr
Hopefully get the subframe ect back from the powder coater then can start the big refit this weekend.
Untitled by Sam Ratcliffe, on FlickrWhat we had - A crusty stock 3.0 M3 back end with 29 year old bushes
Untitled by Sam Ratcliffe, on FlickrACS Eibach rear Anti-roll-bar had already been removed to be powder coated ahead of time
Untitled by Sam Ratcliffe, on FlickrStripped - tank yet to be dropped. I know it doesn't look pretty but there was no rot and no cracks
Untitled by Sam Ratcliffe, on Flickr3mm plates on all subframe mounts and trailing arm pockets, seam sealed and Raptor painted
Untitled by Sam Ratcliffe, on FlickrUntitled by Sam Ratcliffe, on FlickrNew rear brake lines - the old ones were in fine condition but had been routed badly, so new ones with all new clips
Untitled by Sam Ratcliffe, on FlickrWith the tank down I could redo the fuel system, it had been upgraded to a twin pump system but clearly done with the tank in place
What it looked like before - I'll be honest I couldn't even tell what was what
Drivers before
Untitled by Sam Ratcliffe, on FlickrPassenger before
Untitled by Sam Ratcliffe, on FlickrDrivers after
Untitled by Sam Ratcliffe, on FlickrPassenger after
Untitled by Sam Ratcliffe, on FlickrI got rid of a factory external return line as it went right to left, into the pump then back right again. New lines & clips and a new pumps (reused the drivers side housing)
Much neater
Untitled by Sam Ratcliffe, on FlickrTank back up - still yet to finish cleaning it - why only 2 out of the 3 straps.
Untitled by Sam Ratcliffe, on FlickrHopefully get the subframe ect back from the powder coater then can start the big refit this weekend.
Edited by Track_M3 on Tuesday 14th November 16:02
Bit of a slow process at the minute as stilllll waiting on the powder coater with the subframe and few other bits.
Pressed in some new rear wheel bearings and drill the hubs to get disc retaining screws in for E46 M3 rear rotors
 Untitled by Sam Ratcliffe, on Flickr
Cleaned up and refitted rear Intrax suspension, drilled up through all the subframe holes to mark inside the car if ever tie some internal cage bracing down to them, then cleaned the thread and would in new studs/bolts.
Finished cleaning the tank and fitting all the straps.
Changed the prop centre bearing then painted the pro to tidy that up
 Untitled by Sam Ratcliffe, on Flickr
Hopefully powder coating comes through this week as it dragging on now.
Pressed in some new rear wheel bearings and drill the hubs to get disc retaining screws in for E46 M3 rear rotors
Untitled by Sam Ratcliffe, on FlickrCleaned up and refitted rear Intrax suspension, drilled up through all the subframe holes to mark inside the car if ever tie some internal cage bracing down to them, then cleaned the thread and would in new studs/bolts.
Finished cleaning the tank and fitting all the straps.
Changed the prop centre bearing then painted the pro to tidy that up
Untitled by Sam Ratcliffe, on FlickrHopefully powder coating comes through this week as it dragging on now.
Track_M3 said:
Am43 said:
Nice update Sam, shame you never got off up a great first few track days but I’m sure it will be worth it. As always you certainly have some nice parts !
I followed the m2 build and it inspired me to build my m4
Clubsport is king - hope that's the theme I followed the m2 build and it inspired me to build my m4
 , the rear subframe is coming off shortly to fit the KMP diff lift kit, I’m now wondering if it’s worth upgrading the anti roll bars while I’m there. But not sure if it will be too stiff, currently on intrax/ solid rear bushes/ roll centre correction/ usual kinematics
 Did you do the arb’s on the M2 ? Is it worth while or not ?
Am43 said:
Did you do the arb’s on the M2 ? Is it worth while or not ?
If you're happy with the balance now stick with factory bars as anything aftermarket is so much heavier.
Nice! You have gone to town
Thank you guys
Bit of a spanner in the works… popped into see the powder coater as 6 weeks had passed and every week kept on getting the “it will be done next week” walked in and all my bits hadn’t even been touched - fuming.
Took them to a guy local to my work and hopefully be done within the week.
So in a bit of limbo waiting for bits at the minute, fitting solo bits that can bolt up
New flex disc, have also fitted a new prop centre bearing and painted the prop
 Untitled by Sam Ratcliffe, on Flickr
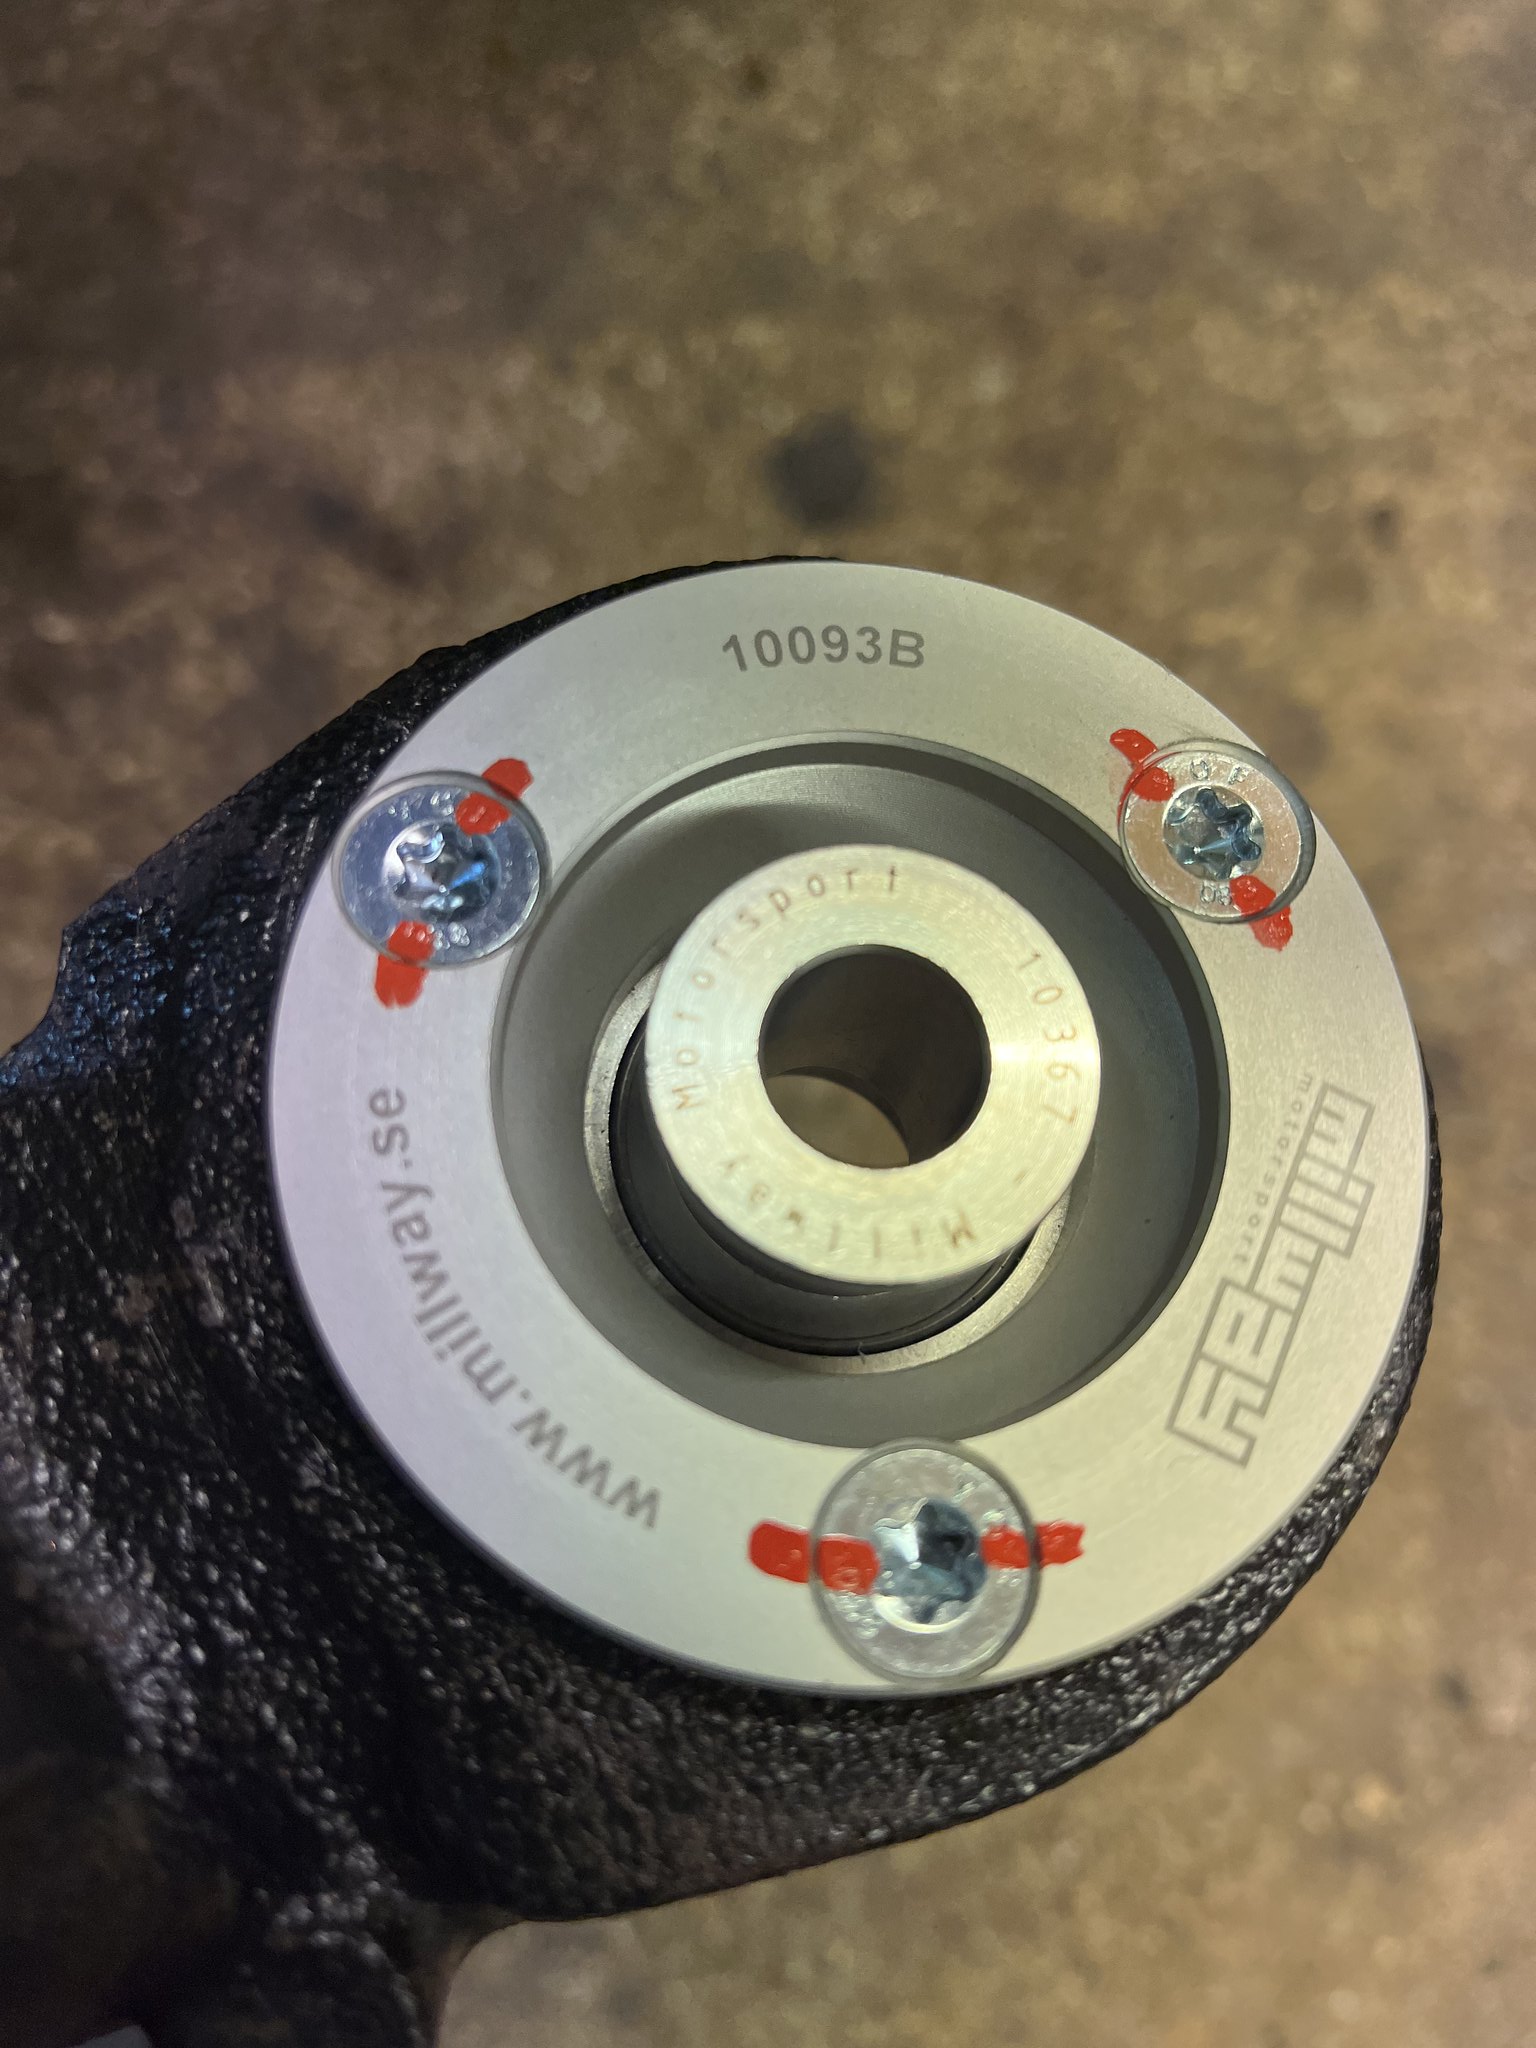
Millway Motorsport Trailing arm bushes are super nice
 Untitled by Sam Ratcliffe, on Flickr
 Untitled by Sam Ratcliffe, on Flickr
Trailing arms painted and mounted
 Untitled by Sam Ratcliffe, on Flickr
Fingers crossed for a big fit up this weekend.
Bit of a spanner in the works… popped into see the powder coater as 6 weeks had passed and every week kept on getting the “it will be done next week” walked in and all my bits hadn’t even been touched - fuming.
Took them to a guy local to my work and hopefully be done within the week.
So in a bit of limbo waiting for bits at the minute, fitting solo bits that can bolt up
New flex disc, have also fitted a new prop centre bearing and painted the prop
Untitled by Sam Ratcliffe, on FlickrMillway Motorsport Trailing arm bushes are super nice
Untitled by Sam Ratcliffe, on FlickrUntitled by Sam Ratcliffe, on FlickrTrailing arms painted and mounted
Untitled by Sam Ratcliffe, on FlickrFingers crossed for a big fit up this weekend.
Finally getting somewhere, after 6 weeks wasted at the first useless powdercoater, a week later the second powercoater delivered on time and has done a excellent job
 Untitled by Sam Ratcliffe, on Flickr
New Millway Motorsport bushes in the inner of the control arms - making the back end now completely rose jointed
 Untitled by Sam Ratcliffe, on Flickr
 Untitled by Sam Ratcliffe, on Flickr
Powerflex black subframe bushes - the rear frame bushes have a bigger hole to allow for tolerances/movement so had a tight M12 insert machined up to avoid any unwanted movement.
Went for Powerflex Heritage for the front diff bush mount as don't want the NVH to be crazy and didn't want a purple bush to bug my OCD, have new E46 M3 bushes in the back of the diff case.
 Untitled by Sam Ratcliffe, on Flickr
 Untitled by Sam Ratcliffe, on Flickr
Still a couple more things to prep them every last bit can be bolted back up.
Untitled by Sam Ratcliffe, on FlickrNew Millway Motorsport bushes in the inner of the control arms - making the back end now completely rose jointed
Untitled by Sam Ratcliffe, on FlickrUntitled by Sam Ratcliffe, on FlickrPowerflex black subframe bushes - the rear frame bushes have a bigger hole to allow for tolerances/movement so had a tight M12 insert machined up to avoid any unwanted movement.
Went for Powerflex Heritage for the front diff bush mount as don't want the NVH to be crazy and didn't want a purple bush to bug my OCD, have new E46 M3 bushes in the back of the diff case.
Untitled by Sam Ratcliffe, on Flickr Untitled by Sam Ratcliffe, on FlickrStill a couple more things to prep them every last bit can be bolted back up.

I’m done - well on the back end anyway… actually kinda nearly, just a couple more bolts and clip I’d like to replace
Before :
 Untitled by Sam Ratcliffe, on Flickr
After :
 Untitled by Sam Ratcliffe, on Flickr
A job I wanted to do since buying this car but everything had to be done and done right
Differential talk - as this is the main party piece :
Old was a tired factory 4 plated 3.0 LSD with a 3.15 final drive (173mph vmax, probably unachievable)
New is a box fresh 12 plated Drexler LSD with a shorter 3.64 final drive built by Heasman Differentials (150mph vmax, possibly achievable on a bigger Europe tracks) shorter ratio and spicy LSD should really wake it up on track, hopefully a game changer.
So basically everything you can see and more is either new, painted or cleaned
 Untitled by Sam Ratcliffe, on Flickr
 Untitled by Sam Ratcliffe, on Flickr
Rear subframe had some bracing added around the rear ARB mounts
 Untitled by Sam Ratcliffe, on Flickr
New ST trackparts slim seat mounts - these were actually designed for the Recaro SPA seats I have and are the first mounts I’ve had that don’t need chopping up or spacing
 Untitled by Sam Ratcliffe, on Flickr
 Untitled by Sam Ratcliffe, on Flickr
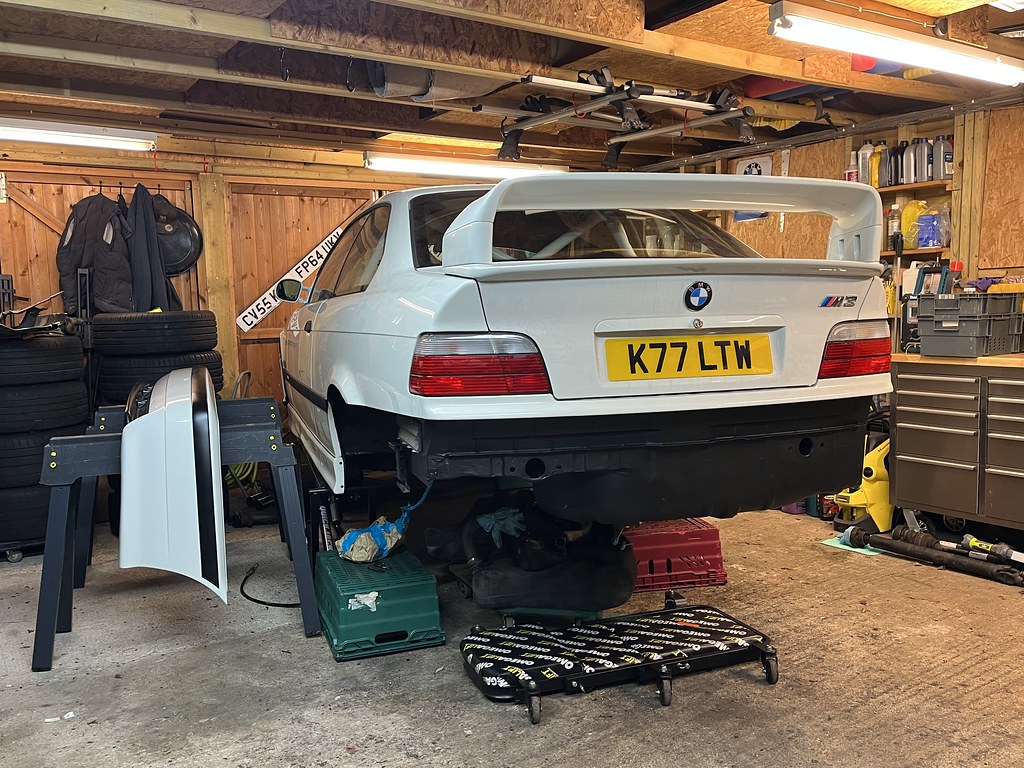
Back on the ground and driven a total of about 5 miles
 Untitled by Sam Ratcliffe, on Flickr
To another friends garage to carry on tinkering and dry winter storage
 Untitled by Sam Ratcliffe, on Flickr
All-in-all took 7 weeks to complete over the odd evening and weekend with friends, could’ve been little quicker with powder coating delays but gave me time to do a proper job on everything
Next up is to finishing covering everything with ACF-50 (why it all looks very glossy underneath)
Then I’ve made a start on chopping out all the rear seat brackets to then carpet the back and fit a cargo net.
Before :
Untitled by Sam Ratcliffe, on FlickrAfter :
Untitled by Sam Ratcliffe, on FlickrA job I wanted to do since buying this car but everything had to be done and done right
Differential talk - as this is the main party piece :
Old was a tired factory 4 plated 3.0 LSD with a 3.15 final drive (173mph vmax, probably unachievable)
New is a box fresh 12 plated Drexler LSD with a shorter 3.64 final drive built by Heasman Differentials (150mph vmax, possibly achievable on a bigger Europe tracks) shorter ratio and spicy LSD should really wake it up on track, hopefully a game changer.
So basically everything you can see and more is either new, painted or cleaned
Untitled by Sam Ratcliffe, on FlickrUntitled by Sam Ratcliffe, on FlickrRear subframe had some bracing added around the rear ARB mounts
Untitled by Sam Ratcliffe, on FlickrNew ST trackparts slim seat mounts - these were actually designed for the Recaro SPA seats I have and are the first mounts I’ve had that don’t need chopping up or spacing
Untitled by Sam Ratcliffe, on FlickrUntitled by Sam Ratcliffe, on FlickrBack on the ground and driven a total of about 5 miles
Untitled by Sam Ratcliffe, on FlickrTo another friends garage to carry on tinkering and dry winter storage
Untitled by Sam Ratcliffe, on FlickrAll-in-all took 7 weeks to complete over the odd evening and weekend with friends, could’ve been little quicker with powder coating delays but gave me time to do a proper job on everything
Next up is to finishing covering everything with ACF-50 (why it all looks very glossy underneath)
Then I’ve made a start on chopping out all the rear seat brackets to then carpet the back and fit a cargo net.
 Proper
Gassing Station | Readers' Cars | Top of Page | What's New | My Stuff