Airfix Curtis Tomahawk II
Discussion


I started a P40 a while ago, and it went terribly wrong, so I binned it, and bought one of Airfixs starter sets. Am still feeling my way back in, and I thought it would be a simple enough model to try my hand out on, and practice minor fixes if needed.
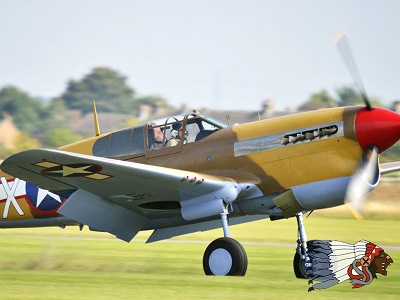
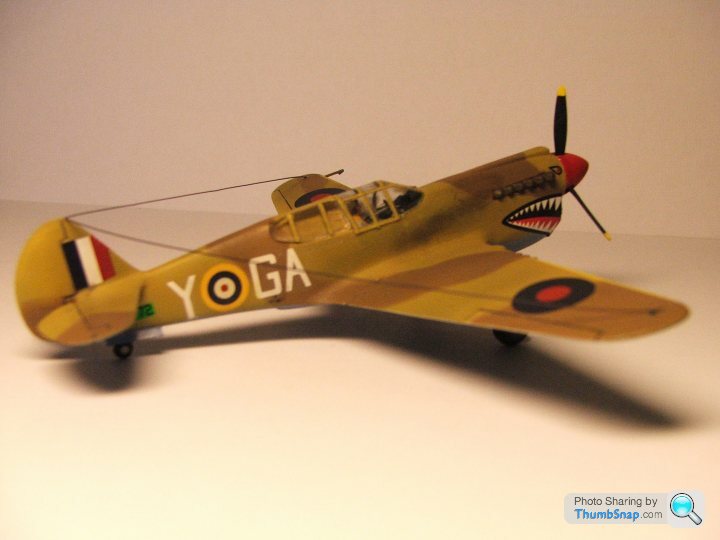
Although different marques, I'm using The Fighter Collections P-40F "Lee's Hope" as a painting guide, and will be shown in flight for a change
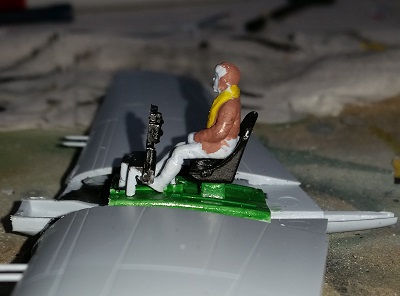
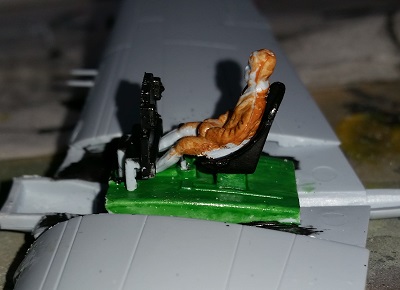
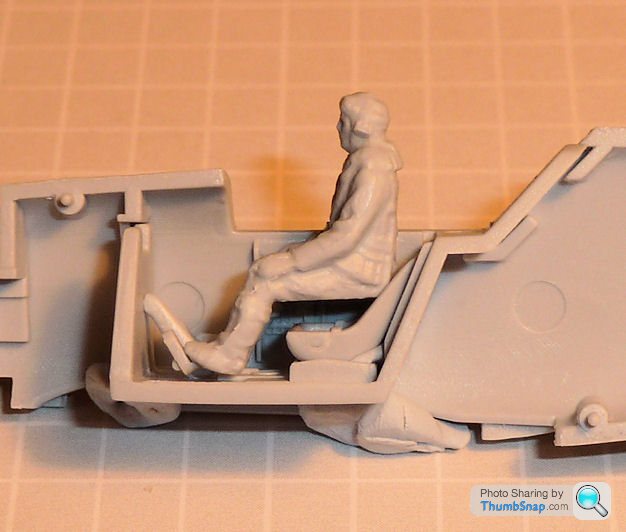
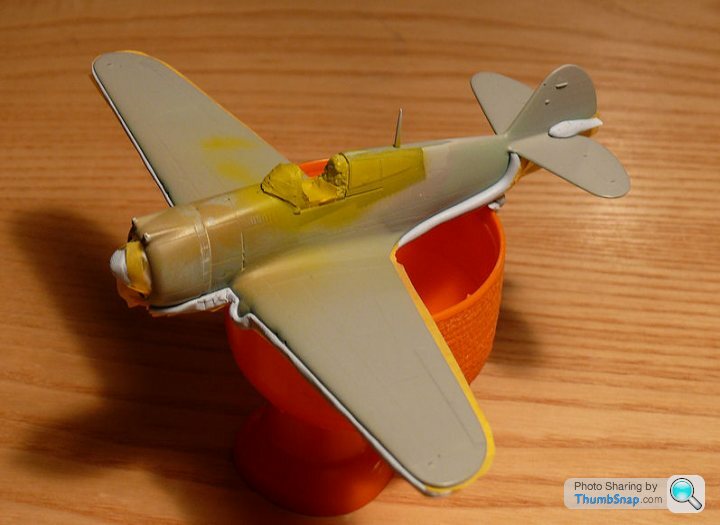
Cockpit and pilot ready, and attached to the assembled wings. Problem is, the pilot doesn't fit into the seat
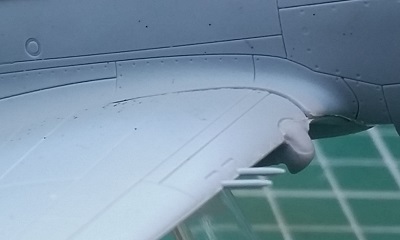
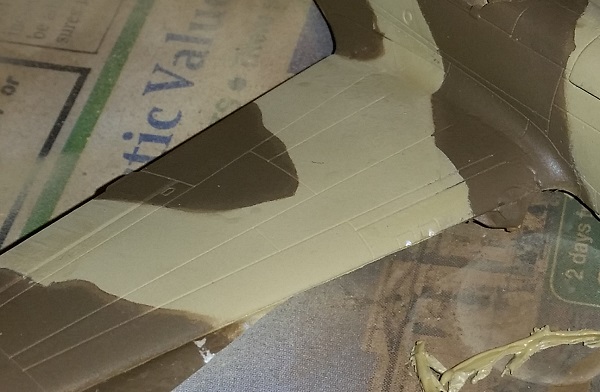
Onto the body, and the joint between the body and wings left a step,
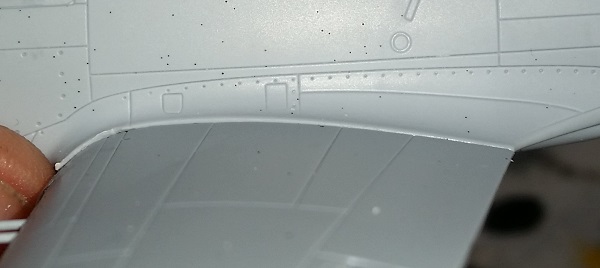
so a little (ok felt like a lot) of filing got the wingroot looking better
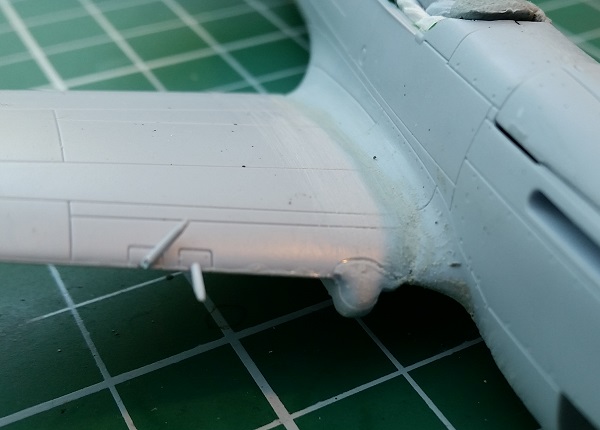
Although, during sanding I've managed to knock one of the moulded guns. A bit of glue and a bend back had it back in alignment.
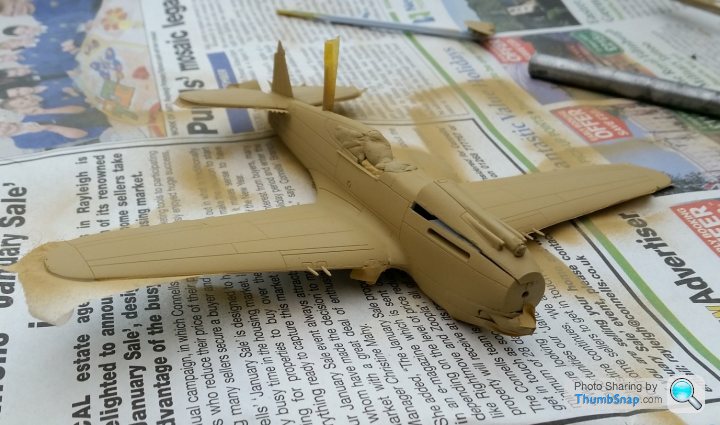
Managed to apply the first coat today, and while I'm happy with the coverage, the sand on the TFCs P40 is a lot more yellowy. Will see what it looks like when the brown is applied
Although different marques, I'm using The Fighter Collections P-40F "Lee's Hope" as a painting guide, and will be shown in flight for a change
Cockpit and pilot ready, and attached to the assembled wings. Problem is, the pilot doesn't fit into the seat
Onto the body, and the joint between the body and wings left a step,
so a little (ok felt like a lot) of filing got the wingroot looking better
Although, during sanding I've managed to knock one of the moulded guns. A bit of glue and a bend back had it back in alignment.
Managed to apply the first coat today, and while I'm happy with the coverage, the sand on the TFCs P40 is a lot more yellowy. Will see what it looks like when the brown is applied
Edited by Mutley on Saturday 24th January 20:28
In the new tool Airfix Bf109 E4, they apparently gave up with the engineering of the parts, and simply included a step in the instructions telling you to cut off either the pilot's legs, or the rudder pedals (can't remember which) if you wanted to fit him.
You might also want to check whether the canopy still fits now the pilot is in place, before you go much further.
You might also want to check whether the canopy still fits now the pilot is in place, before you go much further.

It's all good fun isn't it 
I think the light colour on the P40 you've shown is supposed to be the wartime colour Light Stone rather than sand colour
The P40s in RAF service in the desert were painted Dark Earth and Light Stone upper surface camouflage in the regular RAF fighter pattern and had undersides in Azure Blue
And as far back as I can remember keeping the legs on Airfix pilot figures was a matter of luck Many of them were moulded shin-less back then
Following doc's advice will steer you along nicely
I think the light colour on the P40 you've shown is supposed to be the wartime colour Light Stone rather than sand colour
The P40s in RAF service in the desert were painted Dark Earth and Light Stone upper surface camouflage in the regular RAF fighter pattern and had undersides in Azure Blue
And as far back as I can remember keeping the legs on Airfix pilot figures was a matter of luck
Many of them were moulded shin-less back thenFollowing doc's advice will steer you along nicely
I demasked (is that a real word?) and the masking has worked, kind of. It would seem I hadn't checked the tape was fully tight to the model, and the brown has seeped under and along the odd panel line. Time to touch it up, though I think by hand, as also the brown has some rather straight edges.
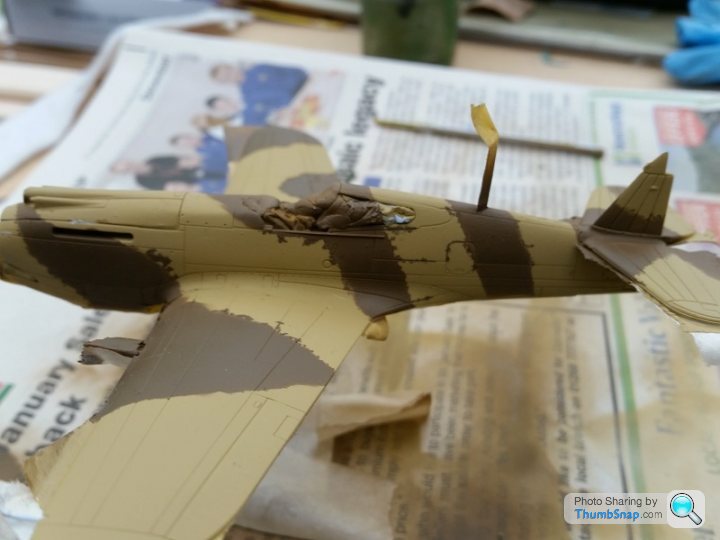
Rookie errors and learning curve. One decade I'll nearly be half as good as Doc
Rookie errors and learning curve. One decade I'll nearly be half as good as Doc
dr_gn said:
Why not use rolls of blu-tac slightly outside the dark brown bits and overspray it? Obviously mask the remainder of yellow. It would work, just mist the brown ob untul the jagged edges disappear.
Thanks Doc, will try that.
This is a learning build, so knowing how to fix my cockups is part of it.
Well, remasking with blu-tac worked, but in part I seem to have ended up with a slightly lighter border. Another attempt will be made to darken the borders next weekend, when my heating has been repaired!
And I seem to have lost the other wing gun! am thinking I could drill into the wing a little to create a mount, and stretch some sprue over heat to remake the small guns. Not having done this before, I presume held over a candle and gently pulled?
And I seem to have lost the other wing gun! am thinking I could drill into the wing a little to create a mount, and stretch some sprue over heat to remake the small guns. Not having done this before, I presume held over a candle and gently pulled?
The edges on the camo look a bit hard for the blu-tac method of masking (unless that's what you wanted)? This is the size of roll I use on a 1:72 model requiring feathered-edge camo (on an ancestor of your Tomahawk):
It's easier with an airbrush to angle the spray to be perpendicular, but it should still be possible to get a decent rsult with a spray can.
It's easier with an airbrush to angle the spray to be perpendicular, but it should still be possible to get a decent rsult with a spray can.
If for whatever reason you need to mask with tape but are worried about bleeding, then a quick flash over with the same colour you just masked will ensure the bleed is, erm, the same colour. That will seal the masking and you can carry on.
This method is not infallable either though and is much more controllable with a dual action airbrush.
What masking tape are you using?
This method is not infallable either though and is much more controllable with a dual action airbrush.
What masking tape are you using?
dr_gn said:
The edges on the camo look a bit hard for the blu-tac method of masking (unless that's what you wanted)? This is the size of roll I use on a 1:72 model requiring feathered-edge camo (on an ancestor of your Tomahawk):
It's easier with an airbrush to angle the spray to be perpendicular, but it should still be possible to get a decent rsult with a spray can.
Doc, your early Curtis is inspiring, but I haven't used that method for the leading edges, just taped it up.It's easier with an airbrush to angle the spray to be perpendicular, but it should still be possible to get a decent rsult with a spray can.
Am still learning the airbrush.
jamieduff1981 said:
If for whatever reason you need to mask with tape but are worried about bleeding, then a quick flash over with the same colour you just masked will ensure the bleed is, erm, the same colour. That will seal the masking and you can carry on.
This method is not infallable either though and is much more controllable with a dual action airbrush.
What masking tape are you using?
I erroneously used some decorating tape cut into shape. It's here I'm wondering if that was the cause of the bleeding, and yes, did a re-mask of the areas and covered the errors.This method is not infallable either though and is much more controllable with a dual action airbrush.
What masking tape are you using?
Am just waiting for a replacement canopy and I can continue. But while I wait I've had the Vallejo acrylic RAF Desert pack arrive, and I'm sorely tempted to strip the paint back and start again.
As always, grateful for your comments
Normal DIY masking tape is not really good enough for model masking. You are better off using the proper stuff. Tamiya tape is by far the best. It's a lot more expensive than hardware store tape but it is much, much better.
To make it last a bit, what I sometime do is mask the edges with Tamiya tape and fill in the spaces with cheap DIY tape or some other masking medium.
The glue on DIY tape is also far too strong and will easily pull off other underlying layers of paint if the stickiness isn't reduced somehow. Sticking and unsticking DIY tape to your jeans a number of time can do a lot to reduce the tackiness of DIY tape.
Mutley said:
dr_gn said:
The edges on the camo look a bit hard for the blu-tac method of masking (unless that's what you wanted)? This is the size of roll I use on a 1:72 model requiring feathered-edge camo (on an ancestor of your Tomahawk):
It's easier with an airbrush to angle the spray to be perpendicular, but it should still be possible to get a decent rsult with a spray can.
Doc, your early Curtis is inspiring, but I haven't used that method for the leading edges, just taped it up.It's easier with an airbrush to angle the spray to be perpendicular, but it should still be possible to get a decent rsult with a spray can.
Am still learning the airbrush.
jamieduff1981 said:
If for whatever reason you need to mask with tape but are worried about bleeding, then a quick flash over with the same colour you just masked will ensure the bleed is, erm, the same colour. That will seal the masking and you can carry on.
This method is not infallable either though and is much more controllable with a dual action airbrush.
What masking tape are you using?
I erroneously used some decorating tape cut into shape. It's here I'm wondering if that was the cause of the bleeding, and yes, did a re-mask of the areas and covered the errors.This method is not infallable either though and is much more controllable with a dual action airbrush.
What masking tape are you using?
Am just waiting for a replacement canopy and I can continue. But while I wait I've had the Vallejo acrylic RAF Desert pack arrive, and I'm sorely tempted to strip the paint back and start again.
As always, grateful for your comments
1) Spray Light Stone.
2) Mask (I use the Tamiya tape Eric mentioned)
3) Spray Light Stone on again. If the masking tape bleeds the errors will be corrected with a tickle of wet'n'dry later. When dry, the second dose of Light Stone seals any problem areas in the tape.
4) When dry, spray the Dark Earth. No bleeds!
TBH though, the Tamiya tape is so compliant that you'll rarely get any real masking problems

Mutley said:
dr_gn said:
The edges on the camo look a bit hard for the blu-tac method of masking (unless that's what you wanted)? This is the size of roll I use on a 1:72 model requiring feathered-edge camo (on an ancestor of your Tomahawk):
It's easier with an airbrush to angle the spray to be perpendicular, but it should still be possible to get a decent rsult with a spray can.
Doc, your early Curtis is inspiring, but I haven't used that method for the leading edges, just taped it up.It's easier with an airbrush to angle the spray to be perpendicular, but it should still be possible to get a decent rsult with a spray can.
Am still learning the airbrush.
Gassing Station | Scale Models | Top of Page | What's New | My Stuff