New restoration project - what have I done!
Discussion


dav123a said:
Griff
A few links for the fire alarm to give you an idea whats out there , loads more than this though. I don't use twin wire systems much but hopefully these may help. Can't wait to see the house finished.
Detectors
www.apollo-fire.co.uk/products/products-by-brand/a...
www.hochikieurope.com/product2.php?id=1643&cod...
Panels
http://www.kentec.co.uk/product_sigmacp.htm
http://www.firesense.co.uk/products/conventional-2...
Whatever range of detectors you pick make sure they are compatible with the panel. With the normal conventional stuff it doesn't really matter.
Cheers for this, it's made for some interesting reading, like most things the more you research, the harder the decision is! More homework time needed! A few links for the fire alarm to give you an idea whats out there , loads more than this though. I don't use twin wire systems much but hopefully these may help. Can't wait to see the house finished.
Detectors
www.apollo-fire.co.uk/products/products-by-brand/a...
www.hochikieurope.com/product2.php?id=1643&cod...
Panels
http://www.kentec.co.uk/product_sigmacp.htm
http://www.firesense.co.uk/products/conventional-2...
Whatever range of detectors you pick make sure they are compatible with the panel. With the normal conventional stuff it doesn't really matter.
Quick update report!
Sparkies have now finished the first fix of the two main floors, so good to go on finishing the plasterboarding on the new walls now!
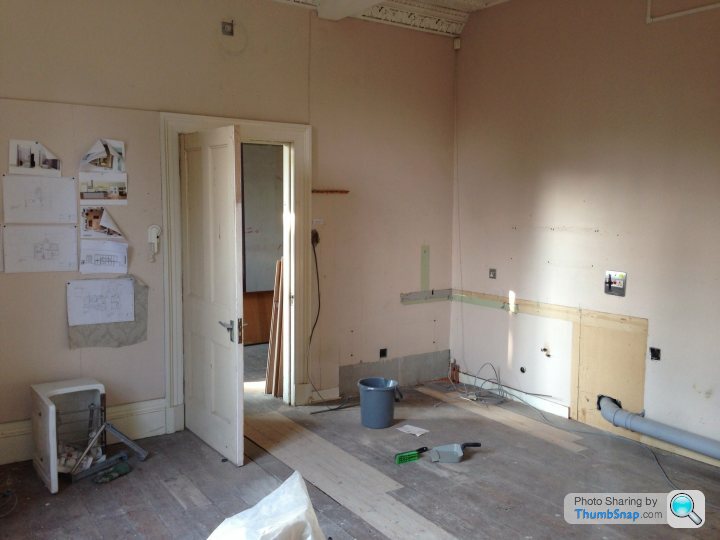
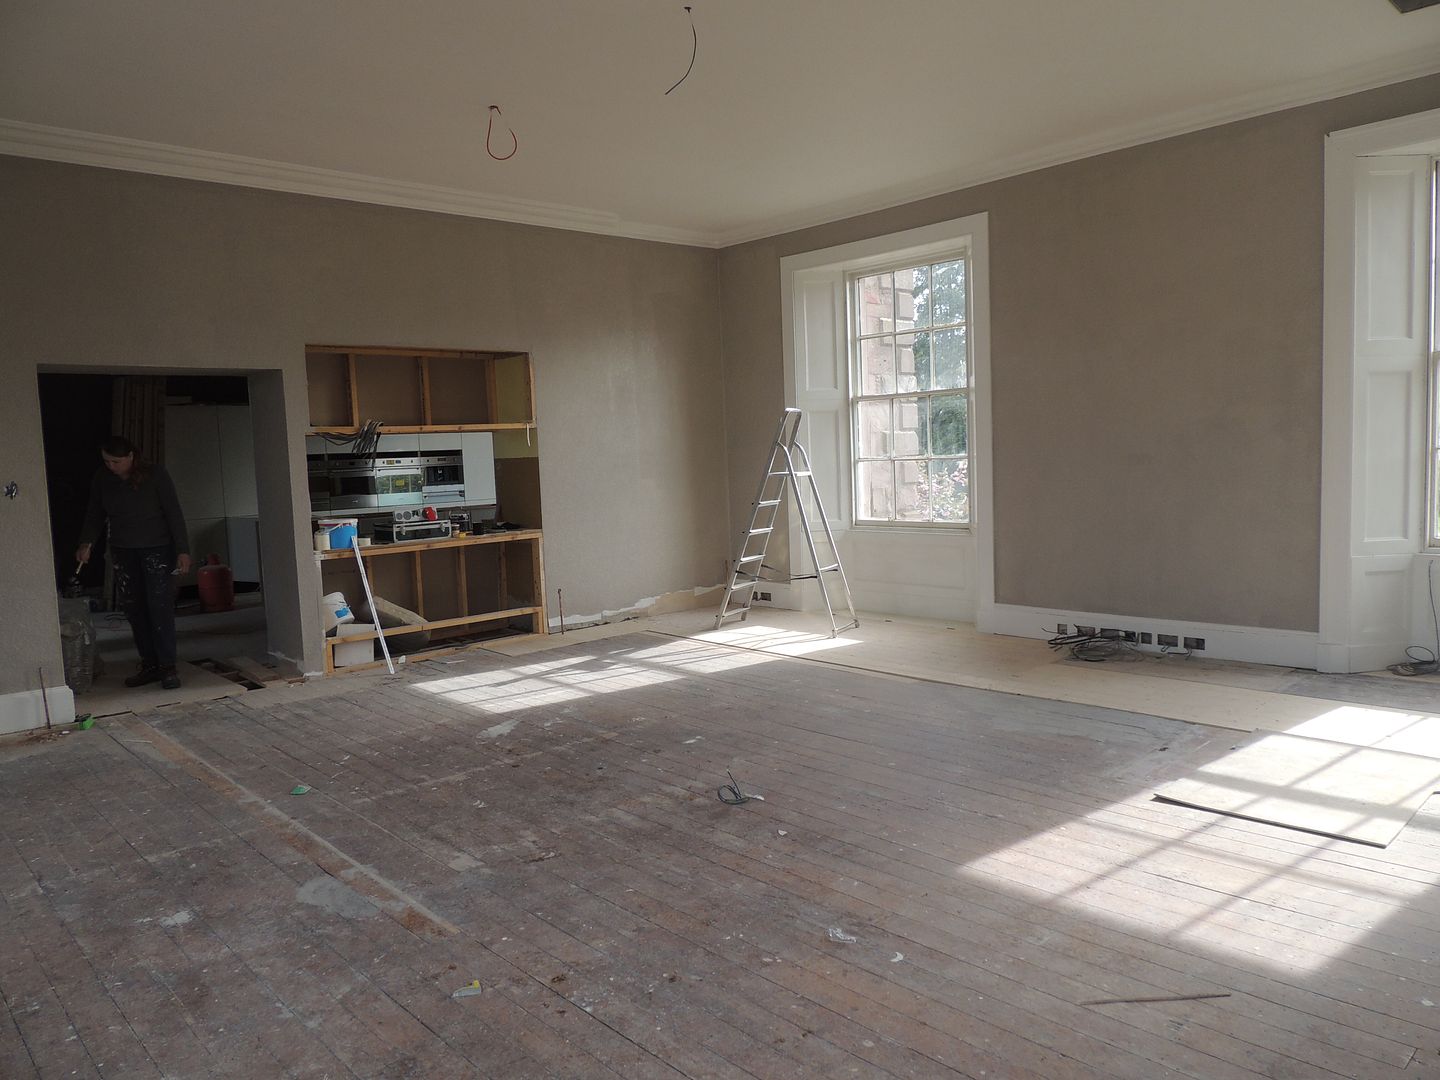
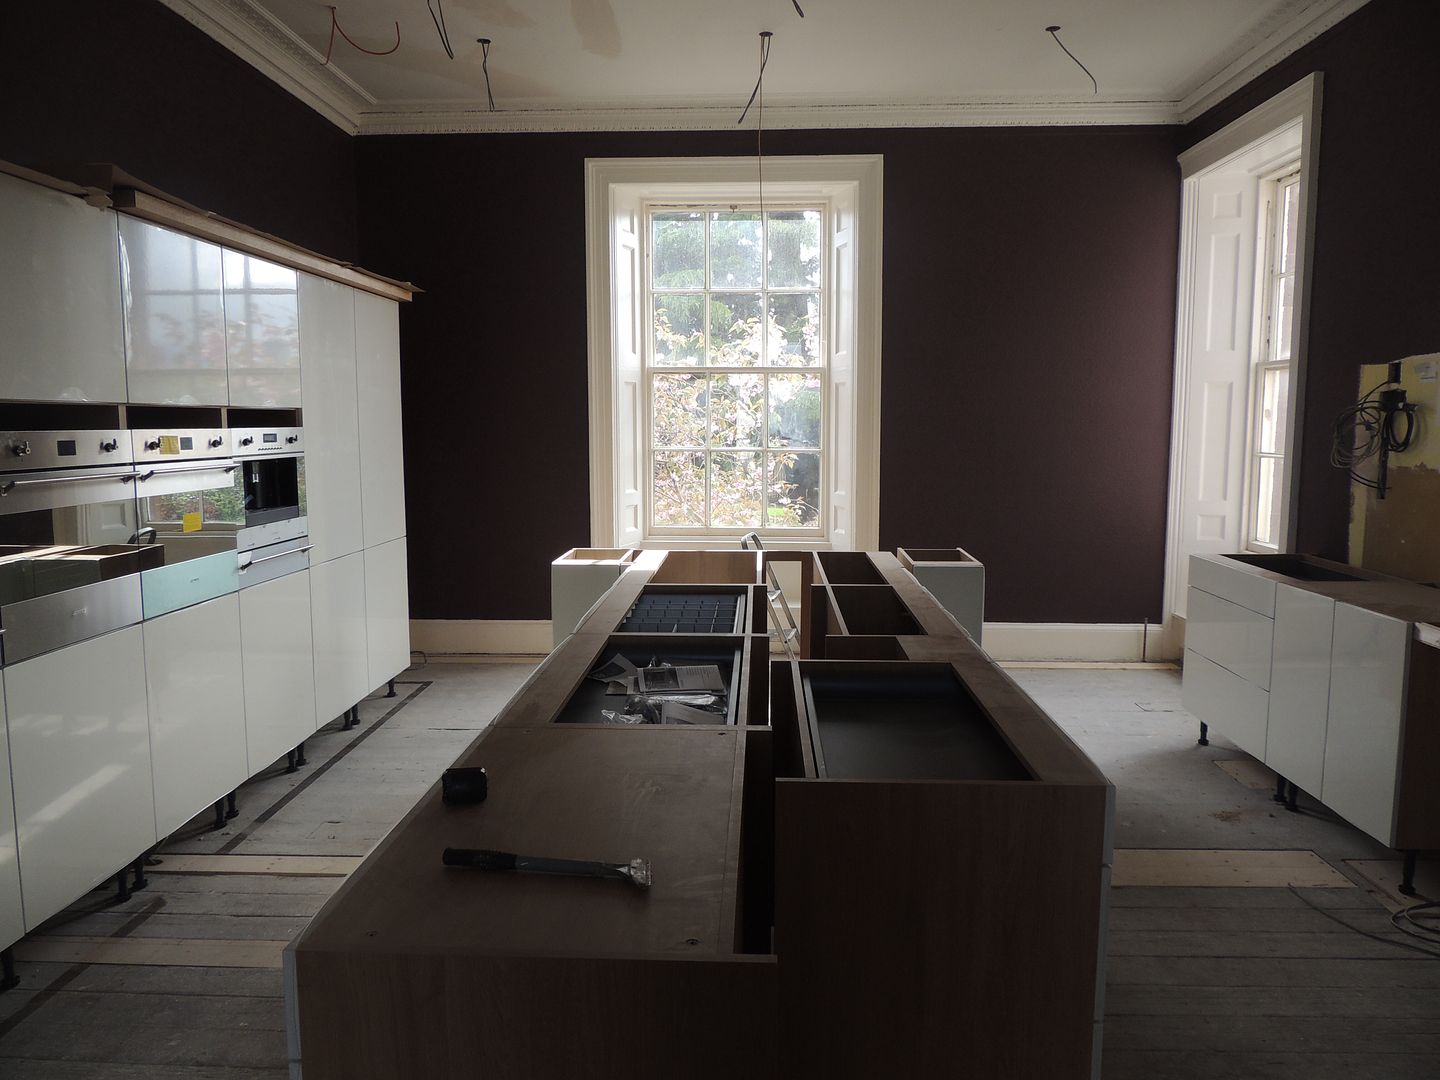
Also, work has continued on the kitchen in the mean time, as it was a room that we could get our teeth into, and can be separated from the rest of the house..
Wallpaper on the areas not being covered by kitchen units, sealing painted, first fixed for lights, Sonos speakers and FP wired for the fire alarm sensors / sounders.
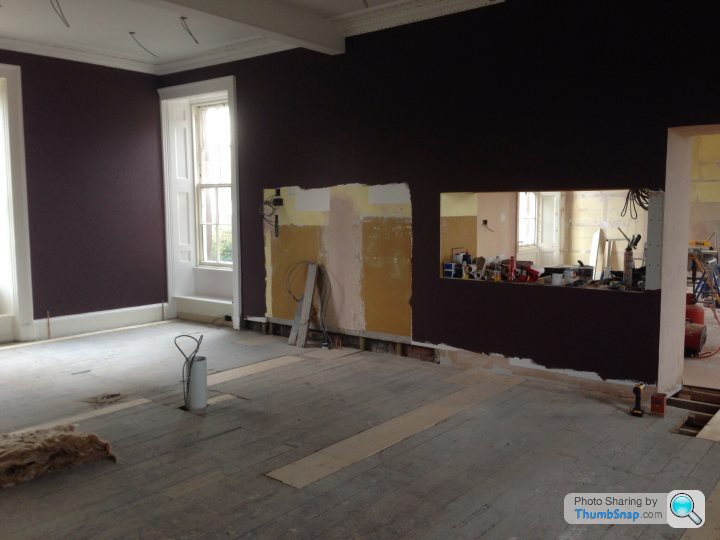
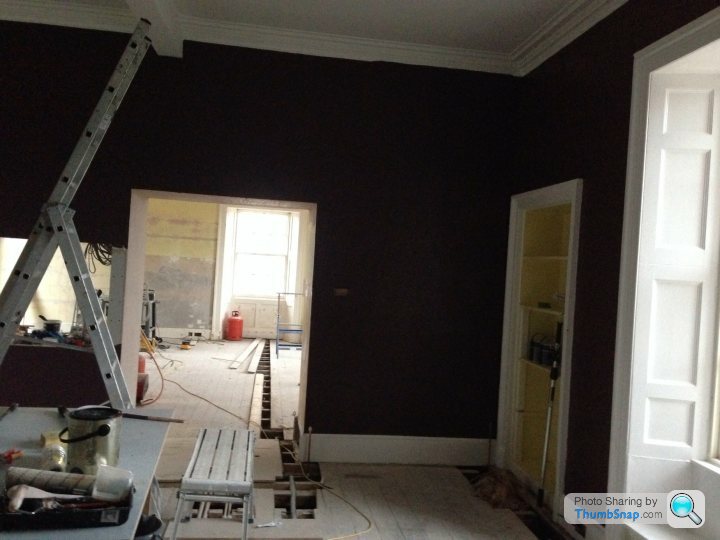
Finally, some pain on the walls! Looks a little dark in the pictures (iPhone I'm afraid!) but is great in real life, and the rooms so big and light it can easily take it!
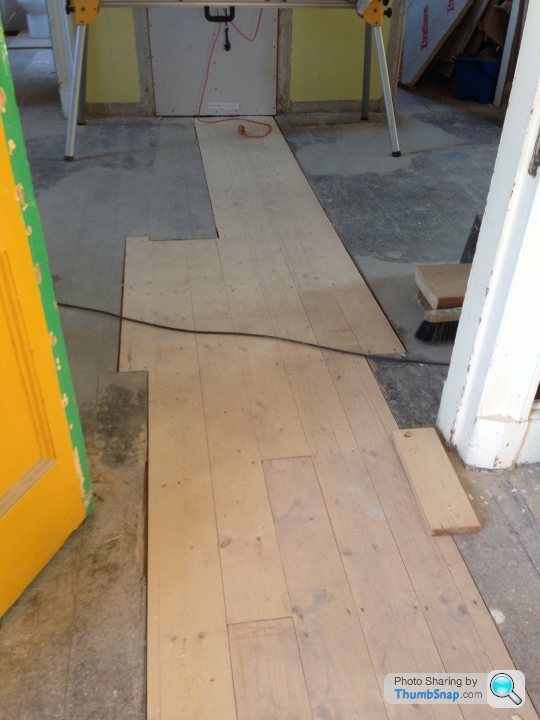
Floors patched with new 28mm floor boards, which was a PITA as the new boards are just a fraction smaller in width than the original, so at the end of every patch I had to cut a fillet strip to fill the spaces, thank god for the table saw!
6" duct is in for the downdraft extractor, runs under the floor and out the rear wall, which was fun....
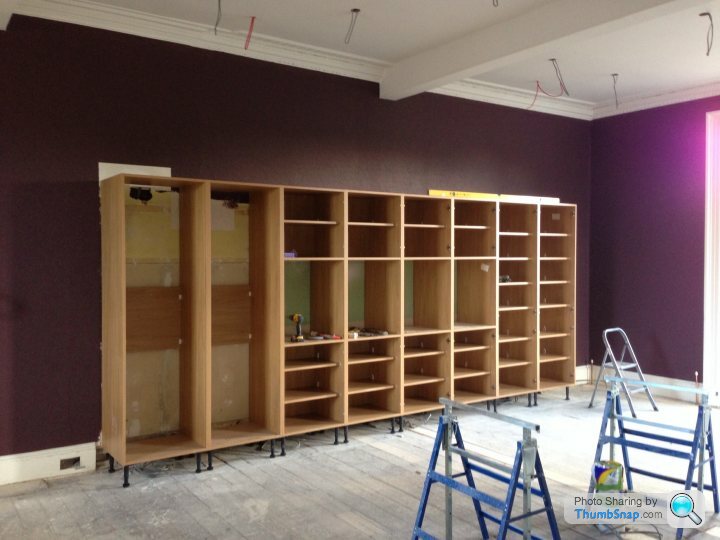
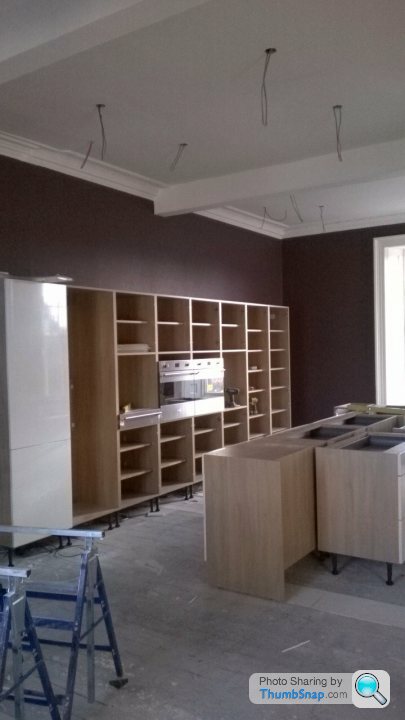
Now, started to fit some of the kitchen units, working on the tall units first. It's going to be a bank of 8 x 600 w tall units, starting from the left, it will have twin full height fridges, then 4 eye level appliance sets (2 x pyro full size ovens, micro/combi oven, coffee machine and 2 x warming drawers) the last two units will be larder units, with pull out internal drawers up to 3/4 height, then shelved above. I've gone for an oak coloured carcass system with a contrasting porcelain gloss door style, which will all be framed in 50mm thick veneered oak framing panels, and fitted with feature LED lighting all round.
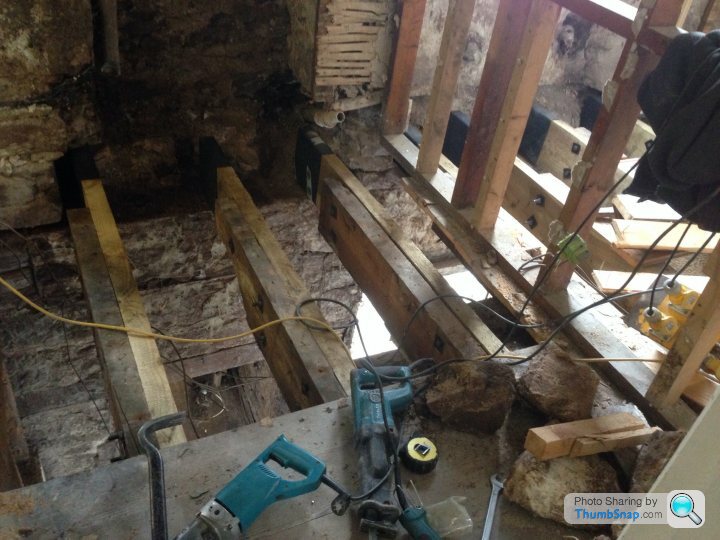
And lastly, I thought I'd share this pic! Had to remove some old light fittings yesterday so the sparky could get the new light run in upstairs, only problem is that it's over the area of the flooring that had to be removed to sort out the dry rot....... So imagine, going up a ladder to a 3300mm ceiling, trying to remove a 6ft fluorescent double tube fitting from what will be my ensuite, whilst having the ladder sitting on two chipboard flooring sheets, screwed to the floor joists... Then look down and see not on,y the floor below, but some of the floor below that! Must get the new floor laid here soon!
Serious squeaky bum time! Probably shouldn't have stopped to take a picture of the 'view' really!

Sparkies have now finished the first fix of the two main floors, so good to go on finishing the plasterboarding on the new walls now!
Also, work has continued on the kitchen in the mean time, as it was a room that we could get our teeth into, and can be separated from the rest of the house..
Wallpaper on the areas not being covered by kitchen units, sealing painted, first fixed for lights, Sonos speakers and FP wired for the fire alarm sensors / sounders.
Finally, some pain on the walls! Looks a little dark in the pictures (iPhone I'm afraid!) but is great in real life, and the rooms so big and light it can easily take it!
Floors patched with new 28mm floor boards, which was a PITA as the new boards are just a fraction smaller in width than the original, so at the end of every patch I had to cut a fillet strip to fill the spaces, thank god for the table saw!
6" duct is in for the downdraft extractor, runs under the floor and out the rear wall, which was fun....
Now, started to fit some of the kitchen units, working on the tall units first. It's going to be a bank of 8 x 600 w tall units, starting from the left, it will have twin full height fridges, then 4 eye level appliance sets (2 x pyro full size ovens, micro/combi oven, coffee machine and 2 x warming drawers) the last two units will be larder units, with pull out internal drawers up to 3/4 height, then shelved above. I've gone for an oak coloured carcass system with a contrasting porcelain gloss door style, which will all be framed in 50mm thick veneered oak framing panels, and fitted with feature LED lighting all round.
And lastly, I thought I'd share this pic! Had to remove some old light fittings yesterday so the sparky could get the new light run in upstairs, only problem is that it's over the area of the flooring that had to be removed to sort out the dry rot....... So imagine, going up a ladder to a 3300mm ceiling, trying to remove a 6ft fluorescent double tube fitting from what will be my ensuite, whilst having the ladder sitting on two chipboard flooring sheets, screwed to the floor joists... Then look down and see not on,y the floor below, but some of the floor below that! Must get the new floor laid here soon!
Serious squeaky bum time! Probably shouldn't have stopped to take a picture of the 'view' really!
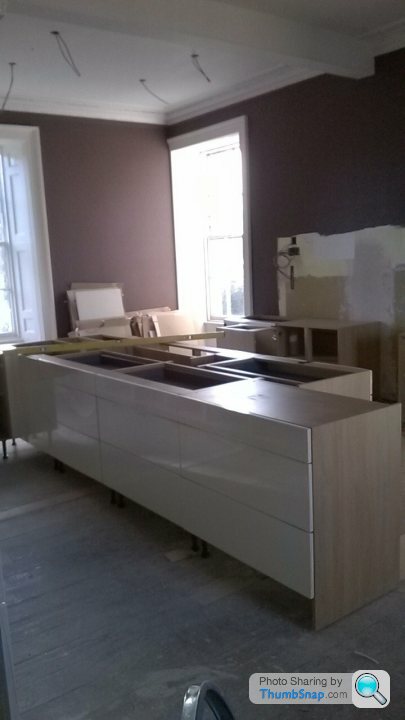
Bit more work done of the kitchen today, started to rough in the island units. Total island is about 4300mm x 1250mm so took a bit of work to get it and set up. Also have a delay as one of the key elements of the island is the 1200mm downdraft extractor, which we have just found out that despite being a De Dietrich appliance is actually made in a factory owned by Fagor, who have just gone bust! So none in stock and I'm now being told it's due in approx April, May time..... I can't finish the island without it or template for the granite worktops, so not ideal, but at least we are not living here just now, so it's not the end of the world!

Quick update, as I've been flogging myself to death recently doing boring, rubbish, tedious and generally completely uninteresiting stuff that unfortunately had to be done!
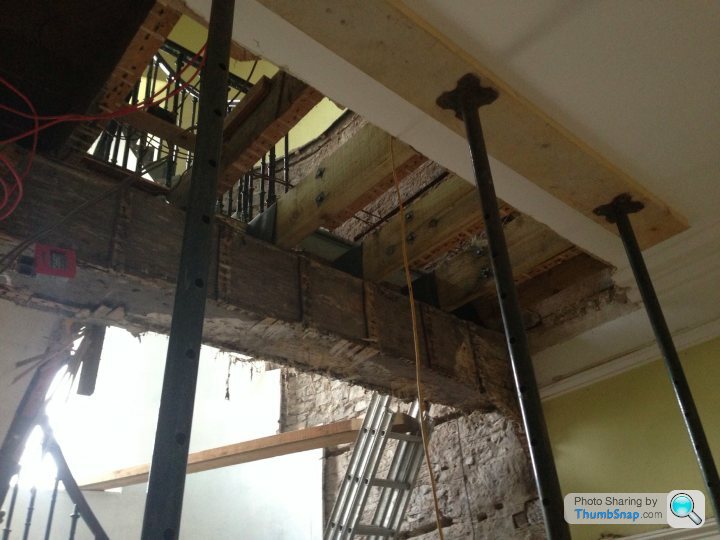
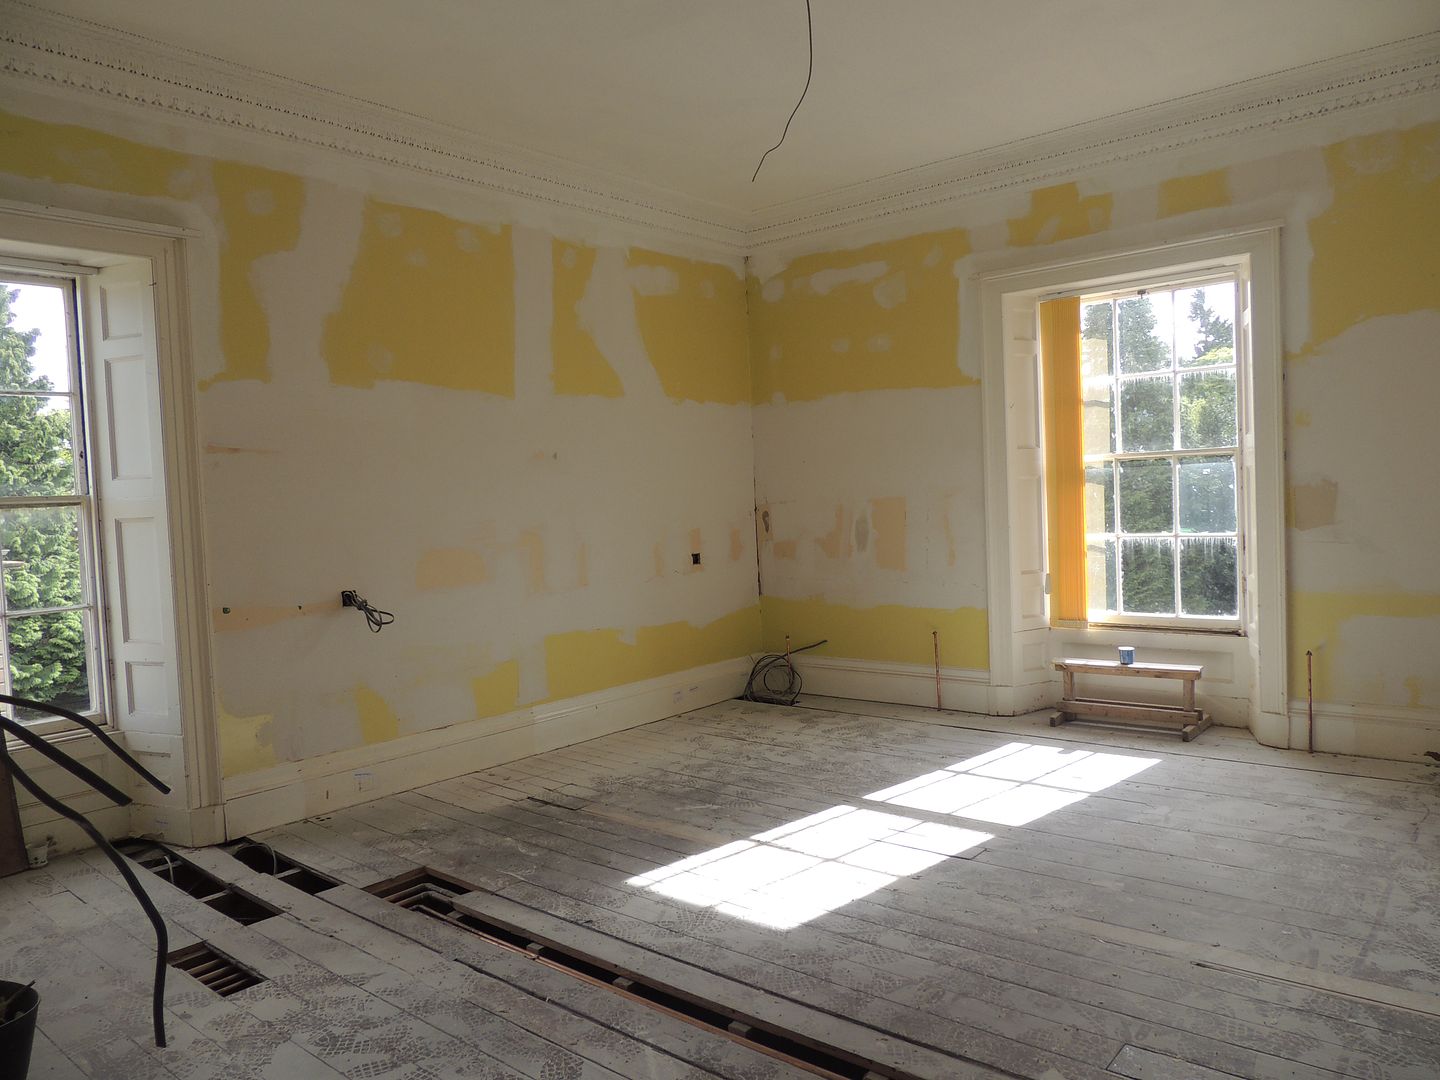
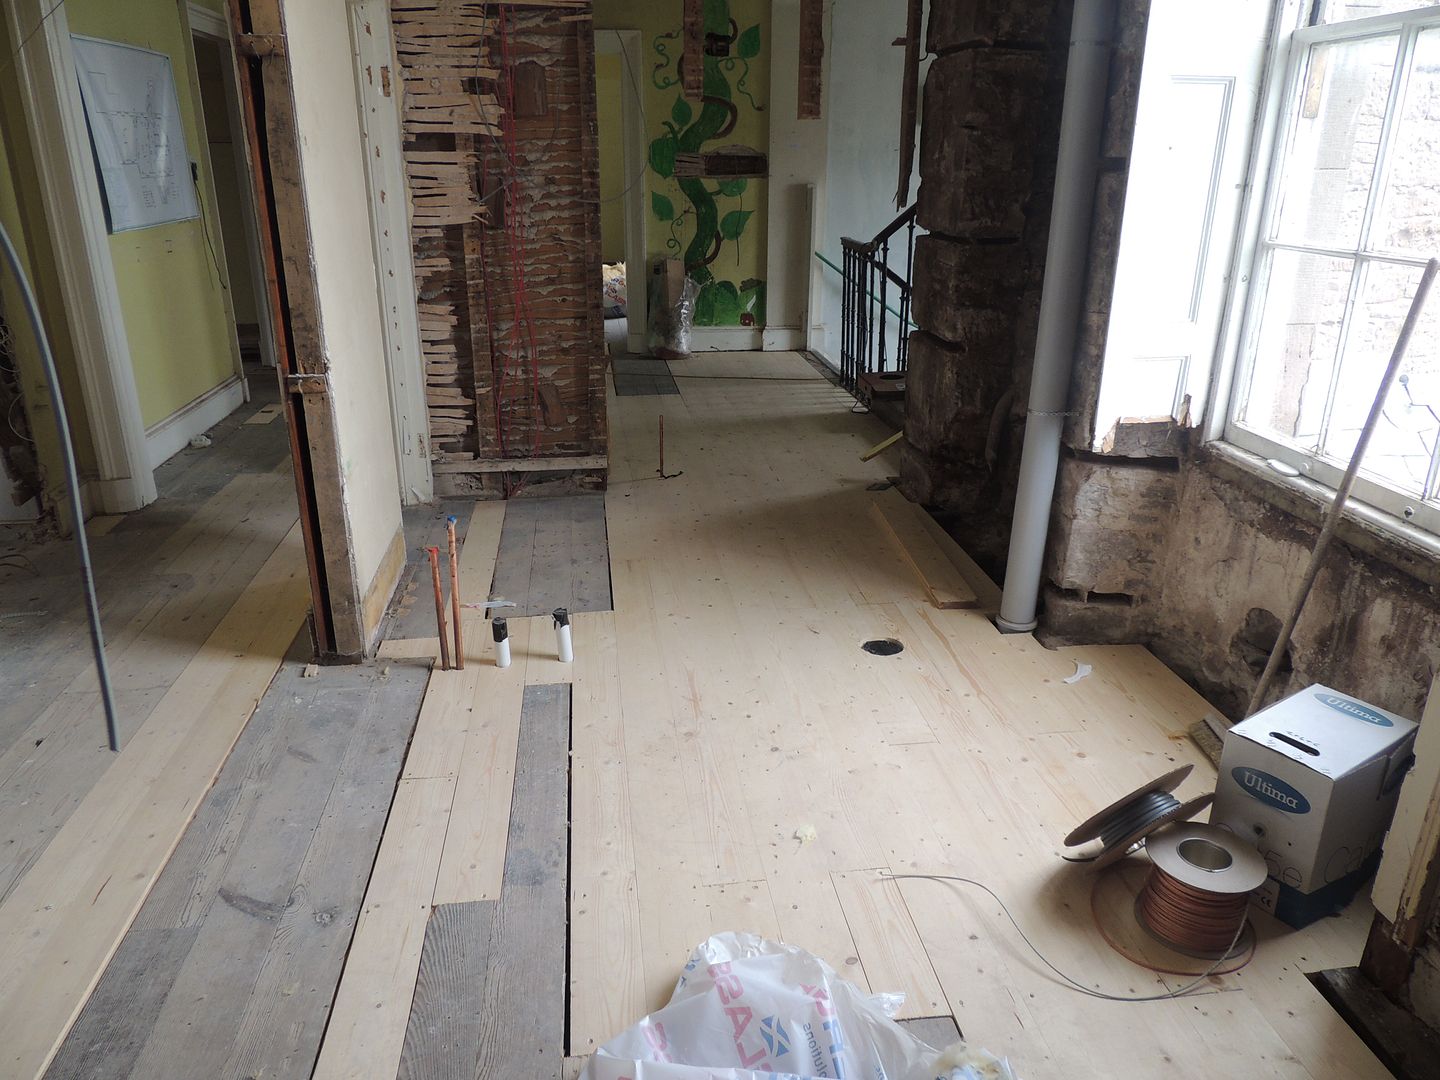
Things like putting a floor down in the upstairs hall area, quite sad to do this actually, as was getting used to "walking the plank" everythime I went upstairs! Although I got used to it, pretty much every visitor started shaking with the look of a 7m drop through two floors arrested only by a piece of 22mm chipboard!
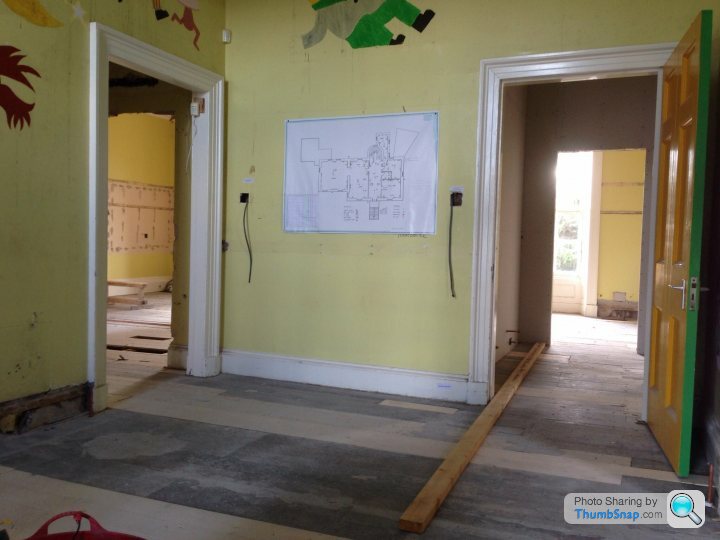
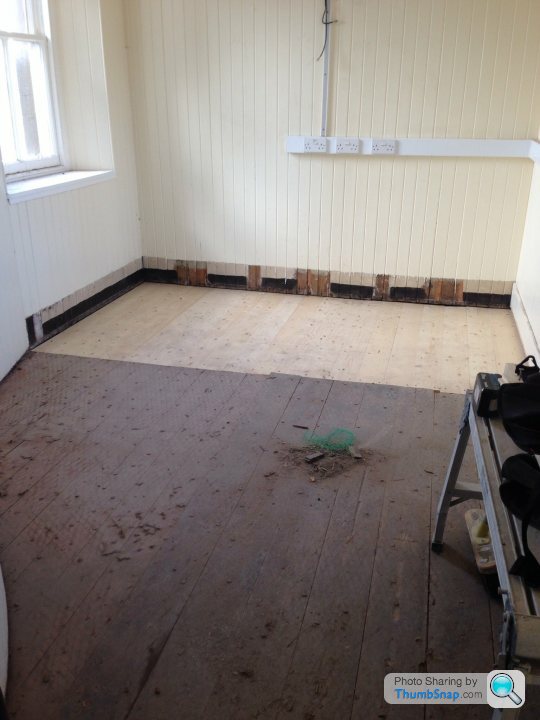
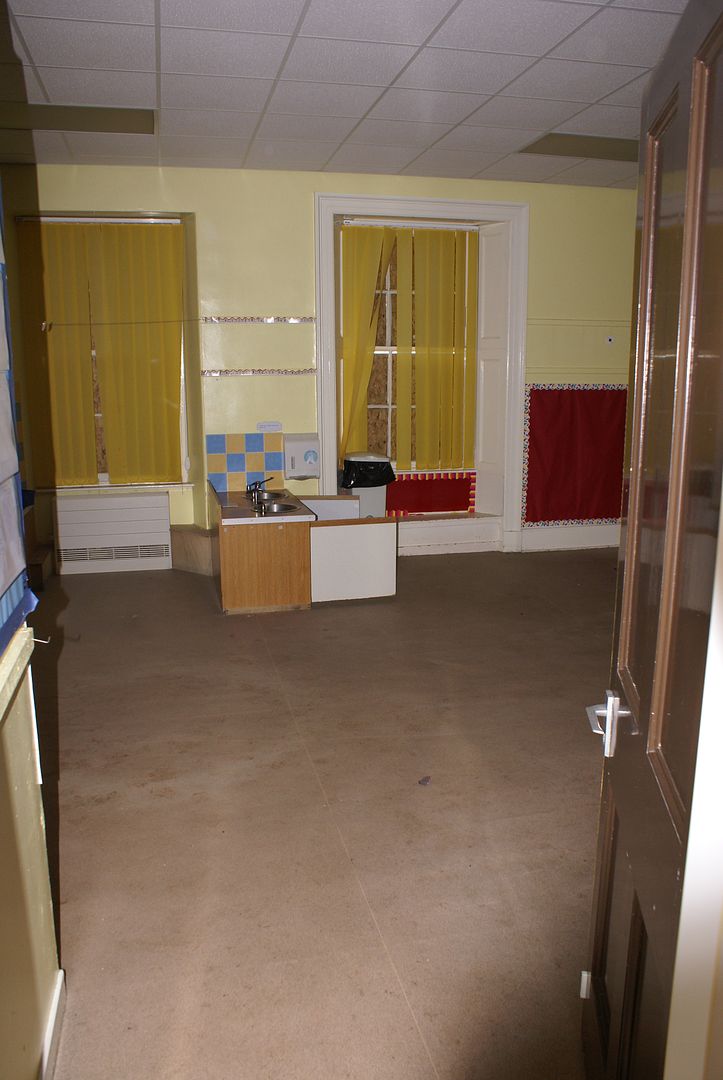
So it went from this:
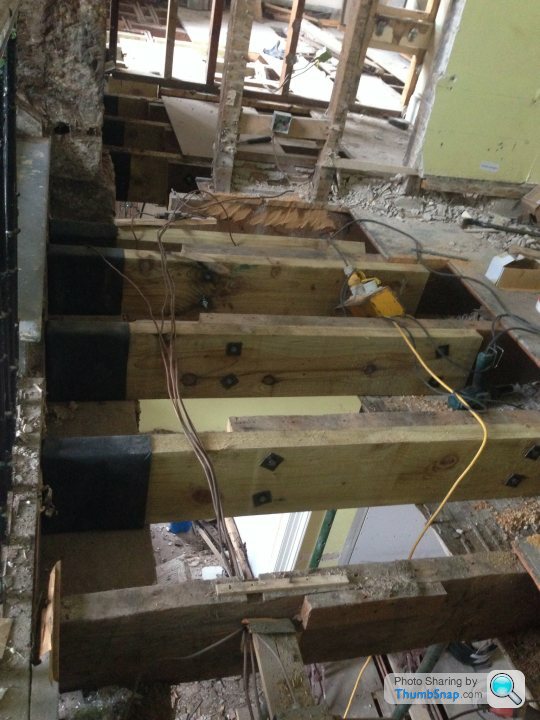
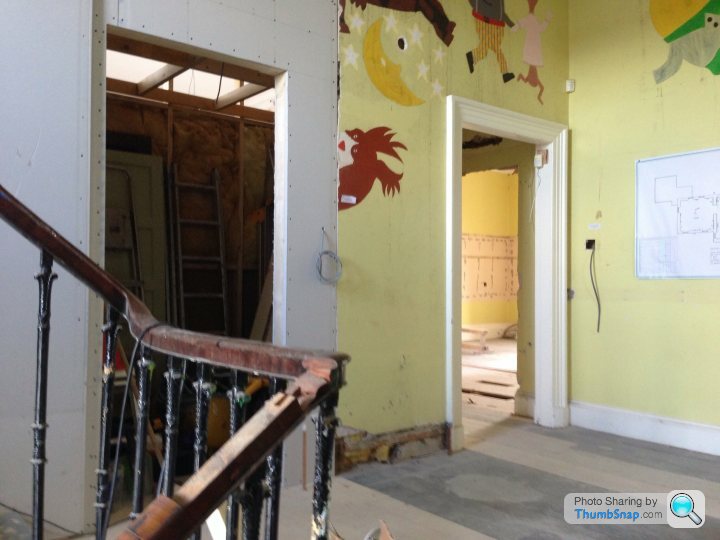
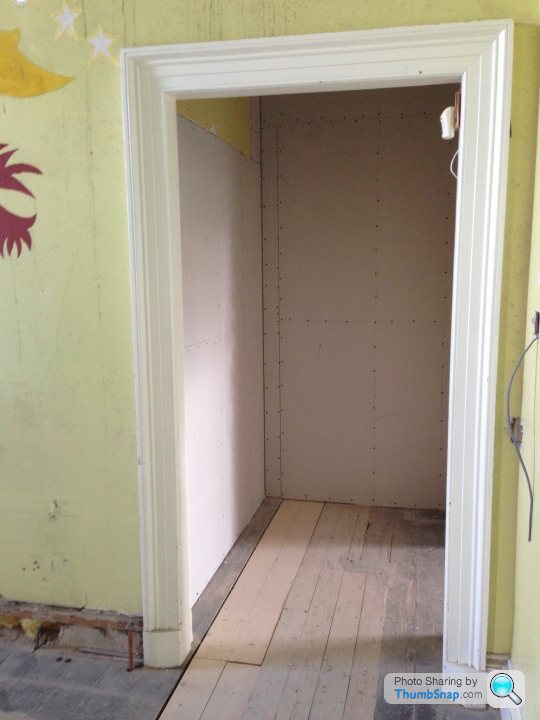
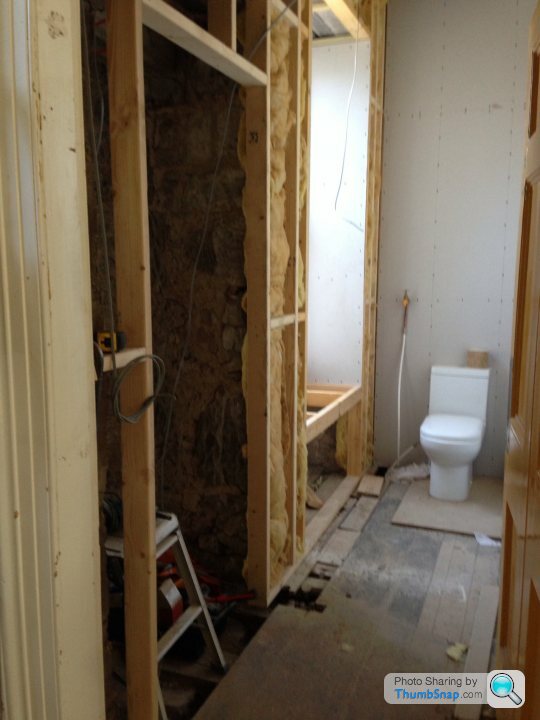
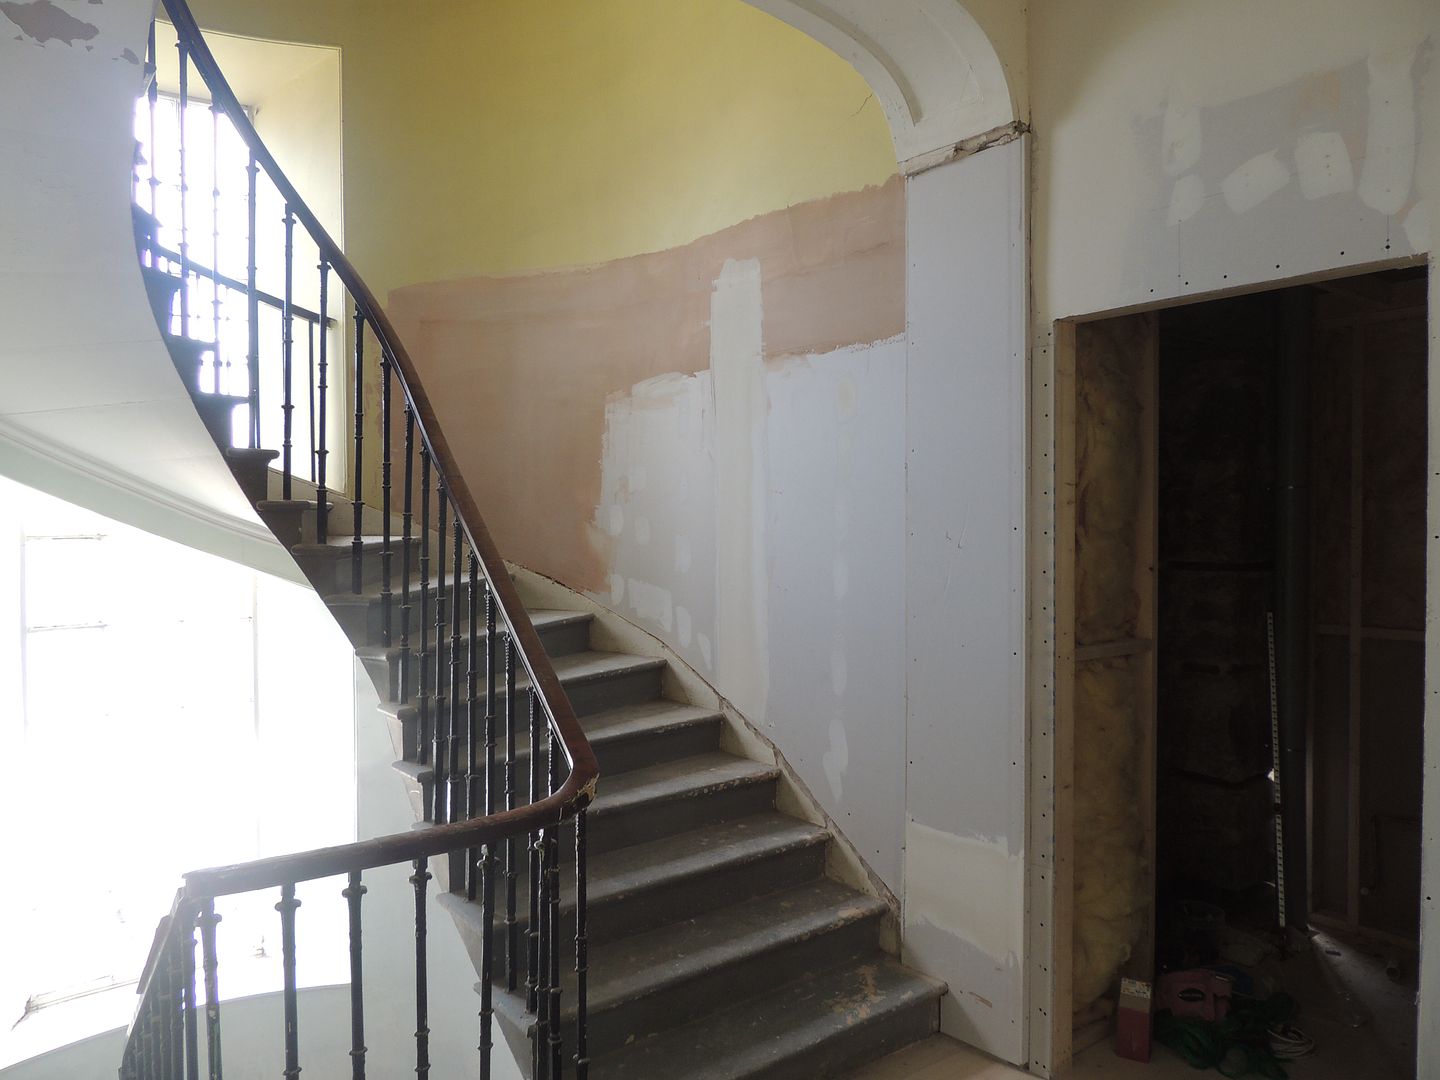
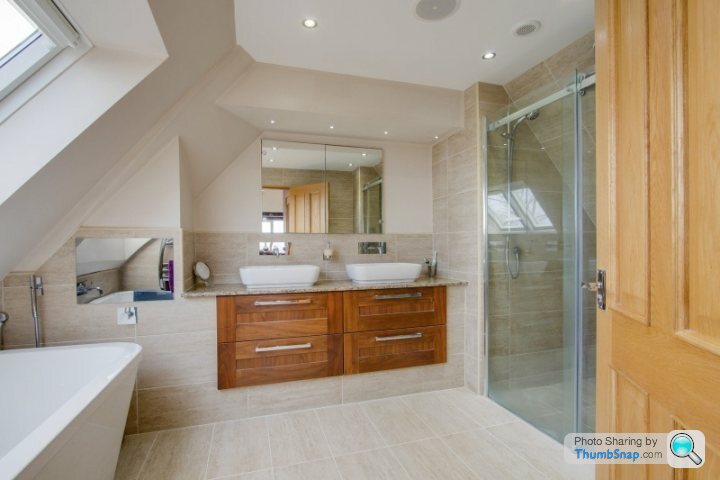
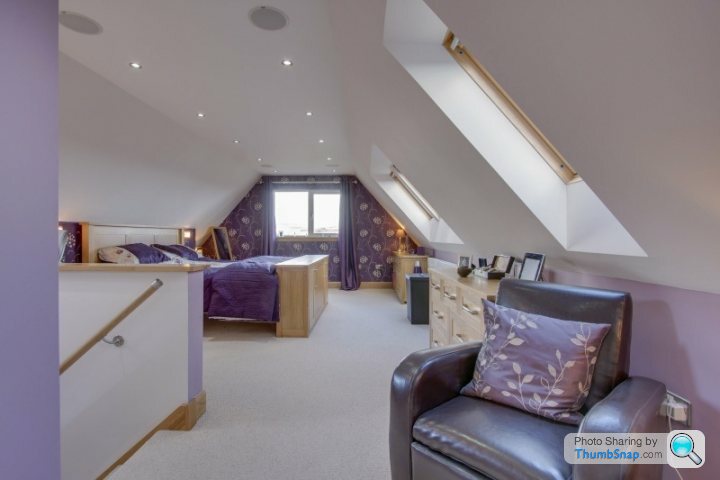
To this, floored, new dividing wall between ensuite and a guest bathroom, created the guest bathroom and rebuilt the wall with the guest bathroom door in which was destroyed by the rot.
 [url]
[url]
Major step forward downstairs! We have a working toilet!!!!
 |http://thumbsnap.com/IjUOyeNH[/url]
And a main hall floor!
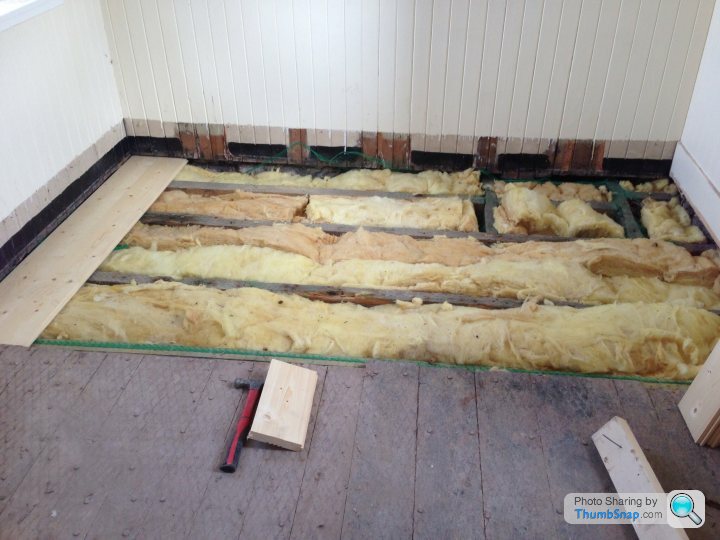
Utility room floor has gone from a draughty hole in the floor to a insulated new floor, you can actually walk on! (Ok, I'm getting overly happy about little things now, it's called house renovation madness!)
To this!
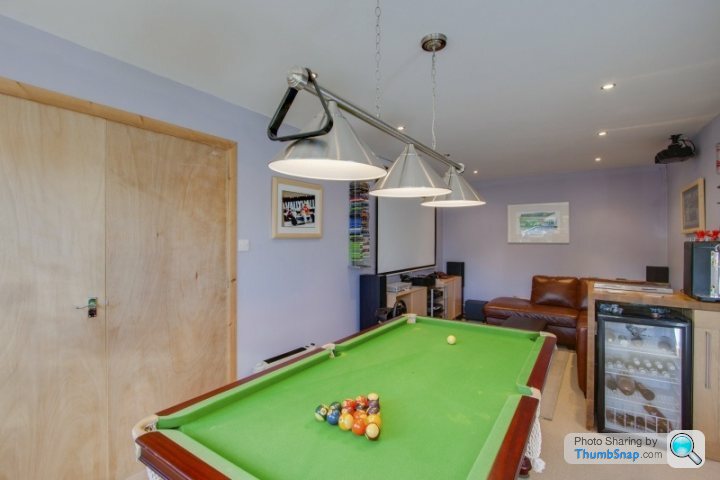
Cleared out the kids tv room ready for work
In the last 5 working days ( 3 days this week and 2 days last week) I've managed to get through 60 sheets of plasterboard, 45 lengths of 4x2 and 4000 plasterboard screws! Bloody knackered, but the upstairs rooms are ready for taping and plastering to start.
Lows? I spent an entire 13 hour day patching old socket holes, damaged walls and general repairs in the second floor, all in lath and plaster walls.. Mind numbing work, and knackering when 40% of then are on the ceiling! and you have to climb up and down the ladder 20 times for each repair.
Highs? Finally being able to walk down the hall without falling down a hole! Being able to have a pee and then FLUSH! Getting the cold water mains live and finally getting an agreement from the Scottish hydro to complete the electricity disconnection, and then reconnection to the new 100amp, 3 phase supply and new fuse board!
edited to add spaces, so all the pictures worked!
Things like putting a floor down in the upstairs hall area, quite sad to do this actually, as was getting used to "walking the plank" everythime I went upstairs! Although I got used to it, pretty much every visitor started shaking with the look of a 7m drop through two floors arrested only by a piece of 22mm chipboard!
So it went from this:
To this, floored, new dividing wall between ensuite and a guest bathroom, created the guest bathroom and rebuilt the wall with the guest bathroom door in which was destroyed by the rot.
[url]Major step forward downstairs! We have a working toilet!!!!
|http://thumbsnap.com/IjUOyeNH[/url]And a main hall floor!
Utility room floor has gone from a draughty hole in the floor to a insulated new floor, you can actually walk on! (Ok, I'm getting overly happy about little things now, it's called house renovation madness!)
To this!
Cleared out the kids tv room ready for work
In the last 5 working days ( 3 days this week and 2 days last week) I've managed to get through 60 sheets of plasterboard, 45 lengths of 4x2 and 4000 plasterboard screws! Bloody knackered, but the upstairs rooms are ready for taping and plastering to start.
Lows? I spent an entire 13 hour day patching old socket holes, damaged walls and general repairs in the second floor, all in lath and plaster walls.. Mind numbing work, and knackering when 40% of then are on the ceiling! and you have to climb up and down the ladder 20 times for each repair.
Highs? Finally being able to walk down the hall without falling down a hole! Being able to have a pee and then FLUSH! Getting the cold water mains live and finally getting an agreement from the Scottish hydro to complete the electricity disconnection, and then reconnection to the new 100amp, 3 phase supply and new fuse board!
edited to add spaces, so all the pictures worked!
Edited by Griff Boy on Tuesday 22 April 16:14
Another step forward managed to get the ceiling finished in the lounge and finally got the walls decorated and wallpapered ready for painting.
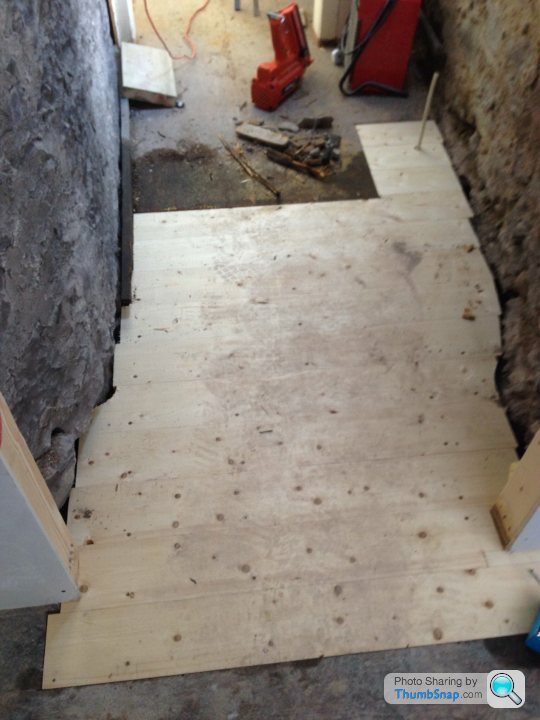
Also, had my first go at building a curved hallway! The entrance to the utility room was one of the worst hit areas by the rot, and the floor, walls and ceiling all had to go, it was an extension done over a 100years ago around the side of the stair tower, hence the curved walls.
It took awhile, but I got there in the end!
New Curved flooring area to replace the damaged area, inc new joists underneath.

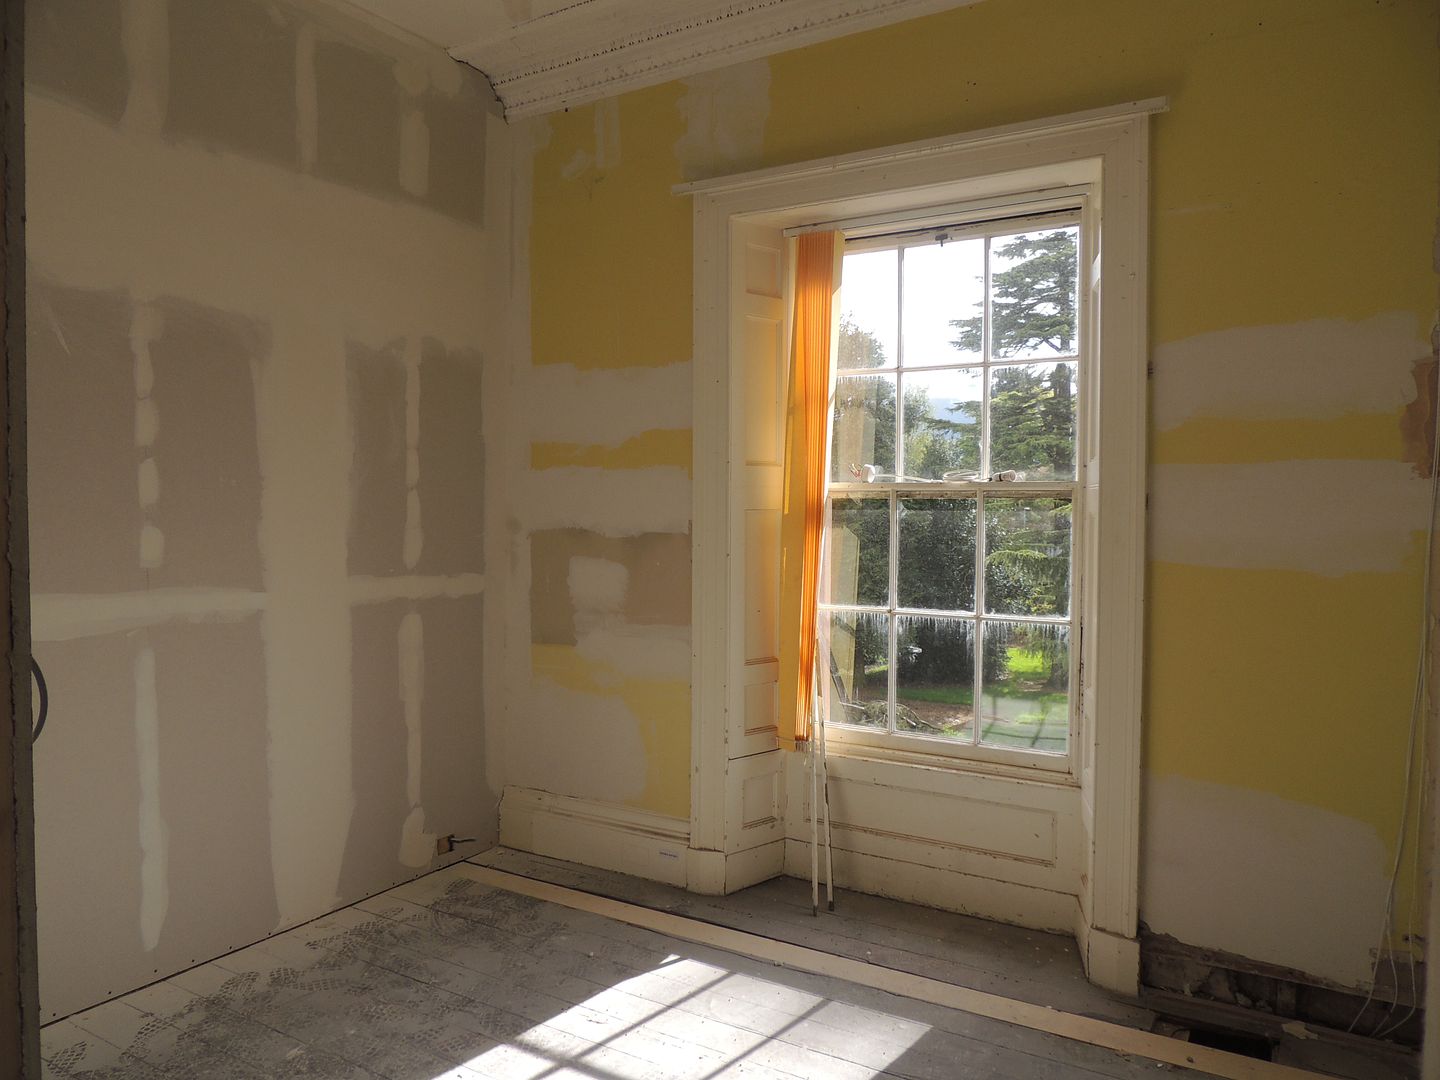
Most of the upstairs bedrooms are coming on fine, all the taping is done and the first coats are on the ceilings, just got to order the replacement skirtings and facings now so I can get the rooms ready for the sparkys final fix.
Also, finally got a date from the Scottish Hydro for the change of the incoming mains cables, which means I can get going on the plans for the new sub mains and the three new 3 phase fuse boards going in (one per floor)
Ordered the 7 rads for the kitchen and lounge now too, so should be able to get those fixed shortly, definitely making progress!
Also, had my first go at building a curved hallway! The entrance to the utility room was one of the worst hit areas by the rot, and the floor, walls and ceiling all had to go, it was an extension done over a 100years ago around the side of the stair tower, hence the curved walls.
It took awhile, but I got there in the end!
New Curved flooring area to replace the damaged area, inc new joists underneath.
Most of the upstairs bedrooms are coming on fine, all the taping is done and the first coats are on the ceilings, just got to order the replacement skirtings and facings now so I can get the rooms ready for the sparkys final fix.
Also, finally got a date from the Scottish Hydro for the change of the incoming mains cables, which means I can get going on the plans for the new sub mains and the three new 3 phase fuse boards going in (one per floor)
Ordered the 7 rads for the kitchen and lounge now too, so should be able to get those fixed shortly, definitely making progress!
eliot said:
Re. 3 phase - according to my mate (unconfirmed) they take his highest reading phase and use that for billing purposes ignoring the other two. If this is true, it means if you are pulling a regular heavy load - say in the kitchen, you end up paying the highest figure across all of your phases - even though your 2nd floor will be pulling nothing for example.
As I said, this is according to my mate with 3 phase. I've not been able to confirm it on the web etc. So its worth asking your provider to check either way (and let me know the outcome!)
Regardless of billing, I assume you know you need to balance the loads across phases regardless - which may not be as simple as a phase per floor.
Good question, one I don't know just now, but I'll find out ASAP.As I said, this is according to my mate with 3 phase. I've not been able to confirm it on the web etc. So its worth asking your provider to check either way (and let me know the outcome!)
Regardless of billing, I assume you know you need to balance the loads across phases regardless - which may not be as simple as a phase per floor.
We are bringing in a 100amp 69kva 3 phase supply to the house, and then each board will be split into three phases, in order to cope with the load on each floor, i.e. the bedroom floor has two 10.5KW electric showers in, so the 3 phases going to that floor will be split, so each shower runs off a separate phase. On the first floor there are 2 x pyro lyric ovens, and a 900mm induction hob, so again, we will split the load across the 3 phases. Downstairs will also have another separate sub mains board, along with the main incoming 3 phase switch. Which will be set up to supply the ground floor showers and such. Hot water will be initially 1 x 300 litre s/steel indirect tank, with provision set up for another one beside it if needs demand. Hot water control system will allow me to heat one tank only or both tanks if required. This is all future proofing for the final decision on the ground floor layout / contents.
My sparkys gone through all the loading a per floor and has done all the calculations for me, including the problem of the losses due to the cable lengths from sub mains to floor fuse boards.
NH1 said:
I would imagine they will just fit a poly phase meter to take care of the billing. I'm sure youe electrician already knows but try not to end up with 2 different phases next to each other say in adjoining switches etc, eg a halway swith that does a different circuit upstairs.
On a side note, why have you put the sockets back in the skirting board? I'm not suggesting they sould go at new build height (450mm) but they generally tend to get lifted above to protect them from damage from thing like the vacuum cleaner or Dr. Martins.
On a side note, why have you put the sockets back in the skirting board? I'm not suggesting they sould go at new build height (450mm) but they generally tend to get lifted above to protect them from damage from thing like the vacuum cleaner or Dr. Martins.
league67 said:
You can say that again.
AAARRRRGGGHHHH - Bloody Iphones!What i was trying to say was:
It's a good point about mixing the boards / circuits up on each floor, and yep, we've discussed it and planned for it!
Ref the sockets, the skirting are 230mm high so the socket sits well up off the floor. The main reason was to avoid having to try to cut 100's of sockets into lath and plaster walls. a) the walls fall apart at the slightest glance, and b) the boxes pull loose eventually in l&p when you take the plugs in and out a lot. The only other way to guarantee the finish was to cut out a patch of L&P and plasterboard at every socket point. So that's the idea behind it!
richtea78 said:
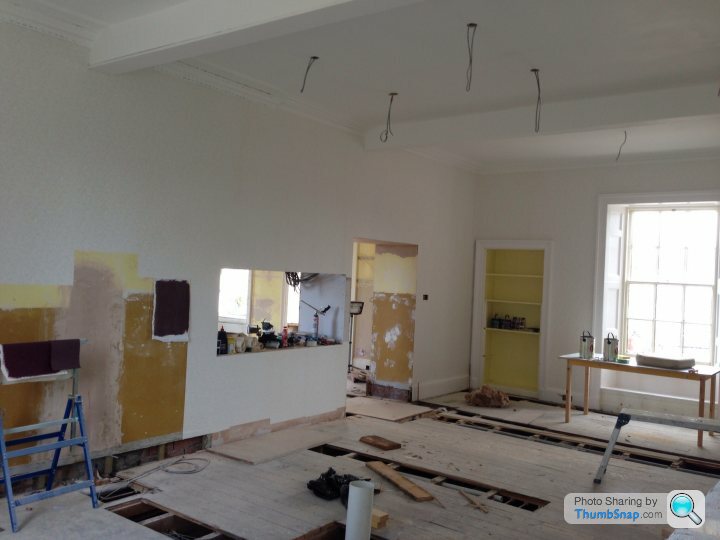
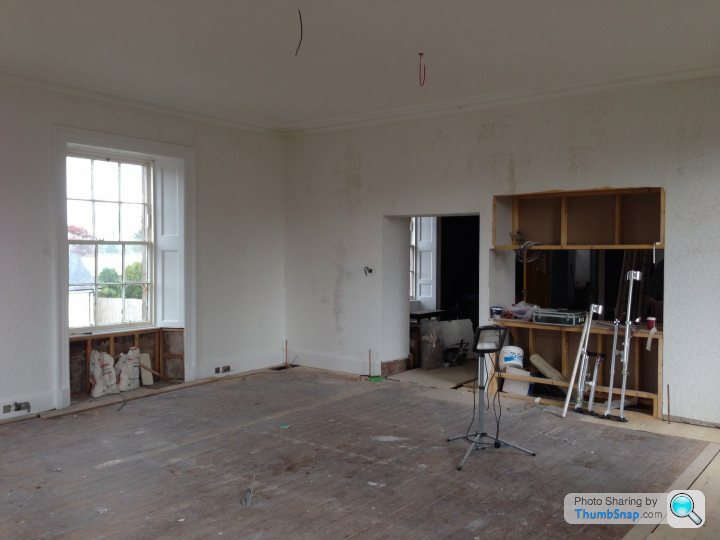
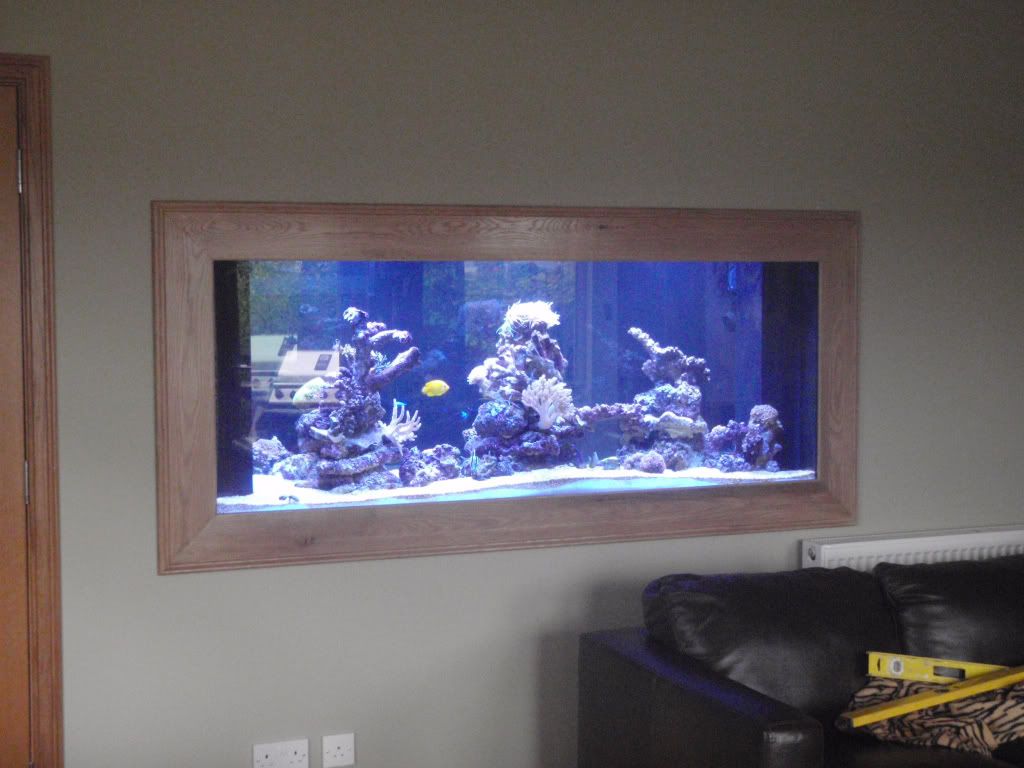
What's going in the wall between the rooms? A fish tank?
Yep, good guess. It's going to be a marine tank, about 1200litres capacity. 1.8m long x 750mm high. Connected down to a sump room in the ground floor where all the filters, reactors etc will sit.It'll be the big brother of my existing tank in my current house, and all the fish will be moved to the new one.
Existing tank:
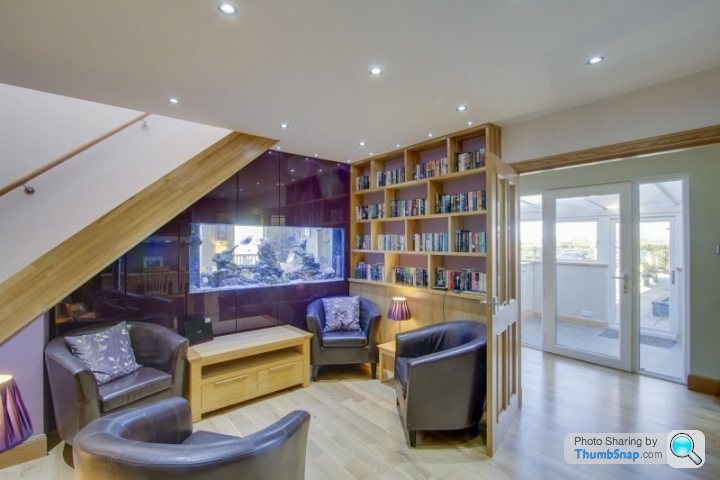

Other side, which is kinda what you'll see from the kitchen side.


Wetwipe said:
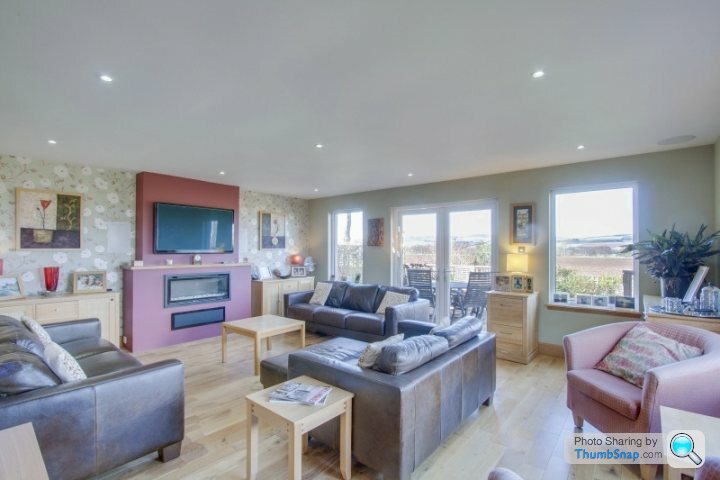
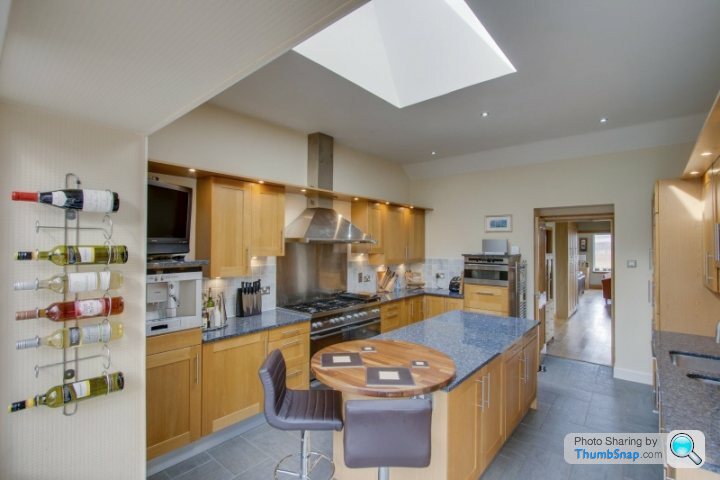
Your current place looks lovely but a little "cramped" in comparison to the floor acreage to have in the new house.
Have a suspicion that Once your furniture has been moved in the house will still look empty!
Lol, true, I'll definitely need to increase the amount of furniture! Of course I didn't show you the picture of the rest of the house and living space, existing house is approx 350m2 so not exactly small, but it does feel a bit compact compared to the 850m2! To be honest, most houses would! Have a suspicion that Once your furniture has been moved in the house will still look empty!

Quick update, decided to spend some time on Sunday doing some precise restoration work, something I enjoy doing a lot, certainly more than stud walling and plasterboarding! Another reason was that I formed the 1st floor wc on Saturday, set in the new entrance wall to it and fitted a false ceiling at 2950mm high (original is 3500mm high) and managed to twist my back a bit plasterboarding the ceiling by trying to lift a full sheet in place on my own......not a clever idea!
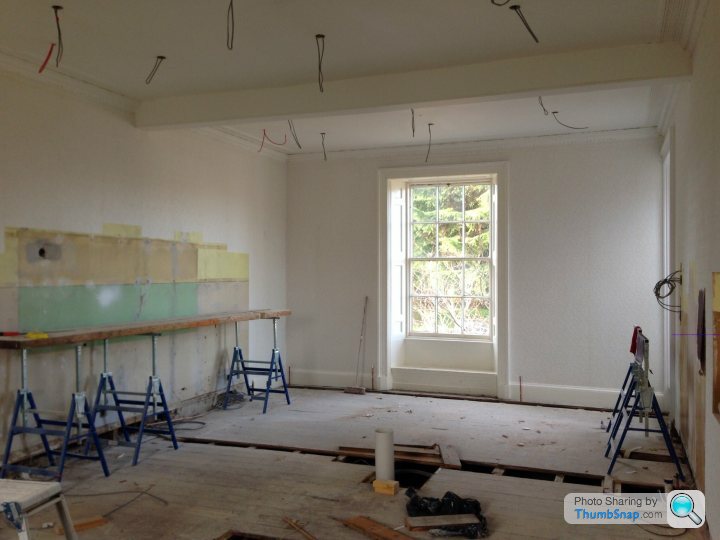
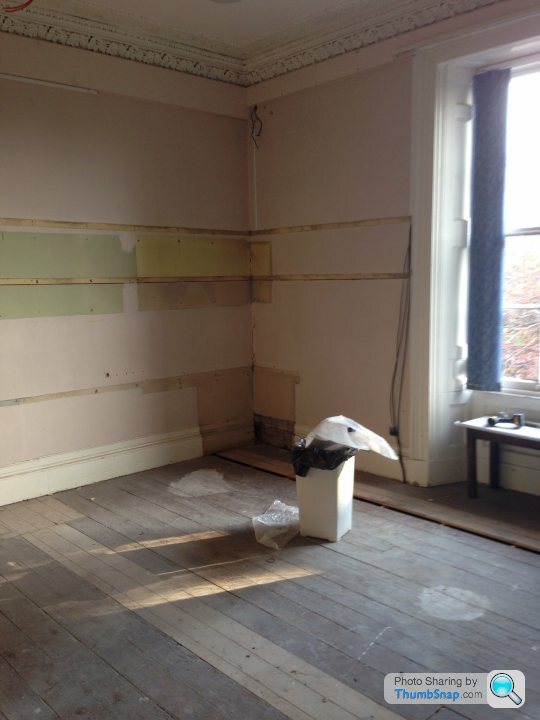
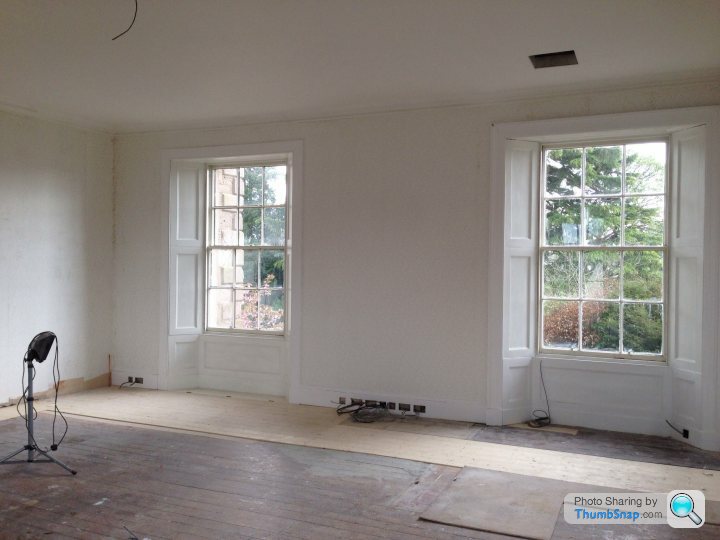
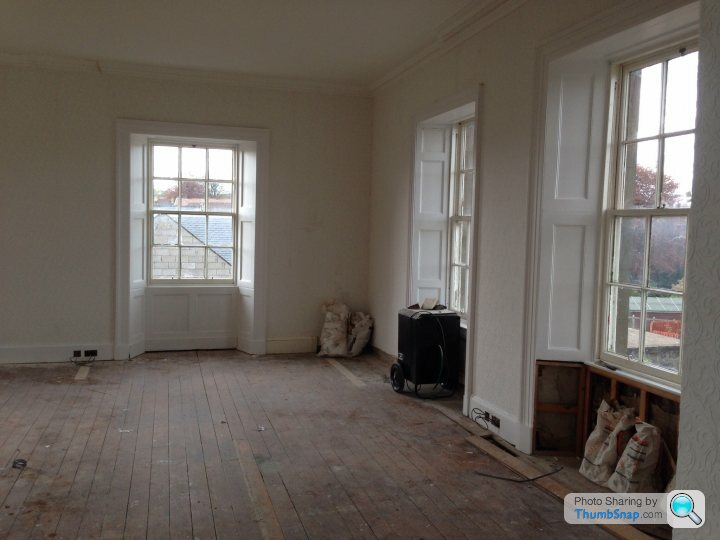
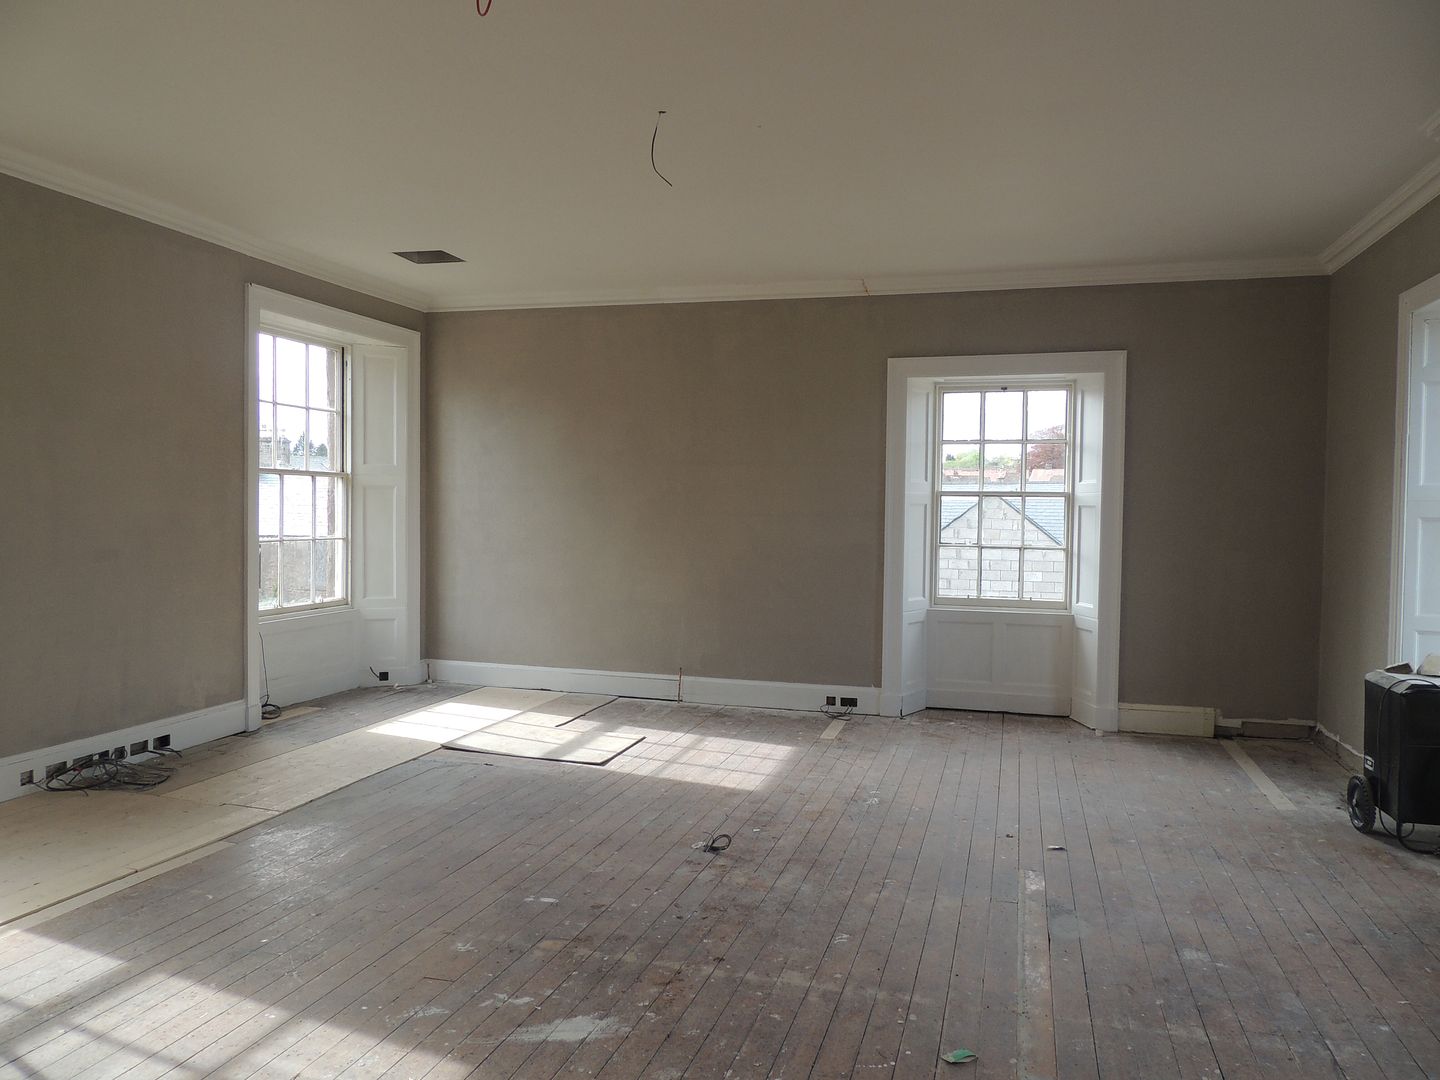
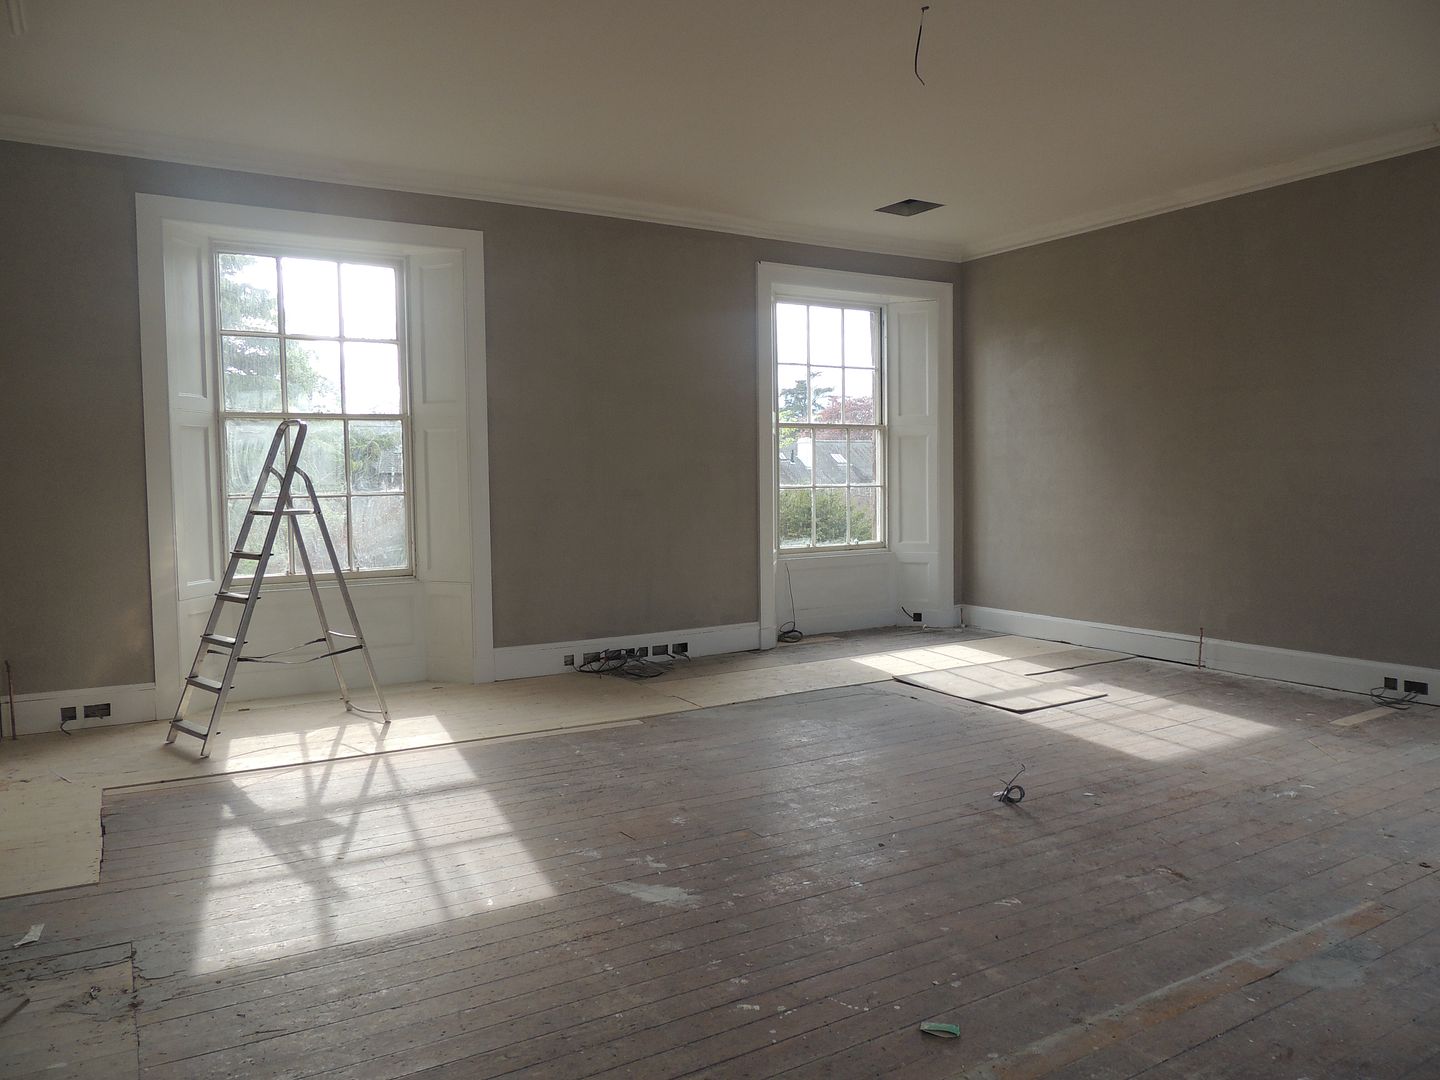
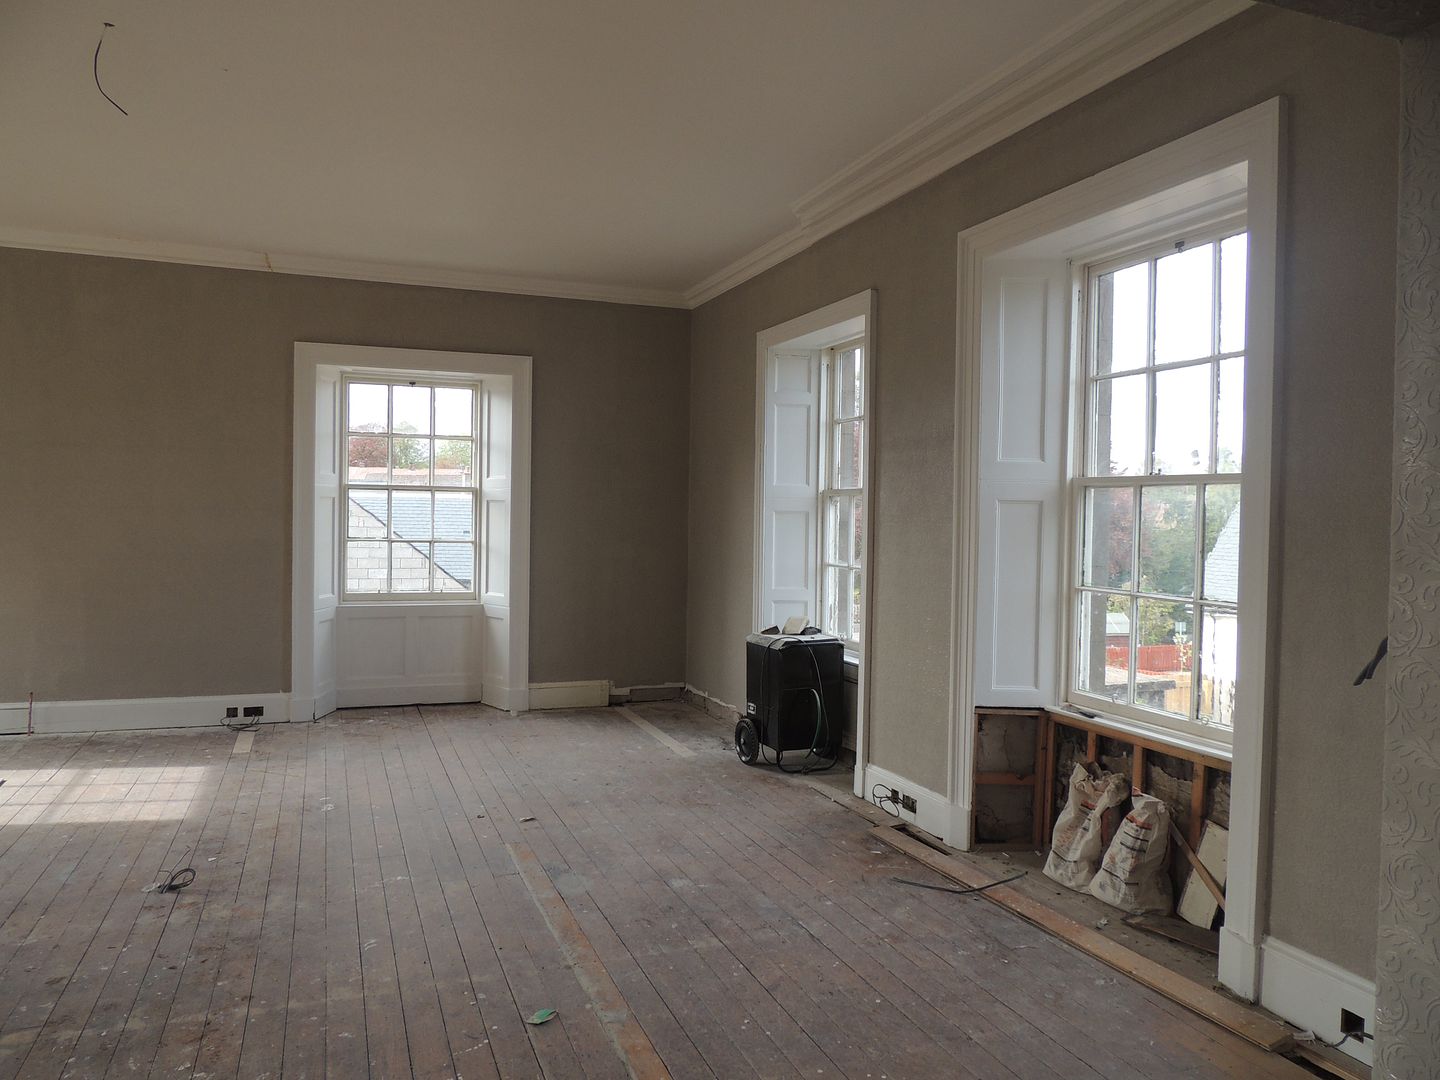
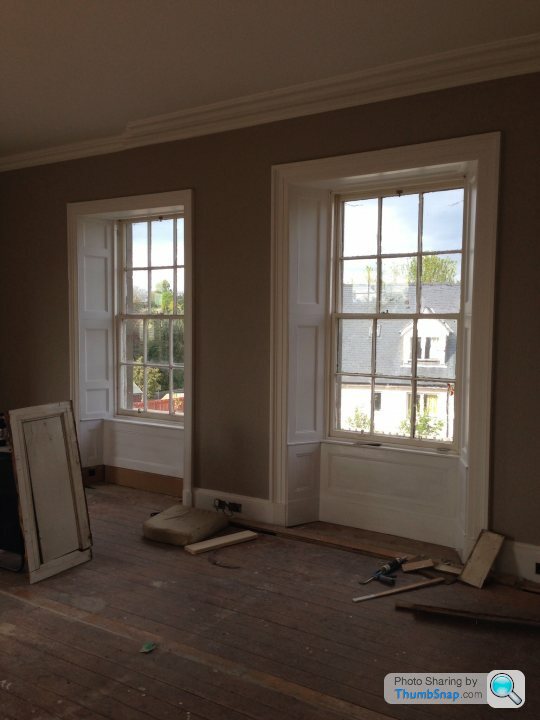
So Sunday I made the dining room into a quick workshop, with my chop saw, table saw and router table, and decided to tackle making the replacement window panels for the lounge. As you may know from past ramblings, the lounge has 5 big windows (2.2mx3.2m) 4 of which had original facings, shutters and lower panels in place, one was completely bare (I've not a clue why!) unfortunately the bottom panel of the original window was completely shot, and although I managed to reclaim some panels to form the bare window, again the base sections were unusable! So replacement panel time. It was quite good fun and a nice change to all the other work I've been doing!
Windows before
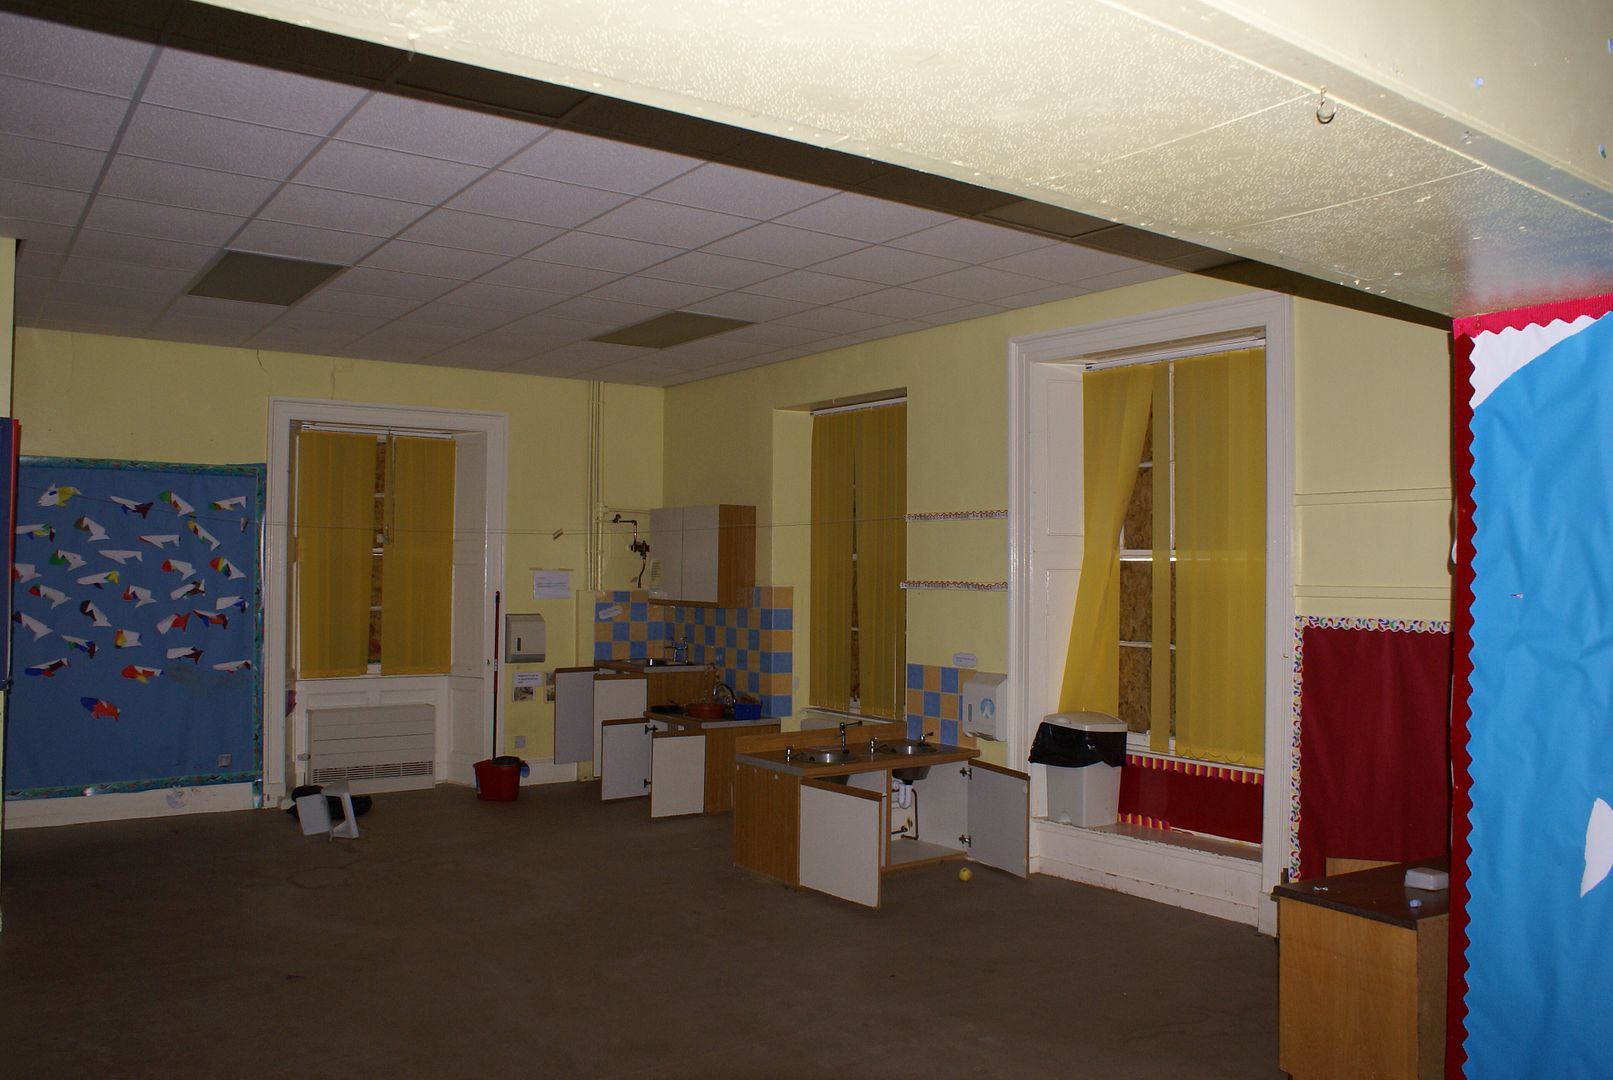
You can see the left hand window has no panels, trims facings etc at all, and the right hand one as butchered by the council!
I'd already managed to form the outer framework and also recover some panels from another window downstairs, but both bottom sections needed doing.
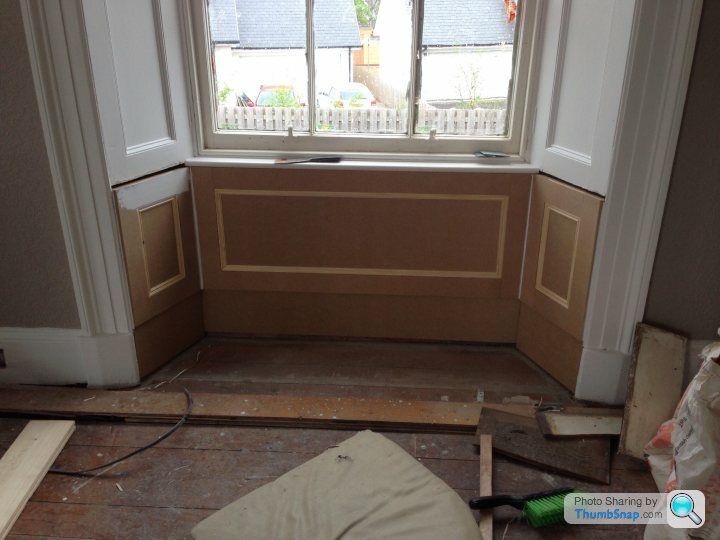
So I formed up the fielded panels in MDF, and used a very close bead to match the other profiles, a small v groove was put in to the panel frames to shown the joints in the MDF to match the existing panels
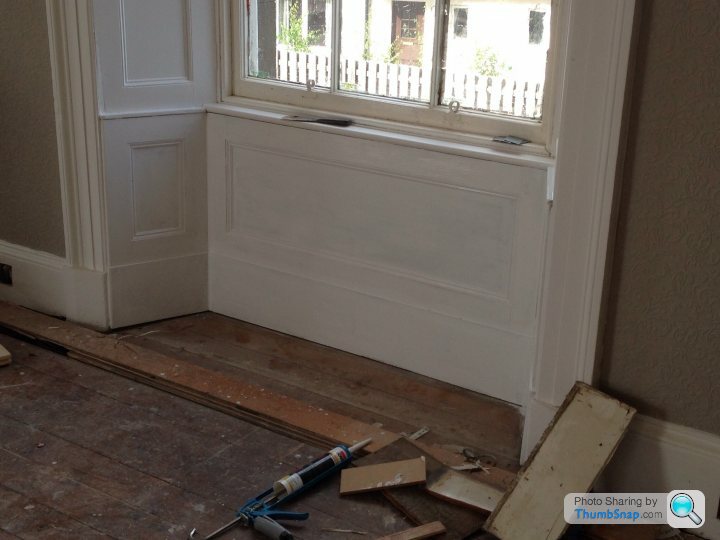
And then under coated ready for final painting!
So Sunday I made the dining room into a quick workshop, with my chop saw, table saw and router table, and decided to tackle making the replacement window panels for the lounge. As you may know from past ramblings, the lounge has 5 big windows (2.2mx3.2m) 4 of which had original facings, shutters and lower panels in place, one was completely bare (I've not a clue why!) unfortunately the bottom panel of the original window was completely shot, and although I managed to reclaim some panels to form the bare window, again the base sections were unusable! So replacement panel time. It was quite good fun and a nice change to all the other work I've been doing!
Windows before
You can see the left hand window has no panels, trims facings etc at all, and the right hand one as butchered by the council!
I'd already managed to form the outer framework and also recover some panels from another window downstairs, but both bottom sections needed doing.
So I formed up the fielded panels in MDF, and used a very close bead to match the other profiles, a small v groove was put in to the panel frames to shown the joints in the MDF to match the existing panels
And then under coated ready for final painting!
Gassing Station | Homes, Gardens and DIY | Top of Page | What's New | My Stuff