Brand new house built in 12 weeks
Discussion


So after spending the weekend figuring out where everything would be plumbed and where sockets, TV and what my fully integrated AV design would look like, instructions were passed to the trades team.
The plumbing is a modern method with minimal (expensive) copper which in theory, will mean less chance of leaks. Most of the plumbing joins are in easily accessed areas (ie, above floor level)
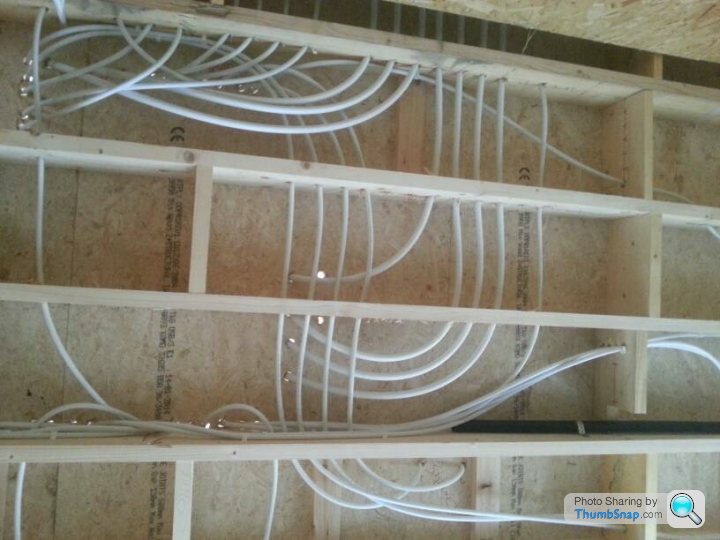
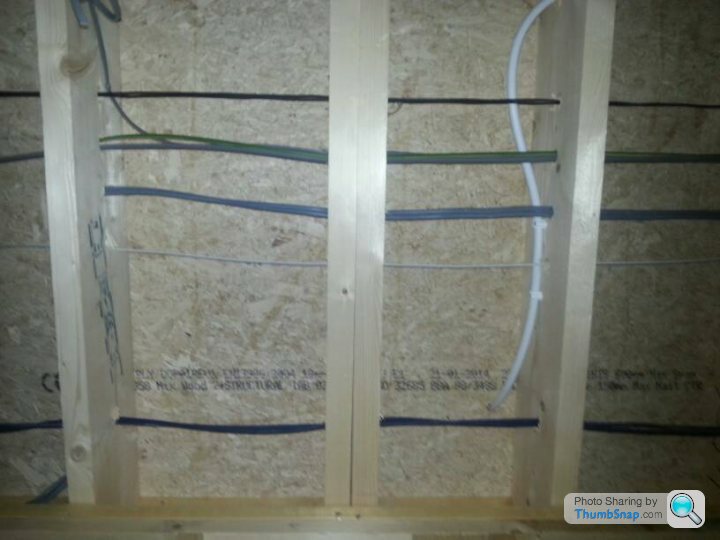
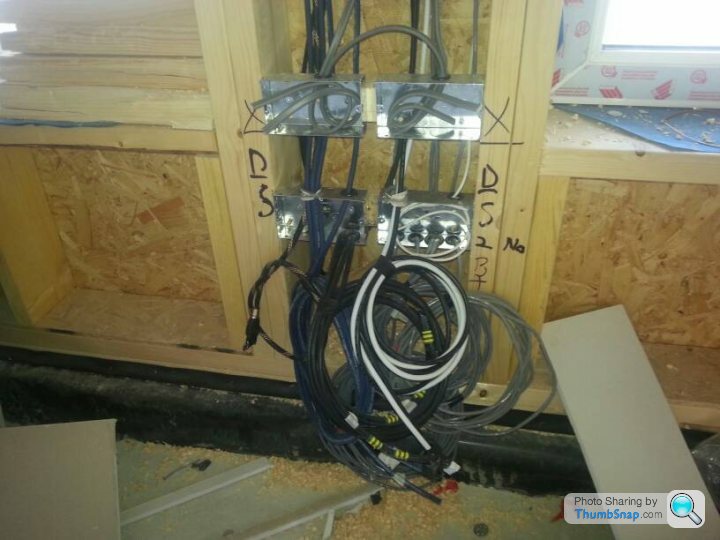
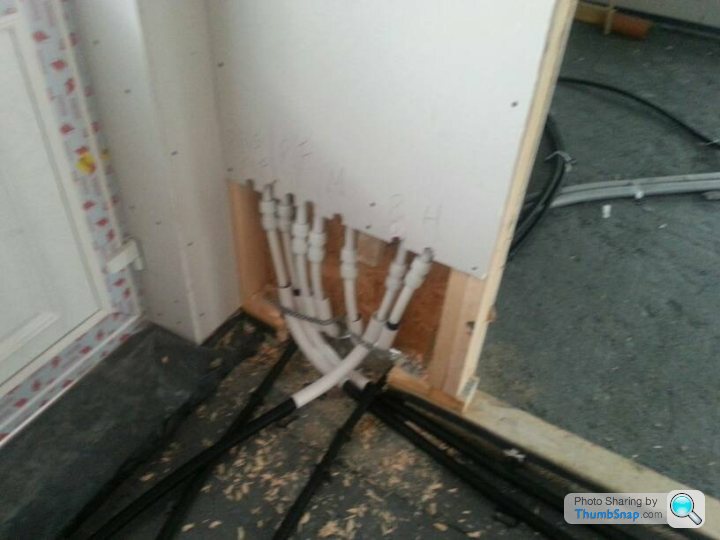
Speaker cable, hdmi, cat6, co-ax, 12v trigger cable all kept away from the mains electric feed to ensure no signal interference
Electrician was like 'are you sure you need all this!?!
Oh yes!
The plumbing is a modern method with minimal (expensive) copper which in theory, will mean less chance of leaks. Most of the plumbing joins are in easily accessed areas (ie, above floor level)
Speaker cable, hdmi, cat6, co-ax, 12v trigger cable all kept away from the mains electric feed to ensure no signal interference
Electrician was like 'are you sure you need all this!?!
Oh yes!
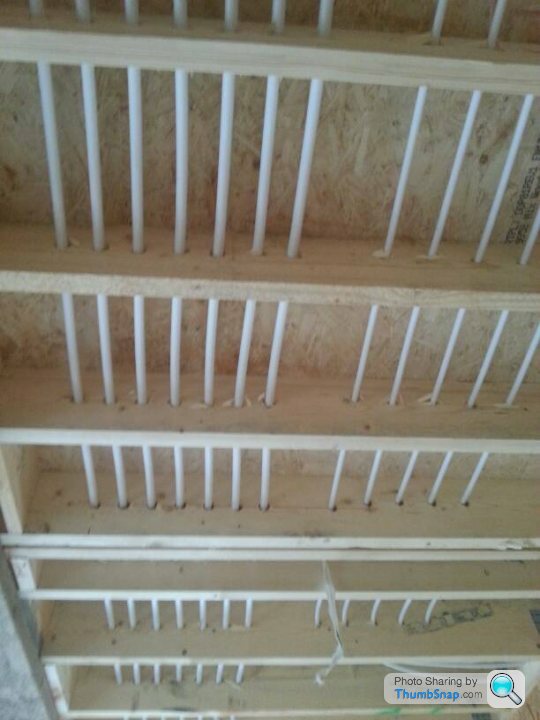
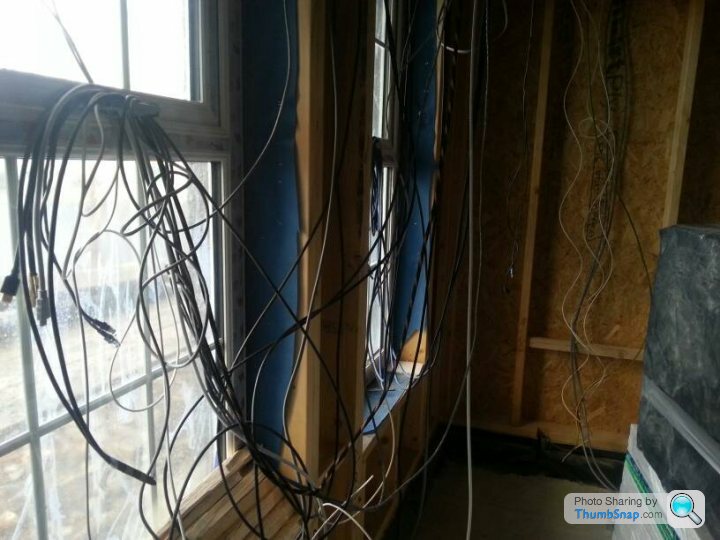
And very quickly we moved towards 2nd fix electrics...
This is the main hub in the cinema room, 2 double sockets and a further 2 brush plates where the AV cabling would channel through.
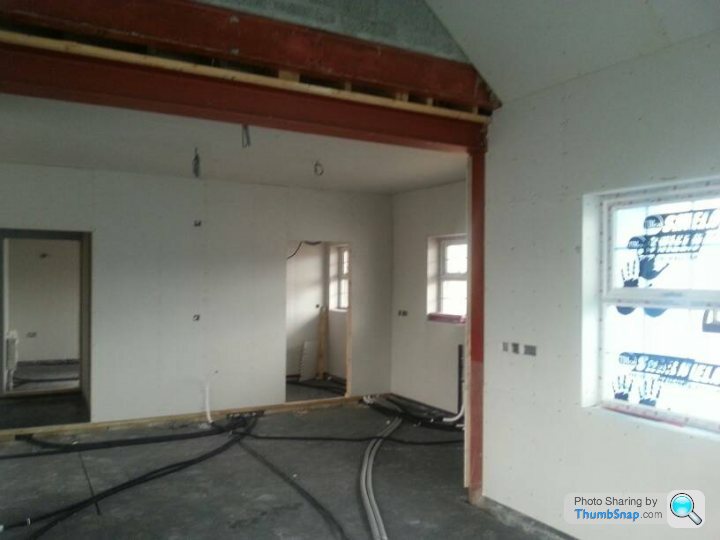
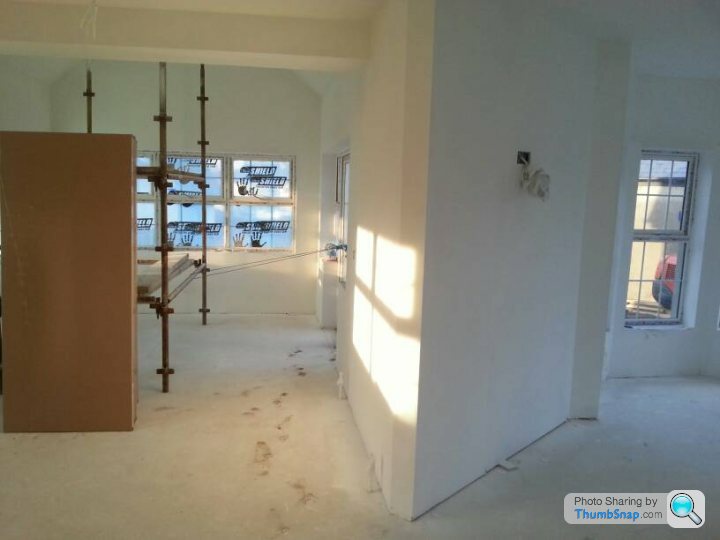
It's a this point where you will start to see our thoughts on design. This pic is the angled wall for the stove to go in the lounge, which also acts as a part partition between the kitchen. This defines the lounge as its own space, despite it also being open plan into the kitchen.
You'll also maybe spot the lighting choices too, where we have pendants and where we have spotlights. A lot of thought went into lighting and you'll see more of this later.
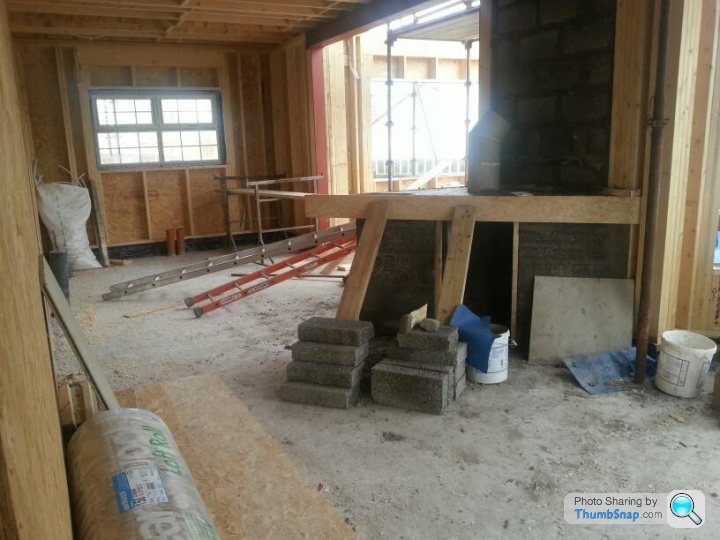
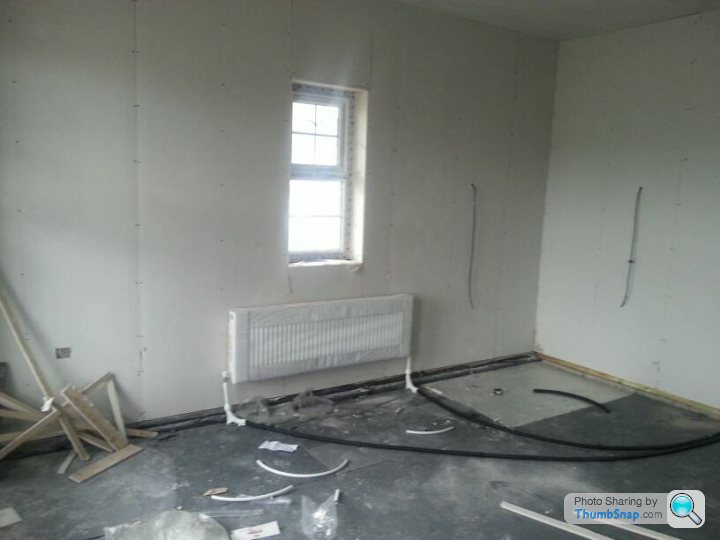
And stove wall built. Its also where the TV will go so and as you can see, I've already channelled in speaker cable for the sound system along with hdmi, co ax and cat 6 cabling.
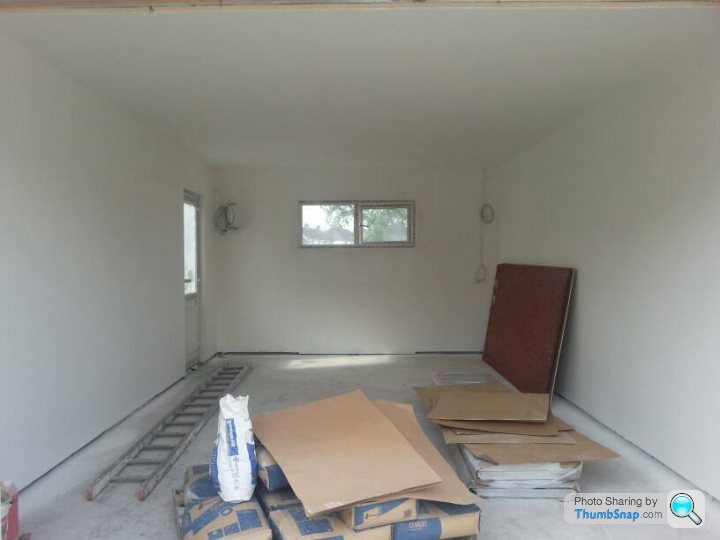
And while all this electrics and plumbing was going in, they were also getting the dry lining up. The speed of all this work happening at once was a bit overwhelming at times. What if I change my mind about something, it's all happening so fast, is what I was thinking to myself.
This is the main hub in the cinema room, 2 double sockets and a further 2 brush plates where the AV cabling would channel through.
It's a this point where you will start to see our thoughts on design. This pic is the angled wall for the stove to go in the lounge, which also acts as a part partition between the kitchen. This defines the lounge as its own space, despite it also being open plan into the kitchen.
You'll also maybe spot the lighting choices too, where we have pendants and where we have spotlights. A lot of thought went into lighting and you'll see more of this later.
And stove wall built. Its also where the TV will go so and as you can see, I've already channelled in speaker cable for the sound system along with hdmi, co ax and cat 6 cabling.
And while all this electrics and plumbing was going in, they were also getting the dry lining up. The speed of all this work happening at once was a bit overwhelming at times. What if I change my mind about something, it's all happening so fast, is what I was thinking to myself.
Week 5 now
This week, they did the downstairs dry lining, plumbed radiators, did all the downstairs insulation and started to do the upstairs towards the end of the week. On the outside, block work was prepared for rendering too.


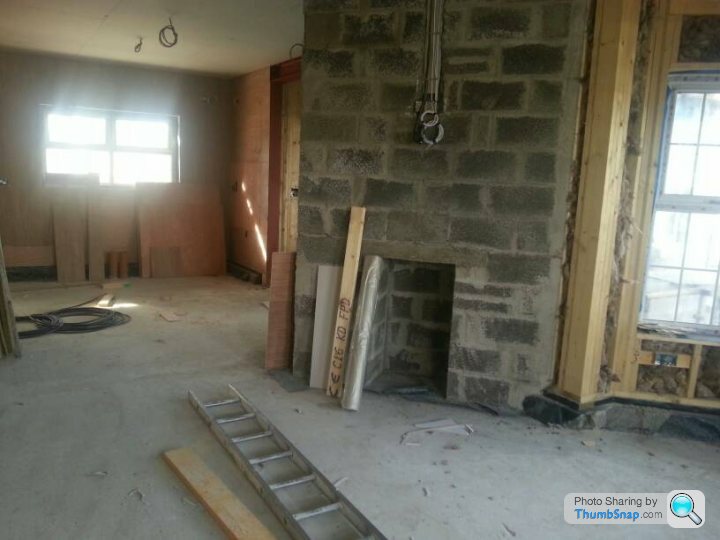
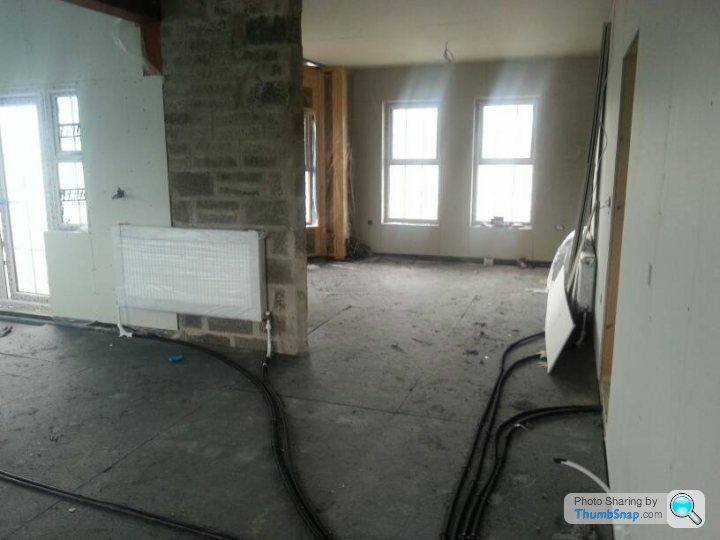
This is the sunroom looking into kitchen. Like the lounge, it has a feature to define it as it's own space while still being open plan to kitchen - in this case, it's the vaulted ceiling which defines it's own space.
Kitchen looking into lounge
Meanwhile, outside work going on...

This week, they did the downstairs dry lining, plumbed radiators, did all the downstairs insulation and started to do the upstairs towards the end of the week. On the outside, block work was prepared for rendering too.
This is the sunroom looking into kitchen. Like the lounge, it has a feature to define it as it's own space while still being open plan to kitchen - in this case, it's the vaulted ceiling which defines it's own space.
Kitchen looking into lounge
Meanwhile, outside work going on...
Muncher said:
Looks good, why didn't you go for underfloor heating?
Its a good question. Not sure if there is a thread on here or not but something like underfloor heating would be a good separate thread as there are pro's and con's.I like the idea of no visible radiators taking up space, thats a key benefit, along with nice warm floors when using tiles.
For us, we decided with radiators for a few reasons.
The main one was because of the time we actually spend in the house. Having the heating running when we are not there seems like a bit of a waste. The benefit of radiators is that they warm the house quickly. With our house being timber frame construction, in the winter, we can go from cold to warm in 10 or 15 mins. You can't do this with underfloor heating - especially if you want your house to go into 'sauna mode' - ie, the missus knocks it up to 30 sometimes where I'm literally sweating when wearing a tee shirt.
My sister got a high end underfloor system in her house a year or so before we built ours and she said that she missed the ability to get a nice 'high temperature' in the winter - aka - 'sauna mode'. In the end, she had to install a stove in her kitchen/dining/lounge open plan area so that she could get that 'toasty warm' feeling.
We run our heating timed around when we are in and out and our lives are pretty structured time wise, so we only spend oil money when we actually need it, and we get the benefit of having the heat exactly when we need it -ie, coming in from work and the house will have just been heated to the required temperature.
We don't use the dining room very often so, take that out, we're looking at heating around 2000sqft of house with higher ceiling for about 1200 litres per annum. I don’t know how that would compare to underfloor heating to be fair as I’m not well versed in it at all, but our bills are low enough for us to think it was the right decision for us. There may be other benefits to under floor heating that I'm not aware of, as I know its a very popular choice these days.
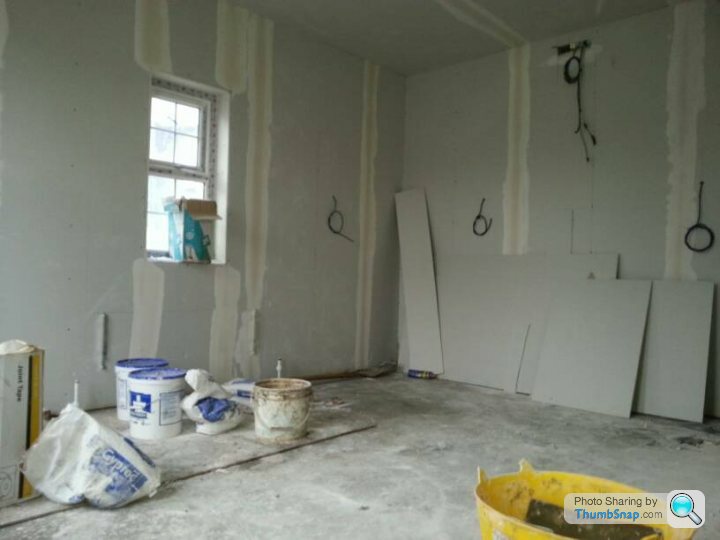
So the dry lining continued, pretty straightforward. With the 9ft ceilings, very little difference in price between 8ft and 9ft boards and as I mentioned earlier, an easy way to give a more spacious feel for very little money.
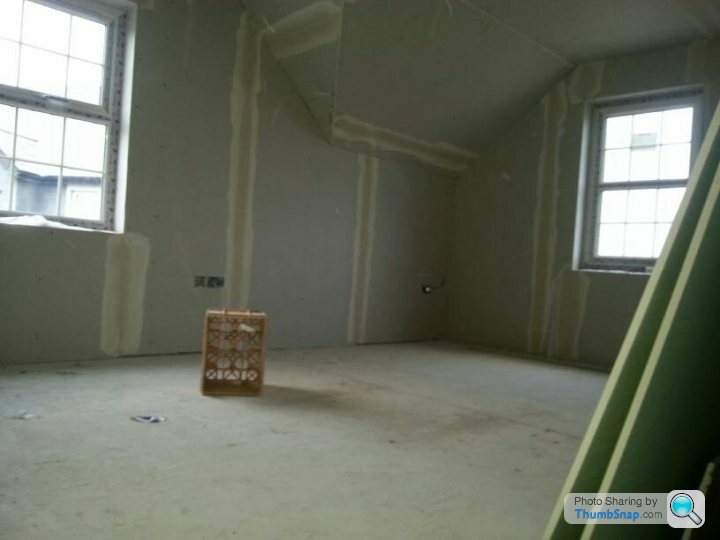
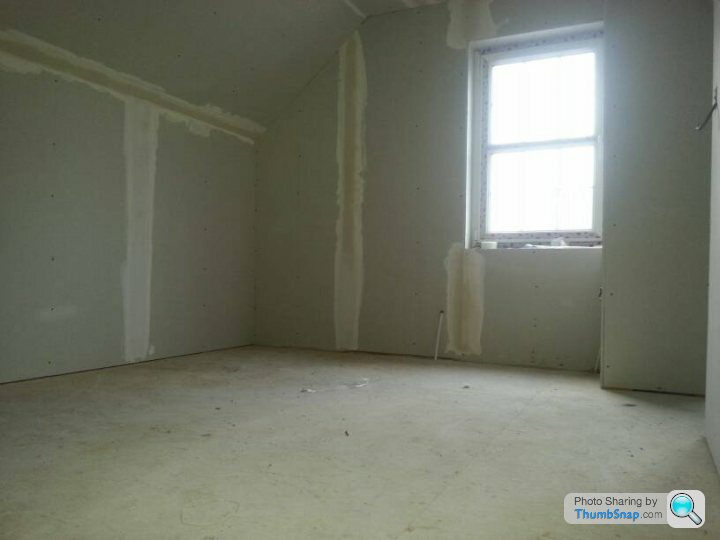
And the upstairs was next. Master bedroom. You can see where the 2 roof pitches combine in the corner, a bit weird looking, but necessary.
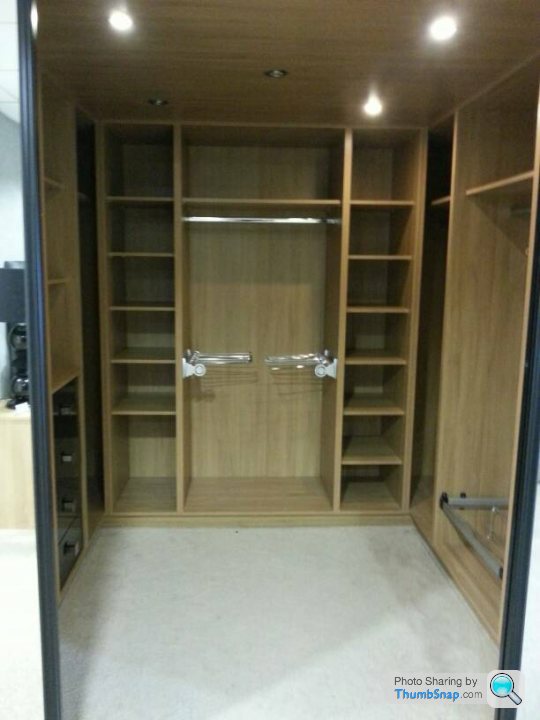
The master leads to our ensuite which then leads to the dressing room. This can also easily be converted to a small bedroom, circa 10ft X 12ft, but as we didn't need another bedroom, made sense to do the dressing room. It's very spacious feeling for a dressing room.
Not forgetting the speed of building the house, we had to be equally quick in fitting it out with kitchen, bathroom etc... A lot of shopping was taking place too.
While at the kitchen showroom, they had a bedroom showroom too. The missus wanted this from the showroom at about £4 or £5k. Considering our sloping ceilings in pic above and the actual size of our dressing room, we may have been looking at £7 or £8k to fit it out. I talked her into letting me build one instead (more on that later on....)
We had spent a hefty part of our budget that week already and the missus is a salespersons dream. Always migrates to the really expensive items which is why I drew a line through the fitted dressing room idea. We would have ran out of money for other stuff if I gave her free reign!
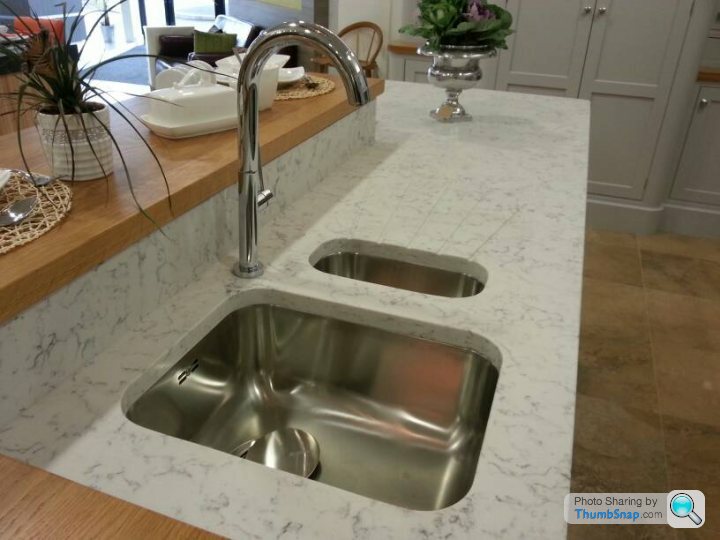
This below was the nicest kitchen surface in the showroom, Matt finish quartz. She wanted. She got. But, in fairness, she has great taste and 3 years later, I still love her choices.
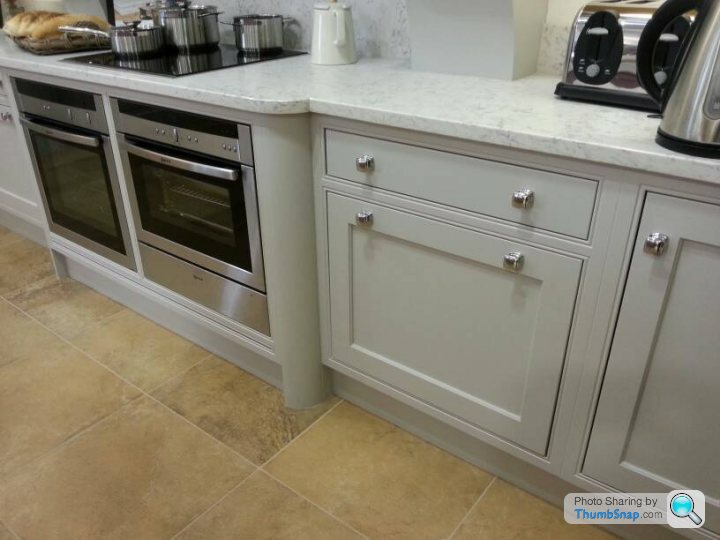
This surface matched really well with these cabinets, so we went for something quite similar, painted exactly the same colour, but a more shaker style.
The bathroom showroom was more of the same. We picked all the stuff online and went to go buy it. Sone great quality items on a summer sale.
As soon as we walked into the showroom, she changed her mind and upgraded to more high end stuff which basically meant we spent twice as much as we had agreed. We were only in about 30 mins and she knocked our budget out of the park before I could blink!
Bath alone was about a grand I think
And then of course, with the 'no tap' slim edge design, we had to buy a more expensive tap too
Then onto showers. At least I got my rain shower and due to the high pressure water system in the house, I knew it would work a treat.
Both showers were going to have these panels, although in different colours and textures than the pic here. We also bought this shower door, good heavy, sturdy doors.
Carpet order was in too...I wanted a deep pile for the master and dressing room as I love the feel of it on bare feet.

Meanwhile.......back at the ranch....
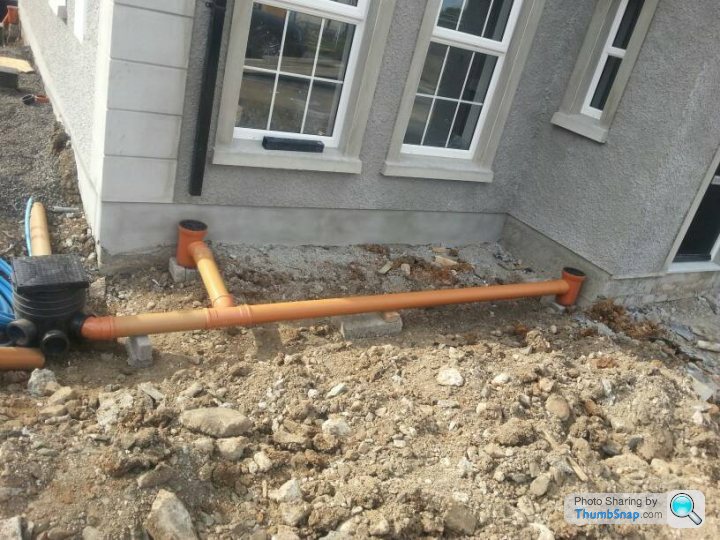
Groundworks are underway.
Inside team, exterior team, and my missus, the one man band shopping junkie, all blasting away at full pace. This was all within a couple of weeks, moving from a house 'skin' to 'finishing line'
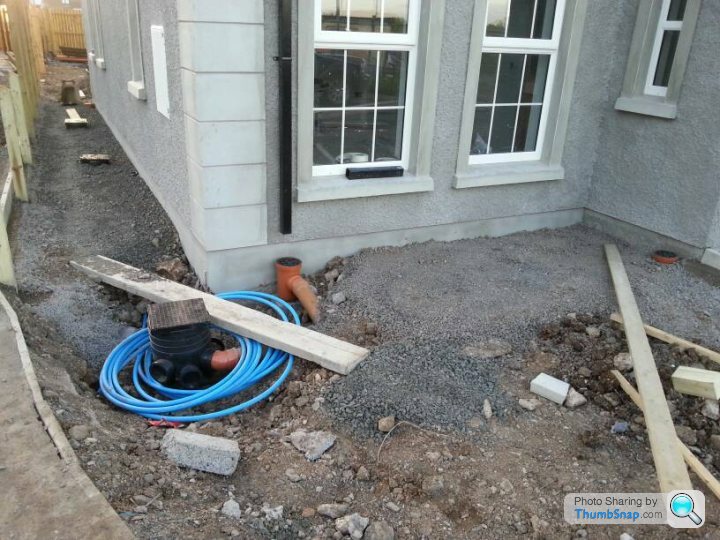
Prepping for paving..
And the upstairs was next. Master bedroom. You can see where the 2 roof pitches combine in the corner, a bit weird looking, but necessary.
The master leads to our ensuite which then leads to the dressing room. This can also easily be converted to a small bedroom, circa 10ft X 12ft, but as we didn't need another bedroom, made sense to do the dressing room. It's very spacious feeling for a dressing room.
Not forgetting the speed of building the house, we had to be equally quick in fitting it out with kitchen, bathroom etc... A lot of shopping was taking place too.
While at the kitchen showroom, they had a bedroom showroom too. The missus wanted this from the showroom at about £4 or £5k. Considering our sloping ceilings in pic above and the actual size of our dressing room, we may have been looking at £7 or £8k to fit it out. I talked her into letting me build one instead (more on that later on....)
We had spent a hefty part of our budget that week already and the missus is a salespersons dream. Always migrates to the really expensive items which is why I drew a line through the fitted dressing room idea. We would have ran out of money for other stuff if I gave her free reign!
This below was the nicest kitchen surface in the showroom, Matt finish quartz. She wanted. She got. But, in fairness, she has great taste and 3 years later, I still love her choices.
This surface matched really well with these cabinets, so we went for something quite similar, painted exactly the same colour, but a more shaker style.
The bathroom showroom was more of the same. We picked all the stuff online and went to go buy it. Sone great quality items on a summer sale.
As soon as we walked into the showroom, she changed her mind and upgraded to more high end stuff which basically meant we spent twice as much as we had agreed. We were only in about 30 mins and she knocked our budget out of the park before I could blink!
Bath alone was about a grand I think
And then of course, with the 'no tap' slim edge design, we had to buy a more expensive tap too
Then onto showers. At least I got my rain shower and due to the high pressure water system in the house, I knew it would work a treat.
Both showers were going to have these panels, although in different colours and textures than the pic here. We also bought this shower door, good heavy, sturdy doors.
Carpet order was in too...I wanted a deep pile for the master and dressing room as I love the feel of it on bare feet.
Meanwhile.......back at the ranch....
Groundworks are underway.
Inside team, exterior team, and my missus, the one man band shopping junkie, all blasting away at full pace. This was all within a couple of weeks, moving from a house 'skin' to 'finishing line'
Prepping for paving..
Choices to be made on exterior too. A neighbour had this...
So we shamelessly copied it! With all the other decisions to make, it was nice to look at something and just say, yep, that'll do the job.
A week or so later, the stuff was on-site and getting started.
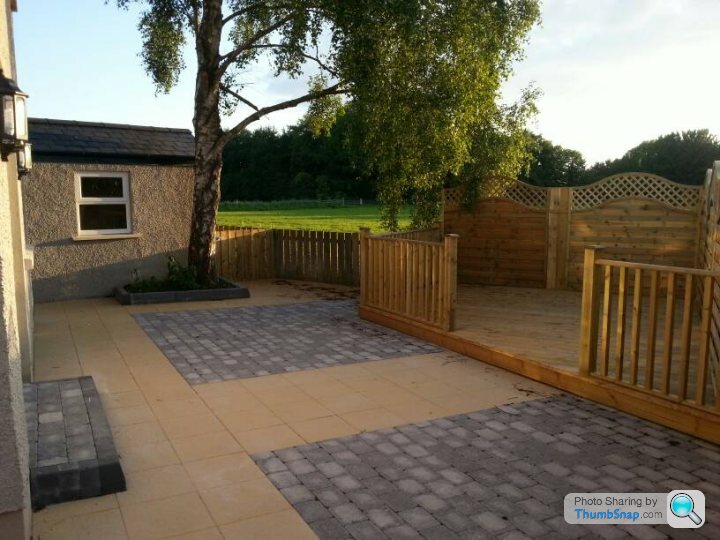
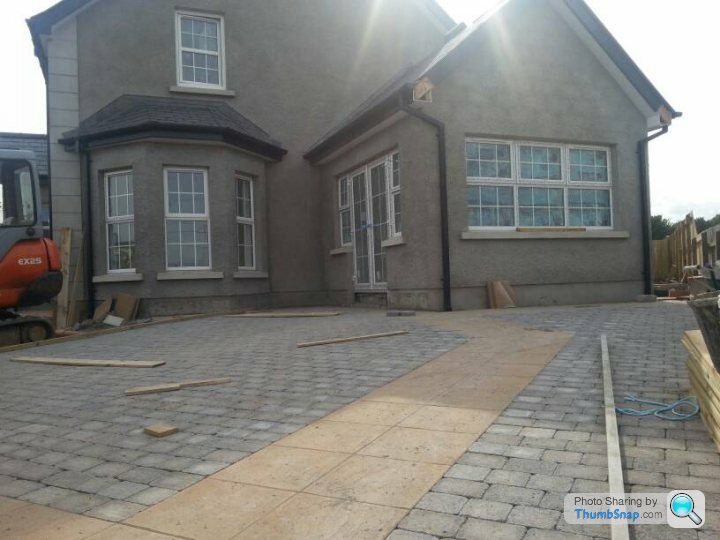
Due to the sun orientation, we decided we needed 2 patios, a morning patio (which is opened onto from the sunroom) and an evening patio for when the sun swings round the back.
This is the morning patio.
And evening patio below. It was around this time I was starting to have to reign in the spend. The block paving isn't cheap so we saved some money with a more simple design.
So we shamelessly copied it! With all the other decisions to make, it was nice to look at something and just say, yep, that'll do the job.
A week or so later, the stuff was on-site and getting started.
Due to the sun orientation, we decided we needed 2 patios, a morning patio (which is opened onto from the sunroom) and an evening patio for when the sun swings round the back.
This is the morning patio.
And evening patio below. It was around this time I was starting to have to reign in the spend. The block paving isn't cheap so we saved some money with a more simple design.
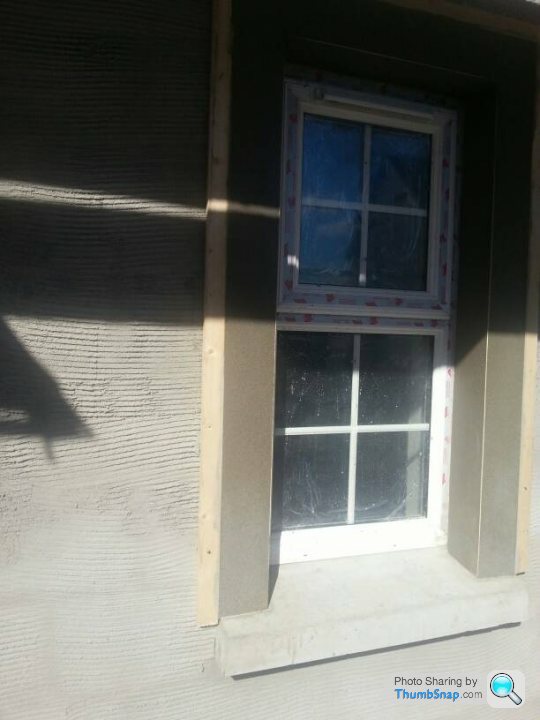
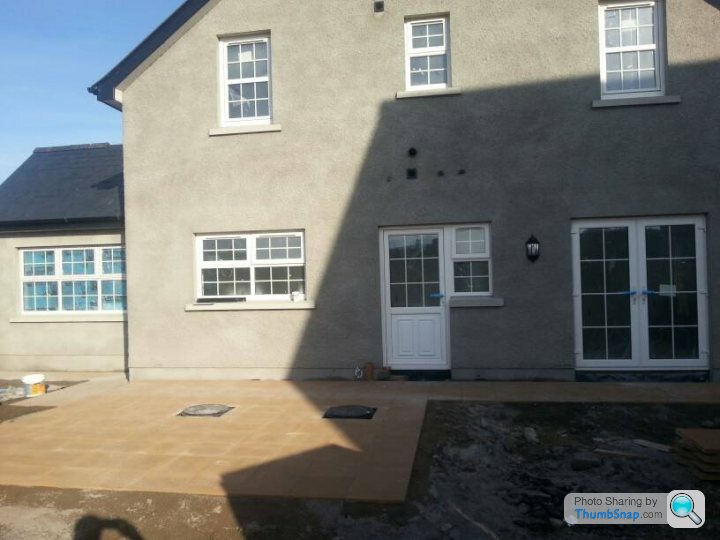
And it wasn't long before the painters were called in - we decided to have everything white as a starting point. With no furniture in place, it's hard to know what colours you want.
This is the outhouse after painting. Wired for a home cinema as you can see.
And moving inside...
As mentioned earlier, rather than a full landing, we cutaway the end section to give the hallway a bit of an architectural feature. It's quite a narrow hallway and had we not cut this away, the only light downstairs would have been from the front door and 2 small side windows, leaving it quite dark. It also gives a nice 2 storey gap which makes the entrance a little more interesting.
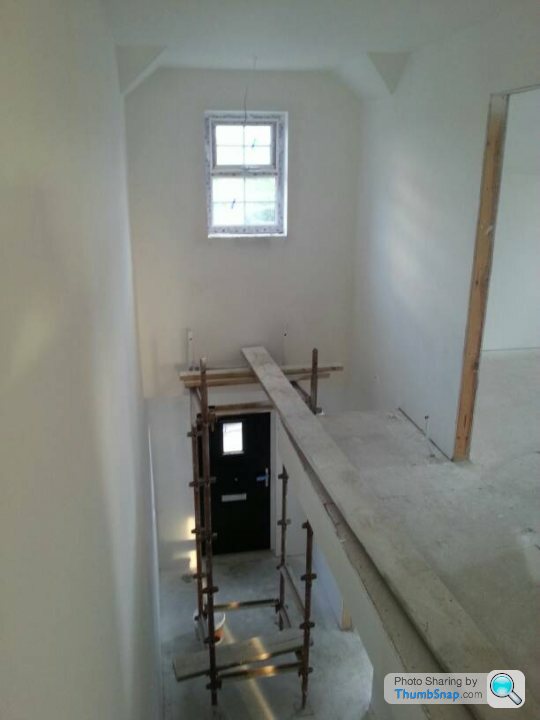
And you can see I've also added sockets for led lighting which runs up the staircase. These are temporary stairs, the actual staircase will be an open tread design in oak.
As mentioned earlier, I was having to keep a very close eye on what we were spending. At the tile showroom, the missus obviously wanted tiles that were mind numbingly expensive. £60-£80 per m2 and with most of the ground floor being tiled, it was far too much.
It was at this point I started looking online, and ordering samples. I found you could get tiles at half the price, even a 3rd of the price by looking online instead of showrooms. Only problem is that you get one tile and can't see it in a properly laid position.
This would be ensuite tile
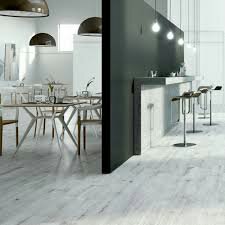
And the ground floor tile. This would be for hall, toilet, lounge, kitchen, sunroom and utility. We made this purchase, our biggest tile decision, by looking at pictures online and a 10cm sample tile - gulp! It was a bit of a gamble but we wanted the interior to be really nice but needed to save some money too.
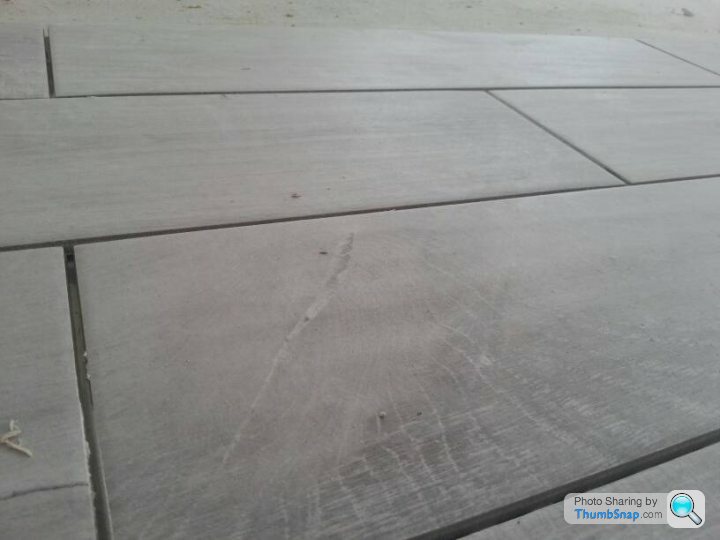
It's like a Scandinavian white oak effect porcelain tile.
And it wasn't long before tiler was getting to work
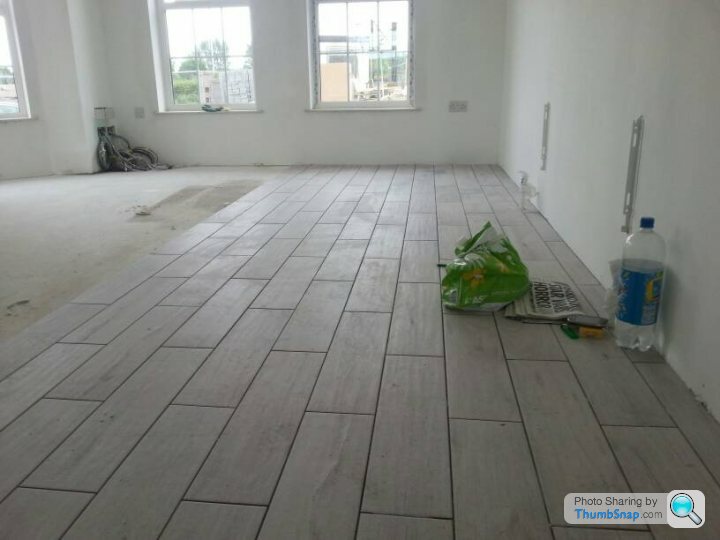
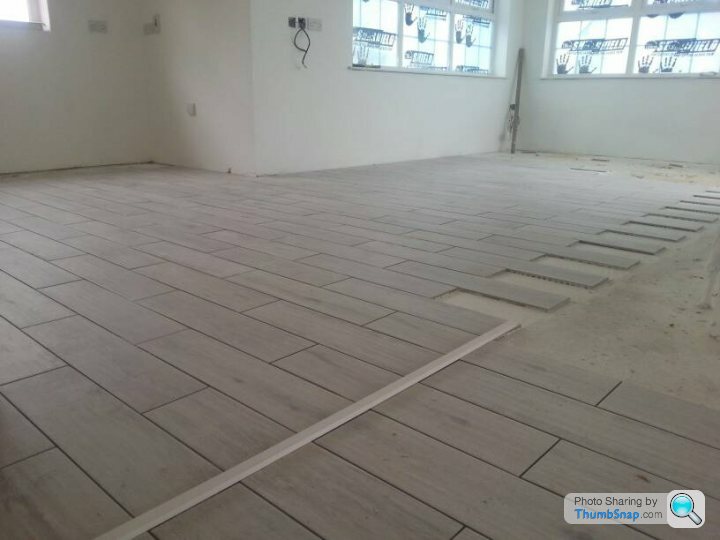
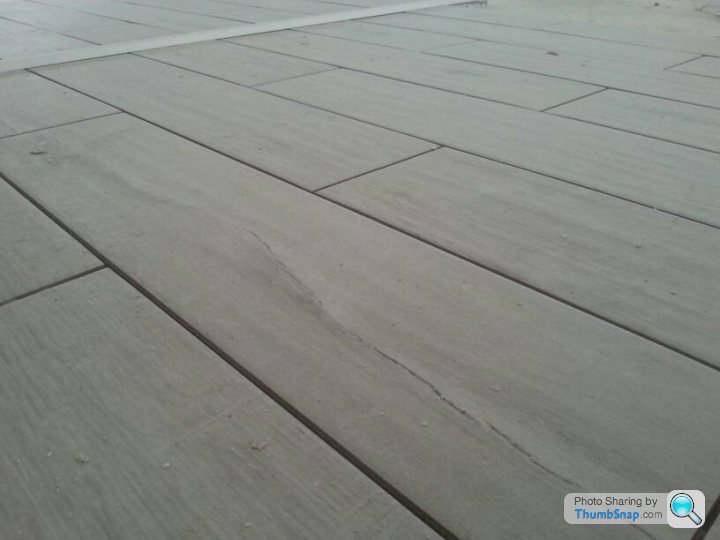
There is a bit of a pink hue on these pics but that's just the phone camera, they are a light grey colour in reality
This is the outhouse after painting. Wired for a home cinema as you can see.
And moving inside...
As mentioned earlier, rather than a full landing, we cutaway the end section to give the hallway a bit of an architectural feature. It's quite a narrow hallway and had we not cut this away, the only light downstairs would have been from the front door and 2 small side windows, leaving it quite dark. It also gives a nice 2 storey gap which makes the entrance a little more interesting.
And you can see I've also added sockets for led lighting which runs up the staircase. These are temporary stairs, the actual staircase will be an open tread design in oak.
As mentioned earlier, I was having to keep a very close eye on what we were spending. At the tile showroom, the missus obviously wanted tiles that were mind numbingly expensive. £60-£80 per m2 and with most of the ground floor being tiled, it was far too much.
It was at this point I started looking online, and ordering samples. I found you could get tiles at half the price, even a 3rd of the price by looking online instead of showrooms. Only problem is that you get one tile and can't see it in a properly laid position.
This would be ensuite tile
And the ground floor tile. This would be for hall, toilet, lounge, kitchen, sunroom and utility. We made this purchase, our biggest tile decision, by looking at pictures online and a 10cm sample tile - gulp! It was a bit of a gamble but we wanted the interior to be really nice but needed to save some money too.
It's like a Scandinavian white oak effect porcelain tile.
And it wasn't long before tiler was getting to work
There is a bit of a pink hue on these pics but that's just the phone camera, they are a light grey colour in reality
Maybe all these construction pics are a bit boring? It was quite exciting for me at the time but I can cut to the chase and get straight into the 'finishing' pics if that's what will be interesting?
Or maybe you want to see some my own DIY skills
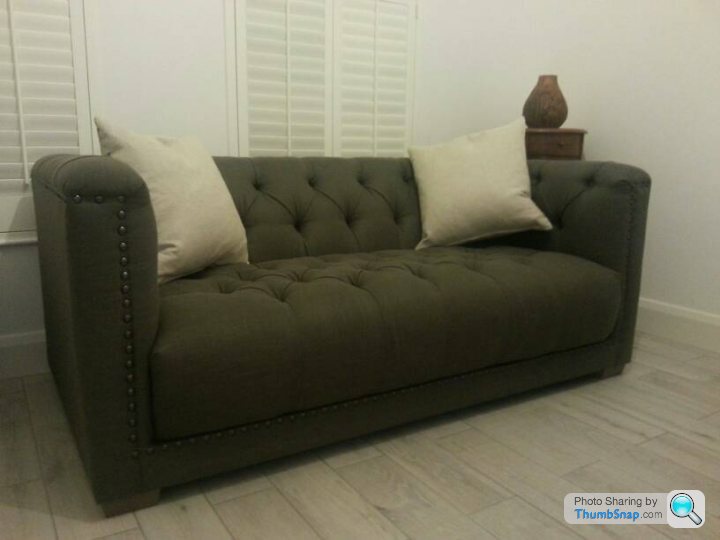
We did run out of money eventually so I had to get my hands dirty eventually, putting wooden flooring in, tiling etc.
An example of lounge finishing

Or if people like DIY, I've a pic blog of me doing my 1st ever plantation shutters install.
We got the front of the house all done in shutters but due to cost, couldn't afford to get all the windows done. Later on, I decided to order online and fit them myself (much cheaper this way) and once I realised it was actually a simple job, I was cross that we spend so much getting a tradesman in to do the front shutters.


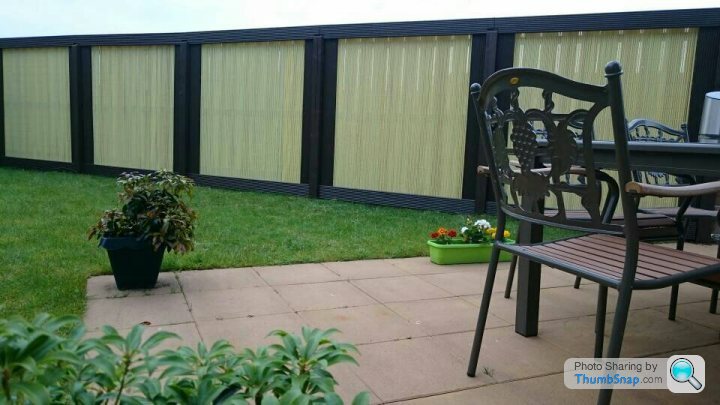
This was my DIY fence. I wanted something a bit different, but there are very little options around for off the shelf fencing. I always liked Japanese style fencing and eventually I came up with this bespoke Japanese style mashup fence. It's basically a bamboo style screen, framed with decking boards to give a unique look.
So it's whatever people find more interesting, I can skip the building work and get straight to the end if that'll make for a better thread
Or maybe you want to see some my own DIY skills
We did run out of money eventually so I had to get my hands dirty eventually, putting wooden flooring in, tiling etc.
An example of lounge finishing
Or if people like DIY, I've a pic blog of me doing my 1st ever plantation shutters install.
We got the front of the house all done in shutters but due to cost, couldn't afford to get all the windows done. Later on, I decided to order online and fit them myself (much cheaper this way) and once I realised it was actually a simple job, I was cross that we spend so much getting a tradesman in to do the front shutters.
This was my DIY fence. I wanted something a bit different, but there are very little options around for off the shelf fencing. I always liked Japanese style fencing and eventually I came up with this bespoke Japanese style mashup fence. It's basically a bamboo style screen, framed with decking boards to give a unique look.
So it's whatever people find more interesting, I can skip the building work and get straight to the end if that'll make for a better thread
Rosscow said:
Very interesting, OP!
Can you provide a link to the floor tiles please?
No problem. They are from porcelain superstore.Can you provide a link to the floor tiles please?
http://www.porcelainsuperstore.co.uk/wood-effect.h...
As I had mentioned, looking at tiles in local showrooms, they were between £50-£80 m2 for wood effect tiles and that was simply too expensive for our quickly depleting budget.
We went for the Oslo White (were £22m2 at the time when we got them 3 years ago) which we thought was a great price. Even better now at only £20!
Porcelain tile, made in Italy. We liked the colour of these but another key consideration was the fact they had a matt finish. Our worktops are a matt finish quartz so we though these tiles would tie in very nicely. And they do. They are also non slip, due to the finish which is great when you have kids running about. Less chance of an accident.
I would highly recommend porcelain superstore - great service and amazing prices compared with the high street retailers.
Muncher said:
Can I ask where you bought your bath filler tap from? I ask as I have the same one and the washers inside the diverter mechanism failed after a couple of years meaning it leaks really badly and I am trying to find some spares for it. Unfortunately I suspect yours will also do the same after a little while.
We bought it from a local supplier, watershed bathrooms. I'll have a look when I'm home to see the brand as I can't remember off the top of my head. What I do remember is that its german, and comes with a 12 year guarantee. The salesperson told us that this particular supplier doesn't send you a washer in the post when you have a warranty claim, they send you the full piece so every single tap and shower in the house (bar kitchen and utility taps) are from this german supplier. Its the long warranty that sold us on their products.Thanks everyone else. At least I know I'm not talking to myself now
The shutters are from 24-7 blinds as far as I can remember, as they did express delivery at the time (4 weeks, built in the UK)
Most others are a 12 week delivery built in china, and with Christmas approaching, we were attracted to the UK built shutters so that we had them in time for Christmas.
We've still got upstairs to finish with the shutters but when we do those, we'll probably go for the cheaper chinese ones with 12 week delivery. I've read plenty of reviews and the quality is still very good (arguably better than the UK ones we got) - you just have to wait a bit longer.
_dobbo_ said:
Super interested in the plantation shutters being easy to fit.
We'd like them in our lounge but we have a large square bay so I would imagine that makes things a bit harder than fitting them in a standard window recess?
The hardest bit is being good with a measuring tape. Honestly. Thats the most important bit. After that, its just screws and pins. I'll do a walk through of my own fitting to show how easy it was.We'd like them in our lounge but we have a large square bay so I would imagine that makes things a bit harder than fitting them in a standard window recess?
A bay window will be trickier though, but there are videos on youtube to show how to measure for shutters in a bay window.
You'll only pay half the price doing them yourself v getting a pro in....well worth DIY'ing them.
Muncher said:
Can I ask where you bought your bath filler tap from? I ask as I have the same one and the washers inside the diverter mechanism failed after a couple of years meaning it leaks really badly and I am trying to find some spares for it. Unfortunately I suspect yours will also do the same after a little while.
Ok, checked it out there for you. All the taps and showers are vado. I said German but actually they are a UK brand. If yours is vado, it should have a 12 year warranty. This is our tap, might help you check if it's the same and if parts are available. I was told you get the full piece swapped out if there is a warranty issue....http://www.dougfields.co.uk/vado-taps/vado-origins...

Before I get back to the build , I'll touch on the shutter subject for those that fancy saving a few bob and doing it DIY. I spent about 20 mins measuring up, 2 tape measures to check for accuracy and then placed the order.
Once they arrived, I spent less time actually fitting them. So so simple, I was kicking myself for not doing the first 7 windows myself, instead of getting the trades in.
Out of the box, frame looks like this.
Pre drilled holes....just need lined up and screwed together, 30 second job...
This is the bottom section which is flat, so it rests on the windowsill.

Next we have sides and top of frame, just slot together like so...

And that's how the frame gets put together....and then simply put it in the window space....
And depending on size, there will be a few pre drilled holes where you simply screw the frame to the wall. Little white caps then cover the screw hole.

And once the frame is on, you'll have a couple of pins for the hinges either side, pop them in, job completed. It really is a very quick and simple job...5-10 mins per window


Before

After curtain and shutters installed...
Each window was about £130 each so not bad at all, although these windows are quite small. But even a standard custom fit blind would be at least £50 and then same again for a standard curtain. For only a little more, you can install a shutter, not too expensive and both me and the missus like the style.
I just regret forking out over £3k for the 7 windows when we got the pro in at the start. Costly mistake.
Once they arrived, I spent less time actually fitting them. So so simple, I was kicking myself for not doing the first 7 windows myself, instead of getting the trades in.
Out of the box, frame looks like this.
Pre drilled holes....just need lined up and screwed together, 30 second job...
This is the bottom section which is flat, so it rests on the windowsill.
Next we have sides and top of frame, just slot together like so...
And that's how the frame gets put together....and then simply put it in the window space....
And depending on size, there will be a few pre drilled holes where you simply screw the frame to the wall. Little white caps then cover the screw hole.
And once the frame is on, you'll have a couple of pins for the hinges either side, pop them in, job completed. It really is a very quick and simple job...5-10 mins per window
Before
After curtain and shutters installed...
Each window was about £130 each so not bad at all, although these windows are quite small. But even a standard custom fit blind would be at least £50 and then same again for a standard curtain. For only a little more, you can install a shutter, not too expensive and both me and the missus like the style.
I just regret forking out over £3k for the 7 windows when we got the pro in at the start. Costly mistake.
Back to the build....
The tiling continued on the ground floor main area...

And meanwhile, the sanitary ware had all arrived. This is the shower tray and panels starting to be installed...

Ensuite panels. They look much better in the flesh, a textured Matt finish which feels really plush.

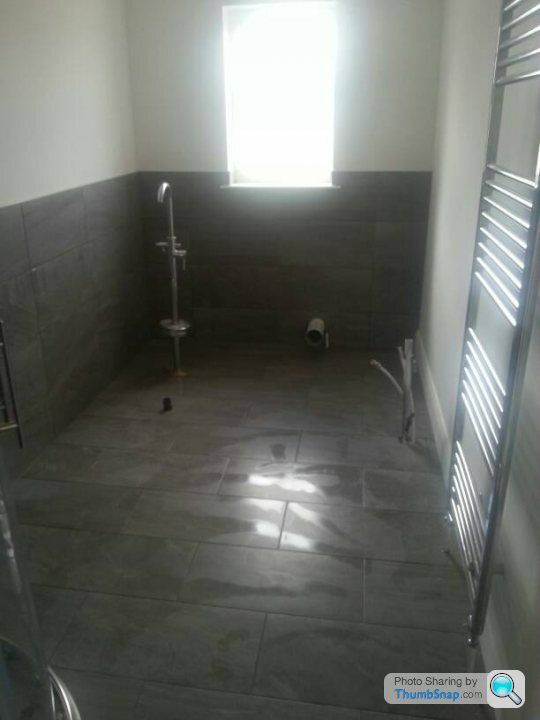
Tiler has now made his way upstairs into the bathroom.

Close up of the tile. Porcelain superstore again, stone blend.

Finished. In hindsight, we wish we went full height rather than half way up, we were just concerned it would be too dark. It's a small bathroom as we reduced it's size to make our daughters bedroom bigger.
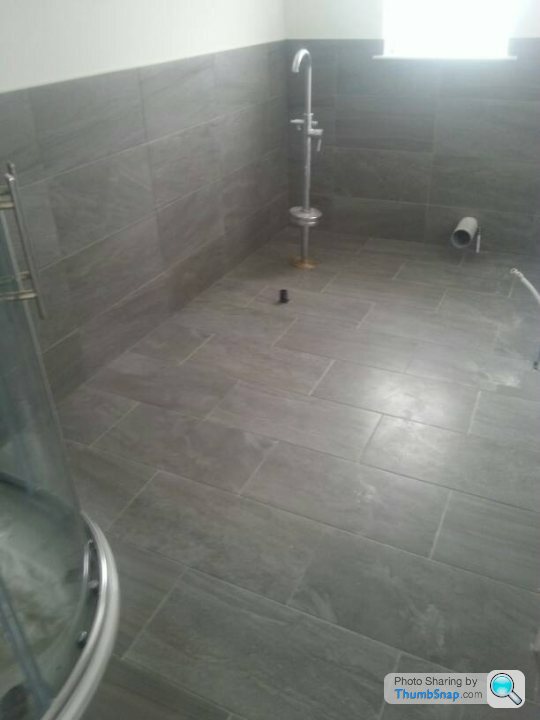
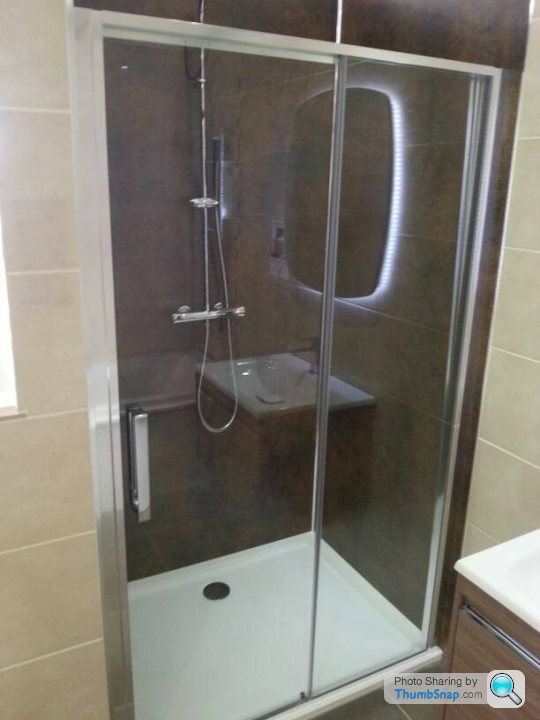
Shower enclosure finished.

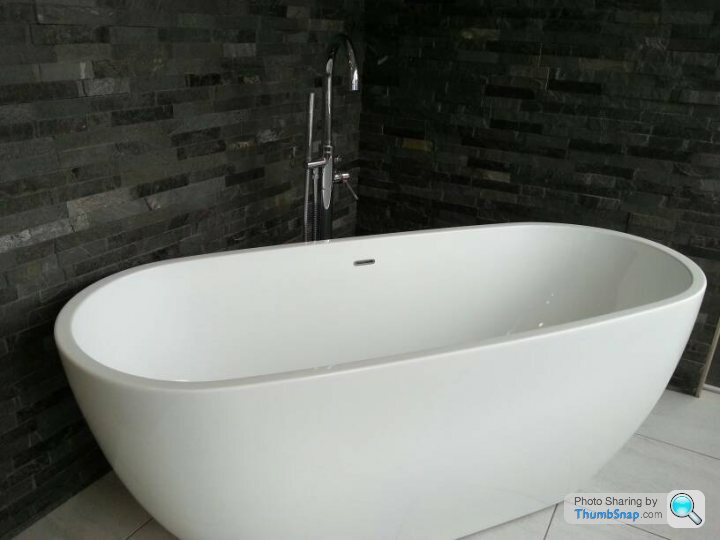
Bath installed

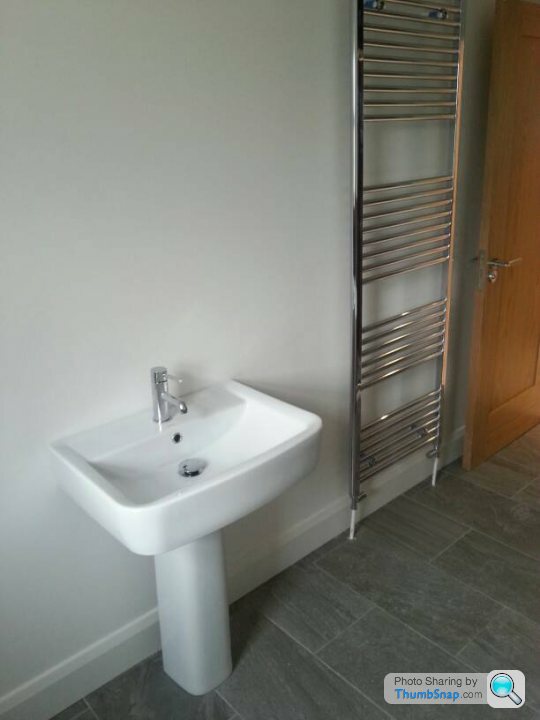
Sink and radiator
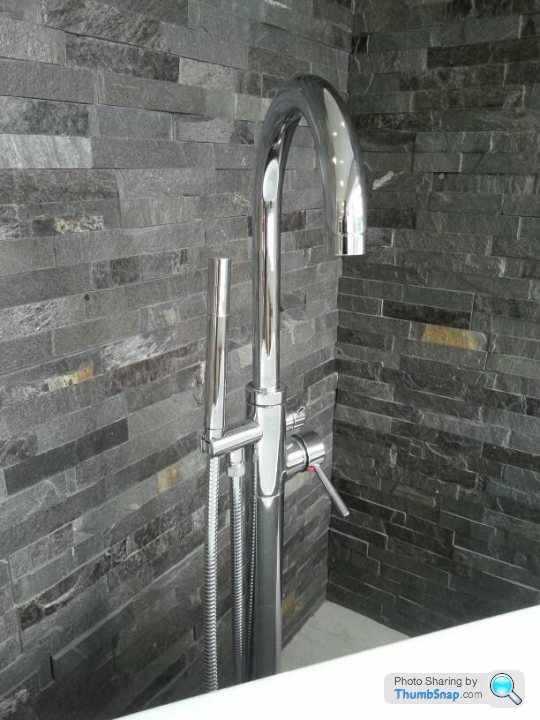
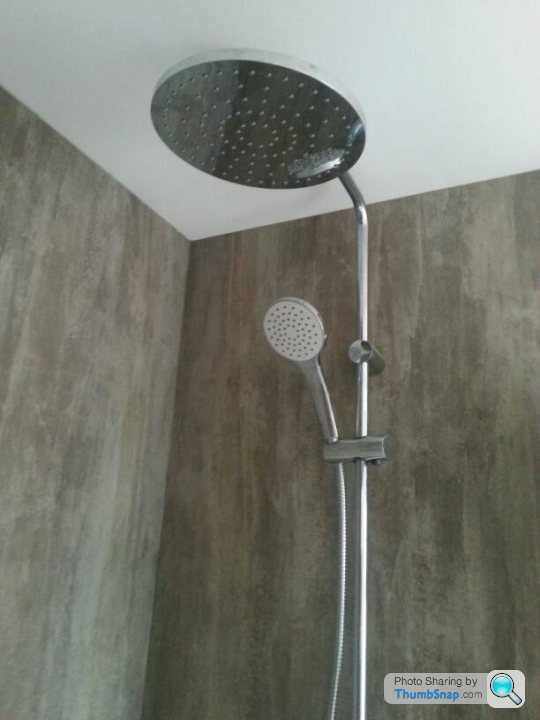
And the ensuite rain shower. The only item I actually picked myself
You may notice the woodwork has started, doors and architrave....more on that later...
The tiling continued on the ground floor main area...
And meanwhile, the sanitary ware had all arrived. This is the shower tray and panels starting to be installed...
Ensuite panels. They look much better in the flesh, a textured Matt finish which feels really plush.
Tiler has now made his way upstairs into the bathroom.
Close up of the tile. Porcelain superstore again, stone blend.
Finished. In hindsight, we wish we went full height rather than half way up, we were just concerned it would be too dark. It's a small bathroom as we reduced it's size to make our daughters bedroom bigger.
Shower enclosure finished.
Bath installed
Sink and radiator
And the ensuite rain shower. The only item I actually picked myself
You may notice the woodwork has started, doors and architrave....more on that later...
maxest said:
Which Chinese supplier would you recommend? Love the look of your shutters, and i'd be in the no rush..
Great thread
Nearly all of them are Chinese. Unless it says UK made, they will be made in China, or if they have a 12week+ lead time, they are probably from China. Loads of different people selling them in the UK but all they really are is 3rd party sellers, unless they specifically say they make their own.Great thread
While the bathrooms were going in, we also had the chippie doing the skirting, architrave and doors.
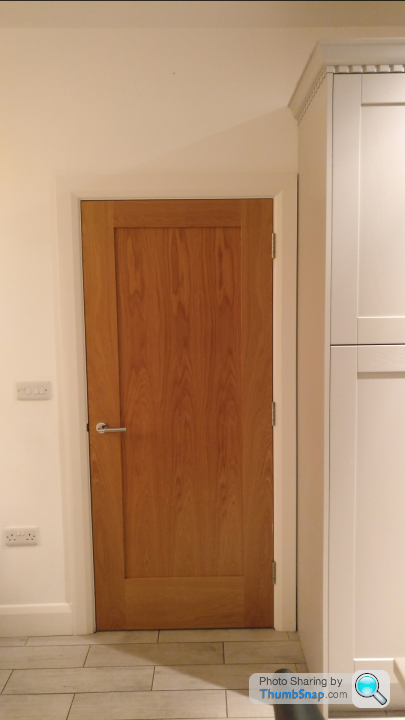
This is what we went with. Shaker style oak door which ties in well with the kitchen cabinet style.
All MDF for the skirting and architrave. The skirting is 6 inch although we wanted 8 inch. The builder could only get real wood in 8 inch but that would have been a painting nightmare. Our last house was 8 inch wooden skirting painted white but despite getting pros in to paint it, the knots started showing through, discoloration everywhere. So we went 6 inch mdf as that would guarantee a better overall finish.
You can see we kept the design nice and simple, which is in keeping with the general decor theme we were after.
....and while plumber and chippie were beavering away, exterior groundworks were also going full speed ahead.
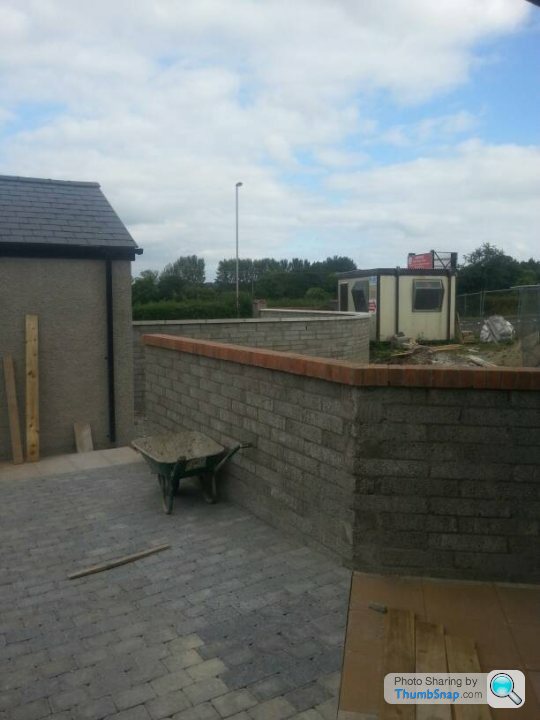
The block paving shown earlier was now completed, and then we were onto building some walls. We wanted a mid height wall to give a boundary, to define this patio area, but not too high as to block out too much sun.

And then a bigger wall which blocks of a road to access a few houses to the side of us.
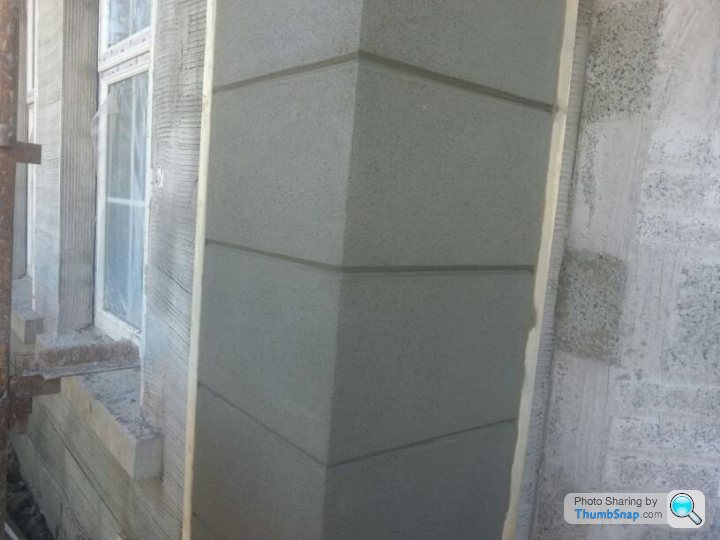
These were to be render finished the same as the house.

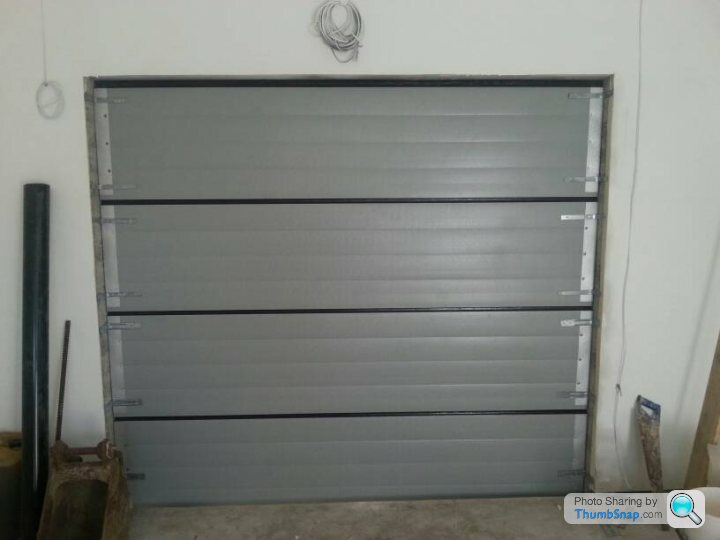
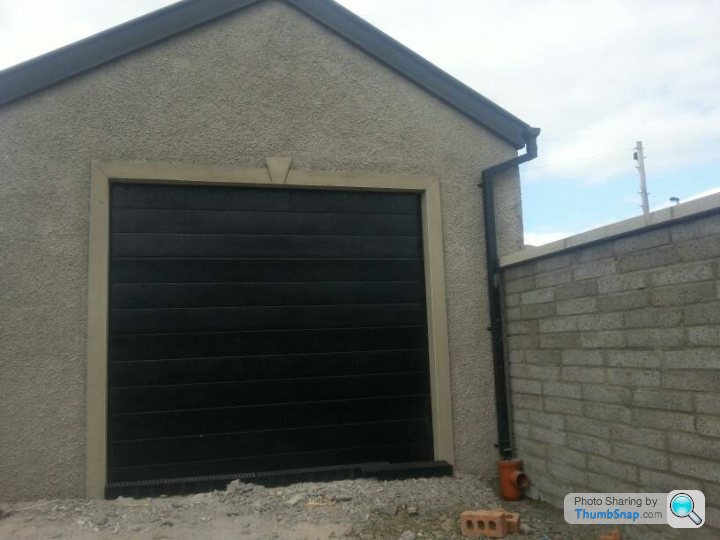
And our garage/outhouse was also being finished at this point, with false composite garage door being installed.
From the other side
And then boxing it in, ready to be dry lined, and painted and skirting the same as the main house.

The block paving shown earlier was now completed, and then we were onto building some walls. We wanted a mid height wall to give a boundary, to define this patio area, but not too high as to block out too much sun.
And then a bigger wall which blocks of a road to access a few houses to the side of us.
These were to be render finished the same as the house.
And our garage/outhouse was also being finished at this point, with false composite garage door being installed.
From the other side
And then boxing it in, ready to be dry lined, and painted and skirting the same as the main house.
Gassing Station | Homes, Gardens and DIY | Top of Page | What's New | My Stuff