Discussion


XCP said:
Just to be clear you say 'my squirrels'. Are you actually putting food out for Grey Squirrels?
( he writes as he watches a squirrel helping itself to his ducks food)
You're quite correct - no; they come in and steal the food I put out for the birds so I thought I'd socially distance them from the birds ( he writes as he watches a squirrel helping itself to his ducks food)

crmcatee said:
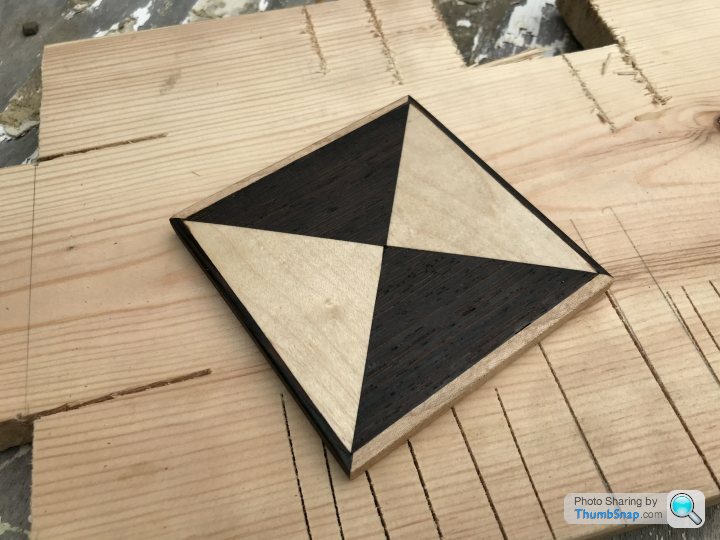
Help yourself although the one with phenolic plyboard (the smooth one mounted on my birds table leg) was the prototype, and having been out with the quality control squirrels I found that a gust of wind would blow the seed away so it either needs a lip on the edge or use something like I did in the second with grooves from the decking which should stop the wind blowing them away.
That tickled me Much like many of us, I, in the literal sense, have nowhere to be and my weekends once full up carting kids to various activities, are fairly empty.
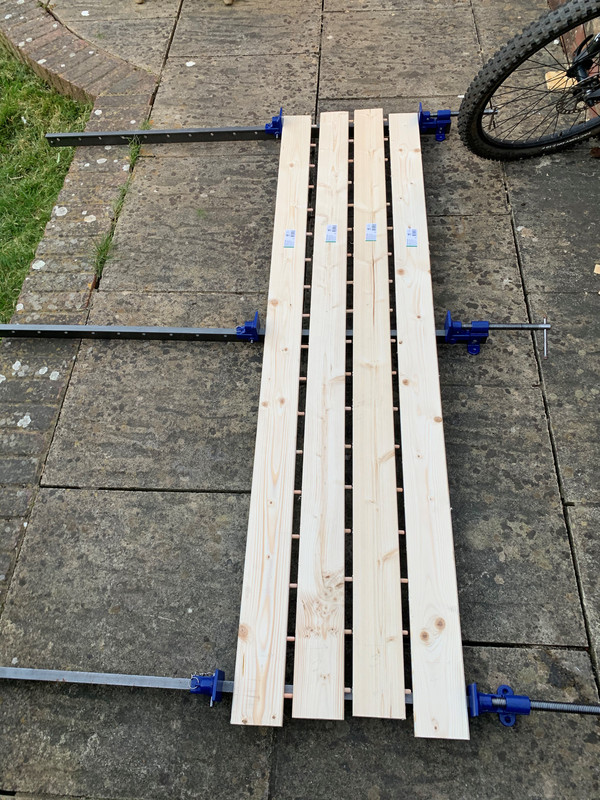
So why not spend that free time over-engineering. Cladding for the Dovecote.
Create bevel on the edge of the board so the joins are accentuated. Hand trimmer.


Dry assembled

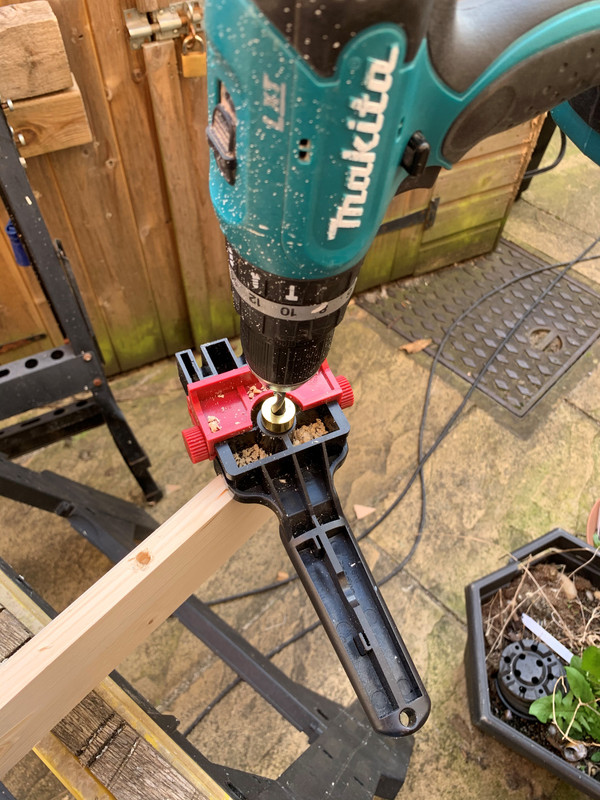
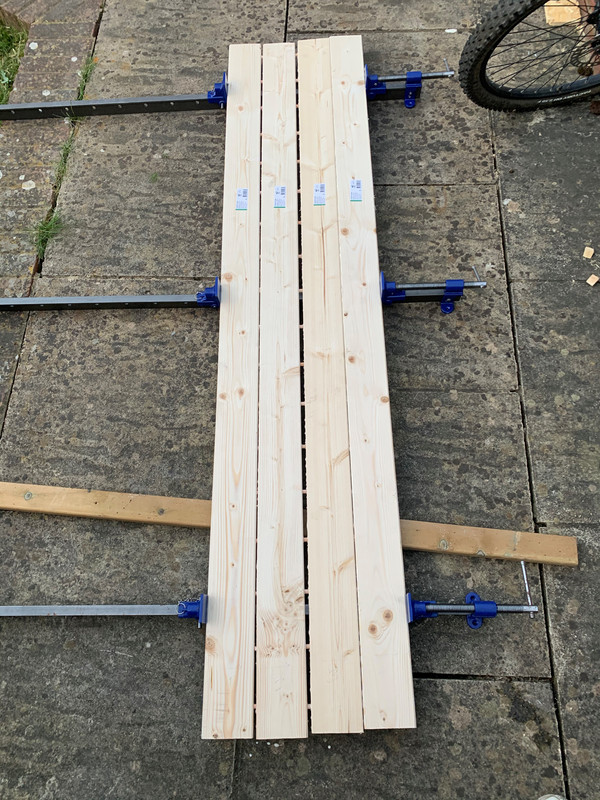
Much free time? Sure, lets dowel the cladding

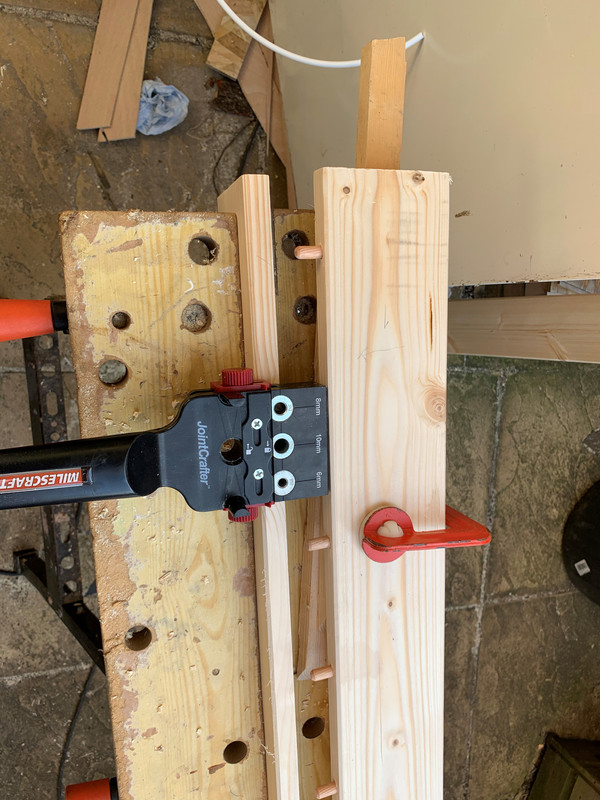
Map the master to the slave
Ready to marry
Everyone loves a dry mock up
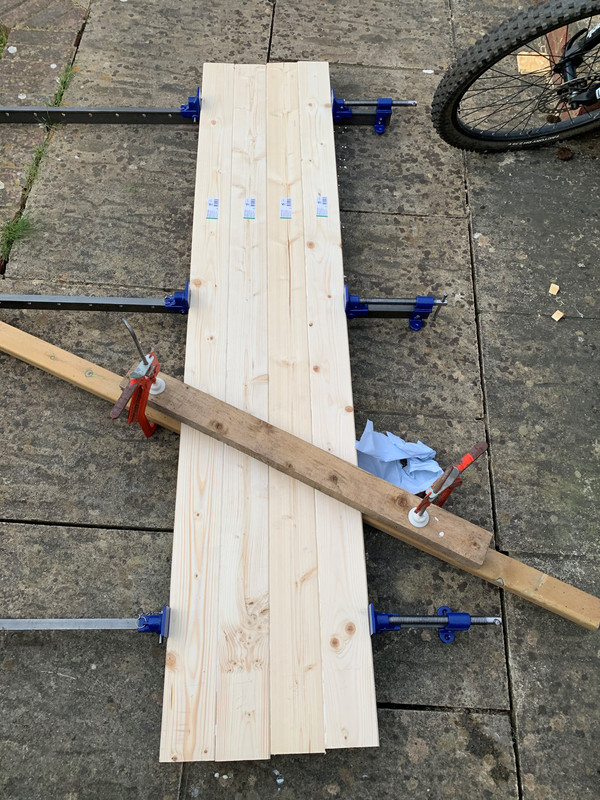
Glued.....

And screwed..
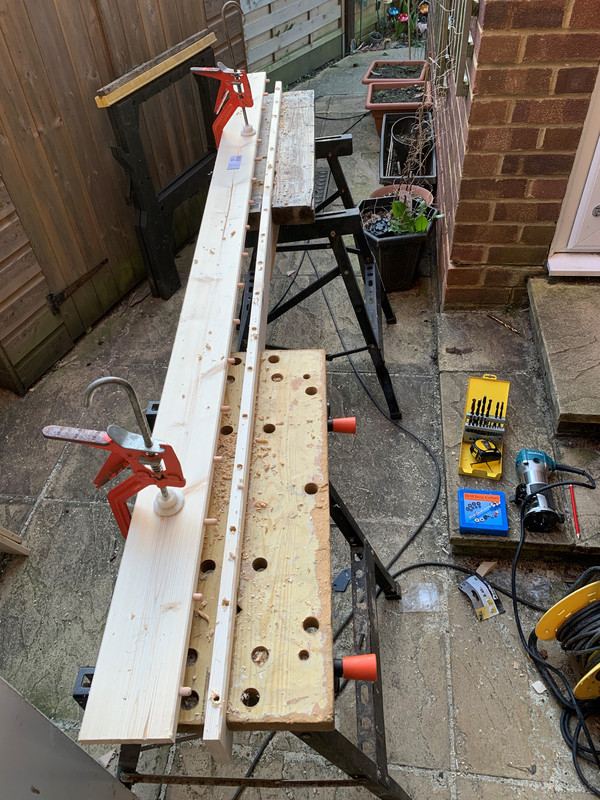
Lessons learned. Do not try to force 4 dowelled boards at once. Do one at a time.
Eventually pulled together and strapped
So why not spend that free time over-engineering. Cladding for the Dovecote.
Create bevel on the edge of the board so the joins are accentuated. Hand trimmer.
Dry assembled
Much free time? Sure, lets dowel the cladding
Map the master to the slave
Ready to marry
Everyone loves a dry mock up
Glued.....
And screwed..
Lessons learned. Do not try to force 4 dowelled boards at once. Do one at a time.
Eventually pulled together and strapped
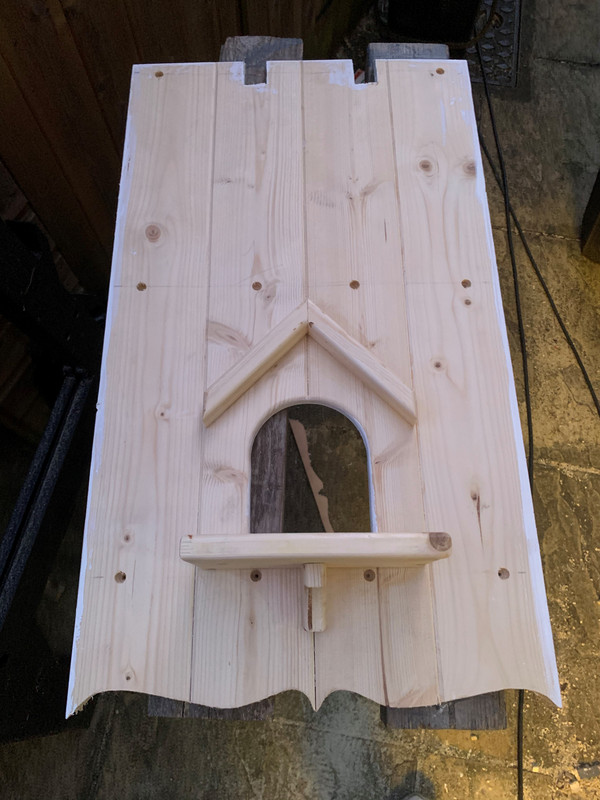
Work on the cladding for the first of six sides.
Box entry holes 4" w by 5" h (mainly because I have a 4" hole saw"). Offered up on the back side
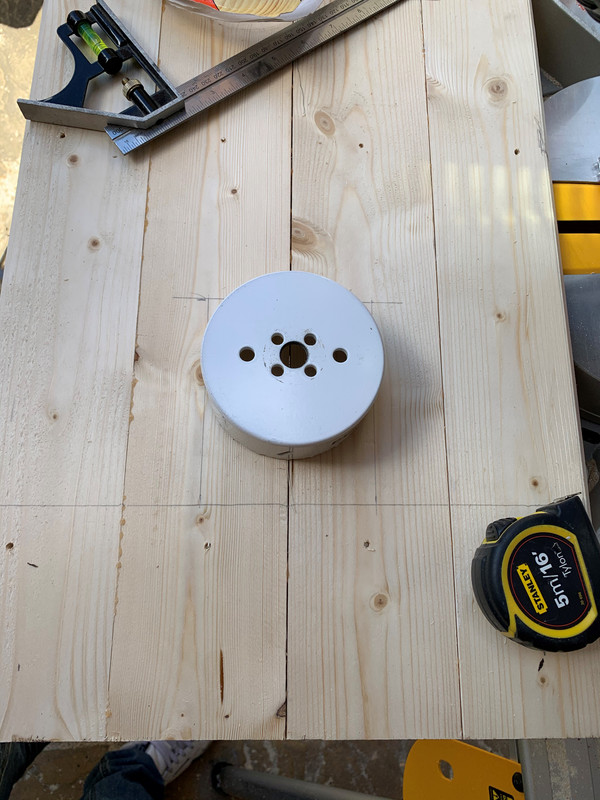
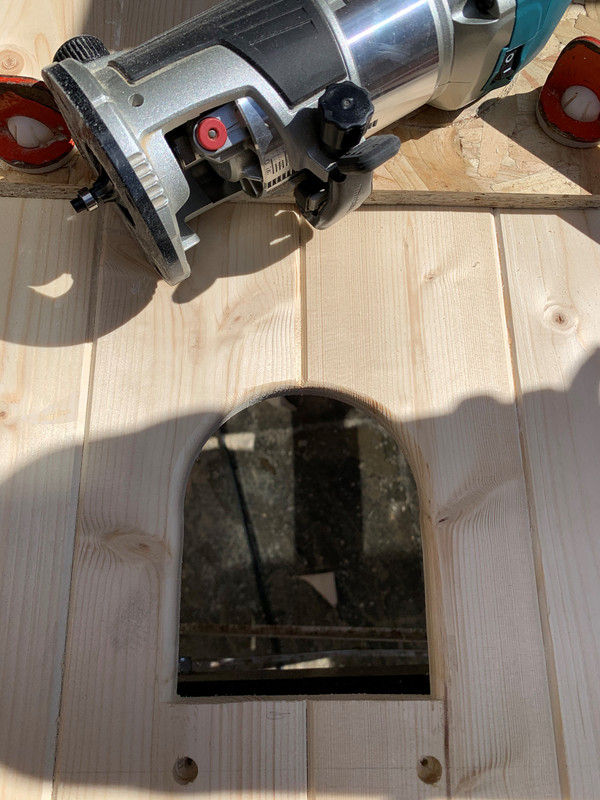
Hole saw used and then jigsaw for the square bits. Rounding bit to round off the edges

Try it out on the reverse side in case it's not quite as it seems
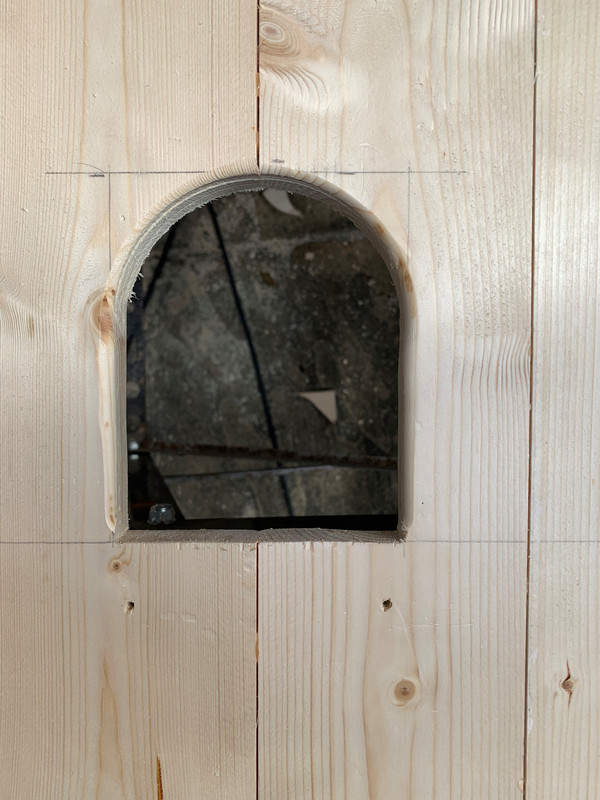
S'all good, front face
Need a landing pad
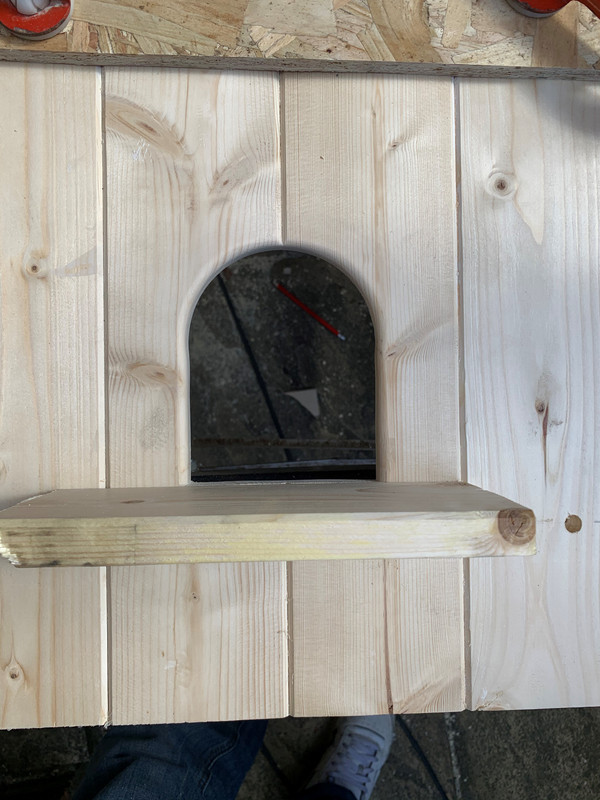
This is exactly as I planned it. The holes that were pre-drilled a week ago were obviously subconsciously considered to accommodate the landing pad I hadn't even thought about.
Cut to size
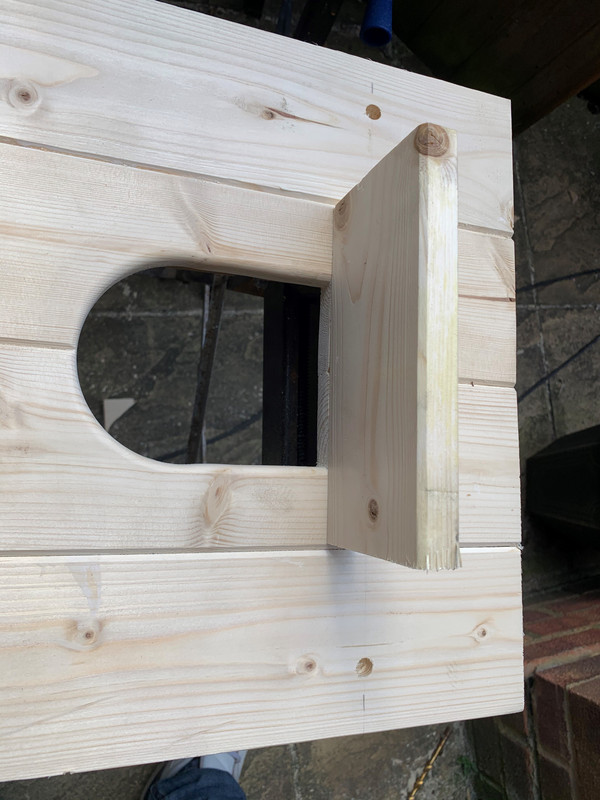
Round off all edges
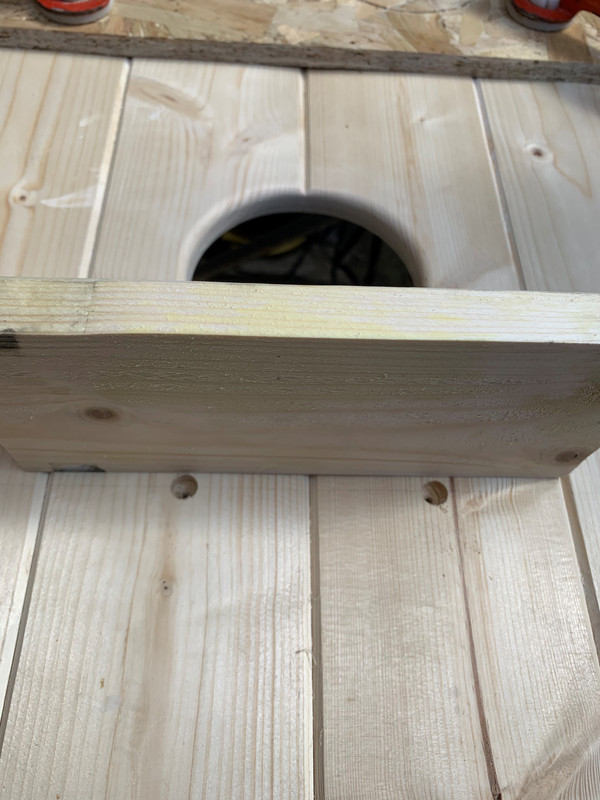
Mount from the rear

Glue and clamp. Très excitant

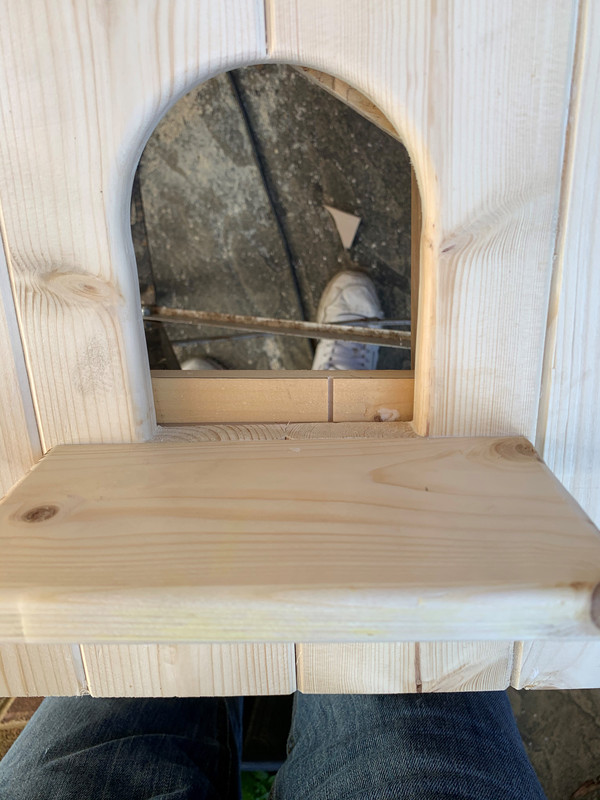
Deflection of rain from the box + aesthetics. Dry lined up

Mark out on the back side to pre-drill the 'oles
Glued and screwed. Run the rounding but to soften the edges

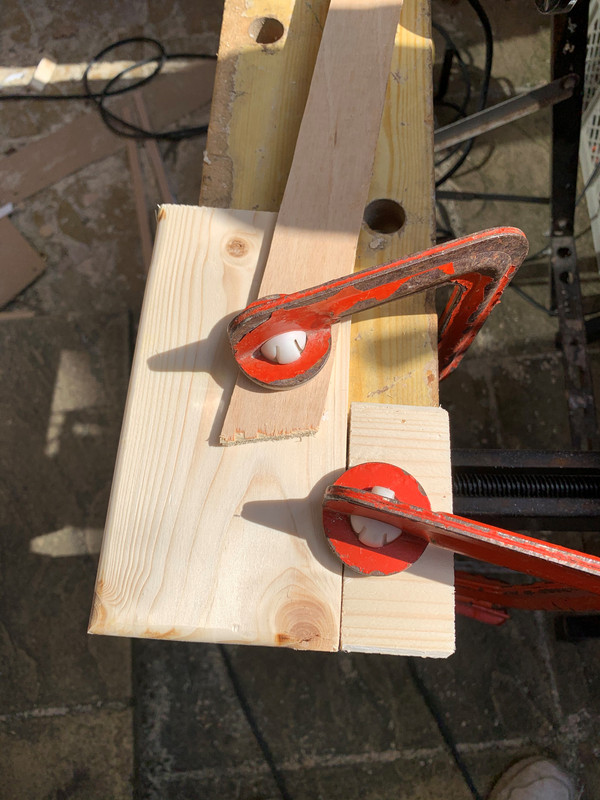
A little (ornate but unnecessary) support for the landing pads. Make a hole

Cut

Too small for a hand router to ensure fingers remain. Screw it to a board
Do the thing
Poppy Cat is having a lovely time (carcass dry installed on a Heath Robinson mount for convenience)

Ready to prime and paint.

Counter sunk holes for screwing cladding to the carcass. Will glue and plug

Two coats of primer on the reverse side tonight, final coat tomorrow.
Box entry holes 4" w by 5" h (mainly because I have a 4" hole saw"). Offered up on the back side
Hole saw used and then jigsaw for the square bits. Rounding bit to round off the edges
Try it out on the reverse side in case it's not quite as it seems
S'all good, front face
Need a landing pad
This is exactly as I planned it. The holes that were pre-drilled a week ago were obviously subconsciously considered to accommodate the landing pad I hadn't even thought about.
Cut to size
Round off all edges
Mount from the rear
Glue and clamp. Très excitant
Deflection of rain from the box + aesthetics. Dry lined up
Mark out on the back side to pre-drill the 'oles
Glued and screwed. Run the rounding but to soften the edges
A little (ornate but unnecessary) support for the landing pads. Make a hole
Cut
Too small for a hand router to ensure fingers remain. Screw it to a board
Do the thing
Poppy Cat is having a lovely time (carcass dry installed on a Heath Robinson mount for convenience)
Ready to prime and paint.
Counter sunk holes for screwing cladding to the carcass. Will glue and plug
Two coats of primer on the reverse side tonight, final coat tomorrow.
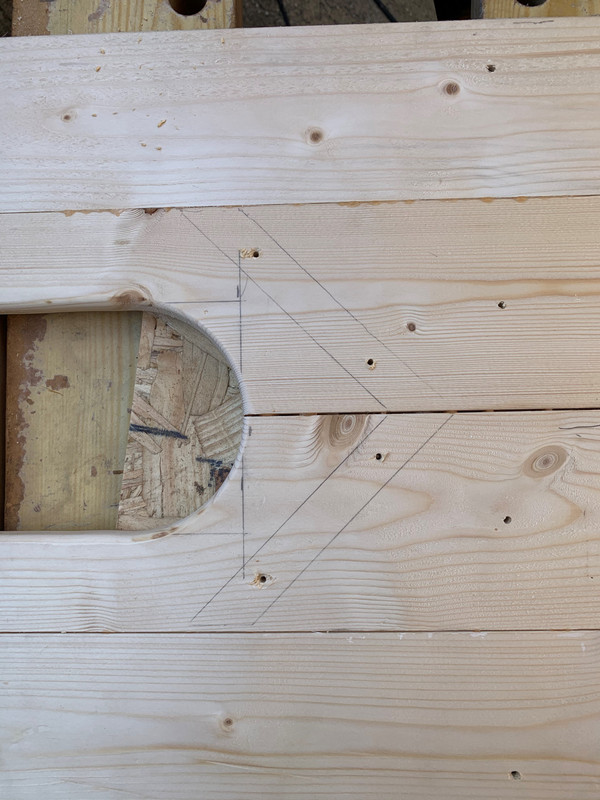
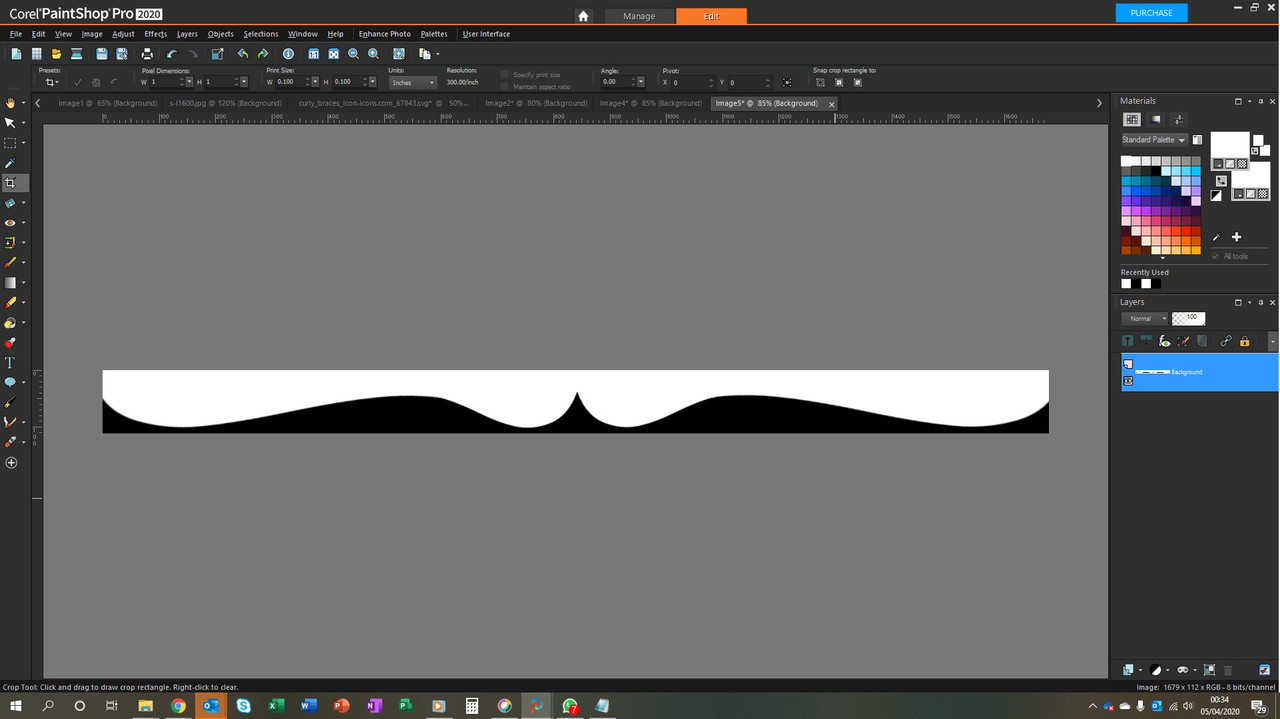
I have a very specific profile in mind for the bottom of the cladding. Messed about in PSP2020 for 3 hours because I'm unsure what I'm doing but eventually came up with this profile.
Next step print it, mount of stock and cut out using scroll saw and use a guide for router to use on all 6 sides.
Run out of timber so progress has come to halt.
Next step print it, mount of stock and cut out using scroll saw and use a guide for router to use on all 6 sides.
Run out of timber so progress has come to halt.
Origin Unknown said:
It's excessive to say the least! No more dowelling, too time consuming, even though I have a lot of that spare at the moment.And yes, it will be nice and high up as the MIL keeps cats!

More seriously, good stuff and I look forward to seeing more on the build and of course the finished item.
A friend at work brought his biscuit cutter in for me a couple of weeks back. Its still on my desk in the locked office.
Must. Not. Buy. One.
^^@Wolfracesonic - still planning to do the roof in lead. I have a 450x2000mm roll here and I have never worked with it so it'll be interesting none-the-less.
Must. Not. Buy. One.
^^@Wolfracesonic - still planning to do the roof in lead. I have a 450x2000mm roll here and I have never worked with it so it'll be interesting none-the-less.
Origin Unknown said:
A friend at work brought his biscuit cutter in for me a couple of weeks back. Its still on my desk in the locked office.
Must. Not. Buy. One.
^^@Wolfracesonic - still planning to do the roof in lead. I have a 450x2000mm roll here and I have never worked with it so it'll be interesting none-the-less.
When you have the roof boarded and ready to cover, post up some pics, I have 3 volumes of lead sheet technical manuals, I can scan and post up some images from them if you want. Oh, and order yourself some patination oil and copper nails ahead of time, some leadmate sealant might be useful as well.Must. Not. Buy. One.
^^@Wolfracesonic - still planning to do the roof in lead. I have a 450x2000mm roll here and I have never worked with it so it'll be interesting none-the-less.


I'm suffering from "workshop envy" right now.
I'm not so great at useful DIY projects, but back when my boys were at the playing with toy cars stage, they also had a bunch of toy aeroplanes. But cheap plastic toys break with alarming frequency, and expensive toys are often "too nice to play with properly".
So I used a load of salvaged timber from old pallets and the ply from wooden ammunition boxes to build them a few things to play with on the theme of naval forces...
I built:
HMS Arrow
USS America
A 'generic' Landing Craft
and air forces...
I built:
Boeing P-26 (Peashooter)
Lancaster
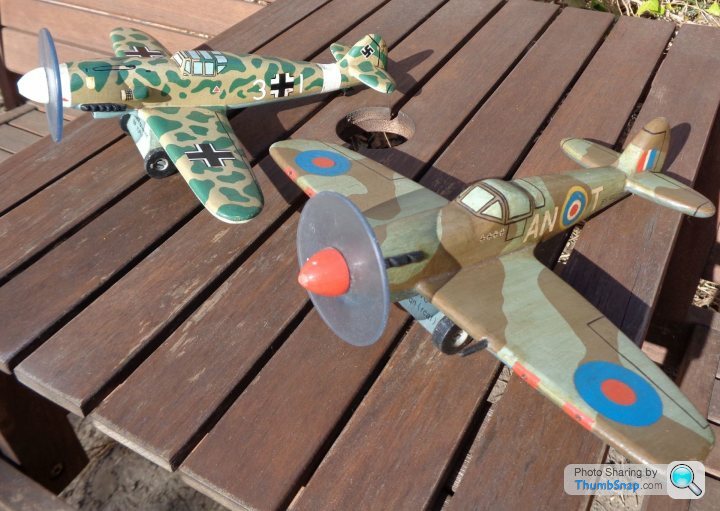
Spitfire
Mustang
Messerschmidt 109
...and an incomplete B-17 Flying Fortress that was a tad too ambitious with too many rotating turrets.
All are still around, and for the most part still in one piece. Not so easy to find since we moved house, the bigger stuff (frigate and aircraft carrier are in the garage rafters) but here's a few pictures of what I could find still...
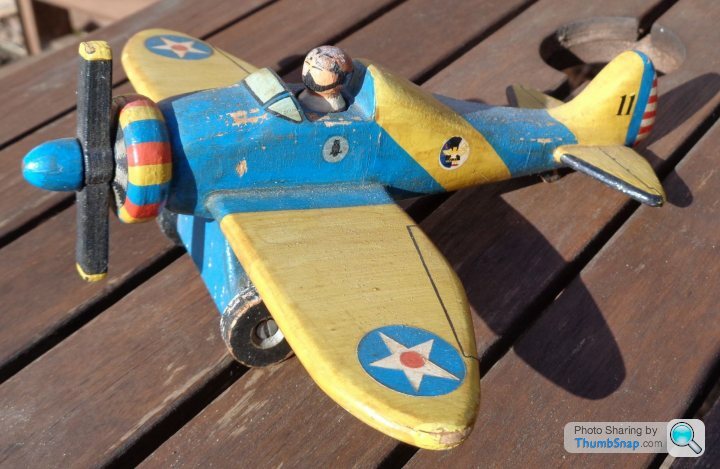
A rather battered P-26. The pilot is a "peg figure" turned from a bit of dowel and he can be taken out, held in by friction alone.
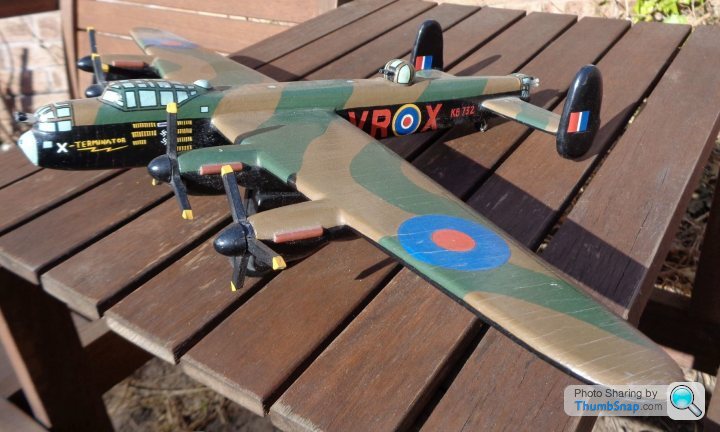
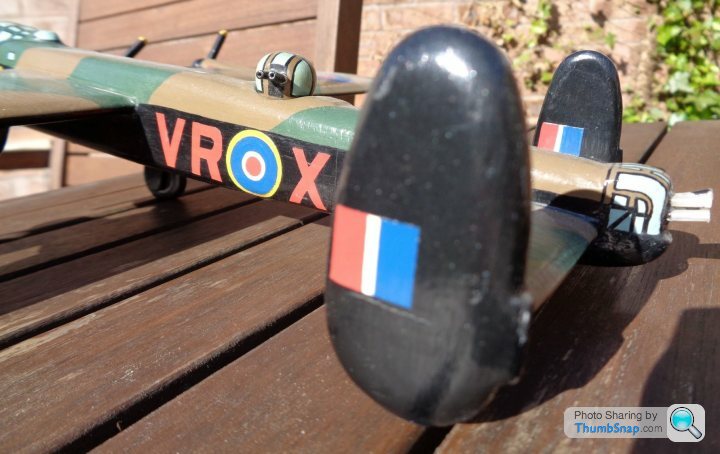
Lancaster.
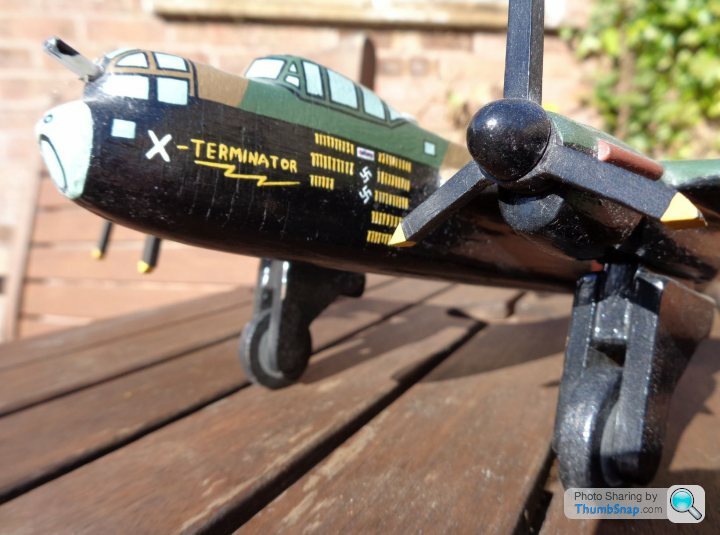
Wheels roll and propellers spin. (wheels cut from ply, props from a non-rigid clear plastic sheet)
Mid upper turret turns. 'Machine guns' made from empty Biro refills.
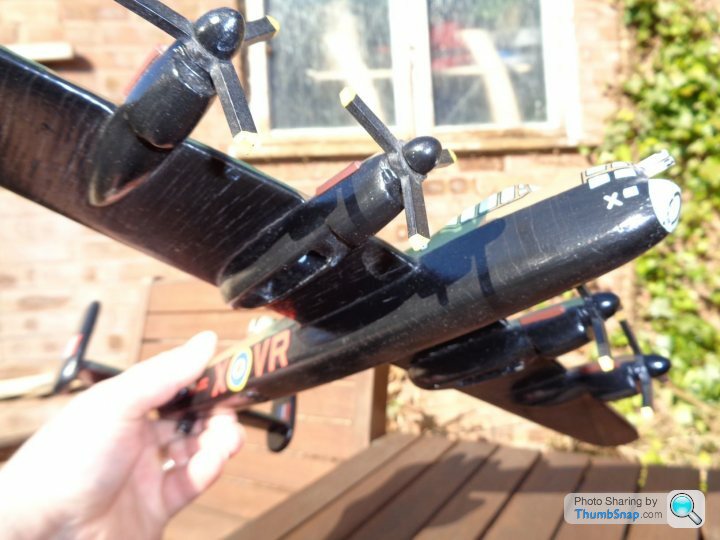
Wheels removed for "flight mode". Cheating with Blutak here - friction fit initially, but they got pretty loose with repeated play.
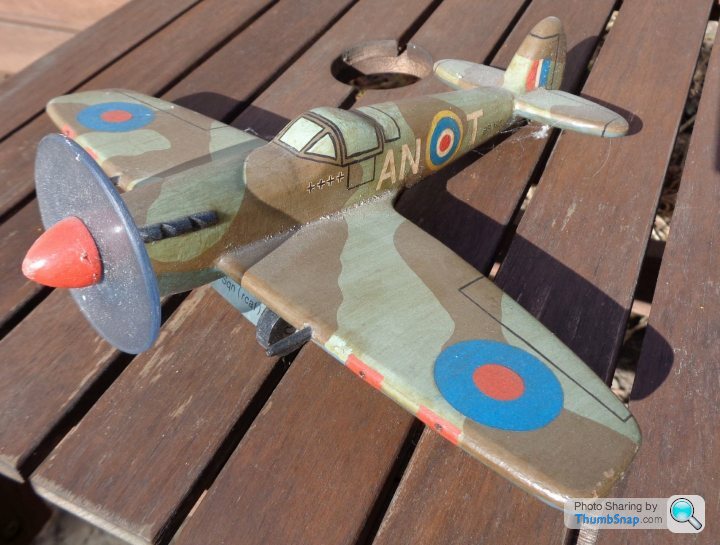
Spitfire Mk.Vc (tropical filter, clipped wings, for desert ops)
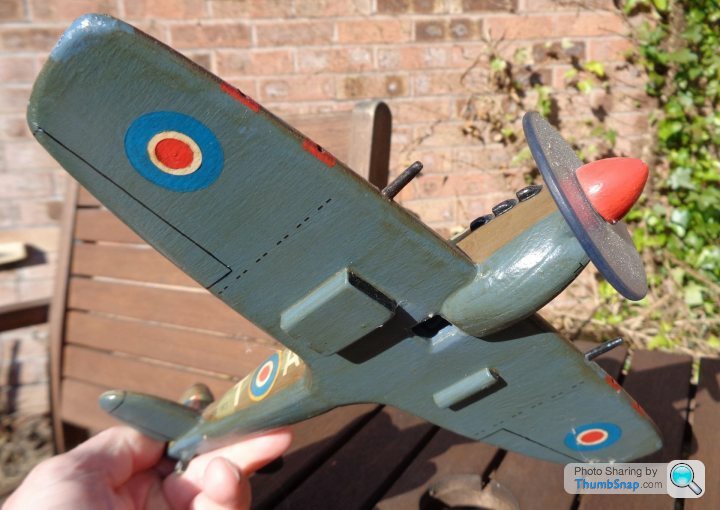
Fighters all have removable wheels, P-26 fixed wheels (like the real thing).
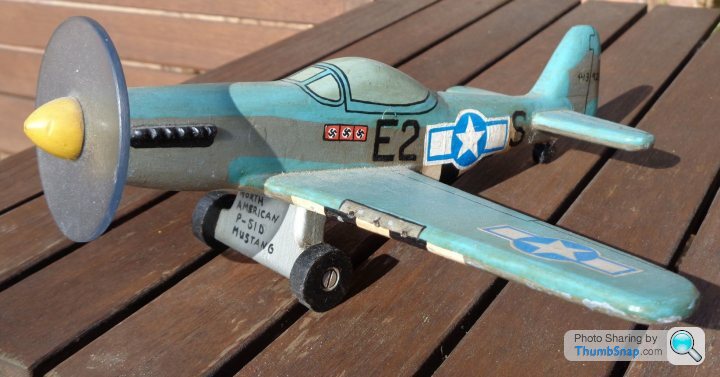
Mustang.
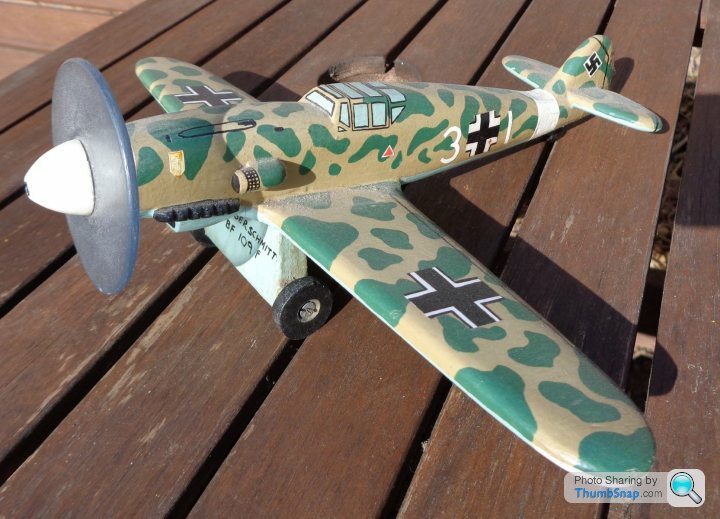
Messerschmidt Bf 109F - North Africa desert camo.
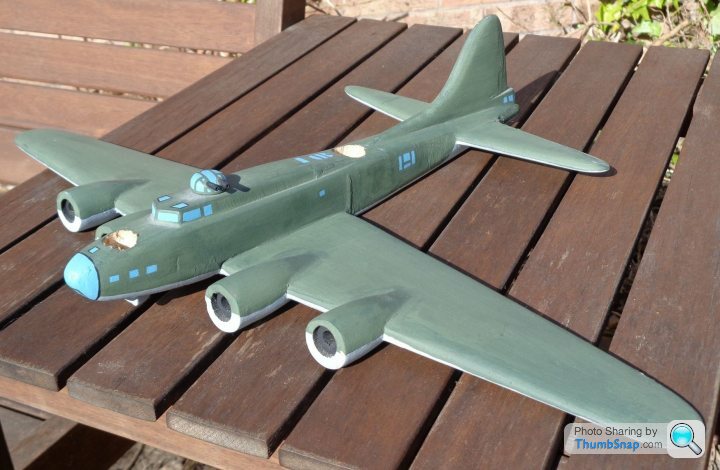
Incomplete B-17 - holes prepared for rotating turrets (top turret fitted) and for propeller hubs. It was going to be painted as "Sally-B" but lost my 'workshop' space and it was stuck in a box for years.
Deadly enemies (after a wipe with a damp cloth - apologies for earlier photos of them dusty).
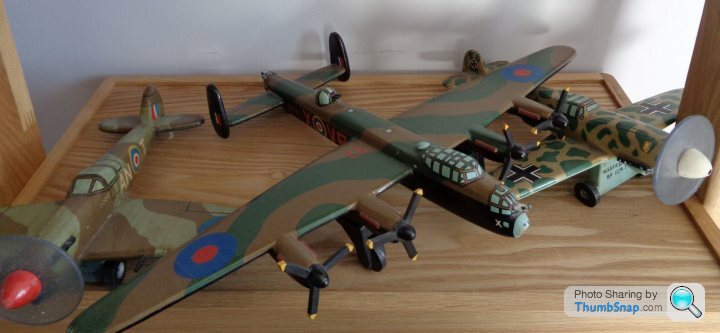
Some are still allowed shelf space in the spare bedroom.
All are hand made, fuselages laminated from plywood, and slotted together with glue and dowels here and there. The only metal parts are a couple of screws holding fighter wheels on, and the only plastic parts are the propellers, cut from a sheet of desktop 'talc' (?) plastic. All painted with old Airfix/Humbrol enamel paints, and varnished (hence the dreadful colour fade on the Spitfire). Markings a mix of hand cut vinyl and hand masked/painted, with the odd Airfix decal repurposed where appropriate. None of them were "garage queens" kept on shelves - they've all been played with by two active boys to a greater or lesser extent. Plenty of touch-up paint on some of them too. Lots of lessons to learn (especially to use a more appropriate paint type!) but also very pleased with my effort, considering all I had was a drill in a workbench to turn things, and a jigsaw to cut the parts out. No router, much of it shaped with needle files and sandpaper. Patterns traced from a collection of aviation books I have, or which I borrowed from the local library. transferred onto old cereal boxes, and then drawn around on scrap/salvage wood. Because I already had the paints, the whole lot was effectively free, the only cost being labour in time/effort.
Given this Corona Virus "lockdown" it might be an idea for me to sort the garage out and maybe finish the B-17 at least?
I'm not so great at useful DIY projects, but back when my boys were at the playing with toy cars stage, they also had a bunch of toy aeroplanes. But cheap plastic toys break with alarming frequency, and expensive toys are often "too nice to play with properly".
So I used a load of salvaged timber from old pallets and the ply from wooden ammunition boxes to build them a few things to play with on the theme of naval forces...
I built:
HMS Arrow
USS America
A 'generic' Landing Craft
and air forces...
I built:
Boeing P-26 (Peashooter)
Lancaster
Spitfire
Mustang
Messerschmidt 109
...and an incomplete B-17 Flying Fortress that was a tad too ambitious with too many rotating turrets.
All are still around, and for the most part still in one piece. Not so easy to find since we moved house, the bigger stuff (frigate and aircraft carrier are in the garage rafters) but here's a few pictures of what I could find still...
A rather battered P-26. The pilot is a "peg figure" turned from a bit of dowel and he can be taken out, held in by friction alone.
Lancaster.
Wheels roll and propellers spin. (wheels cut from ply, props from a non-rigid clear plastic sheet)
Mid upper turret turns. 'Machine guns' made from empty Biro refills.
Wheels removed for "flight mode". Cheating with Blutak here - friction fit initially, but they got pretty loose with repeated play.
Spitfire Mk.Vc (tropical filter, clipped wings, for desert ops)
Fighters all have removable wheels, P-26 fixed wheels (like the real thing).
Mustang.
Messerschmidt Bf 109F - North Africa desert camo.
Incomplete B-17 - holes prepared for rotating turrets (top turret fitted) and for propeller hubs. It was going to be painted as "Sally-B" but lost my 'workshop' space and it was stuck in a box for years.
Deadly enemies (after a wipe with a damp cloth - apologies for earlier photos of them dusty).
Some are still allowed shelf space in the spare bedroom.
All are hand made, fuselages laminated from plywood, and slotted together with glue and dowels here and there. The only metal parts are a couple of screws holding fighter wheels on, and the only plastic parts are the propellers, cut from a sheet of desktop 'talc' (?) plastic. All painted with old Airfix/Humbrol enamel paints, and varnished (hence the dreadful colour fade on the Spitfire). Markings a mix of hand cut vinyl and hand masked/painted, with the odd Airfix decal repurposed where appropriate. None of them were "garage queens" kept on shelves - they've all been played with by two active boys to a greater or lesser extent. Plenty of touch-up paint on some of them too. Lots of lessons to learn (especially to use a more appropriate paint type!) but also very pleased with my effort, considering all I had was a drill in a workbench to turn things, and a jigsaw to cut the parts out. No router, much of it shaped with needle files and sandpaper. Patterns traced from a collection of aviation books I have, or which I borrowed from the local library. transferred onto old cereal boxes, and then drawn around on scrap/salvage wood. Because I already had the paints, the whole lot was effectively free, the only cost being labour in time/effort.
Given this Corona Virus "lockdown" it might be an idea for me to sort the garage out and maybe finish the B-17 at least?
Those are absolutely fantastic, great work. I hope playing with toys Dad created will be a memory the kids will treasure. Woodworking is great use of time under this lockdown but it's the materials that are the issue!
P.S I don't have a workshop, it was THE compromise I made to get us into our dream home. I'm currently spread across 2 wooden sheds for bikes, tools and misc, 2 plastic sheds for garden equipment and a 1.5m x 3m outside cupboard built into the house which means pulling the tools out each time and putting them away after each job. Annoying but not the end of the world.
P.S I don't have a workshop, it was THE compromise I made to get us into our dream home. I'm currently spread across 2 wooden sheds for bikes, tools and misc, 2 plastic sheds for garden equipment and a 1.5m x 3m outside cupboard built into the house which means pulling the tools out each time and putting them away after each job. Annoying but not the end of the world.
Edited by Origin Unknown on Monday 6th April 20:11
Small faffy update
Now that I've decided in the profile fore the bottom edges of the cladding, time to create a template the hand trimmer can follow. I decided I preferred the design above upside down as it's easier to route!
Printed out the design and stuck this onto a a 6mm offcut sheet of ply using a technique I call "Straight whilst walking a bent line"

The scroll saw I have had one of these (not sure what its name is) omnidirectional blades in it that means it will cut in any direction. This means it's more or less impossible to control or be accurate. That tool went back in the shed being called various names.
So do it free hand with the hand trimmer and clean it up after

Now to clean up the edge, unfortunately I don't own a proper drum sander but I do have these little ones.
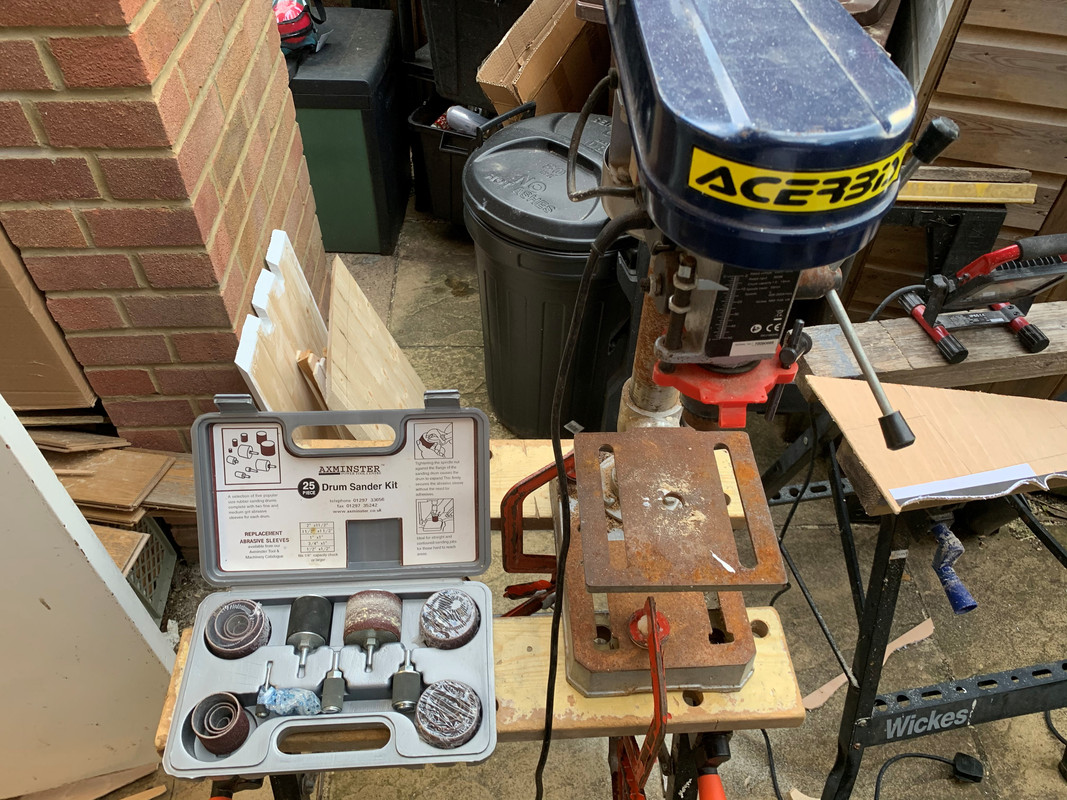
Nice in a small pillar drill but needs something. Cut out in an offcut slightly over the size of the largest drum

Countersink some bolts to hold it and this makes a nice flat surface to work a piece

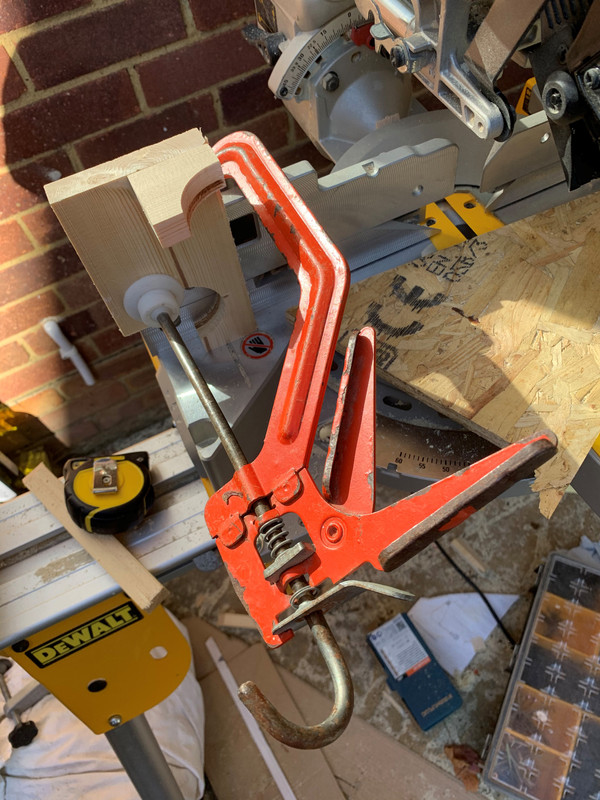
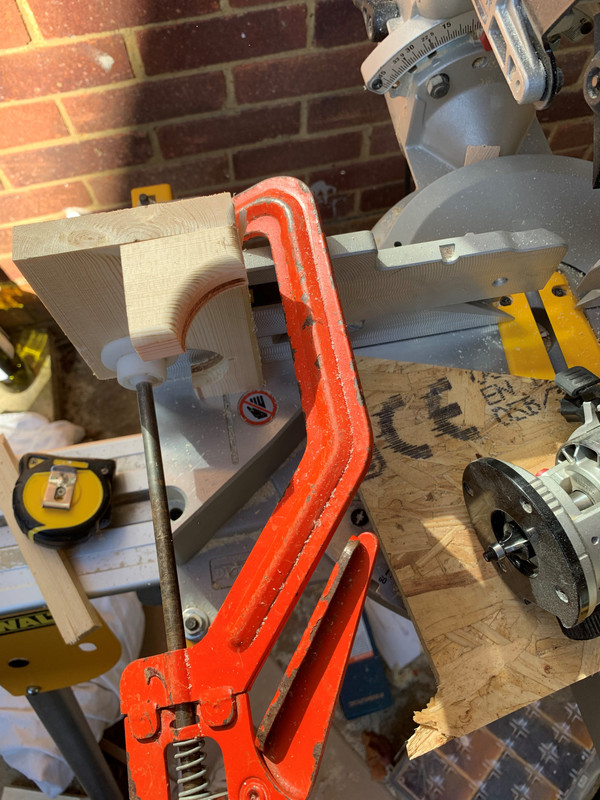
Put the collar into the hand trimmer base.

Chop up the template so it runs around the landing pad but gives me something to clamp and not foul the trimmer base

Clamp in place.

The trimmer only holds a little 1/4" bit and much in the same way when I cut worktops, take multiple passes


A little bit of tidying up with sandpaper and it's all good.
Now that I've decided in the profile fore the bottom edges of the cladding, time to create a template the hand trimmer can follow. I decided I preferred the design above upside down as it's easier to route!
Printed out the design and stuck this onto a a 6mm offcut sheet of ply using a technique I call "Straight whilst walking a bent line"
The scroll saw I have had one of these (not sure what its name is) omnidirectional blades in it that means it will cut in any direction. This means it's more or less impossible to control or be accurate. That tool went back in the shed being called various names.
So do it free hand with the hand trimmer and clean it up after
Now to clean up the edge, unfortunately I don't own a proper drum sander but I do have these little ones.
Nice in a small pillar drill but needs something. Cut out in an offcut slightly over the size of the largest drum
Countersink some bolts to hold it and this makes a nice flat surface to work a piece
Put the collar into the hand trimmer base.
Chop up the template so it runs around the landing pad but gives me something to clamp and not foul the trimmer base
Clamp in place.
The trimmer only holds a little 1/4" bit and much in the same way when I cut worktops, take multiple passes
A little bit of tidying up with sandpaper and it's all good.
Gassing Station | Homes, Gardens and DIY | Top of Page | What's New | My Stuff