Volkswagen Corrado G60
Discussion


Spinakerr said:
Great progress, removing the cornflakes from your car is always satisfying! Hope the G60 will be back on the road shortly.
Any waxoil to cover over that hammerite or is space as a premium/hot rad pipes going to cause melti-smellness?
Mostly going with the Hammerite if I'm honest, I'm saving the Waxoyl for the underside....Any waxoil to cover over that hammerite or is space as a premium/hot rad pipes going to cause melti-smellness?
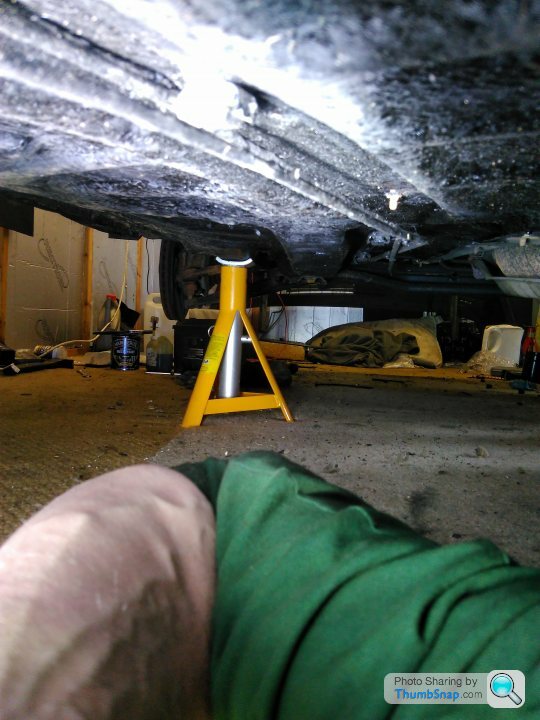
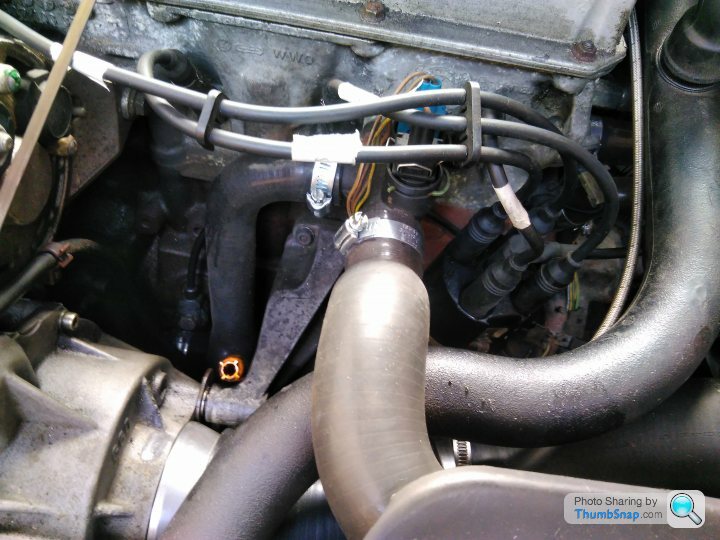
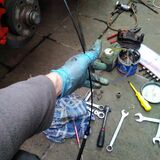
Made a little more progress and some decisions as to what to do with the power steering. It turns out that my working hours are incompatible with those of Pirtek.... Without taking a day off (which is tricky as we're busy at work at present) to do it, and also thinking that the existing hoses might make the re-routing tricky, I took a closer look and the metal pipe that should be protruding from the front of the valance, to see if we could work something out...
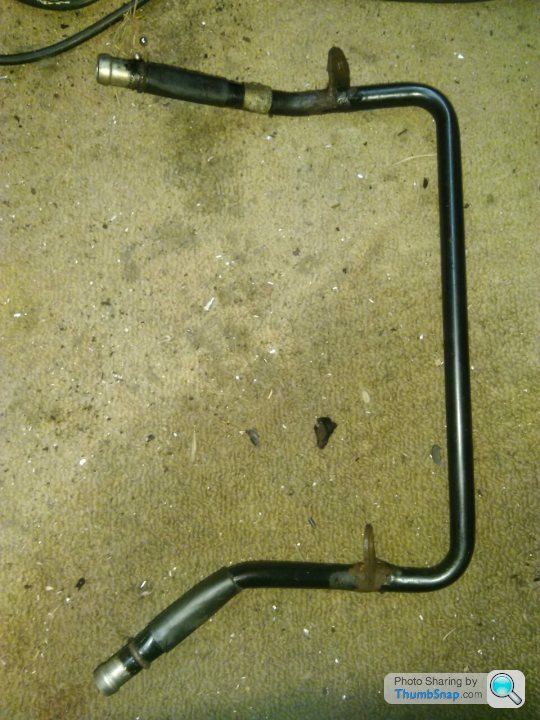
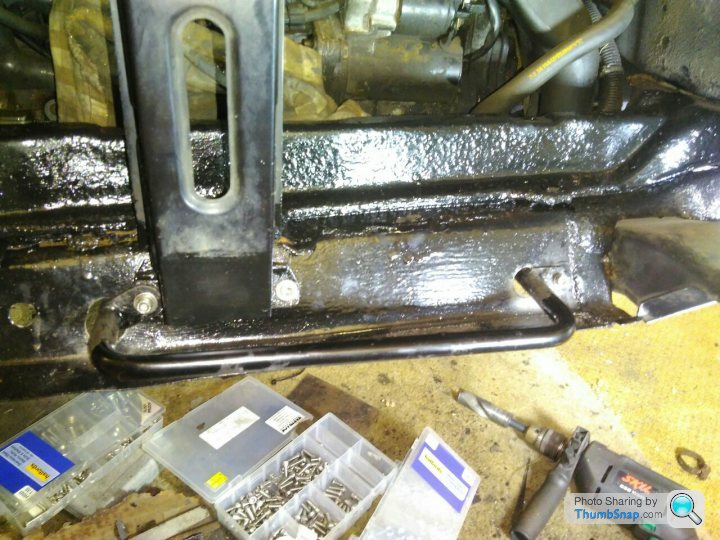
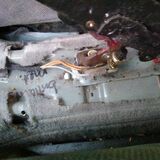
Taking a closer look, it turned out that the corrosion on the pipe wasn't as bad as I first thought, it was made to look worse by the surrounding valance and the bits of that which were still attached to the fastening arrangements on the pipe. This being the case, I abandoned the plan to divert the power steering, and set about measuring and drilling holes in the nice new bit of steelwork that I'd just welded in.
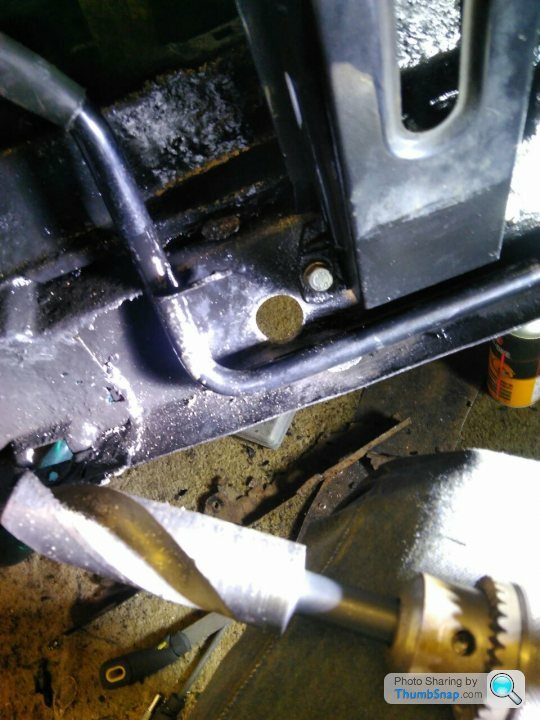
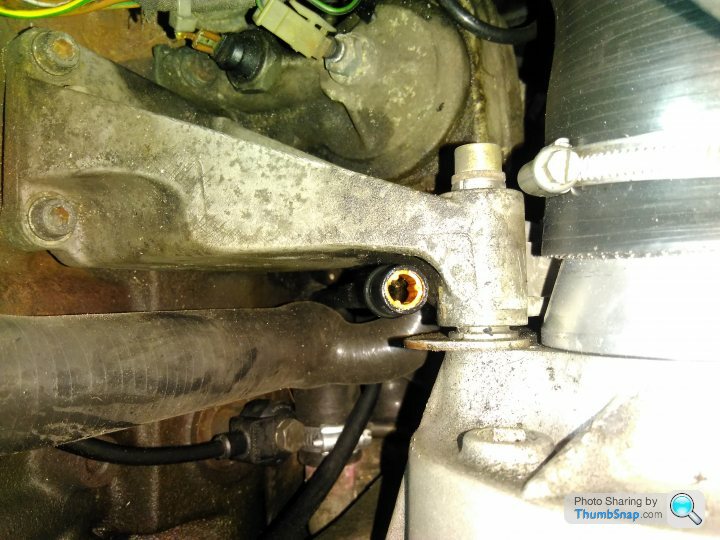
That should be a large enough drill bit.....

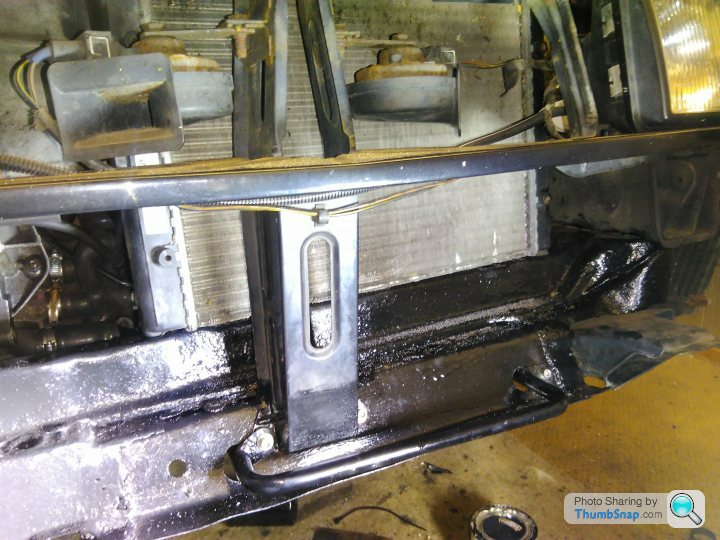
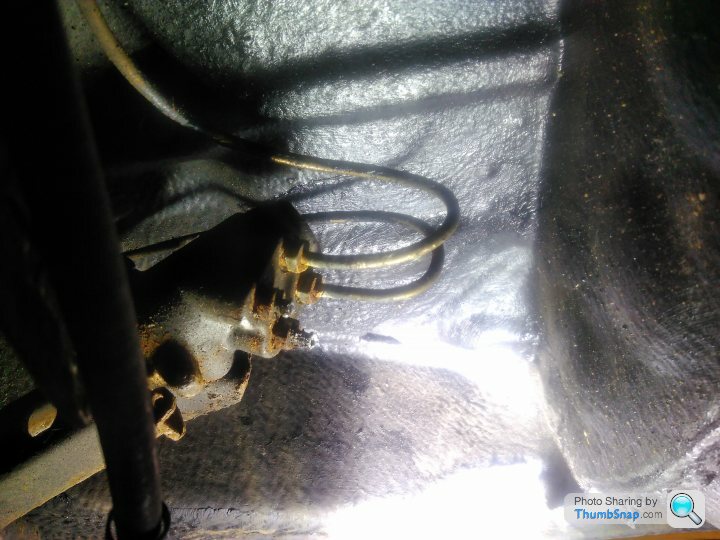
A few hours later, it was in - not fouling the front crossmember either! For an extra bonus, it also lined up with the power steering hoses. I also took the opportunity to sort out the broken attachment for the nearside front brake cooling duct.
Once in, a coat of....you guessed it, Hammerite on the newly drilled holes and the deed was done:
Now that is in, I can get the remainder of the cooling system plumbed in, and the both filled and bled. It really feels like a little bit of progress was made (although there are brake lines and a number of other things to do as well....)
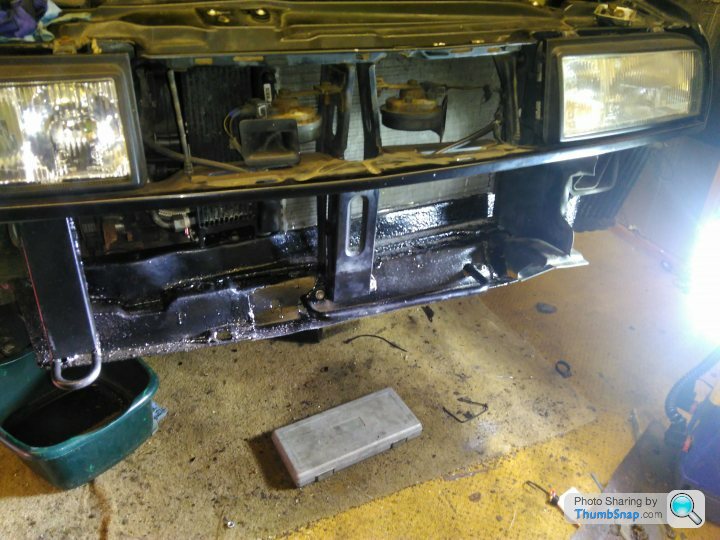
Oh, and I touched up the fan surround too, just as well, you know, I was there.


More work stuff this week, and the small matter of my professional review that has been taking up the majority of my time over the last 6 months. Once that's out the way, the more more important matter of getting the Corrado back on the road can happen.
As and avid reader of the book of lies will know, 'Refitting is the reverse of removal.'
This really helps if you wrote everything down/took pictures/did it yesterday and not 4 months ago.
However, managed to get some more progress made today, and it is slowly coming back together. I also managed to sit my professional review and test-ride a Ducati 999s too, so it's been a good couple of weeks
The cooling system was connected up and test fitted:
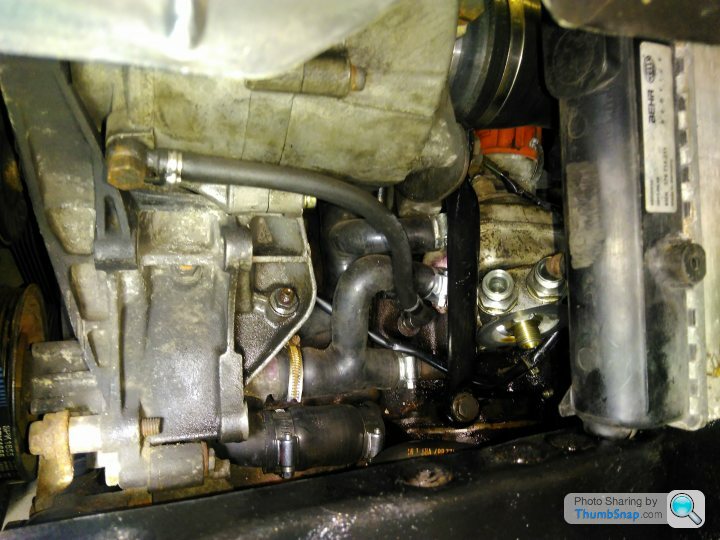
All the hoses seem to fit OK. The radiator went back in OK....to be taken out and put back in again multiple times as the following went in:
Oil cooler and plumbing:

Radiator fan housing (that was a puzzle that required a lot of removal of previously fitted bits.
Supercharger outlet pipework (the new BBM delight) - that required a lot a tweaking too as a new part that wasn't there before.
Power steering pipework
I used stainless bits wherever possible in the refitting, except where I didn't have suitable bits, then the original bits went back in.
All in all, then engine bay, now looks like and engine bay again i.e full of stuff and difficult to work on again!
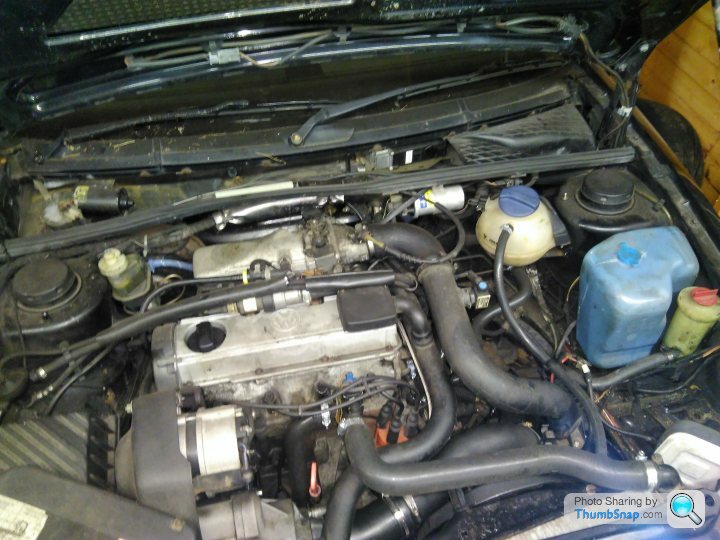
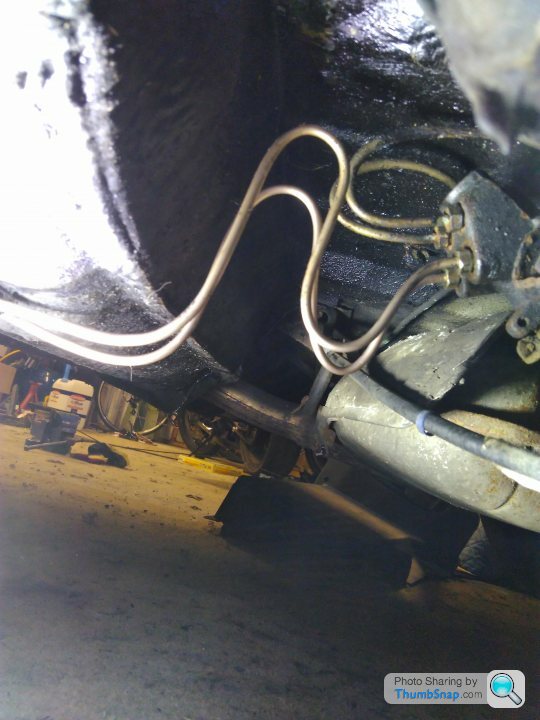
With the new bits, it's now a little bit tighter than before between the fan and the supercharger outlet:
Next step is to change the oil, add coolant and fire it all up to check for leaks....
Cheers,
Tom
This really helps if you wrote everything down/took pictures/did it yesterday and not 4 months ago.
However, managed to get some more progress made today, and it is slowly coming back together. I also managed to sit my professional review and test-ride a Ducati 999s too, so it's been a good couple of weeks
The cooling system was connected up and test fitted:
All the hoses seem to fit OK. The radiator went back in OK....to be taken out and put back in again multiple times as the following went in:
Oil cooler and plumbing:
Radiator fan housing (that was a puzzle that required a lot of removal of previously fitted bits.
Supercharger outlet pipework (the new BBM delight) - that required a lot a tweaking too as a new part that wasn't there before.
Power steering pipework
I used stainless bits wherever possible in the refitting, except where I didn't have suitable bits, then the original bits went back in.
All in all, then engine bay, now looks like and engine bay again i.e full of stuff and difficult to work on again!
With the new bits, it's now a little bit tighter than before between the fan and the supercharger outlet:
Next step is to change the oil, add coolant and fire it all up to check for leaks....
Cheers,
Tom
More progress today:
Oil dropped and replaced with ECP's finest 10-40 semi-synthetic.
Power steering reservoir topped up to max
Cooling system filled with Comma Xtreme G48 Coolant (suitable for VWs up to 1996) and de-ionised water (50/50 mix).
Battery connected and up she fired, like she'd never been off the road! Bloody marvellous!
Drank down a lot of the coolant necessitating a top-up, and the same with the oil and PAS fluid, however, I topped all of these up and ran her up to temperature until the fan kicked in.... Hurrah!
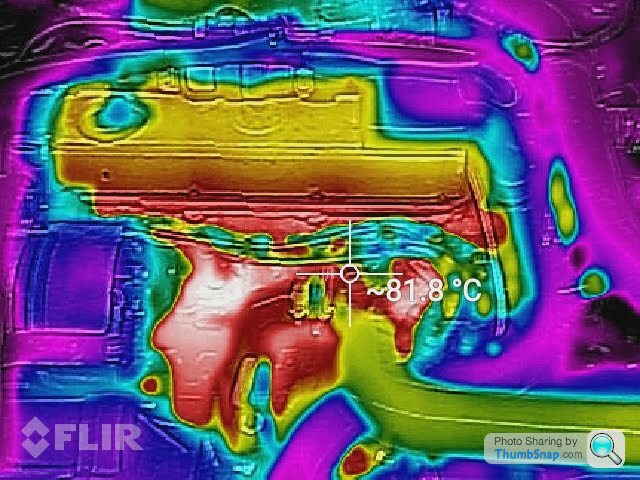
All looking relatively even.
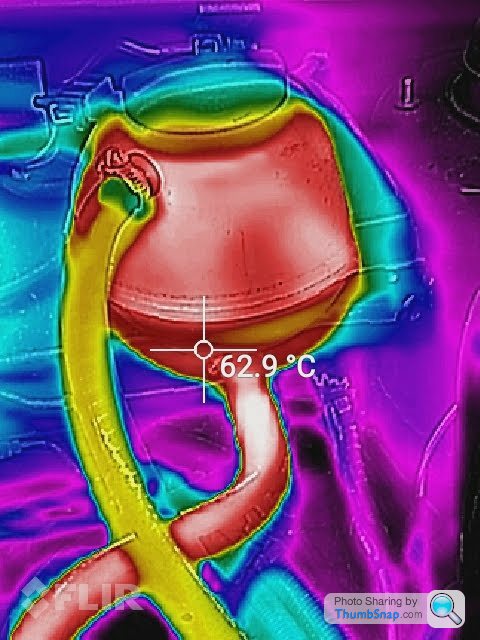
Expansion tank shows a good heat distribution

Not sure about the heat distribution in the radiator mind...
Still, a good first run - I'm going to put the blowers on full and repeat the exercise later this week to make sure the coolant system is fully bled (and add a little more coolant as I'm below the minimum),
Supercharger sounds louder too
Cheers,
Tom
Oil dropped and replaced with ECP's finest 10-40 semi-synthetic.
Power steering reservoir topped up to max
Cooling system filled with Comma Xtreme G48 Coolant (suitable for VWs up to 1996) and de-ionised water (50/50 mix).
Battery connected and up she fired, like she'd never been off the road! Bloody marvellous!
Drank down a lot of the coolant necessitating a top-up, and the same with the oil and PAS fluid, however, I topped all of these up and ran her up to temperature until the fan kicked in.... Hurrah!
All looking relatively even.
Expansion tank shows a good heat distribution
Not sure about the heat distribution in the radiator mind...
Still, a good first run - I'm going to put the blowers on full and repeat the exercise later this week to make sure the coolant system is fully bled (and add a little more coolant as I'm below the minimum),
Supercharger sounds louder too
Cheers,
Tom
Thanks @aka_kerrly, some useful tips.
Got the coolant system bled nicely, and all seems well.
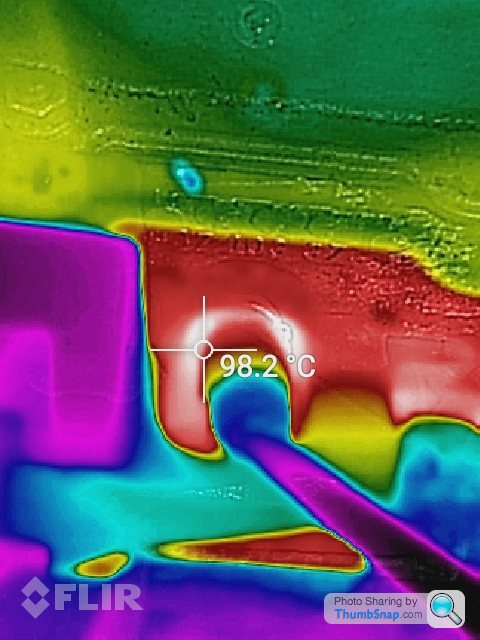
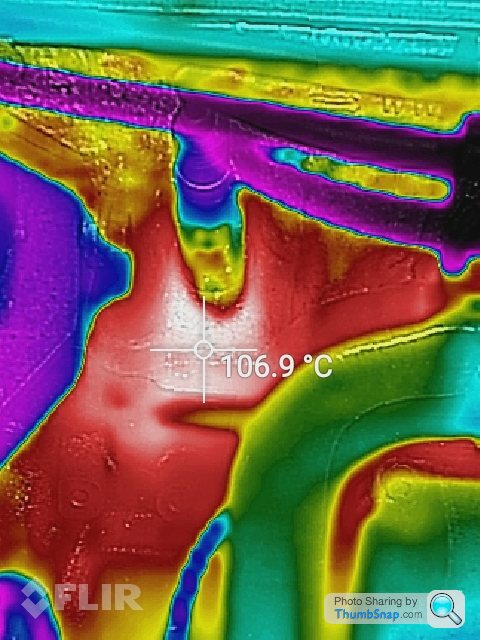
While messing around with the FLIR though, I did notice the cylinder head temp around the spark plug is 4-10 degrees warmer than any other.... Probably means the sum total of bugger all, but I still found it intriguing!
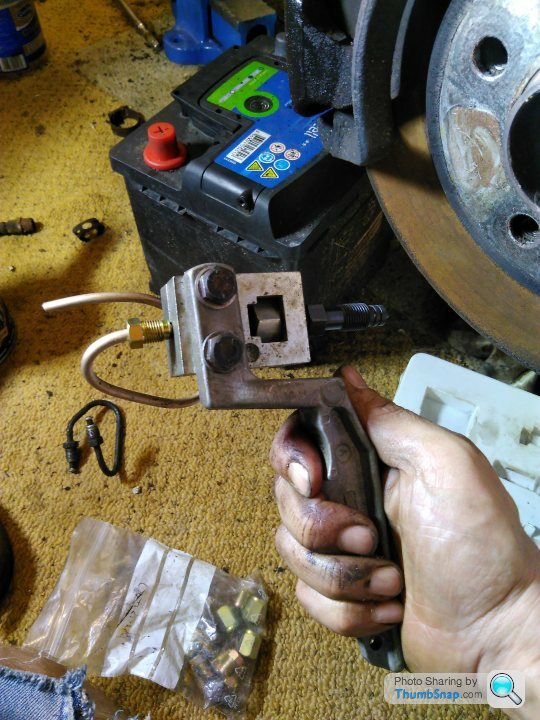
With most stuff in the engine bay now fettled, I set about doing the brake lines which were an advisory on the last MOT. Time for Kunifer all round!
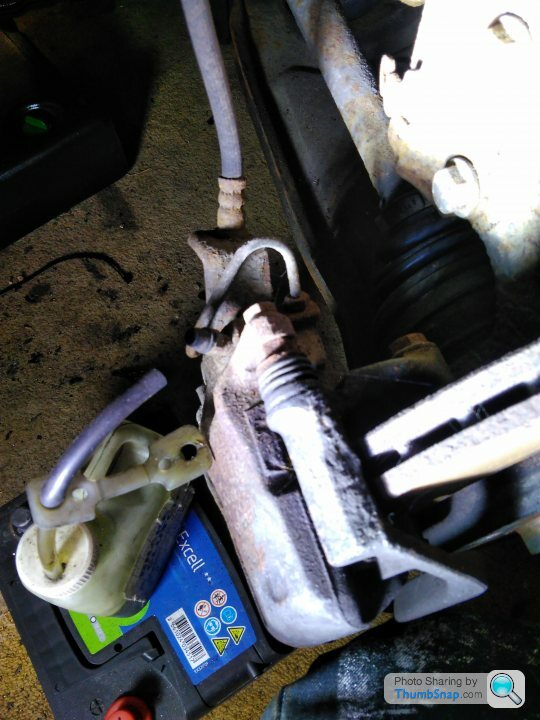
Managed to not shear off the connection with the calliper which was good!
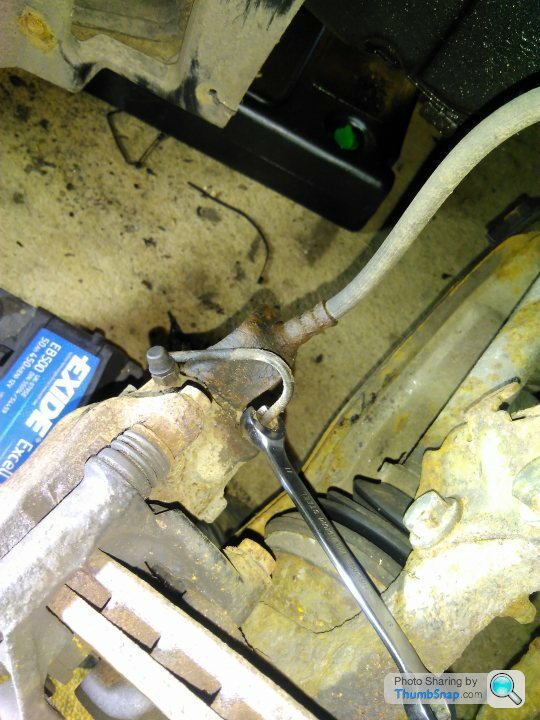
A little bit of bending, straightening, sawing and application of the flaring tool later....
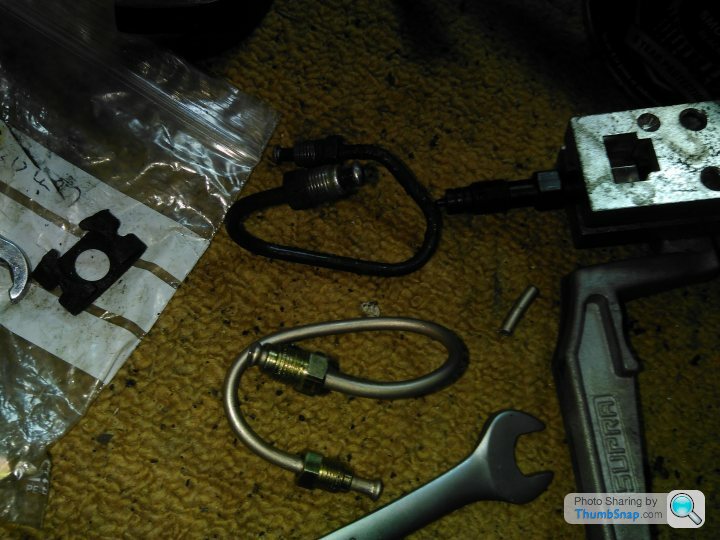
I decided to do the hose at the same time too, as I was there.
Next step is the front to back lines, but I need to pick up more pipe first. I'm also off for a play on the bike at Snetterton, so that's next weekend's job!
Cheers,
Tom
Got the coolant system bled nicely, and all seems well.
While messing around with the FLIR though, I did notice the cylinder head temp around the spark plug is 4-10 degrees warmer than any other.... Probably means the sum total of bugger all, but I still found it intriguing!
With most stuff in the engine bay now fettled, I set about doing the brake lines which were an advisory on the last MOT. Time for Kunifer all round!
Managed to not shear off the connection with the calliper which was good!
A little bit of bending, straightening, sawing and application of the flaring tool later....
I decided to do the hose at the same time too, as I was there.
Next step is the front to back lines, but I need to pick up more pipe first. I'm also off for a play on the bike at Snetterton, so that's next weekend's job!
Cheers,
Tom
Nice! I keep being tempted by the thoughts of an exhaust upgrade, but I'll wait until it needs replacing....
The kunifer is really nice to work with. Making the little fiddly pipes takes a little time and effort, but it's easier to work than steel and more resilient than pure copper. I've never felt in danger of kinking it!
The brake flaring tool is borrowed from a mate and is I think of1980s vintage. It appears much more robust than other stuff I've looked at though!
Good luck with yours.
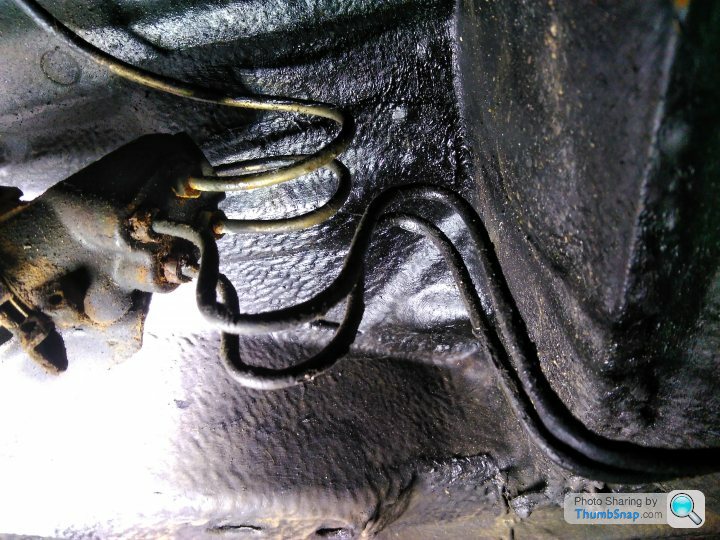
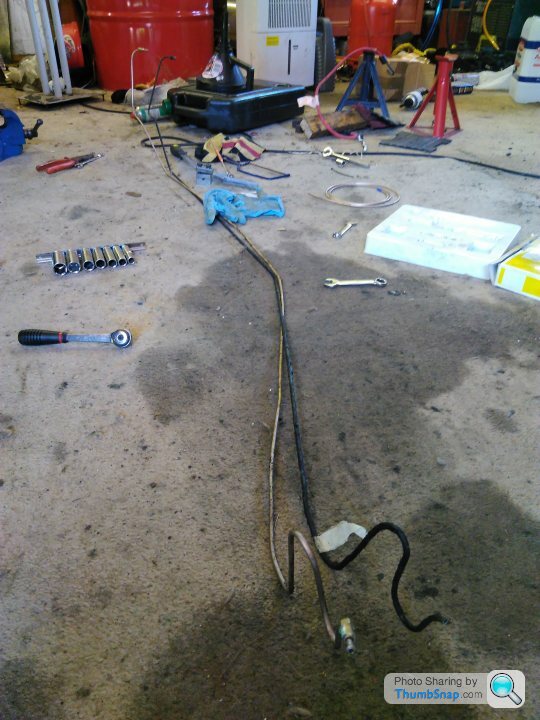
More brake line progress - so much so that there's only 2 pipes left on the car that aren't made from kunifer!

They are the two on the left that go to the master cylinder, and in all honesty, I'm inclined to leave them.... They look at be a total swine to get at!
The other ones that I've done required a little persuasion to come off. By persuasion, I mean they needed to be cut with a hacksaw and then an 11mm hex socket used to remove the remains. The brake spanner did nothing apart from round things off.
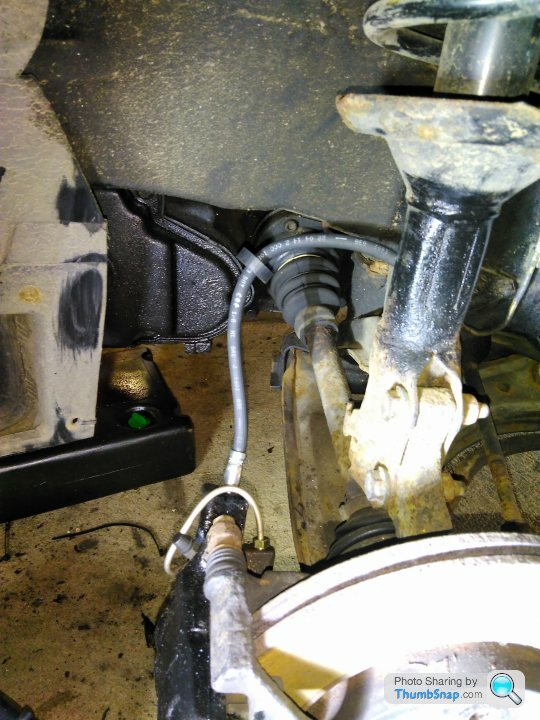
From this:
Via this:
To this:

I have a day off tomorrow which means hopefully more progress, although the AX is going for its MOT, so I may have my effort diverted elsewhere!
They are the two on the left that go to the master cylinder, and in all honesty, I'm inclined to leave them.... They look at be a total swine to get at!
The other ones that I've done required a little persuasion to come off. By persuasion, I mean they needed to be cut with a hacksaw and then an 11mm hex socket used to remove the remains. The brake spanner did nothing apart from round things off.
From this:
Via this:
To this:
I have a day off tomorrow which means hopefully more progress, although the AX is going for its MOT, so I may have my effort diverted elsewhere!
@aka_kerrly - thanks, it's a satisfying job...once it's done!
I'm managing all the lines with the front up on axle stands and the rear wheels on the ground - the rear pipes have already been done though! The compensator is easy to get to with the nose up slightly - enough for access with a hacksaw and socket anyway!
If you're going to give them a go, a vice is handy for making the last tighter bends in the pipes where there's not much clearance for the flaring tool. This means you can put the male connector on, flare the pipe end when it's straight, then grip the male connector to make the final bends. Based upon today, you'll need to make a few alterations when fitting anyway.
The AX did fail it's MOT today, so not as much progress as I might have liked (and I haven't even started fixing it yet....).
However, despite the two remaining pipes in the engine bay not NEEDING to be done, they needed to be done! Access is a total pain if you don't want to take the brake fluid reservoir off (I didn't).
The off side front pipe from the master cylinder isn't too bad, but crosses the rest to sit on the bulkhead before joining the 'T' section which splits the force to the near side front and off side rear calipers.
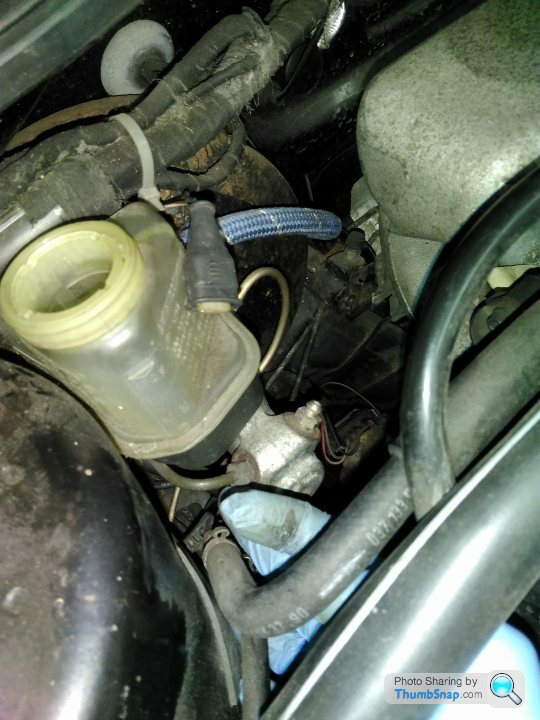
Can you see the other pipe? No? That's because it's under the reservoir.... This little tinker on the off side rear of the master cylinder is the counterpart to the much more easily accessible one on the nearside. This tricky horror runs to a female/female connector that then transfers the pressure to the nearside rear caliper.
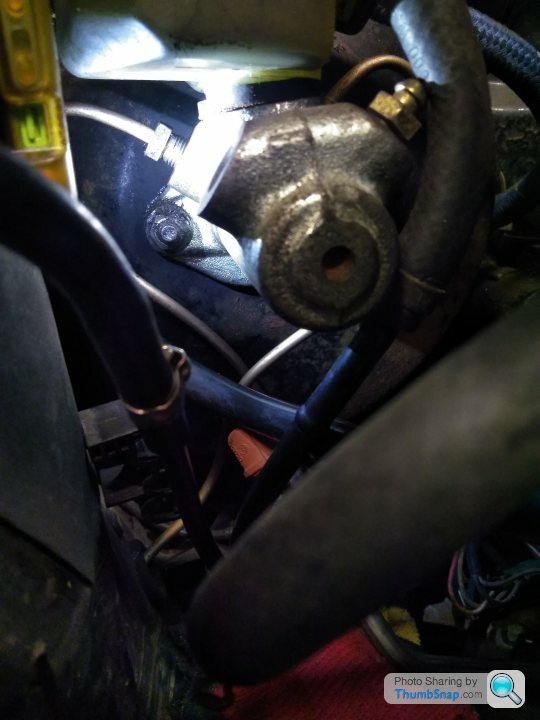
This allows the braking force to be split diagonally across calipers, so if one part of the system fails, in theory, you can still slow the car without it pulling too much one way or the other.
If you're doing this line, remove the air box and unclip the fuel lines, as it gives you just enough room to wield and 11mm spanner. The good news is that because it's a pain to get at, it's protected from the elements and will actually move!
I managed to get both lines out. It's worth noting at this point, that a really smart person would have sketched out the layout before cutting anything. I'm not that person (as I had to work out where the compensator lines went retrospectively...oops) but I had learned enough to draw a diagram this time round!
I got the most difficult line fabricated and installed, given the access, or wasn't a the easiest job, but I did find the perfect use for an iPhone....
I also found myself out of new shiny male connectors during the day. However a quick session with the angle grinder on the old brake lines left me with 3 of the old connectors that were still reasonable:
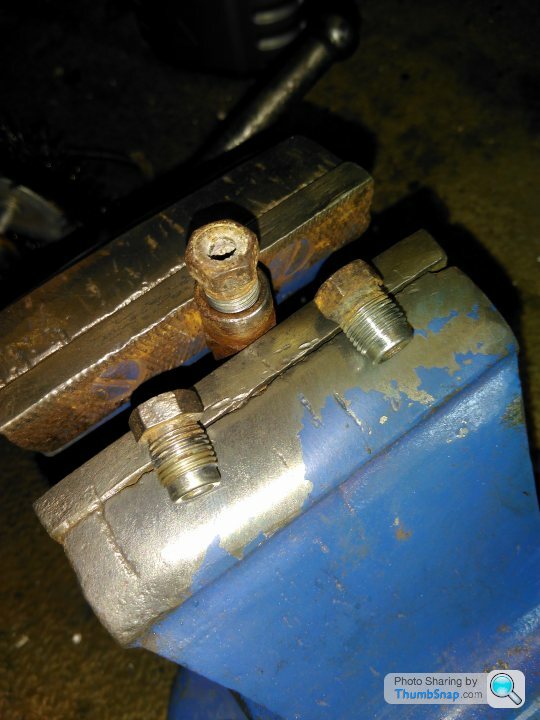
After a quick drill and wire brush session, they were ready for re-use.
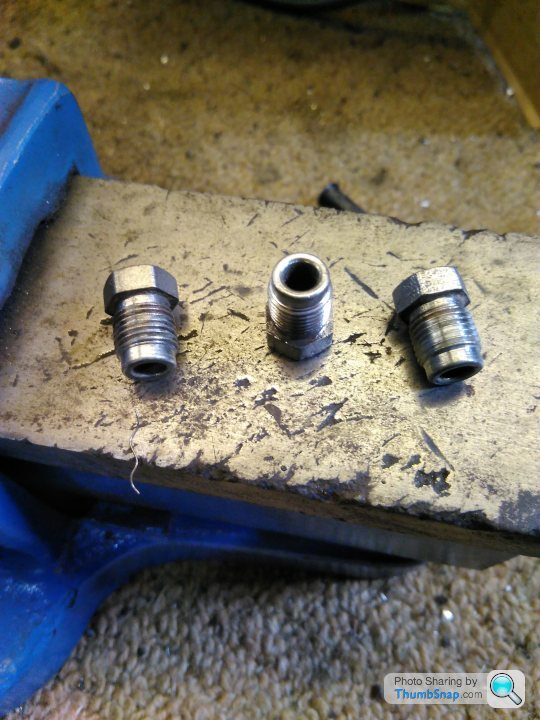
I know it would probably have made more sense to buy new ones, but that would have involved a trip to the factors, and also...I liked making them shiny!
On call this coming week, so hopefully lots more garage time!
I'm managing all the lines with the front up on axle stands and the rear wheels on the ground - the rear pipes have already been done though! The compensator is easy to get to with the nose up slightly - enough for access with a hacksaw and socket anyway!
If you're going to give them a go, a vice is handy for making the last tighter bends in the pipes where there's not much clearance for the flaring tool. This means you can put the male connector on, flare the pipe end when it's straight, then grip the male connector to make the final bends. Based upon today, you'll need to make a few alterations when fitting anyway.
The AX did fail it's MOT today, so not as much progress as I might have liked (and I haven't even started fixing it yet....).
However, despite the two remaining pipes in the engine bay not NEEDING to be done, they needed to be done! Access is a total pain if you don't want to take the brake fluid reservoir off (I didn't).
The off side front pipe from the master cylinder isn't too bad, but crosses the rest to sit on the bulkhead before joining the 'T' section which splits the force to the near side front and off side rear calipers.
Can you see the other pipe? No? That's because it's under the reservoir.... This little tinker on the off side rear of the master cylinder is the counterpart to the much more easily accessible one on the nearside. This tricky horror runs to a female/female connector that then transfers the pressure to the nearside rear caliper.
This allows the braking force to be split diagonally across calipers, so if one part of the system fails, in theory, you can still slow the car without it pulling too much one way or the other.
If you're doing this line, remove the air box and unclip the fuel lines, as it gives you just enough room to wield and 11mm spanner. The good news is that because it's a pain to get at, it's protected from the elements and will actually move!
I managed to get both lines out. It's worth noting at this point, that a really smart person would have sketched out the layout before cutting anything. I'm not that person (as I had to work out where the compensator lines went retrospectively...oops) but I had learned enough to draw a diagram this time round!
I got the most difficult line fabricated and installed, given the access, or wasn't a the easiest job, but I did find the perfect use for an iPhone....
I also found myself out of new shiny male connectors during the day. However a quick session with the angle grinder on the old brake lines left me with 3 of the old connectors that were still reasonable:
After a quick drill and wire brush session, they were ready for re-use.
I know it would probably have made more sense to buy new ones, but that would have involved a trip to the factors, and also...I liked making them shiny!
On call this coming week, so hopefully lots more garage time!
A little more progress yesterday, all brake lines are now in, and I've started putting the interior back together.
A few replacements with stainless fastenings along the way to delay future rust problems in that most critical of elements, the central rear armrest....
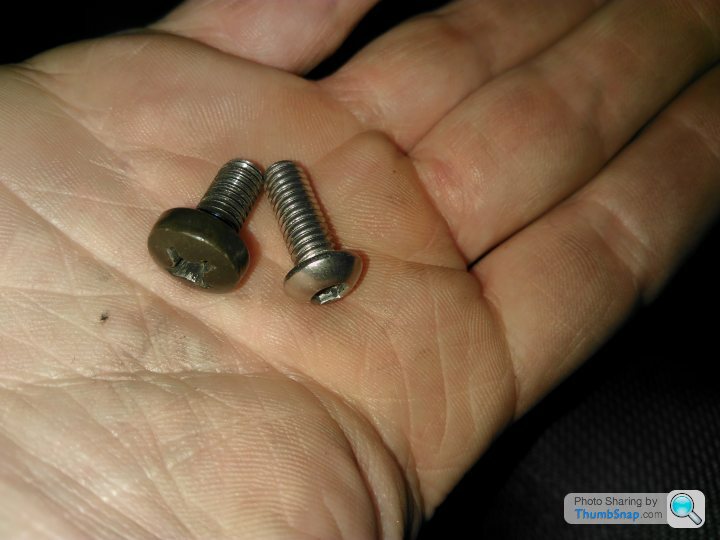

Hopefully get the brakes bled this afternoon and then it's MOT time I think!
A few replacements with stainless fastenings along the way to delay future rust problems in that most critical of elements, the central rear armrest....
Hopefully get the brakes bled this afternoon and then it's MOT time I think!
Having got the Citroën through its MOT, I managed to put more time into the Corrado again.
Getting the brakes bled was a pain and involved an hour long session of "up....up...down....down" call and response with my other half in the driver's seat, and me bouncing around the bleed nipples with an 11mm spanner.
It's a lot easier with all four wheels off so the car is level and all of the calipers accessible. It also helps to have a head of pressure built up so you stand a fighting chance of getting some fluid through along with the air!
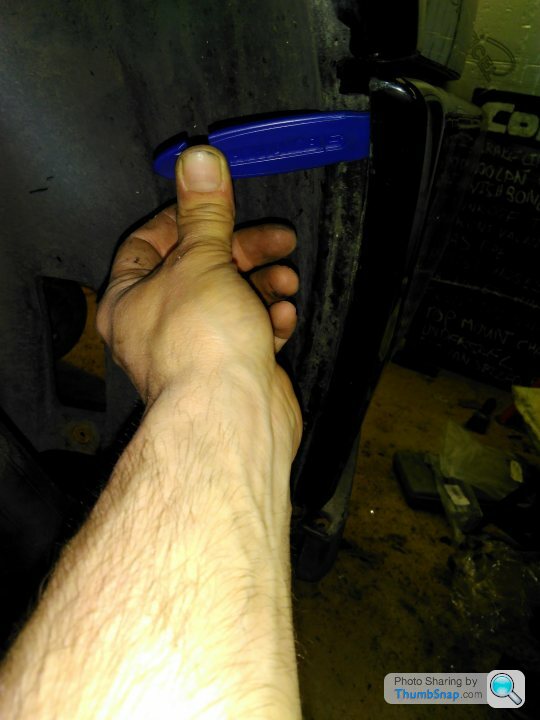
With this done, it was time to get the front bumper back on. Getting the arch liners in involved bicycle tyre levers as the perfect implement:
Given the slightly corroded state of the large bumper mounting bolts that came out (they can end up sat in water) they were replaced with stainless ones and spring washers:
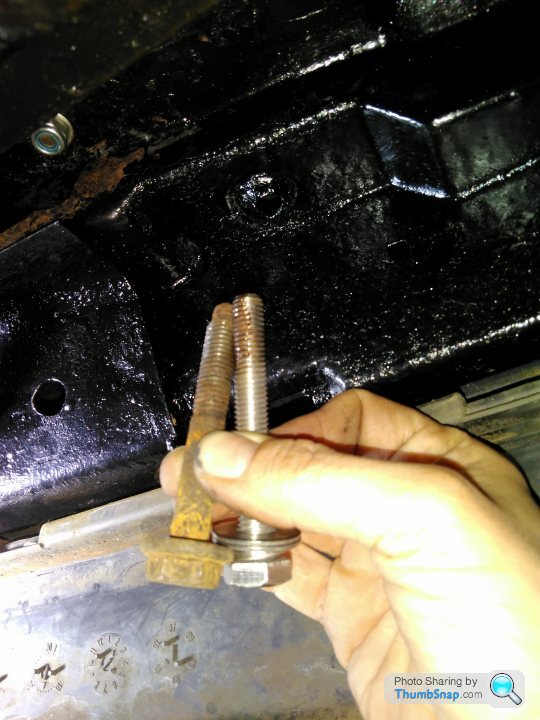
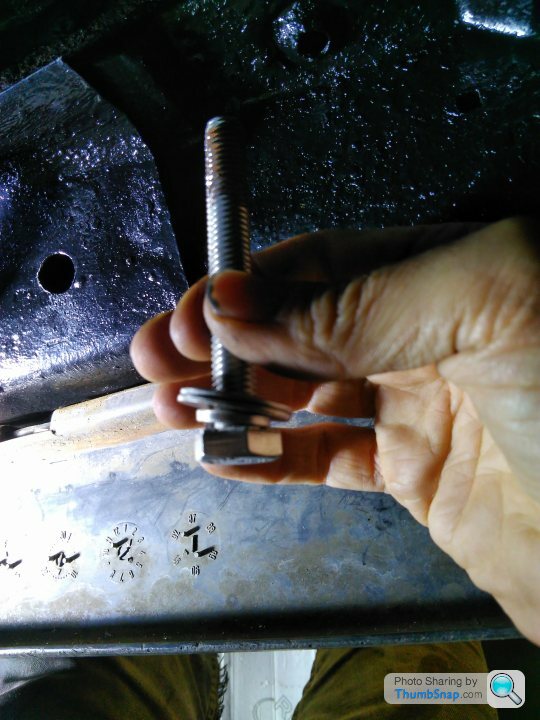
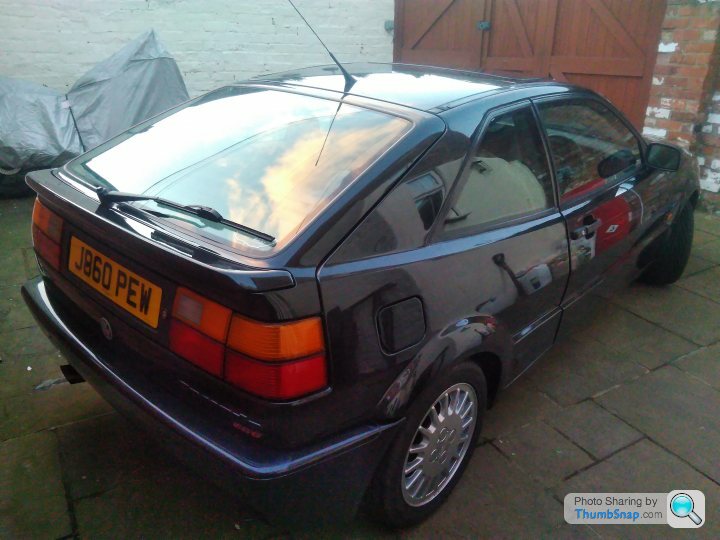
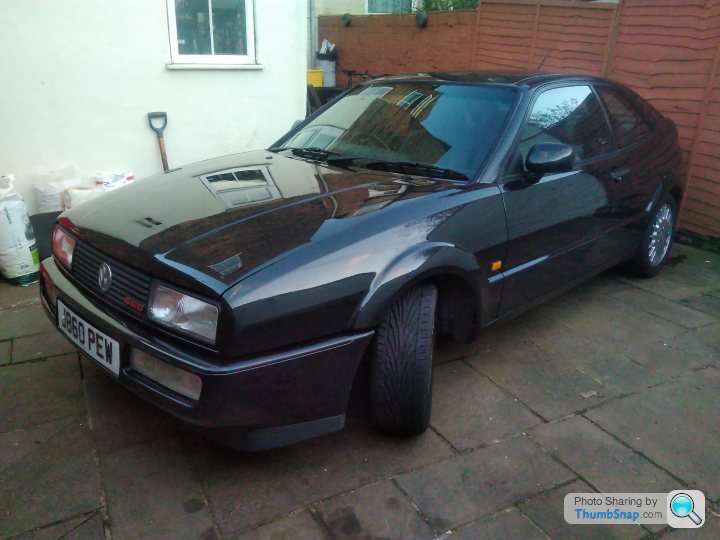
...and lo, it looked like a car again!
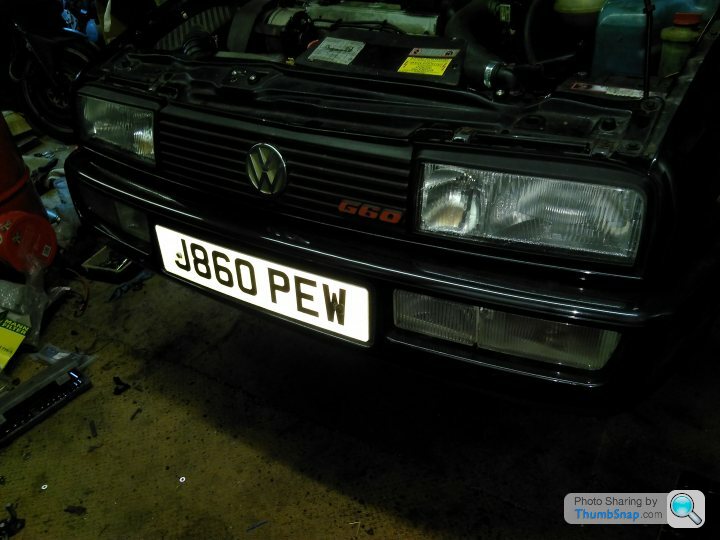
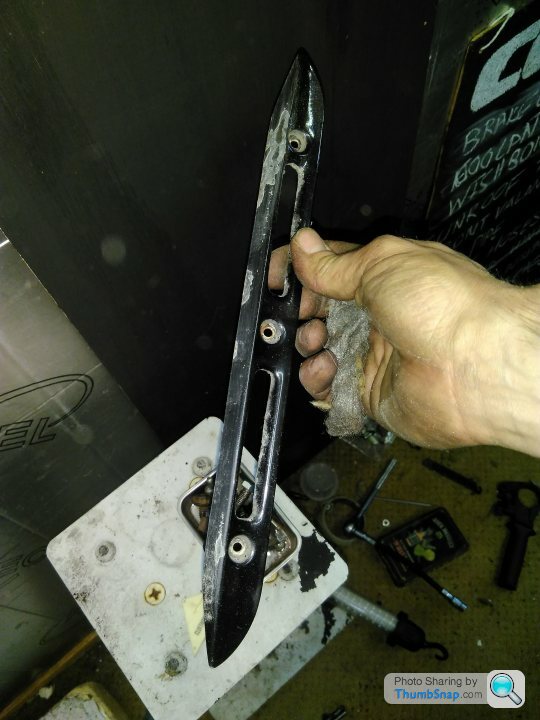
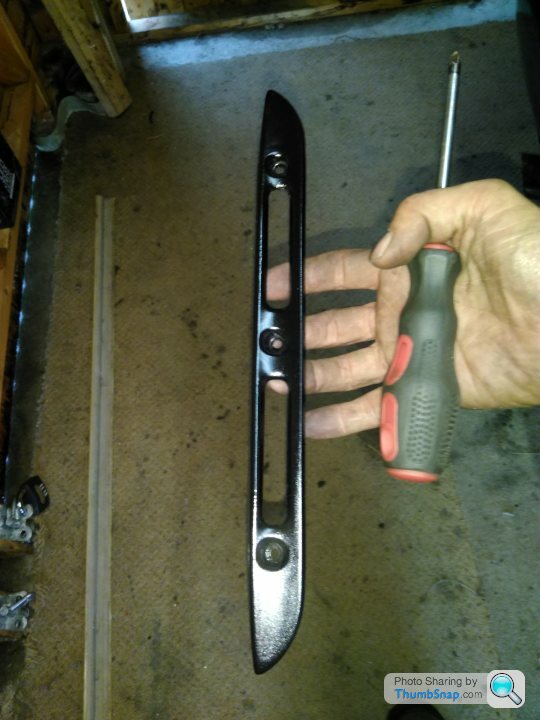
Also did a couple of minor touch up jobs such as the number plate light surround:
Today was D-day. The first MOT in nearly a couple of years, with the car having been off the road for 10 months.
What had I forgotten to do....
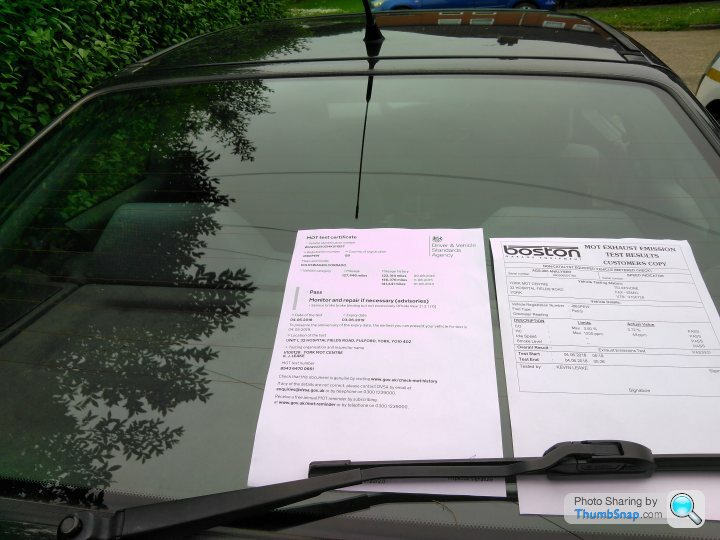
Oh...ok. I'll take that! Emissions good, and it was the one caliper that I knew to be old and tired. Excellent!
Just got back in from a 100 mile celebration including a play with an A3 on the Ring Road, which I thoroughly enjoyed.... The removal of the silencer really means that the charger can be heard, but it's never intrusive.
What's also good is that your can hear the hiss of compressed air from the charger as you modulate the throttle.
Love it!
Getting the brakes bled was a pain and involved an hour long session of "up....up...down....down" call and response with my other half in the driver's seat, and me bouncing around the bleed nipples with an 11mm spanner.
It's a lot easier with all four wheels off so the car is level and all of the calipers accessible. It also helps to have a head of pressure built up so you stand a fighting chance of getting some fluid through along with the air!
With this done, it was time to get the front bumper back on. Getting the arch liners in involved bicycle tyre levers as the perfect implement:
Given the slightly corroded state of the large bumper mounting bolts that came out (they can end up sat in water) they were replaced with stainless ones and spring washers:
...and lo, it looked like a car again!
Also did a couple of minor touch up jobs such as the number plate light surround:
Today was D-day. The first MOT in nearly a couple of years, with the car having been off the road for 10 months.
What had I forgotten to do....
Oh...ok. I'll take that! Emissions good, and it was the one caliper that I knew to be old and tired. Excellent!
Just got back in from a 100 mile celebration including a play with an A3 on the Ring Road, which I thoroughly enjoyed.... The removal of the silencer really means that the charger can be heard, but it's never intrusive.
What's also good is that your can hear the hiss of compressed air from the charger as you modulate the throttle.
Love it!
The Corrado and I haven't had the best relationship for the latter part of this summer, but that's more through my neglect than anything else.
Did one other long journey (Alton Towers for a mate's Birthday) and then the next time I went to use it a week later there were issues.
The coolant light was flashing and it developed a misfire before I got off the driveway. I then tried to open the bonnet to take a look and the release cable failed...
As I was in a hurry, or went back behind the gates and I took the bike instead! I then didn't have any free time to address the issues and so ended up SORN-ing it for a while while I contemplated possible HGF issues.
I had some time over the bank holiday to investigate further though and there was good news. The bonnet release cable hadn't broken, and I was able to get the bonnet up using the excellent Corrado Forum guide. Hook the seatbelt round the release handle then press down on the bonnet! Hey presto, one open bonnet! Some minor adjustments later and that was one off the list...
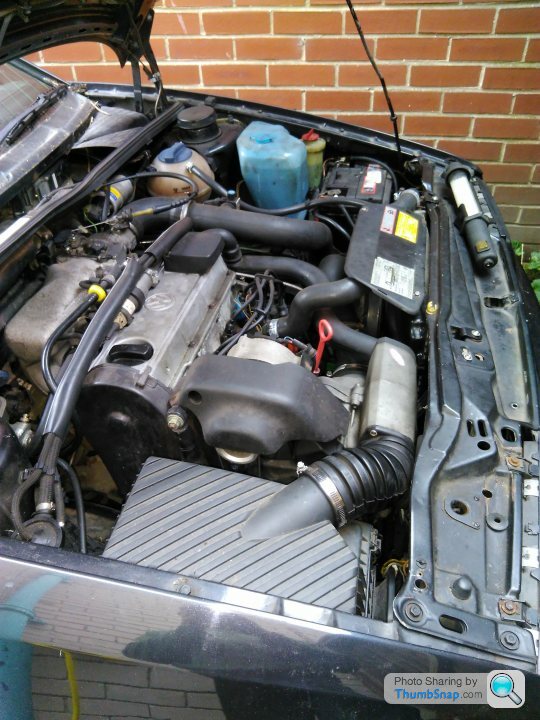
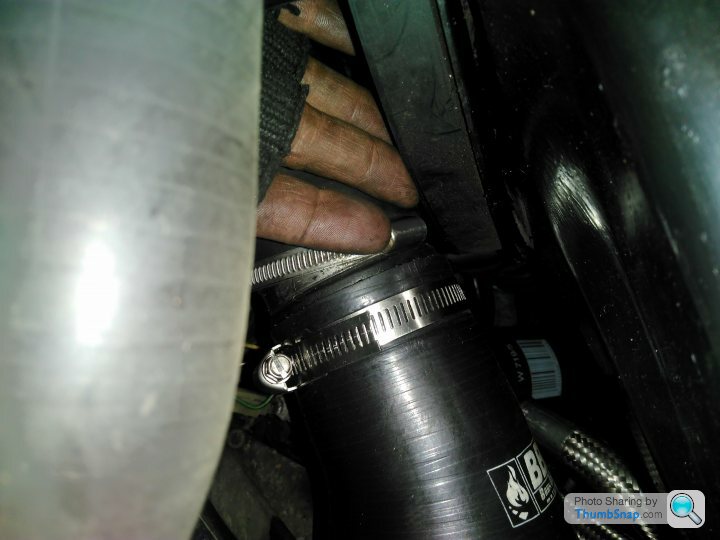
Looking at the expansion tank and oil filler cap, there was no sign of cross contamination but the coolant level was low. Most be going somewhere though, so I felt around all the new hose connections until I found the culprit at the bottom of the radiator on the N/S. It was wet and the others weren't, so a little adjustment later, and that should be the problem sorted.... A trick I learned from the NC30 was that even when every hose seems perfectly tight, you've probably missed one somewhere!
At the risk of sounding smug, what was really nice was the fact that I'd aligned all of the hose clamp adjusters where they could be accessed with the minimum of effort! It was a 30s job to tighten it (although it was in the easiest location).
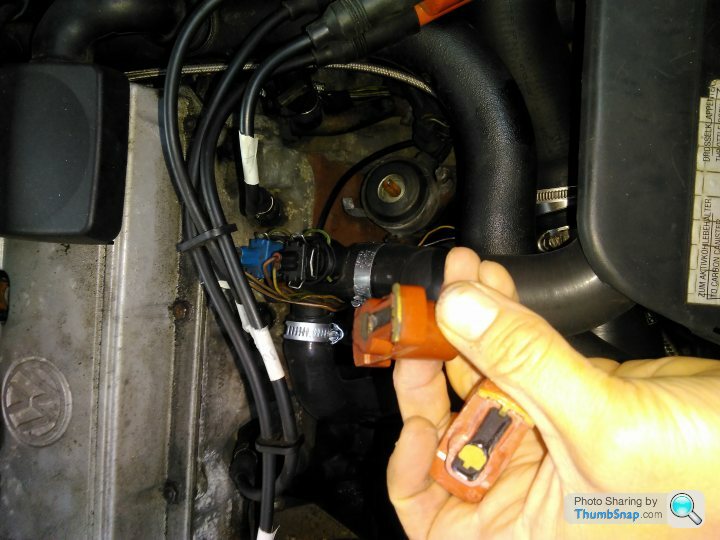
Bouyed by the fact that HGF was off the cards for now, I went hunting the misfire.
Yup, that'll do it:
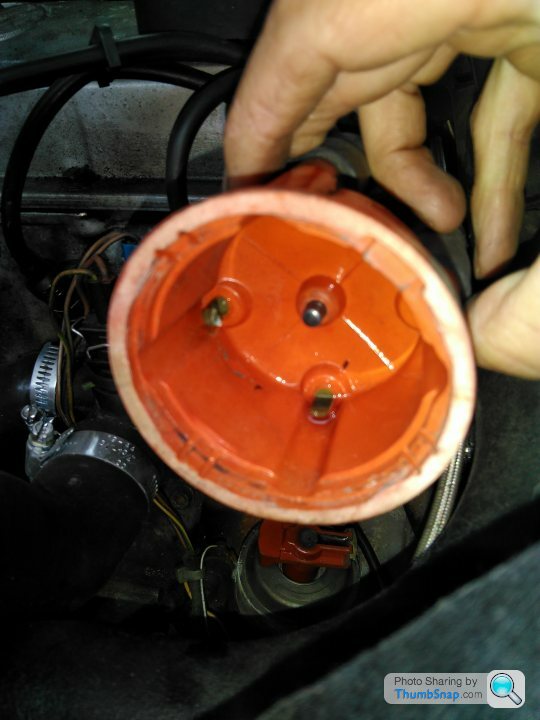
The cap was nearly 4 years old and was an inexpensive item from Euro Car Parts. There was evidence of wear in the rotor arm too, so I ordered some Bosch items and replaced both. The HT lead to cylinder 2 was corroded as well so a new set of leads may be on the cards.
In my previous investigations, I'd managed to snap the dipstick alignment tube off, so replaced that too. A much more challenging job as the plastic was very brittle and took some persuading that it didn't just want to crumble into the dipstick tube.
All that done and with a new VED payment having been made, we went for a potter to do Sunday domestic stuff. Thoroughly enjoyable to be back in it after a month of, although a reminder of the jobs still outstanding!
Did one other long journey (Alton Towers for a mate's Birthday) and then the next time I went to use it a week later there were issues.
The coolant light was flashing and it developed a misfire before I got off the driveway. I then tried to open the bonnet to take a look and the release cable failed...
As I was in a hurry, or went back behind the gates and I took the bike instead! I then didn't have any free time to address the issues and so ended up SORN-ing it for a while while I contemplated possible HGF issues.
I had some time over the bank holiday to investigate further though and there was good news. The bonnet release cable hadn't broken, and I was able to get the bonnet up using the excellent Corrado Forum guide. Hook the seatbelt round the release handle then press down on the bonnet! Hey presto, one open bonnet! Some minor adjustments later and that was one off the list...
Looking at the expansion tank and oil filler cap, there was no sign of cross contamination but the coolant level was low. Most be going somewhere though, so I felt around all the new hose connections until I found the culprit at the bottom of the radiator on the N/S. It was wet and the others weren't, so a little adjustment later, and that should be the problem sorted.... A trick I learned from the NC30 was that even when every hose seems perfectly tight, you've probably missed one somewhere!
At the risk of sounding smug, what was really nice was the fact that I'd aligned all of the hose clamp adjusters where they could be accessed with the minimum of effort! It was a 30s job to tighten it (although it was in the easiest location).
Bouyed by the fact that HGF was off the cards for now, I went hunting the misfire.
Yup, that'll do it:
The cap was nearly 4 years old and was an inexpensive item from Euro Car Parts. There was evidence of wear in the rotor arm too, so I ordered some Bosch items and replaced both. The HT lead to cylinder 2 was corroded as well so a new set of leads may be on the cards.
In my previous investigations, I'd managed to snap the dipstick alignment tube off, so replaced that too. A much more challenging job as the plastic was very brittle and took some persuading that it didn't just want to crumble into the dipstick tube.
All that done and with a new VED payment having been made, we went for a potter to do Sunday domestic stuff. Thoroughly enjoyable to be back in it after a month of, although a reminder of the jobs still outstanding!
@gforceg - good luck with the headlining, and if you take any pictures when you do it, post them up. I need to take a look at my sunroof at some point, and pointers on headlining removal would be handy.
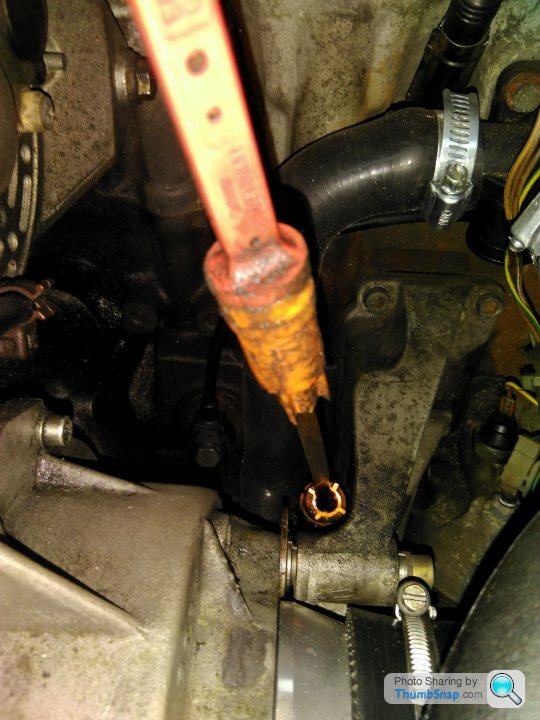
Firstly however I need to tackle a different issue discovered over the weekend....
Used the car to do a round trip to Norfolk this weekend, and or performed brilliantly.
However, it rained solidly most of yesterday for the trip back up and upon arriving home, found the passenger footwell very damp:
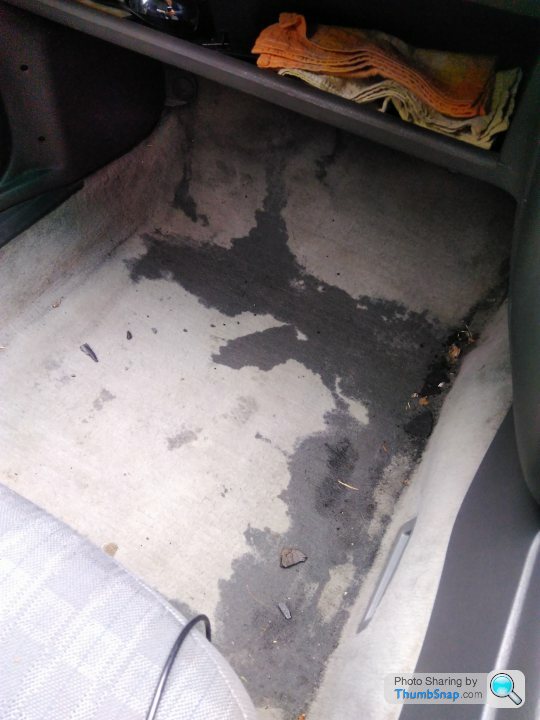
It was cold, and didn't smell of coolant thankfully, however, I've no idea where it's coming from so some investigation is required....
Firstly however I need to tackle a different issue discovered over the weekend....
Used the car to do a round trip to Norfolk this weekend, and or performed brilliantly.
However, it rained solidly most of yesterday for the trip back up and upon arriving home, found the passenger footwell very damp:
It was cold, and didn't smell of coolant thankfully, however, I've no idea where it's coming from so some investigation is required....
Edited by darkyoung1000 on Wednesday 24th October 06:48
Thanks for the suggestions all, most helpful.
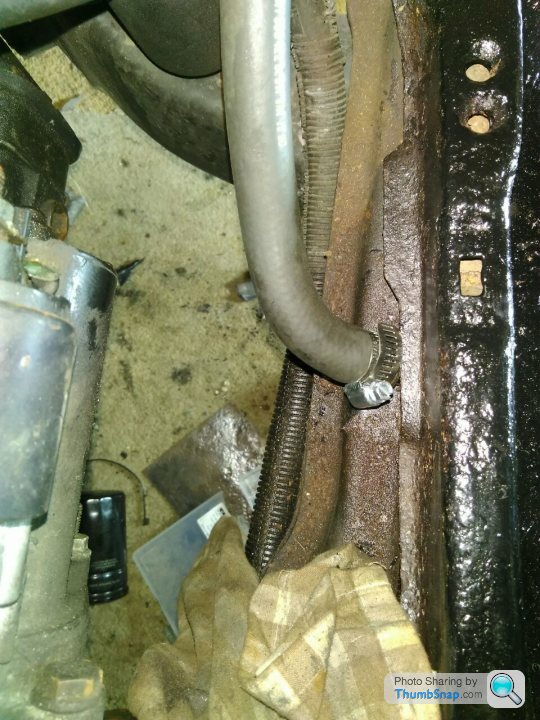
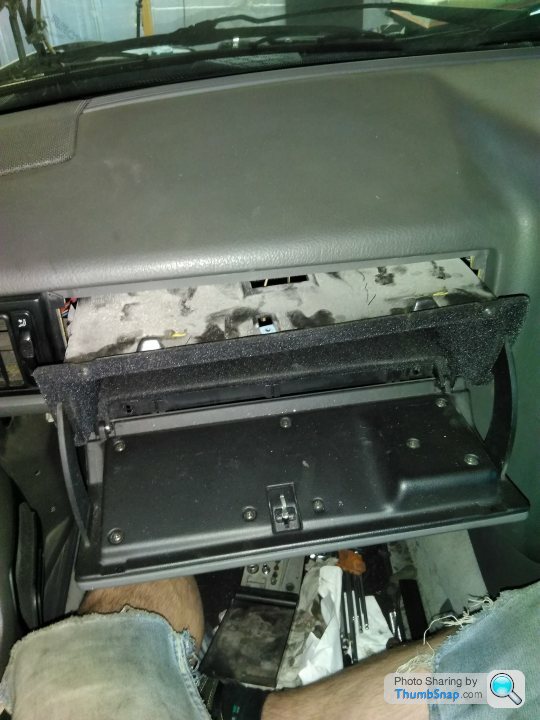
A spot of investigation turned up this:
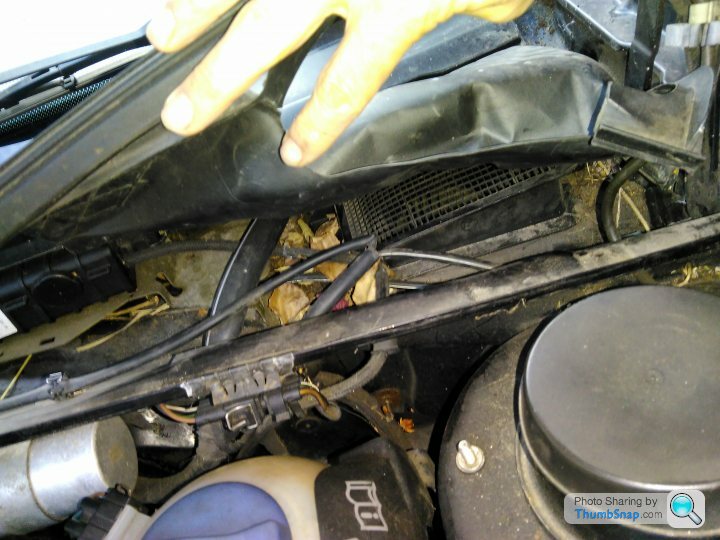
Hopefully this was what was causing the issue, as while I tried to investigate the sunroof drains too, the car was having none of it. I appear to have joined the ranks of 'tilts, but doesn't slide.' I'll be honest, that's low down the list of things to rectify!
Haven't checked it in heavy rain yet as it's been dry, but if it hasn't solved the problem, fixing the sunroof will come higher up the list again!
Used the car to travel down to Rockingham though for the R3 Risk Reduction Driver Training Course.
Superb. Absolutely superb. The use ofa kick plate to deliberately induce a skid for you to catch, really brings on your car control skills!
Got the p1ss taken by the instructors too....
"You'll feel your ABS kick in."
"....ERM...."
Turns out that once you've got the hang of the car being sideways, it's quite easy to catch (in a controlled environment at under 30mph).
Then you can work on not being sideways in the first place!
The season did demonstrate that I really need to adjust my handbrake though and possibly fit those new rear calipers too!
A spot of investigation turned up this:
Hopefully this was what was causing the issue, as while I tried to investigate the sunroof drains too, the car was having none of it. I appear to have joined the ranks of 'tilts, but doesn't slide.' I'll be honest, that's low down the list of things to rectify!
Haven't checked it in heavy rain yet as it's been dry, but if it hasn't solved the problem, fixing the sunroof will come higher up the list again!
Used the car to travel down to Rockingham though for the R3 Risk Reduction Driver Training Course.
Superb. Absolutely superb. The use ofa kick plate to deliberately induce a skid for you to catch, really brings on your car control skills!
Got the p1ss taken by the instructors too....
"You'll feel your ABS kick in."
"....ERM...."
Turns out that once you've got the hang of the car being sideways, it's quite easy to catch (in a controlled environment at under 30mph).
Then you can work on not being sideways in the first place!
The season did demonstrate that I really need to adjust my handbrake though and possibly fit those new rear calipers too!
While it looks like the number of projects might be being forcibly reduced by moving house, the Corrado is hopefully one that's going to stay. Do PM me if you're interested in a Citroën AX though....
With that in mind, a couple of minor jobs this morning, notably changing the HT leads having discovered corrosion on one of them, and changing the wiper blades.
I'd previously fitted cheap ECP ones when I first got the car, just as part of the service. I figured that the Bosch distributor warranted posh HT leads though. A quick look at Matt Lewis racing later, and voila!
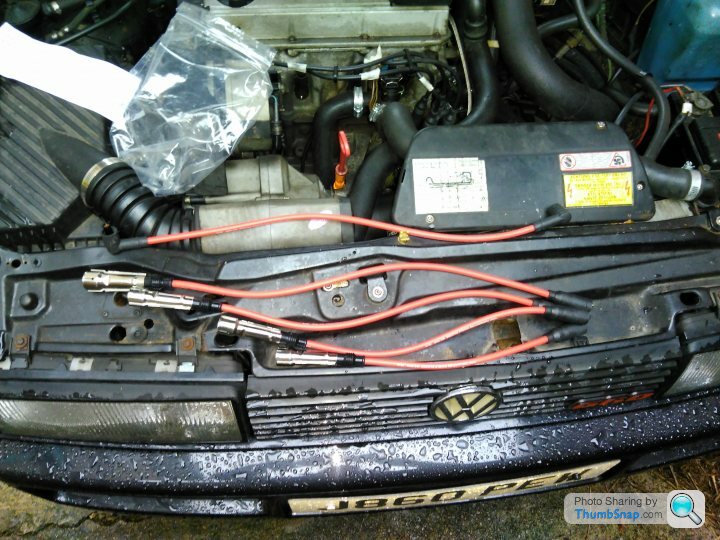
The old ones were by now quite inflexible and bent intoa permanent shape:

A little bit of swearing later, and bling bling!
Not quite finished the wiper blades yet, but I'm only changing the inserts, so nothing exciting.
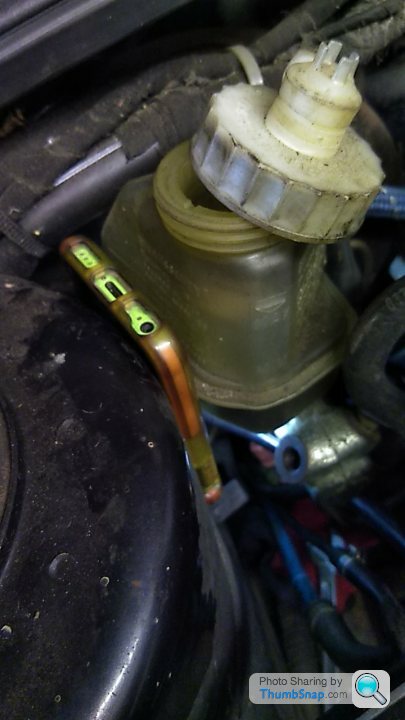
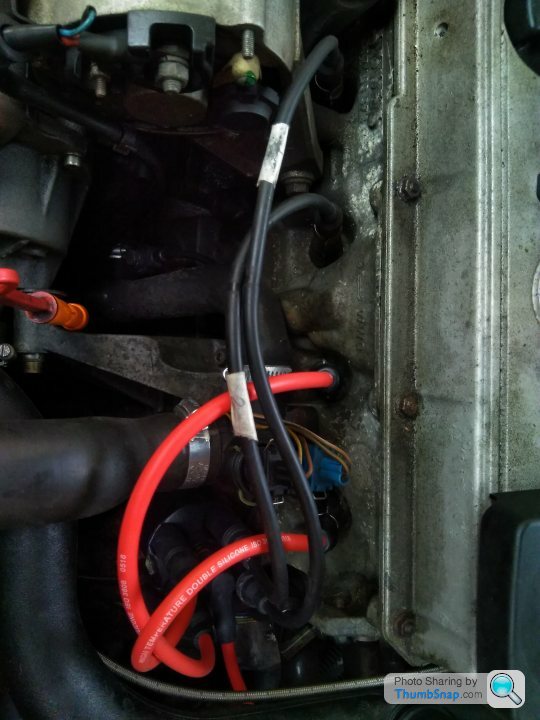
I did spot that the power steering fluid level has dropped though, and I think that the crimped hoses from the factory have seen better days. Time to add that to the list then!
With that in mind, a couple of minor jobs this morning, notably changing the HT leads having discovered corrosion on one of them, and changing the wiper blades.
I'd previously fitted cheap ECP ones when I first got the car, just as part of the service. I figured that the Bosch distributor warranted posh HT leads though. A quick look at Matt Lewis racing later, and voila!
The old ones were by now quite inflexible and bent intoa permanent shape:
A little bit of swearing later, and bling bling!
Not quite finished the wiper blades yet, but I'm only changing the inserts, so nothing exciting.
I did spot that the power steering fluid level has dropped though, and I think that the crimped hoses from the factory have seen better days. Time to add that to the list then!
Went along to the Yorkshire meet up at Scalm Park near Selby on Sunday.
There were some splendid vehicles there, and it was a cracking drive along the B roads.
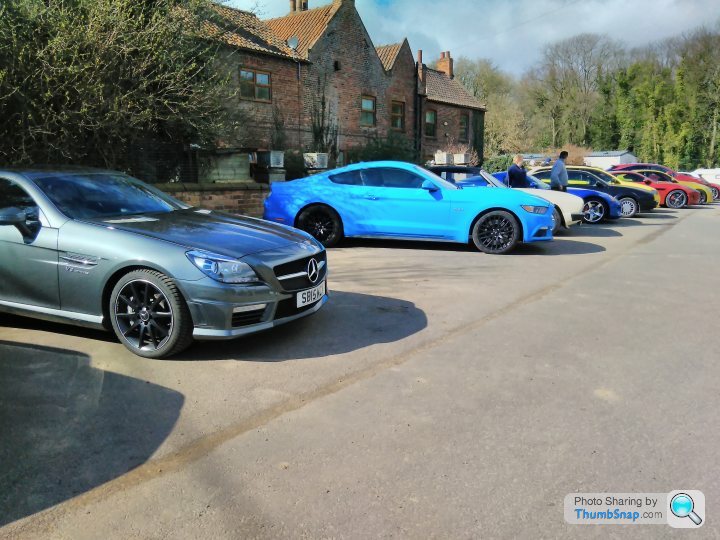
It served to highlight how much a) it's a hoot to drive and b) just how neglected is been in terms of tlc recently.
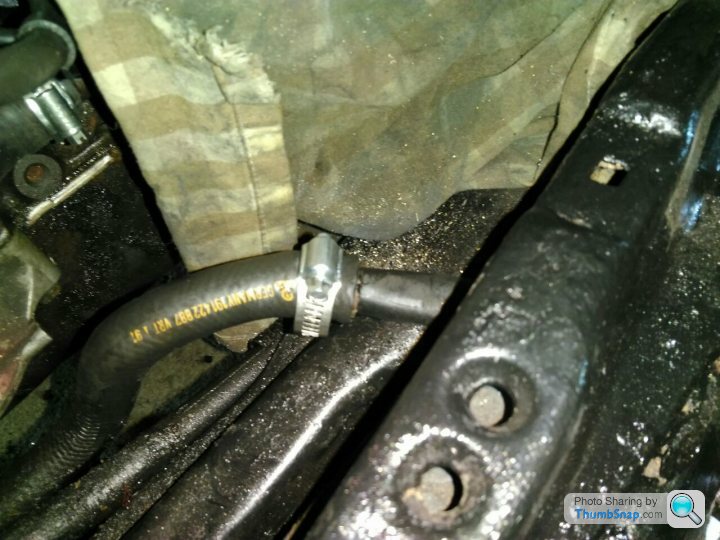
I was half an hour late as the rubber fuel line had perished which I was alerted to by the sharp smell of petrol in the cabin when I started it running.
I've replaced this one before, and I've no idea what possessed me to do it, but I used plain rubber hose, not reinforced fuel line.
The petrol has done for it and was dripping onto the exhaust manifold. Bad. Very bad.
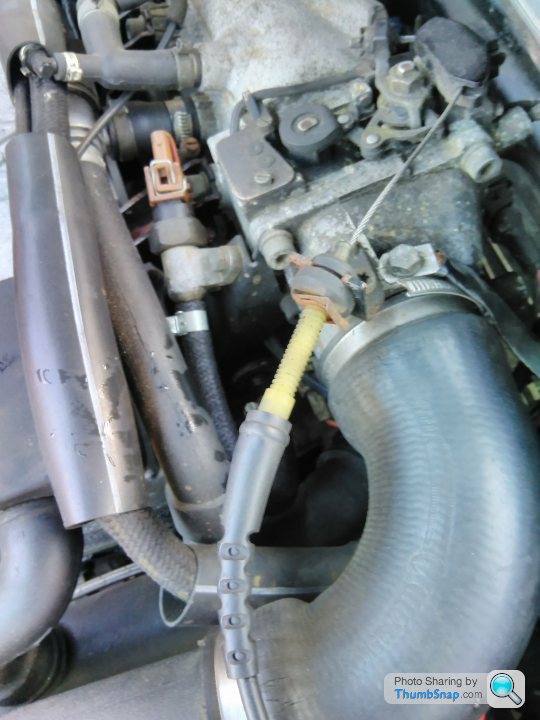
This time I've used proper hose, although I've had to use jubilee clips as a temporary measure, as I didn't have the correct fuel line clips (now on order).
Hopefully, when the AX has gone, more time will be spent on the Corrado!
There were some splendid vehicles there, and it was a cracking drive along the B roads.
It served to highlight how much a) it's a hoot to drive and b) just how neglected is been in terms of tlc recently.
I was half an hour late as the rubber fuel line had perished which I was alerted to by the sharp smell of petrol in the cabin when I started it running.
I've replaced this one before, and I've no idea what possessed me to do it, but I used plain rubber hose, not reinforced fuel line.
The petrol has done for it and was dripping onto the exhaust manifold. Bad. Very bad.
This time I've used proper hose, although I've had to use jubilee clips as a temporary measure, as I didn't have the correct fuel line clips (now on order).
Hopefully, when the AX has gone, more time will be spent on the Corrado!
The AX has now gone, and while I didn't achieve much on the Corrado mechanically, I did spend some time making it look prettier
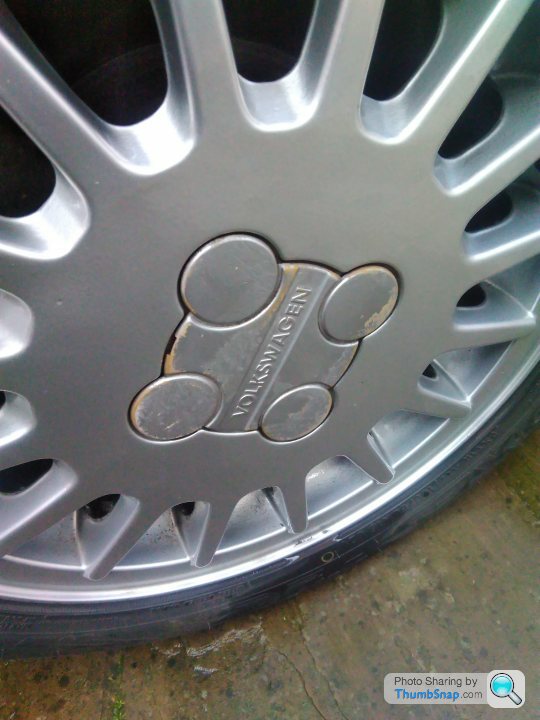
I was mostly out to give it a wash...then the centre caps caught my eye...
Tatty... and the quick blow over a couple of years ago makes them look worse.
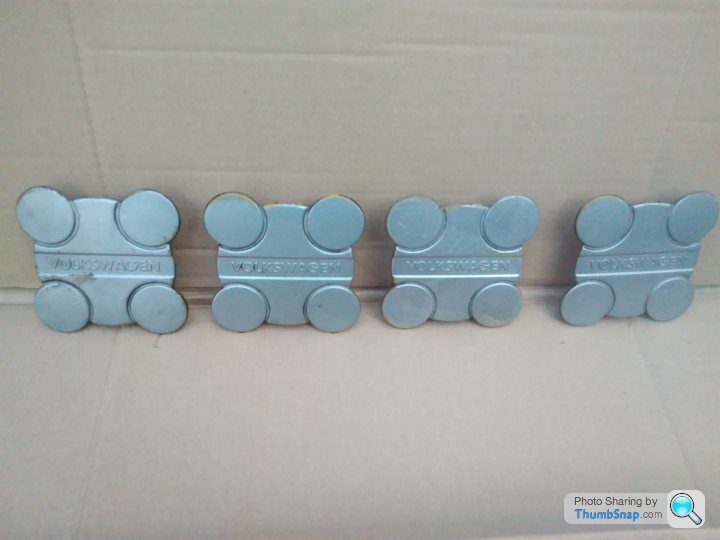
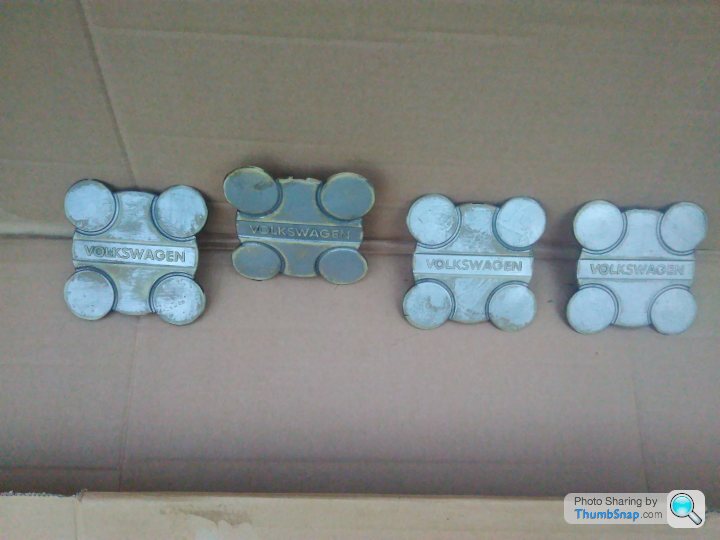
So out with the sandpaper, white spirit and spray paint that I'd picked out a couple of months ago.

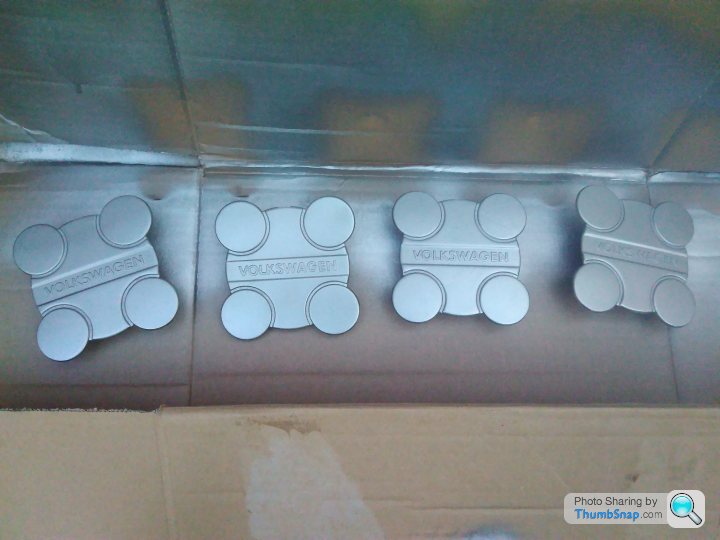
Having done that, I confess I got a little carried away, and just a wash, turned into a polish and wax as well. Still, I won't have to wax it again for a while, and when I went to drive it this evening, it really made me smile!

Mechanical and electrical stuff next time!
I was mostly out to give it a wash...then the centre caps caught my eye...
Tatty... and the quick blow over a couple of years ago makes them look worse.
So out with the sandpaper, white spirit and spray paint that I'd picked out a couple of months ago.
Having done that, I confess I got a little carried away, and just a wash, turned into a polish and wax as well. Still, I won't have to wax it again for a while, and when I went to drive it this evening, it really made me smile!
Mechanical and electrical stuff next time!
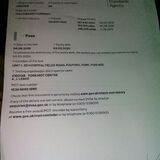
MOT day today - I had 2 weeks left on the existing ticket and next week off in case it failed. It didn't let me down :
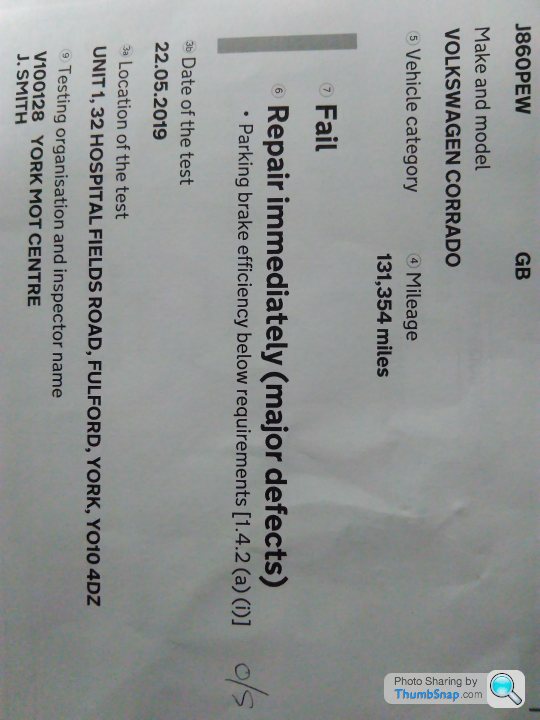
There wad an advisory last year that the OSR caliper was binding and between them and now, I'd managed to pick up a freshly refurbished set from a forum member.
Speaking to the MOT tester, it's that the lever arm on that caliper no longer moves when the handbrake is applied, so I'll just swap them over next week and refurbish this set.
I'll try and tackle a few niggling other things as well, but have work to do on the Morris and at least one motorbike too, so we'll see what happens!
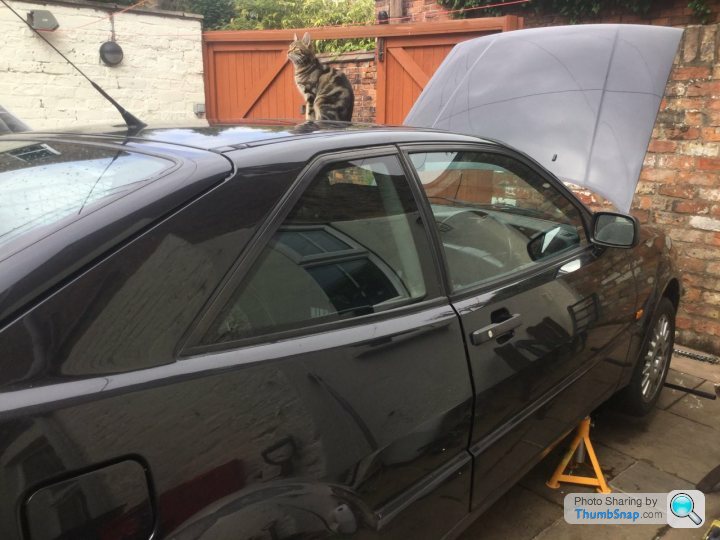
What happens when you take some time off to work on things with no Garag? The weather....
Between showers yesterday I managed to make a start though, having spent the morning picking up parts and consumables in the car.
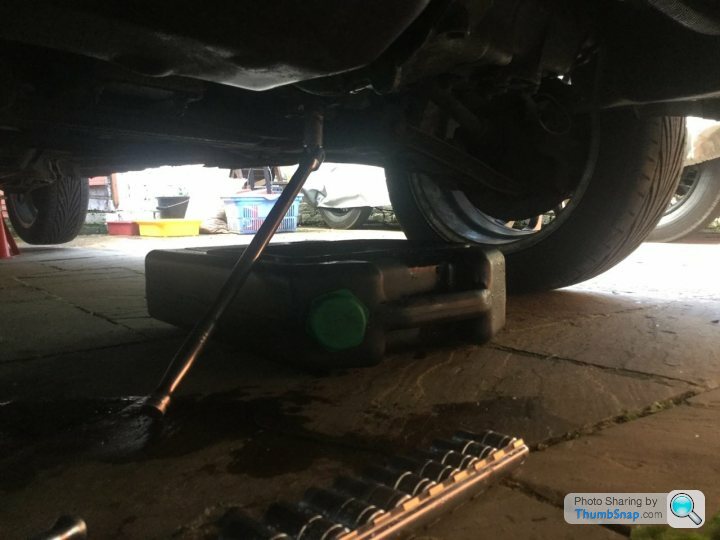
That meant of course that the most sensible thing to do was to ignore the MOT fail and change the oil. Well the engine was warm and so it made sense to me
Having fitted the oil cooler, the oil filter that the database in most motor factors will match, doesn't fit. It has a welded nut on the end and doesn't clear the front cross member. A decent motor factors will be able to dig out the same filter without the welded nut on in a matter of moments... (Wix WL7070 for my own reference for next time).
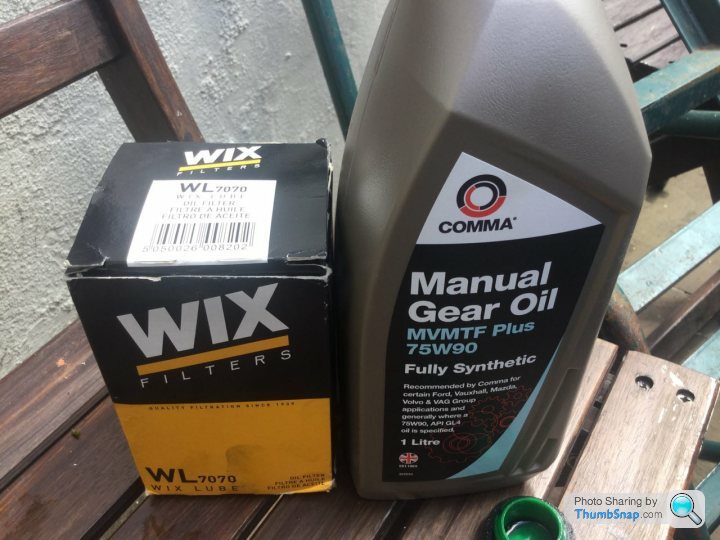
I decided to replace the gearbox oil too while I was draining stuff. I've never done it since owning the car, and the shift doesn't feel brilliant. While this most likely means the linkages need greasing, I wanted to do the oil as a precaution. There's an excellent guide on the Corrado forum, which I won't replicate, but one 17mm hex and a braker bar later and I was in a position to refill.
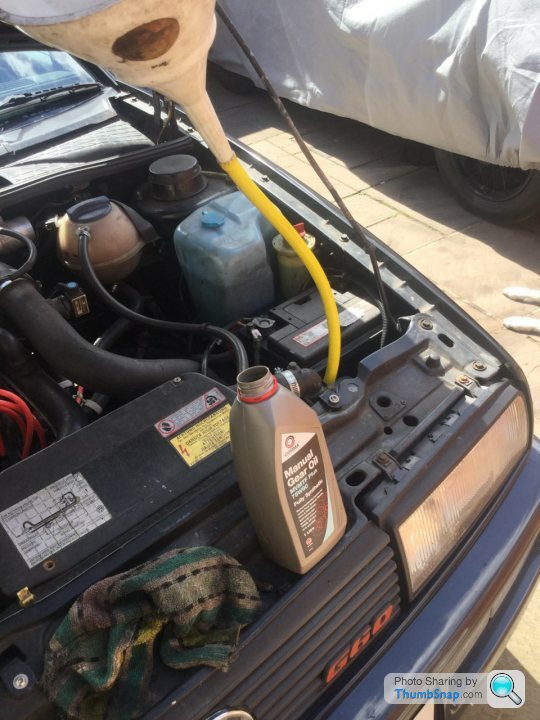
Fluids successfully changed, I went cycling (well it is a week off). Brakes and other bits today.....
Between showers yesterday I managed to make a start though, having spent the morning picking up parts and consumables in the car.
That meant of course that the most sensible thing to do was to ignore the MOT fail and change the oil. Well the engine was warm and so it made sense to me
Having fitted the oil cooler, the oil filter that the database in most motor factors will match, doesn't fit. It has a welded nut on the end and doesn't clear the front cross member. A decent motor factors will be able to dig out the same filter without the welded nut on in a matter of moments... (Wix WL7070 for my own reference for next time).
I decided to replace the gearbox oil too while I was draining stuff. I've never done it since owning the car, and the shift doesn't feel brilliant. While this most likely means the linkages need greasing, I wanted to do the oil as a precaution. There's an excellent guide on the Corrado forum, which I won't replicate, but one 17mm hex and a braker bar later and I was in a position to refill.
Fluids successfully changed, I went cycling (well it is a week off). Brakes and other bits today.....
Edited by darkyoung1000 on Wednesday 29th May 07:54
Well that all took a lot longer than I had anticipated. Nothing is ever simple....
WARNING - CONTAINS INCOMPETENCE
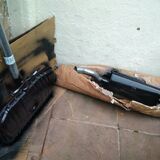
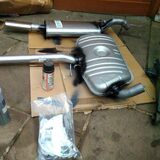
It started well enough with the weather permitting me to unpack the replacement exhaust (the original is blowing slightly, and one of the hangers on the rear box has snapped leading to a temporary repair).
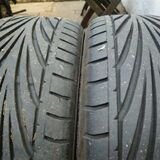
I also managed to swap the wheels front to back to put the more worn tyres on the rear.
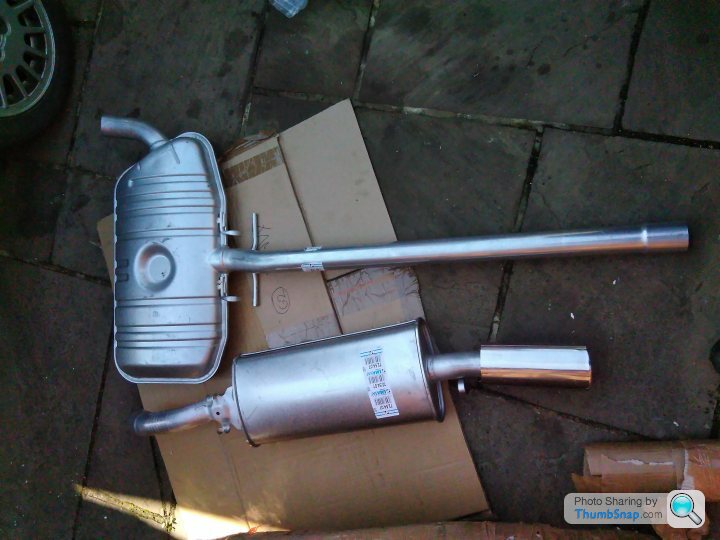
The stainless one was twice the price of the mild one, and so I went with the mild. Although I told some steps to protect it from corrosion with a coating of VHT paint in certain places.
While that was drying, it was time to tackle the brakes. As I knew they might need replacing, I had got a set from a forum member a while back....
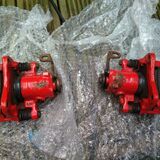
Slightly different to the ones on there, but the handbrake levers and carrier bolts were the same, best crack on then....
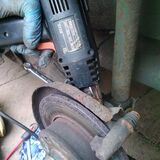
Heat gun for the hex bolts
Wind back the old ones to get them off, and put the new ones on...
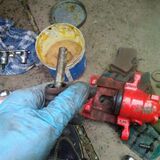
Grease the slider pins and....we're done.
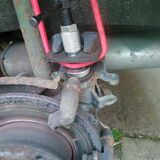
Wait a moment, the bleed nipple is in a different place on these. Blast, there's no way the existing hoses will fit.
Online research shows that there are indeed two different types of rear caliper for the G60, but my registration number only brings up the short hoses.
Double blast.
Out with the tape measure, right so I need 300+mm hoses with one male and one female end. Right, MK2 Golf front hoses fit, two of those please. Oh you have to order them? Tomorrow? Treble blast, still, that will have to do....
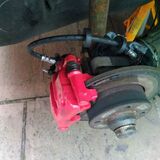
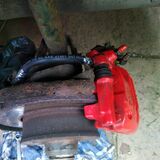
Not sure I like how tight the hose is, but it's not kinked, or stretched, so that will be OK.
On with the second caliper.
Hold on, the bleed nipple on this one is in a different place....wait a moment.... Oh balls, I'm an idiot.
The apertures on each caliper are identical dimensions and thread pitches, the nipple was just in the wrong place on the first one.
In my defence...? I was tired all week, and technically (and if this was a motorbike) the bleed nipple on my' improved design' was correct as it was at the highest point of the caliper. Hence my mistake. Honestly.
Nah, my bad. Doh!
Seems a shame to reuse the old hoses though, so now I need more hoses and while they're ordering stuff, I might as well replace the handbrake cable....
Calipers successfully connected, grease up the new cable and install.

Looks a little lower than the other side.... yup, the internal cable is longer and protrudes a lot further than the other one. Still, adjust it up and it grips the NS rear wheel ok. Time for the retest....
As I drove it across town, it was apparent that all was not well. The handbrake applied while driving made no discernable difference to speed, despite its ability to seemingly grip the wheel.
This was confirmed by the test, which showed that despite the new calipers and cable, the same issue was still there.
Apply logic, I can't cut the cable, so I just need to add spacers so the mechanism works...

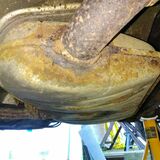
Wait a moment... Oh great. Someone in repeated handbrake applications over the years has fatigued the section to which it is attached. It's pulling away from the floor pan....
Quadruple blast. That will need welding or bolting to fix it permanently. I always did think that it sat high and slightly lopsided, so I don't think this one is my fault.
However with spacers applied and fingers crossed, in for the retest.
Hurrah!
Good job all this took so much time that I didn't manage to fit the exhaust, as I need to drill through the floor plan to attach the handbrake mechanism!
Wish me luck (and a sharper brain) for next time....
WARNING - CONTAINS INCOMPETENCE
It started well enough with the weather permitting me to unpack the replacement exhaust (the original is blowing slightly, and one of the hangers on the rear box has snapped leading to a temporary repair).
I also managed to swap the wheels front to back to put the more worn tyres on the rear.
The stainless one was twice the price of the mild one, and so I went with the mild. Although I told some steps to protect it from corrosion with a coating of VHT paint in certain places.
While that was drying, it was time to tackle the brakes. As I knew they might need replacing, I had got a set from a forum member a while back....
Slightly different to the ones on there, but the handbrake levers and carrier bolts were the same, best crack on then....
Heat gun for the hex bolts
Wind back the old ones to get them off, and put the new ones on...
Grease the slider pins and....we're done.
Wait a moment, the bleed nipple is in a different place on these. Blast, there's no way the existing hoses will fit.
Online research shows that there are indeed two different types of rear caliper for the G60, but my registration number only brings up the short hoses.
Double blast.
Out with the tape measure, right so I need 300+mm hoses with one male and one female end. Right, MK2 Golf front hoses fit, two of those please. Oh you have to order them? Tomorrow? Treble blast, still, that will have to do....
Not sure I like how tight the hose is, but it's not kinked, or stretched, so that will be OK.
On with the second caliper.
Hold on, the bleed nipple on this one is in a different place....wait a moment.... Oh balls, I'm an idiot.
The apertures on each caliper are identical dimensions and thread pitches, the nipple was just in the wrong place on the first one.
In my defence...? I was tired all week, and technically (and if this was a motorbike) the bleed nipple on my' improved design' was correct as it was at the highest point of the caliper. Hence my mistake. Honestly.
Nah, my bad. Doh!
Seems a shame to reuse the old hoses though, so now I need more hoses and while they're ordering stuff, I might as well replace the handbrake cable....
Calipers successfully connected, grease up the new cable and install.
Looks a little lower than the other side.... yup, the internal cable is longer and protrudes a lot further than the other one. Still, adjust it up and it grips the NS rear wheel ok. Time for the retest....
As I drove it across town, it was apparent that all was not well. The handbrake applied while driving made no discernable difference to speed, despite its ability to seemingly grip the wheel.
This was confirmed by the test, which showed that despite the new calipers and cable, the same issue was still there.
Apply logic, I can't cut the cable, so I just need to add spacers so the mechanism works...
Wait a moment... Oh great. Someone in repeated handbrake applications over the years has fatigued the section to which it is attached. It's pulling away from the floor pan....
Quadruple blast. That will need welding or bolting to fix it permanently. I always did think that it sat high and slightly lopsided, so I don't think this one is my fault.
However with spacers applied and fingers crossed, in for the retest.
Hurrah!
Good job all this took so much time that I didn't manage to fit the exhaust, as I need to drill through the floor plan to attach the handbrake mechanism!
Wish me luck (and a sharper brain) for next time....
Gassing Station | Readers' Cars | Top of Page | What's New | My Stuff