Victoria - Pembleton SuperSport
Discussion


I got up this morning and looked outside, then looked at the forecast and thought bugger it, I'm driving the pembleton to work today. My commute is 57miles each way if I go the a43/a45/motorway, or if I wind across country its about 45miles, but a little slower. I opted for the country route today. :biggrin:

First world problems

And now I'm sat in the garden reading a book enjoying a beverage....
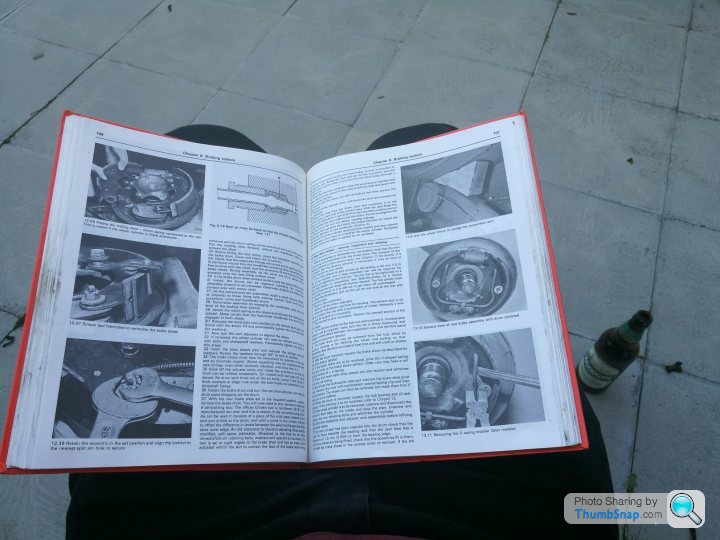
Its a tough life, but someone's gotta do it
First world problems
And now I'm sat in the garden reading a book enjoying a beverage....
Its a tough life, but someone's gotta do it
seiben said:
I've been in that carpark once or twice, if it's the one I'm thinking. Plenty of interesting metal lying around IIRC, and not necessarily stuff that's produced inside!
I couldn't possibly comment! Shame that there's usually at least 10-15 vehicles waiting to be crushed though!
It's been a long time since an update so should probably update....
We moved house back in June and since then I've been very busy. Fortunately the house was in an excellent state, so not much needed doing. Its just silly things like sorting out furniture and trying to organise stuff, we'll get there eventually.
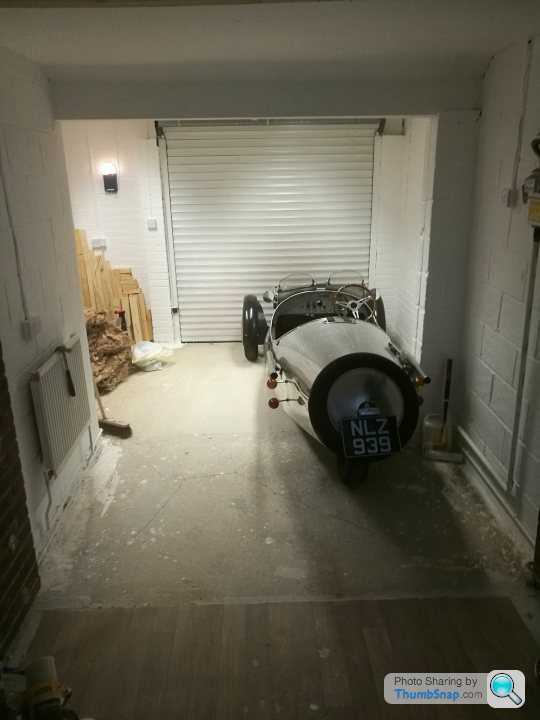
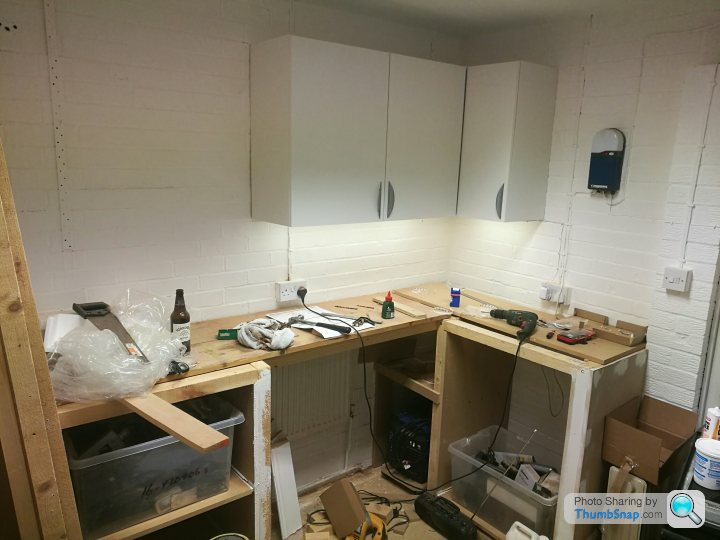
The biggest change by far was in the garage. I've removed a stud wall to make it tandem length. The rest of my time has been spent building a workbench, shelving, cupboards and painting it.
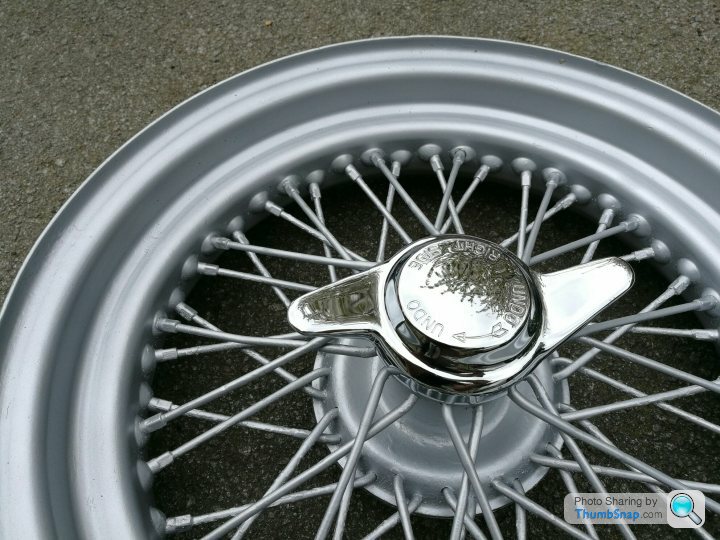
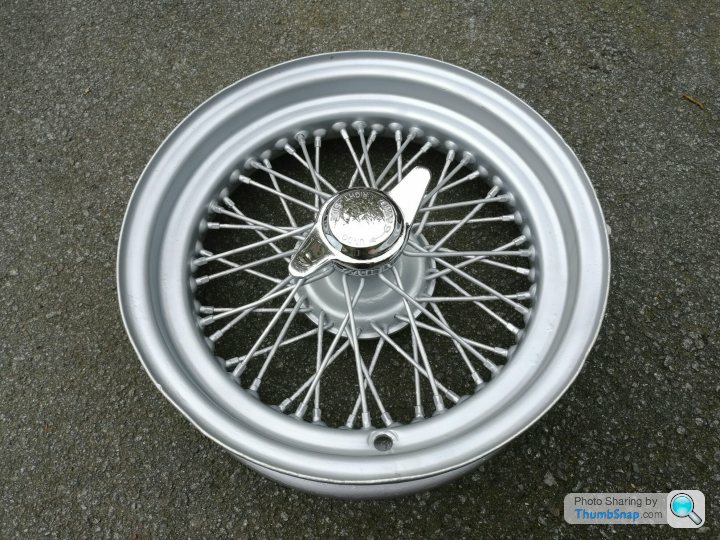
Before we did move house, I did get chance to spend a bit of time rubbing down, etched and painted the wire wheels though. They're not perfect, but they're much better than they were. I still have to source tyres/tubes and another adaptor though so they're not fitted yet.
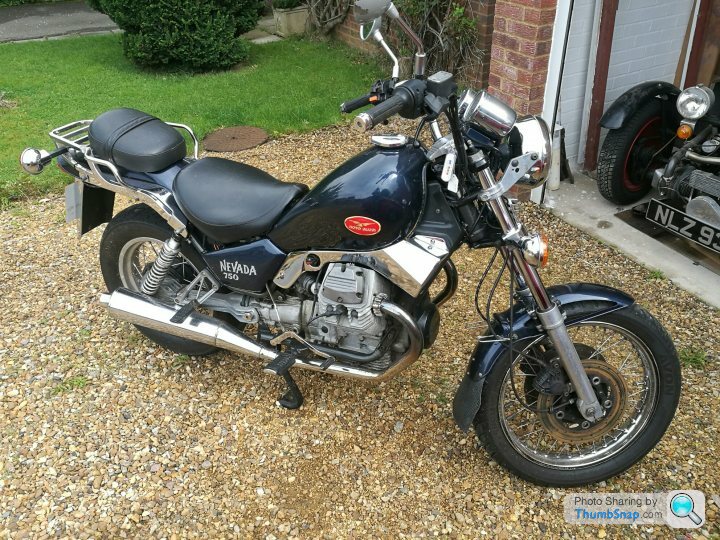
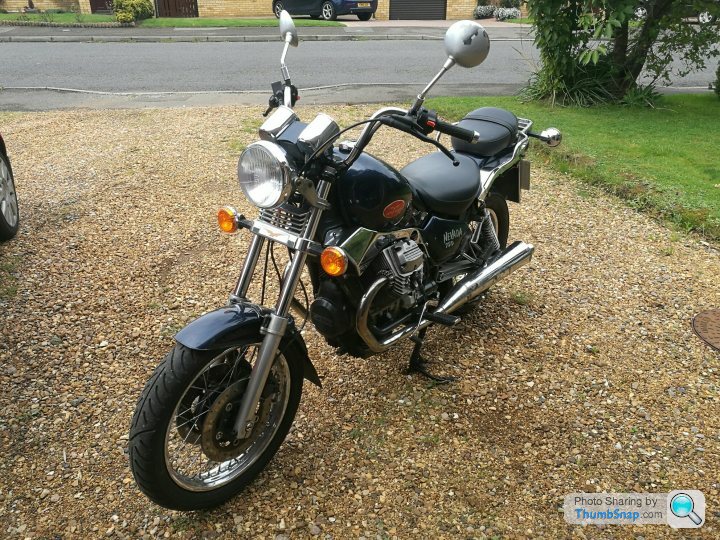
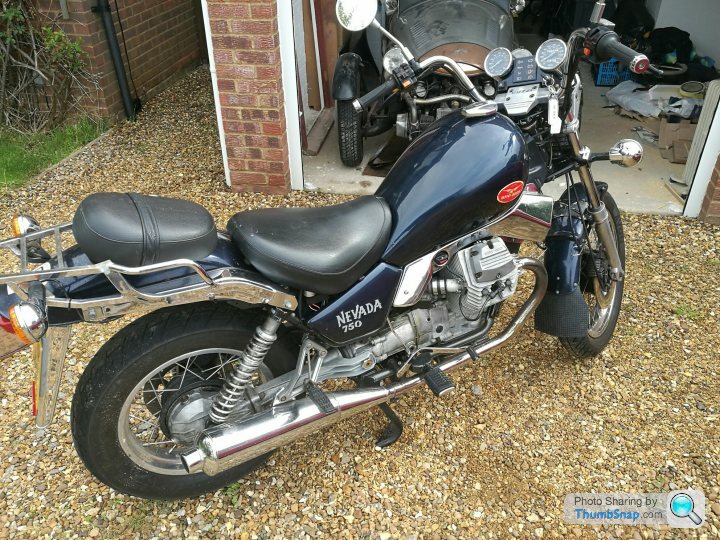
In addition to this I've also managed to get my grubby little paws on a complete moto guzzi nevada 750.
This now means I have 2 of these engines. The one from the bike is in good condition and has only done 10k miles, so that will be going in Victoria as is. I do feel like a barbarian though as its a really nice bike and seems such a shame breaking it for its engine. But the sad truth is that the bare engines go for £800, then you add the carbs, ignition and charging system and you're knocking on the door of £1200-£1300, much more than I paid for an entire running bike with MOT.
My other one is a slightly older engine with about 50k on the clock. This will be fully stripped down and will have new big end shells, timing chain, main bearings, seals, rings and valves and should be as new once done. And this will be going in the new build "tin tub".
In addition to this I have another 2 spare 2cv engines! I should probably cut down the collection....
Inside the house, the wife has let me put up my collection of spare 2cv stainless hubcaps IN THE LIVING ROOM. She was sceptical at first, but once cleaned, polished and put up, she likes them.
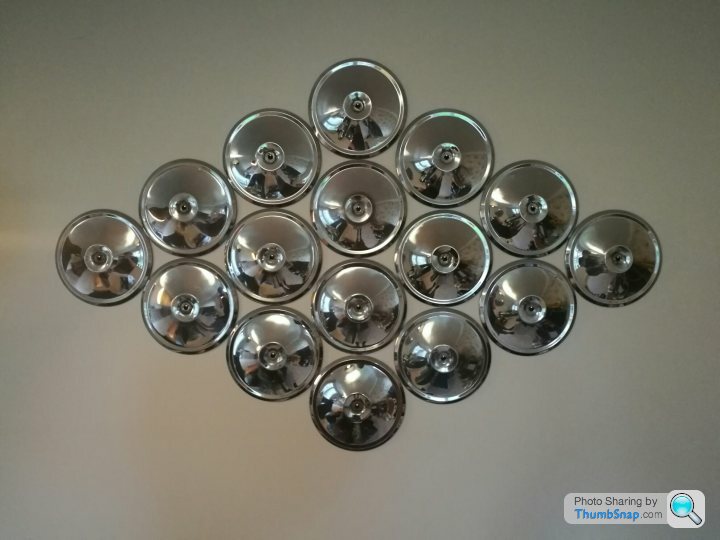
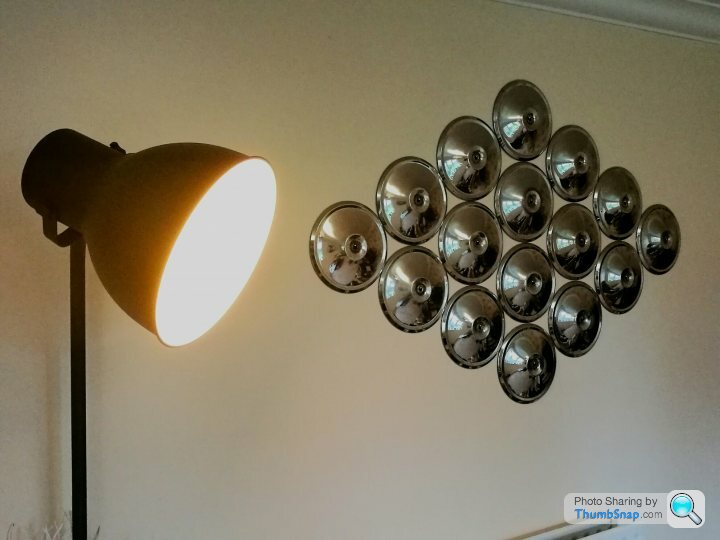
I think she's a keeper!
We moved house back in June and since then I've been very busy. Fortunately the house was in an excellent state, so not much needed doing. Its just silly things like sorting out furniture and trying to organise stuff, we'll get there eventually.
The biggest change by far was in the garage. I've removed a stud wall to make it tandem length. The rest of my time has been spent building a workbench, shelving, cupboards and painting it.
Before we did move house, I did get chance to spend a bit of time rubbing down, etched and painted the wire wheels though. They're not perfect, but they're much better than they were. I still have to source tyres/tubes and another adaptor though so they're not fitted yet.
In addition to this I've also managed to get my grubby little paws on a complete moto guzzi nevada 750.
This now means I have 2 of these engines. The one from the bike is in good condition and has only done 10k miles, so that will be going in Victoria as is. I do feel like a barbarian though as its a really nice bike and seems such a shame breaking it for its engine. But the sad truth is that the bare engines go for £800, then you add the carbs, ignition and charging system and you're knocking on the door of £1200-£1300, much more than I paid for an entire running bike with MOT.
My other one is a slightly older engine with about 50k on the clock. This will be fully stripped down and will have new big end shells, timing chain, main bearings, seals, rings and valves and should be as new once done. And this will be going in the new build "tin tub".
In addition to this I have another 2 spare 2cv engines! I should probably cut down the collection....
Inside the house, the wife has let me put up my collection of spare 2cv stainless hubcaps IN THE LIVING ROOM. She was sceptical at first, but once cleaned, polished and put up, she likes them.
I think she's a keeper!
treetops said:
Looks great fun.
But three wheeler and no crash protection means certain death or life changing injuries in the event of the unmentionable.
Good luck.
You're right, but you just have to ensure you drive within the limits of the vehicle. You can have a huge amount if fun at normal speeds. But three wheeler and no crash protection means certain death or life changing injuries in the event of the unmentionable.
Good luck.
If when driving you understand that if you crash, you die, then all of a sudden you become acutely aware of everything going on. It's more akin to a motorcycle that can't filter, overtake or do more than 80mph.
For those still following this and my other thread. I have managed to acquire a SECOND moto guzzi engine. One for Victoria, and one for TinTub.
As TinTub will be a completely new build, my lower mileage, later engine will be going in that, with the older, higher mileage engine going in Victoria after a tinker and clean up.
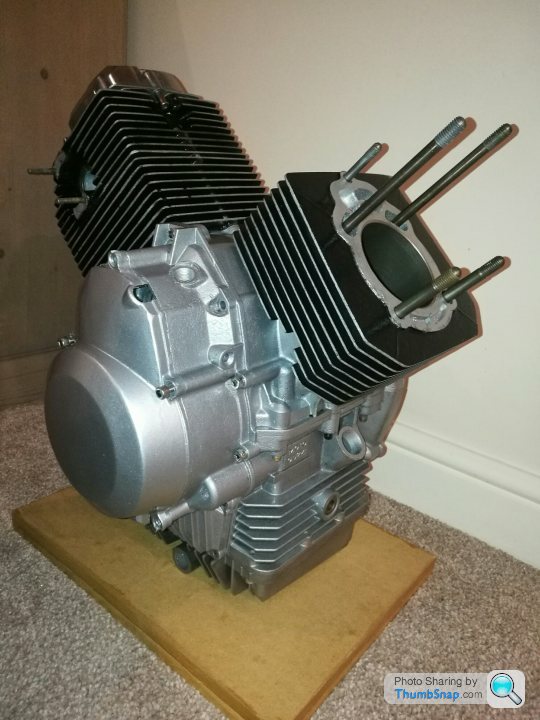
So what have we got for Victoria? A 1991 Moto Guzzi small block 748cc engine from a 750T with circa 45k miles. The engine was purchased from a chap who had several moto guzzis and the final drive had seized, so he stripped the bike. The engine came with wiring loom, ignition and charging systems, but no carbs.
My plan is to steal the carbs from my bike donor for TinTub, and buy brand new carbs for TinTub when she requires them.
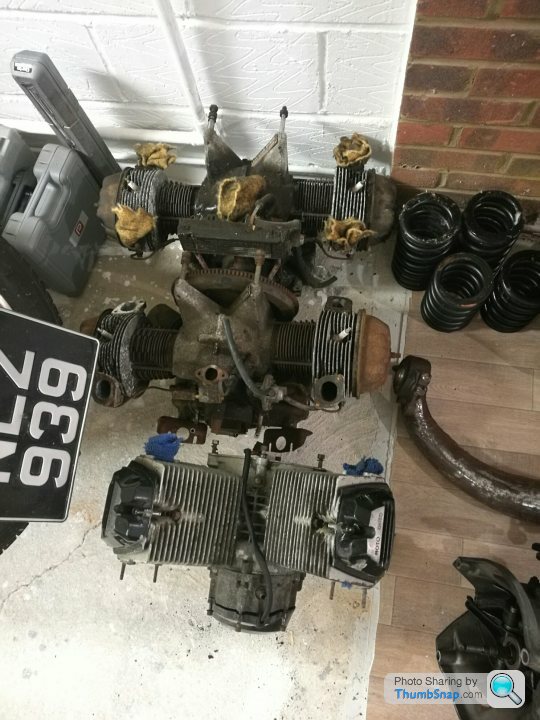
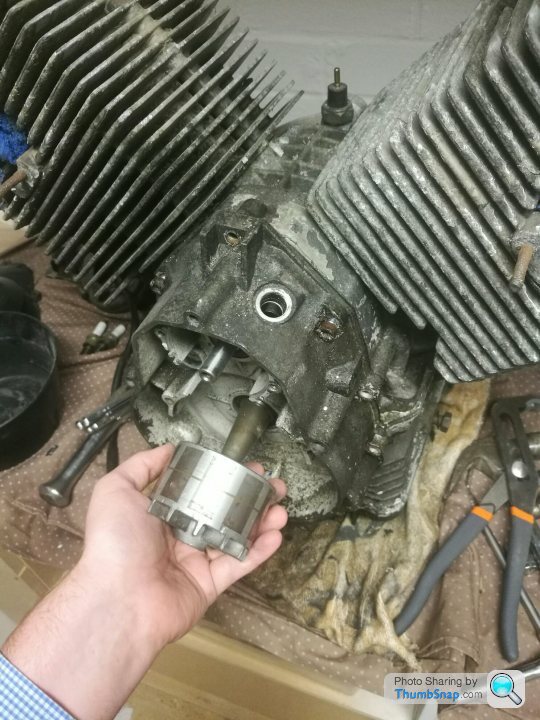
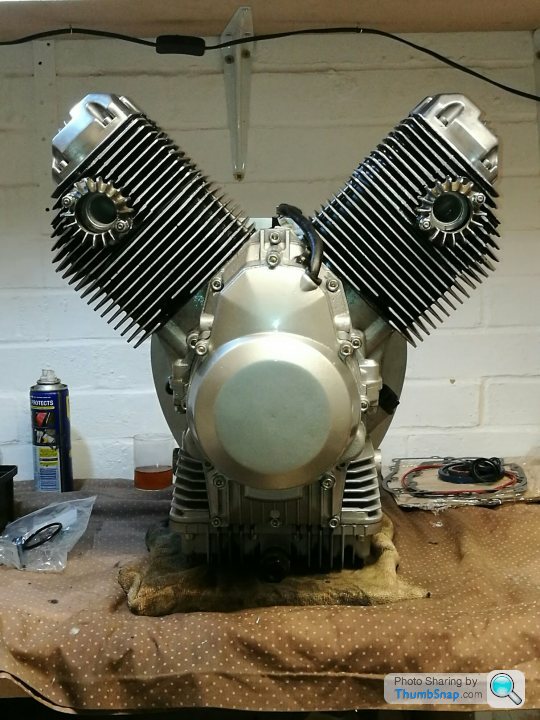
Where do we start? First off, lets start by pulling it apart for inspection, before a clean and rebuild....
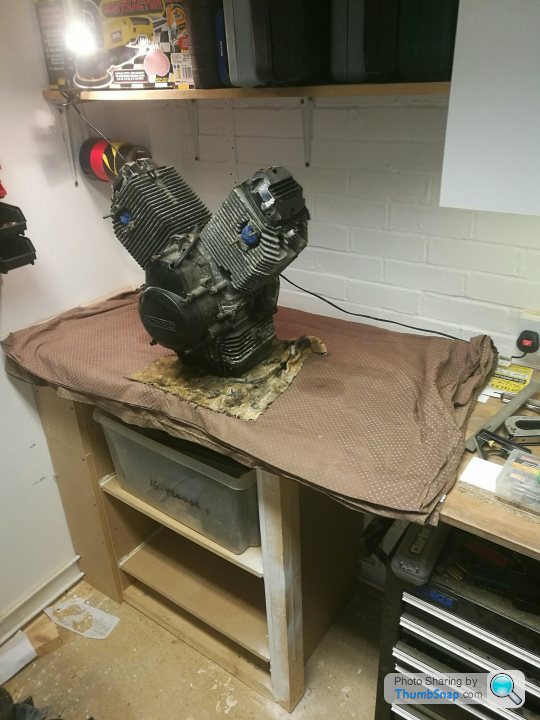
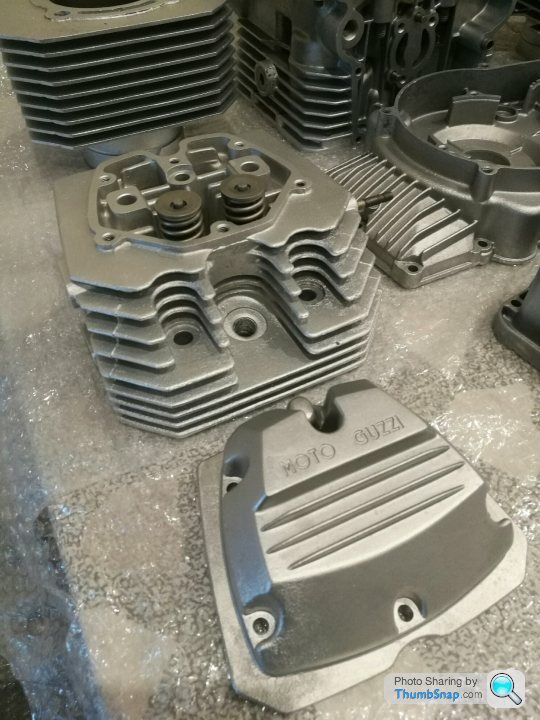
First off with the rocker covers and dynamo plastic cover...
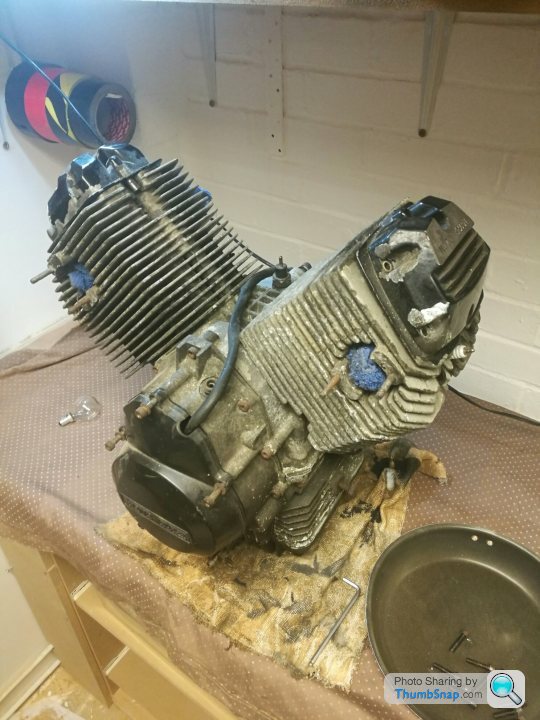

All surprisingly clean, not much ware to speak of immediately visible. Next off was the stator for the dynamo. 3x 4mm allen bolts here, wd40 and tapping with the hammer seemed to shock them all off nicely.
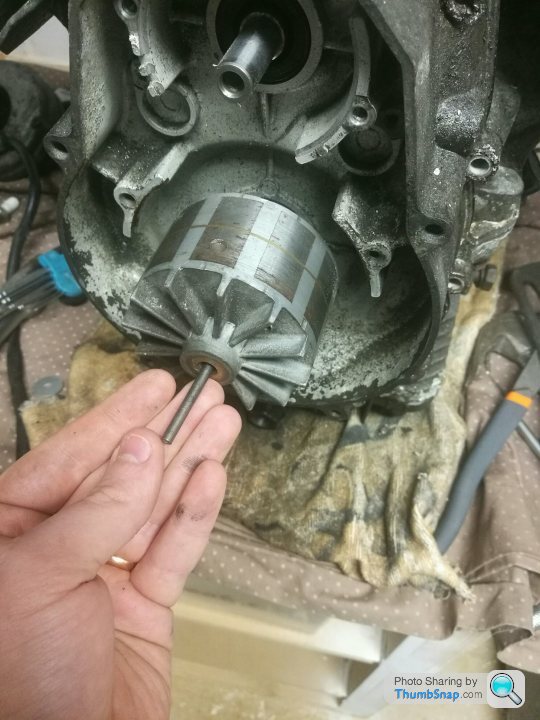
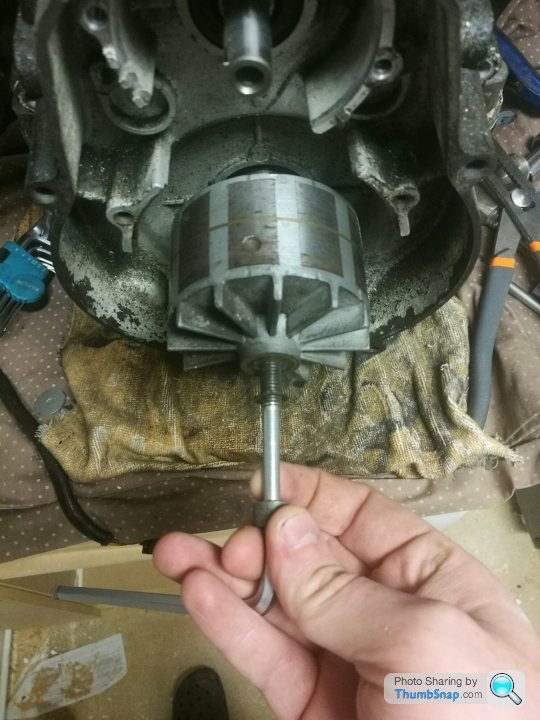
The rotor was stead fast on the taper, a cut down drill bit placed in the bore, then the bolt in acts as a screw jack and pops it off with a ping...
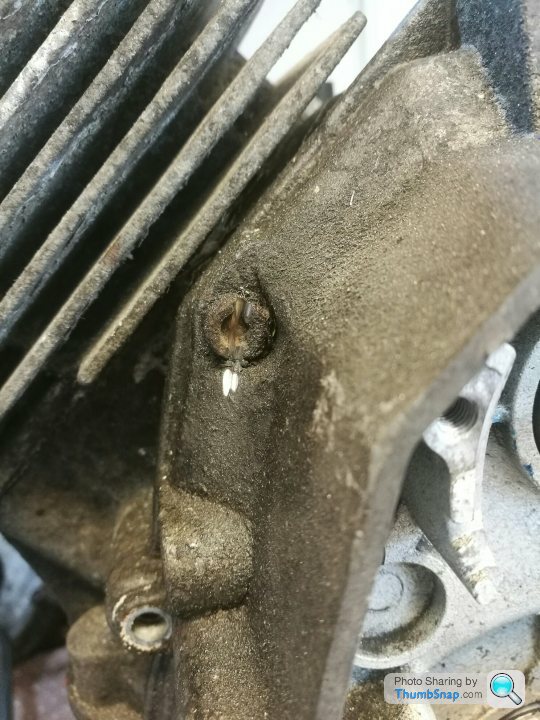
Whilst I was working out how to do that I removed the timing chain bolts. Most came free without too much hassle, but 2 were seized and the allen head cap screws had rounded. After soaking in wd40 over night, I cut a slot in them and managed to get them out by shocking...
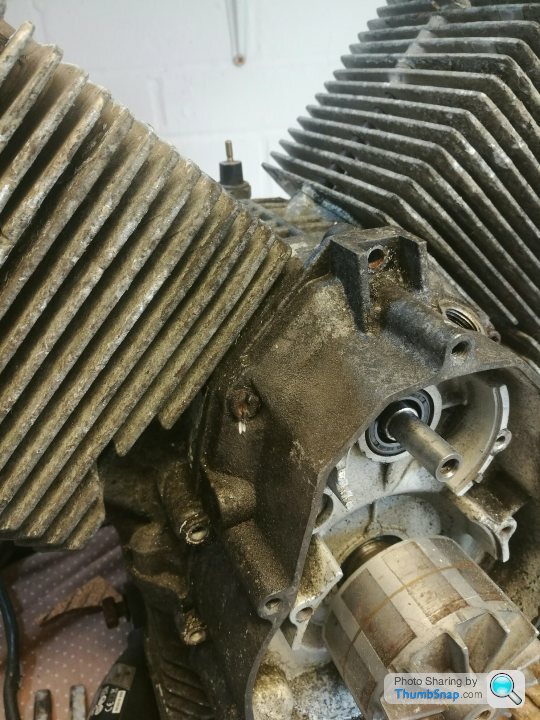
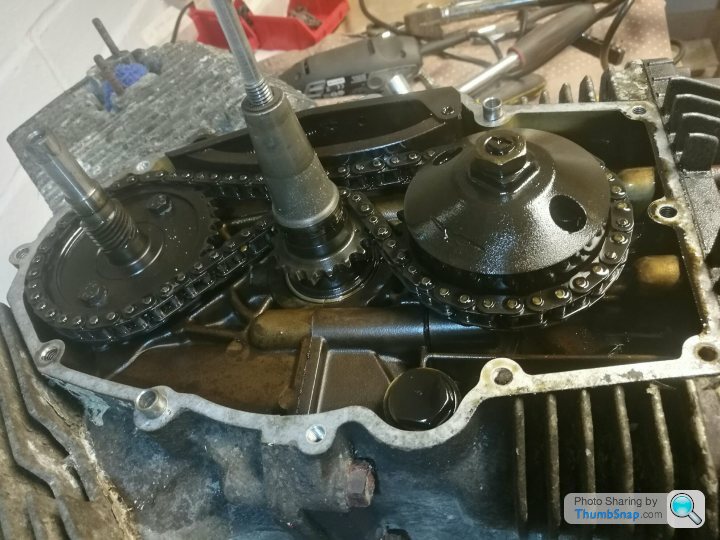
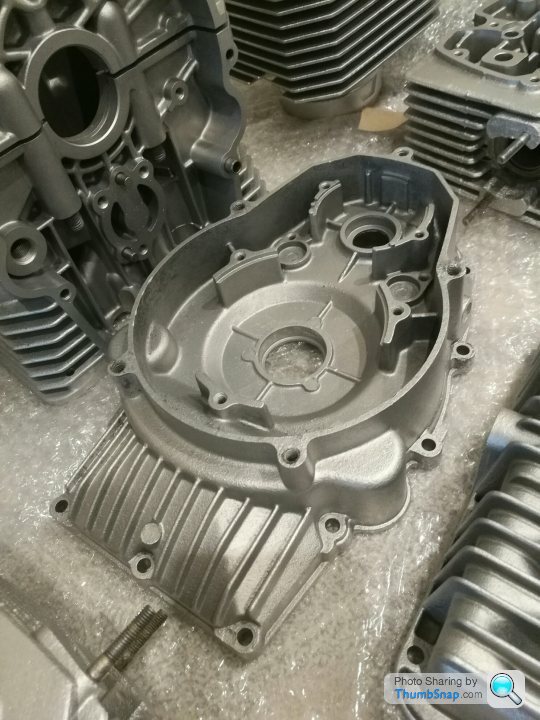
With all the gubbins on the front off, a few gentle taps and the chain cover came off... it looks pretty good under there, with no sign of any excessive wear. I'll inspect fully another day...

As TinTub will be a completely new build, my lower mileage, later engine will be going in that, with the older, higher mileage engine going in Victoria after a tinker and clean up.
So what have we got for Victoria? A 1991 Moto Guzzi small block 748cc engine from a 750T with circa 45k miles. The engine was purchased from a chap who had several moto guzzis and the final drive had seized, so he stripped the bike. The engine came with wiring loom, ignition and charging systems, but no carbs.
My plan is to steal the carbs from my bike donor for TinTub, and buy brand new carbs for TinTub when she requires them.
Where do we start? First off, lets start by pulling it apart for inspection, before a clean and rebuild....
First off with the rocker covers and dynamo plastic cover...
All surprisingly clean, not much ware to speak of immediately visible. Next off was the stator for the dynamo. 3x 4mm allen bolts here, wd40 and tapping with the hammer seemed to shock them all off nicely.
The rotor was stead fast on the taper, a cut down drill bit placed in the bore, then the bolt in acts as a screw jack and pops it off with a ping...
Whilst I was working out how to do that I removed the timing chain bolts. Most came free without too much hassle, but 2 were seized and the allen head cap screws had rounded. After soaking in wd40 over night, I cut a slot in them and managed to get them out by shocking...
With all the gubbins on the front off, a few gentle taps and the chain cover came off... it looks pretty good under there, with no sign of any excessive wear. I'll inspect fully another day...
Right, well here's a video of the full engine strip down!
https://youtu.be/H8Vtn3H2IXk
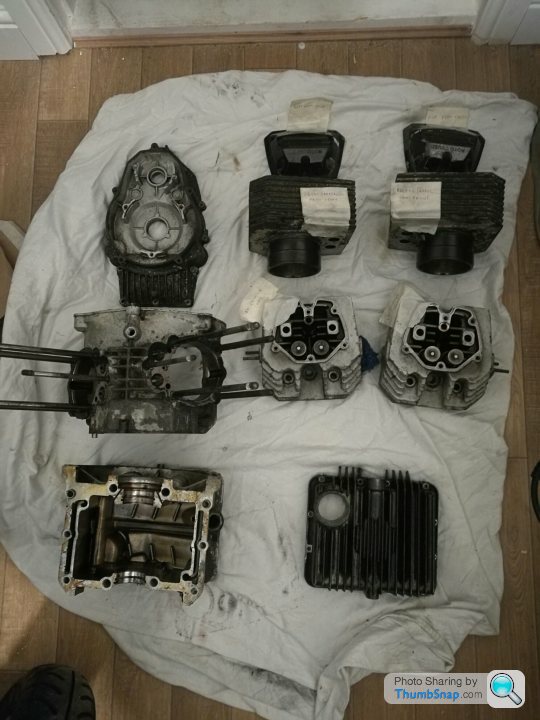
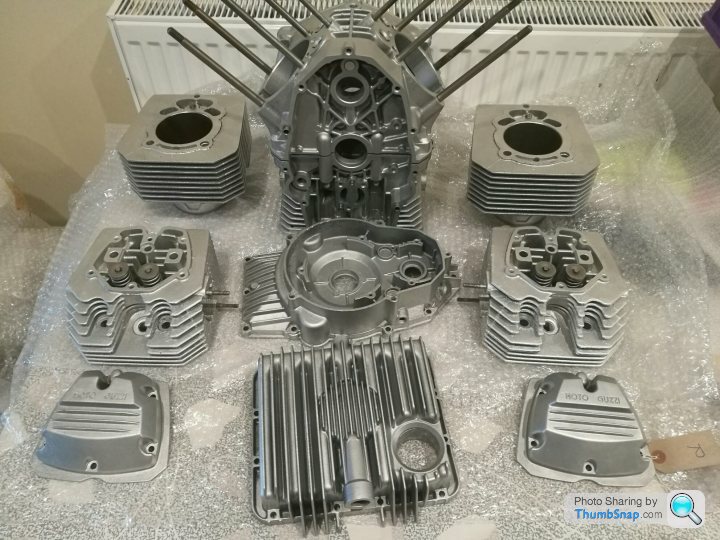
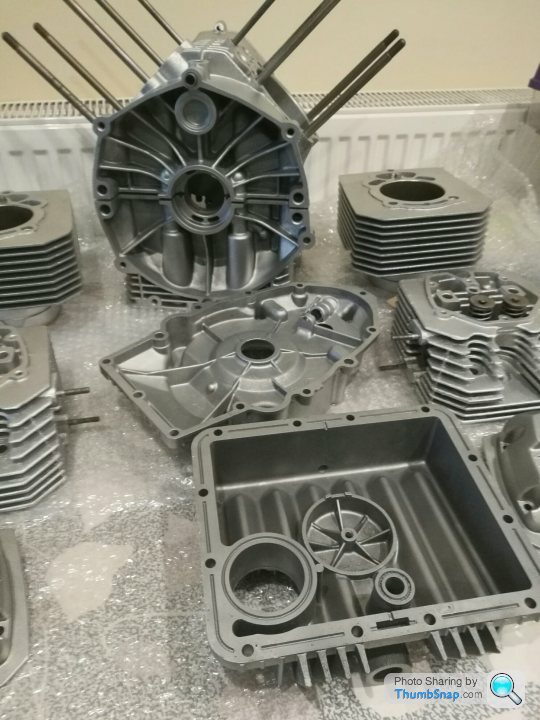
And the parts ready to go off to the vapour blasters!
I've also had confirmation from the machine shop that my adaptor kits are ready to collect! Next opportunity will be next friday...

https://youtu.be/H8Vtn3H2IXk
And the parts ready to go off to the vapour blasters!
I've also had confirmation from the machine shop that my adaptor kits are ready to collect! Next opportunity will be next friday...
TooMany2cvs said:
Just in case anybody's tempted...
https://www.ebay.co.uk/itm/192358260264
BMW R100-powered Pembleton four-wheeler.
https://www.ebay.co.uk/itm/192358260264
BMW R100-powered Pembleton four-wheeler.

This isn't a Pembleton!
This is a bespoke home build that looks a "bit like" a Pembleton. The proportions are all wrong and its too square. It's a shame, because it has all the right ingredients, but the finished article is just a bit disappointing in every aesthetic aspect!
It's been for sale for a while, and I'd guess it'll be sale for a while longer!
a BMW engined pembleton on 2cv wheels should look like this!

In other news, all the parts I've ordered for the engine rebuild are slowly arriving, and I'm collecting the blasted engine castings and adaptor kits tomorrow afternoon.
The pistons came up nice too after soaking in Coca-Cola for 48hrs, the carbon deposits wiped straight off! looking forward to getting it all back together now!
Today marks a bit of a milestone!
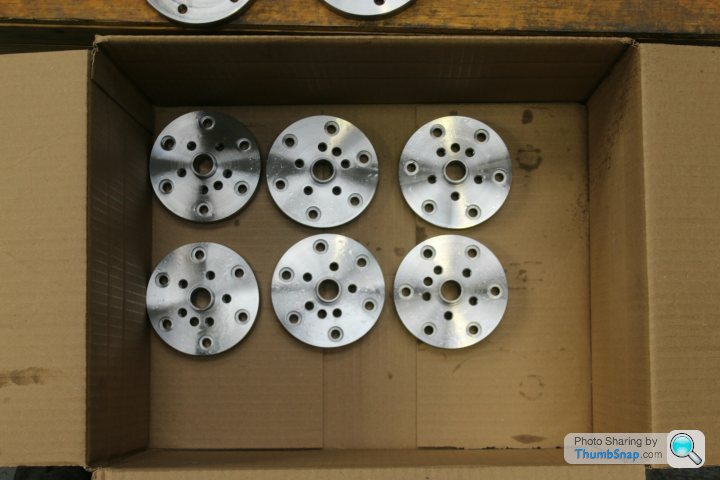
Today I collected my adaptor kits from the machine shop. They really are very very nice indeed. Turns out that they supply machined parts for one or two f1 teams amongst plenty of other people so that kinda means the pembleton will have f1 parts on it... a bit tenuous I know...
I also went and collected my engine castings from the blasters. I cant recommend Boris Blasting in Wellingborough enough. He did a great job at a fantastic price and is a really nice guy too!
I must say that I'm VERY pleased with them, apart from some slight corrosion they look like new!
Today I collected my adaptor kits from the machine shop. They really are very very nice indeed. Turns out that they supply machined parts for one or two f1 teams amongst plenty of other people
so that kinda means the pembleton will have f1 parts on it... a bit tenuous I know...I also went and collected my engine castings from the blasters. I cant recommend Boris Blasting in Wellingborough enough. He did a great job at a fantastic price and is a really nice guy too!
I must say that I'm VERY pleased with them, apart from some slight corrosion they look like new!
Well I spent most of today refinishing my engine castings that I got back from the blasters yesterday.
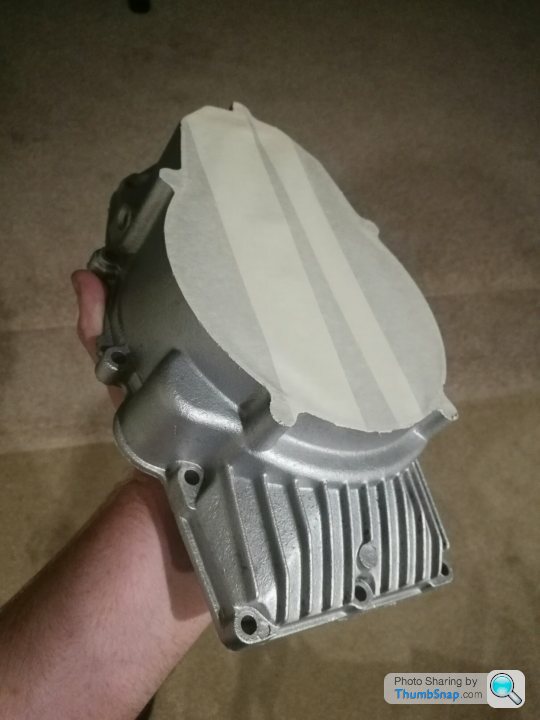
All parts have been rinsed several times and dried. Reground all the valves and setting about masking off
I was out when they tried to deliver the replacement engine parts, so the assembly is on hold until I get everything.
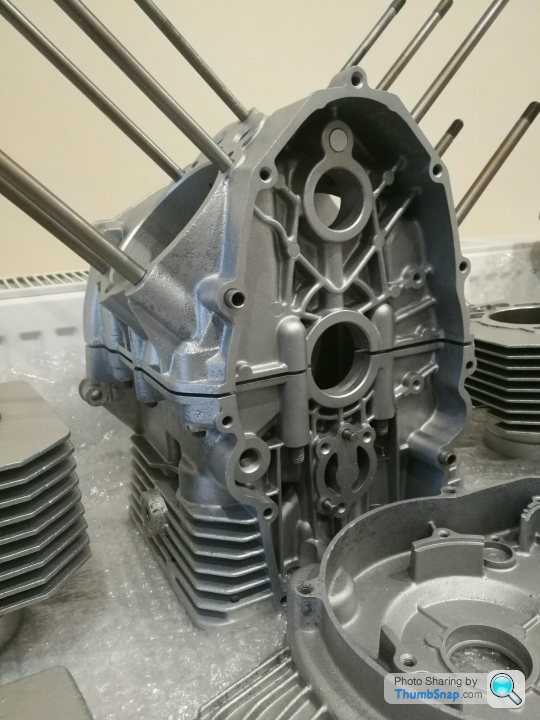
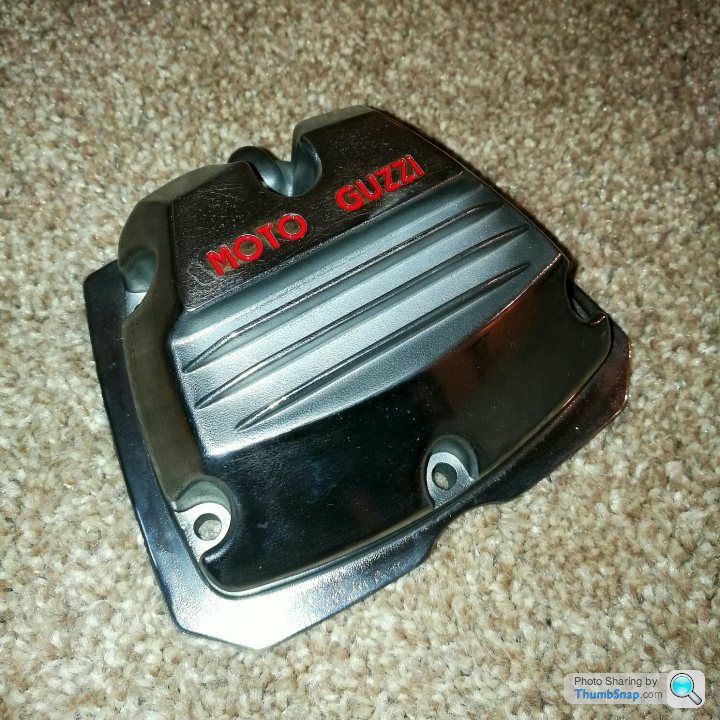
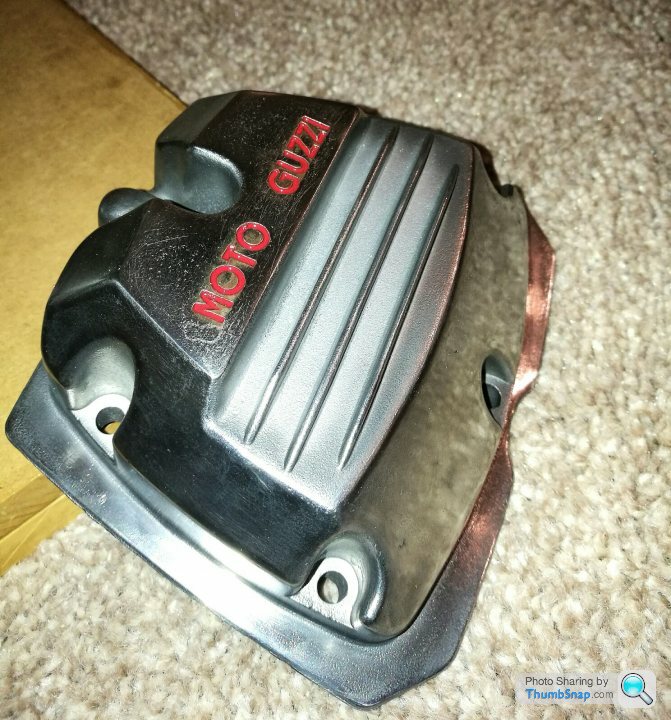
I've polished up the rocker covers. The crankcase, timing chest and sump have been coated with clear VHT engine lacquer.
The barrels and heads have been painted black with the edges of the fins rubbed down, then lacquered.

All parts have been rinsed several times and dried. Reground all the valves and setting about masking off
I was out when they tried to deliver the replacement engine parts, so the assembly is on hold until I get everything.
I've polished up the rocker covers. The crankcase, timing chest and sump have been coated with clear VHT engine lacquer.
The barrels and heads have been painted black with the edges of the fins rubbed down, then lacquered.
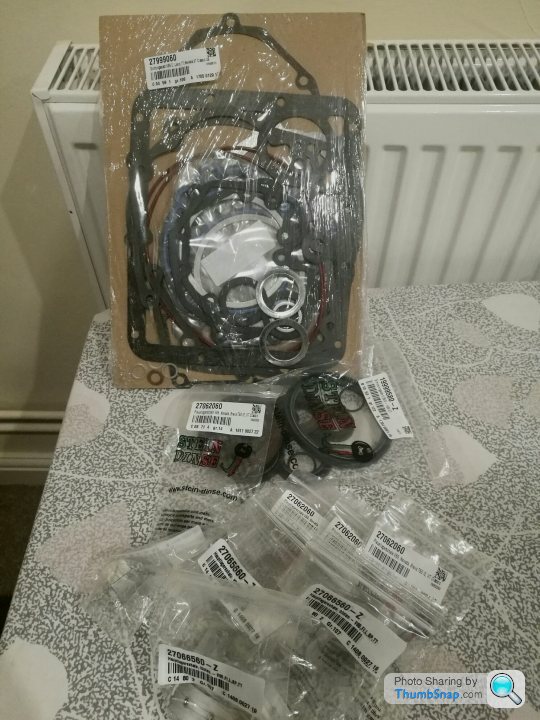
Goodies from germany arrived 
You don't get much for £400 when you're buying guzzi bits...
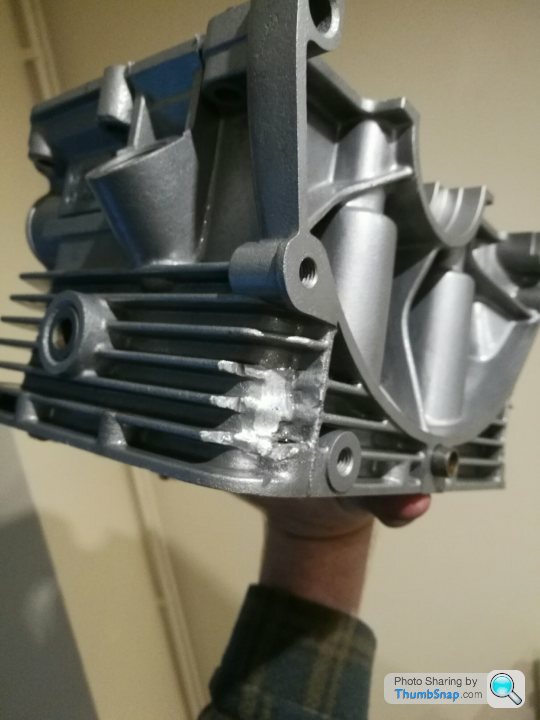
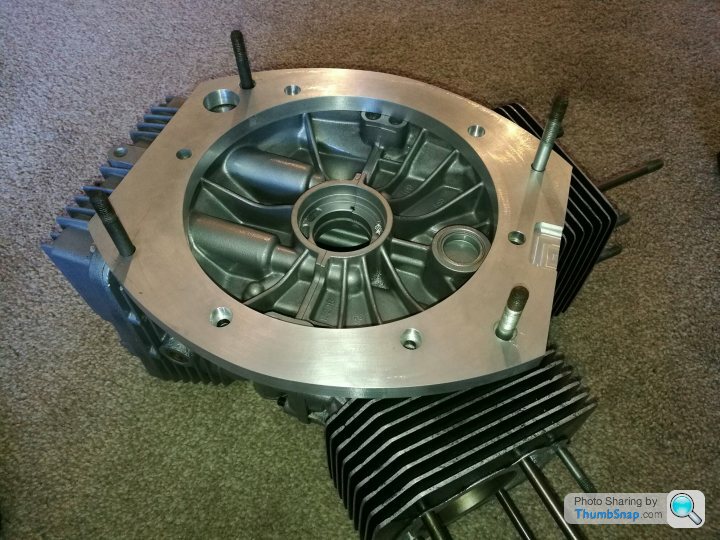
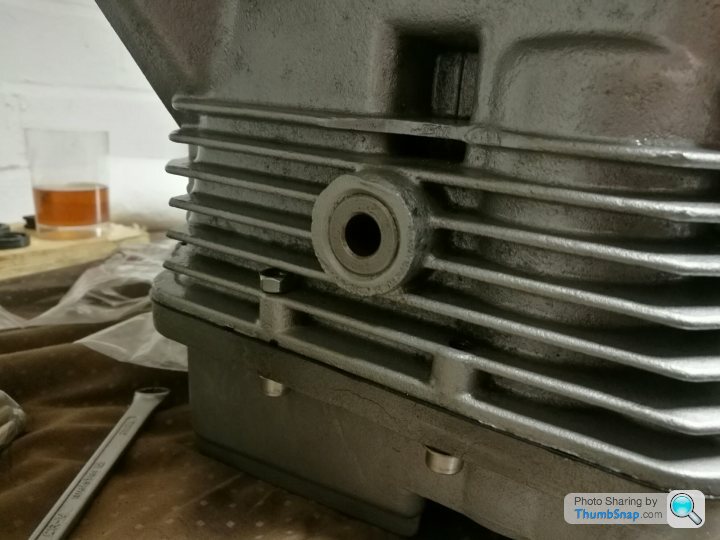
I've also done a trial fit of the register plate on the back of my crank case. Lovely fit! I remembered just before I baked on the VHT lacquer that I needed to grind away some if the fins on the bottom half carefully for bolt access!
You don't get much for £400 when you're buying guzzi bits...
I've also done a trial fit of the register plate on the back of my crank case. Lovely fit! I remembered just before I baked on the VHT lacquer that I needed to grind away some if the fins on the bottom half carefully for bolt access!
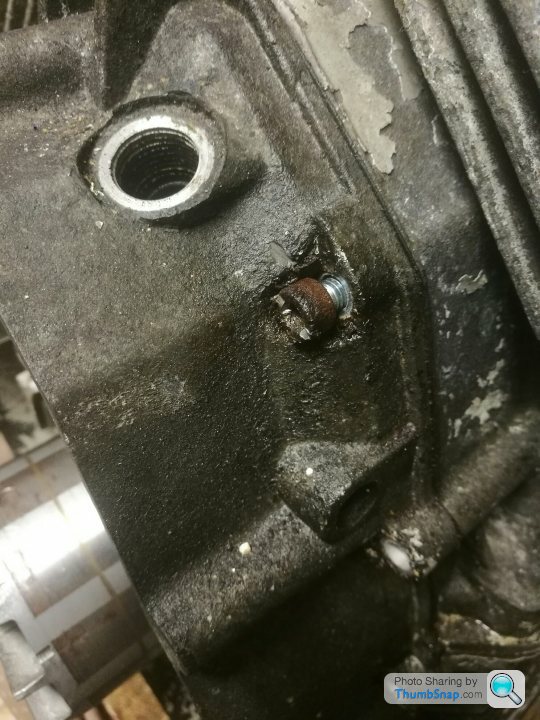
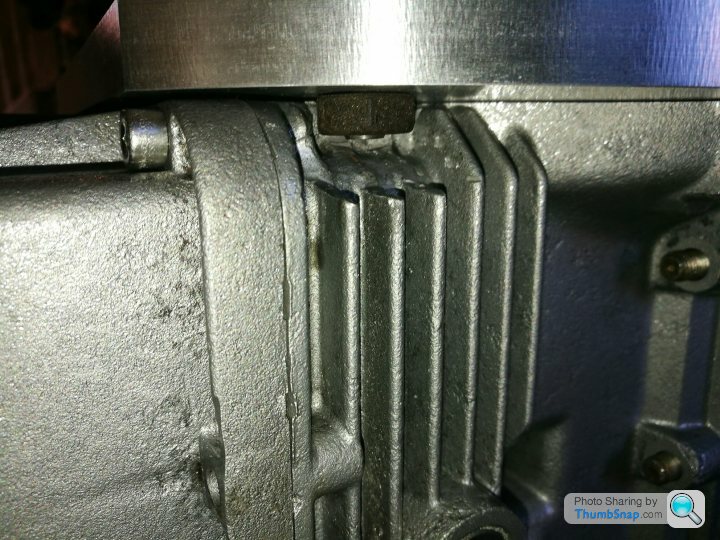
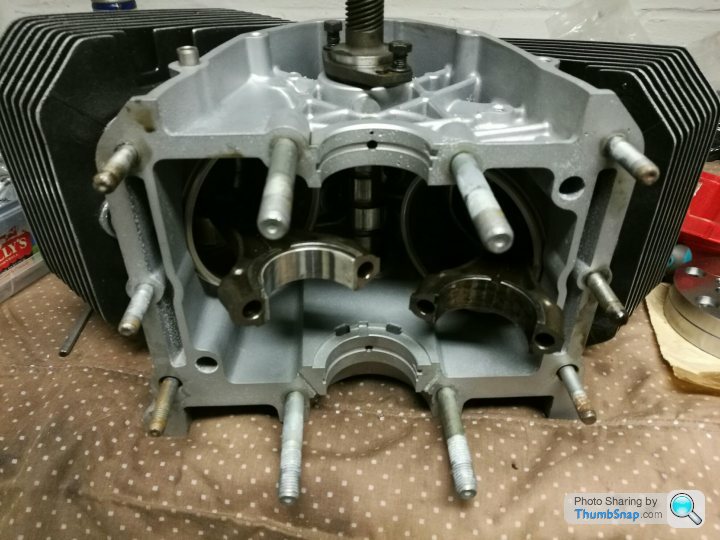
Not much to report for the moment the engine is going back together quite nicely. One seized bolt I had to drill out is now a thru bolt with a nut. I didn't really fancy drilling and tapping to the next size up.
Worn shells:
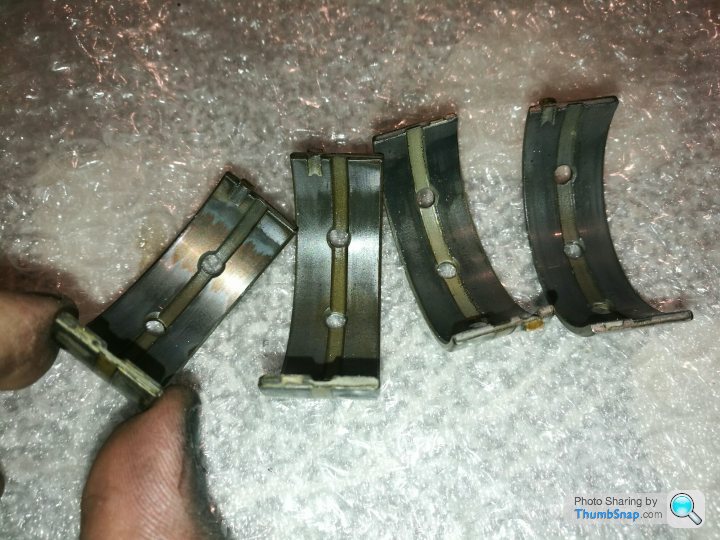
Going together with new gaskets, seals and shells quite nicely...
Worn shells:
Going together with new gaskets, seals and shells quite nicely...
Hi,
Thanks.
The castings shown on my dining room table back from the blasters are bare aluminium. Since then all I've done to rebuild is clear VHT lacquer and baked it to cure, I haven't colour painted them at all apart from the barrels and head fins black, just clear lacquer.
And yes, the rocker cover is the same one before and after a bit of sanding and polishing.
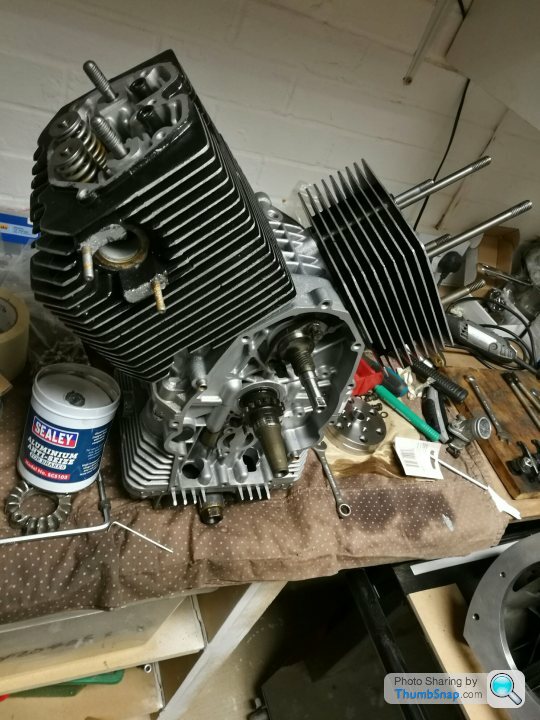
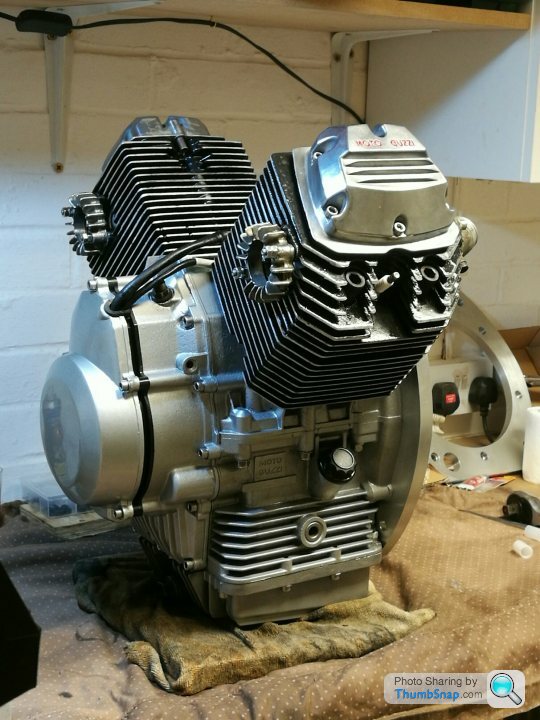
Engine finished! It was actually finished before christmas, but, ya know, life....
I haven't done anything with it though as the pembleton needs an MOT with its current engine first.

In other news I have finished painting the garage, boxing in the meters and fusebox, putting up lighting and laying flooring. So its now a clean, bright and dust free (ish) environment to strip the bike and build a car
I haven't done anything with it though as the pembleton needs an MOT with its current engine first.
In other news I have finished painting the garage, boxing in the meters and fusebox, putting up lighting and laying flooring. So its now a clean, bright and dust free (ish) environment to strip the bike and build a car
I was looking at wheel options for the new build. There aren't that many options in reality.
You can stick with the 2cv wheels and go for various wheel trims, buy Pembletons own custom light weight wire wheels (at a premium), got for some bugatti style wheels from a dutch company, or fit MGA wire wheels and knock on adaptors.
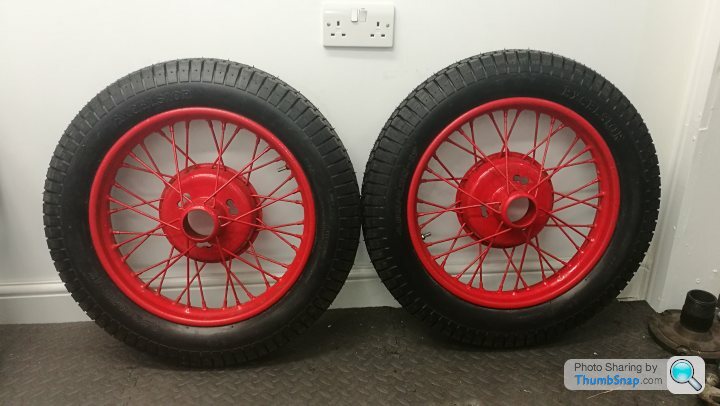
I wanted wire wheels. I did buy a pair of 16" wire wheels and a single adaptor. I made these look like new, but I really struggled to get tyres for them and they were VERY heavy. I bailed out of this idea.
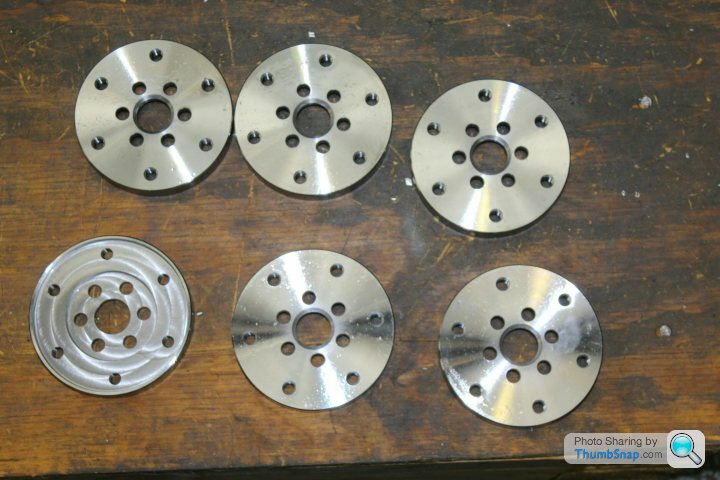
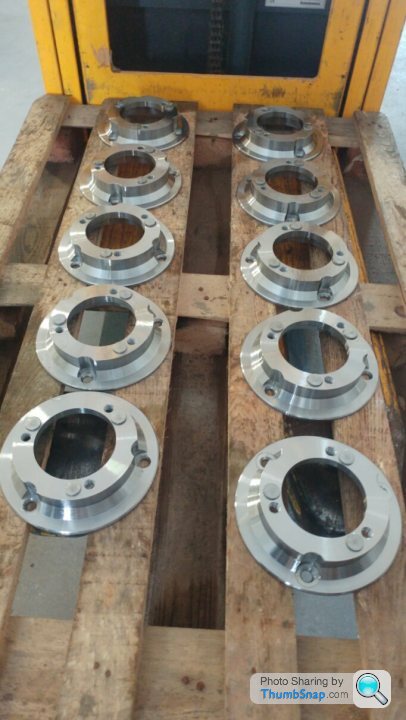
I did a bit more research and found that Austin7 wheels had the right look. They were tall, skinny, readily available, reasonably inexpensive, and bolt ons. I bought a wheel centre from a chap selling knackered wheels on Ebay. He was happy to cut the centre out of the worst one and post it to me. After a tickle with a wire wheel and a lick of paint, I could use it to measure and design my own wheel adaptor.
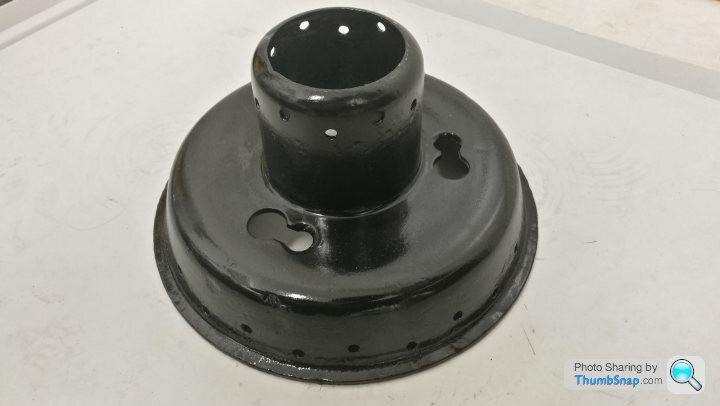
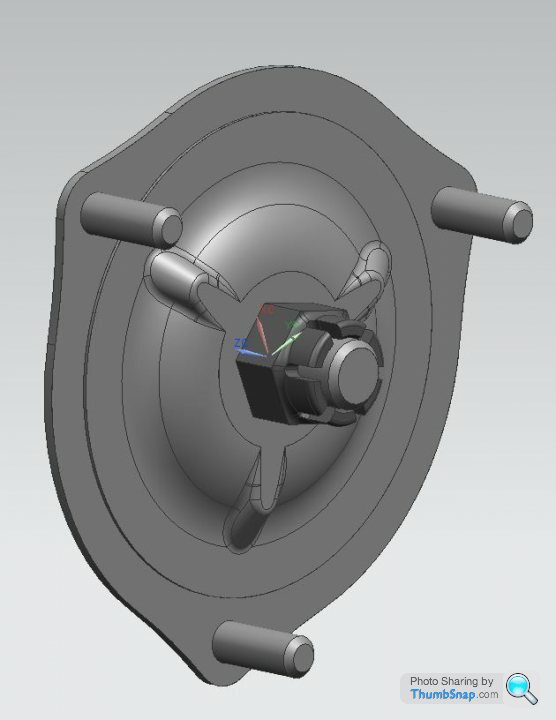
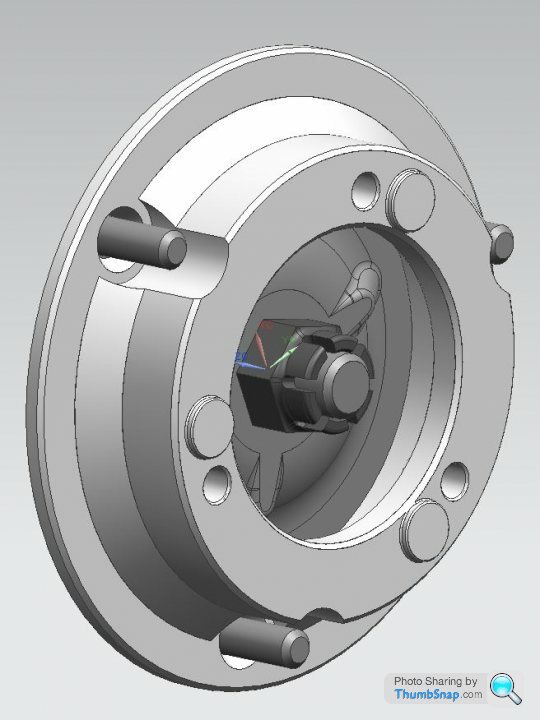
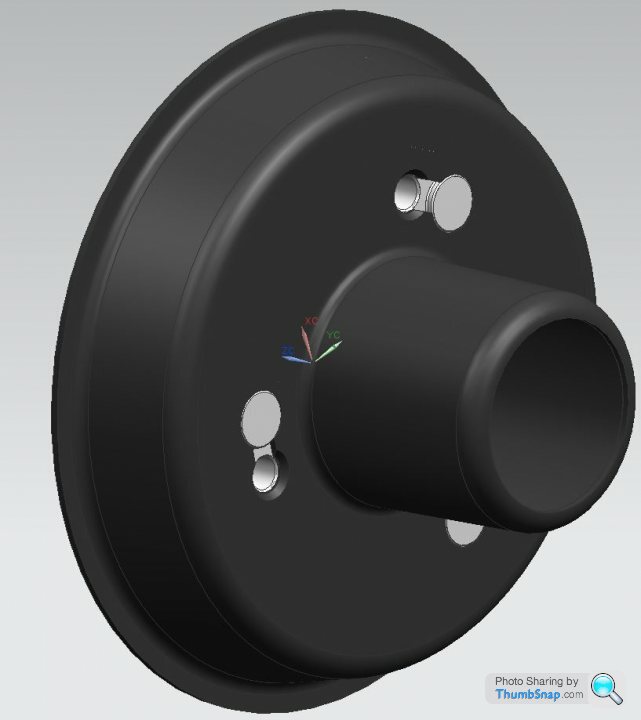
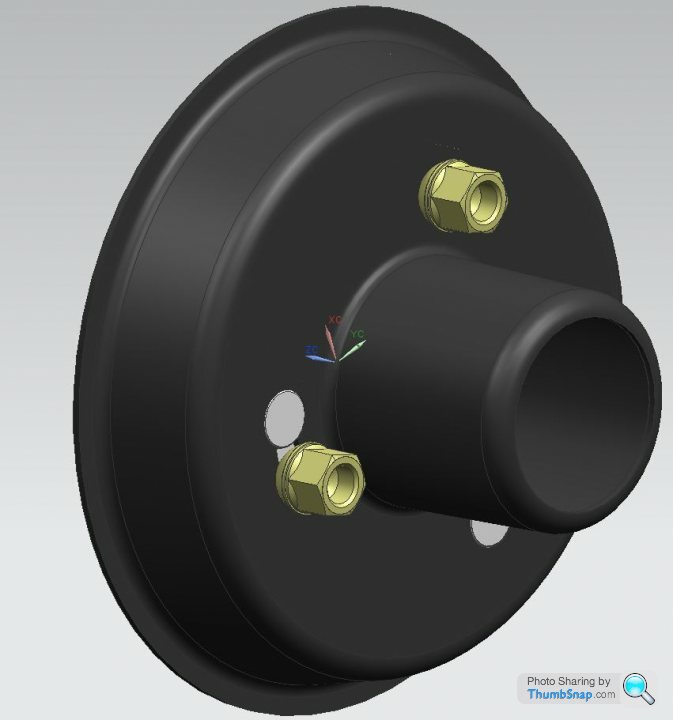
There were a few issue regarding PCD, locating bosses etc, but I got there in the end. The Austin brake drums have raised bosses pressed into them to locate the wheels and stop them rotating. The 2cv stub axle has a domed, raised centre with the castellated nut atop.
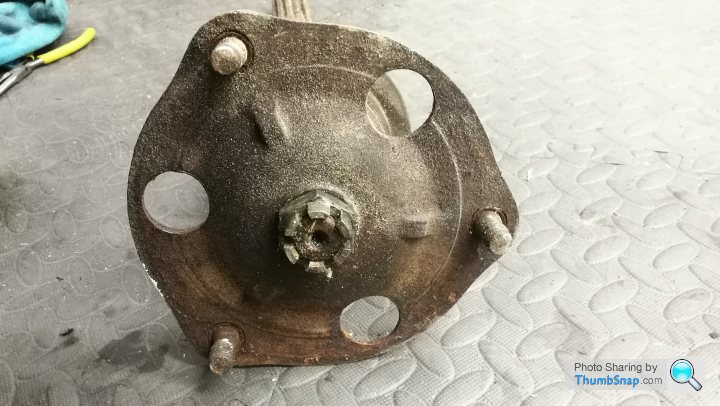
I recreated the 2 parts in CAD and designed the adaptor...
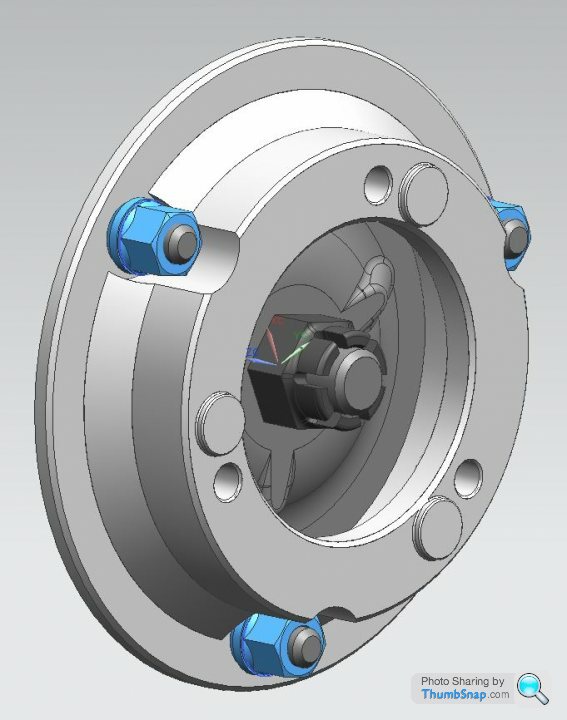
A fellow pembleton owner/builder in france was also keen for a set of 4, so I got a batch of ten machined up in eastern europe and shipped over.
Whilst I was waiting for them to turn up I kept a beady eye on Ebay. As luck would have it, there was a chapbselling a set of 5x Austin 7 17" wheels in good condition, 4 had brand new tyres. Ideal. A deal was struck and I picked them up...
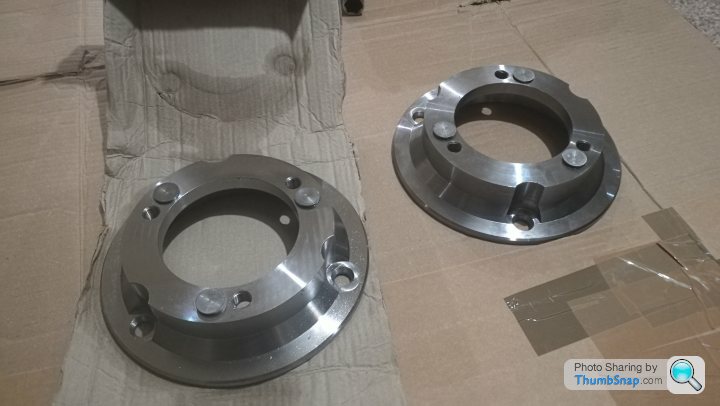
Within a few weeks of picking up the wheels, my adaptors arrived from Lithuania.
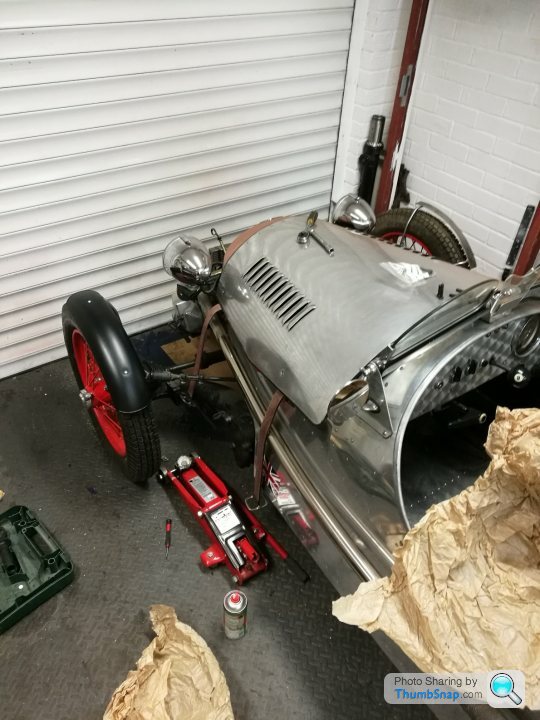
And fitted to the car with wheels...
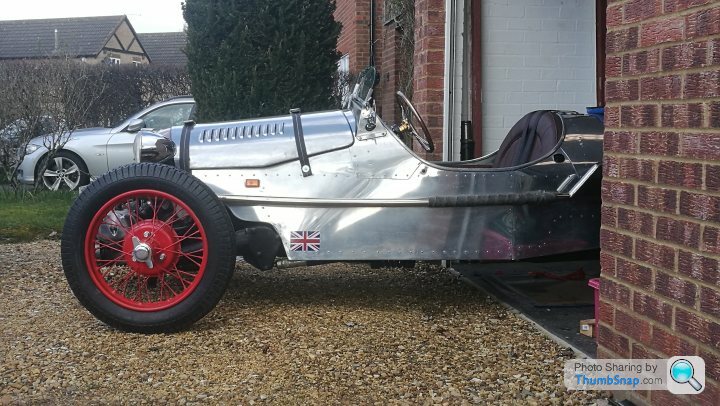
With the larger wheels and offset, my mudguards now dont fit, so that's the next job!
Ive managed to source some 19" wheels for the new build, but the 17s look fine on the current car!
You can stick with the 2cv wheels and go for various wheel trims, buy Pembletons own custom light weight wire wheels (at a premium), got for some bugatti style wheels from a dutch company, or fit MGA wire wheels and knock on adaptors.
I wanted wire wheels. I did buy a pair of 16" wire wheels and a single adaptor. I made these look like new, but I really struggled to get tyres for them and they were VERY heavy. I bailed out of this idea.
I did a bit more research and found that Austin7 wheels had the right look. They were tall, skinny, readily available, reasonably inexpensive, and bolt ons. I bought a wheel centre from a chap selling knackered wheels on Ebay. He was happy to cut the centre out of the worst one and post it to me. After a tickle with a wire wheel and a lick of paint, I could use it to measure and design my own wheel adaptor.
There were a few issue regarding PCD, locating bosses etc, but I got there in the end. The Austin brake drums have raised bosses pressed into them to locate the wheels and stop them rotating. The 2cv stub axle has a domed, raised centre with the castellated nut atop.
I recreated the 2 parts in CAD and designed the adaptor...
A fellow pembleton owner/builder in france was also keen for a set of 4, so I got a batch of ten machined up in eastern europe and shipped over.
Whilst I was waiting for them to turn up I kept a beady eye on Ebay. As luck would have it, there was a chapbselling a set of 5x Austin 7 17" wheels in good condition, 4 had brand new tyres. Ideal. A deal was struck and I picked them up...
Within a few weeks of picking up the wheels, my adaptors arrived from Lithuania.
And fitted to the car with wheels...
With the larger wheels and offset, my mudguards now dont fit, so that's the next job!
Ive managed to source some 19" wheels for the new build, but the 17s look fine on the current car!
Edited by Ambleton on Sunday 1st April 08:35
Huntsman said:
Just read this thread start to finish. top work!
What's happening with the new build?
Thanks! See my other thread entitled Pembleton mkII - Tin Tub here....What's happening with the new build?
https://www.pistonheads.com/gassing/topic.asp?h=0&...
rolando said:
Ambleton said:
I was looking at wheel options for the new build. There aren't that many options in reality.
And fitted to the car with wheels...
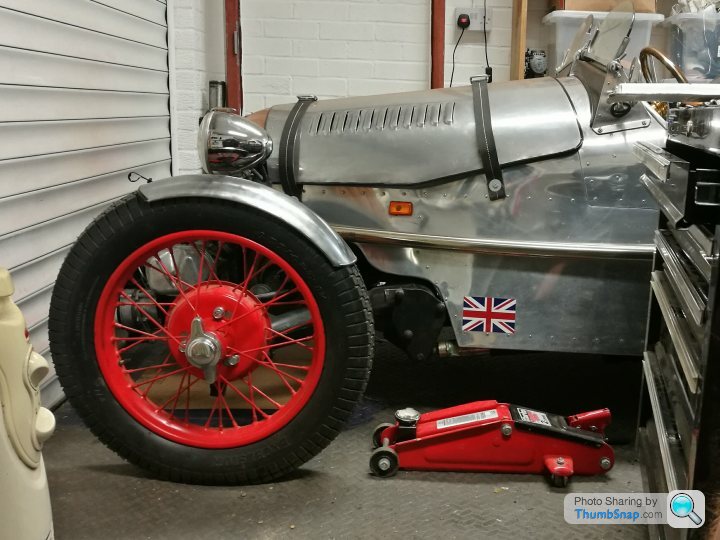
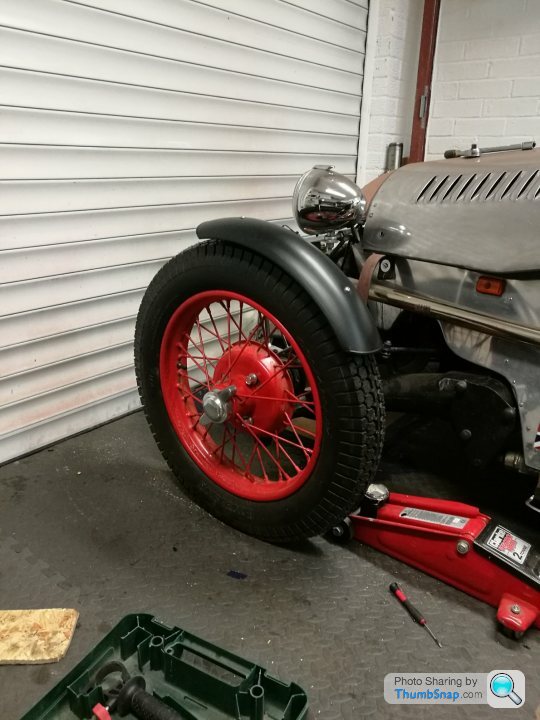
Those wheels look spot on. Do you really need mudguards, apart from making it legal? And fitted to the car with wheels...

They will be offset the wheels a bit obviously once fitted...
simon9a98 said:
Hello lovely wings where did you get them from?
Simon
They're from a classic bike parts seller, designed to be mounted on the front of something like a BSA or a Norton.Simon
https://www.classicbikeshop.co.uk
Not particularly expensive and lots of choice with quick delivery too.


Gassing Station | Readers' Cars | Top of Page | What's New | My Stuff