Full circle into a Marina again. My 73 Morris Marina Coupe
Discussion


rickygolf83 said:
Great progress, should start a go fund me type thing for us brits to chip in to get you some panels sent over 
You are doing great without them though
Thanks. Would've been a handy thing to have back when I started, but once I'm done with this bodywork I ain't going there again You are doing great without them though

its not perfect, but this is where I'm at currently.

Jhonno said:
To quote David Freiburger.. "Don't Get It Right, Just Get It Running"
Looks good!
I'm trying to live by David's wise words, but it's hard when its got to be "right enough" to pass a WOF inspection (MOT) or it can't be driven on the road Looks good!
 They have it so easy over there, can drive anything on the road as long as most of the wheels are still attached.
Just quickly, before moving on, a quick update on the rear quarter panel I left in filler last time. After much sanding, this is where it is. It needs some touching up, but I'm much happier with it.

Finally, something other than bodywork. You're sick of reading about it, I'm sick of doing and writing about it. In a change of scenery, I moved to the front suspension to sort out an issue this Marina had.
Say what you will about the Marina suspension, well no not that; it's not been pulled from the Minor, but anyway, it's very simple.
This simplicity works both ways. It's easy to work on and adjust, but it's also simple in how it operates which can cause some compromises in ride comfort and handling.
One way it's delightfully simple is that it uses a pair of torsion bars in the front suspension instead of traditional springs. These operate as a spring by twisting a spring steel rod along its length. As it always wants to try to unwind, it causes a springing effect.
These have one simple benefit for car weirdos like me; they can be adjusted without special tools, on the car (for the most part), and without any legal headaches. This makes the ride height adjustable.
At the back of the torsion bar, which is about half way down the length of the car, is a trim adjuster. This is used to adjust the fine height of the car. These are usually set about half way in their travel, so the ride can be altered higher or lower by a certain amount (usually an inch or two either way). Coarse adjustment is done by moving the arm by one or more splines on the shaft, one spline is one inch in adjustment.
Mine is pretty ugly because it's 50 years old, and covered in thick underseal, but the basics can be seen. The orange arrow is the torsion bar, this is heading off towards the front of the car to meet the lower front suspension arm. The blue arrow is a locking bolt, this will need to be loosened (not removed) to adjust the arm, and the green arrow is the actual adjuster (which presses against a thick steel "bucket" so it doesn't dig into the floor pan). The adjuster works but moving the lever up and down, causing more or less twist in the torsion bar.

So, the issue the Marina had. Well, just look at it

It was very nose-up. As it turns out, according to the workshop manual, it should be 14.6-15" (37-38cm) when measured from the center of the front wheel dust cap to the arch lip.


This is how mine was sitting, up to a full inch too high. I noticed this when I reassembled the front suspension after its rebuild. I was careful not to move the lower arm on the splines, so it wasn't me that threw it out of whack, but the suspension was so high that the top arm was pressed firmly against the droop stop when at rest. This is not good for ride quality.
It's quite a large gap

It's visible in the delivery photos too, even if the tire is a bit flat on the top.

To correct this was quite simple really. Well, mostly. To actually fix the issue I would ideally need to disassemble the suspension and turn the lower arm one spline on the torsion bar to set the adjuster in the middle again, but because I don't want to do that all over again, I wire brushed off the adjuster, loosened the locking bolt and wound the adjuster bolt out. Loosening the bolt lowers the car as it takes tension off the torsion bar.
I started with the RH side due to easier access and lowered it until the bucket on the top of the adjuster bolt was no longer captive, and wound it back in until it was.
It got it about spot on for what I had in mind, about an inch lower than the lowest stock spec.


It looked pretty good, so I moved to the other side.
Unfortunately this adjuster wasn't in the middle of its travel, so it bottomed out about here. A smidge more than half an inch lower than stock.

To be fair, this actually looked really good too, even though it wasn't quite as low. I wound the RH side up to level it out and ended up with this

Compared to what it was, it's a decent difference. Should improve handling too, both by being lower, but also not having the top arm resting on the droop stop anymore.
Pretty good result on the front. I do have a set of one-inch lowering blocks for the rear, but I want to see what it looks like on the ground again before I decide to lower the rear or not. I think I will, but we'll see.
I'm hoping to get through a lot more work over the coming holiday period and have the car ready for a WOF early next year. It's way behind schedule, but it's slowly getting there.
Finally, something other than bodywork. You're sick of reading about it, I'm sick of doing and writing about it. In a change of scenery, I moved to the front suspension to sort out an issue this Marina had.
Say what you will about the Marina suspension, well no not that; it's not been pulled from the Minor, but anyway, it's very simple.
This simplicity works both ways. It's easy to work on and adjust, but it's also simple in how it operates which can cause some compromises in ride comfort and handling.
One way it's delightfully simple is that it uses a pair of torsion bars in the front suspension instead of traditional springs. These operate as a spring by twisting a spring steel rod along its length. As it always wants to try to unwind, it causes a springing effect.
These have one simple benefit for car weirdos like me; they can be adjusted without special tools, on the car (for the most part), and without any legal headaches. This makes the ride height adjustable.
At the back of the torsion bar, which is about half way down the length of the car, is a trim adjuster. This is used to adjust the fine height of the car. These are usually set about half way in their travel, so the ride can be altered higher or lower by a certain amount (usually an inch or two either way). Coarse adjustment is done by moving the arm by one or more splines on the shaft, one spline is one inch in adjustment.
Mine is pretty ugly because it's 50 years old, and covered in thick underseal, but the basics can be seen. The orange arrow is the torsion bar, this is heading off towards the front of the car to meet the lower front suspension arm. The blue arrow is a locking bolt, this will need to be loosened (not removed) to adjust the arm, and the green arrow is the actual adjuster (which presses against a thick steel "bucket" so it doesn't dig into the floor pan). The adjuster works but moving the lever up and down, causing more or less twist in the torsion bar.
So, the issue the Marina had. Well, just look at it
It was very nose-up. As it turns out, according to the workshop manual, it should be 14.6-15" (37-38cm) when measured from the center of the front wheel dust cap to the arch lip.
This is how mine was sitting, up to a full inch too high. I noticed this when I reassembled the front suspension after its rebuild. I was careful not to move the lower arm on the splines, so it wasn't me that threw it out of whack, but the suspension was so high that the top arm was pressed firmly against the droop stop when at rest. This is not good for ride quality.
It's quite a large gap
It's visible in the delivery photos too, even if the tire is a bit flat on the top.
To correct this was quite simple really. Well, mostly. To actually fix the issue I would ideally need to disassemble the suspension and turn the lower arm one spline on the torsion bar to set the adjuster in the middle again, but because I don't want to do that all over again, I wire brushed off the adjuster, loosened the locking bolt and wound the adjuster bolt out. Loosening the bolt lowers the car as it takes tension off the torsion bar.
I started with the RH side due to easier access and lowered it until the bucket on the top of the adjuster bolt was no longer captive, and wound it back in until it was.
It got it about spot on for what I had in mind, about an inch lower than the lowest stock spec.
It looked pretty good, so I moved to the other side.
Unfortunately this adjuster wasn't in the middle of its travel, so it bottomed out about here. A smidge more than half an inch lower than stock.
To be fair, this actually looked really good too, even though it wasn't quite as low. I wound the RH side up to level it out and ended up with this
Compared to what it was, it's a decent difference. Should improve handling too, both by being lower, but also not having the top arm resting on the droop stop anymore.
Pretty good result on the front. I do have a set of one-inch lowering blocks for the rear, but I want to see what it looks like on the ground again before I decide to lower the rear or not. I think I will, but we'll see.
I'm hoping to get through a lot more work over the coming holiday period and have the car ready for a WOF early next year. It's way behind schedule, but it's slowly getting there.
I've been pushing forward with the Marina this week, spending a couple of days after work finishing up some of the bodywork.
I started by finishing the LH rear quarter window frame; sanding out the filler, and then priming and painting the frame.

The colour match in the rattle cans is pretty good really.
This little corner has come a long way since it was a gaping hole


With the frame painted, I test-fitted some spare door seal I had from the TVR, and to my surprise it's a perfect fit, so I will use that. I still need to cut and join the front edge, but otherwise it's a good fit.

I test fitted the window and it and seems to fit well, but I have a lot of work to do to the window before it can be fitted. It spent many years out in a field.

With that success, I moved on to the rear valance. I'm sick of working on this, so smoothed back the filler, primed and painted it. It's still fairly wobbly, but it's solid and hidden under the bumper for the most part. It looks good at 20ft away, anyway.

I undersealed the back of the fuel tank and filler pipe, to hide them. The plate was also refitted; would you be surprised to find the two holes that were previously used, and that I had been working around, aren't spaced correctly and I had to slot the plate holes for it to fit with the new rivnuts in the original holes? I was both surprised and annoyed. I should've just welded them up and drilled new ones. I'll drill two new ones for the inner pair of holes on the plate so I don't have to slot the personalised plate when I put it on the Marina.

Unfortunately the number plate bulb holder broke at some point, so I'm working on a replacement that should be a bit more reliable than the original that grounds by touching the mounting bracket it's on.
With the bodywork at a point I was happy with, I moved on to the last thing I needed to do before I could finally get the car off the stands; sort the rear suspension.
Even though I had sorted the brakes, I hadn't touched the rear suspension at all. I knew one side was missing a bump stop, and everything else was just a bit tired.
I purchased a 1 inch lowering block set to suit a Capri, Escort, Anglia etc, and some escort poly spring pads. The bump stops are a good pair of used UK spec bump stops.

Speaking of bump stops, it's interesting to note the UK ones are shorter than the Aus spec ones, and have a slightly different shape. The shorter ones are better for a lowered car anyway.


I removed the rather random collection of nuts on the bottom of the original U bolts

Which meant everything started to come apart

In hindsight, I would undo and remove the shock from the bottom spring plate, just so there is more movement in it come time to reassemble.
The old spring pads were in good shape. They appear to already be poly, not rubber, so may have been replaced before.

A nice little collection of bits, less the top plate (still stuck on the axle, but can be removed with a couple of taps of a hammer).

The plates appear to be galvanised which would explain why they were in excellent shape under the dirt

I did a test fit with the new blocks, but found reusing the old spring pads wouldn't work because the thicker U bolts would bind on them (the old, thinner bolts had moulded into them).

Speaking of thicker U bolts, one thing you do need to do is open the bolts in all the mounting plates out a bit, as the holes are a tad too small. I opened them out to the 12mm step on my step drill.


A clamp helps squeeze the U bolt together and fit it through the holes as they come a little too spread apart

All fitted together, with the replacement bump stop, new spring pads, U bolts and 1 inch lowering block.

It took a lot of mucking around with the jack and a ratchet strap to get the axle to line up on the spring holes/pins, as the axle wanted to rotate forward and move backwards, and needed to be pulled forward again; this was made harder on this side because of the forward link on the top of the axle.
The other side went a lot quicker and easier since I had worked out the secret formula on the first side. The main reason I was doing this, was because of the missing bump stop, which would be a WOF failure.

Here it is, with the new parts and a bump stop

I did have to go around with the angle grinder afterwards and just nip the ends off the U bolts as they were a bit long for my liking.
I reinstalled the wheels, cleaned the glass, lowered it off the stands and finally got to see how it looked. In the garage, it looked awesome.
The obvious thing to do now was to see what it looked like out in the cold light of day. After a few goes to get the old inertia start to stop kicking back out, it started without too much fuss and settled into a nice idle. The benefits of an electric fuel pump filling the carb bowl without needing to crank over and over.


There are about two years between these two photos, and hours upon hours of work

The lowered front is the obvious difference, but the rear is subtly lower, the whole lower quarter panel ahead of the wheel has been remade, and the complete outer sill has been replaced.
Lowering it has made a huge difference in how it looks, and I love it. I genuinely think it's one of the coolest looking cars I have owned.
I started by finishing the LH rear quarter window frame; sanding out the filler, and then priming and painting the frame.
The colour match in the rattle cans is pretty good really.
This little corner has come a long way since it was a gaping hole
With the frame painted, I test-fitted some spare door seal I had from the TVR, and to my surprise it's a perfect fit, so I will use that. I still need to cut and join the front edge, but otherwise it's a good fit.
I test fitted the window and it and seems to fit well, but I have a lot of work to do to the window before it can be fitted. It spent many years out in a field.
With that success, I moved on to the rear valance. I'm sick of working on this, so smoothed back the filler, primed and painted it. It's still fairly wobbly, but it's solid and hidden under the bumper for the most part. It looks good at 20ft away, anyway.
I undersealed the back of the fuel tank and filler pipe, to hide them. The plate was also refitted; would you be surprised to find the two holes that were previously used, and that I had been working around, aren't spaced correctly and I had to slot the plate holes for it to fit with the new rivnuts in the original holes? I was both surprised and annoyed. I should've just welded them up and drilled new ones. I'll drill two new ones for the inner pair of holes on the plate so I don't have to slot the personalised plate when I put it on the Marina.
Unfortunately the number plate bulb holder broke at some point, so I'm working on a replacement that should be a bit more reliable than the original that grounds by touching the mounting bracket it's on.
With the bodywork at a point I was happy with, I moved on to the last thing I needed to do before I could finally get the car off the stands; sort the rear suspension.
Even though I had sorted the brakes, I hadn't touched the rear suspension at all. I knew one side was missing a bump stop, and everything else was just a bit tired.
I purchased a 1 inch lowering block set to suit a Capri, Escort, Anglia etc, and some escort poly spring pads. The bump stops are a good pair of used UK spec bump stops.
Speaking of bump stops, it's interesting to note the UK ones are shorter than the Aus spec ones, and have a slightly different shape. The shorter ones are better for a lowered car anyway.
I removed the rather random collection of nuts on the bottom of the original U bolts
Which meant everything started to come apart
In hindsight, I would undo and remove the shock from the bottom spring plate, just so there is more movement in it come time to reassemble.
The old spring pads were in good shape. They appear to already be poly, not rubber, so may have been replaced before.
A nice little collection of bits, less the top plate (still stuck on the axle, but can be removed with a couple of taps of a hammer).
The plates appear to be galvanised which would explain why they were in excellent shape under the dirt
I did a test fit with the new blocks, but found reusing the old spring pads wouldn't work because the thicker U bolts would bind on them (the old, thinner bolts had moulded into them).
Speaking of thicker U bolts, one thing you do need to do is open the bolts in all the mounting plates out a bit, as the holes are a tad too small. I opened them out to the 12mm step on my step drill.
A clamp helps squeeze the U bolt together and fit it through the holes as they come a little too spread apart
All fitted together, with the replacement bump stop, new spring pads, U bolts and 1 inch lowering block.
It took a lot of mucking around with the jack and a ratchet strap to get the axle to line up on the spring holes/pins, as the axle wanted to rotate forward and move backwards, and needed to be pulled forward again; this was made harder on this side because of the forward link on the top of the axle.
The other side went a lot quicker and easier since I had worked out the secret formula on the first side. The main reason I was doing this, was because of the missing bump stop, which would be a WOF failure.
Here it is, with the new parts and a bump stop
I did have to go around with the angle grinder afterwards and just nip the ends off the U bolts as they were a bit long for my liking.
I reinstalled the wheels, cleaned the glass, lowered it off the stands and finally got to see how it looked. In the garage, it looked awesome.
The obvious thing to do now was to see what it looked like out in the cold light of day. After a few goes to get the old inertia start to stop kicking back out, it started without too much fuss and settled into a nice idle. The benefits of an electric fuel pump filling the carb bowl without needing to crank over and over.
There are about two years between these two photos, and hours upon hours of work
The lowered front is the obvious difference, but the rear is subtly lower, the whole lower quarter panel ahead of the wheel has been remade, and the complete outer sill has been replaced.
Lowering it has made a huge difference in how it looks, and I love it. I genuinely think it's one of the coolest looking cars I have owned.
It was nearing the end of the holiday period, and a little Marina waited patiently for some attention.
Now that the Alto was up and running again, I could focus some time on the Marina and check off another item on the pre-WOF list.
One of the main things I needed to sort, that I had everything for, was to fix the wipers and washers.
I removed the whole wiper system a couple of years ago because it was seized and didn't work. The motor didn't function, one of the wiper boxes was jammed solid and the washers didn't respond to the button.
I started with the washer system. The Aus spec Marina uses a bespoke washer bottle with an integrated pump.

I removed the bottle, removed the pump, and found it full of rust. Trash.

There were a couple of options for a replacement pump, but in my eyes the easiest option was to convert the system to the UK spec bottle and remote pump. It's not as tidy, but easier to get parts for.
I started by scrounging up a good used bottle and cap, some new hose, a new pump and a used mounting plate for the firewall as the bracket is different.
The bracket is spot welded to the mounting plate, so I carefully drilled out the spot welds and removed the bracket. Here I had also prepped it for welding.

I considered using rivnuts to mount the bracket, but it's flat on the back so has no space for the bolt heads once the bottle is fitted. The only option was to weld it to the original mounting plate (or paint the replacement one, drill out the rivets and swap the whole plates over).
I marked it out and cleaned the paint off the weld points

And gave it a quick tickle with the sparky glue. I also welded up the lower hole for the Aus spec bracket as this had been letting water in.

A quick prime and a flick of paint and it didn't stick out so much

A test fit with the new bottle

I pulled out all the old perished washer hose and ran all new 4mm hose. Unfortunately during this one of the washer jets crumbled to bits.


With the bottle and hoses in place, I just needed to adapt and install the pump. The connectors are slightly different, so I had to change the wiring to a pair of female spade terminals, but other than that it just plugged straight into the pump and worked. Dark green was positive, and it grounded through the switch.

I drilled a couple of small holes and used a pair of new self-tappers to mount the pump. Also note the nice new hoses to and from the pump, including a one-way valve inside the bottle.


A quick test with some water in the bottle and we finally had water outside the car, albeit in a stream, not a jet

A quick trip to Supercheap resulted in a pair of generic twin jet washers, which I quickly set about fitting

They looked ok and didn't stand out too much


And they worked a treat. Ignore the spoiler regarding the wipers....
https://youtu.be/PEweJKsfJFA
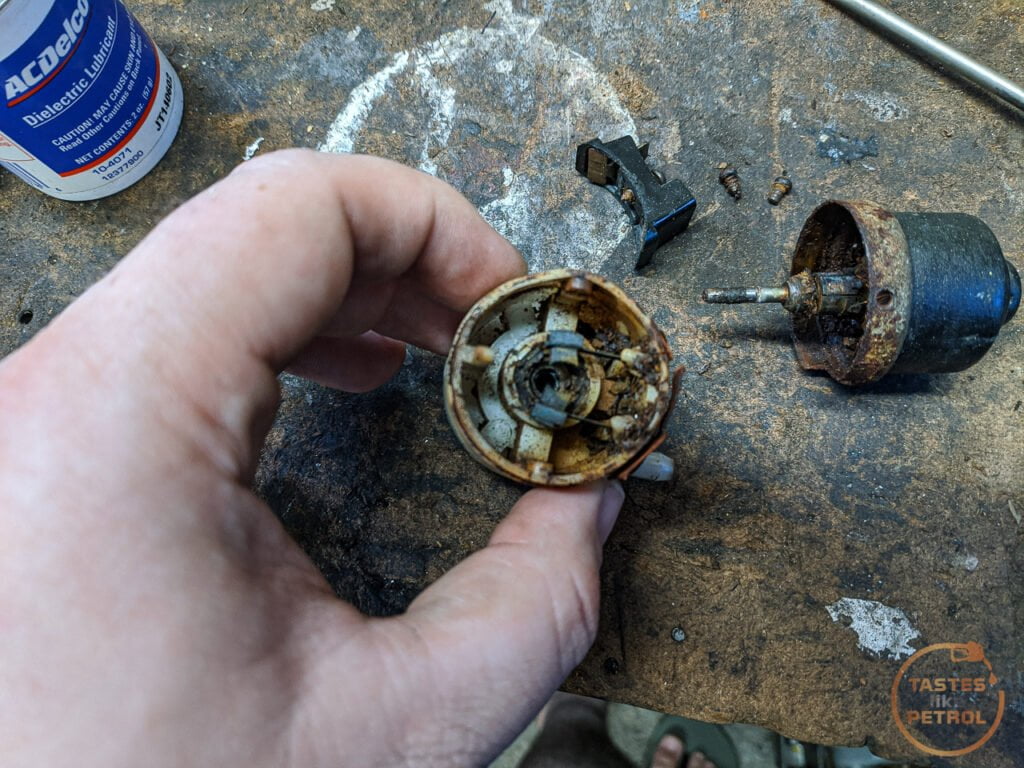
Next on the list was to sort the wipers. When I originally removed everything I had to remove one of the spindles with the rack as it was seized solid and you normally slide the cable through it to remove it.

A bit of brute force got the cable out without damage.
The wiper system is quite interesting really. Instead of linkages like cars have these days, it was operated by a motor pushing and pulling on a spiral wound cable through some steel tubes. This cable engaged teeth on the wheels in the spindles, which caused them to rotate back and forth, thus moving the wipers.

It's quite simple, with not many places to go wrong.
Except mine had. The motor was dead and one of the spindles was seized solid. I also discovered that one of the steel tubes had been bent to get around a bracket (which it should have passed though) which was causing huge resistance on the cable.
I removed the motor which is done by removing the mounting screw and bracket, removing the wiring and then flipping the motor over.

Unless you can/want to remove the whole cable with the motor, you need to disengage it from the motor. This is done by removing the circlip from the arm, remove the small washer and then the arm comes free. The cable is attached to this arm on a pin.
A quick bench test showed that although dirty, the motor was working correctly. Even the park function worked.
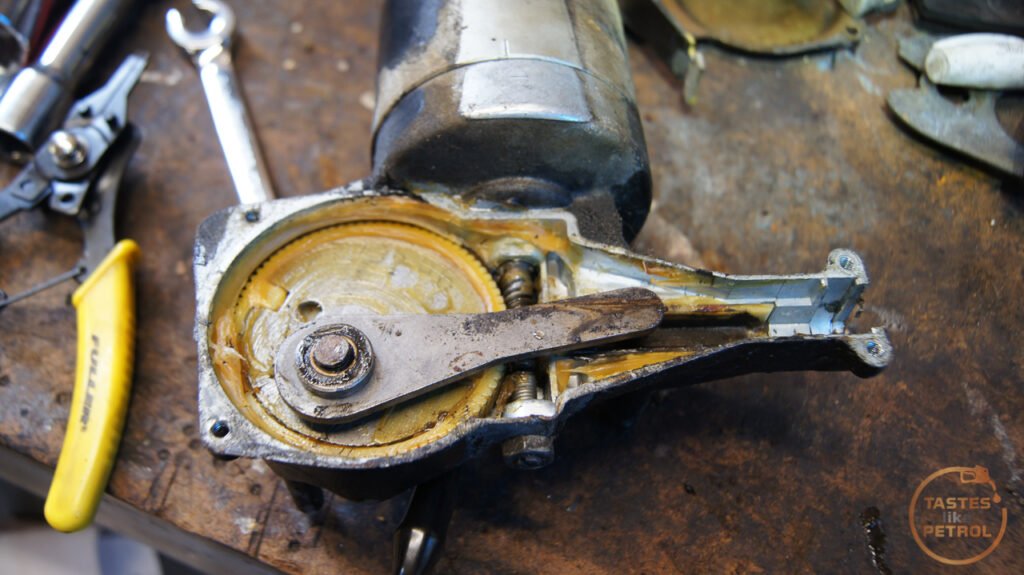

I removed and cleaned the park switch too. It's worn, but still functioning. I have a spare for the future, if needed.


Everything got a thorough clean and then regreased.

I started by grabbing a pair of good working wiper spindles and fitting them to the cowling panel. This wasn't a job I enjoyed, so there are no photos of it. It involves having to hold the spindle up under the dash with one hand, while pushing on the rubber seal, washer and screw on the nut with your other hand. Next was fitting all the steel tubes (including a replacement one between the spindles to replace the bent one) and attaching the gear covers, mostly with one hand due to space. Good fun.


Once all that was in place I greased the cable up, attached it to the motor and threaded it into the tubes, watching as the spindles rotated as it went through. The motor was then refitted to the inner guard, and plugged in.

A quick test showed everything worked correctly, so I installed the original wiper arms and blades. Note the correct side parking position, which was reversed on the later Marina for whatever reason.

For the first time in a couple of years, the Marina had wipers.
To celebrate, I poured some water on the windscreen (since the washers didn't have jets yet) and turned them on
https://youtu.be/K5L0Q3oxFrQ
Hmm, something wasn't quite right. It wiped well (ignoring the ancient rubbers smearing the glass), the wipers had plenty of speed and parked perfectly, but the sweep was.... tiny. It barely cleared the drivers vision.
I tried adjusting the position of the arm up the screen, but by the time I could get enough sweep on the glass, the arm was basically in the middle of my vision.

At best I got this much wipe

I ruminated on it for a bit and came to realisation that I had cocked up. Ages ago, knowing one of my spindles was seized, I bought a couple of second hand replacements. What I had ended up doing, was fitting UK spec spindles, to the AUS spec motor. This had created a mismatch in the gearing, meaning the wipers didn't move as far as they needed to.
I confirmed this by checking my photos taken when I removed the spindles, as to which type were fitted originally

The remedy? I needed to swap the drivers side spindle out for my one remaining good Aus spec spindle with the correct gearing. It means the passengers side doesn't wipe as far as it should, but the drivers side is the one that matters.
Thankfully the drivers side is the easier one to get to. I removed the wiper arm, dismounted the motor and pulled the cable out enough that it disengaged the spindle.

I then removed the back cover so I could remove the tubes from the spindle. It's obvious in this photo, compared to the one above, that the gear on the spindle is bigger and has a different design.

Once removed I put them side by side and you can see the difference here. Aus spec on the left with the smaller gear.


With the Aus spindle installed, how was it?
https://youtu.be/YKvh9MQH-dc
MUCH better. It now cleared right up to the A pillar, from the arm being horizontal.


The Triangle of Doom is horrific though, Hubnut would not be impressed.

The ultimate solution would be to source another Aus spec spindle and replace the passengers side one too, but this will do for now. It will get me through a WOF inspection anyway, well, once the new blades arrive to replace these smeary old things. This is a good-weather car anyway.
One last thing for the week was to sort out the source of jokes from my wife

https://youtu.be/Zzyfcys1aLM?si=lo3PLbRUwQmSkoZ7
I had previously tested the wiring, so knew the issue was the headlight itself and being a sealed beam unit where the whole light is essentially the bulb (not a lens and reflector with the bulb in it) the only option was complete replacement.

This one was an ancient GE unit (ignore the upside down photo...)

I bought a pair of sweet NOS Hella H4 units a couple of years ago and have been waiting to fit them

Date stamped 1996, about a year after this car was last on the road

These are a lens and reflector unit with a replaceable H4 bulb

They were a direct drop-in replacement. The Hella, on the right of this photo, has a slightly whiter shade

My only real issue with them is they don't have the nice pronounced curve in the lens like the old lights (and other new replacements available)
Old

New

I'll use them for now, but will look to replace them again in the future with curved lens units, which is a shame because the Hella ones are really nice quality and really expensive to buy new now. They don't quite look right though with the flat lens.

They do light up really well though

Since I have changed the ride height of the car and levelled it out some, I had to adjust the lights to bring them back to level. This is done with the adjustment screws on the light bowl.
With the grille panel refitted. It somehow changed the face of the car not having curved lenses. It looks surprised.


We're one step closer to a WOF and about three more things crossed off the list. The pre-WOF list is getting pretty small now. I need to reinstall the rear quarter glass, install some carpet, reinstall the seats, install the seatbelts, make a door card and have the exhaust rear section replaced and we should be good to give it a try.
Now that the Alto was up and running again, I could focus some time on the Marina and check off another item on the pre-WOF list.
One of the main things I needed to sort, that I had everything for, was to fix the wipers and washers.
I removed the whole wiper system a couple of years ago because it was seized and didn't work. The motor didn't function, one of the wiper boxes was jammed solid and the washers didn't respond to the button.
I started with the washer system. The Aus spec Marina uses a bespoke washer bottle with an integrated pump.
I removed the bottle, removed the pump, and found it full of rust. Trash.
There were a couple of options for a replacement pump, but in my eyes the easiest option was to convert the system to the UK spec bottle and remote pump. It's not as tidy, but easier to get parts for.
I started by scrounging up a good used bottle and cap, some new hose, a new pump and a used mounting plate for the firewall as the bracket is different.
The bracket is spot welded to the mounting plate, so I carefully drilled out the spot welds and removed the bracket. Here I had also prepped it for welding.
I considered using rivnuts to mount the bracket, but it's flat on the back so has no space for the bolt heads once the bottle is fitted. The only option was to weld it to the original mounting plate (or paint the replacement one, drill out the rivets and swap the whole plates over).
I marked it out and cleaned the paint off the weld points
And gave it a quick tickle with the sparky glue. I also welded up the lower hole for the Aus spec bracket as this had been letting water in.
A quick prime and a flick of paint and it didn't stick out so much
A test fit with the new bottle
I pulled out all the old perished washer hose and ran all new 4mm hose. Unfortunately during this one of the washer jets crumbled to bits.
With the bottle and hoses in place, I just needed to adapt and install the pump. The connectors are slightly different, so I had to change the wiring to a pair of female spade terminals, but other than that it just plugged straight into the pump and worked. Dark green was positive, and it grounded through the switch.
I drilled a couple of small holes and used a pair of new self-tappers to mount the pump. Also note the nice new hoses to and from the pump, including a one-way valve inside the bottle.
A quick test with some water in the bottle and we finally had water outside the car, albeit in a stream, not a jet
A quick trip to Supercheap resulted in a pair of generic twin jet washers, which I quickly set about fitting
They looked ok and didn't stand out too much
And they worked a treat. Ignore the spoiler regarding the wipers....
https://youtu.be/PEweJKsfJFA
Next on the list was to sort the wipers. When I originally removed everything I had to remove one of the spindles with the rack as it was seized solid and you normally slide the cable through it to remove it.
A bit of brute force got the cable out without damage.
The wiper system is quite interesting really. Instead of linkages like cars have these days, it was operated by a motor pushing and pulling on a spiral wound cable through some steel tubes. This cable engaged teeth on the wheels in the spindles, which caused them to rotate back and forth, thus moving the wipers.
It's quite simple, with not many places to go wrong.
Except mine had. The motor was dead and one of the spindles was seized solid. I also discovered that one of the steel tubes had been bent to get around a bracket (which it should have passed though) which was causing huge resistance on the cable.
I removed the motor which is done by removing the mounting screw and bracket, removing the wiring and then flipping the motor over.
Unless you can/want to remove the whole cable with the motor, you need to disengage it from the motor. This is done by removing the circlip from the arm, remove the small washer and then the arm comes free. The cable is attached to this arm on a pin.
A quick bench test showed that although dirty, the motor was working correctly. Even the park function worked.
I removed and cleaned the park switch too. It's worn, but still functioning. I have a spare for the future, if needed.
Everything got a thorough clean and then regreased.
I started by grabbing a pair of good working wiper spindles and fitting them to the cowling panel. This wasn't a job I enjoyed, so there are no photos of it. It involves having to hold the spindle up under the dash with one hand, while pushing on the rubber seal, washer and screw on the nut with your other hand. Next was fitting all the steel tubes (including a replacement one between the spindles to replace the bent one) and attaching the gear covers, mostly with one hand due to space. Good fun.
Once all that was in place I greased the cable up, attached it to the motor and threaded it into the tubes, watching as the spindles rotated as it went through. The motor was then refitted to the inner guard, and plugged in.
A quick test showed everything worked correctly, so I installed the original wiper arms and blades. Note the correct side parking position, which was reversed on the later Marina for whatever reason.
For the first time in a couple of years, the Marina had wipers.
To celebrate, I poured some water on the windscreen (since the washers didn't have jets yet) and turned them on
https://youtu.be/K5L0Q3oxFrQ
Hmm, something wasn't quite right. It wiped well (ignoring the ancient rubbers smearing the glass), the wipers had plenty of speed and parked perfectly, but the sweep was.... tiny. It barely cleared the drivers vision.
I tried adjusting the position of the arm up the screen, but by the time I could get enough sweep on the glass, the arm was basically in the middle of my vision.
At best I got this much wipe
I ruminated on it for a bit and came to realisation that I had cocked up. Ages ago, knowing one of my spindles was seized, I bought a couple of second hand replacements. What I had ended up doing, was fitting UK spec spindles, to the AUS spec motor. This had created a mismatch in the gearing, meaning the wipers didn't move as far as they needed to.
I confirmed this by checking my photos taken when I removed the spindles, as to which type were fitted originally
The remedy? I needed to swap the drivers side spindle out for my one remaining good Aus spec spindle with the correct gearing. It means the passengers side doesn't wipe as far as it should, but the drivers side is the one that matters.
Thankfully the drivers side is the easier one to get to. I removed the wiper arm, dismounted the motor and pulled the cable out enough that it disengaged the spindle.
I then removed the back cover so I could remove the tubes from the spindle. It's obvious in this photo, compared to the one above, that the gear on the spindle is bigger and has a different design.
Once removed I put them side by side and you can see the difference here. Aus spec on the left with the smaller gear.
With the Aus spindle installed, how was it?
https://youtu.be/YKvh9MQH-dc
MUCH better. It now cleared right up to the A pillar, from the arm being horizontal.
The Triangle of Doom is horrific though, Hubnut would not be impressed.
The ultimate solution would be to source another Aus spec spindle and replace the passengers side one too, but this will do for now. It will get me through a WOF inspection anyway, well, once the new blades arrive to replace these smeary old things. This is a good-weather car anyway.
One last thing for the week was to sort out the source of jokes from my wife
https://youtu.be/Zzyfcys1aLM?si=lo3PLbRUwQmSkoZ7
I had previously tested the wiring, so knew the issue was the headlight itself and being a sealed beam unit where the whole light is essentially the bulb (not a lens and reflector with the bulb in it) the only option was complete replacement.
This one was an ancient GE unit (ignore the upside down photo...)
I bought a pair of sweet NOS Hella H4 units a couple of years ago and have been waiting to fit them
Date stamped 1996, about a year after this car was last on the road
These are a lens and reflector unit with a replaceable H4 bulb
They were a direct drop-in replacement. The Hella, on the right of this photo, has a slightly whiter shade
My only real issue with them is they don't have the nice pronounced curve in the lens like the old lights (and other new replacements available)
Old
New
I'll use them for now, but will look to replace them again in the future with curved lens units, which is a shame because the Hella ones are really nice quality and really expensive to buy new now. They don't quite look right though with the flat lens.
They do light up really well though
Since I have changed the ride height of the car and levelled it out some, I had to adjust the lights to bring them back to level. This is done with the adjustment screws on the light bowl.
With the grille panel refitted. It somehow changed the face of the car not having curved lenses. It looks surprised.
We're one step closer to a WOF and about three more things crossed off the list. The pre-WOF list is getting pretty small now. I need to reinstall the rear quarter glass, install some carpet, reinstall the seats, install the seatbelts, make a door card and have the exhaust rear section replaced and we should be good to give it a try.
Om said:
Brilliant! I think it looks good with the new lights and grille on - like its brow is furrowed/a little peeved.
Why did BL fit different wipers and washers for the Aus/NZ market? I would understand if it was LHD, but... Was it a heat/dry thing or just 'because BL'?
All Marinas until late 71 or so had the wipers park on the correct side like mine, and then they were changed to the opposite side parking because the wipers were "lifting off the glass at speed". I guess Aus was a little on the slow side as I haven't seen any with the reversed wiper parking. My UK spec 76 saloon had them reversed.Why did BL fit different wipers and washers for the Aus/NZ market? I would understand if it was LHD, but... Was it a heat/dry thing or just 'because BL'?
https://www.aronline.co.uk/cars/morris/marina/arch...
Progress on the Marina has been slow. I had hoped it would be on the road by now, but that's not happened.
The good news is that any progress, is still good progress, and some headway has been made.
I have really battled with the heater box and dreaded trying to fix it. In reality, getting it into a usable state wasn't that hard. Negative mindsets can be a real pain like that.
According to my records, I removed the intake plenum box way back in October 2021... that's how long it's taken me to get around to sorting it.
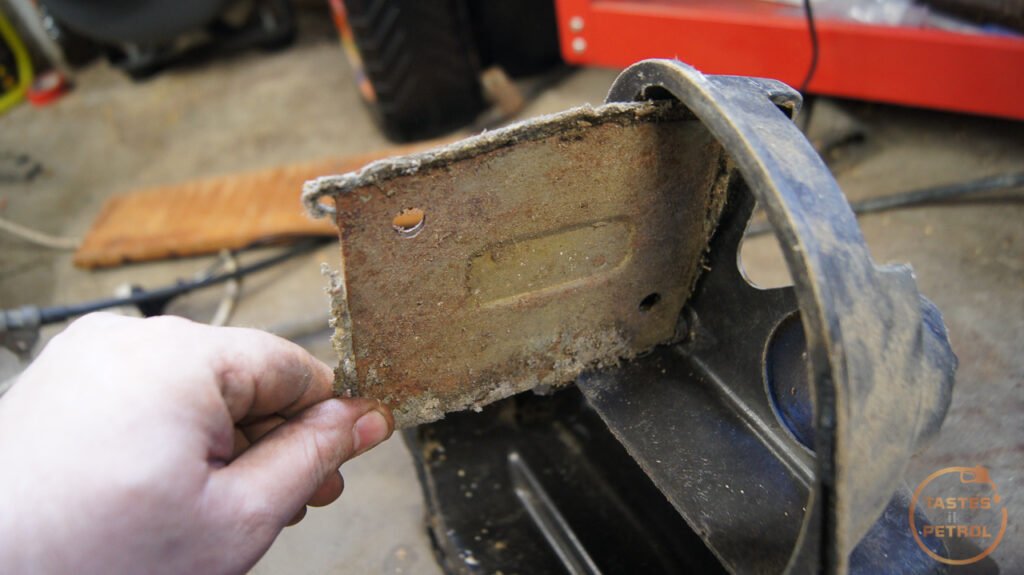
The heater/blower system is completely bespoke to the Aus/Nz spec cars and differs greatly from how the UK ones are set up. This was obviously due to the local content requirements of the time, which meant a percentage of the car had to be made locally and not imported.

This car came with the heater box in the boot, so I've never seen it fitted to the car. The plenum box, which is mounted up under the cowl panel behind the dash, was in place but full of dirt and old leaves. Not a good sign.
I removed the grille and then set about removing the screws that hold the plenum box in place. Once removed, the whole box just drops down.


It was pretty well full. Took a lot of vacuuming to clean it out


But the main reason it needed to come out, was to fix this

The metal has ceased being solid and became a crunchy powder.
Here it sat for a couple of years, until almost 2 years to the day later, and I pulled it out to have a better look. This involved lots of cutting and drilling, to remove the spot welds and remove the rusty remnants.

The gaping hole in the side is obvious, but there were also a lot of other areas that needed attention too, in harder-to-reach places

After cutting all this out and cleaning it up as much as I could, I absolutely saturated it in Brunox to treat the rust and seal it off.
Because my car is a poverty spec Deluxe and doesn't have the face-level fresh air vents in the dash, I opted to just completely remove the tube for that function on this side as it was completely rusted out and the idea of refitting the tube was doing my head in.

I started with some good old CAD

Converted it into metal, and tacked it in place

I didn't fully seam weld it, I just didn't see the point when it was not structural

I seam-sealed the area to seal it and used Newtech body filler to smooth over the welds and fill the holes in the top that I couldn't get to with a welder. Newtech is a fibreglass-infused filler and pretty strong, so should do well enough at keeping the air and water inside the box.


Everything got a coating of black zinc on the outside, and the inside was flooded with epoxy primer and then black zinc.


I remembered to refit the heater resistor

Someone had cut the wires for the heater resistor when removing it, so I crimped on a pair of nice new terminals, so now I can unplug the resistor if I need to
With the plenum box done, it was time to test-fit it with the heater box. Before that though, let's travel back to 2021 when I tested and refurbished the heater box
The heater box was already out of the car, so the first thing to do was see if the fan actually worked. I connected 12v and turned it on. Sure enough, it fired into life with no signs of any issues.

I then set about splitting the box by removing all the nuts and bolts around the perimeter. The whole box is moulded fibreglass.

This gave me access to the fan and heater core. I cleaned out years of detritus and pulled it apart further


The heater core looked ok with no obvious signs of leaking

The direction flap is a little less good
The flap is actually made of two layers of metal that sandwich some sort of felt material that creates the edge seal. After cleaning it wasn't too bad, just missing a bit on one edge. Not the end of the world.

I didn't want to just refit the heater core and cross my fingers, so I bodged up some hose and fittings so I could pressure test it.

I filled it with water and pumped it up to 15psi (just above the rad cap pressure)

I can't remember how long I tested it for now, but I think it was a couple of hours and it didn't drop pressure at all. It could spring a leak once it gets hot, but I hope not.
I rust treated and then black zinc painted everything inside the box


I reassembled it, with some new foam on the diverter flap (to seal it when it's closed), and it's been gathering dust since.
Well, today I pulled it all out and put it together. This is the Aus/NZ spec heater assembly

The air enters the top of the plenum via the vent in the cowl ahead of the windscreen. It then enters the plenum box and gets sent to the heater box via the C shape duct on the side (the other hole is the face-level vent outlet for the higher spec cars. This is blocked off on my car.

The air then passes through the heater core (all air does, the heater valve controls if the core is hot or not), through the fan and down to the ducts at the bottom of the box. The circular outlet would be ducted to the windscreen vents while the large cutouts are the "feet" vents. The heater selector only has three settings, Feet/Windscreen, Windscreen or Off.
There should be a heater valve attached to the box too, but mine was missing and the only spare I have I don't trust. They're very expensive heater valves shared with some classic Aussie Fords (hence the cost), so I will likely just have a manual heater tap in the engine bay to turn the heater on and off. For now, I just have the heater bypassed.
The test assembly was a success, so I contorted myself into the car and started refitting it. The plenum went in easy enough, once I turned it around so it faced the correct direction. I used a ratchet strap to hook into the plenum box just to give me something to lift it up from the floor inside the car while standing outside, as the screws to secure it go through from the outside.

The vent grille could then be refitted, with some nice new screws

Next, it was a case of fitting the heater box to the underside of the plenum. This turned out to be a bigger pain in the bum than expected. I fitted it all up, nice and easy, no issues, and then realised I couldn't fit the C-shaped duct in afterwards. So out the heater box came. I fitted the duct to the plenum first and then squeezed the heater box into place.

This took an awful lot of wiggling and jiggling to get into place, from both sides of the car. That was the easy bit though, the hard bit was getting the cable for the diverter flap into place. This is in the drivers foot well, so I squeezed myself into there and hooked it up.
Next, I connected the blower fan wires, connected the battery and hit the switch. Nothing. Hmmm. I tried again, flicking the switch a few times and suddenly it sprung to life. I guess sitting around unused for a couple of decades does that to a switch.
But both speeds work correctly now, so I'm very happy
I still need to buy some ducting to duct it up to the windscreen vents, but for now, it'll do.
Following that success, I felt it was time to fit something else the car hadn't seen for many years. For the first time in my ownership, the car has steering column shrouds


I did have to relocate the ignition switch though. Turns out it's not meant to point down; the previous owner just didn't clock it to the column properly (and disabled the steering lock in the process) when the switch was replaced. It fits perfectly now, and the steering lock even works too. Makes way more sense having the key where it is, it was always hard to see and use when it was facing down.
We're getting much closer to being able to take it for a WOF check. I need to refit the quarter window, which I'm procrastinating because I haven't done it before and I'm sure it'll suck to do, and then fit some door cards, seatbelts and the other seat.
In the meantime, I scuffed up the new sill and gave it a quick shot of paint


Theres a low spot on the rear quarter that I want to address before I put any more paint on that. Might do that this weekend.
The good news is that any progress, is still good progress, and some headway has been made.
I have really battled with the heater box and dreaded trying to fix it. In reality, getting it into a usable state wasn't that hard. Negative mindsets can be a real pain like that.
According to my records, I removed the intake plenum box way back in October 2021... that's how long it's taken me to get around to sorting it.
The heater/blower system is completely bespoke to the Aus/Nz spec cars and differs greatly from how the UK ones are set up. This was obviously due to the local content requirements of the time, which meant a percentage of the car had to be made locally and not imported.
This car came with the heater box in the boot, so I've never seen it fitted to the car. The plenum box, which is mounted up under the cowl panel behind the dash, was in place but full of dirt and old leaves. Not a good sign.
I removed the grille and then set about removing the screws that hold the plenum box in place. Once removed, the whole box just drops down.
It was pretty well full. Took a lot of vacuuming to clean it out
But the main reason it needed to come out, was to fix this
The metal has ceased being solid and became a crunchy powder.
Here it sat for a couple of years, until almost 2 years to the day later, and I pulled it out to have a better look. This involved lots of cutting and drilling, to remove the spot welds and remove the rusty remnants.
The gaping hole in the side is obvious, but there were also a lot of other areas that needed attention too, in harder-to-reach places
After cutting all this out and cleaning it up as much as I could, I absolutely saturated it in Brunox to treat the rust and seal it off.
Because my car is a poverty spec Deluxe and doesn't have the face-level fresh air vents in the dash, I opted to just completely remove the tube for that function on this side as it was completely rusted out and the idea of refitting the tube was doing my head in.
I started with some good old CAD
Converted it into metal, and tacked it in place
I didn't fully seam weld it, I just didn't see the point when it was not structural
I seam-sealed the area to seal it and used Newtech body filler to smooth over the welds and fill the holes in the top that I couldn't get to with a welder. Newtech is a fibreglass-infused filler and pretty strong, so should do well enough at keeping the air and water inside the box.
Everything got a coating of black zinc on the outside, and the inside was flooded with epoxy primer and then black zinc.
I remembered to refit the heater resistor
Someone had cut the wires for the heater resistor when removing it, so I crimped on a pair of nice new terminals, so now I can unplug the resistor if I need to
With the plenum box done, it was time to test-fit it with the heater box. Before that though, let's travel back to 2021 when I tested and refurbished the heater box
The heater box was already out of the car, so the first thing to do was see if the fan actually worked. I connected 12v and turned it on. Sure enough, it fired into life with no signs of any issues.
I then set about splitting the box by removing all the nuts and bolts around the perimeter. The whole box is moulded fibreglass.
This gave me access to the fan and heater core. I cleaned out years of detritus and pulled it apart further
The heater core looked ok with no obvious signs of leaking
The direction flap is a little less good
The flap is actually made of two layers of metal that sandwich some sort of felt material that creates the edge seal. After cleaning it wasn't too bad, just missing a bit on one edge. Not the end of the world.
I didn't want to just refit the heater core and cross my fingers, so I bodged up some hose and fittings so I could pressure test it.
I filled it with water and pumped it up to 15psi (just above the rad cap pressure)
I can't remember how long I tested it for now, but I think it was a couple of hours and it didn't drop pressure at all. It could spring a leak once it gets hot, but I hope not.
I rust treated and then black zinc painted everything inside the box
I reassembled it, with some new foam on the diverter flap (to seal it when it's closed), and it's been gathering dust since.
Well, today I pulled it all out and put it together. This is the Aus/NZ spec heater assembly
The air enters the top of the plenum via the vent in the cowl ahead of the windscreen. It then enters the plenum box and gets sent to the heater box via the C shape duct on the side (the other hole is the face-level vent outlet for the higher spec cars. This is blocked off on my car.
The air then passes through the heater core (all air does, the heater valve controls if the core is hot or not), through the fan and down to the ducts at the bottom of the box. The circular outlet would be ducted to the windscreen vents while the large cutouts are the "feet" vents. The heater selector only has three settings, Feet/Windscreen, Windscreen or Off.
There should be a heater valve attached to the box too, but mine was missing and the only spare I have I don't trust. They're very expensive heater valves shared with some classic Aussie Fords (hence the cost), so I will likely just have a manual heater tap in the engine bay to turn the heater on and off. For now, I just have the heater bypassed.
The test assembly was a success, so I contorted myself into the car and started refitting it. The plenum went in easy enough, once I turned it around so it faced the correct direction. I used a ratchet strap to hook into the plenum box just to give me something to lift it up from the floor inside the car while standing outside, as the screws to secure it go through from the outside.
The vent grille could then be refitted, with some nice new screws
Next, it was a case of fitting the heater box to the underside of the plenum. This turned out to be a bigger pain in the bum than expected. I fitted it all up, nice and easy, no issues, and then realised I couldn't fit the C-shaped duct in afterwards. So out the heater box came. I fitted the duct to the plenum first and then squeezed the heater box into place.
This took an awful lot of wiggling and jiggling to get into place, from both sides of the car. That was the easy bit though, the hard bit was getting the cable for the diverter flap into place. This is in the drivers foot well, so I squeezed myself into there and hooked it up.
Next, I connected the blower fan wires, connected the battery and hit the switch. Nothing. Hmmm. I tried again, flicking the switch a few times and suddenly it sprung to life. I guess sitting around unused for a couple of decades does that to a switch.
But both speeds work correctly now, so I'm very happy
I still need to buy some ducting to duct it up to the windscreen vents, but for now, it'll do.
Following that success, I felt it was time to fit something else the car hadn't seen for many years. For the first time in my ownership, the car has steering column shrouds
I did have to relocate the ignition switch though. Turns out it's not meant to point down; the previous owner just didn't clock it to the column properly (and disabled the steering lock in the process) when the switch was replaced. It fits perfectly now, and the steering lock even works too. Makes way more sense having the key where it is, it was always hard to see and use when it was facing down.
We're getting much closer to being able to take it for a WOF check. I need to refit the quarter window, which I'm procrastinating because I haven't done it before and I'm sure it'll suck to do, and then fit some door cards, seatbelts and the other seat.
In the meantime, I scuffed up the new sill and gave it a quick shot of paint
Theres a low spot on the rear quarter that I want to address before I put any more paint on that. Might do that this weekend.
amongst all the other cars that have had their time in the garage the past couple of months, the Marina hasn't been forgotten about.
This is the culmination of a couple of months worth of work on the Marina. Like usual, motivation has been hard to dredge up for this car, as I know I'm getting closer and closer to the WOF check, which is hella daunting. The "for WOF" list is getting real short now.
One of the major things I need to sort out before a WOF check was the rear half of the exhaust, which had suffered from sitting for a while and ended up with a large hole just after the hump over the axle. This blew out to be a large hole after the first time I started the engine

One problem I knew about with it, was that someone had been here before and the exhaust was all one piece welded from front to back, making it a lot harder to work with (normally broken into two sections before and after the mid-muffler
So I started by jacking the car up on one side and placing it on stands. Not my favourite angle, I had to get it pretty high to clear everything, and couldn't put stands under the axle as it needed to hang down

I hosed everything in WD40 and gave the threads a wire brush, to make my life easier

A ratcheting spanner really helped on the mid-hanger

Once the hanger was disconnected, since the rear hanger hasn't been fitted in a long time (since I welded the rear valance) the rear of the exhaust just dropped down

The front manifold joint was easier to get off than I thought, I just had to be patient and keep the threads lubricated and they came off without any damage. Since that was the only other thing holding the exhaust in place (there is meant to be a hanger up the front too, but that's long gone), the whole exhaust was now wrangled from its home. Much swearing ensued.


I picked this New Old Stock rear muffler section up off TradeMe a while ago. Compared to the old rear section, this has the correct extra muffler, and is longer

Ideally, you'd just undo the clamp on the outlet of the mid muffler and swap the pipes over, but some muppet had welded the pipe into the muffler, on both sides >_<

The plan was to cut the pipe close to the muffler and then clamp the new pipe onto it, but there wasn't enough space for a clamp before the pipe started to turn up for the hump over the axle.
So I cut the pipe further along, planning to weld the new pipe to the old one

I got it all nicely lined up, tacked it in place

And then a quick trial fit showed that as hard as it was to get the old pipe out, getting the new one in and above the axle, all one piece, was impossible, no matter how much a swore at it.
So I cut the welds and started again.
Look, I know it's not pretty, nor does it work perfectly, but it's only temporary and will be sorted later. The long term plan is a new slightly bigger exhaust to allow the engine to breathe better when the twin carbs are fitted...
Using some scrap steel and my rollers, I made a tube that could act as a sleeve over the pipes


In hindsight, I shouldn't have welded the sleeve shut

On the plus side, it did allow me to get the exhaust back into the car

The muffler fits nicely, almost like it's meant to be there (it is). I bent up some scrap steel to make a bracket for the rear hanger strap to bolt to (the previous pipe had it welded to the pipe)

The length is legit too, didn't even realise that it was short before. It barely cleared the valance


Some exhaust paste and a couple of clamps had everything snugged up into place

After starting the car and running it to get some heat in the exhaust, yes, the sleeve leaks a little at the bottom, but it's better than a gaping hole in the pipe that it had before. I'll call it a sacrificial failure for the WOF man; that and the handbrake which could do with some more adjustment.
Next on my whiteboard of things to do, was to make some door cards so that I wasn't just left with big gaping holes in the doors and the potential for sharp bits. I also wanted to make some A-pillar covers, and remake the parcel shelf trim too since that was broken.
Before getting too carried away with my new jigsaw, I started by replacing the exterior handles with a pair of new old stock ones I picked up a while ago.


Since the barrel and mech on the back of the new handles were different, I swapped these from the old handles.

It was pretty easy to do, remove the C clips, remove the single screw, remove the mechanism and barrels, swap them over, tension the spring and then refit the screw and C clips. Done. One thing I did that was a little more complex was rekeying the new barrels to match my old keys, as the new barrels were in much better condition.
I was slightly amused by the passengers handle, which had a very DIY fix at home point

Yes, that's a big old rusty nail. In its defence, it worked fine when removed! I did have to pull the nail out to remove the handle though, it wouldn't fit through the hole in the door otherwise.
The new handles look and feel lush. I ordered some new gaskets to go behind them too


Now, back to that jigsaw. I will admit, I have zero experience working with wood, and don't particularly enjoy it, but here we are.
I had one home-made door card from the previous owner, the other door never had a door card on it. This door card was manky AF, with mould on the back of it. It was useful for one thing only, a template.


I used MDF as that's what was available locally, in the right thickness, and is easy to work with. I know, if it gets wet it'll soak it up like nothing else, but the plan is to seal the back of it somehow (paint?) and then the front will be trimmed in vinyl. All holes in the doors are sealed with tape.
Using the template door card, I traced around it and all the various holes I needed to make and then cut it out

A couple of trims and test fits had it fitting reasonably well

I haven't quite decided what the final fixing method will be, but in the meantime just to secure them I reused the screw holes the previous owner had made in the door shell

The handle looks pretty grotty (both do) but that's after a thorough cleaning with Simple Green, so I might have to dye it.
With one door card working well, I used that to make a copy for the other side. The RH side has not had a door card since I've had the car, and probably a few years before that too.

The next job for the whizzy blade of missing fingers, was to chop some of the offcuts up and make covers for the base of the A pillars, to close them in. I started with some CAD on the back of a cereal box, clamped two pieces of wood together with a couple of screws through where the clips go, and cut them out

The first one went in easily, with minimal trimming

If it seemed too easy, it's because it was. Of course they aren't the same on both sides, I forgot about the darn bonnet release bracket

It was right in the middle of my new trim. So out came the CAD template, and using some scissors and a screwdriver, I located it and cut a slot to slip over the bracket

I'll give the pillar a squirt of black paint when I take this off again later to trim it in vinyl, but for now, the plan worked perfectly

It's been a long time since the car has looked this complete

The final part I needed was the parcel shelf trim. This piece came with the car, but in two of three pieces, so it needed some creative work in order to make a good template. This is far from perfect, The RH side needs more trimming, but for now it's there, and tidies it up a bit

All of these parts will eventually be trimmed in some tan vinyl I have ready to go, but that will happen once the car is on the road and becomes a rolling project.
The last couple of things to do before the WOF are to sound-deaden the floors so I can fit this

A brand new custom-made fitted carpet set. That will allow me to finally bolt both front seats in once and for all, and fit the new seatbelts I had made.
Once that's done, and I fix a couple of small things like the coolant leak it's developed, I'll cross everything and take it in for a WOF. A terrifying prospect after all the years it's been off the road (30 years next year, over half its life) and the work I've done to get to this point.
This is the culmination of a couple of months worth of work on the Marina. Like usual, motivation has been hard to dredge up for this car, as I know I'm getting closer and closer to the WOF check, which is hella daunting. The "for WOF" list is getting real short now.
One of the major things I need to sort out before a WOF check was the rear half of the exhaust, which had suffered from sitting for a while and ended up with a large hole just after the hump over the axle. This blew out to be a large hole after the first time I started the engine
One problem I knew about with it, was that someone had been here before and the exhaust was all one piece welded from front to back, making it a lot harder to work with (normally broken into two sections before and after the mid-muffler
So I started by jacking the car up on one side and placing it on stands. Not my favourite angle, I had to get it pretty high to clear everything, and couldn't put stands under the axle as it needed to hang down
I hosed everything in WD40 and gave the threads a wire brush, to make my life easier
A ratcheting spanner really helped on the mid-hanger
Once the hanger was disconnected, since the rear hanger hasn't been fitted in a long time (since I welded the rear valance) the rear of the exhaust just dropped down
The front manifold joint was easier to get off than I thought, I just had to be patient and keep the threads lubricated and they came off without any damage. Since that was the only other thing holding the exhaust in place (there is meant to be a hanger up the front too, but that's long gone), the whole exhaust was now wrangled from its home. Much swearing ensued.
I picked this New Old Stock rear muffler section up off TradeMe a while ago. Compared to the old rear section, this has the correct extra muffler, and is longer
Ideally, you'd just undo the clamp on the outlet of the mid muffler and swap the pipes over, but some muppet had welded the pipe into the muffler, on both sides >_<
The plan was to cut the pipe close to the muffler and then clamp the new pipe onto it, but there wasn't enough space for a clamp before the pipe started to turn up for the hump over the axle.
So I cut the pipe further along, planning to weld the new pipe to the old one
I got it all nicely lined up, tacked it in place
And then a quick trial fit showed that as hard as it was to get the old pipe out, getting the new one in and above the axle, all one piece, was impossible, no matter how much a swore at it.
So I cut the welds and started again.
Look, I know it's not pretty, nor does it work perfectly, but it's only temporary and will be sorted later. The long term plan is a new slightly bigger exhaust to allow the engine to breathe better when the twin carbs are fitted...
Using some scrap steel and my rollers, I made a tube that could act as a sleeve over the pipes
In hindsight, I shouldn't have welded the sleeve shut
On the plus side, it did allow me to get the exhaust back into the car
The muffler fits nicely, almost like it's meant to be there (it is). I bent up some scrap steel to make a bracket for the rear hanger strap to bolt to (the previous pipe had it welded to the pipe)
The length is legit too, didn't even realise that it was short before. It barely cleared the valance
Some exhaust paste and a couple of clamps had everything snugged up into place
After starting the car and running it to get some heat in the exhaust, yes, the sleeve leaks a little at the bottom, but it's better than a gaping hole in the pipe that it had before. I'll call it a sacrificial failure for the WOF man; that and the handbrake which could do with some more adjustment.
Next on my whiteboard of things to do, was to make some door cards so that I wasn't just left with big gaping holes in the doors and the potential for sharp bits. I also wanted to make some A-pillar covers, and remake the parcel shelf trim too since that was broken.
Before getting too carried away with my new jigsaw, I started by replacing the exterior handles with a pair of new old stock ones I picked up a while ago.
Since the barrel and mech on the back of the new handles were different, I swapped these from the old handles.
It was pretty easy to do, remove the C clips, remove the single screw, remove the mechanism and barrels, swap them over, tension the spring and then refit the screw and C clips. Done. One thing I did that was a little more complex was rekeying the new barrels to match my old keys, as the new barrels were in much better condition.
I was slightly amused by the passengers handle, which had a very DIY fix at home point
Yes, that's a big old rusty nail. In its defence, it worked fine when removed! I did have to pull the nail out to remove the handle though, it wouldn't fit through the hole in the door otherwise.
The new handles look and feel lush. I ordered some new gaskets to go behind them too
Now, back to that jigsaw. I will admit, I have zero experience working with wood, and don't particularly enjoy it, but here we are.
I had one home-made door card from the previous owner, the other door never had a door card on it. This door card was manky AF, with mould on the back of it. It was useful for one thing only, a template.
I used MDF as that's what was available locally, in the right thickness, and is easy to work with. I know, if it gets wet it'll soak it up like nothing else, but the plan is to seal the back of it somehow (paint?) and then the front will be trimmed in vinyl. All holes in the doors are sealed with tape.
Using the template door card, I traced around it and all the various holes I needed to make and then cut it out
A couple of trims and test fits had it fitting reasonably well
I haven't quite decided what the final fixing method will be, but in the meantime just to secure them I reused the screw holes the previous owner had made in the door shell
The handle looks pretty grotty (both do) but that's after a thorough cleaning with Simple Green, so I might have to dye it.
With one door card working well, I used that to make a copy for the other side. The RH side has not had a door card since I've had the car, and probably a few years before that too.
The next job for the whizzy blade of missing fingers, was to chop some of the offcuts up and make covers for the base of the A pillars, to close them in. I started with some CAD on the back of a cereal box, clamped two pieces of wood together with a couple of screws through where the clips go, and cut them out
The first one went in easily, with minimal trimming
If it seemed too easy, it's because it was. Of course they aren't the same on both sides, I forgot about the darn bonnet release bracket
It was right in the middle of my new trim. So out came the CAD template, and using some scissors and a screwdriver, I located it and cut a slot to slip over the bracket
I'll give the pillar a squirt of black paint when I take this off again later to trim it in vinyl, but for now, the plan worked perfectly
It's been a long time since the car has looked this complete
The final part I needed was the parcel shelf trim. This piece came with the car, but in two of three pieces, so it needed some creative work in order to make a good template. This is far from perfect, The RH side needs more trimming, but for now it's there, and tidies it up a bit
All of these parts will eventually be trimmed in some tan vinyl I have ready to go, but that will happen once the car is on the road and becomes a rolling project.
The last couple of things to do before the WOF are to sound-deaden the floors so I can fit this
A brand new custom-made fitted carpet set. That will allow me to finally bolt both front seats in once and for all, and fit the new seatbelts I had made.
Once that's done, and I fix a couple of small things like the coolant leak it's developed, I'll cross everything and take it in for a WOF. A terrifying prospect after all the years it's been off the road (30 years next year, over half its life) and the work I've done to get to this point.
Tyre Tread said:
Good work. Well done for getting it almost roadworthy.
The door cards were held on by push in clips. The plastic type like these: https://vehicleclips.co.uk/products/plastic-trim-p...
There should be holes in the door metal to accept them.
Thanks, I know about the plastic clips, I have plenty here but the door cards were originally held in with metal spring clips. I don't like the plastic version as they are pretty brutal to remove and have caused many a door cars to tear through. My current lead contender is Christmas tree clips hidden under the vinyl. The door cards were held on by push in clips. The plastic type like these: https://vehicleclips.co.uk/products/plastic-trim-p...
There should be holes in the door metal to accept them.
I feel like a WOF inspector wouldn't look kindly upon a car like the Marina failing to start, so I needed to address that.
The Marina has always been a real pig to start, right from the first start (back in 2021, woah).
I would need a 100% fully charged battery (on charge at least overnight), and often still needed a boost from a jump pack, and then it would turn just fast enough to start. This was a huge problem when I still ran the original mechanical fuel pump as I could not crank it long and fast enough to draw fuel and still start. The electric fuel pump helps a lot, but nothing will make it cold start when it cranks that slowly.
I bought a brand-new battery for it and still had issues. I thought the battery might be faulty, so had it replaced under warranty, still had issues. I messed with grounds, adding new ones, grounding it with jumper leads, and it helped a little but still cranked slow.
One thing I noticed in my efforts was that the main lead from the solenoid to the starter would get hot, indicating a huge amount of current draw. I tried shorting the solenoid terminals together, effectively bypassing it and connecting the starter directly to the battery, and it still turned slowly (all the while welding my screwdriver to the terminals).

So the solenoid was fine, it had to be the starter.
I had a brainwave the other day, in my spares, didn't I remember seeing a spare starter?

Yes, yes I did. It looks a bit worse for wear, but other than oiling the bearings on each end and cleaning the Bendix so it returned with a snap, it worked flawlessly when given 12V. It's a 4.5" (bolt centres) Lucas M35AK (Aus local content copy).
I reconnected the battery, which had been on charge for a couple of days, and this is how it cranked
That was pretty good for it, often it doesn't speed up after a few turns. If I kept trying it might have started, but chances are the voltage would drop and the starter would slow down again.
Removing the starter on the Marina was pretty easy. Two bolts hold it in, both accessible from up top

I removed the power feed from the back, removed the two bolts holding it to the bellhousing and then realised I couldn't get the motor out. I had to also remove the bolt securing the strap for the dipstick tube

I cleaned up the mounting face on the replacement starter, and the face on the bellhousing too, as this is where the starter grounds (or did, it should ground through the extra braided ground strap I added to the top bolt).

I slipped the replacement starter in and bolted it into place.

It could've done with a coat of black paint, but oh well, it joins the rest of the car in also needing paint.
I reconnected the battery, and with no other changes at all, this is how it cranked
It cranks like a new car! Well, an old new car anyway. The Bendix kicks in and out nicely and it cranks so fast. It would've started right then, but with 2+ year old fuel in the tank, that's lost all its octane, it's pretty grumpy to start at the moment, but despite having to crank it a few times to get it to start, the starter never slowed down. It's also interesting to note that the feed wires are no longer noticeably warm to the touch after cranking.
Draining the tank and giving it a belly of fresh fuel should make a big difference to how reliably it starts now. Maybe, just maybe, we might be at a point where it'll start each time when cold.
I was meant to be sound deadening the car ready for the new carpet to go down, but having come down with the man flu, replacing the starter was all I could muster.
As a laugh, here is the old starter when being given 12V. The beeping is from the "1200amp" fully charged jump pack warning it's drawing too much current, and the squealing noise is probably from failing bearings in the starter. The starter is noticeably harder to spin by hand than the replacement.
https://youtube.com/shorts/mQRIAhNd6ck?feature=sha...
The Marina has always been a real pig to start, right from the first start (back in 2021, woah).
I would need a 100% fully charged battery (on charge at least overnight), and often still needed a boost from a jump pack, and then it would turn just fast enough to start. This was a huge problem when I still ran the original mechanical fuel pump as I could not crank it long and fast enough to draw fuel and still start. The electric fuel pump helps a lot, but nothing will make it cold start when it cranks that slowly.
I bought a brand-new battery for it and still had issues. I thought the battery might be faulty, so had it replaced under warranty, still had issues. I messed with grounds, adding new ones, grounding it with jumper leads, and it helped a little but still cranked slow.
One thing I noticed in my efforts was that the main lead from the solenoid to the starter would get hot, indicating a huge amount of current draw. I tried shorting the solenoid terminals together, effectively bypassing it and connecting the starter directly to the battery, and it still turned slowly (all the while welding my screwdriver to the terminals).
So the solenoid was fine, it had to be the starter.
I had a brainwave the other day, in my spares, didn't I remember seeing a spare starter?
Yes, yes I did. It looks a bit worse for wear, but other than oiling the bearings on each end and cleaning the Bendix so it returned with a snap, it worked flawlessly when given 12V. It's a 4.5" (bolt centres) Lucas M35AK (Aus local content copy).
I reconnected the battery, which had been on charge for a couple of days, and this is how it cranked
That was pretty good for it, often it doesn't speed up after a few turns. If I kept trying it might have started, but chances are the voltage would drop and the starter would slow down again.
Removing the starter on the Marina was pretty easy. Two bolts hold it in, both accessible from up top
I removed the power feed from the back, removed the two bolts holding it to the bellhousing and then realised I couldn't get the motor out. I had to also remove the bolt securing the strap for the dipstick tube
I cleaned up the mounting face on the replacement starter, and the face on the bellhousing too, as this is where the starter grounds (or did, it should ground through the extra braided ground strap I added to the top bolt).
I slipped the replacement starter in and bolted it into place.
It could've done with a coat of black paint, but oh well, it joins the rest of the car in also needing paint.
I reconnected the battery, and with no other changes at all, this is how it cranked
It cranks like a new car! Well, an old new car anyway. The Bendix kicks in and out nicely and it cranks so fast. It would've started right then, but with 2+ year old fuel in the tank, that's lost all its octane, it's pretty grumpy to start at the moment, but despite having to crank it a few times to get it to start, the starter never slowed down. It's also interesting to note that the feed wires are no longer noticeably warm to the touch after cranking.
Draining the tank and giving it a belly of fresh fuel should make a big difference to how reliably it starts now. Maybe, just maybe, we might be at a point where it'll start each time when cold.
I was meant to be sound deadening the car ready for the new carpet to go down, but having come down with the man flu, replacing the starter was all I could muster.
As a laugh, here is the old starter when being given 12V. The beeping is from the "1200amp" fully charged jump pack warning it's drawing too much current, and the squealing noise is probably from failing bearings in the starter. The starter is noticeably harder to spin by hand than the replacement.
https://youtube.com/shorts/mQRIAhNd6ck?feature=sha...

I'm still slowly ticking off jobs on the whiteboard, and although this wasn't a "pre-wof" job, I wanted to get it done before a couple of other jobs in the queue that were.
Back in Feb I reinstalled the refurbished and tested heater box, but I never actually connected the heater core to anything, presuming that I would do it later. I'll tell you now, I wish I had at least fit a pair of 90 degree hoses off the heater core when it was out and easy to access, instead of doing it in the car.
The plan here to was get the heater connected and working, before installing the carpet into the car, just in case it did decide to spring a leak, it won't damage the carpet.
A while ago I ordered 1 meter of 51mm flexible ducting from Aliexpress to run from the outlets on the bottom of the heater box and up to the windscreen vents, this will allow me to direct air to the windscreen to demist it. This fits inside the plastic 90 degree joints on the bottom of the heater box, and on the outside of the dash vents, as per factory.
I installed the vents into the dash first. These were a real pain in the backside to get into place, and work out which one went on which side.
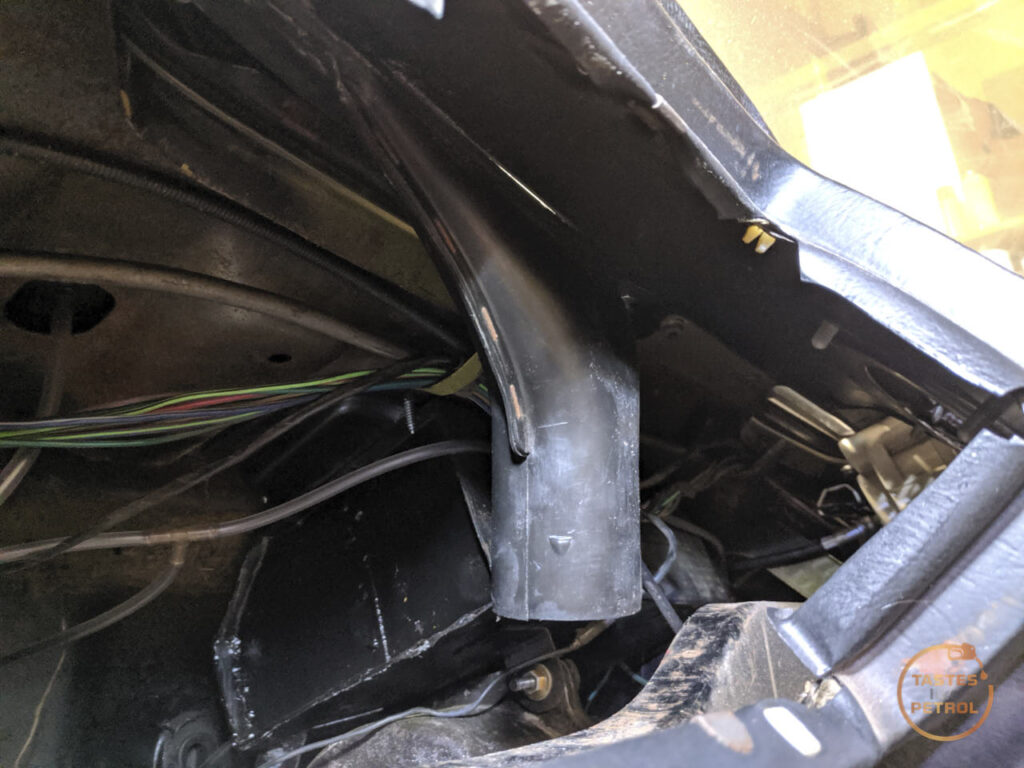
I got there in the end, and then cut some ducting and slipped it into place, using duct tape to seal and secure it.
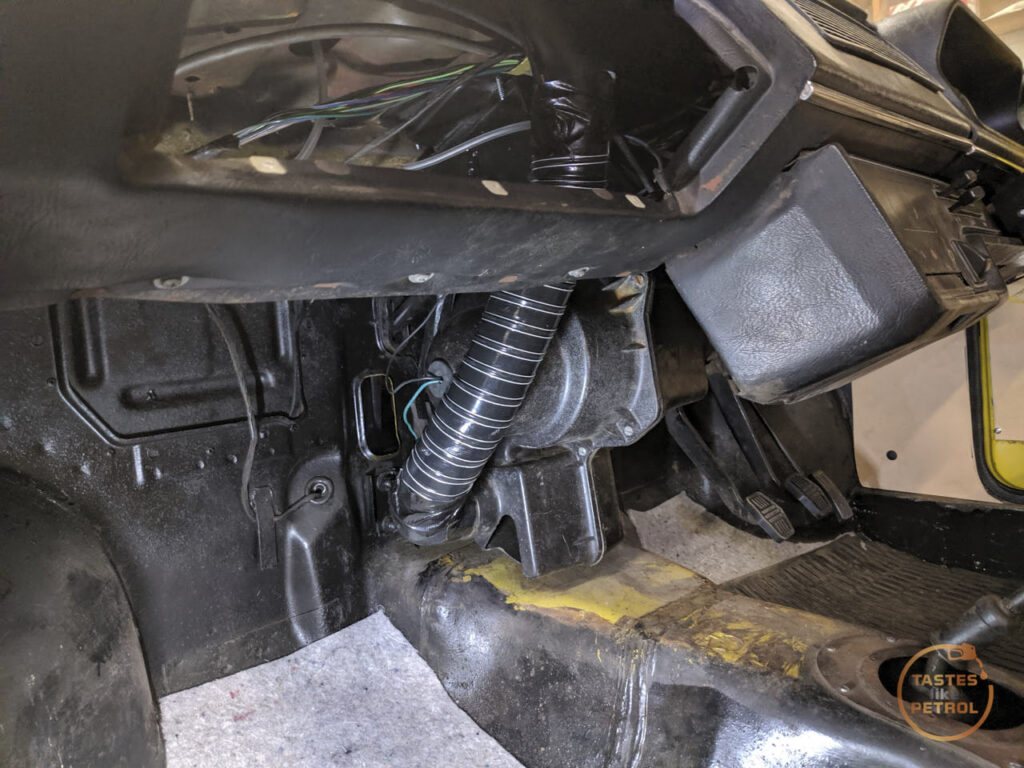

The driver's side is a bit less fun as there is less space to work and more wires in the way
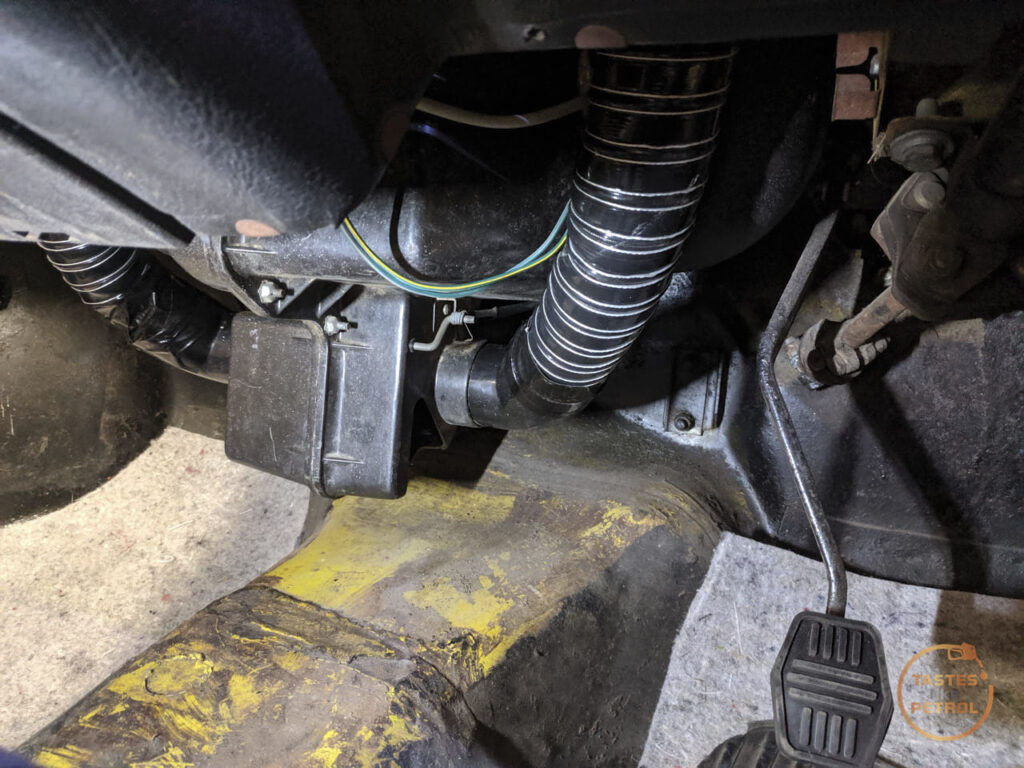
Unfortunately, after all the faffing about getting the dash vent in place, for whatever reason, it turns out the vent doesn't clear the speedo on the three-dial cluster and no amount of forcing it was going to allow them to share the limited space available.
I don't know if this is because the car originally had two dials and the vent is different, or if I was doing something wrong, but in the end, I removed the dash vent, and zip-tied the duct to the dash structure. This still blows out through the slot in the dash, it's just not as directed as it should be. It's better than nothing.

Speaking of the dash cluster, once I refitted it, and the steering wheel (since I removed it to give me more space to work under the dash), I refitted the steering wheel center pad for the first time since I got the car. This wheel is only until the car is on the road and then I have a nice aftermarket one to fit, but it's a milestone nonetheless.

Who doesn't love a good plughole of despair?
Testing the vents with the functional two-speed blower showed ample air being blown in the general direction of the windscreen.
The next step was to actually hook up the heater core to the cooling circuit.
This required me to obtain a couple (2-3) meters of 1/2" heater hose, and a pair of "Z" hoses (universal hoses that have a 90 and a 45 degree bend with a couple of straights, for cutting to fit). I also obtained a brass joiner, and brass "ball" valve.
The Z hoses are to give me a pair of 90 degree fittings out of the heater core. I'm not running the standard heater valve that mounts to the box and is controlled with the cable, as I don't have a good one, and replacements are expensive. I don't care much for needing to change the temp often, so I chose to regulate the temperature with a ball valve in the hose instead. Winter mode, and summer mode.
Because I'm not running the standard heater valve, I needed the hoses to clear the brackets immediately in front of the heater core outlets and then exit through the hole in the firewall. A normal hose would kink when trying to bend that sharp, so it had to be a 90 degree moulded bend.
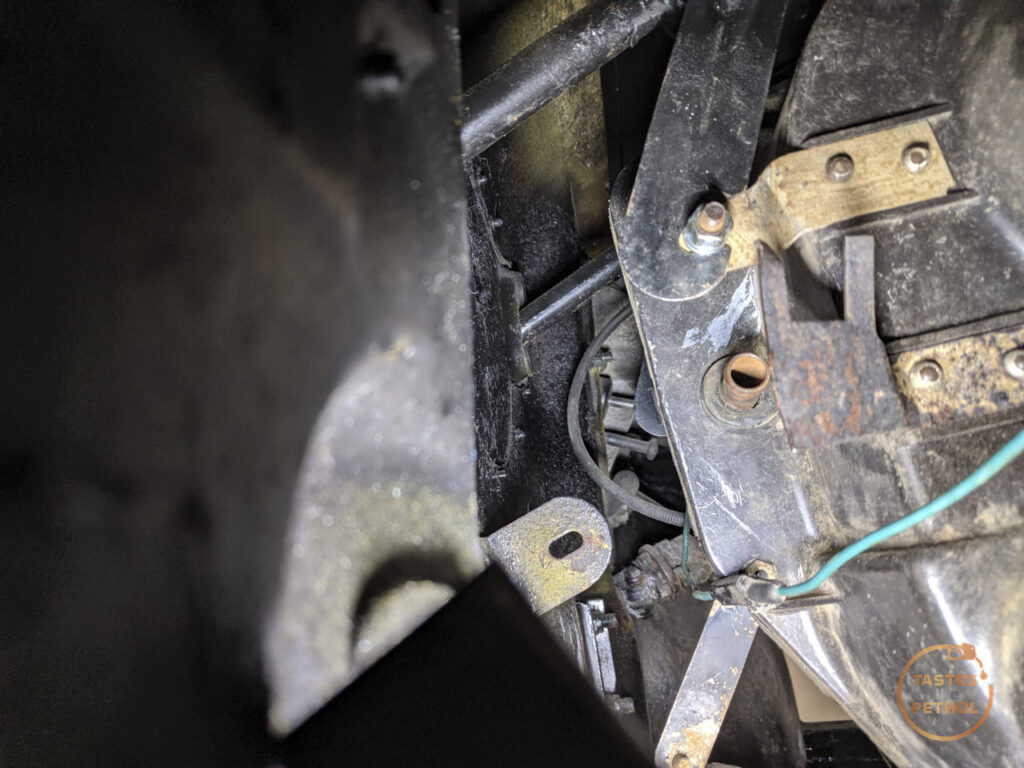 The upper heater core pipe is above the one visible, completely blocked by the bracket
Z hoses are perfect for this sort of thing. I found these Aeroflow silicone ones locally at a reasonable price
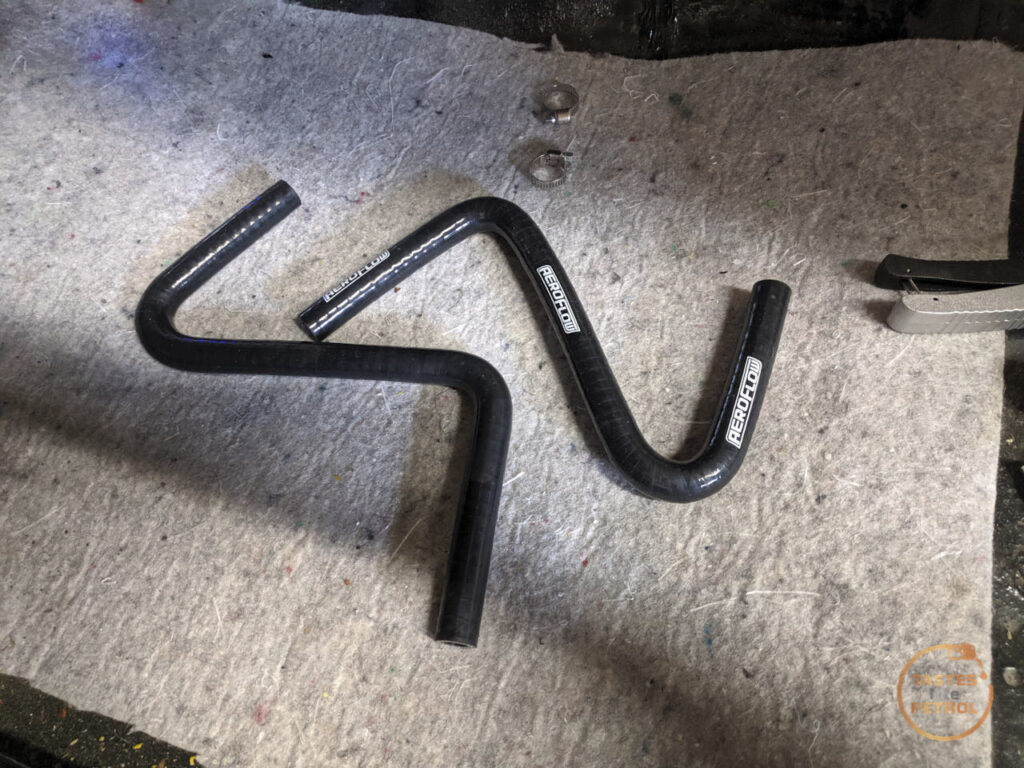
I cut the 45 off and shortened the 90 so it would fit
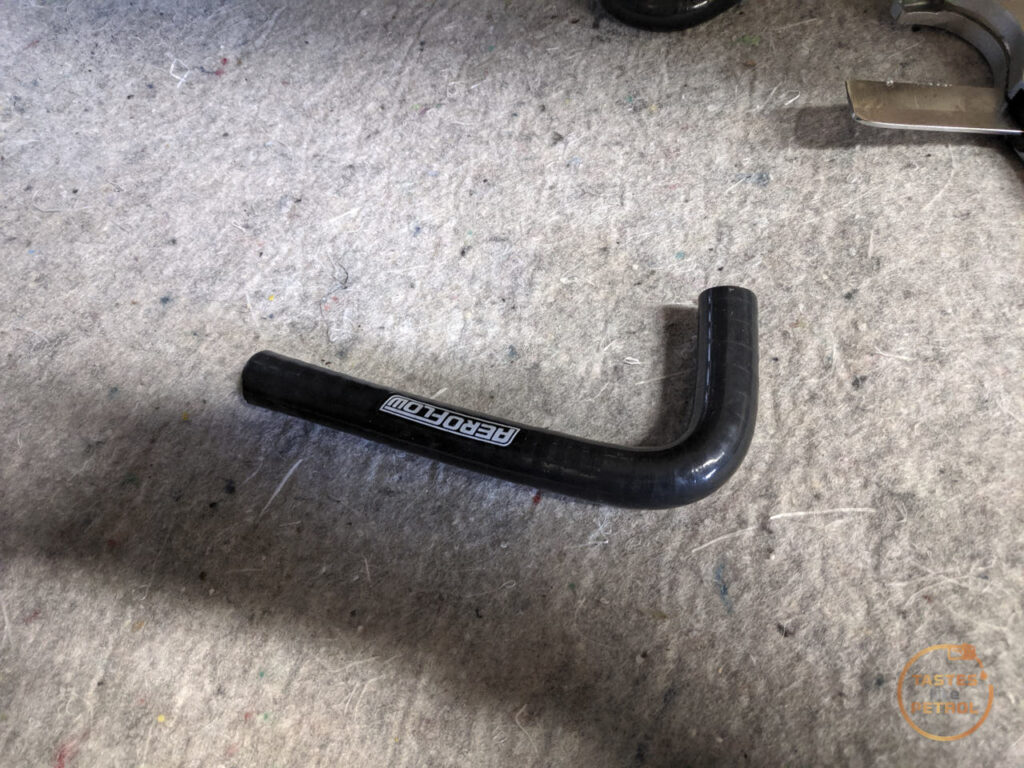
I then proceeded to fight with the hose for the next half hour or so, trying to get it fully onto the upper pipe. The space is limited, and the visibility is zero, so it was all done by feel, and I sure felt the sharp bits digging into me. I was very close to just giving up on fitting the heater, it was fighting me that hard, but eventually, with both hands up under the dash, my head on the trans tunnel and my legs hanging out of the car, it finally slipped into place.
The next fight was the hose clamp, getting that into place and tightening it, but we won't go into that.
The lower hose was much easier to fit, it more or less pressed into place and the clamp went on without much fuss.
Now that I had both stubs of hose poking through the firewall, I sprayed some silicone spray on the rubber grommet and pressed it onto the hoses and into the firewall.
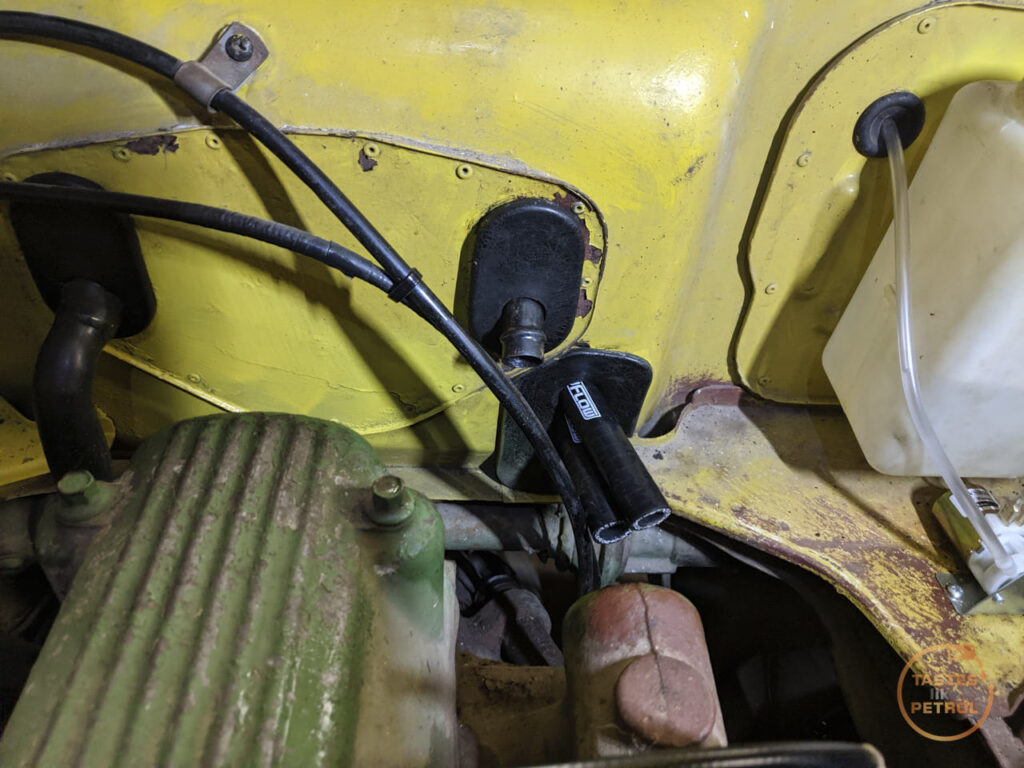
I had previously looped the heater hoses at the engine, as the previous owners had too (albeit their loop was a lot longer and had a joiner in the middle of it)

A bit of research showed that the top heater hose was the one that went to the standard heater valve, so that's the one I fit the tap into
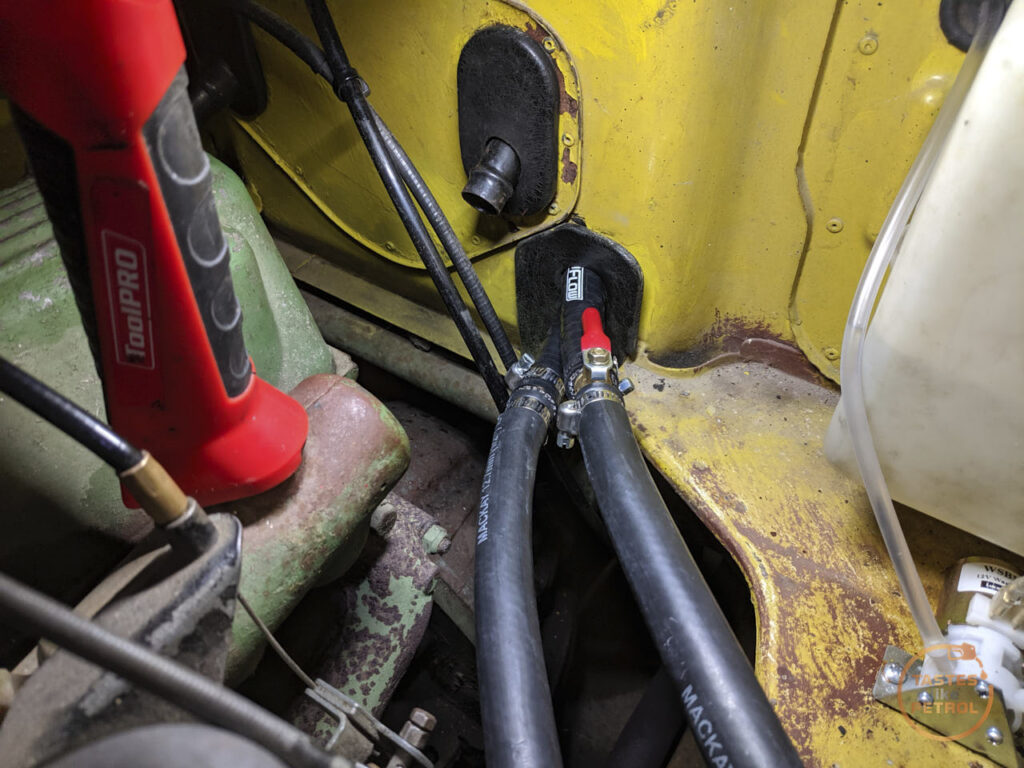
I had also seen in photos that the hoses are usually secured to the inner wing by a pair of P clamps. I located a hole that would've been where a self-tapper went into
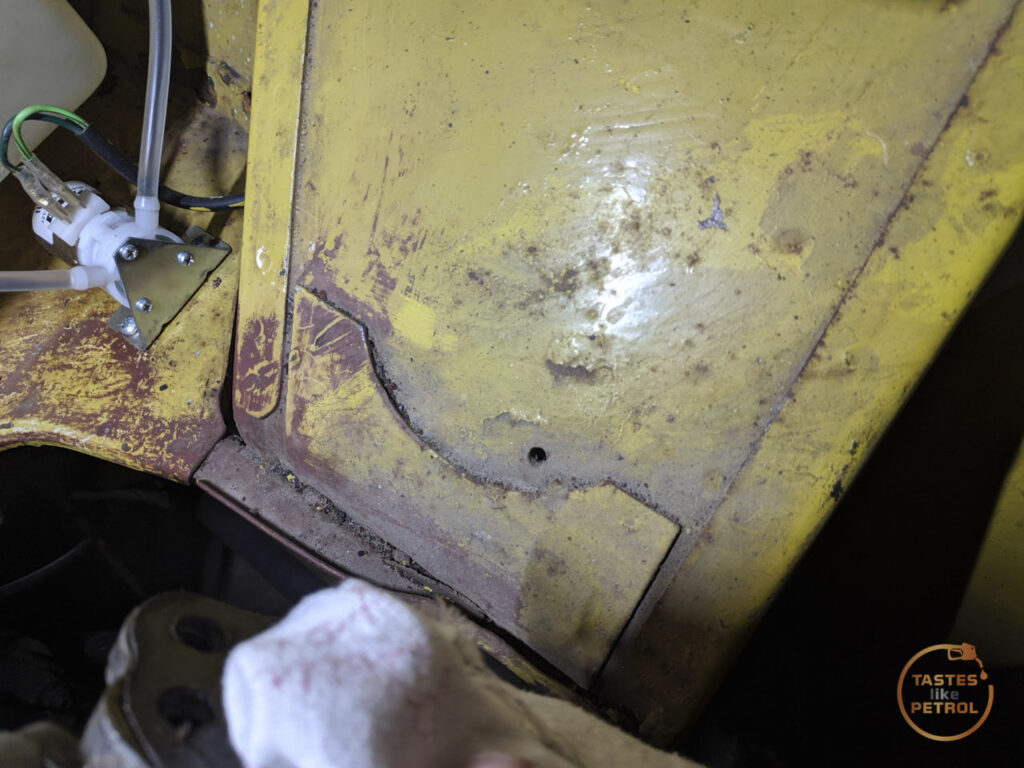
I hate using coarse threaded screws to secure things, so drilled it out a bit further

After coating it with some Rover Zircon Blue paint, I whacked an M5 Rivnut into it
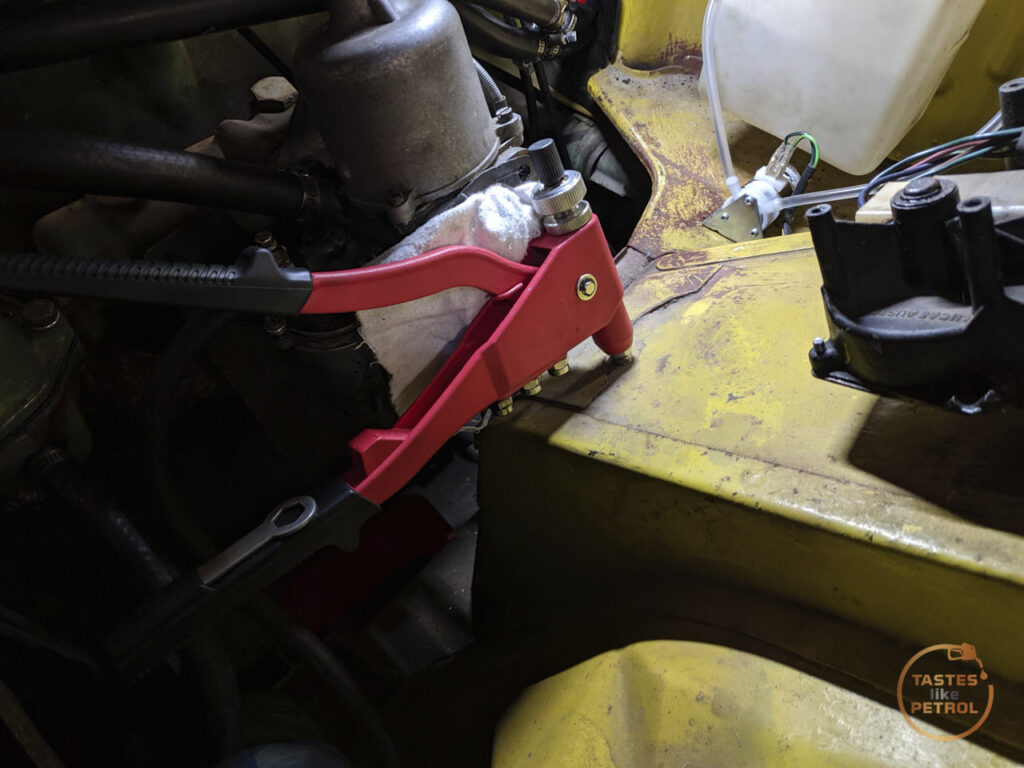

This allowed me to use a pair of P clamps to secure the hoses in place, keeping them tucked up nicely
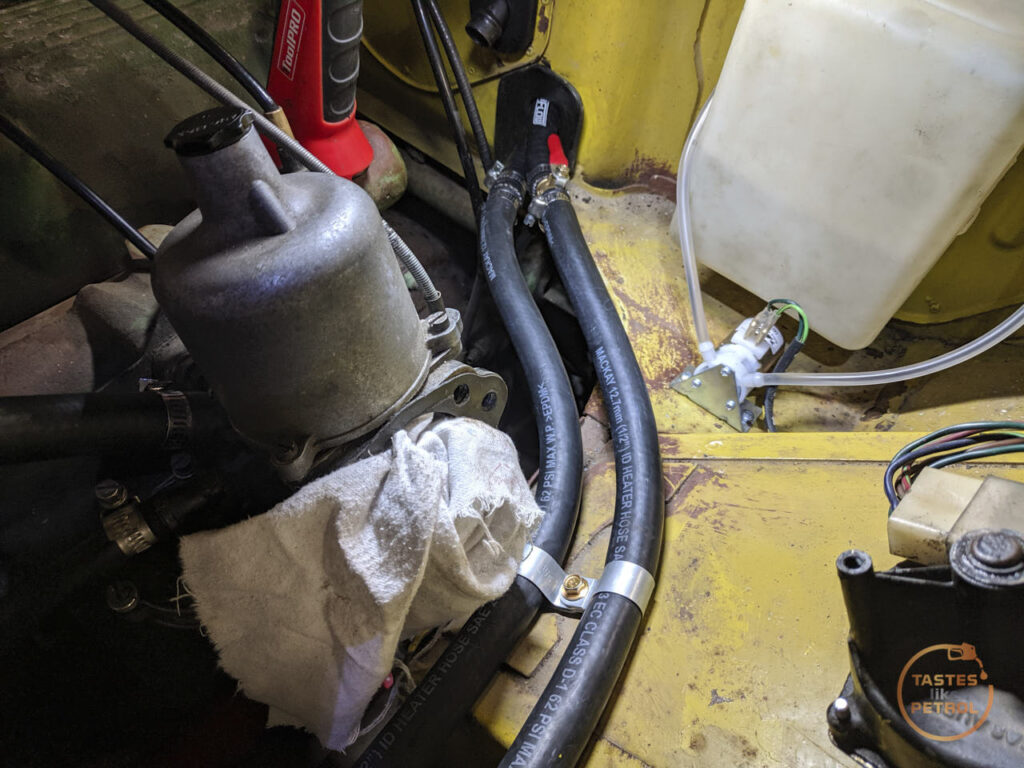
I then quickly juggled the old loop hose, spilled some coolant, and connected the two heater hoses
It's quite a nice tidy setup, and I'm quite proud of how well it has worked out. When the red lever on the valve is in line with the hose, the coolant is flowing in that direction, turn it 90 degrees and it's closed.

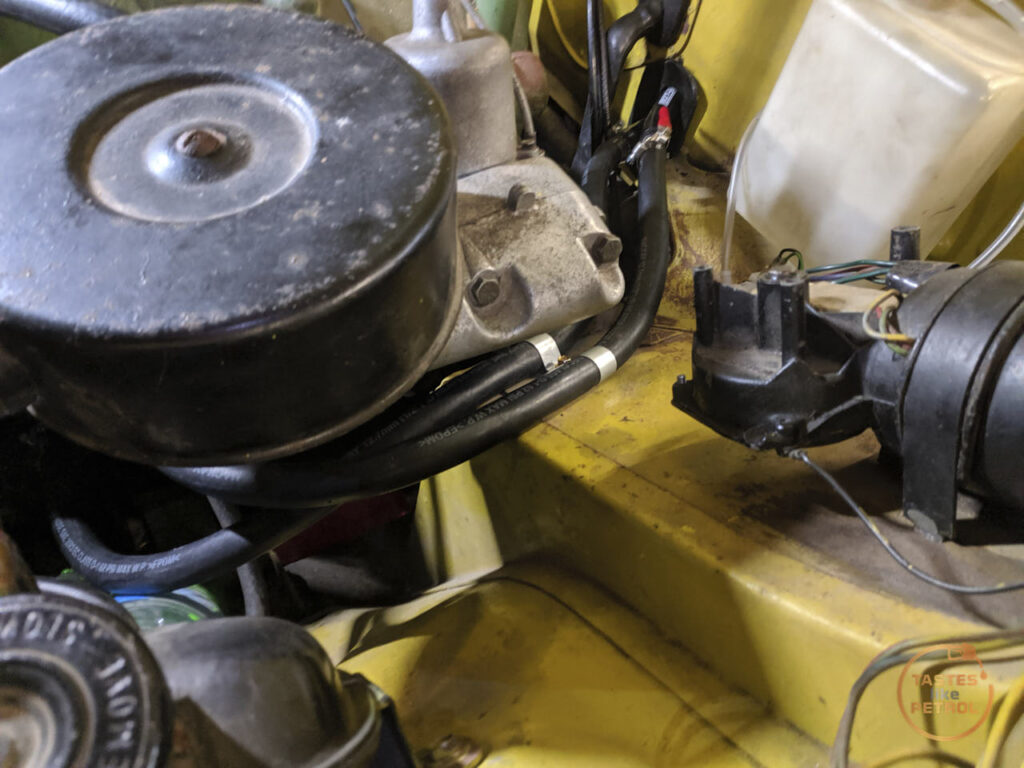
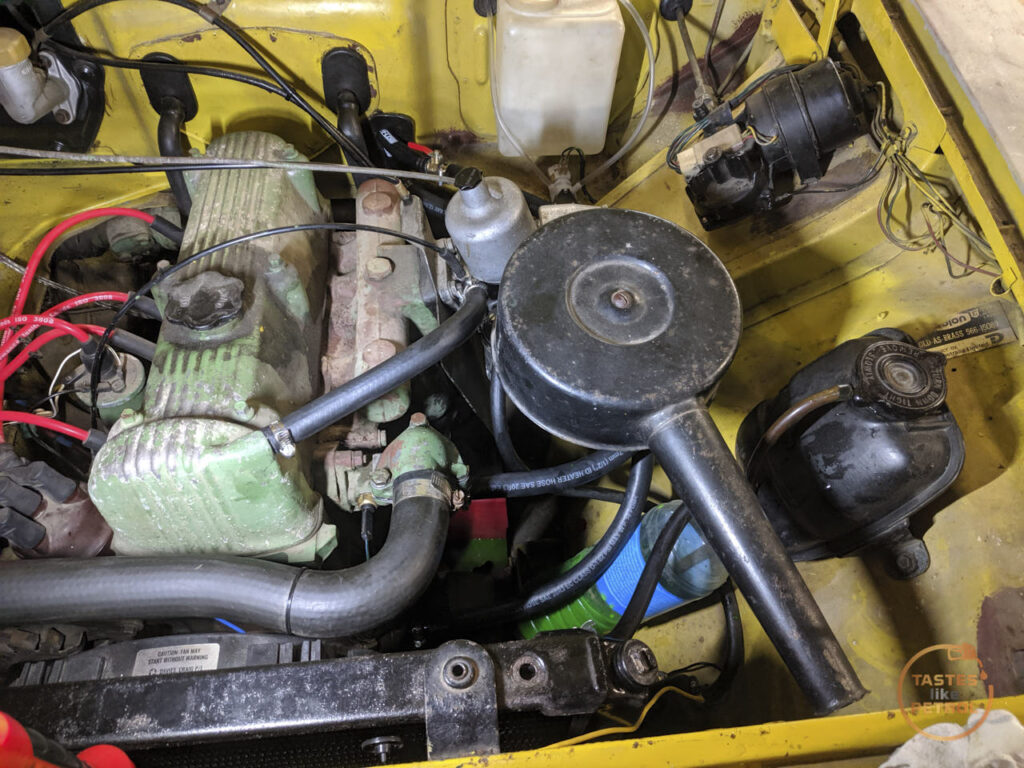
While I was there, spilling coolant on the floor, I also removed and swapped the coolant temp sender. I had never seen the coolant temp gauge rise, even when the coolant was warm enough to cycle the fan, so I wanted to see if replacing the sender helped.
I believe the old one was original and is marked Smiths. The terminal was wiggly, which I'm not sure if it's meant to be
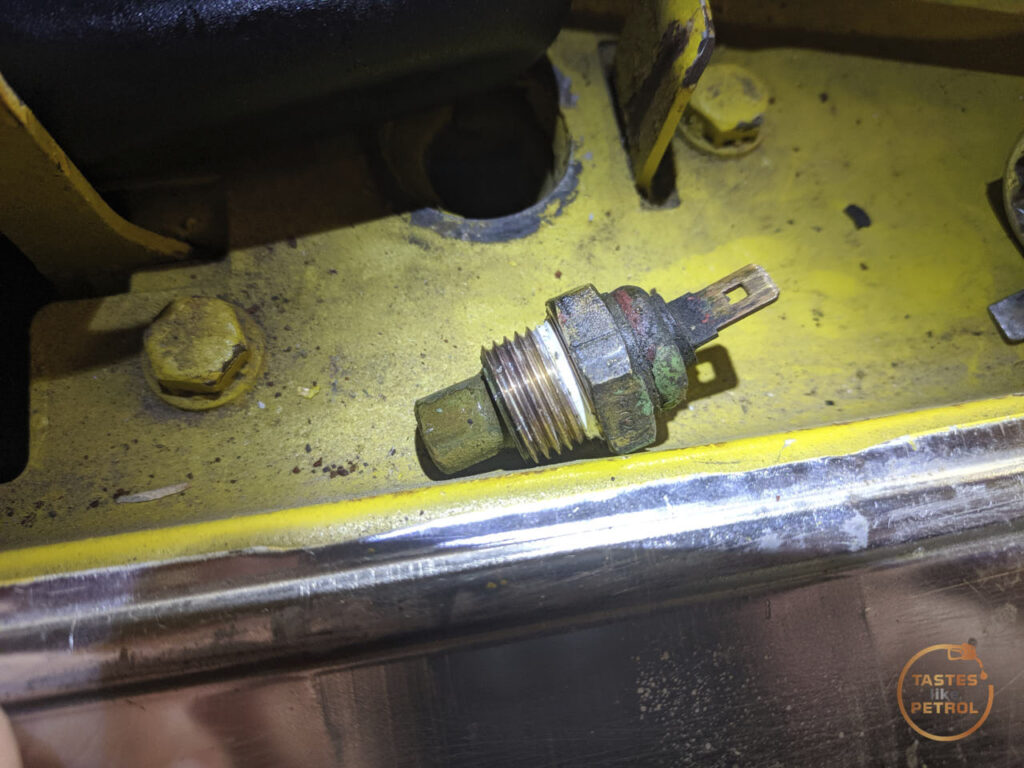
The replacement went straight in without issue.

Before firing the car up to take it outside and bleed the cooling system, I quickly filled the hole in the floor for the shifter.
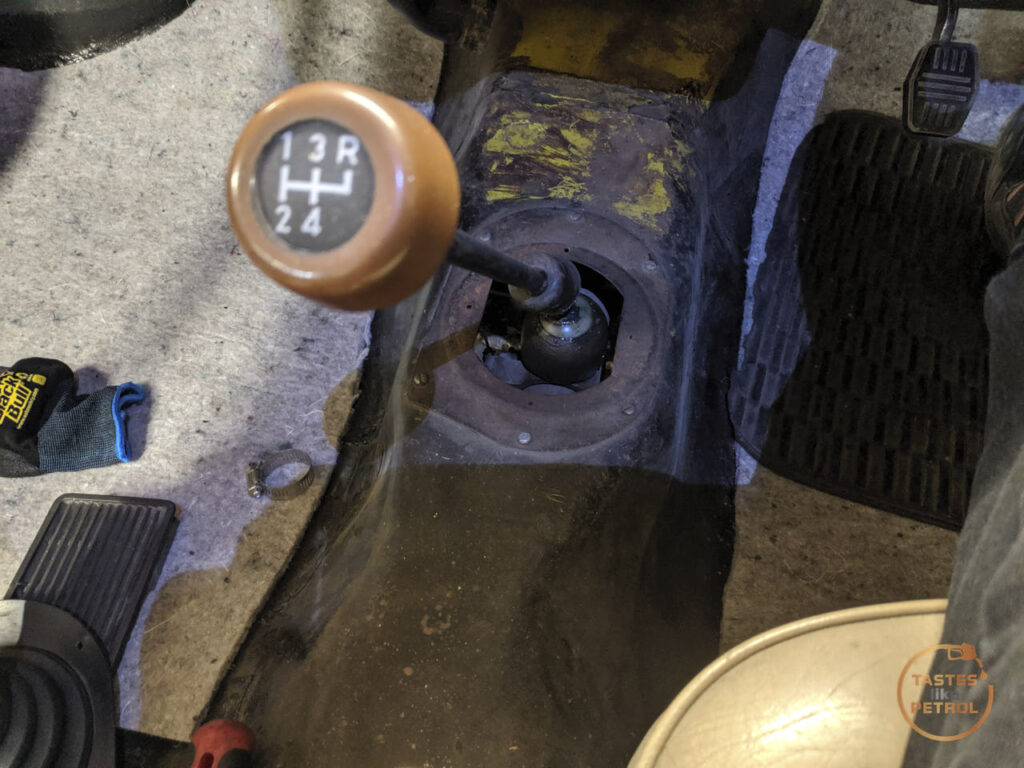
Originally this would've had a lump of foam around the shifter shaft and covered by a nice "leather" shift boot with a metal ring

I have all these parts, but the boot is so manky you wouldn't want to touch it, let alone install it in the car. I plan to remake the shifter and handbrake boots in the same tan vinyl as the door cards, but in the meantime I just wanted to block it off so the WOF man wouldn't be looking at the road during its test.
I bought a MK2 boot from a nice fellow Marina owner, and figured I could make it work. This is the less attractive once-piece rubber deal, which was also used on some UK MK1 cars
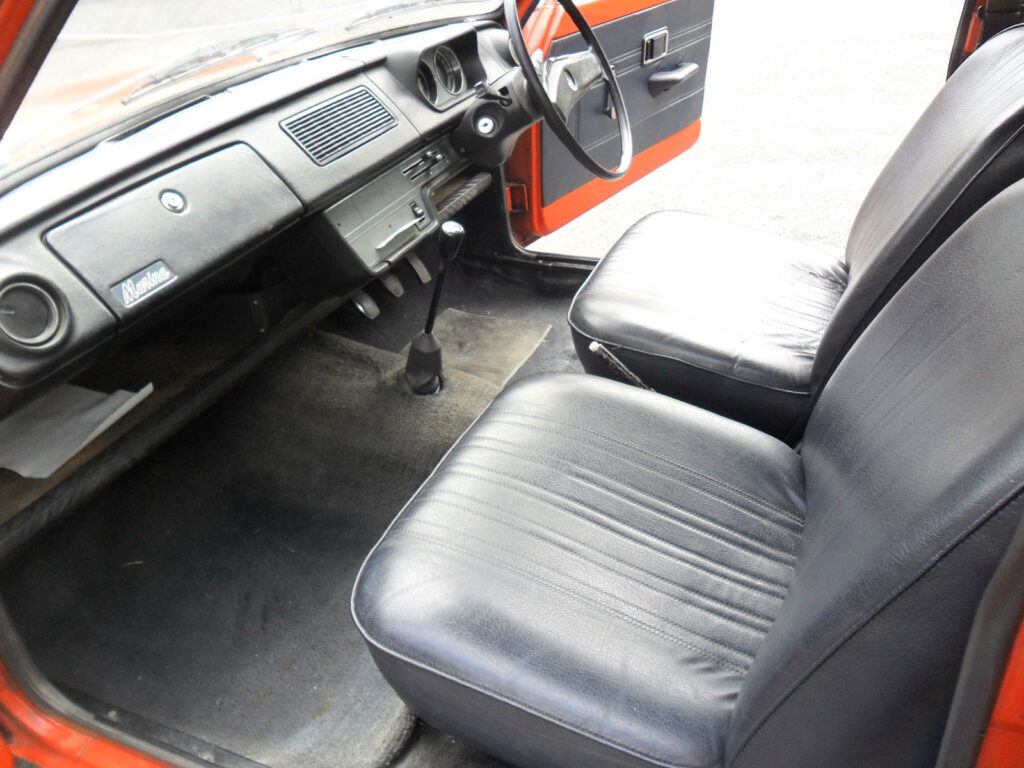
I removed the surround plate from the floor and inserted the rubber boot. It turned out that almost all the holes in the boot lined up with the surround, so it screwed in nice and easy
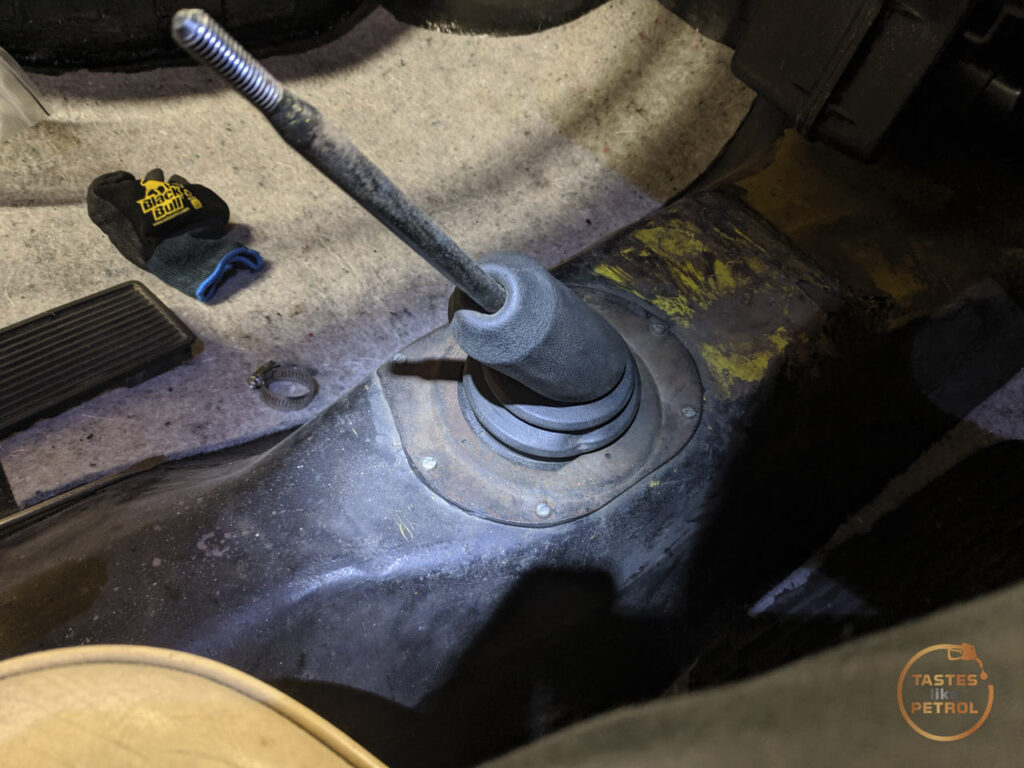
It's not perfect, I suspect cars that are meant to have this boot will have a larger opening in the surround plate, that locates in a ridge on the bottom of the boot, but mine has a smaller opening to support the metal ring of the standard boot. It still works though, and seals the cabin from the outside world.
And with that done, I topped the radiator and expansion tank up and started the car. It really needs some nice new fuel, the old stale fuel makes it really hard to start, but the replacement starter is bliss to use and the engine turns over quickly every time.
Eventually the engine fired up on all cylinders and settled into a nice fast idle. I jumped in, popped it into gear and headed for the garage exit. I didn't quite make it the first time before the cold engine bogged down, so I rolled back and gave it another go, with more revs, and a bit of a run-up to get up my steep driveway. Apparently, this also meant that I did a nice unintentional single-wheel burnout in the garage Just can't harness all that OHC power!
But make it we did. Once outside I got the hose out and gave the engine bay a quick hose down to wash out all the coolant I had spilled (and all the dirt and muck from years of sitting).
This little burst of "cleaning" ended up in the Marina finally seeing the first "wash" of my ownership. Yes, it was only a hose down, but already it's a lot cleaner. It's crazy how much dirt was washed away, after 20+ years of sitting and 3 years of me cutting, grinding, and sanding.
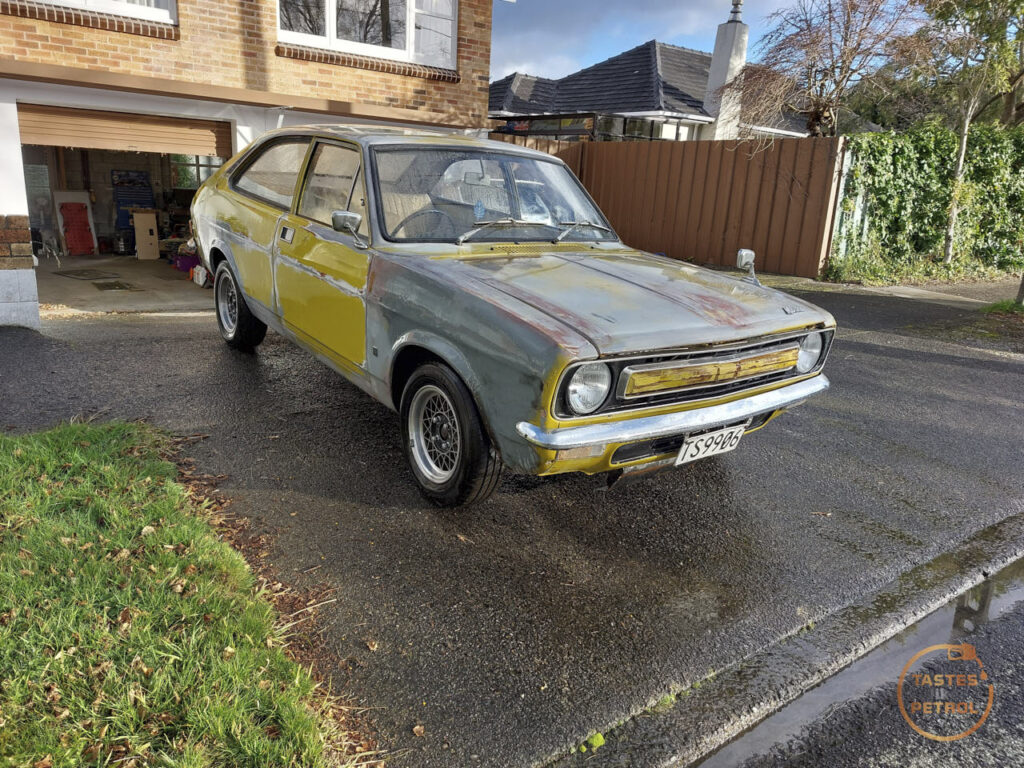
It's no show car, or even clean, by any stretch of the imagination, but at least I can touch the panels without getting filthy now.
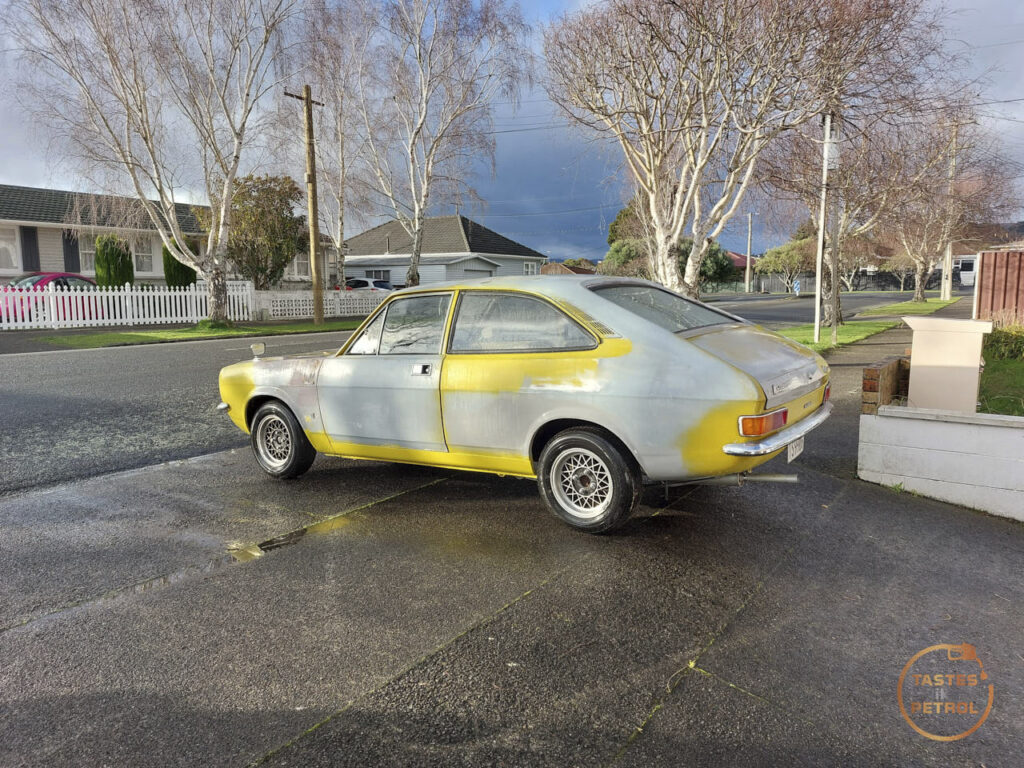
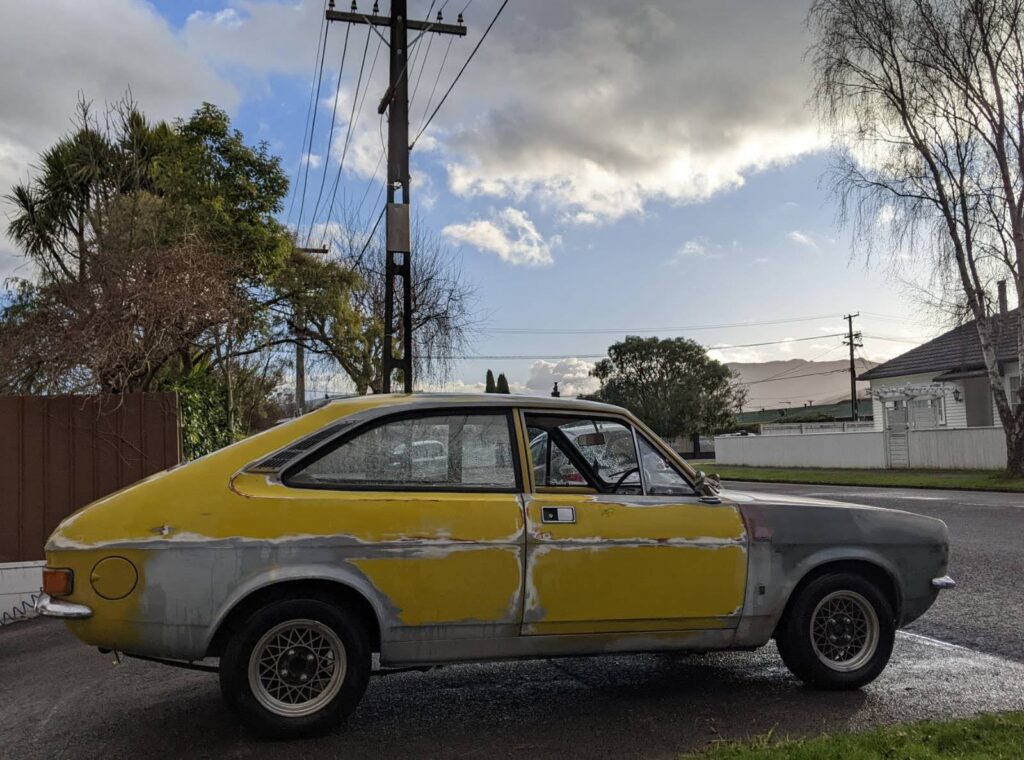
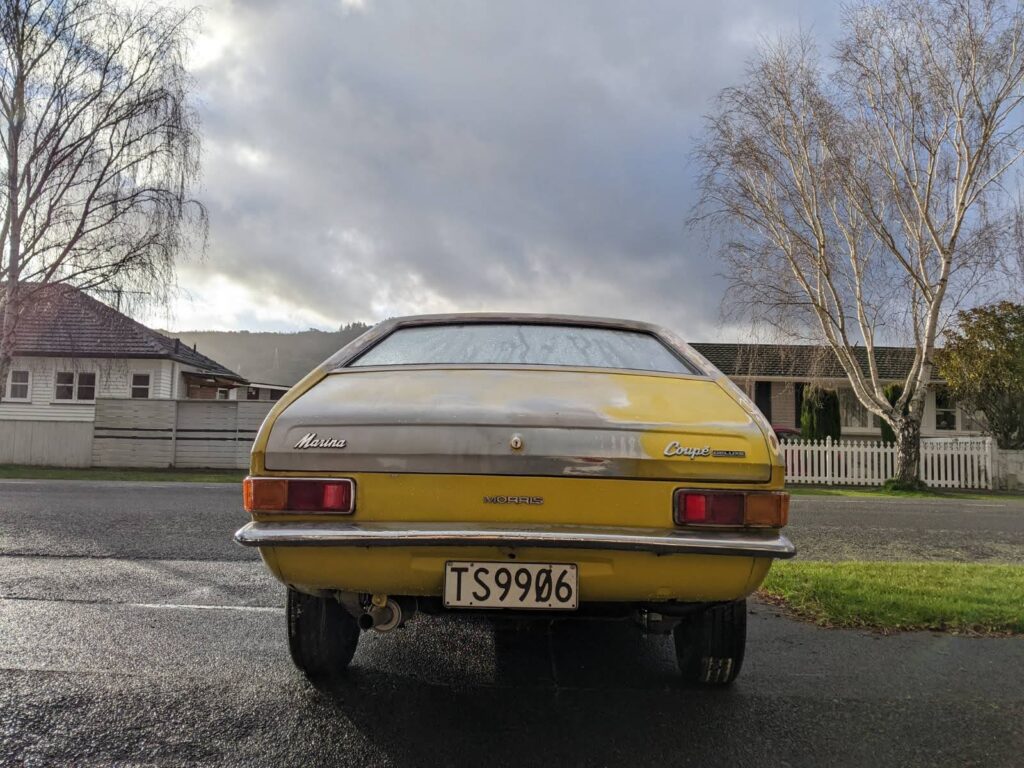

Even with me blasting the car with the hose, the interior was reasonably leak-free, except where expected. The front windscreen leaks like a sieve (expected, the seal is wrong and doesn't fit), the rear windscreen has a tiny leak in the bottom corner, and the front quarterlight windows leaked a little too. Once the windscreen seal is replaced, the others should be fine to handle a little rain if I happen to get caught out.
The whole time it was outside the engine was just happily ticking over at idle, with the fan cutting in and out as needed. On a huge plus, the temp gauge now works.
So what of the heater? well, I can confirm it blows nice warm air around the car, and if you leave it idling with the heater on, the blower on fast, and with the windows up, it becomes uncomfortably warm inside the car. Great success.
As far as I can see, there are no coolant leaks and everything is doing as it should.
Next, sound deadening and then carpet.
Back in Feb I reinstalled the refurbished and tested heater box, but I never actually connected the heater core to anything, presuming that I would do it later. I'll tell you now, I wish I had at least fit a pair of 90 degree hoses off the heater core when it was out and easy to access, instead of doing it in the car.
The plan here to was get the heater connected and working, before installing the carpet into the car, just in case it did decide to spring a leak, it won't damage the carpet.
A while ago I ordered 1 meter of 51mm flexible ducting from Aliexpress to run from the outlets on the bottom of the heater box and up to the windscreen vents, this will allow me to direct air to the windscreen to demist it. This fits inside the plastic 90 degree joints on the bottom of the heater box, and on the outside of the dash vents, as per factory.
I installed the vents into the dash first. These were a real pain in the backside to get into place, and work out which one went on which side.
I got there in the end, and then cut some ducting and slipped it into place, using duct tape to seal and secure it.
The driver's side is a bit less fun as there is less space to work and more wires in the way
Unfortunately, after all the faffing about getting the dash vent in place, for whatever reason, it turns out the vent doesn't clear the speedo on the three-dial cluster and no amount of forcing it was going to allow them to share the limited space available.
I don't know if this is because the car originally had two dials and the vent is different, or if I was doing something wrong, but in the end, I removed the dash vent, and zip-tied the duct to the dash structure. This still blows out through the slot in the dash, it's just not as directed as it should be. It's better than nothing.
Speaking of the dash cluster, once I refitted it, and the steering wheel (since I removed it to give me more space to work under the dash), I refitted the steering wheel center pad for the first time since I got the car. This wheel is only until the car is on the road and then I have a nice aftermarket one to fit, but it's a milestone nonetheless.
Who doesn't love a good plughole of despair?
Testing the vents with the functional two-speed blower showed ample air being blown in the general direction of the windscreen.
The next step was to actually hook up the heater core to the cooling circuit.
This required me to obtain a couple (2-3) meters of 1/2" heater hose, and a pair of "Z" hoses (universal hoses that have a 90 and a 45 degree bend with a couple of straights, for cutting to fit). I also obtained a brass joiner, and brass "ball" valve.
The Z hoses are to give me a pair of 90 degree fittings out of the heater core. I'm not running the standard heater valve that mounts to the box and is controlled with the cable, as I don't have a good one, and replacements are expensive. I don't care much for needing to change the temp often, so I chose to regulate the temperature with a ball valve in the hose instead. Winter mode, and summer mode.
Because I'm not running the standard heater valve, I needed the hoses to clear the brackets immediately in front of the heater core outlets and then exit through the hole in the firewall. A normal hose would kink when trying to bend that sharp, so it had to be a 90 degree moulded bend.
The upper heater core pipe is above the one visible, completely blocked by the bracketZ hoses are perfect for this sort of thing. I found these Aeroflow silicone ones locally at a reasonable price
I cut the 45 off and shortened the 90 so it would fit
I then proceeded to fight with the hose for the next half hour or so, trying to get it fully onto the upper pipe. The space is limited, and the visibility is zero, so it was all done by feel, and I sure felt the sharp bits digging into me. I was very close to just giving up on fitting the heater, it was fighting me that hard, but eventually, with both hands up under the dash, my head on the trans tunnel and my legs hanging out of the car, it finally slipped into place.
The next fight was the hose clamp, getting that into place and tightening it, but we won't go into that.
The lower hose was much easier to fit, it more or less pressed into place and the clamp went on without much fuss.
Now that I had both stubs of hose poking through the firewall, I sprayed some silicone spray on the rubber grommet and pressed it onto the hoses and into the firewall.
I had previously looped the heater hoses at the engine, as the previous owners had too (albeit their loop was a lot longer and had a joiner in the middle of it)
A bit of research showed that the top heater hose was the one that went to the standard heater valve, so that's the one I fit the tap into
I had also seen in photos that the hoses are usually secured to the inner wing by a pair of P clamps. I located a hole that would've been where a self-tapper went into
I hate using coarse threaded screws to secure things, so drilled it out a bit further
After coating it with some Rover Zircon Blue paint, I whacked an M5 Rivnut into it
This allowed me to use a pair of P clamps to secure the hoses in place, keeping them tucked up nicely
I then quickly juggled the old loop hose, spilled some coolant, and connected the two heater hoses
It's quite a nice tidy setup, and I'm quite proud of how well it has worked out. When the red lever on the valve is in line with the hose, the coolant is flowing in that direction, turn it 90 degrees and it's closed.
While I was there, spilling coolant on the floor, I also removed and swapped the coolant temp sender. I had never seen the coolant temp gauge rise, even when the coolant was warm enough to cycle the fan, so I wanted to see if replacing the sender helped.
I believe the old one was original and is marked Smiths. The terminal was wiggly, which I'm not sure if it's meant to be
The replacement went straight in without issue.
Before firing the car up to take it outside and bleed the cooling system, I quickly filled the hole in the floor for the shifter.
Originally this would've had a lump of foam around the shifter shaft and covered by a nice "leather" shift boot with a metal ring
I have all these parts, but the boot is so manky you wouldn't want to touch it, let alone install it in the car. I plan to remake the shifter and handbrake boots in the same tan vinyl as the door cards, but in the meantime I just wanted to block it off so the WOF man wouldn't be looking at the road during its test.
I bought a MK2 boot from a nice fellow Marina owner, and figured I could make it work. This is the less attractive once-piece rubber deal, which was also used on some UK MK1 cars
I removed the surround plate from the floor and inserted the rubber boot. It turned out that almost all the holes in the boot lined up with the surround, so it screwed in nice and easy
It's not perfect, I suspect cars that are meant to have this boot will have a larger opening in the surround plate, that locates in a ridge on the bottom of the boot, but mine has a smaller opening to support the metal ring of the standard boot. It still works though, and seals the cabin from the outside world.
And with that done, I topped the radiator and expansion tank up and started the car. It really needs some nice new fuel, the old stale fuel makes it really hard to start, but the replacement starter is bliss to use and the engine turns over quickly every time.
Eventually the engine fired up on all cylinders and settled into a nice fast idle. I jumped in, popped it into gear and headed for the garage exit. I didn't quite make it the first time before the cold engine bogged down, so I rolled back and gave it another go, with more revs, and a bit of a run-up to get up my steep driveway. Apparently, this also meant that I did a nice unintentional single-wheel burnout in the garage Just can't harness all that OHC power!
But make it we did. Once outside I got the hose out and gave the engine bay a quick hose down to wash out all the coolant I had spilled (and all the dirt and muck from years of sitting).
This little burst of "cleaning" ended up in the Marina finally seeing the first "wash" of my ownership. Yes, it was only a hose down, but already it's a lot cleaner. It's crazy how much dirt was washed away, after 20+ years of sitting and 3 years of me cutting, grinding, and sanding.
It's no show car, or even clean, by any stretch of the imagination, but at least I can touch the panels without getting filthy now.
Even with me blasting the car with the hose, the interior was reasonably leak-free, except where expected. The front windscreen leaks like a sieve (expected, the seal is wrong and doesn't fit), the rear windscreen has a tiny leak in the bottom corner, and the front quarterlight windows leaked a little too. Once the windscreen seal is replaced, the others should be fine to handle a little rain if I happen to get caught out.
The whole time it was outside the engine was just happily ticking over at idle, with the fan cutting in and out as needed. On a huge plus, the temp gauge now works.
So what of the heater? well, I can confirm it blows nice warm air around the car, and if you leave it idling with the heater on, the blower on fast, and with the windows up, it becomes uncomfortably warm inside the car. Great success.
As far as I can see, there are no coolant leaks and everything is doing as it should.
Next, sound deadening and then carpet.
Like usual, it's been a while between updates, but progress has been progressing. Finally, we're reassembling the interior once and for all.
I had been asked about and pondered for a while, on whether I would be sticking some sound deadener under the carpet on the new floor. I wasn't going to, but since I was here I grabbed some cheap no-name butyl stuff and got to work.
The main places were the two footwells in the front


The front of the tunnel under the heater

The front wheel wells (where stones would hit)

and finally, the rear footwells


I'm not certain it will do anything, but even if it can stop the floors drumming, that's a win. It was reasonably easy to apply, although I did do it in winter so had to use a heat gun to get it and the metal warm so it would stick properly. I also grabbed a small rubber roller from the hardware store to roll it out.
With my newly applied sound deadening in place, it was time to lay down some carpet underlay.

I also stuck some underlay over the trans tunnel, hopefully to keep some noise and heat down.

Now, it was the less fun part. The carpet.
The very first part to go in was the rear bulkhead. This has to go in before the rest of the carpet since the main carpet will butt up against it. Thankfully, this was one section of carpet that still existed, even if it was some manky old faded house carpet. I carefully removed them and used them as a template on my new carpet.

A little bit of jiggery pokery had the first bits of nice new carpet stuck in place

Next, I did a quick test fit of the fitted carpet set. This was made by a local supplier. They had two options, UK or AU spec, but couldn't actually tell me what the difference was. I had hoped it was because the AU spec cars, like mine, have the seat rails welded to the floor, whilst the UK ones don't.
The other option was that the later 025 AU spec cars have a bigger trans tunnel, which is more likely the difference, but they couldn't even confirm if that was the reason for the difference.
In the end, I decided to take a punt on the UK spec carpet set as my trans tunnel is the small UK size. The test fit was promising.

But before I got to work fitting it properly, I wanted to refit the rear seat as I'll need to climb into the car to do so, and would rather not be climbing on the new carpet.
Since I was making the interior nice, I couldn't just refit the dirty old rear seat. I've never cleaned it in the years I have had it, and who knows how many decades it's been. With the help and advice of my wife, a bucket of hot water, rags, some Jif cream cleaner and a spinny brush on my drill, here's a quick half and half of the base

This was quite satisfying as the vinyl was cleaning up really well. Its not even the same colour as before.


Once it was clean, for the first time since I've owned the car I actually screwed the seat in place. The base is a bit of a pain.

At the back there are two tabs which get screwed to the body

And the front has these annoying hooks that go through holes in the body, and then get secured with nuts


After a lot of stuffing around, I found the easiest way to fit the base was to get the hooks in place and loosely secured, by tipping the base forward. Then you tip the base down, and secure the screws at the rear.

The back of the seat needed a clean next. This had some old contact adhesive running down the side

Which after a lot of work, got a lot better. Not perfect, but its usable

Once again, its a completely different colour to what it was

There is quite a bit of sun damage to the top of the rear seat, and the vinyl just shatters when you so much as look at it, so I had to take a lot of care there. I need to find an OG tartan woollen blanket to drape over it like my old Marina.

I have no idea why, but I have no photo of the rear seat completely installed, but the backrest went in easy enough. It hooks over tabs on the body, and then two screws through tabs on the bottom hold it in place.
Now it was finally time to fit the carpet kit. I didn't particular enjoy this as it took something like 14 hours to do, and was not as straightforward as I had hoped for a "kit".
The first problem was that there were zero holes in the carpet, which was a pain. I thought they would've pre-cut the shifter hole at least, and maybe the handbrake, but no. So to help get everything centered and aligned, I used some brown paper to make a template, and locate everything using the center bolt for the seatbelt receiver

Once I was happy with the template, I transferred it to the carpet

Then i started the scary bit, cutting the brand new carpet


With the handbrake and bolt aligned, I made the first big I cut for the seat rail. I knew I would need to cut these four slots in the carpet, but it didn't make it any less scary

A second seat rail appears


I did the same on the other side, and using the same high temp ADOS glue as I used on the TVR, I carefully glued the carpet down. I didn't go too nuts, mainly sticking it down around the edges, not slathering the whole thing in glue.
After that, it was time for the front half of the carpet. This was more of the same; cut a hole for the shifter, glue on the pieces that go on the wheel arches and in the footwell, and then slip the front section of the carpet into place.

Oh and surprise, its a TC center console! I bought this on Facebook ages ago, the seller took my money then promptly ghosted me, after months, I thought it was lost forever but it turns out he was known to some absolute legends on a local forum, who paid him a visit and recovered the console for me. I know the car wasn't fitted with a console originally, but it wasn't fitted with carpet either, so lets just call it an upspec.
The final step to fitting the car was to glue the front down, trim the door jams, and then fit the plates that clamp down the carpet

The heal pad is a nice touch

The biggest issue with the fitment, that you cant easily fix, is the wrinkles around the trans tunnel. This is caused by the cut and stitched sections designed to help it fit the tunnel, but its almost like my tunnel was too small and the inserts were sitting in the wrong place. No amount of tweaking was going to make it fit any better.
In the end though, its 100x better than what was there before (nothing) or the house carpet it previously had, which rotted out from sitting.


Its not perfect, but it's good enough for my Marina.

What good is new carpet, if you don't have any front seats?
I've had both seats in at some point, but for ages the passengers seat has been out of the car, and the drivers seat was only partly bolted in. Now we're going to fit them both, properly.
First things first though, seatbelts. The car came with both old crusty belts,
I took them out a couple of years ago, and had them rewebbed by an awesome outfit, Autosafe, who rewebbed the belts with new black webbing, cleaned up the hardware, and mixed and matched bits with some spare belts I supplied to make the best pair.

Everything is properly tagged and certified, and comes with the relevant paperwork

I had also sourced a pair of new old stock plastic covers for the top bolt, which has the integrated belt park. These came from the UK with the help of an awesome fellow Marina enthusiast

The car came with one cover, along with a single bolt cap (missing from the new ones)

I had considered the usual option of converting to retractable belts, but there is something about static belts in old cars for me. Its a novelty, even if its not practical.
I gave the bolts and washers a quick cleanup and then fitted the belts


And it clips nicely into the buckle

With the belts installed and working nicely, it was time to clean the front seats and bolt them in.
The drivers seat got the treatment first. This is in pretty average shape, with a couple of tears in the base which have been stitched together with some red twine.

Before cleaning it I flipped the seat upside down and greased all the moving parts

They're a very simple rail, but with the added complexity of the tilting mech for getting passengers in the back seat. This little lever is what releases the backrest

The lever releases a big hook on each side

The lever acts directly on it, with a rod going to the opposite side

Everything got some grease on it, and is moving nicely. The actual sliding adjustment is very simple, with two independent rails, a U shaped release lever and two pins.


You lift the bar at the front, it disengages the pins and the seat can slide. You release the bar, and it springs back into place, slotting into one of the notches. All of this got greased and then the seat was flipped over for cleaning.

Cleaning up well


I'm very impressed how well these seats clean up


Its like two different seats

So the base got the same treatment too. The decades old tape residue doesn't seem to want to budge, but otherwise its looking good


After a coating of 303 Aerospace Protectant (all seats got this treatment, it's meant to treat and protect vinyl), it was bolted into the car

Moving onto the passengers seat, it had obvious had a life at some point. The seat release bar/adjustment was very bent on one side. The left side pin wasn't even engaging with the rail


Some careful percussive persuation, and it was all as it should be again

This one wasn't as drastic as the drivers seat, but still changed colour quite well


Which could only mean one thing, the final seat got bolted into place


I kicked off my shoes, hopped in, belted myself in, and spent some time making vroom vroom noises.
We're very close to WOF time now. It'll be a couple of weeks, so I'll have to book a day off work, book it in for a WOF and then I'll have a deadline for the car to be ready. I still need to do an oil change, drain the stale fuel out of the tank, fit the new wiper blades and then see why the engine top end is rattling, but thats a days work at most.
I had been asked about and pondered for a while, on whether I would be sticking some sound deadener under the carpet on the new floor. I wasn't going to, but since I was here I grabbed some cheap no-name butyl stuff and got to work.
The main places were the two footwells in the front
The front of the tunnel under the heater
The front wheel wells (where stones would hit)
and finally, the rear footwells
I'm not certain it will do anything, but even if it can stop the floors drumming, that's a win. It was reasonably easy to apply, although I did do it in winter so had to use a heat gun to get it and the metal warm so it would stick properly. I also grabbed a small rubber roller from the hardware store to roll it out.
With my newly applied sound deadening in place, it was time to lay down some carpet underlay.
I also stuck some underlay over the trans tunnel, hopefully to keep some noise and heat down.
Now, it was the less fun part. The carpet.
The very first part to go in was the rear bulkhead. This has to go in before the rest of the carpet since the main carpet will butt up against it. Thankfully, this was one section of carpet that still existed, even if it was some manky old faded house carpet. I carefully removed them and used them as a template on my new carpet.
A little bit of jiggery pokery had the first bits of nice new carpet stuck in place
Next, I did a quick test fit of the fitted carpet set. This was made by a local supplier. They had two options, UK or AU spec, but couldn't actually tell me what the difference was. I had hoped it was because the AU spec cars, like mine, have the seat rails welded to the floor, whilst the UK ones don't.
The other option was that the later 025 AU spec cars have a bigger trans tunnel, which is more likely the difference, but they couldn't even confirm if that was the reason for the difference.
In the end, I decided to take a punt on the UK spec carpet set as my trans tunnel is the small UK size. The test fit was promising.
But before I got to work fitting it properly, I wanted to refit the rear seat as I'll need to climb into the car to do so, and would rather not be climbing on the new carpet.
Since I was making the interior nice, I couldn't just refit the dirty old rear seat. I've never cleaned it in the years I have had it, and who knows how many decades it's been. With the help and advice of my wife, a bucket of hot water, rags, some Jif cream cleaner and a spinny brush on my drill, here's a quick half and half of the base
This was quite satisfying as the vinyl was cleaning up really well. Its not even the same colour as before.
Once it was clean, for the first time since I've owned the car I actually screwed the seat in place. The base is a bit of a pain.
At the back there are two tabs which get screwed to the body
And the front has these annoying hooks that go through holes in the body, and then get secured with nuts
After a lot of stuffing around, I found the easiest way to fit the base was to get the hooks in place and loosely secured, by tipping the base forward. Then you tip the base down, and secure the screws at the rear.
The back of the seat needed a clean next. This had some old contact adhesive running down the side
Which after a lot of work, got a lot better. Not perfect, but its usable
Once again, its a completely different colour to what it was
There is quite a bit of sun damage to the top of the rear seat, and the vinyl just shatters when you so much as look at it, so I had to take a lot of care there. I need to find an OG tartan woollen blanket to drape over it like my old Marina.
I have no idea why, but I have no photo of the rear seat completely installed, but the backrest went in easy enough. It hooks over tabs on the body, and then two screws through tabs on the bottom hold it in place.
Now it was finally time to fit the carpet kit. I didn't particular enjoy this as it took something like 14 hours to do, and was not as straightforward as I had hoped for a "kit".
The first problem was that there were zero holes in the carpet, which was a pain. I thought they would've pre-cut the shifter hole at least, and maybe the handbrake, but no. So to help get everything centered and aligned, I used some brown paper to make a template, and locate everything using the center bolt for the seatbelt receiver
Once I was happy with the template, I transferred it to the carpet
Then i started the scary bit, cutting the brand new carpet
With the handbrake and bolt aligned, I made the first big I cut for the seat rail. I knew I would need to cut these four slots in the carpet, but it didn't make it any less scary
A second seat rail appears
I did the same on the other side, and using the same high temp ADOS glue as I used on the TVR, I carefully glued the carpet down. I didn't go too nuts, mainly sticking it down around the edges, not slathering the whole thing in glue.
After that, it was time for the front half of the carpet. This was more of the same; cut a hole for the shifter, glue on the pieces that go on the wheel arches and in the footwell, and then slip the front section of the carpet into place.
Oh and surprise, its a TC center console! I bought this on Facebook ages ago, the seller took my money then promptly ghosted me, after months, I thought it was lost forever but it turns out he was known to some absolute legends on a local forum, who paid him a visit and recovered the console for me. I know the car wasn't fitted with a console originally, but it wasn't fitted with carpet either, so lets just call it an upspec.
The final step to fitting the car was to glue the front down, trim the door jams, and then fit the plates that clamp down the carpet
The heal pad is a nice touch
The biggest issue with the fitment, that you cant easily fix, is the wrinkles around the trans tunnel. This is caused by the cut and stitched sections designed to help it fit the tunnel, but its almost like my tunnel was too small and the inserts were sitting in the wrong place. No amount of tweaking was going to make it fit any better.
In the end though, its 100x better than what was there before (nothing) or the house carpet it previously had, which rotted out from sitting.
Its not perfect, but it's good enough for my Marina.
What good is new carpet, if you don't have any front seats?
I've had both seats in at some point, but for ages the passengers seat has been out of the car, and the drivers seat was only partly bolted in. Now we're going to fit them both, properly.
First things first though, seatbelts. The car came with both old crusty belts,
I took them out a couple of years ago, and had them rewebbed by an awesome outfit, Autosafe, who rewebbed the belts with new black webbing, cleaned up the hardware, and mixed and matched bits with some spare belts I supplied to make the best pair.
Everything is properly tagged and certified, and comes with the relevant paperwork
I had also sourced a pair of new old stock plastic covers for the top bolt, which has the integrated belt park. These came from the UK with the help of an awesome fellow Marina enthusiast
The car came with one cover, along with a single bolt cap (missing from the new ones)
I had considered the usual option of converting to retractable belts, but there is something about static belts in old cars for me. Its a novelty, even if its not practical.
I gave the bolts and washers a quick cleanup and then fitted the belts
And it clips nicely into the buckle
With the belts installed and working nicely, it was time to clean the front seats and bolt them in.
The drivers seat got the treatment first. This is in pretty average shape, with a couple of tears in the base which have been stitched together with some red twine.
Before cleaning it I flipped the seat upside down and greased all the moving parts
They're a very simple rail, but with the added complexity of the tilting mech for getting passengers in the back seat. This little lever is what releases the backrest
The lever releases a big hook on each side
The lever acts directly on it, with a rod going to the opposite side
Everything got some grease on it, and is moving nicely. The actual sliding adjustment is very simple, with two independent rails, a U shaped release lever and two pins.
You lift the bar at the front, it disengages the pins and the seat can slide. You release the bar, and it springs back into place, slotting into one of the notches. All of this got greased and then the seat was flipped over for cleaning.
Cleaning up well
I'm very impressed how well these seats clean up
Its like two different seats
So the base got the same treatment too. The decades old tape residue doesn't seem to want to budge, but otherwise its looking good
After a coating of 303 Aerospace Protectant (all seats got this treatment, it's meant to treat and protect vinyl), it was bolted into the car
Moving onto the passengers seat, it had obvious had a life at some point. The seat release bar/adjustment was very bent on one side. The left side pin wasn't even engaging with the rail
Some careful percussive persuation, and it was all as it should be again
This one wasn't as drastic as the drivers seat, but still changed colour quite well
Which could only mean one thing, the final seat got bolted into place
I kicked off my shoes, hopped in, belted myself in, and spent some time making vroom vroom noises.
We're very close to WOF time now. It'll be a couple of weeks, so I'll have to book a day off work, book it in for a WOF and then I'll have a deadline for the car to be ready. I still need to do an oil change, drain the stale fuel out of the tank, fit the new wiper blades and then see why the engine top end is rattling, but thats a days work at most.
hidetheelephants said:
I'd suggest trying to find some seat diaphragms, or if they're NLA adapt some MGB ones or similar; I've tried bodging with rubber webbing like that before and I could never get it tight enough and it was like sitting on a partially deflated beachball.
Yeah the strapping isn't great on the seats, particularly the passengers one. Surprisingly the drivers seat is actually quite plump to sit on, for now.Anything original will be long gone, so I was wondering if the Mini seat diaphragms could be adapted to fit. Long term though, I want to replace the seats with something like NA MX5 tan leather seats, or a pair of classic bucket seats.
It's happening, the Marina is finally booked in for a WOF. It's only a couple of years late, but better than never.
I started the day with a checklist of things that needed to be done before the WOF booking in a couple of weeks. The first was to drain the fuel tank of the 2+ year old fuel because it stinks, and the car is hard to start.
With 18L of new high-octane fuel in hand, I used the drain plug on the bottom of the tank to get as much out as I could. I underestimated how much was in there, so couldn't completely drain it, but the fuel coming out was definitely yellow, and stank of varnish. The new fuel can mix with whatever was left in there, it'll be fine.
Moving forward I wanted to drain the filter, pump and lines too. I unhooked the feed hose to the carb and stuck it into a bottle. I disconnected the coil and fuel pump, and turned the ignition on. Using the handy dandy connection under the bonnet, I ran the fuel pump and pumped the fuel into the bottle.
This is what came out
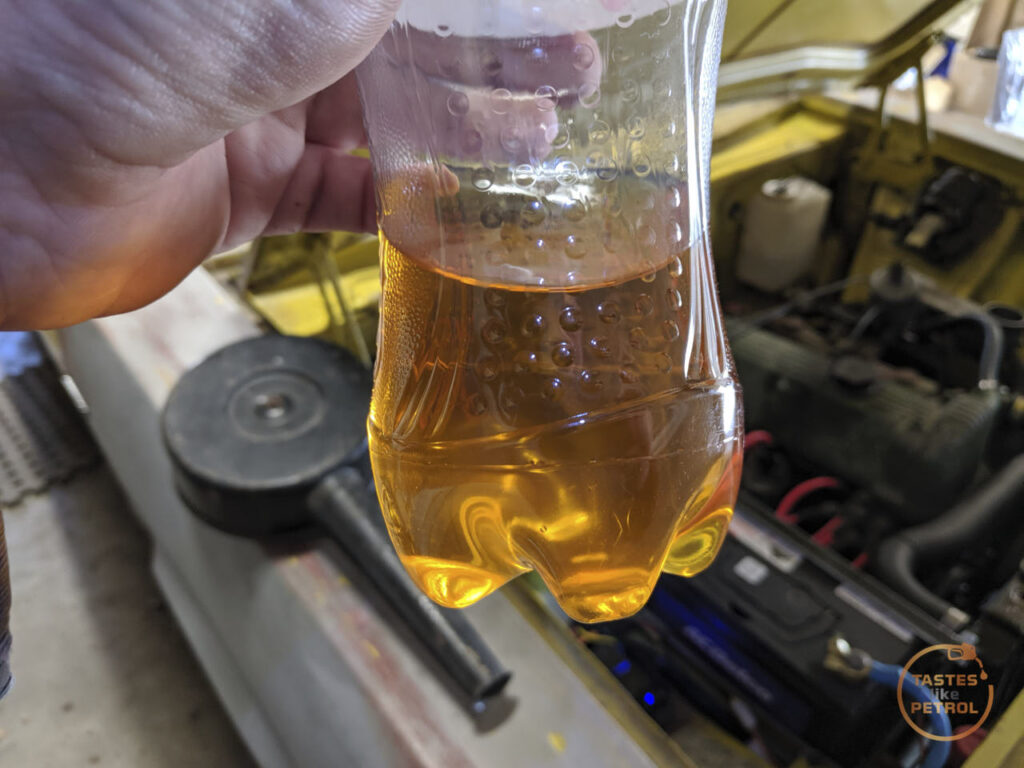
It's much darker than what was coming out of the tank, and stank. I ran the pump until nice clean fuel came through.
I tossed up wether to drain the fuel bowl on the carb or not, but in the end I removed the three screws and removed the top
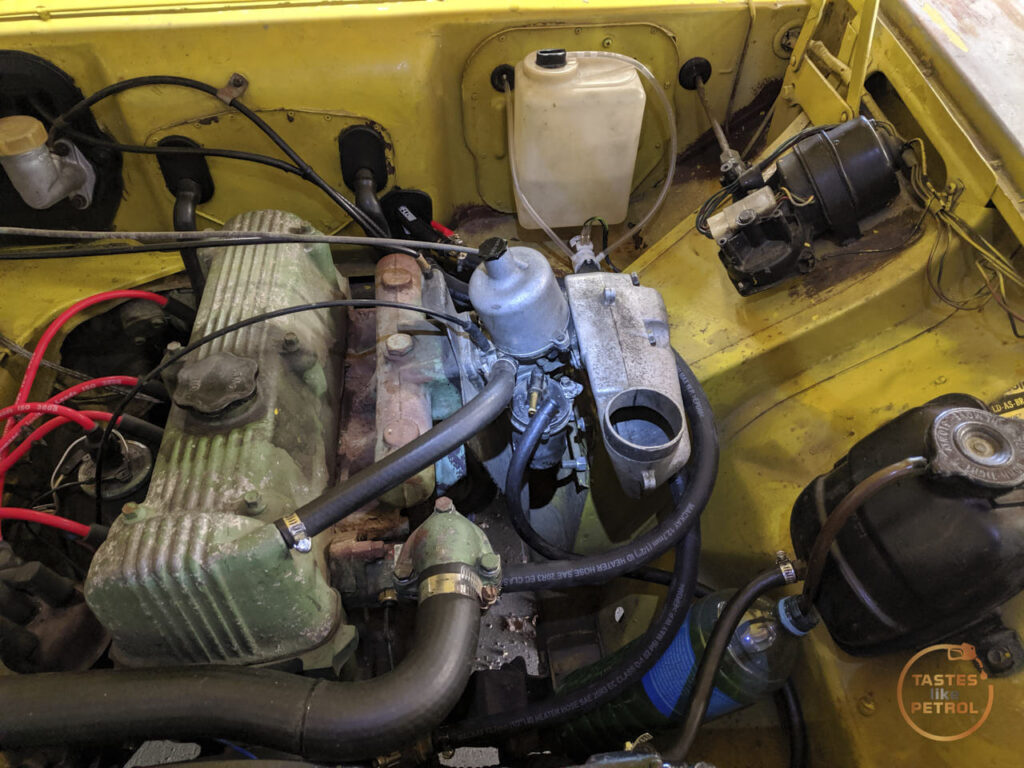
And I'm glad I did. The old fuel was rancid, but there was also an amount of sediment in the bottom of the bowl
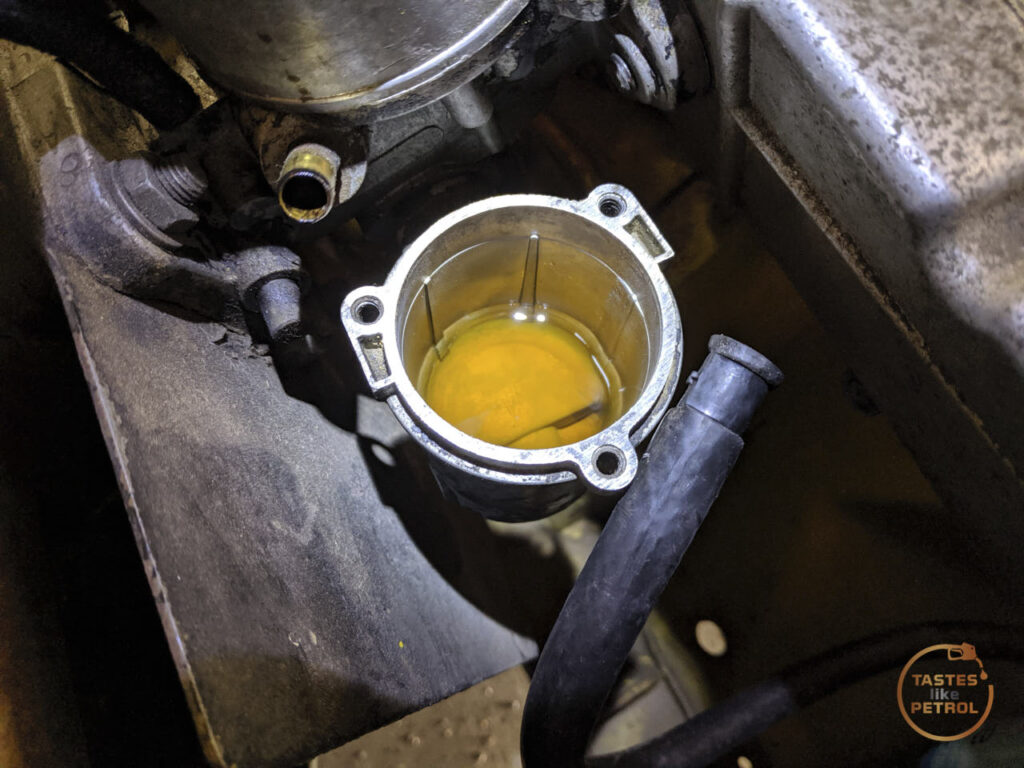
I used a hand vac pump to suck the old fuel out and used a rag and carb cleaner to clean the bottom of the bowl.
Once I reassembled the bowl and used the pump to fill it with fresh new fuel, I wanted to check the spark plugs. I haven't checked them since I fitted them a few years ago, and with all the cold running, hard starts and bad fuel, I expected them to be pretty grotty.
Surprisingly they weren't that bad. One was a bit darker than the rest, all had some degree of black carbon, but none were really fouled.

I gave them all a quick clean with a wire brush and brake cleaner and refitted them.
Since I was there anyway, I thought it was wise to have a look at the points. It's a good thing I did, as forget the points, this is what I found instead

Yup, the center carbon post is completely missing and the spring has been wearing the center of the rotor down
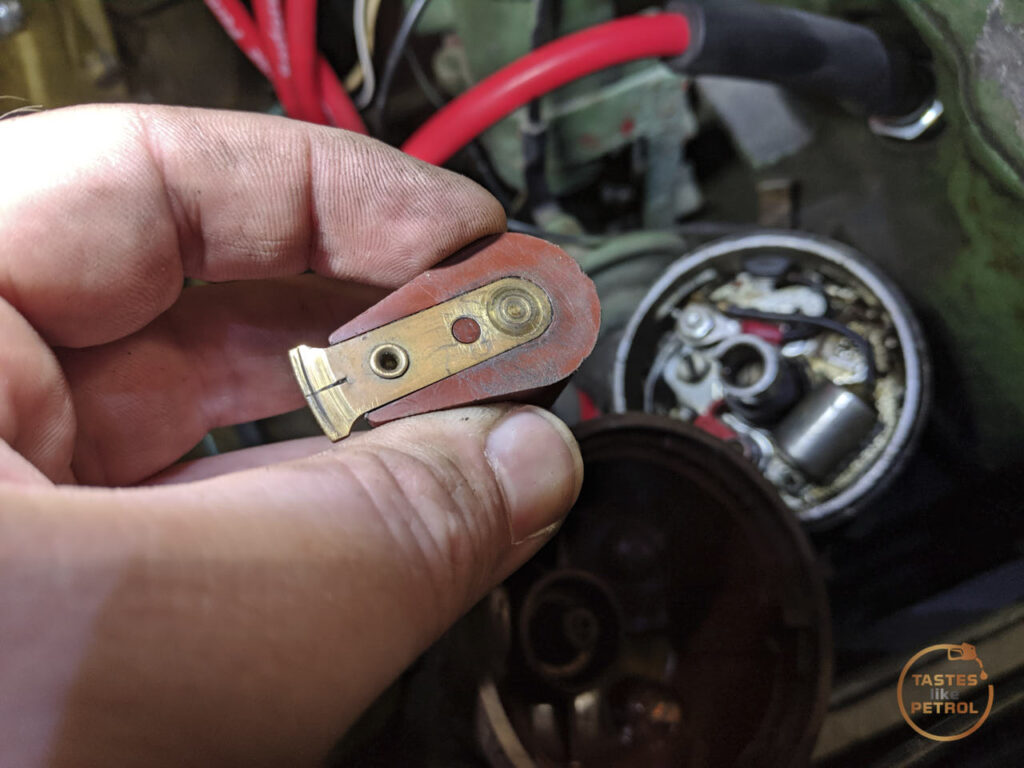
After some investigating I found the little carbon post down in the bottom of the distributor, under the points, sitting with the mechanical advance.
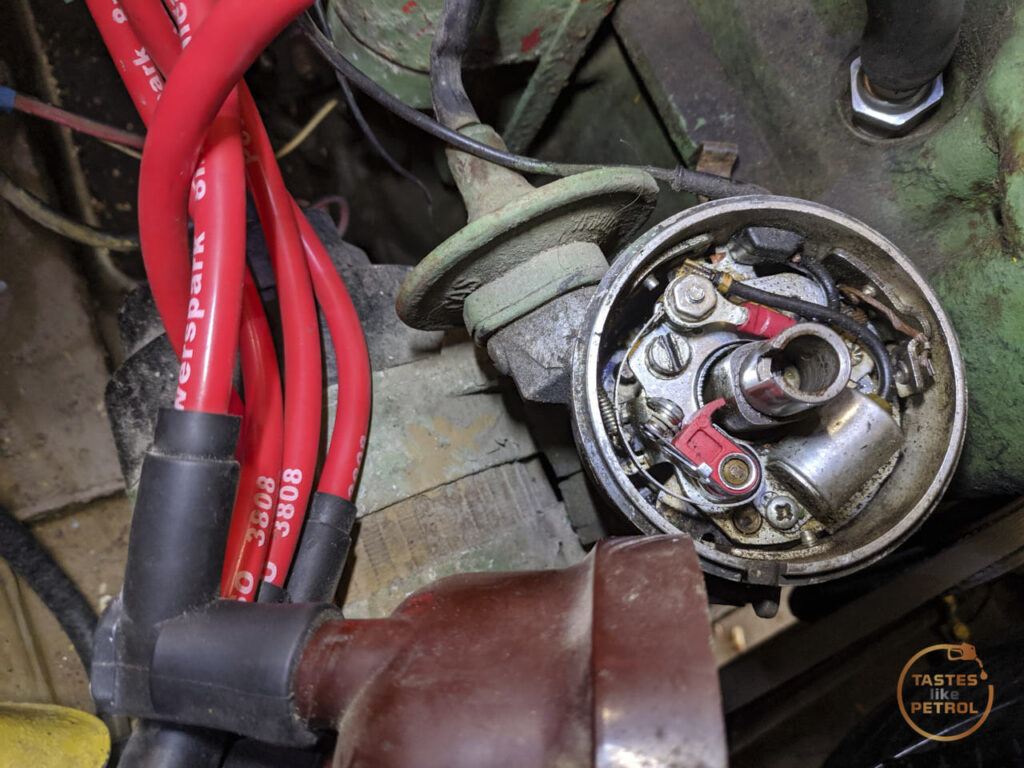
I didn't want to leave it there just in case it jammed the advance, so using a small pick and a pair of offset needlenose pliers, I managed to fish it out

I have no idea how long it's been like that, but it wouldn't have been doing anyone any favours. Thankfully I'm a hoarder, so I had a replacement cap and rotor in my stock.

I quickly swapped them over and after a quick sand of the points we were good to go again.
With the ignition back together, I tried to start the car, and despite the fuel being fresh, the ignition working, and the choke pulled out to its stop, it wasn't having any of it.
It was then that it occurred to me to check the choke
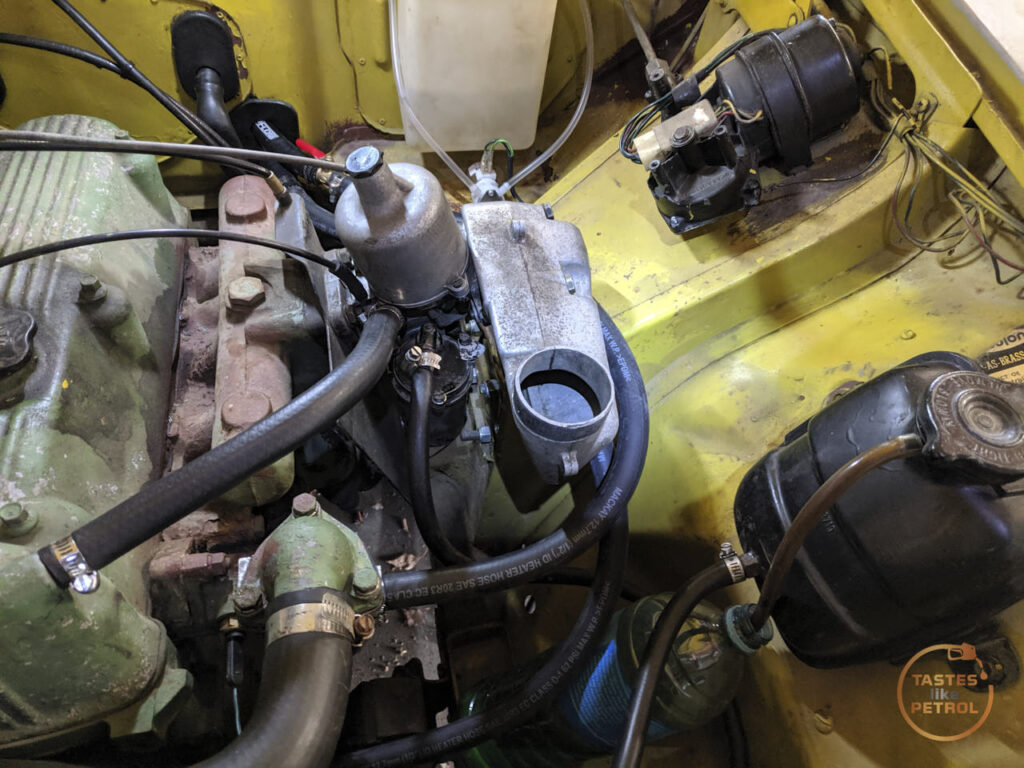
Sure enough, with the choke pulled as far as it could be, the jet under the carb wasn't pulling down like it's meant to (to let more fuel into the carb).

With some gentle prying it slowly started to move
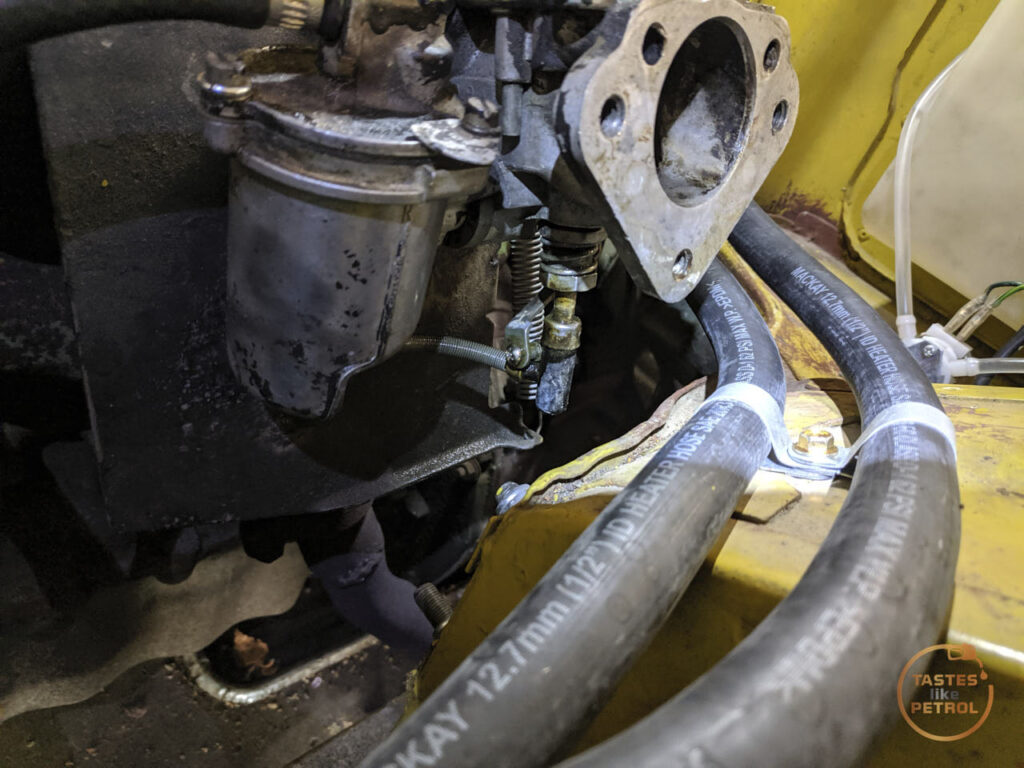
At this point I stripped the top off the carb too, so I could access the top of the jet. Whilst there, I also found the same excellent piston lift pin that I used to tune the Mini

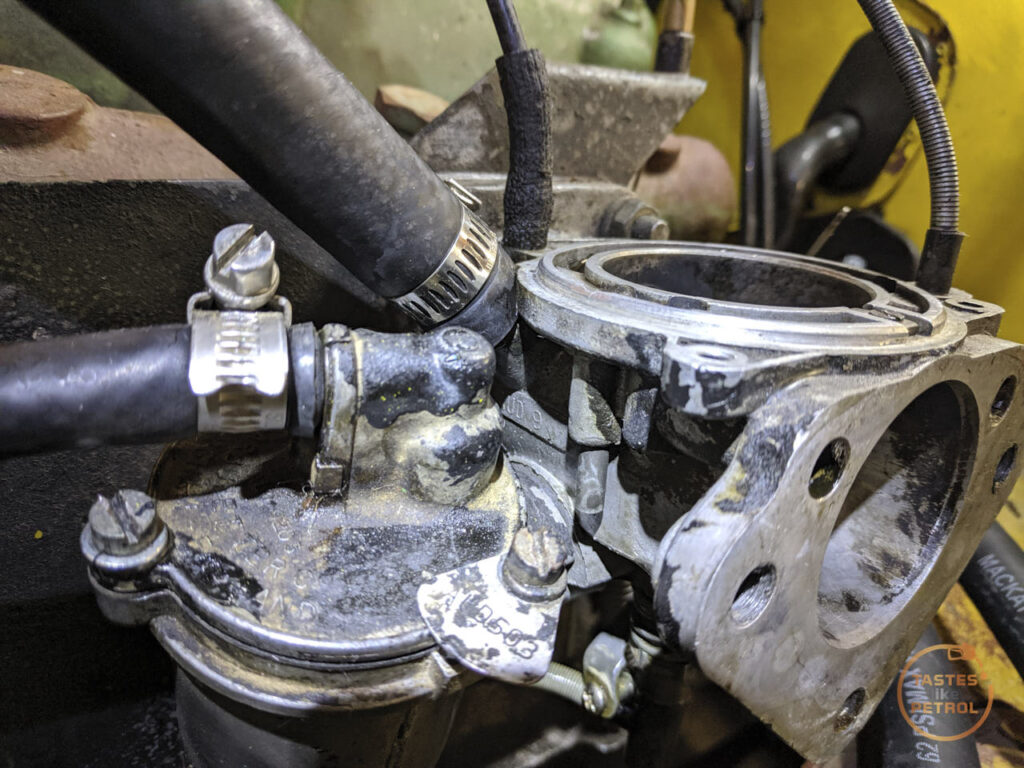

I thoroughly cleaned the jet and gave it a little WD40 to help it move freely, and now the choke operates as it should. It should've been obvious that the lever in the cabin was only pulling out about half way, but it's been a long time since I've had another manual choke.
I cleaned up the piston and needle, and refit with new dashpot oil

Now the car started, easily. It's amazing what a functioning choke can do!
With the car starting and running well, the next thing to do was an oil change. Of course I had to warm the engine up for this, as I did the last oil change cold and 20W60 flows real slow when it's cold.
A quick trip to Mexico for a closed road test was needed
https://youtu.be/KPgh9VYOOWg
It runs and drives really well. The brakes are terrifying, but more use seems to be helping, although a remote booster might be on the cards at some point. A loud rattle present on decel turned out to the hood prop rattling in its bracket and on the air cleaner housing. Easy fix.
It was still flat and gutless though. I had wanted to check the timing for a while, but it's a pain in the bum to do on these, plus I needed the car at full operating temp, which I didn't often do.
A normal car would have the timing marks easy to access and see, usually by just pointing the timing light down into the engine bay. Not the Marina though.
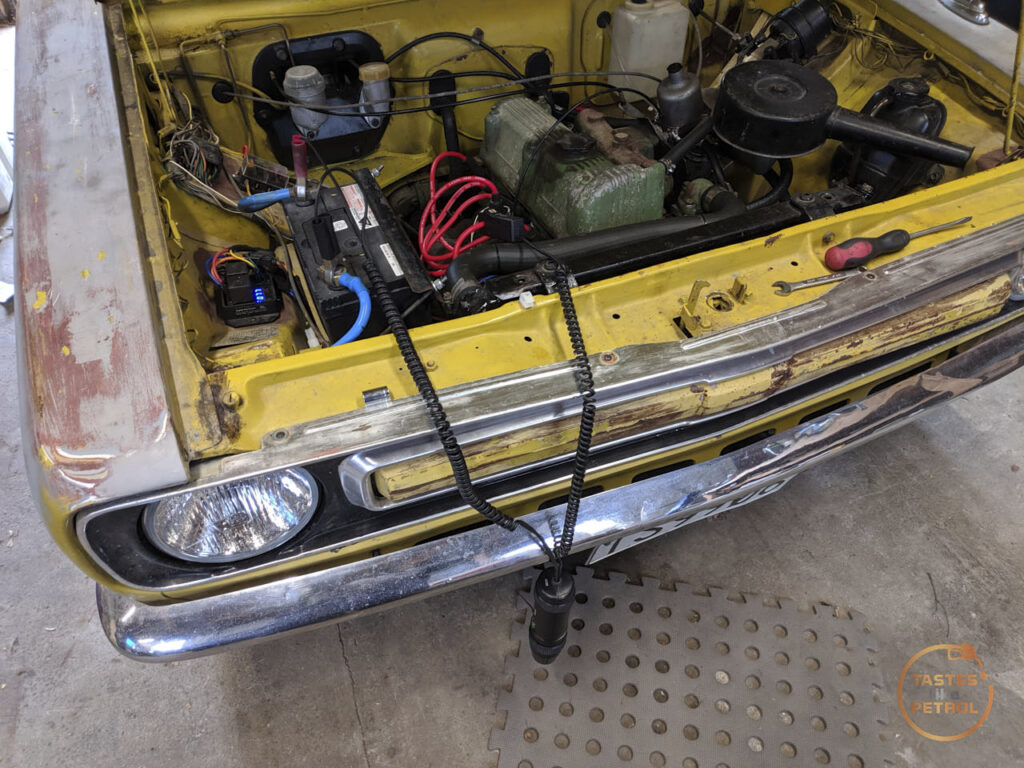
The timing marks are on the bottom of the engine, accessible through the front of the lower bash plate

I painted the timing pointers yellow and the crank mark white ages ago, so it was easier to see. The four pointers are TDC, 5, 10 and 15 degrees Before TDC.

The timing when I started was so far off the scale I think it was actually after TDC, not before. The spec is 10 degrees BTDC. I slackened off the distributor clamp and gave it a tweak. The revs picked up and the idle smoothed out. It didn't take much, but we were sitting bang on 10deg now. I adjusted the idle back down to 500rpm, and tweaked it a little further.
I'm running approx 13-14deg timing now, because I'm a spicy lad that wants more power from his 70s Sports Car, and I'm running high octane fuel.
With the timing where it should be, I wanted to see what the mixture was doing. What better way than to use the lift pin on the carb that I just found? I lifted the piston and the revs rose significantly, indicating a very rich mixture.
Using my handy little SU jet adjustment tool I tweaked the adjustment nut until the revs only slightly rose when the piston was lifted. Perfect.


With that, it was time for another trip to Mexico and hot damn, the car boogies now! Previously it felt really flat, didn't want to rev and couldn't get out of its own way. Now it wants to rev, and properly hoofs it down the road (for a Marina anyway). Great success, can't wait for it to be legal and I can see how it really goes.
Another plus is that although noisy in a couple of gears, like all Marinas (it reminds you it's doing actual mechanical things), the gearbox shifts lovely, even at high RPM and on downshifts.
Back home, I put the car on stands and drained the oil. It wasn't that dirty, but it was quite thin and although stuff all Ks, it's had a lot of cold starts, and it's been in there over 3 years. Oops.
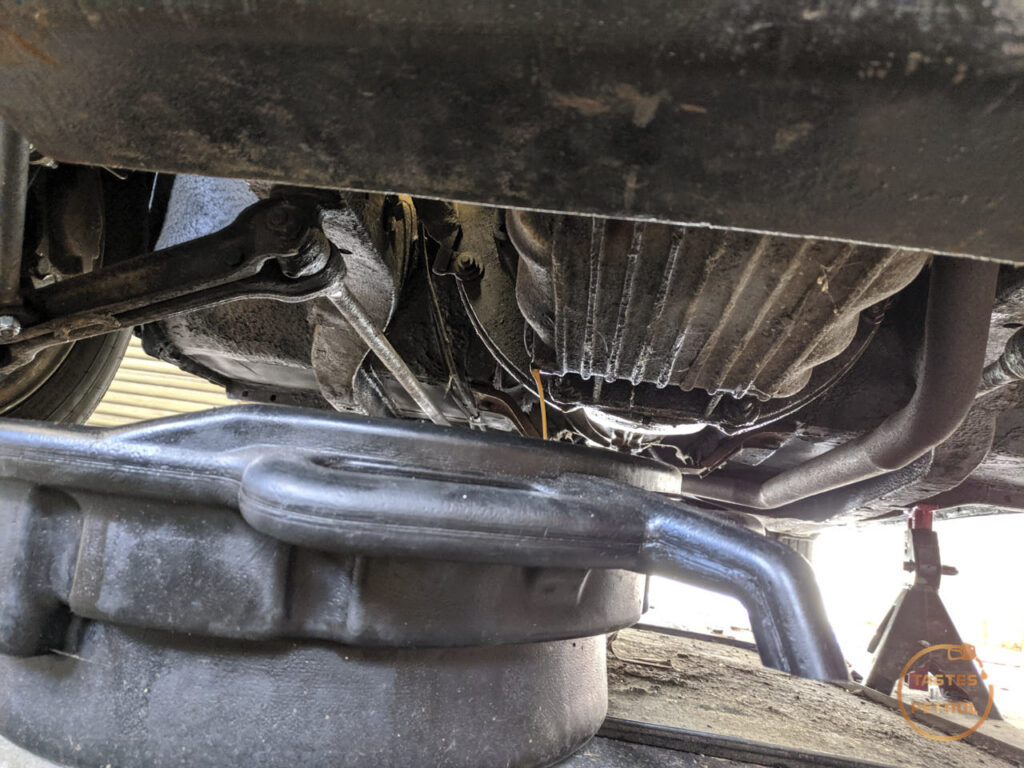
I decided not to change the filter this time, since it's expensive, rare, and it's not really done that much work. I'll change it once the cars been on the road for a bit. 3L of Penrite 20W60 went in the top and didn't come out again. Yay
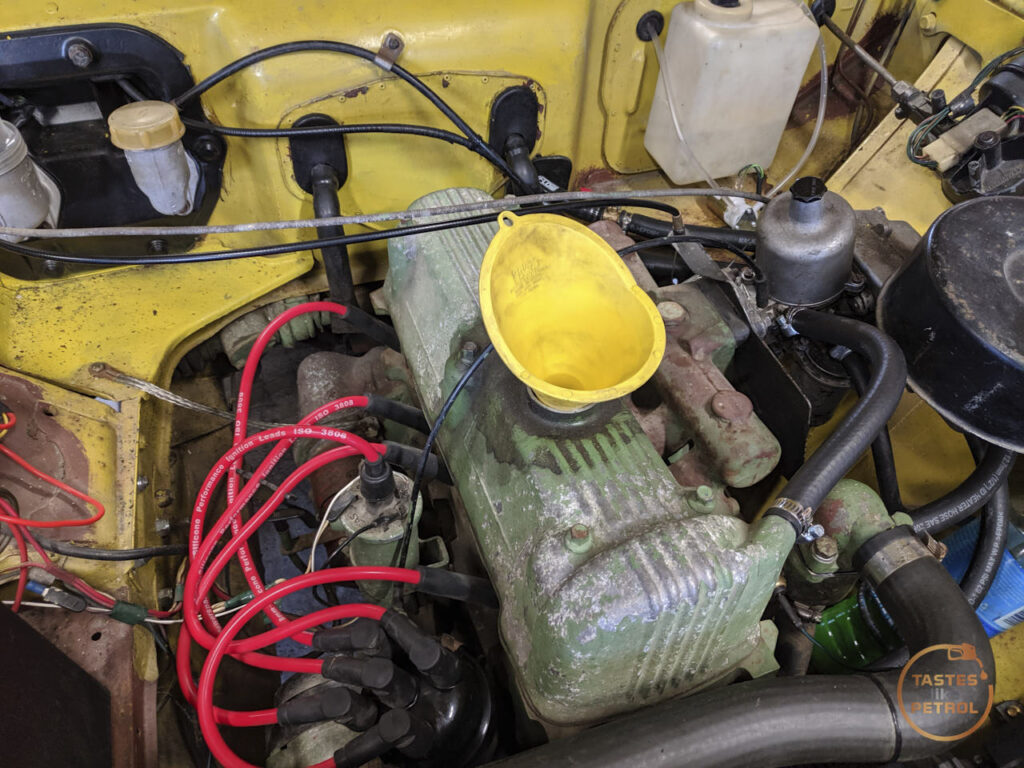
Another quick fix for the WOF was to replace the wiper blades. The old ones are proper plastic, so didn't really do the job of clearing the glass. I grabbed some Tex stainless wipers with the bayonet fitting
They fit well and look good. I gave the arms a quick scrub with some scotch pad and they look a lot better
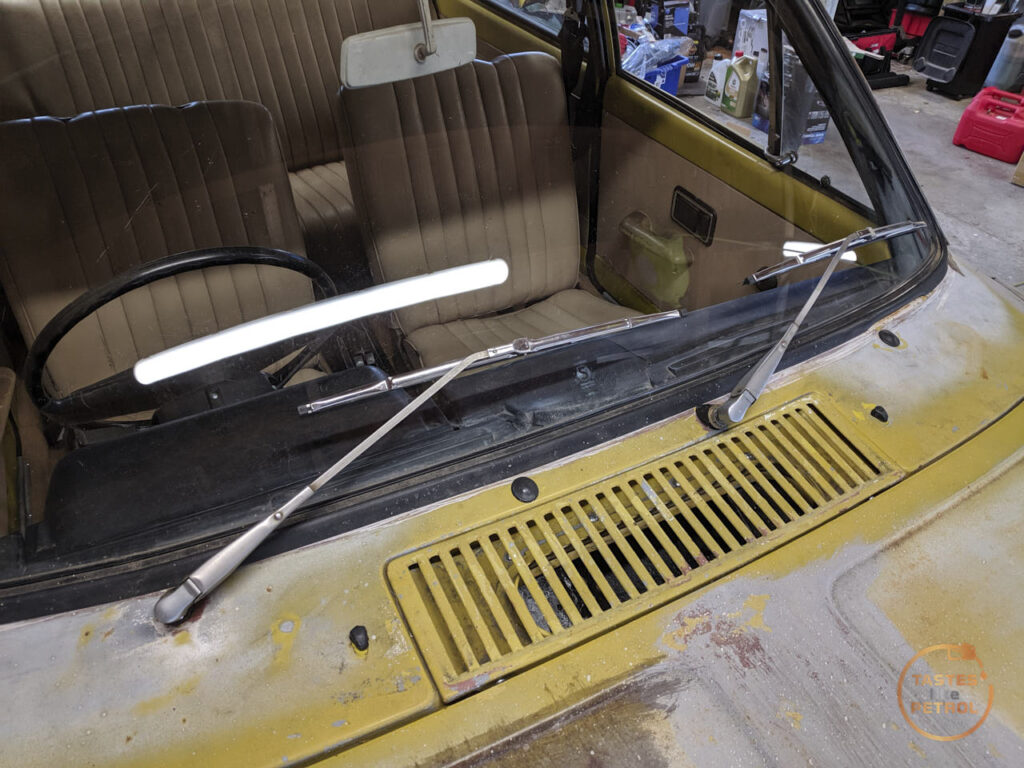

Sadly I can't test them properly as it appears the Lucas washer pump I fitted in Jan has seized and failed. Lame. I have a replacement on order which will hopefully be here this week. Lucas ain't what it used to be, and it wasn't that good to start with.

The last thing I needed to do was to clean all the windows and then fit a high stop light to the rear. I didn't legally need one, but I hate how invisible classics are these days. The brake lights are small, dim and low down on the car, so hopefully this LED unit shining into the eyes of people behind me might give me a chance of them actually seeing me.
I picked up this Hella Matrix unit and really like how it kinda looks period correct but uses modern LEDs.

Fitting it was less than fun. Trying to line up the grey decal on the glass and get it centered and straight, took a lot of tries before I just gave up and sent it.
I flipped the pads on my clamp and used it as a one-man brake light tester
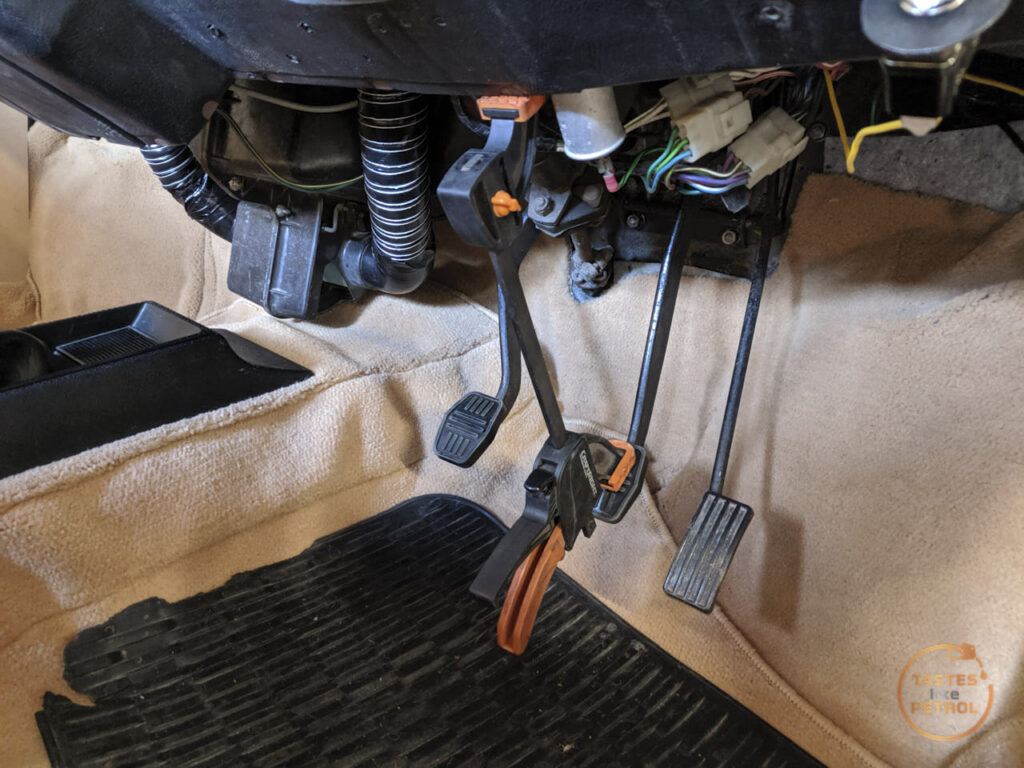
It works well

Standing behind the car seems to be about the height for it to have the hot spot right in your eyes. Hopefully that's about standard modern car driver eyeline too.

With the help of my wife, we tested the rest of the lights, which did initially show up a dodgy connection on the RH brake light bulb, but a quick reseating of the bulb fixed that.

Thats it. There is only one thing left on the board.
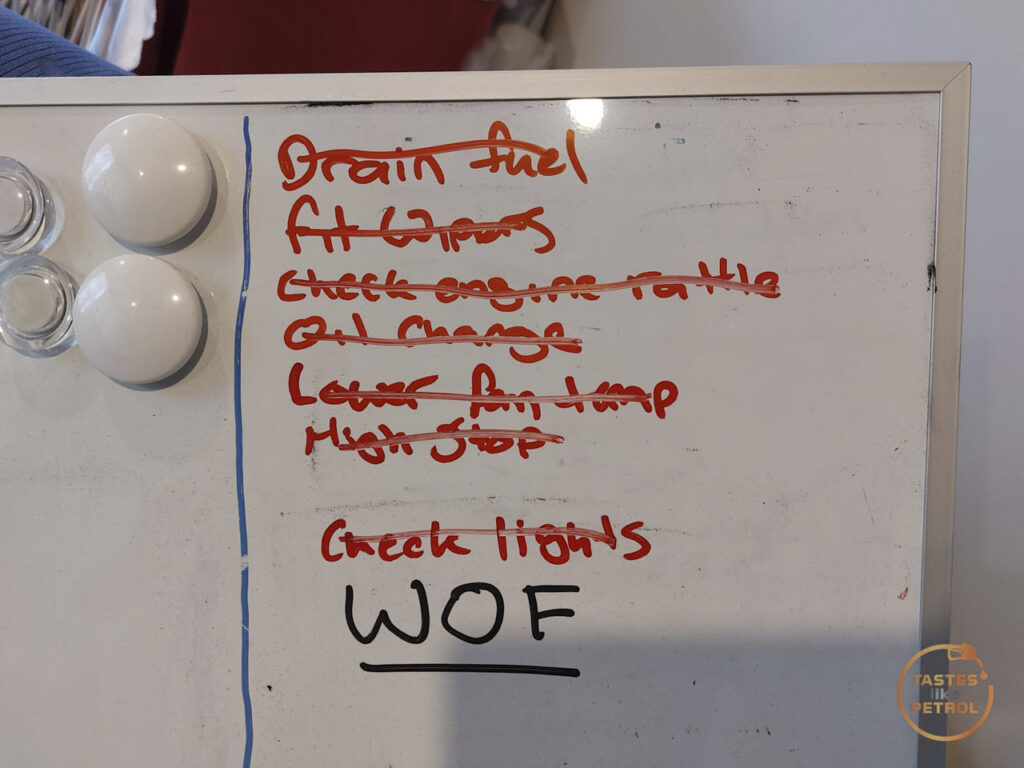
I guess the next update will be after the inspection, where I know it'll fail. What on, well that's yet to be seen, but having been off the road for almost 30 years, it could be anything.
It's been good to finally be doing mechanical work again. I was sick of bodywork.
I started the day with a checklist of things that needed to be done before the WOF booking in a couple of weeks. The first was to drain the fuel tank of the 2+ year old fuel because it stinks, and the car is hard to start.
With 18L of new high-octane fuel in hand, I used the drain plug on the bottom of the tank to get as much out as I could. I underestimated how much was in there, so couldn't completely drain it, but the fuel coming out was definitely yellow, and stank of varnish. The new fuel can mix with whatever was left in there, it'll be fine.
Moving forward I wanted to drain the filter, pump and lines too. I unhooked the feed hose to the carb and stuck it into a bottle. I disconnected the coil and fuel pump, and turned the ignition on. Using the handy dandy connection under the bonnet, I ran the fuel pump and pumped the fuel into the bottle.
This is what came out
It's much darker than what was coming out of the tank, and stank. I ran the pump until nice clean fuel came through.
I tossed up wether to drain the fuel bowl on the carb or not, but in the end I removed the three screws and removed the top
And I'm glad I did. The old fuel was rancid, but there was also an amount of sediment in the bottom of the bowl
I used a hand vac pump to suck the old fuel out and used a rag and carb cleaner to clean the bottom of the bowl.
Once I reassembled the bowl and used the pump to fill it with fresh new fuel, I wanted to check the spark plugs. I haven't checked them since I fitted them a few years ago, and with all the cold running, hard starts and bad fuel, I expected them to be pretty grotty.
Surprisingly they weren't that bad. One was a bit darker than the rest, all had some degree of black carbon, but none were really fouled.
I gave them all a quick clean with a wire brush and brake cleaner and refitted them.
Since I was there anyway, I thought it was wise to have a look at the points. It's a good thing I did, as forget the points, this is what I found instead
Yup, the center carbon post is completely missing and the spring has been wearing the center of the rotor down
After some investigating I found the little carbon post down in the bottom of the distributor, under the points, sitting with the mechanical advance.
I didn't want to leave it there just in case it jammed the advance, so using a small pick and a pair of offset needlenose pliers, I managed to fish it out
I have no idea how long it's been like that, but it wouldn't have been doing anyone any favours. Thankfully I'm a hoarder, so I had a replacement cap and rotor in my stock.
I quickly swapped them over and after a quick sand of the points we were good to go again.
With the ignition back together, I tried to start the car, and despite the fuel being fresh, the ignition working, and the choke pulled out to its stop, it wasn't having any of it.
It was then that it occurred to me to check the choke
Sure enough, with the choke pulled as far as it could be, the jet under the carb wasn't pulling down like it's meant to (to let more fuel into the carb).
With some gentle prying it slowly started to move
At this point I stripped the top off the carb too, so I could access the top of the jet. Whilst there, I also found the same excellent piston lift pin that I used to tune the Mini
I thoroughly cleaned the jet and gave it a little WD40 to help it move freely, and now the choke operates as it should. It should've been obvious that the lever in the cabin was only pulling out about half way, but it's been a long time since I've had another manual choke.
I cleaned up the piston and needle, and refit with new dashpot oil
Now the car started, easily. It's amazing what a functioning choke can do!
With the car starting and running well, the next thing to do was an oil change. Of course I had to warm the engine up for this, as I did the last oil change cold and 20W60 flows real slow when it's cold.
A quick trip to Mexico for a closed road test was needed
https://youtu.be/KPgh9VYOOWg
It runs and drives really well. The brakes are terrifying, but more use seems to be helping, although a remote booster might be on the cards at some point. A loud rattle present on decel turned out to the hood prop rattling in its bracket and on the air cleaner housing. Easy fix.
It was still flat and gutless though. I had wanted to check the timing for a while, but it's a pain in the bum to do on these, plus I needed the car at full operating temp, which I didn't often do.
A normal car would have the timing marks easy to access and see, usually by just pointing the timing light down into the engine bay. Not the Marina though.
The timing marks are on the bottom of the engine, accessible through the front of the lower bash plate
I painted the timing pointers yellow and the crank mark white ages ago, so it was easier to see. The four pointers are TDC, 5, 10 and 15 degrees Before TDC.
The timing when I started was so far off the scale I think it was actually after TDC, not before. The spec is 10 degrees BTDC. I slackened off the distributor clamp and gave it a tweak. The revs picked up and the idle smoothed out. It didn't take much, but we were sitting bang on 10deg now. I adjusted the idle back down to 500rpm, and tweaked it a little further.
I'm running approx 13-14deg timing now, because I'm a spicy lad that wants more power from his 70s Sports Car, and I'm running high octane fuel.
With the timing where it should be, I wanted to see what the mixture was doing. What better way than to use the lift pin on the carb that I just found? I lifted the piston and the revs rose significantly, indicating a very rich mixture.
Using my handy little SU jet adjustment tool I tweaked the adjustment nut until the revs only slightly rose when the piston was lifted. Perfect.
With that, it was time for another trip to Mexico and hot damn, the car boogies now! Previously it felt really flat, didn't want to rev and couldn't get out of its own way. Now it wants to rev, and properly hoofs it down the road (for a Marina anyway). Great success, can't wait for it to be legal and I can see how it really goes.
Another plus is that although noisy in a couple of gears, like all Marinas (it reminds you it's doing actual mechanical things), the gearbox shifts lovely, even at high RPM and on downshifts.
Back home, I put the car on stands and drained the oil. It wasn't that dirty, but it was quite thin and although stuff all Ks, it's had a lot of cold starts, and it's been in there over 3 years. Oops.
I decided not to change the filter this time, since it's expensive, rare, and it's not really done that much work. I'll change it once the cars been on the road for a bit. 3L of Penrite 20W60 went in the top and didn't come out again. Yay
Another quick fix for the WOF was to replace the wiper blades. The old ones are proper plastic, so didn't really do the job of clearing the glass. I grabbed some Tex stainless wipers with the bayonet fitting
They fit well and look good. I gave the arms a quick scrub with some scotch pad and they look a lot better
Sadly I can't test them properly as it appears the Lucas washer pump I fitted in Jan has seized and failed. Lame. I have a replacement on order which will hopefully be here this week. Lucas ain't what it used to be, and it wasn't that good to start with.
The last thing I needed to do was to clean all the windows and then fit a high stop light to the rear. I didn't legally need one, but I hate how invisible classics are these days. The brake lights are small, dim and low down on the car, so hopefully this LED unit shining into the eyes of people behind me might give me a chance of them actually seeing me.
I picked up this Hella Matrix unit and really like how it kinda looks period correct but uses modern LEDs.
Fitting it was less than fun. Trying to line up the grey decal on the glass and get it centered and straight, took a lot of tries before I just gave up and sent it.
I flipped the pads on my clamp and used it as a one-man brake light tester
It works well
Standing behind the car seems to be about the height for it to have the hot spot right in your eyes. Hopefully that's about standard modern car driver eyeline too.
With the help of my wife, we tested the rest of the lights, which did initially show up a dodgy connection on the RH brake light bulb, but a quick reseating of the bulb fixed that.
Thats it. There is only one thing left on the board.
I guess the next update will be after the inspection, where I know it'll fail. What on, well that's yet to be seen, but having been off the road for almost 30 years, it could be anything.
It's been good to finally be doing mechanical work again. I was sick of bodywork.
I couldn't help myself, I wanted to know what the cold start was like now with a working choke, correct mixture and advanced ignition timing.
https://youtu.be/ttd1gVZJS0A
It's very good. It has never started like that when cold. Usually it's ages of cranking, the starter kicking out a few times when the engine tries to fire, a couple of backfires out the intake and then eventually it would rumble into life, begrudgingly. Once it was running it wouldn't take any throttle until it had warmed up a bit, and the choke was a balancing act (particularly since it wasn't working properly).
The engine is running so well I need to completely reassess how I use the choke. Apparently this time I had it out for too long and it started to misfire, but pushing it right in, the engine dropped to idle and ran smoothly, like it was already warmed up, and that was less than a minute after starting. I'm very impressed, for a 50+ year old car to start and run like that.
Fastpedeller said:
A fantastic story and you have more patience than me- I'm known to have lots of determination and patience but I'd have thrown in the towel long ago.
A couple of comments......
Many years ago my Wife had a Volvo 340 (bought before we met) and the ignition timing was one day way out, and another ok. The bob weights would stick (as you've guessed I'm sure, sometimes fully advanced, sometimes fully retarded). Once it was all dismantled cleaned and oiled all was well.
When I worked on dynos at a major manufacturer we had an engine on continual cold start test ( start then almost immediately stop, repeat ad infinitum). After 300 hours, the oil was almost non-functionally diluted and the pistons were slapping around and to continue testing required new pistons and rings!
I've been close to throwing in the towel a few times, but its a labour of love this one, so stepping back for a while and leaving it alone for a bit usually helps.A couple of comments......
Many years ago my Wife had a Volvo 340 (bought before we met) and the ignition timing was one day way out, and another ok. The bob weights would stick (as you've guessed I'm sure, sometimes fully advanced, sometimes fully retarded). Once it was all dismantled cleaned and oiled all was well.
When I worked on dynos at a major manufacturer we had an engine on continual cold start test ( start then almost immediately stop, repeat ad infinitum). After 300 hours, the oil was almost non-functionally diluted and the pistons were slapping around and to continue testing required new pistons and rings!
It was quite surprising that although the oil was thin, it didn't stink of fuel
The time finally came. After many years and countless hours of work, it was WOF time.
Before the WOF, the first thing to do was to replace the failed Lucas washer pump. This was completely dead, even when powering it straight from the battery with a test probe. It turns out I bought the pump about 3 years ago, and only fitted it in Jan this year, so way out of warranty now.
I sourced a cheap unbranded replacement locally. This didn't even get the honour of arriving in a box, just some bubblewrap with a part number sticker on it.
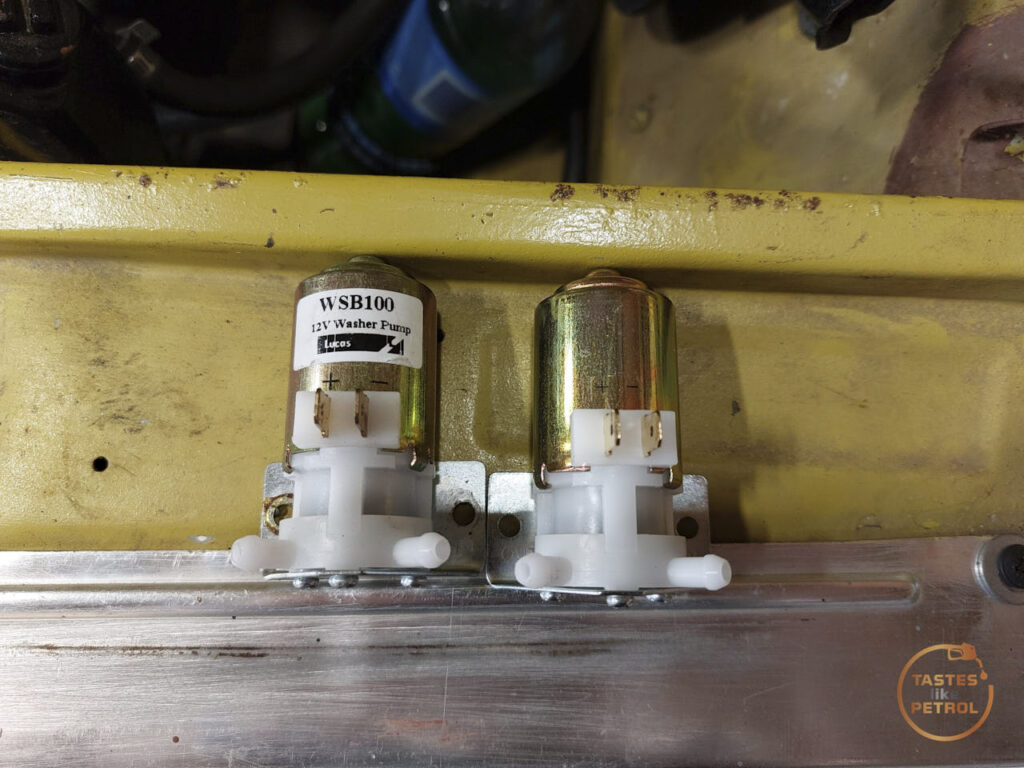
Other than the label, they're almost identical. No surprise. Both from China no doubt.
I quickly screwed it into place and rejoined the hoses

Finally everything was working again. The new Tex wipers were a bit disappointing, with a very average effort clearing the screen, but hopefully they just need some time to bed in.
I've been doing some closed road testing recently to make sure everything is working well, and trying to bed the brakes in a bit too. It turns out, I had done almost exactly 10km since getting the car.
 As bought, back in 2021
 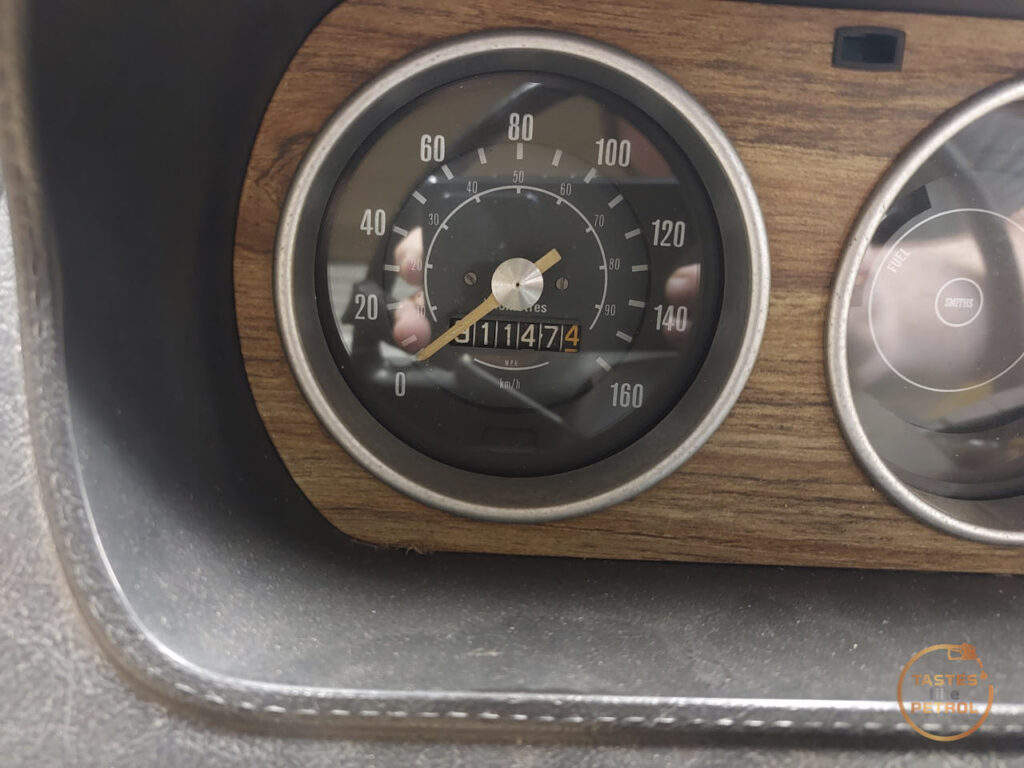 The day before the WOF, 2024
In my travels I did notice two things. First, the ignition timing was just a smidge too spicy, and there was some pinging noticeable at lower RPM. Not good, so I wound the timing back from nearly 15deg to 10deg, and that seems to have fixed it. It's a little less keen to boogie now, but it's still 100x better than it was before I set the timing the other day. Plenty of time to play with that once we're on the road.
Secondly, the front bash plate that protects the alloy sump from getting its face smashed in, was scraping a lot coming in and out of my driveway, and I noticed how close it was to the road when cornering in the video the other day.

So I wanted to raise it just a smidge in the front. Sure, it looks cool as heck that low, but I don't want to smash the poor thing to bits.
After MUCH fiddling with the torsion bar trim adjusters, I finally got it to settle at about 10mm higher than it was. It's lost the forward rake it had, and the sill is about level now, but it brings the bash plate just high enough that it's not hitting things now.

Finally, just to be cocky, I jacked the rear of the car up and fixed the exhaust leak I had at the join above the rear axle (with lots of paste), and adjusted the handbrake just a little bit tighter. Maybe, just maybe, it'll pass with no issues now.
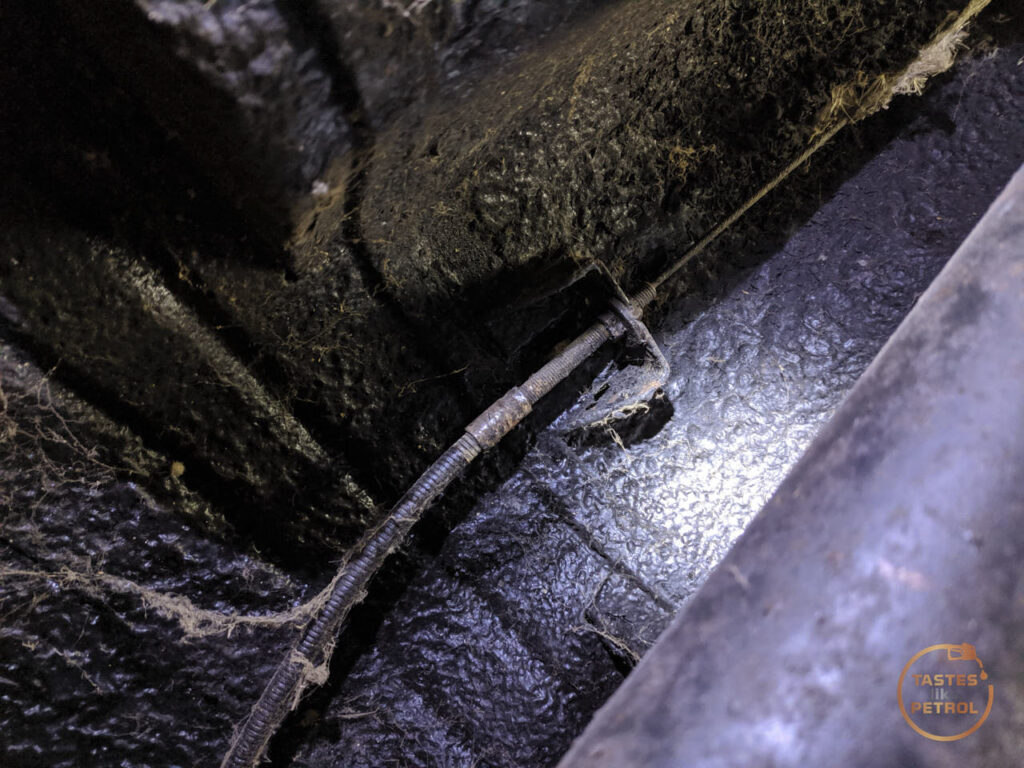
The next day I got up bright and early, played musical cars and fired the Marina to life. It was pretty cold this morning, so the engine was a little grumpier than in my previous testing, but quickly sorted itself out.
I backed out, closed the garage, got to the end of my street and turned the corner.Right into the path of a police car full of officers. To say I puckered a little is an understatement, but they didn't even give it a second look and I spent the rest of the drive to the workshop laughing my arse off at the odds of that happening.
I arrived, parked up and then the waiting began. For the first time in almost 30 years, the old girl was waiting for a checkup.

After a bit of a wait, the tech hopped in, fired the old girl up and took it for a quick road test. Here we go!
Seeing him coming back up the road really hit me, it's such a cool looking car to see driving around. I hope when I drive it around, I can brighten the day of people on the street too.
He rolls it onto the hoist and proceeds with the checks.

TOOT, yes the horn goes. All the lights worked (a miracle), and the wipers and washer worked. They have a good look around with a torch, checking all the nooks and crannies, near hinges, down pillars, inside the boot, everywhere (I'm not sure they're usually this thorough on my other cars...)
The hoist goes up, and my heart is in my throat

As it was in the air and being checked over, a young couple picking their car up walked by and the girl commented to her partner "oh wow, look at this beauty!" pointing at the Marina.
The tech is poking around under the car, checking all the usual things. Bearings, suspension, steering, etc. He also did some poking with a big prybar.
After a long wait, I got the news. It's not going to pass.
Long story short, he stopped the inspection and basically changed it to a pre-WOF check instead of an actual WOF check. A variation of my worst case scenario had happened, he wasn't happy with the underside.
To clarify though, he made no mention at all of the work I had done. The issue he had was the old s tty lumpy tar-based underseal all over everything. In places where it was chipping off, there was surface rust, and for the rest he wasn't happy with what it could be hiding (nothing, I've seen the other side of the metal, but he can't check that).
The stuff covers literally everything under there
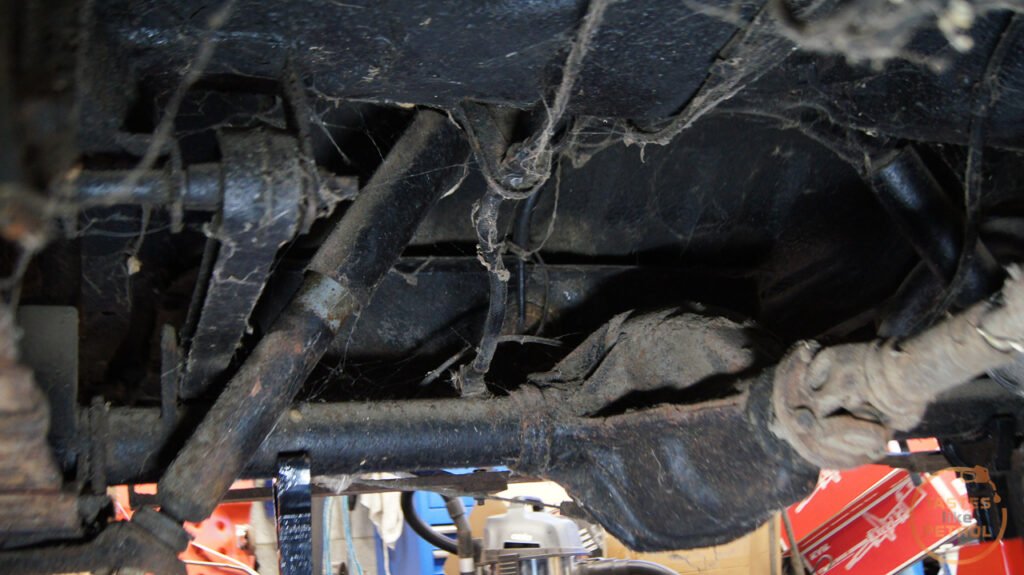
 Very old photos from when I got the car
There were also some other stupid things that I'm beating myself up over for not sorting, like the chassis rails having some rust flakes still in them, visible through the drain holes (from the old floor and rear panel rusting). Despite trying to clean them up at the time, I didn't do a good enough job.
The other spot he was concerned with was inside the boot, near the hinges

It's all surface rust and will clean up easily, but I guess since it's near the hinges he wasn't happy with it being like that.
There were some mechanical issues, but he wasn't really keen on going into detail on them after showing me the bodywork issues he wasn't happy with. He mentioned the RH Rear wheel bearing was noisy and there may be play in the rack.
Overall, I was devastated. It really crushed me, after all that work, for it to fail on bloody bodywork issues. The only positive of it was that it wasn't the work I did (as I feared), it was the work I didn't.
I have always hated the underseal, it's on everything, it's really clumpy, and it's uneven and chipping off. It covers all bolts, nuts, threads etc under there too, which sucks to work around. If you try to lubricate anything with CRC, it melts the tar and turns to a hell of a mess. I should've really removed it all when I did the floors.
Because he decided to not proceed with the WOF, it also means he hasn't entered it into the system as a fail, and I don't have to fix it within the defined 28 day timeframe. I'm thankful for that, because it'd be a pain if the workshops were busy.
So, where to from here? Well, he explained what he wants to see; he wants all the underseal gone, and any surface rust and any uncovered issues to be sorted. He suggested having it sandblasted, treated and then undercoated again in something modern.
I've been mulling it over and looking at my options, and I think from here the best option is indeed to have it sandblasted, to remove the underseal I hate anyway, and then have it zinc coated by the blaster. Once I get the car back, I will then paint the underside in a hard wearing single stage paint (yellow, of course). I'm not really interested in undersealing it again, I'd rather have it painted (unless anyone can convince me otherwise? This isn't a daily and won't often see rain).
I have some calls to make tomorrow, to see what options are available to me, and the costs. I'm not made of money, but this car has cost me less than any of my other projects (monetarily, it's a complete time hog though) so it deserves to have some money spent on doing it properly.
We ain't done yet, there is no option other than pushing forward.
Before the WOF, the first thing to do was to replace the failed Lucas washer pump. This was completely dead, even when powering it straight from the battery with a test probe. It turns out I bought the pump about 3 years ago, and only fitted it in Jan this year, so way out of warranty now.
I sourced a cheap unbranded replacement locally. This didn't even get the honour of arriving in a box, just some bubblewrap with a part number sticker on it.
Other than the label, they're almost identical. No surprise. Both from China no doubt.
I quickly screwed it into place and rejoined the hoses
Finally everything was working again. The new Tex wipers were a bit disappointing, with a very average effort clearing the screen, but hopefully they just need some time to bed in.
I've been doing some closed road testing recently to make sure everything is working well, and trying to bed the brakes in a bit too. It turns out, I had done almost exactly 10km since getting the car.
As bought, back in 2021 The day before the WOF, 2024In my travels I did notice two things. First, the ignition timing was just a smidge too spicy, and there was some pinging noticeable at lower RPM. Not good, so I wound the timing back from nearly 15deg to 10deg, and that seems to have fixed it. It's a little less keen to boogie now, but it's still 100x better than it was before I set the timing the other day. Plenty of time to play with that once we're on the road.
Secondly, the front bash plate that protects the alloy sump from getting its face smashed in, was scraping a lot coming in and out of my driveway, and I noticed how close it was to the road when cornering in the video the other day.
So I wanted to raise it just a smidge in the front. Sure, it looks cool as heck that low, but I don't want to smash the poor thing to bits.
After MUCH fiddling with the torsion bar trim adjusters, I finally got it to settle at about 10mm higher than it was. It's lost the forward rake it had, and the sill is about level now, but it brings the bash plate just high enough that it's not hitting things now.
Finally, just to be cocky, I jacked the rear of the car up and fixed the exhaust leak I had at the join above the rear axle (with lots of paste), and adjusted the handbrake just a little bit tighter. Maybe, just maybe, it'll pass with no issues now.
The next day I got up bright and early, played musical cars and fired the Marina to life. It was pretty cold this morning, so the engine was a little grumpier than in my previous testing, but quickly sorted itself out.
I backed out, closed the garage, got to the end of my street and turned the corner.Right into the path of a police car full of officers. To say I puckered a little is an understatement, but they didn't even give it a second look and I spent the rest of the drive to the workshop laughing my arse off at the odds of that happening.
I arrived, parked up and then the waiting began. For the first time in almost 30 years, the old girl was waiting for a checkup.
After a bit of a wait, the tech hopped in, fired the old girl up and took it for a quick road test. Here we go!
Seeing him coming back up the road really hit me, it's such a cool looking car to see driving around. I hope when I drive it around, I can brighten the day of people on the street too.
He rolls it onto the hoist and proceeds with the checks.
TOOT, yes the horn goes. All the lights worked (a miracle), and the wipers and washer worked. They have a good look around with a torch, checking all the nooks and crannies, near hinges, down pillars, inside the boot, everywhere (I'm not sure they're usually this thorough on my other cars...)
The hoist goes up, and my heart is in my throat
As it was in the air and being checked over, a young couple picking their car up walked by and the girl commented to her partner "oh wow, look at this beauty!" pointing at the Marina.
The tech is poking around under the car, checking all the usual things. Bearings, suspension, steering, etc. He also did some poking with a big prybar.
After a long wait, I got the news. It's not going to pass.
Long story short, he stopped the inspection and basically changed it to a pre-WOF check instead of an actual WOF check. A variation of my worst case scenario had happened, he wasn't happy with the underside.
To clarify though, he made no mention at all of the work I had done. The issue he had was the old s
tty lumpy tar-based underseal all over everything. In places where it was chipping off, there was surface rust, and for the rest he wasn't happy with what it could be hiding (nothing, I've seen the other side of the metal, but he can't check that).The stuff covers literally everything under there
Very old photos from when I got the carThere were also some other stupid things that I'm beating myself up over for not sorting, like the chassis rails having some rust flakes still in them, visible through the drain holes (from the old floor and rear panel rusting). Despite trying to clean them up at the time, I didn't do a good enough job.
The other spot he was concerned with was inside the boot, near the hinges
It's all surface rust and will clean up easily, but I guess since it's near the hinges he wasn't happy with it being like that.
There were some mechanical issues, but he wasn't really keen on going into detail on them after showing me the bodywork issues he wasn't happy with. He mentioned the RH Rear wheel bearing was noisy and there may be play in the rack.
Overall, I was devastated. It really crushed me, after all that work, for it to fail on bloody bodywork issues. The only positive of it was that it wasn't the work I did (as I feared), it was the work I didn't.
I have always hated the underseal, it's on everything, it's really clumpy, and it's uneven and chipping off. It covers all bolts, nuts, threads etc under there too, which sucks to work around. If you try to lubricate anything with CRC, it melts the tar and turns to a hell of a mess. I should've really removed it all when I did the floors.
Because he decided to not proceed with the WOF, it also means he hasn't entered it into the system as a fail, and I don't have to fix it within the defined 28 day timeframe. I'm thankful for that, because it'd be a pain if the workshops were busy.
So, where to from here? Well, he explained what he wants to see; he wants all the underseal gone, and any surface rust and any uncovered issues to be sorted. He suggested having it sandblasted, treated and then undercoated again in something modern.
I've been mulling it over and looking at my options, and I think from here the best option is indeed to have it sandblasted, to remove the underseal I hate anyway, and then have it zinc coated by the blaster. Once I get the car back, I will then paint the underside in a hard wearing single stage paint (yellow, of course). I'm not really interested in undersealing it again, I'd rather have it painted (unless anyone can convince me otherwise? This isn't a daily and won't often see rain).
I have some calls to make tomorrow, to see what options are available to me, and the costs. I'm not made of money, but this car has cost me less than any of my other projects (monetarily, it's a complete time hog though) so it deserves to have some money spent on doing it properly.
We ain't done yet, there is no option other than pushing forward.
Edited by KelvinatorNZ on Saturday 12th October 10:59
Thanks for the kind words everyone. I know it's not everyone's cuppa, but it's nice to see others interested in my progress and cheering me and the Marina on.
Regarding the zinc coating, I presume it's a paint but I'll need to talk to whoever I choose to do the work about overcoating the zinc and see what they say. Zinc may not even be the best option, I'll let the pros guide me on that. As you say, zinc can be a pain with paint, which I had forgotten. I encountered that issue early on in my bodywork and had to remove a bunch of it and replace it with epoxy primer instead as my top coat wouldn't stick.
Yes, I also agree the inspector was being a bit fussy, but in his defence I did bring a car to him that may be older than him, that looks like it does (I'll admit it doesn't give off good vibes visually if you were the one signing off an inspection), and hasn't had a WOF for almost 30 years. I feel like it was judged on looks before he even started the inspection, which I knew was always a risk. I swear its better than it looks!
I could take it elsewhere (and will, it won't be going back there), but unless I tidy the underside up further first, there's a chance that it would also be a waste of time and I'll be told the same thing. I won't be going in for a WOF inspection straight away next time, I'll ask for a pre-WOF check off the bat and see what the go is.
I've now been told that sandblasting may not even touch the old tar based sound deadening, so that's a potential spanner in the works. I'd tried to avoid spending weeks on my back inches from the underside of the car scraping it off with a scraper, but that may end up being exactly what I have to do. I'll ring around tomorrow and see what the pros say.
Gassing Station | Readers' Cars | Top of Page | What's New | My Stuff