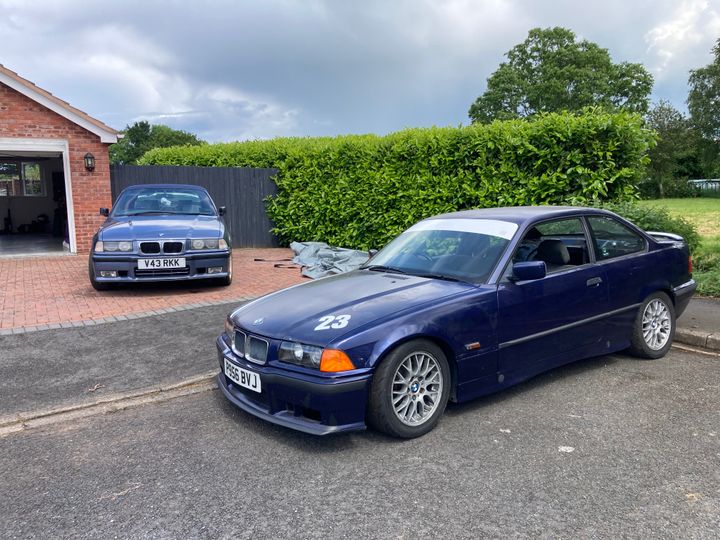
1996 BMW E36 328i Coupe - we have history...
Discussion


Disclaimer - I'm on my new laptop, which is probably far too clever for me. Whatever it's doing is not playing well with the Pistonheads image uploader. The uploader is telling me that it's not a valid image and to go back and try again. The thing is, I know it's an image. I took the image, I moved the image from my phone to my laptop, and I'm looking at the image. It says that it is a JPG, which in my experience is a valid image. So, no pictures with this update. I'm pretty sure I'll be able to add some when I've got my other laptop again.
I had most of this week off, which was nice. I spent it with my kids, which was even nicer. I was also ill, which is less nice. I am still ill. This is a rare occurrence, and for that reason, when I do succumb to some horrendous disease, it is pretty much the end of the world. I cease to function.
I did however optimistically try to cajole the children into helping me out with the car. They were entirely uninterested. Still, I knew I'd have this weekend free, once I'd waved them off to their mum's, so I didn't press the issue. We did things they were more interested in. Then came Saturday. I cancelled all my appointments (I didn't have any) and took the phone off the hook (my kids wouldn't even know what that means), determined to spend the day making progress on the rebuild of Trixie the Track Car. No matter how close I was to death's door, that diff was getting bench pressed into place.
Now, I had already bolted the diff into the subframe, along with the upper and lower arms, because the bolts for the arms are not accessible once the diff is in place. I thought it worth a try lifting it into place like this but had a strong suspicion that I wouldn't be able to get the correct angles to get the flange onto the prop shaft and the subframe bushes onto the studs. If I'd gone for a flat boot floor rather than getting a new spare wheel well welded in, it would have been somewhat easier, but let's not go there...
I'm glad I spent good money on a decent epoxy for the garage floor. It stood up well to me dropping the diff on it from various angles. My cleverly thought out combination of jacks and bits of wood to support the diff at the correct angle to feed into the frame and onto the propshaft ended in failure enough times that I gave up trying to be clever and just brute-forced the thing up and in there using all of my remaining strength, flexibility, and will to live. Once it was up there and held in place with some bolts, I had a good long lie down under the car, contemplating the meaning of life. But it's in. Hooray!
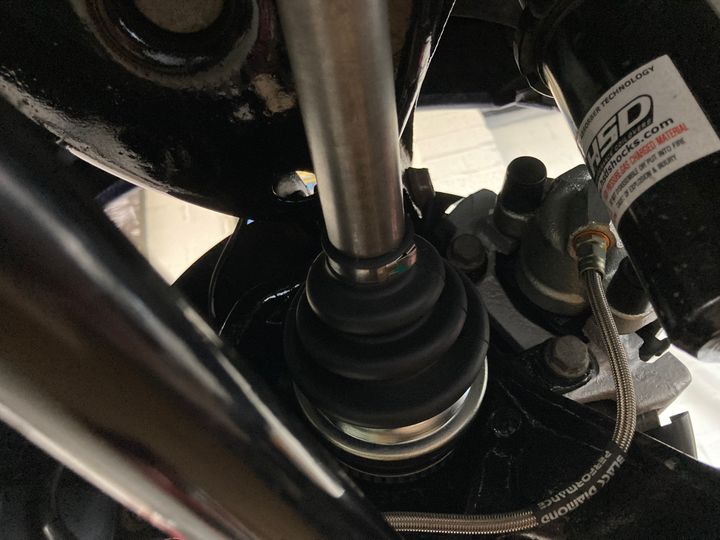
Then it was a case of bolting in the trailing arms and connecting them to the suspension arms so that everything would hang happily in place. After that, drive shafts. I had nice new driveshafts that have been sitting in boxes under the car for months. Bolting them on was fairly straightforward but involved a lot of getting up and down to put the car in or out of gear depending on whether I wanted the shaft to turn to expose the next bolt, or hold firm so I could tighten one. A child in the car responding to commands would have been helpful at this point. It felt a bit like circuit training, which I would very much rather not do in my weakened state.
Anyway, the new shafts went on nicely and I torqued the hub nuts to... quite a lot. My torque wrench doesn't go up to 300Nm, and neither do my arms, so I gave it a good dose of the impact wrench. When I finally take it to an actual professional after all this, they can check such things.
After that I put the suspension back in. My HSD monopro springs and dampers have served me well and seem in pretty good shape. I gave them a wipe off and reinstalled them. I did also order some reinforcement plates for the strut towers. They were only a few quid and seemed a worthwhile precaution. They just sit on top of the strut tower and sandwich the skin of the car between them and the top plate of the damper.
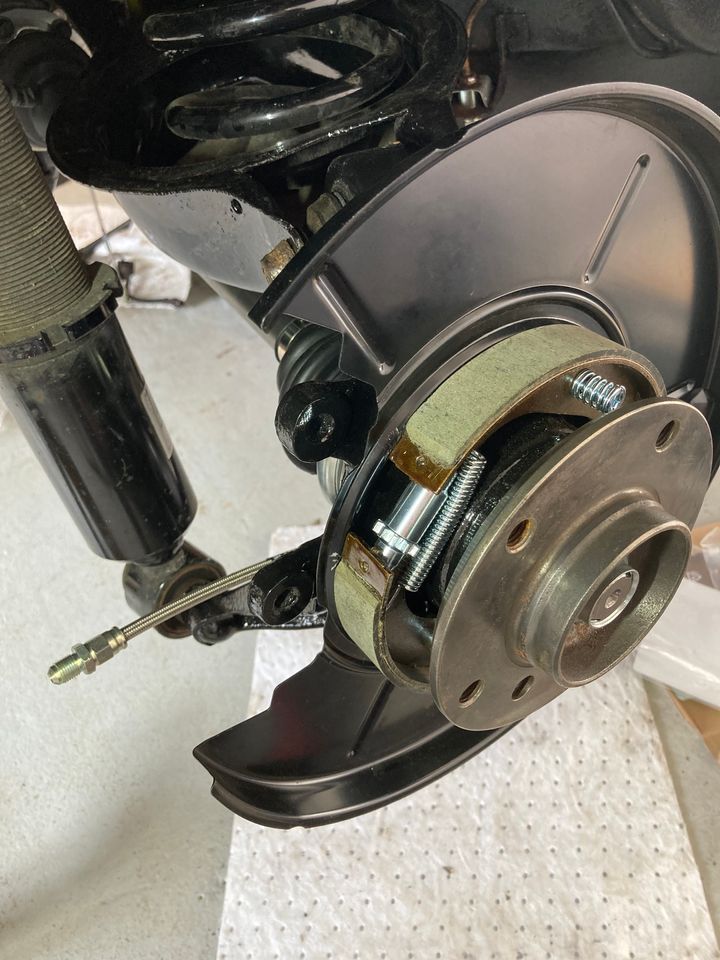
I then tackled the handbrake mechanisms. I had ordered all new parts and they were all sat there ready to go. I've had this weird block for ages about handbrake mechanisms. They seem complicated and arcane. This is entirely irrational. I've had the inlet manifold off this car twice, and I've converted it from auto to manual. There is no reason handbrake mechanisms should give me the heebie-geebies, but their continued mystery played on my mind. Rationally, I knew that as soon as I actually tackled the job it would all make sense and lose its mystique. Obviously, that's what happened. Handbrake mechanisms are not arcane and mysterious. They are, however, fiddly and a massive pain in the arse. How are you meant to get those bloody little springs hooked into the shoes? It almost reduced me to tears. I'm about 80% certain that if I did things in a different order, it would have been a piece of cake. But I did them in the order I did them, and had to fight to the death to get the bloody things in place.
It did help having the extremely rusty reference system to hand, as the old hubs are still lying around in the garage for exactly that reason. I was confident of what it should look like once complete, just made hard work of getting to that point.
Considering my almost terminal condition and total amateur status, I felt that was a pretty good achievement for a Saturday. I'm sure if you know what you're doing then it's probably about 30 minutes of work, but this is me we're talking about.
I had other things to do today, but did spend a couple of hours this morning connecting up the handbrake cables and trying to tension them correctly. Again, probably 10 minutes work for a professional, but boy did I make it hard work! I thought I'd got it once, only to then notice that one of the cables wasn't seated in the hub properly and I had to do that one again. Deep joy. I got there in the end though, and then connected up my calipers. That's as far as I've got for now. Next up will be putting some brake fluid in, replacing the exhaust, and then moving onto the next job...
It is quite satisfying going from a garage full of parts to what could realistically be called a car. One highlight was putting the box for the Black Diamond braided brake lines in the recycling. That box has sat on my shelf and moved with me for probably six years or so, as I could never quite see how I would manage to replace the rear lines. I have now done so, and the box is gone!
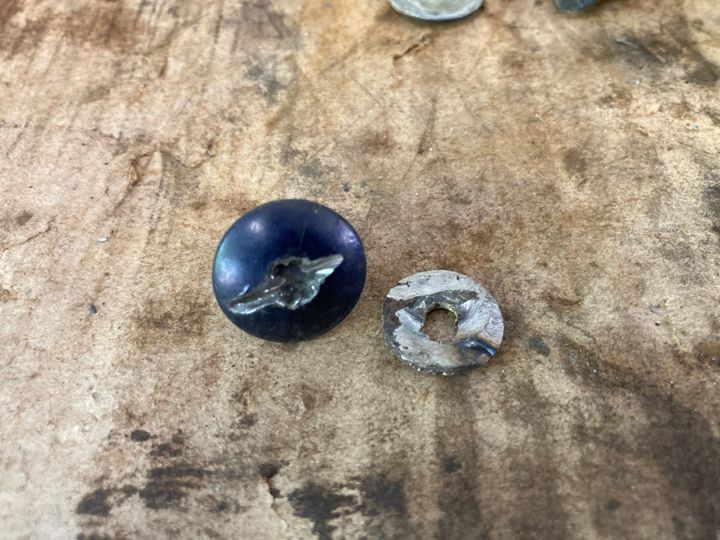
Oh, talking of brake lines, I did have one small mishap whilst bolting the brake line bracket to the trailing arm on the driver's side. The threaded holes were fouled with powder coating and I was too lazy to tap them before trying to force the delicate little M5 (maybe M6?) bolts into them. The inevitable happened and one of them snapped off. I was pretty pissed off, but tried to put it in perspective of how much has gone right up to this point. It doesn't even matter that much, I can always cable tie it in place if it comes to it...
Once the rest of the rear is built (I'm awaiting a new ARB as the chap initially sent me the wrong size, and the exhaust is the last bit), I want to get the front wings off. I've bought some of those repair panels that can be welded onto the bottom section. Both of mine have unsightly rusty holes in them and I'd rather not go into a new track day season looking like I've just driven it out of a scrapheap. My standards may be low, but they do exist!
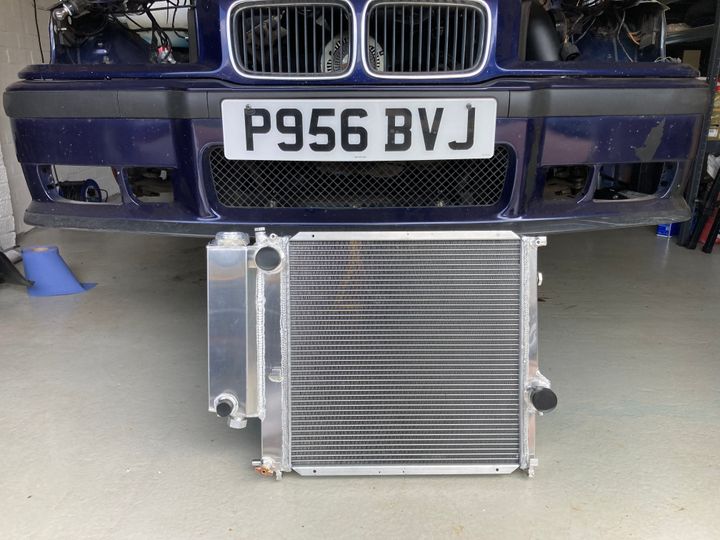
And..... I bought a cheapo aluminium radiator from eBay. I want to put that on and see how it performs.
I had most of this week off, which was nice. I spent it with my kids, which was even nicer. I was also ill, which is less nice. I am still ill. This is a rare occurrence, and for that reason, when I do succumb to some horrendous disease, it is pretty much the end of the world. I cease to function.
I did however optimistically try to cajole the children into helping me out with the car. They were entirely uninterested. Still, I knew I'd have this weekend free, once I'd waved them off to their mum's, so I didn't press the issue. We did things they were more interested in. Then came Saturday. I cancelled all my appointments (I didn't have any) and took the phone off the hook (my kids wouldn't even know what that means), determined to spend the day making progress on the rebuild of Trixie the Track Car. No matter how close I was to death's door, that diff was getting bench pressed into place.
Now, I had already bolted the diff into the subframe, along with the upper and lower arms, because the bolts for the arms are not accessible once the diff is in place. I thought it worth a try lifting it into place like this but had a strong suspicion that I wouldn't be able to get the correct angles to get the flange onto the prop shaft and the subframe bushes onto the studs. If I'd gone for a flat boot floor rather than getting a new spare wheel well welded in, it would have been somewhat easier, but let's not go there...
I'm glad I spent good money on a decent epoxy for the garage floor. It stood up well to me dropping the diff on it from various angles. My cleverly thought out combination of jacks and bits of wood to support the diff at the correct angle to feed into the frame and onto the propshaft ended in failure enough times that I gave up trying to be clever and just brute-forced the thing up and in there using all of my remaining strength, flexibility, and will to live. Once it was up there and held in place with some bolts, I had a good long lie down under the car, contemplating the meaning of life. But it's in. Hooray!
Then it was a case of bolting in the trailing arms and connecting them to the suspension arms so that everything would hang happily in place. After that, drive shafts. I had nice new driveshafts that have been sitting in boxes under the car for months. Bolting them on was fairly straightforward but involved a lot of getting up and down to put the car in or out of gear depending on whether I wanted the shaft to turn to expose the next bolt, or hold firm so I could tighten one. A child in the car responding to commands would have been helpful at this point. It felt a bit like circuit training, which I would very much rather not do in my weakened state.
Anyway, the new shafts went on nicely and I torqued the hub nuts to... quite a lot. My torque wrench doesn't go up to 300Nm, and neither do my arms, so I gave it a good dose of the impact wrench. When I finally take it to an actual professional after all this, they can check such things.
After that I put the suspension back in. My HSD monopro springs and dampers have served me well and seem in pretty good shape. I gave them a wipe off and reinstalled them. I did also order some reinforcement plates for the strut towers. They were only a few quid and seemed a worthwhile precaution. They just sit on top of the strut tower and sandwich the skin of the car between them and the top plate of the damper.
I then tackled the handbrake mechanisms. I had ordered all new parts and they were all sat there ready to go. I've had this weird block for ages about handbrake mechanisms. They seem complicated and arcane. This is entirely irrational. I've had the inlet manifold off this car twice, and I've converted it from auto to manual. There is no reason handbrake mechanisms should give me the heebie-geebies, but their continued mystery played on my mind. Rationally, I knew that as soon as I actually tackled the job it would all make sense and lose its mystique. Obviously, that's what happened. Handbrake mechanisms are not arcane and mysterious. They are, however, fiddly and a massive pain in the arse. How are you meant to get those bloody little springs hooked into the shoes? It almost reduced me to tears. I'm about 80% certain that if I did things in a different order, it would have been a piece of cake. But I did them in the order I did them, and had to fight to the death to get the bloody things in place.
It did help having the extremely rusty reference system to hand, as the old hubs are still lying around in the garage for exactly that reason. I was confident of what it should look like once complete, just made hard work of getting to that point.
Considering my almost terminal condition and total amateur status, I felt that was a pretty good achievement for a Saturday. I'm sure if you know what you're doing then it's probably about 30 minutes of work, but this is me we're talking about.
I had other things to do today, but did spend a couple of hours this morning connecting up the handbrake cables and trying to tension them correctly. Again, probably 10 minutes work for a professional, but boy did I make it hard work! I thought I'd got it once, only to then notice that one of the cables wasn't seated in the hub properly and I had to do that one again. Deep joy. I got there in the end though, and then connected up my calipers. That's as far as I've got for now. Next up will be putting some brake fluid in, replacing the exhaust, and then moving onto the next job...
It is quite satisfying going from a garage full of parts to what could realistically be called a car. One highlight was putting the box for the Black Diamond braided brake lines in the recycling. That box has sat on my shelf and moved with me for probably six years or so, as I could never quite see how I would manage to replace the rear lines. I have now done so, and the box is gone!
Oh, talking of brake lines, I did have one small mishap whilst bolting the brake line bracket to the trailing arm on the driver's side. The threaded holes were fouled with powder coating and I was too lazy to tap them before trying to force the delicate little M5 (maybe M6?) bolts into them. The inevitable happened and one of them snapped off. I was pretty pissed off, but tried to put it in perspective of how much has gone right up to this point. It doesn't even matter that much, I can always cable tie it in place if it comes to it...
Once the rest of the rear is built (I'm awaiting a new ARB as the chap initially sent me the wrong size, and the exhaust is the last bit), I want to get the front wings off. I've bought some of those repair panels that can be welded onto the bottom section. Both of mine have unsightly rusty holes in them and I'd rather not go into a new track day season looking like I've just driven it out of a scrapheap. My standards may be low, but they do exist!
And..... I bought a cheapo aluminium radiator from eBay. I want to put that on and see how it performs.
Thanks for the comments. Knowing that someone is paying attention does help with the motivation.
I've had a good day. It's not been without its setbacks, but if absolutely everything goes right then I start questioning which version of reality I'm in. Having a few hiccoughs reminds me that I'm still in the real world. I would say there have been more victories than defeats, though. So that's good.
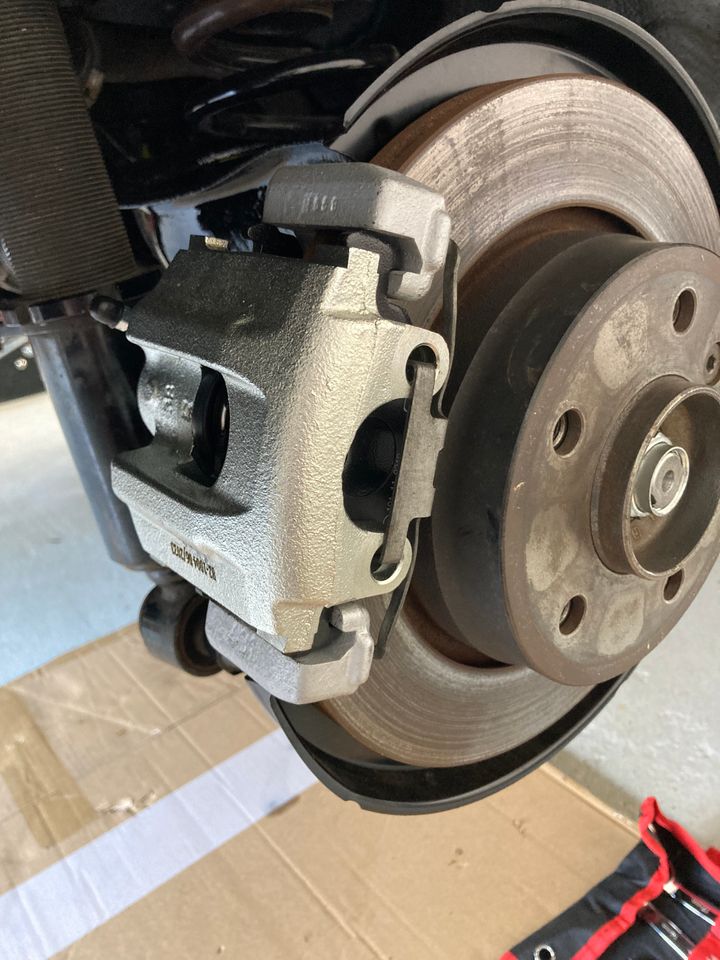
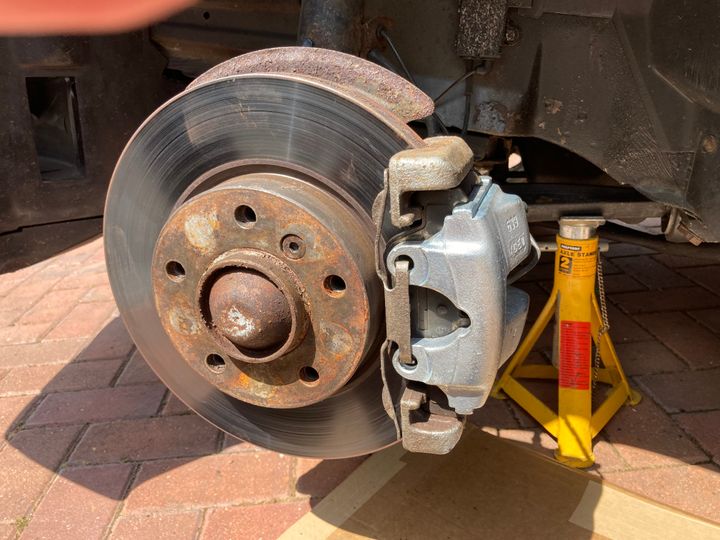
First of all, defeat. I went to put my pads into my shiny new calipers and bolt them to the caliper carriers, only to find that the calipers I'd bought were for cars that use paper brake discs. I believe they are for 10mm discs, whereas mine are 19mm vented. So there was no chance of getting them on with the pads.

It's hard to tell the extent on that photo, but you can see that the span of the new caliper is definitely less than that of the old one. Bum. I've ordered some new ones from Autodoc, which specifically stated they were for 19mm discs. I will return the piddly ones.
So, unable to fill and bleed my brake system, I started putting the remaining bits on the car. I'm still missing an ARB. I had agreed with the guy who I bought the powder coated subframe and axle parts from that he would send me a 20mm ARB, but the one he sent me was 18mm. I've let him know and he said he'll send me a 20mm one, with the correct bushes. It's taking a while though.
I lifted the exhaust into place and checked that it's possible to install the ARB afterwards. It is, so I went ahead and bolted up the exhaust.
I then tapped the screw holes for the ABS sensors and put them in place. I am a bit confused by the connectors on the right hand side though. On the left there is just a single grey connector for the ABS sensor. On the right (helpfully labelled 'right' by whoever disconnected it...) there is a grey one and a black one. I assume the grey one is for the ABS, but I have no idea what the black one is for. I can't even see a connector that could match up with it.
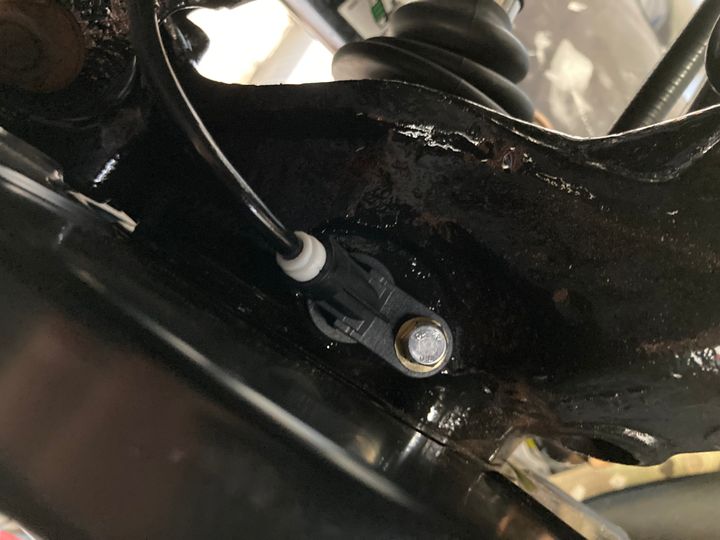
Answers on a postcard please...
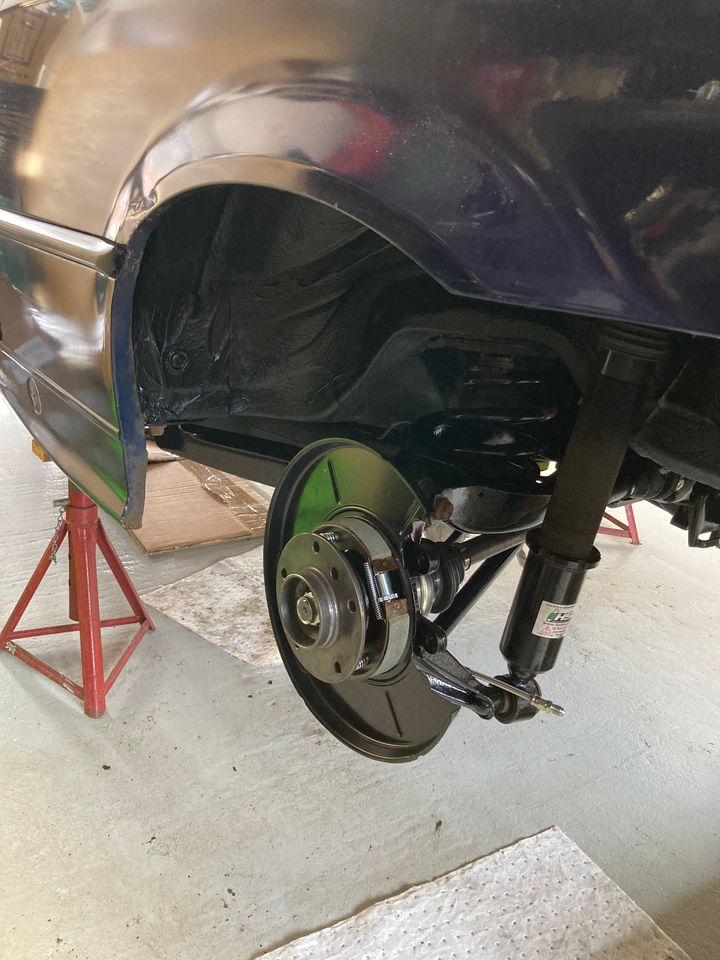
I then put the rear bumper back on, and the rear arch liners. It looks very much like a car.
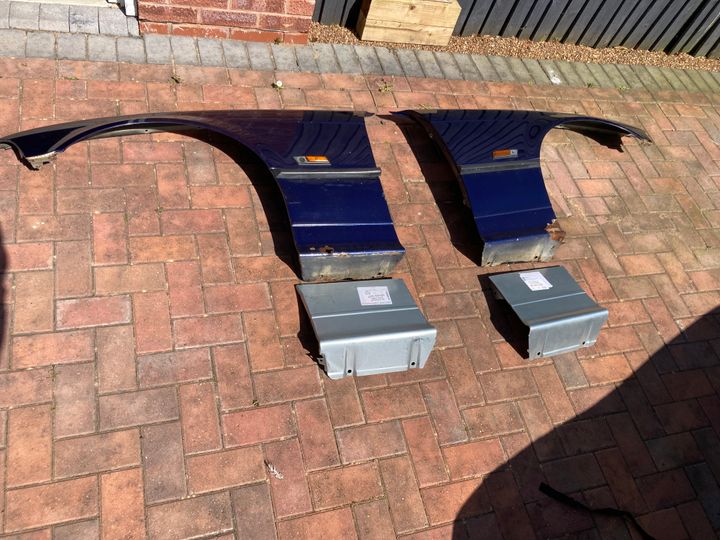
I couldn't have that, so I took the front wings off.
There is a reason for that, of course. They both have rusty holes in them, and the front jacking points need some work too. Last time the welder came he told me the wings needed to be off for him to fix the jacking points, and it would make it far easier to repair the wings too. I watched a few videos on how to take off an E36 wing, and it's very straightforward and mechanical, which is what I love about these cars.
Screws in the door shut, screws under the car, screws under the scuttle panel (which also hold the bonnet hinges), screws behind the bumper, and then the row of T30 screws along the top edge of the wing. I had heard that these T30s strip quite easily, so I was vey careful with my angles and how much pressure I applied. I got lucky. With 7 out of 8...
Of course it was the last one that rebelled. Just as I thought I was home free. I ended up cutting a slot in it and whacking it round with a screwdriver and hammer. It came out though.
Here is is with the b d screw that rounded and wouldn't budge, so I ground its head off.
Apart from those two recalcitrant fixings, the rest of the process was remarkably straightforward. You don't even need to take the headlights or bumper off. I did take the headlights off. The first one because I thought I had to, and the second because it made it easier to get to the fixings I needed to fight.
Anyway, they're off, and I've got some repair panels for the welder to fix them with.
That was a victory. It was swiftly followed by another defeat, as I whipped out my cheapo chinesium-aluminium alloy radiator from eBay. Why anyone would expect such a product to simply work is beyond me.
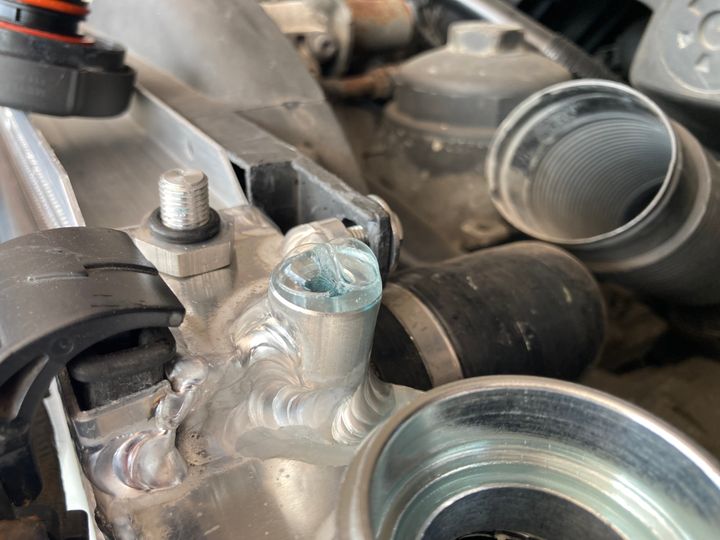
I took the old radiator out, no problem. Apart from splattering coolant everywhere. Then I had to swap over some parts, like the rubber feet, the inserts for the clips, and the level sensor. The level sensor goes through a hole in the bottom, and is then clamped in place with a large plastic nut. The radiator therefore has to have a hole of the correct size, with (I believe) an M27 male thread on the outside. Well... I fed the coolant sensor through the hole in the new radiator. It was a tight fit but it went in. Then put the big plastic nut over it and screwed it on. Or rather, I didn't screw it on, because the thread is either M26 or 1 inch. The big plastic nut, therefore, just span over the top of it and didn't tighten at all. What the actual f.....?
This takes me back to when I replaced Derek's radiator and discovered that if you order a bleed screw for an E36 radiator you get one of any number of different thread pitches. Why? Just why? How hard is it to make an aftermarket product that has the same specifications as the original? And what am I supposed to do with this radiator now? Any level sensor I order is likely to have a nut that actually fits the OEM radiator.
What I have done is order a 1 inch blanking cap, hoping that will fit the thread and I can just block off the hole. I'll check the level before every track day anyway, and will notice if it is coming out. The sensor isn't necessary.
If the 1 inch cap doesn't fit then I'll probably order a proper ally radiator from a recognised manufacturer and hope that it won't be so bloody annoying!
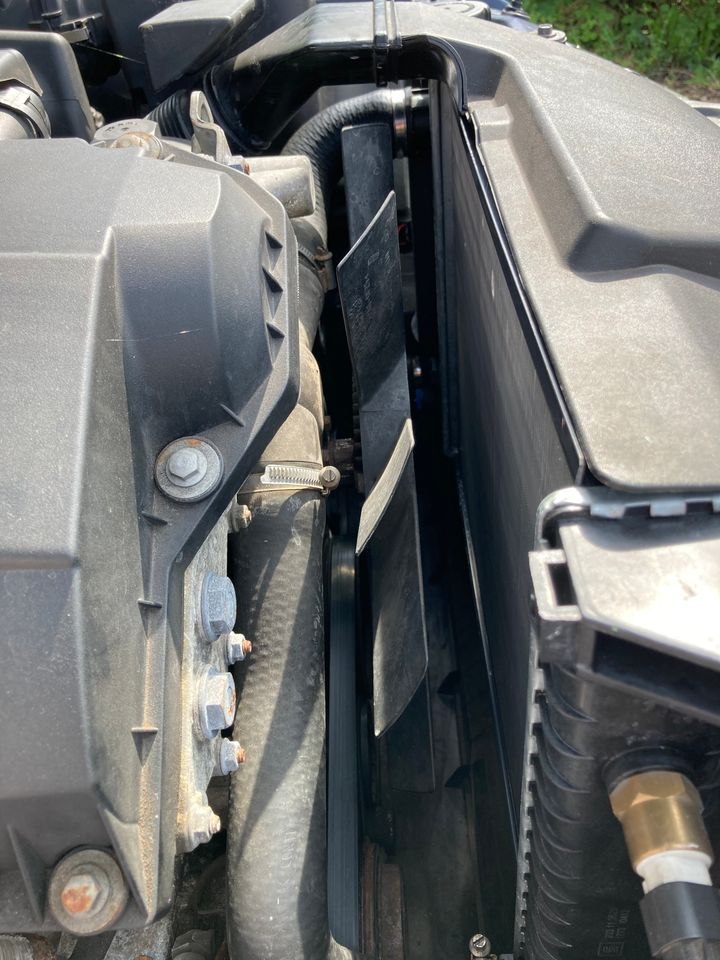
Oh, and it's also quite short. I think mine was big because it was originally an auto. I'm not sure if the big gap underneath it is going to be a problem though. The fan overlaps it. Will it just draw air under the rad rather than through it?
We shall see.
The last thing I did was to take off the front bumper and stick the plastic mesh back into place with hot glue and duct tape. I just used duct tape previously and it wasn't enough, so I'm hoping hot glue is the answer. When is hot glue not the answer?
Oh, and I put some oil in the diff. All of what was left in the bottle, and it wasn't enough, so I've ordered some more. I'll probably need a dribble of it, after spending the best part of £30 on another 'quart' (whatever that is). I'm metric, these things mean nothing to me.
So, as I said, some wins, some losses. Overall I'm definitely up though. I've contacted the welder to come back and do round 2 (wings and jacking points). Once that's done, and I'm able to sort the brakes and the radiator and properly fill the diff, then I can do something exciting like put some wheels on and fuel in and drive it out of the garage. A few more weeks probably.
I've had a good day. It's not been without its setbacks, but if absolutely everything goes right then I start questioning which version of reality I'm in. Having a few hiccoughs reminds me that I'm still in the real world. I would say there have been more victories than defeats, though. So that's good.
First of all, defeat. I went to put my pads into my shiny new calipers and bolt them to the caliper carriers, only to find that the calipers I'd bought were for cars that use paper brake discs. I believe they are for 10mm discs, whereas mine are 19mm vented. So there was no chance of getting them on with the pads.
It's hard to tell the extent on that photo, but you can see that the span of the new caliper is definitely less than that of the old one. Bum. I've ordered some new ones from Autodoc, which specifically stated they were for 19mm discs. I will return the piddly ones.
So, unable to fill and bleed my brake system, I started putting the remaining bits on the car. I'm still missing an ARB. I had agreed with the guy who I bought the powder coated subframe and axle parts from that he would send me a 20mm ARB, but the one he sent me was 18mm. I've let him know and he said he'll send me a 20mm one, with the correct bushes. It's taking a while though.
I lifted the exhaust into place and checked that it's possible to install the ARB afterwards. It is, so I went ahead and bolted up the exhaust.
I then tapped the screw holes for the ABS sensors and put them in place. I am a bit confused by the connectors on the right hand side though. On the left there is just a single grey connector for the ABS sensor. On the right (helpfully labelled 'right' by whoever disconnected it...) there is a grey one and a black one. I assume the grey one is for the ABS, but I have no idea what the black one is for. I can't even see a connector that could match up with it.
Answers on a postcard please...
I then put the rear bumper back on, and the rear arch liners. It looks very much like a car.
I couldn't have that, so I took the front wings off.
There is a reason for that, of course. They both have rusty holes in them, and the front jacking points need some work too. Last time the welder came he told me the wings needed to be off for him to fix the jacking points, and it would make it far easier to repair the wings too. I watched a few videos on how to take off an E36 wing, and it's very straightforward and mechanical, which is what I love about these cars.
Screws in the door shut, screws under the car, screws under the scuttle panel (which also hold the bonnet hinges), screws behind the bumper, and then the row of T30 screws along the top edge of the wing. I had heard that these T30s strip quite easily, so I was vey careful with my angles and how much pressure I applied. I got lucky. With 7 out of 8...
Of course it was the last one that rebelled. Just as I thought I was home free. I ended up cutting a slot in it and whacking it round with a screwdriver and hammer. It came out though.
Here is is with the b
d screw that rounded and wouldn't budge, so I ground its head off.Apart from those two recalcitrant fixings, the rest of the process was remarkably straightforward. You don't even need to take the headlights or bumper off. I did take the headlights off. The first one because I thought I had to, and the second because it made it easier to get to the fixings I needed to fight.
Anyway, they're off, and I've got some repair panels for the welder to fix them with.
That was a victory. It was swiftly followed by another defeat, as I whipped out my cheapo chinesium-aluminium alloy radiator from eBay. Why anyone would expect such a product to simply work is beyond me.
I took the old radiator out, no problem. Apart from splattering coolant everywhere. Then I had to swap over some parts, like the rubber feet, the inserts for the clips, and the level sensor. The level sensor goes through a hole in the bottom, and is then clamped in place with a large plastic nut. The radiator therefore has to have a hole of the correct size, with (I believe) an M27 male thread on the outside. Well... I fed the coolant sensor through the hole in the new radiator. It was a tight fit but it went in. Then put the big plastic nut over it and screwed it on. Or rather, I didn't screw it on, because the thread is either M26 or 1 inch. The big plastic nut, therefore, just span over the top of it and didn't tighten at all. What the actual f.....?
This takes me back to when I replaced Derek's radiator and discovered that if you order a bleed screw for an E36 radiator you get one of any number of different thread pitches. Why? Just why? How hard is it to make an aftermarket product that has the same specifications as the original? And what am I supposed to do with this radiator now? Any level sensor I order is likely to have a nut that actually fits the OEM radiator.
What I have done is order a 1 inch blanking cap, hoping that will fit the thread and I can just block off the hole. I'll check the level before every track day anyway, and will notice if it is coming out. The sensor isn't necessary.
If the 1 inch cap doesn't fit then I'll probably order a proper ally radiator from a recognised manufacturer and hope that it won't be so bloody annoying!
Oh, and it's also quite short. I think mine was big because it was originally an auto. I'm not sure if the big gap underneath it is going to be a problem though. The fan overlaps it. Will it just draw air under the rad rather than through it?
We shall see.
The last thing I did was to take off the front bumper and stick the plastic mesh back into place with hot glue and duct tape. I just used duct tape previously and it wasn't enough, so I'm hoping hot glue is the answer. When is hot glue not the answer?
Oh, and I put some oil in the diff. All of what was left in the bottle, and it wasn't enough, so I've ordered some more. I'll probably need a dribble of it, after spending the best part of £30 on another 'quart' (whatever that is). I'm metric, these things mean nothing to me.
So, as I said, some wins, some losses. Overall I'm definitely up though. I've contacted the welder to come back and do round 2 (wings and jacking points). Once that's done, and I'm able to sort the brakes and the radiator and properly fill the diff, then I can do something exciting like put some wheels on and fuel in and drive it out of the garage. A few more weeks probably.
Ah, yes, that's probably it. I don't think I've actually had a wear sensor on this car in my ownership. I assume it was never plugged into anything then, and it will remain that way.
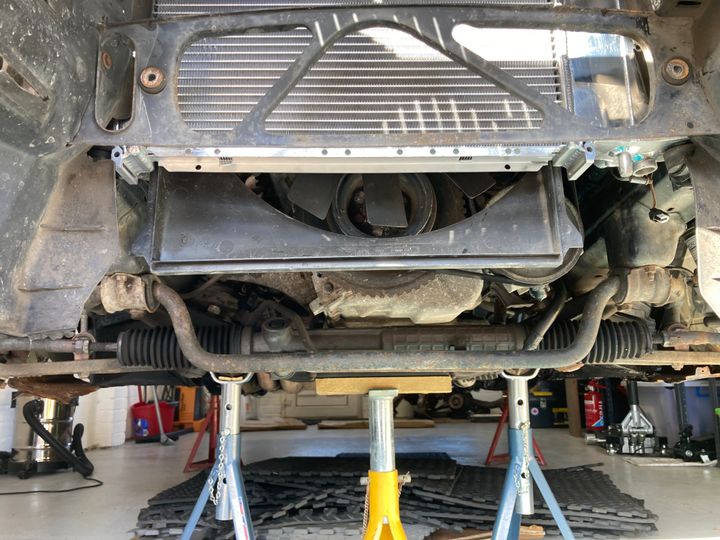
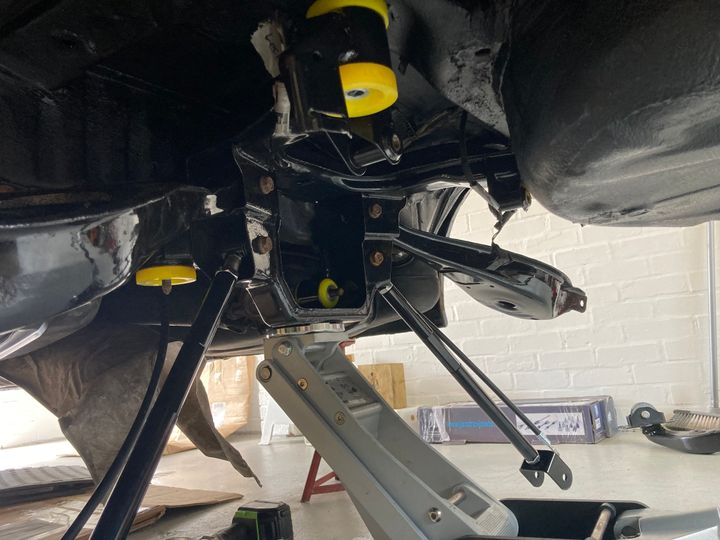
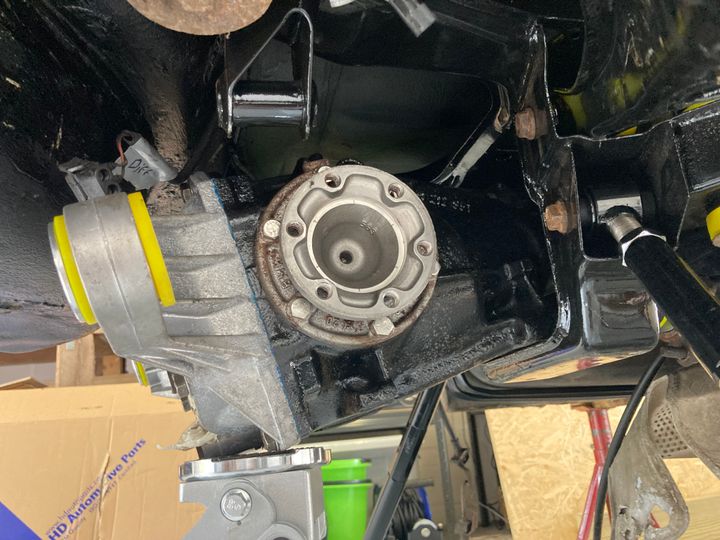
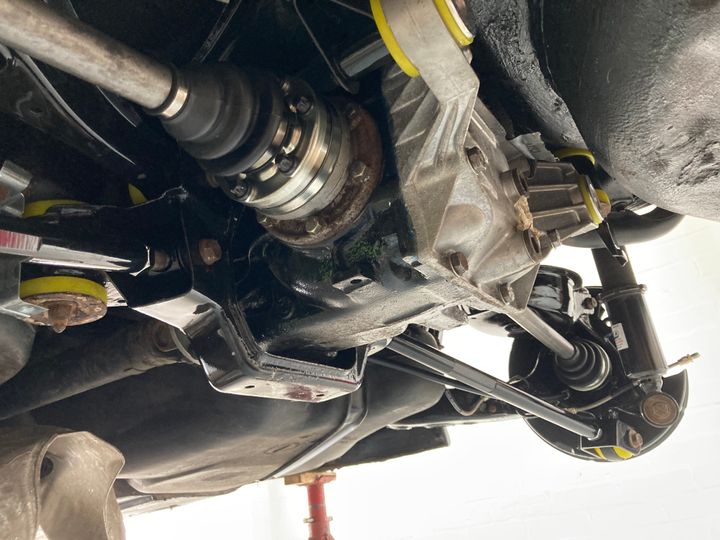
Here are some photos of the subframe, diff etc going in earlier in the month, when I couldn't post them.

I messaged the chap about the ARB today and it is on its way, which is good. Should be able to get it in this weekend.
In other news, I've finally got round to booking Derek the convertible in for a pre-MOT and MOT at my local village mechanic, who has a bit of a thing for interesting cars and doing race prep etc. A useful man to know! He couldn't fit me in til 7 May though.
Derek needs a pre-MOT because his airbag light is on, which I'm pretty sure is a fail. So I want to get that diagnosed and sorted. And just a general check to make sure he's safe as houses. It might be a while before I have full confidence in the radiator though after last years troubles (largely self-inflicted). I'm looking forward to getting out and about with the top down again. It does put a smile on my face.
Here are some photos of the subframe, diff etc going in earlier in the month, when I couldn't post them.
I messaged the chap about the ARB today and it is on its way, which is good. Should be able to get it in this weekend.
In other news, I've finally got round to booking Derek the convertible in for a pre-MOT and MOT at my local village mechanic, who has a bit of a thing for interesting cars and doing race prep etc. A useful man to know! He couldn't fit me in til 7 May though.
Derek needs a pre-MOT because his airbag light is on, which I'm pretty sure is a fail. So I want to get that diagnosed and sorted. And just a general check to make sure he's safe as houses. It might be a while before I have full confidence in the radiator though after last years troubles (largely self-inflicted). I'm looking forward to getting out and about with the top down again. It does put a smile on my face.
Yes, I’m looking forward to getting it sorted. I just hope the bank holiday weekend isn’t gloriously sunny, otherwise I’ll be kicking myself that I didn’t get it sorted sooner!
My 1 inch blanking cap arrived today. There is some sort of fkery at play here. A 1 inch BSP thread is about 1.3 inches. Obviously.
I’m guessing it’s something to do with allowing a 1 inch bore or something. I don’t really care. All I know is that it also doesn’t fit on the stupidly sized hole on the cheapo radiator. I therefore give up on that idiotic plan and have ordered a different chinesium-alloy radiator. This one is actually the same depth (height?) as the OEM one so I won’t have that big overlap of fan at the bottom of it. We will see, once it’s arrived, whether all the holes and threads are the right sizes. At least I’ve still got the OEM one to fall back on, even if I am currently sharing a bleed screw between the two cars. To be honest that’s the main reason I decided to go for an aluminium one!
My 1 inch blanking cap arrived today. There is some sort of f
kery at play here. A 1 inch BSP thread is about 1.3 inches. Obviously. I’m guessing it’s something to do with allowing a 1 inch bore or something. I don’t really care. All I know is that it also doesn’t fit on the stupidly sized hole on the cheapo radiator. I therefore give up on that idiotic plan and have ordered a different chinesium-alloy radiator. This one is actually the same depth (height?) as the OEM one so I won’t have that big overlap of fan at the bottom of it. We will see, once it’s arrived, whether all the holes and threads are the right sizes. At least I’ve still got the OEM one to fall back on, even if I am currently sharing a bleed screw between the two cars. To be honest that’s the main reason I decided to go for an aluminium one!
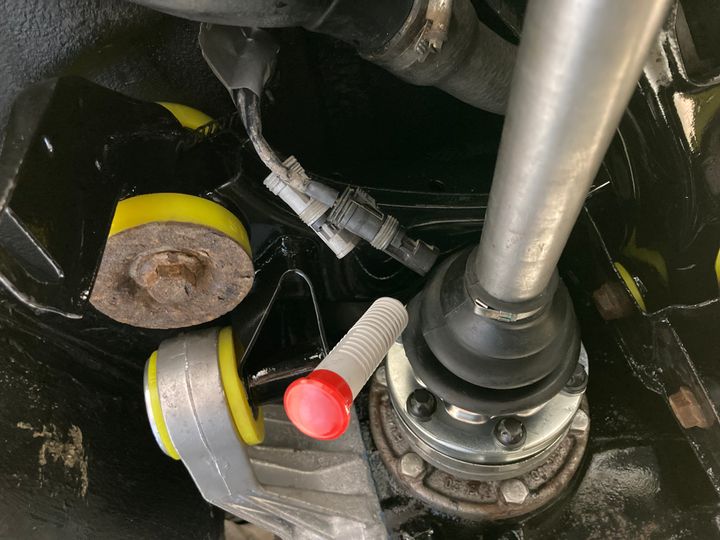
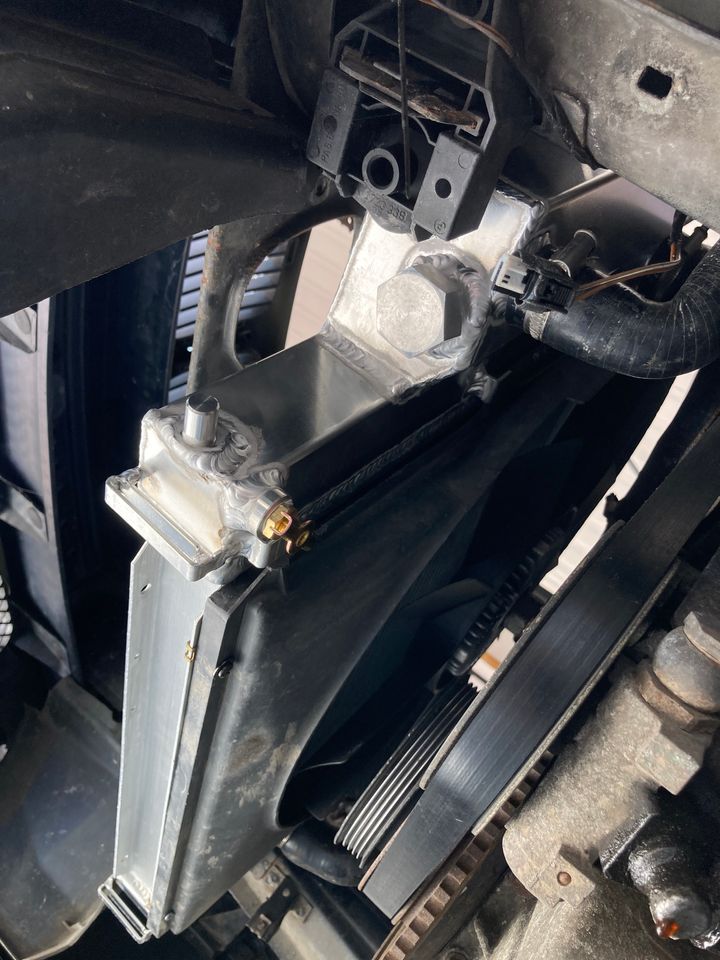
That is a 20mm ARB all bolted into place.
I also put these little plastic boxes onto the subframe and connected up the ABS sensors.
The ARB and those little boxes were a pain in the backside to get fixed into place, but I got them done. May have dropped a ratchet on my face and headbutted the exhaust a few times.
I then filled up my diff, because the oil arrived the other day. It swallowed most of the second quart as well before this happened.
I also took out the stupid radiator and packaged it up ready to return.
Once the calipers arrive I can completely finish the rear end. Once the welding is done on the wings and jacking points, and some sort of radiator is in place, it’ll be good to go!
iguana said:
I've got a remapped for M50 inlet ECU & a purple tag steering rack sat on a shelf if any use for you ?
Thanks, but my ECU has been remapped for the M50 manifold, and I slapped a purple tag rack on it last year (or maybe the year before) after my rebuilt Z3 rack exploded at Thruxton.The welder came round today to remind himself what needs doing. Hopefully I’ll get him booked in in the next couple of weeks once he’s looked at his diary. It’s all coming together. I just hope the diff doesn’t explode the first time I try and drive it anywhere!
It's been a lovely Bank Holiday Monday, and for me one without the children, so I've been doing a few jobs. First I had to clean the Skoda, because I went to Shedfest at Mallory Park on Saturday and did some involuntary offroading in the parking field. Got stuck and then pulled out by a friendly chap in a VW Transporter. The Skoda looked like it had been half buried in mud. Mainly, of course, because it had been. It's all clean now though.
Next up, Derek has come out of hibernation ready to go in to the garage tomorrow for pre-MOT and, hopefully, MOT.
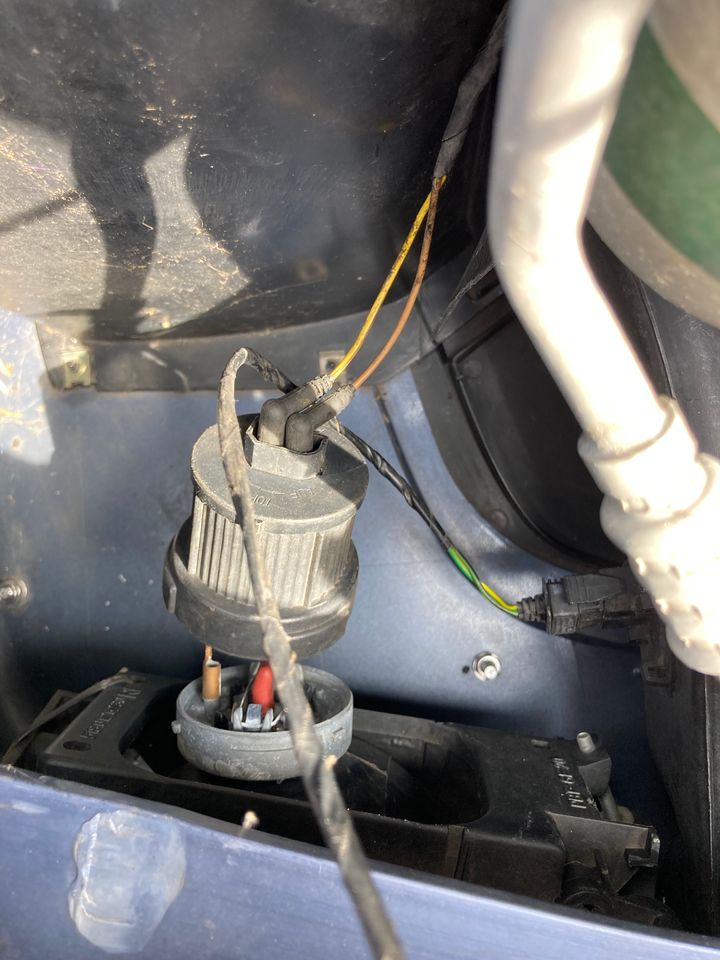
Cover off, checked fluids, started him up and let him run for a bit, checked tyre pressures, and did a few pre-checks of my own. All good as far as I can see apart from the driver's side front fog light not working. I've had this before with him. There is no connector on the loom for it, so the wires are just crammed onto the terminals on the back of the light. Last time I shoved them on there, I'd done it the wrong way round. Easy enough to swap them, and hey presto, the light came on. As slapdash as I am, however, I wasn't going to leave it at that when I have a perfectly good donor car sitting in the garage that has no need of front fog lights.
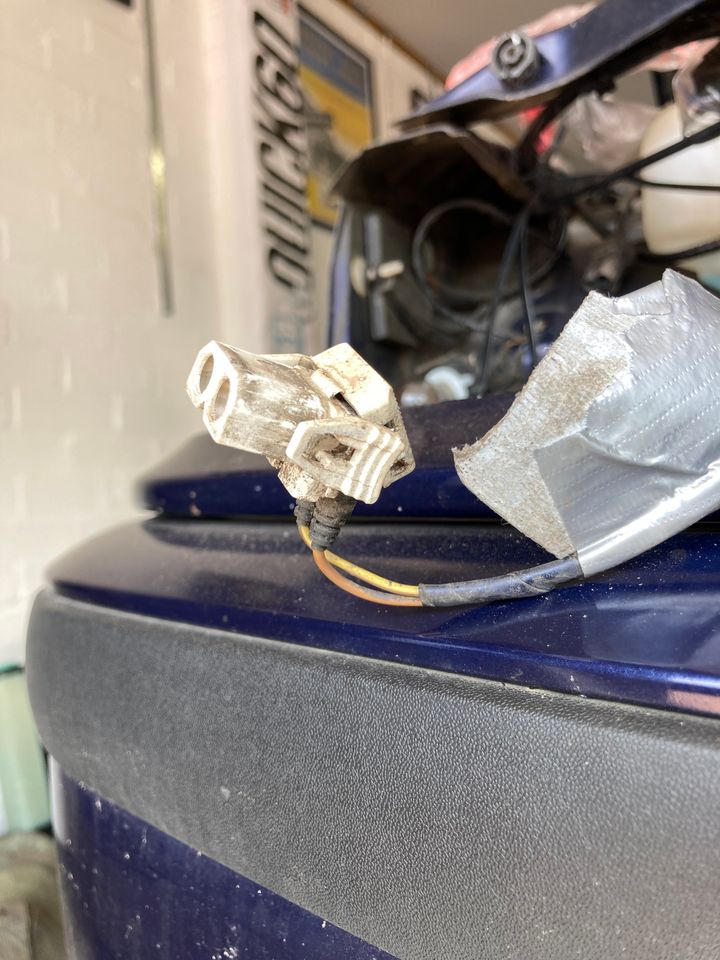
I stole the connector (just unclips) and put it on Derek. He went from this:
To this:
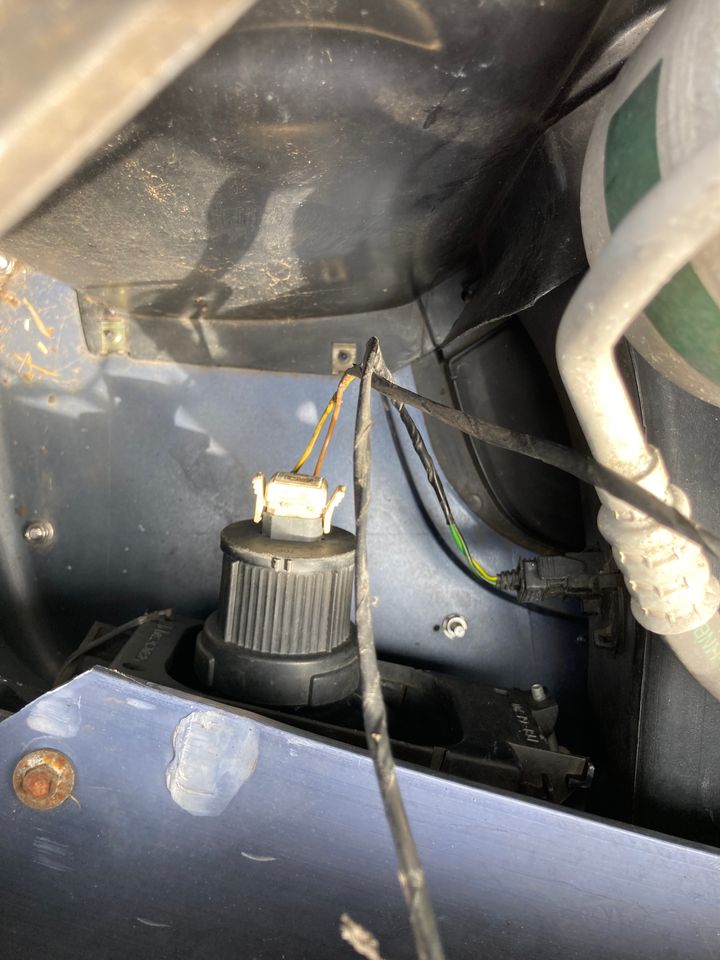
That should sort it out for good.
I have a theory. I think Derek's radiator exploded last summer when I was sat in traffic on a hot day, because he doesn't have a fan cowl. I mean, it's also because he's an E36, but I think the lack of fan cowl may have played a part. With the experiences I've had with the track car, I'm quite alive now to the need for air to be properly channeled through the radiator. Without a cowl I think it's just moving air about near the radiator, rather than sucking it through the fins. I shall get him a cowl.
Derek didn't really give me any trouble (until tomorrow...), so I moved on to the track car. Calipers on and brakes bled:
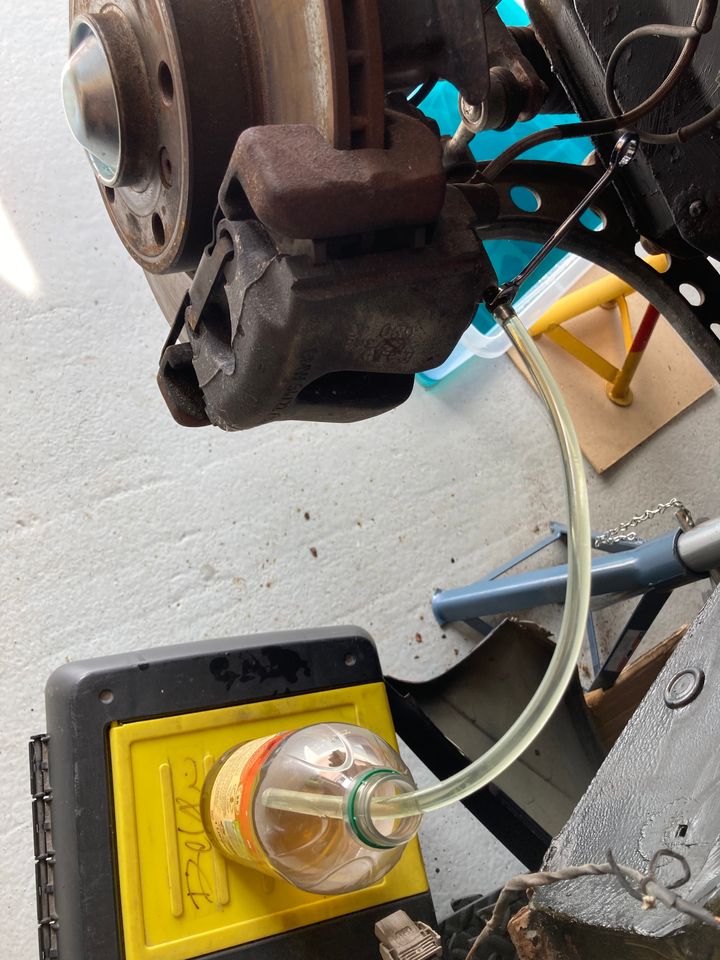
(Just previewing my post and noticed you can see Richard Hammond's signature on my toolbox lid in this picture. I'm such a show-off!)
I like my Gunson pressure bleeder. It works well for me. Since I put a quick release valve connector on the end of it that is. The one it came with was leaky as anything. What surprised me though, was that when I set it all up and applied the pressure from the tyre, the system seemed to fill up, despite all the nipples being closed. I would have thought all the new pipes and hoses and calipers would be full of air that would need to be bled out of the nipples before the fluid came through. That's not how it works, though, apparently. When I cracked the nipple on the rear left, I got fluid immediately, with a few air bubbles. The same happened with rear right. I confess I don't understand what happened there. Where did the air go from the new bits that were empty of fluid? Who knows? Anyway, I put in a litre and got out about the same. I think most of the fluid in the system has now been replaced with new.
I then lifted the back end and moved the jack stands to the trailing arms, because it's quite hard to weld jacking points when it's sitting on them. I also cleaned the bodywork underneath where the wings go, because it's currently exposed, and I can. The garage then got a bit of an organise and tidy so that the welder can get in there and around the car without tripping over stuff. He's coming tomorrow evening.
So, the back end is complete. I'm waiting for another chinesium radiator to arrive, and the jacking points and wings to be welded. I went to get some Montreal Blue paint from Halfords today ready to paint the repaired wings, but obviously it was the only colour they didn't have.
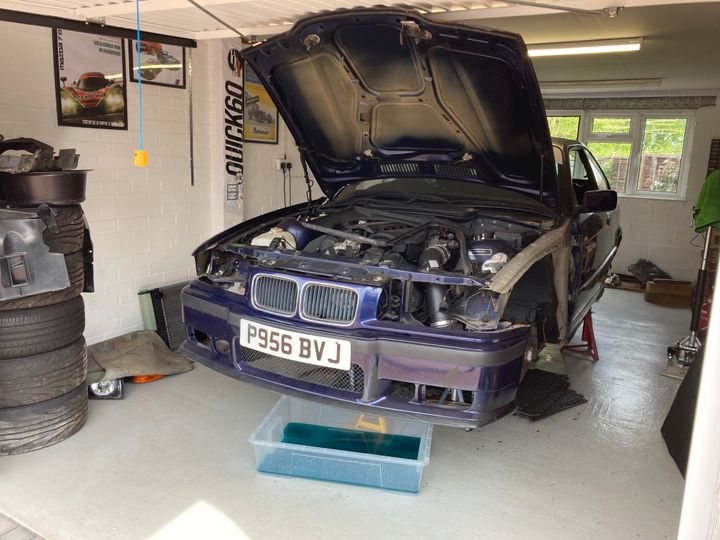
It doesn't look a great deal like it, but this is a car that is very nearly ready to go (picture was before garage tidy!).
Next up, Derek has come out of hibernation ready to go in to the garage tomorrow for pre-MOT and, hopefully, MOT.
Cover off, checked fluids, started him up and let him run for a bit, checked tyre pressures, and did a few pre-checks of my own. All good as far as I can see apart from the driver's side front fog light not working. I've had this before with him. There is no connector on the loom for it, so the wires are just crammed onto the terminals on the back of the light. Last time I shoved them on there, I'd done it the wrong way round. Easy enough to swap them, and hey presto, the light came on. As slapdash as I am, however, I wasn't going to leave it at that when I have a perfectly good donor car sitting in the garage that has no need of front fog lights.
I stole the connector (just unclips) and put it on Derek. He went from this:
To this:
That should sort it out for good.
I have a theory. I think Derek's radiator exploded last summer when I was sat in traffic on a hot day, because he doesn't have a fan cowl. I mean, it's also because he's an E36, but I think the lack of fan cowl may have played a part. With the experiences I've had with the track car, I'm quite alive now to the need for air to be properly channeled through the radiator. Without a cowl I think it's just moving air about near the radiator, rather than sucking it through the fins. I shall get him a cowl.
Derek didn't really give me any trouble (until tomorrow...), so I moved on to the track car. Calipers on and brakes bled:
(Just previewing my post and noticed you can see Richard Hammond's signature on my toolbox lid in this picture. I'm such a show-off!)
I like my Gunson pressure bleeder. It works well for me. Since I put a quick release valve connector on the end of it that is. The one it came with was leaky as anything. What surprised me though, was that when I set it all up and applied the pressure from the tyre, the system seemed to fill up, despite all the nipples being closed. I would have thought all the new pipes and hoses and calipers would be full of air that would need to be bled out of the nipples before the fluid came through. That's not how it works, though, apparently. When I cracked the nipple on the rear left, I got fluid immediately, with a few air bubbles. The same happened with rear right. I confess I don't understand what happened there. Where did the air go from the new bits that were empty of fluid? Who knows? Anyway, I put in a litre and got out about the same. I think most of the fluid in the system has now been replaced with new.
I then lifted the back end and moved the jack stands to the trailing arms, because it's quite hard to weld jacking points when it's sitting on them. I also cleaned the bodywork underneath where the wings go, because it's currently exposed, and I can. The garage then got a bit of an organise and tidy so that the welder can get in there and around the car without tripping over stuff. He's coming tomorrow evening.
So, the back end is complete. I'm waiting for another chinesium radiator to arrive, and the jacking points and wings to be welded. I went to get some Montreal Blue paint from Halfords today ready to paint the repaired wings, but obviously it was the only colour they didn't have.
It doesn't look a great deal like it, but this is a car that is very nearly ready to go (picture was before garage tidy!).
Scoobydrew95 said:
I suspect it almost entirely overheated due to the lack of fan shroud. It would have been pulling barely any air through the rad.
Whens the Pre/Mot?
Looking forward to seeing them both back on the road!
Yes, seems pretty obvious now! I don't think it did any permanent damage to the engine when it went, but I suppose that remains to be seen. Whens the Pre/Mot?
Looking forward to seeing them both back on the road!
I dropped it off this morning, but they didn't get to it today. Hopefully will be sorted this week. It needs the airbag light diagnosing and sorting, and it seems the 'pliers-to-open-the-bonnet' might be an MOT fail too. There's a spare cable and handle in the car so I might have to pay the man to fit that as well. To be fair I can't really be bothered with it!
Some good progress on the track car today. The radiator had arrived and the wings had been repaired, so it was time to start putting things back together.
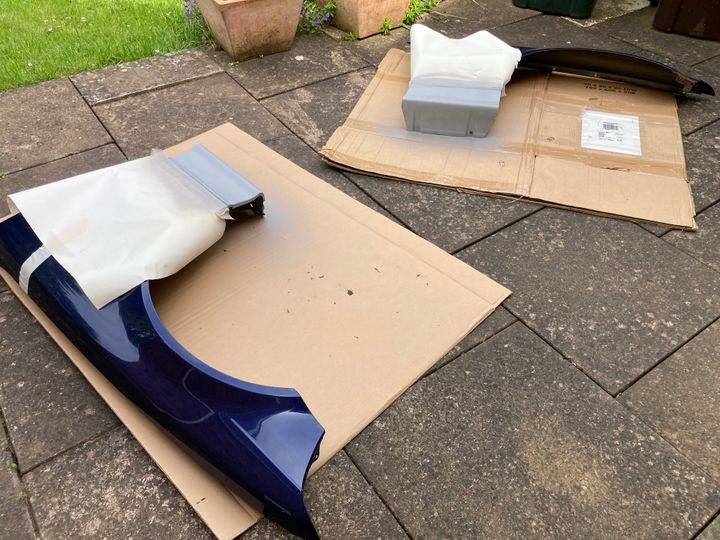
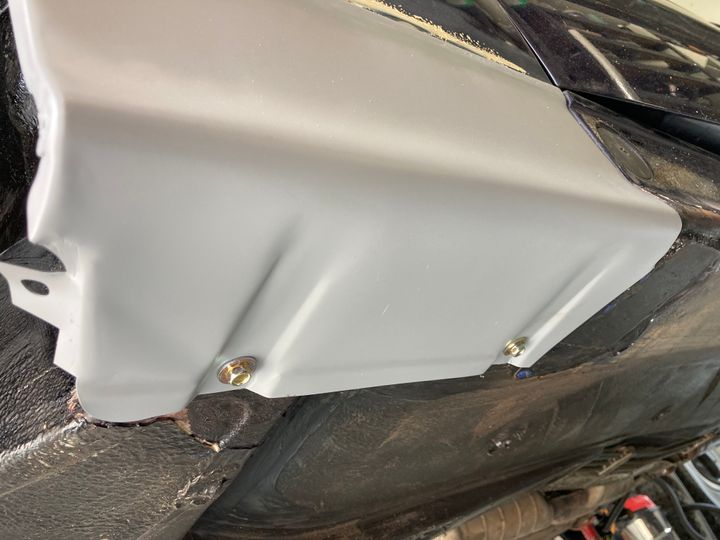
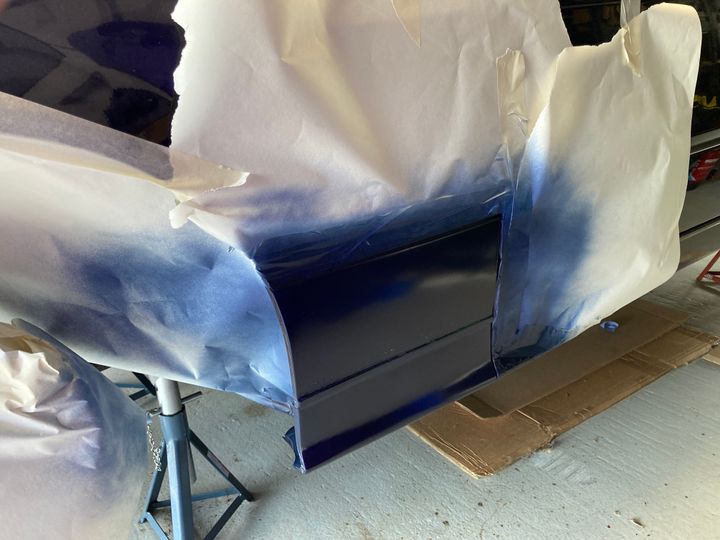
I’ve primed the new bits but I’ll paint them on the car so I can paint over the fixings on the bottom.
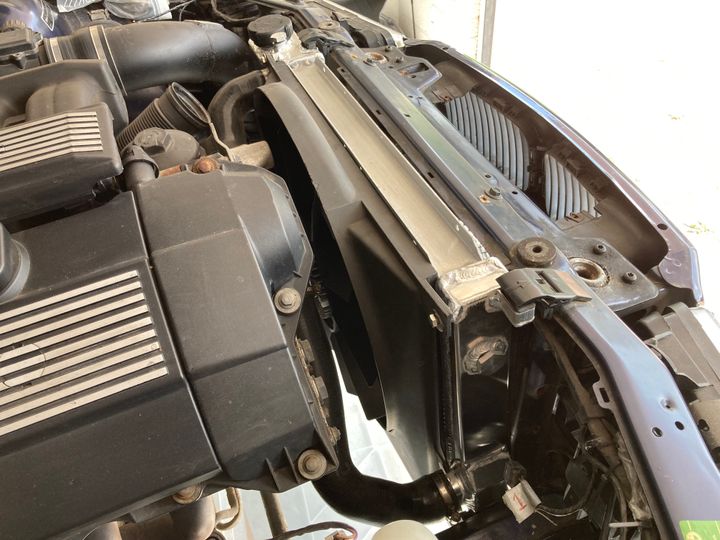
The latest chinesium radiator looks good. It’s the same size as the original radiator that went in this car, which is a promising start. It also has proper blanking caps for the sensor holes, so I have a bit of confidence it will be able to contain the pressure.
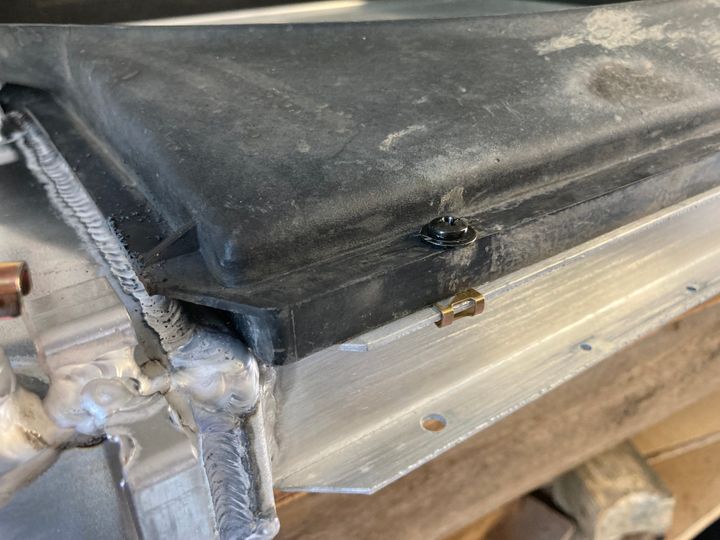
There was a bit of a geometry issue at the bottom of the fan cowl with the new radiator, so I had to cut the bottom tabs off and improvise a bit. It’s pretty secure.
And into the car:
Back to the wings. They went on without too much drama.
On the advice of the welder, I uncovered as much rust as I could see, applied Kurust and then seam sealer.
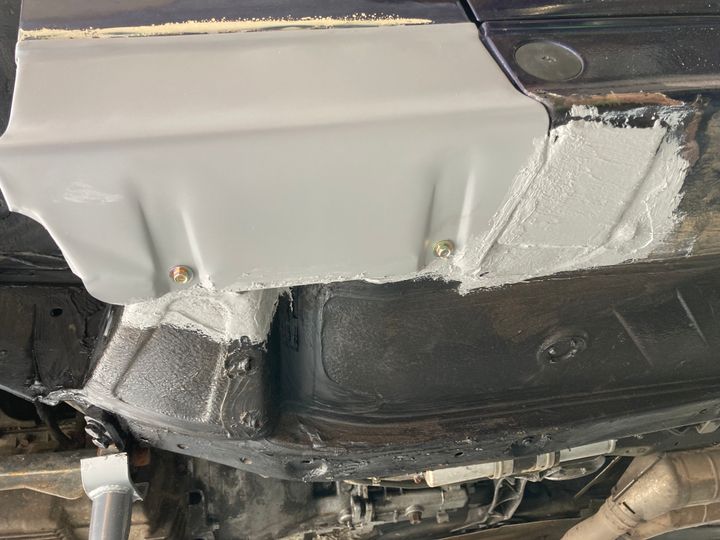
Once that’s gone off I’ll be able to get some paint on it.
It’s so close to being driveable now. I need to refill the coolant, get some fuel in it, do the paint, put the arch liners and undertray back in, wheels on, and it’ll be ready for MOT, alignment, and then some gentle driving to see what falls off first!
I’ve primed the new bits but I’ll paint them on the car so I can paint over the fixings on the bottom.
The latest chinesium radiator looks good. It’s the same size as the original radiator that went in this car, which is a promising start. It also has proper blanking caps for the sensor holes, so I have a bit of confidence it will be able to contain the pressure.
There was a bit of a geometry issue at the bottom of the fan cowl with the new radiator, so I had to cut the bottom tabs off and improvise a bit. It’s pretty secure.
And into the car:
Back to the wings. They went on without too much drama.
On the advice of the welder, I uncovered as much rust as I could see, applied Kurust and then seam sealer.
Once that’s gone off I’ll be able to get some paint on it.
It’s so close to being driveable now. I need to refill the coolant, get some fuel in it, do the paint, put the arch liners and undertray back in, wheels on, and it’ll be ready for MOT, alignment, and then some gentle driving to see what falls off first!
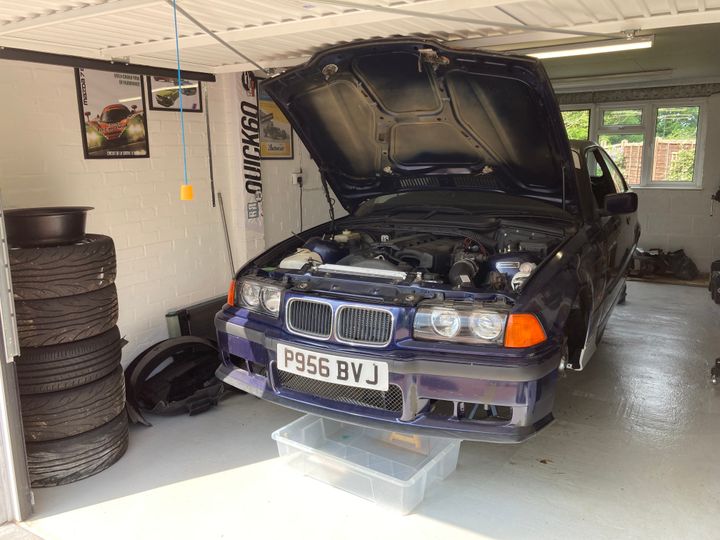
Today is a momentous day.
Trixie the track car drove out of the garage this afternoon, after about 8 months up in the air and major surgery.
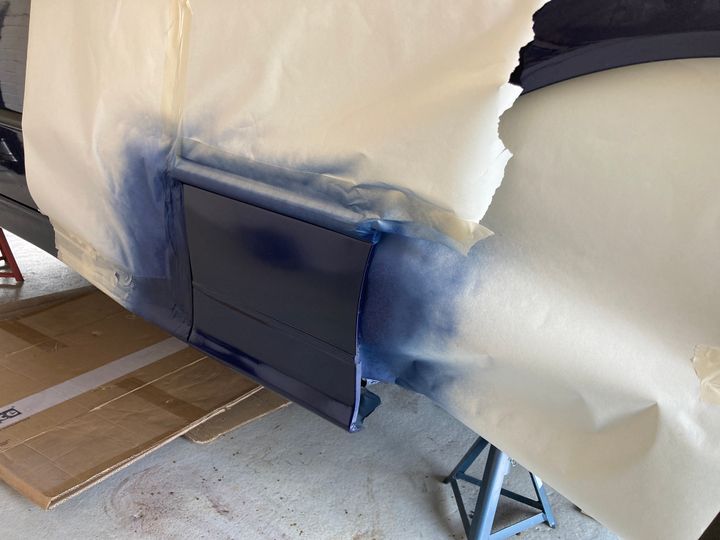
Yesterday I painted the new bits on the bottom of the wings and waxoyled inside and underneath.
Today was just a case of filling the radiator, replacing the arch liners and undertray, and of course putting the wheels back on. It was quite exciting to get it on the ground and drive it outside after so long. The diff didn't explode. The fuel lines didn't leak. The brakes worked. On Tuesday I'm going to drop it at the garage that just MOT'd Derek the convertible. They'll give it a good check over and pre-MOT and get it sorted for me.
My basic pre-MOT checks revealed that the brake lights weren't working. Checked the fuse, which was fine. Had a look in the boot, couldn't work out how they were actually connected to the loom. Eventually figured out that I'd unplugged them and tucked the loom out the way when the welder did the boot floor. Retrieved and plugged in, everything is fine. I'm so special sometimes.
Discovered I had done the same thing with the front right headlight, so plugged that in and all good. Realised I had forgotten to reconnect the side repeaters when I put the wings back on and was slightly worried I was going to have to take them off again...
Fortunately I managed to fish out the connectors without removing the wings.
The front left indicator is not working. That one wasn't my fault. One of the wires has snapped at the terminal. I'm just considering whether I can be bothered to try doing anything about it, or just leave it to the professionals this week.
Other than that, everything seems well with the old girl. She fired up quite happily after a bit of turning over, since I'd drained the fuel tank. Once it was running, it seems fine. The bleed hole in the radiator was bubbling away for quite a while. I'll have another look at that tomorrow and make sure I've got it properly bled and the coolant level is ok.
What about Derek? He still required a bit of work after coming back from the garage. They sorted the airbag warning light (seatbelt pretensioner), which was all that was required to get it through MOT. They did try and fit the new bonnet release cable that I'd supplied, but it turns out it must be for a LHD car as all the furniture was the wrong way round. Having to use pliers to pull on the bonnet release cable is apparently not an MOT fail, so I've got it back in the same condition. They also identified a coolant leak (frayed or slit pipe end) and a binding caliper on the front left.
Having got him home and removed the offending caliper, I went and got a new one from ECP and dropped off the old one to get the surcharge back. I've also got some silicone hoses on the way.

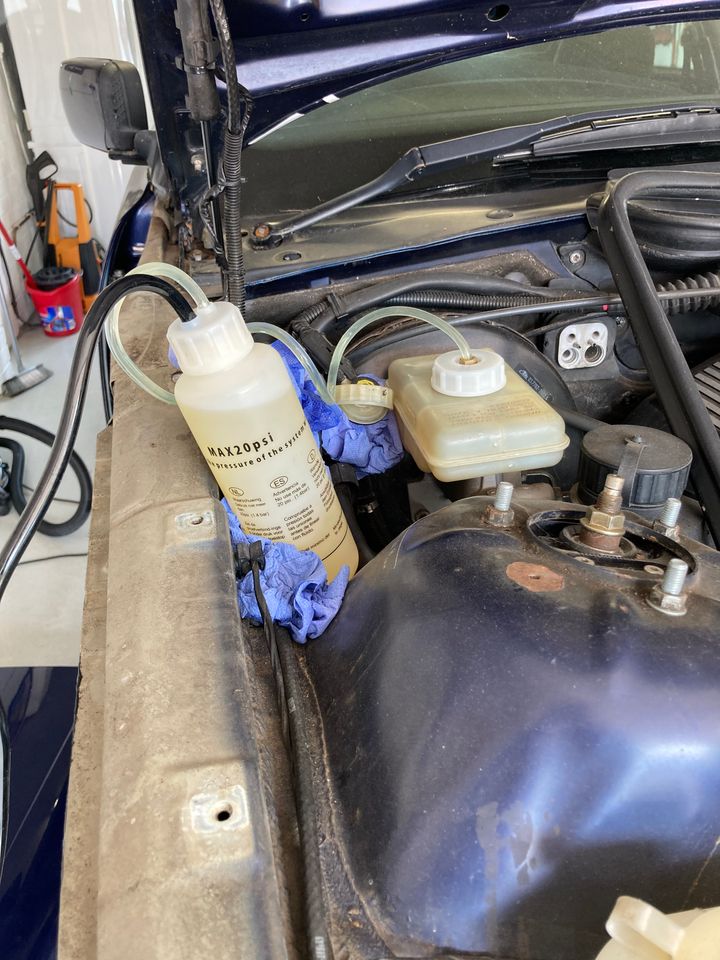
The hose connection needed a bit of heat to remove the old one, but I am a bit more confident doing that now I've done it once. Got the new caliper on no problem, then flushed the brake fluid as I have no idea when it was last done. The fluid that came out was pretty dark and disgusting.
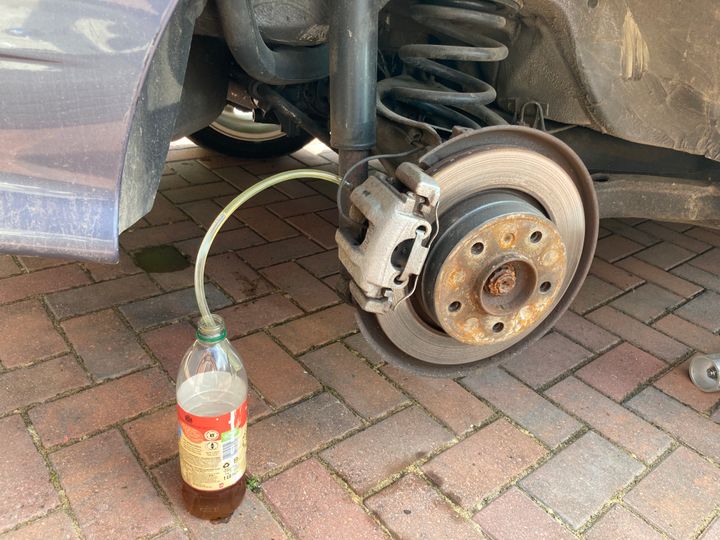

The Gunson pressure bleeder was spot on as usual, though as the car was on the ground, I had to jack up each corner one at a time and take the wheel off to bleed the brakes before putting it back on again and moving on to the next. A bit of a drawn-out process but got there in the end.
Next up is the crucial bit to hopefully prevent any more catastrophic failures of the cooling system. The fan cowl:
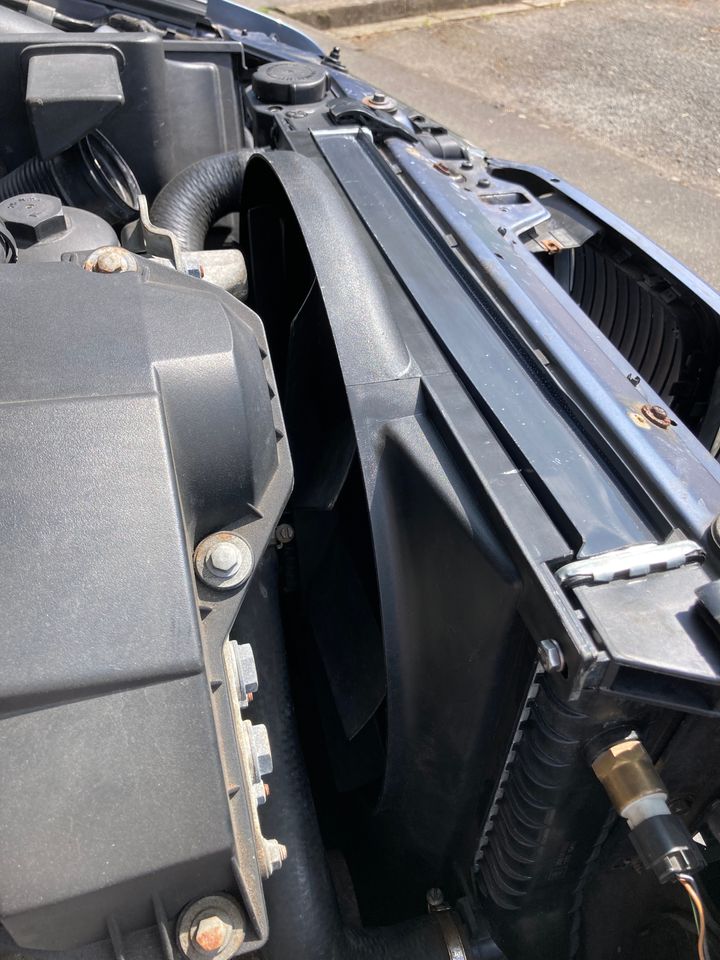
That was remarkably straightforward to fit. Especially as I have the special tools to brace the pulley and unscrew the fan. It looks much better and will hopefully perform better too.
Then, as the sun was out, I dropped the roof and went for a drive. Big grins all round!
Trixie the track car drove out of the garage this afternoon, after about 8 months up in the air and major surgery.
Yesterday I painted the new bits on the bottom of the wings and waxoyled inside and underneath.
Today was just a case of filling the radiator, replacing the arch liners and undertray, and of course putting the wheels back on. It was quite exciting to get it on the ground and drive it outside after so long. The diff didn't explode. The fuel lines didn't leak. The brakes worked. On Tuesday I'm going to drop it at the garage that just MOT'd Derek the convertible. They'll give it a good check over and pre-MOT and get it sorted for me.
My basic pre-MOT checks revealed that the brake lights weren't working. Checked the fuse, which was fine. Had a look in the boot, couldn't work out how they were actually connected to the loom. Eventually figured out that I'd unplugged them and tucked the loom out the way when the welder did the boot floor. Retrieved and plugged in, everything is fine. I'm so special sometimes.
Discovered I had done the same thing with the front right headlight, so plugged that in and all good. Realised I had forgotten to reconnect the side repeaters when I put the wings back on and was slightly worried I was going to have to take them off again...
Fortunately I managed to fish out the connectors without removing the wings.
The front left indicator is not working. That one wasn't my fault. One of the wires has snapped at the terminal. I'm just considering whether I can be bothered to try doing anything about it, or just leave it to the professionals this week.
Other than that, everything seems well with the old girl. She fired up quite happily after a bit of turning over, since I'd drained the fuel tank. Once it was running, it seems fine. The bleed hole in the radiator was bubbling away for quite a while. I'll have another look at that tomorrow and make sure I've got it properly bled and the coolant level is ok.
What about Derek? He still required a bit of work after coming back from the garage. They sorted the airbag warning light (seatbelt pretensioner), which was all that was required to get it through MOT. They did try and fit the new bonnet release cable that I'd supplied, but it turns out it must be for a LHD car as all the furniture was the wrong way round. Having to use pliers to pull on the bonnet release cable is apparently not an MOT fail, so I've got it back in the same condition. They also identified a coolant leak (frayed or slit pipe end) and a binding caliper on the front left.
Having got him home and removed the offending caliper, I went and got a new one from ECP and dropped off the old one to get the surcharge back. I've also got some silicone hoses on the way.
The hose connection needed a bit of heat to remove the old one, but I am a bit more confident doing that now I've done it once. Got the new caliper on no problem, then flushed the brake fluid as I have no idea when it was last done. The fluid that came out was pretty dark and disgusting.
The Gunson pressure bleeder was spot on as usual, though as the car was on the ground, I had to jack up each corner one at a time and take the wheel off to bleed the brakes before putting it back on again and moving on to the next. A bit of a drawn-out process but got there in the end.
Next up is the crucial bit to hopefully prevent any more catastrophic failures of the cooling system. The fan cowl:
That was remarkably straightforward to fit. Especially as I have the special tools to brace the pulley and unscrew the fan. It looks much better and will hopefully perform better too.
Then, as the sun was out, I dropped the roof and went for a drive. Big grins all round!
Court_S said:
That’s good progress on both cars.
Have you got any track days booked in yet?
No, the track car is at the garage now for pre-MOT and MOT. I don’t want to tempt fate by booking anything until it’s back on the road and legal! Have you got any track days booked in yet?
I think I’d like to get a few miles on it on the road first as well, just to shake down and get used to any new noises etc.
shalmaneser said:
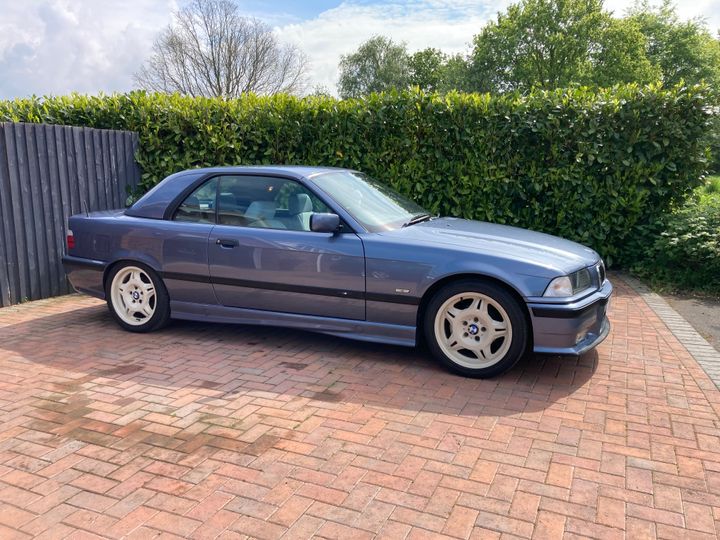
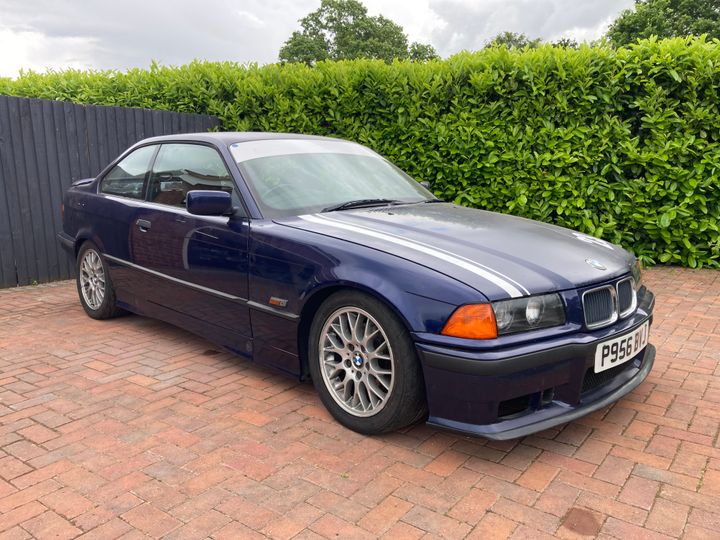
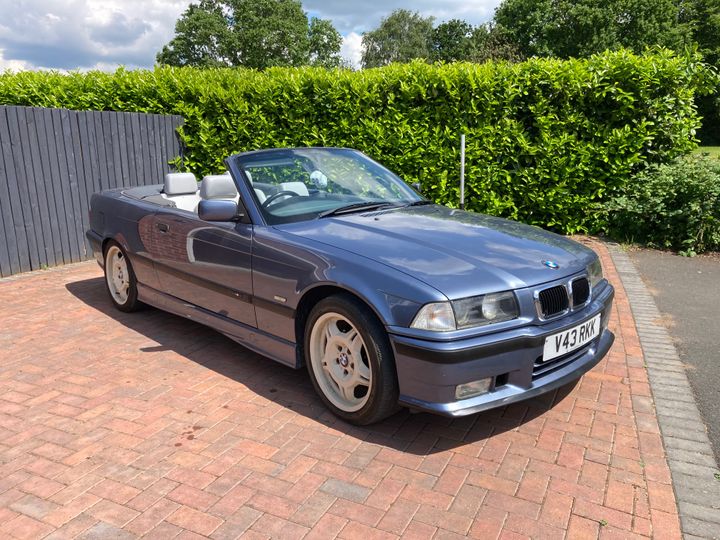
The E36 convertible is such a handsome car, especially with the M-Sport kit and in that colour.
I’m not at all biased and I thoroughly agree! 
A bit of news. Track car has passed MOT, so they’re both back on the road. I’ve been driving around in Derek when the sun’s been shining, and he still puts a massive grin on my face. He’s got a little coolant leak, which seems to be a frayed hose end. I’ve now got some silicone hoses so I’ll stick those on at some point.
Today I took Trixie the track car for a road test because I haven’t driven her any great distance since doing all the work. She handles fine and isn’t as harsh on the road as I thought she might be. However…
When I opened up a bit, I found that as I changed up at higher speeds, the revs would stay high and then increase, whilst the speed stayed constant and a distinct clutchy smell wafted in through the open windows.

The clutch is a standard road-going clutch that came with the conversion kit when I turned her into a manual. So it’s done every single track day I’ve ever done in this car. I guess it was going to go at some point. If anyone needs me I’ll be perusing performance clutches…
I haven't done an update in a while. It's not that nothing has happened, it's more that I've lost the motivation to write about it. I still want to record this journey, but I don't have many words at the moment, so this will be brief.
I mentioned that the track car's clutch was cooked. I bought a kevlar M3 clutch from CG Motorsport and a lightweight flywheel from Driftworks, hoping to give the setup a bit of longevity. To be fair, the roadgoing clutch that was in there was the one I put in when I converted it from auto to manual, so it's done all of my track days. It's had a hard life. Anyway, it needed replacing, so replace it I did. First, some words of encouragement from Pelican Parts:
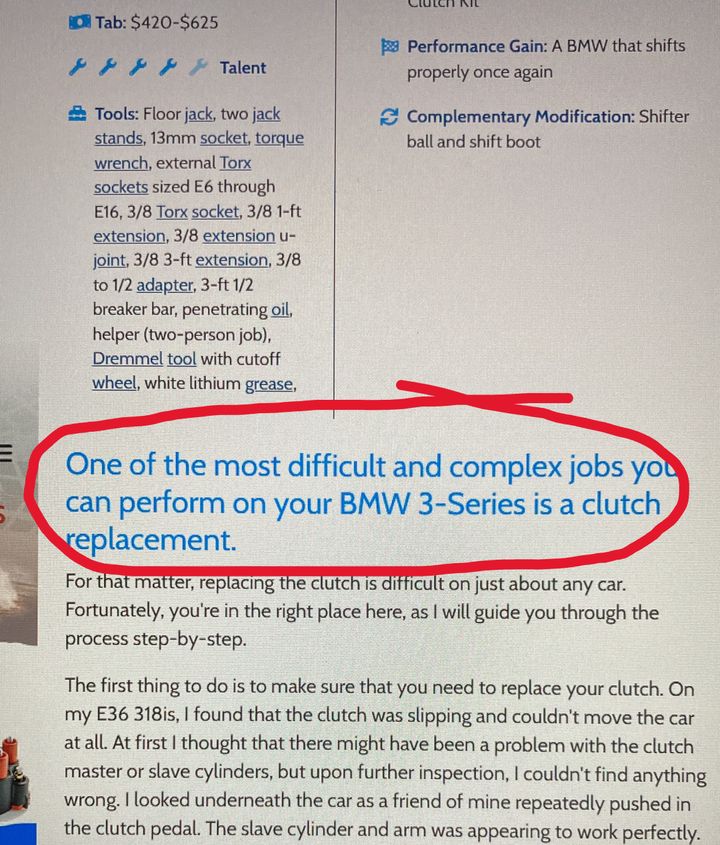
Excellent.
I was buoyed slightly by the fact that I know I've done this before. I was the one who put the clutch in there and put a gearbox on where there was previously an automatic transmission. I did the bolts up, so surely I could get them undone...
Yes.
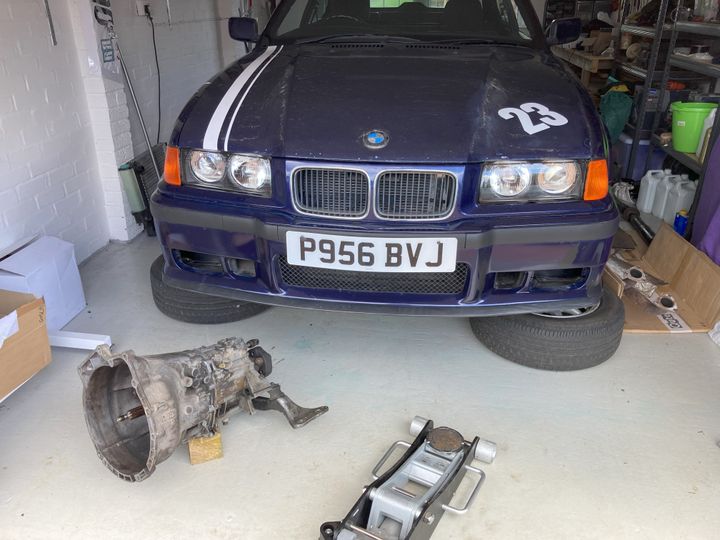
I remembered a pearl of wisdom that I received from somewhere all those years ago when I did the conversion, which was that lifting the front of the engine to tip the gearbox down would give the necessary clearance to get it off. So off it came.
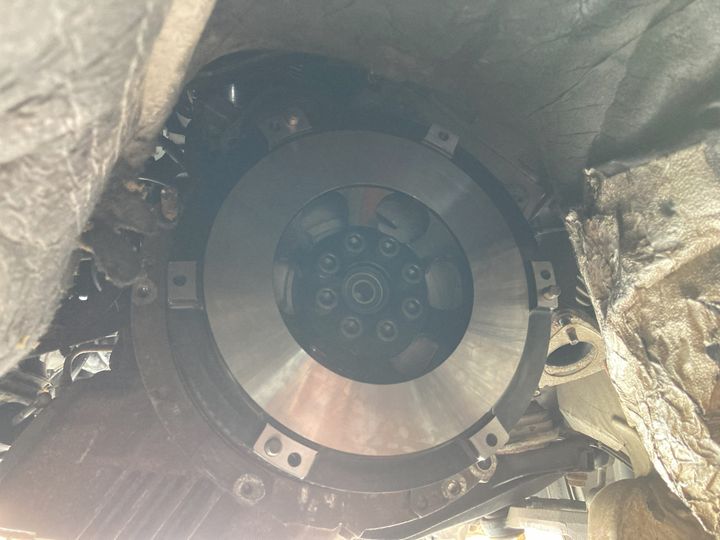
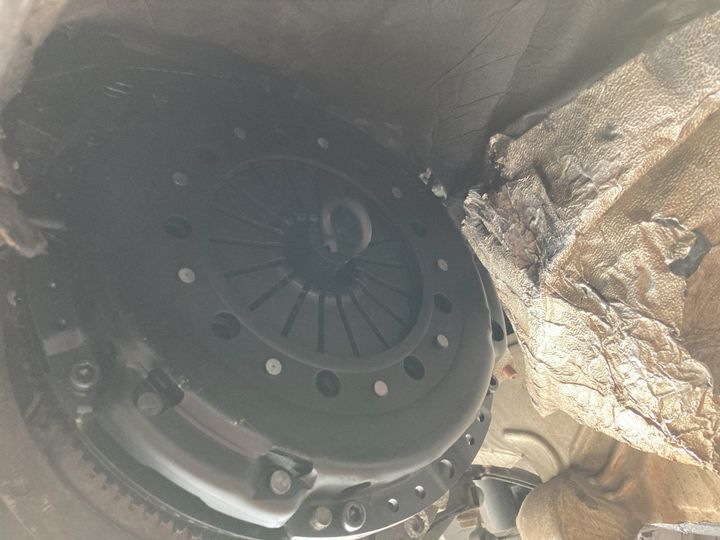
Clutch and flywheel off, and new ones on...
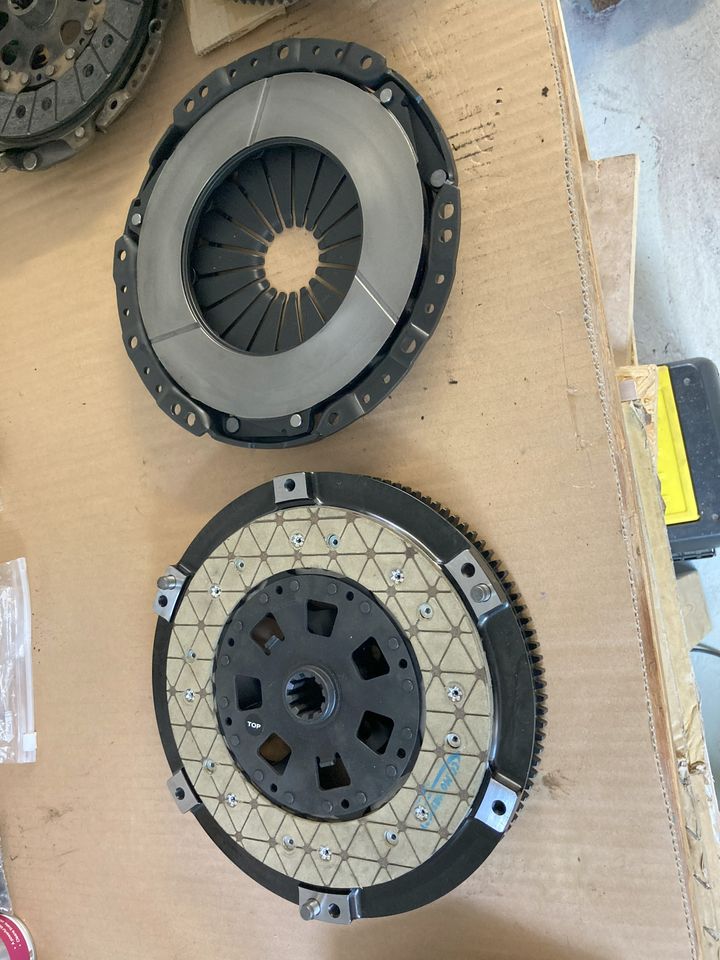
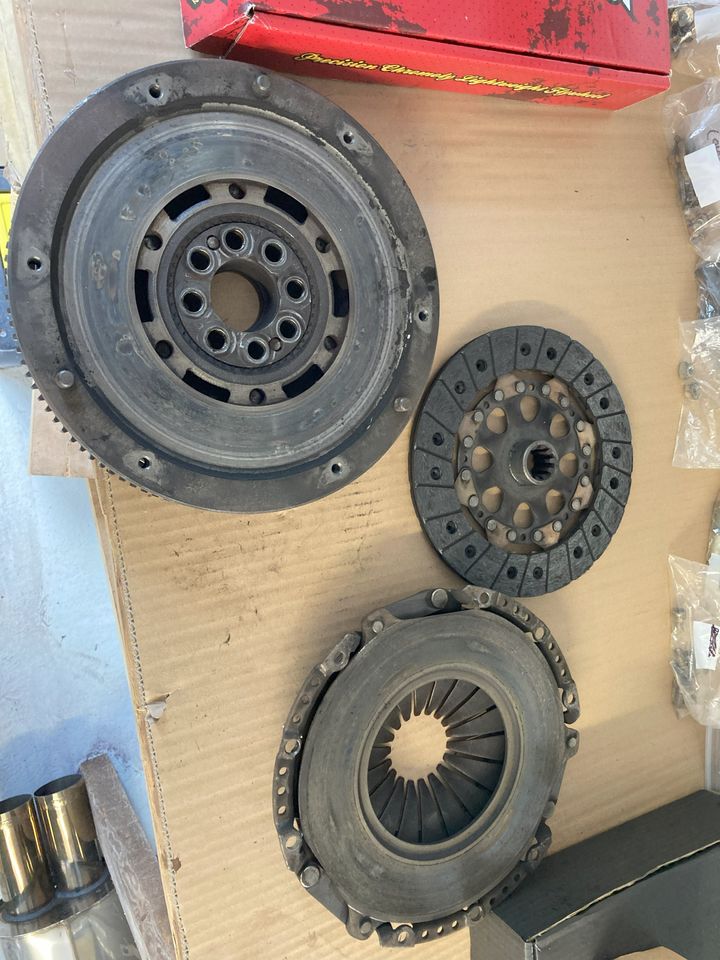
The sun was quite strong outside the garage door when I did this, which my rudimentary photographic skills failed to compensate for. Sorry for the terrible photos. Also, during this procedure I removed the saggy heat insulation material from the transmission tunnel. Time will tell how much I will regret that decision.
I had a track day booked at Mallory Park on 24 July, but given that I was changing the clutch the weekend prior to that, and the instructions said to give it 500 miles to bed in, I bottled it and cancelled. That means that I haven't driven it on a track yet, since the entire rear subframe was replaced and it's had a new clutch and flywheel. I also haven't been organised enough to get the alignment done. At least I haven't got to drive it in a competition tomorrow...
Oh, wait...
I'm driving in the Quckk60 tomorrow at Mallory Park. What could possibly go wrong?
I'm writing this from a hotel somewhere not too far away from Mallory Park. Tomorrow I will go and take my chances in the competition, as thoroughly underprepared as I and the car both are. Wish me luck!
I mentioned that the track car's clutch was cooked. I bought a kevlar M3 clutch from CG Motorsport and a lightweight flywheel from Driftworks, hoping to give the setup a bit of longevity. To be fair, the roadgoing clutch that was in there was the one I put in when I converted it from auto to manual, so it's done all of my track days. It's had a hard life. Anyway, it needed replacing, so replace it I did. First, some words of encouragement from Pelican Parts:
Excellent.
I was buoyed slightly by the fact that I know I've done this before. I was the one who put the clutch in there and put a gearbox on where there was previously an automatic transmission. I did the bolts up, so surely I could get them undone...
Yes.
I remembered a pearl of wisdom that I received from somewhere all those years ago when I did the conversion, which was that lifting the front of the engine to tip the gearbox down would give the necessary clearance to get it off. So off it came.
Clutch and flywheel off, and new ones on...
The sun was quite strong outside the garage door when I did this, which my rudimentary photographic skills failed to compensate for. Sorry for the terrible photos. Also, during this procedure I removed the saggy heat insulation material from the transmission tunnel. Time will tell how much I will regret that decision.
I had a track day booked at Mallory Park on 24 July, but given that I was changing the clutch the weekend prior to that, and the instructions said to give it 500 miles to bed in, I bottled it and cancelled. That means that I haven't driven it on a track yet, since the entire rear subframe was replaced and it's had a new clutch and flywheel. I also haven't been organised enough to get the alignment done. At least I haven't got to drive it in a competition tomorrow...
Oh, wait...
I'm driving in the Quckk60 tomorrow at Mallory Park. What could possibly go wrong?
I'm writing this from a hotel somewhere not too far away from Mallory Park. Tomorrow I will go and take my chances in the competition, as thoroughly underprepared as I and the car both are. Wish me luck!
skylarking808 said:
We have some faith in you and the car! (Hope the clutch works as it should)
Interested to know how you get on as usual.
Thanks for your kind words. First timed practice was fairly significantly slower than last year! I think perhaps I’m lacking confidence in it a bit as I haven’t driven it much this year. I’ll get a bit braver! Interested to know how you get on as usual.
Gallons Per Mile said:
Good job on the clutch, want to do the one on my E46? 
If you don’t mind it going back on with fewer bolts than came out Well, either side of the shower, I’ve put in better times than I got last year, which I’m happy with. I think that’s the end of my day after elimination round one though.
I’m familiar with Mallory, but I haven’t figured out the chicane because it’s never used on track days. I think I’ve lost a lot of speed there on every round. Even if I nailed it though, I’d struggle to find the 10 seconds I’d need to top the class!
Gassing Station | Readers' Cars | Top of Page | What's New | My Stuff