R53 'Ring Tearer (take two)
Discussion


I've had a lot of help from some very lovely people putting my R53 together, so wanted to thank them by documenting progress on here, and to benefit from your ideas and opinions on how to finish it off.
A bit about me. I'm 43, and had a moment of clarity in 2020 - I'd spent the previous 20+ years building bigger and bigger powered cars, with more and more grip and placing outright pace as the priority. Cosworths mainly but also Nissans.
Then it hit me! Despite increasingly ridiculous performance at my disposal, I was never happier than when I was a teenager, wringing the necks of modest powered, chuckable fwd hatchbacks. I realised that trying to be / being the fastest has absolutely zero correlation to the amount of fun you enjoy behind the wheel.
So, thanks to a good acquaintance urging me to try an R53, I ended up buying this standard 2004 Electric Blue example with 80,000 something miles on the clock. What stood out about it was firstly, the colour (Electric Blue is my favourite) but also the fact that it had an impeccable MoT history (failing just once in its life for worn bushes, which never came up as an advisory again).
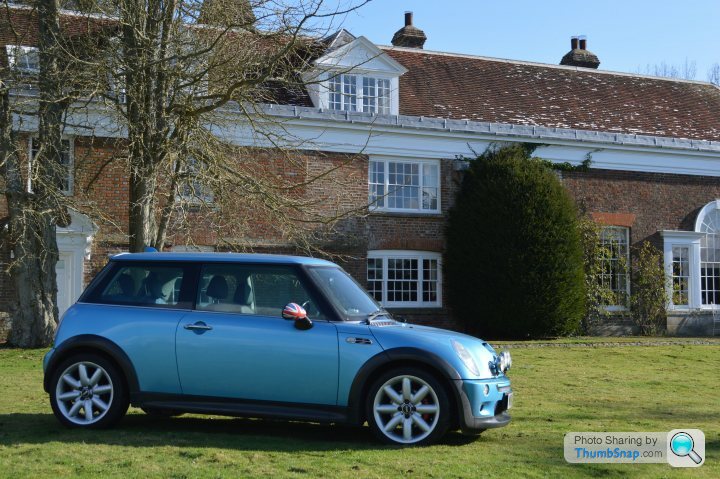
Note the blue roof, Union Flag mirrors, four spotlights on the bonnet... other than that I think it was a sweet purchase!
The car is being built for European track days (namely the Nurburgring) and for sunny Sunday fundays on the epic French country roads (I live there). A Clubsport style build seemed to fit the bill then, but with a few unique elements sprinkled in from my experience of building other marques (ie. non MINI scene mods). My first step was to get some of the questionable aesthetics sorted out, so off it went to the bodyshop. At this juncture, we also took the opportunity to start reducing the cars weight, too. I’ll pick up from there next time : )
A bit about me. I'm 43, and had a moment of clarity in 2020 - I'd spent the previous 20+ years building bigger and bigger powered cars, with more and more grip and placing outright pace as the priority. Cosworths mainly but also Nissans.
Then it hit me! Despite increasingly ridiculous performance at my disposal, I was never happier than when I was a teenager, wringing the necks of modest powered, chuckable fwd hatchbacks. I realised that trying to be / being the fastest has absolutely zero correlation to the amount of fun you enjoy behind the wheel.
So, thanks to a good acquaintance urging me to try an R53, I ended up buying this standard 2004 Electric Blue example with 80,000 something miles on the clock. What stood out about it was firstly, the colour (Electric Blue is my favourite) but also the fact that it had an impeccable MoT history (failing just once in its life for worn bushes, which never came up as an advisory again).
Note the blue roof, Union Flag mirrors, four spotlights on the bonnet... other than that I think it was a sweet purchase!
The car is being built for European track days (namely the Nurburgring) and for sunny Sunday fundays on the epic French country roads (I live there). A Clubsport style build seemed to fit the bill then, but with a few unique elements sprinkled in from my experience of building other marques (ie. non MINI scene mods). My first step was to get some of the questionable aesthetics sorted out, so off it went to the bodyshop. At this juncture, we also took the opportunity to start reducing the cars weight, too. I’ll pick up from there next time : )
Edited by PerformanceMINIR53 on Friday 25th November 19:01
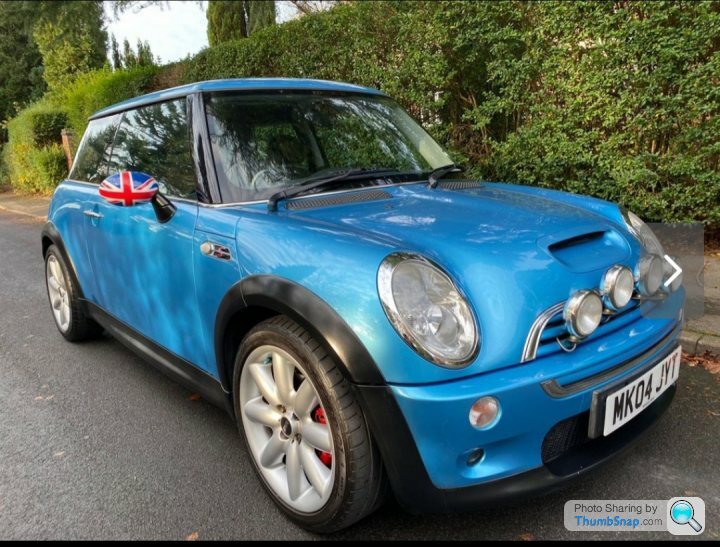
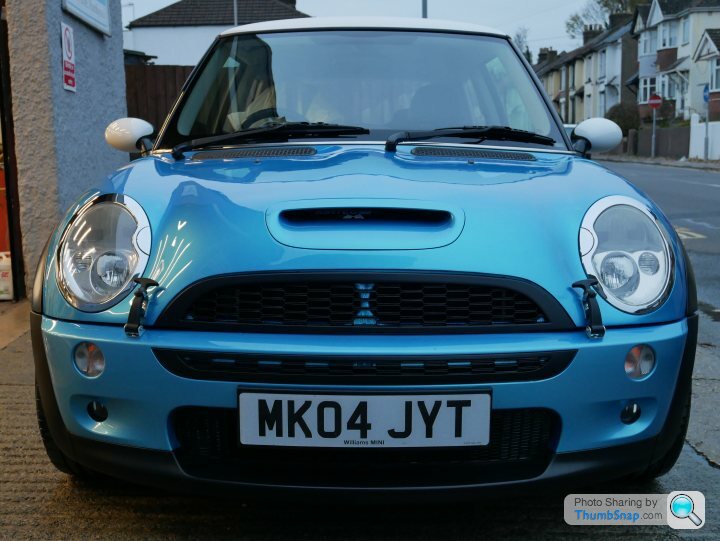
The previous owner of my Cooper S had painted its roof and tailgate spoiler Electric Blue, adorned the door mirrors with Union Flags and fitted four chromed spotlights which was all a bit too Austin Powers for me (sorry dude!).
I like my cars to brim with modifications whilst looking as original as possible, and in my mind Electric Blue with an Aspen White roof and mirrors is THE iconic R53 colour combo.
First stop then was to a bodyshop, and a friend of mine with OCD tendencies recommended Auto Body Repair Centre in Strood, Kent. They were tasked with restoring the OEM freshness back, with a few other mods thrown in for good measure.
They painted the roof, tailgate spoiler and mirrors and trimmed back my plastic wheel arches to give more clearance for the wider Toyo track tyres I’ll be fitting in the future. They also fitted lovely black front upper and lower Aero-style grilles from KillAllChrome, but painted them satin black rather than keeping the high gloss which is how they come originally.
At the same time as this, I took the opportunity to shave some weight from the car with some lightweight panels.
We’ve all heard Colin Chapman’s famous line, “to add speed, add lightness”, and my overall aim with the R53 is to remove 100kg, which means I should achieve just over 250bhp per ton given the engine mods we have planned. This puts us within spitting distance of an E46 M3 CSL, not a bad performance benchmark for an old MINI. Indeed, the legendary German “Coupe Sport Lightweight” was a perfect lesson in how to hone a standard road car model into a razor sharp track weapon without sacrificing cross country refinement or daily practicality.
For those of us wanting to build a track day car that can still be driven on the street, it’s not a bad starting point for inspiration.
I’m certainly taking a few leaves out of the Bavarian engineers’ books, so will be keeping the carpets, headlining, electric windows and so on, instead focusing on a few areas of substantial weight saving that won’t turn the car into a noisy, rattly, flappy hellhole on wheels. Throughout the build I will show you what I remove, the rationale behind my decisions and what the results are in terms of kilos saved.
First off, I’ve had my fair share of fibreglass panels on my cars over the years and they’ve always been a bit… pants. Most have suffered from poor fitment, uneven panel gaps and fragile fibreglass that cracks or crazes. I’d heard great things about Carefully Crafted Fibreglass (aka CCF), and when speaking with the father and son team Rob and Alex it was obvious they have vast experience and a real passion for quality.
I went for their bonnet and tailgate, and some people have asked why I didn’t opt for their doors too as they save a massive 37kg over the originals. Two reasons really – firstly I want to retain electric windows as I’ve never got on with plastic window sliders, and secondly I just didn’t fancy the extra road noise or the lack of reassuring “clunk” you get when you shut a metal door. We are going to cut out some of the internals of our steel doors at a later date and although we might not get anywhere near CCF’s 4.5kg per door, I can live with the compromise on this build.
When the bonnet and tailgate arrived, we were very impressed. The level of finish and quality of workmanship is honestly by far the best I’ve ever seen on fibreglass panels, and I think the team at Wrights were relieved!
I also fancied polycarb windows, not the fronts but the rear screen and rear quarter windows. Theia Transparency were again highly recommended to me and their main man Andy was a diamond with donkeys years of experience in the rally and race world. I opted for their 4mm thick rear quarter windows and a rear screen, all in a plain clear finish although you can also buy them in a bronze tint, a grey tint and with an anti-fog coating. Mine came with a very beautifully crafted black surround just like the OEM glass windows, and the biggest compliment that I can make is that they don’t look like plastic windows at all!
In fact, I don’t think anyone would even spot the car has polycarbonate windows or fibreglass panels if I hadn’t pointed it out.
In summary, we’ve saved a substantial amount of weight without negatively impacting the cars aesthetics or making it nasty to drive in the process, which is a win-win and very much true to the CSL / Clubsport ethos.
The roof and mirrors are now white, and I'm so happy with the final outcome although I'm a bit torn on what to do regarding stickers / stripes. Part of me says go OEM Cooper S white stripes on the bonnet, part of me says go for Viper style stripes on the bonnet and tailgate, a la Clown Shoe Motorsports' old R53. Heeelp!
Weight Savings:
Bonnet - 7kg (CCF), 19kg (OEM)
Tailgate - 4kg (CCF), 13kg (OEM)
Rear screen - 2kg (Theia Transparency), 4kg (OEM)
Side windows (each) - 2kg (Theia Transparency), 4.5kg (OEM)
TOTAL WEIGHT SAVING SO FAR – 28kg
With the bodywork done, the car was now worthy of a serious mechanical transformation so off it went to Sussex Road and Race to perform their speciality - turning MINIs into full on track and race weapons.
I chose them for the build for two reasons - one, because they've won the Cooper, JCW and Cooper S championships no less than a total of four times. And to, because Kevin and Josh Fullbrook conducted every "sounding out" call with the upmost professionalism, candour and care. With all of SRR’s racing pedigree, I’m mega excited and confident about the magic they will sprinkle on my R53, and over the coming months I'll be documenting their work very closely around choosing and fitting the right safety equipment, sorting out brakes beefy enough to take a full day’s track abuse, dialling in the chassis and more.
They have already started the process, having stripped out a lot of the rear trim not just to save weight but to install the rollcage I'll cover in a future post.
Kev has a few tricks up his sleeve when it comes to stripping MINIs and saving weight in the right places without breaking the bank. Starting with the obvious stuff, he began by removing the standard front seats and door cards. We will be replacing these with a set of lightweight buckets and flat profile RaceCarDoorCards in a future post, both of which weigh a fraction of the originals and are much safer and more practical for track use too.
From this point onwards things got a little bit more involved, and noisy! The angle grinder came out and Kev did his best Texas Chainsaw Massacre impression, chopping out – very neatly it has to be said – some of the metalwork from the inside of the doors and removing the crash bars too. As our roll cage will come with door bars we don’t need these MINI crash bars too, so out they came. And yes we could have gone for a set of fibreglass doors which would save a tonne of weight, but after years of sweating inside track cars fitted with polycarbonate front windows (even when equipped with sliding apertures) I decided to keep my electric windows this time around and that meant sticking with metal doors.
Moving around the back, and Kevin quickly got to work on a signature weight saving mod. As standard the R53 has a deep, wide and generally overly engineered battery box, designed for a lead acid car battery. It consists of a large amount of metal, and Kev likes to cut this out and relocate the battery underneath the front passenger seat. Not only does cutting this steel out save weight, but relocating the battery up front also enables them to reduce the amount of wiring running from the front of the car to the back and therefore save even more weight. The final benefit of this “flat floor” boot is that we can get a custom R56 style exhaust system made for the car, with straight pipe runs and thus save even more weight compared to the complicated and heavy R53 rear silencer system.
The relocation of the battery opened our eyes to a wider range of batteries we could now fit, and over the past few years there has been a huge increase in the availability and popularity of lithium. There are quite a few European companies selling kits for track day and race cars, but in my opinion many of them are astronomically overpriced and out of reach for us mere mortals. Doing some research into more cost effective options, and all roads led back to the hotbed of greentech, California, and that’s when I came across Anti Gravity. We haven’t heard much of them in the UK, but they have a long string of champions using their products mostly within American motocross, off road racing, drifting and drag racing series.
Their advice for road cars fitted with alarms, immobilisers and other regular amp draws was to opt for an ATX20, ATX20HD or ATX30HD. These offer huge weight savings over your standard lead-acid battery but also have stacks of available amps to power any accessories and start your car every day without drama. All Anti Gravity batteries have an integrated BMS (battery management system), and the ATX20 also benefits from their unique Restart technology. This trick feature means that if the battery ever runs really “flat” for whatever reason, you can press the Restart button and there will always be enough cranking power stored by the BMS to start your car with.
Knowing that my car won’t be a daily, and that I will be able to take a bit more care of the battery, I opted for an even smaller ATX12HD unit. This is exactly half the size of the original battery, and weighs – weight for it – 1.36kg! The original lead-acid weighed 15.5kg so we’re saving over 14kg just by switching to the Anti Gravity unit. For the price of just £260 (plus the special C-Tek lithium charger also supplied by them for £100), this battery has to be the most cost effective and easiest way to shed significant weight from your MINI – it’s a no brainer as far as I’m concerned! In the next issue Kev will be swearing profusely whilst scraping out sound deadening, and pushing it into the SRR fabrication shop for the roll cage install.
I've listed the parts they have removed so far and how much they weighed below… This build is about to go from mild to wild, somewhere between Clubsport and track day regular I guess.
WEIGHT SAVING CONTINUED:
Front seats - 22kg each
Battery - 15.5kg
Battery box - 4.5kg
Inner doors cut out - 2kg
Rear seat wings and brackets - 1.5kg
Door cards - 4kg
Rear seat backs – 12kg
Rear seat bottom – 4kg
Rear side trim panels – 8kg
Parcel shelf – 1.5kg
Rear boot trim, rear belt fixings, jack, ariel fittings – 4.5kg
TOTAL – 101.5kg (will be recalculated when replacement seats, door cards and battery are fitted)
OVERALL WEIGHT SAVED TO DATE: 129.5kg
Moderator edit: no need for the repeated promotion of company names
With a key driver for building my R53 in the first place being to enjoy several trips a year to Germany’s legendary “track”, I thought it was prudent to protect myself from any potential mistakes, or should that read likely ones! I’ve never been to the Nurburgring before but I’m well aware of its reputation as a pride taking, car smashing beast.?
So first and foremost, I wanted to create a proper safety cell that would stand up to a rollover or three as well as the impact of smacking into an Armco barrier. I actually changed my mind a few times on the design criteria, as my original concept was a Porsche 911 Clubsport style build with a lightweight half rear cage, bucket seats and OEM seatbelts. Talking to Kev however and he just wasn’t having it! It was clear their racing experience and most importantly crashing experience had taught them that A-pillar protection is also very important in a MINI. I’m pretty keen on doing everything possible to keep my squishy bits intact so we agreed that a full, weld in roll cage would be the best option.
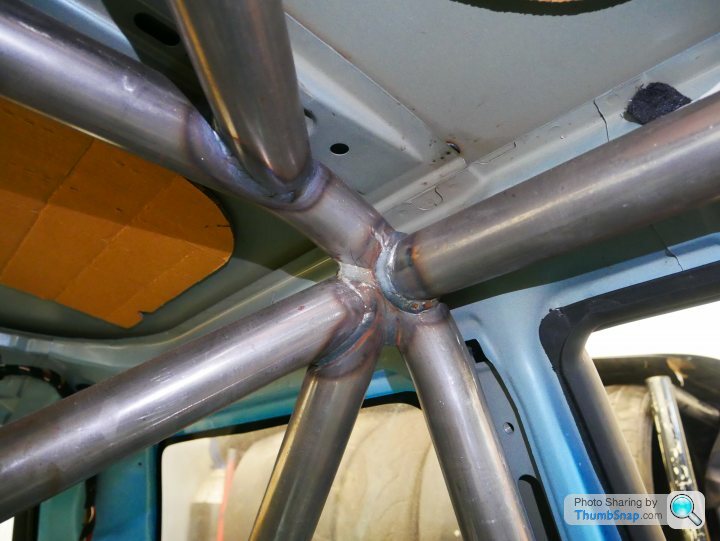
Luckily, they have a fully equipped on-site fabrication shop which turns out carefully crafted MSA-reg compliant cages mostly for race cars but increasingly so now also, track day cars. In my case, the car will be used on the road and the track, so we agreed the double door bars as used in their competition cars would be better substituted for single door bars for easier egress. They’ve also stripped away some of the rear floor bracing found in their competition cars, so I’m essentially going to end up with a front section with single door bars and an “X” braced rear section with harness bars.
They actually tack the bars into position inside the car before removing them and welding them fully on the workbench. You can see the cage is tacked in and the fitment is already looking great, you’ll also notice that the overall construction is reassuringly substantial.


The only hesitations I had about such a beefy cage were firstly weight, and secondly interior aesthetics. We’ve done such a good job getting well over 100kg out of the MINI that a lightweight, minimalistic cage held a certain appeal for me. But as Kev reminded me, I’m not competing, I’m not chasing hundredths or even tenths of a second so the benefit of staying in one piece for my young son rather than saving a few kilos here and there was a no brainer. On the subject of interior aesthetics, I originally wanted to keep the headlining in place but weld in cages make that nigh on impossible to achieve. Sure, I could have gone for a bolt in cage but I’m not as keen on them so I’m having to slightly forego the full Clubsport aesthetic of my original concept. Thankfully however, Kev has allowed me to keep the front carpet!
Next week I’ll be showing you the final roll cage all fitted and painted, and move on to seats and harnesses I hope, as my best mate recently picked these up for me!
So first and foremost, I wanted to create a proper safety cell that would stand up to a rollover or three as well as the impact of smacking into an Armco barrier. I actually changed my mind a few times on the design criteria, as my original concept was a Porsche 911 Clubsport style build with a lightweight half rear cage, bucket seats and OEM seatbelts. Talking to Kev however and he just wasn’t having it! It was clear their racing experience and most importantly crashing experience had taught them that A-pillar protection is also very important in a MINI. I’m pretty keen on doing everything possible to keep my squishy bits intact so we agreed that a full, weld in roll cage would be the best option.
Luckily, they have a fully equipped on-site fabrication shop which turns out carefully crafted MSA-reg compliant cages mostly for race cars but increasingly so now also, track day cars. In my case, the car will be used on the road and the track, so we agreed the double door bars as used in their competition cars would be better substituted for single door bars for easier egress. They’ve also stripped away some of the rear floor bracing found in their competition cars, so I’m essentially going to end up with a front section with single door bars and an “X” braced rear section with harness bars.
They actually tack the bars into position inside the car before removing them and welding them fully on the workbench. You can see the cage is tacked in and the fitment is already looking great, you’ll also notice that the overall construction is reassuringly substantial.
The only hesitations I had about such a beefy cage were firstly weight, and secondly interior aesthetics. We’ve done such a good job getting well over 100kg out of the MINI that a lightweight, minimalistic cage held a certain appeal for me. But as Kev reminded me, I’m not competing, I’m not chasing hundredths or even tenths of a second so the benefit of staying in one piece for my young son rather than saving a few kilos here and there was a no brainer. On the subject of interior aesthetics, I originally wanted to keep the headlining in place but weld in cages make that nigh on impossible to achieve. Sure, I could have gone for a bolt in cage but I’m not as keen on them so I’m having to slightly forego the full Clubsport aesthetic of my original concept. Thankfully however, Kev has allowed me to keep the front carpet!
Next week I’ll be showing you the final roll cage all fitted and painted, and move on to seats and harnesses I hope, as my best mate recently picked these up for me!
Glad to see this thread back - had wondered where it had gone.
Really interesting reading - I’m in the process of stripping down my R53 for dedicated track use after 9 years of daily duties with an occasional track day thrown in. Slow going at the moment but hoping to spend more time on it soon.
Your build so far is almost identical to my plans - would be interested to hear what kind of price they charge for installing the cage - feel free to DM instead of posting, if you prefer.
Following four weeks of blood and tears in freezing workshop temperatures, Sussex Road and Race have finished the rollcage. I'm so happy with the end result! Having first tacked the bare pipework inside my R53 to check fitment, they then removed it and finished up on the bench to ensure solid and consistent welds for optimum integrity in the event of a rollover. It also enables them to make it look ever so pretty too, which is a bonus!
At the same time as the welding was being done, Josh from SRR tackled the interior shell and spent untold hours in what looks like a true labour of love. Picking off sound deadening isn’t fun, but he pushed through and chucked between fifteen and twenty kilos of the stuff into the bin which is quite astounding. He even redid the seam sealer to make the finished result look better than OEM and boy am I grateful for all of his hard work. Meticulous prep work is just as important on the rollcage and interior as it is on the exterior, and all of Josh’s hard work paid off when they applied the Electric Blue paint in their spray booth.
I’m so glad the gaffer Kevin agreed to do this as a “one off special” for me. SRR usually paints their cages and interiors in a flat grey similar to Audi Nimbus Grey, as it not only looks purposeful and is easy to keep clean but it also keeps the interior cooler. Their race cars are all finished in this way, but even Kevin admitted afterwards that the result is rather pretty so is happy to incorporate such paint work into customer rollcage / interior builds in the future.
In terms of weight, as well as the sound deadening we also removed the air-con (circa 5kg) and even the radio and speakers. These are only a couple of kilos in total but I’m too old to listen to Radio 1 these days anyway and would rather hear the supercharger whine. And although we haven’t weighed the rollcage, guesswork puts it at around 25-30kg. Kevin’s R53 race car tips the scales at 1060kg with a similar cage and around 1/3rd of a tank of fuel (but no driver). And the chaps at SSR assure me that my car should be identical or at least very close to that figure which would be a big step towards my 250bhp per tonne goal.
Cool project.
Regarding the loss of the roof lining and the departure from the clubsport spec a little; I’m sure you could apply some of the 4 way stretch felt carpet to the roof to help tidy things up.
The added bonuses of cutting down on temperature swings, condensation and reverberations from the roof panels would also be nice.
Thanks both, much appreciated.
The headliner is a great idea - I covered the top of storage drawers that I custom made for my Jeep in that stuff, I hadn't thought of that but it's a great idea, thanks!
Funnily enough, I had some pics from the SRR chaps who are rapidly refitting the interior, and with just the front carpet and dash in its already "calmed" down a lot in there... I think I may leave the roof but time will tell and again, a great suggestion.
PerformanceMINIR53 said:
Thanks both, much appreciated.
The headliner is a great idea - I covered the top of storage drawers that I custom made for my Jeep in that stuff, I hadn't thought of that but it's a great idea, thanks!
Funnily enough, I had some pics from the SRR chaps who are rapidly refitting the interior, and with just the front carpet and dash in its already "calmed" down a lot in there... I think I may leave the roof but time will tell and again, a great suggestion.
If you do go down that route, a couple of pieces of well placed mass loaded vinyl under the felt, à la kitchen sink bottom, would stop the roof turning in to a giant amplifier for NVH.The headliner is a great idea - I covered the top of storage drawers that I custom made for my Jeep in that stuff, I hadn't thought of that but it's a great idea, thanks!
Funnily enough, I had some pics from the SRR chaps who are rapidly refitting the interior, and with just the front carpet and dash in its already "calmed" down a lot in there... I think I may leave the roof but time will tell and again, a great suggestion.
Happy New Year all!
Whilst I was eating and drinking too much over the festive period, SRR got really stuck in to the build and the car is frighteningly close to being - dare I jinx it- finished.
To carry on where we left off last time, the interior went back in very nicely and my fears of it being too racey are now a distant memory. I swapped my original blue carpet with a black one and went a bit lavish with a couple of purchases which are a little different to the MINI modding norm.


 [url]
[url]
 |https://thumbsnap.com/AUTWPDJQ[/url][url]
 |https://thumbsnap.com/5j7jSmFT[/url][url]
 |https://thumbsnap.com/VsEVvrT6[/url][url]
 |https://thumbsnap.com/FXRxW5em[/url][url]
First off, I spent far too much on a Personal steering wheel. I've never been a fan of the trend for yellow centre marks on steering wheels, even less so when the car is front wheel drive. That, coupled with the fact that Senna used to use Personal wheels and that they're just a little less frequently seen than the usual brands and I was sucked in. I went even further with custom options being blue stitching and a blue horn button. I coupled it with a B&G quick release boss a) so I can get my lumbering arse into to the car more easily, b) to give it a little more security and c) to bring the wheel closer to me. I had this same QR in my Cosworth powered Toyota Starlet and I really like the fact it has a pin that you have to manually operate before it will let you pull the paddles back and take the wheel off. Much safer than others on the market.


 [url]
[url]
 |https://thumbsnap.com/7cMzFhZ5[/url]
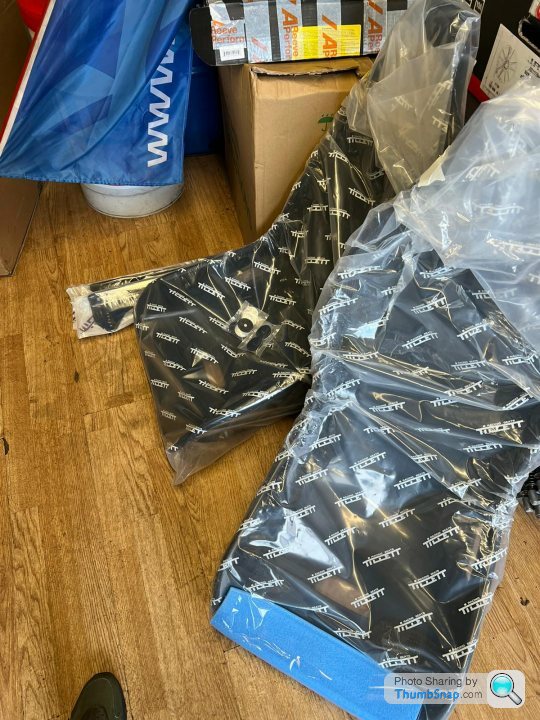
The other things I spent far too much on were Tillet B6 Screamer carbon seats (XL size). I had a set of their B5's in my Starlet and they were so comfy, light, stiff and looked cool that I knew I had to get some in the MINI. They were a b h to get in the MINI though, we had to use Corbeau side mounts and custom made alloy spacers between the side mount and the seat to get them in. To be more precise, the Corbeau mounts bolt straight into the MINI bolt holes which the original MINI seat mounts bolt into. But the Tilletts are a narrow seat, externally, so that bit (lot!) of race car engineering was required to get them in solidly.
After I visited them for a seat fitting over Xmas, SRR then also made a set of brackets to sit me further back than the Corbeau side mounts allowed on their own (I have very long legs and I had just a little too much bend in the leg!).

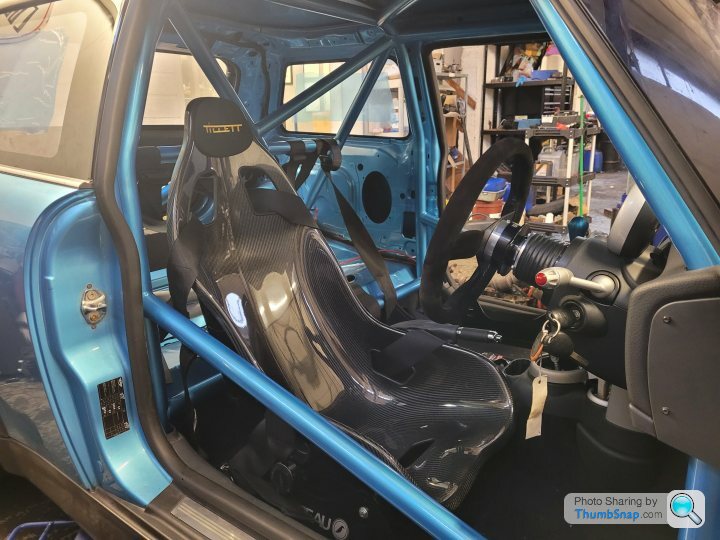


I'm so happy with the outcome - the driving position / ergonomics and the look and feel of it all. I'd actually never sat in an R53 before but it felt "right" immediately, like a baby touring car. I'm also so appreciative of all the amazing care, love and attention showed by Kev at SRR, little touches abound like painting bits and pieces, being meticulous with the wiring loom routing and neatness, making a cute little battery strap to fix it under the passenger seat...


... not to mention all of the trial and error to get the seats fitted just right. They also fitted a rear tailgate release pull and latch, to keep that fibreglass tailgate firmly latched shut - I was a bit worried it might open slightly due to air pressure when I'm blasting along with my windows down. I didn't fancy drafting exhaust gas into the cockpit so the latch gives us a belt and braces tight close.


Some may have noticed the head unit has been replaced by a carbon look panel - this will hold a Scangauge 2 which will be hooked up to the OBD port which has been relocated on a custom bracket near the steering wheel to be easily accessible. This will enable me to remove the Scangauge and plug it into my Jeep when I take that away on expeditions.


Some may also have noticed that there is a rather long gearstick in there! This as one of ZeroPointOne's first R53 short shifters, I think they have got a really good name in the fast Renault circles and I can see why. British made, quality throughout and probably one of the biggest "driving feel" game changers fitted to the car.

Finally, I bought a 2kg Lifeline Zero360 handheld extinguisher and Kev mounted it in front of the passenger seat for a quick grab in the worst case scenario.

Still to go in: carbon (look) door cards from RaceCarDoorCards and some carbon clip on rollcage strips to protect the door bars from shoe and jean scuffs. I'm getting the latter from Demon Tweeks.
Thanks for reading!
Whilst I was eating and drinking too much over the festive period, SRR got really stuck in to the build and the car is frighteningly close to being - dare I jinx it- finished.
To carry on where we left off last time, the interior went back in very nicely and my fears of it being too racey are now a distant memory. I swapped my original blue carpet with a black one and went a bit lavish with a couple of purchases which are a little different to the MINI modding norm.
[url]|https://thumbsnap.com/AUTWPDJQ[/url][url]|https://thumbsnap.com/5j7jSmFT[/url][url]|https://thumbsnap.com/VsEVvrT6[/url][url]|https://thumbsnap.com/FXRxW5em[/url][url]First off, I spent far too much on a Personal steering wheel. I've never been a fan of the trend for yellow centre marks on steering wheels, even less so when the car is front wheel drive. That, coupled with the fact that Senna used to use Personal wheels and that they're just a little less frequently seen than the usual brands and I was sucked in. I went even further with custom options being blue stitching and a blue horn button. I coupled it with a B&G quick release boss a) so I can get my lumbering arse into to the car more easily, b) to give it a little more security and c) to bring the wheel closer to me. I had this same QR in my Cosworth powered Toyota Starlet and I really like the fact it has a pin that you have to manually operate before it will let you pull the paddles back and take the wheel off. Much safer than others on the market.
[url]|https://thumbsnap.com/7cMzFhZ5[/url]The other things I spent far too much on were Tillet B6 Screamer carbon seats (XL size). I had a set of their B5's in my Starlet and they were so comfy, light, stiff and looked cool that I knew I had to get some in the MINI. They were a b
h to get in the MINI though, we had to use Corbeau side mounts and custom made alloy spacers between the side mount and the seat to get them in. To be more precise, the Corbeau mounts bolt straight into the MINI bolt holes which the original MINI seat mounts bolt into. But the Tilletts are a narrow seat, externally, so that bit (lot!) of race car engineering was required to get them in solidly. After I visited them for a seat fitting over Xmas, SRR then also made a set of brackets to sit me further back than the Corbeau side mounts allowed on their own (I have very long legs and I had just a little too much bend in the leg!).
I'm so happy with the outcome - the driving position / ergonomics and the look and feel of it all. I'd actually never sat in an R53 before but it felt "right" immediately, like a baby touring car. I'm also so appreciative of all the amazing care, love and attention showed by Kev at SRR, little touches abound like painting bits and pieces, being meticulous with the wiring loom routing and neatness, making a cute little battery strap to fix it under the passenger seat...
... not to mention all of the trial and error to get the seats fitted just right. They also fitted a rear tailgate release pull and latch, to keep that fibreglass tailgate firmly latched shut - I was a bit worried it might open slightly due to air pressure when I'm blasting along with my windows down. I didn't fancy drafting exhaust gas into the cockpit so the latch gives us a belt and braces tight close.
Some may have noticed the head unit has been replaced by a carbon look panel - this will hold a Scangauge 2 which will be hooked up to the OBD port which has been relocated on a custom bracket near the steering wheel to be easily accessible. This will enable me to remove the Scangauge and plug it into my Jeep when I take that away on expeditions.
Some may also have noticed that there is a rather long gearstick in there! This as one of ZeroPointOne's first R53 short shifters, I think they have got a really good name in the fast Renault circles and I can see why. British made, quality throughout and probably one of the biggest "driving feel" game changers fitted to the car.
Finally, I bought a 2kg Lifeline Zero360 handheld extinguisher and Kev mounted it in front of the passenger seat for a quick grab in the worst case scenario.
Still to go in: carbon (look) door cards from RaceCarDoorCards and some carbon clip on rollcage strips to protect the door bars from shoe and jean scuffs. I'm getting the latter from Demon Tweeks.
Thanks for reading!
Edited by PerformanceMINIR53 on Wednesday 18th January 21:14
Edited by PerformanceMINIR53 on Wednesday 18th January 21:23
Edited by PerformanceMINIR53 on Wednesday 18th January 21:26
Carrying on from the interior build up, Kev also spent hours... no days(!) fitting my meth kit - much to his chagrin! Their race cars aren't allowed to use it so they're not "converts" to the technology just yet, but having had a 4x4 3-door Sierra Cosworth with water injection back in 2002, I know that even plain old H20 can make a massive difference to performance if set up properly.My Cosworth used to run 11-sec 1/4-miles way back then.
Geoff at Clement Speed Shop, who is the UK partner of Speedtech Motorsport, supplied a Snow Performance Stage 2 E Powermax kit. I modified the order slightly, upgrading to their 9.5 litre "race tank" rather than the standard 3 litre plastic tank that comes with the kit. Speedtech in the USA does a TON of meth tuning, they are deep into direct port injection too so they know their onions on the tech.
Kev mounted the tank on the centre line of the car, unfortunately we couldn't get the big tank any more forward than where its ended up, but actually when it's filled with a full 9.5 litres of meth it'll weigh around 11kg. We've definitely stripped more weight out of the rear of the car than at the front, so actually I think it will help with rebalancing front/rear weigh distribution rather than hinder the whole weight saving mission. I went with such a big tank, because I want to be able to go on fairly long road trips and enjoy track days without having to constantly worry about refilling or carrying extra meth with me. I've opted for two water/meth nozzles so will be using a fair bit of the stuff. I also prefer the fact that this tank hides all the hardware such as the pump etc. so it is a much cleaner installation.


I must admit that throughout this process of learning, some changes to the Snow kit "happened". Instead of triggering the pump on/off via the Snow VC50 progressive controller (boost triggered), I've decided to run it off the ECUMaster ECU. So we have ditched the Snow Controller, and added a solid state relay between the ECU and the Snow pump which will help the ECU to pulse the pump when we want it to - ie. triggered by boost, revs, inlet air temps, throttle position... whatever we want really (to be decided).
We also added some other parts to give us the ability to run two nozzles and also to give us a bit of protection in the event of a meth system failure.

First off, the nozzles, and I spent probably 40 hours alone just researching the 1 nozzle vs 2 nozzle argument, speaking with Snow and also several American meth specialists (they seem further ahead on this tech than we do in the UK). Many UK people swear by just one nozzle, placed in the post-intercooler horn. But every American company including Snow, other meth specialists and even long time famous drag racers, plus Devils Own in the UK immediately told me, without any hesitation, to put another nozzle in before the supercharger. Apparently this will cool the charger, give me a bit more boost and several even went as far to say that if they had just one nozzle to install, it would be in that location rather than in the intercooler horn. It flies in the face of the UK MINI crowd, but I'm going to try it anyway.


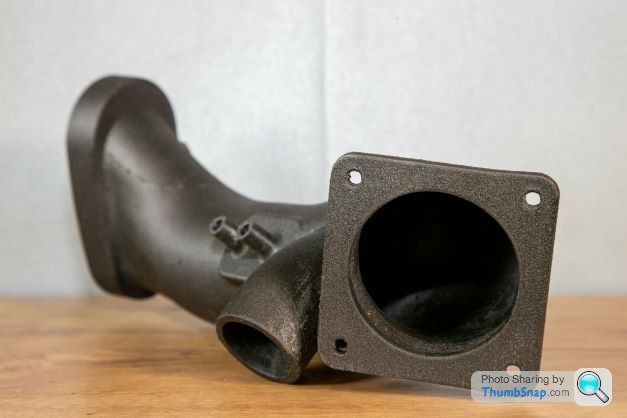
We fitted two 180cc nozzles (so 360cc total), one in the post intercooler horn and one in the charge pipe going from the air filter to the supercharger. Its worth mentioning we are not running our original charge pipe, we are running the beautifully engineered TPE Precision 3D printed pipe which is 45% bigger volumetrically and is said to give an extra 6+bhp at the wheels across a wide rev range on its own. Getting the meth nozzle to fit nicely into it was a bit of a mission but it's certainly never coming out now!
So onto some safety measures.
Firstly we fitted a solenoid between the pump and the injectors to prevent any meth being leaked into the engine when it's not meant to.
Secondly we fitted a low level float switch hooked up to a red LED on my dash to alert me to any dry run situations.
But to be honest the third "failsafe" is the most important in my eyes - a flow pressure sensor fitted before the nozzles. This will be wired up to the ECU and the way I understand it is this:
- The sensor sends a steady voltage to the ECU.
- If it senses a pressure drop (ie there is a leak in the line or in a nozzle or there's an issue with the pump) it will send a different voltage to the ECU and the ECU will fall back onto a safe map. Safe map will mean an immediate retarding of ignition most likely.
- If it senses a pressure spike (a blocked line or nozzle) it will send a different voltage again to the ECU and the ECU will fall back onto a safe map.


I know there are some really advanced kits out there which run on injector duty cycle and also have some pretty special failsafes, but for me, I'm satisfied. Lead times on some kits are ridiculous and sporadic as is the aftersales care, plus if the worst comes to the worst - and I know people who've been running the same set up for many years without issue so I'm not sure it will come to this - you can buy a complete Cooper S engine for about £600.
I'm going to run 50/50 water/meth and the tune will actually be taking advantage of the meth ie. optimising ignition etc. Again, I know a lot of people run water/meth "not tuned in" purely as an intake air temp reducer but honestly I've also watched a lot of tests which show that when not tuned in, even though it's true that IAT's reduce, the meth can actually reduce horsepower as it slows down the fuel burn and other stuff I don't fully understand but have a general gist of.
I guess that will segway nicely into the next installment which will be about the engine mods.
Have a great evening!
Geoff at Clement Speed Shop, who is the UK partner of Speedtech Motorsport, supplied a Snow Performance Stage 2 E Powermax kit. I modified the order slightly, upgrading to their 9.5 litre "race tank" rather than the standard 3 litre plastic tank that comes with the kit. Speedtech in the USA does a TON of meth tuning, they are deep into direct port injection too so they know their onions on the tech.
Kev mounted the tank on the centre line of the car, unfortunately we couldn't get the big tank any more forward than where its ended up, but actually when it's filled with a full 9.5 litres of meth it'll weigh around 11kg. We've definitely stripped more weight out of the rear of the car than at the front, so actually I think it will help with rebalancing front/rear weigh distribution rather than hinder the whole weight saving mission. I went with such a big tank, because I want to be able to go on fairly long road trips and enjoy track days without having to constantly worry about refilling or carrying extra meth with me. I've opted for two water/meth nozzles so will be using a fair bit of the stuff. I also prefer the fact that this tank hides all the hardware such as the pump etc. so it is a much cleaner installation.
I must admit that throughout this process of learning, some changes to the Snow kit "happened". Instead of triggering the pump on/off via the Snow VC50 progressive controller (boost triggered), I've decided to run it off the ECUMaster ECU. So we have ditched the Snow Controller, and added a solid state relay between the ECU and the Snow pump which will help the ECU to pulse the pump when we want it to - ie. triggered by boost, revs, inlet air temps, throttle position... whatever we want really (to be decided).
We also added some other parts to give us the ability to run two nozzles and also to give us a bit of protection in the event of a meth system failure.
First off, the nozzles, and I spent probably 40 hours alone just researching the 1 nozzle vs 2 nozzle argument, speaking with Snow and also several American meth specialists (they seem further ahead on this tech than we do in the UK). Many UK people swear by just one nozzle, placed in the post-intercooler horn. But every American company including Snow, other meth specialists and even long time famous drag racers, plus Devils Own in the UK immediately told me, without any hesitation, to put another nozzle in before the supercharger. Apparently this will cool the charger, give me a bit more boost and several even went as far to say that if they had just one nozzle to install, it would be in that location rather than in the intercooler horn. It flies in the face of the UK MINI crowd, but I'm going to try it anyway.
We fitted two 180cc nozzles (so 360cc total), one in the post intercooler horn and one in the charge pipe going from the air filter to the supercharger. Its worth mentioning we are not running our original charge pipe, we are running the beautifully engineered TPE Precision 3D printed pipe which is 45% bigger volumetrically and is said to give an extra 6+bhp at the wheels across a wide rev range on its own. Getting the meth nozzle to fit nicely into it was a bit of a mission but it's certainly never coming out now!
So onto some safety measures.
Firstly we fitted a solenoid between the pump and the injectors to prevent any meth being leaked into the engine when it's not meant to.
Secondly we fitted a low level float switch hooked up to a red LED on my dash to alert me to any dry run situations.
But to be honest the third "failsafe" is the most important in my eyes - a flow pressure sensor fitted before the nozzles. This will be wired up to the ECU and the way I understand it is this:
- The sensor sends a steady voltage to the ECU.
- If it senses a pressure drop (ie there is a leak in the line or in a nozzle or there's an issue with the pump) it will send a different voltage to the ECU and the ECU will fall back onto a safe map. Safe map will mean an immediate retarding of ignition most likely.
- If it senses a pressure spike (a blocked line or nozzle) it will send a different voltage again to the ECU and the ECU will fall back onto a safe map.
I know there are some really advanced kits out there which run on injector duty cycle and also have some pretty special failsafes, but for me, I'm satisfied. Lead times on some kits are ridiculous and sporadic as is the aftersales care, plus if the worst comes to the worst - and I know people who've been running the same set up for many years without issue so I'm not sure it will come to this - you can buy a complete Cooper S engine for about £600.
I'm going to run 50/50 water/meth and the tune will actually be taking advantage of the meth ie. optimising ignition etc. Again, I know a lot of people run water/meth "not tuned in" purely as an intake air temp reducer but honestly I've also watched a lot of tests which show that when not tuned in, even though it's true that IAT's reduce, the meth can actually reduce horsepower as it slows down the fuel burn and other stuff I don't fully understand but have a general gist of.
I guess that will segway nicely into the next installment which will be about the engine mods.
Have a great evening!
Edited by PerformanceMINIR53 on Wednesday 18th January 21:21
The car came with its original engine, and getting rare nowadays it was bone stock barring an aftermarket stainless rear exhaust section. It had turned 80,000+ miles but had been well maintained so was smooth, free of smoke and didn't guzzle oil or make worrisome noises... the perfect base to ruin with modifying lol!
A lot of late nights reading on the MINI forums and filling my head with info on other peoples big power builds, it became clear that some had reached 270bhp+ with varying degrees of reliability whereas many had reached 250bhp with really impressive levels of reliability. The R53 is never going to be sledgehammer fast so what's 20bhp extra really, on a track day or B road? So 250bhp sounded good to me, and between SRR and Oli at Orranje a spec was formed. Oli has built a reputation as the go to MINI parts guy and thats because he stocks the best products at the best prices and is so efficient and responsive with regards customer satisfaction. He has supplied the parts to most of the big power builds in the UK so it was a no brainer for me to pick his brains.
His Orranje air box with K&N filter sucks through a hole in the scuttle panel, and is regarded as actually making a tangible difference to output. Kev at SRR painted it gloss black to be a bit different.


Oli also supplied an ATi crank damper (the OEM harmonic balancers break up), an oil sump baffle kit with SRR welded in, and Bosch 550cc injectors. Kev at SRR had an uprated fuel pump lying around so we've installed that too.

He also put me in touch with Shane of SC Porting, who'd been getting some great results on Orranje customers cylinder heads. A good chat with him and it became apparent the exhaust ports and exhaust valves are a big restriction on the R53 both of which SC reworks heavily with porting and 2mm bigger valves. The inlets get 1mm bigger valves, incidentally supplied by G&S Valves who wanted to try a trick one piece valves on the car. Along with bronze valve guides, three angle seats and a slightly lumpy Cat Cams 469 cam, my "BVH" is similar to other SC customers cars making 270bhp... apparently the ported head and fast road cam combo is obligatory to get an R53 past 240/250bhp.


This is all held down with ARP head studs, incidentally we also installed ARP con rod bolts along with new shells / bearings for a bit of a refresh and to cope with a few more revs than stock. And that's where I might have made a bit of a mistake...

Consensus with supercharger pulleys is that a 15% reduced pulley is better for higher revving track cars to prevent the supercharger being pushed too far past its efficiency/reliability/heat generation envelope. And that 17% reduced pulleys are better for fast road cars running less revs and using that extra low down grunt for A-B point to point driving. I went for a KAVS 17% reduced pulley, so time will tell whether I have made the right choice or whether I've mismatched the pulley-head-cam-intended use Venn diagram. Incidentally, the JCWs run an 11% reduced pulley which a) work on the edge of the supercharger envelope and b) thanks to the JCW head work doesn't result in a ton more heat/EGT. Kev at SRR runs a 17% pulley on his race car and runs it HARD, and reckons a 17% be sweet on mine so I'm hopeful.
Either way, I also sourced a very low mileage "facelift" supercharger with funky Teflon coating which are meant to be better (more heat resistant, bit more boost), but in reality I reckon it probably makes zero difference and have kept my earlier non Teflon coated one as a spare which I'll happily fit without hesitation when this one packs up.
It is blowing through an Airtec top mount intercooler. Another controversial topic this in the MINI world! Consensus is that a factory GP intercooler is the best especially regarding its ability to shed heat inbetween WOT. But prices are ridiculous now, so I decided to go with this aftermarket option, and the water/meth injection of course. I've always had the best experiences with bar and plate intercoolers in Cosworths and RS Turbos and the Airtec top mount is bar and plate design so that was the reason I opted for their product in this case as all others are tube and fin. I also fitted their silicon hoses all round, their coolant expansion tank as the OEM one is known for failing and their oil cooler kit.


A Scorpion exhaust manifold and de-cat flow into a custom SRR exhaust system which is a straight R56 style complete with a fairly large silencer to try to keep dB track friendly and exiting in a 3 inch downturned tailpipe. I've had downturned pipes on lots of my cars such as my Starlet (pictured below) - like the Tillett seats its a bit of a signature and just looks a bit more racy and uncluttered than the twin pipes usually found on MINIs.


Finally, an ECUMaster Black ECU will be tuned by Horsham Developments - pretty soon I hope, and I'm excited to see what it will do. A few MINI in the know types have said I should be into the 270s, but whilst that may be true if I was running VPower, Jez at Horsham is going to tune it on BP 97. The reason being, I can only get 98RON in France and I'm not convinced its a true 98RON. So we'd rather map on a slightly rubbish UK fuel and be safe when running the car in France rather than tuning to the max on VPower and then blowing the thing up the first time I fill up from the Casino/Carrefour/Leclerc etc.
I'll be happy for the car to make 240bhp on the non meth map, and 250-260bhp on the meth map all day, every day, no pulling timing etc, just solid, repeatable numbers rather than headline grabbing figures.
I'll keep you posted, SRR has put the engine back in now, it's running and sounding angry and we hope to get it mapped within the next month : )
A lot of late nights reading on the MINI forums and filling my head with info on other peoples big power builds, it became clear that some had reached 270bhp+ with varying degrees of reliability whereas many had reached 250bhp with really impressive levels of reliability. The R53 is never going to be sledgehammer fast so what's 20bhp extra really, on a track day or B road? So 250bhp sounded good to me, and between SRR and Oli at Orranje a spec was formed. Oli has built a reputation as the go to MINI parts guy and thats because he stocks the best products at the best prices and is so efficient and responsive with regards customer satisfaction. He has supplied the parts to most of the big power builds in the UK so it was a no brainer for me to pick his brains.
His Orranje air box with K&N filter sucks through a hole in the scuttle panel, and is regarded as actually making a tangible difference to output. Kev at SRR painted it gloss black to be a bit different.
Oli also supplied an ATi crank damper (the OEM harmonic balancers break up), an oil sump baffle kit with SRR welded in, and Bosch 550cc injectors. Kev at SRR had an uprated fuel pump lying around so we've installed that too.
He also put me in touch with Shane of SC Porting, who'd been getting some great results on Orranje customers cylinder heads. A good chat with him and it became apparent the exhaust ports and exhaust valves are a big restriction on the R53 both of which SC reworks heavily with porting and 2mm bigger valves. The inlets get 1mm bigger valves, incidentally supplied by G&S Valves who wanted to try a trick one piece valves on the car. Along with bronze valve guides, three angle seats and a slightly lumpy Cat Cams 469 cam, my "BVH" is similar to other SC customers cars making 270bhp... apparently the ported head and fast road cam combo is obligatory to get an R53 past 240/250bhp.
This is all held down with ARP head studs, incidentally we also installed ARP con rod bolts along with new shells / bearings for a bit of a refresh and to cope with a few more revs than stock. And that's where I might have made a bit of a mistake...
Consensus with supercharger pulleys is that a 15% reduced pulley is better for higher revving track cars to prevent the supercharger being pushed too far past its efficiency/reliability/heat generation envelope. And that 17% reduced pulleys are better for fast road cars running less revs and using that extra low down grunt for A-B point to point driving. I went for a KAVS 17% reduced pulley, so time will tell whether I have made the right choice or whether I've mismatched the pulley-head-cam-intended use Venn diagram. Incidentally, the JCWs run an 11% reduced pulley which a) work on the edge of the supercharger envelope and b) thanks to the JCW head work doesn't result in a ton more heat/EGT. Kev at SRR runs a 17% pulley on his race car and runs it HARD, and reckons a 17% be sweet on mine so I'm hopeful.
Either way, I also sourced a very low mileage "facelift" supercharger with funky Teflon coating which are meant to be better (more heat resistant, bit more boost), but in reality I reckon it probably makes zero difference and have kept my earlier non Teflon coated one as a spare which I'll happily fit without hesitation when this one packs up.
It is blowing through an Airtec top mount intercooler. Another controversial topic this in the MINI world! Consensus is that a factory GP intercooler is the best especially regarding its ability to shed heat inbetween WOT. But prices are ridiculous now, so I decided to go with this aftermarket option, and the water/meth injection of course. I've always had the best experiences with bar and plate intercoolers in Cosworths and RS Turbos and the Airtec top mount is bar and plate design so that was the reason I opted for their product in this case as all others are tube and fin. I also fitted their silicon hoses all round, their coolant expansion tank as the OEM one is known for failing and their oil cooler kit.
A Scorpion exhaust manifold and de-cat flow into a custom SRR exhaust system which is a straight R56 style complete with a fairly large silencer to try to keep dB track friendly and exiting in a 3 inch downturned tailpipe. I've had downturned pipes on lots of my cars such as my Starlet (pictured below) - like the Tillett seats its a bit of a signature and just looks a bit more racy and uncluttered than the twin pipes usually found on MINIs.
Finally, an ECUMaster Black ECU will be tuned by Horsham Developments - pretty soon I hope, and I'm excited to see what it will do. A few MINI in the know types have said I should be into the 270s, but whilst that may be true if I was running VPower, Jez at Horsham is going to tune it on BP 97. The reason being, I can only get 98RON in France and I'm not convinced its a true 98RON. So we'd rather map on a slightly rubbish UK fuel and be safe when running the car in France rather than tuning to the max on VPower and then blowing the thing up the first time I fill up from the Casino/Carrefour/Leclerc etc.
I'll be happy for the car to make 240bhp on the non meth map, and 250-260bhp on the meth map all day, every day, no pulling timing etc, just solid, repeatable numbers rather than headline grabbing figures.
I'll keep you posted, SRR has put the engine back in now, it's running and sounding angry and we hope to get it mapped within the next month : )
Edited by PerformanceMINIR53 on Monday 13th February 20:31
Edited by PerformanceMINIR53 on Wednesday 15th February 21:14
Primary Cat, the shonky exhaust manifold and the horrifically small exhaust valves and ports were what mainly strangled this engine (you've addressed some of this though).
I worked on the development of the R50, R53 and the JCW upgrade spec when I was at Ricardo many, many years ago.
Charge-cooler clamps will be your next weak-spot. They were hella expensive and st.  If you can, find some others.
The other issue is the SC outlet duct, massive restriction and repeated high boost cycling will eventually crack it. Rockers can snap as well but that's pretty rare.
I worked on the development of the R50, R53 and the JCW upgrade spec when I was at Ricardo many, many years ago.
Charge-cooler clamps will be your next weak-spot. They were hella expensive and s
t. If you can, find some others.The other issue is the SC outlet duct, massive restriction and repeated high boost cycling will eventually crack it. Rockers can snap as well but that's pretty rare.
Gassing Station | Readers' Cars | Top of Page | What's New | My Stuff