G40R 2.5 litre Duratec
Discussion


HorneyMX5 said:
How much was the engine from Raceline? One of these would be great in a Mk3 Mx5.
I'm not sure of the forum rules, but it doesn't seem to be the done thing here to quote £ paid. Looking at the values of Mk3 MX5's in the classified section, cost of the engine will be close to value of the car I suspect. Might be some space constraints under-bonnet for the throttle bodies too. Best you do a bit of research, talk to Raceline, BBR etc
Minimal progress unfortunately, due to work and life getting in the way!
All I have done recently is to obtain a different type of oil filter remote housing which should permit both a cleaner pipe route and a larger filter. Also I have a new rear screen waiting to fit, kindly supplied by Ginetta to replace mine which is suffering bond failure and therefore leaking.
I've booked some time off work next month, so hopefully can then knuckle down to it. Will update this thread when anything significant occurs.
After a long break, time for me to update this project. The 2.5 Duratec was installed and given a basic rolling road calibration to 4000rpm by new year 2018, as described originally. Since then work/life events have sapped my energy and caused the project to languish. Also, some unexpected difficulties with the car itself.
Firstly, while having the engine installed at the Guglielmi workshop, it became apparent that the rear screen was progressively de-bonding while just sitting there. Down both sides, the mastic bond was completely failed, allowing rain water to leak onto the parcel shelf and trickle on down under the seats, into the footwell areas. The Ginetta factory graciously accepted that this was a manufacturing fault and supplied a new rear screen with materials and instructions for me to install it. Unfortunately, the summer was roasting hot and I lacked the confidence to tackle this job, worried that the mastic would go off prematurely in the sweltering heat. Finally, in cooler weather around September 2018 I installed the new screen and tried to put some running-in miles on the engine. Unfortunately, the new screen came completely unstuck almost immediately!! This was highly discouraging, coupled with increasing stress in my work life.
I then did my own research into the correct method for bonding acrylic glazing into a fibreglass frame. I had to purchase rather industrial quantities of the relevant Sika products (marine and industrial application). I was then able to have another go at bonding in the previous new screen, which had luckily come unstuck very cleanly without damage. This was a success, so I went to get the MOT renewed.
At this point, the starter motor gear failed to engage with the flywheel, only screeching and grinding instead of turning the engine. The car was beached on my uneven drive, but I managed to drag it by winch into my garage.
The starter gear failure was caused by the flywheel on the new 2.5 engine having a different offset than the original 2 litre engine. The 2 litre engine appeared to be using a Mazda flywheel vs the Ford pattern flywheel on the new 2.5. Therefore the starter gear was only engaging by a couple of mm, until it finally stripped. A new Powerlite starter with Ford offset was purchased at beneficial discount, thanks to referral from Peter at Raceline. Cheers guys!!
What a job to fit the thing though, due to use of cap head bolts to secure the original starter. With the engine in the car, it was hardly possible to apply a wrench. A lifetime collection of obscure tools finally allowed me to persuade the bolts loose. The new unit was fitted using hexagon head flange bolts, much better.
Mazda starter on left, Powerlite Ford on right:

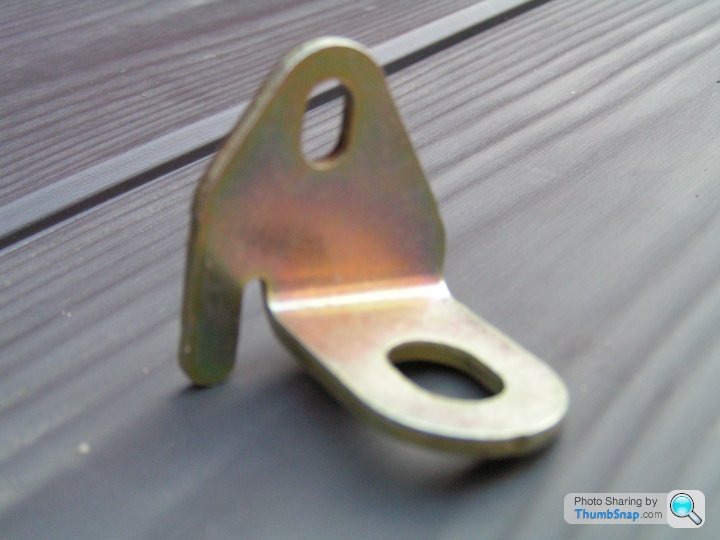
I also discovered this handy bracket, from a Ford Mondeo. It stabilises the front of the starter motor, reducing stress on the main lugs.
This takes us to summer 2019, at which point my work stress was sapping so much energy that I was unable to make any further progress until spring 2020. I then started looking more effectively at the need for an oil cooler and extra wiring for the camshaft actuator and sensor, as follows…….
The starter gear failure was caused by the flywheel on the new 2.5 engine having a different offset than the original 2 litre engine. The 2 litre engine appeared to be using a Mazda flywheel vs the Ford pattern flywheel on the new 2.5. Therefore the starter gear was only engaging by a couple of mm, until it finally stripped. A new Powerlite starter with Ford offset was purchased at beneficial discount, thanks to referral from Peter at Raceline. Cheers guys!!
What a job to fit the thing though, due to use of cap head bolts to secure the original starter. With the engine in the car, it was hardly possible to apply a wrench. A lifetime collection of obscure tools finally allowed me to persuade the bolts loose. The new unit was fitted using hexagon head flange bolts, much better.
Mazda starter on left, Powerlite Ford on right:
I also discovered this handy bracket, from a Ford Mondeo. It stabilises the front of the starter motor, reducing stress on the main lugs.
This takes us to summer 2019, at which point my work stress was sapping so much energy that I was unable to make any further progress until spring 2020. I then started looking more effectively at the need for an oil cooler and extra wiring for the camshaft actuator and sensor, as follows…….
Here is the original remote filter and pipe work, removed from its location on the lower chassis rail near the right front corner of the sump. Due to restricted space, it’s a small filter and the pipes are only -8, which is typical motorbike size, not great for a 2.5 litre car engine. Made to a budget and good enough for the original application I suppose. Time for rethink.

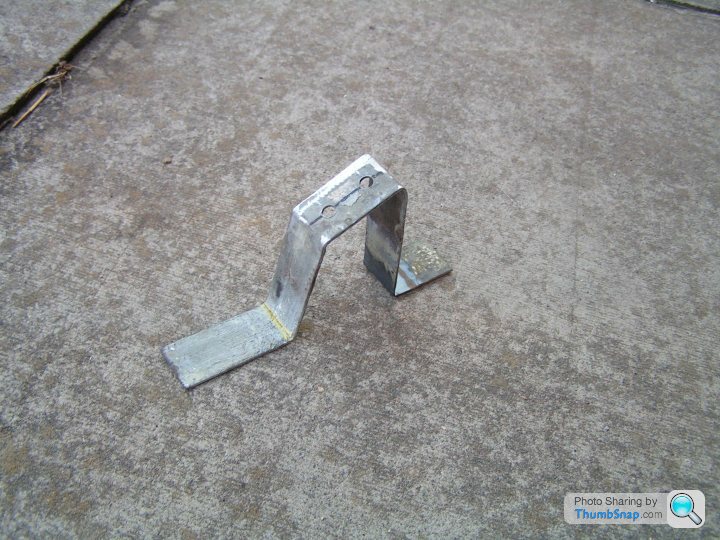
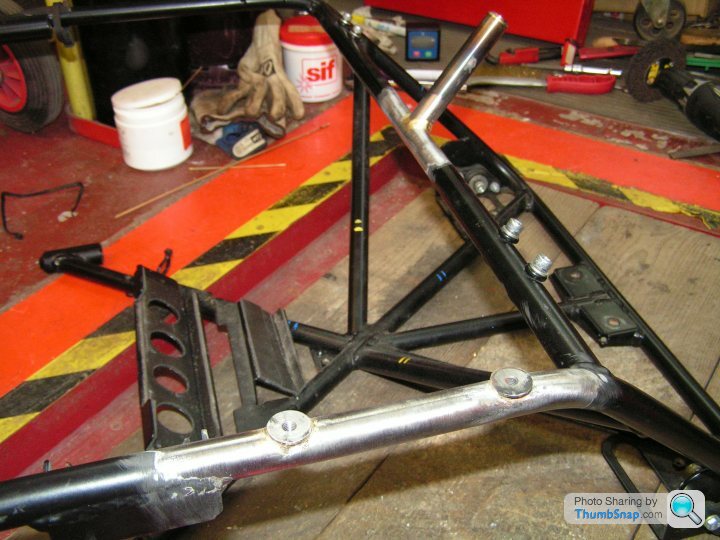
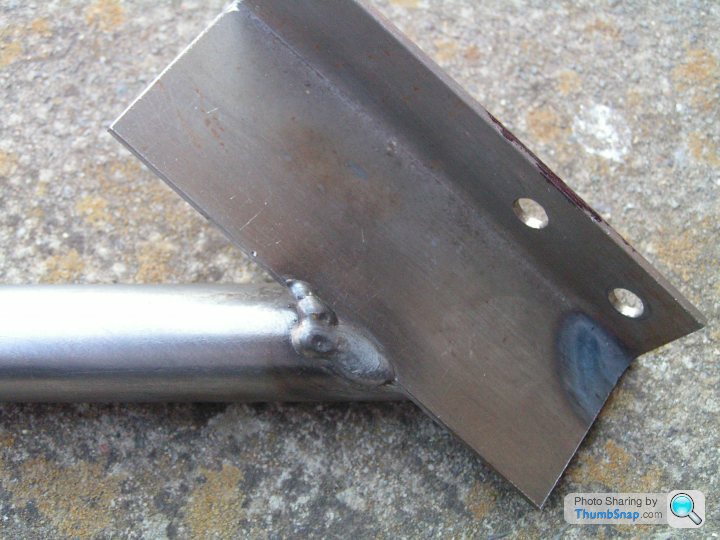
I decided to relocate the filter to up on the timing cover, at the front of the engine. This gives easy access, accommodates a larger filter and makes a cleaner route for the pipes. Here is the bracket I made to attach the Mocal filter head to the timing cover. It’s a weird shape to get the filter level while the engine is inclined at 10°. The bracket is made from heavy aluminium angle with a stiffening gusset brazed on the end and stainless M8 studs.

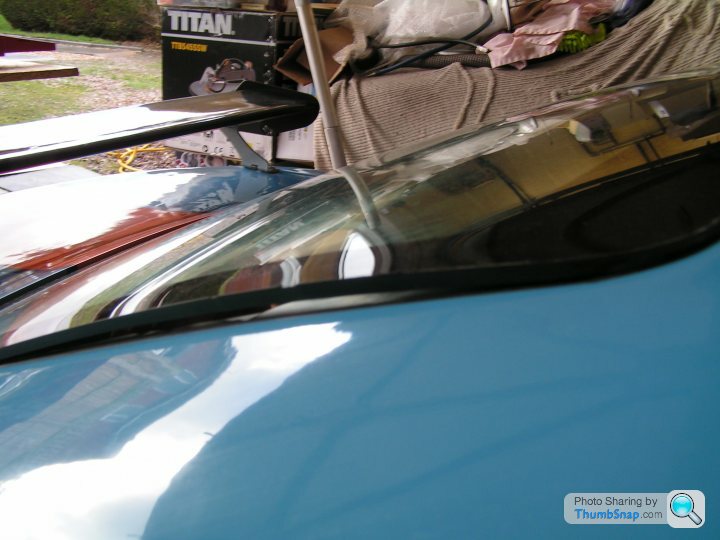
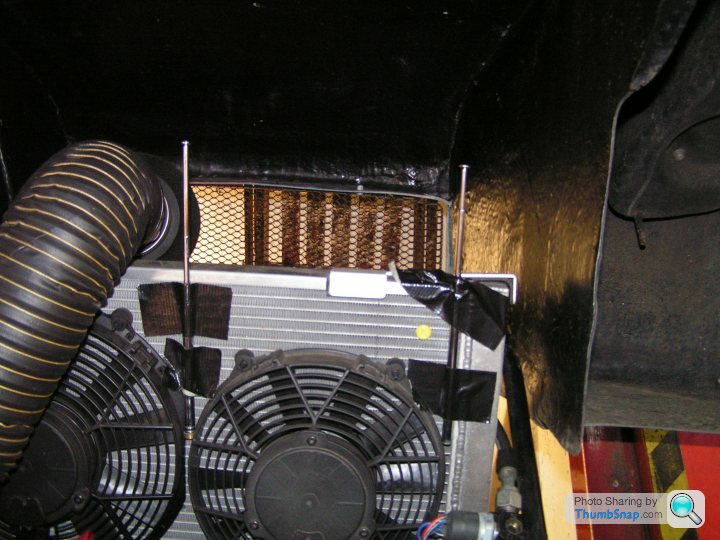
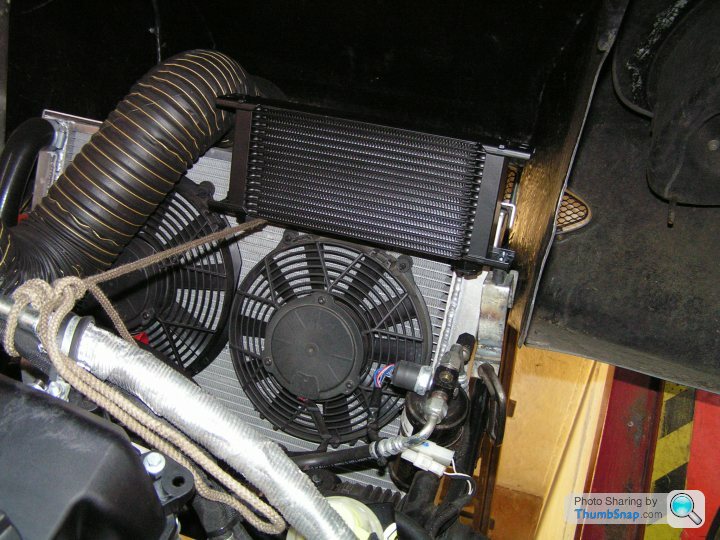
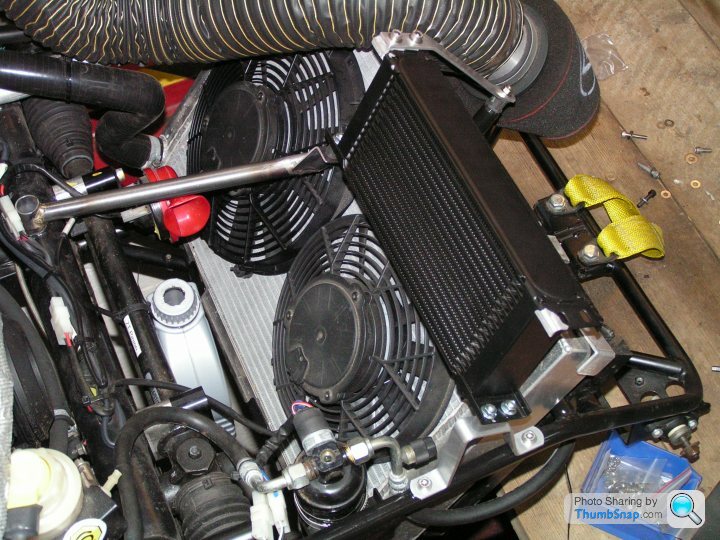
How much room is there under the bonnet for an oil cooler? I did consider mounting it very low down in the nose of the car, immediately behind the grill. I decided against this due to the long pipe run required and because it might rob cooling air from the radiator. Instead, it could go behind/above the top of the radiator to the right of the air filter. In the picture, closing the bonnet onto old telescopic aerials allows the clearance available for the cooler to be measured.
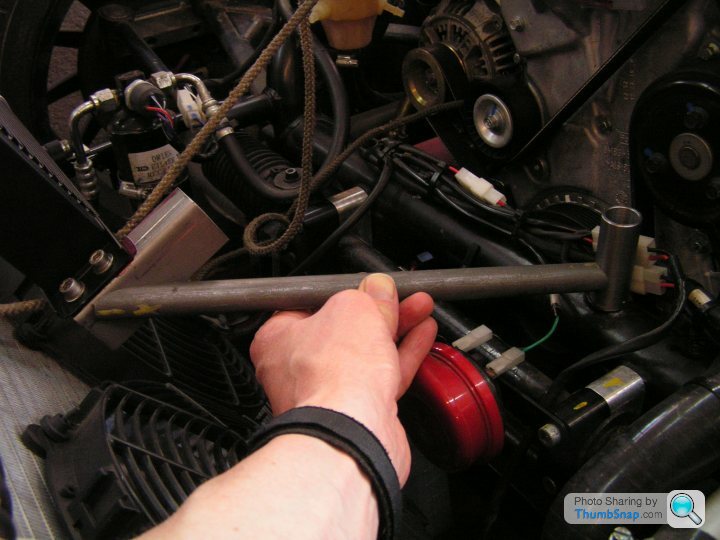
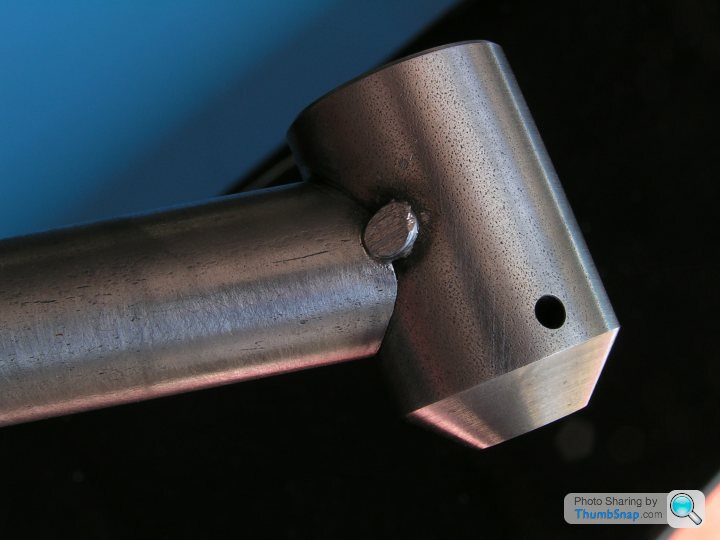
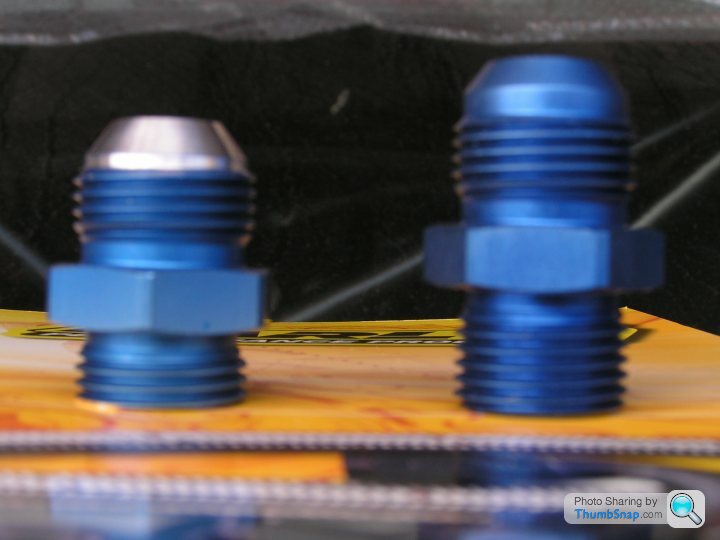
On to the pipe work. I reckoned there would just be room for -10 pipe coming off the oil manifold plate at lower left of the block. See picture of the oil manifold earlier in the thread. It was tight and I had to reduce the height of one of the -10 to ½” BSP adapters. Slightly blurry picture comparing standard to modified Earls adapter.
I’m lucky living only 20 minutes from Silverstone. It turned out that my discount at Earls Performance from way back when I was bike racing is still registered on their system. What nice people to deal with – highly recommended. No stress there!
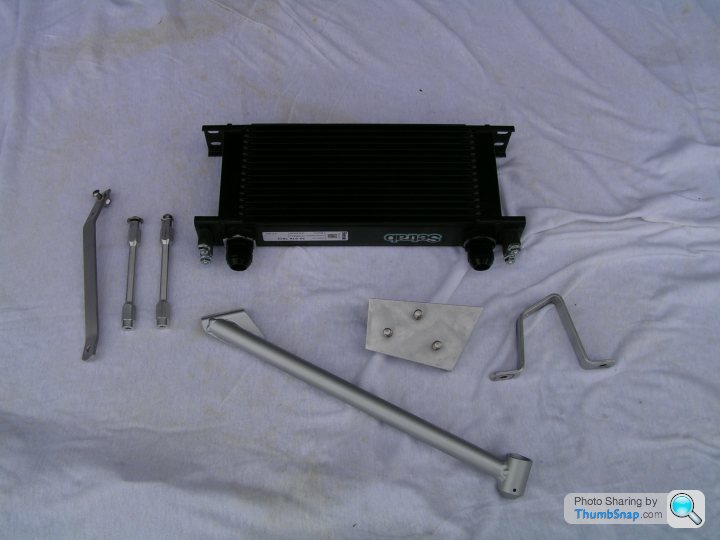
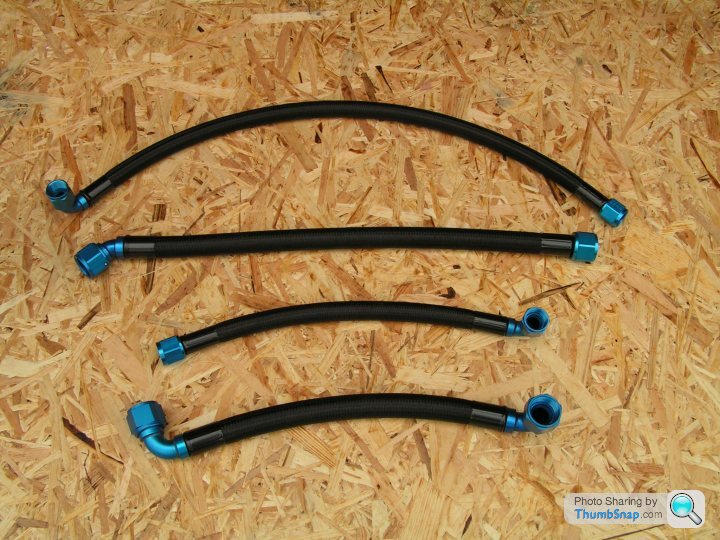
Here are all the pipes after some back and forth to Earls crimping the ends. The ends are Earls Auto-Mate with steel crimp sleeves painted epoxy black by me. The hose is Pro-Lite 390
It is -10 size coming off the engine oil manifold, crossing over to -12 at the cooler. I was really pleased with how these pipes turned out.
I’m lucky living only 20 minutes from Silverstone. It turned out that my discount at Earls Performance from way back when I was bike racing is still registered on their system. What nice people to deal with – highly recommended. No stress there!
Here are all the pipes after some back and forth to Earls crimping the ends. The ends are Earls Auto-Mate with steel crimp sleeves painted epoxy black by me. The hose is Pro-Lite 390
It is -10 size coming off the engine oil manifold, crossing over to -12 at the cooler. I was really pleased with how these pipes turned out.
Gassing Station | Ginetta | Top of Page | What's New | My Stuff