Discussion


It was the same symptoms for me. In my case I had a faulty serial to USB cable. Apparently there was a faulty batch produced. Replaced the cable and all ok. This might or might not be the same in your case but I would recommend you try out with a different cable. I don't know where you live but if you're in the Herts area you're welcome to come along and try out the one I have.
Hi There,
this is quite common fault when using a USB to serial adaptor I'm assuming that is what you are using?
If so read on (if not then this will be a waste of time but I've started so I'll finish....... as they say)
The COM port is the communications port that the diagnostic software is attempting to communicate over, however COM 2 (or port 2) was generally used in the olden days of computers when a serial port was actually built into the computer as a physical port, and this tended to occupy COM port 1 or 2.
However, nowadays it's quite rare to see a serial port on a computer or laptop and so USB adaptors are used instead, however, they typically use a 'high' COM port like 14 or 15 etc.
So you connect the cable up fine to the diagnostics it's using COM port 14 and the software on the computer is looking for the diagnostics on COM port 2, as it doesn't 'see' anything on port 2 (because it's actually connected to 14) then it says that you are not connected properly.
So the first thing we need to do is identify which port (COM) that the USB is actually connected to.
The best way to do this is to open device manager in Windows and you can do this by either typing devmgmt.msc in the Cortana bar in Windows 10, or type in the search bar which appears when you click on the start button, and it shows up as a little white box (in between the start button and 'All Programs').
If you want to get really geeky you can also do it by pressing the windows icon and the 'R' key (together) and then type devmgmt.msc in the box which appears, click ok and this will also open it
Anyway enough of all the geek stuff, lets get to where our COM port is - so when you get to device manager, scroll down the list until you see 'Ports (COM + LPT)'
Click on the little + symbol to the left and it will expand it out, now you should see something like this;
Ports (COM + LPT)
Communications Port (COM 1)
USB Serial Port (COM 14)
So you may look at that and think great, but how do I get my USB to be COM2 well there are two ways to do this, depending on whether there is something already using COM 2;
1) If nothing states COM 2 in your list as in the example above, then it's quite simple, right click on your USB serial device, click properties, once you see the properties box, you will see a few tabs, click on the tab called 'port settings', this will show a collection of things, but what we're looking for is the 'Advanced' button in the middle. Click on this and you will now see the advanced settings - at the bottom of the advanced settings box you will see there is a COM Port dropdown setting.
In my example this is set as COM Port 14, click on the dropdown and move your cursor up until you can see COM Port 2, select it, and then click OK, this may ask do you want to do this etc, but just click OK and then click OK to close down any open properties you have.
You will end up back at the device management windows and you now see the following (using my example);
Ports (COM + LPT)
Communications Port (COM 1)
USB Serial Port (COM 2)
That's it - job done and you should now be able to access the diagnostics as intended.
2) If you're unlucky and something is already using COM 2 then you can either attempt to change the settings in the software to use the COM port that your USB device is already using - the easiest way but some software is not set to go higher than COM 4 sometimes.
If you can't do that then we need to take COM Port 2 back.
So right click on the device which has COM Port 2 now and select properties, using the method (1) above change the COM Port to an unused port i.e. 4 or 5 etc. This will then 'free up' Port 2. Once you have COM port 2 free, then repeat this process again on the USB Port and then choose COM Port 2 as given in method (1).
This should then allow you to communicate with the diagnostics using COM Port 2.
It all sounds very complicated but it isn't really. Sometimes I find that once I've claimed COM Port 2, that I sometimes have to restart the laptop in order to make the COM Port change 'stick' and then it will start communication, other times it works straight away - you'll have to try whichever method works for you.
I hope this is useful and gets you communication with your COM Ports - if it doesn't let me know and I'll try and help you further.
TVRwhoa said:
Hi There,
this is quite common fault when using a USB to serial adaptor I'm assuming that is what you are using?
If so read on (if not then this will be a waste of time but I've started so I'll finish....... as they say)
The COM port is the communications port that the diagnostic software is attempting to communicate over, however COM 2 (or port 2) was generally used in the olden days of computers when a serial port was actually built into the computer as a physical port, and this tended to occupy COM port 1 or 2.
However, nowadays it's quite rare to see a serial port on a computer or laptop and so USB adaptors are used instead, however, they typically use a 'high' COM port like 14 or 15 etc.
So you connect the cable up fine to the diagnostics it's using COM port 14 and the software on the computer is looking for the diagnostics on COM port 2, as it doesn't 'see' anything on port 2 (because it's actually connected to 14) then it says that you are not connected properly.
So the first thing we need to do is identify which port (COM) that the USB is actually connected to.
The best way to do this is to open device manager in Windows and you can do this by either typing devmgmt.msc in the Cortana bar in Windows 10, or type in the search bar which appears when you click on the start button, and it shows up as a little white box (in between the start button and 'All Programs').
If you want to get really geeky you can also do it by pressing the windows icon and the 'R' key (together) and then type devmgmt.msc in the box which appears, click ok and this will also open it
Anyway enough of all the geek stuff, lets get to where our COM port is - so when you get to device manager, scroll down the list until you see 'Ports (COM + LPT)'
Click on the little + symbol to the left and it will expand it out, now you should see something like this;
Ports (COM + LPT)
Communications Port (COM 1)
USB Serial Port (COM 14)
So you may look at that and think great, but how do I get my USB to be COM2 well there are two ways to do this, depending on whether there is something already using COM 2;
1) If nothing states COM 2 in your list as in the example above, then it's quite simple, right click on your USB serial device, click properties, once you see the properties box, you will see a few tabs, click on the tab called 'port settings', this will show a collection of things, but what we're looking for is the 'Advanced' button in the middle. Click on this and you will now see the advanced settings - at the bottom of the advanced settings box you will see there is a COM Port dropdown setting.
In my example this is set as COM Port 14, click on the dropdown and move your cursor up until you can see COM Port 2, select it, and then click OK, this may ask do you want to do this etc, but just click OK and then click OK to close down any open properties you have.
You will end up back at the device management windows and you now see the following (using my example);
Ports (COM + LPT)
Communications Port (COM 1)
USB Serial Port (COM 2)
That's it - job done and you should now be able to access the diagnostics as intended.
2) If you're unlucky and something is already using COM 2 then you can either attempt to change the settings in the software to use the COM port that your USB device is already using - the easiest way but some software is not set to go higher than COM 4 sometimes.
If you can't do that then we need to take COM Port 2 back.
So right click on the device which has COM Port 2 now and select properties, using the method (1) above change the COM Port to an unused port i.e. 4 or 5 etc. This will then 'free up' Port 2. Once you have COM port 2 free, then repeat this process again on the USB Port and then choose COM Port 2 as given in method (1).
This should then allow you to communicate with the diagnostics using COM Port 2.
It all sounds very complicated but it isn't really. Sometimes I find that once I've claimed COM Port 2, that I sometimes have to restart the laptop in order to make the COM Port change 'stick' and then it will start communication, other times it works straight away - you'll have to try whichever method works for you.
I hope this is useful and gets you communication with your COM Ports - if it doesn't let me know and I'll try and help you further.
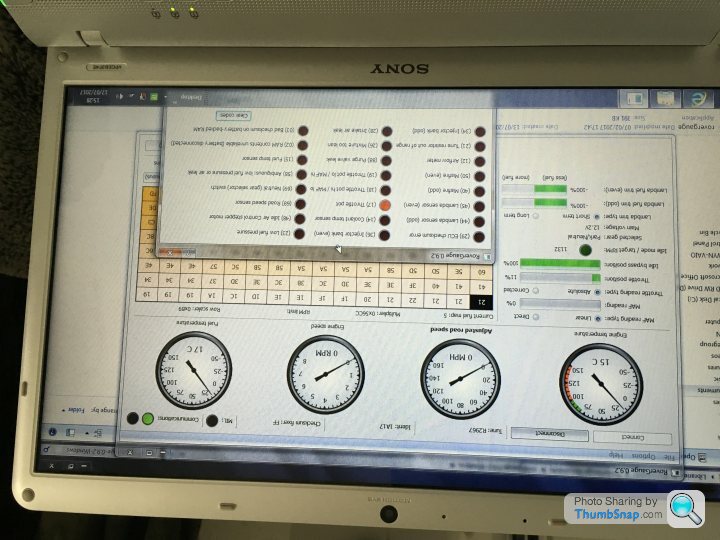
Voila I have managed to get rover gauge to work, when clicking on faults an error on throttle pot shows (17) could you tell me what this means please.this is quite common fault when using a USB to serial adaptor I'm assuming that is what you are using?
If so read on (if not then this will be a waste of time but I've started so I'll finish....... as they say)
The COM port is the communications port that the diagnostic software is attempting to communicate over, however COM 2 (or port 2) was generally used in the olden days of computers when a serial port was actually built into the computer as a physical port, and this tended to occupy COM port 1 or 2.
However, nowadays it's quite rare to see a serial port on a computer or laptop and so USB adaptors are used instead, however, they typically use a 'high' COM port like 14 or 15 etc.
So you connect the cable up fine to the diagnostics it's using COM port 14 and the software on the computer is looking for the diagnostics on COM port 2, as it doesn't 'see' anything on port 2 (because it's actually connected to 14) then it says that you are not connected properly.
So the first thing we need to do is identify which port (COM) that the USB is actually connected to.
The best way to do this is to open device manager in Windows and you can do this by either typing devmgmt.msc in the Cortana bar in Windows 10, or type in the search bar which appears when you click on the start button, and it shows up as a little white box (in between the start button and 'All Programs').
If you want to get really geeky you can also do it by pressing the windows icon and the 'R' key (together) and then type devmgmt.msc in the box which appears, click ok and this will also open it
Anyway enough of all the geek stuff, lets get to where our COM port is - so when you get to device manager, scroll down the list until you see 'Ports (COM + LPT)'
Click on the little + symbol to the left and it will expand it out, now you should see something like this;
Ports (COM + LPT)
Communications Port (COM 1)
USB Serial Port (COM 14)
So you may look at that and think great, but how do I get my USB to be COM2 well there are two ways to do this, depending on whether there is something already using COM 2;
1) If nothing states COM 2 in your list as in the example above, then it's quite simple, right click on your USB serial device, click properties, once you see the properties box, you will see a few tabs, click on the tab called 'port settings', this will show a collection of things, but what we're looking for is the 'Advanced' button in the middle. Click on this and you will now see the advanced settings - at the bottom of the advanced settings box you will see there is a COM Port dropdown setting.
In my example this is set as COM Port 14, click on the dropdown and move your cursor up until you can see COM Port 2, select it, and then click OK, this may ask do you want to do this etc, but just click OK and then click OK to close down any open properties you have.
You will end up back at the device management windows and you now see the following (using my example);
Ports (COM + LPT)
Communications Port (COM 1)
USB Serial Port (COM 2)
That's it - job done and you should now be able to access the diagnostics as intended.
2) If you're unlucky and something is already using COM 2 then you can either attempt to change the settings in the software to use the COM port that your USB device is already using - the easiest way but some software is not set to go higher than COM 4 sometimes.
If you can't do that then we need to take COM Port 2 back.
So right click on the device which has COM Port 2 now and select properties, using the method (1) above change the COM Port to an unused port i.e. 4 or 5 etc. This will then 'free up' Port 2. Once you have COM port 2 free, then repeat this process again on the USB Port and then choose COM Port 2 as given in method (1).
This should then allow you to communicate with the diagnostics using COM Port 2.
It all sounds very complicated but it isn't really. Sometimes I find that once I've claimed COM Port 2, that I sometimes have to restart the laptop in order to make the COM Port change 'stick' and then it will start communication, other times it works straight away - you'll have to try whichever method works for you.
I hope this is useful and gets you communication with your COM Ports - if it doesn't let me know and I'll try and help you further.

Before replacing the throttle pot - follow the wire from it going over the top of the engine You'll find a connector there that often gets contaminated. Break it apart and use contact cleaner to clear out any gunge etc. Doing that fixed my TP issue and I've read other people on this forum having done the same.
Gassing Station | General TVR Stuff & Gossip | Top of Page | What's New | My Stuff