Rustproof your Roadster
Discussion


I'm in the middle of a bit of a mini-restoration on my Roadster, and I thought I'd share this with you.
Everyone with a Mk1 or Mk2 is worried about rust - it’s the car killer.
If your car is already suffering from some major tin-worm then this is not for you - however if you have a car that has just been welded/fixed up, or you want to prolong the life of the original bodywork then your going to need to do some kind of rustproofing.
A few people have been asking about it on Nutz recently, and some garages are claiming that they will do a full Waxoyl for ~£150 in a couple of hours. I am dubious about this. I have previous experience of using Waxoyl - its horrendous stuff. It makes a terrible mess and it’s a horrid, cheap product. It never dries fully as it’s an oil based product and it makes a mess of everything - hence I was a bit reluctant to use it again. It also dribbles everywhere, the tins blow up, the wands block up and explode, its gloopy and messy to apply, generally a bit of a nightmare. I am not sure how some of these cheaper places can claim to full rustproof your Roadster in a couple of hours - I can only assume that they just stick it on a ramp, splash a tonne of Waxoyl over the entire underside of the car, and that’s it. Yuk.
So I did some reading up on various forums, classic car sites, magazines etc to find the alternatives. There are a number of different products/brands that are regularly recommended, but they all use a similar basic 3- step system. First you have to convert the rust - to kill it. Then you apply a protective coating to your freshly converted metal - then you protect it all with a 'sealant'.
I chose to go with some product by Dinitrol after reading lots of favourable reviews, and finding the requisite products online for a decent price.
So here’s how I did my car.
- Put on your grubby gear – you’re going to get filthy and wet.
- Get the car up on jack stands. The higher the better, and remove all the wheels. Usual warnings apply etc etc.
- Remove all the under body protection There is a plastic arch liner at each corner. Most of these are held with pozidrive screws. Set aside all the Black plastic clips that come out, and the screws. There is also a plastic undertray covering the fuel filter (driver’s side, in front of the rear subframe) and the front engine undertray. These are all/mostly 12mm nuts + washers or bolts, all easily accessible.
- Get the hosepipe/jet wash out and thoroughly blast off the bottom of the car. Pay attention to the inside edges and lips of the wheel arches - also the point where the front arch meets the bodyshell, and the corners off the rear arches. If you have mudflaps, remove those too for access.
All cars end up with thick goopy muck that gets stuck in awkward corners, this is what makes cars rust (it holds the moisture and corrosive salt in) - we want to remove this. Be really thorough as these things are all about preparation. I guess a snowfoam gun would be really useful here if you had one, with a strong TFR solution to really clean everything out.
Make sure you get down on your knees in front of each wheel arch and stick your head in - check both sides and you'll see the obvious traps, nooks and crannies - make sure these all get cleaned out.
Let the car dry. It may be worth doing the wash-off one afternoon, with a view to complete the job the morning after. The car needs time to dry off, a good few hours I guess. I left mine overnight.
- Remove the sill guards - 4 screws each side, plus they'll be stuck down with tape. Pull ‘em right out. You'll see a number of access holes into your sills.
- Unscrew your seatbelt tower plastics - you don't need to remove the seatbelts themselves, just loosen all the screws in the trim. You’ll have to drop the hood to get access to the top of the metal cap that covers the top of the plastic trim, remove this cap. Pull the rubber trims off the edge, and pull the plastic back for access. You'll see another larger access hole into the rear quarter panel/sill - AKA the bit that causes the most trouble with these cars. There’s a plastic sheet over the larger hole that can be peeled back.
- Look in the front edge of your rear wheel arches - there is a rubber plug about 30mm in diameter (it will likely be sealed in with the factory underseal). Lever this off, don’t lose it or break it.
- You now have access to the entire inner sill. Inspect it all along its length - if you shine a Torch through the holes, and look through another one, you can get a good view in. You can get a good look at the rear section through the hole left by the rubber bung. My car showed mainly grey galvanised metal, but there was some evidence of surface rust in places. You will have to make a judgement here - I guess if you found a sill full of completely rotten metalwork, and it’s only the paint on the outside holding it together - then you need a cure rather than prevention.
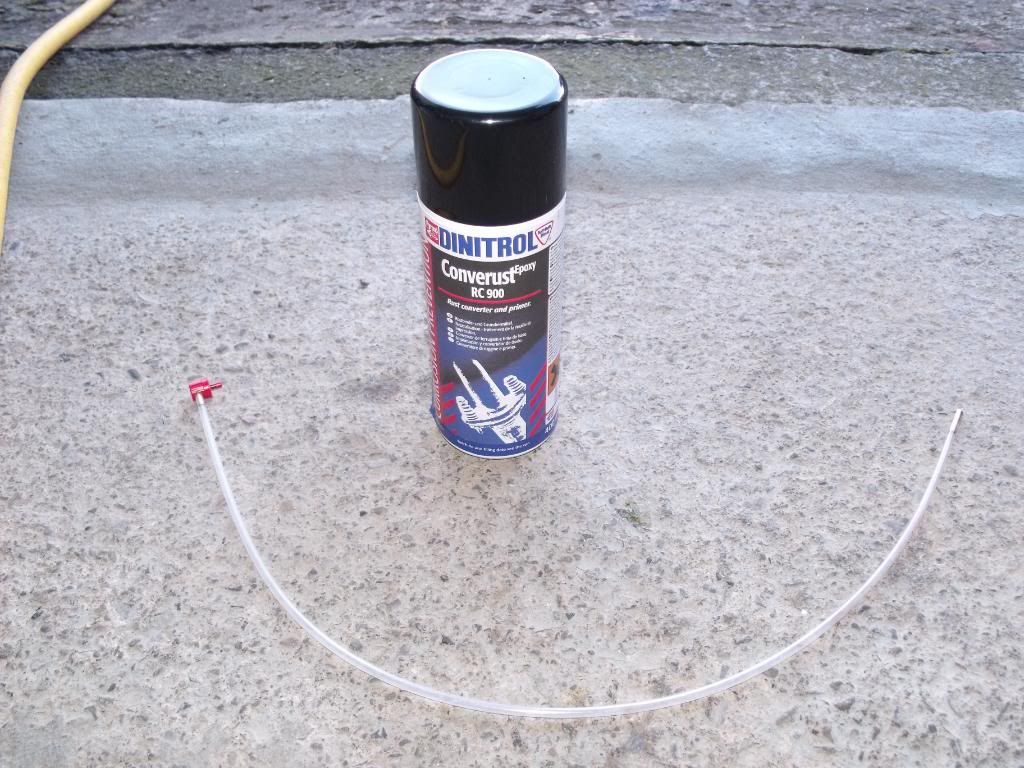
- Take your Dinitrol RC900 and the long Wand. You need to get a good covering of the product on all the inside surfaces. By threading the wand in, then pulling it out slowly as you squirt, and twizzling it round a little too, you can get a good coverage. Pay particular attention to the rear end - the rust hotspot. Make sure you get a good liberal covering. Go in through the wheel arch hole too and get the product all over. Pay attention to stop spraying before the wand pulls out of the hole as it gets everywhere - it’s a well made bit of kit.
- Get under the car now. Look along the frame rails. These often take a bit of a bashing from speed bumps strikes and the like, as they are the lowest point of the chassis. Look along both edges, and also at the ends. Check the whole of the underside for areas of damage. My particular car had a few meaty scrapes out of the frame rails, a couple of dents/bashes at the leading ends of the floorpan (where the flat underside of the car rises up towards the front wheelarch).
You need to find all the areas where corrosion is likely to kick in. If the underseal has been scraped off there will be surface rust here too.
Looking along the floorpan you’ll be able to see plenty of access holes – get your wand in all of these and get a good covering.
-You can now swap the wand back for a regular spray nozzle, and attack all the areas just identified – anywhere that there is bare or rusting metal. Also be sure to check the front and rear ends of the car – along the chassis members that run either side of the engine and diff. Check the boot floor too from underneath. You can use a more localized technique here – just spray the bits that are obviously already rusting, leave anything that’s clean metal. For the purposes of this exercise we are only interested in the body shell itself – the subframe, suspension components, mechanical bits, all require looking after too but I think that calls for different techniques and product. The body is the bit you have to worry about as it’s the only bit that you can’t just replace with another if it’s wrecked.
The Dinitrol says to allow 6 hours for it to work. Within 3 or 4 hours it had already gone off on my car enough for me to start with the wax. Bear in mind that the corner you started at will be ready well before the last bit you did!
- Watch out for drips – it will run out of the drain holes in the sills, and any other holes – it’s quite watery this product until it dries/reacts.
- Waxing. Next product is Dinitrol 3125 Cavity wax. This is designed to run into all the minute cracks and joins in the metalwork – for instance along the seam of metal that runs along the bottom off the sill. Use the same technique as before with the Wand. Now we have killed off all the existing rust we can protect the rest of the metal. Do all the sills as before, all the insides of the frame rails, through the bunghole in the rear arch, etc etc. You can go in through the bonnet to get access to the front end of the two frame rails running right up the front crossmember (where the radiator is). The aim is to have as much of the INTERNAL surfaces covered with the cavity wax. Poking the wand all the way in through a hole, then spraying as you pull and twirl, is the way to get good coverage. You’ll see the aerosol gases venting out of all sorts of holes in the body shell.
Take care to get plenty of fresh air while you’re doing it as its stinky stuff. However unlike Waxoyl it doesn’t drip, splash about, run everywhere, and make a disgusting mess – and the aerosol format is so useful.
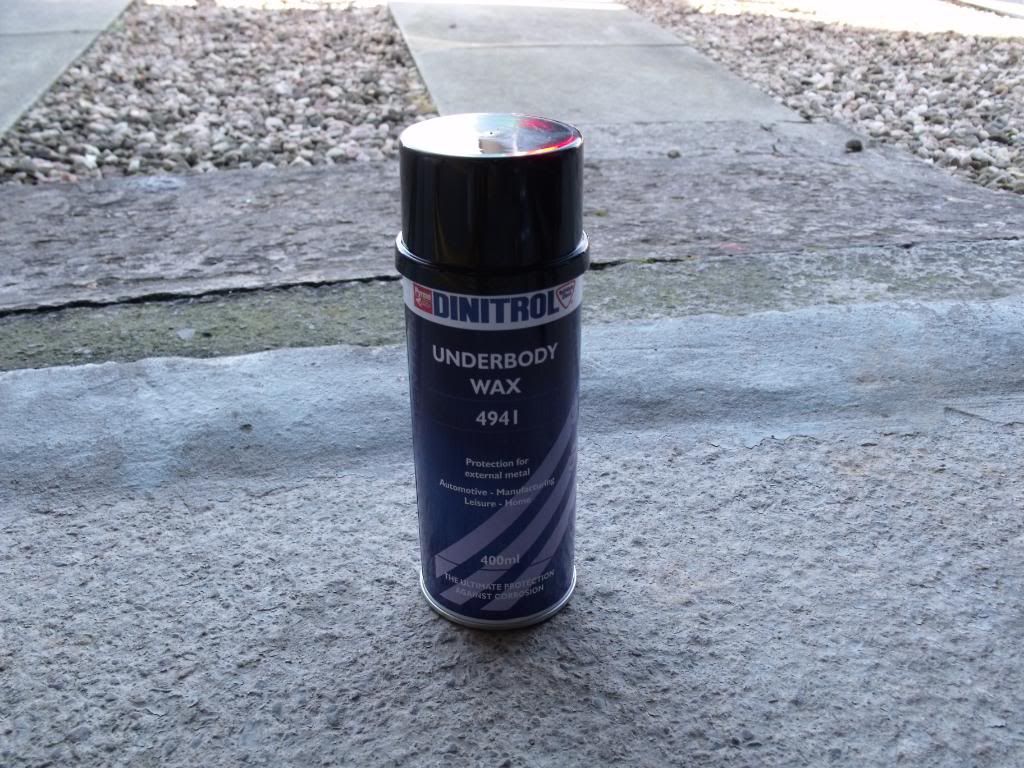
- Undersealing. The Dinitrol 4941 is used to protect and seal all the external areas. All the areas we cleaned off to begin with should get this treatment. It’s really nice to work with this product I was impressed. The product comes out evenly and thinly – yet dries as a tough, thick, rubbery underseal. Start with the arches; make sure you get plenty of coverage in all the corners. Get the can up in the arch and spray back into the lip of the arch (mind your eyes). Be sure to get the inside edge of the front wings, and also along all the seams in the metal – seams are where rust often starts. At this point you should replace the rubber bungs into their holes and seal them in with the underseal.
Because of the viscosity of the product and the fact that it hardly runs at all you can get a really neat, even, factory looking coating of the wax all over the right areas, without it going everywhere you don’t want it to.
Get on your back again and do the rear of the car, focusing on the boot floor, and the areas around the frame rails.
At the front end, get the frame rails again, the inside of the front wing, and be sure to get the areas beneath the footwells.
Underneath you want to get a good, thick covering on the whole of the underside – I made sure to get a good thick coating on the areas where the previous underseal had scraped away on the frame rails. Make sure to spray outwards onto the inside edges of the sill seams, and to get the areas further into the centre of the car. Don’t go mad on these areas though and I’d avoid spraying up near the exhaust, PPF, Fuel lines or Propshaft.
As before – just be thorough, and be liberal with the product, it works well. Be sure you have got all the areas and not missed huge bits that are out of sight – get on your back and wriggle about to look from all angles.
- Let it all dry out and start putting your car back together! I’d leave the car overnight ideally before driving to allow the Underseal to cure.
It is designed to cure with a hard ‘skin’ on the surface, yet if damaged it self heals and will ‘flow’ into the gaps.
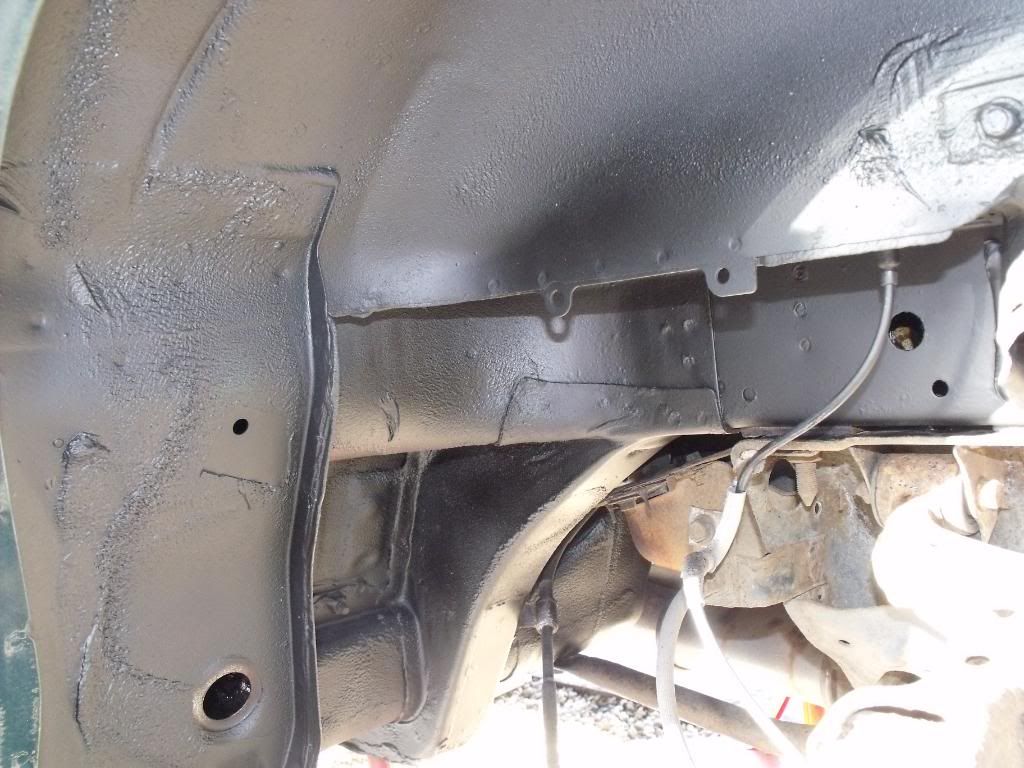
My car dried off with no dripping or runs, and now has a lovely clean, even, satin black underside – I’m really pleased with the result.
I’m really impressed with the Dinitrol products – it’s a very straightforward process and the products work really well. Far, far less mess than Waxoyl and the finish is so much better.
Hopefully the RC900 will have stopped the spread of any of the light rust that was present, and the cavity Wax will stop any more occurring. This product also works well for painting rusty metal – I’m in the process of rebuilding my brakes also, I wire brushed them then primed with the rust converter– they painted up lovely once it had worked its magic. The chemical reaction changes all the rusty metal to a different chemical compound that is inert.
The cavity wax is nice and runny and spreads really well.
After the underseal has dried for a while you’ll need to rod your drain holes to make sure they are not blocked.
I used 1 aerosol tin of RC900 rust converter, 4 tins of 3125S Cavity wax, and 5 tins of 4941 underbody wax. I have been left with one spare tin which will be useful to touch up in a few months any new underbody scrapes.
After a bit of Googling, I bought the products from Rejel – they do a ‘small car kit’ for £59.95 with the products and quantities listed. See here –
http://www.rejel.com/product/10990.aspx
It also includes the long Wand fitting, which is required. They also supply a number of plastic bungs - on some cars it would be necessary to drill some access holes which would need sealing afterwards, but luckily the Roadster has plenty of access holes dotted all over the body. I would suggest that some people might want to buy an extra tin of RC900 as I just about ran out. There may be cheaper sources but these guys delivered to me ultra-quick – I choose the free option, ordered 3pm they were with my at 8.30am the next day.
The products are also available in larger Schutz tins if you’re lucky enough to have airlines – although as I said I’m really impressed with how they worked out of a rattle can.
The purpose of the process is longevity – preventative maintenance. Hopefully it will vastly reduce the likelihood me having any rust related bad news for the next few years, whether the car is with me or another owner, who knows. For the price, it is money well spent IMO.
It is well within the realms of anyone who can safely jack their car up and use a couple of basic tools. It was considerably less messy than using Waxoyl products and has given a much better finish – different class completely, I’m really chuffed, the chassis looks like new underneath now. No thinning or mixing, or warming the tin up, or anything like that.
Note that the higher you can jack your car up, the better. Take your time and do it right, and give yourself room to manoeuvre underneath.
Pictures – yes yes, there on the way. I have some before shots, not many during. But I will get some tomorrow when the light is good to try and show the finish achieved.
I hope this is useful to some of you - I really think its worth doing.
Everyone with a Mk1 or Mk2 is worried about rust - it’s the car killer.
If your car is already suffering from some major tin-worm then this is not for you - however if you have a car that has just been welded/fixed up, or you want to prolong the life of the original bodywork then your going to need to do some kind of rustproofing.
A few people have been asking about it on Nutz recently, and some garages are claiming that they will do a full Waxoyl for ~£150 in a couple of hours. I am dubious about this. I have previous experience of using Waxoyl - its horrendous stuff. It makes a terrible mess and it’s a horrid, cheap product. It never dries fully as it’s an oil based product and it makes a mess of everything - hence I was a bit reluctant to use it again. It also dribbles everywhere, the tins blow up, the wands block up and explode, its gloopy and messy to apply, generally a bit of a nightmare. I am not sure how some of these cheaper places can claim to full rustproof your Roadster in a couple of hours - I can only assume that they just stick it on a ramp, splash a tonne of Waxoyl over the entire underside of the car, and that’s it. Yuk.
So I did some reading up on various forums, classic car sites, magazines etc to find the alternatives. There are a number of different products/brands that are regularly recommended, but they all use a similar basic 3- step system. First you have to convert the rust - to kill it. Then you apply a protective coating to your freshly converted metal - then you protect it all with a 'sealant'.
I chose to go with some product by Dinitrol after reading lots of favourable reviews, and finding the requisite products online for a decent price.
So here’s how I did my car.
- Put on your grubby gear – you’re going to get filthy and wet.
- Get the car up on jack stands. The higher the better, and remove all the wheels. Usual warnings apply etc etc.
- Remove all the under body protection There is a plastic arch liner at each corner. Most of these are held with pozidrive screws. Set aside all the Black plastic clips that come out, and the screws. There is also a plastic undertray covering the fuel filter (driver’s side, in front of the rear subframe) and the front engine undertray. These are all/mostly 12mm nuts + washers or bolts, all easily accessible.
- Get the hosepipe/jet wash out and thoroughly blast off the bottom of the car. Pay attention to the inside edges and lips of the wheel arches - also the point where the front arch meets the bodyshell, and the corners off the rear arches. If you have mudflaps, remove those too for access.
All cars end up with thick goopy muck that gets stuck in awkward corners, this is what makes cars rust (it holds the moisture and corrosive salt in) - we want to remove this. Be really thorough as these things are all about preparation. I guess a snowfoam gun would be really useful here if you had one, with a strong TFR solution to really clean everything out.
Make sure you get down on your knees in front of each wheel arch and stick your head in - check both sides and you'll see the obvious traps, nooks and crannies - make sure these all get cleaned out.
Let the car dry. It may be worth doing the wash-off one afternoon, with a view to complete the job the morning after. The car needs time to dry off, a good few hours I guess. I left mine overnight.
- Remove the sill guards - 4 screws each side, plus they'll be stuck down with tape. Pull ‘em right out. You'll see a number of access holes into your sills.
- Unscrew your seatbelt tower plastics - you don't need to remove the seatbelts themselves, just loosen all the screws in the trim. You’ll have to drop the hood to get access to the top of the metal cap that covers the top of the plastic trim, remove this cap. Pull the rubber trims off the edge, and pull the plastic back for access. You'll see another larger access hole into the rear quarter panel/sill - AKA the bit that causes the most trouble with these cars. There’s a plastic sheet over the larger hole that can be peeled back.
- Look in the front edge of your rear wheel arches - there is a rubber plug about 30mm in diameter (it will likely be sealed in with the factory underseal). Lever this off, don’t lose it or break it.
- You now have access to the entire inner sill. Inspect it all along its length - if you shine a Torch through the holes, and look through another one, you can get a good view in. You can get a good look at the rear section through the hole left by the rubber bung. My car showed mainly grey galvanised metal, but there was some evidence of surface rust in places. You will have to make a judgement here - I guess if you found a sill full of completely rotten metalwork, and it’s only the paint on the outside holding it together - then you need a cure rather than prevention.
- Take your Dinitrol RC900 and the long Wand. You need to get a good covering of the product on all the inside surfaces. By threading the wand in, then pulling it out slowly as you squirt, and twizzling it round a little too, you can get a good coverage. Pay particular attention to the rear end - the rust hotspot. Make sure you get a good liberal covering. Go in through the wheel arch hole too and get the product all over. Pay attention to stop spraying before the wand pulls out of the hole as it gets everywhere - it’s a well made bit of kit.
- Get under the car now. Look along the frame rails. These often take a bit of a bashing from speed bumps strikes and the like, as they are the lowest point of the chassis. Look along both edges, and also at the ends. Check the whole of the underside for areas of damage. My particular car had a few meaty scrapes out of the frame rails, a couple of dents/bashes at the leading ends of the floorpan (where the flat underside of the car rises up towards the front wheelarch).
You need to find all the areas where corrosion is likely to kick in. If the underseal has been scraped off there will be surface rust here too.
Looking along the floorpan you’ll be able to see plenty of access holes – get your wand in all of these and get a good covering.
-You can now swap the wand back for a regular spray nozzle, and attack all the areas just identified – anywhere that there is bare or rusting metal. Also be sure to check the front and rear ends of the car – along the chassis members that run either side of the engine and diff. Check the boot floor too from underneath. You can use a more localized technique here – just spray the bits that are obviously already rusting, leave anything that’s clean metal. For the purposes of this exercise we are only interested in the body shell itself – the subframe, suspension components, mechanical bits, all require looking after too but I think that calls for different techniques and product. The body is the bit you have to worry about as it’s the only bit that you can’t just replace with another if it’s wrecked.
The Dinitrol says to allow 6 hours for it to work. Within 3 or 4 hours it had already gone off on my car enough for me to start with the wax. Bear in mind that the corner you started at will be ready well before the last bit you did!
- Watch out for drips – it will run out of the drain holes in the sills, and any other holes – it’s quite watery this product until it dries/reacts.
- Waxing. Next product is Dinitrol 3125 Cavity wax. This is designed to run into all the minute cracks and joins in the metalwork – for instance along the seam of metal that runs along the bottom off the sill. Use the same technique as before with the Wand. Now we have killed off all the existing rust we can protect the rest of the metal. Do all the sills as before, all the insides of the frame rails, through the bunghole in the rear arch, etc etc. You can go in through the bonnet to get access to the front end of the two frame rails running right up the front crossmember (where the radiator is). The aim is to have as much of the INTERNAL surfaces covered with the cavity wax. Poking the wand all the way in through a hole, then spraying as you pull and twirl, is the way to get good coverage. You’ll see the aerosol gases venting out of all sorts of holes in the body shell.
Take care to get plenty of fresh air while you’re doing it as its stinky stuff. However unlike Waxoyl it doesn’t drip, splash about, run everywhere, and make a disgusting mess – and the aerosol format is so useful.
- Undersealing. The Dinitrol 4941 is used to protect and seal all the external areas. All the areas we cleaned off to begin with should get this treatment. It’s really nice to work with this product I was impressed. The product comes out evenly and thinly – yet dries as a tough, thick, rubbery underseal. Start with the arches; make sure you get plenty of coverage in all the corners. Get the can up in the arch and spray back into the lip of the arch (mind your eyes). Be sure to get the inside edge of the front wings, and also along all the seams in the metal – seams are where rust often starts. At this point you should replace the rubber bungs into their holes and seal them in with the underseal.
Because of the viscosity of the product and the fact that it hardly runs at all you can get a really neat, even, factory looking coating of the wax all over the right areas, without it going everywhere you don’t want it to.
Get on your back again and do the rear of the car, focusing on the boot floor, and the areas around the frame rails.
At the front end, get the frame rails again, the inside of the front wing, and be sure to get the areas beneath the footwells.
Underneath you want to get a good, thick covering on the whole of the underside – I made sure to get a good thick coating on the areas where the previous underseal had scraped away on the frame rails. Make sure to spray outwards onto the inside edges of the sill seams, and to get the areas further into the centre of the car. Don’t go mad on these areas though and I’d avoid spraying up near the exhaust, PPF, Fuel lines or Propshaft.
As before – just be thorough, and be liberal with the product, it works well. Be sure you have got all the areas and not missed huge bits that are out of sight – get on your back and wriggle about to look from all angles.
- Let it all dry out and start putting your car back together! I’d leave the car overnight ideally before driving to allow the Underseal to cure.
It is designed to cure with a hard ‘skin’ on the surface, yet if damaged it self heals and will ‘flow’ into the gaps.
My car dried off with no dripping or runs, and now has a lovely clean, even, satin black underside – I’m really pleased with the result.
I’m really impressed with the Dinitrol products – it’s a very straightforward process and the products work really well. Far, far less mess than Waxoyl and the finish is so much better.
Hopefully the RC900 will have stopped the spread of any of the light rust that was present, and the cavity Wax will stop any more occurring. This product also works well for painting rusty metal – I’m in the process of rebuilding my brakes also, I wire brushed them then primed with the rust converter– they painted up lovely once it had worked its magic. The chemical reaction changes all the rusty metal to a different chemical compound that is inert.
The cavity wax is nice and runny and spreads really well.
After the underseal has dried for a while you’ll need to rod your drain holes to make sure they are not blocked.
I used 1 aerosol tin of RC900 rust converter, 4 tins of 3125S Cavity wax, and 5 tins of 4941 underbody wax. I have been left with one spare tin which will be useful to touch up in a few months any new underbody scrapes.
After a bit of Googling, I bought the products from Rejel – they do a ‘small car kit’ for £59.95 with the products and quantities listed. See here –
http://www.rejel.com/product/10990.aspx
It also includes the long Wand fitting, which is required. They also supply a number of plastic bungs - on some cars it would be necessary to drill some access holes which would need sealing afterwards, but luckily the Roadster has plenty of access holes dotted all over the body. I would suggest that some people might want to buy an extra tin of RC900 as I just about ran out. There may be cheaper sources but these guys delivered to me ultra-quick – I choose the free option, ordered 3pm they were with my at 8.30am the next day.
The products are also available in larger Schutz tins if you’re lucky enough to have airlines – although as I said I’m really impressed with how they worked out of a rattle can.
The purpose of the process is longevity – preventative maintenance. Hopefully it will vastly reduce the likelihood me having any rust related bad news for the next few years, whether the car is with me or another owner, who knows. For the price, it is money well spent IMO.
It is well within the realms of anyone who can safely jack their car up and use a couple of basic tools. It was considerably less messy than using Waxoyl products and has given a much better finish – different class completely, I’m really chuffed, the chassis looks like new underneath now. No thinning or mixing, or warming the tin up, or anything like that.
Note that the higher you can jack your car up, the better. Take your time and do it right, and give yourself room to manoeuvre underneath.
Pictures – yes yes, there on the way. I have some before shots, not many during. But I will get some tomorrow when the light is good to try and show the finish achieved.
I hope this is useful to some of you - I really think its worth doing.
Many thanks for this post. I have one rusty sill, and one crash damaged ( ) sill which I plan to get properly refabricated and welded next month. The first thing I plan to do afterwards is come back to this thread and get stuck in with the Dinitrol. I've been using clear waxoyl just as a surface coating on the damaged areas (temporarily, to help keep any further rusting at bay until my overtime comes in!) and you're right, it is damn messy.
I too have been quoted 'reasonable' seeming prices for one-day underseal jobs and it all seems a bit dubious - I've seen the crap that builds up behind the mud flaps and can't believe any decent garage would want to seal that in without a good pressure wash/steam clean!
) sill which I plan to get properly refabricated and welded next month. The first thing I plan to do afterwards is come back to this thread and get stuck in with the Dinitrol. I've been using clear waxoyl just as a surface coating on the damaged areas (temporarily, to help keep any further rusting at bay until my overtime comes in!) and you're right, it is damn messy.I too have been quoted 'reasonable' seeming prices for one-day underseal jobs and it all seems a bit dubious - I've seen the crap that builds up behind the mud flaps and can't believe any decent garage would want to seal that in without a good pressure wash/steam clean!
This information might also be useful to Mk3 owners:
http://www.dinitrol.co.uk/Portals/0/docs/MX-5%20DI...
http://www.dinitrol.co.uk/Portals/0/docs/MX-5%20DI...
inman999 said:
It would be useful to have some pic's of the access points for waxing the internal sections
 will get that sorted aswell, its quite difficult to take pictures udnenreath because of the light.
 Car is still up on ramps for other reasons, I gave it a qick check this morning and all the wax has hardened off nicely.
Good post - thanks Snotrag!
I was under my early roadster yesterday, and have ways been fairly impressed with how little rust there is on it for a 20 year old car BUT I found a small drop of water on both front 45 degree sections of the front wheelarch/floorpan. I found with a bit of peeling an prodding that there was water trapped ove an area 10" square next to the metal, with varying corrosion. So as a warning - even if your car looks great underneath BEWARE - underseal has a nasty Habit of looking great whilst eating your roadster from underneath.
I'll have a think about this internal rustproofing, thanks.


Just found and read this. I have a Morgan and am planning to underseal/treat the underneath in Autumn. I have been looking round for products and have seen Dinitrol and am drifting towards it.
Another proeduct is Tectyl - but not so easy to find - its less gooey than Waxoyl.
The Dinitrol route looks likely though. The car looks goo dunderneath so I may just go for the final wax coat as everything looks great. Its the protective coat that I am after rather than full treatment.
Another proeduct is Tectyl - but not so easy to find - its less gooey than Waxoyl.
The Dinitrol route looks likely though. The car looks goo dunderneath so I may just go for the final wax coat as everything looks great. Its the protective coat that I am after rather than full treatment.

Well that's me finished!
Here are some pics of the process:
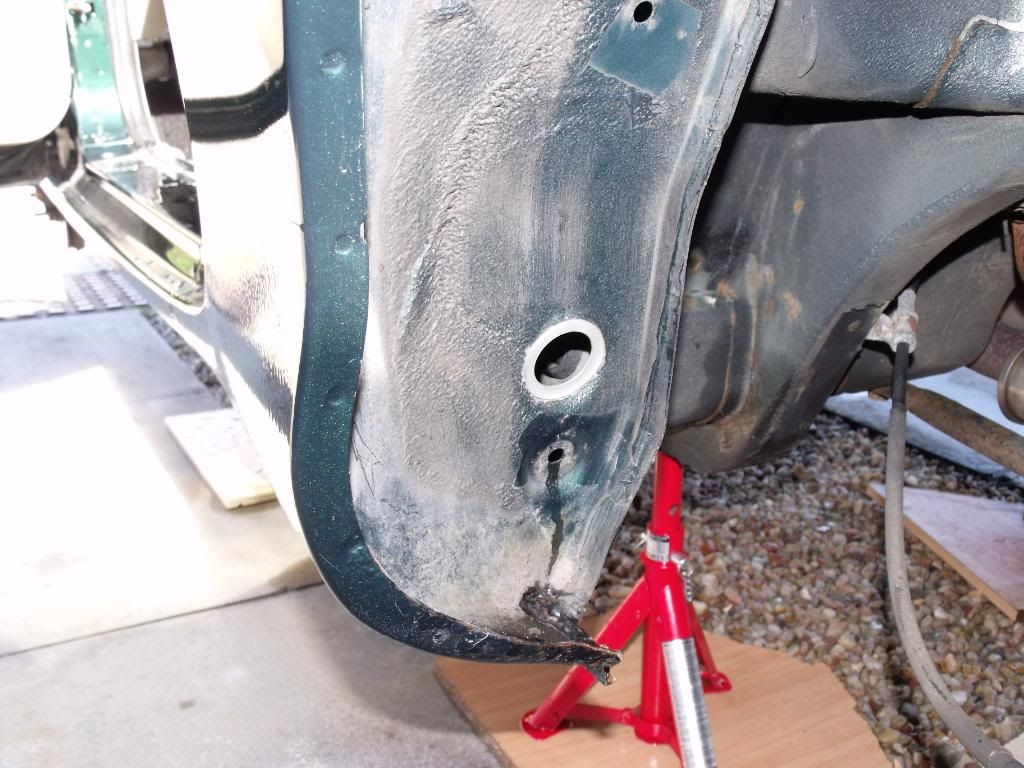
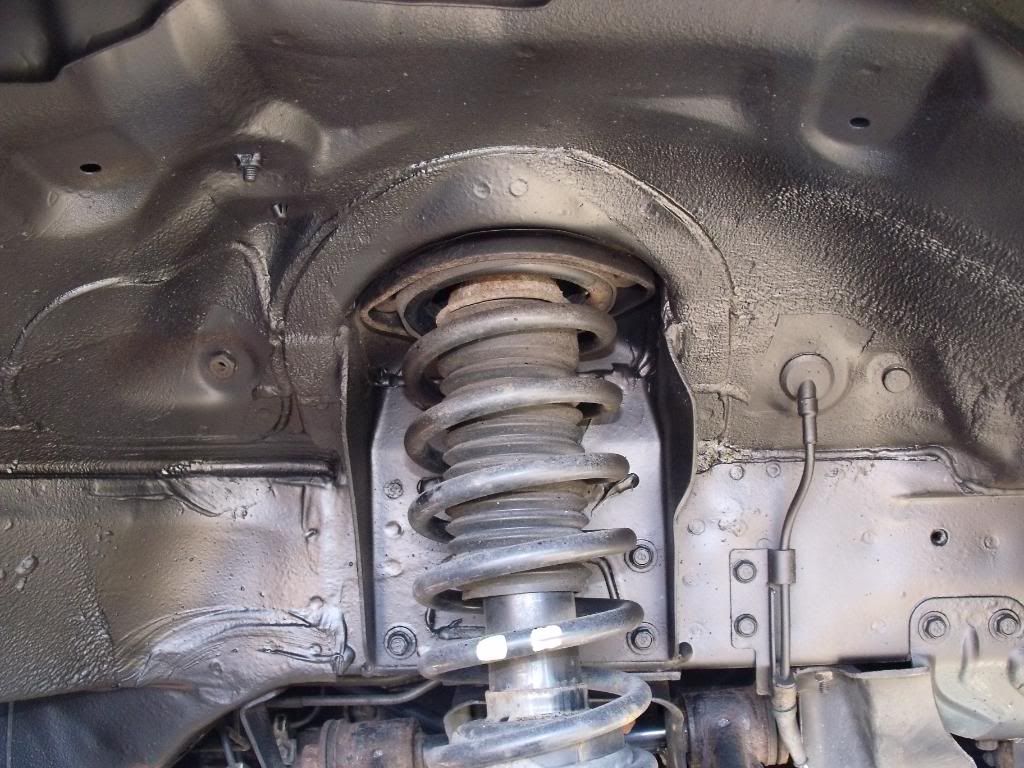
Car up on axle stands:
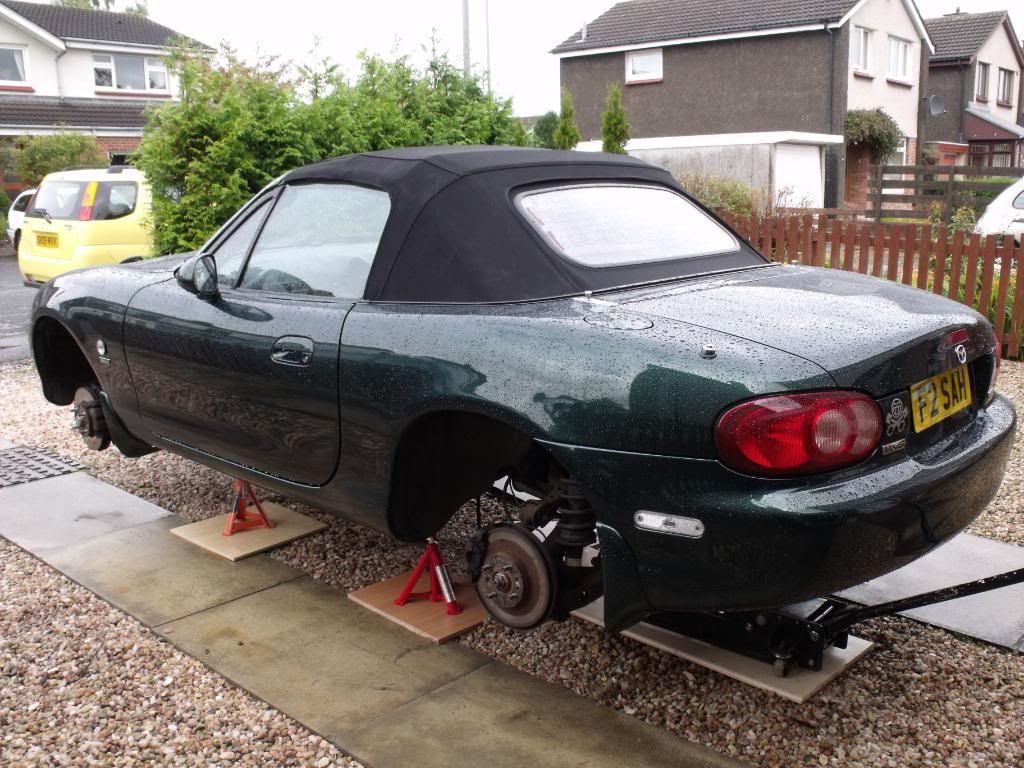
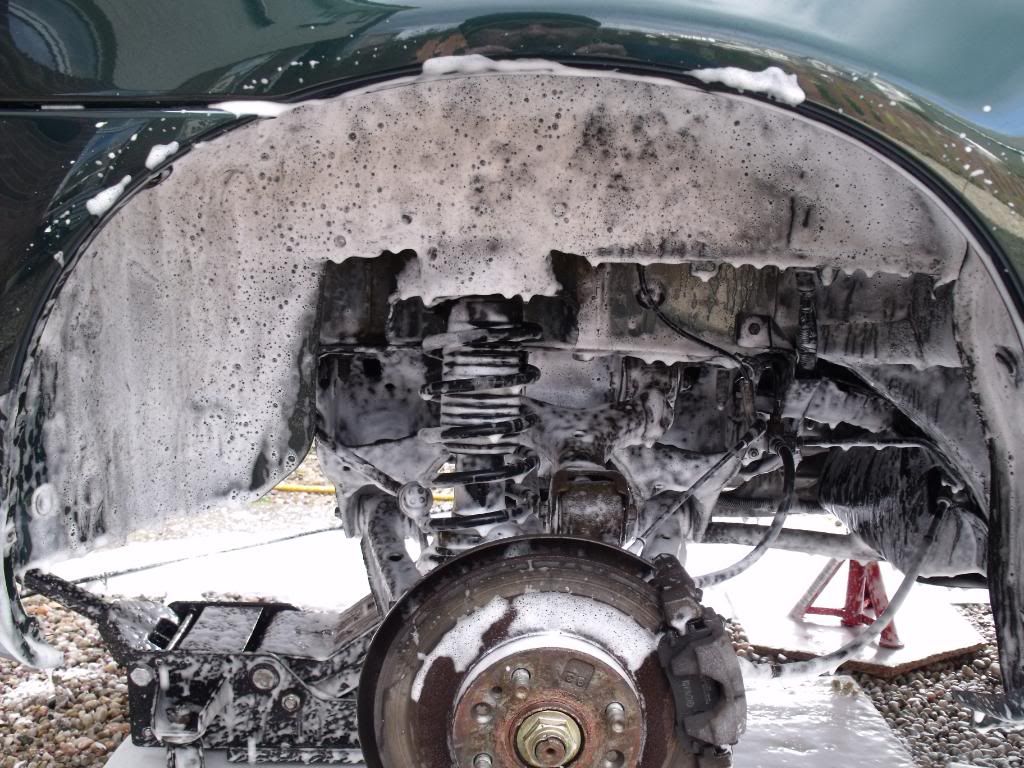
I then Snow-foamed the underside and all arches, and rinsed off with the pressure washer:
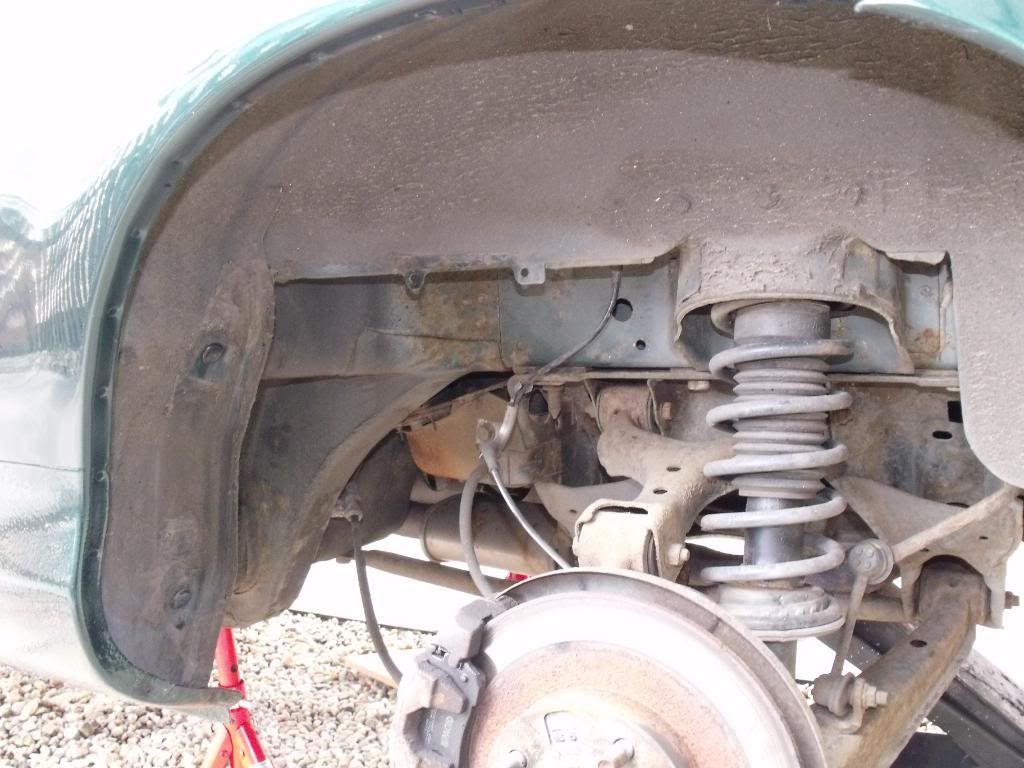
Before:

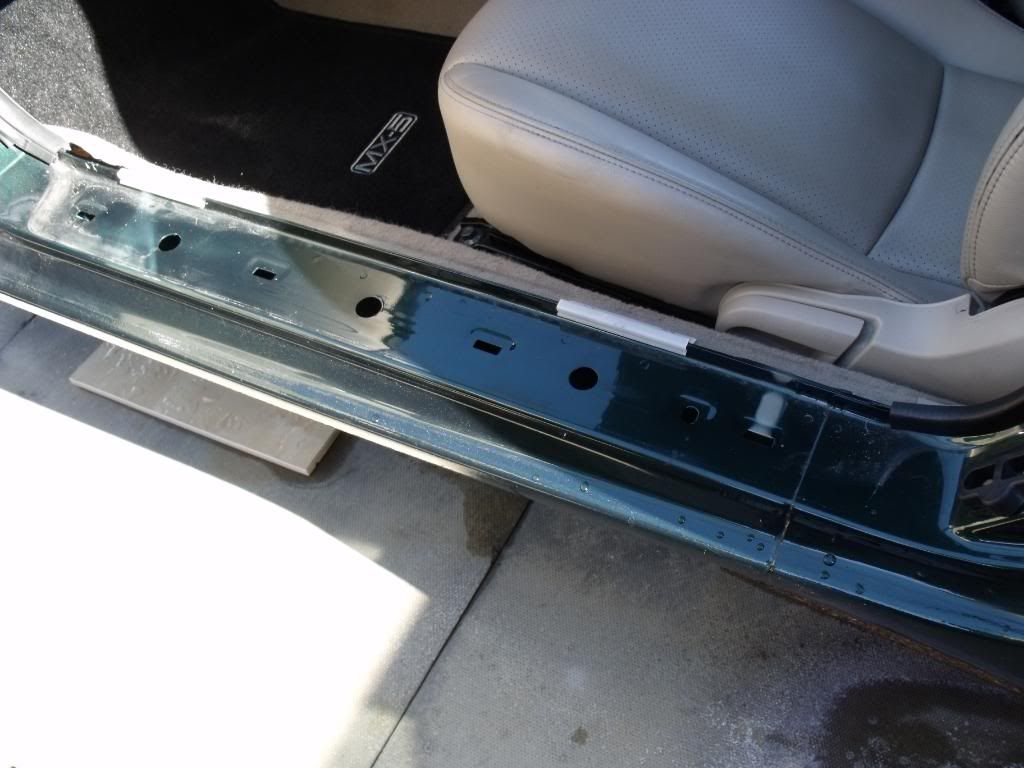
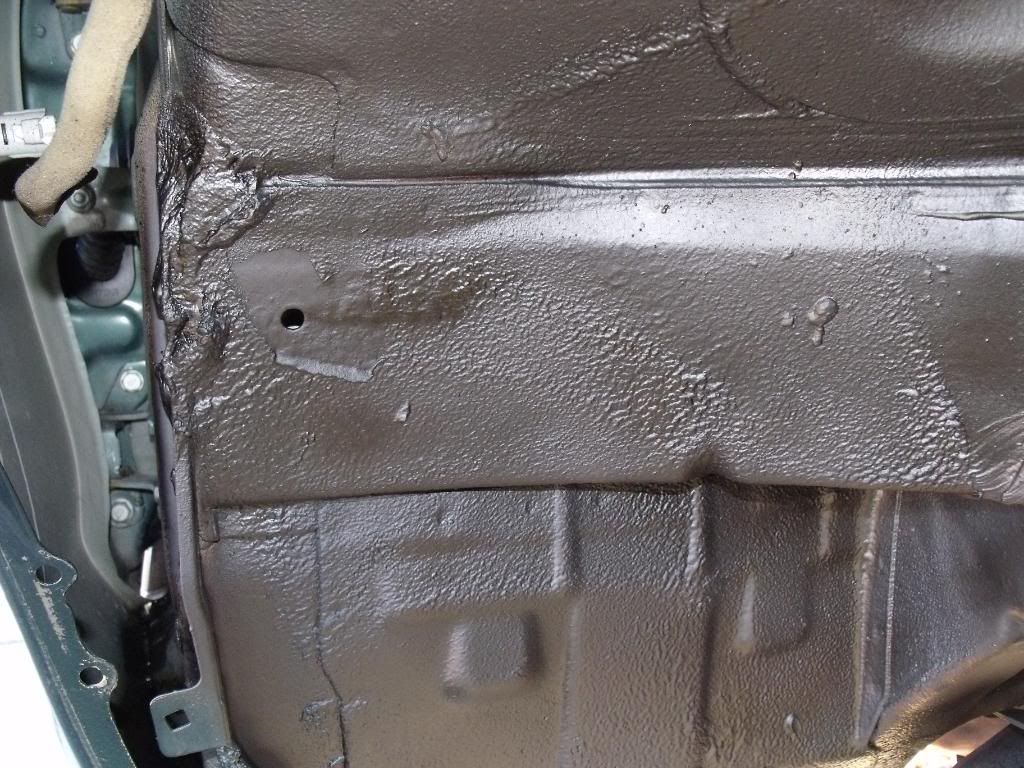
I then removed the sill covers, and the inspection grommet in the rear arch to give access to the inner sills:
Pic of the grommet before cleaning:

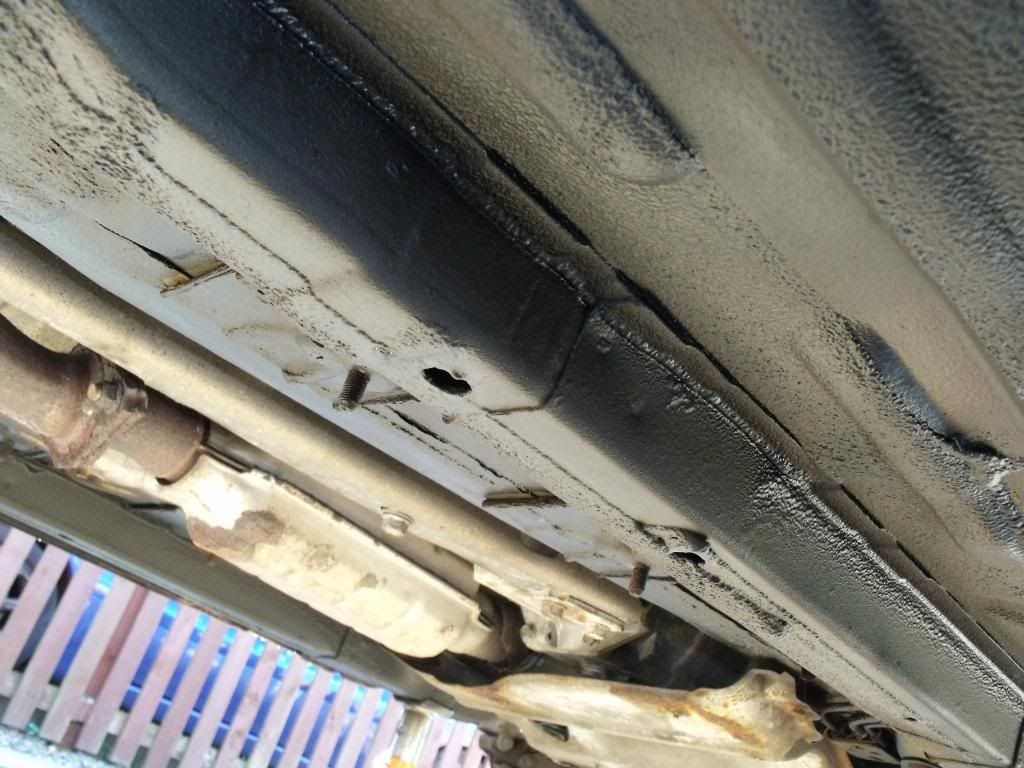
And removed:
Stage 1:
Stage 2:

Stage 3:
I am really chuffed with the finish.
Thanks for Snotrag for the initial write-up which led to me tackling this myself!,
cheers,
Steven
Here are some pics of the process:
Car up on axle stands:
I then Snow-foamed the underside and all arches, and rinsed off with the pressure washer:
Before:
I then removed the sill covers, and the inspection grommet in the rear arch to give access to the inner sills:
Pic of the grommet before cleaning:
And removed:
Stage 1:
Stage 2:
Stage 3:
I am really chuffed with the finish.
Thanks for Snotrag for the initial write-up which led to me tackling this myself!,
cheers,
Steven
Edited by AmiableChimp on Wednesday 5th November 13:25
Welldone steve, your pics show what I never got round to!
How long did it take you?
Yours looks just like mine, I was pleased with the finish too.
Even after a few months of driving down filthy roads, a quick blast with the hose and it cleans right up.
I'm still confident that a job like this is money and effort well spent and can only help your car.
How long did it take you?
Yours looks just like mine, I was pleased with the finish too.
Even after a few months of driving down filthy roads, a quick blast with the hose and it cleans right up.
I'm still confident that a job like this is money and effort well spent and can only help your car.
Gassing Station | Mazda MX5/Roadster/Miata | Top of Page | What's New | My Stuff