removing luggage compartment in g - how to?
Discussion


hi all,
the drivers side screen jet wasn;t working so i thought i'd explore.....
 as i pulled it up, it became apparant why.... the hose was detached at the pump end...!!
to put it back, need to remove the luggage box..... anyone done this for a battery change...
what size allen key is it? t25?
i assume it is the three? allen screws in the compartment that i loosen and that is it...
how do i detach the light, and do i need to worry about the usb port... don;t have a cd changer....
thanks for any help..... and famousass, sorry its another question, thats life with me.....
the drivers side screen jet wasn;t working so i thought i'd explore.....
as i pulled it up, it became apparant why.... the hose was detached at the pump end...!!to put it back, need to remove the luggage box..... anyone done this for a battery change...
what size allen key is it? t25?
i assume it is the three? allen screws in the compartment that i loosen and that is it...
how do i detach the light, and do i need to worry about the usb port... don;t have a cd changer....
thanks for any help..... and famousass, sorry its another question, thats life with me.....
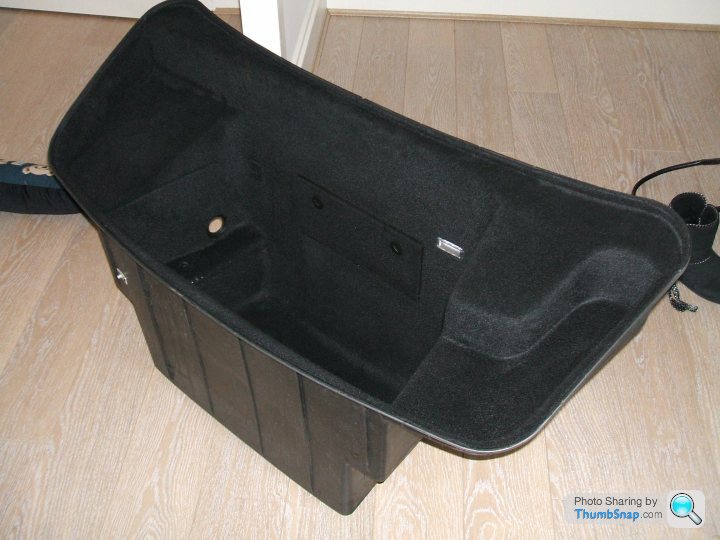
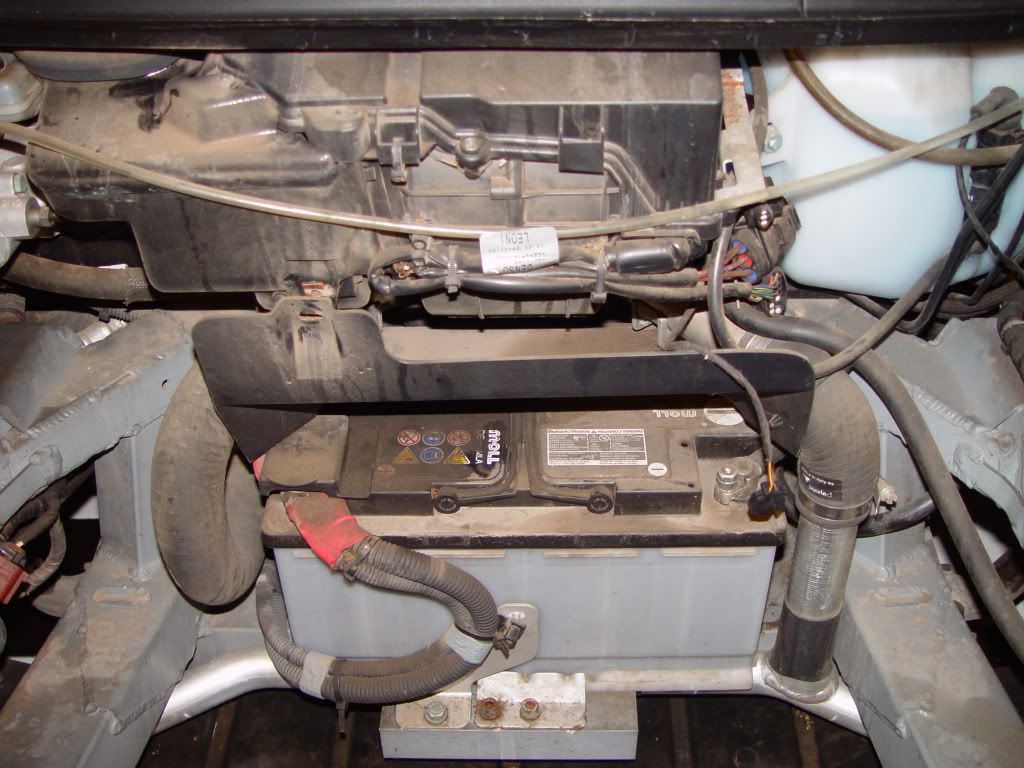
first remove the seal for the compartment, simply pulls off
then remove cd changer etc.... t25 screw at bottom of trim, whole trim then lifts out with unit,
detach connecter to unit, then push this out of the compartment, rubber sleeve too
there are 2 t30 screws each side, which when undone, then allows whole 'tub' to be lifted out
need to disconnect light so lift side to your right first....
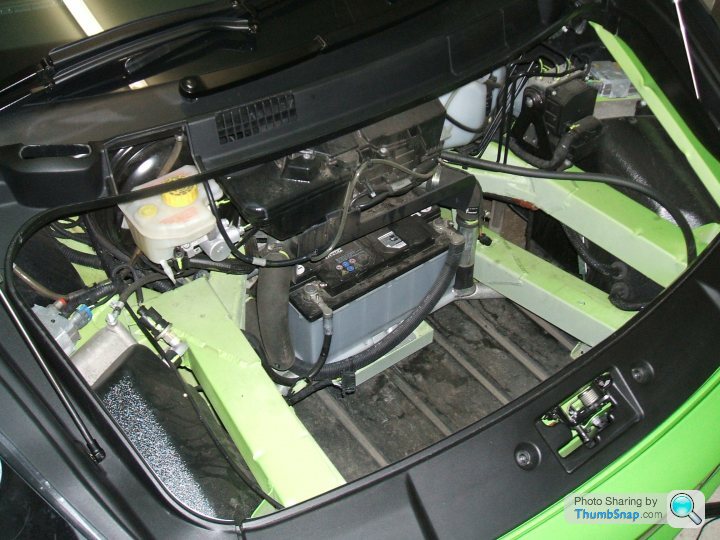
the tube to one jet had detahced from this t piece, which didn;t really have a natural place to sit, so i ended up wrapping it as such

glad i didn;t just assume the jet was clogged up, as the t piece had fallen by the battery so that would have got soaked with every squirt!! also explains a bit of damp in the compartment as water squirted in through battery flap...!!
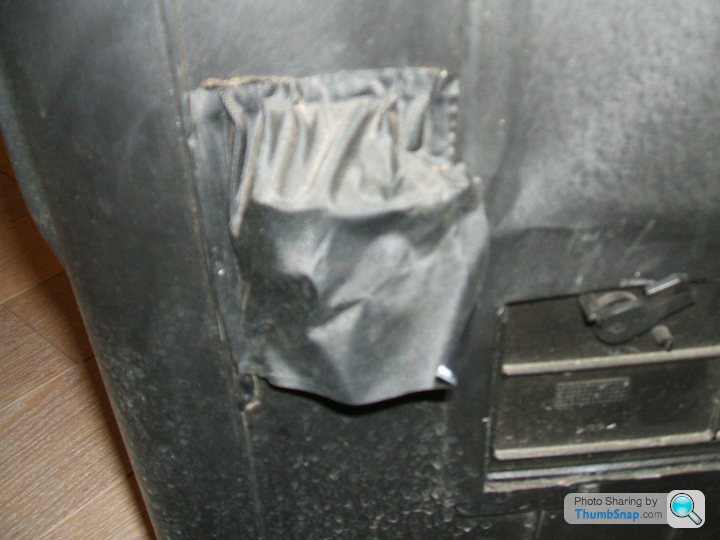
there was a thread not to long ago about build quality.... i was impressed with the obession to detail... even the back of the light has a curtain!
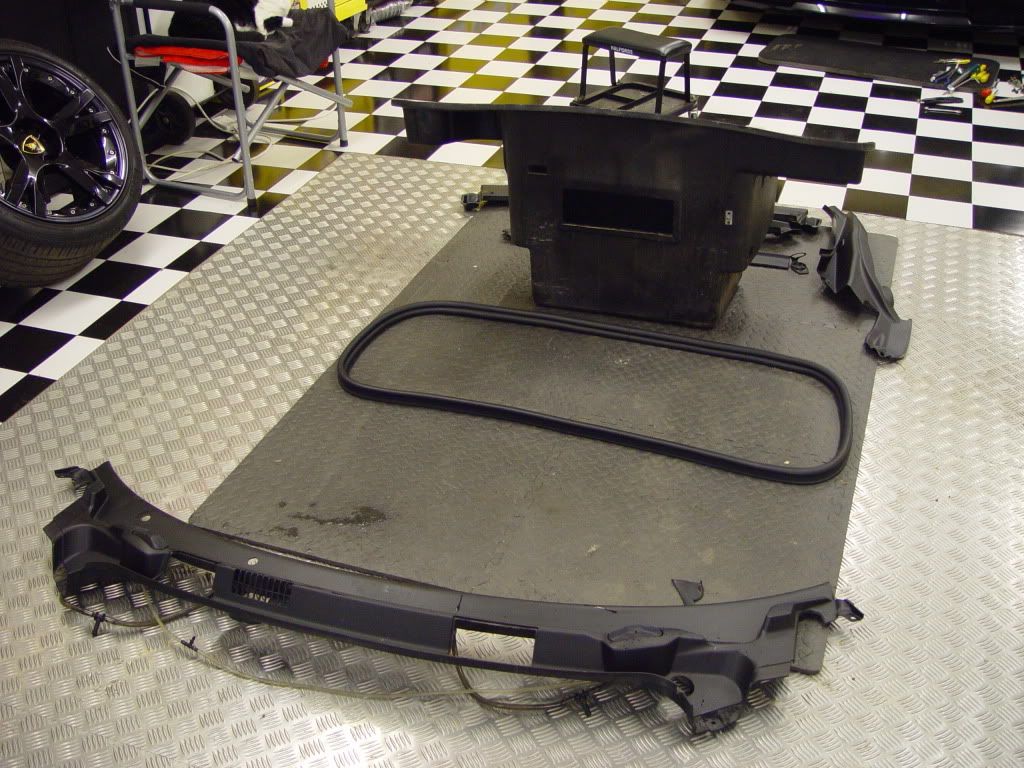
and also found this!!!

then remove cd changer etc.... t25 screw at bottom of trim, whole trim then lifts out with unit,
detach connecter to unit, then push this out of the compartment, rubber sleeve too
there are 2 t30 screws each side, which when undone, then allows whole 'tub' to be lifted out
need to disconnect light so lift side to your right first....
the tube to one jet had detahced from this t piece, which didn;t really have a natural place to sit, so i ended up wrapping it as such
glad i didn;t just assume the jet was clogged up, as the t piece had fallen by the battery so that would have got soaked with every squirt!! also explains a bit of damp in the compartment as water squirted in through battery flap...!!
there was a thread not to long ago about build quality.... i was impressed with the obession to detail... even the back of the light has a curtain!
and also found this!!!
Hey bud,doing a few jobs eh,i like
IIRC take off the large rubber seal.Remove the torkscrews inside the bucket.
The boot light is only pushed in,try a flat blade screwdiver on the right hand side of the light
should lever it out a bit ,pull on the right of it then undo the connector.You need to push connector and wire back through the hole.
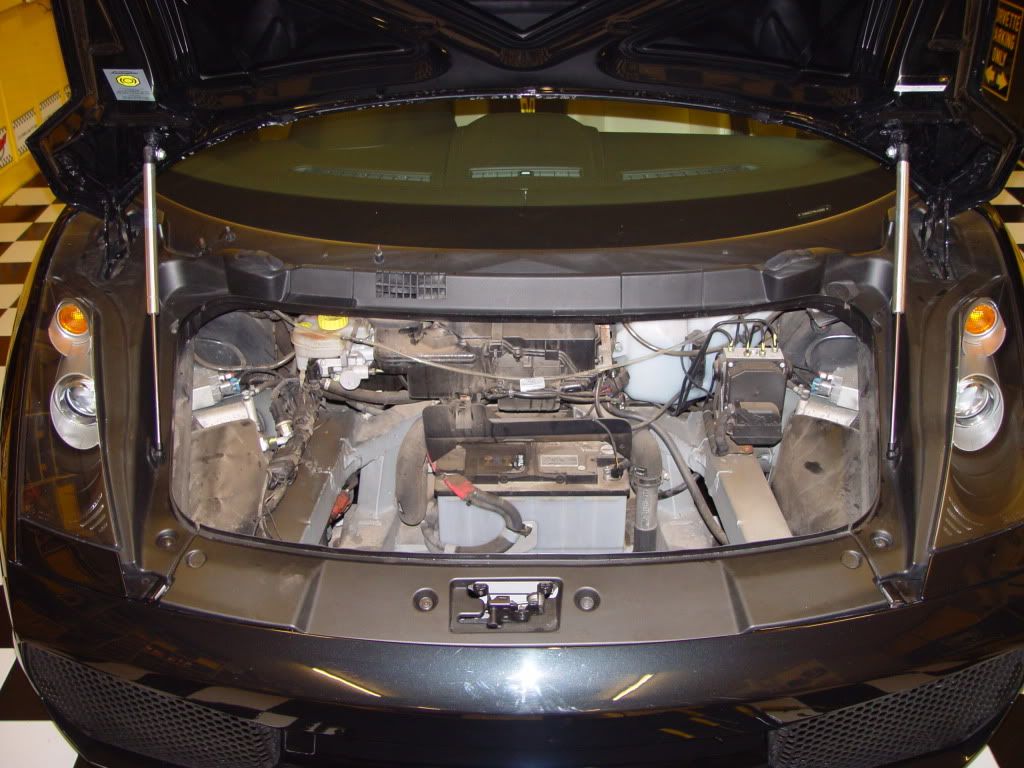
The bucket should be losse now,maybe take off or open the small battery access cover this gives you something to grab ,then just pull up and wiggle.It`s a bit bulky but should come up far enough to remove the whole thing.
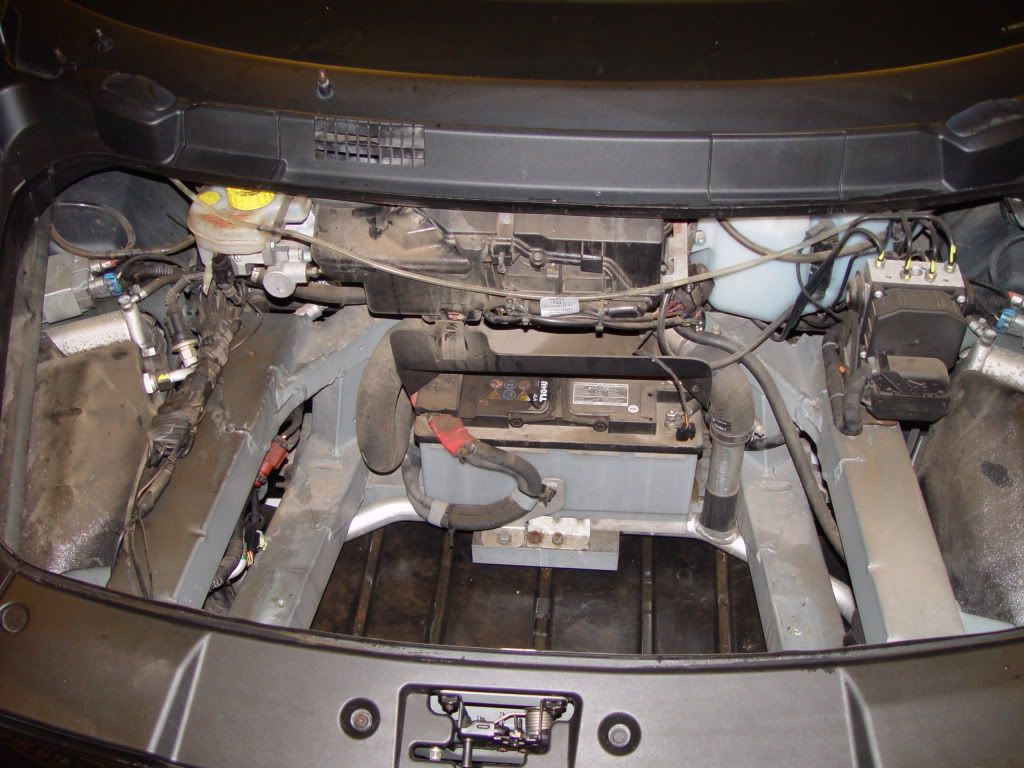
in the pics(not great) the clear small pipes are rain water drains,you want the black pipes,kinda obvious when your in there.
I took off a lot of the trim cos i was doing a bit of paint and clean up,i don`t think they need to be removed for what you need to do.
Cheers mate any questions shout
IIRC take off the large rubber seal.Remove the torkscrews inside the bucket.
The boot light is only pushed in,try a flat blade screwdiver on the right hand side of the light
should lever it out a bit ,pull on the right of it then undo the connector.You need to push connector and wire back through the hole.
The bucket should be losse now,maybe take off or open the small battery access cover this gives you something to grab ,then just pull up and wiggle.It`s a bit bulky but should come up far enough to remove the whole thing.
in the pics(not great) the clear small pipes are rain water drains,you want the black pipes,kinda obvious when your in there.
I took off a lot of the trim cos i was doing a bit of paint and clean up,i don`t think they need to be removed for what you need to do.
Cheers mate any questions shout
unclegrouch said:
Bit of a busman's holiday that one was, wasn't it 70Proof LOL
 , yeah, got impatient so i figured if i try anyway, provided i left a path like hansel and gretal, things couldn;t go disasterously wrong..... TBH pis easy, funny as manual says battery should only be accessed by a highly trained techinician wearing lambo endorsed overalls!!
70proof said:
, yeah, got impatient so i figured if i try anyway, provided i left a path like hansel and gretal, things couldn;t go disasterously wrong.....Gassing Station | Gallardo/Huracan | Top of Page | What's New | My Stuff