tipo 184 build diary
Discussion


2 hrs
not happy today with it
i got a nut extractor and got the rounded nut off by moving the subframe a bit back so i could get to it , that went ok , after that frustrating work
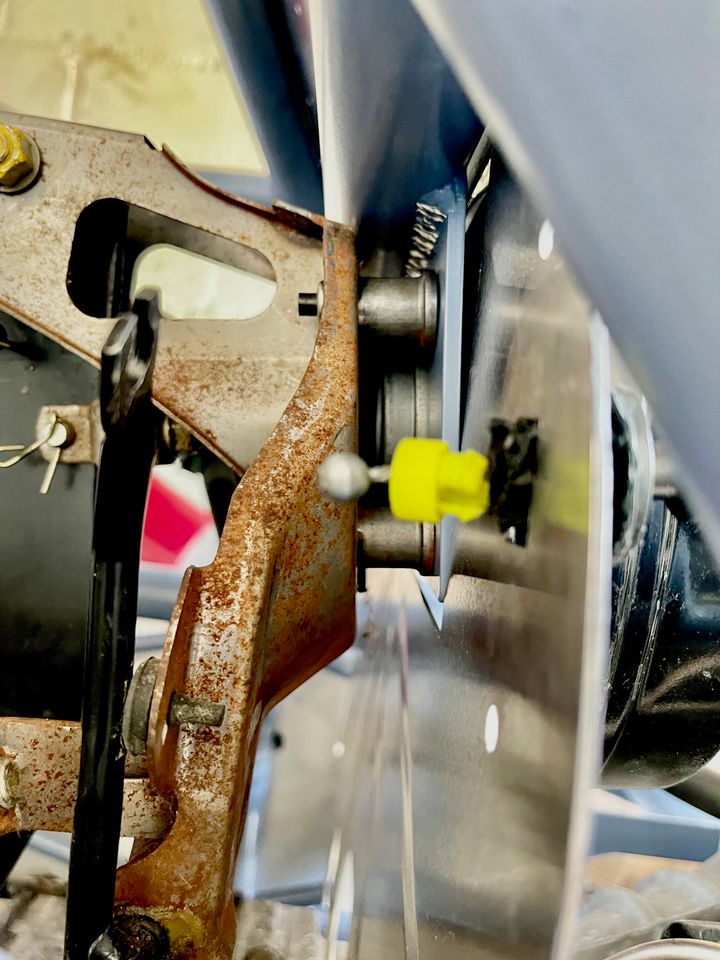
can’t get the sleeve out! i’ve tried extreme heat, hitting it, in the end i managed to get a cold chisel up into the sleeve and split it,only problem is that half is still in there , not sure if that matters really as the bolt passes through it anyway ,the main problem is the holes underneath
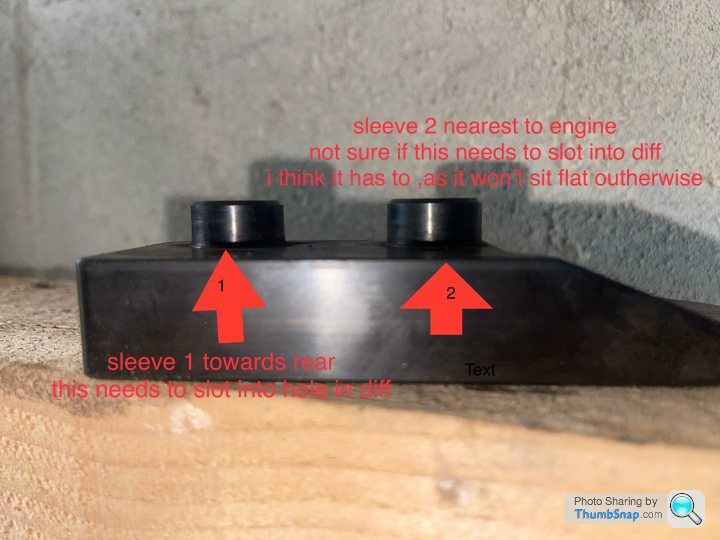
i think the new diff plate has two sleeves that have to sit inside the original diff, they are both different sizes in the og diff,so i might have to drill it out bigger ? if they don’t fit in ,then the bolts provided aren’t long enough
not happy today with it
i got a nut extractor and got the rounded nut off by moving the subframe a bit back so i could get to it , that went ok , after that frustrating work
can’t get the sleeve out! i’ve tried extreme heat, hitting it, in the end i managed to get a cold chisel up into the sleeve and split it,only problem is that half is still in there , not sure if that matters really as the bolt passes through it anyway ,the main problem is the holes underneath
i think the new diff plate has two sleeves that have to sit inside the original diff, they are both different sizes in the og diff,so i might have to drill it out bigger ? if they don’t fit in ,then the bolts provided aren’t long enough
Edited by tricky360 on Friday 22 March 17:56
Edited by tricky360 on Friday 22 March 18:46

had help today
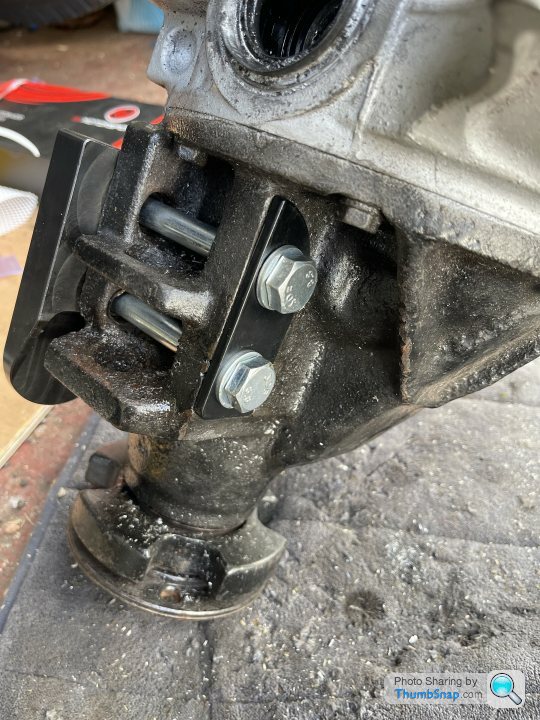
had to take the whole rear apart and take the differential out, i will have to take it to my local garage this week to see if they can do it.
to me the 2nd hole is too small ,this will need drilling out to make it fit the new bracket .
not sure why the new differential bracket is made this way , should have the collars made the right size ?rear hole larger than the front one like it’s on the mazda diff
or when the chassis are made welded on a bracket 3 inches back and provide longer bolts
Iam not an engineer so what do i know, it’s seams over complicated to me the way it’s done
frustrated today , as i thought i was going good up till now
20 mins
what was all the fuss about !
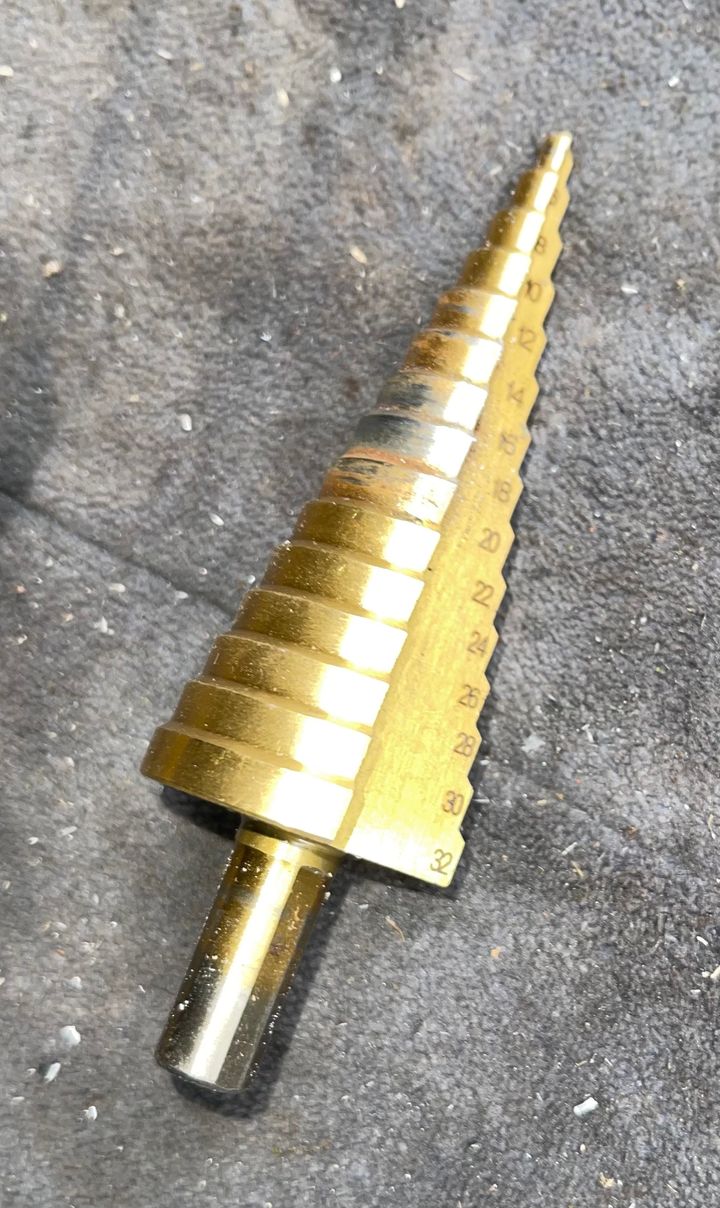
darren told me in another email to get a 16 mm drill bit to drill out the smaller hole once i got the sleeve out, so i got a metal drill bit from screwfix and it snapped straight away, so i ordered a blacksmith drill bit from amazon £ 18
so today i went to get it out myself one last time, so what ever i’ve been doing this week, a combination of sprays and heat loosened the sleeve and it just tapped out ! i think it knew it was in for it!
so next was to drill out the bottom which with tap and drill oil and taking it steady i got it down enough
had to heat it up and the hit it with a club hammer but it’s in now

i think on the underneath i will remove the small washers as the nyloc nut doesn’t go on enough, this is it tight ,so i think i’ll need more thread
as in a photo darren sent me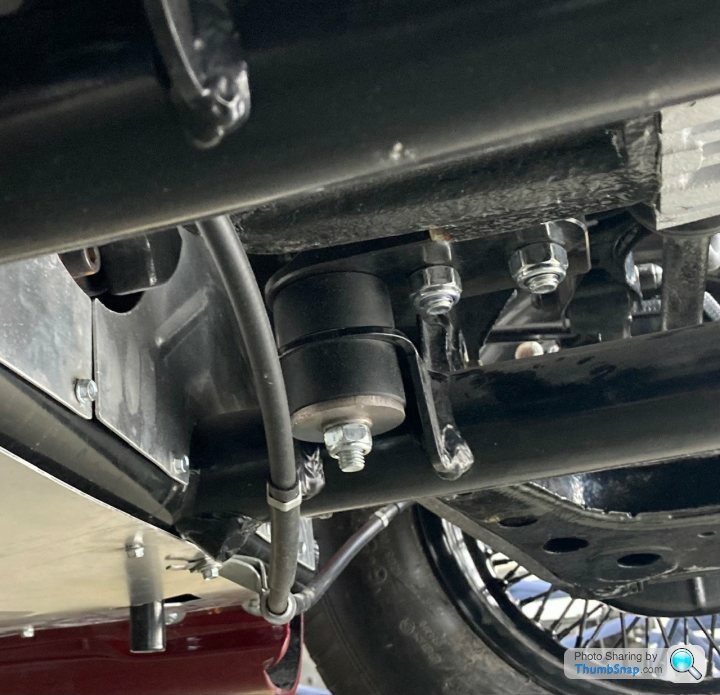
what was all the fuss about !
darren told me in another email to get a 16 mm drill bit to drill out the smaller hole once i got the sleeve out, so i got a metal drill bit from screwfix and it snapped straight away, so i ordered a blacksmith drill bit from amazon £ 18
so today i went to get it out myself one last time, so what ever i’ve been doing this week, a combination of sprays and heat loosened the sleeve and it just tapped out ! i think it knew it was in for it!
so next was to drill out the bottom which with tap and drill oil and taking it steady i got it down enough
had to heat it up and the hit it with a club hammer but it’s in now
i think on the underneath i will remove the small washers as the nyloc nut doesn’t go on enough, this is it tight ,so i think i’ll need more thread
as in a photo darren sent me
40 mins today
looked up a you tube video on the brakes i bought and it needs the metal clip on the inside, this is a brake wear guide
so reversed the brake pads to the right way round.
got the handbrake locked off and tighten up the wheel nuts and put on the splined hubs and tourque them up readfor the wheels to go on the rear
no updates sorry , haven’t done any work on it for ages ,got stuck with fitting the brake lines, can’t get them to fit through the holes in the chassis, i’ve bought 3 types, goodridge braided ones, aftermarket mx5 ones, and genuine mazda ones and none of them fit, darren suggested to grind out the hole a bit as it could be the powder coating
i’ve also got another car that i’ve been getting it through an mot recently so my priority was this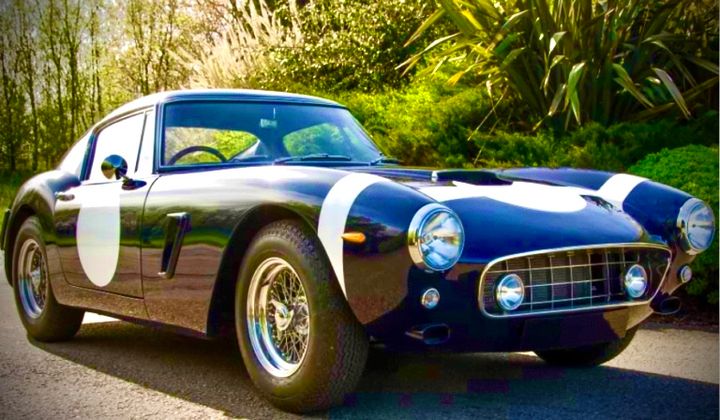
i’ve also got another car that i’ve been getting it through an mot recently so my priority was this
1 hr today
after a reminder i have a tipo to build by ferret50 , i went today to get the brake hoses on
i bought one of these
this got the powder coating off well and took a few mm off the hole for the hose
got all brake hoses in
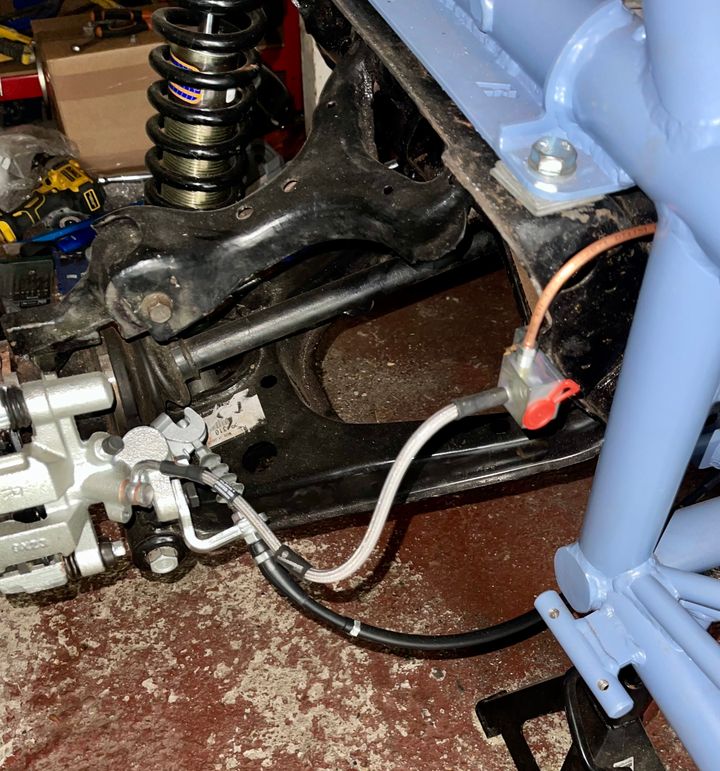
next was to run a new brake cross over pipe
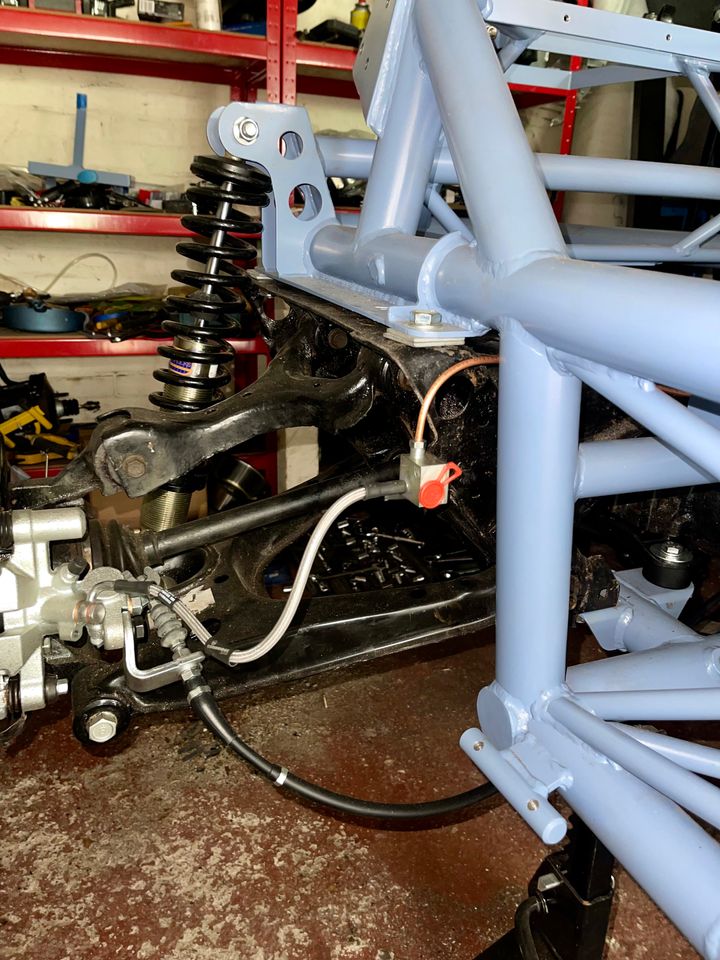
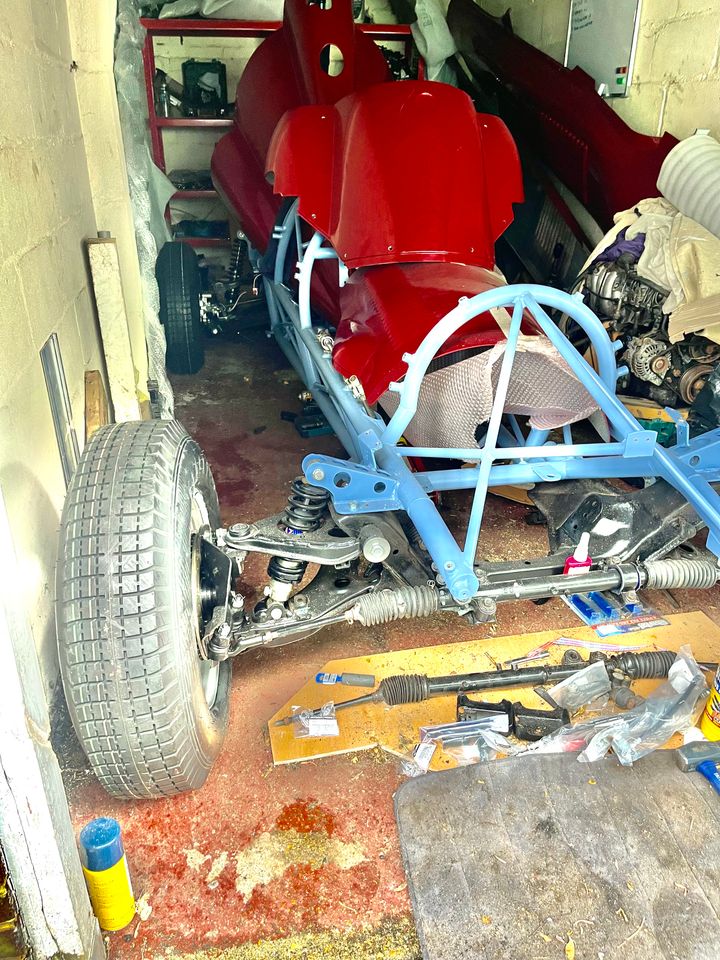
after that i put both the rear wheels on and dropped it to the floor
this will make it much easier to work on as i can roll it out of the single garage
after a reminder i have a tipo to build by ferret50 , i went today to get the brake hoses on
i bought one of these
this got the powder coating off well and took a few mm off the hole for the hose
got all brake hoses in
next was to run a new brake cross over pipe
after that i put both the rear wheels on and dropped it to the floor
this will make it much easier to work on as i can roll it out of the single garage
naturals said:
Beautiful car. Have you recently acquired it? I used to see it parked in Kingston all the time. Only an MOT search revealed it was formerly a Z3.
the car in kingston is a bmw z3 one ,same livery asmine, replica of the sterling moss car
i've had my one for 5 years now ,it’s a mirage kit which is completely bespoke and is definitely more accurate than the z3 ones
2hrs
today after work i cleaned out the garage to make room to manoeuvre the car out , i thought i done a big mistake by putting the engine and gearbox in the middle of the car by the side, looking at the space i have i didn’t think i could get the rear wheels passed the engine !
what i have to do is move the engine and chassis at the same time so it will come out of the garage together, luckily i put the engine on a tescos wheeled pallet .
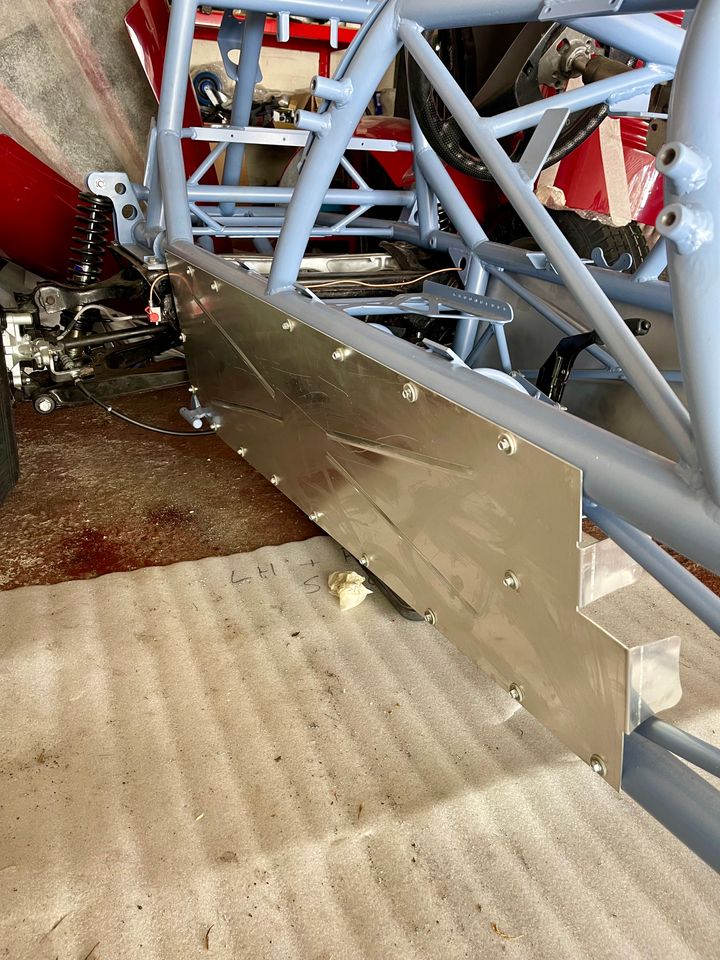
after figuring that out i drilled out the holes for the closing panels on both sides
today after work i cleaned out the garage to make room to manoeuvre the car out , i thought i done a big mistake by putting the engine and gearbox in the middle of the car by the side, looking at the space i have i didn’t think i could get the rear wheels passed the engine !
what i have to do is move the engine and chassis at the same time so it will come out of the garage together, luckily i put the engine on a tescos wheeled pallet .
after figuring that out i drilled out the holes for the closing panels on both sides
2.5 hrs today
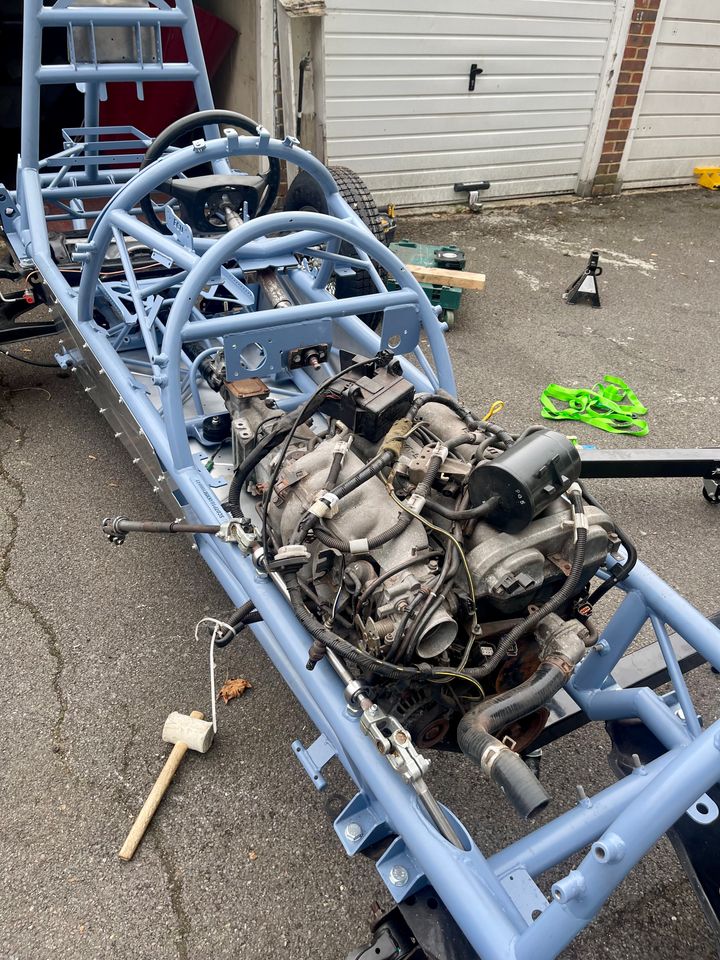
big day today , getting the engine in
rolled car out as well as the engine on a tesco crate trolley which worked well
took about 45 mins to get the engine in , it was easy to get it in line but the hardest bit was lining up the engine mount bolts .

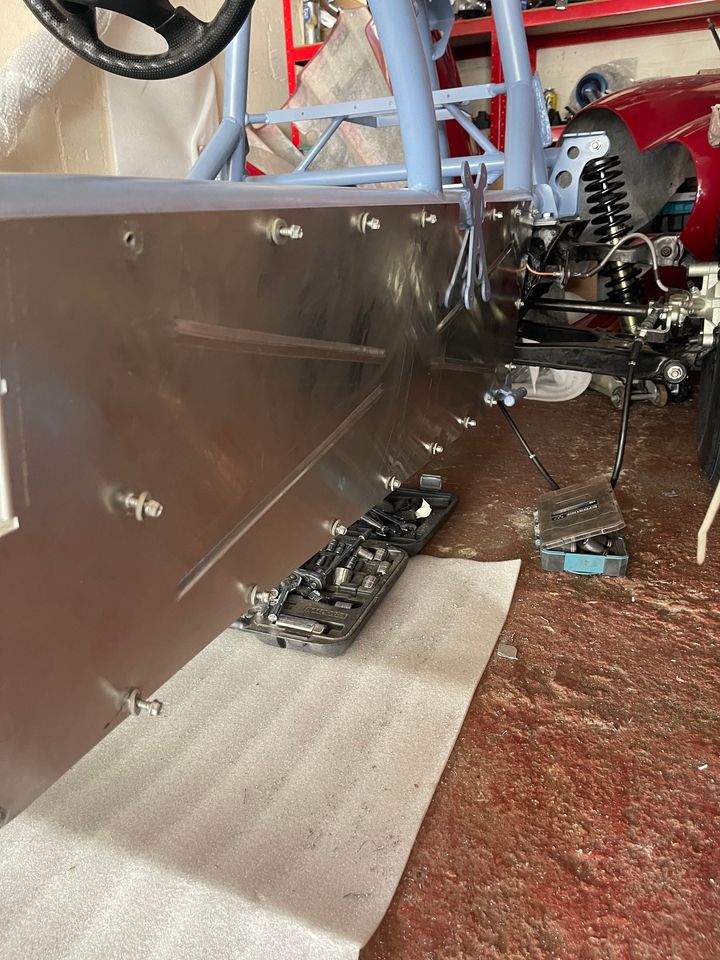
then i put the closing panel around the steering column and behind the seat
big day today , getting the engine in
rolled car out as well as the engine on a tesco crate trolley which worked well
took about 45 mins to get the engine in , it was easy to get it in line but the hardest bit was lining up the engine mount bolts .
then i put the closing panel around the steering column and behind the seat
wow, it’s been ages ! excuses are
1. the weather has been terrible, it’s been to cold to go and work in a single,un-heated , no powered garage
2. my football season started , of which iam the manager so every sunday i was doing that.
3. my work leading up to xmas was chock a block ,6 days a week
4. then loads of un-expected bills came in via my work van diesel particle filter blocking costing me £1,800 ,so money had to go on that
also darren has sold the company to westfield ,so there was a delayed response to me asking for parts, darren forwarded the emails to them, but it had to go through 3 different people till it got answered .
so now i’ve bought the mirror ,signal manoeuvre kit
and the dash kit , all i need to buy now is the seats and the fuel delivery kit then i will have everything
so in the next coming weeks i’ll have some updates to load

1hr today
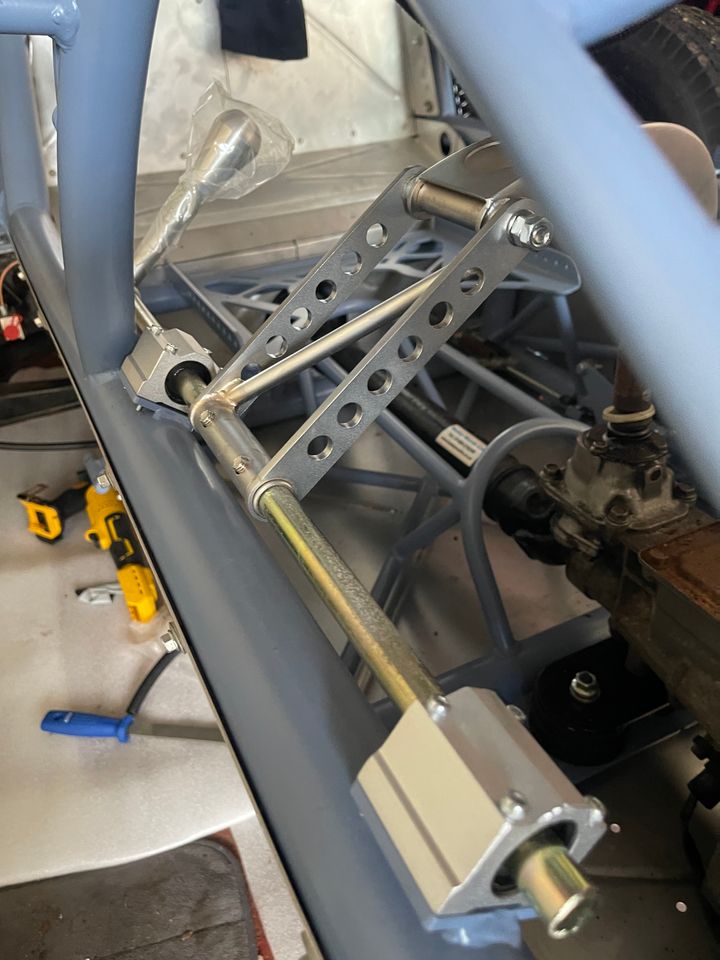
got the gear lever in which was only 12 bolts holding it on so didn’t take long
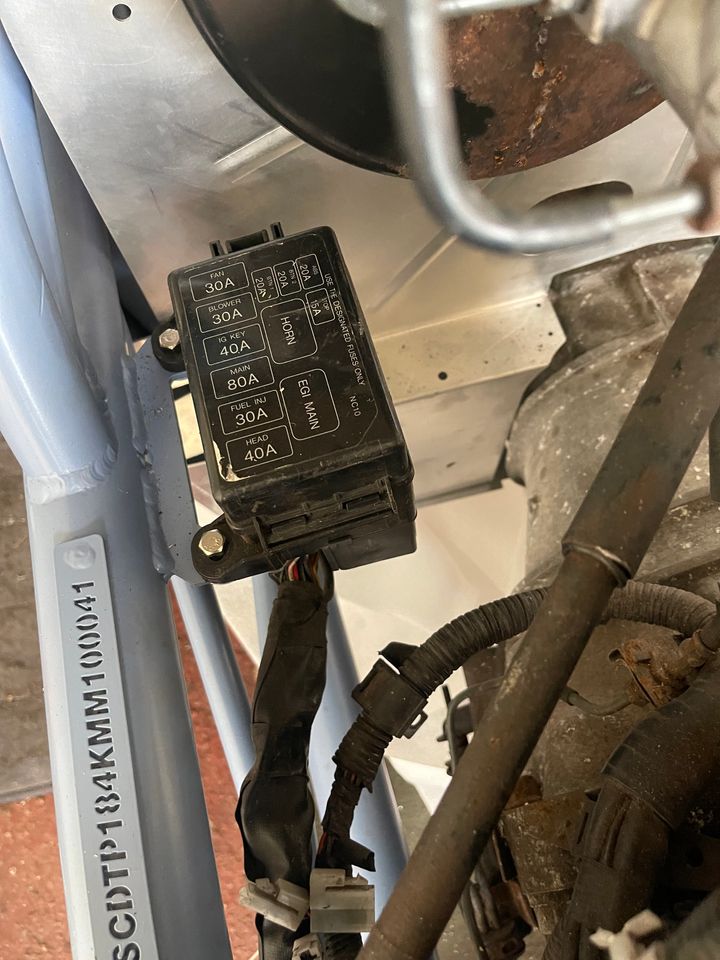
next was i put on the fuse box ,again two bolts and nuts
than i had a go at doing the flared brake pipes , didn’t go good
i just can’t do it, watched loads of different youtube videos and they all can do it with the same equipment i have ,so i gave up and got my local garage to do one for me on there flaring tool
he said he would do all of them for me if i cut and shape the copper tubing for him ,
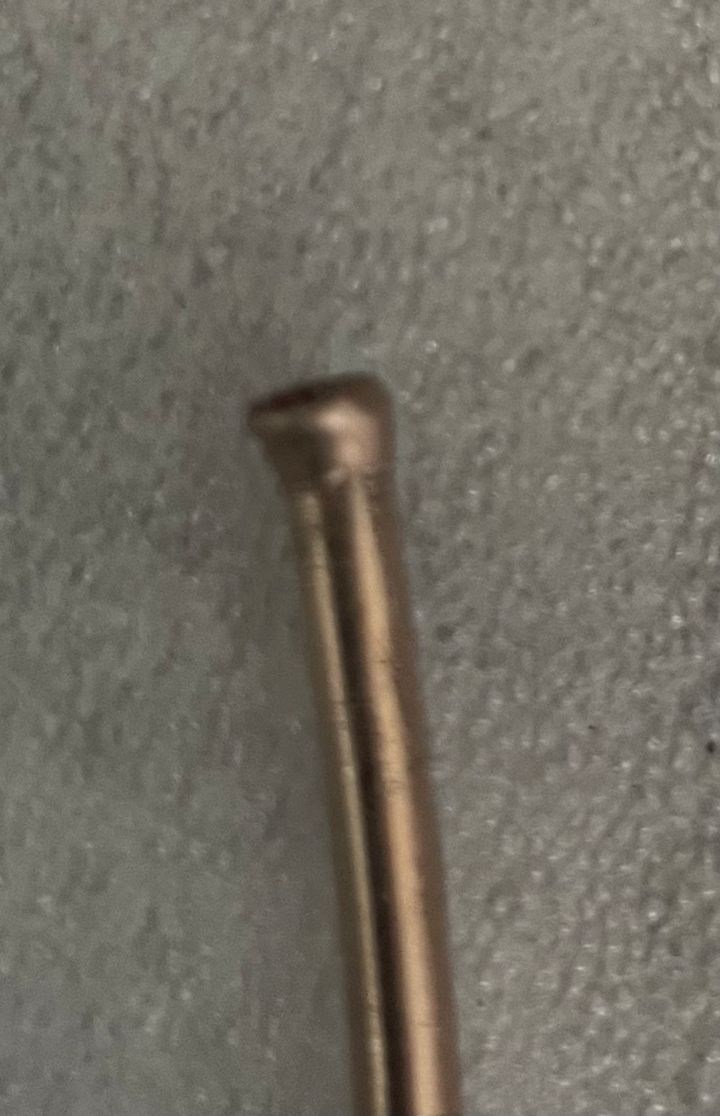
my attempt, one of many
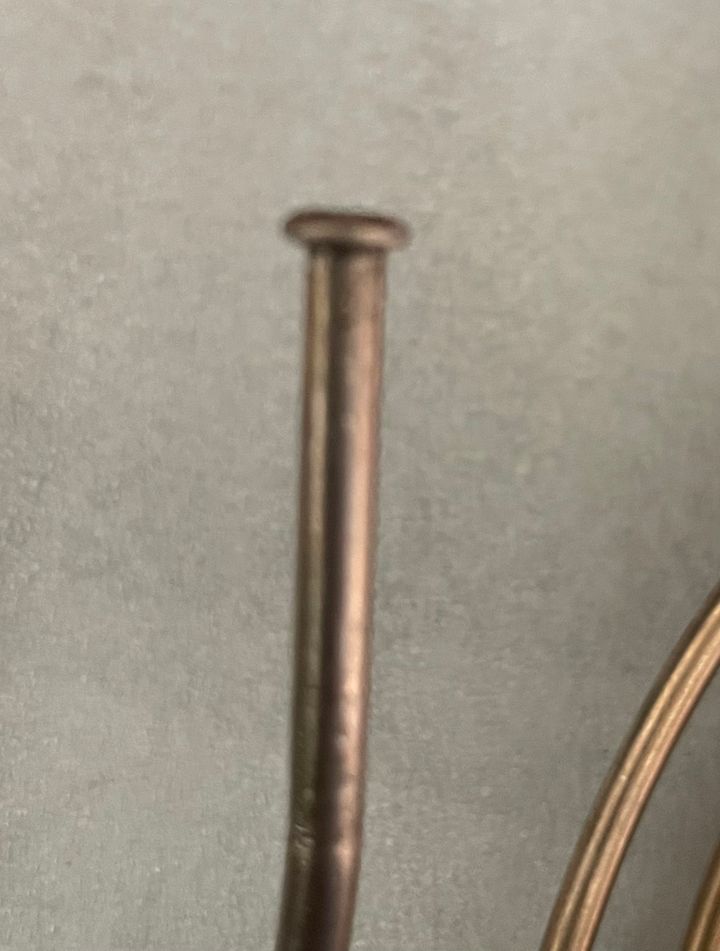
garages one
i also still have the carbon filter on the car and i’m not sure what to do with it of how to delete it

got the gear lever in which was only 12 bolts holding it on so didn’t take long
next was i put on the fuse box ,again two bolts and nuts
than i had a go at doing the flared brake pipes , didn’t go good
i just can’t do it, watched loads of different youtube videos and they all can do it with the same equipment i have ,so i gave up and got my local garage to do one for me on there flaring tool
he said he would do all of them for me if i cut and shape the copper tubing for him ,
my attempt, one of many
garages one
i also still have the carbon filter on the car and i’m not sure what to do with it of how to delete it
Edited by tricky360 on Friday 7th March 18:52
I re watched the build video and I think I found what i need regarding the filter 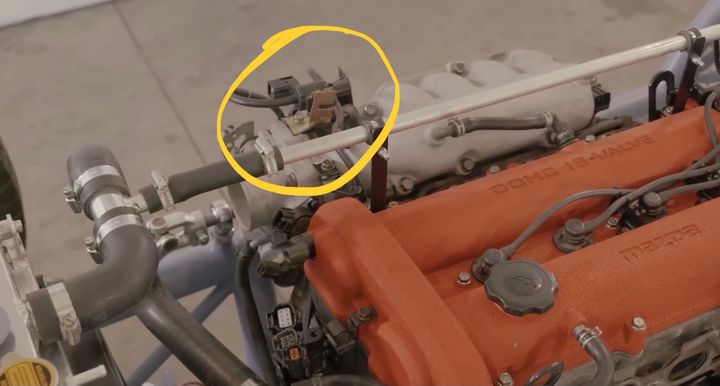
Looks like Darren re fits the sensor on top of the engine

Also plugs off one of the hoses

This Saturday am my other half went to the gym so I took advantage of the dining room table and decided to do the gauges I bought from America
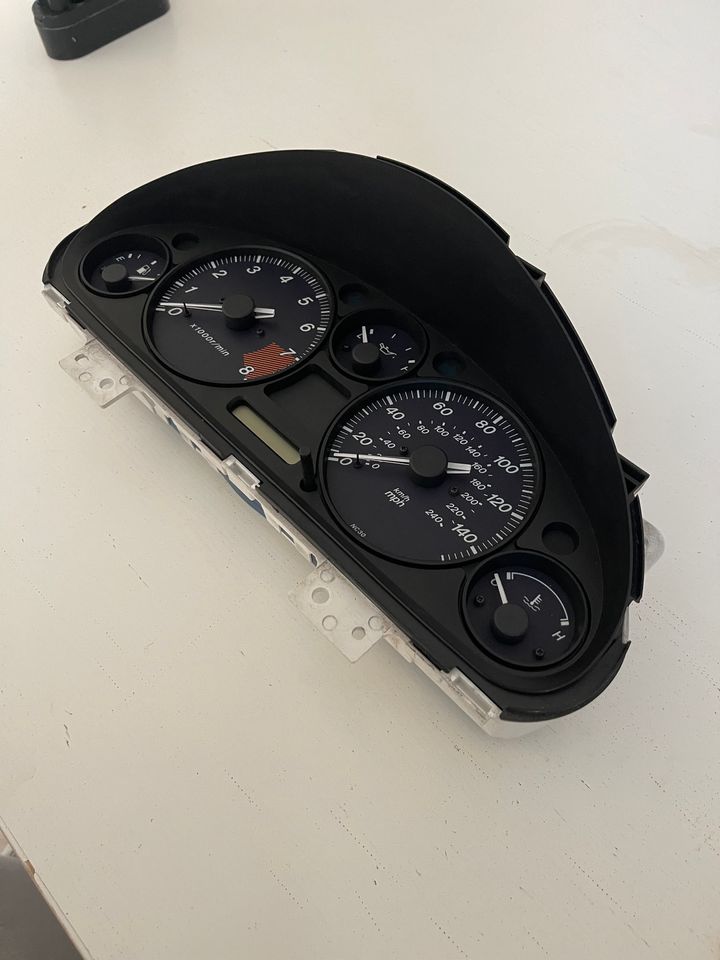
Original gauges before
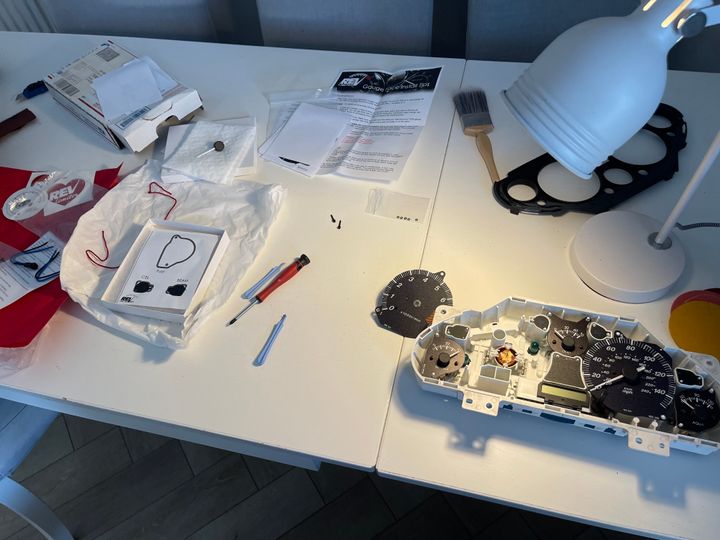
Doing the new ones
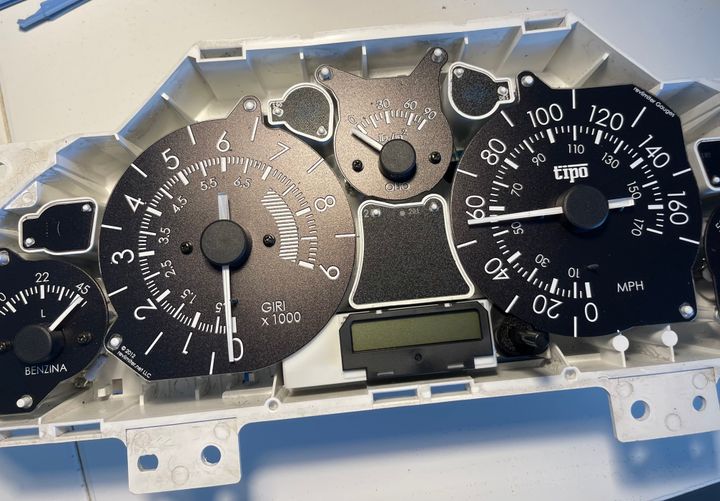
Finished new ones
They were made to order which I had done ages ago
Looks like Darren re fits the sensor on top of the engine
Also plugs off one of the hoses
This Saturday am my other half went to the gym so I took advantage of the dining room table and decided to do the gauges I bought from America
Original gauges before
Doing the new ones
Finished new ones
They were made to order which I had done ages ago
had my local garage do the brake pipe ends this week also
so i fitted the brake pipes all the way to the brake master and have left them long until i know which hole i need to fit them to ,
i email darren last week and he said there was 3 different types of brake servos and that i should just keep my original one that came with the doner, but i can’t remember which hole did what
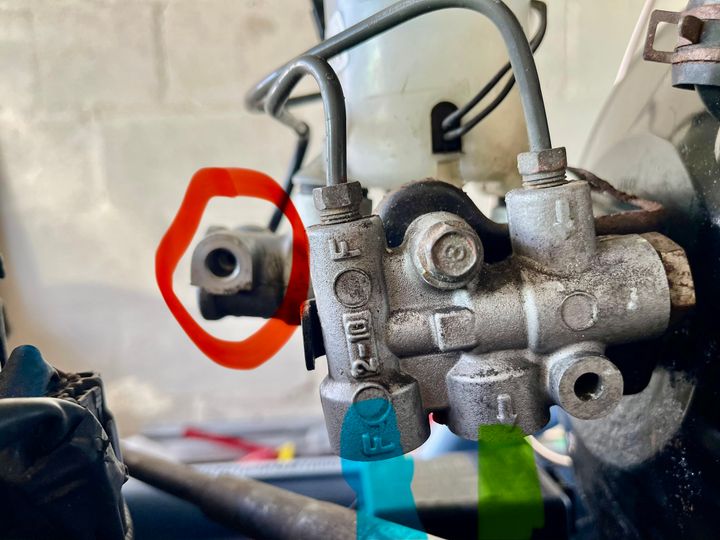
blue line was front
green was rear
red was front right i think but not sure if i need to plug off the red one as i have the t connector on the front that connects both left and right brake -pies into one pipe ?
so i fitted the brake pipes all the way to the brake master and have left them long until i know which hole i need to fit them to ,
i email darren last week and he said there was 3 different types of brake servos and that i should just keep my original one that came with the doner, but i can’t remember which hole did what
blue line was front
green was rear
red was front right i think but not sure if i need to plug off the red one as i have the t connector on the front that connects both left and right brake -pies into one pipe ?
car is getting on my nerves now !
still can’t resolve the brake pipe issue ,the red circle part in the earlier post is what i need ,i was thinking i could use a spare brake line to do the same job but not sure if it will work
also i though i would fit the accelerator cable , do you think that fits now , no chance , you can see how far off it is to the pedal fitting , i can get it to fit if the throttle is fully open ,so not sure what going on here
also been waiting for westfield to get stock in , it’s been 3 to 4 weeks now ,
not happy at the moment with it
Darren C said:
David,
Someone has kindly posted a Mazda MX5 Brake pipe diagram for you, so you can see how pipes went before you took it off the donor car. The missing Mazda Banjo bolt and pipe you have lost from your donor are readily available from any MX5 parts place. We have discussed all this in recent emails. I will gladly help you with Tipo Build information, but cannot control what Mazda parts you loose or forget how they went.
The Tipo throttle cable (made to measure inner) is supplied with the Tipo Fuel Delivery Kit since you chose to buy your kit parts a bit at a time you are limited to what you can do without the parts you need.
iam only going on the build you-tube video, so when my brake servo was different that’s when i reached out to you for answers , if other builders have the same doner as mine ,which is different to the build video then you can see it will get confusing, i didn’t know i had to keep that brake pipe as it wasn’t in your build video , but anyway i’ve got one now from a car being broken on ebay ,it’s quite local so i can pillage what i need off it, , this build diary will help others as i know you can’t cover everything on one video Someone has kindly posted a Mazda MX5 Brake pipe diagram for you, so you can see how pipes went before you took it off the donor car. The missing Mazda Banjo bolt and pipe you have lost from your donor are readily available from any MX5 parts place. We have discussed all this in recent emails. I will gladly help you with Tipo Build information, but cannot control what Mazda parts you loose or forget how they went.
The Tipo throttle cable (made to measure inner) is supplied with the Tipo Fuel Delivery Kit since you chose to buy your kit parts a bit at a time you are limited to what you can do without the parts you need.
regarding the throttle cable,that answers that question , didn’t know it was part of the fdk, again not mentioned in the video that you get a new one , i thought it was me going mad !
Edited by tricky360 on Friday 4th April 17:23
Edited by tricky360 on Friday 4th April 17:24
Gassing Station | Kit Cars | Top of Page | What's New | My Stuff