My "building a cobra" thread
Discussion


Today involved replacing the crappy gearknob with a much nicer one & replacing the indicator relay with a modified version suitable for LED lights. I also chopped my way into the indicator wiring, hooked up the indicators & checked they work.
Hardly worthy of photos.
There'll now be a bit of a hiatus until I can get a friend to give me a hand fitting the rear clamshell.
Hardly worthy of photos.
There'll now be a bit of a hiatus until I can get a friend to give me a hand fitting the rear clamshell.
The work for today was at the back of the car. I chopped into the wiring, identified & marked the various wires & put them into chocolate block connectors for testing prior to putting the permanent connectors on. 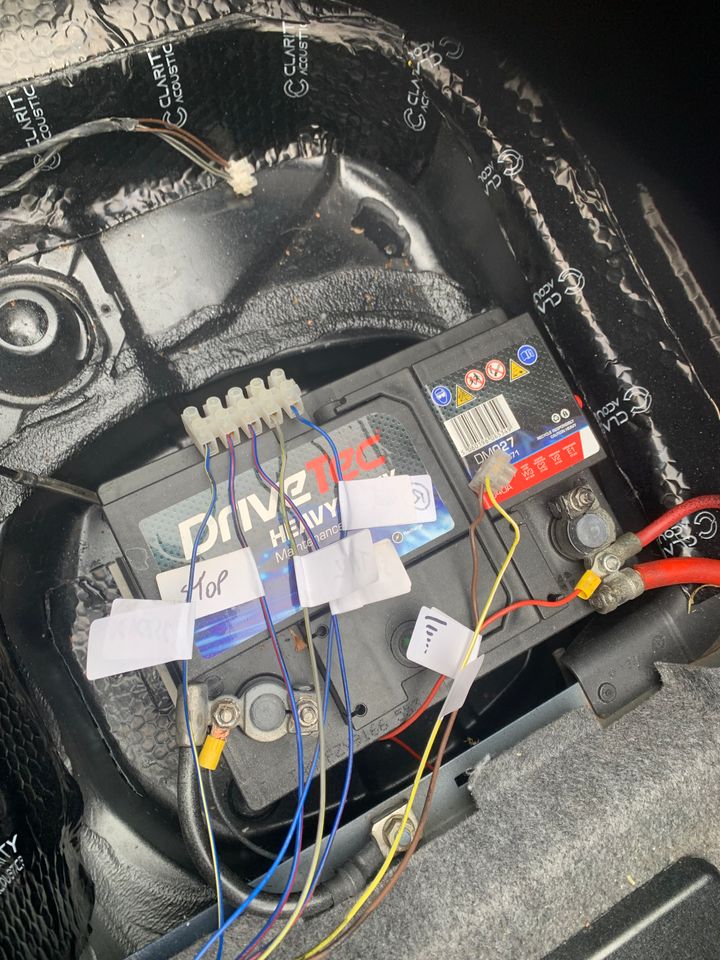
With the help of a friend I offered up the rear clamshell to see what fits & what doesn't- areas needing sanding were identified and were sanded back ready for another trial fitting. This is a long & tedious process involving noise & massive boredom so I'll keep it to hour-long sessions at most & wear gloves/earplugs & maybe a dustmask. It's an exciting life........................
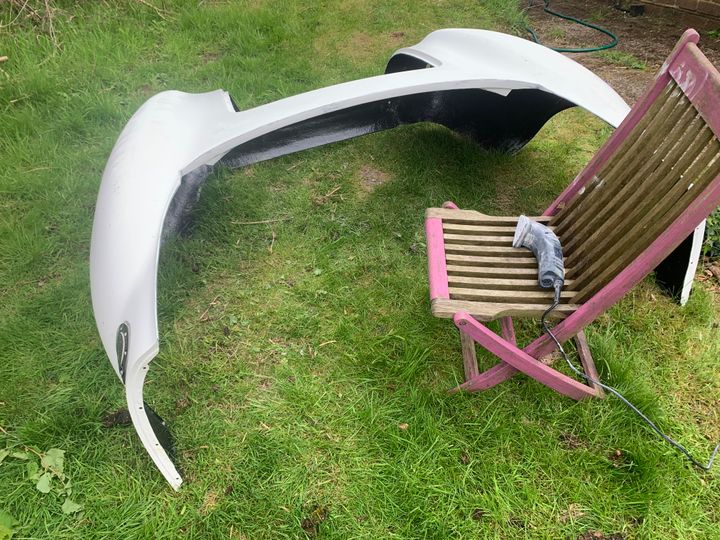
With the help of a friend I offered up the rear clamshell to see what fits & what doesn't- areas needing sanding were identified and were sanded back ready for another trial fitting. This is a long & tedious process involving noise & massive boredom so I'll keep it to hour-long sessions at most & wear gloves/earplugs & maybe a dustmask. It's an exciting life........................
dxg said:
Maybe look at wago connectors. Much more reliable than chocolate blocks...
That was my initial thought but to his credit the OP did say that the choc-block is there for temporary testing purposes. To be replaced with proper connectors.
Quite right too; I never use choc-block for anything other than testing. I've seen enough horrors!
Agree with you about Wagos. Never had an issue with them.
Error_404_Username_not_found said:
That was my initial thought but to his credit the OP did say that the choc-block is there for temporary testing purposes.
To be replaced with proper connectors.
Quite right too; I never use choc-block for anything other than testing. I've seen enough horrors!
Agree with you about Wagos. Never had an issue with them.
Exactly- they're temporary for testing. I'll have to disassemble the electrics for paintwork so these were never intended to be permanent.To be replaced with proper connectors.
Quite right too; I never use choc-block for anything other than testing. I've seen enough horrors!
Agree with you about Wagos. Never had an issue with them.
I have some connectors in a similar style to Wago which I'll be using for the foglights & reversing lights. The stop, tail, reg light & indicators will be using proprietary connectors the same as on my previous cobra build. When assembling it I have to choose connectors which will pass through the holes in the fibreglass.
I should add- all suggestions very welcome, thanks.
Edited by Biggy Stardust on Friday 26th April 20:20
996Type said:
Looking good!
There are also modules if needed on Car Builder Solutions website (or similar) if needed for aux electrics, relay bases and DIY blade fuse systems etc…
Thanks but this is my second cobra build & I've got all the bits I need- lessons learned from the first build.There are also modules if needed on Car Builder Solutions website (or similar) if needed for aux electrics, relay bases and DIY blade fuse systems etc…
Things have been a bit quiet on the build front. Various fittings of the rear clamshell & endless filing/sanding to try & make it fit. Whilst I've had the sander out I've given the bodywork a general go-over to remove a few imperfections.
All this is dull so I decided to do a little job for light relief.
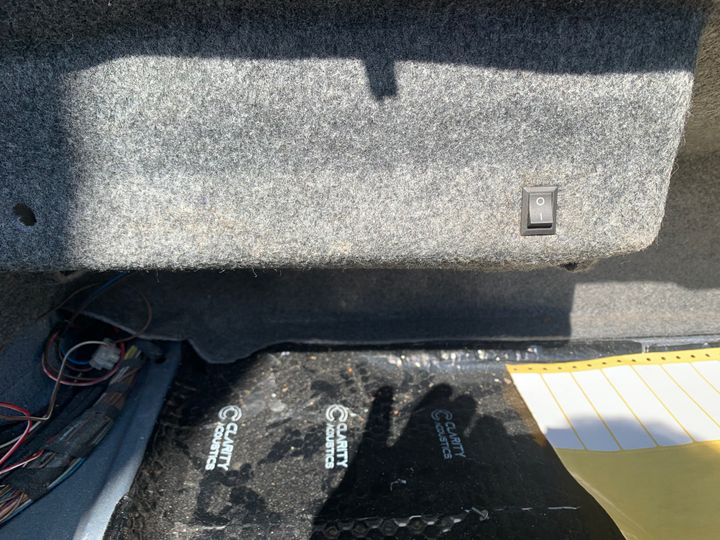
I'd previously identified & marked the wires for the various rear lights but one omission was the boot light. As the switch & wiring in the original boot lid are now gone I needed an alternative. I found the wires to the light & ran them to a little switch I fitted in the trim. As I didn't want to run the risk of accidentally leaving it on with the boot closed I decided to power it from the rear lights. The reg plate lights have 2 separate feeds/earths so one of those powers the boot light & the other powers the reg plate light. Everything is LED so there's zero issue with power requirements.
It's not a massive job but it all helps move the project forward.
All this is dull so I decided to do a little job for light relief.
I'd previously identified & marked the wires for the various rear lights but one omission was the boot light. As the switch & wiring in the original boot lid are now gone I needed an alternative. I found the wires to the light & ran them to a little switch I fitted in the trim. As I didn't want to run the risk of accidentally leaving it on with the boot closed I decided to power it from the rear lights. The reg plate lights have 2 separate feeds/earths so one of those powers the boot light & the other powers the reg plate light. Everything is LED so there's zero issue with power requirements.
It's not a massive job but it all helps move the project forward.
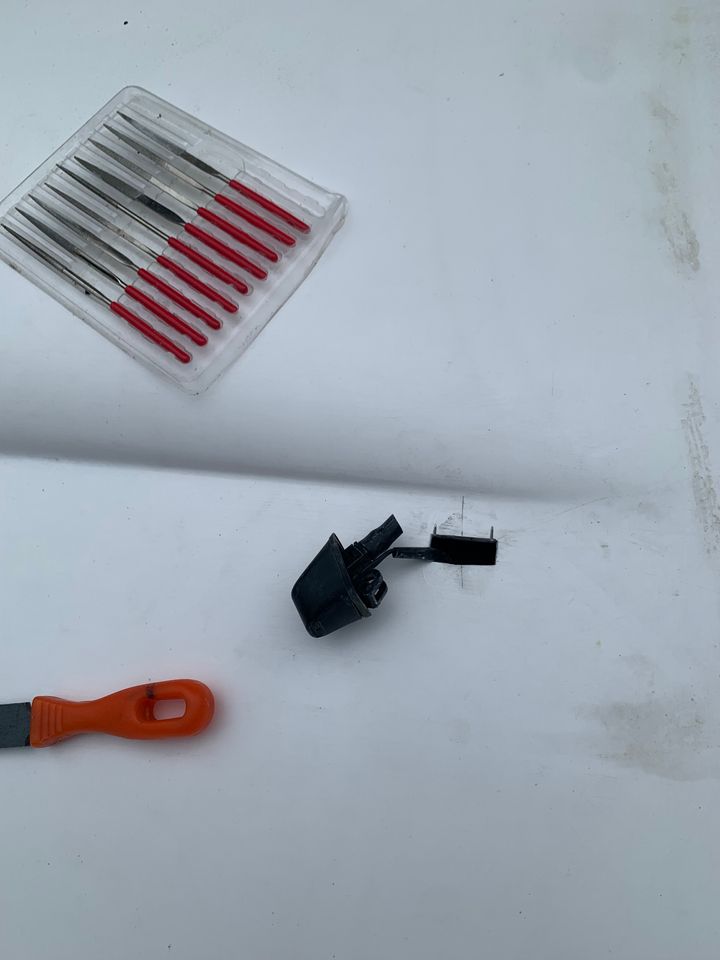
Today's little job was to fit the windsceen washer jets. I wanted to keep the Z3's heated washer function but the donor car's jets were unsuitable as they were too low. The part from an X5 was chosen as it is raised up from the bonnet & has the same electrical connections.
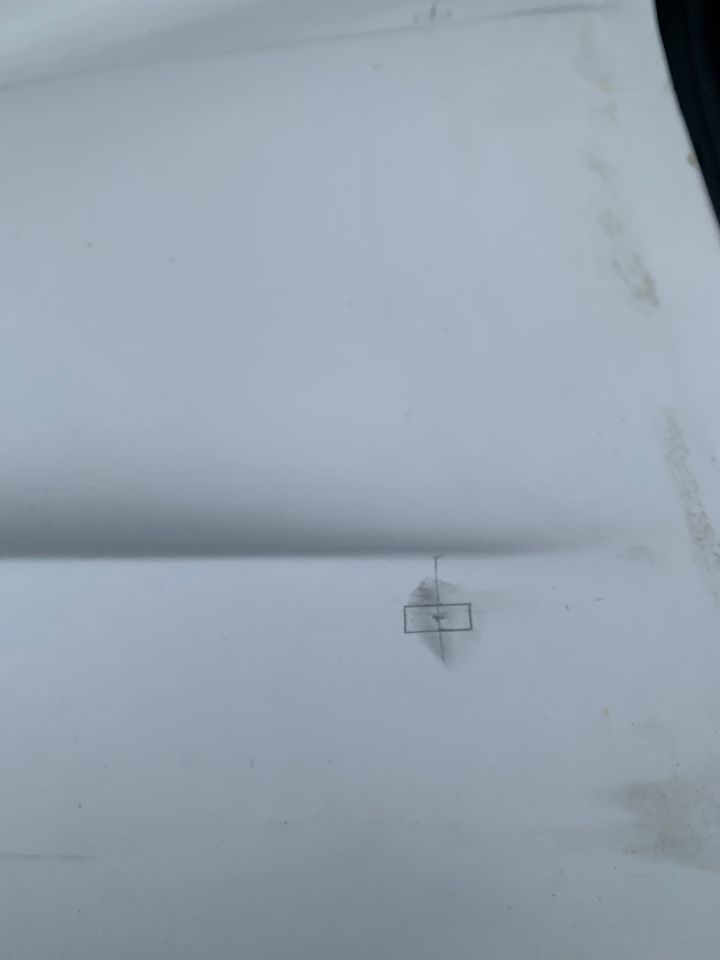
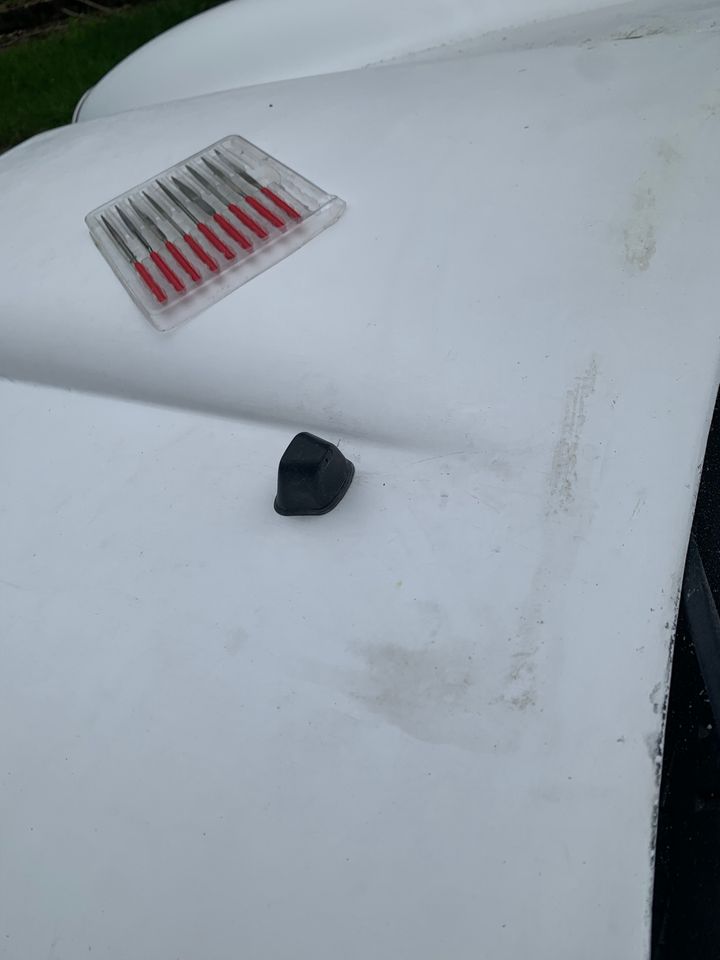
The hole required in the bonnet was 10mm x 25mm so this was measured & marked.
I cut with the baby dremel but this was too much like sending a boy to do a man's job so the big rotary cutter came out to play. Once I'd cut the lines as best I could a 10mm drilbit removed the bulk of the material to be trimmed out. Then file the edges & test fit, repeating many times.
Eventually voila- I had a decent fairly tight fit.
The other side was exactly the same as the first, all the connections for water & power were just plug & play.
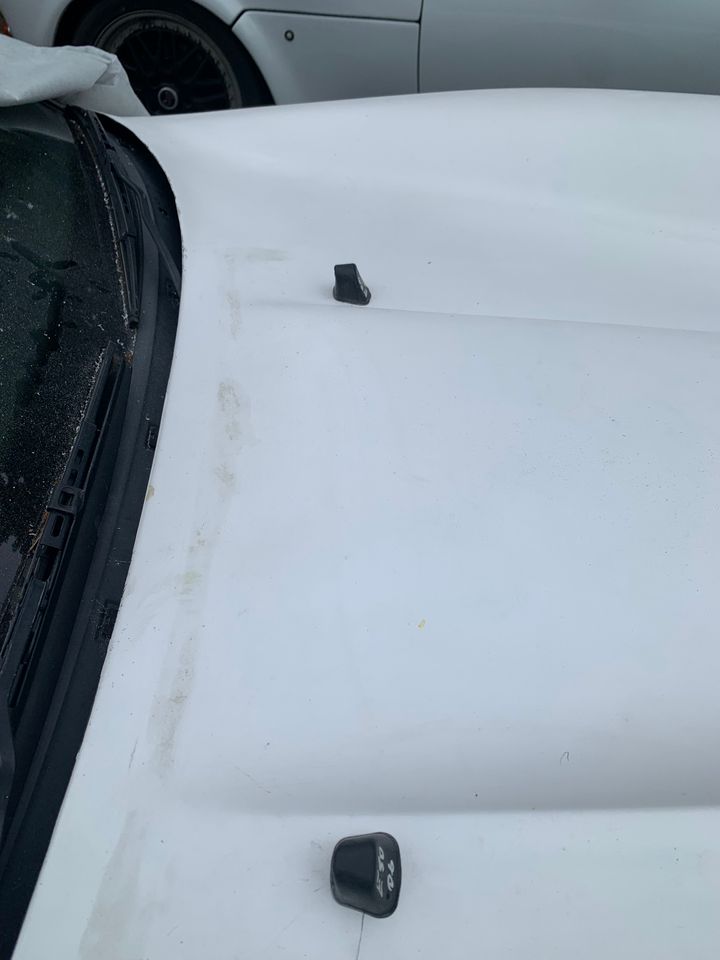
Although the little overcut lines are covered by the washer jets I'll fill them when I do the rest of the bodywork preparation prior to paintwork.
The hole required in the bonnet was 10mm x 25mm so this was measured & marked.
I cut with the baby dremel but this was too much like sending a boy to do a man's job so the big rotary cutter came out to play. Once I'd cut the lines as best I could a 10mm drilbit removed the bulk of the material to be trimmed out. Then file the edges & test fit, repeating many times.
Eventually voila- I had a decent fairly tight fit.
The other side was exactly the same as the first, all the connections for water & power were just plug & play.
Although the little overcut lines are covered by the washer jets I'll fill them when I do the rest of the bodywork preparation prior to paintwork.
Edited by Biggy Stardust on Tuesday 21st May 14:06
Gassing Station | Kit Cars | Top of Page | What's New | My Stuff