Alfa Romeo 164 Twinspark Super
Discussion


Jimmy Recard said:
Great write up. Just why are parts so hard to get for a 164 rather than any other Alfa Romeo of the period? Or are they all impossible?
I don't have too much experience of the other models, but the late 80s/early 90s vehicles seem to sit in the limbo of nothing being manufactured by enthusiasts, slightly too many computers/wires to just replace with equivalent 'Lucas' components (for example) and no longer supported by Alfa themselves.It's a shame as I think GTVs from the 90s, or 16V Twinsparks in general, are quite well served, but only the owners of V^ 164s really hoarded parts, as the most deirable model.
Not impossible though - stuff seems to crop up all the time, just not the items you need that week!
rxe said:
My experience is more V6 based (er, got 5 of them), but nearly all the idle problems have been related to air leaks in the induction system. Go round it with a stethoscope.
The main intake bellows is obvious, but really hard to spot. My current 156-GTA-Shed project had a huge split, which only became obvious when I had the thing entirely out of the car and was able to bend it in all directions.
Thanks rxe - I have had everything off at one stage or another, but really need a few days of good weather, a garage/driveway of my own and some cans of compressed air/stephescope. I can see various jubilee clips and rubbers are showing their age, but ideally need a set of replacement hoses. I have a cunning plan - update to follow!The main intake bellows is obvious, but really hard to spot. My current 156-GTA-Shed project had a huge split, which only became obvious when I had the thing entirely out of the car and was able to bend it in all directions.
Dr G said:
Good car; the new steering wheel is lovely.
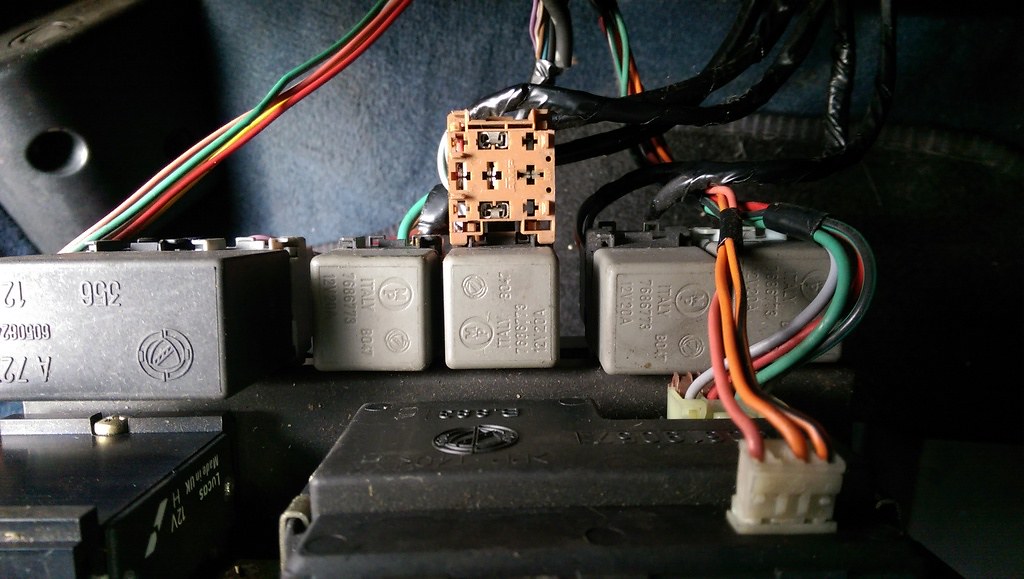
Not quite a Moto-lita, but for something with an airbag it has increased my driving enjoyment immensely.Back in December I was cleaning and checking fuses and relays, and came across this under the glove box:
 IMAG2039_zpsht0yyjus by James Vincent
Missing relay = delve into the archives to see what it covered... "front foglights". Oh.
The facelift cars had a nice front bumper with some 'blanks' for foglights. I took of the panels and discovered all the wiring with rubber end protectors - all put in at the factory and foglights were only installed if a buyer coughed up the Carello prices.
 IMAG2036_zpsppczxya2 by James Vincent
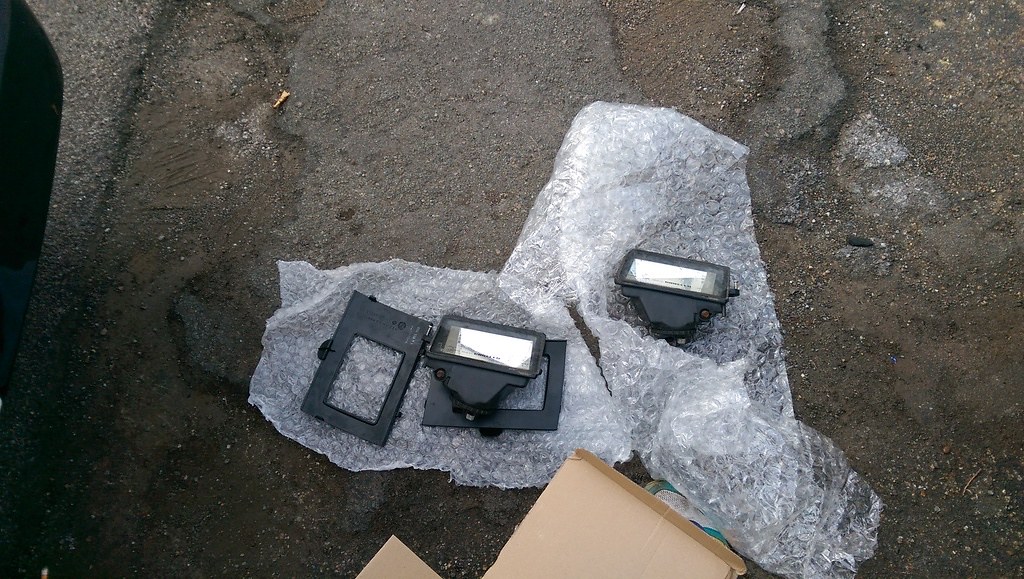
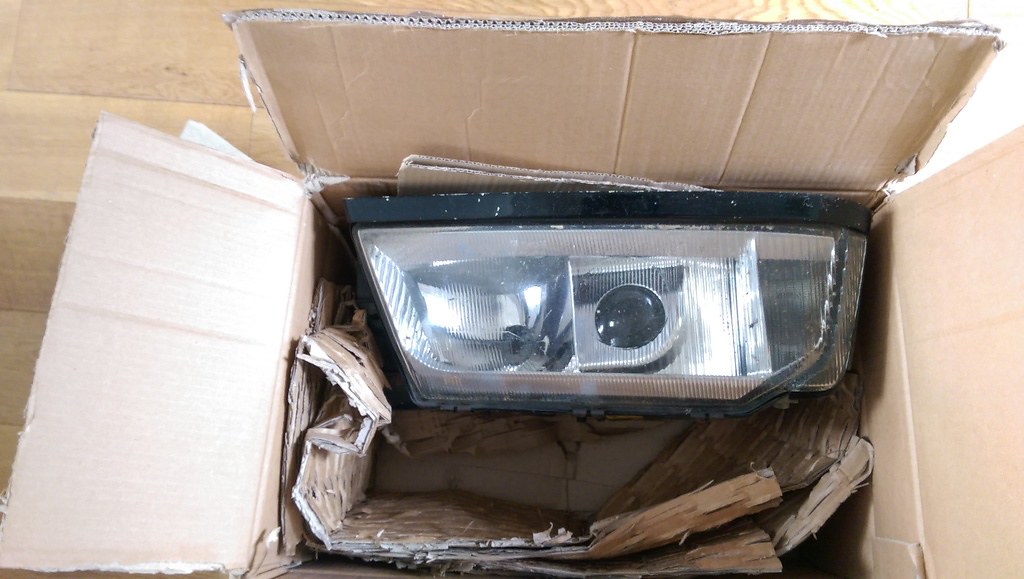
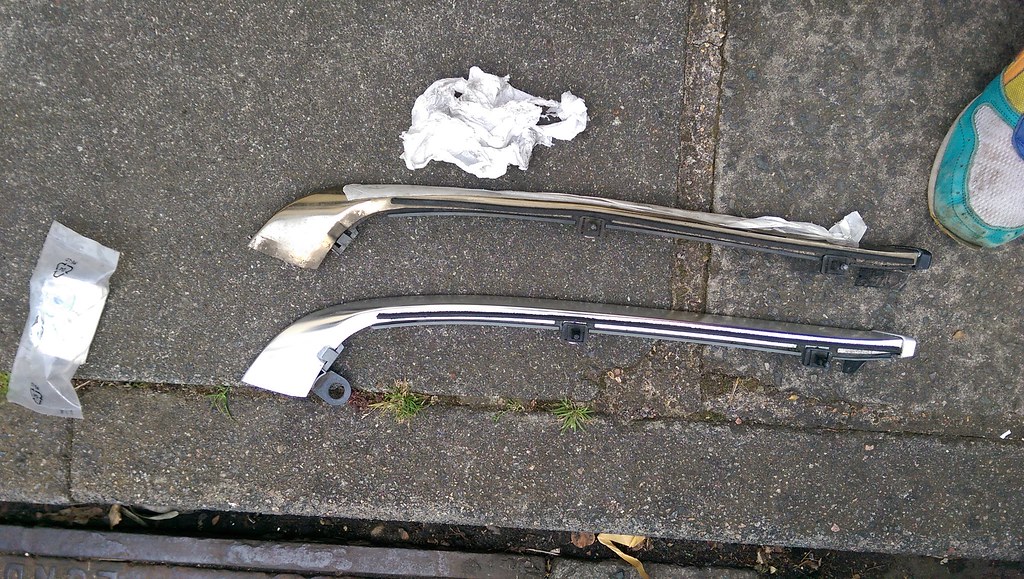
A few weeks later, a pair of used LATE model Carellos came up, and were snapped up by yours truly. Crucially, these came with the correct 'frames' to replace the blanks:
 IMAG2035_zpsxurgoykv by James Vincent
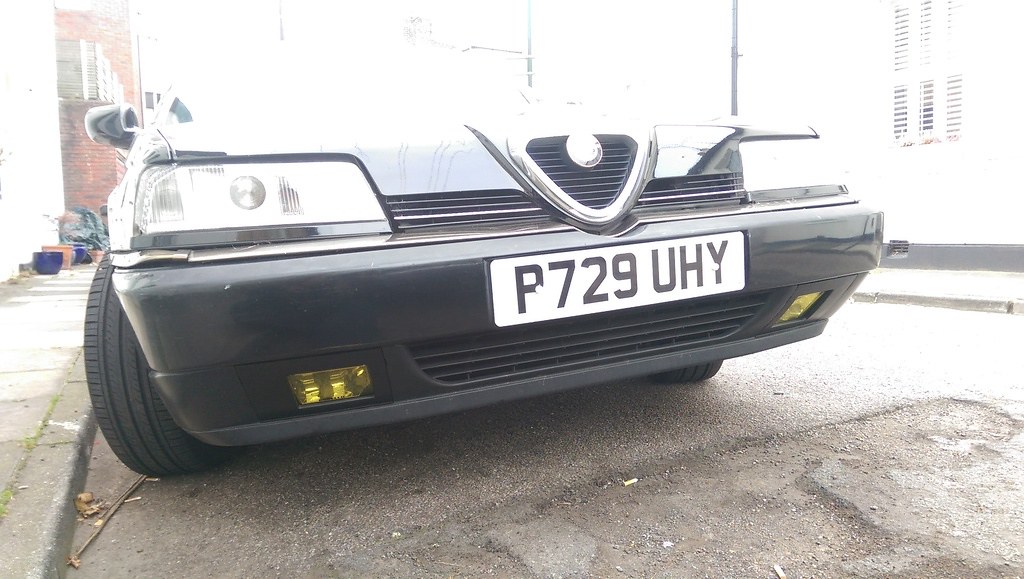
Given their lower position, I wanted to protect them from stone chips and errant ceramic insects, so opted for a thick European yellow film:
 IMAG2068_zpsrldb2drn by James Vincent
Not standard, so against the grain of the project, but I think subtle enough and in-period enough to be acceptable.
Wiring diagrams revealed the relay required was an SP2037, which I got from the US for pennies, including shipping. Of course, the dash switch required some coaxing into action having never been used, but it now works perfectly. Their main use is to flash all the oncoming motorists with their foglights on. I have only used them once, in darkest Somerset, at 'fog speed'.
IMAG2039_zpsht0yyjus by James VincentMissing relay = delve into the archives to see what it covered... "front foglights". Oh.
The facelift cars had a nice front bumper with some 'blanks' for foglights. I took of the panels and discovered all the wiring with rubber end protectors - all put in at the factory and foglights were only installed if a buyer coughed up the Carello prices.
IMAG2036_zpsppczxya2 by James VincentA few weeks later, a pair of used LATE model Carellos came up, and were snapped up by yours truly. Crucially, these came with the correct 'frames' to replace the blanks:
IMAG2035_zpsxurgoykv by James VincentGiven their lower position, I wanted to protect them from stone chips and errant ceramic insects, so opted for a thick European yellow film:
IMAG2068_zpsrldb2drn by James VincentNot standard, so against the grain of the project, but I think subtle enough and in-period enough to be acceptable.
Wiring diagrams revealed the relay required was an SP2037, which I got from the US for pennies, including shipping. Of course, the dash switch required some coaxing into action having never been used, but it now works perfectly. Their main use is to flash all the oncoming motorists with their foglights on. I have only used them once, in darkest Somerset, at 'fog speed'.
Edited by Spinakerr on Saturday 2nd April 18:45
Edited by Spinakerr on Saturday 15th July 20:10
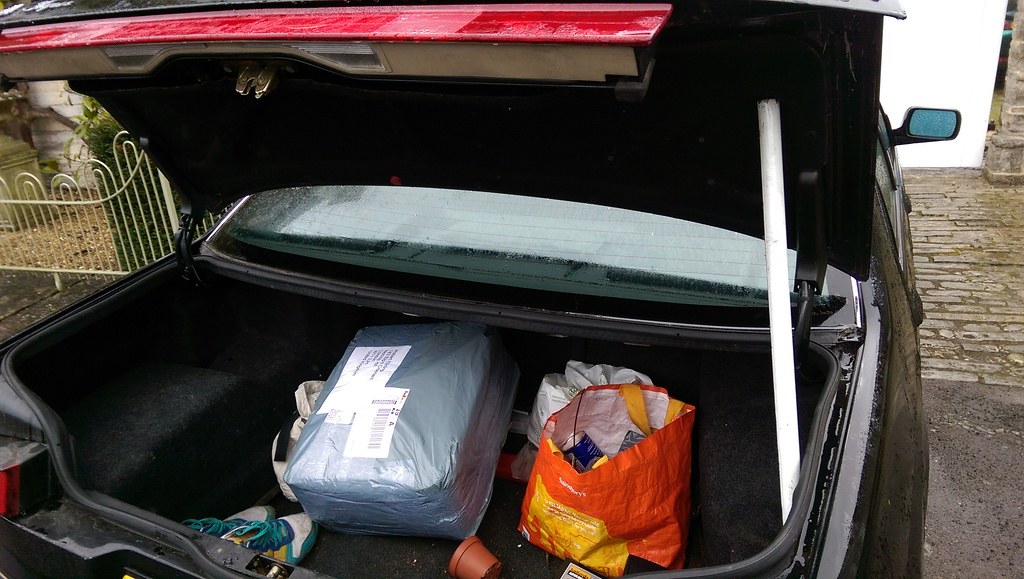
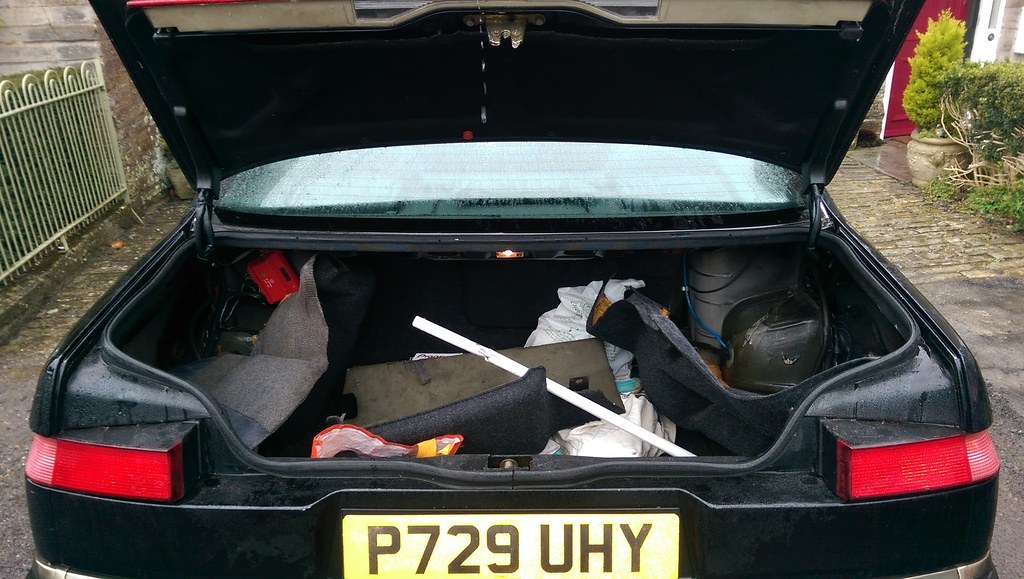
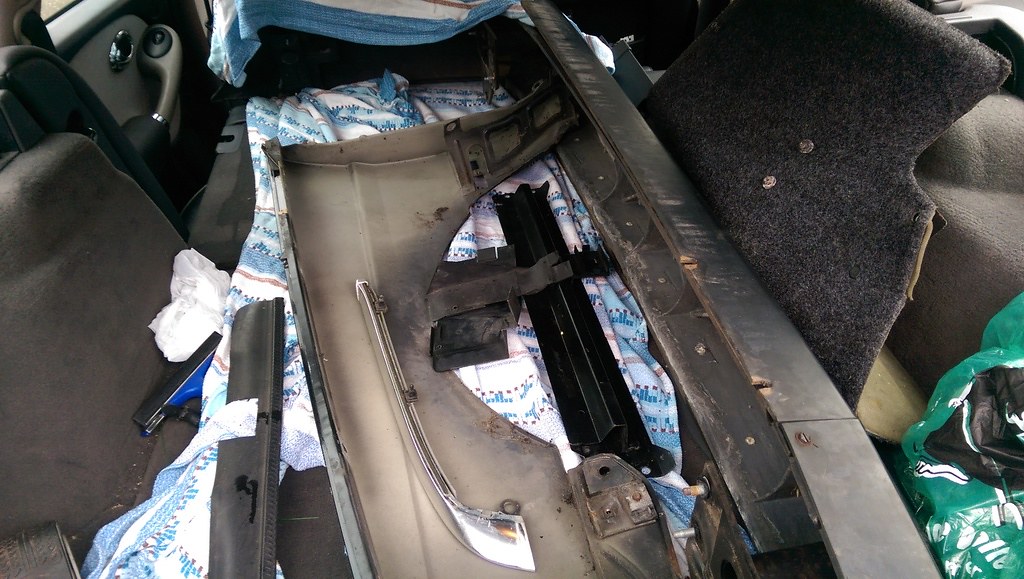
When I purchased the car the owner handed me a short white pole from behind the garage door. "You'll need this" he smirked. Of course I did:
 IMAG2568_zpswafevkuc by James Vincent
After three years of unnecessarily marking the carpet / having a boot slowly close on my head, I looked into replacement gas struts. Those on the car looked relatively new, but it appears they were changed to the 'non-spoiler' part number (60591762). I therefore acquired some Magneti Marelli examples that would accommodate the extra weight of the spoiler on the Super (60566147), from Latvia:
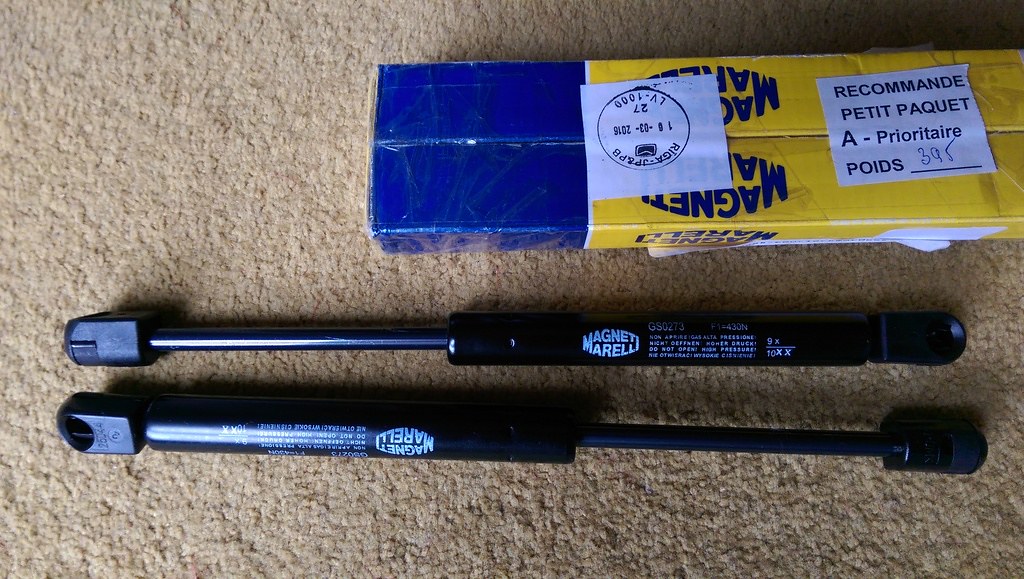 IMAG2567_zpsu7v2o0gq by James Vincent
Pull back various carpets, ping off the circlips with a small pair of pliers and reattach new struts - 10 minutes maximum.

Should have done it years ago:
 IMAG2572_zpsfcd7wiga by James Vincent
I should probably drop the pole off at the old owner's house.
IMAG2568_zpswafevkuc by James VincentAfter three years of unnecessarily marking the carpet / having a boot slowly close on my head, I looked into replacement gas struts. Those on the car looked relatively new, but it appears they were changed to the 'non-spoiler' part number (60591762). I therefore acquired some Magneti Marelli examples that would accommodate the extra weight of the spoiler on the Super (60566147), from Latvia:
IMAG2567_zpsu7v2o0gq by James VincentPull back various carpets, ping off the circlips with a small pair of pliers and reattach new struts - 10 minutes maximum.

Should have done it years ago:
IMAG2572_zpsfcd7wiga by James VincentI should probably drop the pole off at the old owner's house.
Edited by Spinakerr on Saturday 15th July 20:13
A non-working gauge one the dashboard just isn't right, even if 'they all do that'.
 IMAG2680_zps8hfvk4ra by James Vincent
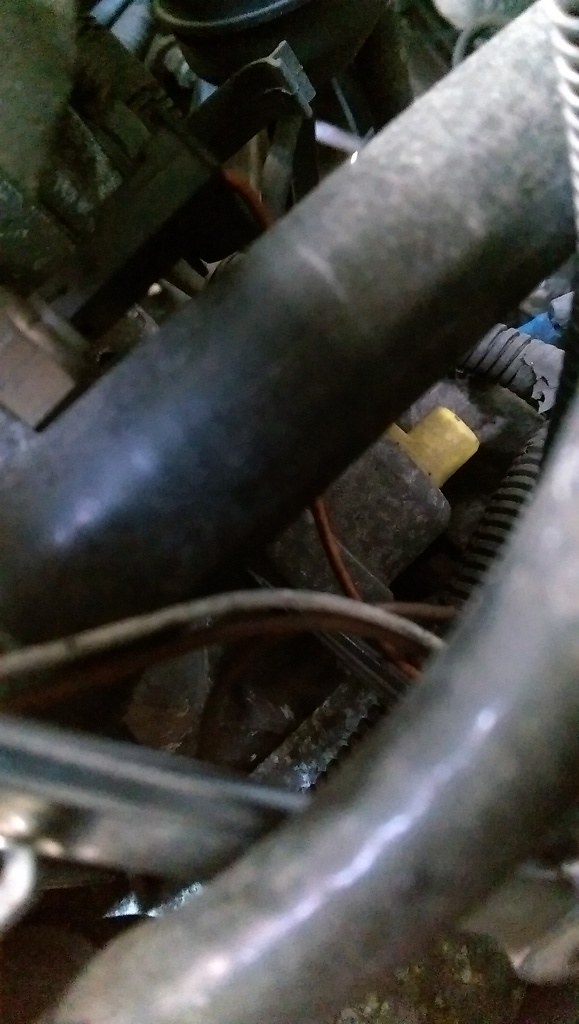
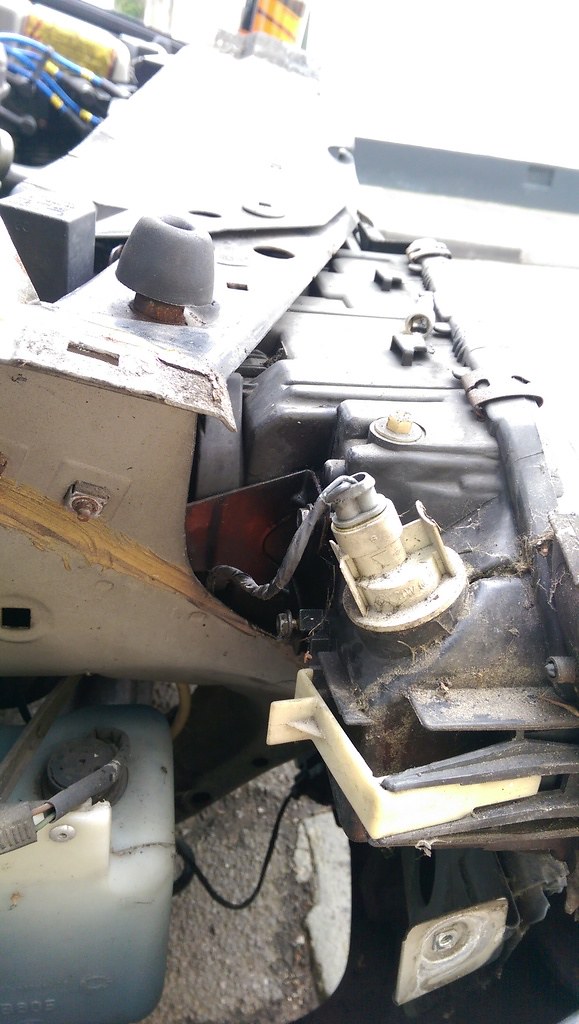
Oil pressure on this iteration of the 8V twinspark has two sensors - one for a warning light and one for the needle itself. The needle sensor often fails as it is diaphram-based, while the warning lamp is made of sterner stuff.
Here it is, at the rear-right of the block:
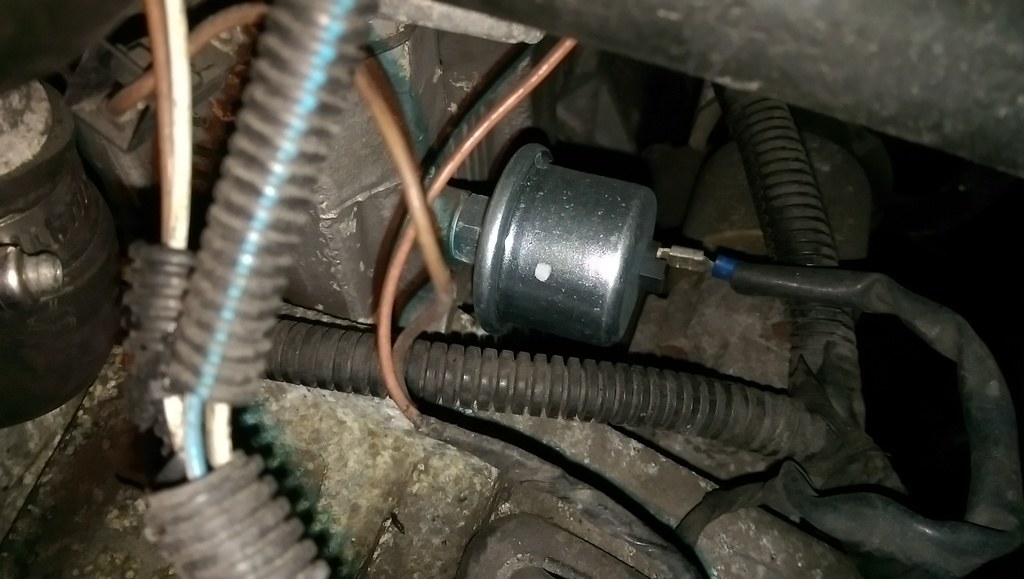
 IMAG2040_zpsf0uxa5gf by James Vincent
An exact Alfa unit is shared with the 75 and 155, but luckily enterprising owners have a unit with the similar characteristics, and importantly the same screw thread, from a TD4 Land Rover (OPS2152, if anyone is interested). 14mm spanner out, 17mm spanner for the new item. A renewed connector, careful short-spannering later:
 IMAG2676_zpsboywaga4 by James Vincent
Nice easy fix, and correctly reading between 4bar at high revs and 0.5-1 at idle:
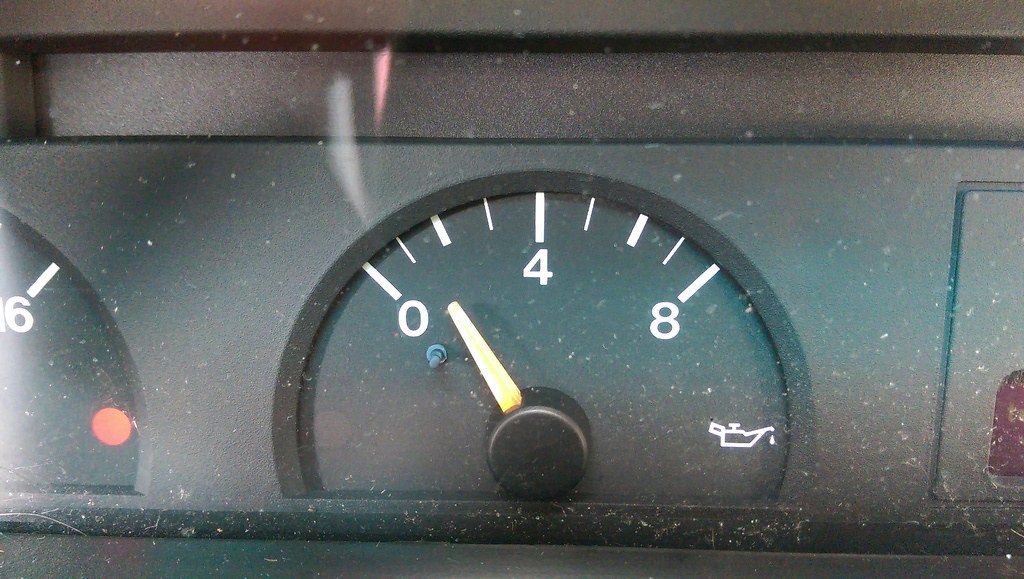 IMAG2681_zpscaloyw4r by James Vincent
IMAG2680_zps8hfvk4ra by James VincentOil pressure on this iteration of the 8V twinspark has two sensors - one for a warning light and one for the needle itself. The needle sensor often fails as it is diaphram-based, while the warning lamp is made of sterner stuff.
Here it is, at the rear-right of the block:
IMAG2040_zpsf0uxa5gf by James VincentAn exact Alfa unit is shared with the 75 and 155, but luckily enterprising owners have a unit with the similar characteristics, and importantly the same screw thread, from a TD4 Land Rover (OPS2152, if anyone is interested). 14mm spanner out, 17mm spanner for the new item. A renewed connector, careful short-spannering later:
IMAG2676_zpsboywaga4 by James VincentNice easy fix, and correctly reading between 4bar at high revs and 0.5-1 at idle:
IMAG2681_zpscaloyw4r by James VincentEdited by Spinakerr on Saturday 15th July 20:15
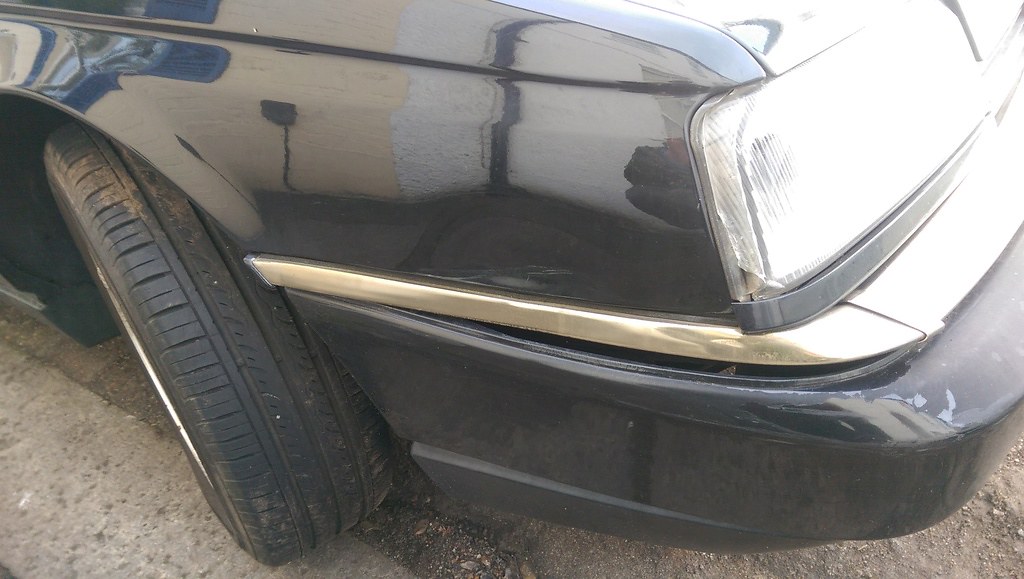
With the Spring Alfa day and Autoitalia looming, it's time to address the main cosmetic issues with the car. Around the time I was adding the fog lights, a delivery van driver took the opportunity to nuzzle the offside front wing and headlight a bit too affectionately. Clearly he wanted a bit of mystery in his/her life, as no note or details were left. The paint left in the gouges was pretty conclusive, but I don't know if I have the willpower to attempt redress.
I sighed before I cried - the perils of London on-street parking:
 IMAG2686_zpsagyz0oas by James Vincent
I think the bumper is the 'true' shape - mounts look parallel, but I now need to investigate wings and paint costs. Does anyone know if the facelift wings are the same one the different trim is removed?
I sighed before I cried - the perils of London on-street parking:
IMAG2686_zpsagyz0oas by James VincentI think the bumper is the 'true' shape - mounts look parallel, but I now need to investigate wings and paint costs. Does anyone know if the facelift wings are the same one the different trim is removed?
Edited by Spinakerr on Saturday 15th July 20:16
Right, off to Auto Italia this Sunday at the New Forest, so despite the weather tomorrow I'm hoping to source and fit a few bits on the same day - the new wing, a headlight and various cosmetic bits.
The gearbox is starting to be a chore on downshifts, signalling time for a rebuild or an alternative Hopefully the 166 twinspark 6 speedy can bolt on with careful planning - all suggestions for alternatives (Fiat C503 original) welcome!
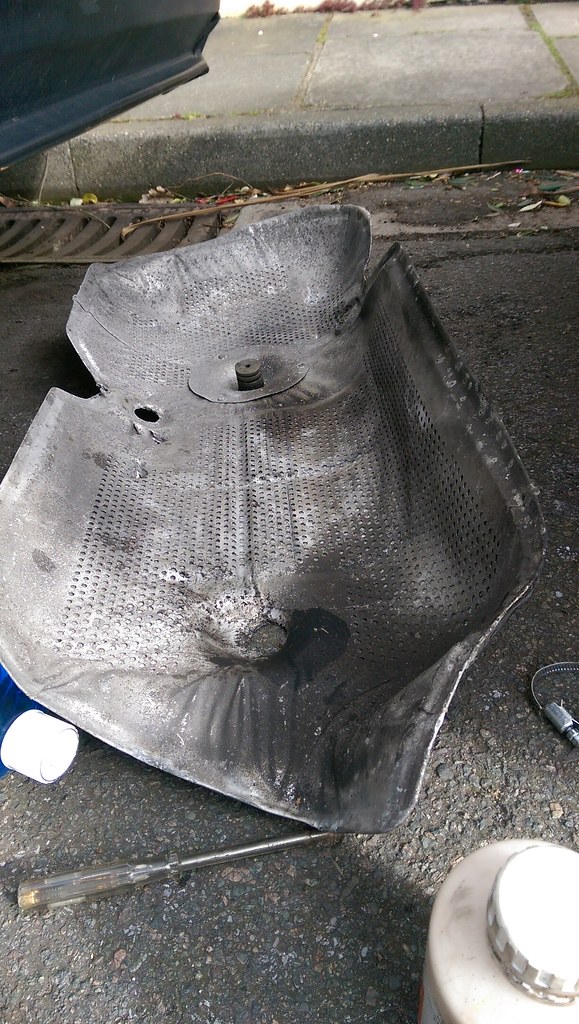
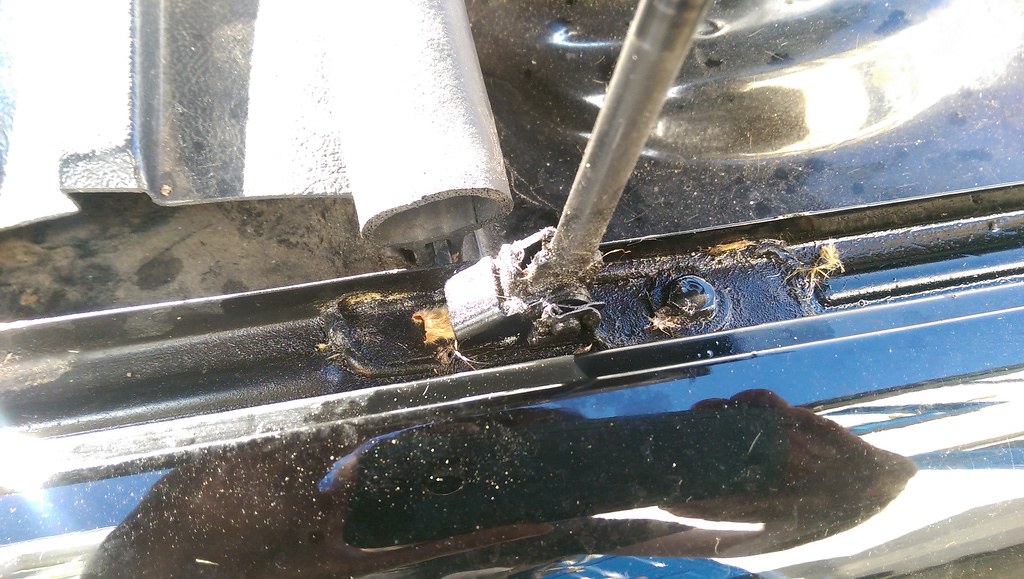
Last weekend the rear heatshield worked itself loose - age has taken its toll on the material around the fixing washers:
 IMAG2609_zpswbjqlmv4 by James Vincent, on Flickr
I have found small jam jar lids to be excellent oversize repair washers, with curved edges to mitigate future damage to fragile shield. I know everyone will say 'just throw the heatshield away', but I'm trying to preserve items where possible.
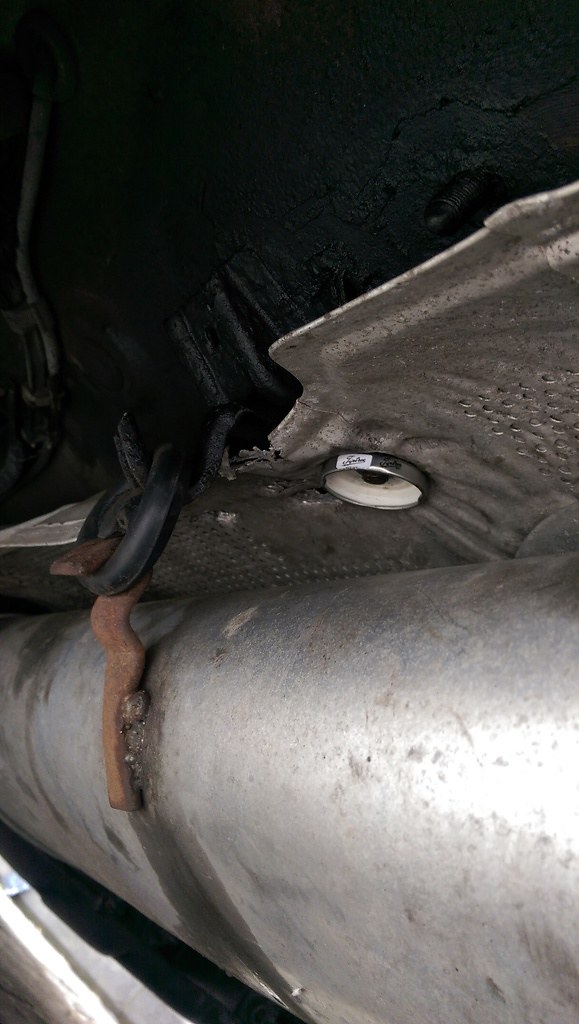 IMAG2690_zpselqck1rv by James Vincent, on Flickr
I managed to (finally) find some half decent rubber mounts and replaced them all - this car got through a fair number of cheap ones since purchase.
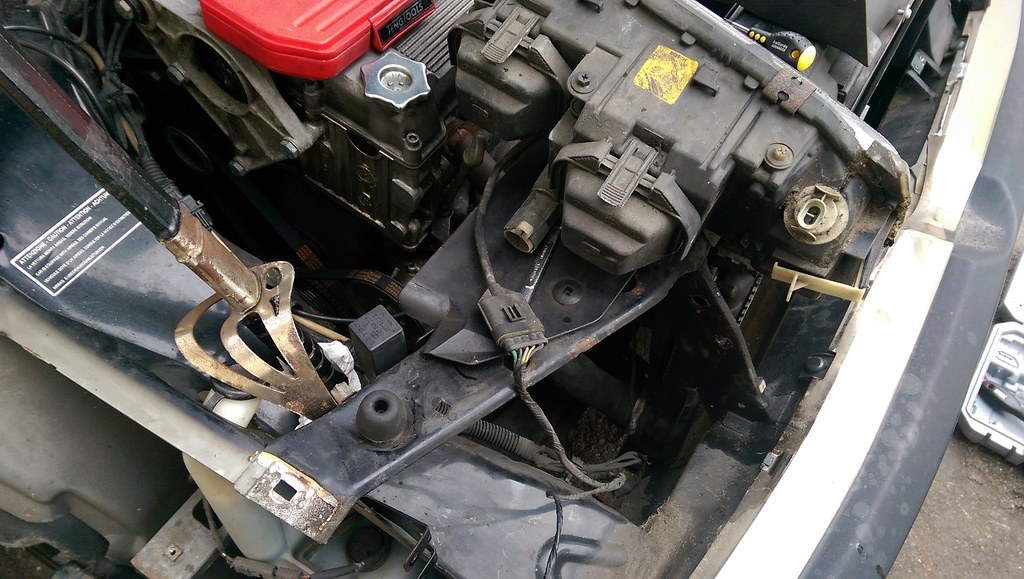
I forgot to add that the integrated thermostat had stuck open last year and was replaced with a 'known good' unit. A pricey item now new, but still available from Alfa if required. Drain coolant a bit, noting jubilee clips and various hoses for future replacement, unplug sensors, unbolt carefully (sensitive bolts!), re-gasket and hylomar and... 'refitting is the reverse of removal'. Plus careful refilling.
 IMAG2685_zpsvvcoujtu by James Vincent
Having been neglected all year (other than rushed pressure washes to get rid of salt), hopefully I'll be able to layer on some polish tomorrow. It is definitely unhappy - look at it, moping about in the rain:
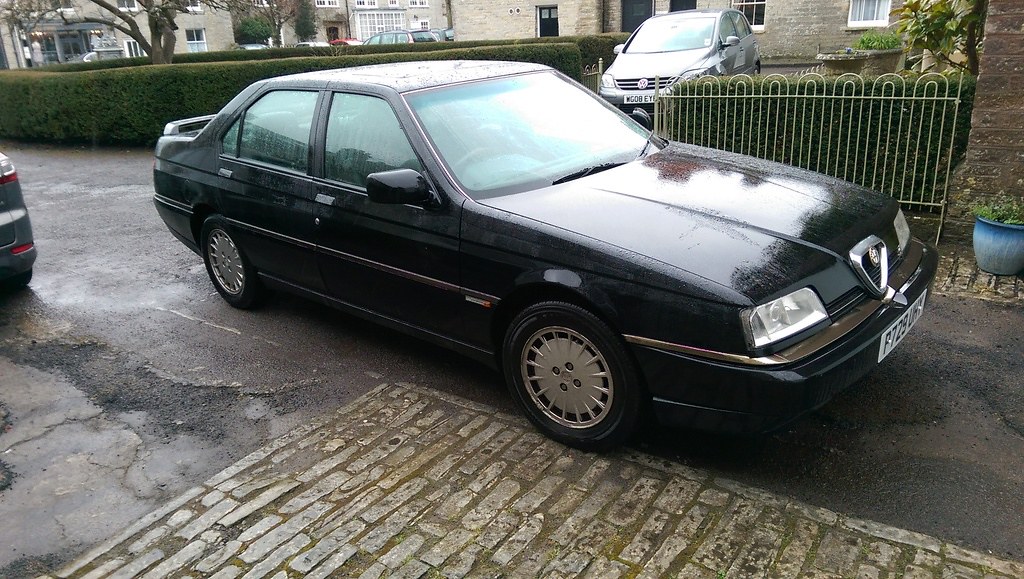 IMAG2574_zpsjgc37cvh by James Vincent, on Flickr
Hopefully more to follow tomorrow and from Beaulieu!
The gearbox is starting to be a chore on downshifts, signalling time for a rebuild or an alternative Hopefully the 166 twinspark 6 speedy can bolt on with careful planning - all suggestions for alternatives (Fiat C503 original) welcome!
Last weekend the rear heatshield worked itself loose - age has taken its toll on the material around the fixing washers:
IMAG2609_zpswbjqlmv4 by James Vincent, on FlickrI have found small jam jar lids to be excellent oversize repair washers, with curved edges to mitigate future damage to fragile shield. I know everyone will say 'just throw the heatshield away', but I'm trying to preserve items where possible.
IMAG2690_zpselqck1rv by James Vincent, on FlickrI managed to (finally) find some half decent rubber mounts and replaced them all - this car got through a fair number of cheap ones since purchase.
I forgot to add that the integrated thermostat had stuck open last year and was replaced with a 'known good' unit. A pricey item now new, but still available from Alfa if required. Drain coolant a bit, noting jubilee clips and various hoses for future replacement, unplug sensors, unbolt carefully (sensitive bolts!), re-gasket and hylomar and... 'refitting is the reverse of removal'. Plus careful refilling.
IMAG2685_zpsvvcoujtu by James VincentHaving been neglected all year (other than rushed pressure washes to get rid of salt), hopefully I'll be able to layer on some polish tomorrow. It is definitely unhappy - look at it, moping about in the rain:
IMAG2574_zpsjgc37cvh by James Vincent, on FlickrHopefully more to follow tomorrow and from Beaulieu!
Edited by Spinakerr on Saturday 15th July 20:53
Hereward said:
Really enjoying this thread, keep up the good work.
Every car enthusiast needs to own an Alfa at some point. I love the 164 and have had a weak spot for the 33 ever since my Dad had one as a company car in the mid-90's. Haven't seen one for years.
My mechanic has a champagne 33 with around 40k on the clock. Worth finding one now if you can! This haphazard purchase has definitely become a keeper, and I like to think all Alfas, at some stage in their life, have an enthusiast owner.Every car enthusiast needs to own an Alfa at some point. I love the 164 and have had a weak spot for the 33 ever since my Dad had one as a company car in the mid-90's. Haven't seen one for years.
Today went largely to plan - finally met a contact in person from whom I had been buying various bits. The donor:
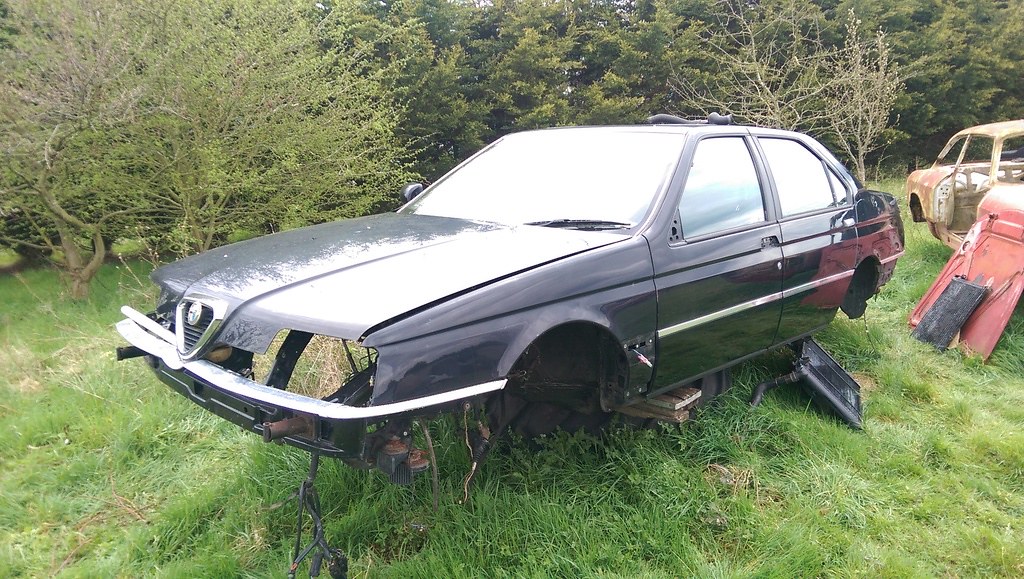 IMAG2708_zps7qiscpgm by James Vincent, on Flickr
Facelift in the right colour. Much penetrating spray, socket setting and careful haggling later, a bootful of booty. Note the factory fresh slam panel:
 IMAG2714_zps7bay74jt by James Vincent
Unfortunately all the really rare items have gone or 'gone'- rear crossmember, fuel filler tongue, boot floor, headlining, sunroof motor, front bumper etc.
As you can probably tell from this thread the tiny cosmetic improvements bring me great joy, so it was a wonder to find the eggshell wiper nut covers:
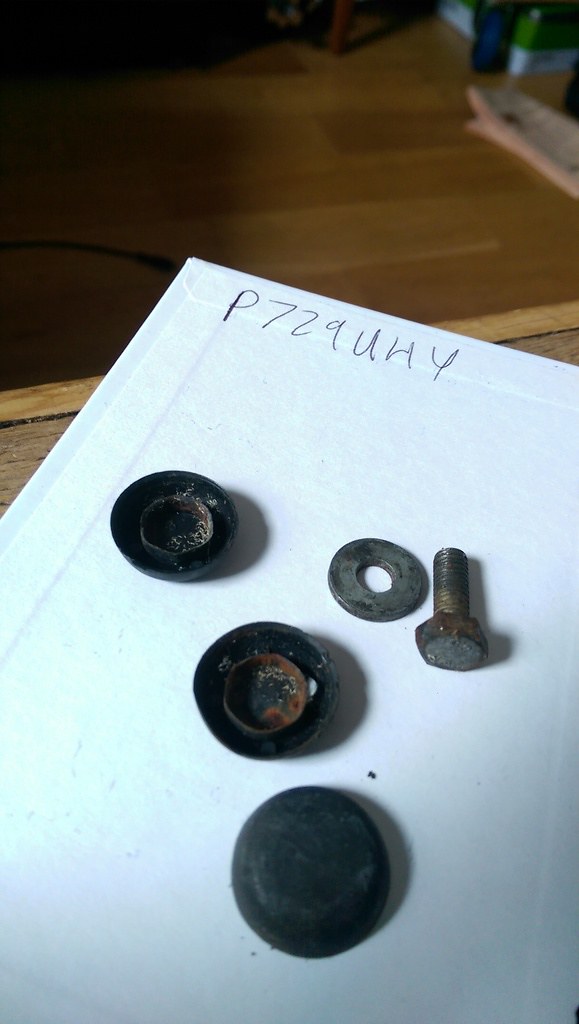 IMAG2715_zps3zfpilcf by James Vincent
Unfortunately came home to find my significant other had taken the car for the day. Should have briefed her on my plans. Looks like tomorrow won't have all the new additions, but on track for Brooklands Auto Italia on the 30th.
Edited by Spinakerr on Saturday 15th July 20:55
Made it!
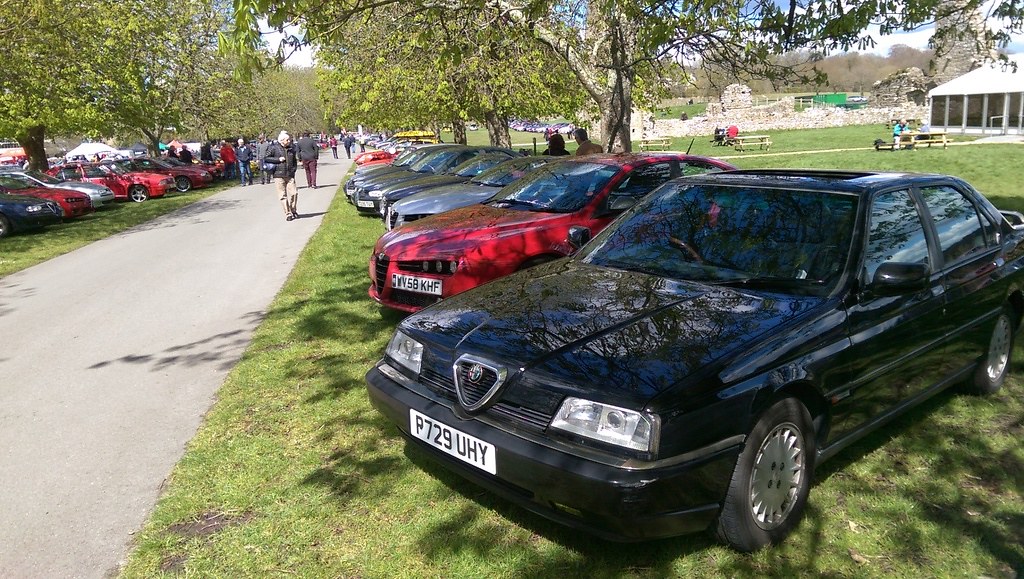 IMAG2742_zpsfovjsbb2 by James Vincent, on Flickr
Fantastic turnout and the usual diverse crowd. Great to see three other 164s (all 3ltr) and interesting beasts such as 33 1.7 boxer Sportwagons in the sun.
IMAG2742_zpsfovjsbb2 by James Vincent, on FlickrFantastic turnout and the usual diverse crowd. Great to see three other 164s (all 3ltr) and interesting beasts such as 33 1.7 boxer Sportwagons in the sun.
Edited by Spinakerr on Saturday 15th July 21:06
Madjoiner said:
Great story, keep it coming.
I've been so enthralled I bought one too!
Nice cars, shame that there are so few left.
Steve.
Excellent! Do start a topic here and/or send me a PM - happy to help out where I can. Do ensure you check in with the AROC 164 register too, great network similarly-salooned individuals.I've been so enthralled I bought one too!
Nice cars, shame that there are so few left.
Steve.
davamer23 said:
I know a chap whose garden is an Alfa graveyard and he has (amongst others) a 164 sitting on axle stands largely complete. I'll contact him tomorrow and if he agrees I could put you in touch with him?
Yes please do! All contacts and parts welcome - thanks for the thought.rxe said:
How do you reconcile your impeccable taste in cars with those trainers? :-)
Onitsuka Tigers are my favourite trainers, no matter the retina-splitting colour scheme. These were a charity shop find and have been excellent, grippy work shoes since. Plus, if I ever chance it in East London to see an obscure French electronica collective, they pretty much guarantee entry 
Quite a few parts have come up of late, and there is the possibility of a house move that will include a garage. I'm feeling positive about being able to get a (small) lift in it too - hopefully some proper mechanical work can commence!
Edited by Spinakerr on Saturday 23 April 12:14
Edited by Spinakerr on Sunday 24th April 10:30
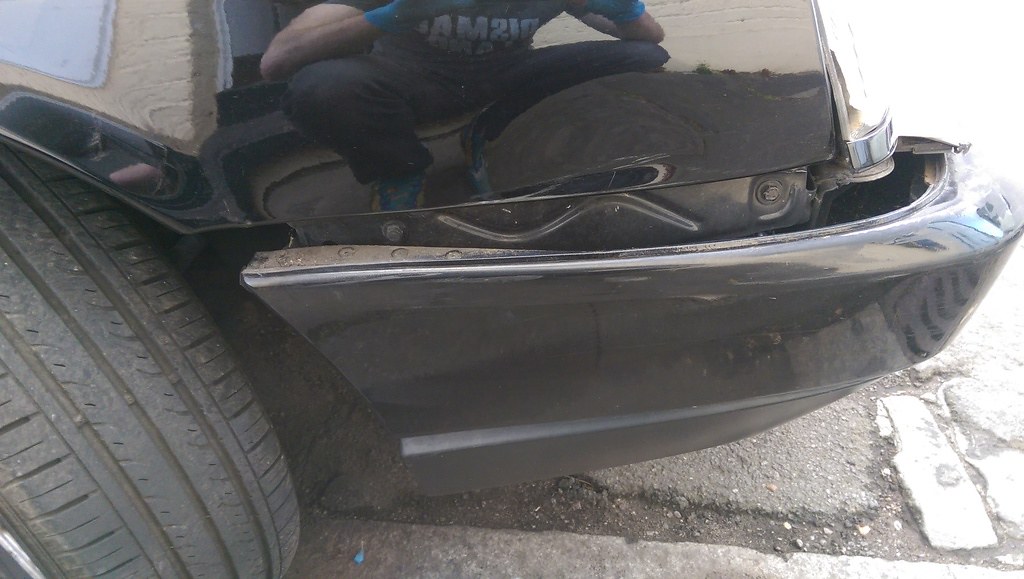
Yesterday I completed the first of several planned bodywork improvements - rear bumper replacement.
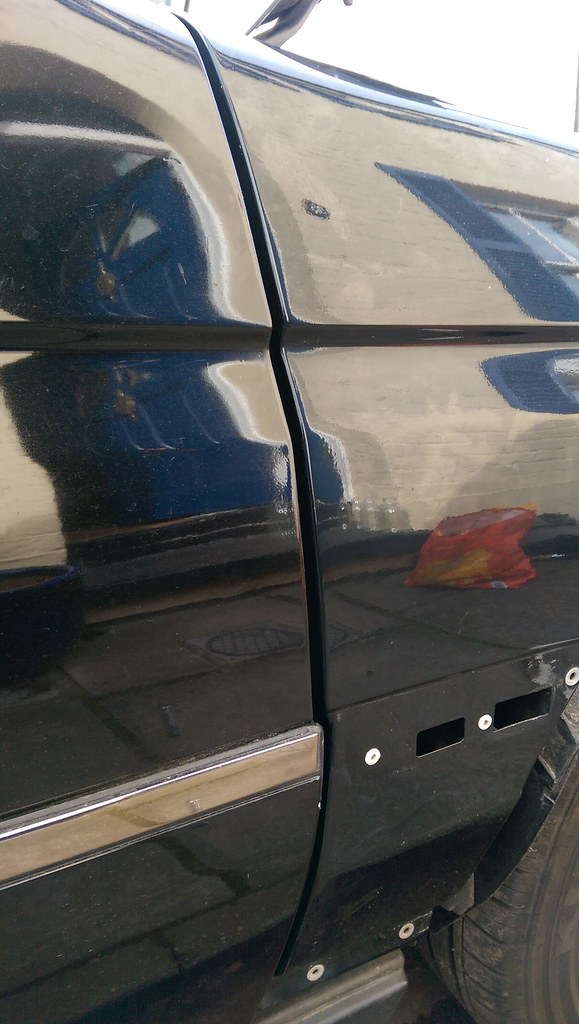
You can see from the photos when purchased the offside had taken quite a knock, and for three years I have endured its wonkiness, complete with ripple effect paintwork and perpetually-falling-out towing cover:
 IMAG0460_zpsc3j70aom by James Vincent
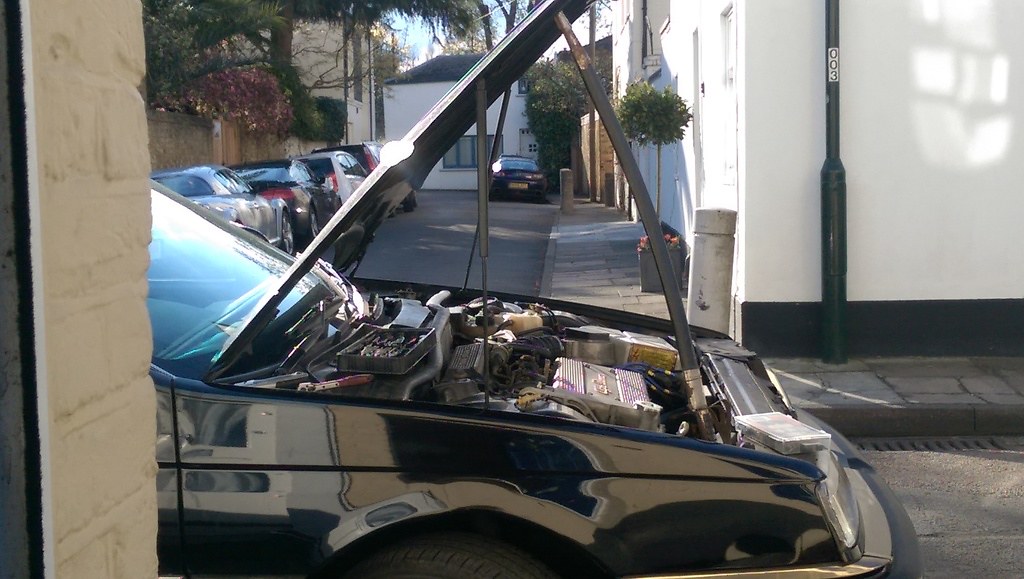
So, having learned where all the bolts were on the donor car (see above), I set to work. Of course, my car is actually full of such useless clutter as a battery, alarm, trim, relays and wires:
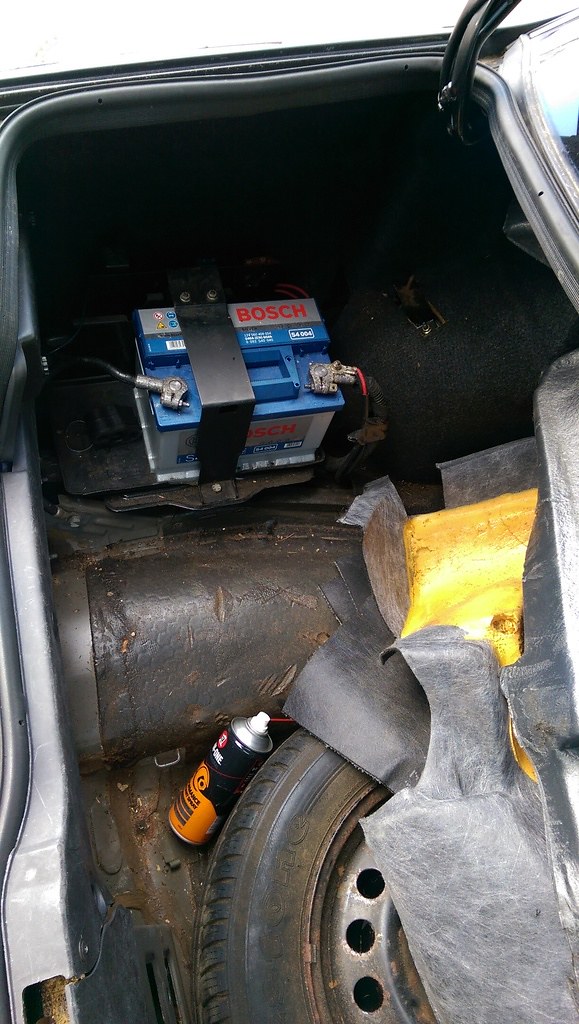 IMAG2755_zps7qacvkvo by James Vincent, on Flickr
 IMAG2756_zpsf1ruwmrb by James Vincent, on Flickr
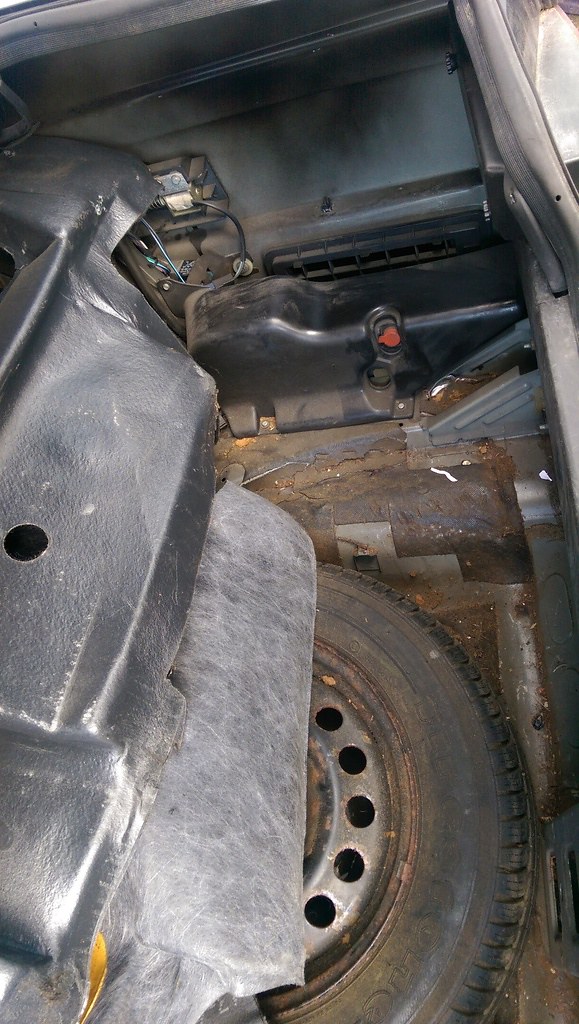
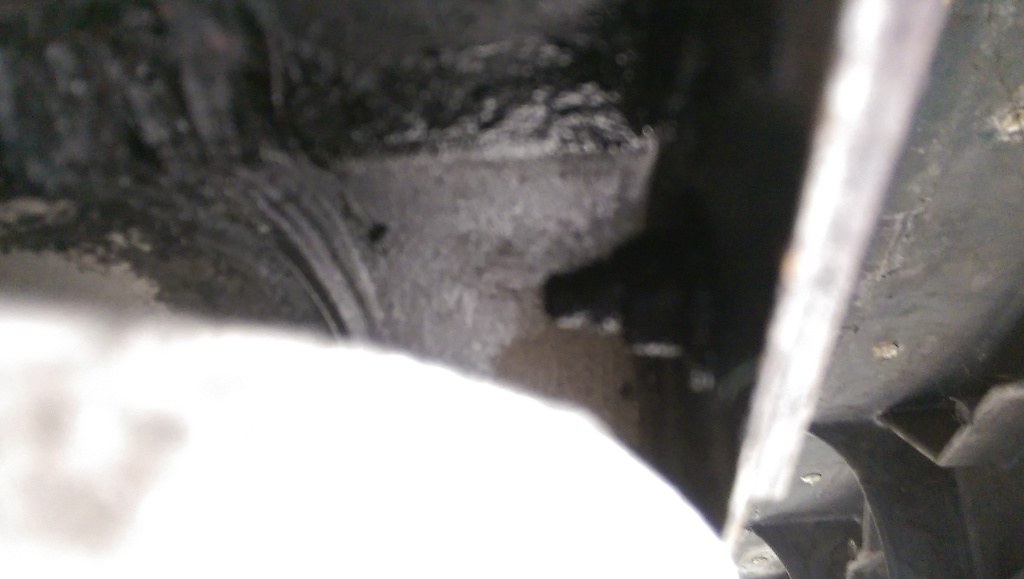
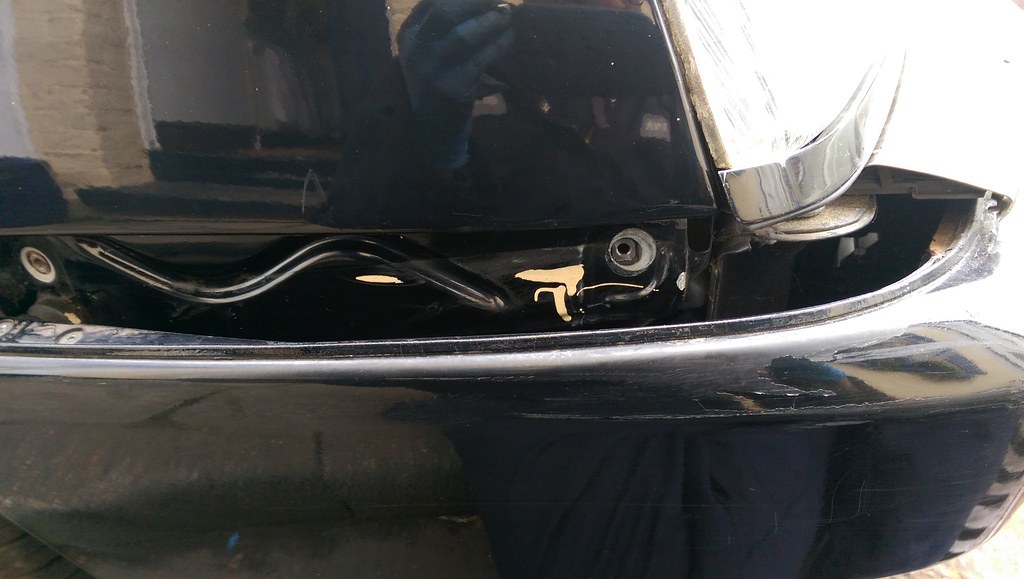
The alarm cover (with the red 'danger button') had to come off, but I really didn't want to have to remove the battery and its tray. Luckily some loosening meant it could shift to and fro in its tray. With a thin flexible light and enough 1/4 inch socket extensions, I just managed to remove the nuts and white plastic washers on both sides:
 IMAG2757_zpsgef747dd by James Vincent, on Flickr
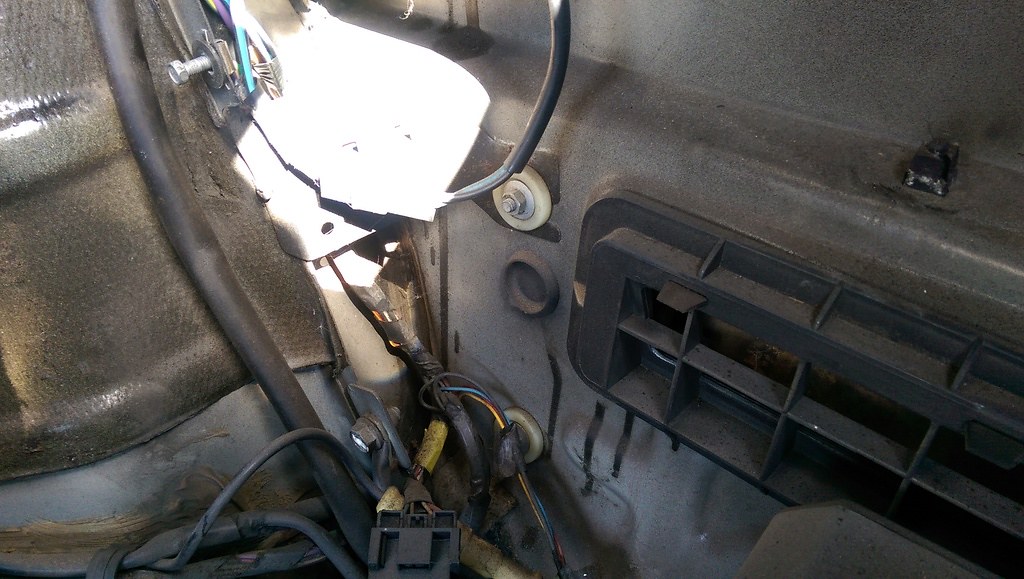
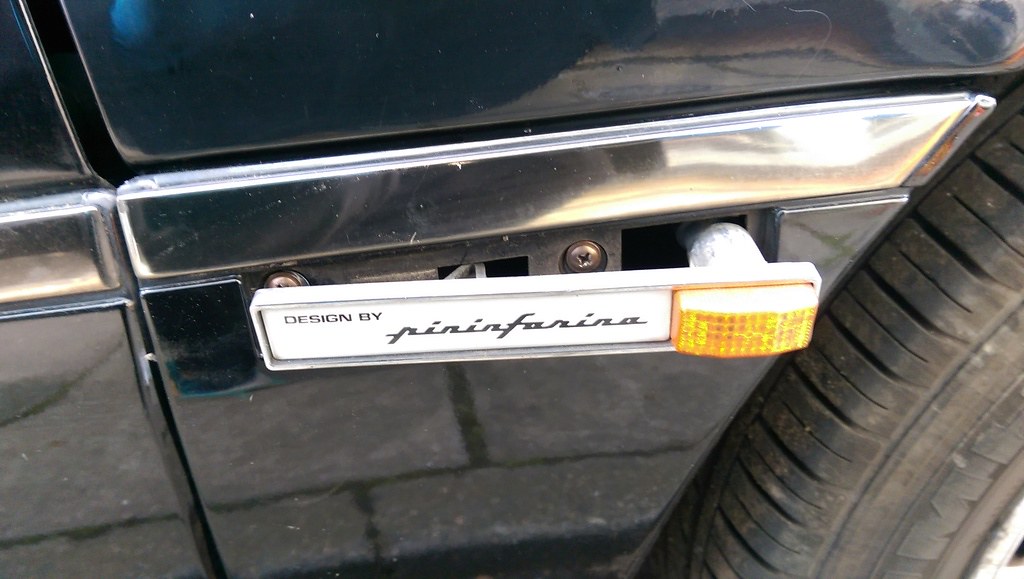
Two small screws also hold the bumper to the wheel arch liner. These bear the full brunt of debris and are often rusted to oblivion. Careful teasing with penetrating spray (on both sides) removed them without breakage. The rear lower quarters were now loose (Shoe reflection included for rxe):
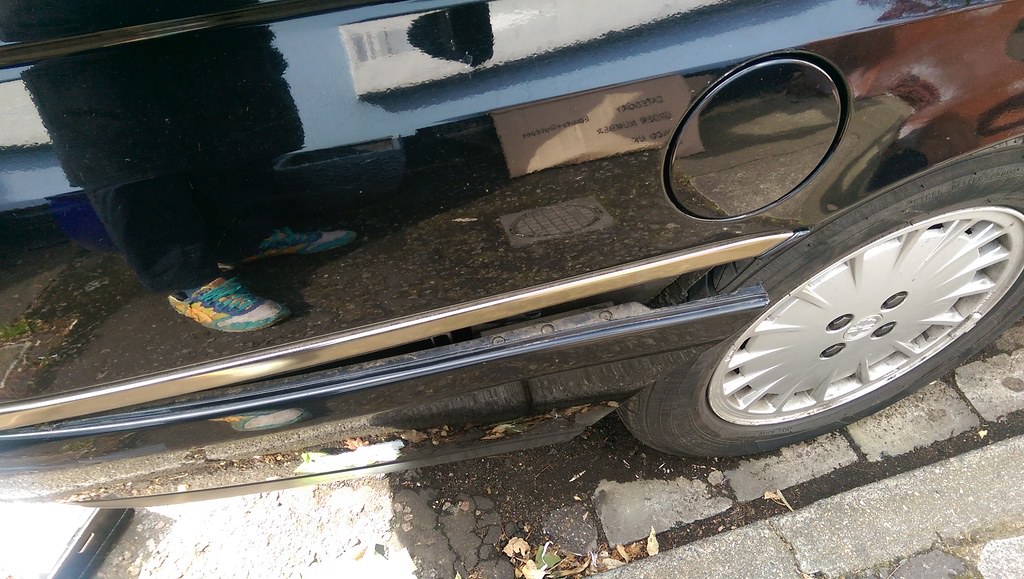 IMAG2760_zpsezjkz9le by James Vincent, on Flickr
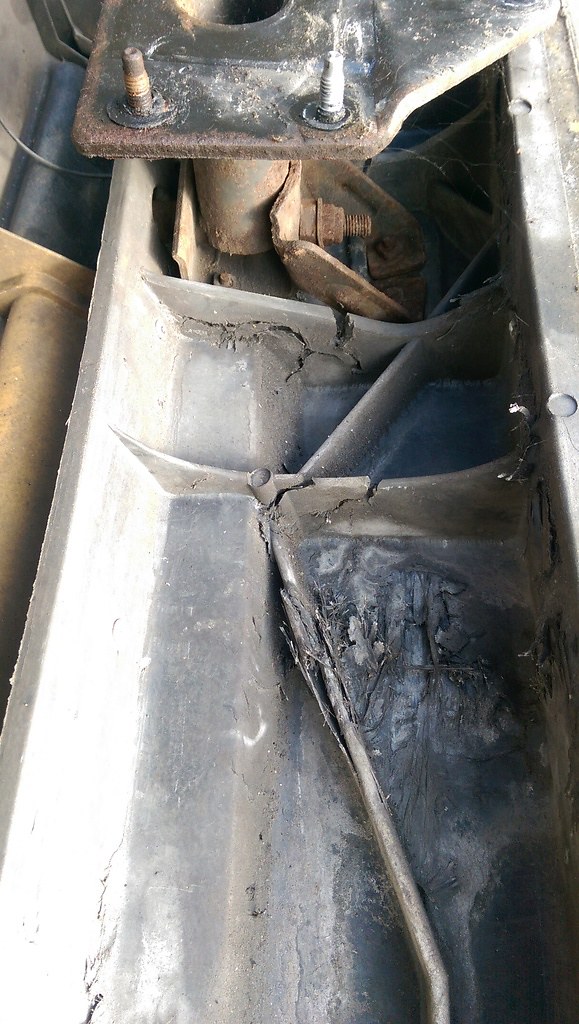
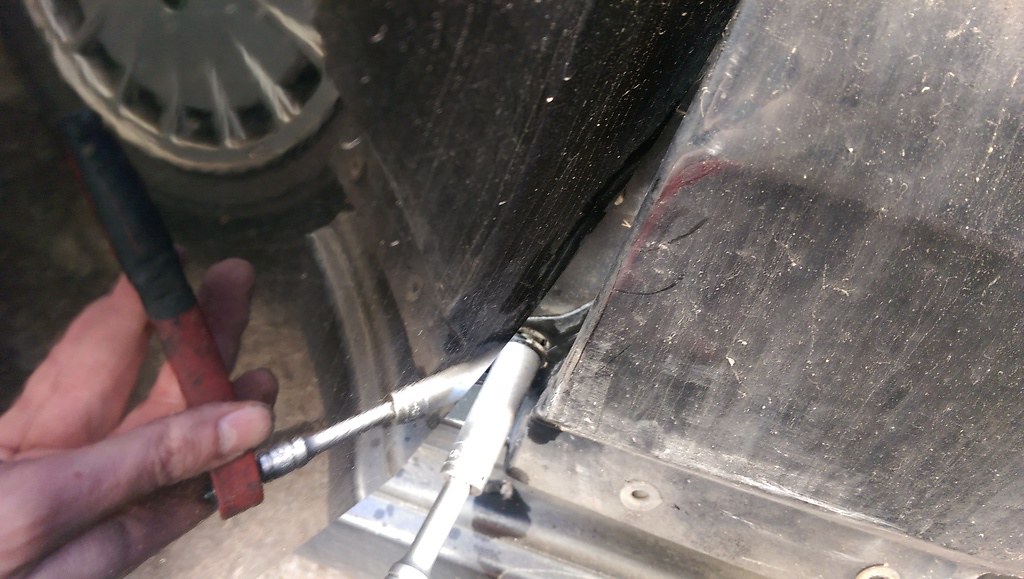
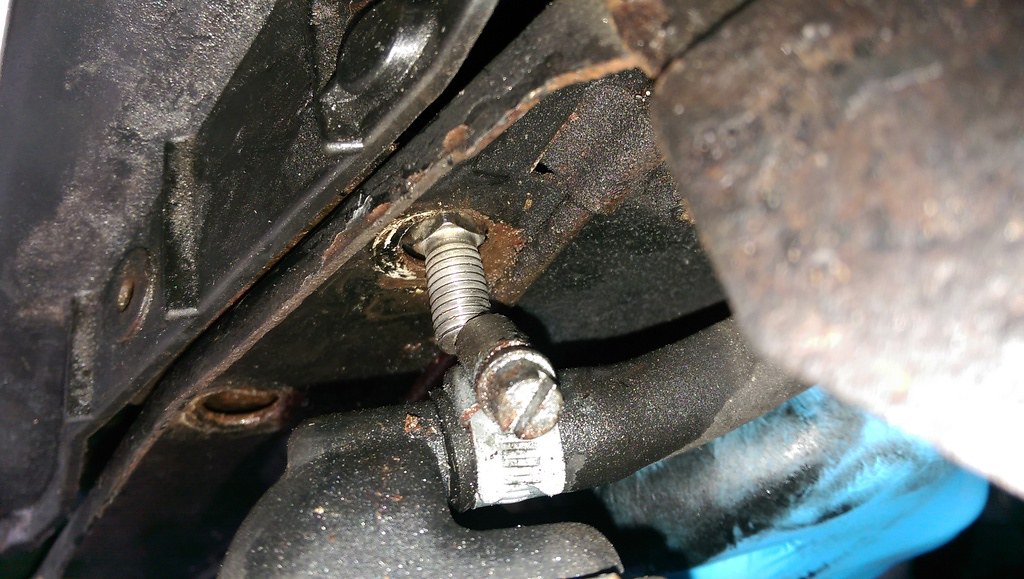
Now the big bolts - I had coated these in penetrating spray a few days earlier. Four a side - three in the boot and one 'Alfa special' outside. The outside bolts were in a dreadful state, and exhaust-side located behind the heat shield I had recently re-affixed. Patience and wire-brushing the thread beforehand helped.
 IMAG2761_zpsmmjzel3o by James Vincent
As I was working alone and this is a heavy item, I kept two 'in boot' nuts finger tight - you wouldn't want to be under this when it slips off. Success!
 IMAG2763_zpsbra2rlh6 by James Vincent
You can see the extent of the damage, but luckily the impact hadn't bent the fixing panel, only the mountings.
 IMAG2764_zps3oe34arl by James Vincent, on Flickr
New bumper was rinsed of spiders and muck, and I salvaged the best nuts and washers from both to reattach. Relatively straightforward other than avoiding scratches to the rest of the bodywork when locating bolt holes. Also managed to renew the lower trim screws:
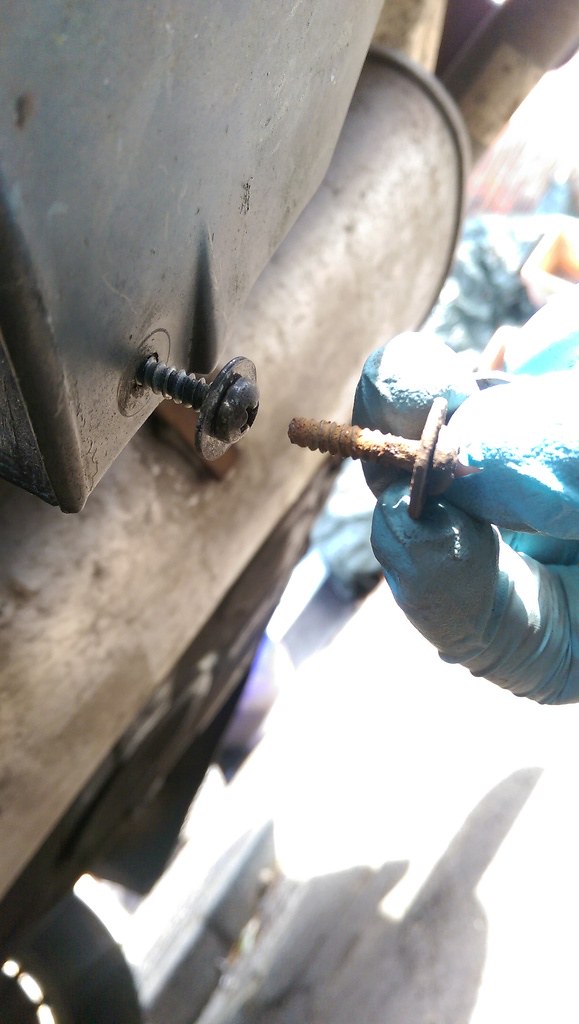 IMAG2768_zps2nm9qook by James Vincent, on Flickr
A straight bumper in the right colour. Finally, no more re-screwing of the towing cover!
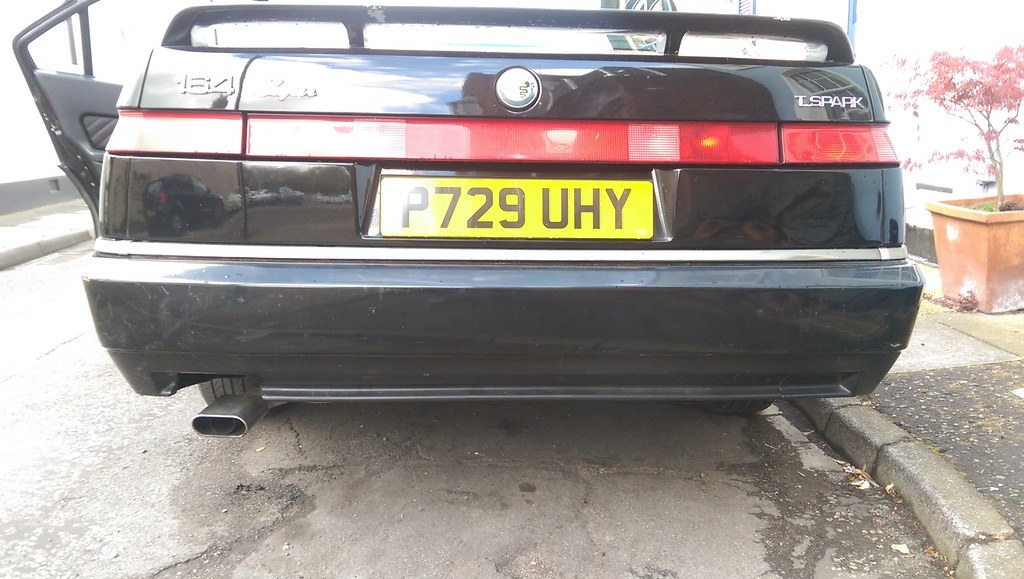 IMAG2784_zpshhape57j by James Vincent, on Flickr
I also renewed the o-rings on the dipstick, which had the pliability of of a prolonged mint Polo:
 IMAG2771_zps2emmmrgm by James Vincent, on Flickr
Didn't cure the idle, of course. I suspect nothing ever will.
Now on the front wing and it's dents. Would that it t'were so simple...
You can see from the photos when purchased the offside had taken quite a knock, and for three years I have endured its wonkiness, complete with ripple effect paintwork and perpetually-falling-out towing cover:
IMAG0460_zpsc3j70aom by James VincentSo, having learned where all the bolts were on the donor car (see above), I set to work. Of course, my car is actually full of such useless clutter as a battery, alarm, trim, relays and wires:
IMAG2755_zps7qacvkvo by James Vincent, on FlickrIMAG2756_zpsf1ruwmrb by James Vincent, on FlickrThe alarm cover (with the red 'danger button') had to come off, but I really didn't want to have to remove the battery and its tray. Luckily some loosening meant it could shift to and fro in its tray. With a thin flexible light and enough 1/4 inch socket extensions, I just managed to remove the nuts and white plastic washers on both sides:
IMAG2757_zpsgef747dd by James Vincent, on FlickrTwo small screws also hold the bumper to the wheel arch liner. These bear the full brunt of debris and are often rusted to oblivion. Careful teasing with penetrating spray (on both sides) removed them without breakage. The rear lower quarters were now loose (Shoe reflection included for rxe):
IMAG2760_zpsezjkz9le by James Vincent, on FlickrNow the big bolts - I had coated these in penetrating spray a few days earlier. Four a side - three in the boot and one 'Alfa special' outside. The outside bolts were in a dreadful state, and exhaust-side located behind the heat shield I had recently re-affixed. Patience and wire-brushing the thread beforehand helped.
IMAG2761_zpsmmjzel3o by James VincentAs I was working alone and this is a heavy item, I kept two 'in boot' nuts finger tight - you wouldn't want to be under this when it slips off. Success!
IMAG2763_zpsbra2rlh6 by James VincentYou can see the extent of the damage, but luckily the impact hadn't bent the fixing panel, only the mountings.
IMAG2764_zps3oe34arl by James Vincent, on FlickrNew bumper was rinsed of spiders and muck, and I salvaged the best nuts and washers from both to reattach. Relatively straightforward other than avoiding scratches to the rest of the bodywork when locating bolt holes. Also managed to renew the lower trim screws:
IMAG2768_zps2nm9qook by James Vincent, on FlickrA straight bumper in the right colour. Finally, no more re-screwing of the towing cover!
IMAG2784_zpshhape57j by James Vincent, on FlickrI also renewed the o-rings on the dipstick, which had the pliability of of a prolonged mint Polo:
IMAG2771_zps2emmmrgm by James Vincent, on FlickrDidn't cure the idle, of course. I suspect nothing ever will.
Now on the front wing and it's dents. Would that it t'were so simple...
Edited by Spinakerr on Saturday 15th July 21:04
waynedear said:
Excellent work, thanks for the tip on oil gauge sender...
Have a picture of an ultra rare 8v METAL intake plenum that is going on my car..

Awesome - what year is yours? The 8V twinspark seems to have so many iterations, I would be afraid to change the plastic intake on mine for fear of disturbing some arcane Alfa spell keeping it running. Please let me know how you get on and if you encounter any differences.Have a picture of an ultra rare 8v METAL intake plenum that is going on my car..
Also I have a tin of high temperature red paint if required...
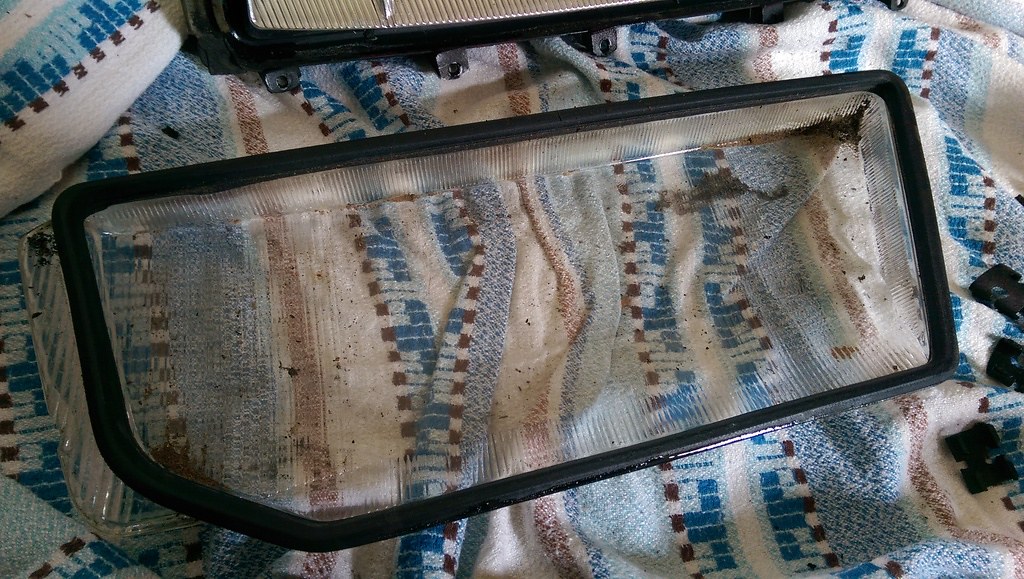
After the relatively straightforward bumper replacement on Saturday, I tackled the wing and headlight replacement on Sunday. Post van encounter, note the chipped and sharp headlight glass.
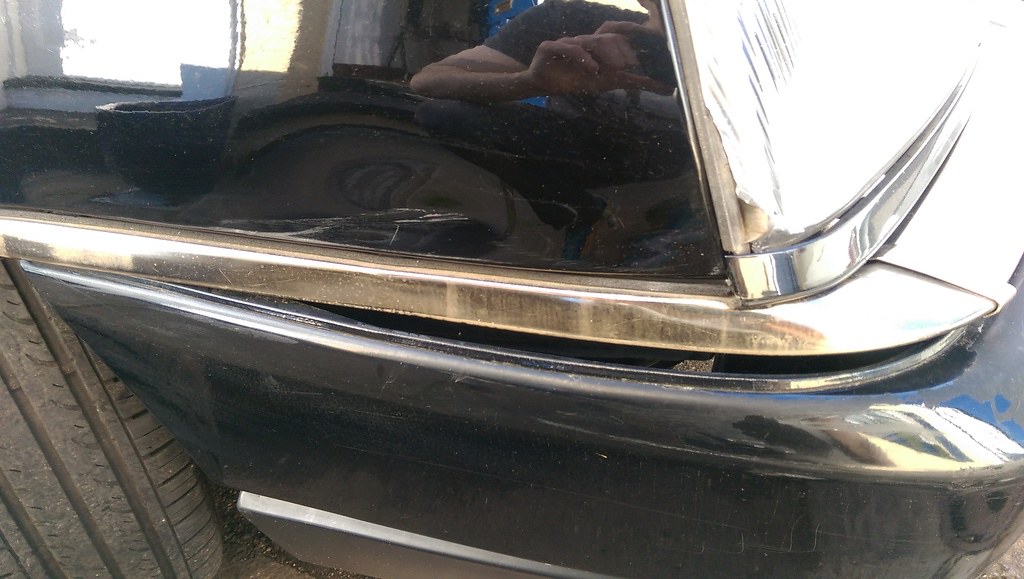 IMAG2773_zpsdkwn7j9b by James Vincent, on Flickr
Luckily there are no welds, but several awkward bolts and faith is required in bending plastic trim and fittings. A good quality socket set and 10mm ratchet spanner are essential.
Firstly, the replacement panel was cleaned and prepped.
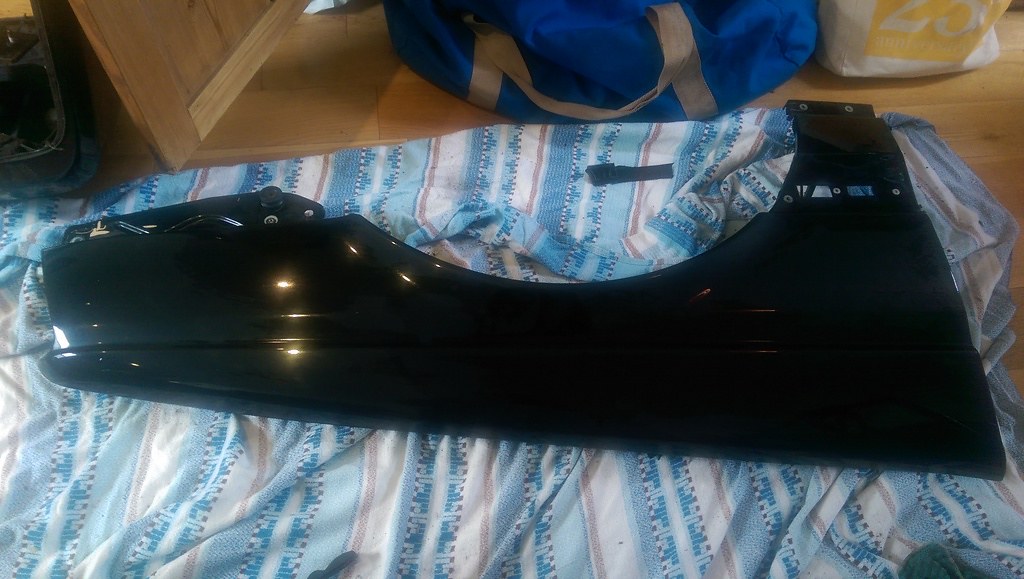 IMAG2746_zpstgfvsgoo by James Vincent, on Flickr
Some paint chips on the arch and surface rust were treated. Luckily all covered up when back on the car.
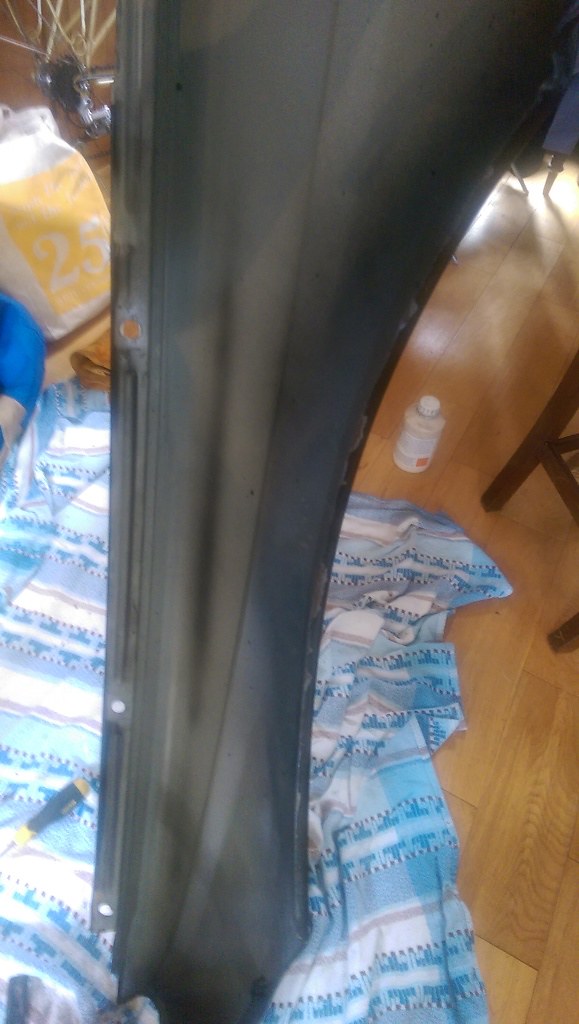 IMAG2749_zpsg7cqwsdq by James Vincent, on Flickr
Firstly, penetrating spray to all bolts and screws. Similar to the bumper, bottom trim screws were ruined from exposure. Carefully pulled the signature indicators out, unplugged it, removed two screws and pulled off the lower trim:
IMAG2773_zpsdkwn7j9b by James Vincent, on Flickr
Opening the door revealed two bolts in the jam, one with a socket set and the other with a ratchet spanner.
 IMAG2775_zps05wjxnmo by James Vincent, on Flickr
Pull away the inner arch trim and remove two bolts on the support behind the indicator. These are most annoying. Next I loosen the top painted bolts, and teased out the clip on the hydraulic strut:
 IMAG2776_zpsxe9md3k4 by James Vincent, on Flickr
 IMAG2777_zpsplatatmc by James Vincent, on Flickr
Find a suitable prop for the bonnet. I took this literally and used an old stage sword:
 IMAG2778_zpsrdyw0zap by James Vincent, on Flickr
Gently pulled out the strut, ensuring the bonnet is stable and supported.
The front trim on the arch also needed to be loosened, then (by feel) I removed a vertical bolt attaching the edge of the front bumper. This gives the bumper enough give to pull off the aluminium trim (screwdriver wrapped in a cloth, push it down):
 IMAG2781_zpsejuslrm4 by James Vincent, on Flickr
This exposes two final bolts.
I masked off any edges that are likely to be knocked as I wrestled it free, take out the top bolts.
Finally, the top edge is sealed/bonded at the top and bottom, so a scalpel later and screwdriver prising freed the panel:
 IMAG2782_zpseu5hfqvw by James Vincent, on Flickr
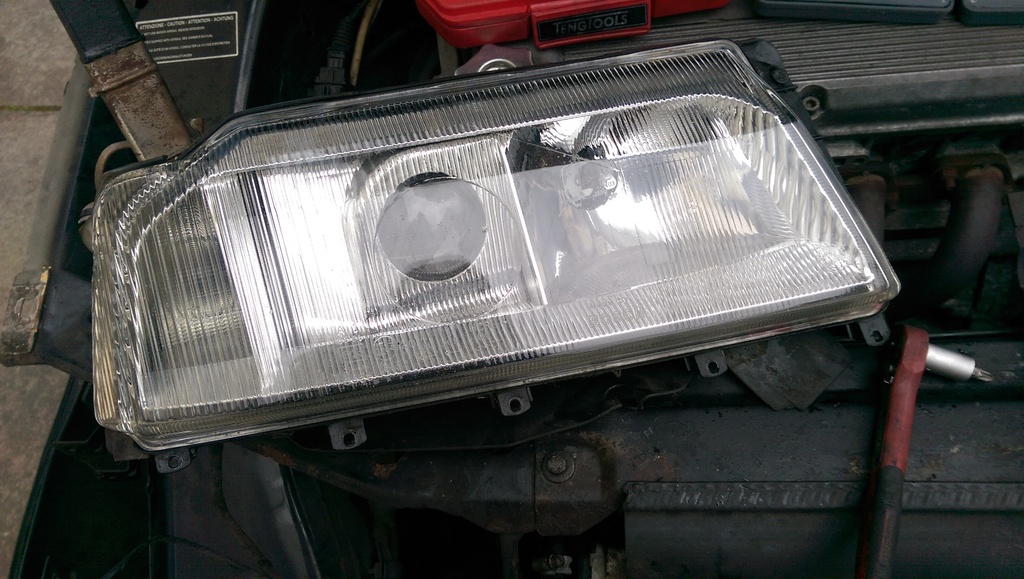
Next piece of the puzzle - the donor light. On closer inspection the blinkin' glass is chipped on the same edge. Ugh.
 IMAG2785_zpsd8t7pd6u by James Vincent, on Flickr
As the donor black trim was in worse condition than mine, I de-allened the four bolts. Then I took off six glass retaining clips, and gently pulled out the glass and its seal. The glass needed a good scrub:
 IMAG2789_zpsp293taxn by James Vincent, on Flickr
On the car, there are two 8mm bolts behind the indicator, and a plug to disconnect.
 IMAG2790_zpsvxbxx3h3 by James Vincent, on Flickr
On the other edge, remove some trim by the radiator secured by a single, lonely screw. Ideally the two larger screws should just come out, but of course one didn't. There are some bolts on the bracket, but unfortunately this time the captive nuts snapped off. Ugh.
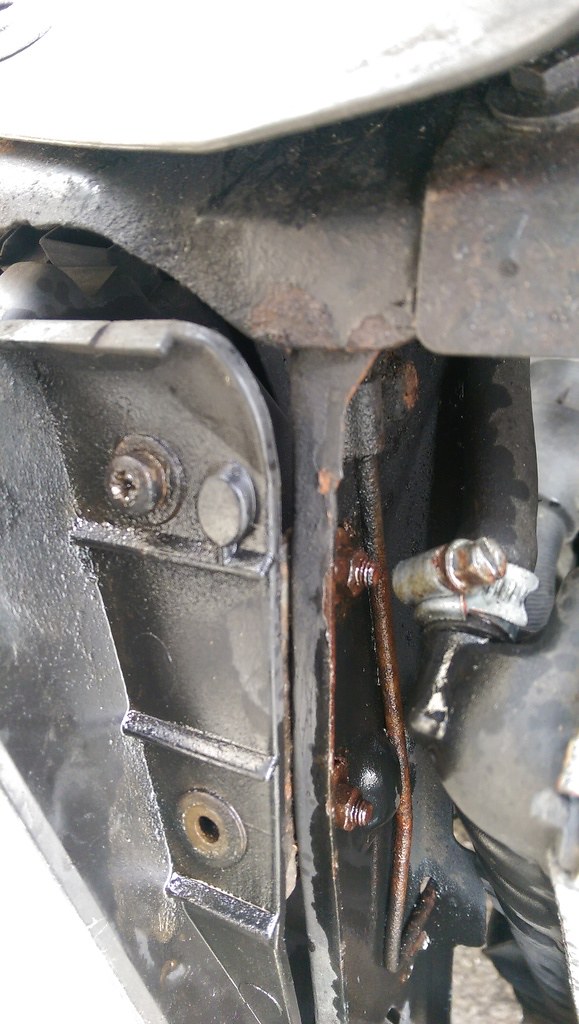 IMAG2791_zpsfou38zxw by James Vincent, on Flickr
Headlight out:
 IMAG2792_zpszqvbluom by James Vincent, on Flickr
Clips off, glass out (cut finger on glass, bandage), glass and gasket back in, clips on:
 IMAG2793_zpsjhsdliab by James Vincent, on Flickr
I luckily had bolts with square thread ends and a domed top that fitted back in:
 IMAG2795_zps0tqou2vc by James Vincent, on Flickr
Fitting the wing back was much quicker of course, although the front supports needed to be gently bent back in line.
 IMAG2799_zpsgwpng3yc by James Vincent, on Flickr
I had to insert some washers and use a longer bolt at the front to line items up correctly:
 IMAG2800_zpsc96tcpoi by James Vincent, on Flickr
Further adjustment require to line up panel gaps and fold the plastic trim back in place. A three-dimensional jigsaw.
 IMAG2801_zpsf7tl2kt5 by James Vincent, on Flickr
Bolts tightened, trim clipped back and indicator plug reconnected:
 IMAG2802_zps3oqkxiwh by James Vincent, on Flickr
The wing came with a replacement piece of aluminium but unfortunately it was silver and not champagne. Luckily it proved useful as a reference for rebending the original to the correct shape.
 IMAG2804_zpshirai0yi by James Vincent, on Flickr
 IMAG2803_zpsxsrrbp01 by James Vincent, on Flickr
Reattach strut and remove sword.
I think that worked out pretty well.
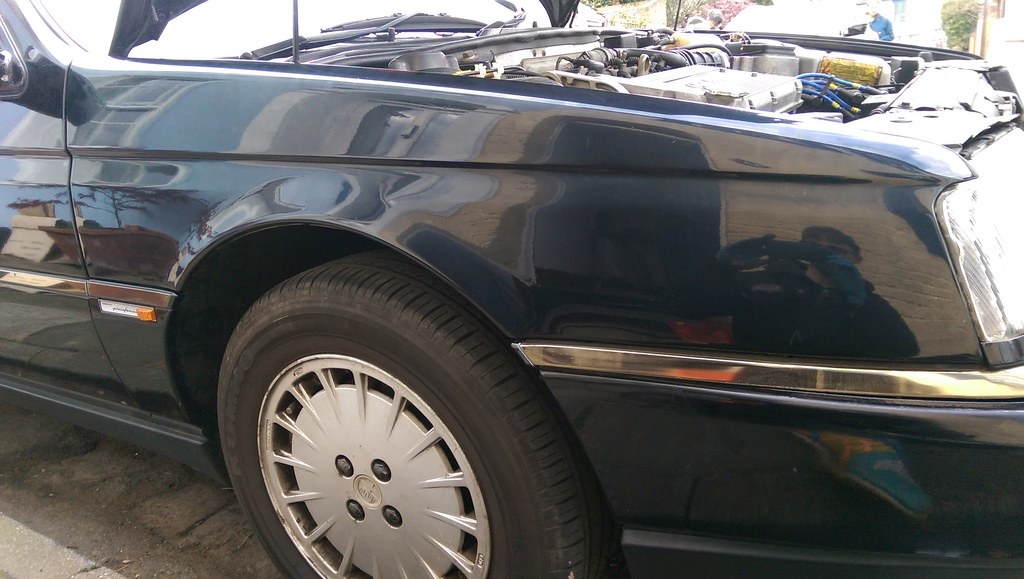 IMAG2805_zpsyur9i1o9 by James Vincent, on Flickr
Hopefully a bit more respectable for Brooklands on the 30th!
IMAG2773_zpsdkwn7j9b by James Vincent, on FlickrLuckily there are no welds, but several awkward bolts and faith is required in bending plastic trim and fittings. A good quality socket set and 10mm ratchet spanner are essential.
Firstly, the replacement panel was cleaned and prepped.
IMAG2746_zpstgfvsgoo by James Vincent, on FlickrSome paint chips on the arch and surface rust were treated. Luckily all covered up when back on the car.
IMAG2749_zpsg7cqwsdq by James Vincent, on FlickrFirstly, penetrating spray to all bolts and screws. Similar to the bumper, bottom trim screws were ruined from exposure. Carefully pulled the signature indicators out, unplugged it, removed two screws and pulled off the lower trim:
IMAG2773_zpsdkwn7j9b by James Vincent, on FlickrOpening the door revealed two bolts in the jam, one with a socket set and the other with a ratchet spanner.
IMAG2775_zps05wjxnmo by James Vincent, on FlickrPull away the inner arch trim and remove two bolts on the support behind the indicator. These are most annoying. Next I loosen the top painted bolts, and teased out the clip on the hydraulic strut:
IMAG2776_zpsxe9md3k4 by James Vincent, on FlickrIMAG2777_zpsplatatmc by James Vincent, on FlickrFind a suitable prop for the bonnet. I took this literally and used an old stage sword:
IMAG2778_zpsrdyw0zap by James Vincent, on FlickrGently pulled out the strut, ensuring the bonnet is stable and supported.
The front trim on the arch also needed to be loosened, then (by feel) I removed a vertical bolt attaching the edge of the front bumper. This gives the bumper enough give to pull off the aluminium trim (screwdriver wrapped in a cloth, push it down):
IMAG2781_zpsejuslrm4 by James Vincent, on FlickrThis exposes two final bolts.
I masked off any edges that are likely to be knocked as I wrestled it free, take out the top bolts.
Finally, the top edge is sealed/bonded at the top and bottom, so a scalpel later and screwdriver prising freed the panel:
IMAG2782_zpseu5hfqvw by James Vincent, on FlickrNext piece of the puzzle - the donor light. On closer inspection the blinkin' glass is chipped on the same edge. Ugh.
IMAG2785_zpsd8t7pd6u by James Vincent, on FlickrAs the donor black trim was in worse condition than mine, I de-allened the four bolts. Then I took off six glass retaining clips, and gently pulled out the glass and its seal. The glass needed a good scrub:
IMAG2789_zpsp293taxn by James Vincent, on FlickrOn the car, there are two 8mm bolts behind the indicator, and a plug to disconnect.
IMAG2790_zpsvxbxx3h3 by James Vincent, on FlickrOn the other edge, remove some trim by the radiator secured by a single, lonely screw. Ideally the two larger screws should just come out, but of course one didn't. There are some bolts on the bracket, but unfortunately this time the captive nuts snapped off. Ugh.
IMAG2791_zpsfou38zxw by James Vincent, on FlickrHeadlight out:
IMAG2792_zpszqvbluom by James Vincent, on FlickrClips off, glass out (cut finger on glass, bandage), glass and gasket back in, clips on:
IMAG2793_zpsjhsdliab by James Vincent, on FlickrI luckily had bolts with square thread ends and a domed top that fitted back in:
IMAG2795_zps0tqou2vc by James Vincent, on FlickrFitting the wing back was much quicker of course, although the front supports needed to be gently bent back in line.
IMAG2799_zpsgwpng3yc by James Vincent, on FlickrI had to insert some washers and use a longer bolt at the front to line items up correctly:
IMAG2800_zpsc96tcpoi by James Vincent, on FlickrFurther adjustment require to line up panel gaps and fold the plastic trim back in place. A three-dimensional jigsaw.
IMAG2801_zpsf7tl2kt5 by James Vincent, on FlickrBolts tightened, trim clipped back and indicator plug reconnected:
IMAG2802_zps3oqkxiwh by James Vincent, on FlickrThe wing came with a replacement piece of aluminium but unfortunately it was silver and not champagne. Luckily it proved useful as a reference for rebending the original to the correct shape.
IMAG2804_zpshirai0yi by James Vincent, on FlickrIMAG2803_zpsxsrrbp01 by James Vincent, on FlickrReattach strut and remove sword.
I think that worked out pretty well.
IMAG2805_zpsyur9i1o9 by James Vincent, on FlickrHopefully a bit more respectable for Brooklands on the 30th!
Edited by Spinakerr on Sunday 16th July 15:01
Good job on the wing!
Just noticed the jam jar lids - ingenious. I got a bag of stainless "repair washers" for about £1.50 on eBay - they're about the size of a small jar lid, and you don't need to eat a pot of marmalade to fix the heat shield. Actually I got several different sizes - so there are small ones for a tight corner, and whoppers where I have the space to get them in.
Just noticed the jam jar lids - ingenious. I got a bag of stainless "repair washers" for about £1.50 on eBay - they're about the size of a small jar lid, and you don't need to eat a pot of marmalade to fix the heat shield. Actually I got several different sizes - so there are small ones for a tight corner, and whoppers where I have the space to get them in.
Gassing Station | Readers' Cars | Top of Page | What's New | My Stuff