Alfa Romeo 164 Twinspark Super
Discussion


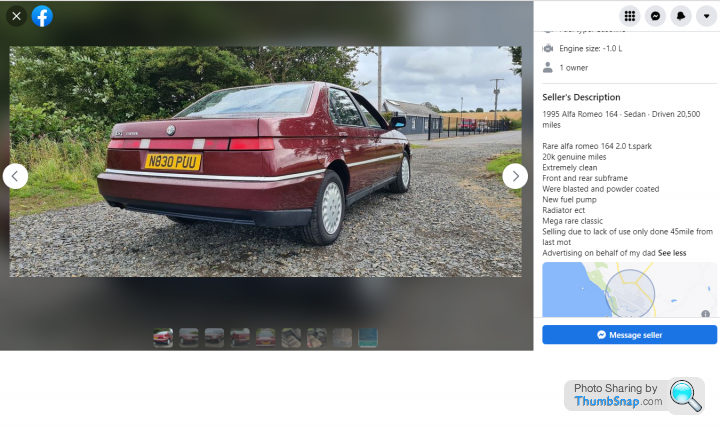
No I'm not in the market but that is a bargain for the amount of car and the condition it presents in!
Coincidentally I am about to embark on subframe rebuilds and it it a significant undertaking. That colour is correctly sinister for Mediterranean summer cruising, too.
Of all the cars at the show I was most keen on a a pale blue step nose 1600 but I think my window for purchasing is long gone!
Coincidentally I am about to embark on subframe rebuilds and it it a significant undertaking. That colour is correctly sinister for Mediterranean summer cruising, too.
Of all the cars at the show I was most keen on a a pale blue step nose 1600 but I think my window for purchasing is long gone!

Well let's just say this weekend is goign to be a big one...
Preparations underway for the front end after managing to finally secure all engine mounts, bushes and various backups.
The front subframe I picked up a few years back has been prepped to withstand the coming decades... any rust scabs or encroaching corrosion hints dispelled and removed.
I also prepped the NOS wishbones.


Full BiltHamber treatment with 80 rust converter, Electrox primer, a significant dosage of satin black and finally a slathering of S50 and Dynax UB.


The workshop beckons... wish us luck!

Preparations underway for the front end after managing to finally secure all engine mounts, bushes and various backups.
The front subframe I picked up a few years back has been prepped to withstand the coming decades... any rust scabs or encroaching corrosion hints dispelled and removed.
I also prepped the NOS wishbones.
Full BiltHamber treatment with 80 rust converter, Electrox primer, a significant dosage of satin black and finally a slathering of S50 and Dynax UB.
The workshop beckons... wish us luck!
Thanks all - its been a tough two days and the results are.. well.. you'll see.
Significant picture content of inner Alfa organs, though Phil did start getting annoyed with my constant photgraphing of every bolt (I need records for putting it back together!).
Caution is advised.
The Front
Day 1 - The Phil Time Menace
I wanted to tackle the front first as I was keen on the new subframe, and had not yet managed to strip and treat the rear subframe. The rear needs a professional with a full dipping and powder coating capability - one for later.
I loaded the car on 'Day 0' - many, many boxes and chemicals, PPE, but it all went in, a testament to the cavernous properties of the 164 boot.

Amazingly, the front subframe, wrapped in plastic from the still-curing waxoil, just went into the rear. Probably about 10mm on clearance!
I measured the 'stock' height at the front (670mm) from floor to top of the wheel arch, and went to bed.
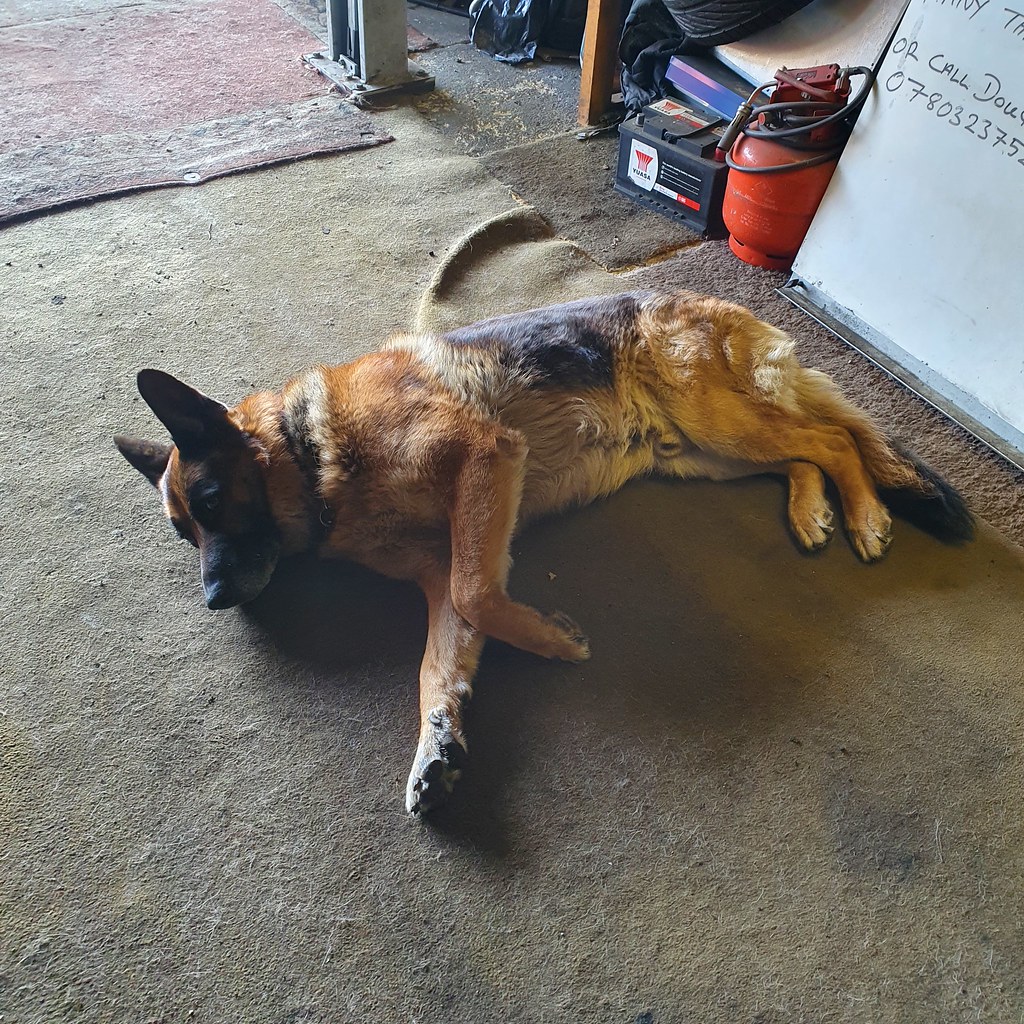
8am on Day 1, the Alfa sprang into life, the sun started shining and I arrived at Phil's to the elated woofling of Senna the German Shephard. I know 50% of you are here for him, so here you go:
Naturally, the first thng Phil said was "Why did you waxoil it before you came? Do it when its on the car!". Oh well... I just wanted to get into all the nooks and crannies from the top... anyway...
First load disgorged before the car goes up.
Engine support on.

Wheels off, state of play inspected.


Wheel arch liners out several bolts later.


Phil's memory suggested struts out first, then start loosening the subframe after taking the front exhaust downpipe off. We got to work in chorus of swearwords, rust and perpetual hunts for the correct spanners and sockets. Pure joy. 13mm top nuts and 17mm main bolts had the original strut towers out quickly. Phil got started on the downpipe, which luckily had only been put on recently for the stainless exhaust.
Inspecting the new coilovers Phil was initially not impressed, grumbling that they 'looked too small' and 'couldnt even be bothered to put the aluminium spacer in'. These run in the gap for the lower hub mounting, and I used a selection of chisels and hammers to reclaim them.


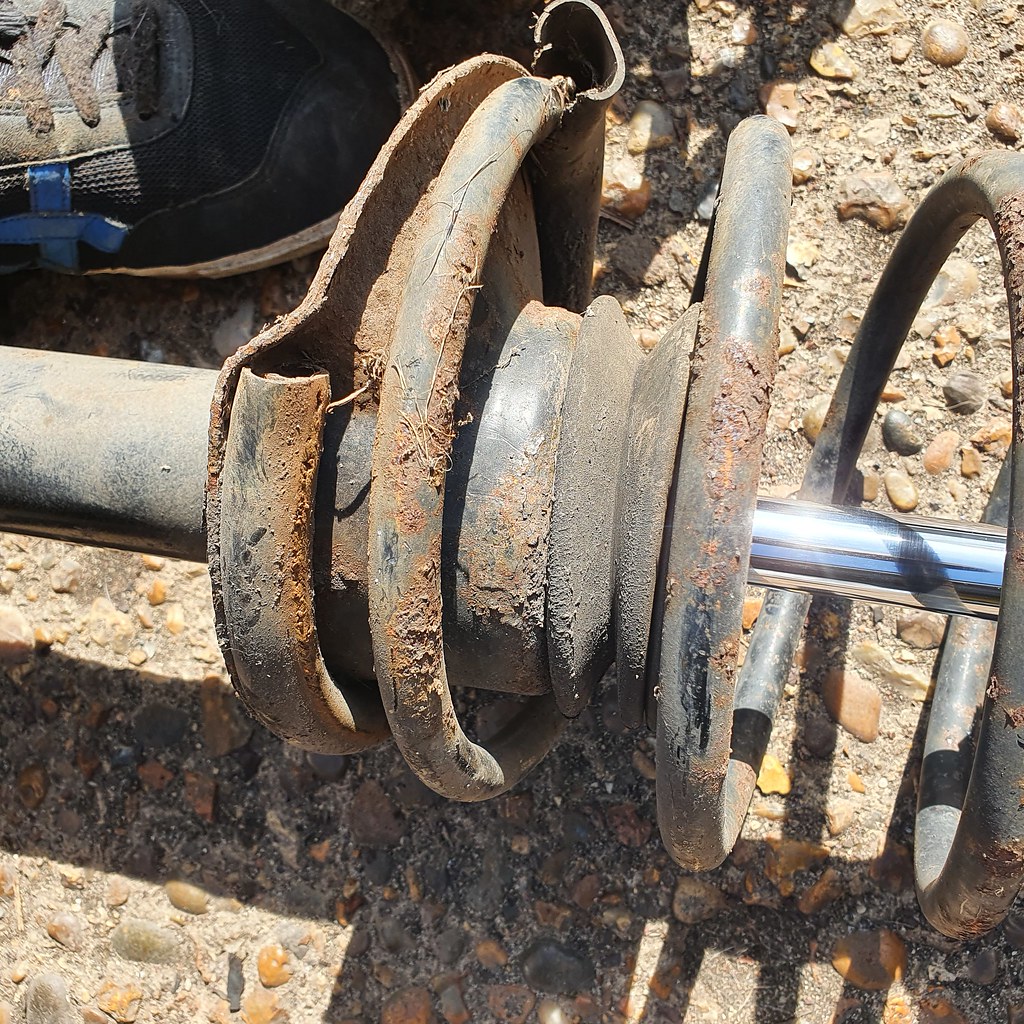
While not actually broken or limp, the original springs and struts are about to start causing issues without proper attention.
Phil sauntered over and grumbled 'that's not doing much good is it'... the exhaust hanger bush I had poured a few months earlier had split through - too firm!

I explained my search for the correct bush, the experiment of pouring bushes and the exciting trip to Redhill for the exhaust. He glared at me, ferreted around in a box for a while and produced... the correct original bush.

Lesson learnt. Always ask Phil.
22mm spanner for the Lambda sensor, and various other bolts - the downpipe came off without issue.
The ABS cradle was not on the new subframe, so we had to save it - Phil suggeted hanging both the pump and the radiator from the upper crossmembers and mounts with cable ties. Done.

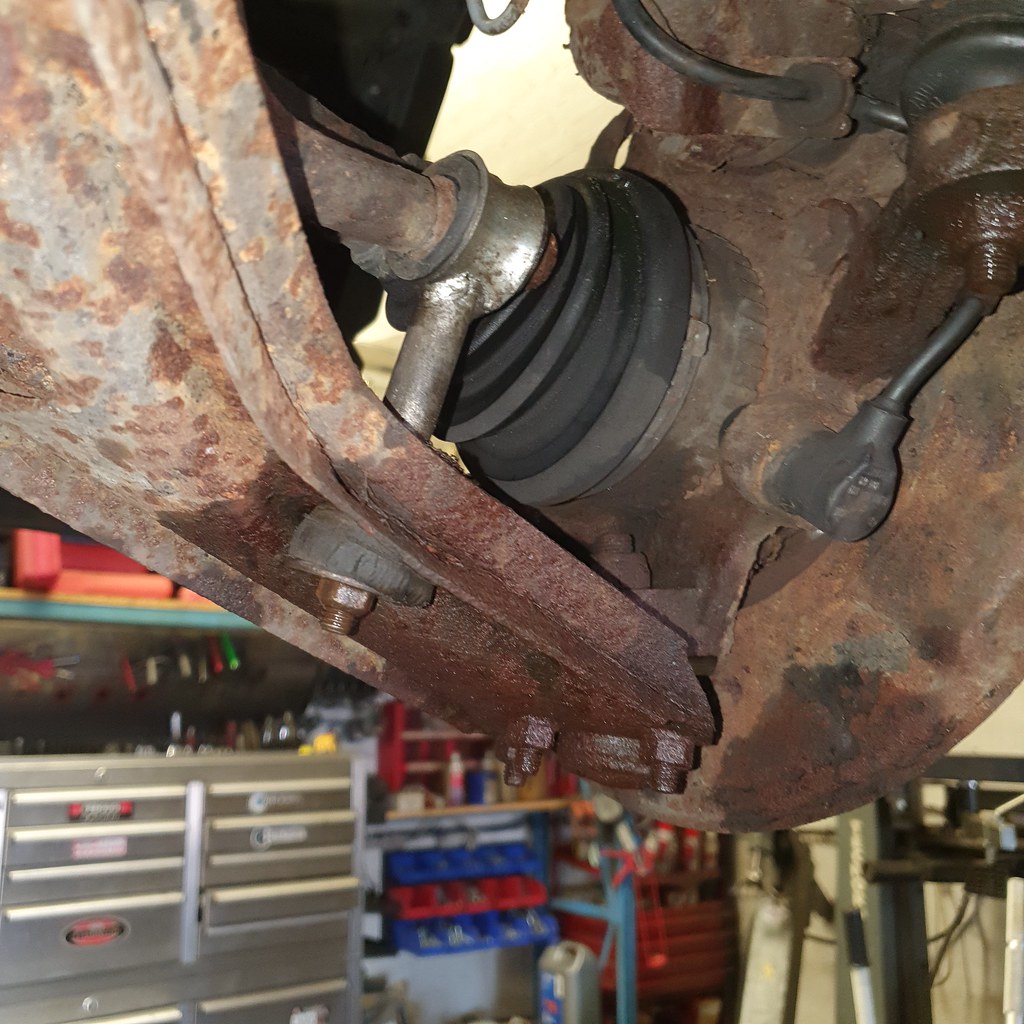
Separation of the drop links and some wishbone bolts next.. . a sea of brown ...
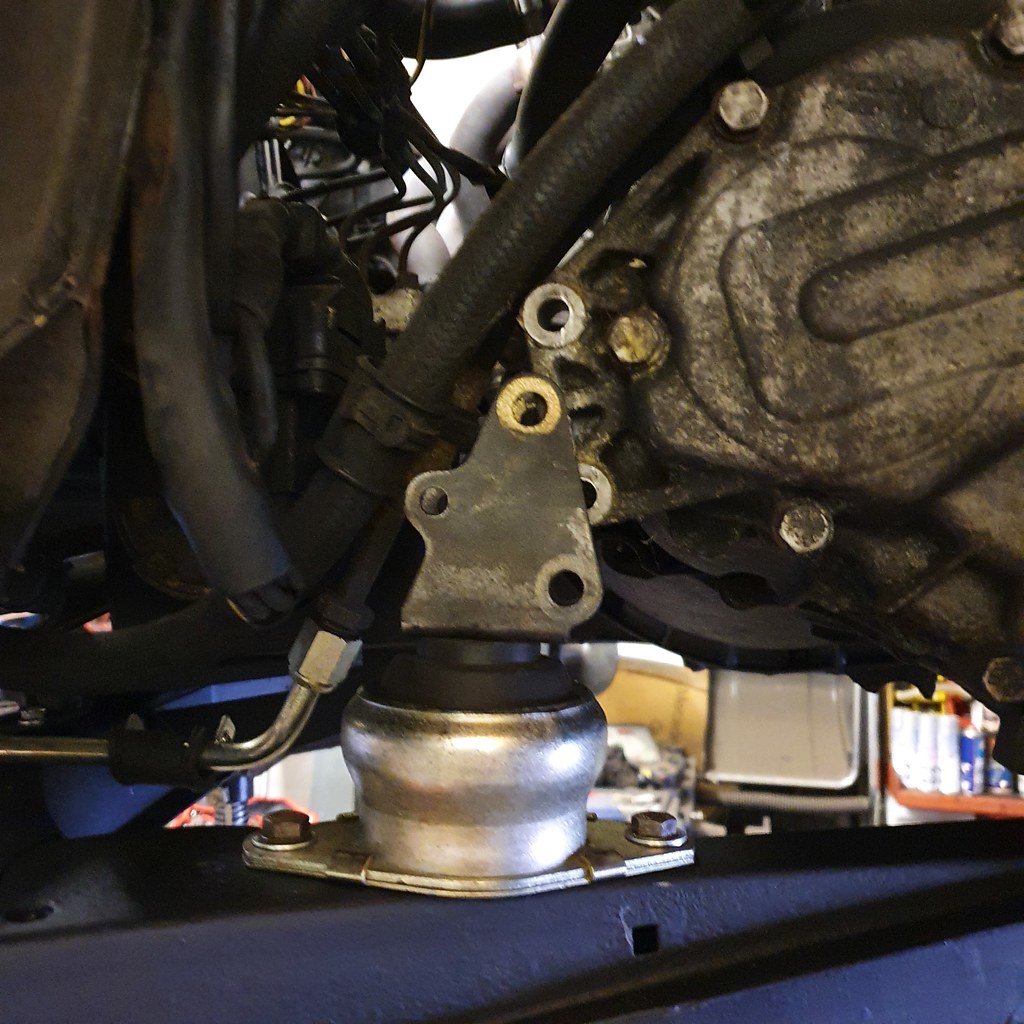
Next up, the gearbox mount, which is on the 'front left', the triangular bracket again needs to be saved while the mount will be changed.

Strut towers looked a bit ropey so, much the Phil's chargrin, I spent 90 minutes cleaning these up and coating them. I also spotted a few items in the wheel arches that needed tidying and treating - I'm not aiming to be here again for a while, so Phil went to poke a customer car, muttering that I was being precious...


Also this front left brake pipe looked to perhaps be weeping slightly. We'll come back to that little bother later.

More scabs identified and marked for the finger sander... on the right...

Purge in progress.

Halfway there...


...and on the left, slightly better.

Let that dry, then on to some sort fo coating. In the meantime, separate the steering rack from the subframe. Very awkward 15 and 13mm bolds, with various hoses and pipe clamps. This was the easiest...

This was the hardest...

Strut tower coating in progress. I went for the Hammerite Stone Chip Black as we are 'rushing' here - its tough, it dries quickly and is easy to direct.


Where were we? Oh yes, the new coilovers. Phil thought it best to get them in to hold the hubs, and I also thought wise to sense check they were roughly the right size before we started delving any more into the innards of the beast.
Following a setup guide on AlfaBB of several owners who had attempted to get stock height, I went for 180mm of thread showing on the main strut. Looked a bit short, but difficult too know how much the spring rates differ and 'settling amount' is.

Well, at least it looks better.

There's one thing Phil is very picky on - bolts being clean. He wire brushed down ever bolts, sometimes the nuts too - or just generously gave me new ones and washers throughout.
A few choice spanners later, they were both in!

Now for the main event - two supports under the frame - constant checking of all loosened hoses, brackets, bolts... lots of big, heavy bolts to come out...

Wishbones unbolted at this stage and swung out of the way... roll bar loosened... gently....

Gently...

Done!

Ah yes. Rust.

All brackets, spaces and supports removed. Some bolts for the wishbones can only be taken out with the engine mount off at the rear. Ouch.


Final project for the day - tidy up the items being reused.

Time was off the essence, so a solid wire wheel, sanding and either rust treatment or straight on with a concoction of underpaints.
There was more stuff, but it was very late. So late Phil took pity on me and lent me his 100HP Panda rather than forcing me onto the bus.

I probably should have just bought one of these.
Day one done!
Significant picture content of inner Alfa organs, though Phil did start getting annoyed with my constant photgraphing of every bolt (I need records for putting it back together!).
Caution is advised.
The Front
Day 1 - The Phil Time Menace
I wanted to tackle the front first as I was keen on the new subframe, and had not yet managed to strip and treat the rear subframe. The rear needs a professional with a full dipping and powder coating capability - one for later.
I loaded the car on 'Day 0' - many, many boxes and chemicals, PPE, but it all went in, a testament to the cavernous properties of the 164 boot.
Amazingly, the front subframe, wrapped in plastic from the still-curing waxoil, just went into the rear. Probably about 10mm on clearance!
I measured the 'stock' height at the front (670mm) from floor to top of the wheel arch, and went to bed.
8am on Day 1, the Alfa sprang into life, the sun started shining and I arrived at Phil's to the elated woofling of Senna the German Shephard. I know 50% of you are here for him, so here you go:
Naturally, the first thng Phil said was "Why did you waxoil it before you came? Do it when its on the car!". Oh well... I just wanted to get into all the nooks and crannies from the top... anyway...
First load disgorged before the car goes up.
Engine support on.
Wheels off, state of play inspected.
Wheel arch liners out several bolts later.
Phil's memory suggested struts out first, then start loosening the subframe after taking the front exhaust downpipe off. We got to work in chorus of swearwords, rust and perpetual hunts for the correct spanners and sockets. Pure joy. 13mm top nuts and 17mm main bolts had the original strut towers out quickly. Phil got started on the downpipe, which luckily had only been put on recently for the stainless exhaust.
Inspecting the new coilovers Phil was initially not impressed, grumbling that they 'looked too small' and 'couldnt even be bothered to put the aluminium spacer in'. These run in the gap for the lower hub mounting, and I used a selection of chisels and hammers to reclaim them.
While not actually broken or limp, the original springs and struts are about to start causing issues without proper attention.
Phil sauntered over and grumbled 'that's not doing much good is it'... the exhaust hanger bush I had poured a few months earlier had split through - too firm!
I explained my search for the correct bush, the experiment of pouring bushes and the exciting trip to Redhill for the exhaust. He glared at me, ferreted around in a box for a while and produced... the correct original bush.
Lesson learnt. Always ask Phil.
22mm spanner for the Lambda sensor, and various other bolts - the downpipe came off without issue.
The ABS cradle was not on the new subframe, so we had to save it - Phil suggeted hanging both the pump and the radiator from the upper crossmembers and mounts with cable ties. Done.
Separation of the drop links and some wishbone bolts next.. . a sea of brown ...
Next up, the gearbox mount, which is on the 'front left', the triangular bracket again needs to be saved while the mount will be changed.
Strut towers looked a bit ropey so, much the Phil's chargrin, I spent 90 minutes cleaning these up and coating them. I also spotted a few items in the wheel arches that needed tidying and treating - I'm not aiming to be here again for a while, so Phil went to poke a customer car, muttering that I was being precious...
Also this front left brake pipe looked to perhaps be weeping slightly. We'll come back to that little bother later.
More scabs identified and marked for the finger sander... on the right...
Purge in progress.
Halfway there...
...and on the left, slightly better.
Let that dry, then on to some sort fo coating. In the meantime, separate the steering rack from the subframe. Very awkward 15 and 13mm bolds, with various hoses and pipe clamps. This was the easiest...
This was the hardest...
Strut tower coating in progress. I went for the Hammerite Stone Chip Black as we are 'rushing' here - its tough, it dries quickly and is easy to direct.
Where were we? Oh yes, the new coilovers. Phil thought it best to get them in to hold the hubs, and I also thought wise to sense check they were roughly the right size before we started delving any more into the innards of the beast.
Following a setup guide on AlfaBB of several owners who had attempted to get stock height, I went for 180mm of thread showing on the main strut. Looked a bit short, but difficult too know how much the spring rates differ and 'settling amount' is.
Well, at least it looks better.
There's one thing Phil is very picky on - bolts being clean. He wire brushed down ever bolts, sometimes the nuts too - or just generously gave me new ones and washers throughout.
A few choice spanners later, they were both in!
Now for the main event - two supports under the frame - constant checking of all loosened hoses, brackets, bolts... lots of big, heavy bolts to come out...
Wishbones unbolted at this stage and swung out of the way... roll bar loosened... gently....
Gently...
Done!
Ah yes. Rust.
All brackets, spaces and supports removed. Some bolts for the wishbones can only be taken out with the engine mount off at the rear. Ouch.
Final project for the day - tidy up the items being reused.
Time was off the essence, so a solid wire wheel, sanding and either rust treatment or straight on with a concoction of underpaints.
There was more stuff, but it was very late. So late Phil took pity on me and lent me his 100HP Panda rather than forcing me onto the bus.
I probably should have just bought one of these.
Day one done!
Edited by Spinakerr on Sunday 8th May 09:10
Edited by Spinakerr on Sunday 8th May 11:43
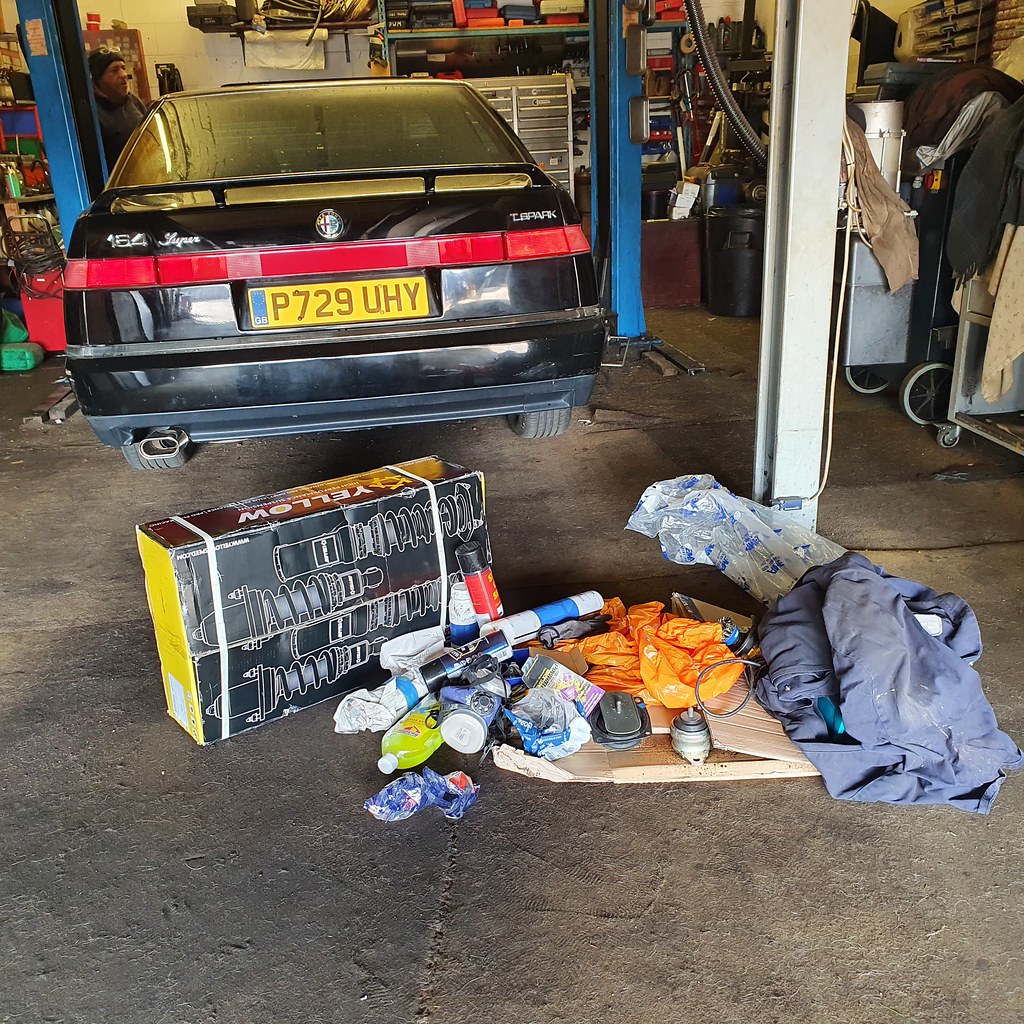
Day 2 - Attack Of The Frames
After a good soak in Swarfega, some plasters and a good night sleep I leapt into the Panda and sped over to Phil's.
Senna was up, sun was out.

What could possibly go wrong today? We had all the parts, and we knew how everything went together. Easy.
I gleefully unwrapped the new subframe and moved it into position.
Phil looked at it. I looked at it...
... it was not right.
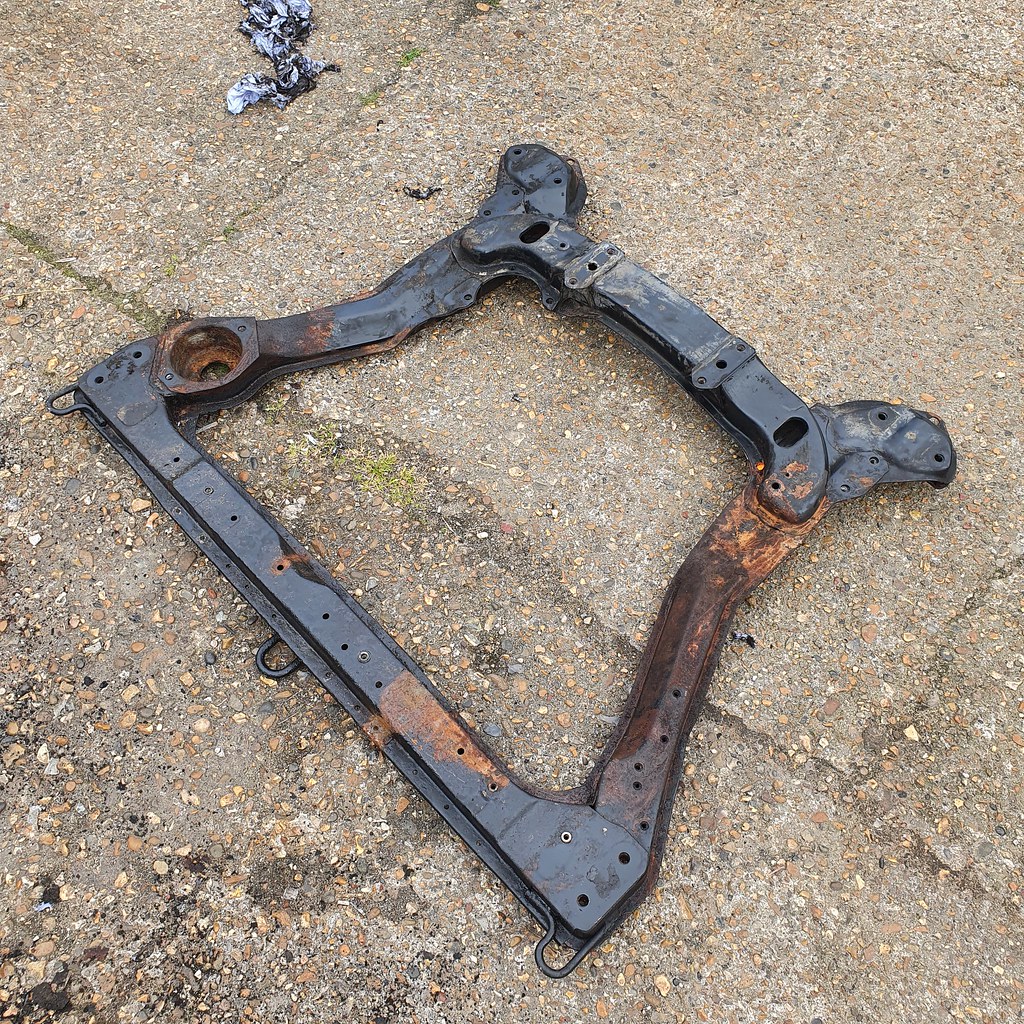
The rear right corner had a different mount for... who knows? An earlier model? The 12V?

The original frame:

Aargh!
Double Aargh!
After storing it for 5 years, spending a significant Sunday prepping and painting... it was the wrong part! For reference, it apears to be an earlier frame, number 60508282. The later frame, mine, appears to be 60563610.

It was early. I was about to make a snap decision, so we instead ordered a breakfast and coffee.
We inspected the old frame. It was not actually rotten anywhere, but I would need to do some seriously speedy prep.
Phil went to work on another car. I entered a trance and got stuck in.
[cue montage music]


This was 2.5 hours I could have done without but... it was done. As with a lot of rusty items that are solid and not actual holes, it actually didn't clean up too badly. I left it to dry and had a little lie down in the shade.
Phil cut the old wishbones and ball joints off because they were 'a pain'.

Not pictured as I was slightly giddy by this time - several coats of stone chip, black paint and a few wax cavity sprays in the subframe.
I started cleaning all the bolts and laying out items for reassembly while Phil worked on his own car.

First mounts back on, along with the radiator support bracket.


The bolts for the wishbones went in before this rear mount!

Now we're getting somewhere - state of play before lunch - all new mounts most definitely in!

Anti roll bar bushes were NOT for a 164 - incorrectly advertised, as always on that auction site.

Old ones had to go back on, but Phil said they looked only a few years old and weren't cracked. We swapped their sides so the stretched portion was least impactful. Indeed, I check the folder and he had swapped them out with the drop links 5 years ago. New wishbones and ball joints affixed.
Newly treated and painted brackets back on. Anti roll bar and ABS cradle back on, plus the top of the gearbox mount.

Back the way it came... sorry for the bad photos but an hour of steering rack, pipe arrangement, careful lining up of items, new washers, now bolts, a swathe of copper grease and it all came together.


Consulting the cardboard to do list, only a few more items like drop links and ball joints to go.

Correct exhaust mount pressed in, downpipe secured.

Mmmmmm matt finish with rubberised coating... lovely. Waxoil cavity to follow - but not today!


Everything just looks so much better here.

A number of checks later... and a few double checks - all secure. All bolts in, all items tight. All bracket back, hoses placed, secured.... done. Are we done? Phil said - 'I'm done with it. Up to you if its done!'. The struts were adjust per the supplied documentation to '12 clicks' from the top... engine hoist off... we were done!
As the wheels touched the ground I measered the ride height - 680mm! As that may settle over time and a few miles, incredibly I may have attained the original height. Phil didn't say a word. So I must have done something right.
By this time I was two hours late for my wife, though as she is understanding she just said to go home, soak and rest up.
That was it. The Front was finally done!
Now, where is that rear subframe....
After a good soak in Swarfega, some plasters and a good night sleep I leapt into the Panda and sped over to Phil's.
Senna was up, sun was out.
What could possibly go wrong today? We had all the parts, and we knew how everything went together. Easy.
I gleefully unwrapped the new subframe and moved it into position.
Phil looked at it. I looked at it...
... it was not right.
The rear right corner had a different mount for... who knows? An earlier model? The 12V?
The original frame:
Aargh!
Double Aargh!
After storing it for 5 years, spending a significant Sunday prepping and painting... it was the wrong part! For reference, it apears to be an earlier frame, number 60508282. The later frame, mine, appears to be 60563610.
It was early. I was about to make a snap decision, so we instead ordered a breakfast and coffee.
We inspected the old frame. It was not actually rotten anywhere, but I would need to do some seriously speedy prep.
Phil went to work on another car. I entered a trance and got stuck in.
[cue montage music]
This was 2.5 hours I could have done without but... it was done. As with a lot of rusty items that are solid and not actual holes, it actually didn't clean up too badly. I left it to dry and had a little lie down in the shade.
Phil cut the old wishbones and ball joints off because they were 'a pain'.
Not pictured as I was slightly giddy by this time - several coats of stone chip, black paint and a few wax cavity sprays in the subframe.
I started cleaning all the bolts and laying out items for reassembly while Phil worked on his own car.
First mounts back on, along with the radiator support bracket.
The bolts for the wishbones went in before this rear mount!
Now we're getting somewhere - state of play before lunch - all new mounts most definitely in!
Anti roll bar bushes were NOT for a 164 - incorrectly advertised, as always on that auction site.
Old ones had to go back on, but Phil said they looked only a few years old and weren't cracked. We swapped their sides so the stretched portion was least impactful. Indeed, I check the folder and he had swapped them out with the drop links 5 years ago. New wishbones and ball joints affixed.
Newly treated and painted brackets back on. Anti roll bar and ABS cradle back on, plus the top of the gearbox mount.
Back the way it came... sorry for the bad photos but an hour of steering rack, pipe arrangement, careful lining up of items, new washers, now bolts, a swathe of copper grease and it all came together.
Consulting the cardboard to do list, only a few more items like drop links and ball joints to go.
Correct exhaust mount pressed in, downpipe secured.
Mmmmmm matt finish with rubberised coating... lovely. Waxoil cavity to follow - but not today!
Everything just looks so much better here.
A number of checks later... and a few double checks - all secure. All bolts in, all items tight. All bracket back, hoses placed, secured.... done. Are we done? Phil said - 'I'm done with it. Up to you if its done!'. The struts were adjust per the supplied documentation to '12 clicks' from the top... engine hoist off... we were done!
As the wheels touched the ground I measered the ride height - 680mm! As that may settle over time and a few miles, incredibly I may have attained the original height. Phil didn't say a word. So I must have done something right.
By this time I was two hours late for my wife, though as she is understanding she just said to go home, soak and rest up.
That was it. The Front was finally done!
Now, where is that rear subframe....
Edited by Spinakerr on Sunday 8th May 11:47
Spinakerr said:
Now, where is that rear subframe....
Hopefully it's not been purloined to help make a set of dentures for a hen!Great update, though having heard of the difficulties of sourcing that part I'm looking forward to the rear update.
The Panda and being lent it is cool, but trumped by the dog and the biscione tattoo.
What a rollercoaster of an update. I was on the edge of my seat when i read you had the wrong subframe.
Amazing work all and hats off to alfa craft. There's not many garages that would allow a non employee in to work on the car. They sound like a fantastic outfit.
Nice dog too!
Amazing work all and hats off to alfa craft. There's not many garages that would allow a non employee in to work on the car. They sound like a fantastic outfit.
Nice dog too!
Edited by Cambs_Stuart on Thursday 12th May 20:41
Cambs_Stuart said:
Walhat a rollercoaster of an update. I was on the edge of my seat when i read you had the wrong subframe.
Amazing work all and hats off to alpha craft. There's not many garages that would allow a non employee in to work on the car. They sound like a fantastic outfit.
Nice dog too!
Alfa Amazing work all and hats off to alpha craft. There's not many garages that would allow a non employee in to work on the car. They sound like a fantastic outfit.
Nice dog too!

carinaman said:
Hopefully it's not been purloined to help make a set of dentures for a hen!
Great update, though having heard of the difficulties of sourcing that part I'm looking forward to the rear update.
The Panda and being lent it is cool, but trumped by the dog and the biscione tattoo.
Thanks - yes I don't know if anyone has every refurbished and painted two subframes for a 164 int he same week - probably a world first!Great update, though having heard of the difficulties of sourcing that part I'm looking forward to the rear update.
The Panda and being lent it is cool, but trumped by the dog and the biscione tattoo.
Phil and Senna are fanstatic - man and beast in perfect, sweary, car-based harmony. The Panda is really special, just a tad harsh on London roads. WIll send some updates when I see him next as he had a few fixes in the pipeline.
Cambs_Stuart said:
What a rollercoaster of an update. I was on the edge of my seat when i read you had the wrong subframe.
Amazing work all and hats off to alfa craft. There's not many garages that would allow a non employee in to work on the car. They sound like a fantastic outfit.
Thanks as always! Yes technically this was a day 'off' for him, so he is very generous with his time. A one man band with all the knowledge. I wish we could download his brain somehow, I'll have to settle for learning as I go.Amazing work all and hats off to alfa craft. There's not many garages that would allow a non employee in to work on the car. They sound like a fantastic outfit.
Epilogue
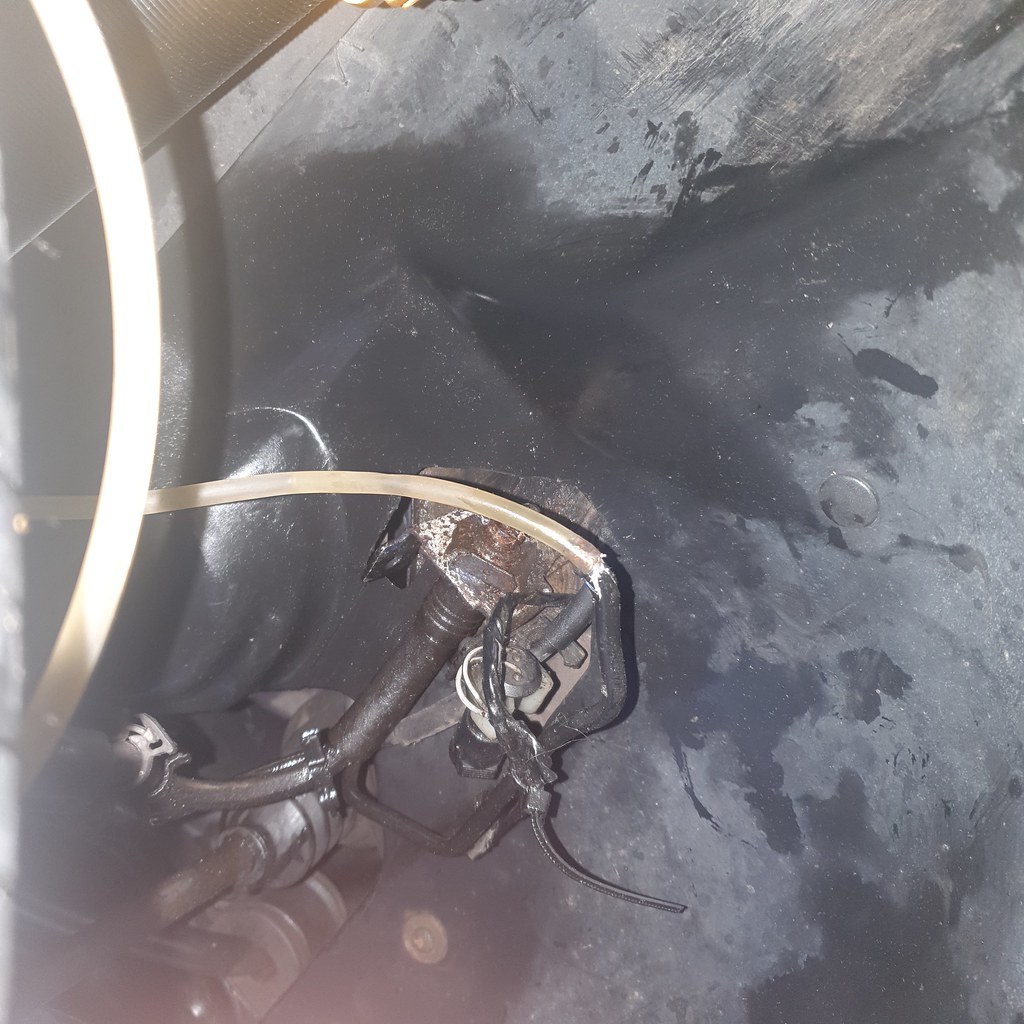
I forgot to add - that brake pipe came back to haunt me - ont he way home the classic soft pedal, panic, handbrake, stir the gears, hiccup breath.... significant failure.
I parked the Alfa up, steadied my heart rate following a few near misses, and took a look.
The brake pipe on the N/S front had decided its comfortable, quiet living arrangement had been disturbed too much in the preceeding two days and was making a protest everywhere.
I decided the pull the pipe entirely from its mooring, as the 11mm was not budging, and link it up to a suitable jar.

Bloody cars. Coilovers look good though, right?
I am sending the two front calipers I rescued from Vintage Alfa last year on to Bigg Red this week, they look reasonable and I freed off the old pads and few fitting just to make their job a might easier and ensure I had a doggie bag full of spares.


It looks like a complete brake overhaul will be causing Phil to again ponder his generosity while I tackle that rear subframe.
Ah yes, the rear! I'm 97.7% sure the subframe did not change in part number or design through the production run, so this one is off to a skilled person with a chemical bath for proper powder coating. I'm also sending the control arms (?) - the ones without adjustment - as they are very expensive to buy.

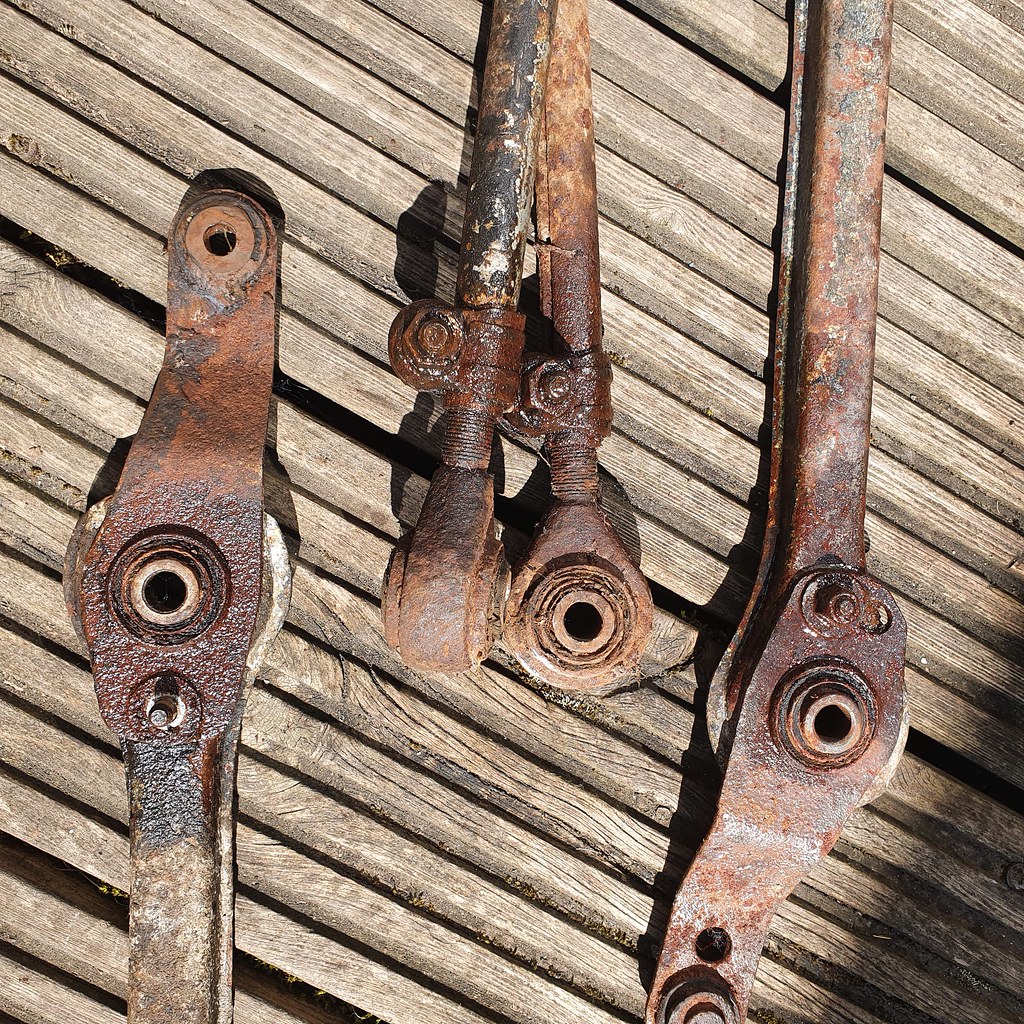
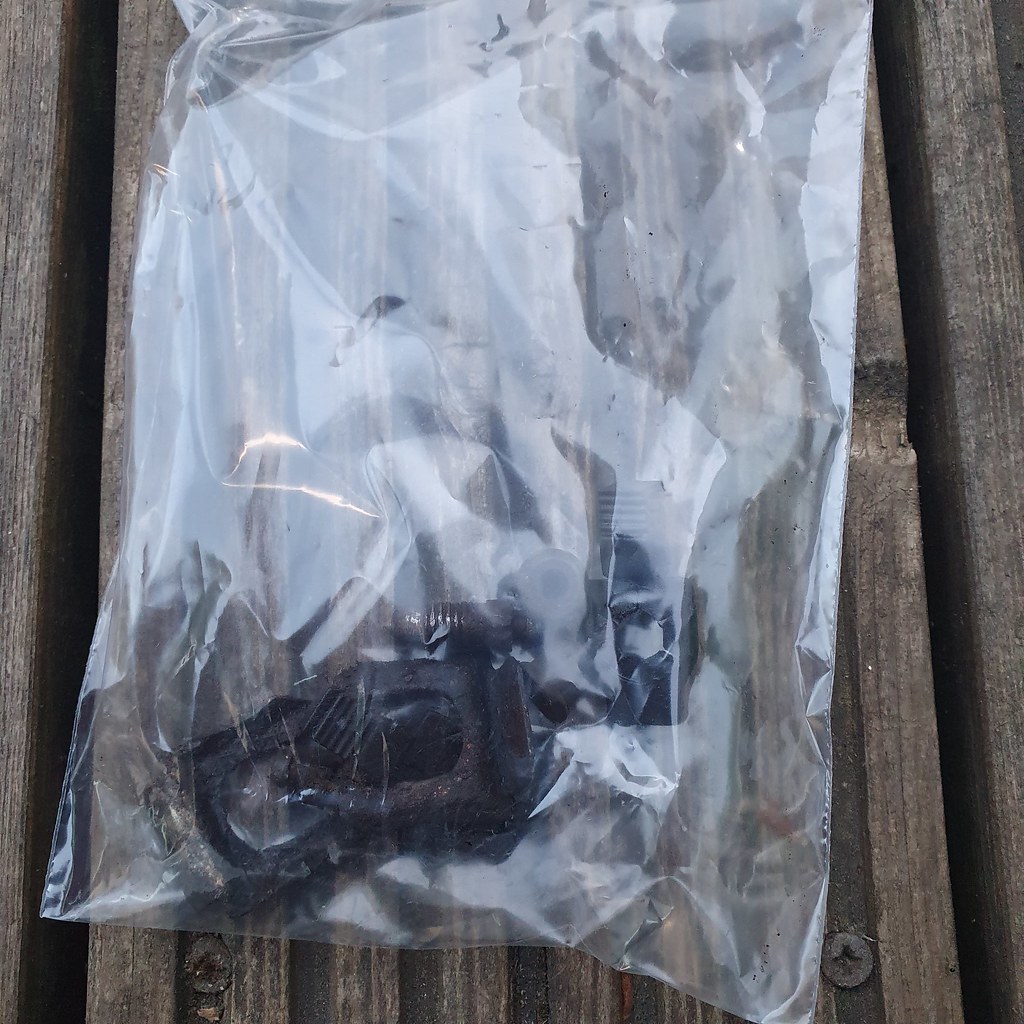
Some items needed persuasion.

The adjustable jobbies are available for circa 60 quid each, so I think its easier to buy them rather than wrestle with the rusty 13mm items, powder coat and then try to fit new bushes.
Next up - hoping Phil returns my call for the dates for the rear...
I forgot to add - that brake pipe came back to haunt me - ont he way home the classic soft pedal, panic, handbrake, stir the gears, hiccup breath.... significant failure.
I parked the Alfa up, steadied my heart rate following a few near misses, and took a look.
The brake pipe on the N/S front had decided its comfortable, quiet living arrangement had been disturbed too much in the preceeding two days and was making a protest everywhere.
I decided the pull the pipe entirely from its mooring, as the 11mm was not budging, and link it up to a suitable jar.
Bloody cars. Coilovers look good though, right?
I am sending the two front calipers I rescued from Vintage Alfa last year on to Bigg Red this week, they look reasonable and I freed off the old pads and few fitting just to make their job a might easier and ensure I had a doggie bag full of spares.
It looks like a complete brake overhaul will be causing Phil to again ponder his generosity while I tackle that rear subframe.
Ah yes, the rear! I'm 97.7% sure the subframe did not change in part number or design through the production run, so this one is off to a skilled person with a chemical bath for proper powder coating. I'm also sending the control arms (?) - the ones without adjustment - as they are very expensive to buy.
Some items needed persuasion.
The adjustable jobbies are available for circa 60 quid each, so I think its easier to buy them rather than wrestle with the rusty 13mm items, powder coat and then try to fit new bushes.
Next up - hoping Phil returns my call for the dates for the rear...
Gassing Station | Readers' Cars | Top of Page | What's New | My Stuff