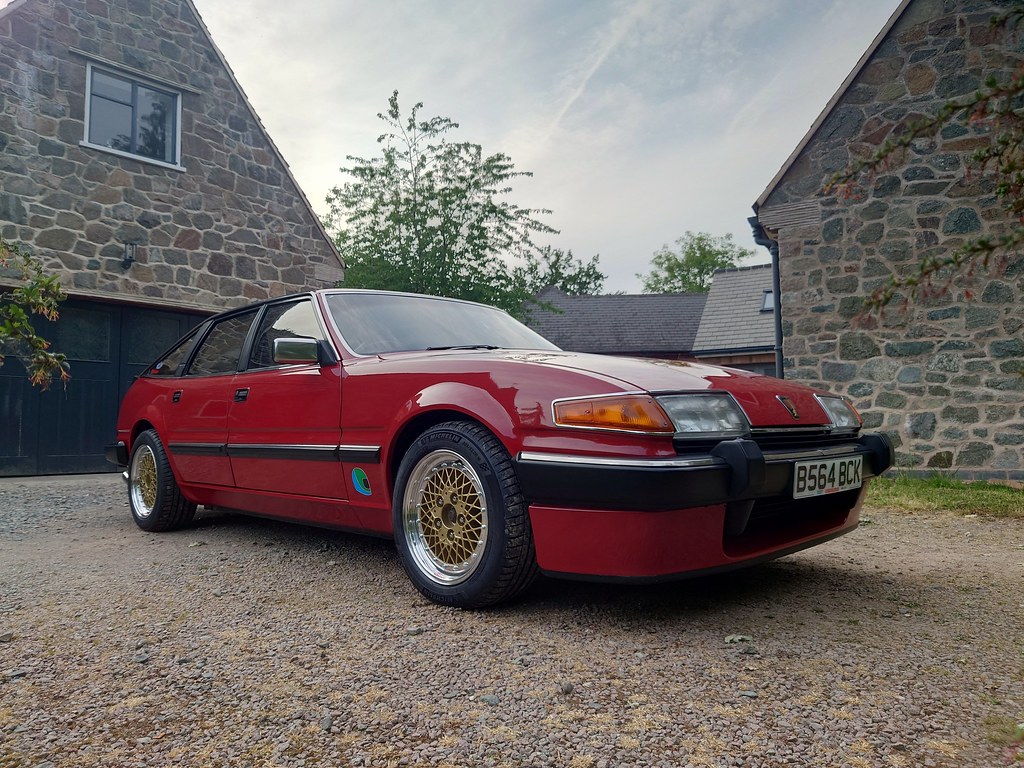
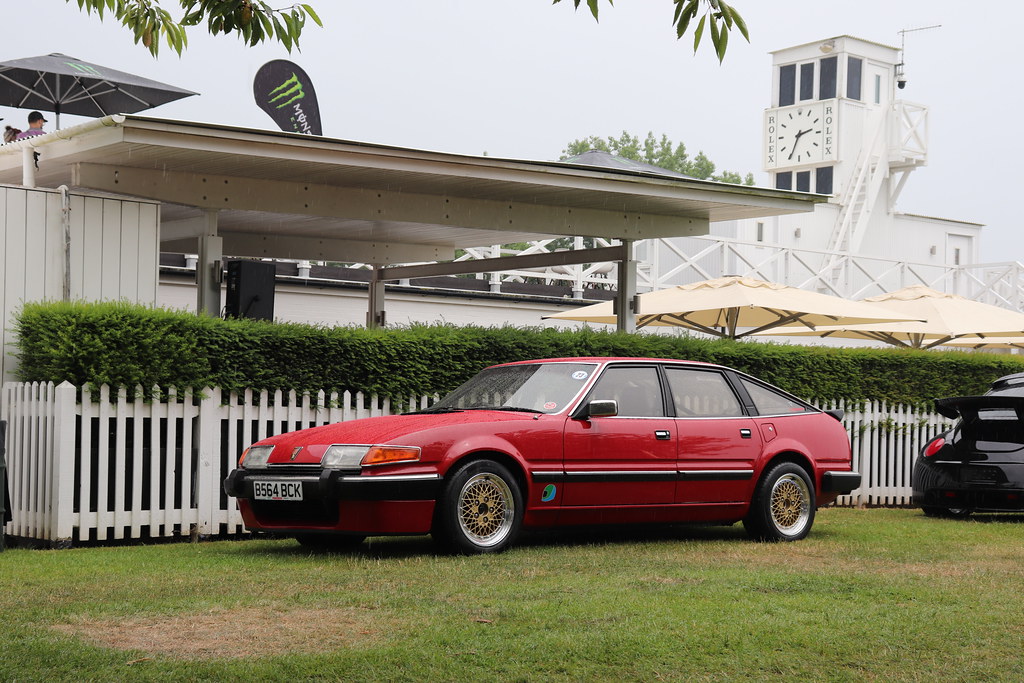
1985 Rover 3500 Vitesse
Discussion


KelvinatorNZ said:
My -30 from Rimmers were yellow, but the paint had long fallen off my old -60s. -30 is meant to be stock vitesse height, that last photo doesn't look as low as mine did at -60.
Yeah yours definitely looks a good chunk lower! Apparently the Rimmer stuff has gone through some new stock in the last few years as I know a few of their springs weren't finished correctly. These seem to be correct. But doesn't really explain the drastic difference!
So shock feedback, foolishly I changed springs and shocks at the same time so I can't just do a shock comparison.
It's definitely a lot firmer than before, and the body control feels really nice. The ride is definitely harsher, but not annoyingly so.
( My exhaust is touching the cross member though so that's affecting my feedback! I think with that vibration gone it'll be a really nice compromise between comfort and performance)
The car doesn't oscillate and nod like a yank tank now too, which is an improvement!

So on Thursday I got a call to say the wheels were finished...
I'm so happy with how these have come out.
I of course drove down to Voodoo Motorsport that afternoon/evening to pick them up.
Final work was machining all 4 centre back pads to my specs, stripping and coating all centres, polishing the lips again, building with my supplied hardware and sealing, modifying 1 wheels nut inserts to 60 degree from 45, installing the other supplied inserts, and fitting and balancing the tyres.
So what I ended up with was a set of ready to install wheels.
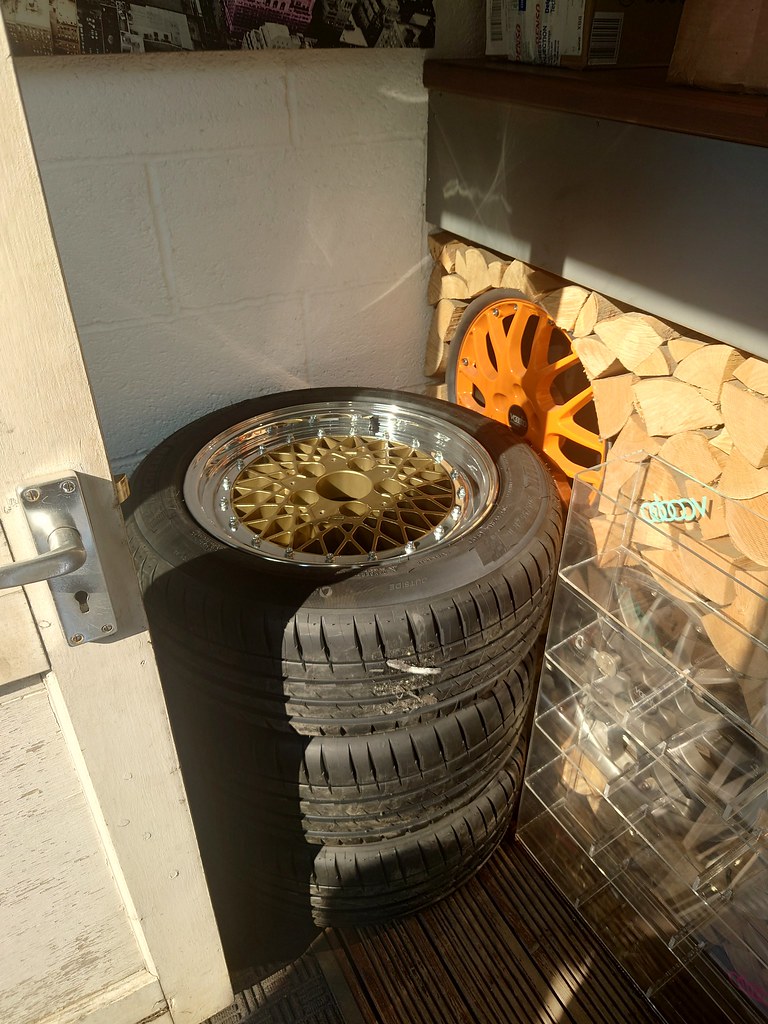
Exactly what I wanted to see when I walked into their reception.


All finished with tyres and nut inserts fitted.
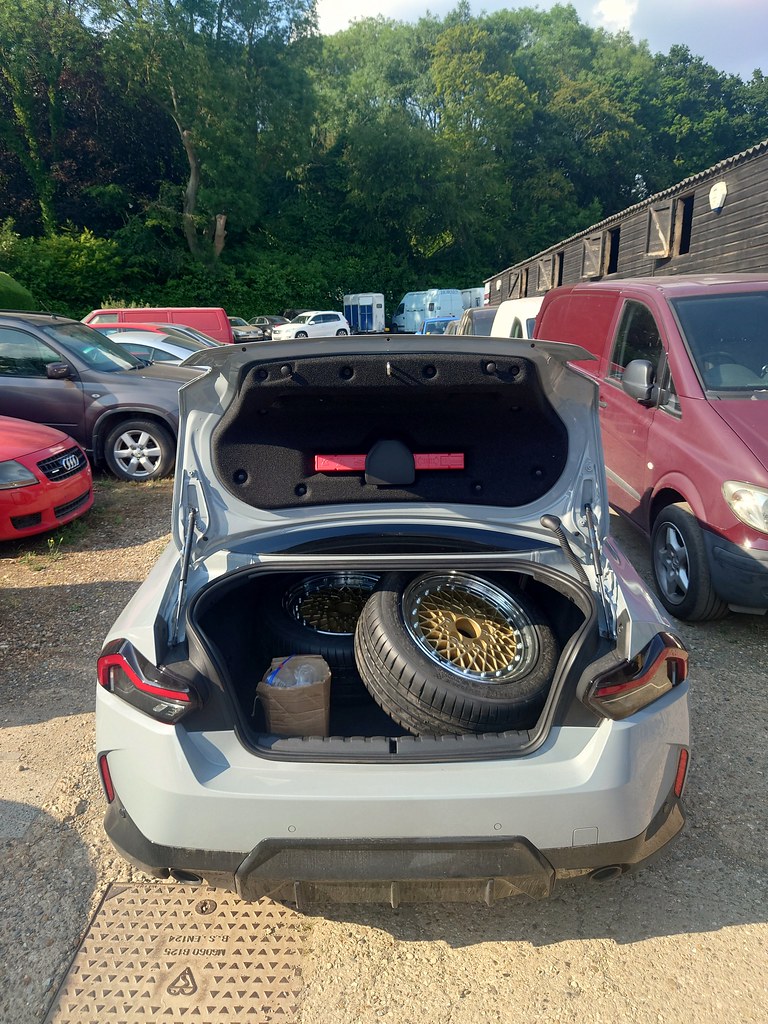
I can confirm that you can transport many wheels in the back of a G42 230i
Finally back home.
One of the reasons for getting down and getting the wheels as early as possible was I wanted to protect them before they went on the car.
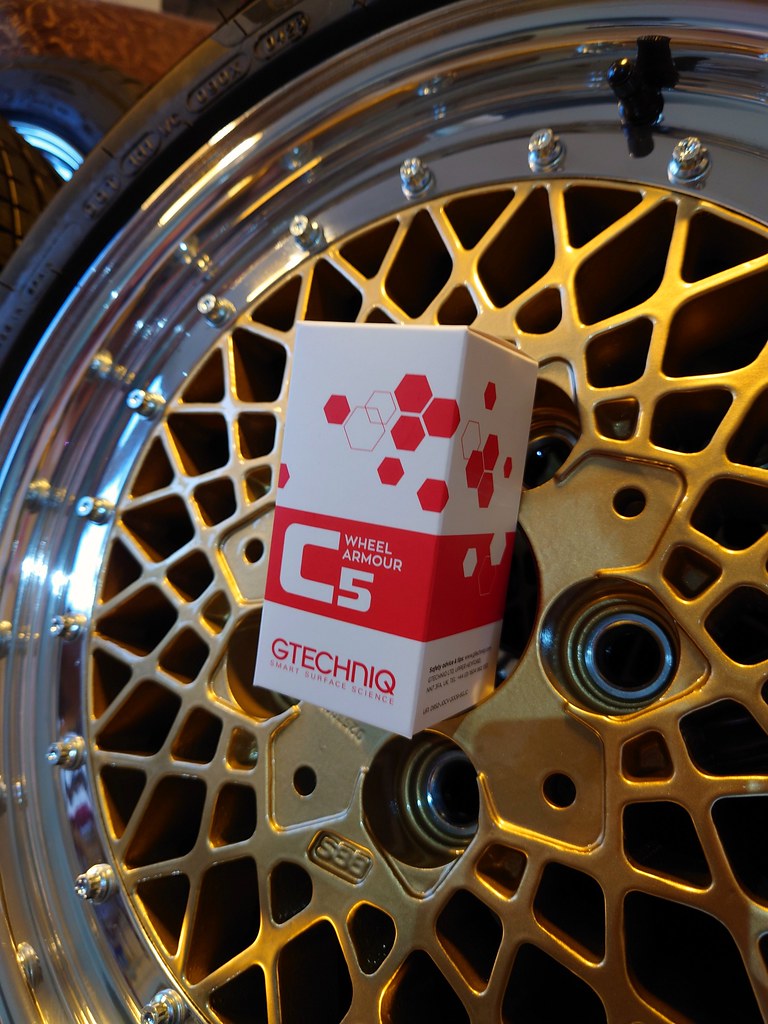
Many hours researching and a second opinion from Voodoo said that GTechniq C5 Wheel Armor ceramic coating as the way to go.
I was warned that you need to be careful applying it though, as if it's left too long it'll go milky. Just to add even more fear to me handling the new wheels!
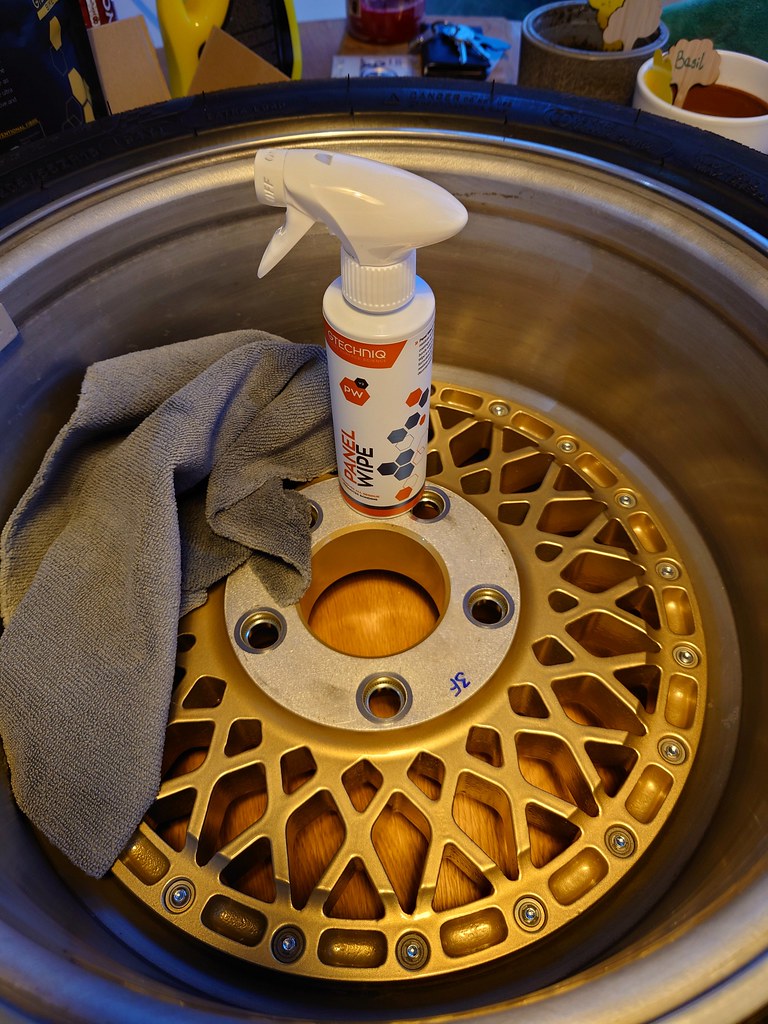
So I spent the evening prepping and coating all the wheels, inside and out!
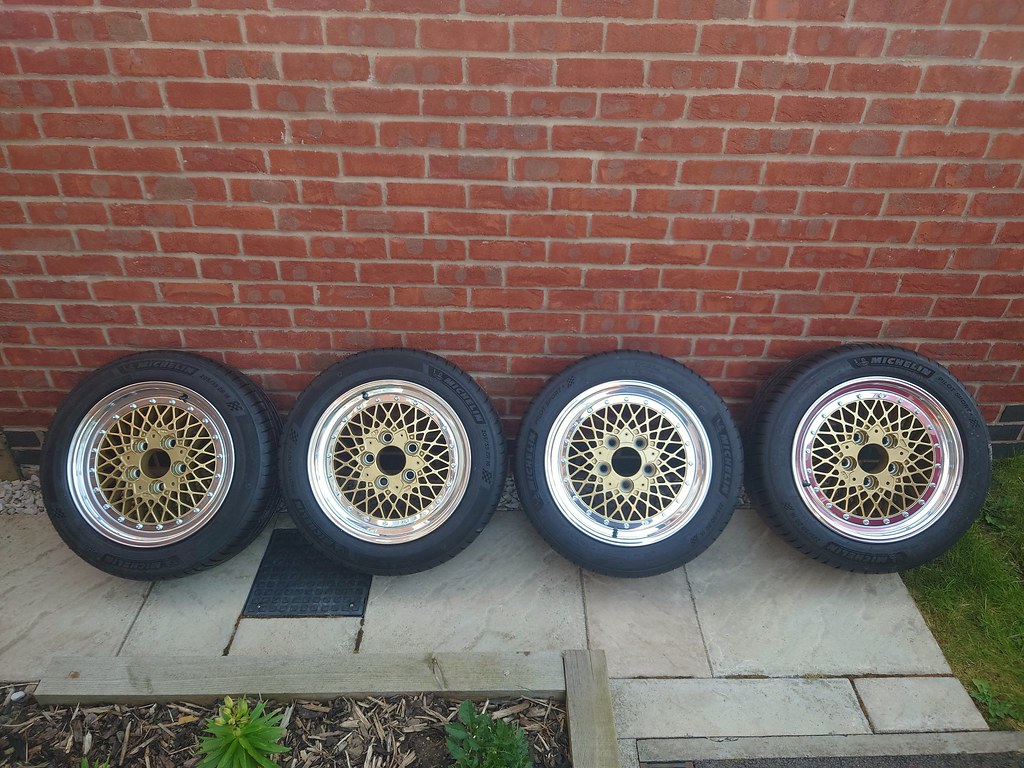
Just look at how beautiful they look from the back too.
Now the dread of wondering if they're even going to fit started to creep in...
Joe
Greendubber said:
Those are going to look great!
I'm so far into it they better! 
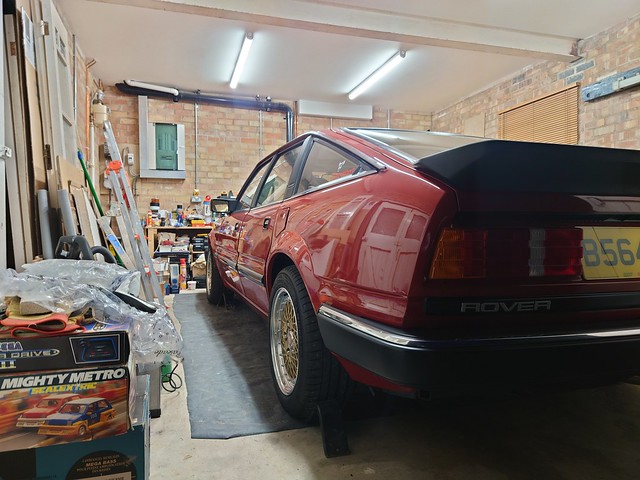
So on the Friday morning I loaded the wheels into the A3 and headed over to the Vitesse.

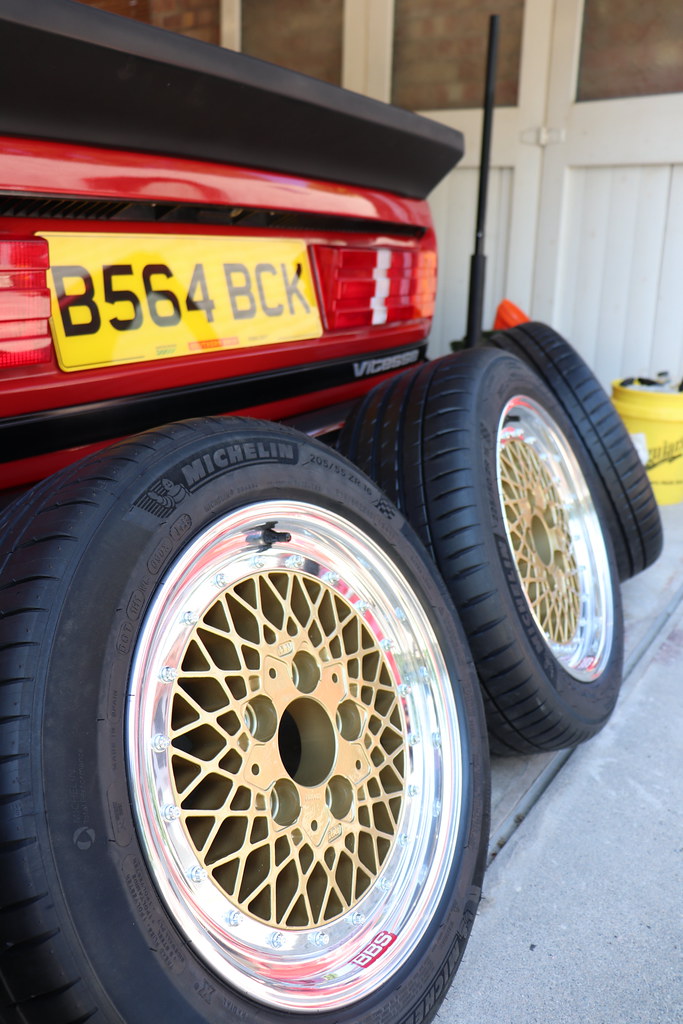
You also might notice I added the BBS lip stickers, I did this before ceramic coating, and I think the pop of red will work nicely against the car.
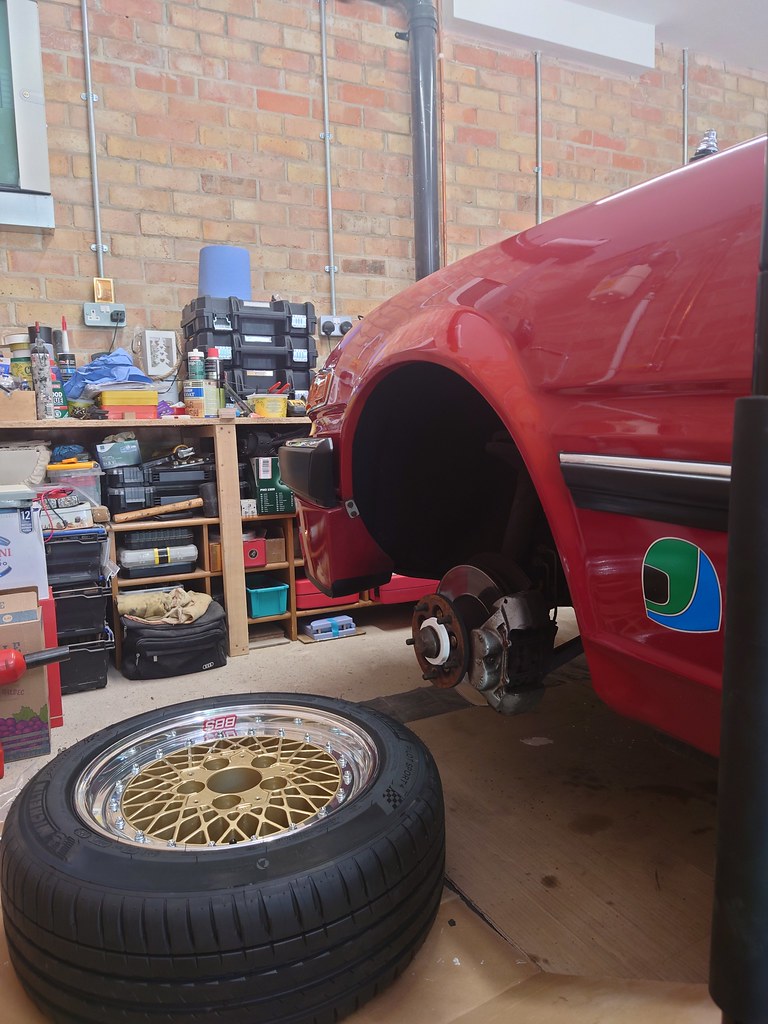
First time on the car!
I'd already had spigot rings made to adapt from the Rover centrebore (58mm) to the BBS wheels (80mm) and the wheel nuts I'd bought fitted perfectly. Luckly the Rover has pretty standard M12x1.5 studs.

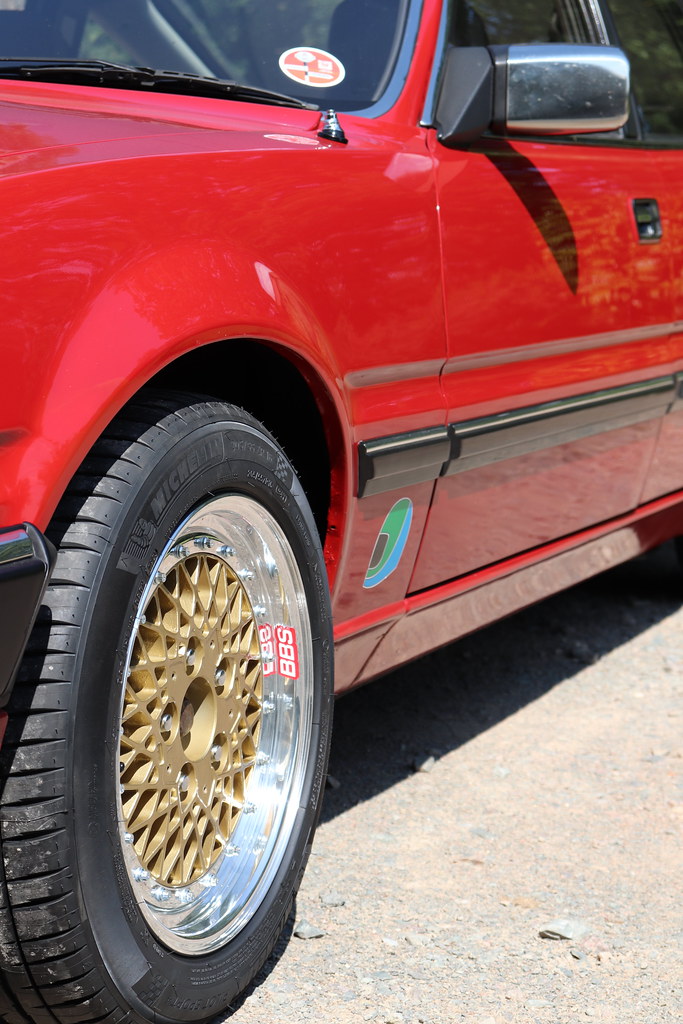
I was so worried if they were going to fit.
I had gone quite aggressive compared to stock.
My final specs are below.

But all the math and CAD work has really paid off.
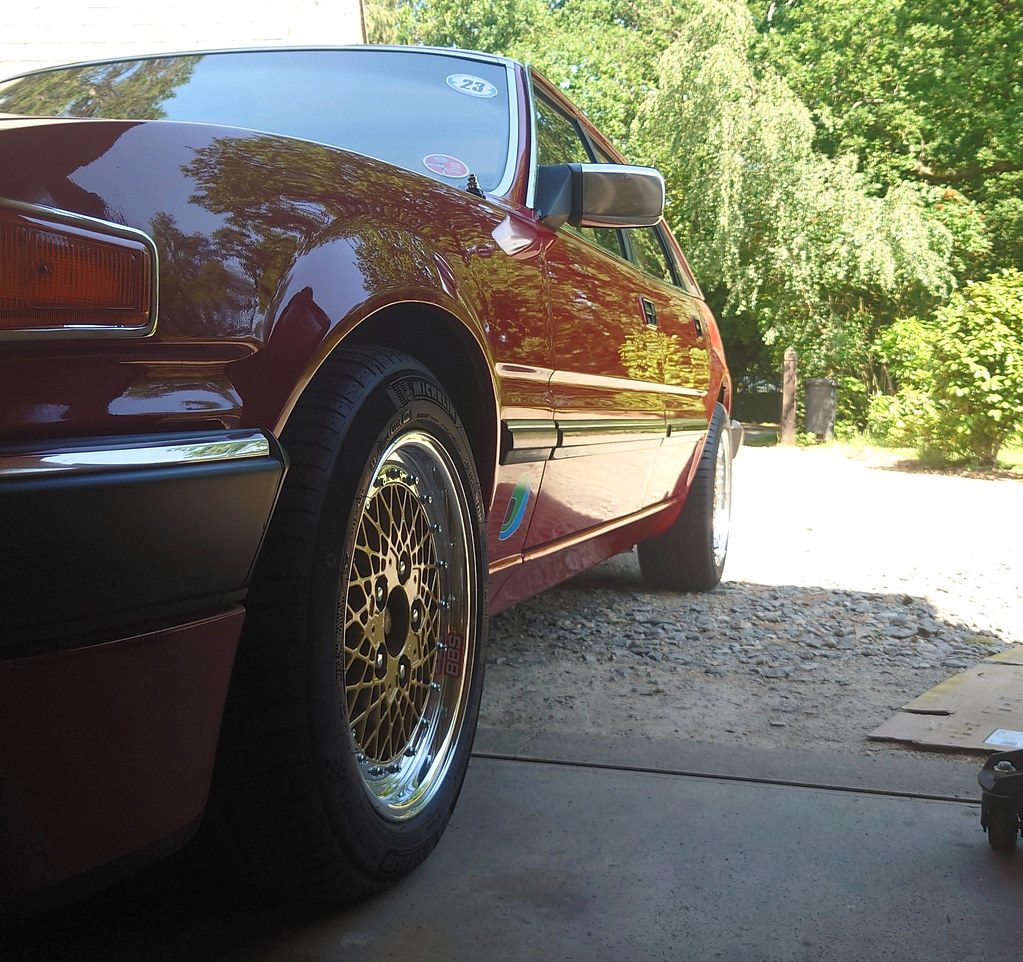
They fit so nicely, doesn't touch anywhere on the rear even at full compression. The front is almost perfect, the right side doesn't touch at all through the full lock sweep, the passenger side just touches the inside edge of the front chin on right full lock as the spoilers been repaired before and has a slight bow in it. But I can't complain to much at that.
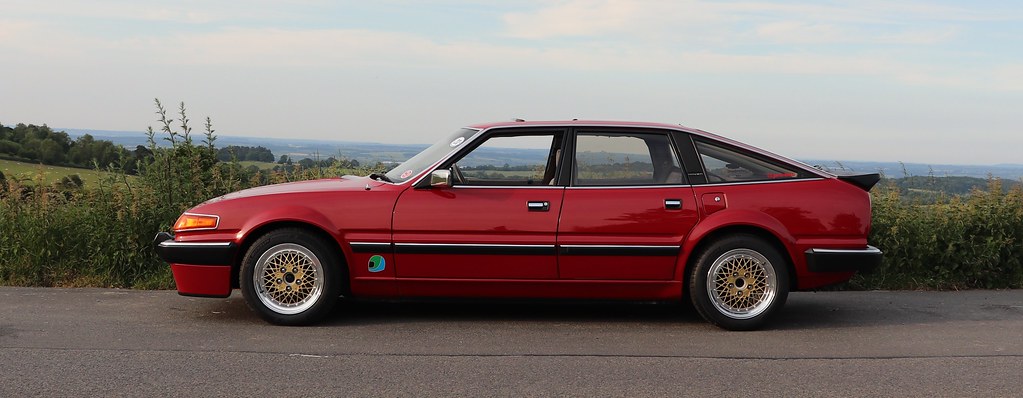
The rear tyres are only 20mm wider, but that combined with the extra rear track really gives it a different look.
I had intended on dying the spigot rings black and leaving them without centre caps. They're motorsport wheels after all and never had centres But I've since offered the original centre caps up, and they do look cool, so I might need to make some adaptors up now!
Joe
ReformedPistonhead said:
Lovely.
My Dad had one when I was 17, I still lust after one now (I am 51!)
This is only here because of the VDP my dad had when I was a kid My Dad had one when I was 17, I still lust after one now (I am 51!)
Bobberoo said:
Those wheels and that stance are perfect!!!
Cheers JeremyH5 said:
Looks ace, well worth all your effort!
Cheers, I appreciate that! CarlosV8 said:
That looks fantastic! Great effort in getting those wheels sorted out!
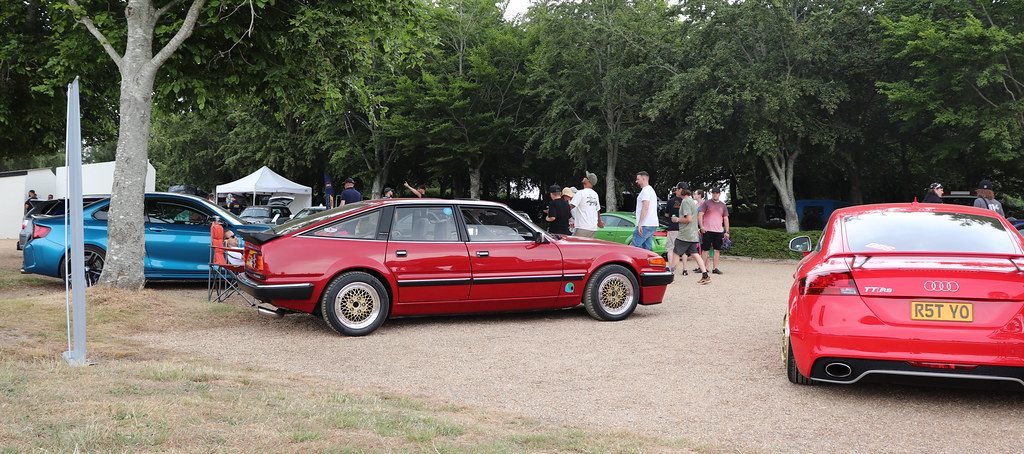
I saw your car at Goodwood and had a good nose around. Unfortunately you weren't about, but it really is a credit to you!
Cheers I saw your car at Goodwood and had a good nose around. Unfortunately you weren't about, but it really is a credit to you!
yeah I tend to wander off and enjoy shows, but I should probably hang around with the car a little more! Pope said:
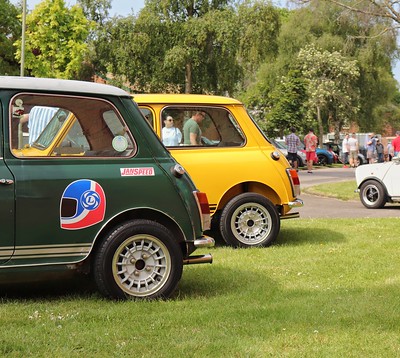
Oh I love that, and got both the Minis in too! KelvinatorNZ said:
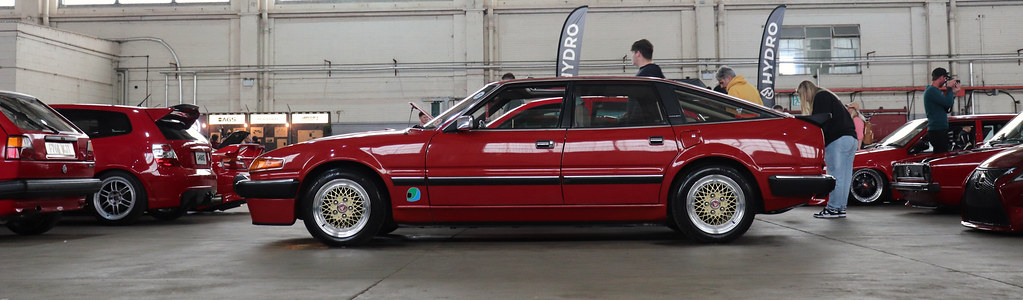
Good lord that looks amazing! Love seeing the nice wide modern rubber with a decent sidewall on there too.
All that work really paid off.
Cheers All that work really paid off.
I'm also very happy to get the chunky Pilot Sports on it, I'm really happy with how the sizes worked out too.
B'stard Child said:
I think that would only improve the look (whilst I can agree they are motor sports wheels they do look a little unfinished without centre caps)
Needs to be a smidge lower for a perfect stance but with the roads we have to put up with today it's probably better with a little height (it might even settle a bit with some use)
Yeah I can see that, I'll try them with an see what I think. I've already drawn up the adaptors in CAD, just need to have them made. Needs to be a smidge lower for a perfect stance but with the roads we have to put up with today it's probably better with a little height (it might even settle a bit with some use)
Yeah I know what you mean, I thought the -60mm springs would have brought it to a silly level of low, but they really haven't!
The adjustable perches I've put on hold, as they'd only go higher, and would add a minimum of 25mm due to the thickness...
I'll see what the front looks like when they turn up...
bangerhoarder said:
That is naughty, should have NSFW tags posting such car porn.
Haha, I'll add the 18 only marker next time 
nismo48 said:
Incredibly beautiful and an iconic car 
Cheers mercedeslimos said:
So when are you going to bag it and head to Players
Haha called me on that one! I'm still definitely not low enough, bagging it would be fun though...
So the soft deadline in my head was Players Classic at Goodwood.
The suspension went on the car on Wednesday evening, the wheels on Friday afternoon, and on Saturday morning at 4:30 I headed off down to Goodwood!
Nothing like a 200mile journey to test your confidence in new parts!

I'd applied for displaying back in December and was accepted, but Voodoo had also asked if I wanted to display on their trade stand and I couldn't say no.
The drive down was nice and easy, but about half a mile from Goodwood at 8:10 we joined the queue!
The queue to get in was a good hour, but of course the Vitesse didn't have any troubles.
Eventually got in and got parked up.

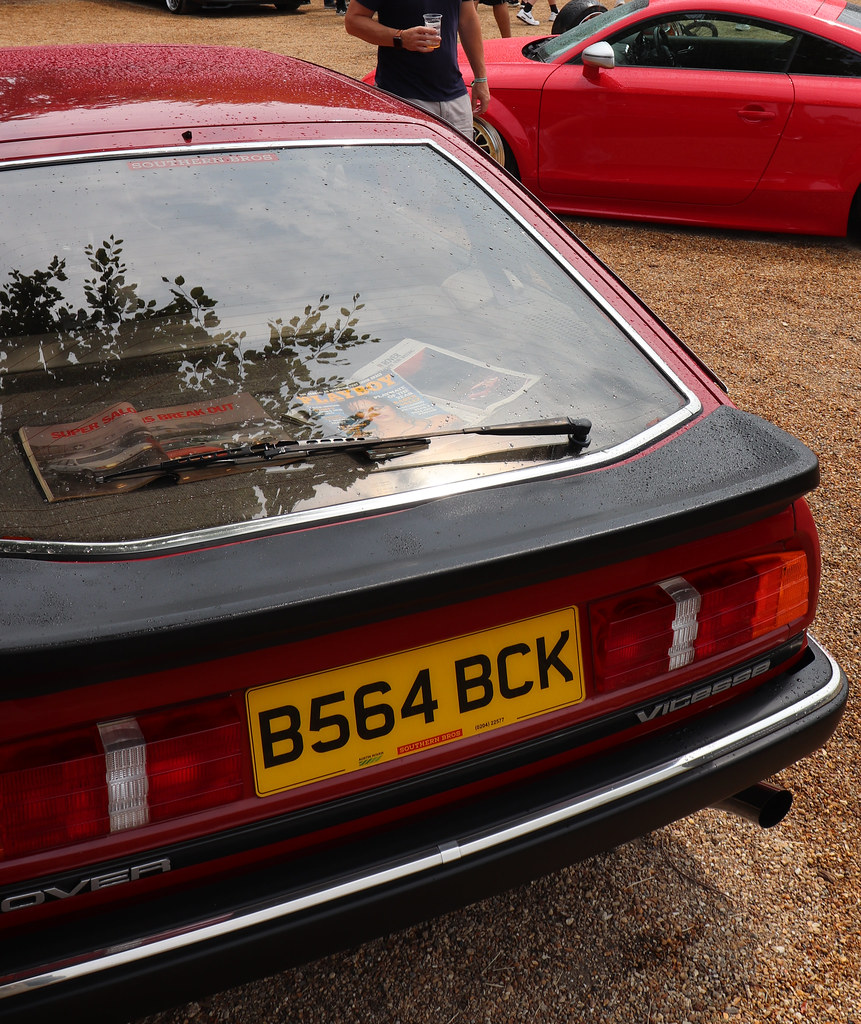
On the Sunday I abandoned Voodoo and joined the Concours d'Elegance inside the circuit. I was nice and early to get a good spot, and was pointed onto the main lawn

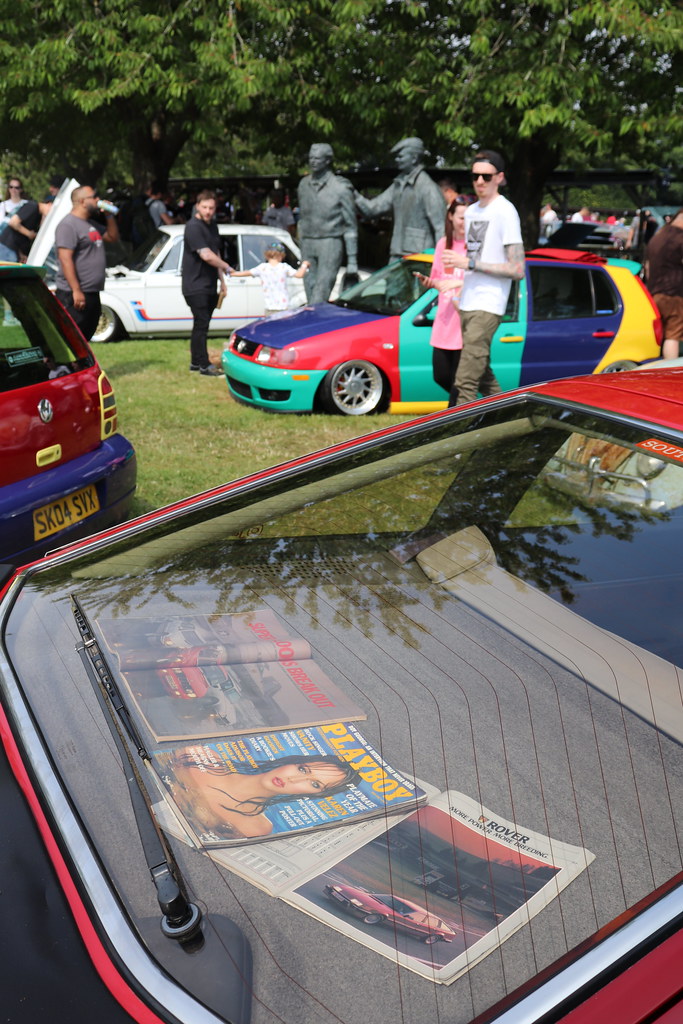
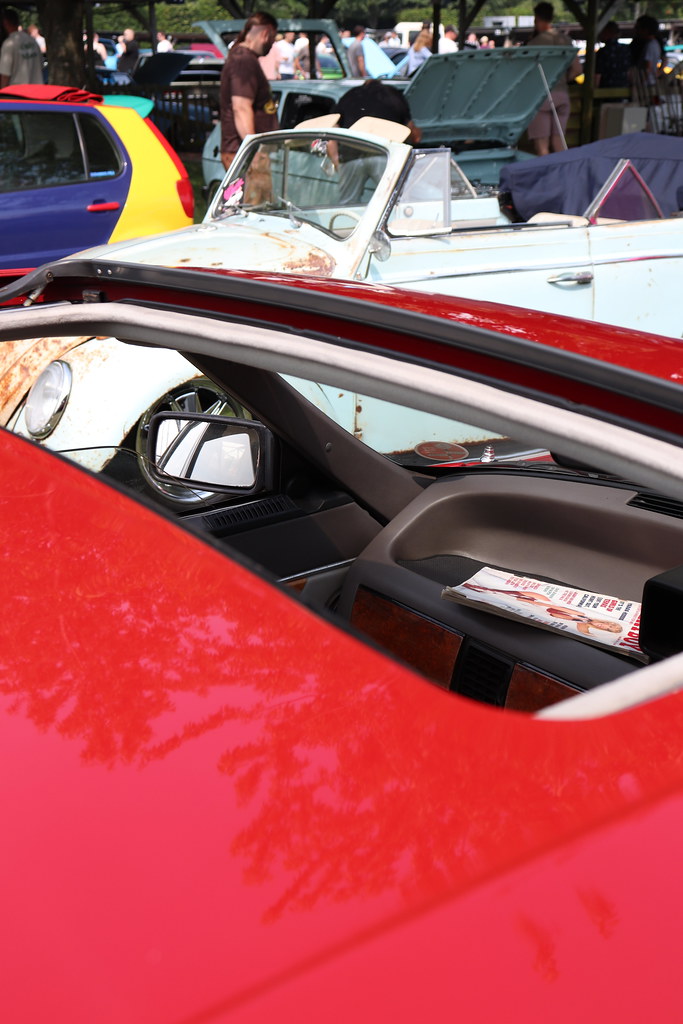
Thought I'd lean into the style of the show and find a Playboy Magazine from 1985 to match the car
One from February for when the car was built, and one from May for when it was registered!

and my new background picture
The show ended a little earlier than anticipated on the sunday with a good rainstorm coming in. But was a damn good weekend. No awards but some really nice compliments and I had a lot of fun.
Joe
Edited by 1275 GT on Saturday 24th June 23:58
So quite a few people have asked me what centre caps I'm going to put on my new wheels.
My response has always been, they're motorsport wheels and are designed to run without centre caps. And apart from the white spigot rings (I always planned on dying them black) I love the look.
But I then for a joke last weekend I popped the original Rover centre caps out, and offered one up.
The outer diameter is just a teeny bit smaller than the 80mm centrebore, so you can just sit them in, and it actually looked really good. Damn it, putting a spanner in the works for myself.
So I started to work out how I could make them fit.
As I had spent far to much time drawing the centres up in CAD it really wasn't too difficult. I just needed to replicate the shape of the original wheel into an adaptor.
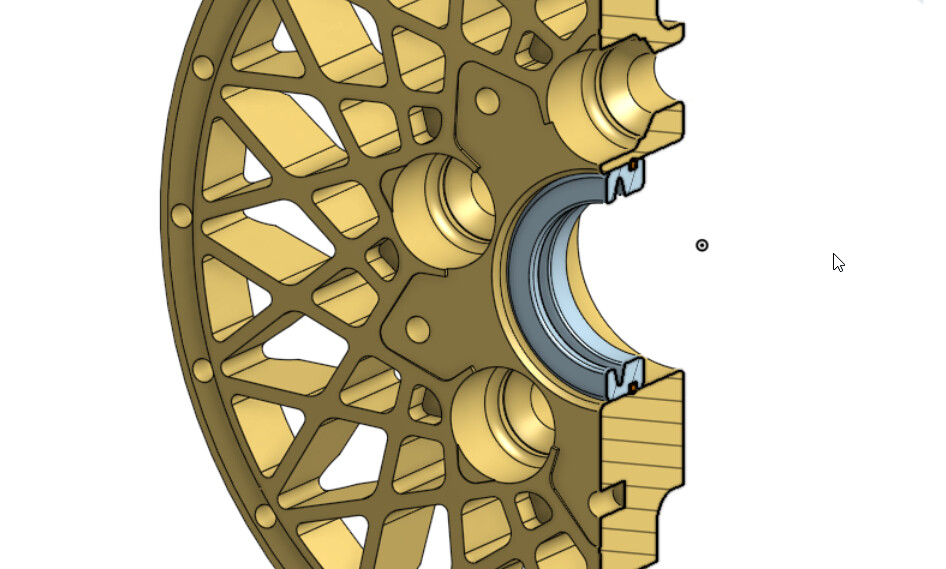
I looked at a few options to secure them to the wheel, grub screws, expanding rings, but I settled on chunky o-rings with an interference fit, (74mm ID 4mm thick) time will tell if that was a sensible decision.
.
Sadly my work is in-between printers at the moment, so I thought I'd try one of the bureau services.
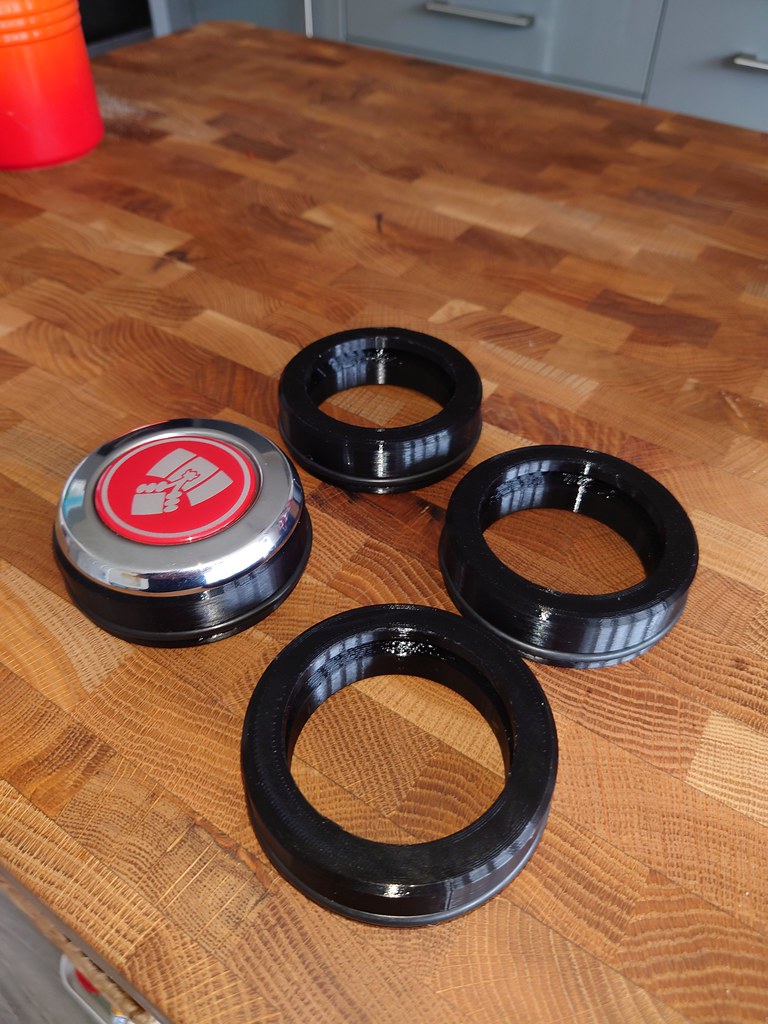
For £48 delivered I received these! (order placed Monday, recieved Wednesday, that's good service)

Very happy with my guess work as the original centres snapped in beautifully.
They didn't need to be pretty so FDM printed PETG sounded perfect. Strong, chemically resistant, and good up to 85 degrees.
Should be perfect for what I need.
If I wanted them pretty I'd have gone for SLS nylon, but it was over twice the price!
Sadly I don't have the wheels sat in my living room any more, so I'll see if they fit on Friday.
Joe
My response has always been, they're motorsport wheels and are designed to run without centre caps. And apart from the white spigot rings (I always planned on dying them black) I love the look.
But I then for a joke last weekend I popped the original Rover centre caps out, and offered one up.
The outer diameter is just a teeny bit smaller than the 80mm centrebore, so you can just sit them in, and it actually looked really good. Damn it, putting a spanner in the works for myself.
So I started to work out how I could make them fit.
As I had spent far to much time drawing the centres up in CAD it really wasn't too difficult. I just needed to replicate the shape of the original wheel into an adaptor.
I looked at a few options to secure them to the wheel, grub screws, expanding rings, but I settled on chunky o-rings with an interference fit, (74mm ID 4mm thick) time will tell if that was a sensible decision.
.
Sadly my work is in-between printers at the moment, so I thought I'd try one of the bureau services.
For £48 delivered I received these! (order placed Monday, recieved Wednesday, that's good service)
Very happy with my guess work as the original centres snapped in beautifully.
They didn't need to be pretty so FDM printed PETG sounded perfect. Strong, chemically resistant, and good up to 85 degrees.
Should be perfect for what I need.
If I wanted them pretty I'd have gone for SLS nylon, but it was over twice the price!
Sadly I don't have the wheels sat in my living room any more, so I'll see if they fit on Friday.
Joe
Edited by 1275 GT on Thursday 29th June 20:33
mercedeslimos said:
This is just getting better and better. To the average person, nothing out of the ordinary on that old SD1. To the wheel w e, that's just the icing on the cake.
Cheers e, that's just the icing on the cake.
It certainly wasn't what I was expecting it to turn into when I started, but I'm very happy that it's what I've ended up with!
Getting back from Players was a little bit of a comedown, especially since the weather was so gross. The car was absolutely filthy, and I really had in the back of my mind that I'd done all this work on the wheels for them to be ruined after one show. (They were all matt on the lips etc)

Of course I was just being dramatic, and the next day using the special auto finesse split rim cleaning shampoo I'd bought (I know I've gone too far) they came up beautifully. The ceramic coating doing it's thing!

There is a little niggle in the back of my mind though that it's finally the thing that in my head "makes it too nice to use" , something that hasn't really bothered me before...
Hopefully something that I'll get over!
Joe
Mr Tidy said:
I hope you do!
There's a show tomorrow at East Kirkby, so I'll drag it out for that! Bobberoo said:
You could always give it to one of us to use in so you don't have to worry so much!!! 
Haha you are funny Bobupndown said:
Your car is absolutely stunning, I am very jealous.
Personally I'd prefer the stock wheels, your split rims a little too blingy for me but hey it still looks amazing.
Cheers Personally I'd prefer the stock wheels, your split rims a little too blingy for me but hey it still looks amazing.
They are very jazzy, the centrecaps I think mute them a little bit...
bolidemichael said:
I came here to say this.
Alternatively, save these as show wheels?
Alternatively, save these as show wheels?
I'm not finished yet...Yeah I think I'll definitely chop and change between them. It doesn't get used for mundane stuff as much these days though.
So I popped over this afternoon and tried my new centre cap adaptors.


The fit was almost perfect, nice and tight but with a little lube popped right in.

I think they make the wheels look a lot less racey, which i'm not sure I love.
But they do make them look more finished, so pros and cons!
Happy to hear opinions!
Joe
bolidemichael said:
Opinions? A little lube goes a long way.
amen to that! wormus said:
Looks brilliant but then I love the whole car. Still very jealous!

miniman said:
Caps in for me (and personally I’d take off the BBS decals but YMMV)
I know what you mean, I think the stickers and the caps together maybe are a bit too much...JeremyH5 said:
The car looks great in its current form. I think the centre caps link the racy wheels nicely to what is clearly a road car.
Yeah that is exactly the vibe I'm going for! So yesterday morning I was up at actually quite a sensible hour to drive to East Kirkby to the Lincolnshire Aviation Heritage Centre. It used to be the Rover Rally, but now it's just a slightly Rover themed car show. Still fun.
SD1's are dumped in the field at the back with the general classics away from the sea of Rover 75's & Sibling ZTs.


6 SD1's in attendance, 4 Vitesse's, 3 Targa Red!
Nice catching up with JJ and his lovely Vitesse, definitely the one mine gets mistaken for the most! & now fun to see the difference a few modifications make
It's always further away than I remember but a good day out.
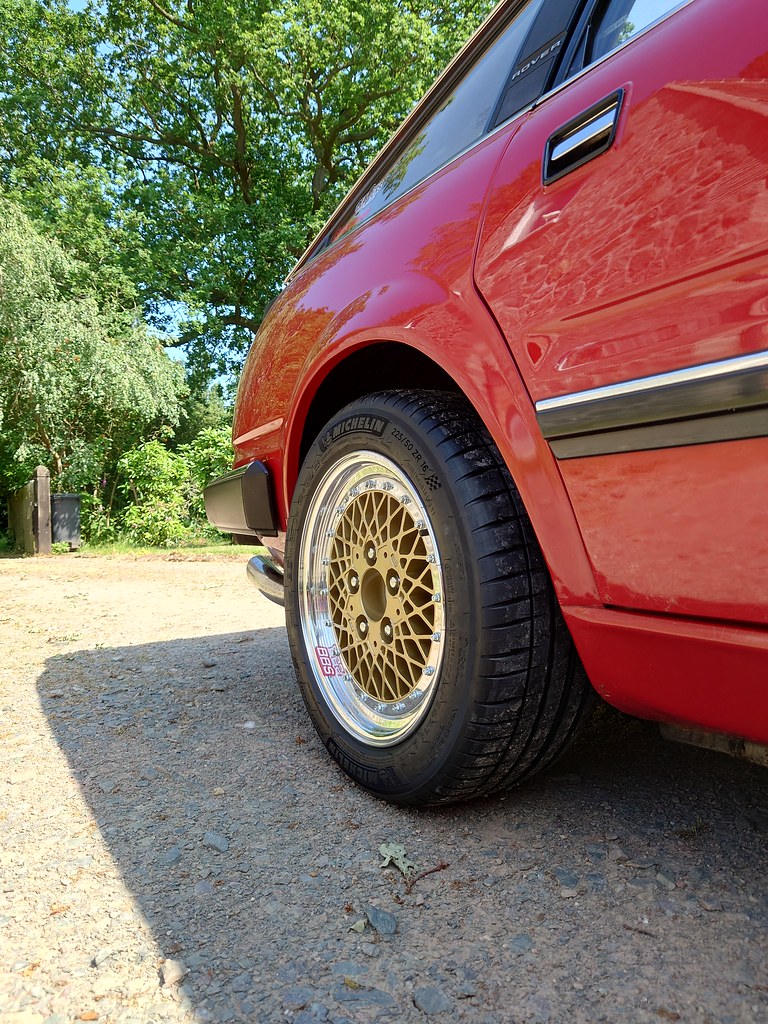
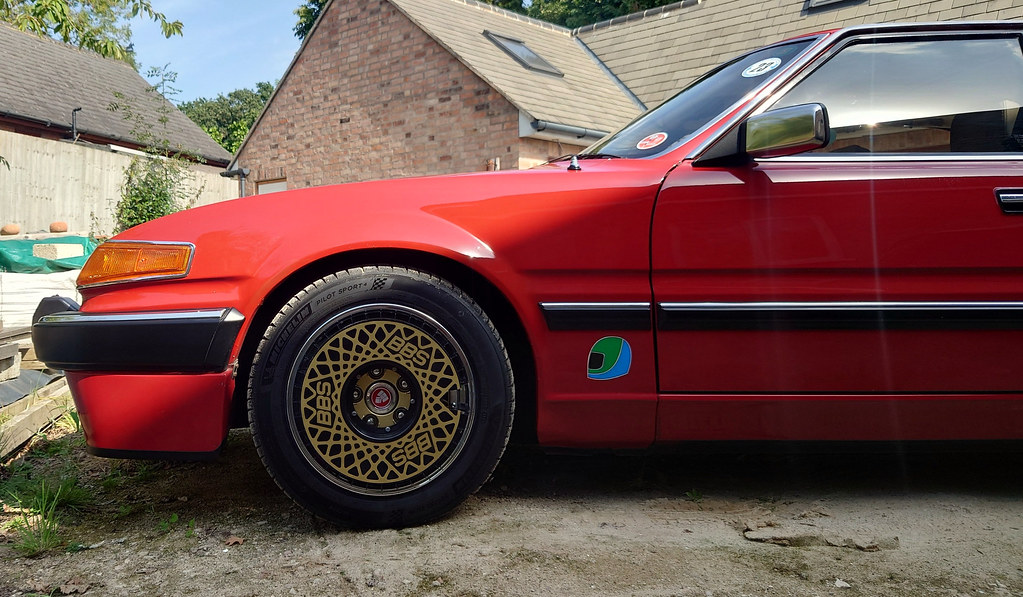
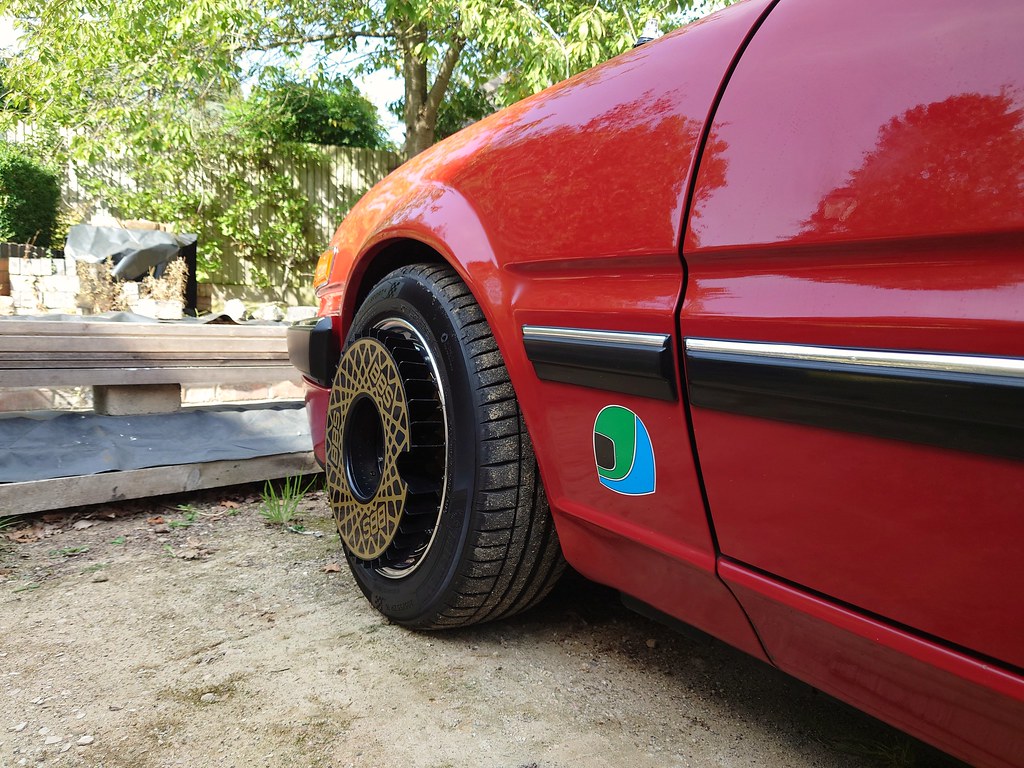
Took a few pics when I got home, I really like how it's brought the front track out, gives it a lovely aggressive stance
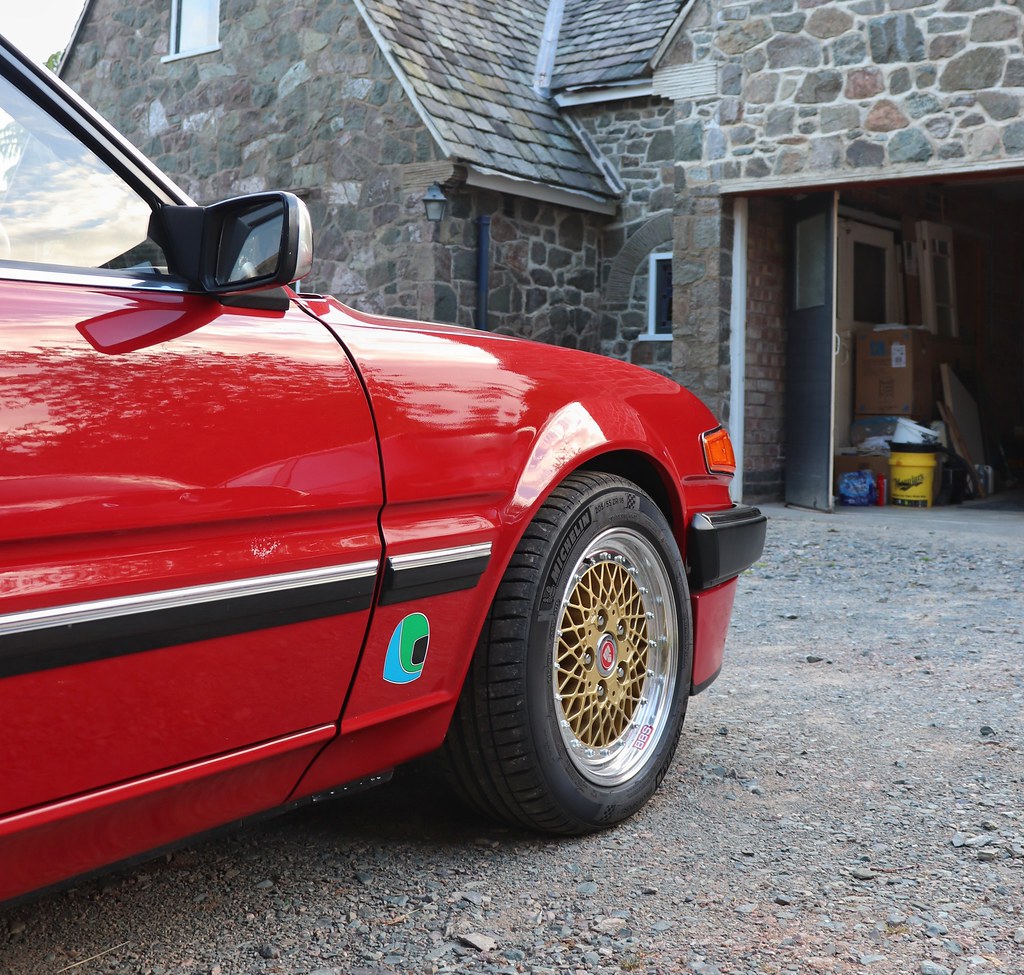
I also think that the centres being flush is the best look. I had them initially sticking out a little like the original wheels, but it didn't work.
Joe
Alfa Pete said:
This is looking amazing and testament to all the work you’ve put in.
I’ve always wondered , what are the side decals on the lower front wings ?
Cheers I’ve always wondered , what are the side decals on the lower front wings ?
really appreciate that. So the helmets on the side are the Austin Rover Racing logos.
A fun little homage to the Vitesse being the homologation model for the Group A touring cars.

They're an evolution of the British Leyland Racing Logos which were red and blue.
The history is quite interesting around the colour changes etc.
https://www.aronline.co.uk/facts-and-figures/histo...

I really like the design so I also had it not so subtlety like the Challenge cars on my 1275GT.
So good job the Vitesses were a little more subtle
Now both my GT & Vitesse are sat on period correct racing wheels
a nerdy fact that makes me very happy. bolidemichael said:
I think that it'd be nice to see the wheel centres coordinated with the blue/green of the racing helmet decal.
Haha yeah I could see that looking good, of course would required something a little more custom...Joe
So in general I haven't managed to do much with the Vitesse. The weather has been awful!
But I did manage to get out for the Festival of the Unexceptional. Now of course I consider my car exceptional, but when a friend had to pull out with his fire engine, I thought I'd bring the Vitesse.
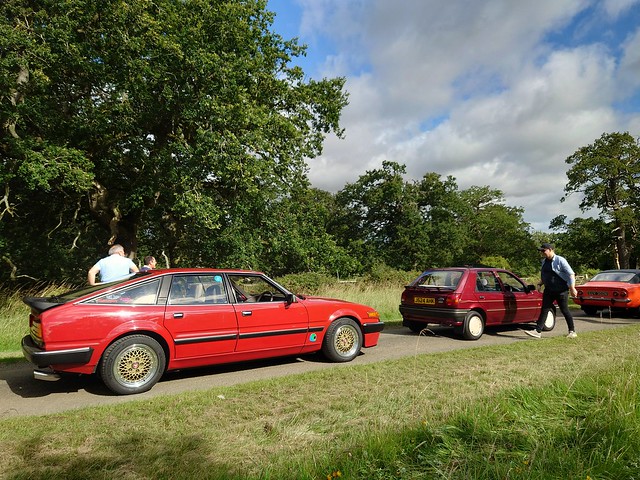
[img]https://live.staticflickr.com/65535/53107631268_8b940c06ed_z.jpg[/img


Such a good show with an amazing variety of cars. The Vitesse is pushing the spirit of the event, but the SD1 is a bit of an unloved diamond...
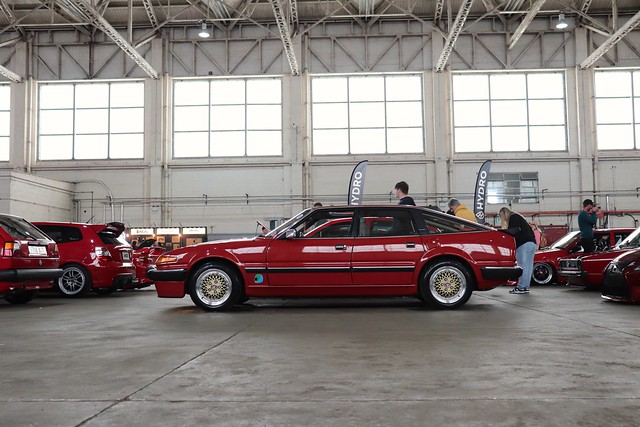
I also was accepted to display at RollHard, which the Vitesse fits more in with now it's got jazzy wheels...
And of course most importantly it was excellent practise for the Pistonheads 25th Anniversary event this weekend!
So I'll see all of you when I'm on display on the readers rides stand!
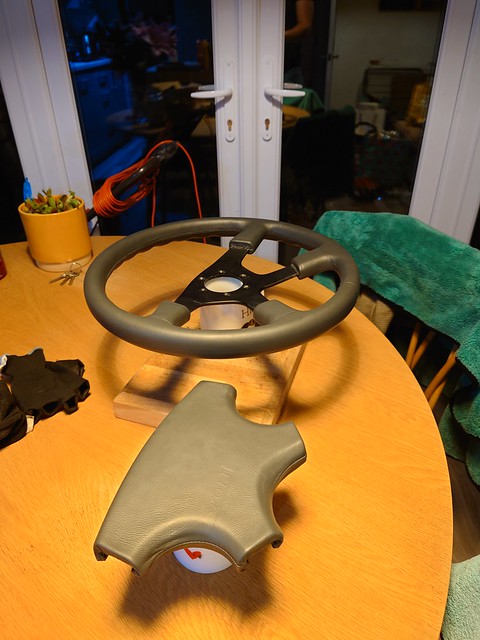
I've also bought a jazzy new steering wheel just in time...
a Jaguar Sport Momo... definitely period correct.
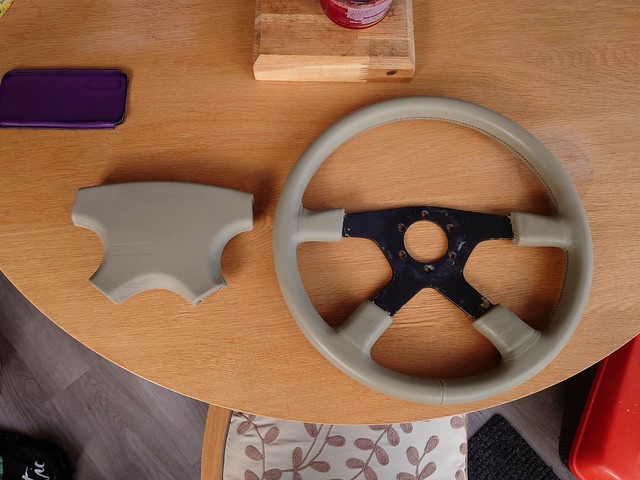
The colour is all wrong but it was NOS! and some dye will fix that
See you guys on Saturday!
(I'm also gonna be at Mallory Park on the Sunday for Retro Rides Gathering...) I do like a car weekend!
Joe
But I did manage to get out for the Festival of the Unexceptional. Now of course I consider my car exceptional, but when a friend had to pull out with his fire engine, I thought I'd bring the Vitesse.
[img]https://live.staticflickr.com/65535/53107631268_8b940c06ed_z.jpg[/img
Such a good show with an amazing variety of cars. The Vitesse is pushing the spirit of the event, but the SD1 is a bit of an unloved diamond...
I also was accepted to display at RollHard, which the Vitesse fits more in with now it's got jazzy wheels...
And of course most importantly it was excellent practise for the Pistonheads 25th Anniversary event this weekend!
So I'll see all of you when I'm on display on the readers rides stand!
I've also bought a jazzy new steering wheel just in time...
a Jaguar Sport Momo... definitely period correct.
The colour is all wrong but it was NOS! and some dye will fix that
See you guys on Saturday!
(I'm also gonna be at Mallory Park on the Sunday for Retro Rides Gathering...) I do like a car weekend!
Joe
miniman said:
Looking forward to seeing you Saturday! I’ll be in the pink TVR outside the hangar!
I beelined it straight for you! miniman said:
Wheels look even more awesome in the metal. Good to see you Joe
Cheers Was a pleasure chatting with you, and thankyou for letting me sit in your beautiful new interior, I definitely approve. And that colour is

bolidemichael said:
You’re in the hangar too? That’ll be fun.
I saw you at the FotU and you were deep in geekery convo.
That does sound like me, pleasure to see you again and the Merc was looking lovely! I saw you at the FotU and you were deep in geekery convo.
Scrump said:
Good to meet you at Bicester.
Lovely car
You too! Brilliant to put a face to a name. Lovely car
bangerhoarder said:
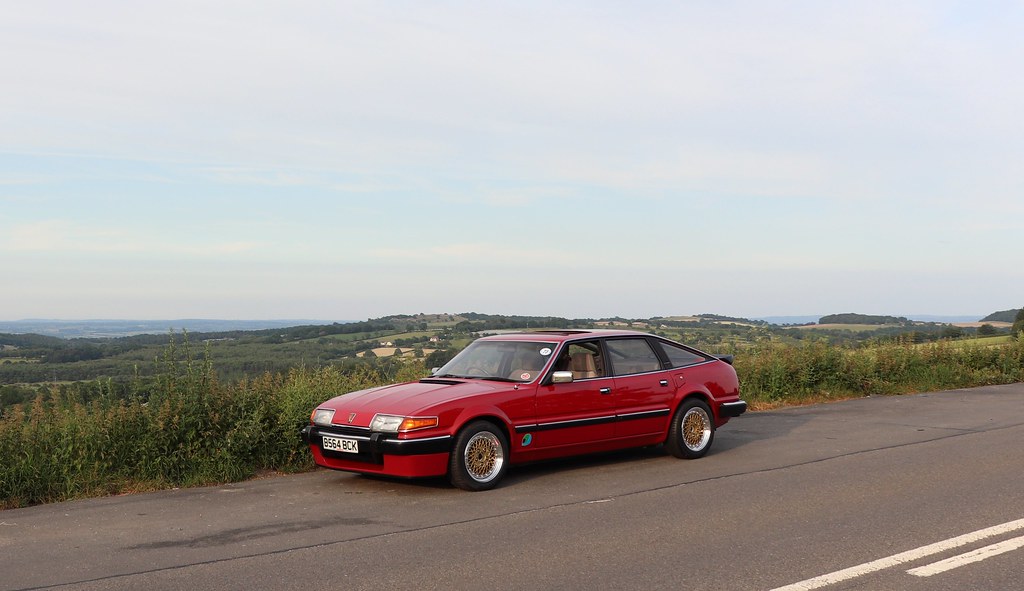
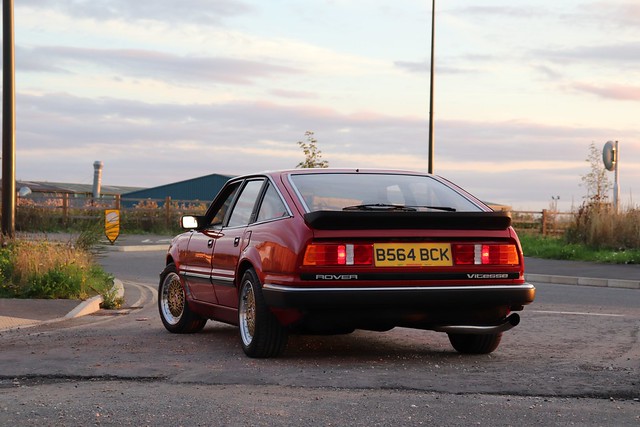
Ooooof they do look so good from any angle, but what a behind that is. Not saggy or wrinkled at 39!
I was very happy with that pic, can't beat golden hour. So before I could come to Bicester, I couldn't do that with a beige steering wheel...
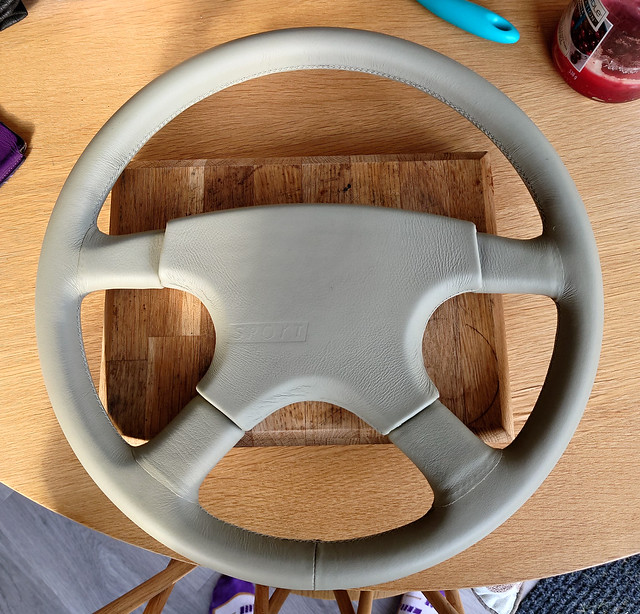
Now I'm fully aware this is sacrilegious to do to a NOS wheel, especially for the person who bid me up by £100 more than I would have paid who was desperate for a Parchment steering wheel...

But it's now Porsche Slate Grey...
& yes I was up till 11pm on Friday night doing this.

Installed at 6:08 Saturday morning
In this light it looks perfect.
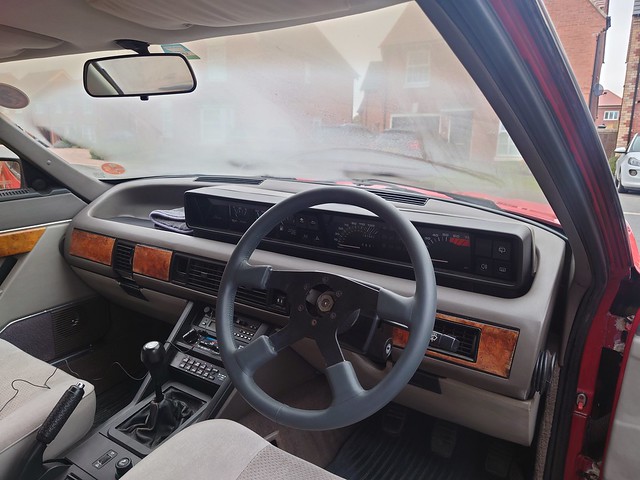
In this light it looks blue, feck...
It's also quite a bit darker than what I was expecting.
I'm not re-dying it, and it doesn't clash as badly as it does before, I don't hate it...
Anyway Saturday. As I said I was up at silly o'clock to install a steering wheel, and had a lovely drive down to Bicester.


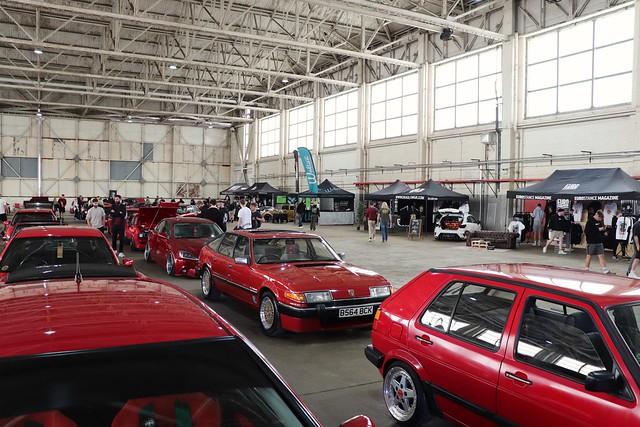
Waiting to enter the Hanger I was a little sad I wasn't out in the sunshine. Later when it pissed it down, very happy to be inside!

So proud to be included in the Readers Rides Display.
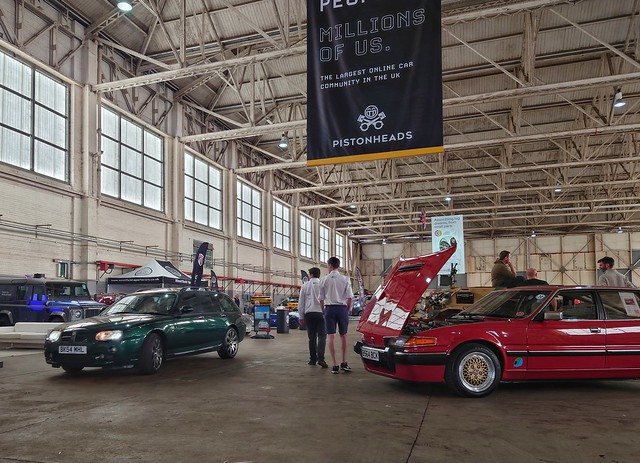
I spent the day chatting with as many people who would listen, and generally having a lovely time.
Such a good event and brilliant to put faces to names.
So good to meet everyone who came and said hello
Joe
Spinakerr said:
It might be easier just to recolour the rest of the dash in the more bluey tint you now have a whole bottle of dye for....
Great to meet you, there was always a horde of slavering interest around your car every time we walked past - a crowd favourite!
Just really go in on it, it is a Porsche colour after all! Great to meet you, there was always a horde of slavering interest around your car every time we walked past - a crowd favourite!
It is a leather dye though and there really isn't much leather in that interior...
You too man! I was sure printing out the article from Matt would have swung me a prize but not to be!

I did get a real a kick walking past and listening to the comments.
LanceRS said:
Having seen it in person, that wheel looks amazing in there.
Cheers, the more I spend around them the more I love them. Really seem to accentuate everything about the car. I parked next to a standard Vitesse recently and it makes those wheels look tiny!I did also pop along to Mallory for Retro Rides on the Sunday which was good fun, but after Saturday I was knackered!
A very good weekend! But not without its hiccups!
In general the Rover isn't running as well as it has though.
It's strong to say it's started to play up a little, still starts and drives nicely but it's not not very happy starting from cold anymore, and the 1500rpm shunting is getting a little worse.

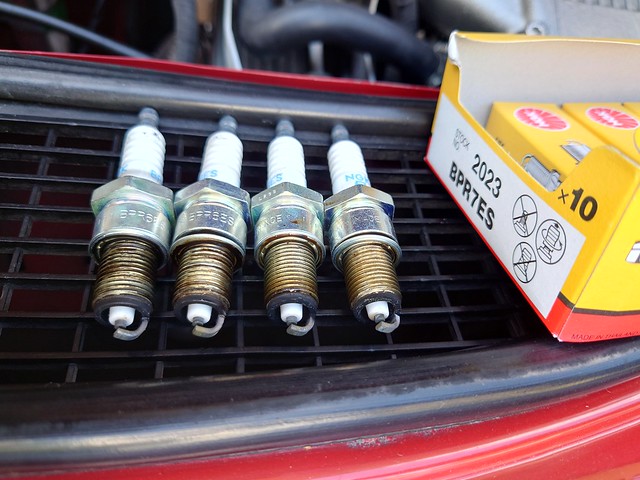
Looking at the plugs I think that's looking lean...
Happy to hear others thoughts though.
Fuel pressure is good and strong so I'm suspecting either AFM or ECU. Might pull the injectors and have them cleaned too.
Ive also got some colder plugs and a rotor and dizzy cap just incase it's ignition related.
I'd also had another look at the timing, as my total advance isn't that high despite running more than factory initial specs. Seems I only get around 12degrees mechanical advance. So with 12static I'm only getting 24 total at 3500rpm. I am getting a full 20degrees vacuum though...
I tried running 16static to get my full 28degrees all in but that seems a lot, and I think the dots on the plugs tell me that too...
Joe
miniman said:
Nice mention in this week's Smith & Sniff
I was so happy listening to that. Not that it should matter, but of course it does, it's always nice to hear that your view is enjoyed and shared by others!Just like meeting people at the Pistonheads event really!
I did enjoy the mention of the continental adult pamphlets too, I thought they were a bit of fun
shalmaneser said:
How would timing advance affect the fuel mixture? those are two separate things are they not? I would have thought you would want more than 25 odd degrees of advance though, you should be able to feel any preignition, it's pretty noticeable!
Oh definitely I'm complicating issues by combining them, I was going with that the advanced timing could also lead to the combustion chamber running hotter by looking at the timing marks on the plug strap. But I think I was going down the wrong road with that one.
The starting from cold was definitely getting worse, and one thing I always loved was how quick it's cold start was!
It was now taking a few cranks, and running like crap for about 15 seconds. I'd checked over everything and found nothing untoward.
So I figured I'd try the ECU from my other Vitesse (80k miles, and sat since 1996) before changing anything else.

Swapped the ECU onto a better condition plate I had, and popped it in.
Car fired immediately and ran fine, so I'm guessing my ECU is finally suffering from the poor cracked soldering!
So that'll be something I'll need to get rebuilt, but it'll be fine on it's donor for now.
I mentioned I'd also bought a few replacement ignition parts so I figured I'd wack them on anyway.
I'd previously bought a genuine rotor cap and arm from LandRover Heritage, and was so disappointed with the quality.
The cap was so loose on the distributor, and the arm was really thin.
They weren't cheap either!
I thought I'd try out Remax, see if that was any better.

Landrover, Remax, and original.
The arm is much better, but still thinner than the original.
The rotor cap is identical to the LandRover one, I'd be shocked if they weren't made in exactly the same factory.
Just as sloppy, so I cleaned the carbon build up off my original and put it back on.
I'd say there's a tickle of colour on the ceramic now, so I'd count that as a win. (completely down to the ECU, the ignition stuff made absolutely no difference. )
I'm still going to try "7" plugs as that's what TVR recommended for a similar spec engine...
It's now back to running as well as it ever has, still shunts though. My next great plan is to try some new engine mounts see if that helps. I'm almost sure they're the originals and they are quite cracked but probably won't make a difference.
Gave it a little test run out to work last Friday in prep for another weekend at Bicester for Radwood, I've definitely overdone it as a venue this year...


I've done 6 events at Bicester this year alone so I think I'm qualified to rate shows there, and Radwood for me missed the mark.
Where they put the cars felt all wrong and just wasn't as fun as it should have been which is a real shame as it's my favourite era of cars these days, and had such promise!
But the weather was brilliant so still a fun day out.
The ECU change has also got me back to over 30mpg per tank too
the previous tank had dropped to under 27 I think. It's not really that important, but didn't feel right.
Joe
bangerhoarder said:
What’s the cost/effort look like for going to an aftermarket ECU? Any modern units that are relatively plug and play? With known issues with the old units, is that a possibility? Also a chance to change to more modern ignition?
After watching a lot of mighty car mods I did look into chucking a Haltec into it at one point, but then I was into basically completely redesigning the injection system and making my own wiring harness. there starter kit starts at £1200, then you're into all the sensors, hardware, and injectors so probably £3k all in, maybe more.Most just give up with the "flapper" system and go to the GEMs system which is just considered better.
KelvinatorNZ fitted a Speeduino ecu to his SD1 and that worked really nicely, and someone else I know has a megasquirt.
Something in me doesn't want to give up on the flapper system though. Apart from the shunting mine has always done it actually runs really nicely.
So onto the shunting. I had one thing I hadn't tried yet, maybe it was a mechanical issue and not a tuning issue at all.
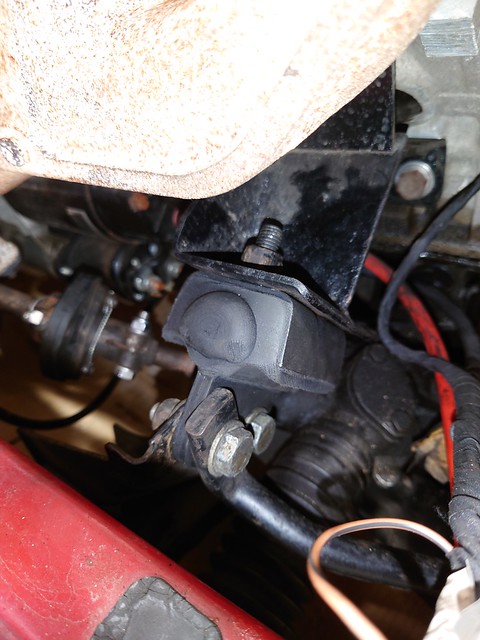
I've already replaced all the rear end rubbers, the diff bushes, and all the gearbox mounts. I think the only mounts I haven't changed are the engine mounts.
In general the engine mounts looked fine, and unlike my A3 I couldn't push my engine backwards and forwards, so assumed everything was good.
I'd done some reading and read that some TVR owners were having to change theirs quite often due to heat build up from the manifold design. It's the same engine mount for SD1's as it is for all Rover V8 TVRs, and even the speed six cars.
So although the heat is less concentrated from the SD1 manifolds, the mounts still sits right below them. Mine must have taken the brunt of a lot of heat and movement over the years. ( and I assume they're the originals)
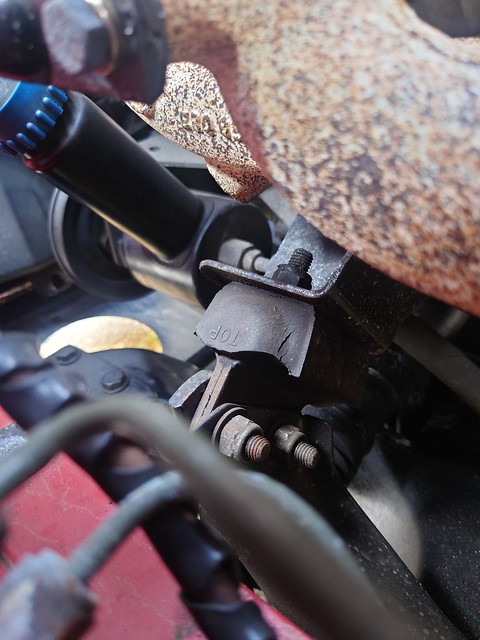

They do have some light cracking, but in general I didn't think they looked awful.
So I took the plunge and bought a replacement pair of mounts from a TVR specialist, claiming they've remade them from a better rubber... (E0053a part number if you're wondering.) I did want the SC power ones, despite being eye wateringly expensive it also appears like it's been a while since they've been stocked anywhere!
So these will have to do.
They arrived a few weeks ago but I'd been putting off installing them as I thought it wouldn't make much of a difference but I had a spare afternoon today so why not.
It's also a bit of a pig to do in the car, requiring the engine to be lifted from the subframe high enough to clear the studs on the mounts. The SD1 also has brace bars from the engine mounts to the subframe where the anti roll bar bolts through making it even more tricky to change them.
The SD1's tin sump also makes lifting just the engine a pain too!
But eventually with the engine lifted from the front sump mounting edge on a jack, I had them out.
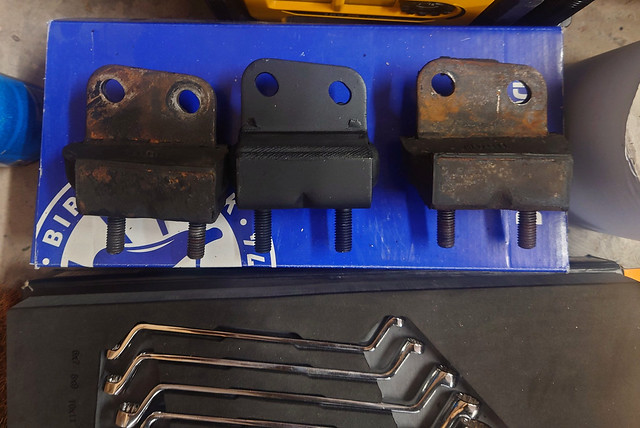
Now compared to the new one you can see how sagged they are.
And the new ones fitted back in.
I made my dad take the first test drive while I tided up as he tends to drive in the lower part of the rev range where the shunting is the worst. Especially coasting back to an idle speed in gear. If you keep it over 1500RPM it's absolutely fine.
To my surprise and delight he pulled back in and said he couldn't feel anything, so I got changed and tried it for myself.
And damn it it'll coast in gear now to idle and pull itself along without shunting. It'll also now hold 1500rpm without shunting, so I'm pretty confident now that all this trouble was the bloody engine mounts!
I'll give it an extended test tomorrow to really confirm, but if it's sorted I think it's one of a few Vitesses now that's actually running as it should!
Joe
bolidemichael said:
How very satisfying, Joe (subject to confirmation!)
So after driving to Nottingham to see a friend I think I now have an accurate idea of where it's at. So it's not completely solved the issue, you can still feel something at 1500rpm when on incredibly light load, but what it has done is completely remove the drama from it. Before you'd have to clutch in it got so bad, now it's just a little movement that doesn't get any worse. No different to quite a few cars I've driven (most notably a new rental Fiat 500 hybrid that had a right wobble at a certain RPM! ) so I'm still pretty happy with that.
What it has solved completely is the low speed to idle behavior. Especially coming up to, and going over speed bumps. Now apart from the scraping height issue it'll behave itself.
Now speaking of the ride height...
Despite me complaining I can't get over speed bumps, in my head I'm about 10mm too high at the front from being level.
So it's good news that my new front suspension is apparently impending.
It's out being coating at the moment, and should only be a few weeks from being ready.
But then again Bilstein have had them for almost a year, so not the speediest of turn arounds!
Bobberoo said:
Such a great car, and I love your attention to detail!!
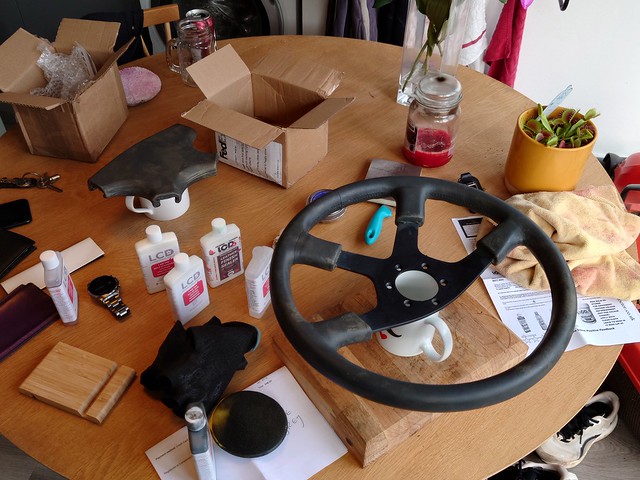
Cheers There's still so much that I want to do, so hopefully it'll only get better! Oh I almost forgot, while browsing facebook marketplace recently I came across the motherload of weird BBS things...
Proper, genuine, period correct, Turbofans!
Now I know my lips are too small to make them really look how they're suppose too, and they're waay to wide but I still kinda love them, they're so ridiculous. Might pop them on for a show or two...
Joe
Stick Legs said:
I love the insanity of the Turbofans.
From my own aesthetic standpoint I think it looks best on it’s original wheels, however as these are bolt on items why not have some fun.
It doesn’t detract from the car or your efforts at all.
It’s still looking beautiful & love the attention to detail on the small stuff.
Got to be a contender for best SD1 out there.
They're so bonkers, my dad was teasing me saying that they might have been better if they had stayed an unobtainable item...From my own aesthetic standpoint I think it looks best on it’s original wheels, however as these are bolt on items why not have some fun.
It doesn’t detract from the car or your efforts at all.
It’s still looking beautiful & love the attention to detail on the small stuff.
Got to be a contender for best SD1 out there.
I know what you mean it's a cleaner look with the original wheels, but that's the joy of bolt on mods!
Cheers
KelvinatorNZ said:
Always a pleasure to see more of this car, its such a stunner.
Regarding the shunting; if what you still have a a slight surging, don't discount the throttle potentiometer. Check its in spec first, and maybe try another if it doesn't help. They are well known for causing surging at low throttle cruise situations.
As mentioned, an aftermarket ECU is the ultimate solution for most engine issues, but i totally understand the desire to keep the flapper going. For me there is a charm to the flapper system, and everyone is so quick to rubbish it when it goes wrong, but when its all working in harmony it does a decent job for what is basically an early 80s analogue injection system.
I read your handy guide and did your little mod to move the track, and tried another also sadly remained the same. Regarding the shunting; if what you still have a a slight surging, don't discount the throttle potentiometer. Check its in spec first, and maybe try another if it doesn't help. They are well known for causing surging at low throttle cruise situations.
As mentioned, an aftermarket ECU is the ultimate solution for most engine issues, but i totally understand the desire to keep the flapper going. For me there is a charm to the flapper system, and everyone is so quick to rubbish it when it goes wrong, but when its all working in harmony it does a decent job for what is basically an early 80s analogue injection system.
Yeah I'm stubborn enough to want to get it to work, and yeah there's been moments when it's driven beautifully.
Cheers
bolidemichael said:
Those Turbofans are so, so cool.
Kelvinator, is the flapper system similar to the one that you resolved on the TVR Tamsin?
They're just 80's bonkers, walking through the pits at the FOS really didn't help, I had to find some Kelvinator, is the flapper system similar to the one that you resolved on the TVR Tamsin?
KelvinatorNZ said:
Thankfully not, that was Bosch K-Jetronic mechanical injection. The Rover uses Bosch L-Jetronic which is proper EFI, but the ECU is all analogue ins and outs, no real processing, just working off a pre-set criteria depending on sensor input.
The term "flapper" comes from the Airflow Meter which has a flap inside it, which opens and closes depending on how much air is being ingested by the engine. The ECU reads how far open the flap is and adjusts fuelling accordingly. The later Land/Range Rover V8s replaced flapper with a smarter "hotwire" system, getting rid of the analogue system.
I spoke with a few people about the shunting, and the current theory is that the combination of the back pulses of the hot cam are causing a pressure wave, and are pulsing the AFM flap...The term "flapper" comes from the Airflow Meter which has a flap inside it, which opens and closes depending on how much air is being ingested by the engine. The ECU reads how far open the flap is and adjusts fuelling accordingly. The later Land/Range Rover V8s replaced flapper with a smarter "hotwire" system, getting rid of the analogue system.
Edited by KelvinatorNZ on Monday 18th September 19:47
So by talking about it again, you'd be right in guessing, my shunting is back, and I can't really work out what's changed! All I did was take all the interior out and put it back again!
So after attending an SD1 club event at the Jet Age Museum in Gloucestershire my journey home was a bit more eventful than I'd have liked...

The Vitesse was driving beautifully and I'd spent the day boasting about how I'd solved my shunting after a few other owners were having similar issues.
I set off home after having a nice day talking about cars. But while doing a little pull back onto the motorway my low coolant light came on, annoying but I know that sometimes the level in the expansion tank drops below the first sensor so I wasn't too concerned.
After a few miles on the motorway I was greeted by the faint sweet sickly smell of coolant...
I dropped off the motorway onto the A-roads and pulled over to check the level. I could still see coolant in the tank, so I carried on home but with the smell slowly getting stronger.
It of course got me home with no hint of the temp gauge moving, but I had a horrible feeling I knew exactly what was wrong.
I'd previously de-rusted and painted the infamous bulkhead to heater matrix coolant pipes, and these were both still dryish (there's a teeny weep from one of the seals, but it has done that for my entire ownership without getting worse. )
It wasn't immediately obvious and I really couldn't get a picture, but putting my hand up the demister vents in the footwells I could feel wet.
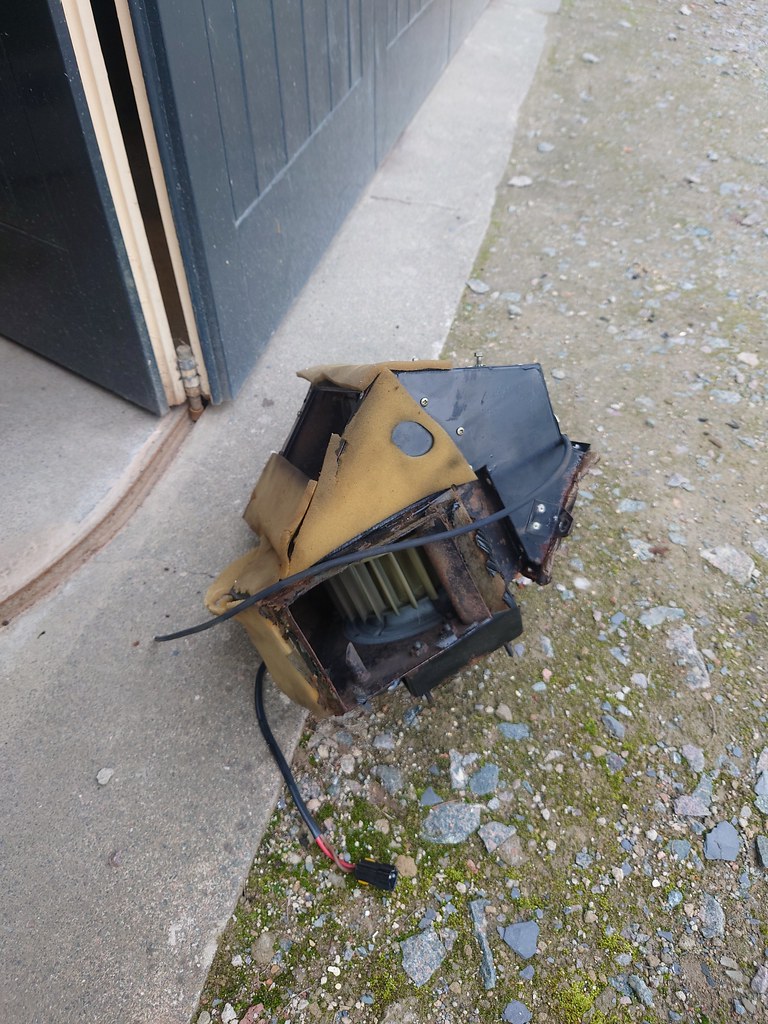
The heater matrix had finally given up.
Now I wasn't entirely surprised, as for my entire ownership the heater had been rubbish, it would barely get warm, and did a terrible job of clearing the windscreen, I'd also tried many times to flush it with the hose to no avail.
Now this was on the 24th of September. I've read what a big job this is, requiring basically the entire interior including the dash has to come out.
A more sensible person would have parked up the car and started to plan for a job for the winter. But of course I'm not quite done with it this year, with a photoshoot booked on the 8th of October, and an indoor show in November...
So basically I had 2 weeks to get it done. I spent the first week plotting. Ordering paint, heater foam, a new heater matrix (we'll come back to that) as well as various fixings etc.
I had planned to have it apart and back together in one weekend, how foolish was I!

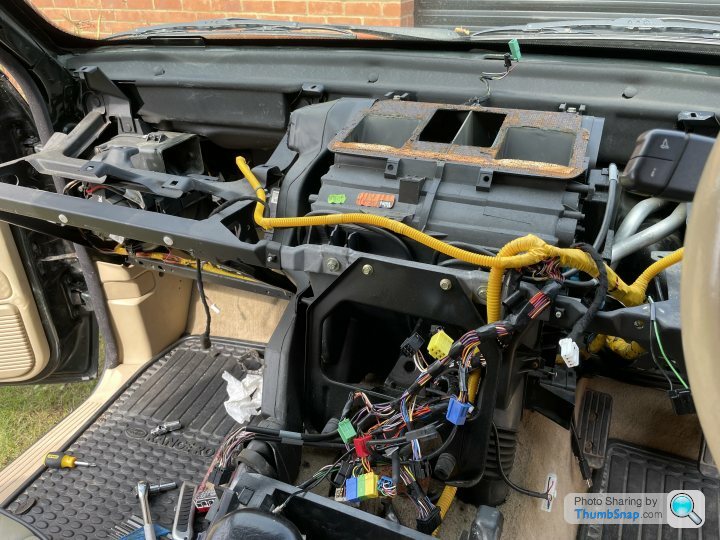
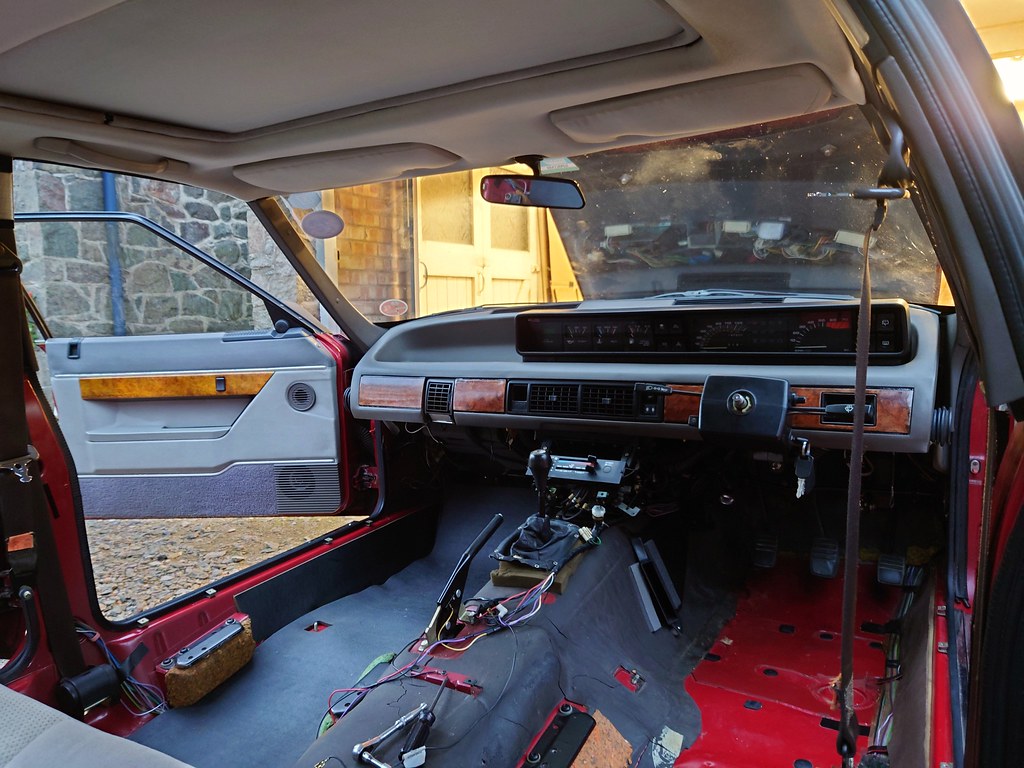
Interior as I started, looking lovely, but hiding a horrible secret.
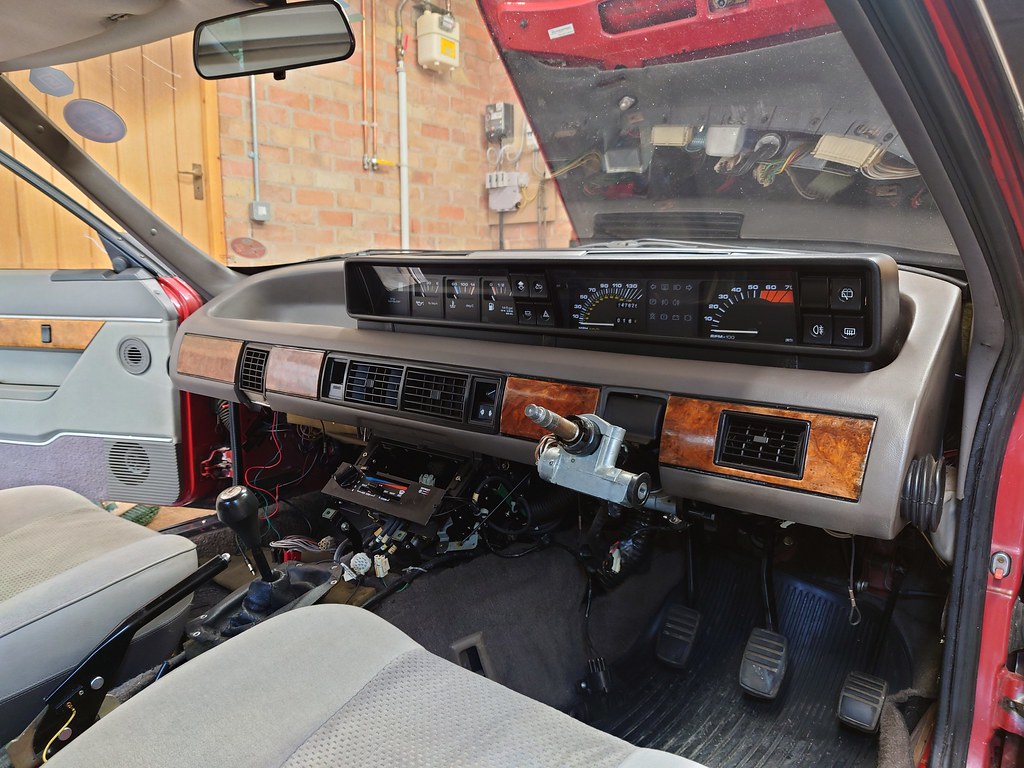
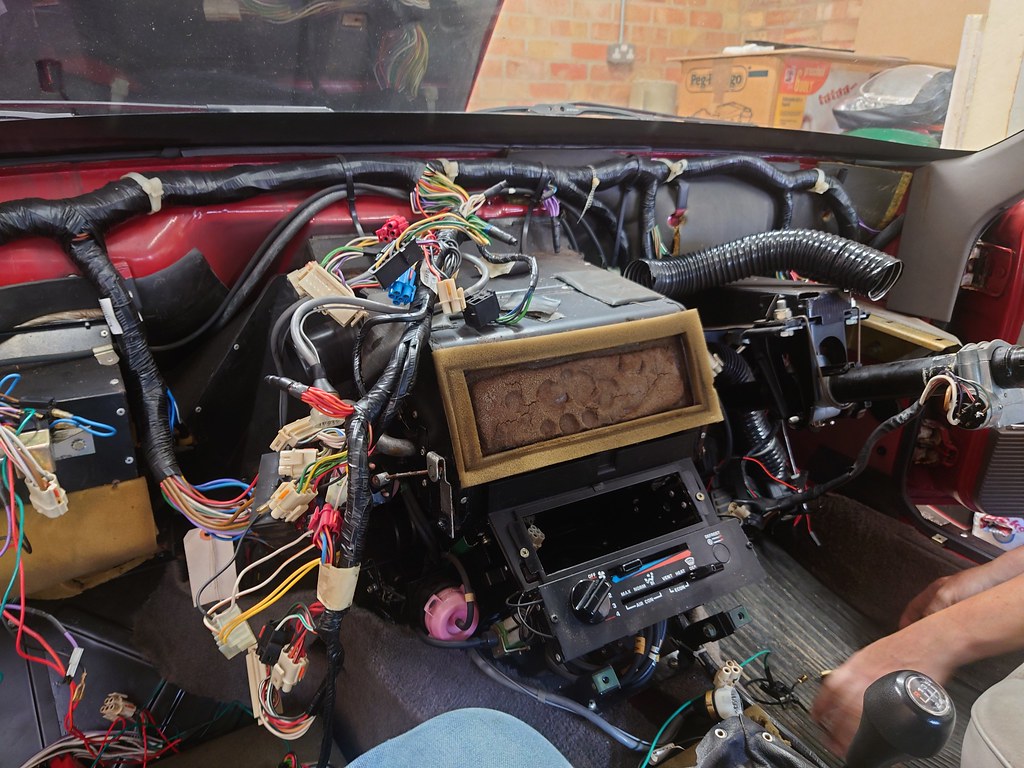
Start of the strip, steering column parts stripped off, radio, trip computer, both glove boxes, and centre console out!
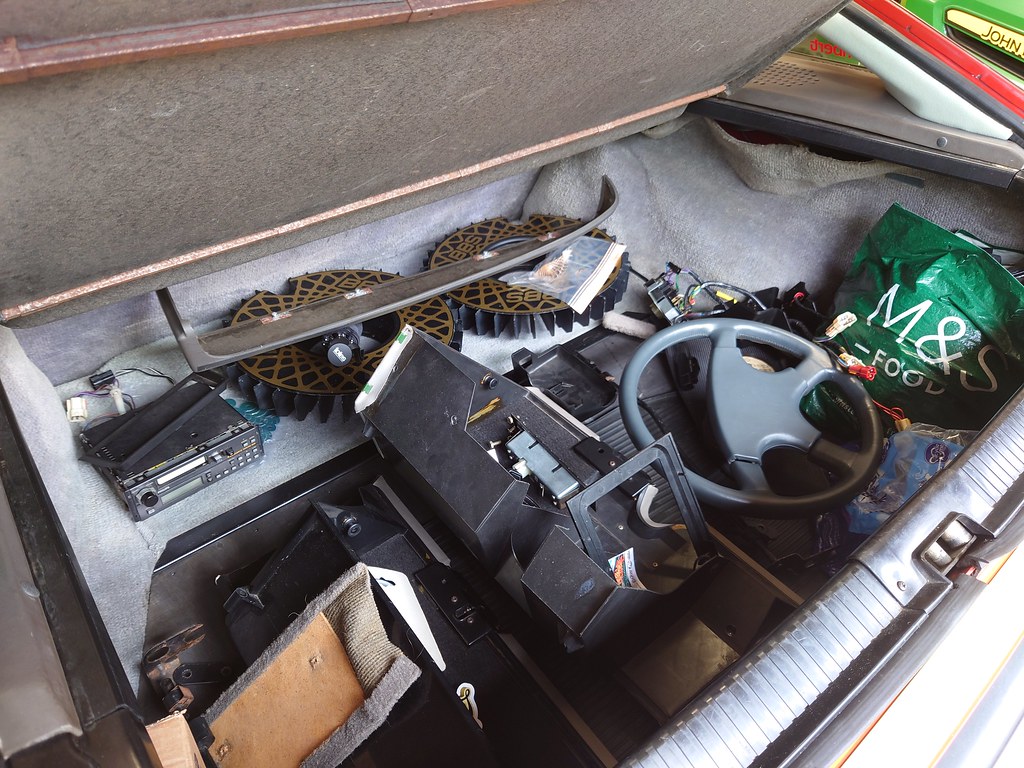
There's quite a bit of interior to remove!

All the wiring for the dash has to be disconnected, then carefully passed back through the dash as you remove it.
I took a lot of pictures to make sure I knew where everything goes back too.

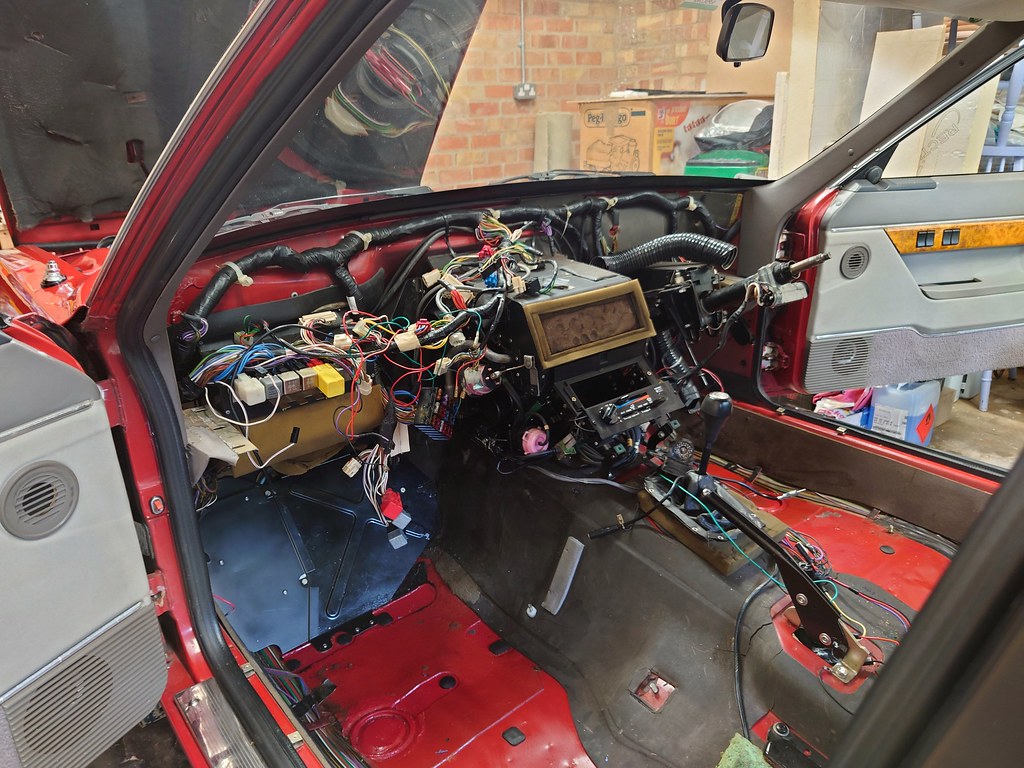
And with just 3 bolts either side, and a little help, the dash comes out.
I couldn't resist poking the old foam, which had degraded awfully. It had been spitting bits of foam out at me for the last few years!
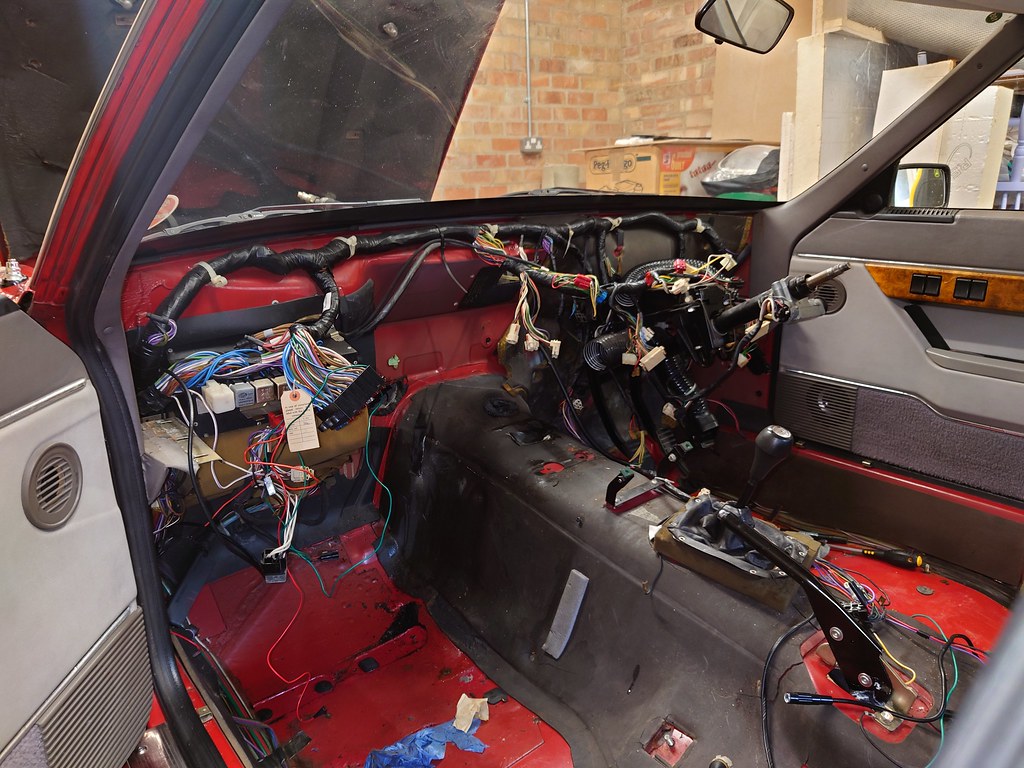
Now It only took me 2 hours to get to this point so my confidence was increasing.
I was hoping to leave the seats and carpet in, but that was soon dashed when a hand under the carpet revealed soaked sound deadening.
So the front seats, carpet, and sound deadening also came out.
Floors still looking mint after I last saw them 5 years ago
so little victories.Now you just have to drop all the coolant, and blow out the matrix so you don't make the swimming pool in the footwell any worse!
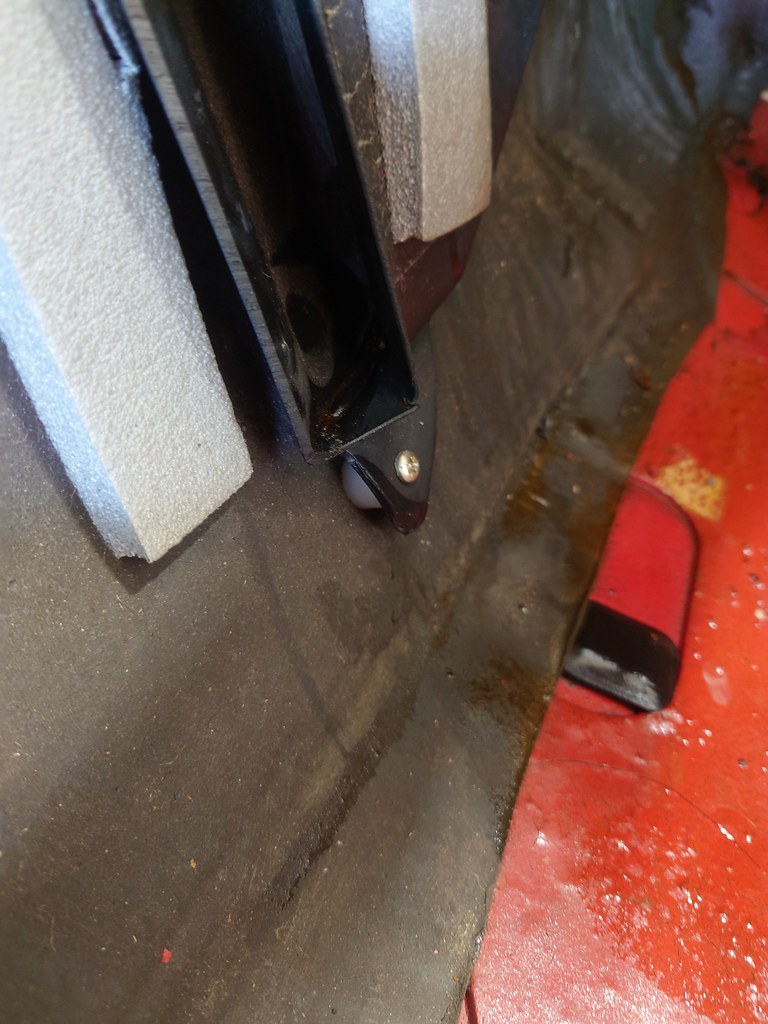
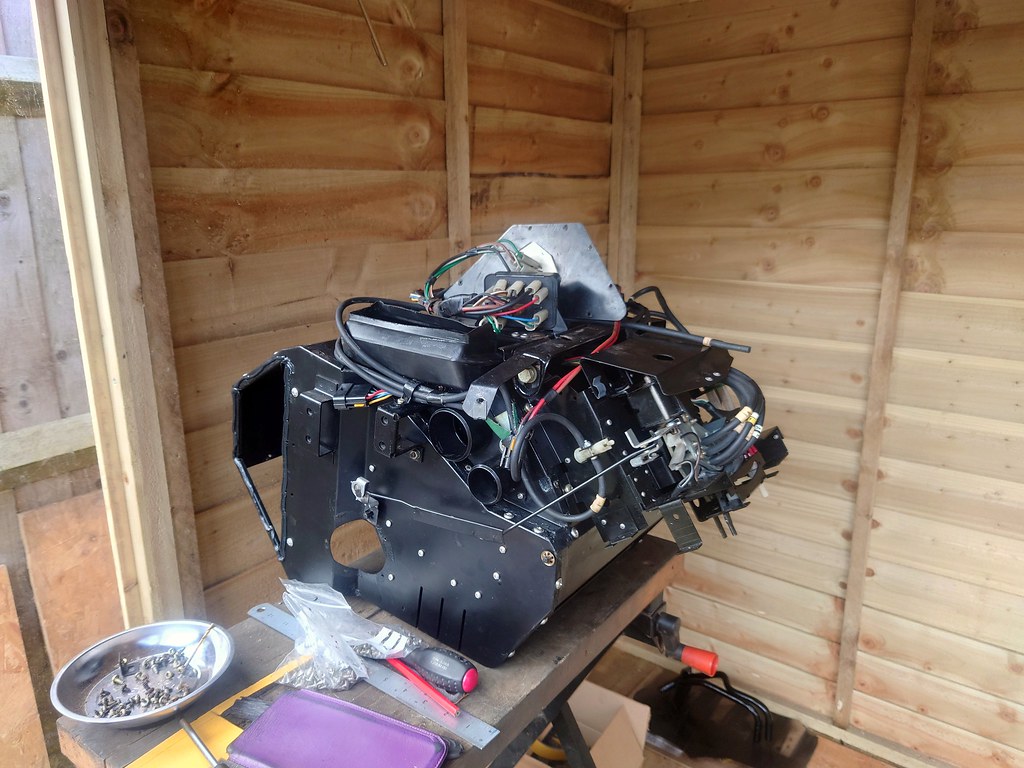
The HVAC unit is then held to the floor with 2 bolts, although one of mine was just placed in as it's missing the captive nut in the body! Bloody Rover quality eh, would explain a little rattle though! It also has 2 studs that pass through the bulkhead which have the brackets for the brake lines attached to them. There's also a foamed bracket that seals it to the heater blower box mounted behind the passenger glove box. The foam was gross.
My car is also a factory Air-Con car. luckily long since drained, so those pipes also need disconnecting. It also means the whole unit is completely different to every other SD1 which did cause some headaches...
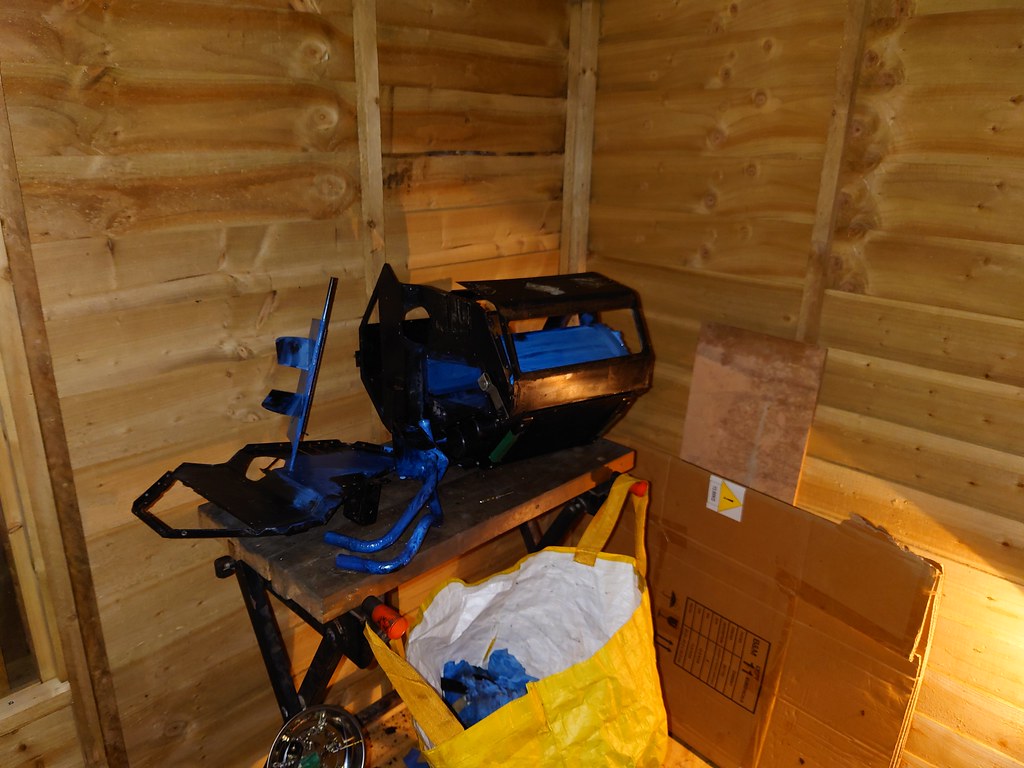
The HVAC unit is a bit of a beast but came out eventually.
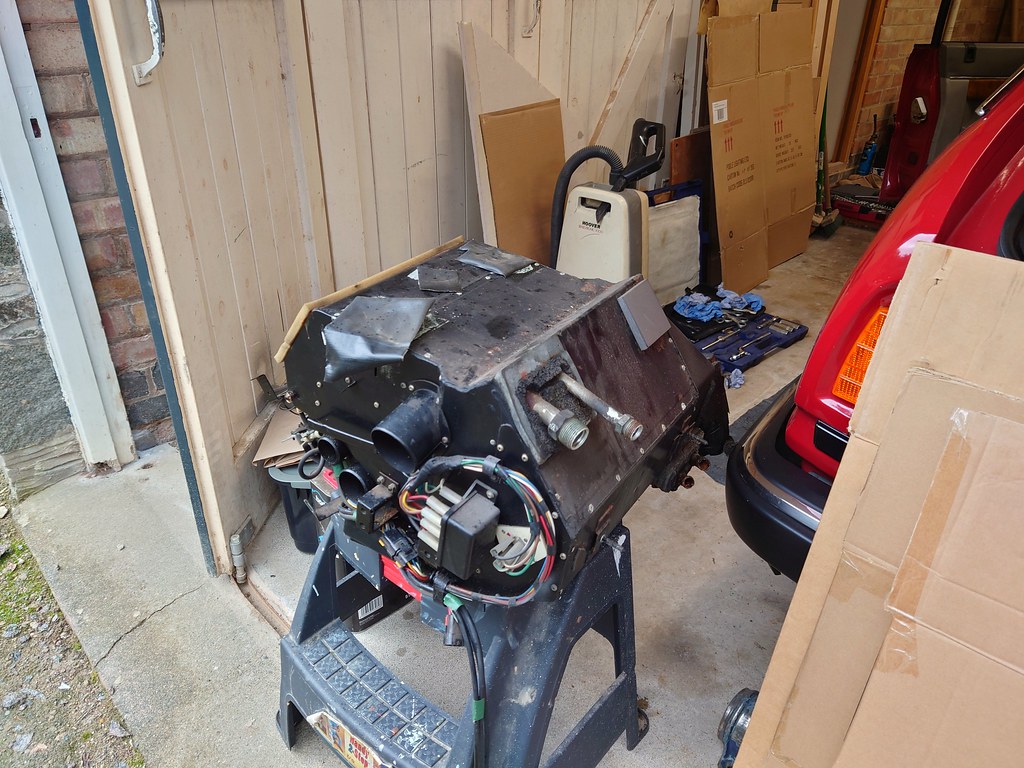
A lot more complicated than the one I changed on a mini before!

I left the heater matrix removal for this point just so I didn't have coolant everywhere...

It was practically rust welded into the unit with the old foam around the matrix, and required sawing out.
Now I'd ordered a new matrix, that was suppose to be universal for all SD1's...
It was not.

This really threw my timing plan out of the window, so I regrouped and tried to come up with a new plan. There was no way I was getting it done in one weekend.
Joe
miniman said:
Yikes, that’s a big job. Definitely a few more steps than swapping the heater out on a Mini
I think I can name every bolt and fixing to do a mini heater box, this is a different kettle of fish...Stick Legs said:
Last heater matrix I did was in a BMW 635CSi which was actually quite straightforward.
I remember doing one in an XJ-S which was like this; essentially it’s inside a huge HVAC assembly which is the first thing they put in the body shell.
Good luck!
Damn Germans designing things with service items in mind! I remember doing one in an XJ-S which was like this; essentially it’s inside a huge HVAC assembly which is the first thing they put in the body shell.
Good luck!
The Rover is exactly how you describe an XJS, I'd be shocked if it wasn't the first thing that went in after the sound deadening...
bangerhoarder said:
Is it possible to pressure test it before full reassembly? It’d really spoil my day/week if I had to do that job twice!
Now that sounds like an incredibly sensible solution, rather than just wanging it back in and hoping for the best... 
21st Century Man said:
'kin 'ell!
Yeah not one for the faint hearted! So with the matrix really throwing a spanner in the works I spent the evening seeing if anyone else had had similar issues. I actually had another Aircon Vitesse owner respond to my pleas of help, he said he had a company near Birmingham make him a matrix. when he was restoring his car earlier this year.
When he sent me the name of the company (foursome vehicle heaters) I was pleasantly surprised as it was the same company I'd already bought my replacement matrix off!
So bright and early Monday morning I was on the phone to them. They were very helpful and we discussed the issue. They were a little confused as they've sold loads of SD1 matrixes with no issues, with Andy (other aircon vitesse owner) being the first to have issues earlier this year. So obviously not many aircon cars have gone bad! Even more luckily for me Andy had sent them his matrix to copy, and they still had it onsite. They asked how urgently I needed it, and I said ideally in the next few days...
It was made later that day, dispatched Tuesday and at my door Wednesday midday. Amazing customer service!

I've also opted to bypass the original seals to pipe design from the matrix as these are long since NLA and prone to leak. I'll connect it with conventional heater hose and clamps.
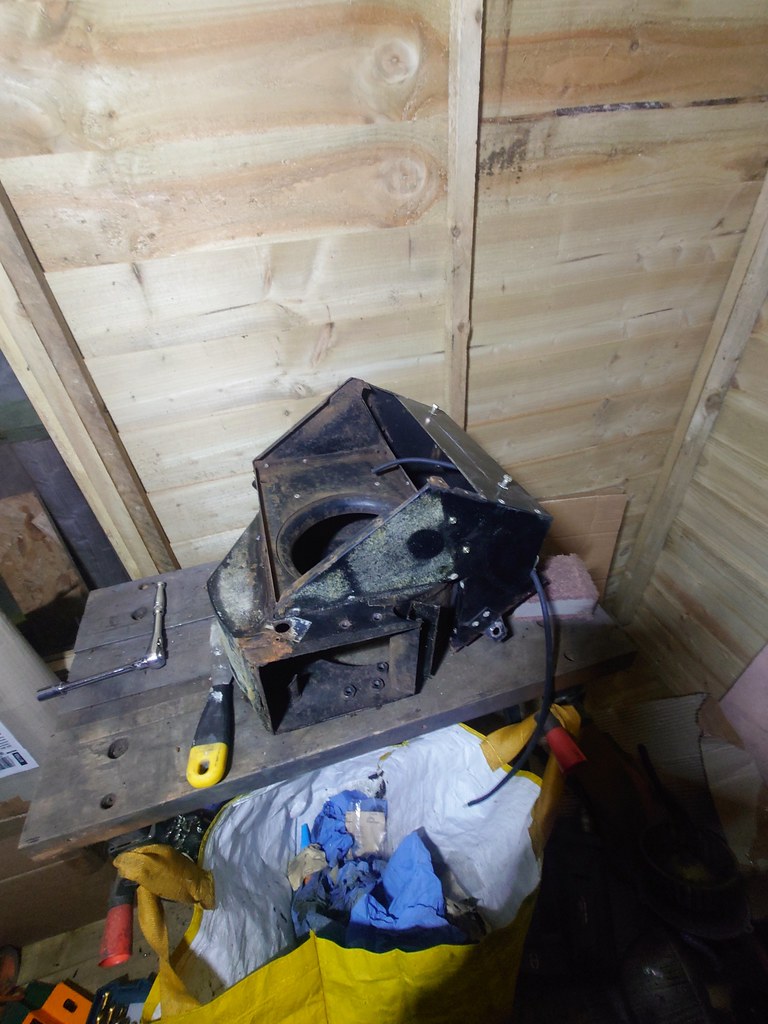
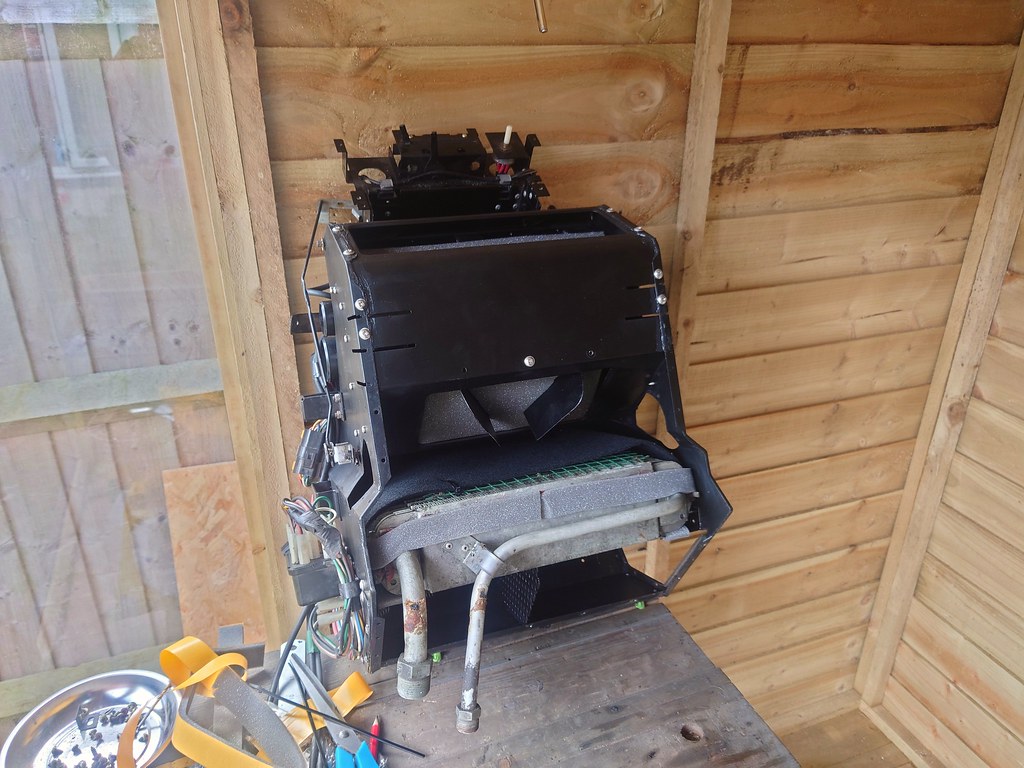
With the matrix solution sorted I could see a light at the end of the tunnel so I cracked on with the HVAC unit.

It honestly doesn't look that bad, until you start to look inside...

First up for removal is the aircon evaporator.
It has a filter behind it, which was disintegrated and was responsible for chucking bits of foam at my face for the last 5 years.

There also was a lot of leaves and crap. It was really gross in there.

Every flap's foam was disintergrated, and had rusted behind where the foam was.

To do it properly I drilled out the rivets holding the unit together to strip it properly.
A little test fit of the matrix.

I then spent a few hours with a wire brush cleaning everything that I could, and then painted on the rust converter (bilt hamber hydrate 80 this time)
I left that for the recommended 24 hours, and then prepped and got the first coat of paint on.

While I was waiting for this to all dry, I had talked myself into also headed back to the car to unbolt the heater blower motor housing.
I want to do this properly, and as my heater had stopped working on setting 3, I was looking for the otter switch (the thermal switch that controls the fan speeds)
This has studs through to the engine bay that attach the bracket for the air con drier, so more engine bay disassembly!
There's also 2 bolts that go through to the scuttle.

I then took this back for more refurbishment...

The underside faces the passenger foot well and is suppose to the the recirculation flap. That was siezed open. It also has two blast flaps, so it can't create excess pressure in the cabin, these are riveted aluminum panels that used to have some kind of plastic inbetween them, which has long since disintergrated.

Much easier to see with the panel removed.

The rest of the unit was much simpler than the HVAC unit, the fan motor came out, all the old foam removed, then the usual rust removal, treatment, and ready for paint.

Much nicer!

Now I had some fun with the recirculation panel, I freed off the pivot point, cleaned the vacuum actuator, and remade the blast panels with polyurethane sheet. My foam was a little messy, I cut the template upside-down...

I replaced all the rivets I'd removed with SS screws, and sealed the unit with loctite 5980 my favourite sealant.
Next up was the HVAC unit.
First up was cleaning the aircon evaporator, reinstalling all the foam ( i bought 10m of adhesive tape, and 5 A4 sheets. I used almost all of it!
I also made a new evaporator filter using correct spec foam.

Again replacing all rivets with stainless fixings.

And both all back together.

In goes the heater matrix, all sealed with new foam.

With the sealing panel on with new pipes. Looking very water tight!
I also cleaned all the plastics that had coolant in them so now everything should be ready to fit!
This in the end took almost all week, and I even took Thursday and Friday off work to get this done. But ready and prepped for a Saturday installation.
Joe
Edited by 1275 GT on Friday 13th October 21:15
wormus said:
You have my sympathies. Just done this on my P38 Range Rover. What started as a project to replace blend motors and heater O rings, ended up as a new matrix as well as the plastic housing was cracked and leaking.
Had to take the dash out and half of the frame, which means undoing bolts that go through the bulkhead. Of course you cannot get at anything as every bolt is hidden and not intended for maintenance. Got it done over a couple of weekends but I nearly gave up on at least one occasion. Never again!
God luck!
That sounds all to familiar, I think the only positive of the SD1 is at least the heater box is metal. Had to take the dash out and half of the frame, which means undoing bolts that go through the bulkhead. Of course you cannot get at anything as every bolt is hidden and not intended for maintenance. Got it done over a couple of weekends but I nearly gave up on at least one occasion. Never again!
God luck!
Ahh yes, whoever designed the fixings to go through the bulkhead definitely needs some kind of punishment.

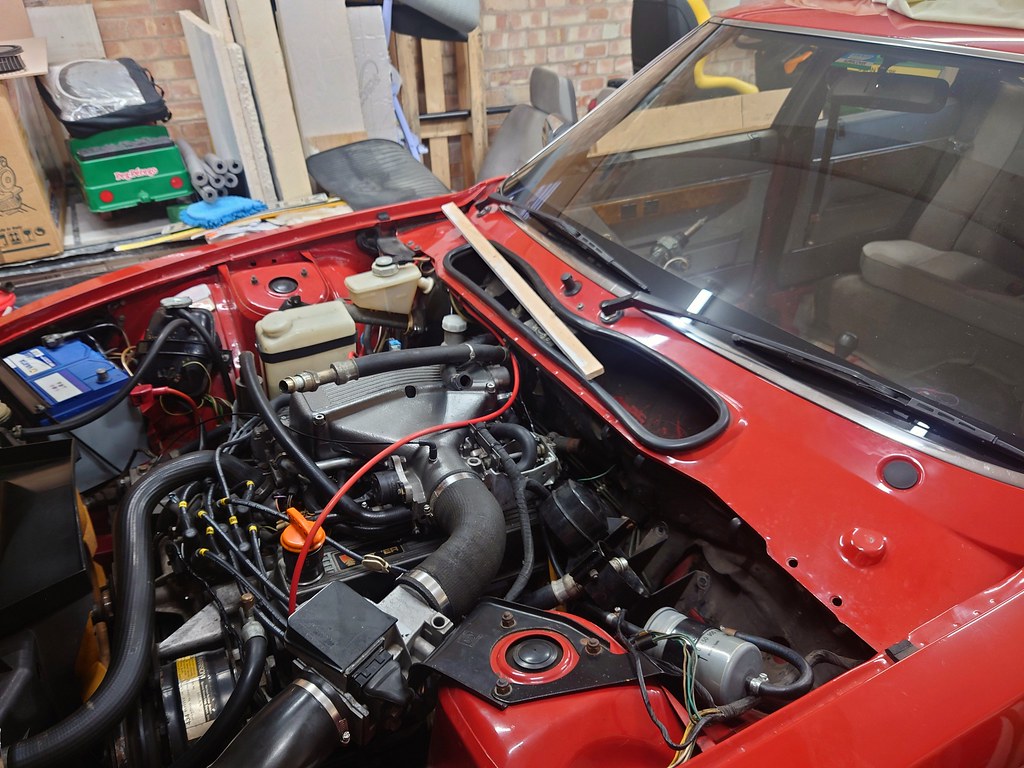
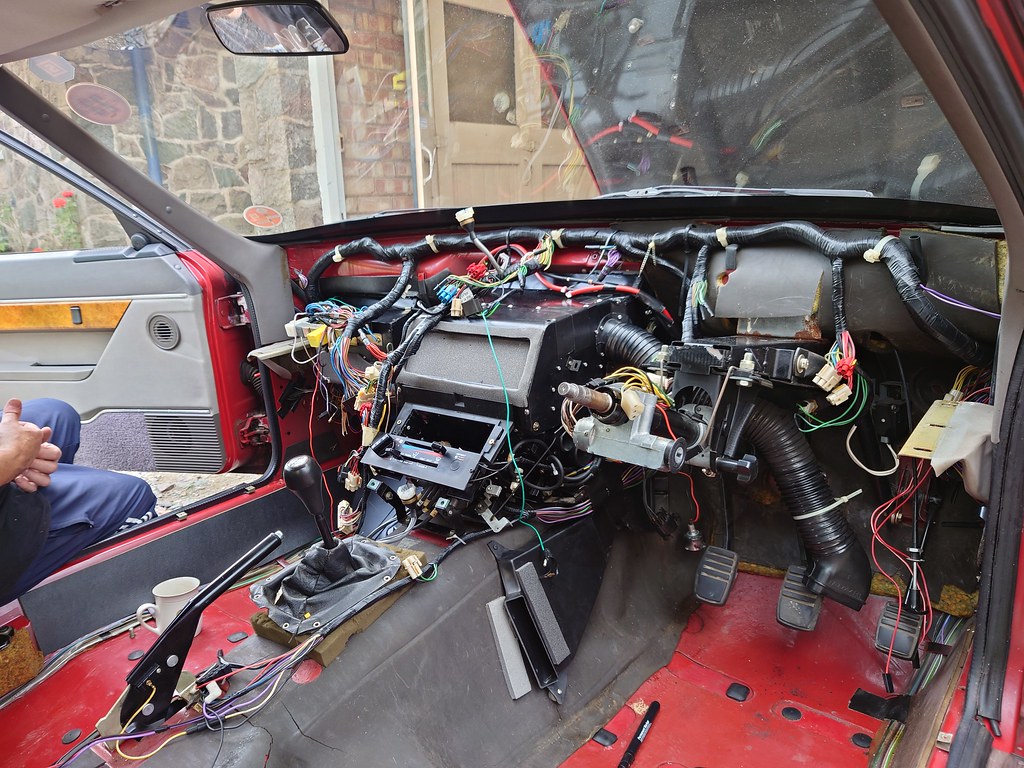
This is about as deep into a car as you can get, and honestly I was pleasantly surprised. Just look at that bulkhead!
A little paint flaking around the intake opening, so treated and painted. But no hidden corrosion or paint loss. and beautifully sealed around the windscreen. Wiring loom is unmolested, and I'm pretty sure nobodies been here before which is always nice.
On the sealing plate for the aircon pipes I found this little nugget.

It's screwed from the inside, so I'd be confident this is the first time this has seen the light of day in 38 years.

What's more curious is to me that looks like cents, so American?
I know the aircon was suppose to be American sourced but that's an interesting find.

I started the re-assembly at around 5pm Friday afternoon. I'd spent most of the day on the re-assembly of the heater boxes so not much time left to work on the car.
Getting the blower motor back in wasn't too bad, I also foamed the outside as it was originally too.
The biggest pain of that was the top bolts aren't captive, so I had to get some help to push them through and hold them while trying to get the nuts on through the bulkhead cavity.
I called it a day at 9pm on the Friday.

Bright and early Saturday I started getting the main HVAC unit in. It's a bit of a mission, it weighs quite a bit and is bulky so making sure you don't catch it on anything while straddling the transmission tunnel requires a very weird squatting motion.
I actually had the unit in at 10:30am Saturday morning, so I was optimistic at this point!
At this point I had to make sure everything was tip top. This of course looks simple but also took hours. I replaced all the aging tape, rebound bits of loom, found a grounding wiring that needed repairing, repaired and re-terminated some of the aerial wiring. And of course vacuumed all the crap that fell around the floors.
I also replaced all the vacuum lines that had gone hard in the engine bay that come through into the cabin.
Now just the task of bolting in the heater box through the bulkhead and to the transmission tunnel. Connecting the heater hoses through the bulkhead of course isn't as simple as it sounds either, I had to replace some of the heater hose, and replaced all the hose clamps with new while I was there.
I started to connect the electrical connections first to verify everything still worked, and of course remembered that my heater hadn't been working on speed 3.

This little box of magic clicked on every setting apart from that...
The fan speed controller.
It's buried under the dash so while I had one last opportunity we decided to dive deeper. At this point it was 3pm on Saturday and I really didn't have the time, but it has to be done right.

Removal and disassembly found one of those teeny pink wires had broken off from it's mount.
So while i held it with tweezers my dad soldered it back on.
We also put a dob of solder on some of the other connections that were looking a little green.
Clipping it back together and connecting it back correctly (many pictures were taken of the correct wiring order) yielded a satisfactory click and working fan on all speeds.
At this point it was time for the dash to go in.
Now this too both of us, and all hands to guide the wiring harness through the hole in the back of the dash, careful not to trap any wiring.
So you just get the result!

Dash in at 4:40pm.
Getting the dash all connected in, and all the ducting under the dash took some time. I also re-installed the column switches.
I'd actually bought the car with a snapped column pinch ring, so the stalks moved. I'd replaced it with one out of my other Vitesse.
But when doing the bulkhead repair in 2019 when the engine was out I had to remove it, and you guessed it snapped that one too when tightening it.
Luckily 2 weeks ago I'd won a good used stalk set on ebay, with a description of good condition, bit of movement in the stalk. The slip ring was in perfect condition though. Turns out the stalk had snapped one of it's locating lugs.
Again my dad came to the rescue and disassembled both and making one perfect indicator assembly from the parts.
6:30pm.

Final vacuum of the floors and the carpet can go in! This again was cleaned by my dad in preparation of the refit. So looks brilliant.
I also got the coolant system sorted, and bled the entire system. This is a little tricky on the SD1, taking a few goes, but comes good in the end. I can also report beautifully leak free in the cabin.

8:24pm.

I'd committed at this point so the car was outside so we could both get access.

The seats went back in at 9:07pm, and after some last minute tinkering we called it finished at 10pm.
Everything went back exactly as I wanted, but it wasn't half a slog of a few days to get to that point!
At this point I treated myself to a well earned meal, and eventually set off for home at 11:30pm.

Heater blowing beautifully hot, and leak free and everything working as it should.
As previously mentioned, and incredibly annoyingly my low speed shunting has magically reappeared...
So 2 steps forward, one back...
Had a very uneventful drive home, and hit my bed just after midnight.
Just intime to get up at 7:30 for a photoshoot!
Joe
bolidemichael said:
Absolutely excellent work Joe and Father Joe! What's the reference to the 'other' Vitesse, I don't recall there being another hanging around -- is it a donor car?
Thankyou very much!There is a second Vitesse hiding away that will eventually also get restored. Or at least that's the plan.
I actually bought both on the same day and it's even background of one of the pics on my second post on this thread.

But that will of course get it's own thread when the time is right, currently I just have it so every time someone asks if BCK is a twin plenum I can say no, but I've got one at home.
KelvinatorNZ said:
I absolutely do not envy you for doing that job! I'd heard it was a horrible task, and that pretty well confirms it. It also shows how insanely complex the AC heater system is too, the non-AC heater box and controls are comparatively basic; all cable and lever controlled.
Its a job well done, of course. Looks better than new, and will last many many years now.
Yeah I'd also been warned of how bad it was, and to be honest the disassembly wasn't that bad, but dealing with the aftermath of a leaking matrix was definitely the worst bit. Its a job well done, of course. Looks better than new, and will last many many years now.
The difference between the AC and non-AC cars is ridiculous! The vacuum control is so unnecessary too. It's also amazing how little documentation there is documenting the differences, and annoyingly how sparse the parts are to find.
But it's all savable, and lucky I now have a source for the matrixes.
Thankyou very much, yes not a job I want to be doing again in a hurry!
clubracing said:
Wow, what a mammoth task! Very impressive work.
Are the AFM on these the clock spring flapper type? Could the shunting be caused by the spring tension having relaxed with age, producing erratic fueling in low throttle/low air flow situations?
Could the new engine mounts have improved the situation by reducing jolting of the engine, which was in turn jolting the AFM and causing the flap to open and close because of the slack in the spring, thereby improving the shunting but not eliminating it? Probably something you'd have already looked at, but just a thought.
Thankyou! It definitely was a lot more than I was expecting. Are the AFM on these the clock spring flapper type? Could the shunting be caused by the spring tension having relaxed with age, producing erratic fueling in low throttle/low air flow situations?
Could the new engine mounts have improved the situation by reducing jolting of the engine, which was in turn jolting the AFM and causing the flap to open and close because of the slack in the spring, thereby improving the shunting but not eliminating it? Probably something you'd have already looked at, but just a thought.
The AFM's are "flapper" type and I think you're onto something with that. It was something I planned on investigating until I thought I solved it with the engine mounts, so it's back to no.1 priority. Apparently it can also be exacerbated by a hotter cam, which I also have.
After reading your thoughts I went and grabbed my 3 spare AFM's I have stashed and checked all of them, 2 have very light springs and you can induce a bounce, one is quite a bit tighter.
Annoyingly ATC has increased their price for refurbishment of the units to £360 now, and there's also a NOS one listed on ebay for offers over £800!
Might have to bite the bullet, even if it's just to rule it out.
I have one "good" second hand AFM that I can swap in and try that. I also want to stick a GoPro just upwind of it, and see if I can prove the theory with a video! Job for the weekend I reckon.
Mr Tidy said:
Wow, that turned into a bit of a marathon - congratulations on getting it all back together!
It really did, especially on the Saturday. I really didn't think it was going to go back together in time.Spinakerr said:
Great stuff! Lovely pics too, the last one for the late night rumble home is great. Who needs a photoshoot?
I've been trying to read this on my commute and the images wouldnt load - there was no way I was reading this without them!
I know the heater is great looking wiht the Bilt Hamber and new foam, but the super-clean carpet must be fantastic.
Oh that drive home was so satisfying, especially with a blasting hot heater. I took the long way home despite it being so late! I've been trying to read this on my commute and the images wouldnt load - there was no way I was reading this without them!
I know the heater is great looking wiht the Bilt Hamber and new foam, but the super-clean carpet must be fantastic.
Oh the carpets come up so nicely. If anything it was a good excuse to get them nice and clean after 5 years of use since I last did it!

You especially would have loved the photoshoot, it was full of our fellow Rover/MG brethren.

I spent most of this weekend doing some "testing" which is just me driving around both loving the Vitesse and being frustrated at it's low speed manners, and of course enjoying the lovely warm heater.
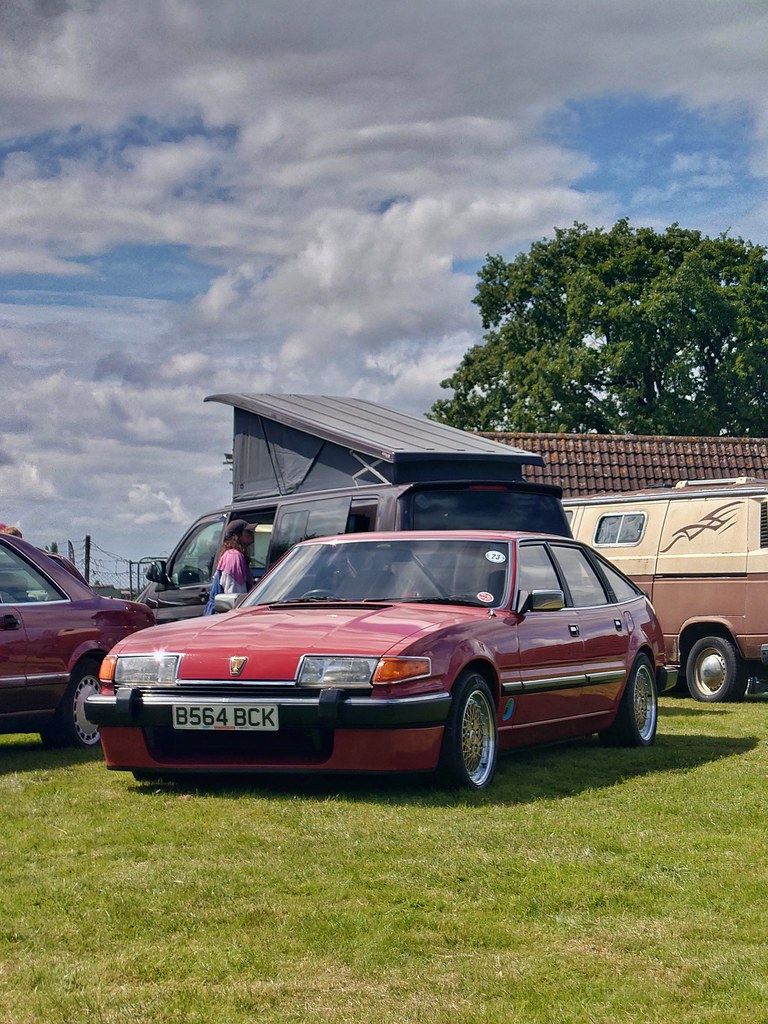
I also chucked the turbofans on for a laugh and made the most of golden hour, I'm far from the best photographer, but I'm damn pleased with how this shot turned out.
Enjoy!

Joe
Edited by 1275 GT on Wednesday 18th October 22:15
So it's MOT season yet again, so a few service items for the Vitesse were due.
Mainly the wiper blades actually.
I also chucked in a new air filter and fuel filter.

I ordered some fancy fronts, and just an insert for the rear, as I couldn't find a decent "pin" type blade in a big enough size.

Quite enjoying the Michelin wiper blades...

The Mann fuel filter definitely isn't as aesthetically pleasing as the Bosch one I had on, so I don't think that'll be staying...

But almost ready for another years inspection.
So I've been driving myself a little made on my pursuit of getting the Vitesse to run perfectly.
I've swapped between a few, but I've never really dug into the Air Flow Meter...
I have a few spare including the one I put down as the reason for the death of the original engine...

It's really not that complicated, it's just a mechanical sweeper that moves on a carbon track which alters the output to the ecu. There's also a temperature sensor, and the initial feedback to start the fuel pump. But if the ecu doesn't see the air flow it can't alter the open timing for the injectors.
The screw on the top that "adjusts" the AFM is just an air bypass bleed that minutely adjusts the position. The major adjustment is the clock spring, the looser the spring the easier it moves, i.e the more airflow so the richer the engine runs. Tighter leaner.
All the outputs are analogue, so can be checked with a multimeter.
I checked through my spare one, and compared it to the one on the car. the spring tension was a little different, but without feedback adjusting it would be complete guess work. Annoying I've been locked out of my Gas analyser, it needs calibrating and is now useless...
But I did want to check my function with what I have available. I'd also suspected that maybe a AFM flutter could be causing my shunting, and clubracing had again prompted me to check again.
https://youtu.be/IjoZdSXrkQg?feature=shared
So whipping off the air filter and a gopro infront of it I could check. I tried at all driving conditions, and even when shunting it stays really steady.
I also did a few full throttle runs, and I'm not entirely smooth at the top end, which isn't good either...
Sounds again like high RPM breakup, but apart from the actual distributor I've been through my ignition system.
If it's fuel related then lets see.
So my next brilliant plan is to bring some data to this problem.
I did look at portable gas analysers and soon gave up when I saw the price! So a little standalone wideband AFM gauge is just what I need.
My AEM Infinity wideband arrived today

I don't see anywhere to mount it in the SD1 cockpit, (happy for suggestions!) I'm not cutting or removing anything from my dash, so I'm thinking either in the drivers glove box, or a temporary installation just for tuning.
I plan to weld bosses to the bottom of both downpipes and go from there.
So that's a job for the next few days I reckon...
Joe
Mainly the wiper blades actually.
I also chucked in a new air filter and fuel filter.
I ordered some fancy fronts, and just an insert for the rear, as I couldn't find a decent "pin" type blade in a big enough size.
Quite enjoying the Michelin wiper blades...
The Mann fuel filter definitely isn't as aesthetically pleasing as the Bosch one I had on, so I don't think that'll be staying...
But almost ready for another years inspection.
So I've been driving myself a little made on my pursuit of getting the Vitesse to run perfectly.
I've swapped between a few, but I've never really dug into the Air Flow Meter...
I have a few spare including the one I put down as the reason for the death of the original engine...
It's really not that complicated, it's just a mechanical sweeper that moves on a carbon track which alters the output to the ecu. There's also a temperature sensor, and the initial feedback to start the fuel pump. But if the ecu doesn't see the air flow it can't alter the open timing for the injectors.
The screw on the top that "adjusts" the AFM is just an air bypass bleed that minutely adjusts the position. The major adjustment is the clock spring, the looser the spring the easier it moves, i.e the more airflow so the richer the engine runs. Tighter leaner.
All the outputs are analogue, so can be checked with a multimeter.
I checked through my spare one, and compared it to the one on the car. the spring tension was a little different, but without feedback adjusting it would be complete guess work. Annoying I've been locked out of my Gas analyser, it needs calibrating and is now useless...
But I did want to check my function with what I have available. I'd also suspected that maybe a AFM flutter could be causing my shunting, and clubracing had again prompted me to check again.
https://youtu.be/IjoZdSXrkQg?feature=shared
So whipping off the air filter and a gopro infront of it I could check. I tried at all driving conditions, and even when shunting it stays really steady.
I also did a few full throttle runs, and I'm not entirely smooth at the top end, which isn't good either...
Sounds again like high RPM breakup, but apart from the actual distributor I've been through my ignition system.
If it's fuel related then lets see.
So my next brilliant plan is to bring some data to this problem.
I did look at portable gas analysers and soon gave up when I saw the price! So a little standalone wideband AFM gauge is just what I need.
My AEM Infinity wideband arrived today
I don't see anywhere to mount it in the SD1 cockpit, (happy for suggestions!) I'm not cutting or removing anything from my dash, so I'm thinking either in the drivers glove box, or a temporary installation just for tuning.
I plan to weld bosses to the bottom of both downpipes and go from there.
So that's a job for the next few days I reckon...
Joe
Edited by 1275 GT on Tuesday 24th October 21:43
Gassing Station | Readers' Cars | Top of Page | What's New | My Stuff