Mercedes SL320 R129 - Part 2
Discussion


r129sl - Your car is cutting power at 144!!!! Jings, that sounds fast. For two reasons that will not happen to me.
I have the economy model so it won't get to 144 and I am quite a sedate driver. I enjoy a bit of brisk driving but I am usually pretty close to the speed limit and as I am only driving in the UK, that means 70 ....ish.
Your warning lights issue does sound odd. I would love to know what causes that and what the solution would be.
Deefor62 - Thanks for the info on the N10. The cover on mine appears to be held on with 6 allen bolts and it looks like I would need to remove some of the scuttle plastics to get to it. The only problem at the moment is the heated rear window not working so I will leave it for now.
I have not decided if I will fit the hard top over winter. The car is garaged but will come out for some of the nicer days where the soft top will probably be down anyway.
So, to the update -
I ordered the TPS and the strut tops from Mercedes. Just as I was arriving at the dealership there was a late model black R129 leaving. It's always nice to see another one out and about.
The parts man was summoned from the basement where they are kept for the odd occasion a punter wants to buy parts.
The first strut top was a bit of a struggle but the second was a doddle. Easy when you know how.
When I changed the front lower arms earlier this year I was left with a grating noise when turning. Quite irritating.
There is a very small gap between the ball joint and the brake disc on my car which leaves very little room for the back plate / dust shield. I had been unable to get it just right.
So, while I had the wheels off I made a more concerted effort and with a bit of careful twisting managed to sort it.
The TPS was an easy changeover.
Well, what an improvement!
I can't put my finger on it but I think the combination of the new strut tops, sorting the grating when turning and the smoother throttle action have combined to make the car feel much better.
I have had several good runs in it with the temp gauge down at 6.5c with the roof down. It does get a bit cold when travelling quickly.
Still no sign of the BAS/ESP light and I haven't noticed the gauges dropping since the day it went to the Indy specialist.
Cured! (ok, that might be a bit optimistic)
I'm not looking for problems so I will leave that problem alone.
If it comes back I might look into aftermarket replacement ABS rings for the rear.
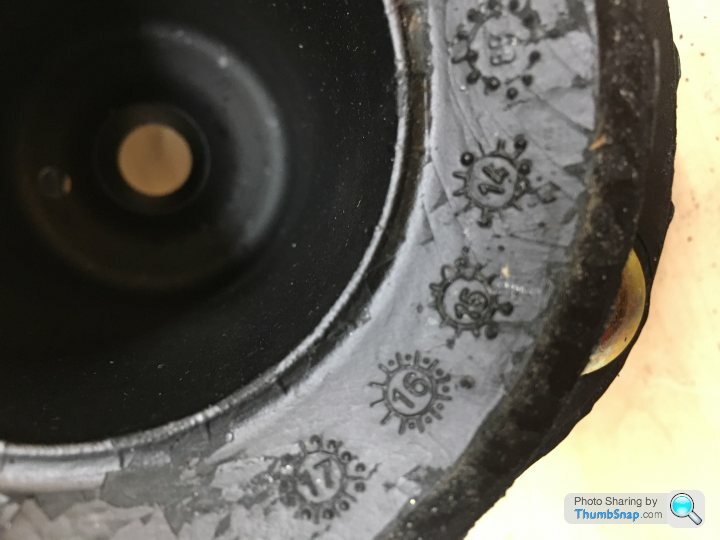
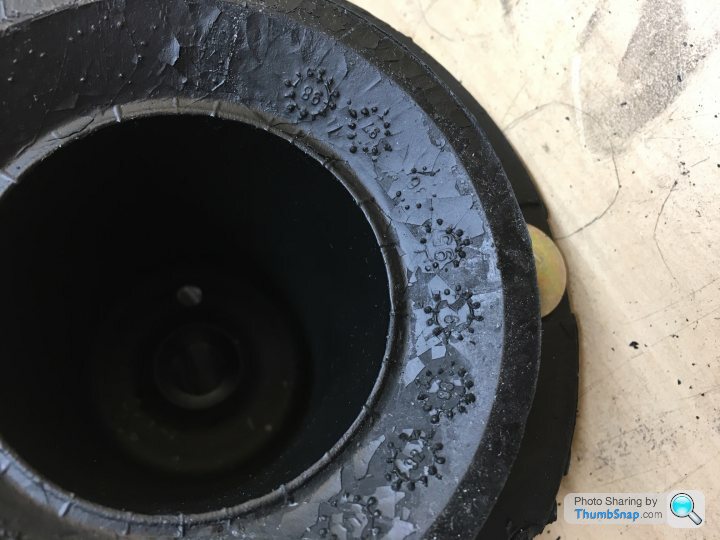
I had a good look at the the old and new strut tops. They have a production date stamp in the mould and looking at them I am fairly confident that my new ones which were made in 2017 came from the same mould as my original 1999 ones and that were used all the way from 1989. This is based on the positions of the stamps which are slightly irregular and match.
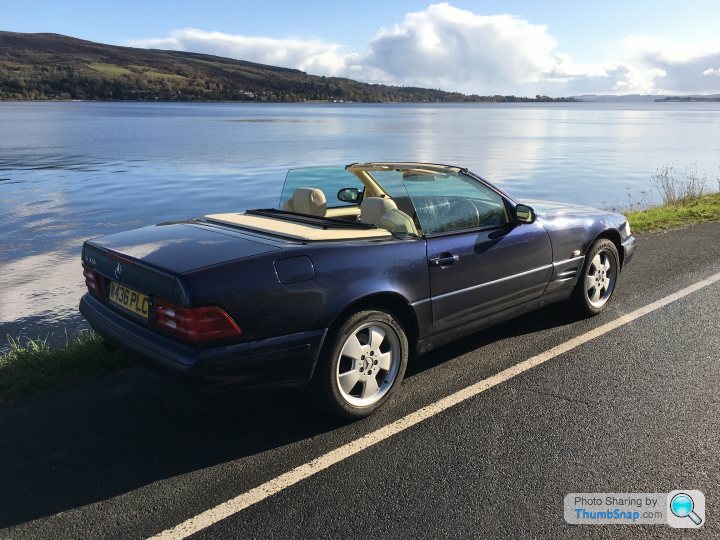
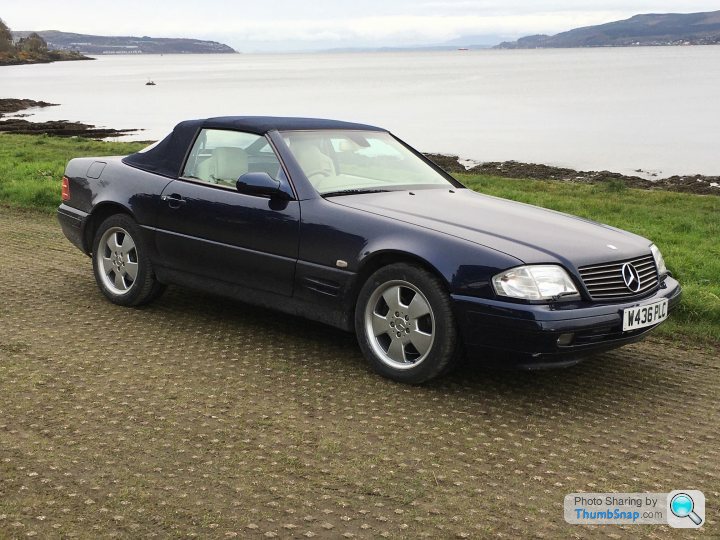
Picture taken near the nuclear sub base.
I ordered new tyres from Oponeo and was surprised to find that they were shipped via DPD all the way from Belgium.
The wheels are booked in for a refurb on Wednesday. They didn't really need done, but there are some minor corrosion and scuff marks and two of them lose pressure so I am hoping that refurb and new tyres will sort all that.
And, I like shiny wheels!
It's probably an age thing, but I do not get the current fashion for black alloys.
Having been surprised by the difference the new strut tops made, I have also decided to replace the rear shock absorbers. Apart from being a bit corroded they seem fine but as they are nearly 20 years old, have done 115k miles and all the other rear arms and bushes are new......
The new ones are in the post from Germany.
When I was coming to the end of the rear subframe overhaul I noticed that a bit of the underseal on the seam behind the offside rear wheel, under the battery was a bit crunchy when I pushed it.
At that point I did not want to investigate further as I had already packed the welder and paint stuff away.
An optimist might think that it will only be surface rust but past experience leads me to expect it to be worse than it looks.
While the wheels are off I will sort it out.
I have the economy model so it won't get to 144 and I am quite a sedate driver. I enjoy a bit of brisk driving but I am usually pretty close to the speed limit and as I am only driving in the UK, that means 70 ....ish.
Your warning lights issue does sound odd. I would love to know what causes that and what the solution would be.
Deefor62 - Thanks for the info on the N10. The cover on mine appears to be held on with 6 allen bolts and it looks like I would need to remove some of the scuttle plastics to get to it. The only problem at the moment is the heated rear window not working so I will leave it for now.
I have not decided if I will fit the hard top over winter. The car is garaged but will come out for some of the nicer days where the soft top will probably be down anyway.
So, to the update -
I ordered the TPS and the strut tops from Mercedes. Just as I was arriving at the dealership there was a late model black R129 leaving. It's always nice to see another one out and about.
The parts man was summoned from the basement where they are kept for the odd occasion a punter wants to buy parts.
The first strut top was a bit of a struggle but the second was a doddle. Easy when you know how.
When I changed the front lower arms earlier this year I was left with a grating noise when turning. Quite irritating.
There is a very small gap between the ball joint and the brake disc on my car which leaves very little room for the back plate / dust shield. I had been unable to get it just right.
So, while I had the wheels off I made a more concerted effort and with a bit of careful twisting managed to sort it.
The TPS was an easy changeover.
Well, what an improvement!
I can't put my finger on it but I think the combination of the new strut tops, sorting the grating when turning and the smoother throttle action have combined to make the car feel much better.
I have had several good runs in it with the temp gauge down at 6.5c with the roof down. It does get a bit cold when travelling quickly.
Still no sign of the BAS/ESP light and I haven't noticed the gauges dropping since the day it went to the Indy specialist.
Cured! (ok, that might be a bit optimistic)
I'm not looking for problems so I will leave that problem alone.
If it comes back I might look into aftermarket replacement ABS rings for the rear.
I had a good look at the the old and new strut tops. They have a production date stamp in the mould and looking at them I am fairly confident that my new ones which were made in 2017 came from the same mould as my original 1999 ones and that were used all the way from 1989. This is based on the positions of the stamps which are slightly irregular and match.
Picture taken near the nuclear sub base.
I ordered new tyres from Oponeo and was surprised to find that they were shipped via DPD all the way from Belgium.
The wheels are booked in for a refurb on Wednesday. They didn't really need done, but there are some minor corrosion and scuff marks and two of them lose pressure so I am hoping that refurb and new tyres will sort all that.
And, I like shiny wheels!
It's probably an age thing, but I do not get the current fashion for black alloys.
Having been surprised by the difference the new strut tops made, I have also decided to replace the rear shock absorbers. Apart from being a bit corroded they seem fine but as they are nearly 20 years old, have done 115k miles and all the other rear arms and bushes are new......
The new ones are in the post from Germany.
When I was coming to the end of the rear subframe overhaul I noticed that a bit of the underseal on the seam behind the offside rear wheel, under the battery was a bit crunchy when I pushed it.
At that point I did not want to investigate further as I had already packed the welder and paint stuff away.
An optimist might think that it will only be surface rust but past experience leads me to expect it to be worse than it looks.
While the wheels are off I will sort it out.
Edited by Yogioes on Monday 20th April 16:43
So, carrying on from my last update -
Time to get these fitted

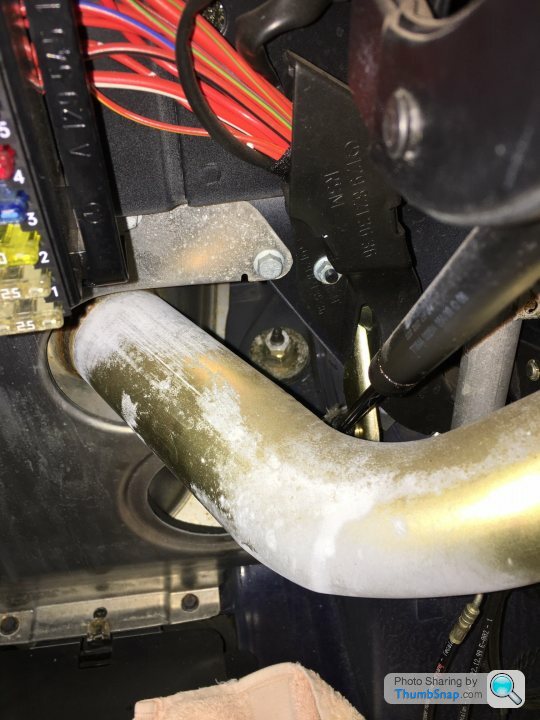
A fairly straight forward job apart from the awkward access to the top nuts.
The spanner needs to go through the 3" hole that is just below the fuel filler pipe. It is doable but I could only get 1/12 of a turn at a time on the spanner so some patience was required.
I have occasionally considered buying ratchet ring spanners for just such situations but it seems a bit extravagant for the few times I actually would use them.
And job done

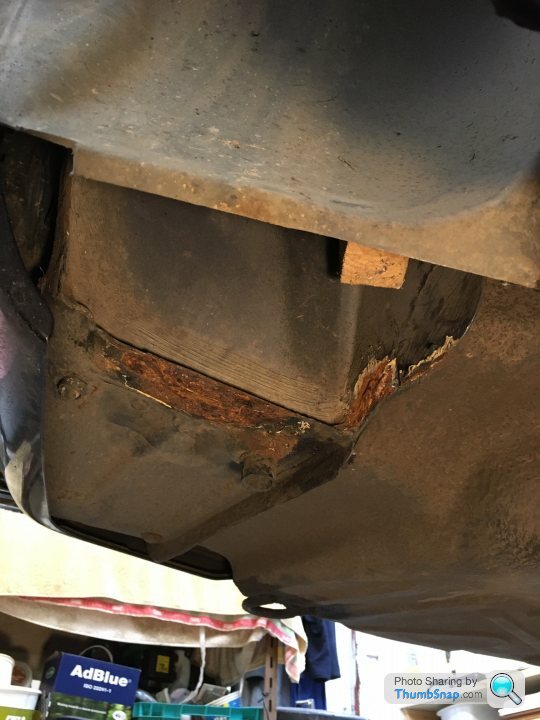
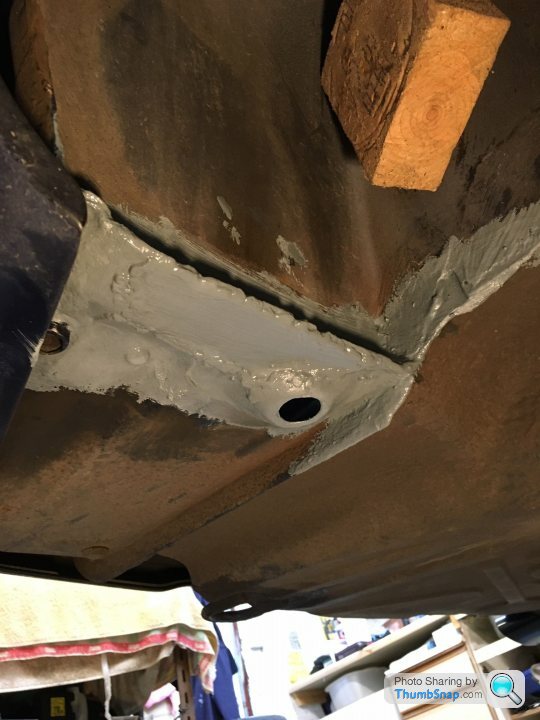
Next it was onto the crusty section below the battery, just behind the rear wheel.
This is what it looked like on initial inspection.

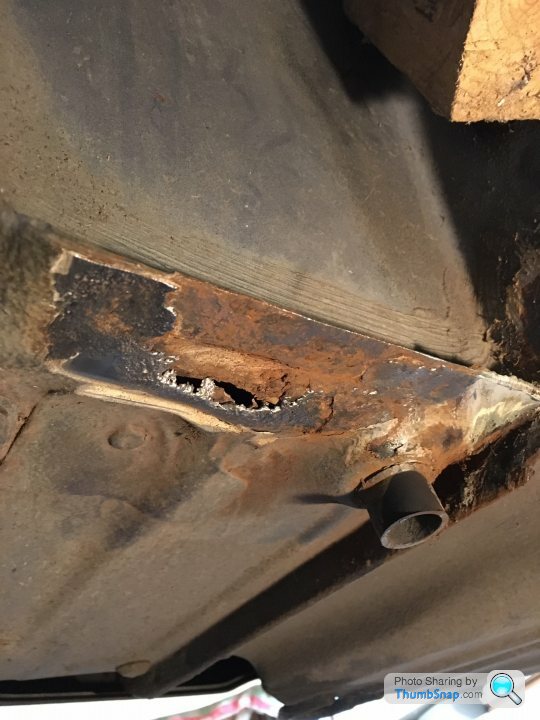
I scraped away the underseal and loose rust with a screwdriver and it seemed quite solid. For a moment I thought I might get away with some wire brushing and rust treatment.
However it did not look so good after a going over with the wire brush in the angle grinder.
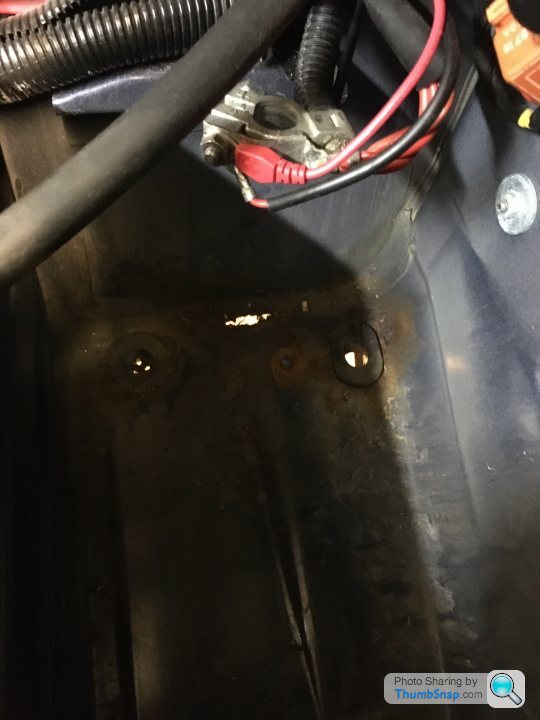
So I removed the battery and the battery tray. Strangely, the two bolts and two nuts that hold in the tray were all loose. Odd.
The rust was very localised.
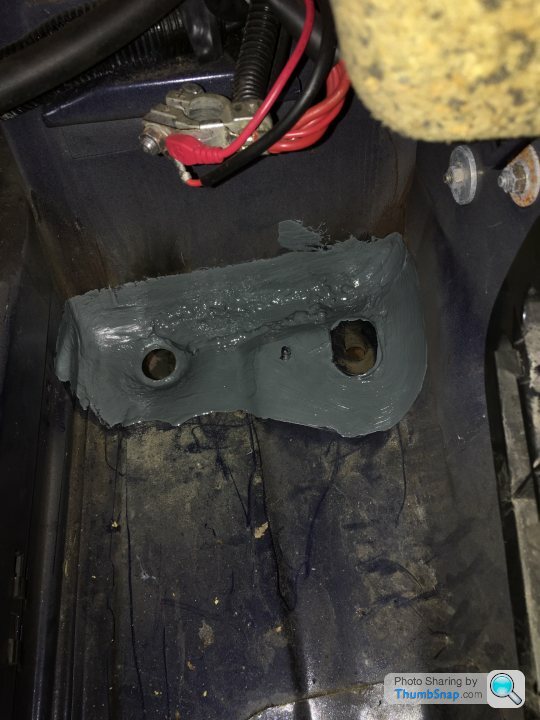
I cut out a rectangle with the grinder and shaped a plate to fit. Proceeded with my usual attempt at welding, got more scars on my arm from spatter while welding upside down.
Not pretty, but plenty strong enough.
I treated it with Hydrate 80 and painted it with Electrox zinc paint followed by a coating of Dynax UB on the underside.
This is it with the Electrox applied.
While it was jacked up I took the opportunity to get the wheels refurbished and the new tyres fitted.
The finish on the wheels is good but there are a few inclusions in the paint that are a bit annoying.
I fitted a new set of centre caps which were £9 off ebay. They are ok, but you get what you pay for.
I will give the originals and clean up and may refit them.
The sum total of all the changes made have resulted in the car feeling more composed on the road, particularly at speed.
Just coming up to my first year of ownership so it was time for the MoT which it passed. The guys there were quite complimentary of the condition which was nice to hear.
I have used the same local garage for Mot's for about 30 years although I think it has had about four owners over that time.
I've done about 3,200 miles in the year and my spreadsheet shows a little over £3,000 spent on it, nearly all of which is just parts with the only purchased labour being 2 hours at the local Indy and the wheel refurb.
Time to get these fitted
A fairly straight forward job apart from the awkward access to the top nuts.
The spanner needs to go through the 3" hole that is just below the fuel filler pipe. It is doable but I could only get 1/12 of a turn at a time on the spanner so some patience was required.
I have occasionally considered buying ratchet ring spanners for just such situations but it seems a bit extravagant for the few times I actually would use them.
And job done
Next it was onto the crusty section below the battery, just behind the rear wheel.
This is what it looked like on initial inspection.
I scraped away the underseal and loose rust with a screwdriver and it seemed quite solid. For a moment I thought I might get away with some wire brushing and rust treatment.
However it did not look so good after a going over with the wire brush in the angle grinder.
So I removed the battery and the battery tray. Strangely, the two bolts and two nuts that hold in the tray were all loose. Odd.
The rust was very localised.
I cut out a rectangle with the grinder and shaped a plate to fit. Proceeded with my usual attempt at welding, got more scars on my arm from spatter while welding upside down.
Not pretty, but plenty strong enough.
I treated it with Hydrate 80 and painted it with Electrox zinc paint followed by a coating of Dynax UB on the underside.
This is it with the Electrox applied.
While it was jacked up I took the opportunity to get the wheels refurbished and the new tyres fitted.
The finish on the wheels is good but there are a few inclusions in the paint that are a bit annoying.
I fitted a new set of centre caps which were £9 off ebay. They are ok, but you get what you pay for.
I will give the originals and clean up and may refit them.
The sum total of all the changes made have resulted in the car feeling more composed on the road, particularly at speed.
Just coming up to my first year of ownership so it was time for the MoT which it passed. The guys there were quite complimentary of the condition which was nice to hear.
I have used the same local garage for Mot's for about 30 years although I think it has had about four owners over that time.
I've done about 3,200 miles in the year and my spreadsheet shows a little over £3,000 spent on it, nearly all of which is just parts with the only purchased labour being 2 hours at the local Indy and the wheel refurb.

Good work, you are saving that car. Most owners would be oblivious.
Noob question but when you reconnect the battery you have to re-sync both windows and turn steering wheel lock to lock, right? Anything else that needs calibrating too? I may lift out my battery and inspect underneath. Cheers
Noob question but when you reconnect the battery you have to re-sync both windows and turn steering wheel lock to lock, right? Anything else that needs calibrating too? I may lift out my battery and inspect underneath. Cheers
Hi J
500 miles isn’t much but time passes and there’s lots to do, especially with a young family.
I haven’t decided what I’ll do about the paintwork and bodywork yet. Maybe next year.
As it is, I’m not too precious about using it.
Hereward
When I opened the doors for the first time after reconnecting the battery the windows drop to half height. It’s just a case of winding them back to the top and holding the switch for a few seconds to let the car know where the top position is.
When I started it the bas/esp and abs lights were on. I drove to the bottom of the drive, turned the steering full left and right and drove off. The light immediately went off.
I don’t know if it was the steering or the speed that reset the lights but all good.
BMW bikes are like that every time it’s started. The brake warning lights flash until you get to about 3mph.
The only other issue was needing the radio code.
However, I would not have been able to see or feel that rust from below the battery as it was mostly under the forward facing edge of the wheel well panel and was under the seam sealer.
Probably easier to find from below, just behind the plastic wheel arch liner.
Edited by Yogioes on Tuesday 19th November 17:49
It has been a while since I updated this.
Convertibles and winter don't mix well and I never did get round to fitting the hardtop.
It did get the occasional run every few weeks and I even had the roof down a couple of times.
With the current lockdown it is unlikely to see a lot of use over the next few months although I did use it today for my weekly run to deliver the messages (I know, that's a strange term for some) to my housebound mother in law.
It seemed sensible to leave the roof up.
I visited the local trimmers a few weeks ago to book it in for new soft top windows but that is now on hold.
I had previously attempted a repair to the stitching which was ok but proved that a full DIY replacement by me was unlikely to turn out well.
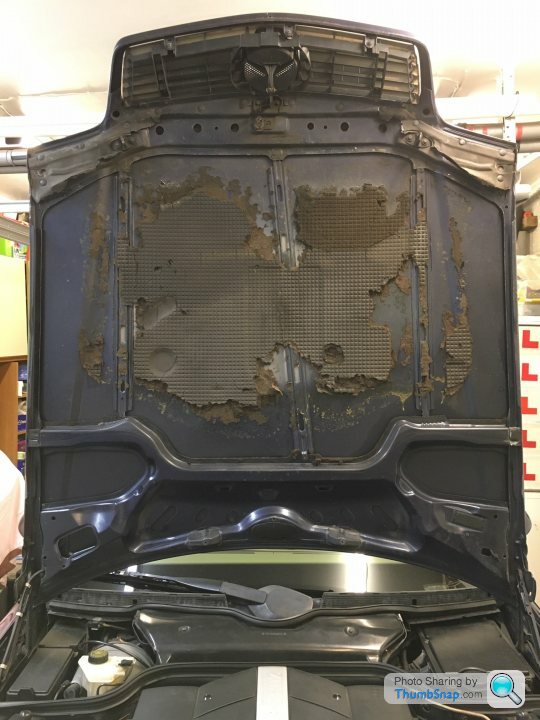
One of the other outstanding Jobs was the bonnet insulation pad.
I don't think it matters that much but the old one looked terrible so I decided it was time to have a go.
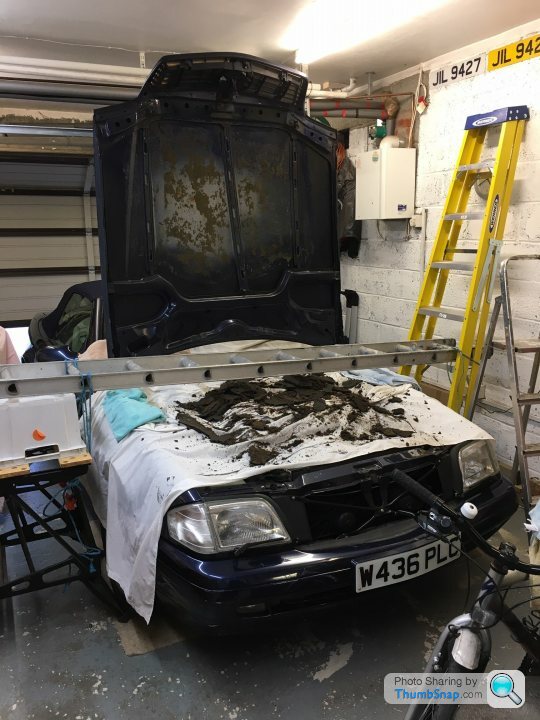
I had an old section of aluminium ladder that the extension builders left behind 20 years ago. I supported it at both ends and had a good bounce up and down on it to ensure it wouldn't bend too much or break!
It was a bit too long so I cut it down to 2.8m.
While finishing that off the postie arrived with the new pad, clips and adhesive. Just in Time.
I stripped the sheets off the kids beds to catch all the rubbish and started scraping off what was left of the old pad.
A horrible task.
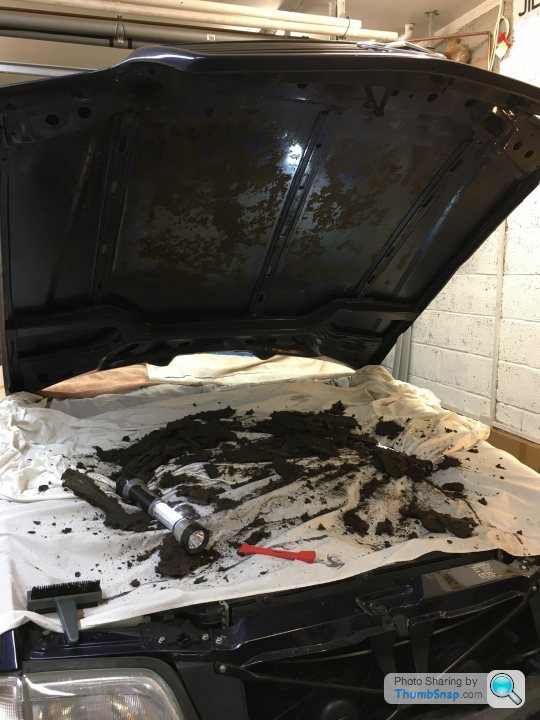
Cleaned off as good as I was going to get it.
I lashed up my working platform and showed it to my pals Heath and Robinson. They said it looked okay to them.
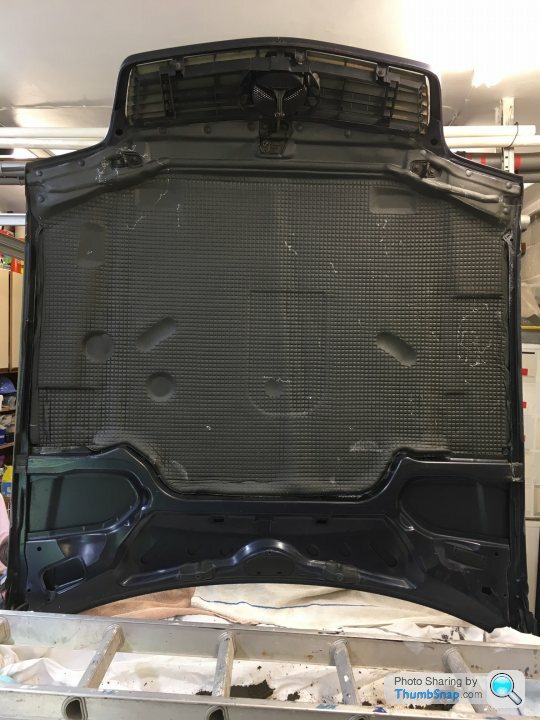
I attached the pad with the pins at the top first. It was a bit awkward spraying the adhesive on both the bonnet and the pad and getting it all in position to tuck the edges in.
In hindsight, I can see that MB did not put as much adhesive on, especially around the edges. I think that would make it easier to tuck the edges into the frame.
Hey ho, it's done now.
I'm glad I wasn't getting paid to do it as the customer might have grounds for complaint!
Still it looks better despite the odd bit of adhesive overspray. It comes out the can a bit like spray string!
Convertibles and winter don't mix well and I never did get round to fitting the hardtop.
It did get the occasional run every few weeks and I even had the roof down a couple of times.
With the current lockdown it is unlikely to see a lot of use over the next few months although I did use it today for my weekly run to deliver the messages (I know, that's a strange term for some) to my housebound mother in law.
It seemed sensible to leave the roof up.
I visited the local trimmers a few weeks ago to book it in for new soft top windows but that is now on hold.
I had previously attempted a repair to the stitching which was ok but proved that a full DIY replacement by me was unlikely to turn out well.
One of the other outstanding Jobs was the bonnet insulation pad.
I don't think it matters that much but the old one looked terrible so I decided it was time to have a go.
I had an old section of aluminium ladder that the extension builders left behind 20 years ago. I supported it at both ends and had a good bounce up and down on it to ensure it wouldn't bend too much or break!
It was a bit too long so I cut it down to 2.8m.
While finishing that off the postie arrived with the new pad, clips and adhesive. Just in Time.
I stripped the sheets off the kids beds to catch all the rubbish and started scraping off what was left of the old pad.
A horrible task.
Cleaned off as good as I was going to get it.
I lashed up my working platform and showed it to my pals Heath and Robinson. They said it looked okay to them.
I attached the pad with the pins at the top first. It was a bit awkward spraying the adhesive on both the bonnet and the pad and getting it all in position to tuck the edges in.
In hindsight, I can see that MB did not put as much adhesive on, especially around the edges. I think that would make it easier to tuck the edges into the frame.
Hey ho, it's done now.
I'm glad I wasn't getting paid to do it as the customer might have grounds for complaint!
Still it looks better despite the odd bit of adhesive overspray. It comes out the can a bit like spray string!

Well done on finishing the job. I did it thinking it would be a I'll just do that quickly whilst I've got a moment job. Although a lot of the insulation was falling off the remainder was quite stubborn and took a fair while to remove. Not so much a satisfying job when finished, more relief that a 'simple' job was finished. I used Loctite mastic adhesive to attach it.
jke11y said:
Excellent job; in this picture just right of centre in the pad you can see the indent of the upturned oil filler cap where i caused by some idiot shutting the bonnet with it sitting on top of the rocker cover.
Thank you J for that wee bit of info. It might seem odd to some, but having that little back story appeals to me.It reminds me of the dent I put in the side of my dads Cortina boot, I was rather carelessly transporting and engine for my escort and went round a corner too fast for the unsecured load.
He was not happy about that.
Nor was he happy about the rip in the back of the drivers seat caused by the hired engine crane.
It's no wonder he was very reluctant to lend me his car.
I have been putting off the next job on the list.
Bodywork.
I prefer the mechanical repairs. Bodywork takes a lot of time, patience and skill.
Well, I have the time as lockdown means there are fewer options to be out and about although I should probably have started three weeks ago!
The patience and skill part ....... Questionable.
I don't feel I can justify a professional full respray which I think would be 2 - 3 thousand.
Perhaps if it was a car I planned to keep forever it would make sense but I have never kept a car that long.
I wish I was one of those people that had owned a car for 30 years but it's never happened.
So, I am building up to doing it myself.
There are some minor scratches in the paintwork but I am not too bothered by them.
It's not too severe, more about preservation and stopping the rot although past experience tells me it will be worse than it looks.
The paintwork is not original as there is evidence of work done in several areas. Certainly the front wings and possibly all the sides as I cannot see any difference in the colour.
I am hoping to keep most of my paintwork under the arches but there are some areas where that will not be possible so it may end up with some poorly blended bits.
The problem areas are .....
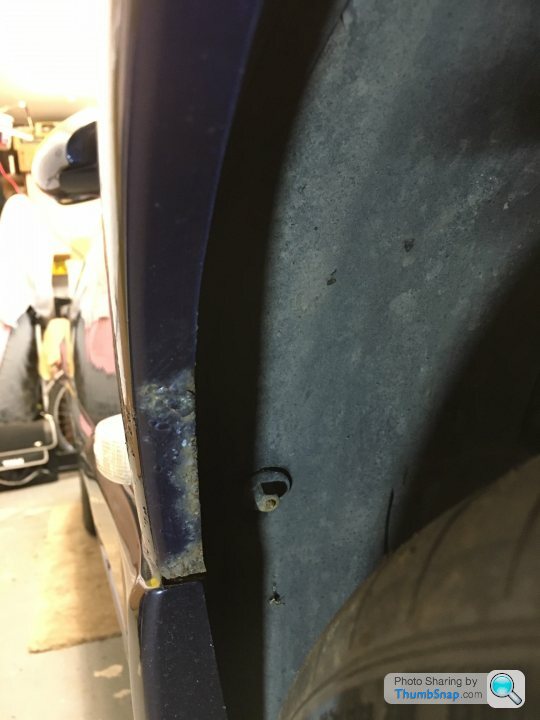
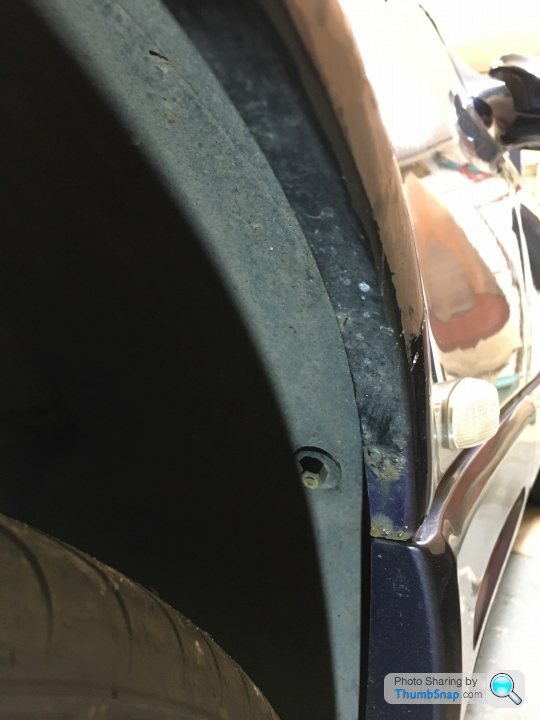
Usual spot on the front wing. I have not looked behind this so this may turn out to be full blown hole!
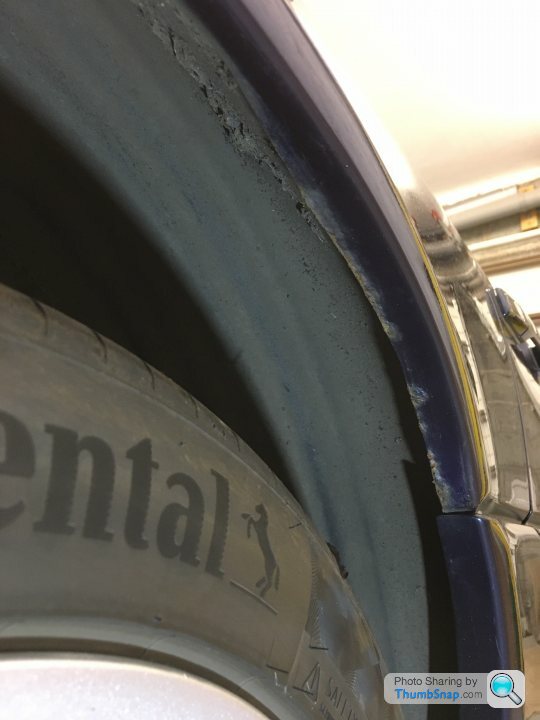
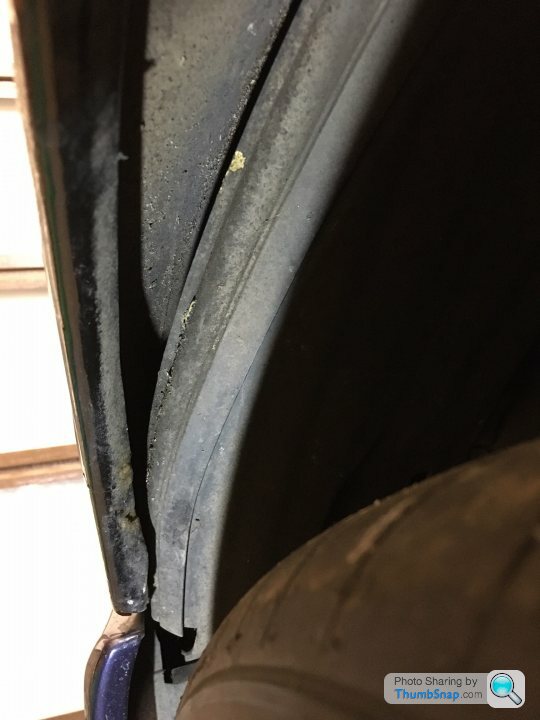
Front edge of the RH front wheel arch
Rear edge of the RH front wheel arch
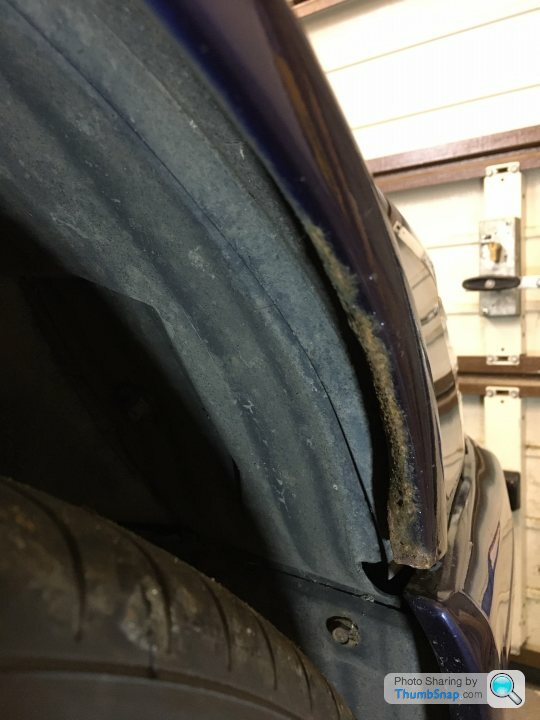
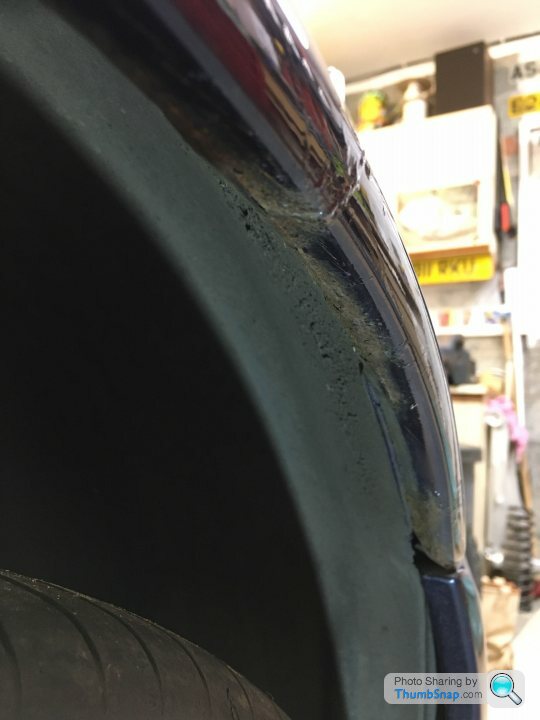
Front edge of the RH rear wheel arch
Rear edge of the RH rear wheel arch. This bit looks a wee bit concerning.
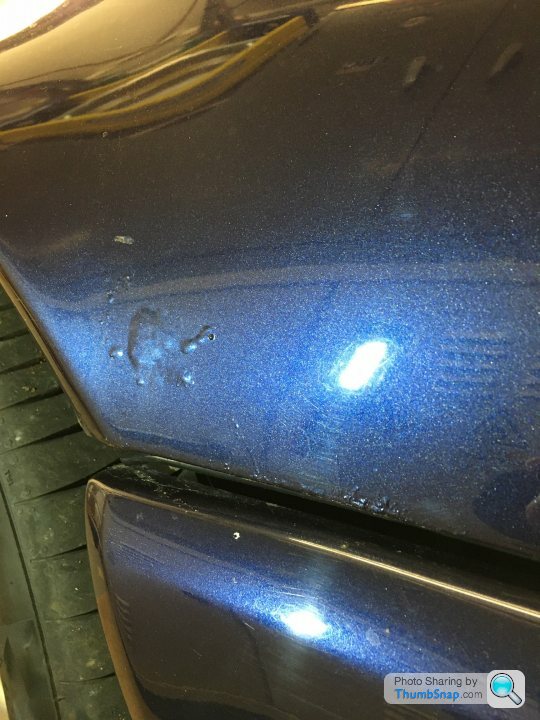
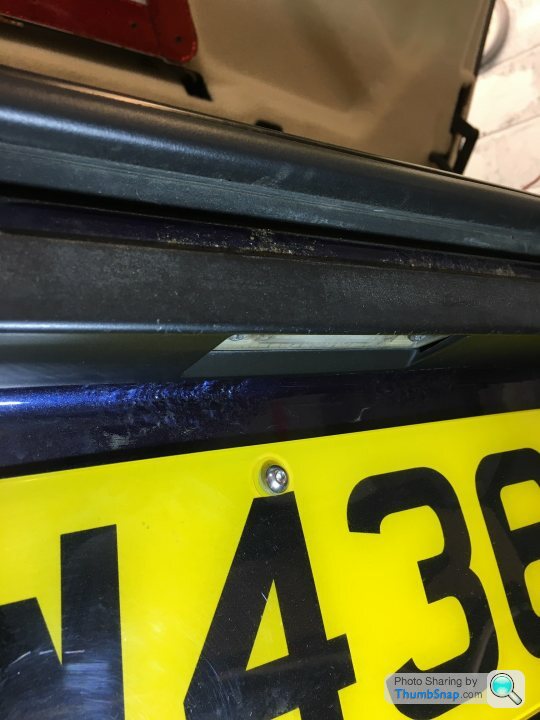
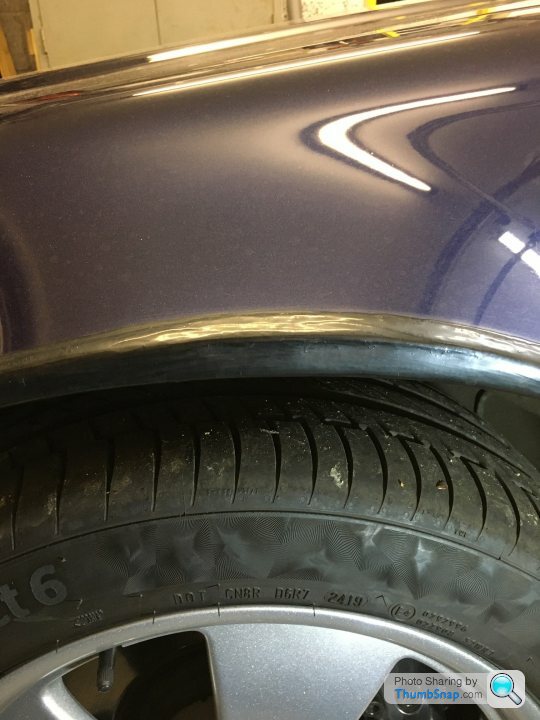
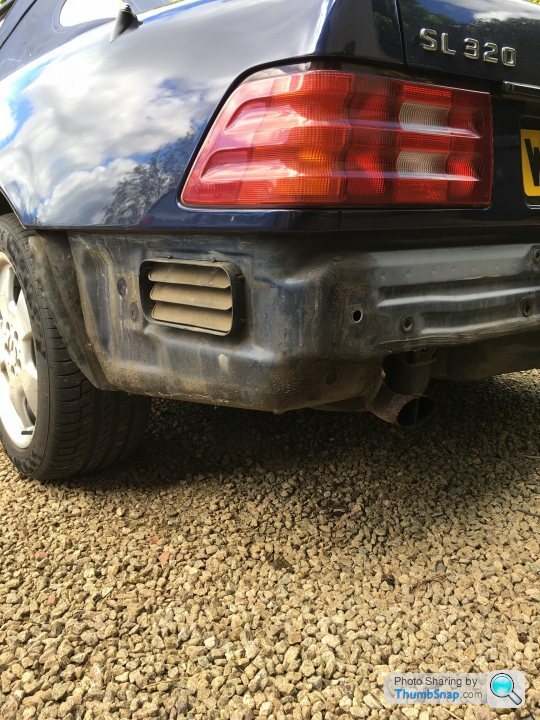
Two areas on the RH rear quarter just above the bumper. The second one looks bad.

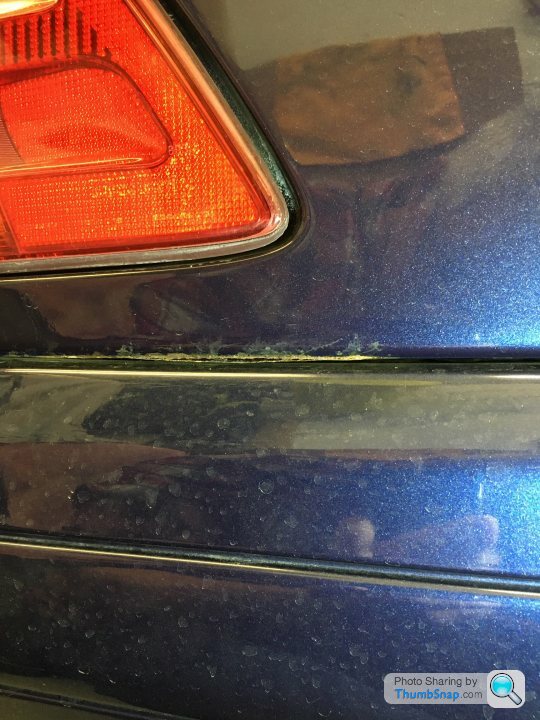
Poor picture but there is a fair bit of bubbling around both the regi plate lights and under the black plastic strip.
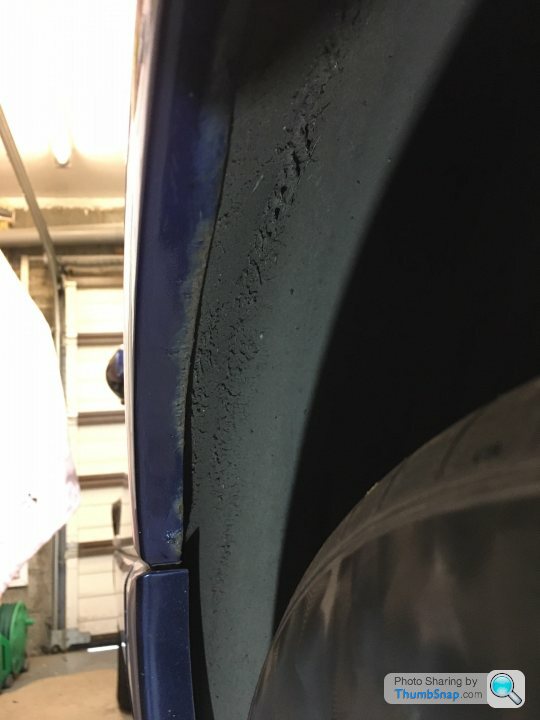
Rear edge of the LH rear arch. This looks like it is not confined just to the inner lip.
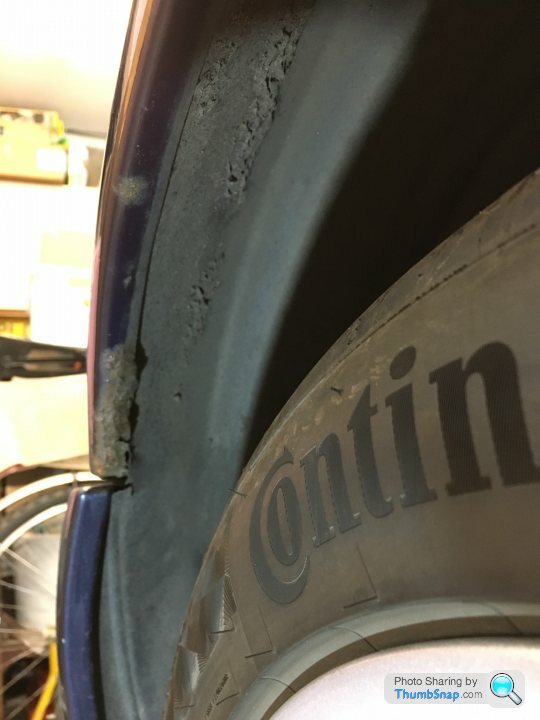
Front edge of the LH rear arch. Minor.
Front edge of the LH front arch.
Rear edge of the LH front arch.
When I bought the car it had been bumped on the edge of the LH front arch. It may be visible in some of the pictures earlier in the thread. It was dented and the paint had been removed so it was rusting.
When I was doing the work under the car I buffed the area down treated it with rust treatment and covered it with black smoothrite. Sounds terrible but wasn't actually that noticeable and it bothered me less than the exposed metal.
My plan is to attempt to fill it back out to the correct profile.
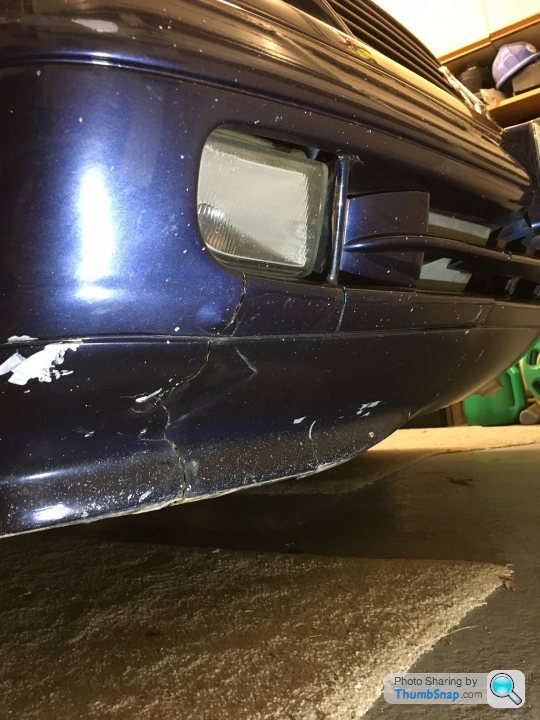
The front bumper is a bit of a mess. It has a thousand minor stone chips and as it appears to be white primer under the blue paint they are very noticeable.
Also, it has been split at some point and repaired with what looks like a metal plate and some fibreglass and filler.
Ideally it would get a new bumper but the 2nd hand ones are expensive so I am planning to have a go at repairing it.
The front of the car is quite low and the damaged area is actually quite hard to see unless you are lying down in front of it.
So, all that is required now is for me to gather together the materials and find a cure for procrastination!
Bodywork.
I prefer the mechanical repairs. Bodywork takes a lot of time, patience and skill.
Well, I have the time as lockdown means there are fewer options to be out and about although I should probably have started three weeks ago!
The patience and skill part ....... Questionable.
I don't feel I can justify a professional full respray which I think would be 2 - 3 thousand.
Perhaps if it was a car I planned to keep forever it would make sense but I have never kept a car that long.
I wish I was one of those people that had owned a car for 30 years but it's never happened.
So, I am building up to doing it myself.
There are some minor scratches in the paintwork but I am not too bothered by them.
It's not too severe, more about preservation and stopping the rot although past experience tells me it will be worse than it looks.
The paintwork is not original as there is evidence of work done in several areas. Certainly the front wings and possibly all the sides as I cannot see any difference in the colour.
I am hoping to keep most of my paintwork under the arches but there are some areas where that will not be possible so it may end up with some poorly blended bits.
The problem areas are .....
Usual spot on the front wing. I have not looked behind this so this may turn out to be full blown hole!
Front edge of the RH front wheel arch
Rear edge of the RH front wheel arch
Front edge of the RH rear wheel arch
Rear edge of the RH rear wheel arch. This bit looks a wee bit concerning.
Two areas on the RH rear quarter just above the bumper. The second one looks bad.
Poor picture but there is a fair bit of bubbling around both the regi plate lights and under the black plastic strip.
Rear edge of the LH rear arch. This looks like it is not confined just to the inner lip.
Front edge of the LH rear arch. Minor.
Front edge of the LH front arch.
Rear edge of the LH front arch.
When I bought the car it had been bumped on the edge of the LH front arch. It may be visible in some of the pictures earlier in the thread. It was dented and the paint had been removed so it was rusting.
When I was doing the work under the car I buffed the area down treated it with rust treatment and covered it with black smoothrite. Sounds terrible but wasn't actually that noticeable and it bothered me less than the exposed metal.
My plan is to attempt to fill it back out to the correct profile.
The front bumper is a bit of a mess. It has a thousand minor stone chips and as it appears to be white primer under the blue paint they are very noticeable.
Also, it has been split at some point and repaired with what looks like a metal plate and some fibreglass and filler.
Ideally it would get a new bumper but the 2nd hand ones are expensive so I am planning to have a go at repairing it.
The front of the car is quite low and the damaged area is actually quite hard to see unless you are lying down in front of it.
So, all that is required now is for me to gather together the materials and find a cure for procrastination!
I've been struggling with enthusiasm for this work.
So I did the easy bit first - buying stuff!
Paint, primer, filler, sand paper and a bumper repair kit.
Mostly on the basis that I like spending money (a nasty disease) and knowing that having the stuff will make me feel obliged to make a start.
It should be the perfect time for this due to lockdown.
I cannot open the doors fully while it's in the garage and they need to be fully open to get to some of the screws so I got it out on the drive and started removing some trim and the plastics.
It's in remarkably good condition for a 20 year old car.
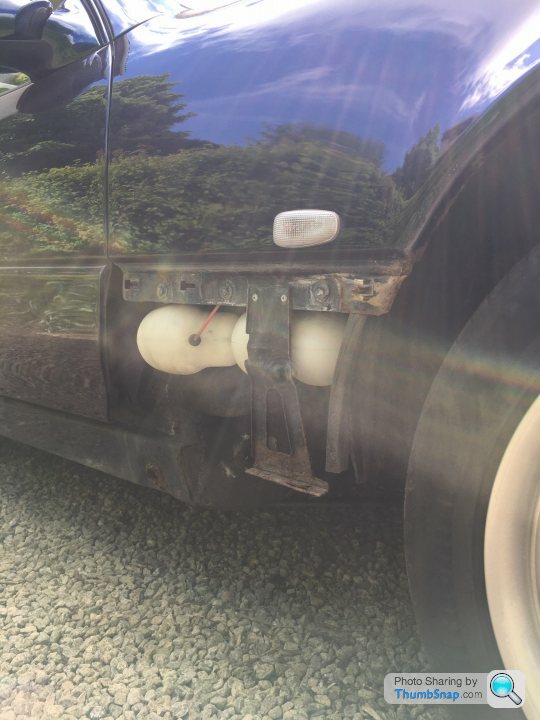
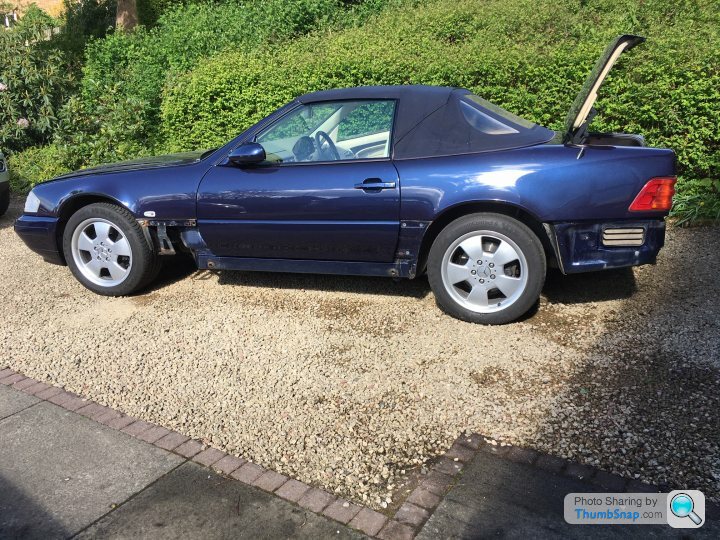
Then it was back into the garage to get it up on axle stands and get the wheels off and the arch liners out.
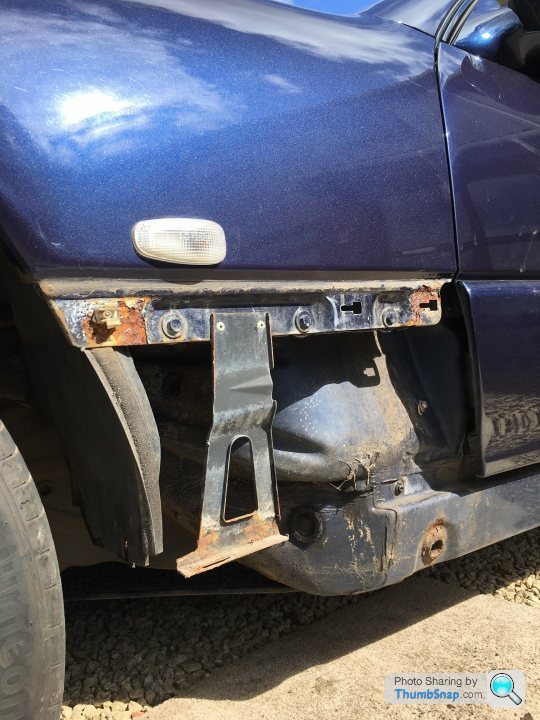
Four of the six rear arch liner studs sheared off and when I removed the liner I discovered that one of them had actually rusted clean off the car.
Fortunately the rust is very localised so I shouldn't have to cut too much away to weld in a plate.
Current plan is to drill out the remains of the old studs and fit rivet nuts.
Mercedes sell these for £16 each ..... so I'll be buying mine elsewhere.
I'm hoping to order assorted other fixings from Mercedes to replace the damaged, broken and rusty parts.

The boot carpets are now behind the couch, the rear bumper and side plastics are in the dining room, the wheels and arch liners are in the shed. There are small labelled bags of screws and clips lying around the garage.
I hope I can find all these bits when the time comes and I hope I can remember how to put it back together.
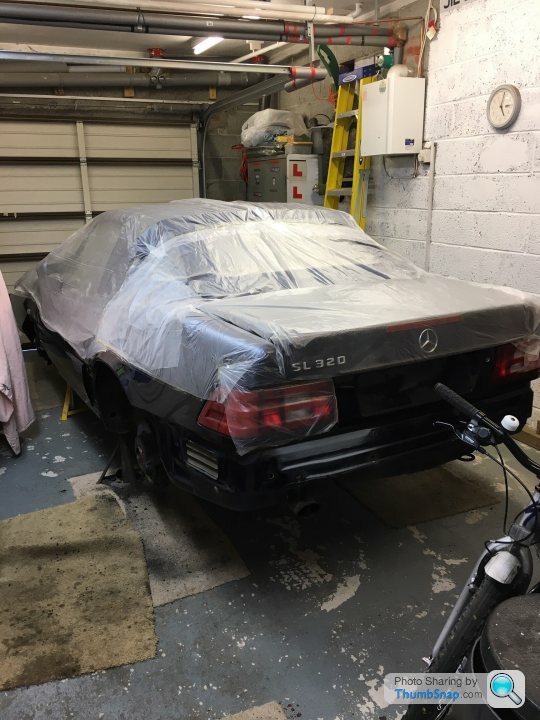
I have covered the car to try and keep the dust out as much as possible.
Next jobs -
Still to remove the front bumper. I'm not overly confident about repairing and repainting it.
Then it's onto rust removal. Most of the areas still feel quite strong so I'm hoping it will go ok.
No surprise with the bubbling paint on the front wing, there appears to be a plate and some filler behind it.
New wings would be great ..... and expensive, so I will have to do some kind of repair or leave that bit for another day.
The front number plate plastic support panel is cracked but as a new one is £110 the old one will have to stay.
Still searching for the cure for procrastination!
So I did the easy bit first - buying stuff!
Paint, primer, filler, sand paper and a bumper repair kit.
Mostly on the basis that I like spending money (a nasty disease) and knowing that having the stuff will make me feel obliged to make a start.
It should be the perfect time for this due to lockdown.
I cannot open the doors fully while it's in the garage and they need to be fully open to get to some of the screws so I got it out on the drive and started removing some trim and the plastics.
It's in remarkably good condition for a 20 year old car.
Then it was back into the garage to get it up on axle stands and get the wheels off and the arch liners out.
Four of the six rear arch liner studs sheared off and when I removed the liner I discovered that one of them had actually rusted clean off the car.
Fortunately the rust is very localised so I shouldn't have to cut too much away to weld in a plate.
Current plan is to drill out the remains of the old studs and fit rivet nuts.
Mercedes sell these for £16 each ..... so I'll be buying mine elsewhere.
I'm hoping to order assorted other fixings from Mercedes to replace the damaged, broken and rusty parts.
The boot carpets are now behind the couch, the rear bumper and side plastics are in the dining room, the wheels and arch liners are in the shed. There are small labelled bags of screws and clips lying around the garage.
I hope I can find all these bits when the time comes and I hope I can remember how to put it back together.
I have covered the car to try and keep the dust out as much as possible.
Next jobs -
Still to remove the front bumper. I'm not overly confident about repairing and repainting it.
Then it's onto rust removal. Most of the areas still feel quite strong so I'm hoping it will go ok.
No surprise with the bubbling paint on the front wing, there appears to be a plate and some filler behind it.
New wings would be great ..... and expensive, so I will have to do some kind of repair or leave that bit for another day.
The front number plate plastic support panel is cracked but as a new one is £110 the old one will have to stay.
Still searching for the cure for procrastination!
In about 2014 I spent £1k on the wings and general body rust and never felt it was a great job. At the same time I asked them to fix the bumper and they said it was too far gone to fix, and to find a secondhand one. I never did as they seem like hens teeth.
Nearly time for you to sell it back to me once you’ve completed all the work I never had done
Nearly time for you to sell it back to me once you’ve completed all the work I never had done
Gassing Station | Readers' Cars | Top of Page | What's New | My Stuff