Headlamp restoration surprise success
Discussion


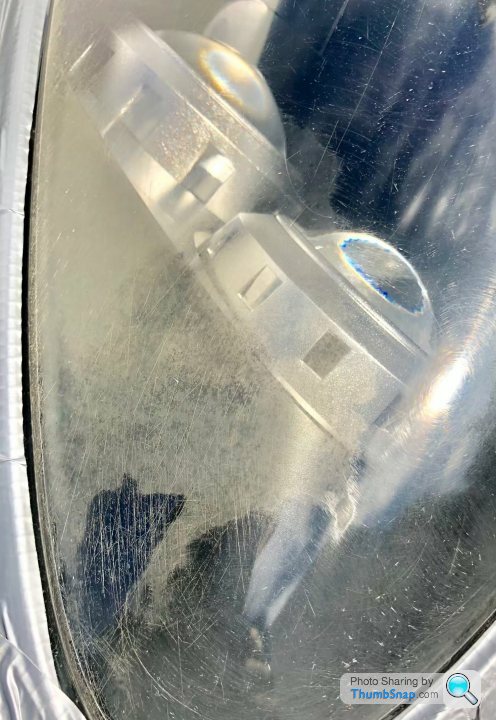
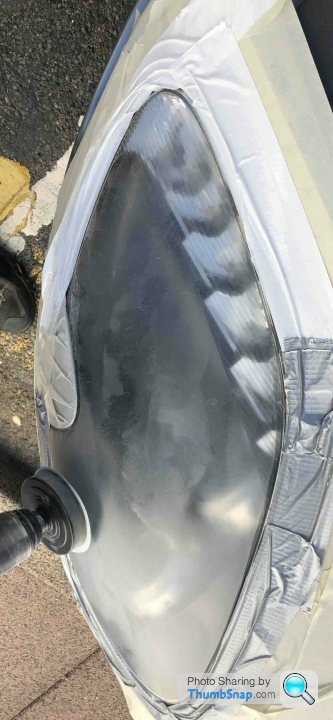
My Vantage is 11yrs old and I had it resprayed but the headlamps were scratched and pitted and looked like they were cloudy on the inside - it really let the car down:
A couple of people said they were too far gone and would need replacing, so with nothing to lose I tried the Autoglym Headlamp Restiration kit - ASTONISHING results:
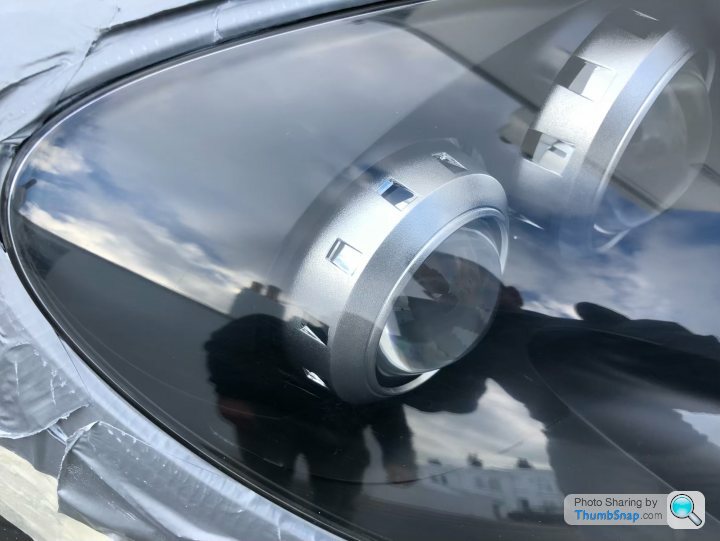
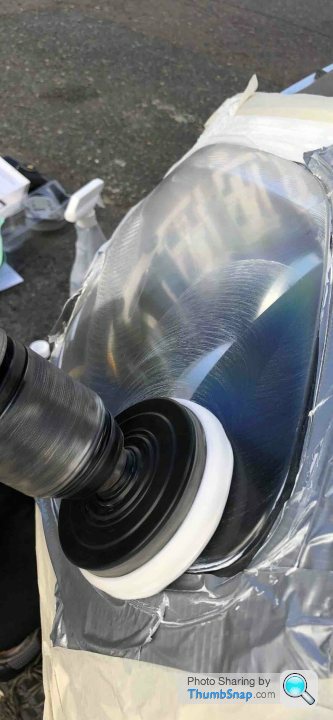
You go through four grades of sanding paper/disc and then a polishing paste. The first stage is terrifying and requires patience:
You will see that some areas of the lens seem to have a harder surface, you have to keep going to get through this surface:
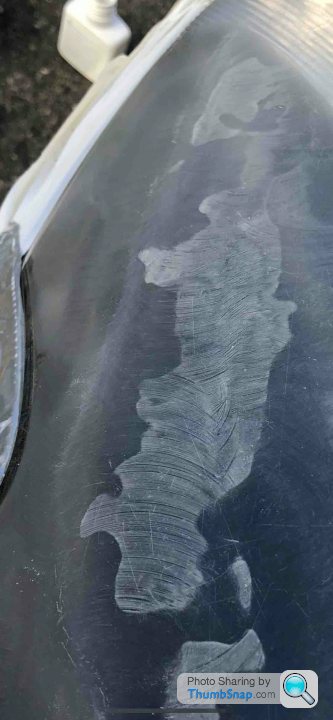
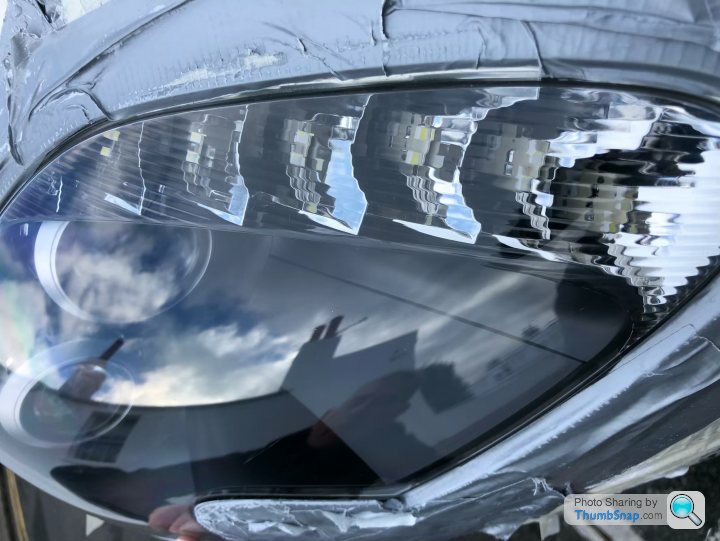
The trick is to clean the dust off the disc and the lens every few seconds - as soon as you go over the Perspex powder at high speed with the disc it becomes a liquid again and solidifies on both lamp and disc. The first stage took nearly an hour. Then the next stages are quick, with the final (messy) Polish taking just minutes:
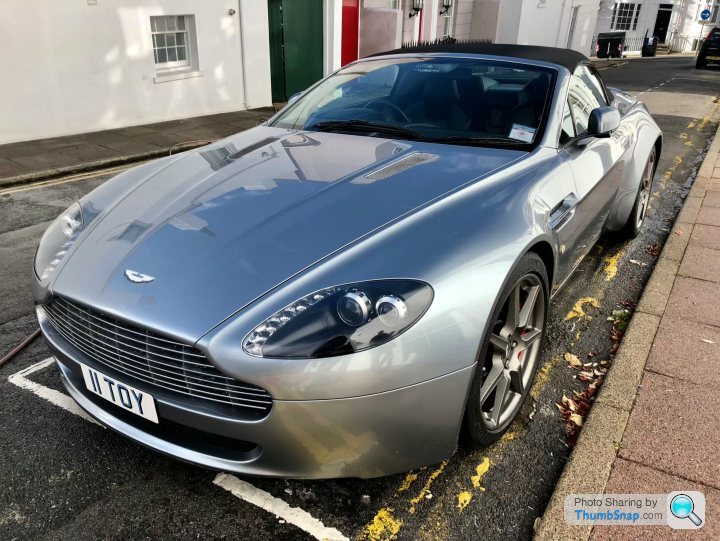
The results speak for themselves - as-new headlamps for £25/side! (I had to use two kits as the coarse grade paper clogged too much to do both - but perhaps less scratched lenses would be easier).
Hope that’s useful to someone.
A couple of people said they were too far gone and would need replacing, so with nothing to lose I tried the Autoglym Headlamp Restiration kit - ASTONISHING results:
You go through four grades of sanding paper/disc and then a polishing paste. The first stage is terrifying and requires patience:
You will see that some areas of the lens seem to have a harder surface, you have to keep going to get through this surface:
The trick is to clean the dust off the disc and the lens every few seconds - as soon as you go over the Perspex powder at high speed with the disc it becomes a liquid again and solidifies on both lamp and disc. The first stage took nearly an hour. Then the next stages are quick, with the final (messy) Polish taking just minutes:
The results speak for themselves - as-new headlamps for £25/side! (I had to use two kits as the coarse grade paper clogged too much to do both - but perhaps less scratched lenses would be easier).
Hope that’s useful to someone.
https://www.ebay.co.uk/itm/Aston-Martin-V8-Vantage...
For headlamp protection film I used the above
It fitted well and went relatively easy over the curvaceous lights with a little help from erindoor's hairdrier
For headlamp protection film I used the above
It fitted well and went relatively easy over the curvaceous lights with a little help from erindoor's hairdrier
Fantastic result.
I had clouding to my SLK headlights a few years ago (though not as bad as the pics of yours before treatment) and used colgate whitening toothpaste to polish out the cloudiness and get them pristine again (yes this internet tip really did work). So the car not only had nice clear lenses after treatment, but a fresh minty smell too!
I had clouding to my SLK headlights a few years ago (though not as bad as the pics of yours before treatment) and used colgate whitening toothpaste to polish out the cloudiness and get them pristine again (yes this internet tip really did work). So the car not only had nice clear lenses after treatment, but a fresh minty smell too!

Perfect !
No final varnish ?
what do you think of this final protection?
https://www.amazon.co.uk/gp/product/B00A3S1RGU/ref...
No final varnish ?
what do you think of this final protection?
https://www.amazon.co.uk/gp/product/B00A3S1RGU/ref...
Awesome job there! best you were dead chuffed, I would be.
I had minor scratches on my 07 DB9 lights.
My local detailor rubbed them down like you did, but once finished he ceramic coated them. Might me worth doing that as my lights where lacquered from factory, not sure if the Vantage ones are the same..
I had minor scratches on my 07 DB9 lights.
My local detailor rubbed them down like you did, but once finished he ceramic coated them. Might me worth doing that as my lights where lacquered from factory, not sure if the Vantage ones are the same..
Gassing Station | Aston Martin | Top of Page | What's New | My Stuff