1995 Griffith 500 restoration
Discussion


PH has operated this rule since time and memorial and long may it continue.
Too often and frequently are people, companies etc. slated on ‘social media’ without recourse. Here, the recourse is with the forum owner and ultimately that gets expensive.
A quick mail to any complainant will likely be met with the info required.
Also, one individuals experience isn’t a measure of a companies overall performance. Axes to grind etc.
I can’t say I’ve abided by it, but it is absolutely the right thing as you, I or the OP aren’t the ones defending the legals or losing the advertising revenue.
Had a couple of hours today to make a bracket of sorts to hold the new fuel tank roll over valve. I used an engineering nylon which allows tapped threads.
Pictures below of the valve and it’s new holding bracket

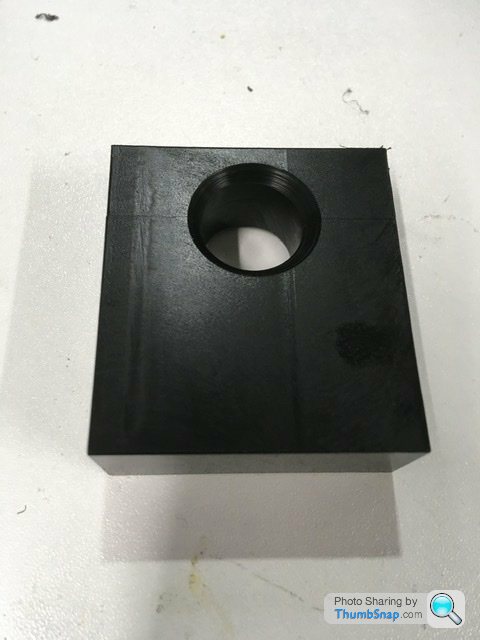
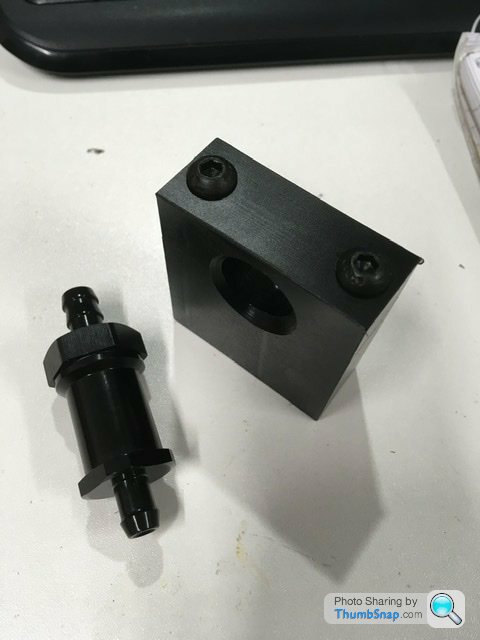
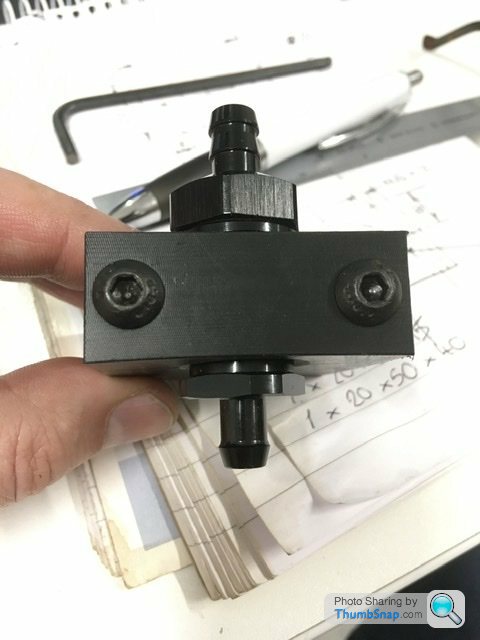
The base will need an angle machined but I’m unsure of that yet until I offer it up for it’s position. The original has just a steel strap bent into position. Very TVR as it’s hidden behind trim lol
Pictures below of the valve and it’s new holding bracket
The base will need an angle machined but I’m unsure of that yet until I offer it up for it’s position. The original has just a steel strap bent into position. Very TVR as it’s hidden behind trim lol
Bowks said:
Any chance of a sneaky peek at the leather hides? Also really interested in the speaker upgrades.
The hides haven’t arrived yet as there is a hold up with the perforation machine. Is it the colour you want to see?The speaker upgrade will be using new old stock kicker 5 1/4” front components with 8” subwoofers fitted behind the front seats and using the space under the centre console. All run active via another new old stocker item a kicker 6 channel amplifier. Keeps everything retro 90’s/2000’s.

RobXjcoupe said:
The hides haven’t arrived yet as there is a hold up with the perforation machine. Is it the colour you want to see?
The speaker upgrade will be using new old stock kicker 5 1/4” front components with 8” subwoofers fitted behind the front seats and using the space under the centre console. All run active via another new old stocker item a kicker 6 channel amplifier. Keeps everything retro 90’s/2000’s.
Mostly the colour. I'm a few years away from sorting out the trim but I'm collating the ideas now. The speaker upgrade will be using new old stock kicker 5 1/4” front components with 8” subwoofers fitted behind the front seats and using the space under the centre console. All run active via another new old stocker item a kicker 6 channel amplifier. Keeps everything retro 90’s/2000’s.
I'm almost at the point of removing the stereo as I don't want too much tech on show, however, your plan sounds good.
Bowks said:
RobXjcoupe said:
The hides haven’t arrived yet as there is a hold up with the perforation machine. Is it the colour you want to see?
The speaker upgrade will be using new old stock kicker 5 1/4” front components with 8” subwoofers fitted behind the front seats and using the space under the centre console. All run active via another new old stocker item a kicker 6 channel amplifier. Keeps everything retro 90’s/2000’s.
Mostly the colour. I'm a few years away from sorting out the trim but I'm collating the ideas now. The speaker upgrade will be using new old stock kicker 5 1/4” front components with 8” subwoofers fitted behind the front seats and using the space under the centre console. All run active via another new old stocker item a kicker 6 channel amplifier. Keeps everything retro 90’s/2000’s.
I'm almost at the point of removing the stereo as I don't want too much tech on show, however, your plan sounds good.
My preferred colour was actually the burnt orange. Unfortunately no matching vinyl and only available as a smooth grain hide so more expensive. Technically you can do the interior with a single hide like for like as per original. As I’m going with perforated seat panels and door trims I needed 2 hides. Then add in new roof cover bag and tool kit bag you need a matching vinyl or plain black to save a few pounds. I’ve gone with matching as it’s a difference I haven’t seen done with another car. Currently I’m at £720 for interior materials inc boot carpet and new door and boot seals but not including interior carpet, scrim foam and any specific colour stitching thread.
As I’m going to use black carpet, I’m personally using black top stitch.
The dash and glovebox in alcantara is extra at £700. New veneer dash and lower panel with all new fittings but using original dials and gauges is £500. Things add up extremely quickly! Any custom machined parts I do myself. On paper the car is going to be a looker but until it’s all back together it’s all just words at the mo lol.
Speakers and audio if you keep things simple it’s very easy to build a nice system…… I think anyway.
If you choose an older head unit, you can find that Sony and kenwood built lovely top end revolving face units. Pioneer and alpine used motorised fronts to adjust panel angle instead. All top end units will have front, rear and sub-out pre-outs and adjustable high and low filters to help stop speaker distortion. There will also be ways of using cd changer inputs as aux inputs if needed as well either wired or as a Bluetooth connection.
Just a matter of searching fleabay for the correct plug in connection for the manufactured unit.

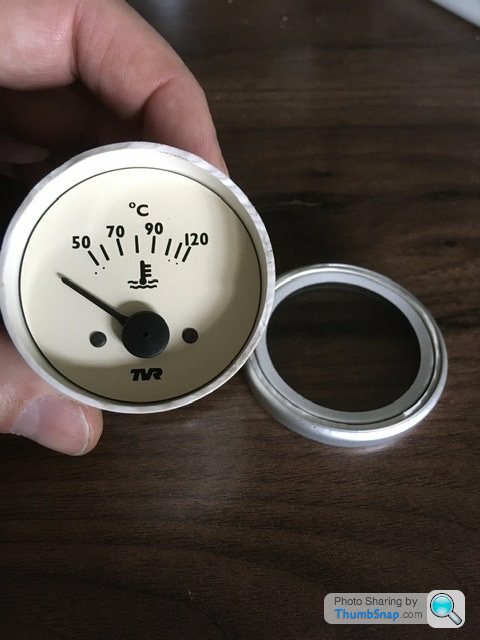
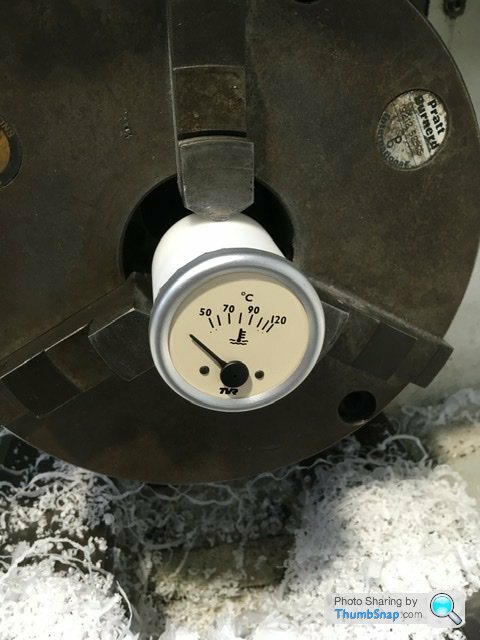
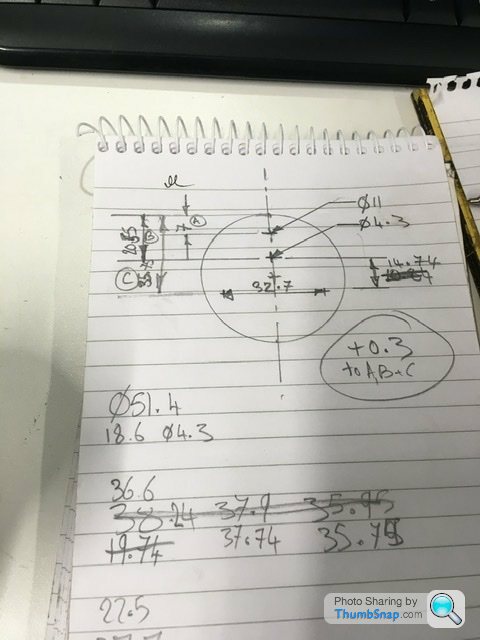
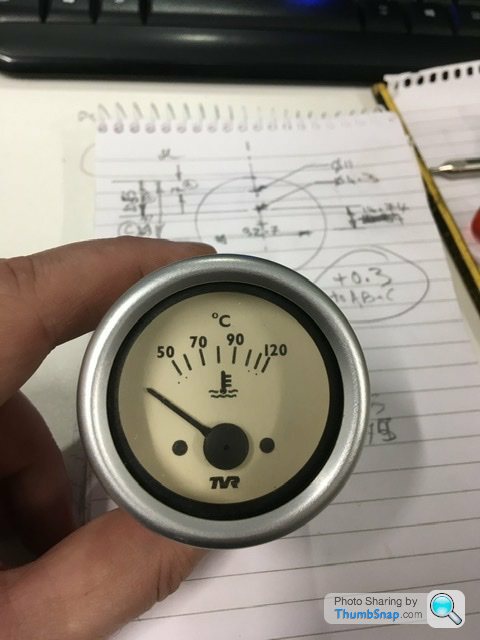
Another issue I’ve been looking at is this broken temp gauge. Broken by the specialist restoration firm I used.
I’ve been looking at Jaguar gauges which are the same size to fit the aperture in the dash. So had a measure today and found the Jag gauge doesn’t have the same depth of housing, which is a pain.
So I’ll attempt to machine a new housing next week. The hard part will be removing the original bezel surround from the broken part and then squeeze it all back together. I’ll try. No fingers crossed with this.
Going back to the wiring, I’ve ordered some electrical bits and bobs so as I can feed a higher current to the window motors when the up button is pushed. A very easy mod while I don’t have any dash fitted. The window motors I’ll also remove from the doors to give an overhaul of the mechanism and fit new felt guides. Hopefully should have a reasonable quick up operation rather than the original will it get there eventually with crossed fingers lol.
The doors also need removing to see what’s up with the hinges as I’m not happy with the current specialist restoration firm fit. There is a bit of drop so possibly new hinge bushes are needed. Originals are nylon. If worn I’ll make new bronze versions. No point trying to adjust a worn out hinge pivot.
The doors also need removing to see what’s up with the hinges as I’m not happy with the current specialist restoration firm fit. There is a bit of drop so possibly new hinge bushes are needed. Originals are nylon. If worn I’ll make new bronze versions. No point trying to adjust a worn out hinge pivot.

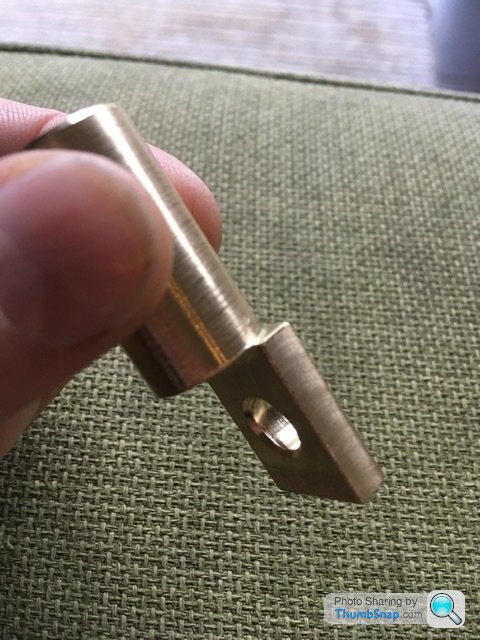
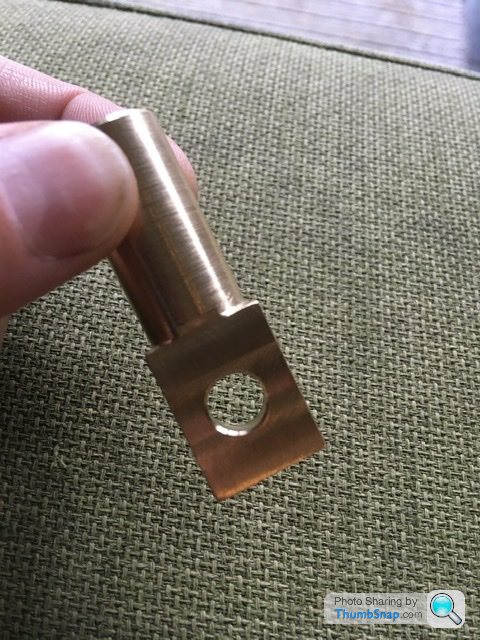
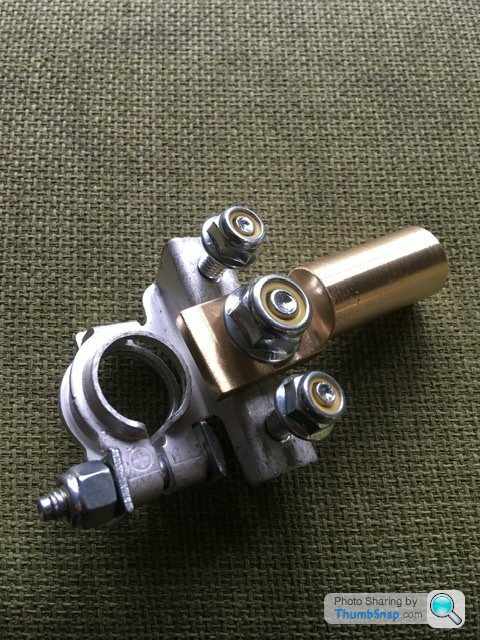
Above I made a new terminal for the big power cable that supplies the starter motor. The battery I’m now using has the positive terminal nearest the transmission tunnel so I can shorten that cable now. Made from 25mm diameter brass I’ll solder the join using a plumbing torch.
Below is the new holder to attach 3 separate power leads to the battery positive terminal.
The starter motor, main fuse box feed and the amplifier for the new audio system. I think it gives a neater fit with 3 separate power offs rather than use the clamp bolt holding everything to the battery terminal.
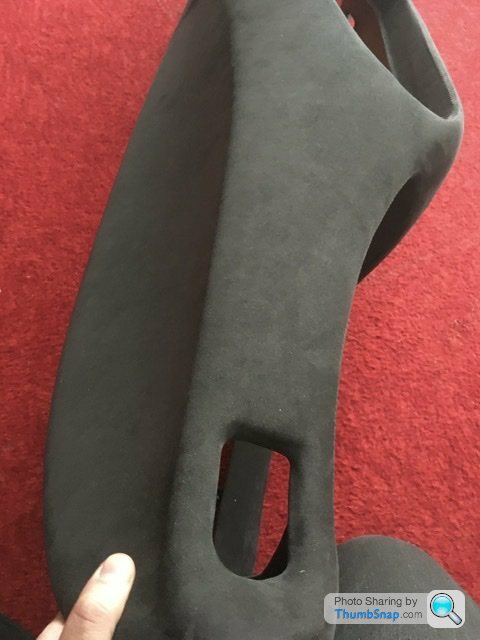
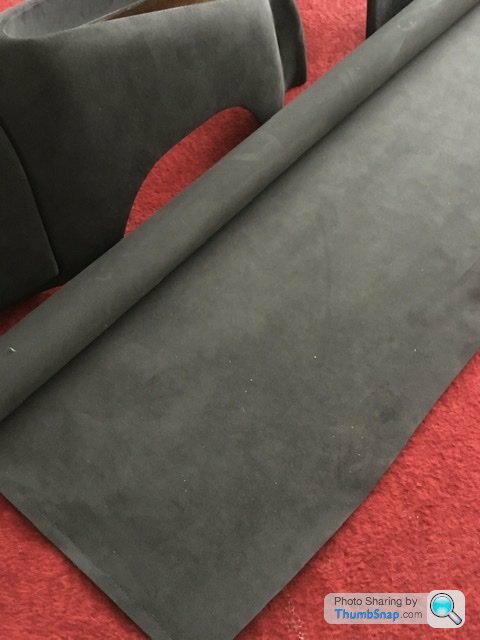
Started to make a new body for temperature gauge. I’ve used a dirty white coloured nylon. I think if lit with a standard bulb you would notice a slight shade of white difference. As I’m going to green bulbs I don’t think it will notice any shade variation. I might be wrong….hopefully not. Pictures below of making the body.

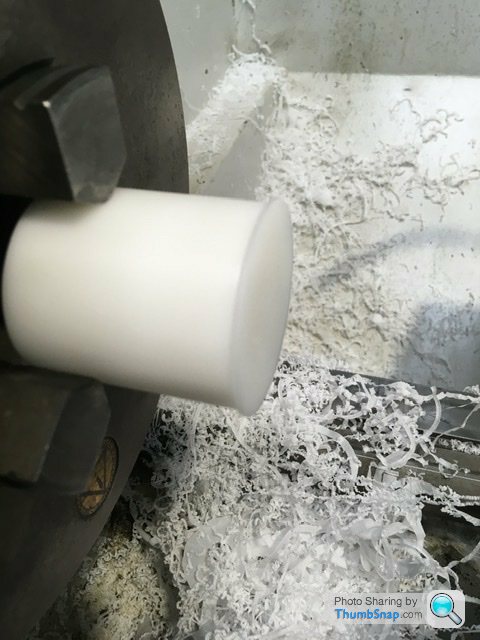
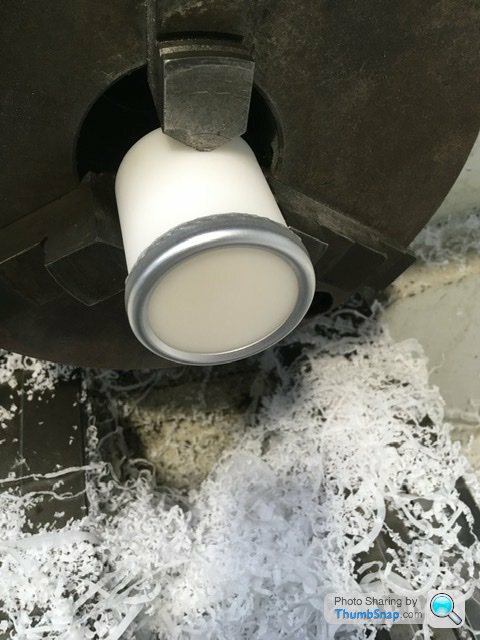

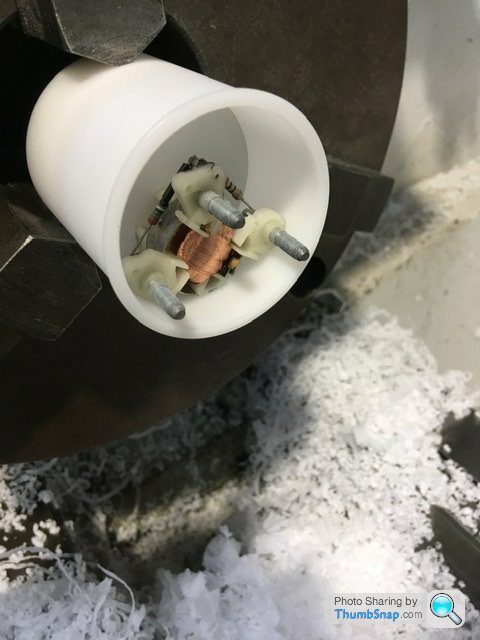
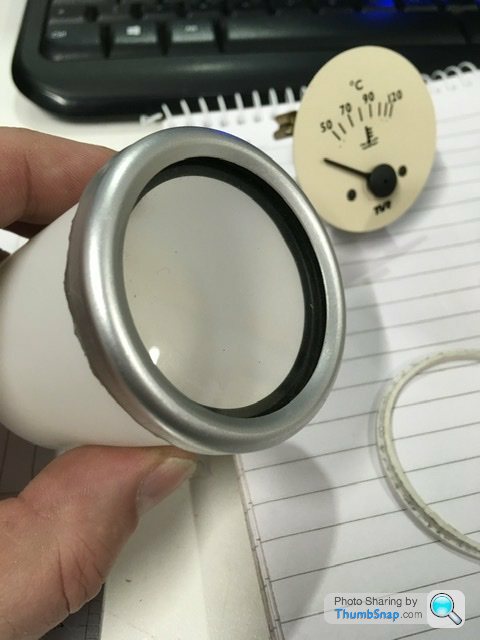
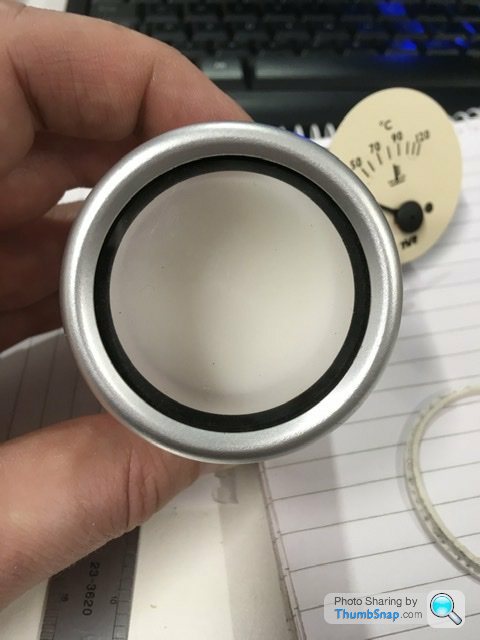
Next week I’ll put the holes in to secure the actual dial and machine the back away to leave the material to hold the backlight bulb and holder. Should be a nice job when finished keeping the original dial face and surround so all dials have the same patina rather than a random new looking temp gauge.
Next week I’ll put the holes in to secure the actual dial and machine the back away to leave the material to hold the backlight bulb and holder. Should be a nice job when finished keeping the original dial face and surround so all dials have the same patina rather than a random new looking temp gauge.


Started to tidy up the wiring loom in the passenger footwell and also add a wiring mod to raise the windows a bit quicker.
Pictures below are the relays to supply a higher current to help move the windows up. I used the relay holder that was already there but without any wiring. I bought the correct terminals to clip in and it looks factory. Left relay supplies left window, right hand relay supplies right hand window motor. The main feed is still needed but I will need the fuse box removed first to gain access to the back and see if there are any spare fuse spaces. If not a separate fuse holder will be needed
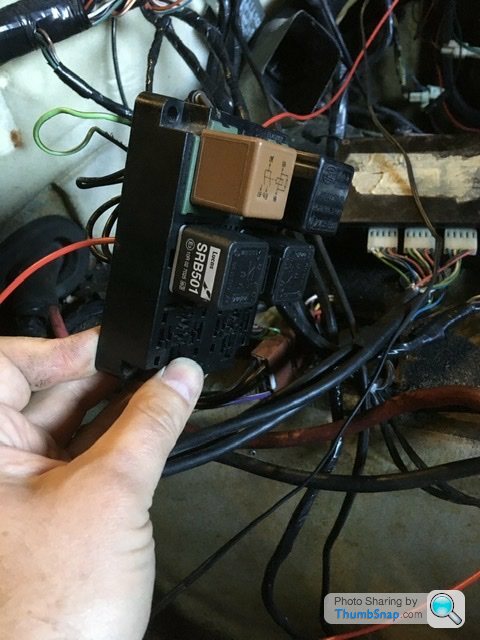
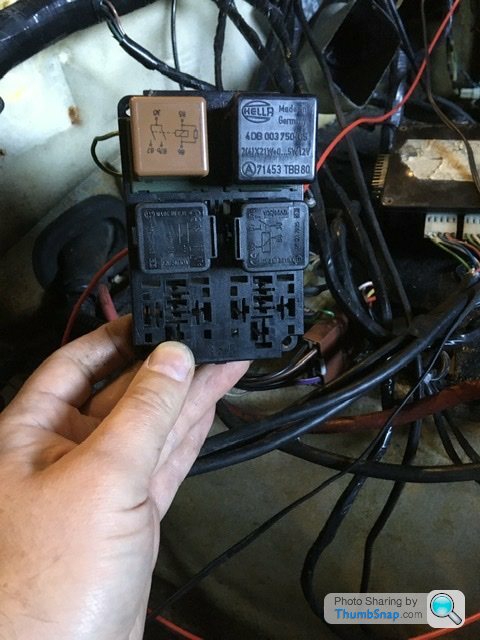
The ecu loom and floating relays have also had a bit of work today. The relay wiring has been shorted and new relay holders fitted that slot together. These will be secured on the bulkhead. The fuse box is going into the glovebox so the ecu will bolt to into that space out the way behind the battery. The third relay in the row is the hot start mod. Again that will be wired properly into the fuse box, properly fused and no loose wiring.
So fusebox removal tomorrow. So I can get the ecu mounted and finally no more rats nest on top of the battery

Pictures below are the relays to supply a higher current to help move the windows up. I used the relay holder that was already there but without any wiring. I bought the correct terminals to clip in and it looks factory. Left relay supplies left window, right hand relay supplies right hand window motor. The main feed is still needed but I will need the fuse box removed first to gain access to the back and see if there are any spare fuse spaces. If not a separate fuse holder will be needed
The ecu loom and floating relays have also had a bit of work today. The relay wiring has been shorted and new relay holders fitted that slot together. These will be secured on the bulkhead. The fuse box is going into the glovebox so the ecu will bolt to into that space out the way behind the battery. The third relay in the row is the hot start mod. Again that will be wired properly into the fuse box, properly fused and no loose wiring.
So fusebox removal tomorrow. So I can get the ecu mounted and finally no more rats nest on top of the battery

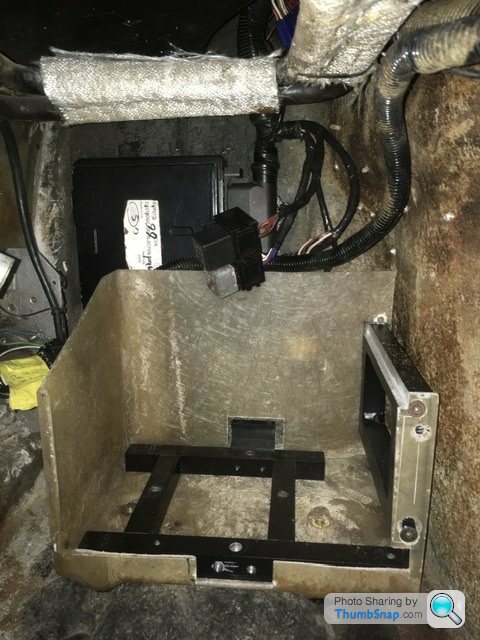
Ecu now fitted where fuse box was. Looking at the space and cable length I would think TVR made that recess specifically for it. Obviously changed there minds at some point.
The strip of relays will now be attached to the back of the battery box in front of the ecu. To bolt them above would make them inaccessible as the heater pipes are at the same height and once the dash is fitted it would be a bit of a mare getting in the footwell and bending arms upwards if you get my drift.
Just above the back of the battery is a better position to see and remove as and when needed.
Also I removed the cable ties holding other wiring to the heater pipes. So that’s all looking a bit more professional. Possibly need to unwrap and wrap again in a new position but not quite yet. I noticed the heater pipes have no support brackets. Held in place via the rubber hose connections which again isn’t ideal. Another job to do!
Gassing Station | Griffith | Top of Page | What's New | My Stuff