Patching screw holes in Monocouche render
Discussion


Afternoon all,
Any hints or tips on the above please.
We have the paint code for the coloured monocouche we had applied, and have some external sockets which we would like to have removed.
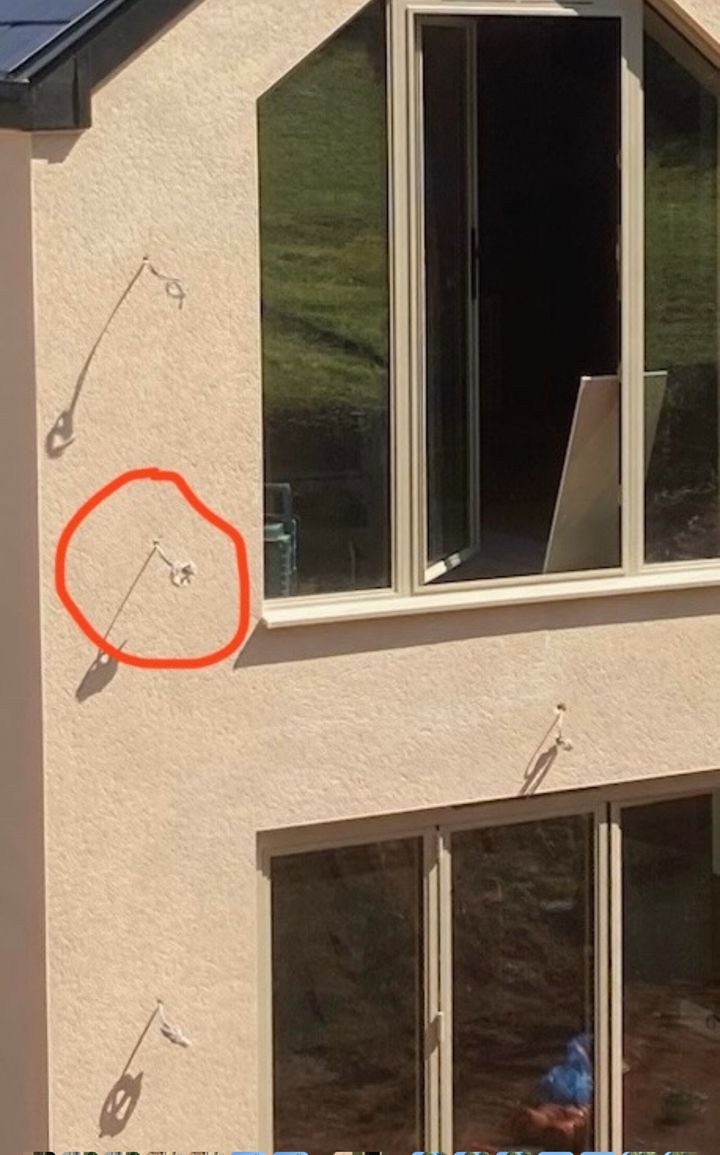
Removal will definitely leave the two fixing holes per external sockets, and the hole put in for the cable feed.
See below for pic if of help
Cheers all
CTO
Any hints or tips on the above please.
We have the paint code for the coloured monocouche we had applied, and have some external sockets which we would like to have removed.
Removal will definitely leave the two fixing holes per external sockets, and the hole put in for the cable feed.
See below for pic if of help
Cheers all
CTO
CTO said:
It s that straightforward?
Should be, it's just render so should work fine for filling a hole or two. Especially for little deep patches. Colour should be fine, only bit you might want to be artistic about is finishing the surface so it's flush & matches the texture.Be careful mixing to add the right amount of water and make sure your tools are clean especially of rust. Also be wary of pot life if you're having to move ladders etc between patches, it might harden too much before you use it.
If it was a proper big patch it might involve a bit more effort but filling holes shouldn't be a challenge.
With my own experience with this type of render and being completely flummoxed with having to spot repair certain areas on our house it has become apparent to me that this is nigh on impossible to match the existing colour with either a repair made from the same material and colour probably due to batch differences, even though I had kept some bags over from my original application it still doesn’t match…or using the same manufacturer silicon paint it still dried differently. The paint is extremely expensive as well.
Possibly the only way to get a good match would be to repair the hole/damage and paint the whole facade up to a natural break point. The rendering will look slightly different especially when it rains as water will run off the paint unlike the original render which will allow it to soak in.
Also having to paint a whole area is a pain for just a small hole/repair, on my house I have had some painted due to issues where I have a small repair I will now leave it and put up with the eyesore of the spot rather than paint it. I prefer its natural state rather than have it painted, just my view.
Having said that what is really starting to show on my render is rainwater white lime scale showing where it’s dripping off the sides of the windows and looks like I might have to paint it anyway. Currently looking for something that will remove the limescale without damaging the render.
I thought this monocouche render was exactly as described in that it is supposed to be the same colour through its depth but you scratch it after it’s dried and it’s a lot paler underneath so have to be very careful when putting anything against it.
Sorry for the ramble and probably not helpful in your situation, I am no expert in this by a long way and maybe someone that does this will drop in..
I tried to patch my rendered wall, now looks like a dogs dinner so be careful before giving it a go, can quickly turn into a far bigger repair. If you're fussy I'd consult a local decorator/plasterer to see if they have done similar repairs and can sort it. Something like this
https://youtu.be/yWQy09lfn8w?si=mz7z-rNs1gx7J7UK
https://youtu.be/yWQy09lfn8w?si=mz7z-rNs1gx7J7UK
Thanks all of you, much appreciated as always!
Interestingly, that YouTube video linked above is one I watched a few months back when I was pondering this….
I might have a little go somewhere inconspicuous before I try on the rear elevation….
I mean, ultimately, if it looks reaaaaaaally s t…. I’ll just put some lights where the sockets are, but I’d rather not
Cheers again, any more advice welcome and I will of course keep you posted on the outcome…
Me next week…

Interestingly, that YouTube video linked above is one I watched a few months back when I was pondering this….
I might have a little go somewhere inconspicuous before I try on the rear elevation….
I mean, ultimately, if it looks reaaaaaaally s
t…. I’ll just put some lights where the sockets are, but I’d rather not Cheers again, any more advice welcome and I will of course keep you posted on the outcome…
Me next week…
Gassing Station | Homes, Gardens and DIY | Top of Page | What's New | My Stuff