Airfix 1:72 Tiger Moth
Discussion


So after completing the Lysander and Delfin, I decided to give modelling a break for a few months. So here I am two weeks later, and I've already started two new kits...
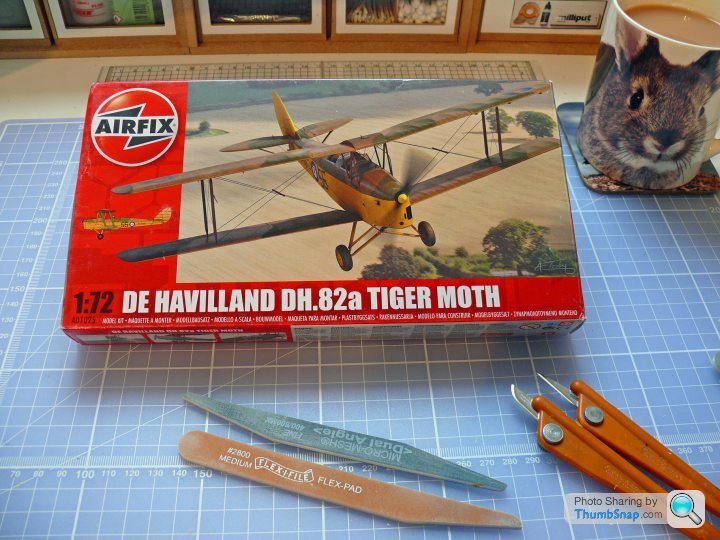
This is the Airfix Tiger Moth, released in 2014. I had high hopes of it being a straightforward build, judging by how well the Airfix Gladiator had gone together:
https://www.pistonheads.com/gassing/topic.asp?t=13...
I was disappointed (although not entirely surprised) to find an issue with it before I'd really begun, in that the nose didn't fit correctly. That was about four years ago, and I put it back in the box and forgot about it until this week; on Tuesday evening I attended a great RAeS talk by Dodge Bailey, the Chief Pilot at the Shuttleworth Collection. Obviously the Tiger Moth was mentioned, and that inspired me to try again with this one.
So...mug of tea and sanding sticks at the ready, I'm ready to do battle:
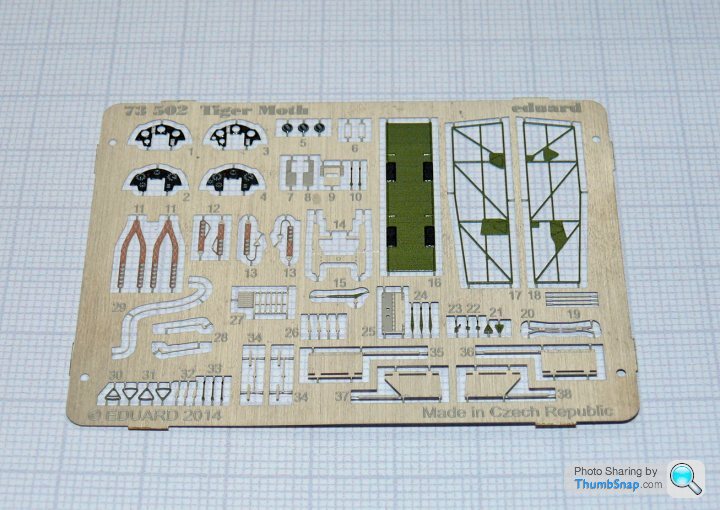
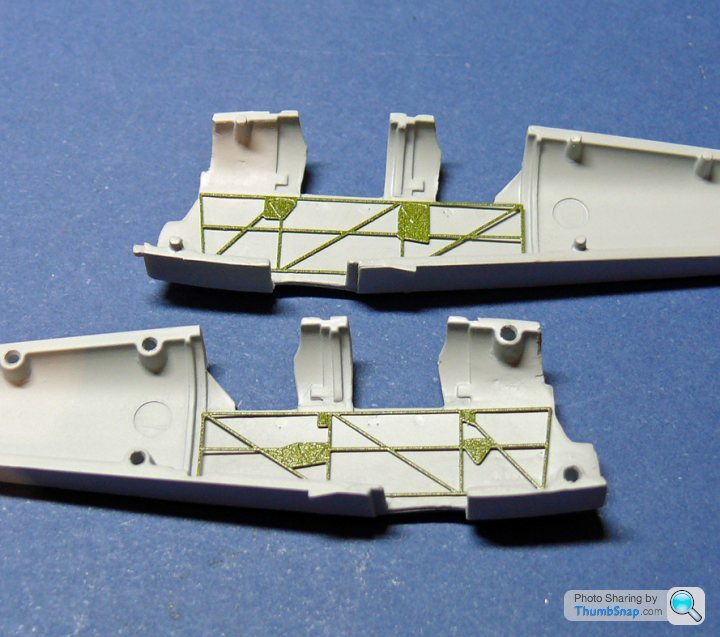
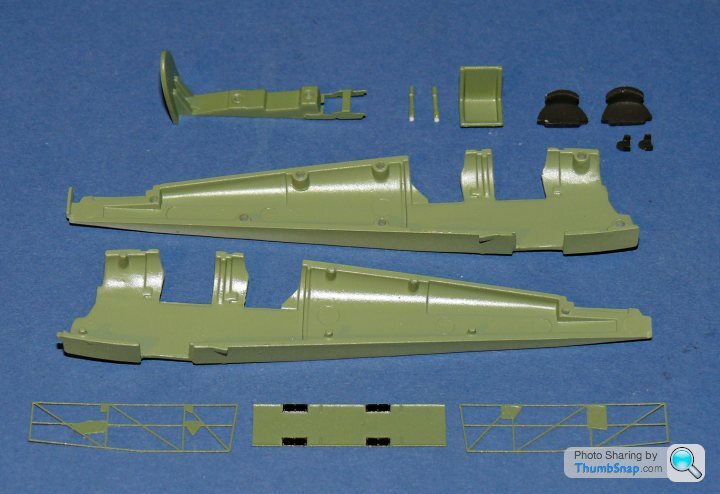
I also got an Eduard photo-etch set for it:
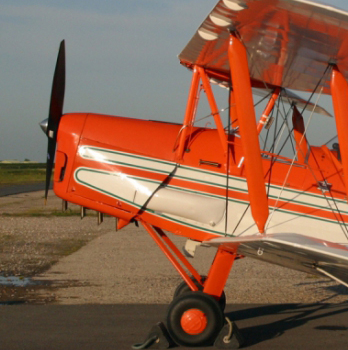
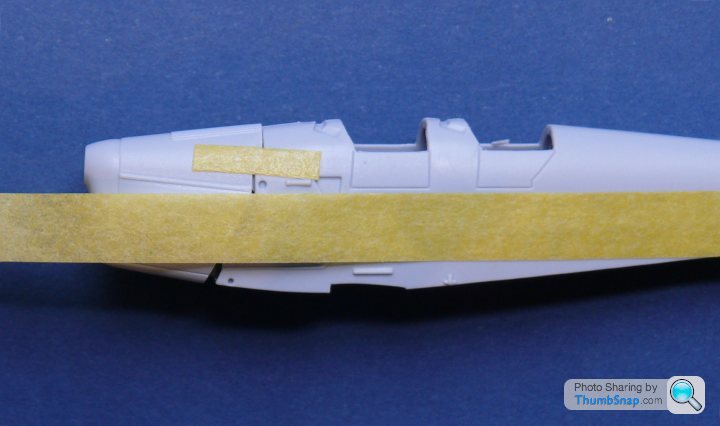
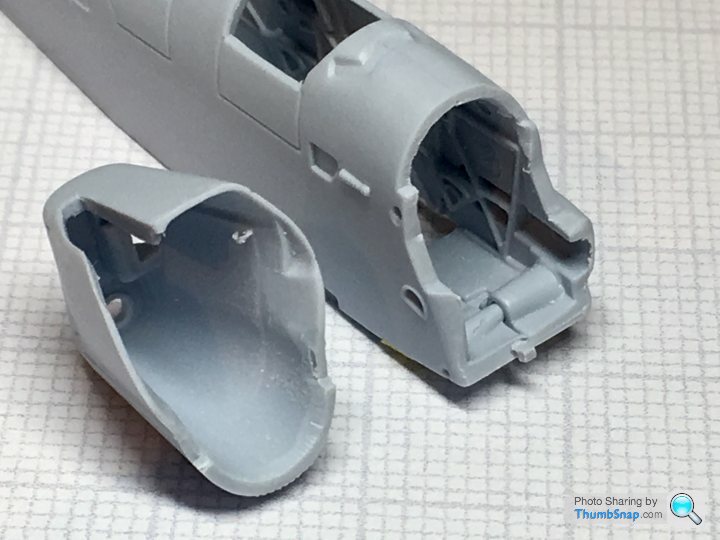
Here's the issue: The top of the engine cover and front fuselage should form a continuous slope, as shown here:
But if you assemble the Airfix nose to the fuselage to get the top slope correct, it's all sorts of wrong everywhere else:
The engine cover hinge line is also then angled incorrectly (it's just visible above the white marking on the real aircraft photo, and the discrepancy is obvious, although acceptable as a compromise):
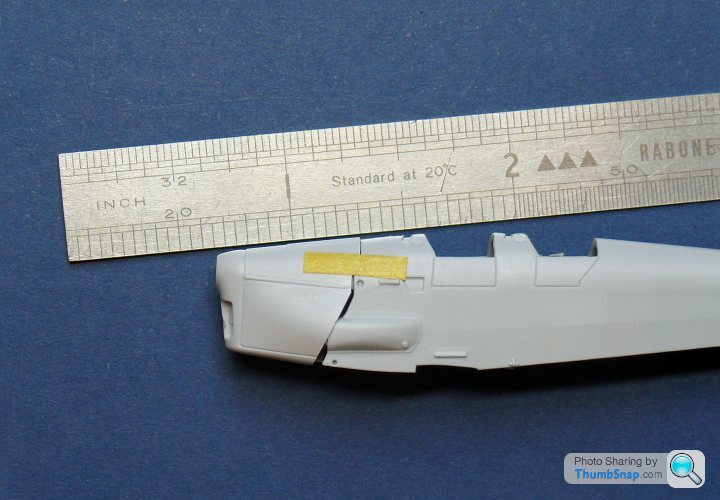
So after much cutting, head scratching, filing and fettling, I've reached a compromise:
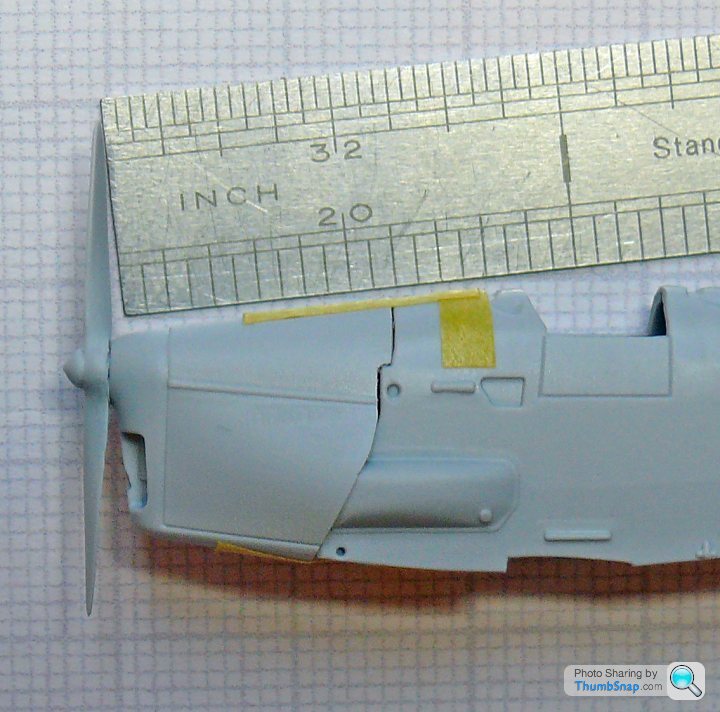
I removed too much from the stbd. side, so it'll have to be built back up with plastic card:
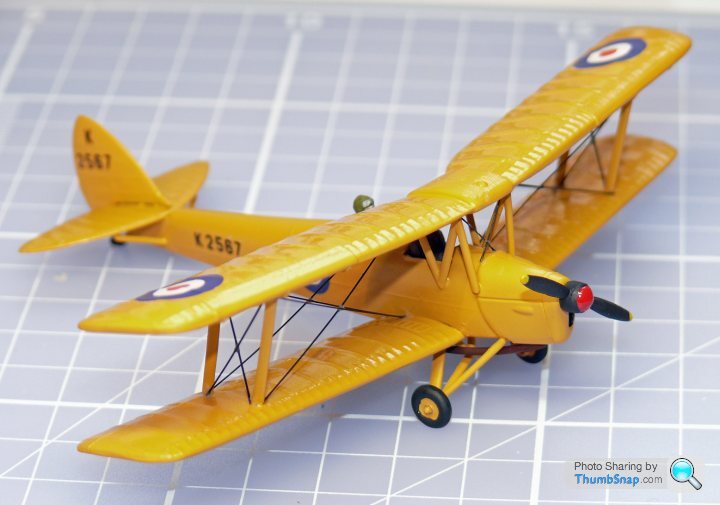
I doubt it could be eaily modified such that everything was spot-on, but hopefully it will look OK once complete. It should be better than the much maligned orginal Airfix Tiger Moth from 1957, here's one I built in another modelling life:
This is the Airfix Tiger Moth, released in 2014. I had high hopes of it being a straightforward build, judging by how well the Airfix Gladiator had gone together:
https://www.pistonheads.com/gassing/topic.asp?t=13...
I was disappointed (although not entirely surprised) to find an issue with it before I'd really begun, in that the nose didn't fit correctly. That was about four years ago, and I put it back in the box and forgot about it until this week; on Tuesday evening I attended a great RAeS talk by Dodge Bailey, the Chief Pilot at the Shuttleworth Collection. Obviously the Tiger Moth was mentioned, and that inspired me to try again with this one.
So...mug of tea and sanding sticks at the ready, I'm ready to do battle:
I also got an Eduard photo-etch set for it:
Here's the issue: The top of the engine cover and front fuselage should form a continuous slope, as shown here:
But if you assemble the Airfix nose to the fuselage to get the top slope correct, it's all sorts of wrong everywhere else:
The engine cover hinge line is also then angled incorrectly (it's just visible above the white marking on the real aircraft photo, and the discrepancy is obvious, although acceptable as a compromise):
So after much cutting, head scratching, filing and fettling, I've reached a compromise:
I removed too much from the stbd. side, so it'll have to be built back up with plastic card:
I doubt it could be eaily modified such that everything was spot-on, but hopefully it will look OK once complete. It should be better than the much maligned orginal Airfix Tiger Moth from 1957, here's one I built in another modelling life:
tight5 said:
dr_gn said:
https://youtu.be/DFFATX_UlMQ
I've got no doubt you'll do a great job.

perdu said:
I havent built one of these although I did convert the earlier Tiger Moth into a Rothman's Stampe many years ago
Didnt I read that the difficulty with the nose section was induced by the thickness of the plastic that covered the oil cooler bulge
Carving it back might make the fit better, you might have just induced me into buying a model to try out mad-eyed theories on

It’s not one individual thing that causes the alignment issue, it’s a combination of poor fit and incorrect geometry. We’re not talking much at all, but at 1:72 on a small subject like this, not much can be the difference between a pigs ear and a silk purse...see next post...Didnt I read that the difficulty with the nose section was induced by the thickness of the plastic that covered the oil cooler bulge
Carving it back might make the fit better, you might have just induced me into buying a model to try out mad-eyed theories on
Did some more fettling - I wanted to avoid shimming the nose to equalise the panel breaks. I want a constant gap around there because it’s a panel break, and as such I don’t want to use filler, but it needs to be “right”. I’ve redone the upper cover angle and removed the locating tabs altogether. I’ve also chamfered all the inner edges of the nose piece. The two small steps in the nose also needed moving forward slightly. The oil tank front was also chamfered. Maybe not too clear, but here are the visible mods:
Resulting fit seems better, and the thrust line (along the axis of the propeller) isn’t too far off either:
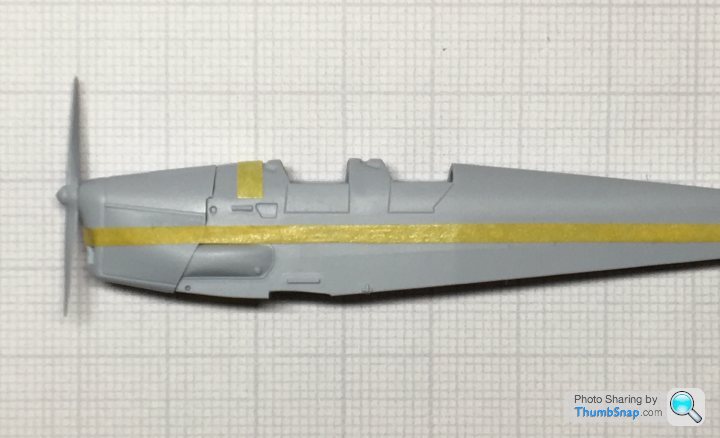

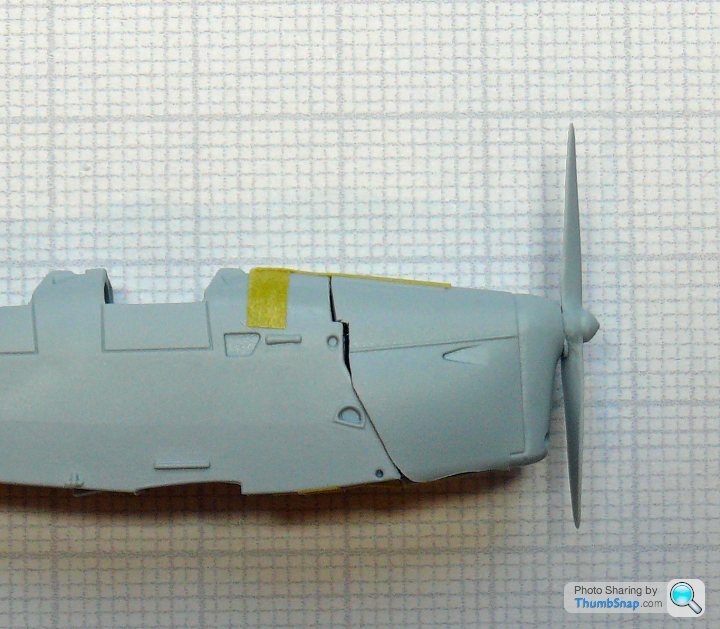
The only remaining issue was the demarcation line for the camouflage, which runs along the door hinges and intersects with the rear of the engine panel hinge (ie the top edge of the rule below). The engine panel hinge line then angles up above the demarcation very slightly. The angle is now too great, and the hinge itself not very subtle. I might remove the raised hinge line altogether and add another in exactly the right place. I’ll decide that when the nose is permanently attached:

Resulting fit seems better, and the thrust line (along the axis of the propeller) isn’t too far off either:
The only remaining issue was the demarcation line for the camouflage, which runs along the door hinges and intersects with the rear of the engine panel hinge (ie the top edge of the rule below). The engine panel hinge line then angles up above the demarcation very slightly. The angle is now too great, and the hinge itself not very subtle. I might remove the raised hinge line altogether and add another in exactly the right place. I’ll decide that when the nose is permanently attached:
perdu said:
Awkward one
That hinge line does need to point straight at the prop spinner centre so you can't take much away from it
IF I get one I'll copy yours
I'm thinking raise the rear of the line by 0.5 mm and leave the front about where it is. That will make the angle shallower, and put the fuselage demarcation level with the door hinges. That hinge line does need to point straight at the prop spinner centre so you can't take much away from it
IF I get one I'll copy yours
I'll scrape the raised line off, scribe a new one and set some stretched sprue in the resulting trough with low viscosity cyano.
Then I'll move onto the cabane struts, which seem to have about 0.5 mm of float around their rear mount sockets...
Cabane and interplane struts. Wow.

Very delicate pieces. The strut ends are significantly smaller than the sockets in the wing, and fixing these robustly will be a challenge. I may try pva.
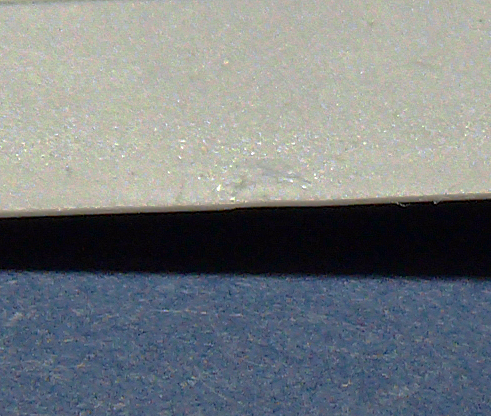
Somehow Airfix plastic seems to be soft, yet quite brittle. Despite being very careful I broke a cabane strut and also one of the temporary interplane fixtures. I also found this rather odd break on the lower wing:

...which makes me wonder if the brittleness is actually a fault in how the plastic flows or solidifies in the mould. It’s as if there are meld lines in certain areas that makes the parts snap no matter how careful you are.
Which brings me to the skill level rating of 2 out of 4 for this kit...not sure about that.
Very delicate pieces. The strut ends are significantly smaller than the sockets in the wing, and fixing these robustly will be a challenge. I may try pva.
Somehow Airfix plastic seems to be soft, yet quite brittle. Despite being very careful I broke a cabane strut and also one of the temporary interplane fixtures. I also found this rather odd break on the lower wing:
...which makes me wonder if the brittleness is actually a fault in how the plastic flows or solidifies in the mould. It’s as if there are meld lines in certain areas that makes the parts snap no matter how careful you are.
Which brings me to the skill level rating of 2 out of 4 for this kit...not sure about that.
Eric Mc said:
Why don't you give up on Airfix. They seem to cause you a lot of problems.
Because I'm experienced enough to overcome problems. You say you're down to build one of these for someone. Why not try it for yourself, see how you get on and post your own findings here? Show everyone how easy it is?
Eric Mc said:
dr_gn said:
Eric Mc said:
Why don't you give up on Airfix. They seem to cause you a lot of problems.
Because I'm experienced enough to overcome problems. You say you're down to build one of these for someone. Why not try it for yourself, see how you get on and post your own findings here? Show everyone how easy it is?
I have rigged in the past using stretched sprue but I want to have a go using more modern media - such as proper Aeroclub rigging wire.
I think modern Airfix kits are very good - but they are very delicate in places and you do have to be ultra careful when removing the pieces from the sprue. I think on occasion they have tried to make them a bit too sophisticated.
Eric Mc said:
You do seem to experience an awful lot of issues with Airfix kits. It seems to be a bit of a constant theme.
Why does it matter to you?If it bothers you as much as it seems to, why not build the same kits, to the same standard and make your own observtions from experience?
If it doesn't bother you, please...don't comment at all.
Eric Mc said:
It's an open forum where people are free to comment. Do you only want praise? I readily praise your builds because they are very good.
But you also seem to struggle with these new Airfix kits which, I find, for a person of your skills and experience, seems strange. I've built a few of the new kits and supervised a group of youngsters building a selection of them as well On the whole, everybody seemed to manage quite well.
I comment on what I find - good or bad, Airfix or otherwise backed up in most cases by images illustrating my points. But you also seem to struggle with these new Airfix kits which, I find, for a person of your skills and experience, seems strange. I've built a few of the new kits and supervised a group of youngsters building a selection of them as well On the whole, everybody seemed to manage quite well.
If you think I ‘struggle’ with Airfix kits, take a look at my review build article for the Airfix Gladiator in Scale Aircraft Modelling International magazine.
You’ve already said you don’t want to even attempt to build this particular kit (so you can gain some credibility by commenting from experience) so please, bore off.

robemcdonald said:
please guys. The scale model forum is my safe space on pistonheads.
I struggle a bit with Airfix myself, but all the issues seem to be fixable (even for me).There are a lot of great things about Airfix too. They are cheap and simple for the most part and can build into beautiful models. (especially when the builders are as good as the OP)
There's only one insurmountable, annoying issue on this thread, and it ain't Airfix. I struggle a bit with Airfix myself, but all the issues seem to be fixable (even for me).There are a lot of great things about Airfix too. They are cheap and simple for the most part and can build into beautiful models. (especially when the builders are as good as the OP)
I've got no problem at all with thread drift, but when it's always the same self important little man constantly picking me up on every observation I make...sorry I've had enough.
So I'll try this here once more (mainly because of Thumbsnap if I'm honest).
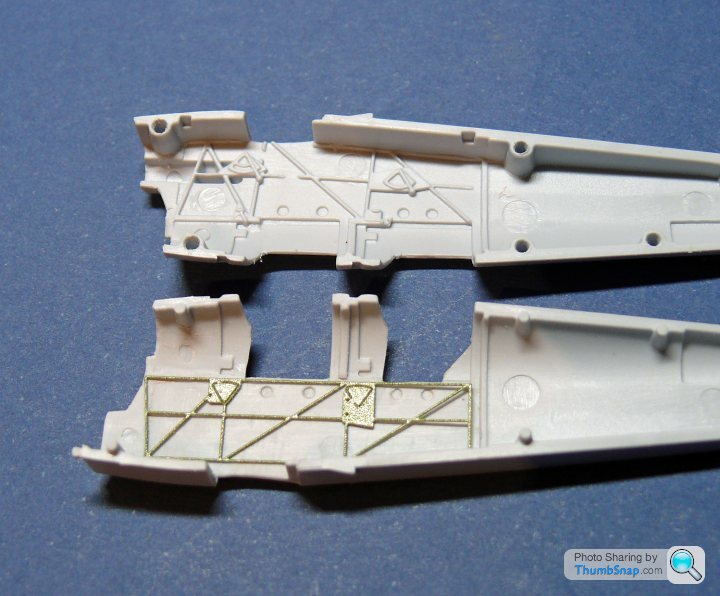
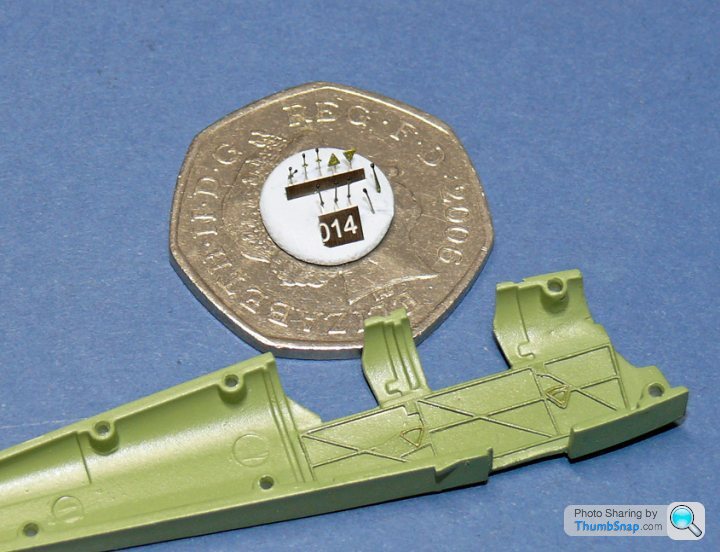
I've removed the raised detail from the cockpit sides, in preparation for the Eduard etched parts:
I'll over-spray the pre-painting, becasue its a) a rubbish finish, and b) difficult to match for other parts.
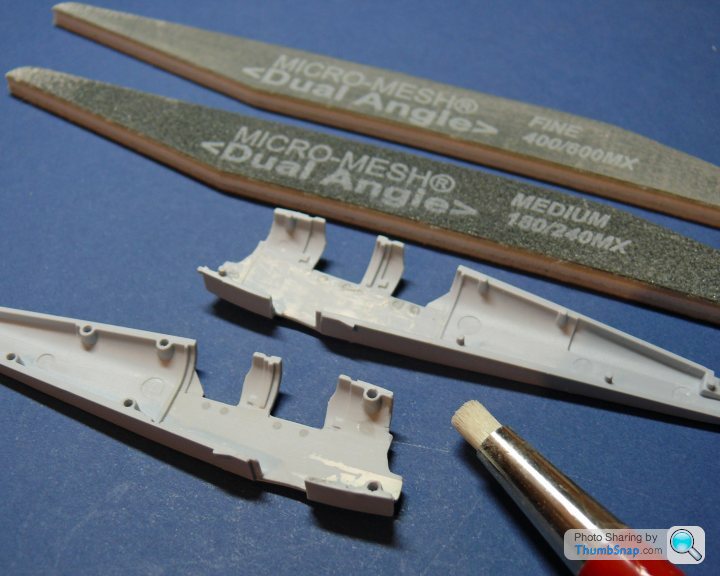
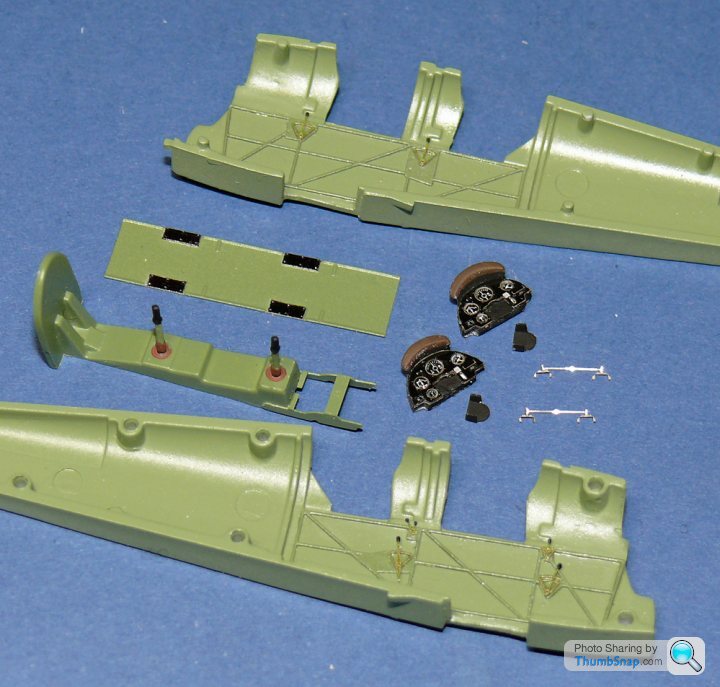
After scraping and sanding the sides, there were a few areas to be filled (I use Milliput and Mr. Surfacer almost exclusively). The filler was then flatted with sanding sticks, and the difficult to reach places abraded with a fibreglass pencil:
I also removed the cockpit doors. Nearly there; I need some Tamiya cockpit green, but I've been snowbound today.
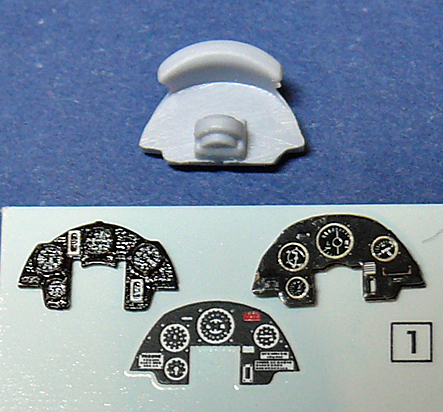
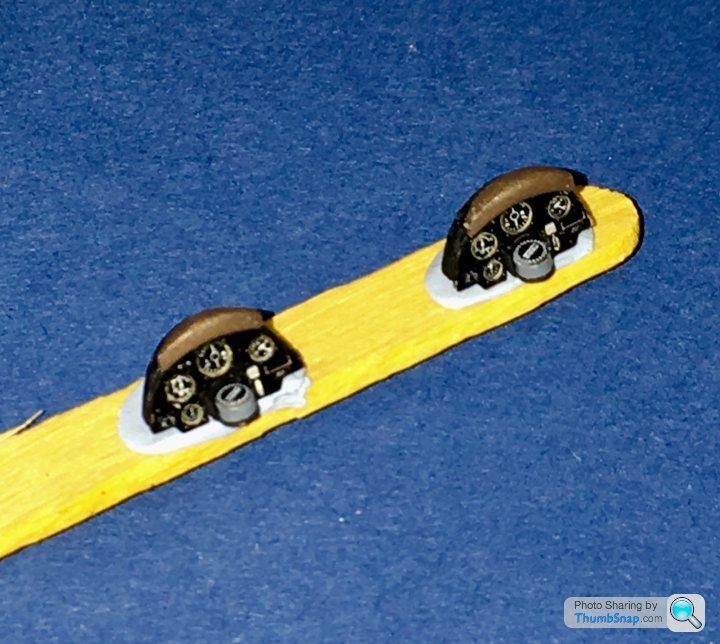
A pair of instrument panels were included in the Eduard etch set (left image), but I thought I'd try some Yahu ones (right image) for the sake of a few quid. The kit decal is also shown for comparison:
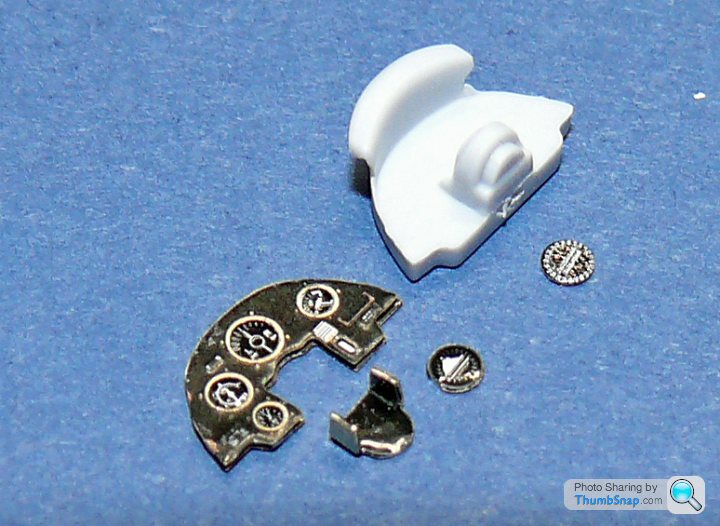
All have their good and bad points, but I think I'll go with the Yahu ones because I quite like the glazing and the brass bezels, even if they're obviously out of centre and might not be particularly accurate. At this scale it's difficult to tell. The Yaho items also came with separate compass brackets, which is a nice touch, although I'll be using the Eduard compass faces because they look more realistic:
The wing trailing edge repair was a pain, but hopefully it's sorted now:
Finally tonight: lower wing fettling. It's a poor fit in the fuselage, which is a shame because it's critical to the spacing of the upper and lower wings. I'm aiming to get those tiny fuselage brackets lined up with the corresponding wing brackets (with reference to some photos), and hope for the best:

I've removed the raised detail from the cockpit sides, in preparation for the Eduard etched parts:
I'll over-spray the pre-painting, becasue its a) a rubbish finish, and b) difficult to match for other parts.
After scraping and sanding the sides, there were a few areas to be filled (I use Milliput and Mr. Surfacer almost exclusively). The filler was then flatted with sanding sticks, and the difficult to reach places abraded with a fibreglass pencil:
I also removed the cockpit doors. Nearly there; I need some Tamiya cockpit green, but I've been snowbound today.
A pair of instrument panels were included in the Eduard etch set (left image), but I thought I'd try some Yahu ones (right image) for the sake of a few quid. The kit decal is also shown for comparison:
All have their good and bad points, but I think I'll go with the Yahu ones because I quite like the glazing and the brass bezels, even if they're obviously out of centre and might not be particularly accurate. At this scale it's difficult to tell. The Yaho items also came with separate compass brackets, which is a nice touch, although I'll be using the Eduard compass faces because they look more realistic:
The wing trailing edge repair was a pain, but hopefully it's sorted now:
Finally tonight: lower wing fettling. It's a poor fit in the fuselage, which is a shame because it's critical to the spacing of the upper and lower wings. I'm aiming to get those tiny fuselage brackets lined up with the corresponding wing brackets (with reference to some photos), and hope for the best:
tight5 said:
There was some talk about stretched sprue for the rigging.
How do you get an even thickness ?
Short answer is: you can't get it even! No matter how you stretch it, it will always gradually taper towards the ends and have a more constant thickness bit in the middle.How do you get an even thickness ?
My method is to get about a 3" to 4" length of sprue and rotate it above a candle until it goes soft. Keep it rolling and gently push the ends in and out until you really feel it begin to liquefy, then remove from the candle and pull it apart with a constant speed until it solidifies again. You might end up with your arms at full span depending on the type of plastic. Hold it for a few seconds under tension then put it on the bench and inspect it. You'll probably see random undulations in it. What I do is then selectively cut out the bits that are the right diameter and similar thicknesses and discard the rest.
You can use the tank-track "rubber" type plastic, which has a bit of stretch, or the normal kit plastic, which doesn't. I only ever use the latter for aerials these days, for rigging I use EzLine elastic thread, which has its own issues. More on that later I guess.
Done some base painting in the cockpit - Tamiya Cockpit green for most of the bits, and 2/3:1/3 mix of Cockpit Green and Sky for the cockpit sides. I want a tiny bit of contrast between the cockpit frames and sides to highlight them a bit, so went a shade lighter for the sides. It's always pretty shadowy inside a 1:72 cockpit, so I commonly lighten the paints a bit to compensate:
Always looks a bit crude at this stage with a coat of Klear and no details or weathering, but got to start somewhere.
Always looks a bit crude at this stage with a coat of Klear and no details or weathering, but got to start somewhere.
Some of the photo-etched levers and quadrants are seriously small on this one:
I blobbed some black paint on the ends to give the knobs some depth.
The fuselage frames and lever quadrants were secured using dilute PVA wicked into place with a paintbrush.
I also dusted some Tamiya light gunmetal powder onto them, which will hopefully show up slightly better with a matt coat.
I blobbed some black paint on the ends to give the knobs some depth.
The fuselage frames and lever quadrants were secured using dilute PVA wicked into place with a paintbrush.
I also dusted some Tamiya light gunmetal powder onto them, which will hopefully show up slightly better with a matt coat.
Some more parts fitted:
The rudder bars (below the instrument panels) are very fragile - I managed to break a couple while bending into shape. They're now pva'd back together.
I'll add some control rods to the levers, and a bit of cockpit wiring tomorrow if I get time. I think the longer levers on the port side of the cockpit should be parallel (like the stbd. side) - I assumed everything is linked front and back. That's what you get for follwing instructions...
Gassing Station | Scale Models | Top of Page | What's New | My Stuff