Winter jobs - suspension rebuild
Discussion


Looks like about the right time of year to start thinking about the winter maintenance, I was entertaining the idea of a Christmas morning hoon but on balance I think I'd prefer to drink some wine and eat mince pies the night before; plus I'm catering this year so will probably not be allowed. Whenever I go for a drive I seem to get back late. A short blast to dry off the brakes after washing on Sunday turned into a 3 hour sprint around Surrey/Berks, for example 
My workspace looks a bit like this:
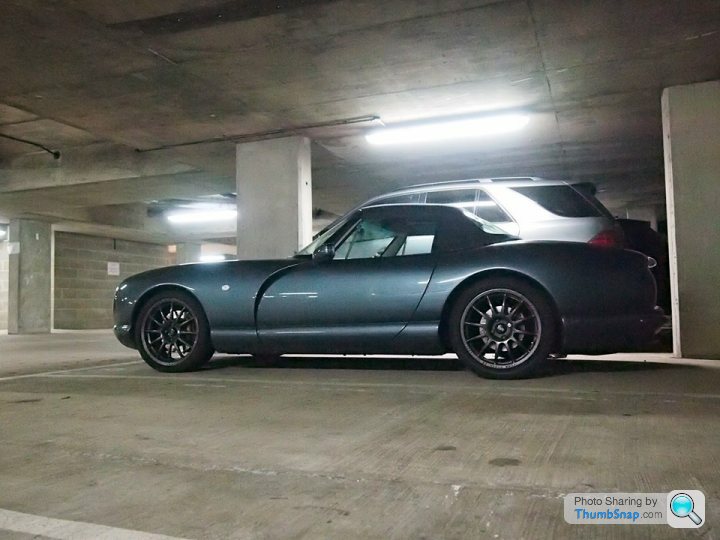
i.e. a residential car park; I don't even live in the block, just rent the space. Last winter I did a carpets out interior refurb, took about 10 weeks and raised a few eyebrows with the neighbours but no objections.
The question really is how complex is a total suspension refurb likely to be and what are the pitfalls I'm likely to encounter? Job list looks a bit like:
Remove all wishbones - send for shot blasting and new powder coat, new OE bushes (need to compare the costs vs buying in new)
Remove, wire brush, clean, paint anti roll bars (or replace if corrosion is more than surface)
Replace drop links
Shocks back to Protech for rebuild - there's a rattle in there somewhere and for £30 a corner, might as well do the lot
Considering new track rod ends and ball joints
Chassis inspection and clean, re-apply the waxoyl
Rub down and paint unswept areas of rear brake discs - slight rubbing due to corrosion build up - probably fit new pads
Possibles - PAS hose upgrade - there's a small weep from the big banjo union on the rack. Or I might leave this to service in February
ACT smoothbore induction upgrade
Most of this stuff I've done before now on other cars, but the challenge here is things like bolts that refuse to budge or shear, given the location recovery to the experts might be troublesome. Also no access to power or water down there either, and the mgmt co. are a bit touchy about flammables and fire risk so grinding might be a no-no as well.
Other question is about parts, wishbones I've found a few options for but its more the sundries - bolts, nuts, spacers, bushes, droplinks etc.
My workspace looks a bit like this:
i.e. a residential car park; I don't even live in the block, just rent the space. Last winter I did a carpets out interior refurb, took about 10 weeks and raised a few eyebrows with the neighbours but no objections.
The question really is how complex is a total suspension refurb likely to be and what are the pitfalls I'm likely to encounter? Job list looks a bit like:
Remove all wishbones - send for shot blasting and new powder coat, new OE bushes (need to compare the costs vs buying in new)
Remove, wire brush, clean, paint anti roll bars (or replace if corrosion is more than surface)
Replace drop links
Shocks back to Protech for rebuild - there's a rattle in there somewhere and for £30 a corner, might as well do the lot
Considering new track rod ends and ball joints
Chassis inspection and clean, re-apply the waxoyl
Rub down and paint unswept areas of rear brake discs - slight rubbing due to corrosion build up - probably fit new pads
Possibles - PAS hose upgrade - there's a small weep from the big banjo union on the rack. Or I might leave this to service in February
ACT smoothbore induction upgrade
Most of this stuff I've done before now on other cars, but the challenge here is things like bolts that refuse to budge or shear, given the location recovery to the experts might be troublesome. Also no access to power or water down there either, and the mgmt co. are a bit touchy about flammables and fire risk so grinding might be a no-no as well.
Other question is about parts, wishbones I've found a few options for but its more the sundries - bolts, nuts, spacers, bushes, droplinks etc.
Edited by 2gins on Tuesday 7th November 12:50
Thanks for that both, very helpful. Yes Geo will be done, most likely TVR101 or I hear there's a also a highly recommended guy in Liphook.
Sounds like brakes are coming off, I'd hoped to leave as much as possible in situ - in that case the calipers might have a refurb as well.
I'm also thinking about the rear uprights and the CV joint gaiters, but this is going another level as I've never done CV gaiters or wheel bearings (presume the bearings will be coming out if I want to play with the uprights / blast and coat rather than wire brush, treat and paint)

Car's up on the stands and I had a good poke about this morning, good news is it all looks structurally sound so no need to replace any of the wishbones; and some of the mounting bolts look relatively new so maybe they'll come free without too much persuasion. Ball joint bolts look well rusted though.
Questions - access looks like a massive pain in the arse for the forward wishbone bolts at the front - the body looks like it will foul the nut and the wishbone itself looks iffy to get a socket or spanner on the bolt. The rear lower appears to bolt through the outrigger?
What are my options for drop links, ball joints and track rod arms? TVR Parts look a bit dear for what these parts are - about £30 each so the best part of £200 including shipping costs just on small components.
Onto the seemingly thorny subject of bushes.
I was thinking of going for the original rubber bushes from TVR Parts but then I found the following from 2011:
https://www.pistonheads.com/gassing/topic.asp?t=10...
Benefit of PU is I gather they can be fitted easily without a press. Drawback is, in my experience, PU bushes get noisy quickly. Creaks and squeaks over any sort of lump.
Also... the cost. My God PU bushes are expensive, looks like £250 for the front wishbones alone.
I'll be getting the bushes done for me along with the powder coat. Been there before, broken my share of drill bits!
Front brakes coming out at the weekend and then the real dismantling can start. Is it preferable to
(a) drain down the whole system front and rear, leave empty and re-fill and bleed after the job (likely to be 2 months), or
(b) disconnect and cap the lines then just bleed later
I have the AP 4 pots (previous owner got the car ready for FI but never followed through) and have read a few stories about master cylinders failing after being left empty and not being able to get hydraulic pressure after a full drain down.
There's not much in it - the full set front and rear is £650 + VAT. I reckon I can buy the bushes, have them fitted and the powder coat done for under £400 so there's enough of a benefit to justify the hassle as the car will be off the road anyway. It comes down to starting the dismantling and see how it goes.
One consideration is that the powder coat on the wishbones hasn't lasted even 5 years / 15-20k miles. Anecdotally the standard coating is rubbish and I think there's an advantage in going with a proper treatment and re-coat than just replacing with more of the same and doing the same job in in another 5 years.
One consideration is that the powder coat on the wishbones hasn't lasted even 5 years / 15-20k miles. Anecdotally the standard coating is rubbish and I think there's an advantage in going with a proper treatment and re-coat than just replacing with more of the same and doing the same job in in another 5 years.
Tomorrow's job is to split the front ball joints - upper, lower and track rod ends. If it goes well maybe I'll have the wishbones off on Sunday.
I recall an issue doing ball joints on my last car (TT), where you start undoing the nut and if it's well seized the ball just spins with the nut. Easy then, as there's good access so cutting is the answer. I'm a bit concerned about the top ball joint because isn't the nut inside a recess on the back of the hub, i.e. no access to get a cutting device in. All being well the plan is to undo this nut, put back on a few turns and crack the ball with a screw-out splitter. What can possibly go wrong?
I recall an issue doing ball joints on my last car (TT), where you start undoing the nut and if it's well seized the ball just spins with the nut. Easy then, as there's good access so cutting is the answer. I'm a bit concerned about the top ball joint because isn't the nut inside a recess on the back of the hub, i.e. no access to get a cutting device in. All being well the plan is to undo this nut, put back on a few turns and crack the ball with a screw-out splitter. What can possibly go wrong?
Ball joints is the current problem. I've no qualms about bashing the top turret about a bit but first the bottom nut has to come free to allow the joint to separate from the hub. They're both very tight / seized solid and I can't get any plusgas into it because its upside down, can't get heat into it because of the access and if I take it off the car I can't compress the suspension to prevent the ball joint splitting and spinning with the nut. Might just have the hubs off and take to the pros. They'll love me.
ETA. Well, they're as good as off. All nuts free'd off including both the top ones - just needed to put the jack handle over the wrench to get more leverage, came free pretty easily after that. Passenger side hub is stripped, I couldn't split the top joint but later realised I hadn't undone the clamp bolt so hopefully with a vice that'll free off easily enough.
Driver's side is all free except for the lock nut on the track rod, so that needs another go with a bit of heat, same for the drop link upper bolts. I'm busy with work for while now and away next weekend so a bit of time to think about it
Time for a gin.
Edited by 2gins on Sunday 26th November 19:43
Nearly there on the front now. Hubs are off and finally managed to separate the top BJs, the nuts came free easily in the end it was just a case of positioning the socket just so such that I could slip the jack lever over the socket wrench for more oompf. Splitting them from the hubs was harder but in the end just a case of clamping them upside down on the workbench and smashing the ball side with a drift (sturdy old socket extension) with no mercy.
Top drop link bolts are seized, I reckon they're original - if so, that's 18 years of rust so not a surprise. I'll cut them off then its just the wishbones to come.
Brake calipers are also dismantled and ready for clean up then paint. Not long until I can start cleaning up the chassis and painting down there too. Progress!
Good advice there, thanks. Take jack down next time just in case. I know the shocks were off a couple of years / 10k ago so hopefully they'll be ok.
No progress this weekend, mrs 2gins has been laid up with a bad hangover most of the day after last night's PTA Christmas do so I've been daddy all day. Annoying but heh ho.
No progress this weekend, mrs 2gins has been laid up with a bad hangover most of the day after last night's PTA Christmas do so I've been daddy all day. Annoying but heh ho.
Bit of an update for anyone interested.
I can see where people are coming from when they've said 'My body off started as a suspension refresh'
Luckily my Chimaera doesn't need such extensive surgery but looking at what I have it is tempting to start taking more stuff off to get better access... I could do a much better job if some other small stuff were to come out, like oh, I don't know, the expansion tank, steering rack gaiters, steering rack, rads, maybe the engine...
The job seems to have morphed from a simple wishbone tidy up to a bit of a de-rust/de-flaky-powder coat/clean/wire brush/paint and underseal challenge. I am lucky insofar as the previous owner has taken good care of it, and it was well prepped on sale to me but nevertheless I'm glad I'm doing this now as it would be a bigger job in say a year or two.
There's a few pics of the passenger side front wheel well after wire brushing (power drill + bits) and cleaning next post down.
I hope I'll have enough time to get the driver's side and the cross members into a similar state over the weekend so that come wednesday when the temperature is forecast to hit double figures, I can prime the bare areas and paint over the lot.
It is quite satisfying... although hard work
If I had a garage the engine would probably be coming out!
Edited by 2gins on Sunday 31st December 23:40
As we go into the new year I can say that I've finished the front, at least as far as cleaning and painting the chassis goes. First coat of white went on before Christmas when the weather gave me a few days more or less in double figures, I had hoped to get two coats on before the weekend and finish there but after being up all night with a sick child on the thursday I took a look at it and decided, No, today is not a grovelling day. Just finished now, it feels good. Still need to sort out the wishbones - the reason for starting the job in the first place - and rebuild it, but for now work moves on to the rear.
I thought I had some pictures of it in paint but I've not done that yet so in the meantime here's a direct link to the pre-paint pictures again for the lazy. I used Rustoleum Combicolor and went in with the primer first.


New questions:
How do I get the rear brake carriers off, the clearance to get any sort of allen tool in past the main upright looks impossible?
Freeing off the handbrake cables, turn the knurled knobs over the diff to slacken the cable then re-tighten afterwards?
How to separate the upright from the drive shaft? Is it just a case of undo the 6 hex bolts on the inner face (in the back of the upright, iyswim) and separate? Anything tricky to watch out for?
I thought I had some pictures of it in paint but I've not done that yet so in the meantime here's a direct link to the pre-paint pictures again for the lazy. I used Rustoleum Combicolor and went in with the primer first.
New questions:
How do I get the rear brake carriers off, the clearance to get any sort of allen tool in past the main upright looks impossible?
Freeing off the handbrake cables, turn the knurled knobs over the diff to slacken the cable then re-tighten afterwards?
How to separate the upright from the drive shaft? Is it just a case of undo the 6 hex bolts on the inner face (in the back of the upright, iyswim) and separate? Anything tricky to watch out for?
Just a few shots of the front end painted. Very satisfying, not sure whether to overcoat with underseal muck or leave clean and open.
Rear is now mostly dismantled, but for the life of me I couldn't undo the drive shaft bolts either inner or outers, just can't get enough leverage on them on axle stands. So, mini-fail there. Might have another look next time or clean paint what I can with the uprights in situ and have another look next winter - that'll be diff service time I think (80k on the clock and apparently not done, there is some shuntiness)
Brake carriers came off OK in the end, it was a question of taking the bottom bolts out and tapping the carrier round with a hammer and applying plusgas to free off the top bolts enough to get a normal allen key to get them moving.


Nest job is to clean off the excess paint etc
Rear is now mostly dismantled, but for the life of me I couldn't undo the drive shaft bolts either inner or outers, just can't get enough leverage on them on axle stands. So, mini-fail there. Might have another look next time or clean paint what I can with the uprights in situ and have another look next winter - that'll be diff service time I think (80k on the clock and apparently not done, there is some shuntiness)
Brake carriers came off OK in the end, it was a question of taking the bottom bolts out and tapping the carrier round with a hammer and applying plusgas to free off the top bolts enough to get a normal allen key to get them moving.
Nest job is to clean off the excess paint etc
Not much has happened last few weeks due to being back to work and having to take my eldest to her classmates' birthdays pretty much every weekend. They always set them up 11-1 so I lose a whole day! 
As it stands after another 4 hr grovelling today the rest of it is ready for primer and I used the last of my enthusiasm to re-install the front ARB with TVR parts orange poly bushes - the first part to go back on, that felt satisfying.
Got a bit of travel for work coming up now so its touch and go if I can get it painted before I leave, but all the parts are coated and the bushes are being done, shocks are in for re-build so when I come back... game on!
Gassing Station | Chimaera | Top of Page | What's New | My Stuff